B-Series Touchcomputer User Guide - Elo TouchSystems
B-Series Touchcomputer User Guide - Elo TouchSystems
B-Series Touchcomputer User Guide - Elo TouchSystems

You also want an ePaper? Increase the reach of your titles
YUMPU automatically turns print PDFs into web optimized ePapers that Google loves.
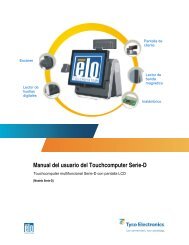
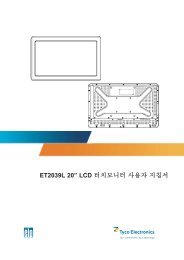
B-<strong>Series</strong> <strong>Touchcomputer</strong> <strong>User</strong> <strong>Guide</strong><br />
B-<strong>Series</strong> LCD Multi-function <strong>Touchcomputer</strong><br />
[15” and 17” models shown]
<strong>Elo</strong> Touch Solutions<br />
B-<strong>Series</strong> <strong>Touchcomputer</strong> <strong>User</strong> <strong>Guide</strong><br />
Multi-function <strong>Touchcomputer</strong><br />
Revision E<br />
SW 601075<br />
1-800-ELOTOUCH (1-800-356-8682)<br />
www.elotouch.com
Copyright © 2012 <strong>Elo</strong> Touch Solutions, Inc. All Rights Reserved.<br />
No part of this publication may be reproduced, transmitted, transcribed, stored in a<br />
retrieval system, or translated into any language or computer language, in any form or by<br />
any means, including, but not limited to, electronic, magnetic, optical, chemical, manual, or<br />
otherwise without prior written permission of <strong>Elo</strong> Touch Solutions, Inc.<br />
Disclaimer<br />
The information in this document is subject to change without notice. <strong>Elo</strong> Touch Solutions,<br />
Inc. and its affiliates (collectively "<strong>Elo</strong>") makes no representations or warranties with<br />
respect to the contents herein, and specifically disclaims any implied warranties of<br />
merchantability or fitness for a particular purpose. <strong>Elo</strong> reserves the right to revise this<br />
publication and to make changes from time to time in the content hereof without obligation<br />
of <strong>Elo</strong> to notify any person of such revisions or changes.<br />
Trademark Acknowledgments<br />
AccuTouch, CarrollTouch, IntelliTouch, iTouch, <strong>Elo</strong> (logo), <strong>Elo</strong> <strong>TouchSystems</strong> (logo), and<br />
<strong>Elo</strong> Touch Solutions (logo) are trademarks of <strong>Elo</strong> and its Affiliates. Windows is a trademark<br />
of Microsoft Corporation. Other product names mentioned herein may be trademarks or<br />
registered trademarks of their respective companies. <strong>Elo</strong> claims no interest in trademarks<br />
other than its own.<br />
B-SERIES TOUCHCOMPUTER USER GUIDE iii
Table of Contents<br />
Chapter 1: Setup...................................................................................... 1<br />
Unpacking Your <strong>Touchcomputer</strong> ....................................................................................................1<br />
Adjusting the Display ......................................................................................................................2<br />
Setting Up the Operating System.....................................................................................................2<br />
Calibrating the Touchscreen ............................................................................................................9<br />
Securing the Base...........................................................................................................................11<br />
Chapter 2: Operation............................................................................. 12<br />
On-Screen Display (OSD) .............................................................................................................13<br />
L.E.D. Functionality ......................................................................................................................15<br />
Using the Input/Output Panel.........................................................................................................16<br />
Chapter 3: Options and Upgrades ....................................................... 17<br />
Adding Optional Peripherals..........................................................................................................17<br />
Magnetic Stripe Reader (MSR) .....................................................................................................18<br />
Customer Display...........................................................................................................................20<br />
Fingerprint Reader (FPR) ..............................................................................................................21<br />
Cash Drawer Port Card ..................................................................................................................22<br />
Second VGA Port Card..................................................................................................................22<br />
Wireless Adapter............................................................................................................................23<br />
Second Hard Disk Drive ................................................................................................................24<br />
Solid State Drive............................................................................................................................24<br />
Modem Card ..................................................................................................................................24<br />
Parallel Port Card...........................................................................................................................25<br />
RAID Controller Card....................................................................................................................25<br />
<strong>Elo</strong> POS Demo Software ...............................................................................................................25<br />
Chapter 4: Safety and Maintenance..................................................... 26<br />
Safety .............................................................................................................................................26<br />
Care and Handling .........................................................................................................................27<br />
Recovering the Operating System .................................................................................................29<br />
Reassigning COM Ports after System Recovery ...........................................................................35<br />
B-SERIES TOUCHCOMPUTER USER GUIDE iv
Chapter 5: Technical Support............................................................... 42<br />
Technical Assistance......................................................................................................................42<br />
Regulatory Information............................................................................44<br />
Warranty ...................................................................................................47<br />
B-SERIES TOUCHCOMPUTER USER GUIDE v
C H A P T E R<br />
1<br />
SETUP<br />
This chapter discusses how to set up and test your touchcomputer. For information<br />
on peripheral options, refer to Chapter 3, “Options and Upgrades.”<br />
Unpacking Your <strong>Touchcomputer</strong><br />
Check that the following items are present and in good condition:<br />
<strong>Touchcomputer</strong><br />
Power cable US/Canada Power cable Europe<br />
Quick Install <strong>Guide</strong> Power Adapter Base Plate<br />
Cable Cover<br />
Locking Screw<br />
B-SERIES TOUCHCOMPUTER USER GUIDE 1
Adjusting the Display<br />
The display screen can be adjusted from 0 to 70 degrees, as shown below.<br />
CAUTION: To prevent tipping or dropping, be sure to hold the base when adjusting<br />
the display.<br />
Setting Up the Operating System<br />
0° 70°<br />
If configured with an operating system, the initial setup of the operating system<br />
takes approximately 5-10 minutes. Additional time may be needed depending on<br />
touchcomputer hardware configurations and connected devices.<br />
To set up the Microsoft® Windows® Operating System for the touchcomputer, turn<br />
on the touchcomputer by pressing the power button, and then follow the<br />
instructions on the screen.<br />
Selecting the Language (For Windows XP and POSReady 2009 Only)<br />
Microsoft Windows® uses English as the default language in menus and dialog<br />
boxes. You can change this language to suit your preferences at the screen below.<br />
Note: If you choose to change the language after initial setup, you can follow steps<br />
1-2 to arrive at the same screen below:<br />
1. From the desktop, click Start > Control Panel<br />
2. In the Control Panel screen, select Regional and Language Options.<br />
B-SERIES TOUCHCOMPUTER USER GUIDE 2
3. Click Customize. The Regional and Language Options window appears.<br />
Select the Languages tab.<br />
4. If required, check the boxes for “Install files for complex script and right-to-left<br />
languages” and “Install files for East Asian languages.”<br />
5. Select the Regional Options tab.<br />
6. Select your preferred language from the drop-down list in the Standards and<br />
formats pane.<br />
B-SERIES TOUCHCOMPUTER USER GUIDE 3
7. Click Apply.<br />
8. Select your location from the drop-down list in the Locations pane.<br />
9. Click OK.<br />
B-SERIES TOUCHCOMPUTER USER GUIDE 4
Selecting the Time Zone (For Windows XP and POSReady 2009 Only)<br />
When the following window appears, you can change the time zone, date, and time<br />
of the touchcomputer.<br />
After making any changes, click Next to finish. Windows Setup completes the<br />
installation of the touchcomputer.<br />
Injecting the Languages (For Windows 7 Only)<br />
Windows 7 Professional only allows the use of one language at one time. But you<br />
can use the <strong>Elo</strong> <strong>TouchSystems</strong> language injection tool to update your language<br />
preference. English is set as the default language, but you can change this<br />
language to suit your preferences.<br />
1. After the TE logo shows up, press F8 several times to enter Advanced Boot<br />
Options.<br />
2. Select Repair your computer.<br />
3. Click Next OK (Shall not have password) Click <strong>Elo</strong> Touch System Tool.<br />
4. The following <strong>User</strong> Interface will be presented:<br />
B-SERIES TOUCHCOMPUTER USER GUIDE 5
5. Click Inject, and the following window will pop out.<br />
6. Click the drop-down list and select the preference language.<br />
7. Click Inject Selected Language<br />
8. The following window will be presented:<br />
B-SERIES TOUCHCOMPUTER USER GUIDE 6
9. After the language package is installed correctly, press any key to exit this<br />
window.<br />
10. Click Exit Exit Restart<br />
Selecting the Region (For Windows 7 Only)<br />
When the following window appears, you can change the country, time and<br />
currency, and keyboard layout of the touchcomputer.<br />
After making any changes, click Next to continue.<br />
B-SERIES TOUCHCOMPUTER USER GUIDE 7
Choosing the Computer Name (For Windows 7 Only)<br />
When the following window appears, you can choose a computer name of the<br />
touchcomputer.<br />
After making any changes, click Next to continue.<br />
Selecting the Update Options (For Windows 7 Only)<br />
When the following window appears, you can select one of the update options of<br />
the touchcomputer. In general, you can choose Use recommended settings as<br />
your default option.<br />
B-SERIES TOUCHCOMPUTER USER GUIDE 8
After making any changes, click Next to continue.<br />
Reviewing the Time and Date Settings (For Windows 7 Only)<br />
When the following window appears, you can set up the time and date of the<br />
touchcomputer.<br />
After making any changes, click Next to finish. Windows Setup completes the<br />
installation of the touchcomputer.<br />
Calibrating the Touchscreen<br />
The touchscreen is pre-calibrated for accurate touch response.<br />
If for any reason the touchscreen needs to be recalibrated, right-click the <strong>Elo</strong> icon<br />
in the Taskbar and then click “Properties.” The following window opens.<br />
NOTE: Calibration is not applicable on APR touchscreen models.<br />
B-SERIES TOUCHCOMPUTER USER GUIDE 9
Click the Align button. This launches the calibration program. The window shown<br />
below opens. Follow the instructions to calibrate the touchscreen.<br />
B-SERIES TOUCHCOMPUTER USER GUIDE 10
Securing the Base<br />
When mounting the B-<strong>Series</strong> touchcomputer, the baseplate must be removed and<br />
mounted on a flat surface. Use the four pre-tapped holes to secure the baseplate<br />
from below the mounting surface before reattaching the touchcomputer as shown<br />
below. The holes are designed to work with ISO metric M6 screws. Mounting<br />
screws are not included with the product. Refer to the figure below for the location<br />
of the holes. All dimensions are in millimeters.<br />
1)<br />
2)<br />
Mounting Diagram<br />
B-SERIES TOUCHCOMPUTER USER GUIDE 11
C H A P T E R<br />
2<br />
OPERATION<br />
This chapter describes how to control the On-Screen Display (OSD), power<br />
buttons, and I/O panel.<br />
All adjustments made to the OSD and power controls are automatically saved.<br />
<strong>User</strong> settings remain unchanged after powering off/on or in the case of a power<br />
failure.<br />
B-SERIES TOUCHCOMPUTER USER GUIDE 12
On-Screen Display (OSD)<br />
OSD Menu<br />
1. To display the OSD Menu, press the Menu button.<br />
Press the RIGHT button or LEFT button to toggle and the SELECT button to<br />
select from the different OSD sub-menus and functions.<br />
2. When the function you want to change is shown, press the SELECT button.<br />
3. To adjust the value of the function:<br />
4. Pressing the RIGHT button increases the value of the selected OSD control<br />
option.<br />
5. Pressing the LEFT button decreases the value of the selected OSD control<br />
option.<br />
The OSD provides the following settings.<br />
Feature Description<br />
Auto adjust Automatically adjusts system clock.<br />
Brightness Adjust brightness and contrast.<br />
• Brightness: Adjusts the backlight of the monitor.<br />
• Contrast: Adjusts the maximum luminance level of the monitor.<br />
B-SERIES TOUCHCOMPUTER USER GUIDE 13
Feature Description<br />
Image setting Adjusts H position, V position, clock, and phase.<br />
• H position: Moves the screen horizontally right and left (1 pixel<br />
pitch increment).<br />
• V position: Moves the screen vertically up and down (1 line<br />
increment).<br />
• Clock: Adjusts the ratio of dividing frequency of the dot clock.<br />
• Phase: Adjusts the phase of the dot clock.<br />
Color Sets color temperature (9300K, 7500K, 6500K, 5500K, or <strong>User</strong><br />
Preset).<br />
OSD Adjusts H position, V position, and OSD timeout.<br />
• H position: Adjusts the OSD menu screen position left or right.<br />
• V position: Adjusts the OSD menu screen position up or down.<br />
• Timeout: Adjusts the amount of time that the OSD menu is<br />
displayed.<br />
Language Changes language to English, French, Italian, German, Spanish,<br />
Japanese, Simplified Chinese, or Traditional Chinese.<br />
Recall Sets color recall and recall defaults. Restores original factory settings.<br />
Miscellaneous Adjusts sharpness, enables/disables DDC/CI function.<br />
Exit Exits the OSD.<br />
OSD and Power Button Control<br />
The OSD menu and power button are enabled by default.<br />
To enable or disable the OSD function:<br />
1. Simultaneously press Menu/Exit and the Left () key for two seconds. A<br />
window appears displaying PWR ENABLE or PWR DISABLE.<br />
2. When the power button lock feature is activated, the power button is disabled.<br />
B-SERIES TOUCHCOMPUTER USER GUIDE 14
L.E.D. Functionality<br />
The B-<strong>Series</strong> base has a LED indicating the state of the touchcomputer. The table<br />
below shows LED state and corresponding color.<br />
LED Color to Observer State<br />
Off No input power — Off mode<br />
Red Input power present – Off mode or hibernation<br />
Orange Input power present — Standby<br />
Green Input power present — Power On<br />
B-SERIES TOUCHCOMPUTER USER GUIDE 15
Using the Input/Output Panel<br />
To access the input/output (I/O) ports, remove the cable cover at the bottom of the<br />
unit. A security screw is included and may be used to secure the cable cover to the<br />
touchcomputer. Below are the I/O descriptions by model:<br />
B1 and B3 models<br />
B2 models<br />
Note: The DB9 Serial (COM) ports are defaulted (from left to right) COM3 and COM4<br />
Note: As a safety precaution, always leave the cable cover door attached when the system is<br />
powered on.<br />
B-SERIES TOUCHCOMPUTER USER GUIDE 16
Adding Optional Peripherals<br />
C H A P T E R<br />
3<br />
OPTIONS AND UPGRADES<br />
When adding a peripheral, complete installation and setup instructions are<br />
provided with the field-installable kits. The following peripherals are available for<br />
purchase separately as field-installable kits:<br />
• Magnetic stripe reader (MSR)*<br />
• Customer display*<br />
• Fingerprint reader (FPR)*<br />
• Cash drawer port expansion card**<br />
• Second VGA port expansion card**<br />
• USB Wireless adapter (802.11 B/G/N)*<br />
• Second hard disk drive (HDD)**<br />
• Solid State Drive**<br />
• Modem PCI-E***<br />
• Parallel Port PCI-E***<br />
• RAID PCI-E***<br />
* External <strong>Elo</strong> Peripheral ** <strong>Elo</strong> Expansion Card *** <strong>Elo</strong> PCI-E Expansion Card<br />
Note: Software drivers and applications for all peripherals are located in the C:\<strong>Elo</strong><strong>TouchSystems</strong><br />
directory of the touchcomputer.<br />
Note: May install up to two (2) <strong>Elo</strong> Expansion Cards OR one (1) <strong>Elo</strong> Expansion Card + one (1)<br />
PCI-E Expansion Card.<br />
B-SERIES TOUCHCOMPUTER USER GUIDE 17
Magnetic Stripe Reader (MSR)<br />
Testing the MSR<br />
You can add a magnetic stripe reader (MSR) to the B-<strong>Series</strong> touchcomputer to any<br />
of the 4 mounting locations located on the display head top, bottom, left, and right.<br />
Software application and drivers can be found in the following directory or on<br />
www.elotouch.com<br />
C:\<strong>Elo</strong><strong>TouchSystems</strong>\Peripherals<br />
The MSR is a USB 2.0 device that reads all three data stripes on standard credit<br />
cards or driver’s licenses conforming to ISO/ANSI standards. The MSR has foreign<br />
language capability. The credit card is read by sliding the credit card forward or<br />
backward through the MSR, stripe side toward the display. The MSR is powered<br />
from the USB port; no external power is needed. The MSR features are:<br />
• Reads up to 3 tracks of information<br />
• Bi-directional swipe reading<br />
• Superior reading of high jitter, scratched, and worn MagStripe cards<br />
• Reliable for over 1,000,000 card swipes<br />
• Reads ISO7811, AAMVA, and most other card data formats<br />
• PC software makes configuration changes easy<br />
• Swipe speeds from 3 to 60 inches per second<br />
• Interfaces: USB-KB and USB-HID<br />
• Fully supports USB 2.0<br />
• Part number: E545781<br />
Testing in USB MSR Keyboard (KB) Emulation Mode<br />
1. Open the Notepad application (click Start > Accessories > Notepad).<br />
2. Slide the card through the MSR and verify that the data is displayed in the<br />
application window.<br />
B-SERIES TOUCHCOMPUTER USER GUIDE 18
Testing in USB MSR Human Interface Device (HID) Mode<br />
1. Double-click the MagSwipe HID Demo icon to start the test application.<br />
2. Slide a card through the MSR and verify that the data is displayed in the<br />
application window.<br />
B-SERIES TOUCHCOMPUTER USER GUIDE 19
Customer Display<br />
3. If the card ID appears in the Reader Output window, the reader is functioning.<br />
You can optionally add a customer display to the B-<strong>Series</strong> touchcomputer to any of<br />
the four mounting locations located on the display head top, bottom, left, and right<br />
of the touchcomputer. Software application and drivers can be found in the<br />
following directory or on www.elotouch.com<br />
C:\<strong>Elo</strong><strong>TouchSystems</strong>\Peripherals<br />
Feature Description<br />
Display type Vacuum fluorescent display<br />
Display color Green<br />
Display pattern 5 x 7 dot matrix<br />
Brightness 350-600 cd/m 2<br />
Characters available 95 alphanumeric & 32 international characters<br />
Dot size (X x Y) 0.86 x 1.2 mm<br />
Font size 5.5(W) x 10.5(H)<br />
Character number 20 characters by 2 lines, for a 5 x 7 dot matrix font<br />
Interface USB<br />
Part number E879762<br />
B-SERIES TOUCHCOMPUTER USER GUIDE 20
Fingerprint Reader (FPR)<br />
Testing the FPR<br />
You can add a fingerprint reader to the B-<strong>Series</strong> touchcomputer to any of the four<br />
mounting locations located on the display head top, bottom, left, and right.<br />
Software application and drivers can be found in the following directory or on<br />
www.elotouch.com<br />
C:\<strong>Elo</strong><strong>TouchSystems</strong>\Peripherals<br />
The fingerprint reader is powered by the USB bus. The reader optically scans the<br />
fingerprint when the user touches the glowing window. Optical technology gives<br />
the highest quality fingerprint scans and reliability.<br />
Fingerprint reader specifications are shown in the table below.<br />
Feature Specification<br />
Fingerprint reader DigitalPersona U.are.U 4000B<br />
Power supply 5.0VDC +/- 0.25V<br />
Current draw – scanning mode 190 mA (typical)<br />
Current draw – idle mode 140 mA (typical)<br />
Current draw – suspend mode 1.5 mA (typical)<br />
Image resolution 512 dpi<br />
Image color 8-bit gray level<br />
Scan capture size 14.6mm (nominal width) x 18.1mm (nominal length)<br />
Image capture speed 100 ms<br />
USB type 1.0, 1.1, or 2.0<br />
Operating temperature 0 to 40°C<br />
Electrostatic discharge (ESD) Up to 15kV mounted in case<br />
Part number E375206<br />
1. Double-click the Fingerprint Reader Test icon to start the test application.<br />
2. Place your finger on the fingerprint reader sensor and verify that the image of<br />
your fingerprint is displayed on the application window.<br />
B-SERIES TOUCHCOMPUTER USER GUIDE 21
Cash Drawer Port Card<br />
A Cash Drawer Port Card can be installed in any available expansion slot. This<br />
card provides:<br />
• 1 x 12V or 24V selectable cash drawer RJ11 port. The voltage setting can<br />
be set via jumper on the card prior to installing into the touchcomputer.<br />
Software application and drivers can be found in the following directory or on<br />
www.elotouch.com<br />
C:\<strong>Elo</strong><strong>TouchSystems</strong>\Peripherals<br />
Part number: E318237<br />
Second VGA Port Card<br />
A second VGA video card can be added to any available expansion slot. This card<br />
provides a VGA port to drive another VGA display. Software application and<br />
drivers can be found in the following directory or on www.elotouch.com<br />
B-SERIES TOUCHCOMPUTER USER GUIDE 22
Wireless Adapter<br />
C:\<strong>Elo</strong><strong>TouchSystems</strong>\Peripherals<br />
Part number: E017487<br />
A wireless adapter can be installed as an option in the B-<strong>Series</strong> touchcomputer in<br />
the I/O area under the cable cover.<br />
Typical specifications for the wireless adapter are:<br />
• USB dongle module<br />
• Compliant to USB 2.0 industry standards<br />
• IEEE 802.11b/g/n compliant<br />
• Support for Windows XP, Windows POSReady 2009 and Windows 7<br />
• RoHS compliant<br />
• Part number: E249774<br />
Testing the Wireless Adapter<br />
To test the wireless adapter:<br />
1. From the desktop, click Start > Control Panel > Network Connections.<br />
2. Double-click the Wireless Network Connections icon to display available<br />
networks and verify that the wireless network is detected.<br />
NOTE: If a wireless network needs to be initialized, please see your system<br />
administrator.<br />
B-SERIES TOUCHCOMPUTER USER GUIDE 23
Second Hard Disk Drive<br />
Solid State Drive<br />
Modem Card<br />
A second hard disk drive can be added via the second hard drive mounting kit. This<br />
addition provides extra data storage or can be used in conjunction with the RAID<br />
controller card for RAID functionality. This option occupies a single expansion slot.<br />
Part number: E109611<br />
A solid state drive can be added to (or used to replace) the original hard disk drive.<br />
This addition provides additional performance and more mechanically reliability in<br />
harsh environments.<br />
Part number: E561164<br />
A modem card can be added to any expansion slot. This provides modem/fax<br />
functionality. Software drivers can be found in the following directory or on<br />
www.elotouch.com :<br />
C:\<strong>Elo</strong><strong>TouchSystems</strong>\Peripherals<br />
Part number: E763313<br />
Note: To use this option ALSO requires the purchase and installation of the <strong>Elo</strong><br />
PCI-E Expansion Card Option Kit. Part number: E827958<br />
B-SERIES TOUCHCOMPUTER USER GUIDE 24
Parallel Port Card<br />
A parallel port card can be added to any Expansion slot. This option provides a<br />
parallel port for printer interfaces only. Software drivers can be found in the<br />
following directory or on www.elotouch.com :<br />
C:\<strong>Elo</strong><strong>TouchSystems</strong>\Peripherals<br />
Part number: E368899<br />
RAID Controller Card<br />
Note: To use this option ALSO requires the purchase and installation of the <strong>Elo</strong><br />
PCI-E Expansion Card Option Kit. Part number: E827958<br />
A RAID controller card can be added when used in conjunction with a second HDD<br />
kit to provide RAID 0 and 1 functionality. Software drivers can be found in the<br />
following directory or on www.elotouch.com:<br />
C:\<strong>Elo</strong><strong>TouchSystems</strong>\Peripherals<br />
Part number: E383216<br />
Note: To use this option ALSO requires the purchase and installation of the <strong>Elo</strong><br />
PCI-E Expansion Card Option Kit. Part number: E827958<br />
<strong>Elo</strong> POS Demo Software<br />
POS demo software created by <strong>Elo</strong> <strong>TouchSystems</strong> is located at the following<br />
directory.<br />
C:\<strong>Elo</strong><strong>TouchSystems</strong>\Demos<br />
B-SERIES TOUCHCOMPUTER USER GUIDE 25
Safety<br />
C H A P T E R<br />
4<br />
SAFETY AND MAINTENANCE<br />
Important information regarding the proper setup and maintenance of your touchcomputer:<br />
• To reduce the risk of electric shock, follow all safety notices and never open the<br />
touchcomputer case.<br />
• Turn off the product before cleaning (refer to “Care and Handling” for proper cleaning<br />
methods).<br />
• Your touchcomputer is equipped with a 3-wire, grounding power cord. The power cord<br />
plug only fits into a grounded outlet. Do not attempt to fit the plug into an outlet that has<br />
not been configured for this purpose. Do not use a damaged power cord. Only use the<br />
power cord that comes with your <strong>Elo</strong> <strong>TouchSystems</strong> touchcomputer. Use of an<br />
unauthorized power cord might invalidate your warranty.<br />
• The slots located on the sides and top of the touchcomputer case are for ventilation.<br />
Do not block or insert anything inside the ventilation slots.<br />
• It is important that your touchcomputer remains dry. Do not pour liquid into or onto your<br />
touchcomputer. If your touchcomputer becomes wet, do not attempt to repair it<br />
yourself. Contact <strong>Elo</strong> Customer Service for instructions.<br />
B-SERIES TOUCHCOMPUTER USER GUIDE 26
Care and Handling<br />
The following tips help keep your touchcomputer functioning at the optimal level.<br />
Warning<br />
To avoid risk of electric shock, do not disassemble the power adapter or display<br />
unit cabinet. The unit is not user serviceable. Remember to unplug the display unit<br />
from the power outlet before cleaning.<br />
Do not use alcohol (methyl, ethyl, or isopropyl) or any strong solvent. Do not use<br />
thinner or benzene, abrasive cleaners, or compressed air.<br />
To clean the display unit cabinet, use a cloth lightly dampened with a mild<br />
detergent.<br />
Avoid getting liquids inside your touchcomputer. If liquid does get inside, have a<br />
qualified service technician check it before you power it on again.<br />
Do not wipe the screen with a cloth or sponge that could scratch the surface.<br />
To clean the touchscreen, use window or glass cleaner. Put the cleaner on the rag<br />
and wipe the touchscreen. Never apply the cleaner directly on the touchscreen.<br />
This product consists of devices that might contain mercury, which must be<br />
recycled or disposed of in accordance with local, state, or federal laws. (Within this<br />
system, the backlight lamps in the monitor display contain mercury.)<br />
B-SERIES TOUCHCOMPUTER USER GUIDE 27
WEEE Directive<br />
In the European Union, the Waste Electrical and Electronic Equipment (WEEE)<br />
directive label shown to the left indicates that this product should not be disposed<br />
of with household waste. It should be deposited at an appropriate facility for<br />
recovery and recycling.<br />
UL Directive<br />
B-<strong>Series</strong> touchcomputer has included a lithium battery on the motherboard. There<br />
is a risk of explosion if battery is replaced by an incorrect type. Please dispose of used batteries<br />
according the region instructions.<br />
China RoHS<br />
B-SERIES TOUCHCOMPUTER USER GUIDE 28
Recovering the Operating System<br />
If for any reason the touchcomputer’s operating system and software need to be<br />
recovered TO FACTORY SETTINGS, there are two ways you can recover your<br />
system:<br />
I) Use the <strong>Elo</strong> recovery utility (included in POSReady 2009,Windows 7, and<br />
some Windows XP systems)<br />
*Windows XP users: If your system does not have a recovery partition,<br />
please follow the steps in section II to recover your system using the<br />
included recovery DVD.<br />
i. Use the included image to recover the touchcomputer (For *Windows XP<br />
and POSReady 2009 Only.)<br />
1. After the TE/<strong>Elo</strong> logo shows up, press DOWN repeatedly to enter<br />
Windows Boot Manager.<br />
2. Select OS Recovery<br />
3. The following <strong>User</strong> Interface will be presented:<br />
4. Click Recover Start Recovery Process<br />
B-SERIES TOUCHCOMPUTER USER GUIDE 29
5. Once completed, click Exit Recovery Process Exit. The system will<br />
restart automatically.<br />
ii. Use the included image to recover the touchcomputer (For Windows 7<br />
Only.)<br />
1. After the TE/<strong>Elo</strong> logo shows up, press F8 repeatedly to enter Advanced<br />
Boot Options.<br />
2. Select Repair your computer<br />
3. Click Next OK (There is no password) <strong>Elo</strong> Touch System Tool<br />
4. The following <strong>User</strong> Interface will be presented:<br />
B-SERIES TOUCHCOMPUTER USER GUIDE 30
5. Click Recover Start Recovery Process<br />
6. Once completed, click Exit Recovery Process Exit. The system will<br />
restart automatically.<br />
B-SERIES TOUCHCOMPUTER USER GUIDE 31
OR<br />
II) Use the <strong>Elo</strong> recovery DVD<br />
(Some Windows XP versions include a recovery DVD; for these systems<br />
there is no recovery partition on the HDD, so you must follow the following<br />
procedure to recovery the system. Some Windows XP versions, and ALL<br />
POSReady 2009 and Windows 7 touchcomputers come with the built-in<br />
recovery partition on the installed HDD; they do not include recovery media.<br />
In the event the HDD recovery partition is accidentally deleted or becomes<br />
or inaccessible, POSReady 2009 and Windows 7 systems do not include a<br />
recovery DVD. You will need to must request a recovery DVD from <strong>Elo</strong><br />
<strong>TouchSystems</strong> customer service. Contact information can be found on the<br />
last page of this guide.)<br />
Hardware needed:<br />
1. <strong>Elo</strong> <strong>Touchcomputer</strong><br />
2. External USB DVD Drive<br />
3. <strong>Elo</strong> Windows XP, POSReady 2009 or Windows 7 Recovery DVD<br />
Procedure<br />
1. Connect the USB DVD drive to the touchcomputer.<br />
2. Place the recovery DVD in the DVD drive.<br />
3. Power on your touchcomputer and press “F11” to enter Device Boot Menu<br />
and boot from DVD.<br />
4. If “F11” doesn’t open the Device Boot Menu (depending on your model),<br />
power off, then power on again and press “F8” to enter the Device Boot<br />
Menu.<br />
5. After entering the System Recovery Tool, click the “WINPE” button.<br />
B-SERIES TOUCHCOMPUTER USER GUIDE 32
6. Once you see the “Command Prompt” window to start the recovery process<br />
type:<br />
• “pos9” to start the recovery process for POSReady 2009/Windows XP.<br />
* Note: If your system came with Windows XP, it will automatically be<br />
re-installed; if your system came with POSReady 2009, it will automatically be<br />
re-installed; you cannot recovery a different operating system than what<br />
originally shipped with your system.<br />
OR<br />
• “win7” to start the recovery process for Windows 7<br />
B-SERIES TOUCHCOMPUTER USER GUIDE 33
7. Then press “Enter”.<br />
8. Follow the on-screen instructions to complete the recovery.<br />
9. Once you are prompted to reboot:<br />
• Remove the recovery DVD from your DVD drive<br />
• Shut down your touchcomputer by pressing and holding the power button<br />
for 5 seconds<br />
• Disconnect the DVD drive from your touchcomputer<br />
• Restart your touchcomputer by pressing the power button<br />
10. Follow the on-screen instructions to setup your system.<br />
NOTE: All data is deleted during the recovery process. The user must back up<br />
files when necessary. <strong>Elo</strong> <strong>TouchSystems</strong> does not accept liability for lost<br />
data or software.<br />
NOTE: If your hard disk is corrupted, you can request a Recovery DVD from <strong>Elo</strong><br />
<strong>TouchSystems</strong> customer service.<br />
NOTE: The end user must adhere to Microsoft's Licensing Agreement.<br />
NOTE: After recovering your touchcomputer by using the included image, the<br />
operating system may reassign your USB Serial Ports during the first<br />
bootup. You can follow the instructions below to reassign them manually.<br />
B-SERIES TOUCHCOMPUTER USER GUIDE 34
Reassigning COM Ports after System Recovery<br />
(The section is required once you recovered your system either from recovery partition or<br />
DVD)<br />
• Instructions to reassign the USB Serial Port(s)<br />
1. For POSReady 2009, right click on the “Computer”icon on the desktop <br />
Left click “Properties” Then “Hardware” Then “Device Manager”.<br />
For Windows 7, right click on the “Computer” icon on the desktop Left<br />
click “Properties” Then “Device Manager”.<br />
B-SERIES TOUCHCOMPUTER USER GUIDE 35
2. Double click the “Ports (COM & LPT)” and verify that all of the “USB Serial<br />
Port” settings are IDENTICAL to the following table:<br />
Description Location<br />
USB Serial Port (COM3) On USB Serial Converter A<br />
USB Serial Port (COM4) On USB Serial Converter B<br />
3. If they are not, and you see the assignments as shown below, then the<br />
operating system has reassigned these serial ports. You need to re‐assign<br />
(correct) them manually.<br />
B-SERIES TOUCHCOMPUTER USER GUIDE 36
Normally, even if the operating system reassigns these serial ports, they<br />
are still in order. In this case, you should re‐assign them as shown in the<br />
following table.<br />
Original one Change to<br />
USB Serial Port (COM5) USB Serial Port (COM3)<br />
USB Serial Port (COM6) USB Serial Port (COM4)<br />
Thus, the settings for these USB Serial Ports should begin at COM3 and<br />
end at COM4 in order.<br />
4. To re‐assign them, please follow the instructions below:<br />
Double click the port you need to change. In this case, it is COM5.<br />
B-SERIES TOUCHCOMPUTER USER GUIDE 37
COM5 is the 1 st port of these USB serial ports so the “Location:” should<br />
be “on USB Serial Converter A”. Please assign this serial port to COM3.<br />
(COM4 for the USB Serial Converter B).<br />
Change to COM3<br />
Select “Port Settings” Click “Advanced…”<br />
Location Information<br />
B-SERIES TOUCHCOMPUTER USER GUIDE 38
In this case, select COM3 from the drop‐down menu click OK OK<br />
back to the Device Manager.<br />
Follow the same steps to accomplish these settings for other ports.<br />
B-SERIES TOUCHCOMPUTER USER GUIDE 39
After completing the above steps, right click on “Ports (COM & LPT)” and<br />
click Scan for hardware changes.<br />
5. This should result in the following assignments:<br />
• If not, please repeat steps 1‐5.<br />
COM3 location: USB Serial Converter A<br />
COM4 location: USB Serial Converter B<br />
B-SERIES TOUCHCOMPUTER USER GUIDE 40
B-SERIES TOUCHCOMPUTER USER GUIDE 41
Technical Assistance<br />
C H A P T E R<br />
5<br />
TECHNICAL SUPPORT<br />
There are three methods to obtain contact information for technical assistance on<br />
the touchcomputer:<br />
• The touchcomputer<br />
• The web<br />
• The phone<br />
Using the <strong>Touchcomputer</strong><br />
Using the Web<br />
You can access support information in System Properties by clicking the Support<br />
Information button. You can get to System Properties by either of the following<br />
methods:<br />
Right-click My Computer and choose Properties.<br />
OR<br />
Click the Start button, select Control Panel, and double-click the System icon.<br />
For online self-help, go to www.elotouch.com/go/websupport.<br />
For technical support, go to www.elotouch.com/go/contactsupport.<br />
For current <strong>Elo</strong> news, product updates, and announcements, or to register to<br />
receive our <strong>Touchcomputer</strong> newsletter, go to www.elotouch.com/go/news.<br />
B-SERIES TOUCHCOMPUTER USER GUIDE 42
Using the Phone<br />
For technical support, see the table at the end of the user guide for contact<br />
information.<br />
B-SERIES TOUCHCOMPUTER USER GUIDE 43
REGULATORY INFORMATION<br />
I. Electrical Safety Information<br />
A) Compliance is required with respect to the voltage, frequency, and current<br />
requirements indicated on the manufacturer’s label. Connection to a different<br />
power source than those specified herein may result in improper operation,<br />
damage to the equipment, invalidation of warranty, or a fire hazard if the<br />
requirements are not followed.<br />
B) There are no operator-serviceable parts inside this equipment. There are<br />
hazardous voltages generated by this equipment which constitute a safety hazard.<br />
Service should be provided only by a qualified service technician.<br />
C) This equipment is provided with a detachable power cord which has an integral<br />
safety ground wire intended for connection to a grounded safety outlet.<br />
1) Do not substitute the cord with other than the provided approved type. Under<br />
no circumstances should you use an adapter plug to connect to a 2-wire outlet<br />
as this defeats the continuity of the grounding wire.<br />
2) The equipment requires the use of the ground wire as a part of the safety<br />
certification. Modification or misuse can provide a shock hazard that can result<br />
in serious injury or death.<br />
3) Contact a qualified electrician or the manufacturer if there are questions<br />
about the installation prior to connecting the equipment to main power.<br />
II. Emissions and Immunity Information<br />
A) Notice to <strong>User</strong>s in the United States: This equipment has been tested and found<br />
to comply with the limits for a Class A digital device, pursuant to Part 15 of FCC<br />
Rules. These limits are designed to provide reasonable protection against harmful<br />
interference in a residential or commercial installation. This equipment generates,<br />
uses, and can radiate radio frequency energy, and if not installed and used in<br />
accordance with the instructions, may cause harmful interference to radio<br />
communications.<br />
B) Notice to <strong>User</strong>s in Canada: This equipment complies with the Class A limits for<br />
radio noise emissions from digital apparatus as established by the Radio<br />
Interference Regulations of Industry Canada.<br />
B-SERIES TOUCHCOMPUTER USER GUIDE 44
C) Notice to <strong>User</strong>s in the European Union: Use only the provided power cords and<br />
interconnecting cabling provided with the equipment. Substitution of provided<br />
cords and cabling may compromise electrical safety or CE Mark Certification for<br />
emissions or immunity as required by the following standards: This Information<br />
Technology Equipment (ITE) is required to have a CE Mark on the manufacturer’s<br />
label which means that the equipment has been tested to the following Directives<br />
and Standards:<br />
This equipment has been tested to the requirements for the CE Mark as required<br />
by EMC Directive 89/336/EEC indicated in European Standard EN 55022 Class A<br />
and the Low Voltage Directive 73/23/EEC as indicated in European Standard EN<br />
60950.<br />
D) General Information to all <strong>User</strong>s: This equipment generates, uses, and can<br />
radiate radio frequency energy. If not installed and used according to this manual,<br />
the equipment may cause interference with radio and television communications.<br />
There is, however, no guarantee that interference will not occur in any particular<br />
installation due to site-specific factors.<br />
1) In order to meet emission and immunity requirements, the user must<br />
observe the following:<br />
a) Use only the provided I/O cables to connect this digital device with any<br />
computer.<br />
b) To ensure compliance, use only the provided manufacturer’s approved<br />
power cord.<br />
c) The user is cautioned that changes or modifications to the equipment not<br />
expressly approved by the party responsible for compliance could void the<br />
user’s authority to operate the equipment.<br />
2) If this equipment appears to cause interference with radio or television<br />
reception, or any other device:<br />
a) Verify as an emission source by turning the equipment off and on.<br />
b) If you determine that this equipment is causing the interference, try to<br />
correct the interference by using one or more of the following measures:<br />
i) Move the digital device away from the affected receiver.<br />
ii) Reposition (turn) the digital device with respect to the affected<br />
receiver.<br />
iii) Reorient the affected receiver’s antenna.<br />
B-SERIES TOUCHCOMPUTER USER GUIDE 45
III. Agency Certifications<br />
iv) Plug the digital device into a different AC outlet so the digital device<br />
and the receiver are on different branch circuits.<br />
v) Disconnect and remove any I/O cables that the digital device does<br />
not use. (Unterminated I/O cables are a potential source of high RF<br />
emission levels.)<br />
vi) Plug the digital device into only a grounded outlet receptacle. Do not<br />
use AC adapter plugs. (Removing or cutting the line cord ground may<br />
increase RF emission levels and may also present a lethal shock<br />
hazard to the user.)<br />
vii) If you need additional help, consult your dealer, manufacturer, or an<br />
experienced radio or television technician.<br />
The following certifications have been issued for the touchcomputer:<br />
• UL/cUL • FCC • TUV<br />
• CE • CB • Argentina S-mark<br />
• Russia GOST-R • Australia C-Tick • Japan VCCI<br />
• China CCC • •<br />
• • •<br />
B-SERIES TOUCHCOMPUTER USER GUIDE 46
WARRANTY<br />
Except as otherwise stated herein or in an order acknowledgment delivered to<br />
Buyer, Seller warrants to Buyer that the Product shall be free of defects in<br />
materials and workmanship. With the exception of the negotiated warranty<br />
periods; the warranty for the touchcomputer and components of the product is 3<br />
years.<br />
Seller makes no warranty regarding the model life of components. Seller’s<br />
suppliers may at any time and from time to time make changes in the components<br />
delivered as Products or components. Buyer shall notify Seller in writing promptly<br />
(and in no case later than thirty (30) days after discovery) of the failure of any<br />
Product to conform to the warranty set forth above; shall describe in commercially<br />
reasonable detail in such notice the symptoms associated with such failure; and<br />
shall provide to Seller the opportunity to inspect such Products as installed, if<br />
possible. The notice must be received by Seller during the Warranty Period for<br />
such product, unless otherwise directed in writing by the Seller. Within thirty (30)<br />
days after submitting such notice, Buyer shall package the allegedly defective<br />
Product in its original shipping carton(s) or a functional equivalent and shall ship to<br />
Seller at Buyer’s expense and risk.<br />
Within a reasonable time after receipt of the allegedly defective Product and<br />
verification by Seller that the Product fails to meet the warranty set forth above,<br />
Seller shall correct such failure by, at Seller’s options, either (i) modifying or<br />
repairing the Product or (ii) replacing the Product. Such modification, repair, or<br />
replacement and the return shipment of the Product with minimum insurance to<br />
Buyer shall be at Seller’s expense. Buyer shall bear the risk of loss or damage in<br />
transit, and may insure the Product. Buyer shall reimburse Seller for transportation<br />
cost incurred for Product returned but not found by Seller to be defective.<br />
Modification or repair, of Products may, at Seller’s option, take place either at<br />
Seller’s facilities or at Buyer’s premises. If Seller is unable to modify, repair, or<br />
replace a Product to conform to the warranty set forth above, then Seller shall, at<br />
Seller’s option, either refund to Buyer or credit to Buyer’s account the purchase<br />
price of the Product less depreciation calculated on a straight-line basis over<br />
Seller’s stated Warranty Period.<br />
B-SERIES TOUCHCOMPUTER USER GUIDE 47
THESE REMEDIES SHALL BE THE BUYER’S EXCLUSIVE REMEDIES FOR<br />
BREACH OF WARRANTY. EXCEPT FOR THE EXPRESS WARRANTY SET<br />
FORTH ABOVE, SELLER GRANTS NO OTHER WARRANTIES, EXPRESS OR<br />
IMPLIED BY STATUTE OR OTHERWISE, REGARDING THE PRODUCTS,<br />
THEIR FITNESS FOR ANY PURPOSE, THEIR QUALITY, THEIR<br />
MERCHANTABILITY, THEIR NONINFRINGEMENT, OR OTHERWISE. NO<br />
EMPLOYEE OF SELLER OR ANY OTHER PARTY IS AUTHORIZED TO MAKE<br />
ANY WARRANTY FOR THE GOODS OTHER THAN THE WARRANTY SET<br />
FORTH HEREIN. SELLER’S LIABILITY UNDER THE WARRANTY SHALL BE<br />
LIMITED TO A REFUND OF THE PURCHASE PRICE OF THE PRODUCT. IN NO<br />
EVENT SHALL SELLER BE LIABLE FOR THE COST OF PROCUREMENT OR<br />
INSTALLATION OF SUBSTITUTE GOODS BY BUYER OR FOR ANY SPECIAL,<br />
CONSEQUENTIAL, INDIRECT, OR INCIDENTAL DAMAGES.<br />
Buyer assumes the risk and agrees to indemnify Seller against and hold Seller<br />
harmless from all liability relating to (i) assessing the suitability for Buyer’s intended<br />
use of the Products and of any system design or drawing and (ii) determining the<br />
compliance of Buyer’s use of the Products with applicable laws, regulations, codes,<br />
and standards. Buyer retains and accepts full responsibility for all warranty and<br />
other claims relating to or arising from Buyer’s products, which include or<br />
incorporate Products or components manufactured or supplied by Seller. Buyer is<br />
solely responsible for any and all representations and warranties regarding the<br />
Products made or authorized by Buyer. Buyer will indemnify Seller and hold Seller<br />
harmless from any liability, claims, loss, cost, or expenses (including reasonable<br />
attorney’s fees) attributable to Buyer’s products or representations or warranties<br />
concerning same.<br />
B-SERIES TOUCHCOMPUTER USER GUIDE 48
www.elotouch.com<br />
Get the latest...<br />
• Product information<br />
• Specifications<br />
• News on upcoming events<br />
• Press release<br />
• Software drivers<br />
• <strong>Touchcomputer</strong> Newsletter<br />
Getting in Touch with <strong>Elo</strong><br />
To find out more about <strong>Elo</strong>’s extensive range of touch solutions, visit our Website at www.elotouch.com or<br />
simply call the office nearest you:<br />
North America<br />
<strong>Elo</strong> Touch Solutions<br />
301 Constitution Drive<br />
Menlo Park, CA 94025<br />
USA<br />
Tel (800) ELO-TOUCH<br />
Tel (800) 557-1458<br />
Tel 650-361-4800<br />
Fax 650-361-4722<br />
customerservice@elotouch.com<br />
Latin America<br />
Tel 786-923-0251<br />
Fax 305-931-0124<br />
www.elotouch.com.ar<br />
Europe<br />
Tel +32(0)(16)35-2100<br />
Fax +32(0)(16)35-2101<br />
elosales@elotouch.com<br />
Asia-Pacific<br />
Tel +81(45)478-2161<br />
Fax +81(45)478-2180<br />
www.tps.co.jp<br />
B-SERIES TOUCHCOMPUTER USER GUIDE 44<br />
© 2012 <strong>Elo</strong> Touch Solutions