

Download - Support - Belkin
Download - Support - Belkin
Download - Support - Belkin

Create successful ePaper yourself
Turn your PDF publications into a flip-book with our unique Google optimized e-Paper software.
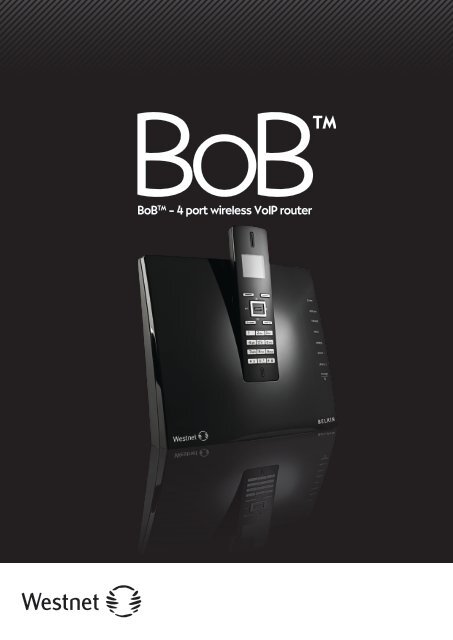
BoB TM – 4 port wireless VoIP router
Table of Contents<br />
Chapter 1 : Introduction Pg. 0 1<br />
Chapter 2 : Product Overview Pg. 02<br />
Chapter 3 : Knowing BoB TM Pg. 04<br />
Chapter 4 : Connection & Configuration Pg. 05<br />
Chapter 5 : Advanced Setup Pg. 07<br />
Setup Wizard Pg. 08<br />
Menu Description Pg. 1 0<br />
System Time Setting Pg. 1 1<br />
Password Setting Pg. 1 2<br />
Remote Management Pg. 1 2<br />
DNS Pg. 1 3<br />
WAN Pg. 1 3<br />
ATM PVC Pg. 1 4<br />
ATM Interface Pg. 1 5<br />
Clone MAC Address Pg. 1 6<br />
LAN Pg. 1 7<br />
VLAN Pg. 1 8<br />
VLAN Access Control Pg. 1 9<br />
Channel and SSID Pg. 20<br />
Wireless Access Control Pg. 2 1<br />
Security Pg. 22<br />
WEP Pg. 23<br />
WPA/WPA2 Pg. 24<br />
WDS Pg. 25<br />
NAT Pg. 25<br />
Address Mapping Pg. 26<br />
Port Forwarding Pg. 27<br />
Special Applications Pg. 28<br />
Route Pg. 30<br />
RIP Parameter Pg. 3 1<br />
Access Control Pg. 34<br />
MAC Filter Pg. 36
Table of Contents<br />
Schedule Rule Pg. 38<br />
Intrusion Detection Pg. 39<br />
DMZ Pg. 40<br />
SNMP Pg. 4 1<br />
Community Pg. 4 1<br />
Trap Pg. 42<br />
ADSL Pg. 42<br />
Status Pg. 43<br />
VoIP Pg. 44<br />
VoIP Advanced Setting Pg. 46<br />
Port Advanced Setting Pg. 47<br />
DECT Setting Pg. 48<br />
UPnP Pg. 49<br />
QoS Pg. 50<br />
Edit Traffic Class Pg. 5 1<br />
Traffic Statistics Pg. 52<br />
DDNS Pg. 52<br />
USB Pg. 53<br />
Configuration Tools Pg. 55<br />
Firmware Upgrade Pg. 55<br />
Diagnostic Utility Pg. 56<br />
Reset Pg. 56<br />
Status Pg. 57<br />
DHCP Client LOG Pg. 58<br />
Security Log Pg. 58<br />
Appendices Pg. 59<br />
A1 Troubleshooting Pg. 6 1<br />
A2 Troubleshooting Pg. 62<br />
B Cables Pg. 63<br />
C Specification Pg. 64<br />
Glossary- 1 Pg. 65<br />
Glossary-2 Pg. 66<br />
<strong>Belkin</strong> International, Inc. Limited 2 Year Product Warranty Pg. 67
Chapter 1 : Introduction<br />
BoB TM 4 port integrated wireless router<br />
Thank you for purchasing the BoB TM 4 port integrated wireless router (handset optional). Within minutes you<br />
will be able to connect to the internet and make Voice over Internet Protocol (VoIP) phone calls. The following<br />
is a list of features that make BoB TM an ideal solution for your home or small office and will contain important<br />
information on how to get what you want out of BoB TM , so please read carefully before setting him up.<br />
*Handset Extra<br />
Page 1
Chapter 2 : Product Overview<br />
About BoB TM 4 port integrated wireless router<br />
Product Overview<br />
BoB TM - 4 port integrated wireless router, excluding<br />
BoB TM handset<br />
Compatibility with both PC’s and<br />
Mac® Computers<br />
The router supports a variety of networking<br />
environments including Mac OS® 8.x, 9.x & v10.x, Linux®,<br />
Windows® 98SE, ME, NT, 2000, XP and Vista. You will<br />
need an Internet browser and a network adapter<br />
that supports TCP/IP (the standard language of the<br />
Internet).<br />
Internet Access<br />
This device supports Internet access through an ADSL<br />
connection. Since many ADSL providers use PPPoE or<br />
PPPoA to establish communications with end users,<br />
the router includes built-in clients for these protocols,<br />
eliminating the need to install these services on your<br />
computer.<br />
Front-Panel LED Display<br />
Light LED’s on the front of the router indicate which<br />
functions are in operation. You’ll know at-a-glance<br />
whether your router is connected to the Internet. This<br />
feature eliminates the need for advanced software and<br />
status-monitoring procedures.<br />
Web-Based Advanced User<br />
Interface<br />
You can set up the router advanced functions easily<br />
through your web browser, without having to install<br />
additional software onto the computer. There are no<br />
disks to install or keep track of and, best of all, you can<br />
make changes and perform setup functions from any<br />
computer on the network quickly and easily.<br />
Built-in Dynamic Host<br />
Configuration Protocol (DHCP)<br />
Built-In Dynamic Host Configuration Protocol (DHCP)<br />
on-board makes for the easiest possible connection of<br />
a network. The DHCP server will assign IP addresses to<br />
each computer automatically so there is no need for a<br />
complicated networking setup.<br />
DMZ Host <strong>Support</strong><br />
DMZ Host <strong>Support</strong> allows a networked computer to<br />
be fully exposed to the Internet. This function is used<br />
when NAT and firewall security prevent an Internet<br />
application from functioning correctly.<br />
NAT IP Address Sharing<br />
Your router employs Network Address Translation<br />
(NAT) to share the single IP address assigned to you by<br />
your Internet Service Provider while saving the cost of<br />
adding additional IP addresses to your Internet service<br />
account.<br />
SPI Firewall<br />
Your router is equipped with a firewall that will protect<br />
your network from a wide array of common hacker<br />
attacks including:<br />
IP Spoofing, Land Attack, Ping of Death (PoD), Denial of<br />
Service (DoS), IP with zero length, Smurf Attack, TCP<br />
Null Scan, SYN f lood, UDP f looding, Tear Drop Attack,<br />
ICMP defect, RIP defect, and fragment f looding.<br />
Universal Plug-and-Play (UPnP)<br />
Compatibility<br />
UPnP (Universal Plug-and-Play) is a technology that<br />
offers seamless operation of voice messaging, video<br />
messaging, games, and other applications that are<br />
UPnP-compliant.<br />
USB/3g/Charge Ports<br />
Your router is equipped with two USB ports,<br />
Storage/3g and Charge. The Storage/3g port currently<br />
supports FAT16/32 & NTFS USB Mass Storage Devices.<br />
With a mass storage device connected you can easily<br />
share your files to anyone on the network.<br />
Future planned firmware upgrades will allow the router<br />
to support 3g USB wireless adapters as a backup if your<br />
ADSL connection is down. For more information on this<br />
feature and a list of support USB adapters, visit http://<br />
www belkin com au/support<br />
Page 2
Chapter 2 : Product Overview<br />
About BoB TM 4 port integrated wireless router<br />
The ‘Charge’ port on your router is dedicated to<br />
charging USB powered devices, such as mobile phones,<br />
iPods, etc. The charge port will supply a maximum 5V<br />
500mA. Connecting a USB device which requires more<br />
than 500mA may result in damage to your equipment.<br />
QoS<br />
QoS (Quality of Service) limits the traffic being sent<br />
from the router (upstream) when using VoIP at the<br />
same time. If QoS is disabled, the quality of the VoIP<br />
call can suffer due to excessive traffic from another<br />
source, such as a PC. When QoS is enabled, it limits the<br />
upstream traffic and sets it aside for VoIP, increasing<br />
the call quality.<br />
Virtual Server<br />
If you have a fixed IP address, you can set the router<br />
to act as a virtual host for network address translation.<br />
Remote users access various services at your site<br />
using a constant IP address. Then, depending on<br />
the requested service (or port number), the router<br />
can route the request to the appropriate server (at<br />
another internal IP address).This secures your network<br />
from direct attack by hackers, and provides more<br />
f lexible management by allowing you to change<br />
internal IP addresses without affecting outside access<br />
to your network.<br />
<strong>Support</strong> for VPN Pass-Through<br />
If you connect to your office network from home using<br />
a VPN connection, your router will allow your VPNequipped<br />
computer to pass through the router and to<br />
your office network. This router supports 1 VPN session<br />
at any one time<br />
This router supports three of the most commonly<br />
used VPN protocols – PPTP, L2TP, and IPSec. The<br />
VPN protocols supported by the router are brief ly<br />
described below.<br />
• Point-to-Point Tunneling Protocol – Provides a<br />
secure tunnel for remote client access to a PPTP<br />
security gateway. PPTP includes provisions for call<br />
origination and flow control required by ISPs.<br />
• L2TP merges the best features of PPTP and L2F<br />
– Like PPTP, L2TP requires that the ISP’s routers<br />
support the protocol.<br />
IP Security – Provides IP network-layer encryption.<br />
IPSec can support large encryption networks (such<br />
as the Internet) by using digital certificates for device<br />
authentication.<br />
<strong>Support</strong> for 1 VPN session.<br />
Wired & Wireless LAN<br />
The router provides access for up to 4 by 10/100 Mbps<br />
wired devices and up to an additional 32 wireless<br />
devices, making it easy to create a network in small<br />
offices or homes. 802 11b, 802 11g & 802 11n wireless<br />
standards are supported.<br />
MAC Address Filtering<br />
For added security, you can set up a list of MAC<br />
addresses (unique client identifiers) that are allowed<br />
access to your network Every computer has its own<br />
MAC address. Simply enter these MAC addresses into<br />
a list using the web-based user interface and you can<br />
control access to your network.<br />
WEP, WPA and WPA 2 Encryption<br />
protocols<br />
The router features WPA2, which is the second<br />
generation of the WPA-based 802 11i standard. It<br />
offers a higher level of wireless security by combining<br />
advanced network authentication and stronger<br />
Advanced Encryption Standard (AES) encryption<br />
methods. It also supports the legacy security standard<br />
called Wired Equivalent Privacy (WEP) in order to allow<br />
you to activate security with any legacy devices you<br />
may have on your network.<br />
VLAN<br />
VLAN (Virtual Local Area Network) adds the ability to<br />
manage multiple networks with the one router. The<br />
router is designed to be placed on a desktop. All of<br />
the cables exit from the rear of the router for better<br />
organisation and utility. The LED indicators are easily<br />
visible on the front of the router to provide you with<br />
information about network activity and status.<br />
BoB TM Handset<br />
The BoB TM handset is an optional device which slots<br />
into the front of the BoB TM router and allows you to<br />
make voice calls (including VoIP where available).<br />
The BoB TM router can support up to 5 DECT-compatible<br />
handsets and the handset cradle also functions as a<br />
charger for the BoB TM handset when it is not in use.<br />
Page 3
Chapter 3 : Knowing BoB TM<br />
Note<br />
on Side Panel Ports:<br />
The router has an<br />
aforementioned USB/3g<br />
port labelled ‘3g/storage’<br />
along with a USB charge<br />
port.<br />
The charge port is able<br />
to charge devices which<br />
use a USB connection,<br />
such as iPods, etc.<br />
Knowing your BoB TM - 4 port integrated wireless router<br />
LED indicators are easily visible on the front of the<br />
router to provide you with information about network<br />
activity and status. All cables and connections<br />
conveniently exit from the rear of the router.<br />
Front Panel<br />
1.<br />
Power LED<br />
When you apply power to the router or restart it, a<br />
short period of time elapses while the router boots<br />
up. When the router has completely booted up,<br />
the Power LED becomes a SOLID light, indicating<br />
the router is ready for use.<br />
• Off - Router is off<br />
• Orange - Router is booting<br />
• Blue - Router is on and ready for use<br />
2. ADSL SYNC LED<br />
The ADSL LED will light up yellow indicating no ADSL<br />
sync. Once line sync is established the LED will light<br />
up blue.<br />
• Off - No ADSL connection<br />
• Orange - Negotiating connection/No ADSL<br />
sync<br />
• On - ADSL link is up and connected<br />
3. Internet LED<br />
The Internet LED shows you when the router<br />
is connected to the Internet. If the LED is off<br />
or yellow the router is NOT connected to the<br />
Internet.<br />
• Off – Not connected to Internet<br />
• Orange – The router is not connected<br />
to the internet or a problem<br />
has been detected.<br />
• On – Connected to internet<br />
4. LAN Status LED<br />
When a computer is properly connected to the<br />
LAN port on the rear of the router, the LED shown<br />
here will light. A solid light means a computer or<br />
a network-enabled device is connected. When<br />
information is being sent over the port, the LED<br />
blinks rapidly.<br />
• Off - Your computer is not connected<br />
• On - Your computer is connected<br />
5. Wireless Status LED<br />
The Wireless status LED shows you when the<br />
router’s wireless is enabled.<br />
• On - Wireless enabled<br />
• Orange - Solid, the router has detected a<br />
problem with a client connecting<br />
to the wireless<br />
• Off - Wireless is disabled<br />
6 & 7. Phone Status LED 1-2<br />
The phone lights indicate whether VoIP account<br />
one or two has successfully registered on the<br />
network.<br />
• On - VoIP registered successfully<br />
• Orange - Solid, the router has detected a<br />
problem registering your VoIP<br />
account on the network<br />
• Off - No VoIP activity<br />
8. Storage/3g<br />
When a USB mass storage device is connected<br />
to this USB Port, this light will illuminate to inform<br />
you the attached storage device is ready for use.<br />
This USB port also accepts a 3g wireless modem<br />
service.<br />
• On – Attached USB Mass Storage or<br />
3g Device connected and ready<br />
for use<br />
• Off – No attached USB Mass Storage<br />
or 3g Device<br />
Page 4
Chapter 4 : Connection & Configuration<br />
Connect & Configure your BoB TM<br />
Back Panel<br />
1.<br />
Power Switch<br />
The power switch allows you to switch on or off<br />
the router. Once you have connected the power<br />
plug, f lip the switch to ON (‘1’) to power on the<br />
router.<br />
2. Power Plug<br />
Connect the included 12V 1 5A DC power supply to<br />
this inlet. Using the wrong type of power adapter<br />
may cause damage to your router.<br />
3. Reset Button<br />
• Resetting the Router<br />
Push and hold the Reset button for one second<br />
then release it. When the power light becomes<br />
solid again the reset is complete.<br />
• Restoring the Factory Defaults<br />
Push and hold the Reset button for ten seconds<br />
then release it. When the power light becomes<br />
solid again the restore is complete.<br />
4. LAN Ports<br />
The Ethernet port is RJ45, 10/100 auto-negotiation.<br />
Connect your net work-enabled computers or any<br />
networking devices to this port.<br />
5. Phone Two Port<br />
Phone Port connects to standard analogue<br />
telephone set or fax machine.<br />
6. PSTN Failover Port<br />
The Optional RJ-11 port is for connection to your<br />
PSTN (Home Phone) line to provide Normal Phone<br />
call backup for when VoIP is unavailable or not<br />
required.<br />
7. ADSL Line<br />
This port is for connection to your ADSL line<br />
Connect your ADSL line to this port.<br />
8. Locate handset (if installed)<br />
Press this button to signal the BoB TM handset to<br />
ring, allowing you to easily find its current location<br />
Useful if you have lost the handset.<br />
9. Register additional handsets<br />
Allows you to register additional DECT compliant<br />
handsets to your router. A total of 5 DECT<br />
handsets can be registered to your router at any<br />
one time.<br />
Page 5
Chapter 4 : Connection & Configuration<br />
Notes:<br />
Use 100-ohm shielded<br />
or unshielded twisted-<br />
pair cable with RJ-45<br />
connectors for all<br />
Ethernet ports. Use<br />
Category 3, 4, or 5<br />
for connections that<br />
operate at 10 Mbps,<br />
and Category 5 for<br />
connections that<br />
operate at 100 Mbps.<br />
Connect & Configure your BoB TM<br />
Step 1. Find a suitable location<br />
Your BoB TM - 4 port integrated wireless router can be<br />
positioned at any convenient location in your office<br />
or home where there is easy access to a phone jack<br />
and power point nearby. No special wiring or cooling<br />
requirements are needed and there is no necessity to<br />
keep the unit connected directly to a computer.<br />
You should, however, comply with the following<br />
guidelines:<br />
•<br />
Keep the router away from any heating devices<br />
• Do not place the router in a dusty or wet<br />
environment<br />
You should also remember to turn off the power,<br />
remove the power cord from the outlet, and keep<br />
your hands dry when you install the router.<br />
Step 2. Connect the ADSL Line<br />
Phone line configuration<br />
Run a standard telephone cable from the wall jack<br />
providing ADSL service to the RJ-11 (‘ADSL’) port on<br />
your router. When inserting an ADSL RJ-11 plug, be<br />
sure the tab on the plug clicks into position to ensure<br />
that it is properly seated. If you are using a splitter<br />
less ADSL service, be sure you add low-pass filters<br />
between the ADSL wall jack and your telephones<br />
(these filters pass voice signals through but filter data<br />
signals out).<br />
If more than 4 connections of any kind (i e faxes,<br />
phones, modems etc) are to be used you will need to<br />
get a central splitter.<br />
Step 3. Attach to your network<br />
using Ethernet cabling<br />
The LAN ports on the router auto-negotiates the<br />
connection speed to 10 Mbps Ethernet or 100 Mbps<br />
Fast Ethernet, as well as the transmission mode to half<br />
duplex or full duplex.<br />
Use twisted-pair cabling to connect any of the LAN<br />
ports on the router to an Ethernet adapter on your<br />
PC. Otherwise, cascade the LAN port on the router<br />
to an Ethernet hub or switch, and then connect your<br />
PC or other network equipment to the hub or switch.<br />
When inserting an RJ-45 connector, be sure the tab<br />
on the connector clicks into position to ensure that it<br />
is properly seated.<br />
Warning: Do not plug a phone jack connector into an<br />
RJ-45 port. This may damage the router. Instead, use<br />
only twisted-pair cables with RJ-45 connectors that<br />
conform to Australian standards.<br />
Step 4. Connect the power<br />
adapter<br />
Plug the power adapter into the power socket on<br />
the rear panel of the router, and the other end into a<br />
power outlet.<br />
Check the power indicator on the front panel<br />
is lit. If the power indicator is not lit, refer to<br />
‘Troubleshooting’.<br />
In case of a power failure, the router will automatically<br />
restart and begin to operate once the power is<br />
restored.<br />
At this time we have now completed connecting the<br />
router and may now move to the actual configuration<br />
of your connection.<br />
*Time needed to obtain line sync will vary depending<br />
on various factors such as line noise and attempted<br />
sync speed.<br />
Page 6
Chapter 5 : Advanced Setup<br />
BoB TM Advanced Setup Method<br />
Step 1. How to log into the router<br />
After you have configured TCP/IP on a client<br />
computer, use a web browser to configure the router.<br />
The router can be configured by any Java-supported<br />
browser such as Internet Explorer 5.0 or above. Using<br />
the web management interface, you may configure<br />
the router and view statistics to monitor network.<br />
To access the router’s management interface, enter<br />
the IP address of the router in your web browser: 10.1.1.1<br />
Note: If you are unable to access this web<br />
page please look at the IP setup section of the<br />
Troubleshooting section at the back of this manual.<br />
Type in ‘admin’ as the password and click login. NOTE:<br />
Password is case sensitive.<br />
ISP Settings<br />
Please collect the following information from your ISP<br />
before setting up the router:<br />
•<br />
•<br />
•<br />
ISP account user name and password<br />
Protocol, encapsulation and VPI/VCI circuit numbers<br />
DNS server address<br />
• IP address, subnet mask and default gateway (for<br />
fixed IP users only)<br />
Step 2. Navigating the web<br />
browser interface ISP account user<br />
name and password<br />
The router’s management interface consists of a<br />
Setup Wizard and an Advanced Setup section.<br />
Setup Wizard: Use the Setup Wizard to quickly set up<br />
the router.<br />
Advanced Setup: Advanced Setup supports more<br />
advanced functions like hacker attack detection, IP<br />
and MAC address filtering, virtual server setup, virtual<br />
DMZ host, as well as other functions.<br />
Note: If you would like to add any additional functions<br />
to your router please view the Advanced Setup<br />
table of contents in order to find the correct setup<br />
method.<br />
Making Configuration Changes<br />
Configurable parameters have a dialog box or a dropdown<br />
list. Once a configuration change has been<br />
made on a page, most of the times you will need<br />
to click the ‘SAVE SETTINGS’ or ‘NEXT’ button at the<br />
bottom of the page to enable the new setting unless<br />
there is an ‘ADD’ button for instance.<br />
Note: To ensure proper screen refresh after a<br />
command entry, be sure that Internet Explorer 5.0<br />
and above is configured as follows: Under the menu<br />
Tools/Internet Options/General/Temporary Internet<br />
Files/Settings, the setting for ‘Check for newer<br />
versions of stored pages’ should be ‘Every visit to the<br />
page.’<br />
Page 7
Chapter 5 : Advanced Setup<br />
Note:<br />
VoIP port 1 is the BoB handset<br />
which slots into the front<br />
of the router or any DECT-<br />
compatible handsets you have<br />
registered to the router.<br />
BoB TM Advanced Setup Method<br />
Step 3. Using Setup Wizard<br />
This page allows you to quickly setup basic settings of the router to get you connected quickly. After making a<br />
change, click on the save settings button on the screen to apply the changes.<br />
VOIP Parameter Setting<br />
User Name: Enter your VoIP account user name for<br />
your ISP<br />
Password: Enter your VoIP account password for your<br />
ISP<br />
ADSL Parameter Setting<br />
User Name: Enter your internet account user name for<br />
your ISP<br />
Password: Enter your internet account password for<br />
your ISP<br />
Wireless Parameter Setting<br />
Enable Wireless Radio: Enable or disable the routers<br />
wireless function.<br />
Primary Wireless SSID: Change the routers primary<br />
SSID (wireless name).<br />
VOIP Parameter Setting<br />
Firstly you need to tick one of the VoIP account<br />
boxes. For instance if you wish to use VoIP port 2<br />
on the back of the router then tick the box for VoIP<br />
account 2. Then you must enter your VoIP account<br />
details and click on ‘SAVE SETTINGS’.<br />
• Phone Number: Enter your VoIP account phone<br />
number from your ISP.<br />
• Password: Enter your VoIP account password for<br />
your ISP.<br />
• Register: Click to register your VoIP account to be<br />
ready for use.<br />
• Unregister: Un-register your VoIP account, so that<br />
you can use it on another VoIP port or device.<br />
Advanced Setup Method<br />
Clicking the Home icon returns you to the home<br />
page. The Main Menu links are used to navigate to<br />
other menus that display configuration parameters<br />
and statistics.<br />
Making Configuration Changes<br />
Configurable parameters have a dialog box or a dropdown<br />
list. Once a configuration change has been<br />
made on a page, click the ‘SAVE SETTINGS’ button at<br />
the bottom of the page to make the new settings<br />
active.<br />
Page 8
Chapter 5 : Advanced Setup<br />
Note:<br />
To ensure proper<br />
screen refresh after a<br />
command entry, check<br />
that Internet Explorer<br />
5.0 is configured as<br />
follows: Under the menu<br />
Tools/Internet Options/<br />
General/Temporary<br />
Internet Files/Settings,<br />
the setting for ‘Check for<br />
newer versions of stored<br />
pages’ should be ‘Every<br />
visit to the page.’<br />
BoB TM Advanced Setup Method<br />
The router’s advanced management interface contains 15 main menu items as described in the following list.<br />
Commonly Requested Features<br />
Noted in this section is a quick reference guide to<br />
the most commonly requested advanced features<br />
and should save you the time of needing to read the<br />
entire section for the necessary features you are<br />
interested in.<br />
Setting up Wireless (Page 44)<br />
This section will explain the basics of turning on the<br />
Wireless Functions in your router, if you should require<br />
this service it is also suggested you look into the<br />
Setting up Wireless Security area as well.<br />
Setting up Wireless Security (Page 44)<br />
This section describes the 2 forms of Wireless security<br />
available and allows you to choose either or both<br />
types of security in order to protect your network<br />
from outside access.<br />
• Option 1: MAC address filtering (Page 21)<br />
MAC Address Filtering uses a unique code that<br />
each computer has in order to create a list of<br />
computers that will be allowed onto your network.<br />
• Option 2: Wireless encryption (Page 22)<br />
Wireless encryption uses a code much like a secret<br />
password in order to ensure only those computers<br />
which know the password are able to access your<br />
network.<br />
Setting up VoIP (Page 44)<br />
This section will guide you through the basics of<br />
setting up your VoIP service on your network<br />
Setting/Adjusting Quality of Service (Page 50)<br />
If you are having problems with the quality of your<br />
Voice service due to large amounts of network traffic<br />
you may adjust your Quality of Service in this section.<br />
Port Forwarding (Page 27)<br />
Some programs will require you to direct certain port<br />
numbers to your computer in order to bypass the<br />
built in Firewall.<br />
Should there be any further features within the<br />
product you would like to use please find a more<br />
extensive list on the next page.<br />
Page 9
Chapter 5 : Advanced Setup<br />
BoB TM Advanced Setup Method<br />
Menu Description<br />
System (Page 11)<br />
Within the System menu you can:<br />
• Set the local time and Time zone as well as Time<br />
Sync Server.<br />
•<br />
Set the password for administrator access.<br />
• Enable remote management and set the IP<br />
address of a PC that will be allowed to access<br />
Router remotely.<br />
•<br />
The IP address of a Domain Name Server.<br />
WAN (Page 13)<br />
• ATM PVC specifies the Internet connection<br />
setting for an ATM (Asynchronous Transfer Mode)<br />
Framework WAN, this service is used primarily in<br />
corporate environments and we would suggest<br />
contacting your corporate administrator in order to<br />
setup these features.<br />
• MAC Address Cloning can also be performed in this<br />
section complete the Internet connection should<br />
it be required by your internet service provider in<br />
order to complete the Internet connection.<br />
LAN (Page 17)<br />
The LAN menu itself has a number of special fields in<br />
which you can configure information about your Local<br />
Area Network like those functions noted below:<br />
•<br />
•<br />
•<br />
•<br />
LAN IP Address Settings.<br />
Subnet Mask settings.<br />
DCHP Server Control.<br />
VLAN Port routing.<br />
The LAN Menu also has 2 sub-menus:<br />
1.<br />
VLAN<br />
This menu allows you to set the VLAN rules for<br />
the other ports and should only be accessed by<br />
experienced professionals.<br />
2. DHCP Client Lists<br />
This menu shows you a list of all computers<br />
currently connected to your network along with<br />
their host name and other details.<br />
Wireless (Page 19)<br />
The Wireless Menu allows you to turn on/off the<br />
wireless features on your router as well as having 4<br />
sub-menus:<br />
1.<br />
Channel & SSID<br />
This area includes the most basic of router<br />
functions and allows you to give a unique name<br />
to your network as well as allowing you to change<br />
the channel your wireless is running on in case it is<br />
accidentally sharing the same channel as another<br />
wireless appliance in the area.<br />
2. Access Control<br />
Access Control or MAC address filtering as it is also<br />
known is an additional level of security which allows<br />
you to specify which computers are able to log<br />
into the network via their unique ‘MAC Address’.<br />
3. Security<br />
The Security menu allows you access to the other<br />
form of Wireless Security known as Encryption. This<br />
works by using a numerical code as a key to your<br />
network.<br />
4. WDS<br />
WDS stands for Wireless Distribution System and is<br />
designed to allow you to add access points to your<br />
network. These work as a relay station to extend<br />
the range of your network.<br />
NAT (Page 25)<br />
Shares a single ISP account with multiple users, sets<br />
up Port forwarding.<br />
Route (Page 30)<br />
Sets routing parameters and displays the current<br />
routing table. A route determines the way in which<br />
the data travels through the network.<br />
Firewall (Page 33)<br />
Configures a variety of security and specialized<br />
functions including: Access Control, URL blocking,<br />
Internet access control scheduling, Intruder<br />
detection, and DMZ.<br />
SNMP (Page 41)<br />
Community string and trap server setting. SNMP<br />
(Simple Network Management Protocol) is used<br />
by network administrators to manage attached<br />
network devices.<br />
ADSL (Page 42)<br />
Sets the ADSL operation type and shows the ADSL<br />
status.<br />
Page 10
Chapter 5 : Advanced Setup<br />
BoB TM Advanced Setup Method<br />
VoIP (Page 44)<br />
Configures VoIP settings for the router, this section<br />
involves extensive and detailed settings. Please<br />
read the entire section carefully before attempting<br />
any changes.<br />
UPnP (Page 49)<br />
Allows you to enable or disable the Universal Plug<br />
and Play function. UPnP is designed to allow users<br />
seamless Internet operation without the need to<br />
open any ports in the firewall.<br />
QoS (Page 50)<br />
Allows you to optimize voice quality by prioritizing<br />
voice over data traffic. QoS (Quality of Service) can<br />
be set to prioritize traffic for many features such as<br />
VoIP, VPN, nominated IP Addresses and ports etc.<br />
DDNS (Page 52)<br />
DDNS (Dynamic Domain Name Server) allows you<br />
to host services on the internet via a web address.<br />
For example it would allow you to host a web<br />
page or email server even with a dynamic WAN<br />
IP Address. In order to use this function you may<br />
need to purchase additional services like a Domain<br />
name from a service provider. This router supports<br />
System Time Settings<br />
DynDNS and TZO.<br />
USB (Page 53)<br />
You can plug-in your USB hard drive or memory<br />
stick and share these resources on your home<br />
network.<br />
Tools (Page 55)<br />
Contains options to back up and restore the<br />
current configuration, restore all configuration<br />
settings to the factory defaults, update system<br />
firmware, or reset the system each under its own<br />
menu.<br />
Status (Page 43)<br />
Provides WAN connection type and status,<br />
firmware and hardware version numbers, system<br />
IP settings, as well as DHCP, NAT, and firewall<br />
information.<br />
Displays the number of attached clients, the<br />
firmware versions, the physical MAC address for<br />
each media interface, and the hardware version<br />
and serial number.<br />
Shows the security and DHCP client log.<br />
Set the time zone and time server for the router. This information is used for log entries and client access<br />
control.<br />
Check ‘Enable Automatic Time Server Maintenance’ to automatically maintain the router’s system time<br />
by synchronizing with a public time server over the Internet. Then configure two different time servers by<br />
selecting the options in the Primary Server and Secondary Server fields.<br />
Page 11
Chapter 5 : Advanced Setup<br />
Note:<br />
If your password is lost,<br />
or you cannot gain<br />
access to the user<br />
interface, press the reset<br />
button (colored blue) on<br />
the rear panel (holding<br />
it down for at least 20<br />
seconds) to restore<br />
the factory defaults (by<br />
default the password is<br />
‘admin’) .<br />
If you check ‘Enabled’<br />
and specify an IP address<br />
of 0.0.0.0, any host can<br />
manage the router.<br />
For remote<br />
management via a WAN<br />
IP address you need<br />
to connect using port<br />
8080.Simply enter WAN<br />
IP address followed by<br />
:8080 in the address<br />
field of your web<br />
browser, for example,<br />
http://212.120.68.20:8080.<br />
This applies unless you<br />
change the port setting,<br />
in which case you need<br />
to substitute the 8080<br />
for whatever port you<br />
have assigned.<br />
BoB TM Advanced Setup Method<br />
Password Settings<br />
Use this page to restrict access based on a password.By default, the password is ‘admin’.<br />
Passwords can contain from 3 to 12 alphanumeric characters which are case sensitive.<br />
Enter a maximum Idle Time Out (in minutes) to define a maximum period of time an inactive login session will be<br />
maintained. If the connection is inactive for longer than the maximum idle time, it will be logged out, and you<br />
will have to login to the web management system again (Default: 10 minutes).<br />
Remote Management<br />
By default, management access is only available to users on your local network. However, you can also manage<br />
the router from outside your network via remote management by checking the Enabled check box. You can set<br />
a HOST ADDRESS, which will only allow that computer to use remote management. The port field should be left<br />
as the default setting of 8080 unless you need to change it. After any changes are made you must click on ‘Save<br />
Settings’ to apply them.<br />
Page 12
Chapter 5 : Advanced Setup<br />
BoB TM Advanced Setup Method<br />
DNS<br />
Domain Name Servers are used to map a domain name (e.g. www.somesite.com) to the equivalent numerical<br />
IP address (e.g. 64.147.25.20). Your ISP should provide the IP address of one or more Domain Name Servers. Enter<br />
those addresses on this page.<br />
WAN<br />
Specify the WAN connection parameters provided by your Internet Service Provider (ISP). The router can be<br />
connected to your ISP in one of the following ways:<br />
•<br />
•<br />
ATM PVC<br />
Clone MAC<br />
Page 13
Chapter 5 : Advanced Setup<br />
BoB TM Advanced Setup Method<br />
ATM PVC<br />
The router uses ATM as its WAN interface. Click on each ATM VC for WAN configuration.<br />
Parameter Description<br />
Description: Click on the VC to set the values for the connection.<br />
VPI/VCI: Virtual Path Identifier (VPI) and Virtual Circuit Identifier (VCI).<br />
Encapsulation: Specifies how to handle multiple protocols at the ATM transport layer.<br />
• VC-MUX: Point-to-Point Protocol over ATM Virtual Circuit Multiplexer (null encapsulation) allows only one<br />
protocol running per virtual circuit with less overhead.<br />
• LLC: Point-to-Point Protocol over ATM Logical Link Control (LLC) allows multiple protocols running over one<br />
virtual circuit (using slightly more overhead).<br />
Protocol: Protocol used for the connection.<br />
Page 14
Chapter 5 : Advanced Setup<br />
BoB TM Advanced Setup Method<br />
ATM Interface<br />
Clicking on the ATM VC brings up the following screen. The router uses ATM as its WAN interface. Protocols<br />
including 1483 Routing, 1483 Bridging, MAC Encapsulated Routing (MER), PPPoA and PPPoE with LLC-SNAP and VC-<br />
MUX encapsulations are supported for each ATM PVC.<br />
When you have finished entering your connection parameters, click ‘SAVE SETTINGS’. You can verify that you<br />
have established an ADSL connection by clicking ‘Status’ at the bottom of the left-hand menu.<br />
See below for a description of the parameters.<br />
Parameter Description<br />
Protocol<br />
1. Disable: Disables the connection<br />
2. 1483 Bridging: Bridging is a standardized layer<br />
2 technology. It is typically used in corporate<br />
networks to extend the physical reach of a single<br />
LAN segment and increase the number of stations<br />
on a LAN without compromising performance.<br />
Bridged data is encapsulated using the RFC1483<br />
protocol to enable data transport. Please note<br />
that setting the router to bridged mode disables<br />
all advanced features such as VoIP, Firewall, and<br />
QoS, etc<br />
3. PPPoA: Point-to-Point Protocol over ATM is a<br />
method of encapsulating data for transmission to<br />
a far point<br />
4. 1483<br />
Routing: 1483 Routing allows a simple, low-cost<br />
connection to the Internet via a standard Ethernet<br />
port. The router looks up the network address for<br />
each packet seen on the LAN port. If the address<br />
is listed in the routing table as local, it is filtered.<br />
If the address is listed under the ADSL port, it is<br />
forwarded. Or if the address is not found, then it is<br />
automatically forwarded to the default router (i.e.,<br />
the router at the head end)<br />
5. PPPoE: Point-to-Point over Ethernet is a common<br />
connection method used for xDSL<br />
6. MAC Encapsulated Routing: If your ADSL service<br />
is a Bridged mode service and you want to share<br />
the connection to multiple PC’s, please select MAC<br />
Encapsulated Routing. MER is a protocol that allows<br />
you to do IP routing with NAT enabled<br />
VPI/VCI<br />
Virtual Path Identifier (VPI) and Virtual Circuit<br />
Identifier (VCI). Data flows are broken up into fixed<br />
length cells, each of which contains a Virtual Path<br />
Identifier (VPI) that identifies the path between<br />
two nodes, and a Virtual Circuit Identifier (VCI) that<br />
identifies the data channel within that virtual path.<br />
Each virtual circuit maintains a constant flow of cells<br />
between the two end points. When there is no data<br />
to transmit, empty cells are sent. When data needs<br />
to be transmitted, it is immediately inserted into the<br />
cell flows.<br />
Page 15
Chapter 5 : Advanced Setup<br />
BoB TM Advanced Setup Method<br />
Encapsulation<br />
Shows the packet encapsulation type.<br />
Packet encapsulation specifies how to handle multiple<br />
protocols at the ATM transport layer.<br />
• VC-MUX: Point-to-Point Protocol over ATM Virtual<br />
Circuit Multiplexer (null encapsulation) allows only<br />
one protocol running per virtual circuit with less<br />
overhead<br />
• LLC: Point-to-Point Protocol over ATM Logical Link<br />
Control allows multiple protocols running over one<br />
virtual circuit (using slightly more overhead)<br />
QoS Class<br />
ATM QoS classes including CBR, UBR and VBR.<br />
PCR/SCR/MBS<br />
QoS Parameters - PCR (Peak Cell Rate), SCR<br />
(Sustainable Cell Rate) and MBS (Maximum Burst Size)<br />
are configurable.<br />
Clone MAC Address<br />
Connect Type<br />
Sets connection mode to always connected,<br />
automatic or manual connection.<br />
Idle Time: Enter the maximum idle time for the<br />
Internet connection.(in minutes) After this time has<br />
been exceeded the connection will be terminated.<br />
• Username: Enter user name<br />
• Password: Enter password<br />
• Confirm password: Confirm Password<br />
MTU<br />
Clicking on the Clone MAC Address brings up the following screen.<br />
Leave the Maximum Transmission Unit (MTU) at the<br />
default value (1500) unless you have a particular<br />
reason to change it.<br />
Some ISPs may require that you register your MAC address with them. If this is the case, the MAC address of the<br />
router must be changed manually to the MAC address that you have registered with your ISP.<br />
Page 16
Chapter 5 : Advanced Setup<br />
BoB TM Advanced Setup Method<br />
LAN<br />
Use the LAN menu to configure the LAN IP address and to enable the DHCP server for dynamic client address<br />
allocation.<br />
Parameter Description<br />
LAN IP<br />
IP Address: The IP address of the router<br />
IP Subnet Mask: The subnet mask of the router<br />
Host Name: If your ISP requires a hostname specified<br />
enter it here, otherwise leave blank<br />
DHCP Server: To dynamically assign an IP address to<br />
client PCs, enable the DHCP (Dynamic Host<br />
Configuration Protocol) Server<br />
VLAN Binding<br />
In this section you can assign VLAN’s that you have<br />
created in the VLAN page to certain ports such as<br />
LAN port 1, 2, 3 or 4 and the WLAN connection. For<br />
instance if you have created a VLAN Binding called<br />
‘Test’, and you want anything connected to the<br />
wireless to be on that VLAN, then you would change<br />
the WLAN setting on this page from ‘Default’ to the<br />
one you created called ‘Test’.<br />
DHCP SERVER<br />
• DHCP Option 60 Vendor ID: If you wish you can<br />
specify the Name of your DHCP Server (Optional).<br />
• Lease Time: Specify the length of time that the<br />
DHCP will assign an IP address to a computer for.<br />
IP Address Pool<br />
Start IP: Specify the start IP address of the DHCP pool<br />
Do not include the gateway address of the router in<br />
the client address pool (see ‘TCP/IP<br />
Configuration’). If you attempt to include the router<br />
gateway address (10.1.1.1 by default) in the DHCP pool,<br />
an error dialog box will appear. If you change the pool<br />
range, make sure the first three octets match the<br />
gateway’s IP address, i.e.10.1.1.xxx<br />
End IP: Specify the end IP address of the DHCP pool.<br />
Domain Name: If your network uses a domain name,<br />
enter it here. Otherwise, leave this field blank<br />
Page 17
Chapter 5 : Advanced Setup<br />
BoB TM Advanced Setup Method<br />
VLAN<br />
VLAN Table: In this table you can click on the ‘ADD VLAN’ button to add a ‘VLAN’ binding or click on ‘EDIT’ to edit<br />
an existing binding, or click on ‘DELETE’ to remove a binding.<br />
VLAN Profile: This screen will appear if you click on<br />
‘ADD VLAN’ or ‘EDIT’ from the VLAN page.<br />
Description: detailed description of the VLAN.<br />
IP Address: IP address of the VLAN virtual interface on<br />
the gateway.<br />
Subnet Mask: subnet mask of the VLAN virtual<br />
interface.<br />
NAT Domain: NAT addressing domain to define the<br />
NAPT operation of the VLAN virtual interface. Public<br />
means that this VLAN will be visible to the Internet.<br />
Private means NAT is enabled to protect the subnet<br />
from visibility to the Internet.<br />
IGMP Snooping: enable/disable the feature to block<br />
unnecessary IP multicast traffic f looding among VLAN<br />
ports without the specific multicast membership.<br />
This feature is working based on snooping IGMP Join/<br />
Leave messages among the VLAN ports to update<br />
the bridging forwarding database. IGMP Snooping<br />
is extremely useful in saving bandwidth of flowspeed<br />
interfaces (ex WLAN) to improve the network<br />
utilization.<br />
IGMP Querier: enable/disable IGMP querying to<br />
the VLAN virtual interface. The option is to control<br />
whether to behave as an IGMP querier on the VLAN<br />
bridging network If IGMP Querier option is disabled,<br />
the router will act as an IP multicast compliant host<br />
and send IGMP reports for its own joined IP multicast<br />
groups.No IGMP query messages will be sent to the<br />
specific VLAN.<br />
Page 18
Chapter 5 : Advanced Setup<br />
BoB TM Advanced Setup Method<br />
VLAN Access Control:<br />
In this table you can enable or disable the communication between the VLAN bindings by ticking (enable) or<br />
un-ticking (disable) the corresponding name in the table.<br />
The DHCP Clients List displays the IP Address, Host Name and MAC Address of each client that has requested an<br />
IP address since the last reboot of the Router. Check the ‘Fix’ box to have the IP address and the MAC address<br />
linked so that the IP address will always be assigned as it is on this screen.<br />
Wireless<br />
The router also operates as a wireless access point,<br />
allowing wireless computers to communicate with<br />
each other. To configure this function, you need to<br />
enable the wireless function, and you may also setup<br />
the security options if needed.<br />
Wireless Settings<br />
Check Enable or Disable and click ‘SAVE SETTINGS’ This<br />
will turn the wireless function on or off and enable or<br />
disable wireless clients to connect to the router.<br />
The router supports two wireless SSID’s, to enable the<br />
second SSID place a tick in the ‘Secondary Wireless<br />
Module’ and click ‘SAVE SETTINGS’.<br />
Page 19
Chapter 5 : Advanced Setup<br />
Note:<br />
If you experience poor<br />
performance, you<br />
may be encountering<br />
interference from<br />
another wireless<br />
device. Try changing<br />
the channel, as this may<br />
eliminate interference<br />
and increase<br />
performance. Channels<br />
1, 6, and 11, as the<br />
three non-overlapping<br />
channels in the 2.4GHz<br />
range, are preferred<br />
The available channel<br />
settings are limited<br />
by local regulations.<br />
(Default Range: 1-13)<br />
BoB TM Advanced Setup Method<br />
Channel and SSID<br />
These settings should be left as default unless you have a reason to change them. You can change the<br />
Service Set ID (SSID) and a common radio channel to be used by the router and all of its wireless clients. Be<br />
sure you configure all of its clients to the same values. The SSID is case-sensitive and can consist of up to 32<br />
alphanumeric characters. Functioning as an access point, the gateway can be configured for roaming clients by<br />
setting the SSID and wireless channel.<br />
See the description of the parameters below.<br />
Parameter Description<br />
SSID: Service Set ID. The SSID must be the same on<br />
the router and all of its wireless clients. The SSID is the<br />
name of your wireless<br />
Show or hide the broadcasting of the SSID. Show<br />
SSID broadcasting on the wireless network for easy<br />
connection with client PCs<br />
Note: The SSID is case sensitive and can consist of up<br />
to 32 alphanumeric characters. (Default: WLAN)<br />
Wireless Mode: This device supports 11n, 11g and 11b<br />
wireless networks. Make your selection depending on<br />
the type of wireless network that you have. (Default:<br />
802 11n + 802 11g + 802 11b)<br />
Channel: The radio channel used by the wireless<br />
router and its clients to communicate with each<br />
other. This channel must be the same on the router<br />
and all of its wireless clients. (Default: 6)<br />
Page 20
Chapter 5 : Advanced Setup<br />
BoB TM Advanced Setup Method<br />
Wireless Access Control<br />
Using the Access Control functionality, you can specify which PCs can wirelessly connect to the access point.<br />
Each PC has a unique identifier known as a Medium Access Control (MAC) address. With MAC filtering enabled,<br />
only the computers whose MAC address you have listed in the filtering table may connect to the router.<br />
See the description of the Access Control features below.<br />
Parameter Description<br />
Enable MAC Filtering: Enable or disable the MAC filtering function.<br />
Access Rule for registered MAC address: When MAC filtering is enabled, all registered MAC addresses are<br />
controlled by this Access Rule.<br />
MAC Filtering Table: Enter the MAC addresses of the network card you wish to allow or deny connection (Up to<br />
32 stations).<br />
Page 21
Chapter 5 : Advanced Setup<br />
BoB TM Advanced Setup Method<br />
Security<br />
It is important to be aware of security issues, especially when using wireless. You can configure your security<br />
settings on this page. You can set security on one SSID or both, select the appropriate SSID from the ‘Select<br />
Virtual AP’ drop down box.<br />
If you are transmitting sensitive data across radio<br />
channels, you should enable wireless security.<br />
For a more secure network, the router can implement<br />
one or a combination of the following security<br />
mechanisms:<br />
•<br />
•<br />
•<br />
•<br />
Disabled<br />
WEP Only<br />
WPA and/or WPA2<br />
WPA and 802.1x*<br />
* Using 8021x security requires support to do so from your OS or other<br />
third party radius server software, and is not recommended unless you<br />
are familiar with setting up such systems.<br />
Security Client <strong>Support</strong> Implementation<br />
Considerations<br />
WEP: Built-in support on all 802.11b and 802.11g devices.<br />
WPA: Requires WPA-enabled system and network<br />
card. Some wireless cards may not support this,<br />
please check with the wireless card’s manufacturer.<br />
WPA2: Requires WPA2 enabled system and network<br />
card. Some wireless cards may not support this,<br />
please check with the wireless card’s manufacturer.<br />
Page 22
Chapter 5 : Advanced Setup<br />
BoB TM Advanced Setup Method<br />
WEP<br />
Wired Equivalent Privacy (WEP) encryption requires you to use the same set of encryption/decryption keys for<br />
the router and all of your wireless clients.<br />
See the description of the Security features below.<br />
Parameter Description<br />
WEP Mode: You can choose 64-bit or 128-bit<br />
encryption. (Default: 64Bit)<br />
Key Entry Method: You can choose HEX or ASCII<br />
(Default/Recommended: HEX)<br />
Key Provisioning: Select static key or dynamic key.<br />
(Default/Recommended: Static)<br />
Static WEP Key: You may manually enter the keys or<br />
automatically generate<br />
Settings: encryption keys. To manually configure the<br />
keys, enter 10 digits for each 64-bit key, or enter 26<br />
digits for the single 128¬bit key (A hexadecimal digit is<br />
a number or letter in the range 0-9 or A-F<br />
Default Key ID: Select the default key. (Default/<br />
Recommended: 1)<br />
Passphrase: For automatic key generation, check<br />
the Passphrase box, enter a Passphrase and click<br />
‘SAVE SETTINGS.’ When you return to this screen the<br />
Passphrase will be gone and the single 128Bit or the 4<br />
64Bit keys will be generated.<br />
Key 1-4: If you do not choose to use the Passphrase<br />
for automatic key generation, you must manually<br />
enter four keys. For 64-bit encryption, enter exactly 10<br />
hex digits. For 128-bit encryption, enter exactly 26 hex<br />
digits.(A hex digit is a number or letter in the range<br />
0-9 or A-F.)<br />
Click ‘SAVE SETTINGS’ to apply your settings.<br />
Page 23
Chapter 5 : Advanced Setup<br />
BoB TM Advanced Setup Method<br />
WPA / WPA2<br />
Wi-Fi Protected Access (WPA) combines Temporal Key Integrity Protocol (TKIP) and 802.1x mechanisms. It<br />
provides dynamic key encryption and 802.1x authentication service. With TKIP, WPA uses 48-bit initialization<br />
vectors, calculates an 8-byte message integrity code, and generates an encryption key periodically<br />
authentication, it allows you to use 802.1x authentication for an environment with a RADIUS server installed on<br />
your network Selecting the Pre-shared Key enables WPA to use the pre-shared key in a SOHO network.<br />
See the description of the WPA settings below.<br />
Field Default Parameter Description<br />
Cipher suite TKIP One of the security mechanisms<br />
used by WPA for frame body and CRC frame<br />
encryption.<br />
Authentication:<br />
• 802.1x: for an enterprise network with a RADIUS<br />
server installed.<br />
• Pre-shared Key: for a SOHO network without any<br />
authentication server installed.<br />
Pre-shared key type:<br />
•<br />
Passphrase: Input 8~63 characters.<br />
• Hex: Input 64 hexadecimal digits. (A hexadecimal<br />
digit is a number or letter in the range 0-9 or A-F.<br />
Pre-shared Key: Specify in Passphrase style or in 64-<br />
Hex characters.<br />
Group Key Re-Keying: The period of renewing<br />
broadcast/multicast keys.<br />
Page 24
Chapter 5 : Advanced Setup<br />
BoB TM Advanced Setup Method<br />
WDS<br />
Wireless Distribution System (WDS) provides a means to extend the range of a Wireless Local Area Network<br />
(WLAN). WDS allows an Access Point (AP) to establish a direct link to other APs and allows stations to roam<br />
freely within the area covered by the WDS.<br />
NAT<br />
From this section you can configure the Virtual Server, and Special Application features that provide control<br />
over the TCP/ UDP port openings in the router’s firewall. This section can be used to support several Internet<br />
based applications such as web, email, FTP and Telnet.<br />
NAT Settings<br />
NAT allows one or more public IP addresses to be shared by multiple internal users. Enter the Public IP address<br />
you wish to share into the Global IP field. Enter a range of internal IPs that will share the global IP.<br />
Enable or disable NAT module function: Enable or disable the function and then click ‘SAVE SETTINGS’ to apply<br />
the change.<br />
Page 25
Chapter 5 : Advanced Setup<br />
BoB TM Advanced Setup Method<br />
Address Mapping<br />
Use Address Mapping to allow a limited number of public IP addresses to be translated into multiple private IP<br />
addresses for use on the internal LAN network. This also hides the internal network for increased privacy and<br />
security.<br />
Page 26
Chapter 5 : Advanced Setup<br />
BoB TM Advanced Setup Method<br />
Port Forwarding<br />
Using this feature, you can put PCs with public IPs and PCs with private IPs in the same LAN area.<br />
If you configure the Port Forwarding settings, remote<br />
users accessing services such as web or FTP at your<br />
local site via public IP addresses can be automatically<br />
redirected to local servers configured with private<br />
IP addresses. In other words, depending on the<br />
requested service (TCP/UDP port number), the<br />
router redirects the external service request to the<br />
appropriate server (located at another internal IP<br />
address).<br />
For example, if you set Type/Public Port to TCP/80<br />
(HTTP or web) and the LAN IP Address/LAN Port to<br />
10.1.1.2/80, then all HTTP requests from outside users<br />
will be transferred to 10.1.1.2 on port 80.Therefore,<br />
by just entering the IP address provided by the ISP,<br />
Internet users can access the service they need at<br />
the local address to which you redirect them.<br />
There is a list of commonly used applications and their<br />
associated port(s), to add an application to the Port<br />
Forwarding list simply select the desired application<br />
and click ‘Add’.<br />
The more common TCP service ports include: HTTP:<br />
80, FTP: 21, Telnet: 23, and POP3: 110.<br />
Page 27
Chapter 5 : Advanced Setup<br />
BoB TM Advanced Setup Method<br />
Special Applications<br />
Some applications, such as Internet gaming, video conferencing, Internet telephony and others, require multiple<br />
connections. These applications cannot work with Network Address Translation (NAT) enabled. If you need to<br />
run applications that require multiple connections, use the following screen to specify the additional public<br />
ports to be opened for each application.<br />
Specify the public port number normally associated with an application in the Trigger Port field. Set the<br />
protocol type to TCP or UDP, and then enter the ports that the application requires. The ports may be in the<br />
format 7, 11, 57, or in a range, e.g., 72-96, or a combination of both, e.g., 7, 11, 57, 72-96.<br />
Popular applications requiring multiple ports are listed in the Popular Applications field. From the drop-down list,<br />
choose the application and then choose a row number to copy this data into.<br />
Note: Choosing a row that already contains data will overwrite the current settings.<br />
Example:<br />
ID Trigger Trigger Port Public Port Public Comment Type<br />
1 6112 UDP 6112 Battle.net<br />
2 28800 TCP 2300 - 2400 MSN Game Zone<br />
For a full list of ports and the services that run on them, see www.iana.org/assignments/port-numbers.<br />
Page 28
Chapter 5 : Advanced Setup<br />
BoB TM Advanced Setup Method<br />
NAT Mapping Table<br />
NAT Mapping Table displays the current NAPT address mappings NAT address mappings are listed 20 lines per<br />
page, click the control buttons to move forwards and backwards As the NAT mapping is dynamic, a Refresh<br />
button is provided to refresh the NAT Mapping Table with the most up-to-date values.<br />
The content of the NAT Mapping Table is described as follows:<br />
•<br />
•<br />
•<br />
•<br />
•<br />
•<br />
•<br />
Protocol - protocol of the flow<br />
Local IP - local (LAN) host’s IP address for the flow<br />
Local Port - local (LAN) host’s port number for the flow<br />
Pseudo IP - translated IP address for the flow<br />
Pseudo Port - translated port number for the flow<br />
Peer IP - remote (WAN) host’s IP address for the flow<br />
Peer Port - remote (WAN) host’s port number for the flow<br />
Page 29
Chapter 5 : Advanced Setup<br />
BoB TM Advanced Setup Method<br />
Route<br />
These pages define routing related parameters, including static routes and Routing Information Protocol (RIP)<br />
parameters.<br />
Static Route Parameters<br />
Parameter Description<br />
Index: Displays the number of the route.<br />
Network Address: Displays the IP address of the remote computer for which to set a static route.<br />
Subnet Mask: Displays the subnet mask of the remote network for which to set a static route.<br />
Gateway: Displays the WAN IP address of the gateway to the remote network.<br />
Configure: Allows you to modify or delete configuration settings.<br />
Click Add or Edit to display the following page and add a new static route to the list.<br />
Index: Displays the number of the route.<br />
Network Address: Enter the IP address of the remote computer for which to set a static route.<br />
Subnet Mask: Enter the subnet mask of the remote network for which to set a static route.<br />
Gateway: Enter the WAN IP address of the gateway to the remote network.<br />
Page 30
Chapter 5 : Advanced Setup<br />
BoB TM Advanced Setup Method<br />
RIP Parameter<br />
The device supports RIP v1 and v2 to dynamically exchange routing information with adjacent routers.<br />
Parameter Description<br />
General RIP Parameters<br />
RIP mode: Globally enables or disables RIP<br />
Auto summary: If Auto summary is disabled, then RIP<br />
packets will include sub-network information from<br />
all sub-net works connected to the ADSL Router.<br />
If enabled, this sub-network information will be<br />
summarized to one piece of information covering all<br />
sub-networks.<br />
Table of current Interface RIP parameter:<br />
Interface: The WAN interface to be configured.<br />
Operation Mode: Disable: RIP disabled on this<br />
interface.<br />
Enable: RIP enabled on this interface.<br />
Silent: Listens for route broadcasts and updates its<br />
route table.It does not participate in sending route<br />
broadcasts.<br />
Version: Sets the RIP version to use on this interface.<br />
Poison Reverse: A method for preventing loops that<br />
would cause endless retransmission of data traffic.<br />
Authentication Required: None: No authentication.<br />
Password: A password authentication key is<br />
included in the packet. If this does not match what is<br />
expected, the packet will be discarded.<br />
This method provides very little security as it is<br />
possible to learn the authentication key by watching<br />
RIP packets.<br />
MD5: An algorithm that is used to verify data integrity<br />
through the creation of a 128-bit message digest from<br />
data input (which may be a message of any length)<br />
that is claimed to be as unique to that specific data as<br />
a fingerprint is to a specific individual.<br />
Authentication Code: Password or MD5<br />
Authentication key.<br />
RIP sends routing-update messages at regular<br />
intervals and when the network topology changes.<br />
When a router receives a routing update that includes<br />
changes to an entry, it updates its routing table to<br />
ref lect the new route. RIP routers maintain only the<br />
best route to a destination. After updating its routing<br />
table, the router immediately begins transmitting<br />
routing updates to inform other network routers of<br />
the change.<br />
Page 31
Chapter 5 : Advanced Setup<br />
BoB TM Advanced Setup Method<br />
Routing Table<br />
Parameter Description<br />
F lags: Indicates the route status:<br />
C = Direct connection on the same subnet.<br />
S = Static route.<br />
R = RIP (Routing Information Protocol) assigned<br />
route.<br />
I = ICMP (Internet Control Message Protocol)<br />
Redirect route .<br />
Network Address: Destination IP address.<br />
Netmask: The subnetwork associated with the<br />
destination.<br />
This is a template that identifies the address bits in<br />
the destination address used for routing to specific<br />
subnets. Each bit that corresponds to a ‘1’ is part of<br />
the subnet mask number; each bit that corresponds<br />
to ‘0’ is part of the host number.<br />
Gateway: The IP address of the router at the next<br />
hop to which frames are forwarded.<br />
Interface: The local interface through which the next<br />
hop of this route is reached.<br />
Metric: When a router receives a routing update that<br />
contains a new or changed destination network entry,<br />
the router adds 1 to the metric value indicated in the<br />
update and enters the network in the routing table.<br />
Page 32
Chapter 5 : Advanced Setup<br />
Note:<br />
After you check the<br />
radio button in the<br />
‘Enable or disable Firewall<br />
features’ field, you must<br />
click the ‘SAVE SETTINGS’<br />
button to display the list<br />
of firewall features.<br />
BoB TM Advanced Setup Method<br />
Security Settings (Firewall)<br />
The router’s firewall enables access control of client PCs, blocks common hacker attacks, including IP<br />
Spoofing, Land Attack, Ping of Death, IP with zero length, Smurf Attack, UDP port loopback, Snork Attack, TCP<br />
null scan, and TCP SYN f looding. The firewall does not significantly affect system performance and we advise<br />
leaving it enabled to protect your network.<br />
You can select a pre-defined firewall level from the drop down list Available options are High, Medium, Low Level<br />
& User Defined. Select User Defined to manually adjust the firewall settings.<br />
Page 33
Chapter 5 : Advanced Setup<br />
BoB TM Advanced Setup Method<br />
Access Control<br />
Access Control allows users to define the outgoing traffic permitted or not-permitted through the WAN<br />
interface. In the example above, all incoming and outgoing emails are blocked. The default is to permit all<br />
outgoing traffic (see the following page for details).<br />
The router can also limit the access of hosts within the local area network (LAN).The MAC Filtering Table allows<br />
the router to enter up to 32 MAC addresses that are not allowed access to the WAN port. The following items<br />
are displayed on the Access Control.<br />
Parameter Description<br />
Enable Filtering: Enables or disables the filtering function.<br />
Normal Filtering Table: Displays the IP address (or an IP address range) filtering table.<br />
Click ‘Add PC’ on the Access Control screen to view the following page.<br />
Page 34
Chapter 5 : Advanced Setup<br />
BoB TM Advanced Setup Method<br />
Access Control Add PC<br />
The settings in the screen shot below will block all email sending and receiving.<br />
Define the appropriate settings for client PC services (as shown above). Click ‘OK’ to save your settings. The<br />
added PC will now appear in the Access Control page.<br />
Page 35
Chapter 5 : Advanced Setup<br />
BoB TM Advanced Setup Method<br />
MAC Filter<br />
Use this page to block access to your network using MAC addresses.<br />
The router can also limit the access of hosts within the local area network (LAN). The MAC Filtering Table allows<br />
the router to enter up to 32 MAC addresses that are allowed access to the WAN port. All other devices will be<br />
denied access.<br />
Page 36
Chapter 5 : Advanced Setup<br />
BoB TM Advanced Setup Method<br />
URL Blocking<br />
To configure the URL Blocking feature, use the table below to specify the web sites (www.somesite.com) and/<br />
or keywords you want to filter on your network<br />
To complete this configuration, you will need to create or modify an access rule in ‘Access Control’. To modify an<br />
existing rule, click the Edit option next to the rule you want to modify. To create a new rule, click on the Add PC<br />
option.<br />
From the Access Control Page, Add PC section, check the option for ‘WWW with URL Blocking’ in the Client PC<br />
Service table to filter out the web sites and keywords selected below, on a specific PC.<br />
The router allows the user to block access to web sites from a particular PC by entering either a full URL address<br />
or just a keyword. This feature can be used to protect children from accessing violent or pornographic web<br />
sites.<br />
Page 37
Chapter 5 : Advanced Setup<br />
BoB TM Advanced Setup Method<br />
Schedule Rule<br />
You may filter Internet access for local clients based on rules<br />
Each access control rule may be activated at a scheduled time. Define the schedule on the Schedule Rule<br />
page, and apply the rule on the Access Control page.<br />
Click ‘Add Schedule Rule’ to add a new rule and bring up the following page.<br />
Edit Schedule Rule<br />
You can create and edit schedule rules on this page.<br />
Define the appropriate settings for a schedule rule (as shown on the above screen). The rule in the screen shot<br />
above prohibits emailing after 3.00pm to 11.00pm. Upon completion, click ‘OK’ to save your schedule rules.<br />
Page 38
Chapter 5 : Advanced Setup<br />
BoB TM Advanced Setup Method<br />
Intrusion Detection<br />
The router’s firewall inspects packets at the application layer, maintains TCP and UDP session information<br />
including timeouts and number of active sessions, and provides the ability to detect and prevent certain types<br />
of network attacks such as Denial-of-Service (DoS) attacks.<br />
Network attacks that deny access to a network<br />
device are called DoS attacks DoS attacks are aimed<br />
at devices and networks with a connection to the<br />
Internet. Their goal is not to steal information, but to<br />
disable a device or network so users no longer have<br />
access to it.<br />
The router protects against DoS attacks including:<br />
Ping of Death (Ping f lood) attack, SYN f lood attack, IP<br />
fragment attack (Teardrop Attack), Brute-force attack,<br />
Land Attack, IP Spoofing attack, IP with zero length,<br />
TCP null scan (Port Scan Attack), UDP port loopback.<br />
Note: The firewall does not significantly affect system<br />
performance, so we advise enabling the prevention<br />
features to protect your network<br />
Parameter Description<br />
Enable SPI and Anti-DoS firewall protection:<br />
The Intrusion Detection feature of the router limits<br />
the access of incoming traffic at the WAN port. When<br />
the Stateful Packet Inspection (SPI) feature is turned<br />
on, all incoming packets are blocked except those<br />
types marked with a check in the Stateful Packet<br />
Inspection section at the top of the screen<br />
Stateful Packet Inspection:<br />
This option allows you to select different application<br />
types that are using dynamic port numbers. If you<br />
wish to use Stateful Packet Inspection (SPI) for<br />
blocking packets, click on the Yes radio button in<br />
the ‘Enable SPI and Anti-DoSfirewall protection’ field<br />
and then check the inspection type that you need,<br />
such as Packet Fragmentation, TCP Connection, UDP<br />
Session, 323 Service, and TFTP Service.<br />
It is called a ‘stateful’ packet inspection because it<br />
examines the contents of the packet to determine<br />
the state of the communication; it ensures that<br />
the stated destination computer has previously<br />
requested the current communication. This is a way<br />
of ensuring that all communications are initiated by<br />
the recipient computer and are taking place only with<br />
sources that are known and trusted from previous<br />
interactions. In addition to being more rigorous<br />
in their inspection of packets, stateful inspection<br />
firewalls also close off ports until a connection to the<br />
specific port is requested.<br />
When particular types of traffic are checked, only the<br />
particular type of traffic initiated from the internal<br />
LAN will be allowed. For example, if the user only<br />
checks FTP Service in the Stateful Packet Inspection<br />
section, all incoming traffic will be blocked except for<br />
FTP connections initiated from the local LAN.<br />
Page 39
Chapter 5 : Advanced Setup<br />
BoB TM Advanced Setup Method<br />
DoS Detect Criteria<br />
Total incomplete TCP/UDP sessions HIGH:<br />
Defines the rate of new un-established sessions<br />
that will cause the software to start deleting halfopen<br />
sessions.<br />
Total incomplete TCP/UDP sessions LOW:<br />
Defines the rate of new un-established sessions<br />
that will cause the software to stop deleting.<br />
Incomplete TCP/UDP sessions (per min.) HIGH:<br />
Maximum number of allowed incomplete TCP/UDP<br />
sessions per minute.<br />
Incomplete TCP/UDP sessions (per min.) LOW:<br />
Minimum number of allowed incomplete TCP/UDP<br />
sessions per minute.<br />
DMZ<br />
Maximum incomplete TCP/UDP sessions<br />
number from same host: Maximum half-open<br />
fragmentation packet number from same host.<br />
Incomplete TCP/UDP sessions detect sensitive<br />
time period: of time before an incomplete TCP/<br />
UDP session is detected as incomplete.<br />
Maximum half-open fragmentation packet<br />
number from same host: Maximum number of<br />
incomplete TCP/UDP sessions from the same host.<br />
Half-open fragmentation detect sensitive<br />
time period: Length of time before a half-open<br />
fragmentation session is detected as half-open.<br />
If you have a client PC that cannot run an Internet application properly from behind the firewall, you can open<br />
the client up to unrestricted two-way Internet access. Enter the IP address of a DMZ (Demilitarized Zone) host<br />
on this screen. Adding a client to the DMZ may expose your local network to a variety of security risks, so only<br />
use this option as a last resort.<br />
Page 40
Chapter 5 : Advanced Setup<br />
BoB TM Advanced Setup Method<br />
SNMP<br />
On this page you can enable the SNMP (Simple Network Management Protocol) functions for LAN, WAN or both<br />
LAN and WAN. By default it is set to disabled.<br />
Community<br />
Use the SNMP configuration screen to display and modify parameters for the Simple Network Management<br />
Protocol (SNMP). A computer attached to the network, called a Network Management Station (NMS), can<br />
be used to access this information. Access rights to the agent are controlled by community strings. To<br />
communicate with the router, the NMS must first submit a valid community string for authentication.<br />
Parameter Description<br />
Community A Community name authorised for management access<br />
Access Management access is restricted to Read or Write<br />
Valid Enables or disables the entry<br />
Note: Up to 5 community names may be entered<br />
Page 41
Chapter 5 : Advanced Setup<br />
BoB TM Advanced Setup Method<br />
Trap<br />
Parameter Description<br />
IP Address: Traps are sent to this address when errors or specific events occur on the network.<br />
Community: A community string (password) specified for trap management. Enter a word, something other<br />
than public or private, to prevent unauthorized individuals from reading information on your system.<br />
Version: Sets the trap status to disabled, or enabled with V1 or V2c.<br />
The v2c protocol was proposed in late 1995 and includes enhancements to v1 that are universally accepted.<br />
These include a get-bulk command to reduce network management traffic when retrieving a sequence of MIB<br />
variables, and a more elaborate set of error codes for improved reporting to a Network Management Station.<br />
ADSL<br />
ADSL Parameters<br />
We recommend leaving the Operation Mode at the default Automatic setting unless you are having line sync<br />
issues, to automatically negotiate with remote DSLAM.<br />
Parameter Description<br />
Operation Mode<br />
•<br />
•<br />
•<br />
Automatic<br />
T1.413 Issue 2<br />
G.992.1 (G.DMT)<br />
•<br />
•<br />
•<br />
G.922.2 (G.Lite)<br />
G.922.3 (ADSL2)<br />
G.922.5 (ADSL2+)<br />
•<br />
G.922.5 (ADSL2+M)<br />
Page 42
Chapter 5 : Advanced Setup<br />
BoB TM Advanced Setup Method<br />
Status<br />
The Status page displays ADSL status information<br />
Parameter Description<br />
Status<br />
Line Status: Shows the current status of the ADSL<br />
line.<br />
Data Rate:<br />
Downstream: Actual and maximum downstream<br />
data rate.<br />
Upstream: Actual and maximum upstream data<br />
rate.<br />
Operation Data/Defect Indication:<br />
Noise Margin Upstream: Minimum noise margin<br />
upstream<br />
Downstream: Minimum noise margin downstream<br />
Output Power: Maximum f luctuation in the output<br />
power<br />
Attenuation Upstream: Maximum reduction in the<br />
strength of the upstream signal<br />
Attenuation Downstream: Maximum reduction in the<br />
strength of the downstream signal<br />
Fast Path FEC: There are two latency paths that<br />
may be used: fast and Correction interleaved. For<br />
either path a forward error correction (FEC) scheme<br />
is employed to ensure higher data integrity. For<br />
maximum noise immunity, an interleaver may be used<br />
to supplement FEC. Interleaved Path An interleaver<br />
is basically a buffer used to introduce a delay, FEC<br />
Correction allowing for additional error correction<br />
techniques to handle noise. Interleaving slows the<br />
data flow and may not be optimal for real-time signals<br />
such as video transmission.<br />
Fast Path CRC indicates the number of Fast Path<br />
Cyclic Redundancy Check Error errors. Interleaved<br />
Path indicates the number of Interleaved Path Cyclic<br />
Redundancy Error Check errors.<br />
Loss of Signal Momentary signal discontinuities.<br />
Defect Loss of Frame Failures due to loss of frames.<br />
Loss of Power Defect: Failures due to loss of power.<br />
Fast Path HEC Error: Fast Path Header Error<br />
Concealment errors.<br />
Interleaved Path HEC Error: Interleaved Path Header<br />
Error Concealment errors.<br />
Statistics: (Superframes represent the highest<br />
level of data presentation which is used to provide<br />
superframe synchronization, identifying the start of<br />
a superframe. Some of the remaining frames are also<br />
used for special functions).<br />
Received Cells: Number of interleaved superframes<br />
received Interleaved.<br />
Transmitted Cells: Number of interleaved super<br />
frames transmitted Superframes Interleaved.<br />
Received Number of fast super frames received.<br />
Superframes Fast<br />
Transmitted Number of fast super frames transmitted.<br />
Superframes Fast<br />
Page 43
Chapter 5 : Advanced Setup<br />
BoB TM Advanced Setup Method<br />
VoIP<br />
Port Setting<br />
Configure the port settings on this page, and click ‘SAVE SETTINGS’ to save the parameters. VoIP providers<br />
operate SIP proxies that allow you to register your router on their system so that your can call friends, family<br />
and business associates. Your BoB TM - 4 port integrated wireless router comes pre-configured for the Westnet<br />
VoIP service. Westnet and <strong>Belkin</strong> will only provide support for use with the Westnet VoIP service.<br />
See below for a description of the parameters.<br />
Parameter Description<br />
Phone 1/2 Enable: Enable/disable phone 1 and/or 2.<br />
Phone Number: Your phone number.<br />
Display Name: Your name, often the same as your phone number.<br />
SIP Domain: (From your VoIP provider).<br />
Sip Server: (From your VoIP provider).<br />
Username: (From your VoIP provider).<br />
Password: (From your VoIP provider).<br />
Page 44
Chapter 5 : Advanced Setup<br />
BoB TM Advanced Setup Method<br />
SIP Setting<br />
Configure your SIP parameters on this page, and click ‘SAVE SETTINGS’ to apply them.<br />
SIP, the Session Initiation Protocol, is a signalling<br />
protocol for Internet conferencing, telephony,<br />
presence, events notification and instant messaging.<br />
The call waiting feature allows the user to take an<br />
incoming call, even though the user is already on the<br />
phone. The user upon hearing the new call can put<br />
the original caller on hold and speak to the new caller.<br />
When the user has finished talking to the new caller,<br />
he can resume his conversation with the original<br />
caller.<br />
According to the SIP RFC, a proxy server is ‘An<br />
intermediary entity that acts as both a server and a<br />
client for the purpose of making requests on behalf of<br />
other clients. A proxy server primarily plays the role of<br />
routing, which means its job is to ensure that request<br />
is sent to another entity ‘closer’ to the targeted user.’<br />
The proxy server therefore, is an intermediate device<br />
that receives SIP requests from a client and then<br />
forwards the requests on the client’s behalf. Proxy<br />
servers receive SIP messages and forward them to<br />
the next SIP server in the network. A series of proxy<br />
and redirect servers receive requests from a client<br />
and decide where to send these requests. Proxy<br />
servers can provide functions such as authentication,<br />
authorization, network access control, routing, reliable<br />
request retransmission, and security.<br />
From the SIP RFC, ‘A registrar is a server that accepts<br />
REGISTER requests and places the information it<br />
receives in those requests into the location service<br />
for the domain it handles.’<br />
See below for a description of the parameters.<br />
Parameter Description<br />
SIP Listen Port: It is strongly recommended that you<br />
to leave the SIP port unchanged (Default: 5060).<br />
Proxy Setting set the proxy settings.<br />
• Proxy IP: IP address of your proxy server. (From your<br />
VoIP provider)<br />
• Proxy Port: Port number of the proxy server. (From<br />
your VoIP provider)<br />
•<br />
•<br />
•<br />
Registrar Setting set the registrar settings.<br />
Registrar IP: IP address of SIP registrar.<br />
Registrar Port: Port number of SIP registrar.<br />
Page 45
Chapter 5 : Advanced Setup<br />
BoB TM Advanced Setup Method<br />
VoIP Advanced Setting<br />
Configure the VoIP advanced settings on this page, and click ‘OK.’<br />
SIP is a peer-to-peer protocol. The peers in a session<br />
are called User Agents (UAs). A user agent can<br />
function in one of the following roles:<br />
1. User agent client (UAC) - A client application that<br />
initiates the SIP request.<br />
2. User agent server (UAS) - A server application that<br />
contacts the user when a SIP request is received<br />
and that returns a response on behalf of the user.<br />
Typically, an SIP end point is capable of functioning as<br />
both a UAC and a UAS, but functions only as one or<br />
the other per transaction<br />
Phone standards vary internationally and from<br />
provider to provider, so it is important that the router<br />
is configured correctly for your provider.<br />
Codec are used to convert an analogue voice signal<br />
to digitally encoded version. Codec vary in the sound<br />
quality, the bandwidth required, the computational<br />
requirements, etc. You can specify which audio<br />
coding process you would like to use. There are four<br />
voice codec supported by the router, you may try<br />
different settings to determine the best audio quality<br />
you obtain from the combination of your network<br />
connection and your used audio device (head set or<br />
hand set). The default codec sequence is listed below.<br />
You can use the Up and Down buttons to change<br />
priority.<br />
1.<br />
G.711 A law<br />
2. G.711 U law<br />
See the below for a description of the parameters<br />
Parameter Description<br />
<strong>Support</strong> Call Waiting: Enables or disables support for<br />
call waiting (Default: Disabled).<br />
<strong>Support</strong> User-Agent Header: Enables or disables<br />
user-agent header support. Enabling this feature<br />
includes user agent information in the packet, e.g.,<br />
the caller’s ID may be displayed. (Default: Disabled).<br />
Telephony Hook F lash Timer: The hook f lash timer is<br />
the length of time before the hook f lash indicates a<br />
time-out (or call disconnect).<br />
(Default: 50 ~ 250 milliseconds)<br />
Telephony Tone Country Setting: Select the country<br />
Voice Codec Configuration: Set the voice codecs.<br />
Available Codecs: List of available codecs.<br />
Selected Codecs: List of selected codecs, move<br />
the preferred codec to the top of the list with up and<br />
down buttons to the right. The codec at the top of<br />
the list will be used when it can.<br />
Page 46
Chapter 5 : Advanced Setup<br />
BoB TM Advanced Setup Method<br />
Port Advanced Setting<br />
Configure advanced VoIP settings on this page then click ‘SAVE SETTINGS’.<br />
Volume Gain Control<br />
Use this option to adjust the volume of calls made<br />
through VoIP.<br />
VAD<br />
Voice Activation Detection. VAD is designed to<br />
conserve bandwidth by halting transmission of voice<br />
packets until it has detected a noise either by voice<br />
or outside noise. The downside to this is it may miss<br />
some packets due to a slight delay in the transmission<br />
of packets. Disable this if you are experiencing issues<br />
with phone system menus, faxing over IP, etc.<br />
Caller ID Mode<br />
Use DTMF Caller ID Mode. Enabling this option enabled<br />
the Dual Tone, Multi-Frequency (touch tone) mode for<br />
Caller ID<br />
Set the Phone Number and Connection Type on this page.<br />
Inter Digit Delay<br />
This is the delay time before processing the dialled<br />
digits This will delay the VoIP unit dial the telephone<br />
number after the digits have been entered.<br />
T.38 Mode<br />
38 is the standard for sending faxes over IP networks.<br />
Enable this option for Faxing over IP.<br />
Dial Tone(Hz)<br />
Adjust the pitch of the VoIP dial tone. Dialling Plans<br />
Configure the VoIP dialling plans on this page, and<br />
click ‘SAVE SETTINGS’.<br />
Page 47
Chapter 5 : Advanced Setup<br />
BoB TM Advanced Setup Method<br />
DECT Setting<br />
View and configure advanced DECT handset settings such as DECT PIN, register, unregister and page your DECT<br />
handset (s).<br />
Register DECT Handset<br />
To register an existing DECT handset, click the<br />
‘register additional handsets’ button once, then follow<br />
the settings in your Handset User Manual. For BoB<br />
Handset users, refer to the Handset Quick Installation<br />
Guide<br />
Unregister DECT Handset<br />
Pressing the Unregister button once will unregister all<br />
DECT handsets<br />
Page DECT Handset<br />
If you have misplaced your handset, pressing the Page<br />
button will ring all DECT handsets.<br />
DECT PIN Code<br />
The default PIN Code is ‘0000’ however you can<br />
change this PIN by typing in the old PIN, then typing in<br />
the new PIN into the ‘New Pin Code’ field and<br />
confirm in the ‘Repeat New Pin Code’ field. Press<br />
‘Apply’ to apply these changes.<br />
VoIP Status and Call Logs<br />
View the VoIP status for both FXS ports on this page<br />
Click ‘Refresh’ to update this page.<br />
This page displays the Port Type, SIP URL and<br />
Registration status of the router.<br />
See the table below for a description of the<br />
parameters.<br />
Parameter Description<br />
Port Type Displays the port type<br />
SIP URL Shows the SIP URL<br />
Registration Indicates whether the user has<br />
successfully registered or not<br />
VoIP Call Logs<br />
View the call log for both FXS ports on this page. Click<br />
‘Refresh’ to update the page.<br />
See the table below for a description of the<br />
parameters.<br />
Parameter Description<br />
Port Type Displays the port type.<br />
Received Call Number of received calls<br />
Dialled Call Number of calls made<br />
Rejected Call Number of rejected calls<br />
Forwarded Call Number of forwarded calls<br />
Page 48
Chapter 5 : Advanced Setup<br />
BoB TM Advanced Setup Method<br />
UPnP<br />
The Universal Plug and Play architecture offers pervasive peer-to-peer network connectivity of PCs of all form<br />
factors, intelligent appliances, and wireless devices UPnP enables seamless proximity network in addition to<br />
control and data transfer among networked devices in the home, office and everywhere in between.<br />
Enable or disable UPnP features: Enable or disable the UPnP function.<br />
Page 49
Chapter 5 : Advanced Setup<br />
BoB TM Advanced Setup Method<br />
QoS<br />
With converging voice and data, it is imperative to establish Quality of Service (QoS) parameters to<br />
appropriately allocate bandwidth. Will only monitor and limit upstream traffic.<br />
QoS Settings<br />
To ensure optimum voice quality, your router should prioritize voice over data packages. Therefore, we<br />
recommend enabling the QoS feature.<br />
Parameter Description<br />
Enable or disable. QoS module function: Enables or disables QoS<br />
Diffserv Forwarding Groups: You can set the minimum amount of bandwidth you want allocated for certain<br />
QOS groups in a Percentage The different groups allow you to manage your different types of connections<br />
more efficiently.<br />
Up to 16 rules can be defined to classify traffic into Diffserv forwarding groups and outgoing VCs.<br />
Click on ‘Add Traffic Class’ or click on ‘Edit’ and a mapping already in the list to bring up the following screen and<br />
enter a setting which is to be mapped to a QOS group.<br />
Page 50
Chapter 5 : Advanced Setup<br />
BoB TM Advanced Setup Method<br />
Edit Traffic Class<br />
This page is for user to specify a classify rule.<br />
Rule Name: Assign a Name to the rule.<br />
Traffic Type: Choose a Traffic type for the rule, or click on ‘Advanced Config’ for more advance options.<br />
Map to Forwarding<br />
Group: Choose which QoS group you wish to have the rule mapped to, which determines how much<br />
bandwidth is to be allocated with this rule.<br />
Direct to VC: Choose which ATM connection you wish to have the rule mapped to. The default setting of ‘By<br />
Routing’ should be used.<br />
Page 51
Chapter 5 : Advanced Setup<br />
BoB TM Advanced Setup Method<br />
Traffic Statistics<br />
This page shows the WAN outbound traffic statistics of all the Diffserv forwarding groups in the last 12 hours<br />
(automatically updated every 5 mins).<br />
DDNS<br />
With a DDNS (Dynamic DNS) connection you can host your own web site, email server, FTP site and more at your<br />
own location even if you have a dynamic IP address.<br />
Parameter Description<br />
Dynamic DNS: Enable or disable the DDNS function.<br />
Provider: Select which provider you wish to use for your DDNS service, either DynDNS or TZO.<br />
Page 52
Chapter 5 : Advanced Setup<br />
BoB TM Advanced Setup Method<br />
USB<br />
You can plug-in your USB hard-drive or memory stick and share these resources on your home network. Once<br />
you have plugged in the USB device you can see the device information in the following ‘Status’.<br />
IMPORTANT: The router’s USB port does not support a USB Hub, only directly connected USB Mass Storage<br />
Devices are supported. File system supporting list: FAT12, FAT16, FAT32 and NTFS. Linux ext2 and new WinXP<br />
FAT64 are not supported by this router.<br />
Advanced Setup USB File Server<br />
This page allows you to enable or disable the File Server features. NetBIOS/SMB share protocol can be used in<br />
Windows® 95, 98, NT 4.0, 2000, XP or other Operating Systems supporting the NetBIOS/SMB protocol. You need<br />
to select which partition (maximum 4 partitions) and folder you want to share. You could specify username,<br />
password and security level for each share resource.<br />
If you see some partitions can not be selected in the partition list table, check the FTP Server partition share<br />
status to make sure you did not share more than 4 disk partitions at the same time.<br />
Page 53
Chapter 5 : Advanced Setup<br />
BoB TM Advanced Setup Method<br />
Advanced Setup USB FTP Server<br />
FTP service is a very common network protocol that enables you to share your files to a local or public network.<br />
By using this feature you can share any files/folders on your USB hard drive or memory stick. You need to specify<br />
which partition (maximum 4 partitions) and folders you want to share. You can specify different passwords and<br />
security levels for different users.<br />
FTP Server and File Server share the same partition share limitation. If you see the error message ‘Partition<br />
share number exceed’ when you select some partitions, check the File Server partition share status.<br />
Advanced Setup USB Web Server<br />
This function allows you to share your mass storage through HTTP protocol. After you enable this function and<br />
specified parameters, you can access via a web browser.<br />
Page 54
Chapter 5 : Advanced Setup<br />
BoB TM Advanced Setup Method<br />
Configuration Tools<br />
Tools<br />
Use the ‘Tools’ menu to back up the current settings, to restore previously saved settings, or to restore the<br />
factory default settings.<br />
Check Backup Router Configuration and click ‘NEXT’ to save your router’s configuration to a file named ‘backup.<br />
cfg’ on your PC.<br />
You can then check Restore from saved Configuration file (backup.cfg) to restore the saved backup<br />
configuration file.<br />
To restore the factory settings, check Restore router to Factory Defaults and click ‘NEXT.’ You will be asked to<br />
confirm your decision.Click ‘APPLY’ to proceed, or ‘CANCEL’ to go back.<br />
Firmware Upgrade<br />
Use this screen to update the firmware or user interface to the latest versions.<br />
<strong>Download</strong> the file to your hard drive from the <strong>Belkin</strong> web site or from another source. Then click Browse...to find<br />
the file on your computer. Select the firmware file and click ‘Open.’ Click ‘Save Settings’ to start the upgrade<br />
process.<br />
Page 55
Chapter 5 : Advanced Setup<br />
BoB TM Advanced Setup Method<br />
Diagnostic Utility<br />
This page allows user use the ping function by entering the destination address and pressing the EXECUTE<br />
button. Ping results will then show on the screen.<br />
Reset<br />
Perform a reset from this page.<br />
Should your unit become unresponsive for any reason, you can simply perform a reset from this page.<br />
Performing a reset will reboot the device. Your configuration settings will remain the same.<br />
Page 56
Chapter 5 : Advanced Setup<br />
BoB TM Advanced Setup Method<br />
Status<br />
The Status screen displays WAN/LAN connection status, firmware and hardware version numbers, as well as<br />
information on DHCP clients connected to your network.<br />
The security log may be saved to a file by clicking ‘Save’ and choosing a location.<br />
The following items are included on the Status screen:<br />
Parameter Description<br />
INTERNET: Displays WAN connection type and status Release Click on this button to disconnect from the WAN.<br />
Renew Click on this button to establish a connection to the WAN.<br />
GATEWAY: Displays system IP settings, as well as DHCP Server and Firewall status.<br />
INFORMATION: Displays the number of attached clients, the firmware versions, the physical MAC address for<br />
each media interface and for the router, as well as the hardware version and serial number.<br />
ATM PVC: Displays ATM connection type and status.<br />
Save: Click on this button to save the security log file.<br />
Clear: Click on this button to delete the access log.<br />
Refresh: Click on this button to refresh the screen.<br />
Page 57
Chapter 5 : Advanced Setup<br />
BoB TM Advanced Setup Method<br />
DHCP Client Log<br />
DHCP Client Log: Displays information on DHCP clients on your network.<br />
Security Log<br />
Security Log: Displays information about attempts to access ports and addresses. Also displays information<br />
about your ADSL connection such as Login failures, disconnections, etc.<br />
After completing hardware setup by connecting all your network devices, you should automatically be able to<br />
connect to the BoB TM - 4 port integrated wireless router by entering 10.1.1.1 into your Internet browsers address<br />
bar.<br />
Should this not work please first determine how your ISP issues your IP address. Many ISPs issue these numbers<br />
automatically using Dynamic Host Configuration Protocol (DHCP).Other ISPs provide a static IP address and<br />
associated numbers, which you must enter manually. How your ISP assigns your IP address determines how you<br />
may need to change the configuration of your computer as per the steps below.<br />
Page 58
Appendices<br />
Appendix A1 - Troubleshooting<br />
TCP/IP Configuration<br />
To access the Internet through the router, you must<br />
configure the network settings of the computers on<br />
your LAN to use the same IP subnet as the router. The<br />
default network settings for the router are:<br />
IP Address: 10.1.1.1 Subnet Mask: 255.255.255.0<br />
Note: These settings can be changed to fit your<br />
network requirements, but you must first configure<br />
at least one computer to access the router’s web<br />
configuration interface in order to make the required<br />
changes.<br />
Configuring Your Computer in<br />
Windows 2000<br />
DHCP IP Configuration<br />
1. On the Windows desktop, click Start/Settings/<br />
Network and Dial-Up Connections.<br />
2. Click the icon that corresponds to the connection<br />
to your router.<br />
3. The connection status screen will open. Click<br />
Properties 2.<br />
4. Double-click Internet Protocol (TCP/IP).<br />
5. If ‘Obtain an IP address automatically’ and ‘Obtain<br />
DNS server address automatically’ are already<br />
selected, your computer is already configured for<br />
DHCP. If not, select these options and then click<br />
ok and then ok again, or click Cancel to close each<br />
window.<br />
Page 59
Appendices<br />
Appendix A1 - Troubleshooting<br />
Manual IP Configuration<br />
1. Follow steps 1-5 in ‘DHCP IP Configuration’ on the<br />
previous page.<br />
2. Select ‘Use the following IP address.’ Enter an<br />
IP address based on the default network which<br />
is 10.1.1.x (where x is between 2 and 254), use<br />
255.255.255.0 for the subnet mask and the IP<br />
address of the router 10.1.1.1 for the default gateway<br />
field.<br />
3. Select ‘Use the following DNS server addresses’.<br />
4. Enter the IP address for the touter in the Preferred<br />
DNS server field. This automatically relays DNS<br />
requests to the DNS server(s) provided by your<br />
ISP. Also, add a specific DNS server close the dialog<br />
boxes of your ISP into the Alternate DNS Server<br />
field and click OK to close the dialog boxes.<br />
5. For future reference you may record the<br />
configured information in the following table:<br />
TCP/IP Configuration Setting<br />
IP Address ____.____.____.____<br />
Subnet Mask ____.____.____.____<br />
Default Gateway ____.____.____.____<br />
Preferred DNS Server ____.____.____.____<br />
Alternate DNS Server ____.____.____.____<br />
Disable HTTP Proxy<br />
You need to verify that the ‘HTTP Proxy’ feature of<br />
your web browser is disabled. This is so that your<br />
browser can view the router’s HTML configuration<br />
pages.<br />
1.<br />
Open control panel.<br />
2. Open ‘Internet Options’.<br />
3. Go to the connections tab and click on the ‘LAN<br />
settings’ button.<br />
4. Ensure that NOTHING is ticked on this screen and<br />
click ’OK’.<br />
5. On the connections tab, make sure that there are<br />
no dial up connections, select the ‘Never dial a<br />
connection’ radio button.<br />
Your computer is now configured to connect to the<br />
router.<br />
Page 60
Appendices<br />
Appendix A1 - Troubleshooting<br />
Configuring Your Macintosh Computer<br />
You may find that the instructions here do not exactly<br />
match your operating system. This is because these<br />
steps and screen shots were created using Mac OS<br />
10.2..Mac OS 7.x and above are similar, but may not be<br />
identical to the Mac OS you are using.<br />
Follow these instructions:<br />
1.<br />
1.<br />
Open the ‘Systems Preferences’ window.<br />
Double Click ‘Network’.<br />
2. If ‘Using DHCP Server’ is already selected in the<br />
configure field, your computer is already configured<br />
for DHCP. If not, select this option.<br />
1. Your new settings are shown in the TCP/IP tab.<br />
Verify that your IP Address is now 10.1.1.xxx, your<br />
Subnet Mask is 255.0.0.0 or 255.255.255.0 and your<br />
Default Gateway is 10.1.1.1.These values confirm that<br />
your router is functioning.<br />
2. Close the ‘Network’ window.<br />
Now your computer is configured to connect to the<br />
router.<br />
Disable HTTP Proxy<br />
You need to verify that the ‘HTTP Proxy’ feature of<br />
your web browser is disabled. This is so that your<br />
browser can view the router’s HTML configuration<br />
pages. The following steps are for Internet Explorer.<br />
Internet Explorer<br />
1. Open Internet Explorer and click the ‘Stop’ button.<br />
Click ‘Explorer/Preferences’.<br />
2. In the Internet Explorer Preferences window, under<br />
‘Network’, select ‘Proxies’.<br />
3. Uncheck all check boxes and click OK.<br />
Page 61
Appendices<br />
Appendix A2 - Troubleshooting<br />
This section describes common problems you may encounter and possible solutions to them. The BoB TM - 4 port<br />
integrated wireless router can be easily monitored through panel indicators to identify problems.<br />
Troubleshooting<br />
Symptom Action<br />
LED Indicators<br />
Power LED is Off • Check connections between the router, the external power supply, and the wall<br />
outlet.<br />
• If the power indicator does not turn on when the power cord is plugged in, you<br />
may have a problem with the power outlet, power cord, or external power supply.<br />
However, if the unit powers off after running for a while, check for loose power<br />
connections, power losses, or surges at the power outlet. If you still cannot isolate<br />
the problem, then the external power supply may be defective. In this case,<br />
contact Technical <strong>Support</strong> for assistance.<br />
LAN LED is Off • Verify that the router and attached device are powered on.<br />
Network Connection Problems<br />
Cannot ping the<br />
router from the<br />
attached LAN, or<br />
the router cannot<br />
ping any device on<br />
the attached LAN<br />
Management Problems<br />
Cannot connect<br />
using the Web<br />
Browser<br />
Forgot or lost the<br />
password<br />
• Be sure the cable is plugged into both the LAN port on the router and the<br />
corresponding device.<br />
• Verify that the proper cable type is used and that its length does not exceed the<br />
specified limits.<br />
• Be sure that the network interface on the attached device is configured for the<br />
proper communication speed and duplex mode.<br />
• Check the adapter on the attached device and cable connections for possible<br />
defects replace any defective adapter or cable if necessary.<br />
• Verify that the IP addresses are properly configured. For most applications, you<br />
should use the router’s DHCP function to dynamically assign IP addresses to hosts<br />
on the attached LAN. However, If you manually configure IP addresses on the LAN,<br />
verify that the same network addresses (network component of the IP address) and<br />
subnet mask are used for both the router and any attached LAN devices.<br />
• Be sure the device you want to ping (or from which you are pinging) has been<br />
configured for TCP/IP.<br />
•<br />
Disable any installed Firewalls, refer to your Firewall User Manual for instructions.<br />
• Be sure to have configured the router with a valid IP address, subnet mask, and<br />
default gateway.<br />
• Check that you have a valid network connection to the router and the port you are<br />
using has not been disabled.<br />
•<br />
•<br />
•<br />
Check the network cabling between the management station and the router.<br />
Disable any installed Firewalls, please read your firewalls manual.<br />
Disable any proxies.<br />
• Press the Reset button on the rear panel (holding it down for at least 20 seconds)<br />
to restore the factory defaults. Note: All settings will need to be re-entered – this<br />
option wipes all settings and restore the unit back to the factory defaults.<br />
Page 62
Appendices<br />
Appendix B - Cables<br />
Ethernet Cable<br />
Caution: Do not plug a phone jack connector into an RJ-45 port. For Ethernet connections, use only twisted-pair<br />
cables with RJ-45 connectors that conform to FCC standards.<br />
Specification<br />
Cable Types and Specification<br />
Cable Type Max. Length Connector<br />
100 BASE - T Cat.3, 4, 5100 - ohm UTP 100m (328 ft) RJ - 45<br />
100 BASE - TX Cat. 5 100 - ohm UTP 100m (328 ft) RJ - 45<br />
Page 63
Appendices<br />
Appendix C - Specifications<br />
Standards Compliance<br />
CE Mark<br />
Emissions<br />
FCC Class B, VCCI Class B<br />
Industry Canada Class B<br />
EN55022 (CISPR 22) Class B<br />
C-Tick - AS/NZS 3548 (1995) Class B<br />
Immunity<br />
EN 61000-3-2/3<br />
EN 61000-4-2/3/4/5/6/8/11<br />
Safety<br />
UL 1950<br />
EN60950 (TÜV)<br />
CSA 22.2 No. 950<br />
IEEE 802.3 10 BASE-T Ethernet<br />
IEEE 802.3u 100 BASE-TX Fast Ethernet<br />
Modem Standards<br />
ITU G 992.1 (G.dmt)<br />
ITU G 992.2 (G.lite)<br />
ITU G 994 1 (G.handshake)<br />
ITU T.413 issue 2 - ADSL full rate<br />
G.992.3 (ADSL2)<br />
G 992.5 (ADSL2+)<br />
G 992.5M (ADSL2+M)<br />
LAN Interface<br />
RJ-45 10 BASE-T/100 BASE-TX ports<br />
Auto-negotiates the connection speed to 10 Mbps<br />
Ethernet or 100 Mbps<br />
Fast Ethernet and the transmission mode to halfduplex<br />
or full-duplex<br />
USB Interface<br />
2 USB Ports, charging plus 3G/storage<br />
WAN Interface<br />
1 ADSL RJ-11 port<br />
FXO Interface<br />
1 FXO port<br />
FXS Interface<br />
2 FXS lines<br />
Indicator Panel<br />
Line, Phone 1-2, VoIP, USB, LAN 1-4, Wireless, Internet,<br />
power<br />
Dimensions<br />
67 5 x 214 x 177 5 mm (L x W x H)<br />
Input Power<br />
12V 1 5A<br />
Management<br />
Web management<br />
Advanced Features<br />
VoIP-QoS, VAD, call waiting, call forwarding, caller ID,<br />
jitter buffer. Codec supported - G.711 U/A Law<br />
Dynamic IP Address Configuration – DHCP, DNS,<br />
DDNS Firewall – Client privileges, hacker prevention<br />
and logging, Stateful Packet Inspection<br />
Virtual Private Network – PPTP, IPSec pass-through,<br />
VPN pass-through<br />
Internet Standards<br />
RFC 826 ARP, RFC 791 IP, RFC 792 ICMP, RFC 768<br />
UDP, RFC 793 TCP, RFC 783 TFTP, RFC 1483 AAL5<br />
Encapsulation, RFC 1661 PPP, RFC 1866 HTML, RFC<br />
2068 HTTP, RFC 2364 PPP over ATM<br />
Temperature<br />
Operating 0 to 40°C (32 to 104°F)<br />
Storage -40 to 70°C (-40 to 158°F)<br />
Humidity<br />
5% to 95% (non-condensing)<br />
Page 64
Glossary<br />
Glossary- 1<br />
10BASE-T<br />
IEEE 802.3 specification for 10 Mbps Ethernet over<br />
two pairs of Category 3, 4, or 5 UTP cable<br />
100BASE-TX<br />
IEEE 802.3u specification for 100 Mbps Fast Ethernet<br />
over two pairs of Category 5 UTP cable<br />
Auto-Negotiation<br />
Signaling method allowing each node to select<br />
its optimum operational mode (eg., 10 Mbps or<br />
100 Mbps and half or full duplex) based on the<br />
capabilities of the node to which it is connected<br />
Bandwidth<br />
The difference between the highest and lowest<br />
frequencies available for network signals. Also<br />
synonymous with wire speed, the actual speed of<br />
the data transmission along the cable<br />
Collision<br />
A condition in which packets transmitted over the<br />
cable interfere<br />
with each other. Their interference makes both<br />
signals unintelligible<br />
Collision Domain<br />
Single CSMA/CD LAN segment<br />
CSMA/CD<br />
CSMA/CD (Carrier Sense Multiple Access/Collision<br />
Detect) is the communication method employed<br />
by Ethernet, Fast Ethernet, or Gigabit Ethernet<br />
End Station<br />
A workstation, server, or other device that does<br />
not forward traffic<br />
Ethernet<br />
A network communication system developed<br />
and standardized by DEC, Intel, and Xerox, using<br />
baseband transmission, CSMA/ CD access, logical<br />
bus topology, and coaxial cable. The successor IEEE<br />
8023 standard provides for integration into the<br />
OSI model and extends the physical layer and<br />
media with repeaters and implementations that<br />
operate on fiber, thin coax and twisted-pair cable<br />
Fast Ethernet<br />
A 100 Mbps network communication system based<br />
on Ethernet and the CSMA/CD access method<br />
Full Duplex<br />
Transmission method that allows two network<br />
devices to transmit and receive concurrently,<br />
effectively doubling the bandwidth of that link<br />
IEEE<br />
Institute of Electrical and Electronic Engineers<br />
IEEE 802.3<br />
Defines carrier sense multiple access with collision<br />
detection (CSMA/CD) access method and physical<br />
layer specifications<br />
IEEE 802.3ab<br />
Defines CSMA/CD access method and physical<br />
layer specifications for 1000BASE-T Fast Ethernet<br />
IEEE 802.3u<br />
Defines CSMA/CD access method and physical<br />
layer specifications for 100BASE-TX Fast Ethernet<br />
IEEE 802.3x<br />
Defines Ethernet frame start/stop requests and<br />
timers used for flow control on full-duplex links<br />
Page 65
Glossary<br />
Glossary-2<br />
Local Area Network<br />
(LAN) A group of interconnected computer and support devices<br />
LAN Segment<br />
LED<br />
Separate LAN or collision domain<br />
Light emitting diode used or monitoring a device or network condition<br />
Local Area Network<br />
MIB<br />
A group of interconnected computers and support devices.<br />
Media Access Control (MAC) A portion of the networking protocol that governs access to the transmission<br />
medium, facilitating the exchange of data between network nodes<br />
An acronym for Management Information Base. It is a set of database objects that contains information about<br />
the device<br />
RJ-45 Connector<br />
A connector for twisted-pair wiring<br />
Straight-through Port<br />
An RJ-45 port which does not cross the receive and transmit signals internally (MDI) so it can be connected<br />
with straight- through twisted-pair cable to any device having a crossover port (MDI-X) Also referred to as a<br />
‘Daisy-Chain’ port. The RJ-45, 10/100 Mbps port supports Auto MDI/ MDI-X<br />
Switched Ports<br />
UTP<br />
Ports that are on separate collision domains or LAN segments<br />
Unshielded twisted-pair cable<br />
Page 66
<strong>Belkin</strong> International, Inc.<br />
Limited Two Year Product Warranty<br />
What this warranty covers.<br />
<strong>Belkin</strong> International, Inc. (‘<strong>Belkin</strong>’) warrants to the<br />
original purchaser of this <strong>Belkin</strong> product that the<br />
product shall be free of defects in design, assembly,<br />
material, or workmanship.<br />
What the period of coverage is.<br />
<strong>Belkin</strong> warrants the <strong>Belkin</strong> product for two years.<br />
What will we do to correct<br />
problems?<br />
Product Warranty. <strong>Belkin</strong> will repair or replace, at its<br />
option, any defective product free of charge (except<br />
for shipping charges for the product). <strong>Belkin</strong> reserves<br />
the right to discontinue any of its products without<br />
notice, and disclaims any limited warranty to repair or<br />
replace any such discontinued products. In the event<br />
that <strong>Belkin</strong> is unable to repair or replace the product<br />
(for example, because it has been discontinued),<br />
<strong>Belkin</strong> will offer a refund in an amount equal to the<br />
purchase price of the product as evidenced on the<br />
original purchase receipt as discounted by its natural<br />
use.<br />
What is not covered by this<br />
warranty?<br />
All above warranties are null and void if the <strong>Belkin</strong><br />
product is not provided to <strong>Belkin</strong> for inspection<br />
upon <strong>Belkin</strong>’s request at the sole expense of the<br />
purchaser, or if <strong>Belkin</strong> determines that the <strong>Belkin</strong><br />
product has been improperly installed, altered in any<br />
way, or tampered with. The <strong>Belkin</strong> Product Warranty<br />
does not protect against acts of God such as f lood,<br />
earthquake, lightning, war, vandalism, theft, normaluse<br />
wear and tear, erosion, depletion, obsolescence,<br />
abuse, damage due to low voltage disturbances<br />
(i.e. brownouts or sags), non-authorized program, or<br />
system equipment modification or alteration.<br />
How to get service.<br />
To get service for your <strong>Belkin</strong> product you must take<br />
the following steps:<br />
1. Contact <strong>Belkin</strong> Tech <strong>Support</strong> within 15 days of the<br />
Occurrence. Be prepared<br />
•<br />
•<br />
•<br />
•<br />
The part number of the <strong>Belkin</strong> product.<br />
Where you purchased the product.<br />
When you purchased the product.<br />
Copy of original receipt.<br />
2. Your <strong>Belkin</strong> Customer Service Representative will<br />
then instruct you on how to forward your receipt<br />
and <strong>Belkin</strong> product and how to proceed with your<br />
claim.<br />
<strong>Belkin</strong> reserves the right to review the damaged<br />
<strong>Belkin</strong> product. All costs of shipping the <strong>Belkin</strong> product<br />
to <strong>Belkin</strong> for inspection shall be borne solely by the<br />
purchaser. If <strong>Belkin</strong> determines, in its sole discretion,<br />
that it is impractical to ship the damaged equipment<br />
to <strong>Belkin</strong>, <strong>Belkin</strong> may designate, in its sole discretion,<br />
an equipment repair facility to inspect and estimate<br />
the cost to repair such equipment. The cost, if any,<br />
of shipping the equipment to and from such repair<br />
facility and of such estimate shall be borne solely by<br />
the purchaser. Damaged equipment must remain<br />
available for inspection until the claim is finalised.<br />
Whenever claims are settled, <strong>Belkin</strong> reserves the<br />
right to be subrogated under any existing insurance<br />
policies the purchaser may have.<br />
How state law relates to the<br />
warranty.<br />
THIS WARRANTY CONTAINS THE SOLE WARRANTY<br />
OF BELKIN. THERE ARE NO OTHER WARRANTIES,<br />
EXPRESSED OR, EXCEPT AS REQUIRED BY LAW,<br />
IMPLIED, INCLUDING THE IMPLIED WARRANTY OR<br />
CONDITION OF QUALITY, MERCHANTABILITY OR<br />
FITNESS FOR A PARTICULAR PURPOSE, AND SUCH<br />
IMPLIED WARRANTIES, IF ANY, ARE LIMITED IN<br />
DURATION TO THE TERM OF THIS WARRANTY.<br />
Some states do not allow limitations on how long an<br />
implied warranty lasts, so the above limitations may<br />
not apply to you.<br />
IN NO EVENT SHALL BELKIN BE LIABLE FOR INCIDENTAL,<br />
SPECIAL, DIRECT, INDIRECT, CONSEQUENTIAL OR<br />
MULTIPLE DAMAGES SUCH AS, BUT NOT LIMITED TO,<br />
LOST BUSINESS OR PROFITS ARISING OUT OF THE<br />
SALE OR USE OF ANY BELKIN PRODUCT, EVEN IF<br />
ADVISED OF THE POSSIBILITY OF SUCH DAMAGES.<br />
This warranty gives you specific legal rights, and you<br />
may also have other rights, which may vary from state<br />
to state. Some states do not allow the exclusion<br />
or limitation of incidental, consequential, or other<br />
damages, so the above limitations may not apply to<br />
you.<br />
Page 67
Westnet<br />
Westnet <strong>Support</strong><br />
tel 1300 786 068<br />
fax 1300 554 160<br />
support@westnet.com.au<br />
<strong>Belkin</strong><br />
1800 235 546<br />
Open 24 hours a day,<br />
7 days a week<br />
© 2010 <strong>Belkin</strong> International, Inc. All rights reserved. All trade names are registered trademarks of respective manufacturers listed.<br />
P75004au-D