
Create successful ePaper yourself
Turn your PDF publications into a flip-book with our unique Google optimized e-Paper software.
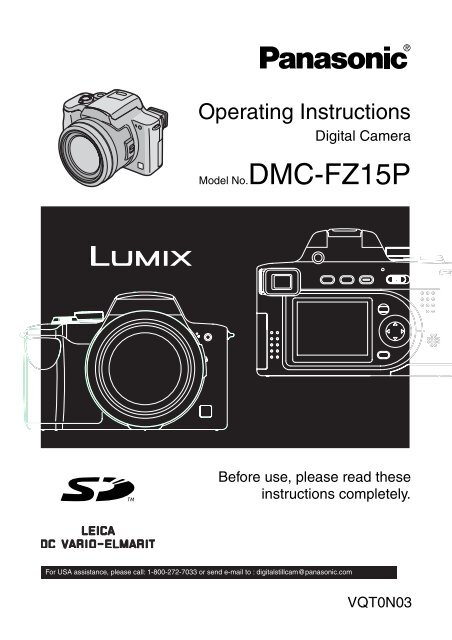
<strong>Operating</strong> <strong>Instructions</strong><br />
Digital Camera<br />
Model No.DMC-FZ15P<br />
Before use, please read these<br />
instructions completely.<br />
For USA assistance, please call: 1-800-272-7033 or send e-mail to : digitalstillcam@panasonic.com<br />
VQT0N03
Before Use<br />
Dear Customer,<br />
We would like to take this opportunity to<br />
thank you for purchasing this Panasonic<br />
Digital Camera. Please read these<br />
<strong>Operating</strong> <strong>Instructions</strong> carefully and keep<br />
them handy for future reference.<br />
Information for Your<br />
Safety<br />
2<br />
WARNING<br />
TO REDUCE THE RISK OF FIRE OR<br />
SHOCK HAZARD AND ANNOYING<br />
INTERFERENCE, USE ONLY THE<br />
RECOMMENDED ACCESSORIES<br />
AND DO NOT EXPOSE THIS<br />
EQUIPMENT TO RAIN OR<br />
MOISTURE. DO NOT REMOVE THE<br />
COVER (OR BACK); THERE ARE NO<br />
USER SERVICEABLE PARTS INSIDE.<br />
REFER SERVICING TO QUALIFIED<br />
SERVICE PERSONNEL.<br />
Notice:<br />
This product has parts that contain a<br />
small amount of mercury. It also<br />
contains lead in some components.<br />
Disposal of these materials may be<br />
regulated in your community due to<br />
environmental considerations. For<br />
disposal or recycling information please<br />
contact your local authorities, or the<br />
Electronics Industries Alliance:<br />
<br />
RBRC<br />
TM<br />
Li-ion<br />
Before Use<br />
Carefully observe copyright laws.<br />
Recording of pre-recorded tapes or<br />
disks or other published or broadcast<br />
material for purposes other than your<br />
own private use may infringe copyright<br />
laws. Even for the purpose of private<br />
use, recording of certain material may<br />
be restricted.<br />
• Please note that the actual controls and<br />
components, menu items, etc. of your<br />
Digital Camera may look somewhat<br />
different from those shown in the<br />
illustrations in these <strong>Operating</strong><br />
<strong>Instructions</strong>.<br />
SD Logo is a trademark.<br />
Other names, company names, and<br />
product names printed in these<br />
instructions are trademarks or registered<br />
trademarks of the companies concerned.<br />
THE SOCKET OUTLET SHALL BE<br />
INSTALLED NEAR THE EQUIPMENT<br />
AND SHALL BE EASILY ACCESSIBLE.<br />
CAUTION<br />
Danger of explosion if battery is<br />
incorrectly replaced. Replace only with<br />
the same or equivalent type<br />
recommended by the manufacturer.<br />
Dispose of used batteries according to<br />
the manufacturer’s instructions.<br />
A lithium ion/polymer battery that is recyclable powers the<br />
product you have purchased. Please call 1-800-8-BATTERY for<br />
information on how to recycle this battery.
FCC Note: (U.S. only)<br />
This equipment has been tested and<br />
found to comply with the limits for a<br />
Class B digital device, pursuant to Part<br />
15 of the FCC Rules. These limits are<br />
designed to provide reasonable<br />
protection against harmful interference<br />
in a residential installation. This<br />
equipment generates, uses, and can<br />
radiate radio frequency energy and, if<br />
not installed and used in accordance<br />
with the instructions, may cause harmful<br />
interference to radio communications.<br />
However, there is no guarantee that<br />
interference will not occur in a particular<br />
installation. If this equipment does<br />
cause harmful interference to radio or<br />
television reception, which can be<br />
determined by turning the equipment off<br />
and on, the user is encouraged to try to<br />
correct the interference by one or more<br />
of the following measures:<br />
Reorient or relocate the receiving<br />
antenna.<br />
Increase the separation between the<br />
equipment and receiver.<br />
Connect the equipment into an outlet<br />
on a circuit different from that to which<br />
the receiver is connected.<br />
Consult the dealer or an experienced<br />
radio/TV technician for help.<br />
FCC Caution: To assure continued<br />
compliance, follow the<br />
attached installation<br />
instructions and use only<br />
shielded interface cables<br />
with ferrite core when<br />
connecting to computer or<br />
peripheral devices.<br />
Any changes or modifications not<br />
expressly approved by the party<br />
responsible for compliance could void<br />
the user’s authority to operate this<br />
equipment.<br />
Before Use<br />
Trade Name: Panasonic<br />
Model No.: DMC-FZ15<br />
Responsible party: Matsushita Electric<br />
Corporation of<br />
America<br />
One Panasonic<br />
Way, Secaucus, NJ<br />
07094<br />
Support Contact: Panasonic<br />
Consumer<br />
Electronics<br />
Company<br />
1-800-272-7033<br />
This device complies with Part 15 of the<br />
FCC Rules. Operation is subject to the<br />
following two conditions: (1) This device<br />
may not cause harmful interference,<br />
and (2) this device must accept any<br />
interference received, including<br />
interference that may cause undesired<br />
operation.<br />
DMC-FZ15<br />
3
∫ Care for the camera<br />
Do not shake or cause impact to the<br />
camera. The camera may not be<br />
operated normally or recording of pictures<br />
may be disabled, or the lens may be<br />
damaged.<br />
• Sand or dust may cause a malfunction<br />
of the camera. When you use the<br />
camera on a beach etc., take care so<br />
that sand or dust does not get into the<br />
camera.<br />
When you use the camera on a rainy day<br />
or on a beach, take care so that water<br />
does not get into the camera.<br />
If seawater splashes onto the camera,<br />
wet a soft cloth with tap water, wring it<br />
well, and use it to wipe the camera<br />
body carefully. Then, wipe it again with<br />
a dry cloth.<br />
∫ About the LCD monitor/Viewfinder<br />
Do not press the LCD monitor strongly.<br />
It may cause uneven colors on the LCD<br />
monitor or a malfunction of the LCD<br />
monitor.<br />
In a place with drastic temperature<br />
changes, condensation may form on the<br />
LCD monitor. Wipe it with a soft, dry cloth.<br />
If the camera is extremely cold when you<br />
turn the camera on, the image on the<br />
LCD monitor/Viewfinder is slightly darker<br />
than usual at first. However, as the<br />
internal temperature increases, it goes<br />
back to the normal brightness.<br />
∫ About the Lens<br />
Do not direct the lens to the sun or strong<br />
light sources. It may cause not only a<br />
malfunction of the camera but irreversible<br />
damage to your eye.<br />
Do not press the lens strongly.<br />
4<br />
Extremely high precision technology is<br />
employed to produce the LCD monitor/<br />
Viewfinder screen. The result is more<br />
than 99.99% effective pixels with a<br />
mere 0.01% of the pixels inactive or<br />
always lit. However, this will not be<br />
recorded on the pictures in the card.<br />
Before Use<br />
Leaving the camera with the lens facing<br />
the sun may cause a malfunction. Be<br />
careful when you put the camera outside<br />
or near a window.<br />
∫ About Condensation<br />
Condensation takes place when the<br />
ambient temperature or humidity is<br />
changed as follows:<br />
Be careful of condensation since it causes<br />
stains on the lens, fungus or malfunction.<br />
(P105)<br />
When the camera is brought inside from<br />
the cold to a warm room.<br />
When the camera is moved from outside<br />
to an air-conditioned car.<br />
When cool wind from an air conditioner or<br />
other is directly blown onto the camera.<br />
In humid places<br />
∫ If you will not be using the camera for<br />
a long time<br />
Store the battery in a cool and dry place<br />
with a relatively stable temperature.<br />
(Recommended temperature: 59oF–77oF<br />
(15oC–25oC), Recommended humidity:<br />
40% – 60%)<br />
Be sure to remove the battery and the<br />
card from the camera.<br />
When the battery is left inserted in the<br />
camera for a long time, discharge takes<br />
place even if the camera is turned off. If<br />
you leave the battery inserted for an<br />
extended period of time, it will be<br />
excessively discharged and it may<br />
become unusable even after it is charged.<br />
To store the battery for a long period of<br />
time, we recommend charging it once<br />
every year and storing it again after you<br />
completely use up the charged capacity.<br />
When you keep the camera in a closet or<br />
a cabinet, we recommend storing it with<br />
the desiccant (silica gel).
Before Use<br />
About These <strong>Operating</strong> <strong>Instructions</strong><br />
Please note that the description on this page is a sample and all pages are not described<br />
in this manner.<br />
S<br />
M<br />
A SCN1<br />
P<br />
SCN2<br />
∫ About illustrations in these operating instructions<br />
Please note that the appearance of the product, the illustration or the menu screen are a<br />
little different from those in actual use.<br />
∫ About illustrations of the cursor button<br />
In those operating instructions, the operations on the cursor button are described as<br />
illustrated below.<br />
e.g.: When you press the 4 button<br />
Modes indicated here allow you to use<br />
the functions or settings described on<br />
this page. Set the Mode dial to any of<br />
the modes to use the functions or<br />
settings.<br />
Compensating the Exposure<br />
SCN1 SCN2<br />
Use this function when you cannot achieve<br />
appropriate exposure due to the difference<br />
of brightness between the subject and the<br />
background.<br />
EV is an abbreviation of Exposure Value,<br />
and it is the amount of light given to the<br />
CCD by the aperture value and the<br />
shutter speed.<br />
Convenient or helpful information for<br />
use of this camera is described.<br />
5
Contents<br />
6<br />
Before Use<br />
Information for Your Safety....................... 2<br />
About These <strong>Operating</strong> <strong>Instructions</strong> ......... 5<br />
Preparation<br />
Standard Accessories............................... 8<br />
Names of the Components ..................... 10<br />
Quick Guide............................................ 12<br />
Charging the Battery with the Charger ... 13<br />
About the Battery ....................................14<br />
Inserting/Removing the Battery .............. 15<br />
Inserting/Removing the Card .................. 16<br />
About the Card........................................17<br />
Approximate number of recordable<br />
pictures and the size ........................... 18<br />
Attaching the Lens Cap/Strap................. 19<br />
Attaching the Lens Hood ........................ 20<br />
Setting Date/Time (Clock Set) ................ 22<br />
Setup Menu ............................................ 24<br />
About the LCD Monitor/Viewfinder ......... 28<br />
Recording pictures (basic)<br />
Taking Pictures ....................................... 31<br />
Checking the Recorded Picture<br />
(Review) .............................................. 37<br />
Using the Optical Zoom ..........................38<br />
Taking Pictures using the Built-in<br />
Flash ...................................................39<br />
Taking Pictures with the Self-timer ......... 42<br />
Compensating the Exposure .................. 43<br />
Taking Pictures using Auto Bracket........ 44<br />
Taking Pictures using Burst Mode .......... 45<br />
Playback (basic)<br />
Playing Back Pictures ............................. 46<br />
9 Pictures Multi Playback........................ 47<br />
Using the Playback Zoom....................... 48<br />
Deleting Pictures..................................... 49<br />
Recording pictures (advanced)<br />
Using the Mode Dial ............................... 51<br />
Aperture-priority AE ......................... 51<br />
Shutter-priority AE ............................ 52<br />
Manual exposure .............................. 53<br />
Macro mode...................................... 56<br />
Motion image mode .......................... 56<br />
Scene mode..................................... 58<br />
– Portrait mode................................. 59<br />
– Sports Mode .................................. 59<br />
– Scenery mode ............................... 60<br />
– Night scenery mode ...................... 60<br />
– Night portrait mode........................ 61<br />
– Panning mode ............................... 61<br />
– Fireworks mode............................. 62<br />
– Party mode .................................... 63<br />
– Snow mode ................................... 64<br />
Taking Pictures with Manual Focus ........ 65<br />
Using the [REC] mode menu .................. 67<br />
White Balance [W.BALANCE] .......... 68<br />
ISO Sensitivity [SENSITIVITY] ......... 70<br />
Picture Size [PICT.SIZE] .................. 70<br />
Quality [QUALITY] ............................ 71<br />
Metering Mode<br />
[METERING MODE]......................... 72<br />
AF Mode [AF MODE]........................ 72<br />
Continuous AF [CONT.AF] ............... 73<br />
AF Assist Lamp<br />
[AF ASSIST LAMP] .......................... 74<br />
Digital Zoom [D.ZOOM] .................... 74<br />
Color Effect [COL.EFFECT].............. 75<br />
Picture Adjustment [PICT.ADJ.]........ 75<br />
Optical Image Stabilizer<br />
[STABILIZER]................................... 76<br />
Flip Animation [FLIP ANIM.] ............. 76<br />
Conversion Lens [CONVERSION].... 79
Playback (advanced)<br />
Playing Back Motion Images ..................81<br />
Using the [PLAY] mode menu ................82<br />
Rotating the Picture [ROTATE]......... 82<br />
Setting the Picture to be Printed and<br />
the Number of Prints<br />
[DPOF PRINT].................................. 83<br />
Preventing Accidental Erasure of<br />
the Picture [PROTECT] .................... 85<br />
Playing Back with Slide Show<br />
[SLIDE SHOW].................................86<br />
Resizing the Pictures [RESIZE] ........ 88<br />
Trimming the Pictures<br />
[TRIMMING] ..................................... 89<br />
Initializing the Card [FORMAT] ......... 91<br />
Playing Back Pictures with a TV<br />
Screen.................................................92<br />
Connecting to a PC or Printer<br />
Before Connecting with USB Connection<br />
Cable [USB MODE].............................93<br />
Connecting to a PC.................................95<br />
Connecting to a PictBridge-compliant<br />
Printer..................................................97<br />
Others<br />
Using the MC Protector/ND Filter .........101<br />
Screen Display......................................102<br />
Cautions for Use ...................................104<br />
Message Display ..................................107<br />
Troubleshooting ....................................108<br />
Specifications........................................111<br />
Digital Camera Accessory System........113<br />
Digital Camera Accessory Order Form<br />
(For USA Customers)........................114<br />
Request for Service Notice<br />
(For USA Only)..................................115<br />
Limited Warranty (For USA Only) .........116<br />
Customer Services Directory<br />
(For USA Only)..................................118<br />
Index .....................................................119<br />
Spanish Quick Use Guide/<br />
Guía rápida en español.....................121<br />
7
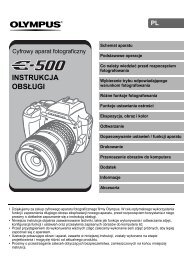
Preparation<br />
Standard Accessories<br />
8<br />
Preparation<br />
Before using your camera, check the contents.<br />
∫ SD Memory Card (8 MB)<br />
RP-SD008B<br />
(In the text, it is indicated as “Card”)<br />
∫ Battery Pack<br />
CGA-S002A<br />
(In the text, it is indicated as “Battery”)<br />
∫ Battery Charger<br />
DE-993B<br />
(In the text, it is indicated as “Charger”)<br />
∫ Video Cable<br />
K1HA08CD0003<br />
∫ USB Connection Cable<br />
K1HA08CD0001<br />
∫ CD-ROM
∫ Lens Cap<br />
VYK0W96<br />
∫ Strap<br />
VFC4078<br />
∫ Lens Hood<br />
VYQ3234<br />
∫ Lens Hood Adaptor<br />
VYQ3213<br />
Preparation<br />
9
10<br />
Preparation<br />
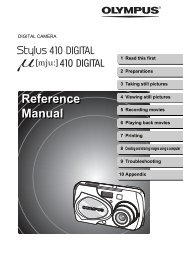
Names of the Components<br />
45 6<br />
12<br />
7<br />
1 2 3<br />
8<br />
9<br />
13 14 15<br />
10 11<br />
16<br />
1 Lens<br />
2 Flash (P39)<br />
3 Self-timer Indicator (P42)<br />
AF Assist Lamp (P74)<br />
4 Diopter Adjustment Dial (P29)<br />
5 Viewfinder (P28, 102)<br />
6 [EVF/LCD] Button (P28)<br />
7 Flash Open Button (P39)<br />
8 [DISPLAY] Button (P28)<br />
9 [EXPOSURE] Button<br />
(P35, 51, 52, 53)<br />
10 Power Indicator (P32)<br />
11 Camera Switch (P12)<br />
12 LCD Monitor (P28, 102)<br />
13 [MENU] Button (P24)<br />
14 Delete Button (P49)<br />
15 Cursor buttons<br />
2/Self-timer Button (P42)<br />
4/[REVIEW] Button (P37)<br />
1/Flash Mode Button (P39)<br />
3/Flash Output Adjustment (P41)/<br />
Exposure Compensation (P43)/Auto<br />
Bracket (P44)/White Balance Fine<br />
Adjustment (P69) Button<br />
16 Speaker (P26)
22<br />
27 28<br />
M<br />
S<br />
SC2<br />
P<br />
A SC1<br />
17<br />
18<br />
19 20<br />
21<br />
23<br />
24<br />
25<br />
26<br />
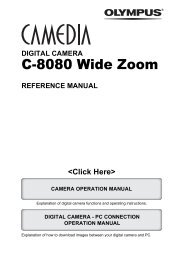
Preparation<br />
17 MF Ring (P65)<br />
18 Zoom Lever (P38, 74)<br />
19 Mode Dial (P31)<br />
20 Shutter Button (P32)<br />
21 Single/Burst Mode Button (P45)<br />
22 Focus Switch (P62, 65)<br />
23 Strap Eyelet (P19)<br />
24 [V OUT / DIGITAL] Socket<br />
(P92, 95, 97)<br />
25 [DC IN] Socket (P95, 97)<br />
Please be sure to use genuine<br />
Panasonic AC adaptor (DMW-CAC1;<br />
optional).<br />
26 Terminal Door<br />
27 Card/Battery Door (P15, 16)<br />
28 Tripod Receptacle<br />
11
Quick Guide<br />
This is the overview of the procedure to<br />
record pictures with this camera. For each<br />
operation, be sure to refer to the<br />
corresponding pages.<br />
1 Charge the battery. (P13)<br />
When the camera is shipped, the<br />
battery is not charged. Charge the<br />
battery before use.<br />
2 Insert the battery and the card.<br />
(P15, 16)<br />
12<br />
Preparation<br />
3 Turn the camera on to take<br />
pictures.<br />
Set the clock. (P22)<br />
1 Set the mode dial to [ ].<br />
2 Open the flash.<br />
(When using the flash) (P39)<br />
3 Press the shutter button to take<br />
pictures. (P32)<br />
4 Play back the pictures.<br />
P<br />
S<br />
OPEN<br />
M<br />
A SCN1<br />
P<br />
SCN2<br />
A SCN1<br />
SCN2<br />
S<br />
M<br />
OFF ON<br />
1 Set the mode dial to [ ].<br />
2 Select the picture you want to view.<br />
(P46)
Preparation<br />
Charging the Battery with the Charger<br />
When the camera is shipped, the battery is<br />
not charged. Charge the battery before<br />
use.<br />
1 Attach the battery to the charger.<br />
2 Connect the charger to the<br />
electrical outlet.<br />
When the [CHARGE] indicator A lights<br />
in green, charging starts.<br />
When the [CHARGE] indicator A turns<br />
off (in about 120 minutes), charging is<br />
completed.<br />
3 Detach the battery.<br />
After charging is completed, be sure to<br />
disconnect the charger from the electrical<br />
outlet.<br />
The battery becomes warm after use/<br />
charge or during charge. The camera also<br />
becomes warm during use. However, it is<br />
not a malfunction.<br />
Use the dedicated charger and battery.<br />
Charge the battery with the charger<br />
indoors.<br />
Do not disassemble or modify the<br />
charger.<br />
13
About the Battery<br />
∫ Battery indication<br />
The remaining battery power appears on<br />
the screen. [It does not appear when you<br />
use the camera along with the AC adaptor<br />
(DMW-CAC1; optional).]<br />
> > ><br />
The indication turns red and blinks:<br />
Recharge or replace the battery.<br />
∫ The lifetime of the battery<br />
The number of recordable pictures by<br />
CIPA standards<br />
CIPA is an abbreviation of<br />
[Camera & Imaging Products<br />
Association].<br />
Number of<br />
recordable pictures<br />
(Recording conditions by CIPA standards)<br />
Temperature: 73.4°F (23°C)/<br />
Humidity: 50% when LCD monitor is on.<br />
Using the supplied battery.<br />
Recording starts 30 seconds after the<br />
camera is turned on.<br />
Record once every 30 seconds, with full<br />
flash every other recording.<br />
Rotating the zoom lever towards Tele to<br />
Wide and vice versa in every recording.<br />
Turning the camera off every<br />
10 recordings.<br />
The number of recordable pictures<br />
when using the Viewfinder<br />
(Viewfinder is used for recording. Other<br />
recording conditions comply with CIPA<br />
standards.)<br />
14<br />
Approx. 240 pictures<br />
(CIPA)<br />
Used media 16 MB SD Memory Card<br />
(optional)<br />
Number of recordable<br />
pictures<br />
Approx.<br />
270 pictures<br />
Used media 16 MB SD Memory<br />
Card (optional)<br />
Preparation<br />
Playback time when using the LCD<br />
monitor<br />
Playback time Approx. 240 min.<br />
The number of recordable pictures and<br />
playback time will vary depending on the<br />
operating conditions and storing condition<br />
of the battery.<br />
∫ Charging<br />
Charging time Approx. 120 min.<br />
Charging time and the number of<br />
recordable pictures with the optional<br />
battery pack (CGA-S002A) are the same<br />
as above.<br />
When charging starts, the [CHARGE]<br />
indicator lights.<br />
∫ Charging error<br />
If a charging error occurs, the [CHARGE]<br />
indicator blinks in 1 second cycles.<br />
In this case, disconnect the charger from<br />
the electrical outlet, remove the battery<br />
and make sure that both room and battery<br />
temperature are not too low or high and<br />
then charge it again. If the [CHARGE]<br />
indicator still blinks even if you charge the<br />
battery for a while, consult the dealer or<br />
your nearest servicenter.<br />
When the operating time of the camera<br />
becomes extremely short even if the<br />
battery is properly charged, the life of the<br />
battery may have expired. Buy a new<br />
battery.<br />
∫ Charging conditions<br />
Charge the battery under temperature of<br />
50oF–95oF (10oC–35oC). (Battery<br />
temperature should be the same.)<br />
The performance of the battery may be<br />
temporarily deteriorated and the operating<br />
time may become shorter in low<br />
temperature conditions (e.g. skiing/<br />
snowboarding).
Preparation<br />
Inserting/Removing the Battery<br />
Check that the camera is turned off and<br />
that the lens is retracted.<br />
Close the flash.<br />
1 Slide the card/battery door to<br />
open it.<br />
Please be sure to use genuine<br />
Panasonic’s batteries (CGA-S002A).<br />
2 Insert:<br />
Insert the charged battery until it<br />
clicks.<br />
Remove:<br />
Slide the lock 1 to remove the<br />
battery.<br />
3 1 Close the card/battery door.<br />
2 Slide the card/battery door to<br />
the end and then close it firmly.<br />
If you will not be using the camera for a<br />
long time, remove the battery.<br />
When a fully charged battery has been<br />
inserted for more than 24 hours, the clock<br />
setting is stored (in the camera) for at<br />
least 3 months even if the battery is<br />
removed. (The storing may be shorter if<br />
the battery is not charged sufficiently.)<br />
If more than 3 months has passed, the<br />
clock setting will be lost. In this case, set<br />
the clock again. (P22)<br />
Do not remove the card and the battery<br />
while the card is being accessed. The<br />
data on the card may be damaged.<br />
The supplied battery is designed only<br />
for this camera. Do not use it with any<br />
other equipment.<br />
15
16<br />
Preparation<br />
Inserting/Removing the Card<br />
Check that the camera is turned off and<br />
that the lens is retracted.<br />
Close the flash.<br />
1 Slide the card/battery door to<br />
open it.<br />
The card and the data may be<br />
damaged if it is inserted or removed<br />
while the camera is on.<br />
We recommend using Panasonic’s SD<br />
Memory Card. (Use only the genuine<br />
SD card with SD Logo.)<br />
2 Insert:<br />
Insert the card with the label<br />
facing the front of the camera<br />
until it clicks.<br />
Remove:<br />
Push the card until it clicks, then<br />
pull the card out upright.<br />
Check the direction of the card.<br />
Do not touch the connection terminals<br />
on the back side of the card.<br />
The card may be damaged if it is not<br />
fully inserted.<br />
3 1 Close the card/battery door.<br />
2 Slide the card/battery door to<br />
the end and then close it firmly.<br />
If the card/battery door cannot be<br />
completely closed, remove the card and<br />
insert it again.
About the Card<br />
∫ Access to the card<br />
While the card is being accessed<br />
(Recognizing/Recording/Reading/<br />
Deleting), the card access indication 1<br />
lights.<br />
2304<br />
19<br />
When the card access indication 1 lights,<br />
do not:<br />
turn the camera off.<br />
remove the battery or the card.<br />
shake or impact the camera.<br />
The card and the data may be damaged<br />
and the camera may not operate normally.<br />
∫ About handling a card<br />
Store precious data to your hard disk (P95).<br />
The data on the card may be damaged or<br />
lost due to electromagnetic waves, static<br />
electricity, breakdown of this camera or a<br />
defective card.<br />
Preparation<br />
∫ SD Memory Card (supplied) and<br />
MultiMediaCard (optional)<br />
The SD Memory Card and MultiMediaCard<br />
are small, lightweight, removable external<br />
memory cards. The reading/writing speed<br />
of an SD Memory Card is fast. The SD<br />
Memory Card is equipped with a<br />
Write-Protect switch A that can inhibit<br />
writing and formatting a card. (When the<br />
switch is slid to the [LOCK] side, it is not<br />
possible to write or delete data on the card<br />
and format it. When the switch is unlocked,<br />
these functions become available.)<br />
SD Memory Card<br />
MultiMediaCard<br />
The reading/writing speed of a<br />
MultiMediaCard is slower than an SD<br />
Memory Card. When a MultiMediaCard is<br />
used, the performance of certain features<br />
may be slightly slower than advertised.<br />
After recording motion images using the<br />
MultiMediaCard, the card access<br />
indication may appear for a while, but this<br />
is not a malfunction.<br />
Keep the Memory Card out of reach of<br />
children to prevent swallowing.<br />
17
18<br />
Preparation<br />
Approximate number of recordable pictures and<br />
the size<br />
Picture size 2304k1728 1600k1200 1280k960<br />
Quality<br />
8 MB 0 3 7 1 6 13 1 10 19<br />
16 MB 1 8 16 2 14 28 3 22 41<br />
32 MB 2 17 33 4 31 59 7 47 86<br />
64 MB 4 35 69 10 63 121 15 96 176<br />
128 MB 9 71 139 20 128 244 31 195 356<br />
256 MB 19 143 278 40 255 487 62 390 709<br />
512 MB 39 288 561 81 515 982 126 785 1429<br />
1 GB 76 554 1079 157 991 1889 243 1511 2748<br />
Picture size 640k480 1920k1080 (HDTV)<br />
Quality<br />
8 MB 6 32 58 0 6 12<br />
16 MB 13 69 113 2 13 25<br />
32 MB 28 145 236 4 28 54<br />
64 MB 58 298 484 9 58 110<br />
128 MB 118 602 979 18 118 223<br />
256 MB 236 1200 1950 37 236 445<br />
512 MB 476 2418 3929 75 476 898<br />
1 GB 916 4650 7557 145 916 1727<br />
The numbers are approximations. (If you mix TIFF, Fine and Standard quality, the number<br />
of recordable pictures changes.)<br />
The number of recordable pictures may vary depending on subjects.<br />
The remaining number of recordable pictures displayed on the screen is an<br />
approximation.
Preparation<br />
Attaching the Lens Cap/Strap<br />
∫ Lens Cap<br />
1 Attach the lens cap.<br />
∫ Strap<br />
1 Pass the strap through the hole at<br />
the Strap Eyelet.<br />
2 Pass the strap through the<br />
stopper and fasten the strap.<br />
A: Pull the strap 2 cm or more.<br />
Attach the strap to the other side of the<br />
camera being careful not to twist it.<br />
Check that the strap is firmly attached to<br />
the camera.<br />
Attach the strap so that you can see<br />
“LUMIX” logo.<br />
When you turn the camera off, carry the camera or play back the pictures, attach the lens<br />
cap to protect the surface of the lens.<br />
Detach the lens cap before turning on the camera in the recording mode.<br />
Be careful not to lose the lens cap.<br />
19
Attaching the Lens Hood<br />
In bright sunlight or backlight, the lens hood<br />
will minimize lens flare and ghosting. The<br />
lens hood cuts off excess lighting and<br />
improves the picture quality.<br />
Check that the camera is turned off and<br />
that the lens is retracted.<br />
Close the flash.<br />
1 1 Detach the lens ring.<br />
2 Attach the lens hood adaptor.<br />
20<br />
Preparation<br />
2 Attach the lens hood.<br />
1 Place the camera upside down.<br />
2 Catch the hook on the lens<br />
hood adaptor.<br />
3 Push the lens hood.<br />
4 Align the marks as illustrated.<br />
5 Tighten the screw.<br />
1<br />
3<br />
5<br />
4<br />
2<br />
Check if the screw is loose and then<br />
attach the lens hood.<br />
Do not tighten the screw too much.
∫ Temporarily storing the lens hood<br />
1 Remove the lens hood, reverse it<br />
and then attach it again.<br />
1 Place the camera upside down.<br />
2 Catch the hook on the lens<br />
hood adaptor.<br />
3 Push the lens hood.<br />
4 Align the marks as illustrated.<br />
5 Tighten the screw.<br />
1<br />
4<br />
5<br />
2<br />
3<br />
Check if the screw is loose and then<br />
attach the lens hood.<br />
Do not tighten the screw too much.<br />
Preparation<br />
2 Attach the lens cap.<br />
Do not take a picture while the lens<br />
hood is temporarily stored.<br />
Ensure that the lens cap is firmly<br />
attached.<br />
When taking pictures with flash with the<br />
lens hood attached, the lower portion of<br />
the photo may turn dark (vignetting effect)<br />
and the control of the flash may be<br />
disabled because the photo flash may be<br />
obscured by the lens hood. We<br />
recommend detaching the lens hood.<br />
When using the AF assist lamp in the<br />
dark, detach the lens hood.<br />
For details on how to attach the MC<br />
protector and the ND filter, refer to P101.<br />
If any of the accessories are lost, please<br />
contact Panasonic’s parts department at<br />
1 800 833-9626 (For USA) for chargeable<br />
replacement.<br />
21
22<br />
Preparation<br />
Setting Date/Time (Clock Set)<br />
∫ Initial setting<br />
The clock is not set when the camera is<br />
shipped. When you turn the camera on, the<br />
following screen appears.<br />
PLEASE SET THE CLOCK<br />
CLOCK SET MENU<br />
When pressing the [MENU] button, the<br />
screen shown in step 2 appears.<br />
The screen disappears in about<br />
5 seconds. Start from step 1.<br />
1 Select [CLOCK SET] from the<br />
[SETUP] menu. (P24)<br />
BEEP<br />
SHUTTER<br />
CLOCK SET<br />
NO.RESET<br />
RESET<br />
SELECT<br />
MENU<br />
SETUP 2/ 3<br />
EXIT MENU<br />
2 Set date and time.<br />
CLOCK SET<br />
10: 00<br />
SELECT<br />
DEC. 11 . 2004<br />
M/D/Y<br />
SET<br />
EXIT MENU<br />
2/1: Select the desired item.<br />
3/4: Set date and time.<br />
3 Select [M/D/Y], [D/M/Y] or [Y/M/D].<br />
CLOCK SET<br />
SELECT<br />
10:001DEC.11.2004<br />
M/D/Y<br />
SET<br />
EXIT MENU<br />
Close the menu by pressing the<br />
[MENU] button 2 times after finishing<br />
the setting.<br />
Check if the clock setting is correct,<br />
after turning the camera off and on.
When a fully charged battery has been<br />
inserted for more than 24 hours, the clock<br />
setting is stored (in the camera) for at<br />
least 3 months even if the battery is<br />
removed. (The storing time may be<br />
shorter if the battery is not charged<br />
sufficiently.)<br />
If more than 3 months has passed, the<br />
clock setting will be lost. In this case, set<br />
the clock again.<br />
You can set the year from 2000 to 2099.<br />
The 24-hour system is used.<br />
If you do not set the date, the date cannot<br />
be printed when you go to a photo studio<br />
for digital printing.<br />
For the date print setting, refer to P84.<br />
Preparation<br />
23
Setup Menu<br />
1 Turn the camera on.<br />
2 Press the [MENU] button.<br />
REC<br />
SETUP<br />
3 Select the [SETUP] Menu.<br />
REC SETUP 1/ 3<br />
24<br />
MENU<br />
When rotating the zoom lever A toward<br />
T, the page of the menu screen can be<br />
forwarded. (vice versa)<br />
S<br />
M<br />
A SCN1<br />
P<br />
SCN2<br />
OFF ON<br />
1/3<br />
W.BALANCE AUTO<br />
SENSITIVITY AUTO<br />
PICT.SIZE<br />
QUALITY<br />
METERING MODE<br />
2304<br />
SELECT EXIT MENU<br />
MONITOR<br />
n0<br />
AUTO REVIEW OFF<br />
PLAY ON LCD OFF<br />
POWER SAVE 2MIN.<br />
MF ASSIST<br />
ON<br />
SELECT EXIT MENU<br />
Preparation<br />
4 Select the desired item.<br />
SETUP<br />
MONITOR<br />
n0<br />
AUTO REVIEW OFF<br />
PLAY ON LCD 1SEC.<br />
POWER SAVE 3SEC.<br />
MF ASSIST ZOOM<br />
SELECT SET EXIT MENU<br />
1/ 3<br />
5 Set the desired value.<br />
SETUP 1/3<br />
MONITOR<br />
n0<br />
AUTO REVIEW OFF<br />
PLAY ON LCD 1SEC.<br />
POWER SAVE 3SEC.<br />
MF ASSIST ZOOM<br />
SELECT SET EXIT MENU<br />
Be sure to press 1 at the end to<br />
determine the setting.<br />
Close the menu by pressing the shutter<br />
button halfway or the [MENU] button<br />
after finishing the setting.
Preparation<br />
You can control the following items on [SETUP] Menu.<br />
Menu Functions<br />
MONITOR/<br />
FINDER<br />
Adjust the brightness of the LCD monitor (when pictures appear<br />
on the LCD monitor) or Viewfinder (when pictures appear on the<br />
Viewfinder) in 7 steps.<br />
AUTO REVIEW [OFF]: The recorded picture does not automatically appear.<br />
[1SEC.]: The recorded picture automatically appears on the<br />
screen for about 1 second.<br />
[3SEC.]: The recorded picture automatically appears on the<br />
screen for about 3 seconds.<br />
[ZOOM]: The recorded picture automatically appears on the<br />
screen for about 1 second. Then it is enlarged 4 times<br />
and appears for about 1 second. This mode is useful<br />
for confirming focus. Pictures in burst mode and auto<br />
bracket are not enlarged even if [ZOOM] is selected.<br />
In motion image mode [<br />
activated.<br />
], auto review function is not<br />
PLAY ON LCD<br />
When pictures are recorded in burst mode or auto bracket, the<br />
time for the auto review function is fixed to 1 second regardless<br />
of the setting on the [SETUP] menu. When the quality is set to<br />
[TIFF], the auto review function works until the end of recording<br />
onto the card. (The picture is not enlarged.)<br />
When Viewfinder is selected in the recording mode while setting<br />
[PLAY ON LCD] to [ON], the picture automatically appears on the<br />
LCD monitor in review or playback. (P29)<br />
POWER SAVE The battery life is saved by turning the camera off automatically<br />
while the camera is not in use.<br />
[1MIN.]/[2MIN.]/[5MIN.]/[10MIN.]:<br />
The camera is automatically turned off if it has not been<br />
used for a predetermined amount of time.<br />
(Press the shutter button or turn the camera off and on to<br />
cancel the power save mode.)<br />
[OFF]: The camera is not automatically turned off.<br />
When using the AC adaptor (DMW-CAC1; optional)/connecting<br />
to a PC or a printer/recording motion images/playing back<br />
motion images/during Slide Show, the power save mode is not<br />
activated.<br />
25
26<br />
Preparation<br />
Menu Functions<br />
MF ASSIST<br />
(Recording mode<br />
only)<br />
In manual focus, assistance screen appears on the center of the<br />
screen to facilitate focusing on the subject. (P65)<br />
BEEP Set to select the volume of operational sound.<br />
[ ]: No operational sound<br />
[ ]: Soft operational sound<br />
[ ]: Loud operational sound<br />
SHUTTER Set to select the volume of shutter sound.<br />
[ ]: No shutter sound<br />
[ ]: Soft shutter sound<br />
[ ]: Loud shutter sound<br />
CLOCK SET Change date and time. (P22)<br />
NO.RESET Set this when you want to start the file number of the picture from<br />
0001 on the next recording. (The folder number is updated, and<br />
the file number starts from 0001.)<br />
The folder number can be assigned from 100 to 999.<br />
When the folder number reaches 999, it cannot be reset. We<br />
recommend formatting the card after saving the data on a PC or<br />
elsewhere.<br />
When you insert a formatted card or a new card and select this<br />
item, the file number is reset and the confirmation screen for<br />
reset of folder number appears. If you select [YES] on the<br />
screen, the folder number is reset to 100.<br />
RESET The settings on the recording or the [SETUP] menu are reset to<br />
the initial settings. However, the folder number and the clock<br />
setting are not changed.<br />
USB MODE Set the USB communication system. Set before connecting to a<br />
PC or a printer. (P93)<br />
HIGHLIGHT When the auto review or review function is activated, a white<br />
saturated area appears blinking in black and white. (P29)<br />
VIDEO OUT<br />
(Playback mode<br />
only)<br />
[NTSC]: Video output is set to NTSC system.<br />
[PAL]: Video output is set to PAL system. (P92)
Preparation<br />
Menu Functions<br />
SCENE MENU [OFF]: Scene menu does not appear when setting the mode<br />
dial to [ SCN1 ] or [ SCN2 ] and the camera is operated in the<br />
scene mode currently selected. If you change the<br />
scene mode, Press the [MENU] button to display the<br />
scene menu and then select the desired scene mode.<br />
LANGUAGE<br />
[AUTO]: Scene menu appears automatically when setting the<br />
mode dial to [ SCN1 ] or [ SCN2<br />
]. Select the desired scene<br />
mode.<br />
Set to the language on the menu screen from the following<br />
7 languages.<br />
Set to the desired language with 3/4 and determine it with 1.<br />
[ENGLISH]: English [DEUTSCH]: German<br />
[FRANÇAIS]: French [ESPAÑOL]: Spanish<br />
[ITALIANO]: Italian [ ]: Chinese (Simplified)<br />
[ ]: Japanese<br />
When you set to other language by mistake, select [<br />
the menu icons to set the desired language.<br />
] from<br />
27
28<br />
Preparation<br />
About the LCD Monitor/Viewfinder<br />
EVF/LCD<br />
DISPLAY<br />
1Switching the LCD monitor/Viewfinder<br />
Press the [EVF/LCD] button to switch to the<br />
screen you would like to turn on.<br />
A LCD monitor (LCD)<br />
B Viewfinder (EVF)<br />
When the LCD monitor turns on, the<br />
Viewfinder turns off (and vice versa).<br />
2Selecting the screen to be used<br />
Press the [DISPLAY] button to switch to the<br />
screen to be used.<br />
When the menu screen appears, the<br />
[DISPLAY] button is not activated. During<br />
9 pictures multi playback (P47) or<br />
playback zoom (P48), the indications on<br />
the screen can be turned on and off.<br />
In recording mode (P32)<br />
2304<br />
19<br />
C Display<br />
D Display with histogram<br />
E Out-of-frame display<br />
F Non-display (Recording guide line)<br />
G Non-display<br />
¢Histogram<br />
In playback mode (P46)<br />
100_ 2304<br />
0001<br />
1/19<br />
10:00 DEC. 1.2004<br />
H Display<br />
I Display with recorded information and<br />
histogram<br />
J Non-display<br />
2304<br />
19<br />
100_ 2304<br />
0001<br />
1/19<br />
F2.8 1/25 ISO100 AUTO<br />
10:00 DEC. 1.2004
∫ Out-of-frame display<br />
The recording information is displayed out<br />
of the recording screen, therefore, you can<br />
take pictures without interruption by icons<br />
or others on the recording screen.<br />
∫ Diopter adjustment<br />
This feature is handy for users who wear<br />
corrective lenses and prefer to use the<br />
Viewfinder.<br />
Press the [EVF/LCD] button to display the<br />
Viewfinder.<br />
Adjust the diopter, rotating the diopter<br />
adjustment dial.<br />
∫ Monitor priority<br />
When setting [PLAY ON LCD] to [ON] on<br />
the [SETUP] menu (P24), the LCD monitor<br />
is turned on in the following cases.<br />
You can save the time it takes to switch the<br />
display to the LCD monitor even when<br />
using the Viewfinder in recording.<br />
When the recording mode is switched to<br />
playback mode.<br />
When reviewing pictures. (P37)<br />
When turning the camera on in playback<br />
mode.<br />
2304<br />
19<br />
Preparation<br />
∫ Recording guide line<br />
When you align the subject on the<br />
horizontal and vertical guide lines or the<br />
cross point of these lines, you can take<br />
pictures with well-designed composition by<br />
viewing the size, the slope and the balance<br />
of the subject.<br />
∫ Highlight display<br />
When setting [HIGHLIGHT] to [ON] on the<br />
[SETUP] menu (P24) while the auto review<br />
or review function is activated, any white<br />
saturated area (extremely bright or<br />
glistening part) on the picture appears<br />
blinking in black and white.<br />
If you compensate the exposure to minus,<br />
referring to the histogram and then take a<br />
picture again, it may result in a good<br />
picture.<br />
No highlight display<br />
EXIT<br />
4X<br />
DELETE<br />
With highlight display<br />
EXIT<br />
REVIEW1X<br />
REVIEW1X<br />
4X<br />
DELETE<br />
29
∫ Histogram<br />
A histogram is a graph that displays<br />
brightness along the horizontal axis (black<br />
to white) and the number of pixels at each<br />
brightness level on the vertical axis.<br />
It allows the camera user to easily check<br />
the way a picture is being exposed.<br />
It is very useful if manual adjustments of<br />
the lens aperture and shutter speed are<br />
available, especially in those situations<br />
where automatic exposure may be difficult<br />
due to uneven lighting. Using the<br />
histogram feature will allow you to get the<br />
best performance from the camera.<br />
When the values are concentrated to the<br />
left A, the picture is under exposed.<br />
When the values in the histogram are<br />
distributed evenly B, the exposure is<br />
adequate and the brightness is<br />
well-balanced.<br />
When the values are concentrated to the<br />
right C, the picture is over exposed.<br />
Example of histogram<br />
A Under Exposed<br />
B Properly Exposed<br />
C Over Exposed<br />
¢Histogram<br />
30<br />
100_ 2304<br />
0001<br />
1/19<br />
F2.8 1/200 ISO100 AUTO<br />
10:00 DEC. 1.2004<br />
100_ 2304<br />
0001<br />
1/19<br />
F2.8 1/100 ISO100 AUTO<br />
10:00 DEC. 1.2004<br />
100_ 2304<br />
0001<br />
1/19<br />
F2.8 1/50<br />
ISO100 AUTO<br />
10:00 DEC. 1.2004<br />
Preparation<br />
When the recorded picture and the<br />
histogram do not match each other<br />
under the following conditions, the<br />
histogram is displayed in orange.<br />
– When the flash is activated<br />
– When the flash is closed<br />
1 Aperture-priority AE/Shutter-priority<br />
AE:<br />
When the brightness of the screen is<br />
not correct or when the exposure is<br />
not adequately adjusted in dark<br />
places<br />
2 Manual exposure:<br />
When the shutter speed is slower<br />
than 1/13th<br />
3 In modes other than the above:<br />
When the brightness of the screen is<br />
not correct in dark places<br />
The histogram does not appear when in<br />
motion image mode [ ], during multi<br />
playback and playback zoom.<br />
The histogram in the recording mode is an<br />
approximation.<br />
The histogram in recording and playback<br />
may not match each other.<br />
The histogram in this camera does not<br />
match the one displayed in image editing<br />
software used with a PC, etc.<br />
Check white saturated areas with the<br />
highlight display in the auto review<br />
function or the review function. (P29)
Recording pictures (basic)<br />
Taking Pictures<br />
Recording pictures (basic)<br />
∫ The Mode Dial<br />
This camera has a mode dial to suit for recording of many kinds of scenes.<br />
Select the desired mode and enjoy the variety of recording.<br />
Rotate the mode dial slowly and securely.<br />
: Program AE mode (P32)<br />
The exposure is automatically adjusted by<br />
the camera.<br />
: Aperture-priority AE (P51)<br />
The shutter speed is automatically<br />
determined by the aperture value you set.<br />
: Shutter-priority AE (P52)<br />
The aperture value is automatically<br />
determined by the shutter speed you set.<br />
: Manual exposure (P53)<br />
The exposure is adjusted by the aperture<br />
value and the shutter speed which are<br />
manually adjusted.<br />
: Macro mode (P56)<br />
This mode allows you to take a picture<br />
closely focusing on to the subject.<br />
: Motion image mode (P56)<br />
This mode allows you to record motion<br />
images without audio.<br />
S<br />
M<br />
A SCN1<br />
P<br />
SCN2<br />
SCN1 : Scene mode 1<br />
SCN2 : Scene mode 2 (P58)<br />
This mode allows you to take pictures<br />
depending on the recording scenes.<br />
This mode also allows you to set [SCENE<br />
MENU] (P27) on the [SETUP] menu to<br />
[OFF] and set the scene modes which are<br />
frequently used to [ SCN1 ] and [ SCN2<br />
] on the<br />
mode dial.<br />
It is convenient because you can select the<br />
scene mode quickly and minimize the<br />
operation.<br />
: Playback mode (P46)<br />
This mode allows you to play back<br />
recorded pictures.<br />
31
∫ Program AE<br />
The camera automatically sets the shutter<br />
speed and the aperture value according to<br />
the brightness of the subject.<br />
Insert the charged battery. (P15)<br />
Insert the card. (P16)<br />
Remove the lens cap.<br />
1 1 Turn the camera on.<br />
2 Set the mode dial to program<br />
AE mode [ ].<br />
3 Slide the focus switch to [AF].<br />
32<br />
FOCUS<br />
AF<br />
MF<br />
S<br />
M<br />
A SCN1<br />
P<br />
SCN2<br />
OPEN<br />
OFF ON<br />
The power indicator (green) lights.<br />
When it blinks, the remaining battery<br />
power is low. Insert a fully charged<br />
battery.<br />
Recording pictures (basic)<br />
2 Aim the AF area 1 to the point<br />
you want to focus and then press<br />
the shutter button halfway.<br />
F2.8<br />
A: Press the shutter button halfway to<br />
focus.<br />
The focus indication 2 is lit and then<br />
the aperture value 3 and the shutter<br />
speed 4 are displayed.<br />
3 Take a picture.<br />
F2.8<br />
1/25<br />
1/25<br />
B: Press the shutter button fully to take<br />
the picture.<br />
When the<br />
subject is not<br />
focused<br />
Focus<br />
indication<br />
AF area Turns from<br />
white to red<br />
When the<br />
subject is<br />
focused<br />
Blink (green) On (green)<br />
Turns from<br />
white to green<br />
Sound Beeps 4 times Beeps 2 times
∫ AF/AE Lock (AF: Auto focus/<br />
AE: Auto exposure)<br />
When recording a picture of people with a<br />
composition as the above picture, you<br />
cannot focus on the subject because it is<br />
out of AF area in usual operation.<br />
In this case,<br />
1 Aim the AF area at the subject.<br />
2 Press the shutter button halfway to fix<br />
the focus and the exposure.<br />
3 When the subject is focused, the focus<br />
indication lights.<br />
4 Keeping the focus and the exposure<br />
fixed, move the camera as you compose<br />
the picture.<br />
5 Press the shutter button fully.<br />
You can repeatedly retry AF/AE lock<br />
before pressing the shutter button.<br />
F2.8<br />
1/25<br />
2304<br />
F2.8<br />
19<br />
1/25<br />
Recording pictures (basic)<br />
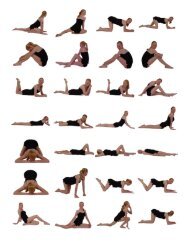
∫ Correct posture for taking good<br />
pictures<br />
To take pictures without blurring:<br />
Hold the camera gently with both hands,<br />
keep arms stationary at your side and<br />
stand with your feet slightly apart.<br />
Make sure that camera shake does not<br />
occur when pressing the shutter button<br />
halfway.<br />
After pressing the shutter button, keep the<br />
camera stationary until the picture<br />
appears on the screen.<br />
In the following cases, keep the camera<br />
stationary for a longer time.<br />
– Slow sync./Red-eye reduction [ ]<br />
(P39)<br />
– When you set to a slower shutter speed<br />
(P52, 53)<br />
– [NIGHT SCENERY], [NIGHT<br />
PORTRAIT], [FIREWORKS] and<br />
[PARTY] in scene mode (P58)<br />
When recording<br />
with LCD Monitor<br />
When recording<br />
with Viewfinder<br />
Position of feet<br />
Hold the camera firmly with your right<br />
hand.<br />
Do not cover the AF assist lamp with your<br />
finger or other objects.<br />
Do not touch the lens.<br />
33
∫ Focusing<br />
The focus range is 0.98 feet (30 cm) – <br />
(Wide), 6.56 feet (200 cm) – (Tele).<br />
If you press the shutter button fully without<br />
prefocusing, pictures may be blurry or<br />
unfocused.<br />
When the focus indication is blinking, the<br />
subject is not focused. Press the shutter<br />
button halfway and focus on the subject<br />
again.<br />
If the camera will not focus after a few<br />
tries, turn it off and on and try again.<br />
In the following cases, the camera cannot<br />
focus on subjects properly.<br />
– When including both near and distant<br />
subjects in a scene.<br />
– When there is dirt or dust on the glass<br />
between the lens and the subject.<br />
– When there are illuminated or glittering<br />
objects around the subject.<br />
– When taking a picture in a dark place.<br />
– When the subject is moving fast.<br />
– When the scene has low contrast.<br />
– When jitter occurs.<br />
– When recording a very bright subject.<br />
We recommend taking pictures using<br />
manual focus (P65), prefocus (P66) or<br />
AF/AE lock (P33). In dark places, the AF<br />
assist lamp (P74) may turn on to focus on<br />
the subject.<br />
Even if the focus indication appears and<br />
the subject is focused, it is canceled when<br />
you release the shutter button. Press the<br />
shutter button halfway again.<br />
34<br />
Recording pictures (basic)<br />
∫ Jitter (camera shake)<br />
Be careful of jittering when pressing the<br />
shutter button.<br />
When jitter could occur, the jitter alert 1<br />
appears.<br />
F2.8<br />
1/8<br />
When the jitter alert appears, we<br />
recommend using a tripod. If you cannot<br />
use a tripod, be careful of how you hold<br />
the camera. (P33)<br />
∫ Exposure<br />
If you press the shutter button halfway<br />
when the exposure is not adequate, the<br />
indication of the aperture value and the<br />
shutter speed turns red. (However, the<br />
aperture value and the shutter speed do<br />
not turn red when the flash is activated.)<br />
The brightness of the screen may differ<br />
from that of recorded pictures. In<br />
particular, when taking pictures in dark<br />
places with slow shutter speed, the<br />
subject looks dark on the screen, but the<br />
actual picture is bright.<br />
When most of the subjects in the screen<br />
are bright (e.g. blue sky on a clear day,<br />
snowy field, etc.), the recorded pictures<br />
may become dark. In this case,<br />
compensate the exposure value on the<br />
camera. (P43)
When you press the shutter button, the<br />
screen may become bright for a moment.<br />
This function allows easy adjustment of<br />
focus and the recorded picture will not be<br />
affected.<br />
We recommend setting the clock again<br />
before taking pictures. (P22)<br />
When the time for power save is set (P24),<br />
the camera is automatically turned off if<br />
you do not operate within the set time.<br />
When operating the camera again, press<br />
the shutter button or turn the camera off<br />
and on.<br />
In some cases, if the distance between<br />
the camera and the subject is beyond the<br />
recordable range when you use the<br />
camera, the picture may not be properly<br />
focused even if the focus indication is lit.<br />
Recording pictures (basic)<br />
∫ Program shift<br />
In Program AE mode, you can change the<br />
preset aperture value and the shutter<br />
speed under the same exposure. This is<br />
called Program shift.<br />
By this function, you can make the<br />
background more blurred (by decreasing<br />
the aperture value) or record the moving<br />
subject more dynamically (by setting to<br />
slow shutter speed) in Program AE mode.<br />
Press the shutter button halfway and then<br />
press the [EXPOSURE] button while the<br />
aperture value and the shutter speed are<br />
displayed on the screen (for 10 seconds).<br />
Then press 2/1 to activate the Program<br />
shift.<br />
2304<br />
PROGRAM SHIFT<br />
F2.8 1/60<br />
EXPOSURE<br />
2304<br />
PROGRAM SHIFT<br />
F4.0 1/30<br />
When the Program shift is activated, the<br />
Program shift indication 1 appears on<br />
the screen.<br />
19<br />
19<br />
35
∫ Example of Program shift<br />
2<br />
2.8<br />
4<br />
(A)<br />
5.6<br />
8<br />
11<br />
(A): Aperture value<br />
(B): Shutter speed<br />
Program shift can be set in Macro mode<br />
[ ] too.<br />
If the exposure is not adequate when<br />
pressing the shutter button halfway, the<br />
shutter speed turns red.<br />
When Program shift can be set, you<br />
cannot switch the flash mode or set the<br />
self-timer. Press the [EXPOSURE] button<br />
to cancel.<br />
When 10 or more seconds have passed<br />
after the Program shift becomes effective,<br />
the status to activate the Program shift is<br />
canceled and returned to the Program AE<br />
mode. However, the setting on the<br />
Program shift is memorized.<br />
Program shift is canceled when turning<br />
the camera off.<br />
The Program shift may not be activated<br />
depending on the brightness of the<br />
subject.<br />
36<br />
2 3 4 5 6 7 8 9 10 11 12 13 14<br />
0 1/2 1/4 1/8 1/15 1/30 1/60 1/125 1/250 1/500 1/1000 1/2000<br />
(B)<br />
Recording pictures (basic)
Recording pictures (basic)<br />
Checking the Recorded Picture (Review)<br />
1 Press 4.<br />
EXIT<br />
REVIEW1X<br />
4X<br />
The last recorded picture appears for<br />
about 10 seconds.<br />
Press the shutter button halfway or 4<br />
to cancel the review.<br />
You can check the previous or following<br />
picture with 2/1.<br />
When the recorded pictures are too<br />
bright or dim, compensate the<br />
exposure. (P43)<br />
2 Enlarge and shift the picture.<br />
REVIEW4X<br />
: 1k>4k>8k<br />
: 8k>4k>1k<br />
SCN1 SCN2<br />
DELETE<br />
1X 8X DELETE<br />
W<br />
T<br />
When you change the magnification or<br />
the position to be displayed, the zoom<br />
position indication A appears for about<br />
1 second to check where is enlarged.<br />
∫ Recorded pictures can be deleted<br />
during the review (Quick Deletion)<br />
SELECT<br />
SET<br />
DELETE SINGLE<br />
DELETE THIS PICTURE?<br />
NO<br />
YES<br />
MULTI/ALL<br />
Once deleted, pictures cannot be<br />
recovered.<br />
Multi pictures or all pictures can be<br />
deleted. Read P49 or P50 to operate<br />
them.<br />
37
Using the Optical Zoom<br />
38<br />
SCN1 SCN2<br />
You can make people and subjects appear<br />
closer with the 12 times optical zoom, and<br />
landscapes can be recorded in wide angle.<br />
∫ To make subjects appear further away<br />
use (Wide)<br />
W T 1X<br />
W<br />
2304<br />
T<br />
19<br />
Recording pictures (basic)<br />
∫ To make subjects appear closer use<br />
(Tele)<br />
2304<br />
W T 12X<br />
W<br />
19<br />
The picture may have some distortion<br />
(typical example: vertical straight line bent<br />
outwards). This is due to the lens<br />
aberration, which is common to some<br />
extent with all photographic lenses.<br />
Distortion may be more visible when using<br />
a wider area of the zoom lens as you get<br />
closer to the subject.<br />
When using the zoom lens at high<br />
magnification, the quality of the picture<br />
can be enhanced if a tripod is used. At<br />
high magnification, even small<br />
movements can cause a slight decrease<br />
in picture sharpness.<br />
If you use the zoom function after focusing<br />
on the subject, focus on the subject again.<br />
The indicated zoom magnification is an<br />
approximation.<br />
T
Recording pictures (basic)<br />
Taking Pictures using the Built-in Flash<br />
SCN1 SCN2<br />
When you set the flash, you can take<br />
pictures using the built-in flash according to<br />
the recording condition.<br />
∫ To open the flash<br />
Press the [ OPEN] button.<br />
∫ To close the flash<br />
Press the flash until it clicks.<br />
OPEN<br />
Be sure to close the flash when not in use.<br />
The flash setting is fixed to Forced OFF<br />
[ ] while the flash closes.<br />
∫ Switching to the appropriate flash<br />
setting<br />
: AUTO<br />
The flash is automatically activated<br />
according to the recording condition.<br />
: AUTO/Red-eye reduction<br />
The flash is automatically activated<br />
according to the recording condition.<br />
It reduces the red-eye phenomenon<br />
(eyes of the subject appear red in the<br />
picture) by triggering the flash at<br />
1 second before actually recording the<br />
picture.<br />
Use this when you take pictures of<br />
people in low lighting conditions.<br />
: Forced ON<br />
The flash is activated every time<br />
regardless of the recording condition.<br />
Use this when your subject is<br />
back-lit or under fluorescent light.<br />
: Forced ON/Red-eye reduction<br />
When you set to [PARTY] in scene<br />
mode (P58), the flash mode is set to<br />
Forced ON/Red-eye reduction.<br />
: Slow sync./Red-eye reduction<br />
When you take a picture with a dark<br />
background landscape, this feature<br />
makes the shutter speed slow when the<br />
flash is activated, so that the dark<br />
background landscape will become<br />
bright. Simultaneously it reduces the<br />
red-eye phenomenon.<br />
Use this when taking pictures of<br />
people in front of a dark background.<br />
: Forced OFF<br />
The flash is not activated in any<br />
recording condition.<br />
Use this when taking pictures in<br />
places where the use of the flash is<br />
not permitted.<br />
39
40<br />
Recording pictures (basic)<br />
∫ Available flash settings by recording mode<br />
The available flash settings depend on the recording mode.<br />
(±: Available, —: Not available)<br />
∫ The available flash range to take pictures<br />
ISO sensitivity Available flash control range<br />
AUTO¢ 0.98 feet (30 cm) – 23.0 feet (7 m)<br />
(also applicable in Macro mode [ ])<br />
ISO64 0.98 feet (30 cm) – 9.19 feet (2.8 m)<br />
ISO100 0.98 feet (30 cm) – 11.5 feet (3.5 m)<br />
ISO200 1.31 feet (40 cm) – 16.4 feet (5 m)<br />
ISO400 1.97 feet (60 cm) – 23.0 feet (7 m)<br />
¢Except when the flash mode is set to Slow sync./Red-eye reduction [<br />
The available flash range is an approximation.<br />
Refer to P34 for the focus range.<br />
∫ Shutter speed for each flash mode<br />
]<br />
Flash mode Shutter speed<br />
: AUTO 1/60 – 1/2000<br />
: AUTO/Red-eye reduction 1/60 – 1/2000<br />
: Forced ON<br />
: Forced ON/Red-eye reduction<br />
1/60 – 1/2000<br />
: Slow sync./<br />
Red-eye reduction<br />
1 – 1/2000<br />
: Forced OFF<br />
1/4 – 1/2000<br />
8 – 1/2000<br />
(In [NIGHT SCENERY] in<br />
scene mode)<br />
Refer to P55 for the Aperture-priority AE, Shutter-priority AE or Manual exposure mode.
∫ Adjusting flash output<br />
Adjust the flash output when the subject is<br />
small or reflection ratio is extremely high or<br />
low.<br />
1 Press 3 several times until<br />
[ FLASH] appears and then set<br />
the flash output.<br />
FLASH<br />
SELECT EXIT<br />
You can adjust this from j2 EV to<br />
i2 EV in steps of 1/3 EV.<br />
The determined flash output is<br />
memorized even if the camera is turned<br />
off.<br />
In motion image mode [ ],<br />
[SCENERY], [NIGHT SCENERY] or<br />
[FIREWORKS] in scene mode (P58),<br />
you cannot adjust the flash output.<br />
If the ISO sensitivity is set to [AUTO], it is<br />
automatically adjusted from [ISO100] to<br />
[ISO400] when you use the flash. (except<br />
when the flash mode is set to Slow sync./<br />
Red-eye reduction [ ]) To avoid<br />
noise, decrease the ISO sensitivity.<br />
In [NIGHT PORTRAIT] in scene mode<br />
(P58), flash setting is fixed to Slow sync./<br />
Red-eye reduction [ ].<br />
In motion image mode [ ], [SCENERY],<br />
[NIGHT SCENERY] or [FIREWORKS] in<br />
scene mode (P58), the flash mode is fixed<br />
to the Forced OFF [ ] even if the flash is<br />
opened.<br />
Do not stare at the photo flash from<br />
close proximity when using the flash.<br />
Recording pictures (basic)<br />
If you bring the flash too close to the<br />
subjects, they may appear distorted or<br />
discolored by its heat and lighting.<br />
Do not cover the photo flash with your<br />
fingers or any other items.<br />
When you take a picture beyond the flash<br />
control range, the exposure may not be<br />
adjusted properly and the picture may<br />
become bright or dark.<br />
When you repeat taking a picture,<br />
recording may be disabled even if the<br />
flash is activated. Take a picture after the<br />
card access lamp disappears.<br />
When the jitter alert appears, we<br />
recommend using the flash.<br />
When you set to burst mode or auto<br />
bracket, only 1 picture is recorded for<br />
every flash activated.<br />
The flash icon turns red when activating<br />
the flash and pressing the shutter button<br />
halfway.<br />
When the flash is being charged, the flash<br />
icon blinks red, and you cannot take a<br />
picture even when you press the shutter<br />
button fully.<br />
When taking a picture with the flash,<br />
we recommend removing the lens<br />
hood. In some cases it may not allow<br />
the scene to be illuminated properly.<br />
Do not close the flash soon after the flash<br />
is activated prior to taking pictures due to<br />
AUTO/Red-eye reduction etc. It causes a<br />
malfunction.<br />
When taking a picture with the flash, the<br />
white balance will be automatically<br />
adjusted [except for [ ] (Daylight) and<br />
[ ] (Flash)], but the white balance may<br />
not be properly adjusted if the photo flash<br />
is insufficient.<br />
When the shutter speed is fast, the flash<br />
effect may not be sufficient.<br />
To avoid picture noise, we recommend<br />
setting [NOISE REDUCTION] in<br />
[PICT.ADJ.] to [HIGH] or setting the items<br />
except [NOISE REDUCTION] to [LOW] to<br />
take pictures. (P75)<br />
Refer to P70 for the ISO sensitivity.<br />
41
42<br />
Recording pictures (basic)<br />
Taking Pictures with the Self-timer<br />
SCN1 SCN2<br />
1 Switch the self-timer setting.<br />
2304<br />
: Self-timer set to 10 seconds<br />
;<br />
: Self-timer set to 2 seconds<br />
;<br />
No display (canceled)<br />
2 Focus on the subject to take the<br />
picture.<br />
2304<br />
19<br />
19<br />
CANCEL MENU<br />
If you press the [MENU] button when<br />
the self-timer is set, the self-timer<br />
setting is canceled.<br />
When using a tripod or in other cases,<br />
setting the self-timer to 2 seconds is a<br />
convenient way to stabilize the jitter<br />
caused by pressing the shutter button.<br />
The self-timer indicator 1<br />
blinks and the shutter is<br />
activated after 10 seconds<br />
(or 2 seconds).<br />
When you press the button<br />
fully with one stroke, the<br />
subject is automatically focused just<br />
before the recording. In dark places, the<br />
self-timer indicator blinks and then it may<br />
turn on brightly to work as the AF assist<br />
lamp (P74) for focusing on the subject.<br />
When you set the self-timer in the burst<br />
mode, the camera starts taking a picture 2<br />
or 10 seconds after the shutter button is<br />
pressed. The number of pictures taken at<br />
a time is fixed to 3.<br />
We recommend using a tripod when<br />
setting the self-timer.
Recording pictures (basic)<br />
Compensating the Exposure<br />
Use this function when you cannot achieve<br />
appropriate exposure due to the difference<br />
of brightness between the subject and the<br />
background.<br />
0<br />
SCN1 SCN2<br />
Under exposed<br />
Compensate the exposure<br />
toward positive.<br />
Properly Exposed<br />
Over exposed<br />
Compensate the exposure<br />
toward negative.<br />
1 Press 3 several times until<br />
[ EXPOSURE] appears and<br />
then compensate the exposure.<br />
EXPOSURE<br />
SELECT EXIT<br />
You can compensate from j2 EV to<br />
i2 EV in steps of 1/3 EV.<br />
EV is an abbreviation of Exposure Value,<br />
and it is the amount of light given to the<br />
CCD by the aperture value and the shutter<br />
speed.<br />
The compensation range of the exposure<br />
will be limited depending on the<br />
brightness of the subject.<br />
The exposure compensation value<br />
appears on the lower left of the screen.<br />
The exposure value is memorized even if<br />
the camera is turned off.<br />
43
44<br />
Recording pictures (basic)<br />
Taking Pictures using Auto Bracket<br />
SCN1 SCN2<br />
In this mode, 3 pictures are automatically<br />
recorded by each press of the shutter<br />
button according to the compensation<br />
range of the exposure.<br />
You can select the desired exposure<br />
among the 3 types of pictures.<br />
1 Press 3 several times until<br />
[ AUTO BRACKET] appears<br />
and then set the compensation<br />
range of the exposure.<br />
AUTO BRACKET<br />
SELECT EXIT<br />
You can select the exposure from<br />
j1 EV to i1 EV in steps of 1/3 EV.<br />
When you do not use auto bracket,<br />
select [OFF].<br />
When setting the auto bracket, the auto<br />
bracket icon appears on the lower left of<br />
the screen.<br />
When taking pictures using auto bracket<br />
after the exposure compensation, the<br />
pictures are based on the compensated<br />
exposure.<br />
When the exposure is compensated, the<br />
compensated exposure value appears on<br />
the lower left of the screen.<br />
When the flash is activated, you can take<br />
only 1 picture.<br />
When setting auto bracket, you cannot<br />
take a picture of which quality is [TIFF].<br />
When setting auto bracket and the burst<br />
mode simultaneously, auto bracket will be<br />
performed.<br />
The exposure may not be compensated<br />
with auto bracket depending on the<br />
brightness of the subject.
Recording pictures (basic)<br />
Taking Pictures using Burst Mode<br />
SCN1 SCN2<br />
1 Switch the burst mode setting to<br />
record pictures.<br />
: High speed<br />
;<br />
: Low speed<br />
;<br />
: No limit<br />
;<br />
No display (canceled)<br />
2304<br />
19<br />
∫ Number of pictures recorded in burst<br />
mode<br />
Burst speed<br />
(pictures/<br />
second)¢<br />
Number of recordable<br />
pictures (pictures)<br />
4 max. 5 max. 10<br />
2 max. 5 max. 10<br />
Depends on Depends on<br />
approx. 2 the card the card<br />
capacity capacity<br />
¢When the shutter speed is higher than<br />
1/60 and the flash is not activated<br />
Keep pressing the shutter button fully to<br />
activate the burst mode.<br />
If the flash is activated, you can record<br />
only 1 picture.<br />
When the self-timer is used, the number<br />
of recordable pictures in burst mode is<br />
fixed to 3.<br />
You cannot take pictures in the burst<br />
mode when the quality is set to [TIFF].<br />
When setting auto bracket and the burst<br />
mode simultaneously, auto bracket will be<br />
performed by default.<br />
When the burst mode setting is set to no<br />
limit, the speed of taking pictures<br />
becomes slow during a recording in burst<br />
mode.<br />
Burst mode will not perform as described<br />
if a MultiMediaCard is used in place of an<br />
SD Memory Card. The reading/writing<br />
speed of a MultiMediaCard is slower than<br />
that of an SD Memory Card.<br />
45
Playback (basic)<br />
Playing Back Pictures<br />
1 Select the picture.<br />
46<br />
2304<br />
100 _ 0001<br />
1/19<br />
10:00 DEC. 1.2004<br />
2: Play back the previous picture.<br />
1: Play back the next picture.<br />
The picture following the last one is the<br />
first picture.<br />
∫ Fast forwarding/Fast rewinding<br />
When you keep pressing 2/1 during<br />
playback, the file number and the page<br />
number are updated. If you release 2/1<br />
when the number of the desired picture<br />
appears, you can play back the picture.<br />
1: Fast forward<br />
2: Fast rewind<br />
The number of files forwarded/rewound at<br />
a time depends on how long you hold<br />
down 2/1. It also varies depending on<br />
the number of the recorded pictures.<br />
If you release 2/1 and press them again,<br />
the files will be forwarded/rewound one by<br />
one.<br />
In review playback in the recording mode<br />
or multi playback, the picture can only be<br />
forwarded or rewound one by one.<br />
Playback (basic)<br />
When you forward or rewind a large<br />
number of pictures, release 2/1 once<br />
before reaching the picture to be played<br />
back, then press 2/1 to forward/rewind<br />
pictures little by little.<br />
This camera is based on the DCF<br />
standards (Design rule for Camera File<br />
system) which was established by the<br />
Japan Electronics and Information<br />
Technology Industries Association<br />
(JEITA).<br />
When changing the folder name or file<br />
name on a PC, the pictures will not be<br />
played back.<br />
The file format that can be played back<br />
with this camera is JPEG. (There are also<br />
pictures that on some occasions cannot<br />
be played back in JPEG format.)<br />
When playing back pictures that have<br />
been recorded with other equipment, the<br />
picture quality may be deteriorated and<br />
pictures may not be played back.<br />
When playing back a file out of standard,<br />
the folder/file number is indicated by [—]<br />
and the screen may turn black.<br />
An interference fringe may appear on the<br />
screen depending on the subject. This is<br />
called moire. This is not a malfunction.
Playback (basic)<br />
9 Pictures Multi Playback<br />
1 Switch to multi screen. 2 Select the pictures.<br />
10:00 DEC. 1.2004<br />
W<br />
1 2 3<br />
4<br />
2304<br />
100 _ 0001<br />
1/19<br />
5 6<br />
7 8 9<br />
SELECT CANCEL<br />
T<br />
1 2 3<br />
4<br />
7<br />
SELECT<br />
SELECT<br />
10 11<br />
5 6<br />
8 9<br />
CANCEL<br />
CANCEL<br />
12<br />
∫ To return to the normal playback<br />
Rotate the zoom lever towards [ ] or<br />
press the [MENU] button.<br />
The picture with the number colored in<br />
orange appears.<br />
∫ To delete a picture during a 9 pictures<br />
multi playback<br />
Press the [ ] button.<br />
When the confirmation screen appears,<br />
press 4 to select [YES], and press 1.<br />
(P49)<br />
Rotated pictures are displayed in the<br />
direction oriented when they are recorded.<br />
(P82)<br />
47
48<br />
Playback (basic)<br />
Using the Playback Zoom<br />
1 Enlarge the picture.<br />
2X<br />
4X<br />
CANCEL<br />
: 1k>2k>4k>8k>16k<br />
: 16k>8k>4k>2k>1k<br />
When you rotate the zoom lever<br />
towards W after the picture is enlarged,<br />
the magnification becomes lower.<br />
When you change the magnification,<br />
the zoom position indication A appears<br />
for about 1 second to check the position<br />
of the section enlarged.<br />
When you press the [MENU] button, the<br />
magnification reverts to 1k.<br />
2 Shift the picture.<br />
2X<br />
4X<br />
CANCEL<br />
W<br />
DELETE<br />
When you move the position to be<br />
displayed, the zoom position indication<br />
is displayed for about 1 second.<br />
T<br />
DELETE<br />
∫ To delete a picture during the<br />
playback zoom<br />
Press the [ ] button.<br />
When the confirmation screen appears,<br />
press 4 to select [YES], and press 1.<br />
(P49)<br />
The more the picture is enlarged, the<br />
more its quality deteriorates.<br />
The playback zoom may not operate if<br />
pictures have been recorded with other<br />
equipment.<br />
Even if the indication on the LCD monitor<br />
are turned off in normal playback mode<br />
(P28), the magnification and enabled<br />
operations appear on the LCD monitor<br />
when the playback zoom is activated.<br />
You can switch whether you turn the<br />
indications on the LCD monitor on or off<br />
by pressing the [DISPLAY] button.<br />
When you set the magnification to 1k, the<br />
indication on the LCD monitor are<br />
displayed as in normal playback mode.<br />
Rotated pictures are displayed in the<br />
direction oriented when they are recorded.<br />
(P82)
Deleting Pictures<br />
∫ To delete a single picture<br />
1 Select the picture to be deleted.<br />
2: Play back the previous picture.<br />
1: Play back the next picture.<br />
2 Delete the picture.<br />
SELECT<br />
SET<br />
100 _ 0001<br />
1/19<br />
10:00 DEC. 1.2004<br />
DELETE SINGLE<br />
2304<br />
DELETE THIS PICTURE?<br />
NO<br />
YES<br />
MULTI/ALL<br />
While deleting the picture, [ ] appears<br />
on the screen.<br />
Playback (basic)<br />
∫ To delete multiple pictures<br />
1 Select [MULTI DELETE].<br />
MULTI/ALL DELETE<br />
MULTI DELETE<br />
ALL DELETE<br />
SELECT<br />
2 times<br />
CANCEL<br />
2 Select the pictures to be deleted.<br />
MULTI DELETE<br />
7<br />
10 11<br />
SELECT<br />
MARK/UNMARK<br />
8 9<br />
12<br />
DELETE<br />
EXIT MENU<br />
The selected pictures appear with [ ].<br />
When 4 is pressed again, the setting is<br />
canceled.<br />
The icon [ ] blinks red if the selected<br />
picture cannot be deleted. Cancel the<br />
protect setting. (P85)<br />
49
3 Delete the pictures.<br />
50<br />
MULTI DELETE<br />
DELETE THE PICTURES<br />
YOU MARKED?<br />
NO<br />
YES<br />
SELECT SET<br />
It is possible to delete up to 50 pictures<br />
all at once.<br />
∫ To delete all pictures<br />
1 Select [ALL DELETE].<br />
MULTI/ALL DELETE<br />
SELECT<br />
2 times<br />
MULTI DELETE<br />
ALL DELETE<br />
CANCEL<br />
2 Delete all of the pictures.<br />
ALL DELETE<br />
DELETE ALL PICTURES?<br />
NO<br />
YES<br />
SELECT SET<br />
Playback (basic)<br />
Once deleted, pictures cannot be<br />
recovered. Please double-check before<br />
deleting pictures.<br />
Do not turn off the camera while deleting.<br />
Pictures that are protected (P85) or that<br />
do not conform to DCF standards (P46)<br />
will not be deleted.<br />
When you delete pictures, use a battery<br />
with sufficient battery power (P14) or use<br />
with the AC adaptor (DMW-CAC1;<br />
optional).
Recording pictures (advanced)<br />
Using the Mode Dial<br />
Aperture-priority AE<br />
When you want the background to be in<br />
sharp focus, set the aperture value to a<br />
higher number. The higher the aperture<br />
value is the smaller the aperture opening<br />
will be. For a soft focus background, set the<br />
aperture value to a lower number which<br />
corresponds to a larger aperture opening.<br />
1 Set the aperture value and take<br />
the picture.<br />
EXPOSURE<br />
ISO100 2304<br />
F2.8<br />
Recording pictures (advanced)<br />
19<br />
Refer to P55 for the available range of the<br />
aperture value and the shutter speed.<br />
The focus range is 0.16 feet (5 cm) – <br />
(Wide), 6.56 feet (200 cm) – (Tele).<br />
If the subject is too bright, set to a larger<br />
aperture value, if too dim, set to a smaller<br />
aperture value.<br />
The brightness of the screen may differ<br />
from that of the actual pictures. Check it<br />
using review function or setting to the<br />
playback mode.<br />
The ISO sensitivity cannot be set to<br />
[AUTO]. (P70) (When the recording mode<br />
is switched to Aperture-priority AE, the<br />
ISO sensitivity is automatically set to<br />
[ISO100] even though it was set to [AUTO]<br />
beforehand. Even though the ISO mode is<br />
set to [ISO100] automatically, you can<br />
also change ISO setting from [ISO64],<br />
[ISO200], [ISO400] on the menu.)<br />
When the exposure is not adequate, the<br />
aperture value and the shutter speed on<br />
the screen turn red.<br />
51
52<br />
Shutter-priority AE<br />
When you want to take a sharp picture of a<br />
fast moving subject, set to a faster shutter<br />
speed. When you want to create a trail<br />
effect, set to a slower shutter speed.<br />
1 Set the shutter speed and take<br />
the picture.<br />
EXPOSURE<br />
2304<br />
1/30<br />
Recording pictures (advanced)<br />
19<br />
Refer to P55 for the available range of the<br />
aperture value and the shutter speed.<br />
The focus range is 0.16 feet (5 cm) – <br />
(Wide), 6.56 feet (200 cm) – (Tele).<br />
The brightness of the screen may differ<br />
from that of the actual pictures. Check it<br />
using review function or setting to the<br />
playback mode.<br />
You cannot set the following items in<br />
Shutter-priority AE.<br />
– Slow sync./Red-eye reduction [ ]<br />
(P39)<br />
– [AUTO] in ISO sensitivity (P70) (When<br />
the recording mode is switched to<br />
Shutter-priority AE, the ISO sensitivity is<br />
automatically set to [ISO100] even<br />
though it was set to [AUTO] beforehand.<br />
Even though the ISO mode is set to<br />
[ISO100] automatically, you can also<br />
change ISO setting from [ISO64],<br />
[ISO200], [ISO400] on the menu.)<br />
When the exposure is not adequate, the<br />
aperture value and the shutter speed on<br />
the screen turn red.<br />
When the shutter speed is slow, we<br />
recommend using a tripod.
Manual exposure<br />
Decide the exposure by setting the<br />
aperture value and the shutter speed<br />
manually.<br />
1 Set the aperture value and the<br />
shutter speed.<br />
F2.8<br />
EXPOSURE<br />
3/4: Aperture value<br />
2/1: Shutter speed<br />
2 Press the shutter button halfway.<br />
F4.0<br />
2304<br />
1/30<br />
1/125<br />
Indication for the condition of exposure<br />
1 (manual exposure assistance)<br />
appears for about 10 seconds.<br />
When the exposure is not adequate, set<br />
the aperture value and the shutter<br />
speed again.<br />
Recording pictures (advanced)<br />
19<br />
3 Take the picture.<br />
F5.6<br />
1/125<br />
∫ Manual Exposure Assistance<br />
The exposure is<br />
adequate.<br />
Set to faster shutter<br />
speed or larger aperture<br />
value.<br />
Set to slower shutter<br />
speed or smaller<br />
aperture value.<br />
The manual exposure assistance is an<br />
approximation. We recommend taking<br />
pictures and then checking them using the<br />
review function.<br />
53
Refer to P55 for the available range of the<br />
aperture value and the shutter speed.<br />
The focus range is 0.16 feet (5 cm) – <br />
(Wide), 6.56 feet (200 cm) – (Tele).<br />
If the exposure is not adequate, the<br />
aperture value and the shutter speed turn<br />
red when pressing the shutter button<br />
halfway.<br />
You cannot set the following items in<br />
manual exposure.<br />
– Slow sync./Red-eye reduction [ ]<br />
(P39)<br />
– [AUTO] in ISO sensitivity (P70) (When<br />
the recording mode is switched to<br />
Manual exposure, the ISO sensitivity is<br />
automatically set to [ISO100] even<br />
though it was set to [AUTO]<br />
beforehand.)<br />
– Exposure compensation (P43)<br />
Please set [HIGHLIGHT] to [ON] on the<br />
[SETUP] menu (P24). Any white saturated<br />
area on the picture will appear blinking in<br />
black and white. Adjust the aperture value<br />
or shutter speed to compensate for a<br />
better exposure.<br />
54<br />
Recording pictures (advanced)
∫ Aperture Value and Shutter Speed<br />
Aperture-priority AE<br />
Shutter-priority AE<br />
Available Shutter Speed (Sec.)<br />
(Per 1/3 EV)<br />
8 6 5 4<br />
Recording pictures (advanced)<br />
Available Aperture Value<br />
(Per 1/3 EV)<br />
Shutter Speed (Sec.)<br />
F8.0 1 – 1/2000<br />
F7.3 F6.5 F5.6 1 – 1/1600<br />
F5.2 F4.6 F4.0 1 – 1/1300<br />
F3.7 F3.3 F2.8 1 – 1/1000<br />
Aperture Value<br />
3.2 2.5 2 1.6<br />
1.3 1 1/1.3 1/1.6<br />
1/2 1/2.5 1/3.2 1/4<br />
1/5 1/6 1/8 1/10<br />
1/13 1/15 1/20 1/25<br />
F2.8–F8.0<br />
1/30 1/40 1/50 1/60<br />
1/80 1/100 1/125 1/160<br />
1/200 1/250 1/320 1/400<br />
1/500 1/640 1/800 1/1000<br />
1/1300 F4.0 – F8.0<br />
1/1600 F5.6 – F8.0<br />
1/2000 F8.0<br />
Manual exposure<br />
Available Aperture Value<br />
Available Shutter Speed (Sec.)<br />
(Per 1/3 EV)<br />
(Per 1/3 EV)<br />
F2.8 – F3.7 8 – 1/1000<br />
F4.0 – F5.2 8 – 1/1300<br />
F5.6 – F7.3 8 – 1/1600<br />
F8.0 8 – 1/2000<br />
55
This mode allows you to take pictures<br />
closely focusing on the subject. (e.g. When<br />
taking pictures of flowers.)<br />
You can take pictures with the lens at a<br />
distance of up to 0.16 feet (5 cm) (Wide)<br />
from the subject.<br />
∫ Focus range<br />
Normal<br />
Macro mode [ ]<br />
We recommend using a tripod.<br />
When the camera lens is at a distance<br />
beyond the available range from the<br />
subject, the subject may not be focused<br />
even if the focus indication lights.<br />
You can also set the Program shift. (P35)<br />
The available flash range is about<br />
0.98 feet (30 cm) – 23.0 feet (7 m). (This is<br />
applied when you set the ISO sensitivity to<br />
[AUTO]. However, the flash mode should<br />
be set to the mode except Slow sync./<br />
Red-eye reduction [ ].)<br />
56<br />
Macro mode<br />
T<br />
W<br />
T<br />
0.98 feet<br />
(30 cm)<br />
0.16 feet<br />
(5 cm)<br />
W<br />
2304<br />
6.56 feet<br />
(200 cm)<br />
6.56 feet<br />
(200 cm)<br />
Recording pictures (advanced)<br />
19<br />
Motion image mode<br />
You can record motion images without<br />
audio.<br />
1 Select [MOTION RATE].<br />
REC 1/2<br />
W.BALANCE AUTO<br />
MOTION RATE 10fps<br />
METERING MODE<br />
AF MODE<br />
30fps<br />
CONT.AF<br />
OFF<br />
SELECT<br />
MENU<br />
SET EXIT MENU<br />
MENU<br />
[10fps]:<br />
Recording motion images for a longer<br />
time is available though the quality will<br />
be less than the quality recorded at<br />
[30fps]. The file size is smaller, so the<br />
files are suitable to be attached to<br />
e-mails.<br />
[30fps]:<br />
The motion of the recorded image is<br />
smooth, but the file size is large.<br />
fps (frame per second); This refers to<br />
the number of frames used in 1 second.<br />
Close the menu by pressing the shutter<br />
button halfway or the [MENU] button<br />
after finishing the setting.
2 Press the shutter button halfway.<br />
When the subject is focused, the focus<br />
indication 1 lights.<br />
The remaining recording time<br />
(approximation) appears on the screen.<br />
3 Press the shutter button fully to<br />
start the recording.<br />
35S<br />
By pressing the shutter button fully<br />
again, the recording stops.<br />
If the memory card becomes full during<br />
recording, the camera stops<br />
automatically.<br />
Recording pictures (advanced)<br />
∫ Available recording time (seconds)<br />
SD Memory Card Motion rate<br />
Capacity 10fps 30fps<br />
8 MB 36 10<br />
16 MB 83 26<br />
32 MB 177 59<br />
64 MB 365 123<br />
128 MB 742 253<br />
256 MB 1482 508<br />
512 MB 2989 1027<br />
1 GB 5752 1978<br />
The recordable time is an approximation.<br />
The picture size is fixed to<br />
320k240 pixels.<br />
The motion images cannot be recorded<br />
with audio.<br />
If using a MultiMediaCard, after recording<br />
motion images, the card access indication<br />
may appear for a while, but this is not a<br />
malfunction. The file is being loaded to the<br />
MultiMediaCard.<br />
The settings of auto focus/zoom/aperture<br />
values are fixed to what they are when<br />
recording starts (in the first frame).<br />
If you use a card with little capacity,<br />
recording may stop while you are<br />
recording motion images.<br />
When motion images recorded with this<br />
camera are played back on other<br />
equipment, the quality of pictures may be<br />
deteriorated or it may not be possible to<br />
play them back.<br />
The motion images recorded with setting<br />
[MOTION RATE] to [30fps] cannot be<br />
played back on a camera which does not<br />
support [30fps] of motion rate.<br />
The review function cannot be used.<br />
You cannot set [MODE2] on the Optical<br />
Image Stabilizer function.<br />
Keep the camera away from magnetized<br />
equipment or equipment which generates<br />
electromagnetic waves (e.g. a microwave<br />
oven, TV, cell phone or video game<br />
equipment, etc.) as far as possible. If not,<br />
pictures may be distorted due to<br />
electromagnetic wave radiation.<br />
57
SCN1 SCN2 Scene mode<br />
SCN1 SCN2<br />
Press the [MENU] button to display the<br />
scene menu. When setting [AUTO] in the<br />
[SETUP] menu, set the mode dial to [ SCN1 ]<br />
or [ SCN2 ] to display the scene menu<br />
automatically.<br />
When rotating the zoom lever toward T,<br />
the page of the menu screen can be<br />
forwarded. (vice versa)<br />
If you press the [MENU] button while the<br />
scene menu is displayed, you can set the<br />
[SETUP] menu (P24) and the [REC] mode<br />
menu (P67).<br />
58<br />
Menu items<br />
SCENE MODE<br />
PORTRAIT<br />
SPORTS<br />
SCENERY<br />
SELECT SET<br />
MENU<br />
Recording pictures (advanced)<br />
1/3<br />
MENU MENU<br />
: [PORTRAIT] (P59)<br />
: [SPORTS] (P59)<br />
: [SCENERY] (P60)<br />
: [NIGHT SCENERY] (P60)<br />
: [NIGHT PORTRAIT] (P61)<br />
: [PANNING] (P61)<br />
: [FIREWORKS] (P62)<br />
: [PARTY] (P63)<br />
: [SNOW] (P64)<br />
The following functions cannot be set in<br />
scene mode.<br />
– White balance (P68)<br />
– ISO sensitivity (P70)<br />
– Metering mode (P72)<br />
– Color effect (P75)<br />
– Picture adjustment (P75)
Portrait mode<br />
This mode allows you to make the subject<br />
stand out from an unfocused background<br />
and adjust the exposure and the hue to<br />
achieve a healthy complexion on the<br />
subject.<br />
2304<br />
∫ Technique for Portrait mode<br />
To make this mode more effective:<br />
1 Rotate the zoom lever to Tele as far as<br />
possible.<br />
2 Be close to the subject.<br />
3 Select a background which is far from<br />
the camera.<br />
This mode is suitable for outdoors in the<br />
daytime.<br />
White balance works best when recording<br />
outdoors in the daytime. When using<br />
indoors, the hue may change.<br />
The ISO sensitivity is fixed to [AUTO].<br />
When you want to change the exposure or<br />
the hue, compensate the exposure (P43).<br />
Recording pictures (advanced)<br />
19<br />
Sports Mode<br />
This mode allows you to take pictures of a<br />
fast moving subject. (e.g. When taking<br />
pictures of outdoor sports.)<br />
2304<br />
19<br />
∫ Technique for Sports mode<br />
To record actions of the subject as if it were<br />
still, the shutter speed becomes faster than<br />
usual. This mode is more effective when<br />
taking pictures in the daytime on a clear<br />
day.<br />
This mode is suitable for outdoors in the<br />
daytime, keeping 16.4 feet (5 m) or more<br />
away from the subject.<br />
White balance works best when recording<br />
outdoors in the daytime. When using<br />
indoors, the hue may change.<br />
The ISO sensitivity is fixed to [AUTO].<br />
59
60<br />
Scenery mode<br />
This mode allows you to take a picture of a<br />
wide landscape. The camera focuses on a<br />
distant subject preferentially.<br />
2304<br />
The focus range is 16.4 feet (5 m) – .<br />
The ISO sensitivity is fixed to [AUTO].<br />
The Flash setting is fixed to Forced OFF<br />
[ ].<br />
The setting on the AF assist lamp is<br />
disabled.<br />
Recording pictures (advanced)<br />
19<br />
Night scenery mode<br />
This mode allows you to take a picture of a<br />
nightscape. The landscape can be<br />
recorded vividly by using the slow shutter<br />
speed.<br />
2304<br />
19<br />
∫ Technique for Night scenery mode<br />
Since the shutter speed becomes slow<br />
(max. about 8 sec.), use a tripod.<br />
The focus range is 16.4 feet (5 m) – .<br />
The shutter may be kept closed<br />
(max. about 8 seconds) after taking a<br />
picture with slow shutter speed, but it is<br />
not a malfunction.<br />
When you take pictures in dark places,<br />
noise may become visible.<br />
The ISO sensitivity is fixed to [ISO100].<br />
The Flash setting is fixed to Forced OFF<br />
[ ].<br />
The settings on the AF assist lamp and<br />
the continuous AF are disabled.
Night portrait mode<br />
This mode allows you to take pictures<br />
against a night landscape. The subject can<br />
be recorded with brightness in real life by<br />
using the flash and the slow shutter speed.<br />
2304<br />
∫ Technique for Night portrait mode<br />
Open the flash. (P39)<br />
Since the shutter speed becomes slow<br />
(max. about 1 sec.), we recommend using<br />
a tripod.<br />
Keep the subject still for about 1 second<br />
after taking a picture.<br />
Take a picture within the available flash<br />
range [max. about 11.5 feet (3.5 m)] of the<br />
subject.<br />
We recommend rotating the zoom lever to<br />
Wide.<br />
The focus range is 6.56 feet<br />
(2 m) – 16.4 feet (5 m).<br />
Be sure to close the flash when not in use.<br />
The shutter may be kept closed (max.<br />
about 1 sec.) after taking a picture with<br />
slow shutter speed, but this is not a<br />
malfunction.<br />
When you take pictures in dark places,<br />
noises may become visible.<br />
Flash setting is fixed to Slow sync./<br />
Red-eye reduction [ ].<br />
The ISO sensitivity is fixed to [AUTO].<br />
The setting on the continuous AF is<br />
disabled.<br />
Recording pictures (advanced)<br />
19<br />
Panning mode<br />
When you take a picture following the<br />
motion of a subject which moves to a<br />
certain direction as a runner or a car, the<br />
background will show some motion blur.<br />
This special effect is called “panning”. This<br />
mode allows you to obtain this effect easier.<br />
2304<br />
19<br />
∫ Technique for Panning mode<br />
To achieve good pictures in panning mode,<br />
pick a horizontal plane – and then pan as<br />
you fire shots.<br />
1 Move the camera smoothly while<br />
tracking a subject in motion.<br />
2 Press the shutter button while moving<br />
the camera.<br />
3 Keep moving the camera continuously.<br />
Be careful of the following:<br />
– Use the Viewfinder. (P28)<br />
– Select a subject with quick motion.<br />
– Prefocus to the point where the subject<br />
will come. (P66)<br />
– Use this mode with burst mode (P45).<br />
Select the best picture from the pictures<br />
taken.<br />
61
In panning mode, the shutter speed<br />
becomes slower than usual to achieve the<br />
panning effect. As a result, jitter can easily<br />
occur.<br />
Panning function does not work well in the<br />
following situations.<br />
– Very bright scenes such as daytime in<br />
summer. We recommend using an ND<br />
filter (DMW-LND72; optional). (P101)<br />
– When the shutter speed is faster than<br />
1/100th.<br />
– When the subject moves slowly and the<br />
tracking speed is too slow. (The<br />
background cannot be recorded<br />
dynamically.)<br />
The stabilizer function is fixed to<br />
[MODE1]. In Panning mode, only vertical<br />
jitters can be compensated.<br />
The ISO sensitivity is fixed to [ISO64].<br />
The settings on the AF assist lamp and<br />
the continuous AF are disabled.<br />
62<br />
Recording pictures (advanced)<br />
Fireworks mode<br />
This mode allows you to take beautiful<br />
pictures of fireworks exploding in the night<br />
sky. The shutter speed or the exposure is<br />
automatically adjusted for taking pictures of<br />
fireworks.<br />
2304<br />
19<br />
∫ Technique for Fireworks mode<br />
We recommend following the prefocus<br />
procedure below to ensure that you do not<br />
miss the chance to take pictures.<br />
1 Set the focus mode to MF mode. (P65)<br />
2 Aim the camera at an object (such as<br />
illumination on a building), which is<br />
roughly the same distance as the point of<br />
fireworks.<br />
3 Slide down the focus switch to [4]. (P66)<br />
4 When the focus indication (P32) lights,<br />
aim the camera at the direction where<br />
the fireworks will be exploding.<br />
5 Press the shutter button fully when<br />
fireworks are exploding.<br />
When you zoom out or in on the subject,<br />
repeat steps 2 – 5 since the focus position<br />
becomes misaligned.<br />
We recommend using a tripod.
When the auto focus is activated, the<br />
available recording range is 16.4 feet<br />
(5 m) – . (We recommend following<br />
steps 1 to 5 on the previous page to take<br />
pictures with prefocus.)<br />
The ISO sensitivity is fixed to [ISO100].<br />
The settings on the AF assist lamp and<br />
the continuous AF are disabled.<br />
The Flash setting is fixed to Forced OFF<br />
[ ].<br />
Recording pictures (advanced)<br />
Party mode<br />
This mode allows you to take a picture in a<br />
dim room (e.g. a wedding reception, a<br />
party, a banquet in a bar, etc.) clearly.<br />
The shutter speed or the exposure is<br />
automatically adjusted according to the<br />
brightness of the room.<br />
2304<br />
19<br />
∫ Technique for Party mode<br />
The shutter speed is slowed down. Hold<br />
the camera firmly to take a picture.<br />
The flash mode of the built-in flash can be<br />
set to Forced ON/Red-eye reduction<br />
[ ] or Slow sync./Red-eye reduction<br />
[ ].<br />
The ISO sensitivity is fixed to [AUTO].<br />
63
64<br />
Snow mode<br />
This mode allows you to take a picture in<br />
locations such as skiing resorts and<br />
locations near snowy mountains. The<br />
exposure and the white balance are<br />
adjusted to make the white color of the<br />
snow stand out.<br />
2304<br />
The ISO sensitivity is fixed to [AUTO].<br />
Recording pictures (advanced)<br />
19
Recording pictures (advanced)<br />
Taking Pictures with Manual Focus<br />
SCN1 SCN2<br />
Use this function when you want to fix the<br />
focus or when the distance between the<br />
lens and the subject is determined and you<br />
do not want to activate the auto focus.<br />
1 Select [MF ASSIST] from the<br />
[SETUP] menu (in the recording<br />
mode) (P24) and set it to [ON].<br />
MONITOR<br />
AUTO REVIEW<br />
PLAY ON LCD<br />
POWER SAVE<br />
MF ASSIST<br />
SELECT<br />
MENU<br />
SET<br />
SETUP 1/3<br />
n0<br />
OFF<br />
OFF<br />
2MIN.<br />
OFF<br />
EXIT ONMENU<br />
Close the menu by pressing the<br />
[MENU] button after finishing the<br />
setting.<br />
2 Slide the focus switch to [MF] and<br />
rotate the MF ring 1 to focus on<br />
the subject.<br />
AF: Auto focus<br />
MF: Manual focus<br />
4: One shot AF<br />
3 The MF assistance appears on<br />
the center of the screen.<br />
P 2304<br />
AF<br />
MF<br />
FOCUS<br />
19<br />
You can also set [MF ASSIST] to [OFF]<br />
on the [SETUP] menu (in the recording<br />
mode).<br />
When you stop rotating the MF ring, the<br />
MF assistance disappears about<br />
2 seconds after.<br />
65
∫ Technique for Manual focus<br />
1 Rotate the MF ring slowly.<br />
2 Even if the subject is focused, rotate it a<br />
little more.<br />
3 Finely focus on the subject while<br />
rotating the MF ring in the reverse<br />
direction.<br />
∫ One shot AF<br />
You can focus on the subject with auto<br />
focus by sliding down the focus switch to<br />
[4] in MF mode.<br />
This is convenient for prefocus.<br />
66<br />
FOCUS<br />
AF<br />
MF<br />
Recording pictures (advanced)<br />
∫ Prefocus<br />
This is a technique to focus on the point to<br />
take pictures in advance when it is difficult<br />
to focus on the subject with auto focus due<br />
to its quick motion. [e.g. [PANNING] in<br />
scene mode (P61)]<br />
This function is suitable when the distance<br />
between the camera and the subject is<br />
certain.<br />
You can also record with manual focus in<br />
motion image mode [ ]. When starting<br />
the recording, the focus is fixed.<br />
When you focus on the subject in Wide,<br />
the focus may not be adequate in Tele. In<br />
this case, focus on the subject again.<br />
When setting the manual focus, you<br />
cannot set the continuous AF. (P73)<br />
The MF assistance only appears in optical<br />
zoom range.
Recording pictures (advanced)<br />
Using the [REC] mode menu<br />
Setting the hue, picture quality adjustment,<br />
etc. allows you to create wide variations on<br />
taking pictures.<br />
Set the mode dial to the desired recording<br />
mode.<br />
Menu items<br />
SCN1 SCN2<br />
REC 1/3 AUTO<br />
W.BALANCE<br />
SENSITIVITY<br />
PICT.SIZE<br />
QUALITY<br />
METERING MODE<br />
SELECT SET EXIT MENU<br />
MENU<br />
When rotating the zoom lever toward T,<br />
the page of the menu screen can be<br />
forwarded. (vice versa)<br />
Close the menu by pressing the shutter<br />
button halfway or the [MENU] button after<br />
finishing the setting.<br />
: [W.BALANCE] (P68)<br />
: [SENSITIVITY] (P70)<br />
: [PICT.SIZE] (P70)<br />
: [QUALITY] (P71)<br />
: [METERING MODE] (P72)<br />
: [AF MODE] (P72)<br />
: [CONT.AF] (P73)<br />
: [AF ASSIST LAMP] (P74)<br />
: [D.ZOOM] (P74)<br />
: [COL.EFFECT] (P75)<br />
: [PICT.ADJ.] (P75)<br />
: [STABILIZER] (P76)<br />
: [FLIP ANIM.] (P76)<br />
: [CONVERSION] (P79)<br />
67
This function allows you to reproduce a<br />
white color closer to the tone in real life on<br />
the pictures recorded under sunlight,<br />
halogen lighting, etc. in which the white<br />
color may appear reddish or bluish.<br />
When setting the white balance to the<br />
mode except [AUTO], you can finely<br />
adjust the white balance.<br />
68<br />
White Balance [W.BALANCE]<br />
AUTO for auto setting (auto<br />
white balance)<br />
(Daylight) for recording outdoors<br />
on a bright day<br />
(Cloudy) for recording under a<br />
cloudy or shaded<br />
area sky<br />
(Halogen) for recording under<br />
halogen lighting<br />
(Flash) for taking a picture<br />
with photo flash only<br />
(White set) for using the preset<br />
white balance<br />
(White set) for setting the white<br />
balance again (P69)<br />
Recording pictures (advanced)<br />
∫ Auto White Balance<br />
Use of auto white balance adjustment in<br />
inappropriate lighting conditions may result<br />
in reddish or bluish pictures. Where the<br />
subject is surrounded by many light<br />
sources, auto white balance adjustment<br />
may not operate properly.<br />
In this case, set the white balance to a<br />
mode except [AUTO] manually.<br />
1 The range that is controlled by the auto<br />
white balance adjustment mode of this<br />
camera<br />
2 Blue sky<br />
3 Cloudy sky (Rain)<br />
4 TV screen<br />
5 Sunlight<br />
6 White fluorescent light<br />
7 Incandescent light bulb<br />
8 Sunrise and sunset<br />
9 Candlelight<br />
1)<br />
2)<br />
5)<br />
6)<br />
7)<br />
8)<br />
9)<br />
4)<br />
KlKelvin Color Temperature<br />
3)
∫ Setting the White Balance manually<br />
(White set )<br />
Use this mode when you want to set the<br />
white balance manually.<br />
1 Set to [ ] (White Set) and then<br />
press 1.<br />
2 Aim the camera at a sheet of white paper<br />
or a similar white object so that the frame<br />
on the center of the screen turns white<br />
and then press 1.<br />
WHITE SET<br />
SET CANCEL MENU<br />
∫ Finely Adjusting the White Balance<br />
(White Balance Fine Adjustment )<br />
When you cannot acquire the desired hue<br />
by setting the white balance, you can adjust<br />
the white balance finely.<br />
1 Set the white balance to [ ]/[ ]/<br />
[ ]/[ ]/[ ]. (P68)<br />
2 Press 3 several times until<br />
[WB ADJUST.] appears.<br />
WB ADJUST.<br />
RED<br />
BLUE<br />
SELECT EXIT<br />
Recording pictures (advanced)<br />
3 Finely adjust the white balance.<br />
1 [BLUE]: Press when the hue is<br />
reddish.<br />
2 [RED]: Press when the hue is<br />
bluish.<br />
About the white balance<br />
When taking a picture with the flash, the<br />
white balance will be automatically<br />
adjusted [except for [ ] (Daylight) and<br />
[ ] (Flash)], but the white balance may<br />
not be properly adjusted if the photo flash<br />
is insufficient.<br />
About the white balance fine adjustment<br />
The white balance icon on the screen<br />
turns red or blue.<br />
You can set the value independently for<br />
each of the modes in white balance.<br />
The setting on the fine adjustment of the<br />
white balance is reflected to the picture<br />
when taking a picture with the flash.<br />
When you set the white balance using the<br />
White set [ ], the adjustment level is<br />
set to “0”.<br />
When the color effect is set to any of<br />
[COOL], [WARM], [B/W] or [SEPIA] (P75),<br />
you cannot finely adjust the white balance.<br />
69
ISO sensitivity represents the sensitivity to<br />
light in values. If you set the ISO sensitivity<br />
higher, the camera becomes more suitable<br />
for recording in dark places.<br />
When setting to [AUTO], the ISO<br />
sensitivity is automatically adjusted from<br />
[ISO64] to [ISO200] according to the<br />
brightness. (It can be adjusted from<br />
[ISO100] to [ISO400] when using the<br />
flash. However, it is fixed to [ISO100]<br />
when the flash mode is set to Slow sync./<br />
Red-eye reduction [ ].)<br />
In motion image mode [ ] or scene<br />
mode (P58), ISO sensitivity is fixed to<br />
[AUTO]. (In [NIGHT SCENERY] and<br />
[FIREWORKS] in scene mode, it is fixed<br />
to [ISO100], and in [PANNING], it is fixed<br />
to [ISO64].)<br />
You cannot select [AUTO] in<br />
Aperture-priority AE, Shutter-priority AE<br />
and Manual exposure mode.<br />
To avoid picture noises, we recommend<br />
reducing the ISO sensitivity, setting<br />
[NOISE REDUCTION] in [PICT.ADJ.] to<br />
[HIGH] or setting the items except [NOISE<br />
REDUCTION] to [LOW] to take pictures.<br />
(P75)<br />
Refer to P55 for the shutter speed.<br />
70<br />
ISO Sensitivity [SENSITIVITY]<br />
ISO sensitivity 64 400<br />
Use in bright<br />
places<br />
(e.g. outdoors)<br />
Use in dark<br />
places<br />
Suitable<br />
Not<br />
suitable<br />
Recording pictures (advanced)<br />
Not<br />
suitable<br />
Suitable<br />
Shutter speed Slow Fast<br />
Noise Less Increased<br />
Picture Size [PICT.SIZE]<br />
SCN1 SCN2<br />
When you select a smaller picture size<br />
(640k480 pixels), you can store more<br />
pictures on a card. In addition, it is<br />
convenient to attach the picture to an<br />
e-mail or post it on a website because the<br />
file size is small.<br />
If you select a larger picture size<br />
(2304k1728 pixels), you can print pictures<br />
clearly.<br />
2304 2304k1728 pixels<br />
1600 1600k1200 pixels<br />
1280 1280k960 pixels<br />
640 640k480 pixels<br />
HDTV 1920k1080 pixels<br />
For details on how to playback pictures<br />
recorded using [HDTV] mode on a<br />
High-Definition TV (HDTV has a 16:9<br />
aspect), refer to P92.<br />
Both ends of the pictures recorded using<br />
[HDTV] mode may be cut off in printing.<br />
Check the picture before printing. (P106)<br />
In motion image mode [ ], the picture<br />
size is fixed to 320k240 pixels.<br />
Pictures may appear like a mosaic<br />
depending on the subject or the recording<br />
condition.<br />
The number of recordable pictures<br />
depends on the subject.<br />
The number of remaining pictures may not<br />
correspond with recorded frames.<br />
Refer to P18 for the number of recordable<br />
pictures.
Quality [QUALITY]<br />
SCN1 SCN2<br />
You can select 3 types of quality<br />
(compression rate) according to the usage<br />
of the picture.<br />
TIFF (Uncompressed):<br />
This type is suitable when editing<br />
and processing pictures with retouch<br />
software.<br />
Fine (Low compression):<br />
This type gives priority to picture<br />
quality. Picture quality will be high.<br />
Standard (High compression):<br />
This type gives priority to the<br />
number of recordable pictures and<br />
records standard quality pictures.<br />
When the quality is set to [TIFF], a JPEG<br />
picture with the quality equal to the<br />
standard is created at the same time.<br />
Pictures may have a mosaic-like<br />
appearance depending on the subject or<br />
the recording condition.<br />
The number of recordable pictures<br />
depends on the subject.<br />
The number of remaining pictures may not<br />
correspond with recorded frames.<br />
The following functions cannot be used for<br />
pictures recorded in [TIFF].<br />
– Auto bracket<br />
– Burst mode<br />
–[ROTATE]<br />
–[RESIZE]<br />
–[TRIMMING]<br />
Refer to P18 for the number of recordable<br />
pictures.<br />
Recording pictures (advanced)<br />
71
You can switch to the following metering<br />
modes.<br />
72<br />
Metering Mode<br />
[METERING MODE]<br />
Multiple:<br />
This is the method in which the<br />
camera measures the most suitable<br />
exposure by judging the allocation of<br />
brightness on the whole screen<br />
automatically. Usually, we<br />
recommend using this method.<br />
Center weighted:<br />
This is the method used to focus on<br />
the subject on the center of the<br />
screen and measure the whole<br />
screen evenly.<br />
Spot:<br />
This is the method to measure the<br />
subject in the spot metering target<br />
A.<br />
Recording pictures (advanced)<br />
AF Mode [AF MODE]<br />
SCN1 SCN2<br />
9-area-focusing:<br />
The camera focuses on any of<br />
9 focus areas. You can record a<br />
picture in free composition without<br />
limiting the position of the subject.<br />
3-area-focusing:<br />
The camera focuses on any of the<br />
left, center and right of the screen.<br />
This mode allows you to focus on<br />
the subject faster than any other<br />
modes in AF mode.<br />
1-area-focusing:<br />
The camera focuses on the subject<br />
in AF area on the center of the<br />
screen.<br />
Spot-focusing:<br />
The camera focuses on the limited<br />
and narrow area in the screen.
When setting to 3-area-focusing, pictures<br />
may become still while being focused on,<br />
however, this is not a malfunction.<br />
When using the digital zoom or when you<br />
take pictures in dark places, the AF area<br />
is displayed on the center of the screen<br />
with a size wider than usual.<br />
When multiple AF areas (max. 9 areas)<br />
light at the same time, the camera is<br />
focusing on all the AF areas.<br />
The focus position is not predetermined<br />
because it is set to the position the<br />
camera automatically determines at the<br />
time of focusing. If you want to determine<br />
the focus position to take pictures, switch<br />
the AF mode to 1-area-focusing mode.<br />
Recording pictures (advanced)<br />
Continuous AF [CONT.AF]<br />
SCN1 SCN2<br />
This mode allows you to compose a picture<br />
more easily by always focusing on the<br />
subject.<br />
When the AF mode is set to<br />
1-area-focusing or spot-focusing, the time<br />
required for focusing when pressing the<br />
shutter button halfway will be reduced.<br />
When it is set to [ON], the [ ] indication<br />
appears.<br />
When setting the manual focus, you<br />
cannot use the continuous AF.<br />
The battery may be consumed faster than<br />
usual.<br />
It may take time to focus on the subject<br />
after rotating the zoom lever from Wide to<br />
Tele or suddenly changing the subject<br />
from a distant one to a nearby one.<br />
Press the shutter button halfway again<br />
when it is difficult to focus on the subject.<br />
73
Illuminating the subject with the AF assist<br />
lamp allows the camera to focus on the<br />
subject in low light conditions.<br />
When you press the<br />
shutter button halfway in<br />
dark places or other<br />
situations, an AF area<br />
wider than usual appears<br />
and the AF assist lamp 1<br />
turns on.<br />
Be sure of the following points when the<br />
AF assist lamp is in use.<br />
– Do not look in to the AF assist lamp<br />
closely.<br />
– Detach the lens hood.<br />
– Do not cover the AF assist lamp with<br />
your fingers.<br />
– The battery may be consumed faster<br />
than usual.<br />
You cannot use the AF assist lamp in<br />
[SCENERY], [NIGHT SCENERY],<br />
[PANNING], [FIREWORKS] in scene<br />
mode (P58) and when setting<br />
[CONVERSION] (P79) to [ ] or [ ].<br />
When you do not want to use the AF<br />
assist lamp (e.g. when you take a picture<br />
of a subject in a dark place), set the [AF<br />
ASSIST LAMP] to [OFF]. In this case, it<br />
becomes difficult to focus on the subject.<br />
74<br />
AF Assist Lamp<br />
[AF ASSIST LAMP]<br />
SCN1 SCN2<br />
ON The AF assist lamp turns on under<br />
low light conditions. In this time, the<br />
AF assist lamp icon [ ] appears<br />
on the screen. The effective range<br />
of the AF assist lamp is 4.92 feet<br />
(1.5 m).<br />
OFF The AF assist lamp does not turn<br />
on.<br />
Recording pictures (advanced)<br />
The AF area is set only to a point on the<br />
center of the screen when the AF assist<br />
lamp is turned on.<br />
A vignetting effect may appear on the<br />
circumference of the AF assist lamp<br />
because the AF assist lamp may be<br />
obscured by the lens, however, this does<br />
not cause a problem with the performance<br />
of the camera.<br />
Digital Zoom [D.ZOOM]<br />
It is possible to further magnify a subject<br />
already magnified 12 times with the optical<br />
zoom 4 more times with the digital zoom,<br />
thereby reaching a maximum of 48 times.<br />
∫ Entering the digital zoom range<br />
When you rotate the zoom lever to the<br />
extreme Tele position, the on-screen zoom<br />
indication may momentarily pause. This is<br />
not a malfunction.<br />
You can enter the digital zoom range to<br />
continuously rotate the zoom lever to Tele<br />
or to release the zoom lever once and then<br />
rotate it to Tele again.<br />
W<br />
W<br />
1 Optical zoom<br />
2 Digital zoom<br />
SCN1 SCN2<br />
When using the digital zoom the picture<br />
quality becomes deteriorated.<br />
In the digital zoom range, the stabilizer<br />
function may not be effective.<br />
We recommend using a tripod.<br />
The indicated zoom magnification is an<br />
approximation.<br />
The AF area is displayed with a size wider<br />
than usual and set only to a point on the<br />
center of the screen in the digital zoom<br />
range.<br />
T<br />
T
Color Effect [COL.EFFECT]<br />
You can use 4 types of color effects<br />
depending on the image of the picture.<br />
COOL The picture becomes bluish.<br />
WARM The picture becomes reddish.<br />
B/W The picture becomes black and<br />
white.<br />
SEPIA The picture becomes sepia.<br />
Recording pictures (advanced)<br />
Picture Adjustment [PICT.ADJ.]<br />
Use this function according to the recording<br />
situation and the atmosphere of the picture.<br />
CONTRAST HIGH Increases the<br />
difference between the<br />
brightness and the<br />
darkness in the picture.<br />
LOW Decreases the<br />
difference between the<br />
brightness and the<br />
darkness in the picture.<br />
SHARPNESS HIGH The picture is sharply<br />
defined.<br />
LOW The picture is softly<br />
focused.<br />
SATURATION HIGH The colors in the<br />
picture become vivid.<br />
LOW The colors in the<br />
picture become natural.<br />
NOISE<br />
REDUCTION<br />
HIGH The noise reduction<br />
effect is enhanced.<br />
The resolution of the<br />
picture may be slightly<br />
deteriorated.<br />
LOW The noise reduction<br />
effect is reduced.<br />
You can obtain pictures<br />
with higher resolution.<br />
When you take pictures in dark places,<br />
noise may become visible. To avoid<br />
picture noise, we recommend setting<br />
[NOISE REDUCTION] in [PICT.ADJ.] to<br />
[HIGH] or setting the items except [NOISE<br />
REDUCTION] to [LOW] to take pictures.<br />
75
OFF<br />
( )<br />
MODE1<br />
( )<br />
MODE2<br />
( )<br />
The stabilizer function may not work<br />
sufficiently in the following cases.<br />
– When too much jitter occurs<br />
– In digital zoom range<br />
– When taking pictures while following<br />
subjects in motion.<br />
– When the shutter speed is extremely<br />
slow due to dark conditions or other<br />
reasons.<br />
In motion image mode [ ], [MODE2]<br />
cannot be set.<br />
76<br />
Optical Image Stabilizer<br />
[STABILIZER]<br />
SCN1 SCN2<br />
When image stabilization is not<br />
desired or when using the<br />
camera with a tripod.<br />
The stabilizer operates<br />
continuously and can assist<br />
during photo composition.<br />
The stabilizer function is in<br />
standby and activates at the<br />
moment the shutter captures the<br />
image. This mode offers a<br />
greater degree of stabilization.<br />
Recording pictures (advanced)<br />
Flip Animation [FLIP ANIM.]<br />
SCN1 SCN2<br />
This camera allows you to create motion<br />
picture files up to 20 seconds long by<br />
connecting images recorded in flip<br />
animation mode.<br />
Example:<br />
When capturing images of the subject in<br />
sequence moving the camera little by little<br />
and aligning the images, the subject looks<br />
as if it is moving.<br />
You can play back created flip animations<br />
with the same method used to play back<br />
motion images. (P81)
1 Select [FLIP ANIM.].<br />
SELECT<br />
MENU<br />
REC<br />
3/ 3<br />
PICT.ADJ.<br />
STABILIZER<br />
FLIP ANIM.<br />
CONVERSION<br />
EXIT MENU<br />
A motion image file is created by putting<br />
images recorded in [IMAGE CAPTURE]<br />
together by [CREATE MOTION<br />
IMAGE].<br />
Audio cannot be recorded.<br />
2 Select [IMAGE CAPTURE].<br />
IMAGE CAPTURE<br />
CREATE MOTION IMAGE<br />
DELETE STILL IMAGES<br />
SELECT<br />
FLIP ANIM.<br />
MODE1<br />
OFF<br />
EXIT MENU<br />
The picture size is 320k240 pixels.<br />
Recording pictures (advanced)<br />
3 Capture images for flip animation.<br />
You can check the recorded image with<br />
4 and the previous or following image<br />
with 2/1.<br />
Delete unnecessary images with [ ]<br />
button.<br />
You can record up to 100 pictures. The<br />
number of recordable pictures<br />
displayed is an approximation.<br />
4 Select [CREATE MOTION IMAGE].<br />
IMAGE CAPTURE<br />
320<br />
8<br />
REMAIN 92<br />
CREATE MOTION IMAGE<br />
DELETE STILL IMAGES<br />
SELECT<br />
MENU<br />
FLIP ANIM.<br />
EXIT MENU<br />
EXIT MENU<br />
77
5 Select [FRAME RATE] and set the<br />
number of frames.<br />
6 Select [CREATE MOTION IMAGE]<br />
and create a flip animation.<br />
78<br />
CREATE MOTION IMAGE<br />
FRAME RATE<br />
5fps<br />
10fps<br />
CREATE MOTION IMAGE<br />
SELECT SET<br />
5fps 5 frames/sec.<br />
10fps 10 frames/sec. (The motion<br />
images become smoother.)<br />
FRAME RATE<br />
CREATE MOTION IMAGE<br />
SELECT<br />
EXIT MENU<br />
CREATE MOTION IMAGE<br />
5fps<br />
EXIT MENU<br />
MENU<br />
3 times<br />
The file number appears after creating<br />
a flip animation.<br />
Recording pictures (advanced)<br />
∫ Deleting all still images used to create<br />
flip animation<br />
When selecting [DELETE STILL IMAGES]<br />
in [FLIP ANIM.] menu, a confirmation<br />
screen appears. Select [YES] with 4 and<br />
then press 1.<br />
You cannot use burst mode and auto<br />
bracket.<br />
The images in each frame do not appear<br />
in normal review. (P37)<br />
If you execute [CREATE MOTION<br />
IMAGE], flip animation is made from all<br />
pictures recorded for flip animation.<br />
Delete unnecessary pictures.<br />
Flip animations may not be played back by<br />
other equipment.
∫ Recordable range when using the<br />
conversion lens<br />
When using the tele conversion lens:<br />
Normal: 15.1 feet (4.6 m) – <br />
Macro mode [ ]:<br />
15.1 feet (4.6 m) – <br />
When using the wide conversion lens:<br />
Normal: 0.56 feet (17 cm) – <br />
Macro mode [ ]: 0.03 feet (1 cm) – <br />
Tele conversion lens<br />
Indication 6k 12k 48k<br />
Actual<br />
magnification<br />
9k 18k 72k<br />
35 mm film<br />
camera<br />
equivalent<br />
When using the tele conversion lens, the<br />
available zoom range is limited to 6 times<br />
or more. Digital zoom is available.<br />
When using the wide conversion lens, the<br />
available zoom range is limited between<br />
1k and 2k. Digital zoom is not available.<br />
When you use the zoom function beyond<br />
the recordable range described above, the<br />
conversion icon blinks in red.<br />
80<br />
315 mm 630 mm 2520 mm<br />
Indication<br />
Wide conversion lens<br />
1k 2k<br />
Actual magnification 0.8k 1.6k<br />
35 mm film camera<br />
equivalent<br />
28 mm 56 mm<br />
Recording pictures (advanced)<br />
Check to make sure the lens cap is<br />
removed before attaching the conversion<br />
lens.<br />
When using the conversion lens:<br />
– The built-in flash cannot be activated.<br />
– If you use a tripod, use the tripod<br />
adaptor supplied with the conversion<br />
lens, and then attach the tripod to the<br />
tripod adaptor.<br />
– If you set [CONVERSION] to [OFF],<br />
the performance of the conversion<br />
lens will not be optimal.<br />
When using the tele conversion lens:<br />
– We recommend using a tripod.<br />
– The stabilizer function may not work<br />
sufficiently.<br />
– The focus indication may light due to the<br />
jitter even if the subject is not focused.<br />
– The time required for focusing may<br />
become longer than usual.<br />
If you set [CONVERSION] to [ ] or [ ],<br />
you cannot use the AF assist lamp. (P74)<br />
Read the operating instructions of the<br />
conversion lens for details.
Playback (advanced)<br />
Playback (advanced)<br />
Playing Back Motion Images<br />
∫ Motion images<br />
Select the picture with the motion image<br />
icon [ ] and play back the motion<br />
images.<br />
PLAY MOTION<br />
IMAGE<br />
100 _ 0001<br />
1/19<br />
10:00 DEC. 1.2004<br />
The cursor displayed during<br />
playback corresponds to 3/4/<br />
2/1.<br />
Motion image playback stops and the<br />
normal playback is restored by pressing<br />
4.<br />
∫ Fast forwarding/Fast rewinding<br />
During motion image playback, keep<br />
pressing 2/1.<br />
1: Fast forward<br />
2: Fast rewind<br />
When releasing the button, it turns to<br />
normal motion image playback.<br />
∫ To pause<br />
Press 3 during motion image playback.<br />
Press 3 again to cancel pause.<br />
You cannot use the zoom function while<br />
playing back or pausing motion images.<br />
The file format that can be played back<br />
with this camera is QuickTime Motion<br />
JPEG.<br />
Some QuickTime Motion JPEG files<br />
recorded by a PC or other equipment may<br />
not be played back with this camera.<br />
When playing back motion images that<br />
have been recorded with other equipment,<br />
the quality of images may be deteriorated<br />
or it may not be possible to play them<br />
back.<br />
When using a high capacity card, it is<br />
possible that fast rewinding may be slower<br />
than usual.<br />
81
82<br />
Playback (advanced)<br />
Using the [PLAY] mode menu<br />
You can rotate the recorded pictures in<br />
increments of 90°.<br />
This is a convenient function to play back<br />
pictures on TV.<br />
∫ Example<br />
When rotating clockwise ( )<br />
Original<br />
picture<br />
Rotating the Picture [ROTATE]<br />
1 Select [ROTATE].<br />
PLAY 1/2<br />
ROTATE<br />
PROTECT<br />
DPOF PRINT<br />
SLIDE SHOW<br />
RESIZE<br />
SELECT<br />
MENU<br />
EXIT MENU<br />
2 Select the picture to be rotated<br />
and set it.<br />
ROTATE<br />
SELECT<br />
SET<br />
100 _ 0001<br />
1/19<br />
EXIT MENU<br />
3 Select the direction to rotate the<br />
picture.<br />
ROTATE<br />
SELECT SET<br />
2304<br />
EXIT MENU<br />
MENU<br />
2 times<br />
The picture rotates clockwise in<br />
increments of 90°.<br />
The picture rotates<br />
counter-clockwise in increments<br />
of 90°.
Still pictures can only be rotated in normal<br />
playback. When playing back rotated<br />
pictures in zoom playback or multi<br />
playback, pictures appear in original<br />
angle.<br />
Protected pictures and pictures recorded<br />
after setting the quality to [TIFF] cannot be<br />
rotated.<br />
When you play pictures on a PC, you<br />
cannot play rotated pictures without an<br />
OS or software compatible with Exif.<br />
Exif is the file format for still pictures, to<br />
which recording information and other can<br />
be added, established by JEITA [Japan<br />
Electronics and Information Technology<br />
Industries Association].<br />
Playback (advanced)<br />
Setting the Picture to be<br />
Printed and the Number of<br />
Prints [DPOF PRINT]<br />
DPOF (Digital Print Order Format) is a<br />
system that allows the user to select which<br />
pictures are to be printed on compatible<br />
photo printers. DPOF also allows the user<br />
to set how many copies of each picture will<br />
be printed. Many commercial photo printing<br />
services now use DPOF.<br />
For more information please visit:<br />
http://panasonic.jp/dc/dpof_110/<br />
white_e.htm<br />
1 Select [DPOF PRINT], then select<br />
[SINGLE], [MULTI] or [CANCEL].<br />
PLAY<br />
ROTATE<br />
1/ 2<br />
PROTECT<br />
DPOF PRINT SINGLE<br />
SLIDE SHOW MULTI<br />
RESIZE<br />
CANCEL<br />
SELECT<br />
MENU<br />
EXIT MENU<br />
83
∫ Single setting<br />
Select the picture and set the number of<br />
prints.<br />
2 times<br />
The number of prints can be set from 0 to<br />
999.<br />
The number of prints icon [ ] appears.<br />
When the number of prints is set to “0”,<br />
DPOF print setting is canceled.<br />
∫ Multi setting<br />
Select the pictures and set the number<br />
of prints.<br />
2 times<br />
Repeat the above procedure.<br />
The number of prints can be set from 0 to<br />
999.<br />
The number of prints icon [ ] appears.<br />
When the number of prints is set to “0”,<br />
DPOF print setting is canceled.<br />
84<br />
DPOF SET THIS<br />
1<br />
100 _ 0001<br />
1/19<br />
COUNT 1 DATE DISPLAY<br />
SELECT EXIT MENU<br />
DPOF SET MULTI<br />
7<br />
8<br />
MENU<br />
10 11 12<br />
COUNT 1 DATE DISPLAY<br />
SELECT EXIT MENU<br />
1<br />
9<br />
MENU<br />
Playback (advanced)<br />
∫ To cancel all settings<br />
Select [YES] to cancel all settings.<br />
CANCEL ALL DPOF<br />
CANCEL ALL DPOF<br />
PRINT SETTINGS?<br />
NO<br />
YES<br />
SELECT SET<br />
MENU<br />
∫ To print the date<br />
You can set/cancel the printing with the<br />
recorded date with each press of the<br />
[DISPLAY] button when setting the number<br />
of prints.<br />
DPOF SET THIS<br />
1<br />
DATE<br />
100 _ 0001<br />
1/19<br />
COUNT 1 DATE DISPLAY<br />
SELECT EXIT MENU<br />
The date print icon [ DATE<br />
] appears.<br />
When you go to a photo studio for digital<br />
printing, be sure to order the printing of<br />
the date additionally if required.<br />
The date may not be printed depending<br />
on photo studios or printers even if you set<br />
the date print. For further information, ask<br />
the photo studio for details or refer to the<br />
operating instructions of the printer.
DPOF print setting is a convenient<br />
function when you print pictures with<br />
printers supporting DPOF printing. (P97)<br />
DPOF is the abbreviation for Digital Print<br />
Order Format. This feature allows you to<br />
write print information or other into the<br />
images on the card and to use such<br />
information on the DPOF-compliant<br />
system.<br />
The setting of DPOF print will not be<br />
applied to the DPOF setting of<br />
Slide Show.<br />
If the file is not based on the DCF<br />
standard, the DPOF print setting cannot<br />
be set. DCF is an abbreviation of [Design<br />
rule for Camera File system], stipulated by<br />
JEITA [Japan Electronics and Information<br />
Technology Industries Association].<br />
When setting the DPOF print, delete any<br />
previous DPOF print settings made by<br />
other equipment.<br />
Playback (advanced)<br />
Preventing Accidental Erasure<br />
of the Picture [PROTECT]<br />
You can set the protection on the pictures<br />
which you do not want to delete to prevent<br />
them from accidental erasure.<br />
1 Select [PROTECT], then select<br />
[SINGLE], [MULTI] or [CANCEL].<br />
PLAY 1/ 2<br />
ROTATE<br />
PROTECT<br />
DPOF PRINT<br />
SLIDE SHOW<br />
RESIZE<br />
SELECT<br />
MENU<br />
SINGLE<br />
MULTI<br />
CANCEL<br />
EXIT MENU<br />
∫ Single setting<br />
Select the picture and set/cancel the<br />
protection.<br />
100_ PROTECT THIS<br />
0001<br />
1/19<br />
SELECT<br />
SET/CANCEL EXIT MENU<br />
MENU<br />
2 times<br />
SET The protect icon [ ] appears.<br />
CANCEL The protect icon [<br />
disappears.<br />
]<br />
85
∫ Multi setting/To cancel all settings<br />
Perform the same operation as in [Setting<br />
the Picture to be Printed and the Number of<br />
Prints [DPOF PRINT]]. (P83– 84)<br />
If you want to delete protected pictures,<br />
cancel the protect setting first.<br />
While this feature protects the pictures<br />
from accidental erasure, formatting the<br />
card will permanently delete all data.<br />
(P91)<br />
The protect setting may not be effective in<br />
other equipment.<br />
Sliding the Card Write-Protect switch A to<br />
[LOCK] prevents the picture from deletion<br />
even if the protection is not set.<br />
86<br />
Playback (advanced)<br />
Playing Back with Slide Show<br />
[SLIDE SHOW]<br />
1 Select [SLIDE SHOW], then select<br />
[ALL] or [DPOF].<br />
PLAY 1/2<br />
ROTATE<br />
PROTECT<br />
DPOF PRINT<br />
SLIDE SHOW ALL<br />
RESIZE DPOF<br />
SELECT<br />
EXIT MENU<br />
MENU<br />
ALL for playing back all pictures<br />
DPOF for playing back the pictures for<br />
which DPOF Slide Show was<br />
set<br />
2 Set the items of the Slide Show.<br />
ALL SLIDE SHOW<br />
START<br />
DURATION<br />
SELECT SET<br />
1SEC.<br />
2SEC.<br />
3SEC.<br />
5SEC.<br />
EXIT MENU
DURATION It can be set among 1,<br />
2, 3 and 5 seconds.<br />
DPOF SET<br />
(Only when<br />
setting to<br />
[DPOF])<br />
CANCEL ALL<br />
(Only when<br />
setting to<br />
[DPOF])<br />
3 Select [START].<br />
You can select the<br />
pictures you want to set<br />
to the Slide Show.<br />
DPOF icon 1 appears<br />
on the selected pictures<br />
in green.<br />
You can cancel the<br />
DPOF Slide Show<br />
setting.<br />
DPOF SET THIS<br />
100 _ 0001<br />
1/19<br />
SELECT<br />
SET/CANCEL EXIT MENU<br />
ALL SLIDE SHOW<br />
START<br />
DURATION<br />
SELECT<br />
1SEC.<br />
EXIT MENU<br />
4 By pressing the [MENU] button,<br />
the Slide Show stops.<br />
Playback (advanced)<br />
∫ SD Slide Show<br />
If you insert a card including the SD<br />
Slide Show edited with the [SD Viewer for<br />
DSC] which is in the supplied CD-ROM,<br />
and then turn the camera on in playback<br />
mode, the confirmation screen appears.<br />
Select [YES] and press 1 to start the SD<br />
Slide Show. Select [NO] and press 1 to<br />
start normal playback.<br />
Pictures set with the DPOF Slide Show by<br />
the [SD Viewer for DSC] cannot be played<br />
back as a Slide Show. Please set DPOF<br />
Slide Show with this camera again.<br />
In motion image playback, Slide Show is<br />
not available.<br />
The DPOF setting for the Slide Show will<br />
not be applied to DPOF printing.<br />
DPOF Slide Show cannot be performed<br />
without the DPOF setting for Slide Show.<br />
When setting the DPOF Slide Show to a<br />
picture with DPOF printing, both the<br />
DPOF icon and the number of prints<br />
appear on the picture in green.<br />
When only the DPOF printing is set on the<br />
picture, the DPOF icon and the number of<br />
prints appear in white. They do not appear<br />
on the DPOF Slide Show.<br />
When setting the DPOF Slide Show on<br />
the camera, delete any previous DPOF<br />
settings made by other equipment.<br />
87
This function is useful if you want to reduce<br />
the file size of the picture in cases when it<br />
needs to be attached to an e-mail or<br />
uploaded to a website.<br />
1 Select [RESIZE].<br />
2 Select the picture and set it.<br />
88<br />
Resizing the Pictures [RESIZE]<br />
MENU<br />
PLAY 1/ 2<br />
ROTATE<br />
PROTECT<br />
DPOF PRINT<br />
SLIDE SHOW<br />
RESIZE<br />
SELECT<br />
RESIZE<br />
SELECT<br />
SET<br />
EXIT MENU<br />
100_ 2304<br />
0001<br />
1/19<br />
EXIT MENU<br />
The following pictures cannot be<br />
resized.<br />
–Pictures equal to or smaller than<br />
640k480 pixels<br />
–Pictures recorded after setting the<br />
picture size to [HDTV]<br />
Playback (advanced)<br />
–Pictures recorded after setting the<br />
quality to [TIFF]<br />
–Motion images<br />
–Flip animation<br />
–Rotated pictures (You can resize them<br />
if you rotate them back to their original<br />
position.)<br />
3 Select the size and set it.<br />
2304<br />
1600<br />
RESIZE<br />
SELECT<br />
RESIZE<br />
100_ 2304<br />
0001<br />
1/19<br />
EXIT MENU<br />
Sizes smaller than the recorded picture<br />
are displayed.<br />
[1600]: 1600k1200 pixels<br />
[1280]: 1280k960 pixels<br />
[640]: 640k480 pixels
4 Select [YES] or [NO] and set it.<br />
RESIZE<br />
DELETE ORIGINAL<br />
PICTURE?<br />
NO<br />
YES<br />
SELECT SET<br />
CANCEL MENU<br />
MENU<br />
2 times<br />
When you select [YES], the picture is<br />
overwritten.<br />
When the original picture is protected,<br />
you cannot overwrite the resized<br />
picture.<br />
It may not be possible to resize pictures<br />
recorded with other equipment.<br />
When resized pictures are overwritten,<br />
they cannot be restored.<br />
Playback (advanced)<br />
Trimming the Pictures<br />
[TRIMMING]<br />
Use this function when you trim necessary<br />
parts of the recorded picture.<br />
1 Select [TRIMMING].<br />
SELECT<br />
MENU<br />
PLAY 2/ 2<br />
TRIMMING<br />
FORMAT<br />
EXIT MENU<br />
89
2 Select the picture to trim and set<br />
it.<br />
90<br />
SELECT<br />
SET<br />
TRIMMING<br />
100_ 2304<br />
0001<br />
1/19<br />
EXIT MENU<br />
The following pictures cannot be<br />
trimmed.<br />
–Pictures smaller than 640k480 pixels<br />
–Pictures recorded after setting the<br />
picture size to [HDTV]<br />
–Pictures recorded after setting the<br />
quality to [TIFF]<br />
–Motion images<br />
–Flip animation<br />
–Rotated pictures (You can trim them if<br />
you rotate them back.)<br />
3 Enlarge or decrease the picture.<br />
TRIMMING<br />
ZOOM EXIT MENU<br />
W<br />
100_ 2304<br />
0001<br />
1/19<br />
T<br />
Playback (advanced)<br />
4 Shift the picture and press the<br />
shutter button to set.<br />
TRIMMING<br />
ZOOM<br />
TRIM:SHUTTER<br />
100_ 2304<br />
0001<br />
1/19<br />
EXIT MENU<br />
5 Select [YES] or [NO] and set it.<br />
TRIMMING<br />
DELETE ORIGINAL<br />
PICTURE?<br />
NO<br />
YES<br />
SELECT SET<br />
CANCEL MENU<br />
MENU<br />
2 times<br />
When you select [YES], the picture is<br />
overwritten.<br />
When the original picture is protected,<br />
you cannot overwrite the resized<br />
picture.<br />
It may not be possible to trim pictures<br />
recorded with other equipment.<br />
The picture size of the trimmed pictures<br />
may become smaller than that of the<br />
original one depending on the cut size.<br />
The picture quality of the trimmed picture<br />
may be deteriorated.<br />
When trimmed pictures are overwritten,<br />
they cannot be restored.
Initializing the Card [FORMAT]<br />
1 Select [FORMAT].<br />
SELECT<br />
MENU<br />
PLAY 2/2<br />
TRIMMING<br />
FORMAT<br />
2 Select [YES] to format.<br />
FORMAT<br />
EXIT MENU<br />
DELETE ALL DATA<br />
ON THE MEMORY CARD?<br />
NO<br />
YES<br />
SELECT SET<br />
Playback (advanced)<br />
Usually, it is not necessary to format the<br />
card. Format the card when the message<br />
[MEMORY CARD ERROR] appears.<br />
If the card has been formatted by a PC or<br />
other equipment, format the card on the<br />
camera again.<br />
Once the card is formatted, all data<br />
including protected images are<br />
irretrievably erased. Please confirm<br />
that all data is transferred to your PC<br />
before proceeding with format<br />
function.<br />
During formatting, do not turn the camera<br />
off.<br />
When you format the card, use a battery<br />
with sufficient battery power (P14) or AC<br />
adapter (DMW-CAC1; optional).<br />
When the SD Memory Card Write-Protect<br />
switch is slid to [LOCK], you cannot format<br />
the card.<br />
If the card cannot be formatted, consult<br />
your nearest servicenter.<br />
For USA assistance, please call: 1-800-272-7033<br />
or send e-mail to : digitalstillcam@panasonic.com<br />
91
92<br />
Playback (advanced)<br />
Playing Back Pictures with a TV Screen<br />
∫ Playing back pictures with video<br />
cable (supplied)<br />
Turn the camera and the TV off.<br />
1 Connect the video cable A<br />
(supplied) to the [V OUT / DIGITAL]<br />
socket of the camera.<br />
Connect the video cable with the [ ]<br />
mark facing you.<br />
Hold B and then insert or pull the video<br />
cable straight.<br />
2 Connect the video cable to the<br />
video input sockets of the TV.<br />
1 Yellow: to the video input socket<br />
3 Turn the TV on and select external<br />
input.<br />
4 Turn the camera on and then set<br />
the mode dial to playback mode<br />
[ ].<br />
∫ Viewing pictures in other countries<br />
When setting [VIDEO OUT] on the menu,<br />
you can view pictures on a TV in other<br />
countries (regions) which use the NTSC or<br />
PAL system.<br />
Even if you set menu selection for [VIDEO<br />
OUT] to [PAL], the output signal is still<br />
NTSC in the recording mode.<br />
∫ Playback pictures on TV with SD<br />
Memory Card slot<br />
A recorded SD Memory Card can be<br />
played back on TVs with an SD Memory<br />
Card slot.<br />
If you play back pictures recorded using<br />
[HDTV] mode on a High-Definition TV,<br />
(HDTV has 16:9 aspect) the picture quality<br />
will be better.<br />
Do not use any other AV cables except the<br />
supplied one.<br />
Read the TV operating instructions too.
Connecting to a PC or Printer<br />
Connecting to a PC or Printer<br />
Before Connecting with USB Connection Cable<br />
[ : USB MODE]<br />
Select the USB communication system according to the OS of your PC or your printer<br />
before connecting them to the camera with the USB connection cable (supplied).<br />
Set the items on [USB MODE] in the [SETUP] menu. (P24)<br />
1 Select [USB MODE]. 2 Select [PC] or [PictBridge (PTP)].<br />
MENU<br />
PC/OS<br />
SETUP<br />
USB MODE<br />
PC<br />
HIGHLIGHT OFF<br />
SELECT<br />
EXIT MENU<br />
3/ 3<br />
VIDEO OUT NTSC<br />
SCENE MENU AUTO<br />
LANGUAGE ENG<br />
Devices to be connected<br />
Windows ® 2000 Professional, Windows Me,<br />
Windows 98/98 SE or Mac OS X (10.1 or above),<br />
Mac OS 9.x<br />
Windows XP Home Edition, Windows XP<br />
Professional or Mac OS X<br />
USB MODE<br />
PictBridge<br />
(PTP)<br />
SELECT SET<br />
When [PC] is selected, the camera is connected via USB Mass Storage communication<br />
system.<br />
When [PictBridge (PTP)] is selected, the camera is connected via the PTP (Picture<br />
Transfer Protocol) communication system.<br />
PC<br />
[PC]<br />
Setting on the<br />
USB mode<br />
[PC] or [PictBridge<br />
(PTP)]<br />
Printer Printers supporting PictBridge [PictBridge (PTP)]<br />
93
94<br />
Connecting to a PC or Printer<br />
∫ When using Windows 98/98 SE<br />
When using Windows 98/98 SE, install the USB driver before connecting. (When using<br />
Windows Me/2000/XP, Mac OS 9.x and Mac OS X, you do not have to install the USB<br />
driver.)<br />
∫ When using Windows 2000 Professional, Windows Me, Windows 98/98 SE or Mac<br />
OS 9.x<br />
Even if the [PictBridge (PTP)] is selected in [USB MODE], the camera cannot be<br />
connected by a PC with the following OS’s: Windows 2000 Professional, Windows Me,<br />
Windows 98/98 SE or Mac OS 9.x.<br />
When connecting the camera to a PC, do not set [USB MODE] to [PictBridge (PTP)].<br />
(When the camera is shipped, [PC] is selected.)<br />
When connecting to a PC which includes the above-mentioned OS<br />
USB MODE<br />
and setting the [USB MODE] to [PictBridge (PTP)], the messages<br />
shown on the right appear on the LCD monitor of the camera.<br />
The following messages appear for each OS on the display of the<br />
PC. Select [Cancel] to close the window and disconnect the USB<br />
connection cable.<br />
PictBridge<br />
(PTP)<br />
OS Message<br />
Windows 2000 Professional [Welcome to the Found New Hardware Wizard]<br />
Windows Me<br />
[New Hardware Found]><br />
Windows 98/98 SE<br />
[Add New Hardware Wizard]<br />
(When you connect to the PC more than 2 times, only<br />
[Add New Hardware Wizard] appears.)<br />
Mac OS 9.x [Software needed for the USB device “DMC-FZ15” is not<br />
available. Would you like to look for the software on the<br />
Internet?]
Connecting to a PC<br />
If you use Windows 98/98SE, install the<br />
USB driver and then connect it to the<br />
computer.<br />
When using Windows Me/2000/XP, Mac<br />
OS 9.x and Mac OS X, you do not have to<br />
install the USB driver.<br />
A: USB connection cable (supplied)<br />
B: AC adaptor (DMW-CAC1; optional)<br />
Connecting to a PC or Printer<br />
1 Turn the camera on and set the<br />
[USB MODE] according to the OS<br />
you use.<br />
Set to [PC] or [PictBridge (PTP)]. Refer<br />
to “Before Connecting with USB<br />
Connection Cable” on page 93.<br />
If [USB MODE] is set to [PictBridge<br />
(PTP)] while Windows XP or Mac OS X<br />
is used, it is connected as PTP.<br />
2 Connect the camera to a PC via<br />
the USB connection cable A<br />
(supplied).<br />
Connect the USB connection cable with<br />
the [ ] mark facing you.<br />
Hold C and then insert or pull the USB<br />
connection cable straight.<br />
Depending on the USB mode setting, the<br />
indications on the screen may vary. Refer<br />
to page 96.<br />
95
∫ PC<br />
[Windows]<br />
The drive appears on the [My Computer]<br />
folder.<br />
If it is the first time you are connecting the<br />
camera to a PC, the required driver is<br />
installed automatically so that the camera<br />
can be recognized by the Windows Plug<br />
and Play, then it appears on the<br />
[My Computer] folder.<br />
[Macintosh]<br />
The drive is shown on the screen as<br />
untitled.<br />
∫ PictBridge (PTP)<br />
[Windows]<br />
The camera icon appears on the<br />
[My Computer] folder.<br />
If it is the first time you are connecting the<br />
camera to a PC, the required driver is<br />
installed automatically so that the camera<br />
can be recognized by the Windows Plug<br />
and Play, then the camera icon appears<br />
on the [My Computer] folder.<br />
[Macintosh]<br />
You can read pictures with image capture<br />
or iPhoto.<br />
If the remaining battery power is<br />
exhausted during communication, the<br />
recorded data may be damaged. When<br />
you connect the camera to the PC, use<br />
the battery with sufficient battery power<br />
(P14) or the AC adaptor (DMW-CAC1;<br />
optional).<br />
If the remaining battery power becomes<br />
low during communication, the power<br />
indicator blinks and the alarm beeps. In<br />
this case, stop the communication. Then<br />
turn the camera off and charge or replace<br />
the battery.<br />
Refer to P94 when connecting to the OS<br />
except for Windows XP and Mac OS X<br />
when setting [USB MODE] to [PictBridge<br />
(PTP)].<br />
96<br />
Connecting to a PC or Printer<br />
While [ACCESS] is being displayed, do<br />
not disconnect the USB connection cable.<br />
Do not use any other USB connection<br />
cables except the supplied one.<br />
For more information refer to the separate<br />
operating instructions about PC<br />
connection.<br />
Also refer to the operating instructions of<br />
the PC.<br />
∫ About PictBridge (PTP) setting<br />
It may take time to display the<br />
communication screen depending on the<br />
PC.<br />
You can only load pictures from the<br />
camera and cannot write them on the card<br />
or delete them.<br />
When there are 1000 or more pictures on<br />
a card, the pictures may not be imported.<br />
When the PC recovers from the standby<br />
mode while connecting it to a camera with<br />
USB connection cables, they may not<br />
properly communicate with each other.
Connecting to a PC or Printer<br />
Connecting to a PictBridge-compliant Printer<br />
By connecting the camera directly to a<br />
printer supporting PictBridge via the USB<br />
connection cable (supplied), you can select<br />
the pictures to be printed or start printing.<br />
A: USB connection cable (supplied)<br />
B: AC adaptor (DMW-CAC1; optional)<br />
1 Turn the camera on and then set<br />
the USB mode to [PictBridge<br />
(PTP)]. (P93)<br />
2 Turn on the printer.<br />
3 Connect the camera to a printer<br />
via the USB connection cable A<br />
(supplied).<br />
Connect the USB connection cable with<br />
the [ ] mark facing you.<br />
Hold C and then insert or pull the USB<br />
connection cable straight.<br />
When the DPOF<br />
Print is set. (P83)<br />
When the DPOF<br />
Print is not set.<br />
Select [DPOF<br />
PICTURE]. (P99)<br />
Select [SINGLE<br />
PICTURE]. (P98)<br />
If the remaining battery power becomes<br />
low during communication, the power<br />
indicator blinks and the alarm beeps. In<br />
this case, stop the communication at<br />
once. Then turn the camera off and<br />
replace the battery with a charged one or<br />
charge the battery. Or, use the AC adaptor<br />
(DMW-CAC1; optional).<br />
Set the print settings such as print quality<br />
on the printer beforehand. Ask the<br />
manufacturer of the printer about the<br />
corresponding models. (Read the printer<br />
operating instructions, too.)<br />
It may take time to print some pictures.<br />
Therefore, we recommend using a battery<br />
with sufficient power (P14) or the AC<br />
adaptor (DMW-CAC1; optional) when you<br />
connect to a printer.<br />
Disconnect the USB connection cable<br />
after printing.<br />
Do not use any other USB connection<br />
cables except the supplied one.<br />
97
Set the print settings such as paper size<br />
or print quality on the printer beforehand.<br />
Connect the camera to a printer. (P97)<br />
∫ Single picture<br />
1 Select a picture to be printed.<br />
98<br />
100<br />
PLEASE SELECT<br />
THE PICTURE TO PRINT<br />
_ PictBridge 2304<br />
0001<br />
1/19<br />
SELECT<br />
A message displays for about<br />
2 seconds.<br />
2 Set the print settings.<br />
SINGLE PICTURE<br />
PRINT START<br />
PRINT WITH DATE<br />
NUM. OF PRINTS<br />
PAPER SIZE<br />
PAGE LAYOUT<br />
SELECT SET<br />
PRINT<br />
OFF<br />
ON<br />
CANCEL MENU<br />
The items which are not supported by<br />
the printer are displayed in gray and<br />
cannot be selected.<br />
When you want to print pictures in a<br />
paper size or a layout which is not<br />
supported by the camera, set [PAPER<br />
SIZE] and [PAGE LAYOUT] to [ ] and<br />
then set the paper size or the layout on<br />
the printer. (For details, refer to the<br />
operating instructions of the printer.)<br />
Connecting to a PC or Printer<br />
∫ [PRINT WITH DATE]<br />
Settings on the printer are<br />
prioritized.<br />
OFF Date is not printed.<br />
ON Date is printed.<br />
If the printer does not support date<br />
printing, the date cannot be printed on the<br />
picture.<br />
∫ [NUM. OF PRINTS]<br />
Set the number of prints.<br />
∫ [PAPER SIZE]<br />
(Possible paper sizes on the camera)<br />
The items are listed on 1/2 and 2/2.<br />
Press 4 to select the desired item.<br />
1/2<br />
Settings on the printer are<br />
prioritized.<br />
L/3.5qk5q 89 mmk127 mm<br />
2L/5qk7q 127 mmk178 mm<br />
POSTCARD 100 mmk148 mm<br />
A4<br />
2/2<br />
210 mmk297 mm<br />
¢<br />
CARD SIZE 54 mmk85.6 mm<br />
10k15cm 100 mmk150 mm<br />
4qk6q 101.6 mmk152.4 mm<br />
8qk10q 203.2 mmk254 mm<br />
LETTER 216 mmk279.4 mm<br />
¢These items cannot be displayed when<br />
the printer does not support the paper<br />
sizes.
∫ [PAGE LAYOUT]<br />
(Possible layouts on the camera)<br />
Settings on the printer are<br />
prioritized.<br />
1 page with no frame print<br />
1 page with frame print<br />
2 pages print<br />
4 pages print<br />
3 Select [PRINT START] and then<br />
print out the picture.<br />
SINGLE PICTURE<br />
PRINT START<br />
PRINT WITH DATE<br />
NUM. OF PRINTS 1<br />
PAPER SIZE<br />
PAGE LAYOUT<br />
SELECT CANCEL MENU<br />
Press the [MENU] button to cancel<br />
printing.<br />
Connecting to a PC or Printer<br />
∫ DPOF picture<br />
Set the DPOF print with this camera in<br />
advance. (P83)<br />
1 Select [DPOF PICTURE].<br />
PictBridge<br />
SINGLE PICTURE<br />
DPOF PICTURE<br />
SELECT SET<br />
When printing under the new settings,<br />
disconnect the USB connection cable<br />
and connect it to the printer again.<br />
You can change the DPOF print setting<br />
by pressing the [MENU] button. (P83)<br />
2 Select [PRINT START] and then<br />
print out the picture.<br />
DPOF<br />
PRINT START<br />
PAPER SIZE<br />
PAGE LAYOUT<br />
SELECT<br />
CANCEL MENU<br />
Refer to P98 for print setting.<br />
Press the [MENU] button to cancel<br />
printing.<br />
99
∫ Setting the date printing with the<br />
DPOF print in advance<br />
When the printer supports the date printing<br />
by DPOF setting, we recommend setting<br />
the date printing with the DPOF print in<br />
advance. (P84) The recording date can be<br />
printed by selecting [DPOF PICTURE] to<br />
start printing.<br />
The setting on the printer may have<br />
priority over the setting on the camera in<br />
the date print. Also check the date print<br />
setting on the printer.<br />
If the printer does not support date<br />
printing, the date cannot be printed on the<br />
picture.<br />
Layout printing<br />
When printing a picture several times<br />
on 1 sheet of paper<br />
For example, if you want to print a picture<br />
4 times on 1 sheet of paper, set [PAGE<br />
LAYOUT] to [ ] and then set the<br />
number of prints to 4 for the picture on<br />
[NUM. OF PRINTS].<br />
When printing different pictures on<br />
1 sheet of paper (only in DPOF<br />
printing)<br />
For example, if you want to print 4 different<br />
pictures on 1 sheet of paper, set [PAGE<br />
LAYOUT] to [ ] and then set the<br />
number of prints to 1 on [COUNT] in<br />
DPOF print setting (P83) for each of the<br />
4pictures.<br />
When printing with PictBridge<br />
Do not disconnect the USB connection<br />
cable when the cable disconnection<br />
warning icon [ ] is indicated.<br />
When the [¥] indication lights in yellow<br />
during printing, make sure there is no<br />
malfunction on the printer.<br />
When the printer does not support TIFF<br />
print, you cannot print pictures of which<br />
quality is TIFF.<br />
100<br />
Connecting to a PC or Printer<br />
In DPOF print, if the total number of prints<br />
or the number of printed pictures is high,<br />
pictures are printed several times. (The<br />
indication of the remaining number of<br />
prints is different from the setting,<br />
however, this is not a malfunction.)
Others<br />
Others<br />
Using the MC Protector/ND Filter<br />
The MC protector (DMW-LMC72; optional)<br />
is a transparent filter which affects neither<br />
the colors nor the amount of light, so it can<br />
always be used to protect the camera’s<br />
lens.<br />
The ND filter (DMW-LND72; optional)<br />
reduces the amount of light to<br />
approximately 1/8th (equal to adjusting the<br />
aperture value 3 increments) without<br />
affecting the color balance.<br />
1 Remove the lens cap and the lens<br />
ring.<br />
2 Attach the lens hood adaptor.<br />
(P20)<br />
3 Attach the MC protector A or the<br />
ND filter B.<br />
Cap C (supplied with MC protector)<br />
The lens cap supplied with the camera<br />
cannot be attached to the MC protector or<br />
the ND filter.<br />
You cannot attach the MC protector and<br />
the ND filter at the same time.<br />
When taking pictures with the flash using<br />
the MC protector or ND filter, vignetting<br />
effect may occur.<br />
If the MC protector/ND filter are dropped,<br />
they may be destroyed. Be careful not to<br />
drop them when attaching them to the<br />
camera.<br />
The cap supplied with MC protector can<br />
also be used for the ND filter.<br />
MCu“Multi-coated”<br />
NDu“Neutral Density”<br />
101
13<br />
12<br />
∫ In playback<br />
1 Playback mode<br />
2 DPOF (P83, 87)<br />
(White):<br />
DPOF setting for printing<br />
(Green):<br />
DPOF setting for Slide Show<br />
(Green with number of prints):<br />
DPOF setting for printing and<br />
Slide Show<br />
3 Protected picture (P85)<br />
4 Picture size (P70)<br />
: In Motion image mode<br />
5 Quality (P71)<br />
/ : In Motion image mode<br />
6 Battery indication (P14)<br />
7 Folder/File number<br />
8 Page number/Total pictures<br />
9 Histogram (P30)<br />
It will be displayed when the<br />
[DISPLAY] button is pressed.<br />
Others<br />
1 2 3 4 5 6<br />
1<br />
PLAY MOTION<br />
IMAGE<br />
2304<br />
100 _ 0001<br />
1/19<br />
P F2.8 1/25 ISO100 AUTO<br />
10:00 DEC. 1.2004<br />
7<br />
8<br />
10 Recording information<br />
(Recording mode/Aperture value/<br />
Shutter speed/ISO sensitivity/Flash/<br />
White balance)<br />
It will be displayed when the<br />
[DISPLAY] button is pressed.<br />
11 Recorded date and time<br />
12 Motion image playback<br />
13 Flip animation (P76)<br />
9<br />
10<br />
11<br />
103
Cautions for Use<br />
∫ Optimal Use of the Camera<br />
When carrying this camera, take care<br />
not to drop or cause impact to it.<br />
The outer case may be destroyed by the<br />
strong shock, and it may cause<br />
malfunction of this camera.<br />
Keep the camera away from magnetized<br />
equipment (such as a microwave oven,<br />
TV, video game equipment, etc.).<br />
If you use the camera on or near a TV,<br />
pictures may be disrupted due to<br />
electromagnetic wave radiation.<br />
Do not use the camera near a cell phone<br />
because doing so may cause noise to<br />
adversely affect the pictures.<br />
Recorded data may be damaged, or<br />
pictures may be distorted by strong<br />
magnetic fields created by speakers or<br />
large motors.<br />
Electromagnetic wave radiation generated<br />
by a microprocessor may adversely affect<br />
the camera, causing the disturbance of<br />
pictures.<br />
If the camera is affected by magnetically<br />
charged equipment and does not function<br />
properly, turn the camera off and remove<br />
the battery or disconnect AC adaptor<br />
(DMW-CAC1; optional) and then insert<br />
the battery or connect AC adaptor again.<br />
Thereafter, turn the camera on.<br />
Do not use the camera near radio<br />
transmitters or high-voltage lines.<br />
If you record near radio transmitters or<br />
high-voltage lines, recorded pictures may<br />
be adversely affected.<br />
104<br />
Others<br />
Make sure to use the supplied cords and<br />
cables. If you use optional accessories,<br />
use the cords and the cables supplied<br />
with them.<br />
Do not extend the cords and the cables.<br />
Do not spray insecticides or volatile<br />
chemicals onto the camera.<br />
If the camera is sprayed with such<br />
chemicals, the camera body may be<br />
damaged and the surface finish may peel<br />
off.<br />
Do not keep rubber or plastic products in<br />
contact with the camera for a long period<br />
of time.<br />
Do not use benzine, thinner or alcohol<br />
for cleaning the camera.<br />
Before cleaning the camera, remove the<br />
battery or disconnect charger from the<br />
electrical outlet.<br />
The camera body may be deformed and<br />
the surface finish may peel off.<br />
Wipe the camera with a soft, dry cloth. To<br />
remove stubborn stains, wipe with a cloth<br />
that is soaked in a detergent diluted with<br />
water and afterward finish wiping with a<br />
dry cloth.<br />
When you use chemical cloth, follow the<br />
instructions that come with the cloth.<br />
In case rain or other sources of water<br />
splash onto the camera, wet a soft cloth<br />
with tap water, wring it well, and use it to<br />
wipe the camera body carefully. Then<br />
wipe it again with a dry cloth.
∫ Battery<br />
The battery is a rechargeable lithium ion<br />
battery. Its ability to generate power is<br />
based upon the chemical reaction that<br />
takes place inside it. This reaction is<br />
susceptible to the surrounding temperature<br />
and humidity, and, if the temperature is too<br />
high or too low, the operating time of the<br />
battery will be shorter.<br />
When you go out, bring charged spare<br />
batteries.<br />
Prepare batteries with the charger equal<br />
to 3 to 4 times of the power for the desired<br />
operating time. The operating time of the<br />
battery may become shorter in low<br />
temperatures such as skiing resorts.<br />
When you travel, be sure to prepare the<br />
supplied charger to charge the battery on<br />
the spot.<br />
If you drop the battery accidentally,<br />
check to see if the battery body and<br />
terminals are damaged.<br />
Inserting damaged battery in the camera<br />
may damage the camera.<br />
After use, be sure to remove the card<br />
and the battery or disconnect the plug<br />
from the electrical outlet.<br />
Extremely high or low temperatures will<br />
shorten the life of the battery.<br />
If the battery is kept in smoky or dusty<br />
places, the terminals may rust and cause<br />
malfunctions.<br />
Dispose of an unusable battery.<br />
The battery has a limited life.<br />
Do not throw the battery into fire because<br />
it may cause an explosion.<br />
An unusable battery should be discarded<br />
in accordance with battery recycling laws.<br />
For information you can call the RBRC<br />
hotline at 1-800-822-8837.<br />
Others<br />
Do not allow the battery terminals to<br />
come in contact with metal objects<br />
(such as necklaces, hairpins, etc.).<br />
This can result in a short circuit or heat<br />
generation and, if you touch the battery in<br />
this condition, you may be badly burned.<br />
∫ Charger<br />
If you use the charger near a radio, radio<br />
reception may be disturbed. Keep the<br />
charger 3.28 feet (1 m) or more away from<br />
radio.<br />
When the charger is in use, it may<br />
generate whirring sounds. However, this is<br />
not a malfunction.<br />
After use, be sure to disconnect the<br />
charger from the electrical outlet. (If it is<br />
left connected, a minute amount of current<br />
is consumed.)<br />
Keep the terminal of the charger and<br />
battery clean.<br />
∫ Condensation (When the lens or the<br />
Viewfinder is fogged up)<br />
When condensation has taken place:<br />
Turn the camera off and leave the camera<br />
in this condition for about 2 hours. When<br />
the camera becomes close to the ambient<br />
temperature, the condensation<br />
disappears naturally.<br />
When you move the camera from a cold<br />
place to a hot place, put the camera into<br />
plastic bag and then take it out after the<br />
temperature of the camera becomes close<br />
to the ambient temperature to avoid<br />
condensation.<br />
If condensation has taken place, it causes<br />
a malfunction.<br />
Be careful to avoid condensation and take<br />
proper measures when condensation<br />
occurs.<br />
105
∫ Card<br />
While the card access indication<br />
appears (the card is being accessed), do<br />
not open the Card/Battery Door to<br />
remove the card, do not turn the camera<br />
off or do not shake or cause impact to<br />
the camera.<br />
Do not leave the card in places where<br />
there is high temperature or direct<br />
sunlight, or where electromagnetic<br />
waves or static electricity are easily<br />
generated.<br />
Do not bend or drop the card.<br />
The card may be damaged or the<br />
recorded content may be damaged or<br />
erased.<br />
After use, be sure to remove the card<br />
from the camera and then store it.<br />
For storing or transporting the camera,<br />
place it in a bag.<br />
Do not allow dirt, dust or water to enter the<br />
terminals on the back of the card and do<br />
not touch it with your fingers.<br />
∫ Folder Composition<br />
When a Memory Card with data recorded<br />
on it is inserted into a PC, the folders<br />
shown below will appear.<br />
In the [100_PANA] folder it is possible to<br />
record up to 999 pictures.<br />
In the [MISC] folder it is possible to record<br />
the files that have been set with DPOF<br />
settings.<br />
The files recorded in flip animation<br />
function are stored in [PRIVATE1] folder.<br />
The motion images created by flip<br />
animation function are stored in<br />
[100_PANA] or another folder.<br />
106<br />
SD Memory<br />
Card<br />
DCIM<br />
100_PANA<br />
EXPORT<br />
MISC<br />
PRIVATE1<br />
Others<br />
∫ Printing pictures recorded with HDTV<br />
mode<br />
When you print pictures recorded after<br />
setting the picture size to [HDTV]<br />
(1920k1080 pixels), both ends of the<br />
pictures may be cut out.<br />
To print pictures with ends:<br />
When you order photo studios to print<br />
pictures:<br />
Ask the photo studio if the pictures can be<br />
printed with both ends.<br />
When you print pictures with your printer:<br />
When using the printer with a trimming<br />
feature or a feature which cuts out both<br />
edges of the pictures, cancel the feature<br />
for printing.<br />
The feature depends on the printer used.<br />
Refer to the operating instructions of the<br />
printer for details.
Message Display<br />
[NO MEMORY CARD]<br />
Insert the card.<br />
[THIS MEMORY CARD IS PROTECTED]<br />
Cancel the card lock.<br />
[NO VALID IMAGE TO PLAY]<br />
Play back after recording or after inserting<br />
a card with a recorded picture.<br />
[MEMORY CARD FULL/<br />
NOT ENOUGH MEMORY IN THE CARD]<br />
Insert a new card or delete the<br />
unnecessary data.<br />
[PLEASE CLOSE THE FLASH]<br />
Be sure to close the flash after use.<br />
[MODE DIAL IS NOT IN THE PROPER<br />
POSITION]<br />
This message appears when you turn the<br />
camera on with the mode dial in the wrong<br />
position.<br />
Rotate the mode dial to the proper position.<br />
[PLEASE SET THE CLOCK]<br />
This message appears when you use the<br />
camera for the first time or you do not use<br />
the camera for a long time. Set the clock.<br />
[THIS PICTURE IS PROTECTED]<br />
After canceling the protect setting, you can<br />
delete or overwrite the picture.<br />
[THIS PICTURE CAN’T BE DELETED /<br />
SOME PICTURES CAN’T BE DELETED]<br />
The pictures not based on the DCF<br />
standard cannot be deleted.<br />
Others<br />
[CAN’T BE SET ON THIS PICTURE /<br />
CAN’T BE SET ON SOME PICTURES]<br />
If the pictures are not based on the DCF<br />
standard, the DPOF print cannot be set.<br />
[NO ADDITIONAL DELETE SELECTIONS<br />
CAN BE MADE]<br />
You have exceeded the number of pictures<br />
that can be set at once with multi-delete<br />
setting.<br />
[MEMORY CARD ERROR FORMAT THIS<br />
CARD?]<br />
The format of the card cannot be<br />
recognized by this camera. Format the card<br />
again with this camera.<br />
[PLEASE TURN CAMERA OFF AND<br />
THEN ON AGAIN]<br />
This message appears when the camera<br />
does not operate properly. Turn the camera<br />
off and on. If the message persists, contact<br />
the dealer or your nearest servicenter.<br />
[MEMORY CARD ERROR]<br />
Failed access to the card.<br />
Insert the card again.<br />
[READ ERROR]<br />
Data reading error.<br />
Play it back again.<br />
[WRITE ERROR]<br />
Data writing error.<br />
Turn the camera off and remove the card.<br />
Then insert the card and turn the camera<br />
on again. Be sure that the camera is turned<br />
off before removing or inserting the card to<br />
avoid damage.<br />
107
Troubleshooting<br />
108<br />
Others<br />
If you put the menu back to the settings at the time of purchase, the conditions may be<br />
improved. Carry out the [RESET] in the setup menu. (P24)<br />
Conditions Causes<br />
The camera will not turn<br />
on.<br />
As the camera is turned<br />
on, it turns off<br />
immediately.<br />
The brightness of the<br />
screen becomes dark or<br />
bright for a moment.<br />
The picture cannot be<br />
recorded.<br />
The picture is not<br />
displayed on the LCD<br />
monitor.<br />
The screen is too bright<br />
or dark.<br />
Is the battery inserted correctly?<br />
Is the battery sufficiently charged?<br />
Use a battery that has been sufficiently charged.<br />
Is the battery charge insufficient to operate the camera?<br />
Use a battery that has been sufficiently charged.<br />
This phenomenon appears when pressing the shutter button<br />
halfway to set the aperture value and does not affect the<br />
recorded pictures.<br />
Is the card inserted?<br />
Is the mode dial correctly set?<br />
Is there any memory capacity left on the card?<br />
Before recording, delete some pictures.<br />
Does the picture appear on the Viewfinder?<br />
Press the [EVF/LCD] button to switch to LCD monitor display.<br />
Adjust the brightness of the screen.<br />
Flash is not activated. Is the flash closed?<br />
Press the [ OPEN] button to open the flash.<br />
Unreadable language Select [ ] icon on the [SETUP] menu to set the desired<br />
was selected by mistake. language.<br />
The subject is not<br />
focused properly.<br />
The focus range varies depending on the recording mode.<br />
Rotate the mode dial to set to the proper mode for the<br />
distance to the subject.<br />
Is the subject out of the focus range? (P34)<br />
When you cannot focus on the subject even if you tried many<br />
times, turn the camera off once and turn it on again.<br />
The picture is not played Is the card inserted?<br />
back.<br />
Is there a picture in the card?<br />
Is the mode dial set to playback [ ]?<br />
The picture does not Is the camera connected to the TV correctly?<br />
appear on the television. Check it.<br />
Set the TV to video input mode.
Others<br />
Conditions Causes<br />
When connecting to a<br />
PC, pictures cannot be<br />
transferred.<br />
The clock setting is<br />
reset.<br />
A certain part of the<br />
picture blinks.<br />
When the shutter button<br />
is pressed halfway, a red<br />
lamp turns on<br />
sometimes.<br />
The camera will make<br />
sounds caused by<br />
internal mechanical<br />
movement when it is<br />
shaken.<br />
Is the camera connected to the PC correctly?<br />
Check it.<br />
Is the camera recognized by the PC correctly?<br />
Is the USB mode set correctly?<br />
If you do not use the camera for a long time, the clock setting<br />
may be reset. When the message [PLEASE SET THE<br />
CLOCK] appears, set the clock again.<br />
When you take a picture before setting the clock,<br />
[0:00 0. 0. 0] is recorded.<br />
This appears due to the highlight display function which<br />
shows white saturated areas. (P29)<br />
In dark places, the AF assist lamp (P74) lights red to make it<br />
easier to focus on a subject.<br />
The sound arises when the lens moves.<br />
This is not a malfunction.<br />
The lens clicks. When brightness has changed due to the zoom or the<br />
movement of the camera or other, the lens may click and the<br />
picture on the screen may be drastically changed, however,<br />
the pictures are not affected.<br />
The sound is caused by automatic adjustment of the<br />
aperture. It is not a malfunction.<br />
Some pixels are inactive<br />
or always lit on the LCD<br />
monitor.<br />
Noise appears on the<br />
LCD monitor.<br />
A vertical red spectrum<br />
appears on the LCD<br />
monitor.<br />
The pictures cannot be<br />
printed with printers<br />
supporting PictBridge.<br />
This is not a malfunction.<br />
These pixels do not affect the recorded pictures.<br />
In dark places, noise may appear to maintain the brightness<br />
of the LCD monitor. This does not affect the pictures you are<br />
recording.<br />
This is called smear. It is specific to CCD, not a malfunction.<br />
It appears when the subject has a bright part. It is recorded<br />
on motion images, but not recorded on still pictures.<br />
Set the USB mode to [PictBridge (PTP)].<br />
109
110<br />
Others<br />
Conditions Causes<br />
Both ends of the picture<br />
recorded by setting the<br />
picture size to [HDTV]<br />
(1920k1080 pixels) are<br />
cut out.<br />
Colors that were actually<br />
not around the subject<br />
appear on the picture.<br />
The flash is activated<br />
2 times.<br />
Even if the zoom lever is<br />
rotated, the zoom<br />
function is stopped<br />
halfway.<br />
When you order photo studios to print pictures, ask the photo<br />
studio if the pictures can be printed with both ends.<br />
When using the printer with a trimming feature or other<br />
feature which cuts out both edges of the pictures, cancel<br />
the feature for printing. The feature depends on the printer<br />
used.<br />
Refer to the operating instructions of the printer for details.<br />
This camera compensates the color shift caused by the<br />
characteristic of the lens. However, the color shift may<br />
appear when you rotate the zoom lever to Tele, etc.<br />
This is not a malfunction.<br />
The first flash is activated for red-eye prevention on the<br />
subject (red-eye phenomenon). 1 second after, the flash is<br />
activated again for recording.<br />
Is [CONVERSION] set in the [REC] mode menu? If so, the<br />
zoom range is limited. Cancel the setting on<br />
[CONVERSION]. (P79)
Specifications<br />
Others<br />
Digital Camera: Information for your safety<br />
Power Source: DC 8.4 V<br />
Power Consumption: 2.4 W (When recording with LCD Monitor)<br />
2.2 W (When recording with Viewfinder)<br />
1.4 W (When playing back with LCD Monitor)<br />
1.2 W (When playing back with Viewfinder)<br />
Camera Effective pixels: 4,000,000 pixels<br />
Image sensor: 1/2.5q CCD, total pixel number 4,230,000 pixels<br />
Primary color filter<br />
Lens: Optical 12k zoom, fl6 – 72 mm (35 mm film camera<br />
equivalent: 35 – 420 mm)/F2.8<br />
Digital zoom: Max. 4k<br />
Focus: TTL Normal/Macro/Manual/9-area-focusing/3-area-focusing/<br />
1-area-focusing/Spot-focusing<br />
Focus range: 0.98 feet (30 cm) (Wide)/6.56 feet (200 cm) (Tele) – ,<br />
Macro/Aperture-priority AE/Shutter-priority AE/<br />
Manual exposure: 0.16 feet (5 cm) (Wide)/<br />
6.56 feet (200 cm) (Tele) – <br />
Shutter system: Electronic shutteriMechanical shutter<br />
Burst recording<br />
Burst speed: 4 frames/second (high speed), 2 frames/second (low speed),<br />
Approx. 2 frames/second (no limit)<br />
Number of recordable<br />
pictures: Max. 10 frames (standard), max. 5 frames (fine), Depends on<br />
the capacity of the card. (no limit)<br />
(Performance in burst recording is only with SD Memory Card.<br />
MultiMediaCard performance will be less.)<br />
Motion image recording: 320k240 pixels<br />
(30 or 10 frames/second without audio. The maximum<br />
recording time depends on the capacity of the card.)<br />
ISO sensitivity: AUTO (without flash: from ISO64 to ISO200/<br />
with flash: from ISO100 to ISO400)/64/100/200/400<br />
Shutter speed: 8 – 1/2,000th<br />
Motion image mode: 1/30th – 1/2,000th<br />
White balance: AUTO/Daylight/Cloudy/Halogen/Flash/White set<br />
Exposure (AE): Program AE (P)/Aperture-priority AE (A)/<br />
Shutter-priority AE (S)/Manual exposure (M)<br />
Exposure compensation (1/3 EV Step, j2–i2 EV)<br />
Metering mode: Multiple/Center weighted/Spot<br />
LCD monitor: 2.0q low-temperature polycrystalline TFT LCD<br />
(130,000 pixels) (field of view ratio about 100%)<br />
Viewfinder: Color electrical Viewfinder (114,000 pixels)<br />
(field of view ratio about 100%)<br />
(with dioptor adjustment j4–i4 dioptor)<br />
111
112<br />
Others<br />
Flash: Built-in pop up flash<br />
Flash range: (ISO AUTO)<br />
Approx. 0.98 feet (30 cm) – 23.0 feet (7 m)<br />
AUTO, AUTO/Red-eye reduction, Forced ON (Forced ON/<br />
Red-eye reduction), Slow sync./Red-eye reduction,<br />
Forced OFF<br />
Speaker: Monaural<br />
Recording media: SD Memory Card/MultiMediaCard<br />
Picture size: 2304k1728 pixels, 1600k1200 pixels, 1280k960 pixels,<br />
640k480 pixels, 1920k1080 pixels (Still picture)<br />
320k240 pixels (Motion image)<br />
Quality: Fine/Standard/TIFF<br />
Recording file format<br />
Still Picture: JPEG (Design rule for Camera File system, based on Exif 2.2<br />
standard)/TIFF (RGB), DPOF corresponding<br />
Motion images: QuickTime Motion JPEG (motion images without audio)<br />
Interface<br />
Digital: USB 2.0 (Full Speed)<br />
Analog video: NTSC/PAL Composite (Switched by menu)<br />
Terminal<br />
V OUT / DIGITAL: Dedicated jack (8 pin)<br />
DC IN: type 3 jack<br />
Dimensions: 5 q (W)k3 7/16q (H)k4 2/11q (D) (127.6 mm (W)k87.2 mm<br />
(H)k106.2 mm (D)) (excluding the projection part)<br />
Weight: Approx. 18.3 oz/520 g<br />
(excluding Memory Card and battery)<br />
Approx. 19.6 oz/556 g (with Memory Card and battery)<br />
<strong>Operating</strong> Temperature: 32oF – 104oF (0oC–40oC)<br />
<strong>Operating</strong> Humidity: 10% – 80%<br />
Battery Charger<br />
(Panasonic DE-993B): Information for your safety<br />
Input: 110 – 240 V 50/60 Hz, 0.15 A<br />
Output: CHARGE 8.4 V 0.43 A<br />
Equipment mobility: Movable<br />
Battery Pack (lithium-ion)<br />
(Panasonic CGA-S002A): Information for your safety<br />
Voltage/capacity: 7.2 V, 680 mAh
Others<br />
Others<br />
Digital Camera Accessory System<br />
Accessory# Figure<br />
Description<br />
CGA-S002A Lithium Ion Battery<br />
DMW-CAC1 Battery Charger/AC Adaptor<br />
DMW-LTZ10<br />
DMW-LWZ10<br />
DMW-LND72<br />
DMW-LMC72<br />
RP-SDH01GU1A<br />
RP-SDH512U1A<br />
RP-SDH256U1A<br />
RP-SD128BU1A<br />
RP-SD064BPPA<br />
RP-SD032BPPA<br />
BN-SDCAPU/1B<br />
BN-SDABPU/1B<br />
Tele Conversion Lens<br />
Wide Conversion Lens<br />
ND Filter<br />
MC Protector<br />
1 GB SD Memory Card<br />
512 MB SD Memory Card<br />
256 MB SD Memory Card<br />
128 MB SD Memory Card<br />
64 MB SD Memory Card<br />
32 MB SD Memory Card<br />
SD USB Reader/Writer<br />
(compatible with<br />
MultiMediaCard)<br />
SD PC Card Adaptor<br />
(compatible with<br />
MultiMediaCard)<br />
* Please refer to page 14, for details on the battery charging time and the<br />
number of recordable pictures.<br />
* NOTE: Accessories and/or model numbers may vary by country. Please<br />
consult your local dealer.<br />
113
114<br />
Others<br />
Digital Camera Accessory Order Form<br />
(For USA Customers)<br />
Please photocopy this form when placing an order.<br />
1. Digital Camera Model #<br />
2. Items Ordered<br />
Accessory # Description Price Each Quantity Total Price<br />
Subtotal<br />
Your State & Local Sales Tax<br />
Shipping & Handling<br />
Total Enclosed<br />
3. Method of payment (check one)<br />
Check of Money Order enclosed (NO C.O.D.SHIPMENTS)<br />
VISA<br />
Credit Card #<br />
MasterCard Expiration Date<br />
Discover<br />
Customer Signature<br />
Make Check or Money Order to: PANASONIC ACCESSORIES<br />
(Please do not send cash)<br />
4. Shipping information (UPS delivery requires complete street address)<br />
Ship To:<br />
Mr.<br />
Mrs.<br />
Ms.<br />
First Last<br />
Phone#:<br />
Day ( )<br />
Street Address<br />
Night ( )<br />
City State Zip<br />
6.95<br />
TO OBTAIN ANY OF OUR DIGITAL CAMERA ACCESSORIES YOU CAN DO ANY OF<br />
THE FOLLOWING:<br />
VISIT YOUR LOCAL PANASONIC DEALER<br />
OR<br />
CALL PANASONIC’S ACCESSORY ORDER LINE AT 1-800-332-5368<br />
[6 AM-5 PM M-F, 6 AM-10:30 AM SAT, PACIFIC TIME]<br />
OR<br />
MAIL THIS ORDER TO: PANASONIC SERVICES COMPANY ACCESSORY ORDER OFFICE<br />
20421 84th Avenue South Kent, WA. 98032
Others<br />
Request for Service Notice (For USA Only)<br />
Please photocopy this form when making a request for service notice.<br />
In the unlikely event this product needs service.<br />
Request for Service Notice:<br />
(USA Only)<br />
Please include your proof of purchase.<br />
(Failure to do so will delay your repair.)<br />
To further speed your repair, please provide<br />
an explanation of what wrong with the unit<br />
and any symptom it is exhibiting.<br />
Mail this completed form and your Proof of Purchase along with your unit to:<br />
Panasonic Services Company<br />
1705 N. Randall Road<br />
Elgin, IL. 60123-7847<br />
Attn: Digital Camera Repair<br />
115
116<br />
Others<br />
Limited Warranty (For USA Only)<br />
PANASONIC CONSUMER<br />
ELECTRONICS COMPANY,<br />
DIVISION OF MATSUSHITA<br />
ELECTRIC CORPORATION OF<br />
AMERICA, One Panasonic Way<br />
Secaucus, New Jersey 07094<br />
PANASONIC SALES COMPANY,<br />
DIVISION OF MATSUSHITA<br />
ELECTRIC OF PUERTO RICO, INC.<br />
Ave. 65 de Infanteria, Km. 9.5, San<br />
Gabriel Industrial Park, Carolina,<br />
Puerto Rico 00985<br />
Panasonic Digital Still Camera<br />
Limited Warranty<br />
Limited Warranty Coverage<br />
If your product does not work properly because of a defect in materials or<br />
workmanship, Panasonic Consumer Electronics Company or Panasonic Sales<br />
Company (collectively referred to as “the warrantor”) will, for the length of the<br />
period indicated on the chart below, which starts with the date of original<br />
purchase (“warranty period”), at its option either (a) repair your product with new<br />
or refurbished parts, or (b) replace it with a new or refurbished product. The<br />
decision to repair or replace will be made by the warrantor.<br />
PRODUCT OR PART NAME<br />
DIGITAL STILL CAMERA<br />
PARTS LABOR<br />
(EXCEPT ITEMS LISTED<br />
BELOW)<br />
1 (ONE) YEAR 90 (NINETY) DAYS<br />
CCD<br />
RECHARGEABLE BATTERY<br />
6 (SIX) MONTHS 90 (NINETY) DAYS<br />
PACK (IN EXCHANGE FOR<br />
DEFECTIVE BATTERY PACK)<br />
SD MEMORY CARD<br />
90 (NINETY) DAYS NOT APPLICABLE<br />
(IN EXCHANGE FOR<br />
DEFECTIVE SD CARD)<br />
90 (NINETY) DAYS NOT APPLICABLE<br />
During the “Labor” warranty period there will be no charge for labor. During the<br />
“Parts” warranty period, there will be no charge for parts. You must carry-in or<br />
mail-in your product during the warranty period. If non-rechargeable batteries<br />
are included, they are not warranted. This warranty only applies to products<br />
purchased and serviced in the United States or Puerto Rico. This warranty is<br />
extended only to the original purchaser of a new product which was not sold “as<br />
is”. A purchase receipt or other proof of the original purchase date is required for<br />
warranty service.
Others<br />
Carry-In or Mail-In Service<br />
For Carry-In or Mail-In Service in the United States call<br />
1-800-272-7033.<br />
For assistance in Puerto Rico call Panasonic Sales Company<br />
(787)-750-4300 or fax (787)-768-2910.<br />
This warranty ONLY COVERS failures due to defects in materials or<br />
workmanship, and DOES NOT COVER normal wear and tear or cosmetic<br />
damage. The warranty ALSO DOES NOT COVER damages which occurred in<br />
shipment, or failures which are caused by products not supplied by the<br />
warrantor, or failures which result from accidents, misuse, abuse, neglect,<br />
mishandling, misapplication, alteration, faulty installation, set-up adjustments,<br />
misadjustment of consumer controls, improper maintenance, power line<br />
surge, lightning damage, modification, or commercial use (such as in a hotel,<br />
office, restaurant, or other business), rental use of the product, service by<br />
anyone other than a Factory Servicenter or other Authorized Servicer, or<br />
damage that is attributable to acts of God.<br />
THERE ARE NO EXPRESS WARRANTIES EXCEPT AS LISTED UNDER<br />
“LIMITED WARRANTY COVERAGE”. THE WARRANTOR IS NOT LIABLE<br />
FOR INCIDENTAL OR CONSEQUENTIAL DAMAGES RESULTING FROM<br />
THE USE OF THIS PRODUCT, OR ARISING OUT OF ANY BREACH OF<br />
THIS WARRANTY. (As examples, this excludes damages for lost time, travel<br />
to and from the servicer, loss of media or images, data or other memory<br />
content. The items listed are not exclusive, but are for illustration only.) ALL<br />
EXPRESS AND IMPLIED WARRANTIES, INCLUDING THE WARRANTY<br />
OF MERCHANTABILITY, ARE LIMITED TO THE PERIOD OF THE LIMITED<br />
WARRANTY.<br />
Some states do not allow the exclusion or limitation of incidental or<br />
consequential damages, or limitations on how long an implied warranty lasts,<br />
so the exclusions may not apply to you.<br />
This warranty gives you specific legal rights and you may also have other rights<br />
which vary from state to state. If a problem with this product develops during<br />
or after the warranty period, you may contact your dealer or Servicenter. If the<br />
problem is not handled to your satisfaction, then write to the warrantor’s<br />
Consumer Affairs Department at the addresses listed for the warrantor.<br />
PARTS AND SERVICE WHICH ARE NOT COVERED BY THIS LIMITED<br />
WARRANTY ARE YOUR RESPONSIBILITY.<br />
117
118<br />
Others<br />
Customer Services Directory (For USA Only)<br />
For Product Information, <strong>Operating</strong> Assistance, Literature Request, Dealer Locations, and<br />
all Customer Service inquiries please contact:<br />
1-800-272-7033, Monday-Friday 8:30am-8pm EST.<br />
Web Site: http://www.panasonic.com/support<br />
You can purchase parts, accessories or locate your<br />
nearest servicenter by visiting our Web Site.<br />
Accessory Purchases:<br />
Purchase Parts, Accessories and Instruction Books online for all Panasonic Products by<br />
visiting our Web Site at:<br />
http://www.pasc.panasonic.com<br />
or, send your request by E-mail to:<br />
npcparts@panasonic.com<br />
You may also contact us directly at:<br />
1-800-332-5368 (Customer Orders Only)<br />
Panasonic Services Company 20421 84th Avenue South, Kent, WA 98032<br />
(6 am to 5 pm Monday - Friday; 6 am to 10:30 am Saturday; PST)<br />
(Visa, MasterCard, Discover Card, American Express, Check)<br />
Product Repairs<br />
MAIL TO :<br />
Centralized Factory Servicenter<br />
Panasonic Services Company<br />
1705 N. Randall Road,<br />
Elgin, IL 60123-7847<br />
Attention: Digital Camera Repair<br />
Please carefully pack and ship, prepaid and insured, to the Elgin Centralized Factory<br />
Servicenter.<br />
Customer's in Puerto Rico, please ship or carry in to location below (“Service in Puerto Rico”).<br />
Service in Puerto Rico<br />
Matsushita Electric of Puerto Rico, Inc. Panasonic Sales Company/ Factory Servicenter:<br />
Ave. 65 de Infanteria, Km. 9.5, San Gabriel Industrial Park, Carolina, Puerto Rico 00985<br />
Phone (787) 750-4300 Fax (787) 768-2910<br />
As of November 2003
Others<br />
Index<br />
A<br />
Adjusting Flash Output ......................41<br />
AF Assist Lamp ...................................74<br />
AF Mode ..............................................72<br />
AF/AE Lock .........................................33<br />
Aperture-priority AE .....................51, 55<br />
Auto Bracket ........................................44<br />
Auto Review ........................................25<br />
Auto White Balance ...........................68<br />
B<br />
Brightness of the LCD<br />
Monitor/Viewfinder ..........................25<br />
Built-in Flash .......................................39<br />
Burst Mode ..........................................45<br />
C<br />
Card ......................................................17<br />
Card Access Indication ......................17<br />
Center weighted .................................72<br />
Charger ..............................................105<br />
Clock Set ........................................22, 26<br />
Color Effect ..........................................75<br />
Condensation ....................................105<br />
Continuous AF ....................................73<br />
Conversion Lens .................................79<br />
D<br />
Date Printing ...............................84, 100<br />
Deleting Pictures ..........................49, 50<br />
Digital Zoom ........................................74<br />
Diopter Adjustment ............................29<br />
DPOF Print Setting ............................83<br />
E<br />
Exposure ..............................................34<br />
Exposure Compensation ...................43<br />
F<br />
Fine .......................................................71<br />
Others<br />
Fireworks Mode ..................................62<br />
Flip Animation .....................................76<br />
Focus ....................................................34<br />
Formatting ............................................91<br />
H<br />
HDTV ..............................................70, 92<br />
Highlight Display ...........................26, 29<br />
Histogram ............................................30<br />
I<br />
ISO Sensitivity .....................................70<br />
J<br />
Jitter ......................................................34<br />
L<br />
Language setting ................................27<br />
LCD Monitor ................................28, 102<br />
Lens Cap ..............................................19<br />
Lens Hood ...........................................20<br />
Lens Hood Adaptor ............................20<br />
M<br />
Macro Mode ........................................56<br />
Manual Exposure .........................53, 55<br />
Manual Exposure Assistance ...........53<br />
Manual Focus .....................................65<br />
MC Protector .....................................101<br />
Metering Mode ....................................72<br />
Monitor Priority ..............................25, 29<br />
Motion Image Mode ...........................56<br />
Motion Rate .........................................56<br />
Multi Playback .....................................47<br />
Multiple .................................................72<br />
N<br />
ND Filter .............................................101<br />
Night Portrait Mode ............................61<br />
Night Scenery Mode ..........................60<br />
NO.RESET ..........................................26<br />
119
NTSC .................................................... 26<br />
Number of recordable pictures ........ 18<br />
120<br />
O<br />
One Shot AF ....................................... 66<br />
Operational sound ..............................26<br />
Optical Image Stabilizer .................... 76<br />
Optical Zoom ....................................... 38<br />
P<br />
PAL .......................................................26<br />
Panning Mode ..................................... 61<br />
Party Mode .......................................... 63<br />
PC ...................................................93, 95<br />
PictBridge ................................ 93, 95, 97<br />
Picture Adjustment ............................. 75<br />
Picture Size ................................... 18, 70<br />
Playback .............................................. 46<br />
Playback Pictures on TV ...................92<br />
Playback Zoom ................................... 48<br />
Playing Back Motion Images ............ 81<br />
Portrait Mode ......................................59<br />
Power indicator ................................... 32<br />
Power Save ......................................... 25<br />
Prefocus ...............................................66<br />
Program AE ......................................... 32<br />
Program Shift ......................................35<br />
Protect .................................................. 85<br />
PTP .......................................................93<br />
Q<br />
Quality .................................................. 71<br />
R<br />
Recording Guide Line ........................ 29<br />
Reset of setting ................................... 26<br />
Resizing ...............................................88<br />
Review .................................................37<br />
Rotate ...................................................82<br />
S<br />
Scene Menu ........................................27<br />
Scene Mode ........................................58<br />
Scenery Mode ..................................... 60<br />
Others<br />
SD Slide Show .................................... 87<br />
Setup Menu .........................................24<br />
Shutter sound ...................................... 26<br />
Shutter-priority AE ........................52, 55<br />
Slide Show ...........................................86<br />
Snow Mode .........................................64<br />
Sports Mode ........................................ 59<br />
Spot ...................................................... 72<br />
Spot-focusing ...................................... 72<br />
Standard .............................................. 71<br />
Strap ..................................................... 19<br />
T<br />
TIFF ...................................................... 71<br />
Trimming .............................................. 89<br />
U<br />
USB Connection Cable ..................... 93<br />
USB Mode .....................................26, 93<br />
V<br />
Video output ........................................ 26<br />
Viewfinder ....................................28, 102<br />
W<br />
White Balance .....................................68<br />
White Balance Fine Adjustment ...... 69<br />
Numerics<br />
1-area-focusing ................................... 72<br />
3-area-focusing ................................... 72<br />
9-area-focusing ................................... 72
Others<br />
Others<br />
Spanish Quick Use Guide/Guía rápida en español<br />
Ésta es una visión de conjunto que trata<br />
del procedimiento para grabar las<br />
imágenes con esta cámara. Por lo que<br />
respecta a cada única operación, haga<br />
referencia a las páginas correspondientes.<br />
1 Cargue la batería.<br />
Cuando se envía la cámara, la<br />
batería está sin carga. Cárguela<br />
antes del uso.<br />
2 Inserte la batería y la tarjeta.<br />
3 Encienda la cámara para sacar<br />
las imágenes.<br />
Ajuste el reloj.<br />
1 Ajuste el disco del modo a [ ].<br />
2 Abra el flash. (Cuando usa el flash)<br />
3 Oprima el botón del obturador para<br />
sacar las imágenes.<br />
4 Reproduzca las imágenes.<br />
P<br />
S<br />
OPEN<br />
M<br />
A SCN1<br />
P<br />
SCN2<br />
A SCN1<br />
SCN2<br />
S<br />
M<br />
OFF ON<br />
1 Ajuste el disco del modo a [ ].<br />
2 Seleccione la imagen que quiere ver.<br />
121
MEMO<br />
122
MEMO<br />
123
Panasonic Consumer Electronics Company,<br />
Division of Matsushita Electric Corporation of America<br />
One Panasonic Way, Secaucus, NJ 07094<br />
Panasonic Sales Company ("PSC")<br />
Division of Matsushita Electric of Puerto Rico, Inc.<br />
Ave. 65 de Infanteria, Km. 9.5, San Gabriel Industrial Park, Carolina, Puerto Rico 00985<br />
C 2004 Matsushita Electric Industrial Co., Ltd.<br />
P<br />
VQT0N03<br />
F0704Ke0( 32000 )<br />
C