Chapter 7D - Publications, US Army Corps of Engineers
Chapter 7D - Publications, US Army Corps of Engineers
Chapter 7D - Publications, US Army Corps of Engineers
You also want an ePaper? Increase the reach of your titles
YUMPU automatically turns print PDFs into web optimized ePapers that Google loves.
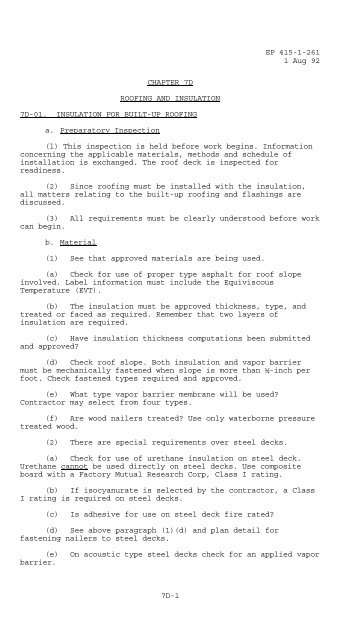
CHAPTER <strong>7D</strong><br />
ROOFING AND INSULATION<br />
<strong>7D</strong>-01. INSULATION FOR BUILT-UP ROOFING<br />
a. Preparatory Inspection<br />
<strong>7D</strong>-1<br />
EP 415-1-261<br />
1 Aug 92<br />
(l) This inspection is held before work begins. Information<br />
concerning the applicable materials, methods and schedule <strong>of</strong><br />
installation is exchanged. The ro<strong>of</strong> deck is inspected for<br />
readiness.<br />
(2) Since ro<strong>of</strong>ing must be installed with the insulation,<br />
all matters relating to the built-up ro<strong>of</strong>ing and flashings are<br />
discussed.<br />
(3) All requirements must be clearly understood before work<br />
can begin.<br />
b. Material<br />
(1) See that approved materials are being used.<br />
(a) Check for use <strong>of</strong> proper type asphalt for ro<strong>of</strong> slope<br />
involved. Label information must include the Equiviscous<br />
Temperature (EVT).<br />
(b) The insulation must be approved thickness, type, and<br />
treated or faced as required. Remember that two layers <strong>of</strong><br />
insulation are required.<br />
(c) Have insulation thickness computations been submitted<br />
and approved?<br />
(d) Check ro<strong>of</strong> slope. Both insulation and vapor barrier<br />
must be mechanically fastened when slope is more than ½-inch per<br />
foot. Check fastened types required and approved.<br />
(e) What type vapor barrier membrane will be used?<br />
Contractor may select from four types.<br />
(f) Are wood nailers treated? Use only waterborne pressure<br />
treated wood.<br />
(2) There are special requirements over steel decks.<br />
(a) Check for use <strong>of</strong> urethane insulation on steel deck.<br />
Urethane cannot be used directly on steel decks. Use composite<br />
board with a Factory Mutual Research Corp, Class I rating.<br />
(b) If isocyanurate is selected by the contractor, a Class<br />
I rating is required on steel decks.<br />
(c) Is adhesive for use on steel deck fire rated?<br />
(d) See above paragraph (1)(d) and plan detail for<br />
fastening nailers to steel decks.<br />
(e) On acoustic type steel decks check for an applied vapor<br />
barrier.
EP 415-1-261<br />
1 Aug 92<br />
(f) Check insulation board for square edges.<br />
(g) Check for tapered insulation. Fitup is extremely<br />
important for smooth surfaces.<br />
c. Preparation <strong>of</strong> the Ro<strong>of</strong> Deck<br />
(1) See that the entire section <strong>of</strong> ro<strong>of</strong>—deck construction<br />
is complete before vapor barrier and insulation application<br />
begins.<br />
(2) Inspect the ro<strong>of</strong> for being dry, smooth, firm, and<br />
dirt—free and free <strong>of</strong> projections and foreign materials. Check<br />
metal ro<strong>of</strong> decks for holes, rust, or repair <strong>of</strong> paint<br />
coat—especially where deck has been welded.<br />
(3) Note preparation and safety protection around ro<strong>of</strong><br />
openings.<br />
(4) Run dryness test on the concrete deck.<br />
(5) Protect ro<strong>of</strong> drain and vent intake during ro<strong>of</strong>ing<br />
operations. Check for proper drainage at other times.<br />
(6) Check the insulating concrete deck for dryness by<br />
weighing the deck sample for 50 percent moisture loss. This is<br />
necessary although base sheet is laid dry.<br />
d. Application <strong>of</strong> Vapor Barrier<br />
(1) Are weather conditions favorable?<br />
(2) Has concrete deck been primed?<br />
(3) Is bitumen kettle safely located? Fire extinguisher?<br />
Does kettle have an operable thermometer?<br />
(4) Kettleman must be attending the kettle at all times<br />
when bitumen is heated.<br />
0<br />
(5) Check for asphalt temperature within 25 <strong>of</strong> EVT at<br />
point <strong>of</strong> application.<br />
(6) Are joints in precast decks covered as required?<br />
(7) Check for solid mopping and brooming for the 2 ply, 15<br />
pound felt over concrete.<br />
(8) Are fasteners for base sheet type vapor barrier the<br />
approved type for gypsum deck? For insulating concrete deck? Check<br />
fastened materials for specified fastening.<br />
(9) Ensure that felts are maintained at a minimum<br />
0<br />
temperature <strong>of</strong> 50 F. for not less than 24 hours prior to laying.<br />
(10) Note ambient temperature prior to placing <strong>of</strong> vapor<br />
barrier.<br />
(11) Does vapor barrier seal edge <strong>of</strong> insulation at<br />
openings? Do not seal with vapor barrier if edge <strong>of</strong> insulation is<br />
vented.<br />
<strong>7D</strong>-2
<strong>7D</strong>-3<br />
EP 415-1-261<br />
1 Aug 92<br />
(12) Check for felt edge envelope formed with vapor barrier<br />
where insulation is vented. Install envelope in steep asphalt or<br />
bituminous cement at ro<strong>of</strong> edges.<br />
(13) Inspect the vapor harrier to assure that it provides a<br />
complete seal over the deck. See that method <strong>of</strong> brooming assures<br />
complete adhesion to deck, assures complete adhesion between<br />
plies, and eliminates air pockets.<br />
e. Wood Nailers and Vents<br />
(1) Nailers flush with the deck will he used with nailable<br />
insulation.<br />
(a) On slopes more than ½—inch per foot nail vapor barrier<br />
to nailers.<br />
(b) Nail first layer insulation.<br />
(c) Nailers are installed as concrete is cast. Install<br />
parallel to the slope <strong>of</strong> the ro<strong>of</strong>.<br />
(d) Check for flush nailers to fasten flashings for ro<strong>of</strong>ing<br />
applied to the deck.<br />
(2) Use surface mounted nailers at edges <strong>of</strong> insulation.<br />
Slot nailers for venting insulation; except on steel decks.<br />
(3) Non-nailable insulation needs surface mounted nailers,<br />
parallel to the slope, when slope is more than ½—inch per foot.<br />
(4) Check nailable securement requirements.<br />
(5) Use 1-inch thick nailers on edge behind base flashings.<br />
f. Application <strong>of</strong> Insulation<br />
(1) On slopes up to ½—inch per foot.<br />
(a) Check for solid moppings <strong>of</strong> hot bitumen over vapor<br />
barrier or directly to concrete deck.<br />
(h) Limit bitumen to 12-15 pound per square on steel deck<br />
flutes. Use steep slope (Type III) asphalt.<br />
(2) On slopes more than ½-inch per foot.<br />
(a) Check for fastener requirements or,<br />
(b) Use treated surface nailers between insulation section,<br />
parallel to slope.<br />
(c) Is nailer thickness same as insulation?<br />
(3) Use only dry insulation. Have wet insulation been<br />
removed from the work site?<br />
(4) Plan must be to cover all insulation on same day<br />
applied with full ro<strong>of</strong>ing system.<br />
(5) Apply insulation in at least two layers.<br />
(6) Stagger joints between layers.
EP 415-1-261<br />
1 Aug 92<br />
(7) Lay top layer so that continuous insulation joint is<br />
parallel to the ro<strong>of</strong> slope. Be sure this joint is not over flute<br />
openings <strong>of</strong> steel decks.<br />
(8) Lay units with close joints. Be sure that no voids are<br />
built in by damaged boards or open joints.<br />
(9) Remember the water cut—<strong>of</strong>fs to protect insulation edges<br />
at end <strong>of</strong> work day. Remember to remove cut—<strong>of</strong>fs at beginning <strong>of</strong><br />
next work day. Check for wet insulation.<br />
(10) Underlayment supports ro<strong>of</strong>ing on steel decks not<br />
requiring insulation. Same application as for insulation. Use<br />
insulation manufacturer*s recommended thickness.<br />
<strong>7D</strong>-02. BUILT-UP ROOFING<br />
a. Preparatory Inspection<br />
(1) The quality control inspector for the contractor is<br />
responsible for this inspection meeting. The ro<strong>of</strong>ing applicator<br />
and Government Inspection representatives must attend and<br />
participate.<br />
(2) Check the agenda. The insulation, ro<strong>of</strong>ing and sheetmetal<br />
phases should be held together as all this work must be<br />
coordinated.<br />
(3) Discuss types <strong>of</strong> machines which will be used on the<br />
ro<strong>of</strong>. The deck and installed materials cannot be subject to<br />
damage.<br />
b. Material<br />
(l) Use only asphalt felts with hot asphalt or coal tar<br />
felts with hot cool tar.<br />
(2) Check for labels on all materials. Labels must identify<br />
specified and approved materials.<br />
(3) Contractor must prove specified material without proper<br />
labels. Test if necessary.<br />
(4) Check surface treatment materials.<br />
(5) Are the type IV glass—fibered felts specified in cold<br />
climatic locations.<br />
c. Preparation <strong>of</strong> the Ro<strong>of</strong> Deck<br />
(1) See paragraph <strong>7D</strong>-01 c.<br />
(2) Bitumen kettle is not allowed on the ro<strong>of</strong> deck.<br />
(3) Do not overload deck. Remember that all material must<br />
be protected from weather.<br />
(4) The system <strong>of</strong> ro<strong>of</strong>ing application should provide for<br />
free drainage at all temporary terminations.<br />
(5) Remember the dryness test for concrete decks. Remember<br />
the air-dry density test for insulating concrete decks.<br />
<strong>7D</strong>-4
d. Application <strong>of</strong> Ro<strong>of</strong>ing<br />
(1) Check felt temperature from storage.<br />
(2) Check bitumen temperature control to prevent<br />
overheating.<br />
<strong>7D</strong>-5<br />
EP 415-1-261<br />
1 Aug 92<br />
(3) Check hot asphalt supply system for specified EVT at<br />
0<br />
point <strong>of</strong> use. A maximum <strong>of</strong> 25 F variation from EVT is permitted.<br />
No more at anytime.<br />
(4) Are ambient weather conditions suitable? Temperature at<br />
0<br />
least 40 F? Too windy? Threat <strong>of</strong> rain?<br />
(5) Note the method <strong>of</strong> laying the felt that is immediately<br />
behind the mopping <strong>of</strong> bitumen and assure that the felt is broomedin<br />
so that the layer will be free <strong>of</strong> air pockets, wrinkles, and<br />
buckles.<br />
(6) Check the requirements for and the installation <strong>of</strong> base<br />
sheet. This is the only occasion when hot coal-tar could be<br />
applied to an asphalt base sheet.<br />
(7) Are cant strips installed as required?<br />
(8) Are all felts at specified lap? Four plies go down<br />
together.<br />
(9) Systems on wet decks use a base sheet. Then the three<br />
plies go down together.<br />
(10) Is ro<strong>of</strong>ing run to top <strong>of</strong> cant?<br />
(11) Check for two extra plies <strong>of</strong> felt at eaves and rakes<br />
for envelope bitumen stop. Check for application to deck or<br />
insulation in steep slope asphalt or bituminous cement. Use only<br />
organic or asbestos felts for these envelopes.<br />
(12) For fiberglass felt system the edge envelopes must be<br />
separately placed. Fiberglass felts can*t be used.<br />
(13) Check aggregates to be used for surfacing:<br />
(a) Has aggregate been sampled and approved for use?<br />
(b) Is aggregate dry and free from dust, sand, loam, and<br />
other foreign material?<br />
(c) Is stone waterworn and free from sharp, flat and<br />
angular pieces?<br />
(d) Is slag crushed, blast-furnace slag? )If you cannot<br />
tell visually, check certificate <strong>of</strong> compliance.)<br />
(e) Is aggregate spread while bitumen is still hot? Is it<br />
thoroughly and evenly embedded in hot bitumen? Have aggregates and<br />
bitumen been applied at the specified weights per unit area?<br />
(f) Check for the removal <strong>of</strong> loose aggregate. Are there<br />
base spots?
EP 415-1-261<br />
1 Aug 92<br />
(g) Check method <strong>of</strong> transporting and storing aggregate on<br />
ro<strong>of</strong> to assure that felt and flashing has not been damaged and to<br />
prevent excessive loading <strong>of</strong> ro<strong>of</strong> in localized areas.<br />
(14) Cap sheet may be specified instead <strong>of</strong> the flood coat<br />
and aggregate surface. Check for special requirements. Cap sheet<br />
should be rolled into hot asphalt to prevent blistering.<br />
(15) Use a glaze coating <strong>of</strong> hot bitumen when rain is about<br />
to occur.<br />
(16) Glaze coat is only an emergency treatment.<br />
(17) Check to see that the ro<strong>of</strong> drains have been set at<br />
proper location and elevation, that they are properly flashed and<br />
that they are clean and provided with gratings when ro<strong>of</strong>ing is<br />
completed.<br />
(18) Are ro<strong>of</strong>ing samples being taken? Check sample<br />
immediately for free water, bitumen skips and weight. Record<br />
results and replace sample unless a deficiency exists. Sample may<br />
be replaced depending on nature <strong>of</strong> deficiency provided a firm<br />
understanding can be reached prior to replacement.<br />
(19) If finished or unfinished ro<strong>of</strong> sections are used for<br />
traffic, be sure that ro<strong>of</strong>ing is protected. Are temporary plywood<br />
runways needed?<br />
(20) Check for felt fastenings requirements on ro<strong>of</strong> slopes<br />
more than 1/2-inch per foot, Do not use coal—tar on these slopes.<br />
<strong>7D</strong>-03. FLASHINGS<br />
a. Preparatory Inspection<br />
(1) Shop drawings for sheet metal ro<strong>of</strong> flashings will be<br />
discussed at this inspection. See <strong>Chapter</strong> 7E <strong>of</strong> this guide for<br />
details.<br />
(2) Flashings in this paragraph include the felt strip<br />
flashings and plastic base flashings and their requirements will<br />
be clearly understood.<br />
(3) Will flashing work be coordinated with ro<strong>of</strong>ing?<br />
(4) Check for same day installation to completely<br />
waterpro<strong>of</strong> the ro<strong>of</strong>ing area begun each day.<br />
(5) A copy <strong>of</strong> the ro<strong>of</strong>ing felt manufacturer*s published<br />
flashing recommendations is required.<br />
(6) Check for flashings at all projections through ro<strong>of</strong>ing.<br />
b. Material<br />
(1) Check that the asbestos flashing sheet has a built-in<br />
reinforcing fabric. This is required even though not in<br />
manufacturer*s recommendations.<br />
(2) Where the glass fiber system is to be installed, use<br />
the mineral (glass fibered) cap sheet. See label for conformance<br />
to SS-R-630, Class 3.<br />
<strong>7D</strong>-6
<strong>7D</strong>-7<br />
EP 415-1-261<br />
1 Aug 92<br />
(3) Check label on bituminous cement for asphalt base Type<br />
I, per SS-C-153.<br />
c. Base Flashing<br />
(1) Check for selection <strong>of</strong> 2-ply or 3-ply system.<br />
(2) Be sure the manufacturer*s published recommendations<br />
are available and used.<br />
(3) Check installation for loose plies. Embed all<br />
sheetsfully into adhesive and press into position.<br />
(4) Are plies mechanically fastened at top <strong>of</strong> vertical leg?<br />
(5) Check for felt strip over horizontal joint with<br />
ro<strong>of</strong>ing.<br />
d. Strip Flashing<br />
(1) Two ply strip flashing required.<br />
(2) Check for solid coatings <strong>of</strong> bituminous cement.<br />
(3) Install strip flashings before surfacing treatment,<br />
over all horizontal edges <strong>of</strong> sheetmetal such as gravel stops, ro<strong>of</strong><br />
drain and pipe flashing flanges, metal base flashings,etc.<br />
<strong>7D</strong>-04. ROOF WALKWAYS AND LADDERS<br />
a. Wood Walkways<br />
(1) Check for waterborne pressure treated wood.<br />
(2) Are cut edges being treated?<br />
(3) Are pads <strong>of</strong> premolded filler strips being used beneath<br />
wood bases? Locate these before ro<strong>of</strong>ing surface treatment.<br />
ply?<br />
b. Composition Type Walkways<br />
(1) Is material <strong>of</strong> specified thickness?<br />
(2) Is material pressed into hot bitumen over top ro<strong>of</strong>ing<br />
(3) Is space provided between sections for drainage.<br />
c. Precast Concrete Walkways<br />
Check the requirements for size, location and spacing. He<br />
sure ro<strong>of</strong>ing surface is clean. Precast concrete units are usually<br />
set loose over the waterpro<strong>of</strong>ed surface.<br />
d. Ladders<br />
(1) Are ladders located with walkways?<br />
(2) If ladders are anchored into ro<strong>of</strong>ing, check for<br />
relocation to sidewalls.
EP 415-1-261<br />
1 Aug 92<br />
<strong>7D</strong>-05. SINGLE PLY ROOFING<br />
Although there are over eight different generic types <strong>of</strong><br />
single ply ro<strong>of</strong>ing materials, and many more systems, only the EPDM<br />
(Ethylene Propylene Diene Monomer) type is specified for CE use.<br />
This is a synthetic rubber material. The following deals with<br />
systems using that material.<br />
a. Submittals<br />
(1) Check for receipt <strong>of</strong> the certificate attesting to<br />
material compliance. Remember the certificate must be signed by an<br />
<strong>of</strong>ficer <strong>of</strong> the manufacturer*s firm.<br />
(2) The following must be received and approved before<br />
ro<strong>of</strong>ing can begin:<br />
(a) Manufacturer*s installation instructions.<br />
(b) Samples <strong>of</strong> the membrane, joint cement and sealant.<br />
(c) Layout drawings and all flashing details.<br />
b. Materials<br />
(1) Check the EPDM material labels closely for spec and<br />
certificate compliance.<br />
(2) Check storage site for temperature and weather<br />
protection. Adhesives and sealants are especially sensitive to<br />
these conditions.<br />
(3) Ballast for surface covering must be clean and well<br />
graded.<br />
(4) Check treatment for wood nailers and rants. Same as for<br />
built-up ro<strong>of</strong>ing.<br />
c. Application <strong>of</strong> Ro<strong>of</strong>ing<br />
(1) A preparatory inspection must be held before ro<strong>of</strong>ing<br />
begins.<br />
(2) Ro<strong>of</strong> deck must be in same condition as for builtpro<strong>of</strong>ing.<br />
This includes a positive air-dry density test for<br />
insulating concrete ro<strong>of</strong> deck.<br />
(3) Check manufacturer*s instructions.<br />
(4) Are the laps joints between sheets <strong>of</strong> EPDM at least<br />
3—inches wide?<br />
(5) Are laps made to shed water?<br />
(6) Check special treatment at expansion joints for<br />
drainage and waterpro<strong>of</strong>ing.<br />
(7) Check for perimeter nailers and adequate fastening <strong>of</strong><br />
the membrane.<br />
(8) Have all joints been carefully inspected before<br />
concealing with ballast?<br />
<strong>7D</strong>-8
(9) Flashings must be installed same day as ro<strong>of</strong>ing<br />
membrane to waterpro<strong>of</strong> area covered.<br />
(10) Remember cut<strong>of</strong>fs at end <strong>of</strong> day or when rain is<br />
imminent.<br />
<strong>7D</strong>-9<br />
EP 415-1-261<br />
1 Aug 92<br />
(11) See Paragraph <strong>7D</strong>-01 for board insulation and vapor<br />
barrier checklists. Board insulation may be loose laid instead <strong>of</strong><br />
usual adhesion method for built-up ro<strong>of</strong>ing. Check the specs.<br />
<strong>7D</strong>-06. FLUID APPLIED ROOFING<br />
The system given in the specs includes spray-applied<br />
urethane foam insulation applied to broom finish concrete ro<strong>of</strong><br />
decks. Two coats <strong>of</strong> spray-applied silicone rubber cover the<br />
urethane.<br />
a. Submittals<br />
(1) Check applicator*s experience for satisfactory<br />
performance.<br />
(2) Check for manufacturer*s application instructions and<br />
material certificates <strong>of</strong> compliance.<br />
(3) Have samples been examined?<br />
(4) Does ro<strong>of</strong>ing system meet the Underwriters Laboratories<br />
UL 790 test for fire resistance?<br />
(5) Has insulation thickness computation been approved?<br />
b. Materials<br />
(1) Check labels for compliance.<br />
(2) Is there enough coating material to cover all areas to<br />
specified dry film thickness?<br />
c. Application <strong>of</strong> Urethane Insulation<br />
(1) Check the complete plan <strong>of</strong> application during the<br />
preparatory inspection.<br />
(2) Has equipment been calibrated? At the beginning? Daily?<br />
More frequently as required?<br />
(3) Is thickness as determined for “U” value?<br />
(4) Lap-in layers.<br />
(5) Check surface smoothness and slope for drainage.<br />
d. Application <strong>of</strong> Coatings<br />
(1) Protective coating must be applied same day to the<br />
urethane foam.<br />
(2) Check dry film thickness.<br />
(3) Finish coating must be free <strong>of</strong> pinholes?<br />
(4) Check for sheet elastomeric base flashings.
EP 415-1-261<br />
1 Aug 92<br />
(5) Is a granule finish required? Are walkways included? It<br />
is extremely important that walkways be provided where traffic is<br />
expected as this system is extremely susceptible to damage.<br />
<strong>7D</strong>-07. STRIP SHINGLE ROOFING<br />
a. Preparation for Installation<br />
(1) Have the required samples been submitted and approved?<br />
Do shingles on site match the approved samples? Are they labeled<br />
as U.L. approved? Are they wind resistant type?<br />
(2) Is ro<strong>of</strong> clean, dry, and otherwise ready for ro<strong>of</strong>ing?<br />
Check to cover knot holes and splits with sheetmetal plates.<br />
(3) Are flashings installed or on hand to be installed<br />
concurrently with ro<strong>of</strong>ing?<br />
(4) Check for proper installation <strong>of</strong> under layment and<br />
metal edge drips. Edge drip strips are installed over the<br />
underlayment.<br />
(5) Check slope as double layer underlayment is required on<br />
slopes to 4-inch per foot.<br />
(6) Check for special requirements if in cold climate where<br />
ice forms at building eaves. Either a sheet metal eave flashing or<br />
layer <strong>of</strong> bituminous cement should be required.<br />
b. Installation<br />
(1) Check starter course <strong>of</strong> shingles, at the eaves. Is it a<br />
double or triple layer <strong>of</strong> shingles? Does this starter course<br />
extend 3/4 inch beyond eave line to form a drip?<br />
(2) Check alignment <strong>of</strong> layers and rows <strong>of</strong> shingles. Start<br />
rows at center <strong>of</strong> ro<strong>of</strong> for spans over 30 feet and lay to chalk<br />
lines or other guide for a neat job.<br />
(3) Check exposure <strong>of</strong> shingles on hips and ridges. Are all<br />
nails concealed?<br />
(4) Check that each shingle tab is cemented in place with<br />
bituminous cement with a contact area <strong>of</strong> at least 1 square inch.<br />
Check self-sealing type shingles.<br />
(5) Self-sealing shingles are usually required and the<br />
manufacturer*s warranty furnished by the contractor provides<br />
insurance against unit blow-<strong>of</strong>f. The contractor shall be<br />
responsible for replacement <strong>of</strong> blown-<strong>of</strong>f or damaged shingles.<br />
<strong>7D</strong>-10


