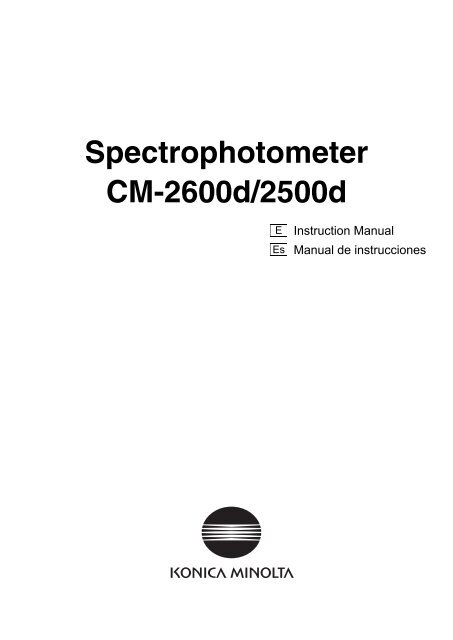
Spectrophotometer CM-2600d/2500d - Konica Minolta Sensing ...
Spectrophotometer CM-2600d/2500d - Konica Minolta Sensing ...
Spectrophotometer CM-2600d/2500d - Konica Minolta Sensing ...

Create successful ePaper yourself
Turn your PDF publications into a flip-book with our unique Google optimized e-Paper software.
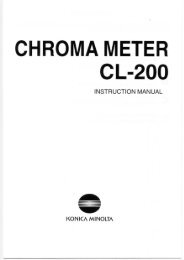
<strong>Spectrophotometer</strong><br />
<strong>CM</strong>-<strong>2600d</strong>/<strong>2500d</strong><br />
E Instruction Manual<br />
Es Manual de instrucciones
Safety Symbols<br />
The following symbols are used in this manual to prevent accidents which may occur as result of incorrect<br />
use of the instrument.<br />
Denotes a sentence regarding a safety warning or note.<br />
Read the sentence carefully to ensure safe and correct use.<br />
Denotes a prohibited operation.<br />
The operation must never been performed.<br />
Denotes an instruction.<br />
The instruction must be strictly adhered to.<br />
Denotes a prohibited operation.<br />
Never disassemble the instrument.<br />
Denotes an instruction.<br />
Disconnect the AC power cord from the AC outlet.<br />
Notes on this Manual<br />
• Copying or reproduction of all or any part of the contents of this manual without KONICA MINOLTA<br />
SENSING’s permission is strictly prohibited.<br />
• The contents of this manual are subject to change without prior notice.<br />
• Every effort has been made in the preparation of this manual to ensure the accuracy of its contents.<br />
However, should you have any questions or find any errors, please contact a KONICA MINOLTA<br />
SENSING -authorized service facility.<br />
• KONICA MINOLTA SENSING will not accept any responsibility for consequences arising from the<br />
use of the instrument.
Safety Precautions<br />
To ensure correct use of this instrument, read the following points carefully and adhere to them. After<br />
you have read this manual, keep it in a safe place where it can be referred to anytime a question arises.<br />
WARNING<br />
Do not use the instrument in places<br />
where flammable or combustible gases<br />
(gasoline etc.) are present. Doing so<br />
may cause a fire.<br />
Always use the AC adapter supplied as<br />
a standard accessory or the optional AC<br />
adapter, and connect it to an AC outlet<br />
of the rated voltage and frequency. If the<br />
AC adapters other than those specified<br />
by KONICA MINOLTA SENSING,<br />
this may result in damage to the unit,<br />
fire or electric shock<br />
If the instrument will not be used for a<br />
long time, disconnect the AC adapter<br />
from the AC outlet. Accumulated dirt or<br />
water on the prongs of the AC adapter’s<br />
plug may cause a fire and should be removed.<br />
Take special care not to allow liquid or<br />
metal objects to enter the instrument.<br />
Doing so may cause a fire or electric<br />
shock. Should liquid or metal objects<br />
enter the instrument, turn the power<br />
OFF immediately, disconnect the AC<br />
adapter from the AC outlet (or remove<br />
the batteries if they are used), and contact<br />
the nearest KONICA MINOLTA<br />
SENSING-authorized service facility.<br />
CAUTION<br />
Do not perform measurement which the<br />
measurement aperture directed towards<br />
your face. Doing so may damage them.<br />
Do not use batteries other than those<br />
specified by KONICA MINOLTA<br />
SENSING.<br />
When installing batteries in the instrument,<br />
make sure that they are correctly<br />
oriented according to the (+) and (–)<br />
marks. Failure to adhere to these instructions<br />
may cause batteries to explode<br />
or leakage of electrolyte, resulting<br />
in fire, injury or air pollution.<br />
(Failure to adhere to the following points may result<br />
in death or serious injury.)<br />
Do not disassemble or modify the instrument<br />
or the AC adapter. Doing so<br />
may cause a fire or electric shock.<br />
The instrument should not be operated if<br />
it is damaged or AC adapter is damaged,<br />
or if smoke or odd smells occur. Doing<br />
so may result in a fire. In such situations,<br />
turn the power OFF immediately, disconnect<br />
the AC adapter from the AC<br />
outlet (or remove the batteries if they are<br />
used) and contact the nearest KONICA<br />
MINOLTA SENSING-authorized service<br />
facility.<br />
Do not insert or disconnect the AC<br />
adapter with wet hands. Doing so may<br />
cause electric shock.<br />
Do not dispose of batteries in fire, short<br />
their terminals, apply heat to them, or<br />
disassemble them. Also, do not recharge<br />
them (if they are not chargeable). Doing<br />
so may cause explosion or heat generation,<br />
resulting in fire or injury.<br />
(Falling to adhere to the following points may result in<br />
injury or damage to the instrument or other property.)<br />
Do not place the instrument on an unstable<br />
or sloping surface. Doing so may result<br />
in its dropping or overturning,<br />
causing injury. Take care not to drop the<br />
instrument when carrying it.<br />
When using the AC adapter, make sure<br />
that the AC outlet is located near the instrument<br />
and that the AC adapter can be<br />
connected to and disconnected from the<br />
AC outlet easily.<br />
E-1
E-2<br />
Notes on Use<br />
<br />
• This instrument and the AC adapter supplied as a standard accessory have been designed exclusively<br />
for indoor use.<br />
• Do not leave the <strong>CM</strong>-<strong>2600d</strong>/<strong>2500d</strong> in direct sunlight or near sources of heat, such as stoves etc. The<br />
internal temperature of the instrument may become much higher than the ambient temperature in such<br />
cases.<br />
• Do not use the <strong>CM</strong>-<strong>2600d</strong>/<strong>2500d</strong> in areas where dust, cigarette smoke or chemical gases are present.<br />
Doing so may cause deterioration in performance or breakdown.<br />
• Do not use the <strong>CM</strong>-<strong>2600d</strong>/<strong>2500d</strong> near equipment which produces a strong magnetic field (such as<br />
speakers etc.)<br />
• The <strong>CM</strong>-<strong>2600d</strong>/<strong>2500d</strong> belongs to installation category II products (equipment which is powered by an<br />
AC adapter connected to a commercially available power).<br />
• The <strong>CM</strong>-<strong>2600d</strong>/<strong>2500d</strong> belongs to pollution level 2 products (equipment which may cause temporary<br />
electrical hazards due to contamination or condensation or products which are used in such an environment).<br />
• Do not use the <strong>CM</strong>-<strong>2600d</strong>/<strong>2500d</strong> at altitudes of higher than 2000m.<br />
• Use this instrument at ambient temperature between 5 and 40°C and relative humidity 80% or less (at<br />
35°C) with no condensation (*1) . Operating this instrument outside specified temperature and humidity<br />
range may unsatisfy its original performance.<br />
*1 Operating temperature/humidity range of products for North America: between 5 and 40°C and relative humidity<br />
80% or less (at 31°C) with no condensation<br />
<br />
• When using the instrument upside-down, make sure no dirt or dust get into the aperture.<br />
• When using the instrument for long periods of time, the displayed value may change depending on<br />
changes in the environment. Therefore, in order to achieve accurate measurements, we recommend<br />
that white calibration be done regularly using the White Calibration Plate.<br />
<br />
• The calibration data for the White Calibration Plate was measured at 23°C. To achieve the highest accuracy<br />
when measuring absolute values (colorimetric values), calibration and measurement should be<br />
performed at 23°C.<br />
• Do not allow the White Calibration Plate to get scratched or stained.<br />
• If you are not going to use the White Calibration Plate, attach the cap to the White Calibration Plate to<br />
prevent entry of ambient light.<br />
<br />
• Do not touch the Target Mask’s inner surface by hand, scratch it or make it dirty.<br />
• When the Target Mask is not in use, install it on the White Calibration Plate (<strong>CM</strong>-A145) to prevent<br />
exposure to external light.<br />
<br />
• When removing the “Measuring Base”, make sure that the screws used to attach the base to the instrument<br />
are stored properly and are not mislaid. If the screws do become mislaid, use M3 cross-headed<br />
screws that are 4 to 5 mm long as replacements. (For details, see page E-16.)<br />
• Do not tighten the screws too tightly when attaching the “Measuring Base”. This could damage the<br />
“Measuring Base” or the instrument itself.<br />
• Remove the “Measuring Base” before using the optional Zero Calibration Box or Dust Cover Set.<br />
<br />
• Make sure that the power switch is set to OFF (“O”) when the <strong>CM</strong>-<strong>2600d</strong>/<strong>2500d</strong> is not in use.<br />
• Always use the AC adaptor (AC-A17) supplied as a standard accessory and connect it to an AC outlet<br />
of the rated voltage and frequency. Use the AC power supply voltage of the rated supply voltage (within<br />
± 10%).
• Do not subject the <strong>CM</strong>-<strong>2600d</strong>/<strong>2500d</strong> to strong impact or vibration. Doing so may cause deterioration<br />
in performance or breakdown.<br />
• Since the specimen measuring port and integrating sphere are extremely precise optical components,<br />
great care should be taken to prevent them getting dirty or exposing them to impact. If you are not going<br />
to use the <strong>CM</strong>-<strong>2600d</strong>/<strong>2500d</strong>, put it on the White Calibration Plate (<strong>CM</strong>-A145).<br />
• The <strong>CM</strong>-<strong>2600d</strong>/<strong>2500d</strong> may cause interference if used near a television, radio, etc.<br />
• Since the <strong>CM</strong>-<strong>2600d</strong>/<strong>2500d</strong> uses a microcomputer, the LCD may go blank if it is exposed to strong<br />
static electricity. In this case, turn the power OFF, then turn it ON again. If black smudges appear on<br />
the LCD, wait until they disappear naturally.<br />
• When turning the power OFF and then ON again, wait several seconds after turning the power OFF.<br />
<br />
• Measured data and various settings are stored in the memory backed up by batteries. The backup batteries<br />
are automatically charged during operation of this instrument, and can retain the contents of the<br />
memory for 4.5 months if they have been fully charged. At the time of purchase, the backup battery<br />
may not be fully charged. To charge the backup battery, set the power switch to ON. Charging of the<br />
backup battery is performed continuously while the instrument is switched on, even while the instrument<br />
is being used. Full charging is completed in 25 hours, and there is no danger of overcharging.<br />
• It is recommended to keep a backup of your important data in another recording medium using optional<br />
Color Data Software (sold separately).<br />
Note<br />
• The backup batteries’ model number is VL2020 (3V).<br />
• Do not try to replace the backup batteries by yourself. Contact a KONICA MINOLTA SENSING-authorised<br />
service facility.<br />
Notes on Storage<br />
• The <strong>CM</strong>-<strong>2600d</strong>/<strong>2500d</strong> should be stored at temperatures between 0°C and 45°C, and at a relative humidity<br />
of 80% or less (35°C), without condensation. Do not store the instrument in areas subject to<br />
high temperatures, high humidity, sudden changes in temperature, or where freezing or condensation<br />
may occur, because these circumstances may cause breakdown. It is more reliable to store the <strong>CM</strong>-<br />
<strong>2600d</strong>/<strong>2500d</strong> with a drying agent (such as silica gel) at a temperature around 20°C.<br />
• Do not leave the <strong>CM</strong>-<strong>2600d</strong>/<strong>2500d</strong> inside a car such as in the cab or trunk. Otherwise, the temperature<br />
and/or humidity may go leave the allowable range for storage during midsummer or midwinter, resulting<br />
in breakdown.<br />
• Keep the packing materials used for shipment and use it to transport the <strong>CM</strong>-<strong>2600d</strong>/<strong>2500d</strong>. This protects<br />
the instrument from sudden changes in temperature, vibration, and shock.<br />
• Do not store the <strong>CM</strong>-<strong>2600d</strong>/<strong>2500d</strong> in areas where dust, cigarette smoke or chemical gases are present.<br />
Doing so may cause deterioration in performance or breakdown.<br />
• Entry of dust into the measuring aperture will hinder accurate measurement. Block the measuring port<br />
to prevent entry of the dust.<br />
• The White Calibration Plate may become discolored if left exposed to light. Therefore, make sure that<br />
the lid is closed to prevent entry of ambient light when it is not in use.<br />
• The Target Masks may discolor if they are left exposed to light. When they are not in use, keep them<br />
in a safe place to prevent exposure to light and to protect them from scratches and dust.<br />
• Be sure to keep all packing materials (cardboard box, cushioning material, plastic bags, etc.). They can<br />
be used to protect the instrument during transportation to service facility for maintenance (re-calibration<br />
etc.).<br />
• If you are not going to use the <strong>CM</strong>-<strong>2600d</strong>/<strong>2500d</strong> for more than two weeks, the batteries must be removed.<br />
If the batteries are left in the instrument, leakage may occur resulting in damage to the instrument.<br />
E-3
E-4<br />
Notes on Cleaning<br />
• If the <strong>CM</strong>-<strong>2600d</strong>/<strong>2500d</strong> becomes dirty, wipe it with a soft, clean dry cloth. Never use solvents such as<br />
thinner and benzene.<br />
• If the White Calibration Plate becomes dirty, wipe it gently with a soft, clean dry cloth. If dirt is difficult<br />
to remove, contact the nearest service facility listed on the attached sheet.<br />
• If the inner surface of the Target Masks or the inside of the integrating sphere get dirty, contact a<br />
KONICA MINOLTA SENSING-authorized service facility.<br />
• Should the <strong>CM</strong>-<strong>2600d</strong>/<strong>2500d</strong> break down, do not try to disassemble and repair it by yourself. Contact<br />
a KONICA MINOLTA SENSING-authorized service facility.
Contents<br />
Safety Precautions .......................................................................................................................... E-1<br />
Notes on Use............................................................................................................................... E-2<br />
Notes on Storage......................................................................................................................... E-3<br />
Notes on Cleaning....................................................................................................................... E-4<br />
Conventions ................................................................................................................................ E-8<br />
Chapter 1 Before Using the Instrument<br />
Accessories....................................................................................................................................... E-10<br />
Standard Accessories .................................................................................................................. E-10<br />
Optional Accessories .................................................................................................................. E-11<br />
Names and Functions of Parts....................................................................................................... E-12<br />
Preparation ..................................................................................................................................... E-14<br />
Attaching/Removing a Target Mask........................................................................................... E-14<br />
Attaching/Removing the “Measuring Base”.............................................................................. E-16<br />
Cleaning Each Part...................................................................................................................... E-17<br />
Inserting the Batteries ................................................................................................................. E-18<br />
Connecting the AC Adapter........................................................................................................ E-19<br />
Turning Power ON...................................................................................................................... E-20<br />
Turning Power OFF.................................................................................................................... E-20<br />
System Configuration..................................................................................................................... E-21<br />
Items You Must Know ................................................................................................................... E-22<br />
Language Mode .......................................................................................................................... E-22<br />
Measurement Mode .................................................................................................................... E-22<br />
Target Modes .............................................................................................................................. E-23<br />
Screen Display ............................................................................................................................ E-23<br />
Battery Alarm ............................................................................................................................. E-23<br />
Data Saving................................................................................................................................. E-23<br />
Chapter 2 Preparation for Measurement<br />
Flow of Measurement ................................................................................................................. E-26<br />
Turning Power On for the First Time .......................................................................................... E-27<br />
Setting the Language Mode and Measurement Mode ................................................................ E-27<br />
Selecting the Target Mode.......................................................................................................... E-28<br />
Initial Setting................................................................................................................................... E-29<br />
Setting the Date and Time .......................................................................................................... E-30<br />
Setting the Display Direction...................................................................................................... E-31<br />
Setting the LCD Contrast............................................................................................................ E-32<br />
Selecting a Measurement Condition ............................................................................................. E-33<br />
Setting a Measurement Condition ................................................................................................ E-34<br />
Setting the Measurement Area and Specular Component Mode................................................ E-35<br />
Setting the UV ............................................................................................................................ E-36<br />
Selecting Illuminant 1................................................................................................................. E-36<br />
Selecting Illuminant 2................................................................................................................. E-37<br />
Selecting the Observer................................................................................................................ E-37<br />
Selecting the Display Mode........................................................................................................ E-38<br />
Selecting a Color Space .............................................................................................................. E-39<br />
Setting the Number of Measurements for Manual Averaging.................................................... E-40<br />
Setting the Standard Deviation for Manual Averaging .............................................................. E-40<br />
E-5
Contents<br />
Setting the Number of Measurements for Auto Averaging........................................................ E-40<br />
Setting the Delay Time ............................................................................................................... E-41<br />
Zero Calibration ............................................................................................................................. E-44<br />
White Calibration........................................................................................................................... E-46<br />
Setting a Color Difference Target Data........................................................................................ E-48<br />
Selecting a Color Difference Target Data .................................................................................... E-50<br />
Deleting a Color Difference Target Data.................................................................................... E-51<br />
Setting Color Difference Tolerances............................................................................................. E-52<br />
Box Tolerance............................................................................................................................. E-52<br />
Elliptical Tolerance..................................................................................................................... E-55<br />
Chapter 3 Measurement<br />
Measurement................................................................................................................................... E-64<br />
Displaying the Measurement Results............................................................................................ E-66<br />
Measured Data ............................................................................................................................ E-66<br />
Pass/Fail Judgment ..................................................................................................................... E-67<br />
Color Difference Graph .............................................................................................................. E-68<br />
Spectral Reflectance Graph ........................................................................................................ E-69<br />
Assessments................................................................................................................................ E-70<br />
Switching the Display Contents of the Measurement Results.................................................... E-72<br />
Deleting Measured Data ............................................................................................................. E-74<br />
Abbreviations on LCD Display .................................................................................................. E-76<br />
Measurement Results for “linked to each data.”......................................................................... E-77<br />
Chapter 4 Other Functions<br />
Measuring the Average .................................................................................................................. E-80<br />
Manual Averaging ...................................................................................................................... E-80<br />
Auto Averaging........................................................................................................................... E-82<br />
Pass/Fail Judgment for Color Difference..................................................................................... E-83<br />
Pass/Fail Judgment Based on Box Tolerances ........................................................................... E-83<br />
Pass/Fail Judgment Based on Elliptical Tolerances ................................................................... E-85<br />
Assessments ..................................................................................................................................... E-87<br />
Assessment by Box Tolerances .................................................................................................. E-87<br />
Assessment by Elliptical Tolerances .......................................................................................... E-89<br />
Connecting to an External Device................................................................................................. E-92<br />
Connecting a Personal Computer ............................................................................................... E-92<br />
Outputting to a Printer ................................................................................................................ E-95<br />
TASK Mode .................................................................................................................................... E-101<br />
What is TASK Mode?................................................................................................................. E-101<br />
Downloading a Task ................................................................................................................... E-101<br />
Performing Measurement in TASK Mode.................................................................................. E-102<br />
Chapter 5 Troubleshooting<br />
Error Messages ............................................................................................................................... E-110<br />
Troubleshooting.............................................................................................................................. E-112<br />
Chapter 6 Appendix<br />
Principles of Measurement ............................................................................................................ E-116<br />
Illuminating/Viewing System..................................................................................................... E-116<br />
Illumination Area and Measurement Area.................................................................................. E-117<br />
Simultaneous SCI/SCE Measurement ........................................................................................ E-118<br />
E-6
Contents<br />
UV Control ................................................................................................................................. E-118<br />
Target Mode.................................................................................................................................... E-119<br />
Relation Between Measured Data and Target Color .................................................................. E-119<br />
Deleting a Color Difference Target Data.................................................................................... E-119<br />
Notes on Changing the Target Mode.......................................................................................... E-119<br />
Specifications................................................................................................................................... E-123<br />
Dimensions ...................................................................................................................................... E-125<br />
Menu Structure............................................................................................................................... E-126<br />
Reading the menu structure diagram .......................................................................................... E-126<br />
Menu Structure diagram ............................................................................................................. E-127<br />
E-7
Contents<br />
Conventions<br />
This manual describes how to setup the <strong>CM</strong>-<strong>2600d</strong>/<strong>2500d</strong> which the firmware version is 1.40 or higher<br />
and use it to take measurements.<br />
• Organization<br />
The <strong>CM</strong>-<strong>2600d</strong>/<strong>2500d</strong> (Ver. 1.30 or higher) supports two types of the target mode, “linked to each data.”<br />
and “defined in COND.”; the procedure and details for these types varies slightly.<br />
This manual describes the procedures for the default target mode, which is “linked to each data.”. It only<br />
includes information for the “defined in COND.” mode where it differs from the default.<br />
• Page layout<br />
Symbols used in this manual are explained below.<br />
*Note that the page shown in the illustration is for explanatory purposes only, and is not an actual page<br />
from this manual.<br />
Memo<br />
Gives useful Information<br />
and additional explanations.<br />
Start screen<br />
Shows the screen<br />
from which operation<br />
must be<br />
started.<br />
Setting an Environmental Condition<br />
Up to six sets of conditions (COND 1 to COND 6) can be set. Since the instrument will perform measurement<br />
according to the selected condition, conditions must be set prior to start of measurement.<br />
The following nine condition items can be set:<br />
A setting can be made for the currently highlighted item. To confirm the setting, press A. The next item will<br />
be highlighted automatically.<br />
The items (1) to (9) must be set in this order. If incorrect settings have been made, you must start once again<br />
from item (1).<br />
[Setting Procedure]<br />
screen<br />
1<br />
2<br />
3<br />
Note<br />
Gives the points that you should know to perform operations<br />
correctly. Make sure that you read the notes.<br />
Turn B to select “SEL”, then press A.<br />
“SEL” can be selected in page 1/2 only.<br />
Turn B to select the desired setting, then press A.<br />
<br />
M/I+E: ø8 mm, simultaneous measurement of SCI and SCE<br />
M/SCI: ø8 mm, SCI<br />
M/SCE: ø8 mm, SCE<br />
The measurement area that suits the target mask used for measurement or the setting of the lens position<br />
selector switch must be selected.<br />
Direct the specimen measuring port to the specimen.<br />
Procedure<br />
If necessary, slide the viewfinder lever to check the position of the specimen.<br />
Shows the oper-<br />
60<br />
ating procedure.<br />
C............ Indicates the button.<br />
B....... Indicates request to turn the navigation wheel to the right or left.<br />
A....... Indicates request to press the navigation wheel.<br />
For the version of the instrument firmware<br />
Screen<br />
Shows the contents<br />
of the screen<br />
in effect when the<br />
given operation is<br />
carried out.<br />
Settings<br />
Gives the range<br />
and explanation<br />
of the values to<br />
be set in this<br />
screen.<br />
TIP (screen)<br />
Gives explanation<br />
about the screen<br />
and operations that<br />
can be carried out<br />
from this screen.<br />
Screen note<br />
Gives the points to note on<br />
the operations to be performed<br />
from this screen.<br />
The version of the instrument firmware can be confirmed on the screen which is displayed first after<br />
switching power on.<br />
E-8
Chapter 1<br />
Before Using the Instrument<br />
E-9
E-10<br />
Accessories<br />
Standard and optional accessories are available with the instrument.<br />
Standard Accessories<br />
Make sure that all the following items are present.<br />
White Calibration Plate <strong>CM</strong>-A145<br />
Used to perform white calibration.<br />
A data disk containing white calibration data is supplied with<br />
this accessory.<br />
Memo<br />
• This accessory can be used as a table on which to store the <strong>CM</strong>-<strong>2600d</strong>/<br />
<strong>2500d</strong>.<br />
• In the case of the <strong>CM</strong>-<strong>2600d</strong>, a Target Mask that is not in use can be<br />
stored on this accessory.<br />
Target Mask<br />
<strong>CM</strong>-A146 (for ø8 mm) <strong>CM</strong>-A147 (for ø3 mm)<br />
Used to switch the illumination area (specimen measuring port<br />
area) according to the specimen.<br />
Memo<br />
• <strong>CM</strong>-A146 (for ø8 mm) is already attached to the <strong>CM</strong>-<strong>2600d</strong>/<strong>2500d</strong><br />
when it is supplied.<br />
• <strong>CM</strong>-A147 (for ø3 mm) can be used for the <strong>CM</strong>-<strong>2600d</strong> only, and it is<br />
already attached to the White Calibration Plate (<strong>CM</strong>-A145) when it is<br />
supplied.<br />
AC Adapter AC-A17<br />
Used to supply power from an AC outlet to the instrument.<br />
Input: Voltage 100 to 240 VAC (50-60 Hz)<br />
Output: Voltage 5 VDC Current 2.8 A (Max.)<br />
RS-232C Cable IF-A16<br />
(for IBM PC/AT, 9-pin, 2 m)<br />
Used to connect the instrument to a personal computer (PC).<br />
AA-size battery (× 4)
Optional Accessories<br />
Zero Calibration Box (<strong>CM</strong>-A32)<br />
Used to perform zero calibration.<br />
Hard Case (<strong>CM</strong>-A148)<br />
Can be used for storing the <strong>CM</strong>-<strong>2600d</strong>/<strong>2500d</strong>, the instruction<br />
manual and standard accessories, such as the White Calibration<br />
Plate and AC adapter.<br />
Note<br />
The Hard Case is designed purely for storing the above items and<br />
must not be used for transportation purposes.<br />
Dust Cover Set (<strong>CM</strong>-A149)<br />
Used when measuring powder or wet surfaces.<br />
It can also be used when woven fabric needs to be laid flat and<br />
measured.<br />
Memo<br />
The Dust Cover (<strong>CM</strong>-A152) can be used as a vinyl cover for the replacement.<br />
Color Data Software “SpectraMagic NX” (<strong>CM</strong>-S100w)<br />
This software supports the two types of the target-mode,<br />
“linked to each data.” and “defined in COND.”, provided by<br />
this instrument. It allows you to operate the instrument from<br />
your PC, and to process data and manage files.<br />
Printer Cable (CR-A75)<br />
Used to transfer data to a printer. Connect a printer to the external<br />
output terminal on the instrument with this cable. The Dsub<br />
connector (9-pin) of the cable must be connected to the<br />
printer.<br />
Accessories<br />
*metric screw type<br />
E-11
E-12<br />
Names and Functions of Parts<br />
2<br />
1<br />
3<br />
5<br />
4<br />
1 Viewfinder<br />
Used to check the position of the specimen. By sliding the<br />
lever you can check whether the specimen is set correctly.<br />
2 Viewfinder lever<br />
Used to open/close the viewfinder. By sliding the lever in<br />
the direction of the arrow, the white LED will light up and<br />
illuminate the specimen, so the specimen can be seen<br />
through the viewfinder to check that it is set correctly.<br />
SAV<br />
MAV<br />
6<br />
B<br />
A<br />
I<br />
O<br />
0<br />
9 8<br />
Open<br />
Memo<br />
The specimen cannot be measured if the viewfinder is open and the white LED is lit.<br />
3 Navigation wheel<br />
Use this navigation<br />
wheel to select an<br />
item or set the selected<br />
item.<br />
To select an item, turn<br />
it to the right or left<br />
until the desired item<br />
To select To enter<br />
is shown. To set the Memo<br />
selected item, press it.<br />
4 LCD display<br />
When selecting an item or setting a value, holding down the jog dial will switch<br />
the item or value from one to another continuously.<br />
Displays the setting items and measured data.<br />
5 Specimen measuring port<br />
A port provided to measure the specimen.<br />
With the <strong>CM</strong>-<strong>2600d</strong>, a Target Mask must be attached to this port, according to the measurement area<br />
selector position.<br />
7
6 Measurement area selector<br />
Used to change the lens position according to the measurement<br />
area.<br />
Memo<br />
This switch is not available with the <strong>CM</strong>-<strong>2500d</strong>.<br />
7 Measuring button (MEAS. button)<br />
Press this button to perform calibration or measurement.<br />
Names and Functions of Parts<br />
Memo<br />
When setting measurement conditions or tolerances, this button can be used as UNDO button to return to the<br />
previous item.<br />
8 External output terminal<br />
To transfer data to an external device, connect the RS-232C cable (IF-A16) or printer cable (CR-A75)<br />
to this terminal.<br />
9 Battery cover<br />
A cover for the battery chamber. Four AA-size batteries must be set in the battery chamber in the correct<br />
polarity direction.<br />
0 AC adapter terminal<br />
When using the AC adapter (AC-A17), connect the adapter’s plug to this terminal.<br />
A POWER switch<br />
Used to turn ON/OFF power. Setting this switch to “ ” turns the power OFF, and setting it to “|”<br />
turns the power ON.<br />
B Measuring Base<br />
Use this base to attach the specimen securely to the instrument when analyzing small specimens.<br />
White Calibration Plate <strong>CM</strong>-A145<br />
1<br />
2<br />
1 Cap<br />
A cap provided to protect the White Calibration Plate.<br />
Note<br />
If you are not going to use the White Calibration Plate, attach the cap to the White Calibration Plate to prevent<br />
exposure to ambient light and protect it from scratches and dust.<br />
2 White Calibration Plate<br />
Used to perform white calibration of the <strong>CM</strong>-<strong>2600d</strong>/<strong>2500d</strong>.<br />
If you are not going to use it, attach the cap to prevent exposure to ambient light and protect it from<br />
scratches and dust.<br />
3 Target Mask mount section<br />
Used for storing a Target Mask that is not in use.<br />
Memo<br />
For attaching/removing a Target Mask, refer to “Attaching/Removing a Target Mask” (page E-14).<br />
3<br />
E-13
E-14<br />
Preparation<br />
Attaching/Removing a Target Mask<br />
With the <strong>CM</strong>-<strong>2600d</strong>, a Target Mask conforming to the selected lens position and measurement condition<br />
must be used. A Target Mask that is not in use can be attached to the Target Mask mount section of the<br />
White Calibration Plate, so that it can be stored together with the instrument.<br />
To attach/remove a Target Mask, follow the procedure given below.<br />
Memo<br />
To facilitate attaching/removing a Target Mask, turn the instrument over so that the specimen measuring port is face<br />
up.<br />
Note<br />
• When attaching/removing a Target Mask, take care not to allow dirt and dust to enter the integrating sphere<br />
though the measuring port.<br />
• Do not exert excessive force on the latch of the Target Mask. Doing so may damage the latch, disabling use of<br />
the Target Mask.<br />
Attaching/Removing a Target Mask to/from the Instrument<br />
Target Mask<br />
Attaching a Target Mask<br />
Latch<br />
Specimen measuring port<br />
1. Place the Target Mask on the specimen measuring<br />
port so that the marker on the latch is aligned with<br />
the “ ” marker on the port.<br />
2. Hold the outer edge of the mask, and turn it in the<br />
direction of the arrow (clockwise) until the marker<br />
on the latch is aligned with the “o” marker on the<br />
port.<br />
Removing the Target Mask<br />
1. Hold the outer edge of the mask, and turn it in the<br />
opposite direction to the arrow (counter-clockwise)<br />
until the marker on the latch is aligned with<br />
the “ ” marker.<br />
2. Hold the outer edge of the mask and remove it.<br />
Positioning<br />
marker
Storing a Target Mask<br />
Preparation<br />
In the case of the <strong>CM</strong>-<strong>2600d</strong>, a Target Mask that is not in use can be attached to the Target Mask mount<br />
section of the White Calibration Plate, so that it can be stored together with the instrument.<br />
Memo<br />
Even in the case of the <strong>CM</strong>-<strong>2500d</strong>, when the Target Mask is removed for cleaning the integrating sphere, it can be<br />
attached to the Target Mask mount section of the White Calibration Plate to prevent loss and damage.<br />
Note<br />
• Do not touch the inner surface of the Target Mask or allow it to get dirty and scratched.<br />
• Do not exert excessive force on the latch of the Target Mask. Doing so may damage the latch, disabling use of<br />
the Target Mask.<br />
Target Mask<br />
Attaching a Target Mask<br />
1.<br />
Target Mask mount section White<br />
Calibration<br />
Plate<br />
Latch<br />
Place the Target Mask on the Target Mask mount<br />
section so that the inner surface of the latch is<br />
aligned with the notch on the White Calibration<br />
Plate.<br />
2. Hold the outer edge of the mask and turn it clockwise<br />
to secure it.<br />
Removing the Target Mask<br />
1.<br />
Hold the outer edge of the mask and turn it counter-clockwise<br />
until the inner surface of the latch is<br />
aligned with the notch on the White Calibration<br />
Plate.<br />
2. Hold the outer edge of the mask and remove it.<br />
2<br />
1<br />
Notch<br />
1<br />
2<br />
E-15
E-16<br />
Preparation<br />
Attaching/Removing the “Measuring Base”<br />
A “Measuring Base” has been included with the <strong>Spectrophotometer</strong> <strong>CM</strong>-<strong>2600d</strong>/<strong>2500d</strong>.<br />
This allows small specimens to be attached securely to the instrument when they are being measured, and<br />
this enables more accurate measurements to be made.<br />
The “Measuring Base” is shown in the illustration to the right,<br />
and is attached to the base of the <strong>CM</strong>-<strong>2600d</strong>/<strong>2500d</strong> with two<br />
screws.<br />
Note<br />
• Make sure that the “Measuring Base” is securely attached to the<br />
instrument before calibrating the instrument or taking measurements.<br />
• You must remove the “Measuring Base” before using the optional<br />
Measuring Base<br />
“Measuring Base”<br />
attachment hole<br />
Zero Calibration Box or Dust Cover Set. Specifications for “Measuring Base” attachment screws<br />
• When removing the “Measuring Base”, make sure that the screws<br />
used to attach the base to the instrument are stored properly and<br />
are not mislaid.<br />
If the screws do become mislaid, replace them with screws that<br />
meet the specifications shown to the right.<br />
[Screw name]<br />
Cross-Recessed Pan Head Machine Screw M3, Nominal Length 4-5 mm<br />
Diameter of screw head (head diameter): φ5-6.5 mm<br />
Thickness of screw head<br />
(head height): less than 3 mm<br />
Length of screw body<br />
(body length): 4- 5 mm<br />
Screw diameter: φ3 mm<br />
Terms in parenthesis () are JIS defined terms for parts of screws<br />
Attaching/Removing the “Measuring Base” to/from the Instrument<br />
Removing the “Measuring Base”<br />
1. Place the <strong>CM</strong>-<strong>2600d</strong>/<strong>2500d</strong> so that its base is facing<br />
up and it is stable.<br />
2. Using a crosshead screwdriver, turn the two attachment<br />
screws counter-clockwise and remove them.<br />
Use a crosshead screwdriver that is a suitable size for the screws.<br />
Attaching the “Measuring Base”<br />
1. Place the <strong>CM</strong>-<strong>2600d</strong>/<strong>2500d</strong> so that its base is facing<br />
up and it is stable.<br />
2. Place the “Measuring Base” on the base of the<br />
<strong>CM</strong>-<strong>2600d</strong>/<strong>2500d</strong> as shown in the illustration.<br />
Place the “Measuring Base” so that it is aligned with the attachment<br />
holes in the base of the <strong>CM</strong>-<strong>2600d</strong>/<strong>2500d</strong>. When placing the<br />
“Measuring Base” on the base of the <strong>CM</strong>-<strong>2600d</strong>/<strong>2500d</strong>, make sure<br />
that nothing is trapped between the instrument and the base.<br />
3. Using a crosshead screwdriver, turn the two attachment<br />
screws clockwise and tighten them securely.<br />
Do not tighten the screws too tightly.
Cleaning Each Part<br />
Preparation<br />
This section explains how to clean the White Calibration Plate, Target Mask and inside of the integrating<br />
sphere.<br />
White Calibration Plate<br />
Gently wipe off dirt with a soft dry cloth. If dirt is difficult to remove, dampen a cloth with commercially<br />
available lens cleaning liquid and wipe. Then remove the liquid with a cloth dampened with water, and<br />
leave it to dry.<br />
Note<br />
Take care not to scratch the White Calibration Plate.<br />
Target Mask<br />
Use a blower to remove dirt and dust from the Target Masks.<br />
Note<br />
Do not touch the inner surface of the Target Masks with your fingers or wipe them with a cloth. If the Target<br />
Masks are so dirty that dirt cannot be removed with a blower, contact the nearest KONICA MINOLTA SENSINGauthorized<br />
service facility.<br />
Inside the Integrating Sphere<br />
Memo<br />
For attaching/removing a Target Mask, refer to “Attaching/Removing a Target Mask” (page E-14).<br />
1. To prevent dust and dirt entering the optics section<br />
from the integrating sphere, slide the viewfinder<br />
lever to open the viewfinder.<br />
2. Remove the Target Mask.<br />
3. Use a blower to remove dirt and dust from the integrating<br />
sphere.<br />
Note<br />
Do not touch the white-coated inner surface of the integrating<br />
sphere, wipe it with a cloth or put any object inside it. If the surface<br />
is so dirty that dirt cannot be removed with a blower, contact the<br />
nearest KONICA MINOLTA SENSING-authorized service facility.<br />
E-17
E-18<br />
Preparation<br />
Inserting the Batteries<br />
To supply power to the instrument, the AC adapter (AC-A17) or four AA-size batteries (Alkaline or Ni-<br />
MH battery is recommended for better service life) must be used. Use either the AC adapter or batteries,<br />
according to which suits your application.<br />
Note<br />
• If you are not going to use the instrument for more than two weeks, make sure that the batteries are removed.<br />
If the batteries are left in the instrument for long periods of time, battery electrolyte may leak and damage the<br />
instrument.<br />
• Do not use batteries of different types or mix new batteries with old ones. Doing so may result in battery explosion<br />
or reduction of battery life.<br />
• Do not touch or short-circuit the terminals inside the battery chamber. Doing so may result in breakdown of<br />
the instrument.<br />
[Operating Procedure]<br />
1<br />
2<br />
3<br />
4<br />
Make sure that power is OFF (i.e. the POWER<br />
switch is set to “ ”).<br />
Slide the battery cover on the rear of the instrument<br />
to open it.<br />
Place four AA-size batteries in the battery<br />
chamber. Make sure that the batteries are<br />
placed in the correct direction.<br />
Align the marker on the battery cover with that<br />
on the instrument, and slide the battery cover<br />
to close it.
Connecting the AC Adapter<br />
Preparation<br />
Memo<br />
Use of the AC adapter (AC-A17) rather than batteries is recommended, since more power will be required when the<br />
external output terminal is used to output data to an external device or print it.<br />
Note<br />
• To supply AC power to the instrument, always use the AC adapter (AC-A17) supplied with the instrument.(Rated:<br />
5 V, 2.8 A)<br />
• Before connecting or removing the AC adapter, make sure that power is turned OFF.<br />
[Operating Procedure]<br />
1<br />
2<br />
3<br />
Make sure that power is OFF (i.e. the power<br />
switch is set to “ ”).<br />
Connect the AC adapter’s connector plug to<br />
the AC adapter terminal on the rear of the instrument.<br />
Insert the AC adapter’s power plug to an AC<br />
outlet (100-240 VAC, 50-60 Hz).<br />
AC outlet<br />
E-19
E-20<br />
Preparation<br />
Turning Power ON<br />
Note<br />
When turning the power ON for the first time, the display language and measurement mode must be set.<br />
For details, refer to page E-27.<br />
[Operating Procedure]<br />
1<br />
Set the POWER switch to “|”.<br />
The power will be turned ON.<br />
Turning Power OFF<br />
[Operating Procedure]<br />
1<br />
Set the POWER switch to “ ”.<br />
The power will be turned OFF.<br />
Auto Power Save Function<br />
Power save mode will be activated if the MEAS. button and navigation wheel are not operated for more<br />
than three minutes. During power save mode, the flash circuit will not be charged. To cancel power save<br />
mode, press the MEAS. button to start measurement.<br />
Note<br />
• If the MEAS. button is pressed to cancel power save mode, start of measurement will be delayed by a few seconds,<br />
so keep the instrument still until the lamp flashes and measurement is taken.<br />
• The auto power save function is not available in remote mode (see page E-89).
System Configuration<br />
Personal computer<br />
(commercially available)<br />
Color Data Software<br />
SpectraMagic NX<br />
(<strong>CM</strong>-S100w)<br />
Standard accessories<br />
Optional accessories<br />
AA-size battery<br />
( 4)<br />
AC Adapter<br />
AC-A17<br />
RS-232C Cable<br />
IF-A16<br />
Printer Cable<br />
CR-A75<br />
Printer (commercially available)<br />
* For details to output data to a printer,<br />
refer to page E-91.<br />
Hard Case <strong>CM</strong>-A148<br />
Target Mask 3 mm<br />
<strong>CM</strong>-A147<br />
* Not supplied with the<br />
<strong>CM</strong>-<strong>2500d</strong>.<br />
Target Mask 8 mm<br />
<strong>CM</strong>-A146<br />
White Calibration Plate <strong>CM</strong>-A145<br />
Zero Calibration Box <strong>CM</strong>-A32<br />
<strong>CM</strong>-<strong>2600d</strong><br />
(<strong>CM</strong>-<strong>2500d</strong>)<br />
* with Measuring<br />
Base<br />
Dust Cover Set <strong>CM</strong>-A149<br />
Replacement Dust Cover <strong>CM</strong>-A152<br />
(polyolefin)<br />
E-21
E-22<br />
Items You Must Know<br />
Language Mode<br />
Contents on the LCD screen can be displayed in English, Japanese, German, French, Spanish or Italian.<br />
In this manual, explanation of operating methods and display is given for English mode.<br />
Measurement Mode<br />
Two measurement modes (COND and TASK) are available with this instrument, and can be switched<br />
from one to another.<br />
Measurement Mode Application<br />
COND mode<br />
TASK mode<br />
Normal measurement mode. Measurement can be performed while the conditions<br />
are changed. In this mode, up to six sets of conditions (illuminant,<br />
observer angle, color space etc.) can be registered.<br />
Special measurement mode. For continuous inspection, this mode allows<br />
you to perform measurement while messages indicating the measurement<br />
procedure are displayed on the LCD. The messages can be created by use of<br />
the previously used software SpectraMagic (Ver.3.2 or higher; except for<br />
Ver. 3.5) with your PC. In this mode, color differences can be calculated one<br />
by one against up to 10 color difference target data.<br />
Note<br />
• Before starting measurement, tasks (measurement procedure) must be downloaded<br />
from the PC using SpectraMagic (Ver.3.2 or higher; except for Ver.3.5).<br />
TASK mode cannot be selected if no tasks have been downloaded.<br />
• During TASK mode, only the data measured last is displayed. Use of SpectraMagic<br />
(Ver.3.2 or higher; except for Ver.3.5) allow you to access to previous data<br />
in the memory.<br />
Up to six sets of conditions can be registered either in COND or TASK mode.<br />
In the case of COND mode:
Target Modes<br />
Items You Must Know<br />
• The <strong>CM</strong>-<strong>2600d</strong>/<strong>2500d</strong> supports two Target Modes, “defined in COND.” mode and “linked to each data.”<br />
mode, to analyze both measurement data and color difference. As with Language Mode and Measurement<br />
Mode, you can select the desired mode when you turn the power ON.<br />
• The default setting is “linked to each data.” mode. To switch to “defined in COND.” mode or switch between<br />
the target modes, you need to follow the procedure to select target mode.<br />
• Depending on the target mode selected, the display and the procedure for some operation for the instrument<br />
are different.<br />
Below are some examples of these differences. (For details, see Target Mode in the Appendix.)<br />
• In “linked to each data.” mode, the next color difference data number is displayed next to the currently<br />
selected color difference data number in the initial settings screen.<br />
When “defined in COND.” mode is selected, it is not displayed.<br />
• In “linked with each data” mode, to display the color difference for measurement data, you can only select<br />
the color difference for the currently selected measurement data. When “defined in COND.” mode is selected,<br />
you can freely select the color difference data number after making measurements. You can also<br />
display the results of the selection.<br />
• Data storage capacity for the “linked to each data.” mode is 1700 pieces, and that for the “defined in<br />
COND.” mode is 700 pieces.<br />
Note<br />
Once the target mode is changed, previous data will be cleared. It is recommended that you save previous data<br />
into other storage media in advance by using the Color Data Software that is optionally available.<br />
Screen Display<br />
The basic screen structure is shown below.<br />
Battery Alarm<br />
Data No. and screen title are displayed.<br />
Items that can be used are displayed.<br />
Conditions and measurement<br />
results are displayed.<br />
When using <strong>CM</strong>-<strong>2600d</strong>/<strong>2500d</strong> with batteries, battery alarm indication appears when their power level<br />
lowers.<br />
[Half battery indication]<br />
If this indication (Half battery indication) appears, new batteries should be prepared for replacement<br />
in near future. Even with this indication displayed, measurements are still possible.<br />
[Empty battery indication]<br />
If this indication (Empty battery indication) appears, measurement or calibration is no longer possible.<br />
Replace batteries with new ones.<br />
E-23
E-24<br />
Items You Must Know<br />
Data Saving<br />
Data used with this instrument is saved automatically. Although white calibration data is retained in internal<br />
memory even after power is turned off, it is still necessary to repeat white calibration each time<br />
you switch the power back on.
Chapter 2<br />
Preparation for Measurement<br />
E-25
E-26<br />
Flow of Measurement<br />
For the first time<br />
Turning Power On for the First Time<br />
(see page E-27)<br />
Initial Setting (see page E-29)<br />
Selecting a Measurement Condition (see page E-33)<br />
Setting a Measurement Condition<br />
(see page E-34)<br />
Zero Calibration (see page E-44)<br />
White Calibration (see page E-46)<br />
Setting a Color Difference<br />
Target Data (see page E-48)<br />
Selecting a Color Difference<br />
Target Data (see page E-50)<br />
Measurement (see page E-60)<br />
Complete Measurement<br />
For the second and subsequent times<br />
Turning Power ON (see page E-20)<br />
When Checking Color Difference When Not Checking Color Difference
Turning Power On for the First Time<br />
When turning the power ON for the first time, the display language and measurement mode must be set.<br />
Setting the Language Mode and Measurement Mode<br />
Set the language and measurement mode as follows:<br />
[Setting Procedure]<br />
1<br />
2<br />
3<br />
While pressing A, turn the power ON.<br />
The screen<br />
will appear, with the item “LAN-<br />
GUAGE” highlighted.<br />
TARGET<br />
Turn B to select the desired language, then press A.<br />
TARGET<br />
(Back side)<br />
• When the cursor moves to the desired language, all the text will be displayed in the selected language.<br />
Turn B to select the desired measurement mode, then press A.<br />
TARGET<br />
• If no tasks have been downloaded to the instrument, only “COND” will be displayed.<br />
E-27
E-28<br />
Turning Power On for the First Time<br />
TARGET<br />
• If a task(s) has been downloaded to the instrument, both “COND” and “TASK” will be displayed.<br />
• Select “COND”.<br />
Selecting the Target Mode<br />
The default setting is “linked to each data.” mode. The following procedure is required only if you want<br />
to switch the target mode.<br />
Note<br />
• If the Color Data Software “SpectraMagic <strong>CM</strong>-S9w” is used, switch the target mode to “defined in COND.”<br />
mode.<br />
• Once the target mode is changed, previous data will be cleared. It is recommended that you save previous data<br />
into other storage media in advance by using the Color Data Software that is optionally available.<br />
[Setting Procedure]<br />
1<br />
2<br />
Turn B to select the desired<br />
target mode, then<br />
press A.<br />
Memo<br />
If you do not want to change the target<br />
mode, press A.<br />
• The default setting is “linked to each data.”.<br />
A warning message is displayed.<br />
Turn B to select “Yes”,<br />
then press A.<br />
The screen will appear.<br />
TARGET<br />
linked to each data.<br />
defined in COND.<br />
Measurement data and color difference<br />
target color data stored in the<br />
instrument are all deleted.<br />
Are you sure to delete all data?<br />
YES NO<br />
Memo<br />
If you select “No” and press A, you will return to the screen shown in 1.
Initial Setting<br />
The following five initial setting items are available.<br />
(1) REMOTE..................... Connects the instrument to the PC to enable bi-directional communications.<br />
(2) AUTO PRINT.............. If the instrument is connected to a printer, measured data will be printed automatically<br />
each time measurement is taken.<br />
(3) CLOCK........................ Adjusts the instrument’s built-in clock.<br />
(4) DISPLAY INVERT..... Reverses the display direction.<br />
(5) LCD CONTRAST ....... Adjusts the LED’s contrast.<br />
Memo<br />
“(1) REMOTE” and “(2) AUTO PRINT” can be used when connecting the instrument to a PC or printer.<br />
The settings will be kept even if the power is turned OFF.<br />
To make initial settings, follow the procedure given below:<br />
[Setting Procedure]<br />
1<br />
2<br />
Turn the power ON.<br />
Turn B to select “MENU”, then press A.<br />
The screen will appear.<br />
The initial settings can be made in<br />
this screen.<br />
E-29
E-30<br />
Initial Setting<br />
Setting the Date and Time<br />
[Setting Procedure]<br />
screen<br />
1<br />
2<br />
3<br />
4<br />
Turn B to select “CLOCK”, then press A.<br />
Turn B to select “ADJUST”, then press A.<br />
The cursor will move to the currently<br />
set date, allowing you to change<br />
it.<br />
Turn B to select the desired date and time, then press A.<br />
The selected date and time will be<br />
set.<br />
• Each time A is pressed, the cursor will move as follows:<br />
“day” → “month” → “year” → “hour” → “minute” → “second” → “PREV”<br />
• Keeping B held down to left or right will cause the date/time to change continuously.<br />
• To change the entries, restart from step 2.<br />
<br />
• Day: 01 to 28, 29, 30, 31 (varies with the selected month)<br />
• Month: 01 to 12<br />
• Year: 00 to 99 (lower two digits)<br />
• Hour: 00 to 23<br />
• Minute: 00 to 59<br />
• Second: 00 to 59<br />
Turn B to select “PREV”, then press A.<br />
The settings you made at step 3 will<br />
be confirmed, and the <br />
screen will reappear.
Setting the Display Direction<br />
[Setting Procedure]<br />
screen<br />
1<br />
Turn B to select “DISPLAY INVERT”, then press A.<br />
The contents displayed on the LCD<br />
will be reversed each time A is<br />
pressed.<br />
Initial Setting<br />
E-31
E-32<br />
Initial Setting<br />
Setting the LCD Contrast<br />
[Setting Procedure]<br />
screen<br />
1<br />
2<br />
Turn B to select “LCD CONTRAST”, then press A.<br />
Turn B to adjust the LCD contrast, then press A.<br />
The contrast you set will be confirmed,<br />
and the screen<br />
will reappear.<br />
• Turning B to the right will move the contrast adjuster bar to the right, increasing the contrast.<br />
Turning B to the left will move the contrast adjuster bar to the left, decreasing the contrast.<br />
• Keeping B held down to left or right will cause the contrast adjuster bar to move continuously.<br />
Note<br />
On the LCD of this instrument, the display looks darker in a high temperature environment, and looks<br />
paler in a low temperature environment. When this occurs, adjust the display level so that the display<br />
shows its contents properly.<br />
If the contrast is too high or too low, the contents displayed on the LCD cannot be viewed properly. In this<br />
case, turn the power OFF, and then turn it ON again while pressing A. The default contrast will be<br />
stored and the screen shown in “Setting the Language and Measurement Mode” (page E-27) will appear.<br />
Adjust the LCD contrast again as explained in “Initial Setting” (from page E-29) if necessary.
Selecting a Measurement Condition<br />
Before starting measurement, the desired measurement condition (COND1 to COND6) must be selected.<br />
Memo<br />
• Up to six sets of measurement conditions (COND1 to COND6) can be set.<br />
• Measurement conditions must be set before start of measurement. For details, refer to page E-34.<br />
[Setting Procedure]<br />
screen<br />
1<br />
2<br />
Turn B to select one of the conditions (COND1 to COND6), then press A.<br />
Turn B to select “FILE”, then press A.<br />
• “T*” is the number of the color difference target data for the next measurement. If nothing is selected,<br />
“T---” appears.<br />
• “T*” does not appear if “defined in COND.” mode is selected.<br />
The currently selected measurement<br />
condition will be displayed.<br />
• The FILE screen consists of two pages (1/2 and 2/2).<br />
• The pages can be switched from one to another by turning B to select “ 2/2” (or “ 1/2”) and<br />
then pressing A.<br />
Memo<br />
• To set a new condition or change an existing condition, refer to “Setting a Measurement Condition” on the<br />
following page.<br />
• If an maesurement condition has been set, calibration and measurement can be performed under that condition.<br />
E-33
E-34<br />
Setting a Measurement Condition<br />
Up to six sets of conditions (COND1 to COND6) can be set. Since the instrument will perform measurement<br />
according to the selected condition, conditions must be set before start of measurement.<br />
The following nine condition items can be set:<br />
(1) Measurement area and specular component “MASK/GLOSS”<br />
(2) UV setting (UV SETTING)<br />
(3) Illuminant 1, illuminant 2 “ILLUMINANT 1, ILLUMINANT 2”<br />
(4) Observer “OBSERVER”<br />
(5) Display contents “DISPLAY”<br />
(6) Color space “COLOR SPACE”<br />
(7) Measurement times and standard deviation for manual averaging<br />
“MANUAL AVG. TIMES” and “DEVIATION”<br />
(8) Auto averaging times “AUTO AVG.”<br />
(9) Delay time “DELAY TIME”<br />
Memo<br />
• A setting can be made for the currently highlighted item. To confirm the setting, press A. The next item will<br />
be highlighted automatically.<br />
• For the items for which no setting needs to be made, press A to skip them.<br />
• If an incorrect setting has been made for items (1) to (9), press the MEAS. button. This will take you to the previous<br />
items and allow you to make a correct setting.<br />
[Setting Procedure]<br />
screen<br />
1<br />
Turn B to select “SEL”, then press A.<br />
“MASK/GLOSS” will be highlighted.<br />
For <strong>CM</strong>-<strong>2600d</strong><br />
For <strong>CM</strong>-<strong>2500d</strong><br />
• Only those conditions whose measurement area is MAV can be selected.
Setting a Measurement Condition<br />
Setting the Measurement Area and Specular Component Mode<br />
2<br />
Turn B to select the desired setting, then press A.<br />
<br />
• M/I+E: Measurement area:ø8 mm, simultaneous measurement of SCI (Specular Component Included)<br />
and SCE (Specular Component Excluded)<br />
• M/SCI: Measurement area:ø8 mm, SCI (Specular Component Included)<br />
• M/SCE:Measurement area:ø8 mm, SCE (Specular Component Excluded)<br />
• S/I+E: Measurement area:ø3 mm, simultaneous measurement of SCI (Specular Component Included)<br />
and SCE (Specular Component Excluded)<br />
• S/SCI: Measurement area:ø3 mm, SCI (Specular Component Included)<br />
• S/SCE: Measurement area:ø3 mm, SCE (Specular Component Excluded)<br />
• The measurement area that suits the Target Mask used for measurement or the setting of the lens position<br />
selector switch must be selected.<br />
• With the <strong>CM</strong>-<strong>2500d</strong>, only “M/ *** ” can be selected.<br />
If the mask type has been changed<br />
from “M/ *** ” to “S/ *** ” or vice<br />
versa, a message will appear when<br />
A is pressed, inform you that<br />
the mask (measurement area) has<br />
been changed. The next item will<br />
then appear automatically.<br />
E-35
E-36<br />
Setting a Measurement Condition<br />
Setting the UV<br />
3<br />
Turn B to select “UV SETTING”, then press A.<br />
For <strong>CM</strong>-<strong>2600d</strong><br />
<br />
• UV100%: Measurement is performed with an illumination that contains all UV components of Xe flash<br />
light source.<br />
• UV0%: Measurement is performed with an illumination that contains no UV components of Xe flash light<br />
source.<br />
• UVADJUSTED: This item can be selected only if UV coefficients have been downloaded from SpectraMagic<br />
(Ver.3.2 or higher; excluded Ver.3.5).<br />
• Only “UV100%” can be selected.<br />
Selecting Illuminant 1<br />
4<br />
For <strong>CM</strong>-<strong>2500d</strong><br />
Turn B to select the desired illuminant, then press A.<br />
<br />
• D65: Standard illuminant D65; daylight, Color temperature: 6504K<br />
• D50: Complementary illuminant D50; daylight, Color temperature: 5003K<br />
• C: Complementary illuminant C; daylight (Ultraviolet part is small in comparison with the daylight),<br />
Color temperature: 6774K<br />
• A: Standard illuminant A; Incandescent lamp, Color temperature: 2856K<br />
• F2: Cool white (fluorescent lamp)<br />
• F6: Cool white (fluorescent lamp)<br />
• F7: Color rendering A daylight white (fluorescent lamp)<br />
• F8: Color rendering AAA natural white (fluorescent lamp)<br />
• F10: 3-band type natural white (fluorescent lamp)<br />
• F11: 3-band type cool white (fluorescent lamp)<br />
• F12: 3-band type warm white (fluorescent lamp)<br />
• ---: None (Not selectable “ILLUMINANT 1”)
Selecting Illuminant 2<br />
5<br />
Setting a Measurement Condition<br />
As explained in “Selecting Illuminant 1”, select the desired illuminant, then press<br />
A.<br />
<br />
• Same as those given in “Selecting Illuminant 1”<br />
• To display MI (metamerism index), an illuminant must be selected for ILLUMINANT 2.<br />
Selecting the Observer<br />
6<br />
Turn B to select the desired observer angle, then press A.<br />
<br />
• 10°: 10° observer (CIE1964)<br />
• 2°: 2° observer (CIE1931)<br />
E-37
E-38<br />
Setting a Measurement Condition<br />
Selecting the Display Mode<br />
7<br />
Turn B to select the desired display mode, then press A.<br />
<br />
• DIFF&ABS:<br />
Displays the absolute value and the color difference in relation to the target color. (Only absolute value or<br />
only color difference can be displayed.)<br />
If pass/fail judgment is made according to the specified box color difference tolerances, the failed factor<br />
of the measured data will be highlighted.<br />
• PASS/FAIL:<br />
Whether color difference from the target colors is within the specified color difference limit is judged.<br />
“PASS” will be displayed if the color difference is within the specified limit for all items of the measured<br />
data, and “FAIL” will be displayed if not within the specified limit for any factor of the measured data.<br />
• COLOR GRAPH:<br />
Displays the color difference from the target value in a graph. (Only for illuminant 1, box tolerance and<br />
L*a*b*)<br />
• SPECT. GRAPH:<br />
Displays a spectral reflectance graph.<br />
• ASSESSMENTS<br />
The color difference from the target color, pass/fail judgment result made based on the specified tolerances<br />
and direction of deviation from the target color for each axis in the L*a*b* or L*C*h color space are displayed.<br />
• If no color target has been selected, the color difference, pass/fail judgment result and tint deviation<br />
direction will not be displayed even if “ASSESSMENTS” is selected. Furthermore, if no tolerances<br />
are selected, the pass/fail judgment result and deviation direction will not be displayed even if the<br />
target color is selected.<br />
• Even if “DIFF&ABS” or “COLOR GRAPH” is selected, no color difference values will be displayed<br />
if no color difference target data have been selected.
Selecting a Color Space<br />
8<br />
Turn B to select the desired color space, then press A.<br />
Locating the highlighted cursor to<br />
by turning B will display<br />
the next page of the color space list.<br />
Locating the highlighted cursor to<br />
by turning B will display<br />
the previous page of the color space<br />
list.<br />
Setting a Measurement Condition<br />
<br />
• L*a*b*, E*: L*a*b* color space and color difference by “ E*ab (CIE1976)” color-difference formula<br />
• L*C*h, E*: L*C*h color space and color difference by “ E*ab (CIE1976)” color-difference formula<br />
• L*C*h, <strong>CM</strong>C1:1: L*C*h color space and color difference by “<strong>CM</strong>C1:1” color-difference formula<br />
• L*C*h, <strong>CM</strong>C2:1: L*C*h color space and color difference by “<strong>CM</strong>C2:1” color-difference formula<br />
• XYZ: XYZ color space<br />
• L*C*h, CIE94: L*C*h color space and color difference by “ E*94 (CIE1994)” color-difference formula<br />
• Hunter Lab: Hunter Lab<br />
• Yxy: Yxz color space<br />
• MUNSELL: Munsell color notation<br />
• WI ASTM E313: Whiteness (ASTM E313-73)<br />
• WI CIE: Whiteness Index<br />
• YI ASTM E313: Yellowness Index (ASTM E313-73)<br />
• YI ASTM D1925: Yellowness Index (ASTM D1925)<br />
• B ISO 2470: ISO Brightness<br />
• DENSITY (A): Density (status A)<br />
• DENSITY (T): Density (status T)<br />
• Wl, Tint Ganz: Whiteness Index and Tint value (Ganz & Griesser)<br />
• Wl, Tint CIE: Whiteness Index and Tint value (CIE)<br />
• L*a*b*, CIE00: L*a*b* color space and color difference by “ E*00 (CIE2000)” color-difference formula<br />
• L*C*h, CIE00: L*C*h color space and color difference by “ E*00 (CIE2000)” color-difference formula<br />
• If L*a*b* or L*C*h is selected as the color space, DIFF&ABS or PASS/FAIL as the display mode<br />
and ILLUMINANT 1 or ILLUMINAT 2 as the illuminant, it will be possible to calculate MI (metamerism<br />
index) and display the result.<br />
• Even if “WI, Tint Ganz” is selected, no data for WI and Tint (Ganz/Griesser) will be displayed when<br />
using SpectraMagic NX or the previously used software SpectraMagic Ver.3.2 or higher (except for<br />
Ver. 3.5), unless the proper Ganz coefficient has been specified and UV ADJUSTED is selected in the<br />
UV SETTING in the Measurement Condition Setting.<br />
In addition, if the Ganz coefficient is re-specified after measurement, the measurement data will be<br />
replaced with the one that is calculated based on that Ganz coefficient.<br />
E-39
E-40<br />
Setting a Measurement Condition<br />
• The coefficient for CIE00 (kl:kc:kh) is (1:1:1). This can be changed using SpectraMagic NX (except<br />
for Ver. 1.50 or earlier).<br />
If the coefficient (kl:kc:kh) is re-specified after measurement, the measurement data will be replaced<br />
with data calculated based on the new coefficient.
Setting a Measurement Condition<br />
Setting the Number of Measurements for Manual Averaging<br />
Manual averaging settings can be made as follows: For details, refer to “Manual Averaging” (page E-76).<br />
9<br />
Turn B to select the number of measurements to be performed, then press<br />
A.<br />
<br />
• TIMES:<br />
Specify the number of measurements to be performed (2 to 30).<br />
If “- -” is selected, manual averaging will not be performed.<br />
• Keeping B held down to left or right will cause the value to change continuously.<br />
Setting the Standard Deviation for Manual Averaging<br />
10<br />
Turn B to set the desired standard deviation, then press A.<br />
<br />
• DEVIATION:<br />
Set the desired standard deviation (0.01 to 2.00). When the standard deviation is below the specified value,<br />
the average of the measured values taken so far will be calculated and used as the measurement result.<br />
If “- -” is selected, manual averaging by the standard deviation will not be performed.<br />
• If “- -” has been set for TIMES, “- - - -” will also be set for DEVIATION and cannot be changed.<br />
• If the spectral graph has been selected as the display mode, “- - - -” will be set for DEVIATION and<br />
can not be changed.<br />
• The standard deviation can be set only if L*a*b* or L*C*h has been set as the color space.<br />
• The standard deviation cannot be set if “SPECT. GRAPH” has been selected as the display mode.<br />
• Manual averaging will end when either the specified number of measurements (TIMES) or the specified<br />
standard deviation (DEVIATION) is reached.<br />
• Keeping B held down to left or right will cause the value to change continuously.<br />
Setting the Number of Measurements for Auto Averaging<br />
11<br />
Turn B to select the number of measurements to be performed, then press A.<br />
<br />
• Specify the number of measurements to be performed (1, 3, 5 or 8).<br />
E-41
E-42<br />
Setting a Measurement Condition<br />
Setting the Delay Time<br />
12<br />
Turn B to set the desired delay time, then press A.<br />
<br />
• DELAY TIME:<br />
The delay time is used to prevent influences caused by movement of the hands, and is the duration from<br />
when the MEAS. button is pressed until the lamp flashes and measurement is performed. Specify the desired<br />
delay time (0.1 to 3.0 seconds in steps of 0.1 seconds). If “0.0” (second) is specified, no delay time<br />
will be provided.<br />
• Keeping B held down to left or right will cause the value to change continuously.<br />
“BREAK” will be highlighted.<br />
13<br />
<br />
Turn B to select “PREV”, then press A.<br />
Setting will be completed and the<br />
screen will appear.<br />
• “T*” is the number of the color difference target data for the next measurement. If nothing is selected,<br />
“T---” appears.
• “T*” does not appear if “defined in COND.” mode is selected.<br />
Setting a Measurement Condition<br />
Memo<br />
Selecting “CALIBRATION” by turning B and pressing A will display the <br />
screen. So, perform the desired calibration according to step 3 and subsequent steps given in “Zero Calibration”<br />
(from page E-44) or “White Calibration” (from page E-46).<br />
Note<br />
Depending on the target mode selected, some of the options displayed will be different.<br />
<br />
Turn B to select “BREAK”, then press A.<br />
The screen will appear.<br />
E-44<br />
• “T*” does not appear if “defined in COND.” mode is selected.<br />
Selecting “PREV” by turning B and pressing A again will cause the screen to reappear.<br />
So, set another measurement condition<br />
according to the procedure given<br />
in “Selecting a Measurement<br />
Condition” and “Setting a Measurement<br />
Condition” (from page E-34).
Zero Calibration<br />
Zero Calibration<br />
When you use this instrument for the first time or when you have initialized it, zero calibration must be<br />
performed.<br />
Zero calibration is also sometimes required when measurement conditions are changed.<br />
Once zero calibration is completed, the zero calibration data will be kept even if the power is turned OFF.<br />
Thus, it is not necessary to perform zero calibration each time the power is turned ON.<br />
Memo<br />
• The effects of stray light inside the measuring part (i.e. light generated due to the flare characteristics of the optical<br />
system) will be compensated automatically by the zero calibration data.<br />
• The amount of stray light may change because of dust or dirt which has collected in the optical system, temperature,<br />
repeated operation, vibration and shock exerted on the instrument. In this case, performing zero calibration<br />
periodically is recommended.<br />
Note<br />
• If the instrument is not used for long periods of time, the zero calibration data stored in the instrument may be<br />
lost. If the data is lost, zero calibration must be performed again.<br />
• Before starting zero calibration, select the desired MASK/GLOSS setting from M/I+E, M/SCI, M/SCE, S/I+E,<br />
S/SCI and S/SCE in the screen. If M/ *** is selected, set MAV to the instrument. If S/ *** is selected,<br />
set SAV to the instrument. For MAV, set the lens position selector switch and Target Mask to MAV. For<br />
SAV, set them to SAV.<br />
• A lens position error will occur if the lens position does not match the one set in the file, and a calibration error<br />
will occur if the Target Mask does not match.<br />
[Setting Procedure]<br />
screen<br />
1<br />
2<br />
Turn B to select one of the conditions (COND1 to COND6), then press A.<br />
Turn B to select “CALIBRATION”, then press A.<br />
• “T*” is the number of the color difference target data for the next measurement. If nothing is selected,<br />
“T---” appears.<br />
• “T*” does not appear if “defined in COND.” mode is selected.<br />
E-45
3<br />
4<br />
5<br />
E-46<br />
Turn B to select “ZERO”.<br />
Direct the specimen measuring port into the air.<br />
1m or more<br />
• Never place the specimen measuring port toward a light source.<br />
• Keep the specimen measuring port more than 1m away from any reflective items (hands, desks,<br />
walls etc.).<br />
Make sure that is displayed, then press C (MEAS. button).<br />
Zero calibration will be performed.<br />
When zero calibration is complete,<br />
the screen will<br />
reappear.<br />
Memo<br />
• Use of the optional Zero Calibration Box ensures proper zero calibration.<br />
If Zero Calibration Box is used, remove “Measuring Base”.<br />
• If does not appear due to the auto power save function, this may be due the fact that it can take time<br />
to start zero calibration after C is pressed.<br />
Note<br />
• When zero calibration is complete, perform white calibration. Measurement cannot be performed if<br />
white calibration has not been completed.<br />
• Even though white calibration has been performed after the power is turned ON, if zero calibration has<br />
also been performed after that, white calibration must be performed again.
White Calibration<br />
White Calibration<br />
White calibration must be performed prior to start of measurement after the power is turned ON.<br />
Memo<br />
• Own calibration data has been registered to the White Calibration Plate supplied with the instrument.<br />
• Although white calibration data is retained in internal memory even after power is turned off, it is still necessary<br />
to repeat white calibration each time you switch the power back on.<br />
• The reading may fluctuate slightly due to changes in the ambient temperature or due to heat generation caused by<br />
repeated operation of the instrument. In this case, make sure to perform white calibration regularly.<br />
• White calibration is not required if you just want to see the measured data without performing measurement.<br />
Note<br />
• White calibration must be performed at the same temperature as the one at which measurement will be performed.<br />
• Before starting white calibration, make sure that the instrument is sufficiently acclimatized to the ambient temperature.<br />
• Before starting white calibration, select the desired MASK/GLOSS setting from M/I+E, M/SCI, M/SCE, S/I+E,<br />
S/SCI and S/SCE in the screen. If M/ *** is selected, set MAV to the instrument. If S/ *** is selected,<br />
set SAV to the instrument. For MAV, set the measurement area selector switch and Target Mask to MAV.<br />
For SAV, set them to SAV.<br />
• A lens position error will occur if the lens position does not match the one set in the screen, and a<br />
calibration error will occur if the Target Mask does not match.<br />
[Setting Procedure]<br />
screen<br />
Turn B to select one of th3e conditions (COND1 to COND6), then press A.<br />
1<br />
2<br />
Turn B to select “CALIBRATION”, then press A.<br />
• “T*” is the number of the color difference target data for the next measurement. If nothing is selected,<br />
“T---” appears.<br />
• “T*” does not appear if “defined in COND.” mode is selected.<br />
E-47
3<br />
4<br />
5<br />
E-48<br />
Turn B to select “WHITE”.<br />
Note that the White Calibration<br />
Plate No. is displayed.<br />
Place the instrument on the correct White Calibration Plate (i.e. the calibration<br />
plate whose plate No. is displayed in the screen).<br />
Make sure that is displayed, then press C (MEAS. button).<br />
White calibration will be performed.<br />
When white calibration is complete,<br />
the measurement screen will reappear.<br />
Note<br />
The instrument's memory contains the calibration data of the White Calibration Plate supplied with instrument.<br />
Therefore, to execute white calibration, be sure to use the White Calibration Plate of the same<br />
serial number as the number displayed on the screen.<br />
Memo<br />
• In COND mode, the measurement screen can still be displayed even if white calibration has not been completed.<br />
However, it will not be possible to take measurement. (Measured data can still be viewed.)<br />
• White calibration must be performed each time the power is turned ON.<br />
• To perform white calibration again after the measurement screen is displayed, select “PREV” to return to<br />
screen, then restart the procedure from step 2.<br />
• If the measurement area or specular component mode is changed in the screen following white<br />
calibration, it is necessary to perform white calibration again under those new conditions (i.e. with the<br />
newly selected measurement area or specular component mode).<br />
• Even if the conditions are changed (e.g. switched from COND2 to COND3) following white calibration,<br />
it will be not necessary to perform white calibration again if the measurement area and specular component<br />
mode remain unchanged.<br />
• If does not appear due to the auto power save function, this may be due the fact that it can take time<br />
to start white calibration after C is pressed.
Setting a Color Difference Target Data<br />
Setting a Color Difference Target Data<br />
To measure the color difference between two specimens, the color of one of the specimens must be set<br />
as the target color. Up to 1700 target colors can be set for color difference measurement. (700 can be set<br />
in the “defined in COND” mode.)<br />
To set a target color, follow the procedure given below.<br />
Memo<br />
• Since tolerances for pass/fail judgment need to be set for each target color, target color data must be set before<br />
setting tolerances.<br />
• The memory of this instrument can store up to 1700 pieces of data in total, (700 in the “defined in COND” mode).<br />
This amount includes the sample data for the COND and TASK modes as well as color difference target data.<br />
When some sample data have already been stored, the number of target colors which can be set will be reduced<br />
by the number of the sample data.<br />
Note<br />
• Before setting target colors, a measurement condition (COND1 to COND6) must be selected and white calibration<br />
performed.<br />
• For accurate measurement, make sure to keep measurement conditions (ambient temperature etc.) constant.<br />
[Setting Procedure]<br />
screen<br />
1<br />
2<br />
Turn B to select “TARGET”, then press A.<br />
• “T*” is the number of the color difference target data for the next measurement. If nothing is selected,<br />
“T---” appears.<br />
• “T*” does not appear if “defined in COND.” mode is selected.<br />
Turn B to select D, then press A.<br />
D will change to E.<br />
• “T1” appears instead of “T---” if “defined in COND.” mode is selected.<br />
3 Turn B to select the desired target color no. (T * ), then press A.<br />
E will return to D.<br />
• Keeping B held down to left or right will cause the target color No. to change continuously.<br />
E-49
4<br />
5<br />
6<br />
E-50<br />
Place the specimen measuring port to the specimen.<br />
Make sure that is displayed, then press C (MEAS. button).<br />
The lamp will flash, measurement<br />
will be taken, then the result will appear<br />
on the LCD.<br />
Memo<br />
• The navigation wheel and MEAS. button cannot be used for three seconds after the MEAS. button is<br />
pressed, if “UV100%” has been set for “UV SETTING”, or for four seconds if “UV0%” or “ADJUSTED”<br />
has been set.<br />
• If does not appear due to the auto power save function, this may be due the fact that it can take time<br />
to start measurement after C is pressed.<br />
Turn B to select “BREAK” or “PREV”, then press A.<br />
To set the next target color, repeat<br />
steps 2 to 5.<br />
To exit target color setting, select<br />
“PREV”.<br />
Memo<br />
• If a target color has already been set for the selected target color no., a message asking you whether you<br />
wish to overwrite the target color data will appear. Select “YES” to overwrite (or select “NO” if not) using<br />
B, then press A.<br />
• If “MUNSELL”, “DENSITY (A)” or “DENSITY (T)” has been selected as the color space, it will be possible<br />
to set target colors, but no color difference data will be displayed in the measurement screen. In addition,<br />
it is not possible to set color difference tolerances.<br />
• If “COLOR GRAPH” has been selected as the display mode, it will be possible to set target colors, but<br />
color difference cannot be displayed in the measurement screen.<br />
• Measurement will no longer be possible once the total number of target color data and measured data<br />
reaches 1700 (700 in the “defined in COND.” mode). In this case, delete some target color data or measured<br />
data.<br />
Switching between the Measured Data screen and the screen<br />
Turning B to select “T” and then pressing A will cause the measured data screen to<br />
change to the screen showing the color difference target data for the currently selected<br />
target number which is the target will be used for the next measurement.<br />
Note<br />
If “SPECT. GRAPH” has been selected as the display mode, “T” will not be displayed in the Measured<br />
Data screen. Similarly, “BREAK” will not be displayed in the screen. Thus, switching from<br />
the Measured Data screen to screen or vice versa, back to the screen once, must<br />
be carried out by the method to select the desired screen.
Selecting a Color Difference Target Data<br />
Selecting a Color Difference Target Data<br />
To measure the color difference between two specimens, the target color to be used for measurement<br />
must be selected from those set in “Setting a Color Difference Target Data”.<br />
To select a target color, follow the procedure given below.<br />
[Setting Procedure]<br />
screen<br />
1<br />
2<br />
Turn B to select “TARGET”, then press A.<br />
• “T*” is the number of the color difference target data for the next measurement. If nothing is selected,<br />
“T---” appears.<br />
• “T*” does not appear if “defined in COND.” mode is selected.<br />
Turn B to select “D”, then press A.<br />
“D” will change to “E”.<br />
3 Turn B to select the desired target color no. (T * ), then press A.<br />
“E” will return to “D”.<br />
• Keeping B held down to left or right will cause the target color No. to change continuously.<br />
4<br />
<br />
Turn B to select “BREAK”, then press A.<br />
The measurement screen will appear.<br />
E-51
E-52<br />
Note<br />
To make pass/fail judgment during measurement, it is necessary to set tolerances for the target color to<br />
be used. For details, refer to “Setting Color Difference Tolerances” (page E-52).<br />
Deleting a Color Difference Target Data<br />
There are two methods for deleting target color data. One is to delete the target color data set in “T * ” of<br />
the measurement conditions (COND 1 to COND 6) one by one. The other is to delete all the target color<br />
data set in the instrument.<br />
Note<br />
• When target color data is deleted, its tolerances will also be deleted.<br />
• You will not be able to view the color difference for measurement data that used the deleted target color data.<br />
[Setting Procedure]<br />
Display the target color data to be deleted, as explained in “Setting a Color Difference Target<br />
Data”.<br />
1<br />
2<br />
Turn B to select “DEL”, then press A.<br />
Turn B to select the desired deletion method, then press A.<br />
Deletion Method<br />
• T * DELETE:<br />
Deletes the currently displayed target color data.<br />
• If the target color data to be deleted by another “COND * ” or “TASK * ” has been selected, a message<br />
“THIS TARGET IS USED IN OTHER COND OR TASK. DO YOU DELETE IT?” will appear. Select<br />
“YES” if you want to delete or select “NO” if not, using B, then press A.<br />
• The target color data nos. next to that of the deleted target color data will scroll up automatically.<br />
• ALL DELETE:<br />
Deletes all the target color data currently set in the instrument. All the target color data will be deleted<br />
without a confirmation message.<br />
Note<br />
If the target mode is “linked to each data.”, “T---” is displayed for target color number if the target color linked<br />
at the time of measurement is deleted, and the color difference for that data cannot be displayed.
Setting Color Difference Tolerances<br />
Setting Color Difference Tolerances<br />
This instrument allows you to set tolerances for the measured color difference, to make pass/fail judgment.<br />
Pass/fail judgment is made based on two types of tolerances: box tolerances and elliptical tolerances. Prior<br />
to start of measurement, tolerances must be set.<br />
Memo<br />
• Two types of tolerances are available (box tolerances and elliptical tolerances). With this instrument, either box<br />
or elliptical tolerances can be set for each target color. However, the following restrictions apply to the tolerance<br />
type that can be set, depending on the selected color space.<br />
• In the case of “MUNSELL” and “DENSITY” as the Color Space, neither box nor elliptical tolerances can be set.<br />
• In the case of “WI”, “YI”, “ISO BRIGHTNESS” and “WI/Tint” as the Color Space, only box tolerances can be set.<br />
• In the case of “Spect. Graph” as the Display Mode, neither box nor elliptical tolerance can be set.<br />
Note<br />
Once tolerances are set, the tolerance type cannot be changed. To change the tolerance type, the currently set tolerances<br />
must be cleared.<br />
Box Tolerance<br />
If the measured color difference is outside the specified tolerances set for the target color, it will be highlighted<br />
to indicate that the pass/fail judgment result is FAIL. Both + and - box tolerances can be set for each target color.<br />
Note<br />
Target colors must be set before setting tolerances.<br />
[Setting Procedure]<br />
screen<br />
1<br />
2<br />
Turn B to select “TARGET”, then press A.<br />
• “T*” is the number of the color difference target data for the next measurement. If nothing is selected,<br />
“T---” appears.<br />
• “T*” does not appear if “defined in COND.” mode is selected.<br />
Turn B to select “D”, then press A.<br />
“D” will change to “E”.<br />
E-53
E-54<br />
Setting Color Difference Tolerances<br />
3 Turn B to select the desired target color no. (T * ), then press A.<br />
“E” will return to “D”.<br />
4<br />
5<br />
6<br />
• Keeping B held down to left or right will cause the target color No. to change continuously.<br />
Turn B to select “TOLERANCE”, then press A.<br />
A screen that allows selection of<br />
the tolerance type will appear.<br />
If tolerances have already been<br />
set, they will be displayed, so<br />
skip to step 6.<br />
• Example when “M/I+E” is set for “MASK/GLOSS” condition<br />
item.<br />
• Example when “M/SCI” is set for “MASK/GLOSS” condition<br />
item.<br />
Turn B to select “BOX”, then press A.<br />
Turn B to select “ADJUST”, then press A.
7<br />
8<br />
9<br />
Setting Color Difference Tolerances<br />
Turn B to select the value for an item to be set, then press A.<br />
The selected value will be set,<br />
and the cursor will move to the<br />
next value.<br />
Memo<br />
Keeping A held down will<br />
cause the cursor to move from one<br />
value to another continuously. The<br />
cursor will stop when it reaches<br />
“ADJUST”.<br />
<br />
• + (“+” tolerance range) : “----” (No setting), 0.1 to 20.0<br />
• - : (“-” tolerance range) : “----” (No setting), 0.1 to 20.0<br />
• Keeping B held down to left or right will cause the value to change continuously.<br />
• To change a value that has been set, press C (MEAS. button) in the screen where “↑ : ”<br />
is displayed. This will take you to the previous items, so change the value.<br />
• Pressing the MEAS. button after the cursor has returned to the first item (∆L*) will exit from the setting<br />
screen and the cursor will locate on “ADJUST”.<br />
If illuminant 2 has been selected, the observer and illuminant conditions for illuminant<br />
2 set in the measurement condition (COND1 to COND6) will be displayed.<br />
Turn B to select it and press A to switch to the screen that allows setting<br />
of box tolerances for illuminant 2. Set the desired box tolerances in the same way<br />
as in steps 6 and 7.<br />
• Example when illuminant 2 is not selected.<br />
• Example when illuminant 2 is selected.<br />
Turn B to select “PREV”, and then press A.<br />
The screen will reappear.<br />
E-55
E-56<br />
Setting Color Difference Tolerances<br />
Elliptical Tolerance<br />
Provided to judge whether the measured color difference is within the ellipse set for the target color.<br />
Memo<br />
• Elliptical tolerances must be set using the “L*a*b*” color space axis if “L*C*h” has been selected as the color<br />
space.<br />
• After elliptical tolerances have been set, if the color space is switched to another (e.g. “WI”) that does not allow<br />
setting of elliptical tolerances, a message will appear informing you that the specified elliptical tolerances are no<br />
longer valid, and no pass/fail judgment based on the specified tolerances will be made.<br />
Note<br />
Target colors must be set before setting tolerances.<br />
[Setting Procedure]<br />
screen<br />
1<br />
2<br />
Turn B to select “TARGET”, then press A.<br />
• “T*” is the number of the color difference target data for the next measurement. If nothing is selected,<br />
“T---” appears.<br />
• “T*” does not appear if “defined in COND.” mode is selected.<br />
Turn B to select “D”, then press A.<br />
“D” will change to “E”.<br />
3 Turn B to select the desired target color no. (T * ), then press A.<br />
“E” will return to “D”.<br />
• Keeping B held down to left or right will cause the target color No. to change continuously.
4<br />
5<br />
6<br />
7<br />
Turn B to select “TOLERANCE”, then press A.<br />
A screen that allows selection of the<br />
tolerance type will appear.<br />
If tolerances have already been set,<br />
they will be displayed, so skip to<br />
step 6.<br />
Turn B to select “ELLIPTICAL”, then press A.<br />
Turn B to select “ADJUST”, then press A.<br />
Setting Color Difference Tolerances<br />
Select the value for an item to be set, starting from the top, then press A.<br />
The selected value will be set,<br />
and the cursor will move to the<br />
next value.<br />
Memo<br />
Keeping A held down will<br />
cause the cursor to move from one<br />
value to another continuously. The<br />
cursor will stop when it reaches<br />
“ADJUST”.<br />
<br />
• (Tolerance range): 0.1 to 20.0<br />
The tolerance range for “MINOR” must be smaller than that for “MAJOR”.<br />
• OFFS.: Below the specified +/- tolerances<br />
• ROTAT.: 0.0 to 179.9<br />
E-57
8<br />
9<br />
E-58<br />
Setting Color Difference Tolerances<br />
• Keeping B held down to left or right will cause the value to change continuously.<br />
• “MAJOR” in the L*a*b* color space will be “a*” axis when “OFFS.” and “ROTAT.” on the “a*b*”<br />
plane are “0” (ZERO).<br />
• To change a value that has been<br />
set, press C (MEAS. button) in<br />
the screen where “↑ : ”<br />
is displayed. This will take you to<br />
the previous items, so change the<br />
value.<br />
MINOR<br />
ROTAT.<br />
MAJOR<br />
OFFS.<br />
If the measurement conditions (illuminant 2, observer, specular component mode,<br />
etc.) are displayed, turn B to select it and press A to switch to the screen<br />
that allows setting elliptical tolerances for illuminant 2. Set the desired elliptical<br />
tolerances in the same way as in steps 6 and 7.<br />
Turn B to select “PREV”, then press A.<br />
The screen will reappear.<br />
• Example when “ * /I+E” is set for “MASK/GLOSS” and illuminant<br />
2 is selected.<br />
Memo<br />
Use of the optional Color Data Software “SpectraMagic” (Ver.3.2 or higher; excluded Ver.3.5) allows you<br />
to set elliptical tolerances using <strong>CM</strong>C coefficients or automatically set them using the target colors and some<br />
preset values.
Clearing Tolerances<br />
To change the tolerance type, it is necessary to clear the currently set tolerances.<br />
To clear the currently set tolerances, follow the procedure given below:<br />
[Setting Procedure]<br />
screen<br />
1. Turn B to select “TOLERANCE”, then press A.<br />
The currently set tolerances will be displayed.<br />
2. Turn B to select “RESET”, then press A.<br />
A message confirming you whether to<br />
clear the tolerances will appear.<br />
3. Turn B to select “OK” or “CANCEL”, then press A.<br />
• If “OK” is selected, the currently<br />
set tolerances will be cleared, and<br />
a screen that allows selection of<br />
the tolerance type will appear.<br />
If a color space that does not allow<br />
setting of elliptical tolerances has<br />
been selected, a screen that allows<br />
setting of box tolerances will appear<br />
automatically.<br />
To make pass/fail judgment, it is<br />
necessary to set tolerances again.<br />
• If “CANCEL” is selected, clearing<br />
of tolerances will be canceled<br />
and the previous screen will reappear.<br />
Setting Color Difference Tolerances<br />
E-59
E-60<br />
Setting Color Difference Tolerances
Chapter 3<br />
Measurement<br />
E-61
E-62<br />
Measurement<br />
To perform measurement, you need to switch from a screen in which “BREAK” is displayed to the measurement<br />
screen.<br />
To perform measurement, follow the procedure given below:<br />
Note<br />
• Prior to start of measurement, be sure to perform white calibration. For details, refer to “White Calibration” (page E-46).<br />
• To measure color difference, it is necessary to set target colors first and then select the one to be used for measurement.<br />
• For accurate measurement, make sure to keep measurement conditions (ambient temperature etc.) constant.<br />
[Operating Procedure]<br />
1<br />
2<br />
3<br />
Turn B to select “BREAK”, then press A.<br />
Place the specimen measuring port to the specimen.<br />
• Example for screen.<br />
• “T*” is the number of the color difference target data for the next<br />
measurement. If nothing is selected, “T---” appears.<br />
• “T*” does not appear if “defined in COND.” mode is selected.<br />
• If necessary, slide the viewfinder lever to check the position of the specimen.<br />
Make sure that is displayed, then press C (MEAS. button).<br />
The lamp will flash, measurement<br />
will be taken, then the result will appear<br />
on the LCD.<br />
• Example when “DIFF&ABS” is selected as the display mode.
Measurement<br />
Memo<br />
• Measurement will no longer be possible once the total number of target color data and measured data reaches 1700<br />
(700 in the “defined in COND.” mode). In this case, delete some target color data or measured data.<br />
• The navigation wheel and MEAS. button cannot be used for three seconds after the MEAS. button is pressed, if<br />
“UV100%” has been set for “UV SETTING”, or for four seconds if “UV0%” or “ADJUSTED” has been set.<br />
• If the Ganz coefficient is re-downloaded and overwritten after measurement when “WI, Tint Ganz” has been selected<br />
as the display mode, the measurement data will be replaced with the one that is calculated based on that<br />
Ganz coefficient.<br />
• If does not appear due to the auto power save function, this may be due the fact that it can take time to start<br />
measurement after C is pressed.<br />
E-63
E-64<br />
Displaying the Measurement Results<br />
At the end of measurement, the measurement results will be displayed on the LCD according to the specified<br />
measurement condition. Typical measurement result screens are shown hereafter. To change LCD’s<br />
display contents, change them in the corresponding screen. For details, refer to “Setting a<br />
Measurement Condition” (from page E-34).<br />
Measured Data<br />
The following screen appears if “DIFF&ABS” has been selected for “DISPLAY” mode.<br />
Note<br />
• Color difference will not be displayed if no target color has been selected.<br />
• If the target mode is “linked to each data.”, you will not be able to view the color difference for measurement<br />
data that uses the deleted color difference target data.<br />
Memo<br />
“#####” will be displayed if the color difference data has two or more decimal places.<br />
1 Ready to measure.<br />
2 Currently selected no.<br />
3 Mask/gloss/UV at the time of measurement<br />
4 Currently selected observer/illuminant<br />
5 Currently selected measured data no.<br />
6 Currently selected target color data no.<br />
7 Measured data<br />
8 Measurement date. For the year, only the lower two digits are displayed.<br />
9 Displays the relative gloss value. If the gloss value exceeds 200, the screen will display<br />
“G###” in place of the value.<br />
0 Deletes the currently displayed measured data.<br />
A Displays other measured data.<br />
B Switches the screen page from one to another (when there are two pages or more).<br />
C Switches to the screen for the currently selected no. (T * ).<br />
D Outputs the currently displayed measured data to the printer.<br />
E Returns to the screen.<br />
F Appears if there is insufficient battery power when the instrument is powered by the battery.<br />
If appears, replace the batteries with new ones.
Pass/Fail Judgment<br />
Displaying the Measurement Results<br />
The following screen appears if “PASS/FAIL” has been selected for “DISPLAY” mode and tolerances<br />
have been set.<br />
• When the result is “PASS”<br />
1 Ready to measure.<br />
2 Currently selected no.<br />
3 Mask/gloss/UV at the time of measurement<br />
4 Currently selected observer/illuminant<br />
5 Currently selected measured data no.<br />
6 Currently selected target color data no.<br />
7 PASS/FAIL judgment result.<br />
8 Measurement date. For the year, only the lower two digits are displayed.<br />
9 Displays the relative gloss value. If the gloss value exceeds 200, the screen will display<br />
“G###” in place of the value.<br />
0 Deletes the currently displayed measured data.<br />
A Displays other measured data.<br />
B Switches the screen page from one to another (when there are two pages or more).<br />
C Switches to the screen for the currently selected no. (T * ).<br />
D Outputs the currently displayed measured data to the printer.<br />
E Returns to the screen.<br />
F Appears if there is insufficient battery power when the instrument is powered by the battery.<br />
If appears, replace the batteries with new ones.<br />
• When the result is “FAIL”<br />
E-65
E-66<br />
Displaying the Measurement Results<br />
Color Difference Graph<br />
The following screen appears if “COLOR GRAPH” has been selected for “DISPLAY” mode. The<br />
L*a*b* color difference value and the assessment message will be displayed in this screen regardless of<br />
the color space selected for “COLOR SPACE” condition item. The data will be plotted in a color difference<br />
graph with the selected target color as the origin.<br />
(If “ * /I+E” has been selected as specular component mode, only the graph will be displayed. Color difference<br />
value and assessment message will not be displayed.)<br />
Note<br />
• If no target color has been selected, no color difference will be displayed and the graph will be blank.<br />
• If the target mode is “linked to each data.”, you will not be able to view the color difference for measurement<br />
data that uses the deleted color difference target data.<br />
Memo<br />
“#####” will be displayed if the color difference data has two or more decimal places.<br />
1 Ready to measure.<br />
2 Currently selected no.<br />
3 Mask/gloss/UV at the time of measurement<br />
4 Currently selected target color data no.<br />
5 Measured data.<br />
6 Color difference graph<br />
7 Currently selected measured data no.<br />
8 Currently selected observer/illuminant<br />
9 Measurement date. For the year, only the lower two digits are displayed.<br />
0 Displays the relative gloss value. If the gloss value exceeds 200, the screen will display<br />
“G###” in place of the value.<br />
A Deletes the currently displayed measured data.<br />
B Displays other measured data.<br />
C Switches the screen page from one to another (when there are two pages or more).<br />
D Switches to the screen for the currently selected no. (T * ).<br />
E Outputs the currently displayed measured data to the printer.<br />
F Returns to the screen.<br />
G Appears if there is insufficient battery power when the instrument is powered by the battery.<br />
If appears, replace the batteries with new ones.
• Color difference graph<br />
H L* axis (color difference graph)<br />
I a* axis (color difference graph)<br />
J b* axis (color difference graph)<br />
K Measuring point<br />
L Scale for each axis<br />
M Specified box tolerances<br />
N Position of target color<br />
Spectral Reflectance Graph<br />
Displaying the Measurement Results<br />
The following screen appears if “SPECT. GRAPH” has been selected for “DISPLAY” mode.<br />
1 Ready to measure.<br />
2 Currently selected no.<br />
3 Spectral reflectance graph<br />
4 Position of the currently selected wavelength<br />
5 Mask/gloss/UV at the time of measurement<br />
6 Currently selected measured data no.<br />
7 Currently selected wavelength<br />
8 Spectral reflectance at the currently selected wavelength data<br />
9 Measurement date. For the year, only the lower two digits are displayed.<br />
0 Displays the relative gloss value. If the gloss value exceeds 200, the screen will display<br />
“G###” in place of the value.<br />
A Select the wavelength in the spectral reflectance graph.<br />
Turn B to select and press A to switch to . The desired<br />
wavelength can be selected by turning B.<br />
E-67
E-68<br />
Displaying the Measurement Results<br />
Assessments<br />
B Deletes the currently displayed measured data.<br />
C Displays other measred data.<br />
D Outputs the currently displayed measured data to the printer.<br />
E Returns to the screen.<br />
F Appears if there is insufficient battery power when the instrument is powered by the<br />
battery. If appears, replace the batteries with new ones.<br />
The following screen appears if “ASSESSMENTS” has been selected for “DISPLAY” mode and tolerances<br />
have been set.<br />
Memo<br />
“#####” will be displayed if the color difference data has two or more decimal places.<br />
• Displaying Assessment by Box Tolerance<br />
1 Ready to measure.<br />
2 Currently selected no.<br />
3 Mask/gloss/UV at the time of measurement<br />
4 Currently selected observer/illuminant<br />
5 Currently selected measured data no.<br />
6 Currently selected target color data no.<br />
7 Color Difference from the target, result of PASS/FAIL judgment and message indicating<br />
the deviation direction<br />
8 Measurement date. For the year, only the lower two digits are displayed.<br />
9 Displays the relative gloss value. If the gloss value exceeds 200, the screen will display<br />
“G###” in place of the value.<br />
0 Deletes the currently displayed measured data.<br />
A Displays other measured data.<br />
B Switches the screen page from one to another (when there are two pages or more).<br />
C Switches to the screen for the currently selected no. (T * ).<br />
D Outputs the currently displayed measured data to the printer.<br />
E Returns to the screen.<br />
F Appears if there is insufficient battery power when the instrument is powered by the battery.<br />
If appears, replace the batteries with new ones.
• Displaying Assessment by Elliptical Tolerance<br />
Displaying the Measurement Results<br />
1 Ready to measure.<br />
2 Currently selected no.<br />
3 Mask/gloss/UV at the time of measurement<br />
4 Currently selected observer/illuminant<br />
5 Currently selected measured data no.<br />
6 Currently selected target color data no.<br />
7 Color Difference from the target, result of PASS/FAIL judgment and message indicating<br />
the deviation direction<br />
8 Measurement date. For the year, only the lower two digits are displayed.<br />
9 Displays the relative gloss value. If the gloss value exceeds 200, the screen will display<br />
“G###” in place of the value.<br />
0 Deletes the currently displayed measured data.<br />
A Displays other measured data.<br />
B Switches the screen page from one to another (when there are two pages or more).<br />
C Switches to the screen for the currently selected no. (T * ).<br />
D Outputs the currently displayed measured data to the printer.<br />
E Returns to the screen.<br />
F Appears if there is insufficient battery power when the instrument is powered by the battery.<br />
If appears, replace the batteries with new ones.<br />
E-69
E-70<br />
Displaying the Measurement Results<br />
Switching the Display Contents of the Measurement Results<br />
In the measurement screen that appears at the end of measurement, the following data will be displayed<br />
according to the settings made in the screen. The display contents can also be changed.<br />
Memo<br />
Selecting “DISP” by turning B in a measurement screen in which “DISP” is displayed and then pressing A<br />
will allow you to switch the display contents of the measurement results.<br />
Settings in Screen<br />
Display Mode (P. E-38) Color Space (P. E-39) Specular component (P. E-35) Other Conditions<br />
DIFF&ABS<br />
(Color difference &<br />
absolute value)<br />
PASS/FAIL<br />
COLOR GRAPH<br />
(Color difference graph)<br />
SPECT. GRAPH<br />
(Spectral graph)<br />
ASSESSMENT<br />
L*a*b*, L*C*h,<br />
XYZ, Yxy etc.<br />
WI, YI etc.<br />
Munsell, density<br />
L*a*b*, L*C*h,<br />
XYZ, Yxy etc.<br />
WI, YI etc.<br />
Munsell, density<br />
L*a*b* only<br />
L*a*b*, L*C*h only<br />
I + E<br />
SCI or SCE<br />
I + E<br />
SCI or SCE<br />
I + E<br />
SCI or SCE<br />
I + E<br />
SCI or SCE<br />
I + E<br />
SCI or SCE<br />
I + E<br />
SCI or SCE<br />
Only illuminant 1 is set.<br />
Both illuminants 1 and 2<br />
are set.<br />
Only illuminant 1 is set.<br />
Both illuminants 1 and 2<br />
are set.<br />
Japanese only<br />
Box tolerance<br />
Elliptical tolerance<br />
Note<br />
• Metamerism index is displayed only if L*a*b* or L*C*h is selected as the color space.<br />
• “Deviation A” indicates that the direction in relation to the target color is displayed, irrespective of whether the<br />
results are PASS or FAIL. “Deviation B” indicates that “PASS” is displayed when the result is PASS and the<br />
direction is displayed only when the result is FAIL.<br />
• Items enclosed by are not displayed in English.<br />
• If the display mode is set to “COLOR GRAPH” and the MASK/GLOSS is set to “*/I+E”, the system will display<br />
graphs for light source #1 only. If you set the system to use two different sources, only graphs for source #1 will<br />
be shown.
Screen Switching<br />
Measurement Screen 1 Measurement Screen 2 Measurement Screen 3<br />
Color difference, absolute value<br />
Color difference, absolute value<br />
Color difference only<br />
Absolute value only<br />
Metamerism index (MI)* Color difference only<br />
Absolute value only<br />
Metamerism index (MI)* Color difference, absolute value<br />
Color difference, absolute value<br />
Color difference, absolute value<br />
Absolute value only<br />
Color difference only<br />
Absolute value only<br />
PASS or FAIL<br />
Metamerism index (MI), color difference & absolute value<br />
PASS or FAIL<br />
Color difference only<br />
Metamerism index (MI), absolute value<br />
PASS or FAIL<br />
Metamerism index (MI), color difference & absolute value<br />
PASS or FAIL<br />
Absolute value only<br />
Color difference, absolute value<br />
Color difference graph<br />
Color difference, absolute value<br />
Color difference graph, color difference, absolute value Color difference, absolute value<br />
Color difference graph, color difference, deviation A Color difference, absolute value<br />
Spectral graph, reflectance of<br />
selected wavelength<br />
Color difference, deviation B<br />
Color difference, deviation A, PASS or FAIL<br />
Color difference, deviation A, PASS or FAIL<br />
Color difference, absolute value<br />
Color difference, absolute value<br />
Color difference, absolute value<br />
Displaying the Measurement Results<br />
* Metamerism index (MI) is displayed only if L*a*b* or L*C*h is selected as the color space.<br />
E-71
E-72<br />
Displaying the Measurement Results<br />
Deleting Measured Data<br />
There are two methods of deleting measured data. One is to delete the data items displayed on the LCD<br />
one by one. The other is to delete all the data items for the selected measurement condition (COND1 to<br />
COND6).<br />
Deleting Data One by One<br />
Data currently displayed on the LCD can be deleted.<br />
This can be done in the measurement screen.<br />
1. Turn B to select “D”, and then press A.<br />
“D” will change to “E”.<br />
2. Turn B to select the data to be deleted, and then press A.<br />
“E” will return to “D”.<br />
• Keeping B held down to left or right will cause the preset data No. (No. * ) to change continuously.<br />
3. Turn B to select “DEL”, and then hold down A for more than one second.<br />
A confirmation message will appear.<br />
4. To delete the data, select “OK” with B and press A. The selected data will be<br />
deleted, and the data below the delected one will scroll up.<br />
To cancel deletion, select “CANCEL” with B and press A. Deletion of the data<br />
will be canceled, and the previous screen will reappear.
Deleting All Data At Once<br />
Displaying the Measurement Results<br />
All the data items for the selected measurement condition (COND1 to COND6) can be deleted at once.<br />
Note<br />
• Never turn OFF the instrument while global deletion is in progress.<br />
• Should the instrument be turned OFF during global deletion, the measured data for all the measurement conditions<br />
(COND1 to COND6) as well as for all the tasks will be deleted.<br />
However, measurement conditions (e.g. color space) and target color data will be retained.<br />
This can be done in the screen.<br />
1. Turn B to select the measurement condition (COND * ) of which all the measured data<br />
is to be deleted globally, then press A.<br />
2. Turn B to select “DATA DELETE”, then press A.<br />
A confirmation screen will appear.<br />
• “T*” does not appear if “defined in COND.” mode is selected.<br />
3. Turn B to select “OK”, then press A.<br />
All the measured data will be globally<br />
deleted.<br />
During global deletion, the amount of<br />
deleted measured data will be displayed<br />
in a percentage.<br />
When data deletion is complete, the<br />
screen will reappear.<br />
Memo<br />
To cancel deletion, select “CANCEL”<br />
and press A. Global deletion will<br />
be canceled.<br />
• “T*” does not appear if “defined in COND.” mode is selected.<br />
E-73
E-74<br />
Displaying the Measurement Results<br />
Abbreviations on LCD Display<br />
To facilitate the user’s understanding of various types of information displayed on the instrument’s LCD, the<br />
following abbreviations are commonly used.<br />
• For notation of values to be set in each setting screen (e.g. measurement conditions), refer to the description<br />
given in the corresponding operating procedure.<br />
screen<br />
Screens appearing during<br />
calibration<br />
screen<br />
screen<br />
Screens in following Display<br />
mode<br />
• “DIFF&ABS”<br />
• “PASS/FAIL”<br />
• “COLOR GRAPH”<br />
• “SPECT. GRAPH”<br />
Screens in following Display<br />
mode<br />
• “DIFF&ABS”<br />
• “PASS/FAIL”<br />
Screen/Item Notation Meaning<br />
Mask (measurement area) M MAV<br />
S SAV<br />
Gloss (spectral component) I+E SCI (specular component included) and<br />
SCE (specular component excluded)<br />
UV adjustment<br />
100 UV 100%<br />
Color space, colorimetric<br />
data<br />
0 UV 0% (no specular component)<br />
ADJ UV adjustment required<br />
<strong>CM</strong>C1 <strong>CM</strong>C1:1<br />
<strong>CM</strong>C2 <strong>CM</strong>C2:1<br />
L4 L for CIE94<br />
C4 C for CIE94<br />
H4 H for CIE94<br />
E94 E for CIE94<br />
LC L for <strong>CM</strong>C1:1 or <strong>CM</strong>C2:1<br />
CC C for <strong>CM</strong>C1:1 or <strong>CM</strong>C2:1<br />
HC H for <strong>CM</strong>C1:1 or <strong>CM</strong>C2:1<br />
Tw Tint value<br />
E00 E when CIE00 is set
Measurement Results for “linked to each data.”<br />
Displaying the Measurement Results<br />
This instrument can set multiple target color data numbers and select one of those for displaying the results<br />
for the color difference. It can also easily switch the selected target color number using the navigation<br />
wheel. The “defined in COND.” target mode can use these functions to calculate multiple color<br />
differences for measurement data, and make pass/fail judgments based on this.<br />
However, the pass/fail judgment is based on a standard color difference setting for the selected target<br />
color data number and the color difference. The differences between the target color data and the color<br />
difference is not always standard.<br />
The other target mode supported by this instrument, “linked to each data.”, can store the target color data<br />
number with the selected measurement data and display the results using the associated target color data<br />
number. In addition to absolute values, it can also be used for general color differences.<br />
This section describes how the results are affected when using “linked to each data.” target mode and the<br />
specified target color data has been changed or deleted. It also compares the difference to the results displayed<br />
for “defined in COND.” target mode.<br />
When the Color Difference Target Data No. has Been Changed<br />
When “T” is selected in the measurement results screen, the target color screen will be changed to the<br />
currently selected number to be used for next measurement. The navigation wheel can also be used in<br />
this screen to recall a target color number that has been stored in the instrument’s memory. If “BREAK”<br />
is selected in the target color data screen, you can revert to the originally selected target color number.<br />
For details, see “Switching between the Measured Data screen and the screen” on page E-<br />
49.<br />
Select and then press A, the screen<br />
is displayed. It shows the target color data which number<br />
is currently selected and is used for next measurement.<br />
Select D, press A and then turn B to the<br />
left or right, it can be switched the target color data<br />
number.<br />
In “linked to each data.” mode, the measured data is calculated<br />
with the target data which is selected at the time<br />
of measurement and the results are displayed.<br />
Select “BREAK” and then press A, the display<br />
return to the measurement screen.<br />
In “defined in COND.” mode, the measured data<br />
is recalculated with the new selected target color<br />
number’s data and the results are displayed.<br />
E-75
E-76<br />
Displaying the Measurement Results<br />
When the Target Color Data No. has Been Deleted<br />
If the target color data for a number is deleted, the target color for data to which that number was associated<br />
is set to that of the next highest number. The target color number is reset to that of the number for<br />
which there is a target color data number.<br />
With “linked to each data.” target-mode, the measured data is saved with target color number that was<br />
specified for it at the time of measurement. If the number for the target color that was set at the time of<br />
measurement is deleted, the link between the data and target color data number is cut when the number<br />
is deleted. The measurement data is saved with information that states that there is no target color for that<br />
data, “T---” is displayed for the target color, and “-----” for the color difference and pass/fail judgment.<br />
In addition, no points appear on the graph.<br />
With “defined in COND.” the color difference and pass/fail judgments for the reset target color data and<br />
its data are recalculated based on the associated color difference.<br />
Select and then press A , the screen<br />
is displayed. It shows the target color data which number<br />
is currently selected and is used for next measurement.<br />
In the screen that shows the target color data<br />
which you want to delete, select “DEL” and then press<br />
A, the screen is displayed. In<br />
the screen, select “T * DELETE” and then press A,<br />
the target color data which the target color data number is<br />
“T * ” will be deleted.<br />
In “linked to each data.” mode, the measured data is calculated<br />
with the target data which is selected at the time of<br />
measurement. Because the target color data is deleted,<br />
“T- - -” is displayed on the screen as the target color data<br />
number, and the no color difference results are displayed<br />
(“- - - - -” is displayed as the color difference results).<br />
Select “BREAK” and then press A, the display<br />
return to the measurement screen.<br />
In “defined in COND.” mode, the measured data is<br />
recalculated with the new selected target color<br />
number's data and the results are displayed.<br />
If a number for target color data is deleted, the target color is set to the next target color, but set as the target color of the<br />
deleted number.<br />
* In the example above, target color T2 has been set to number T1.
Chapter 4<br />
Other Functions<br />
E-77
E-78<br />
Measuring the Average<br />
When taking measurements or setting target colors, more accurate data can be obtained if the averaging<br />
function is used.<br />
The following two averaging functions are available.<br />
• Manual Averaging: When the color of the specimen is not uniform, measurements are performed at<br />
different positions on the specimen and then the average of the measured reflectance<br />
data is calculated. This gives the average data of the entire specimen.<br />
• Auto Averaging: Specified number of measurement are repeated at the same position on the specimen<br />
and then the average of the measured spectral reflectance data is calculated.<br />
This will improve the accuracy of the measured data.<br />
These two functions can be used in combination. In this case, it is necessary to make settings for both<br />
auto and manual averaging. For details, refer to “Setting a Measurement Condition” (from page E-34).<br />
Note<br />
For average measurement, the average of the measured spectral reflectance data is calculated first, then colorimetric<br />
data is calculated based on that calculated average. Thus, the result may not match the average of colorimetric<br />
data.<br />
Manual Averaging<br />
This method is used when the color of the specimen is not uniform. Measurements are performed at different<br />
positions on the specimen and then the average of the measured reflectance data is calculated, to<br />
obtain the average data of the entire specimen.<br />
Set the number of measurements to be performed and the standard deviation, and then start measurement.<br />
Note<br />
Before starting manual averaging, make sure that the number of measurements to be performed and standard<br />
deviation are set. For details, refer to “Setting an Measurement Condition” (from page E-34).<br />
[Setting Procedure]<br />
This operation can be started from a screen in which “BREAK” is displayed.<br />
1<br />
Make sure that “BREAK” is highlighted, then press A.<br />
Turn B to select “BREAK”,<br />
if it is not highlighted.<br />
• Example when “COND1” is selected.
2<br />
Measuring the Average<br />
Place the specimen measuring port to the specimen to be measured, and then<br />
press C (MEAS. button).<br />
If 2 is set for “MANUAL AVG.<br />
TIMES” or if 3 or a higher value is<br />
set and the standard deviation is not<br />
below the specified one, place the<br />
specimen measuring port to the next<br />
place and then press C (MEAS.<br />
button).<br />
When the specified number of measurements<br />
has been completed or the<br />
standard deviation drops below the<br />
specified one, the averaging result<br />
will be displayed on the LCD.<br />
• The number of completed measurements including the one currently<br />
in progress and standard deviation will be displayed during<br />
measurement.<br />
Memo<br />
• To exit manual averaging and display the results before the specified number of measurements is completed or<br />
before the specified standard deviation is reached, press A.<br />
• If does not appear due to the auto power save function, this may be due the fact that it can take time<br />
to start measurement after C is pressed.<br />
E-79
E-80<br />
Measuring the Average<br />
Auto Averaging<br />
Measurement is repeated the specified number of times in the same position on the specimen and then<br />
the average of the measured reflectance data is calculated. This will improve the accuracy of the measured<br />
data.<br />
Set the number of measurements to be performed and the standard deviation, and then start measurement.<br />
Note<br />
Before starting auto averaging, make sure that the number of measurements to be performed is set. For details,<br />
refer to “Setting a Measurement Condition” (from page E-34).<br />
[Setting Procedure]<br />
This operation must be started from a screen in which “BREAK” is displayed.<br />
1<br />
2<br />
Make sure that “BREAK” is highlighted, then press A.<br />
Turn B to select “BREAK”,<br />
if it is not highlighted.<br />
• Example when “COND1” is selected<br />
Place the speimen measuring port to the specimen, and then press C (MEAS.<br />
button).<br />
• Take care to keep the instrument still during measurement.<br />
The number of lamp flashing will be<br />
highlighted during auto averaging.<br />
When the specified number of measurements<br />
has been completed, the<br />
averaging result will be displayed on<br />
the LCD.<br />
Memo<br />
If does not appear due to the<br />
auto power save function, this may<br />
be due the fact that it can take time to<br />
start measurement after C is<br />
pressed.
Pass/Fail Judgment for Color Difference<br />
This instrument allows you to set tolerances for the measured color difference, to make pass/fail judgment.<br />
Two kinds of pass/fail judgment methods are available. One is based on the specified box tolerances, and<br />
the other is based on the specified elliptical tolerances.<br />
In “linked to each data.” mode, the number of the target color data selected at the time of measurement<br />
or the measured data are passed/failed based on the tolerances.<br />
If the target color data has been deleted, the color difference displayed for that color target and based on<br />
the tolerances for the color target cannot be performed. In addition, if other target color data is selected,<br />
recalculations and pass/fail judgments cannot take place.<br />
Pass/Fail Judgment Based on Box Tolerances<br />
If the measured color difference is outside the specified tolerances, it will be highlighted to indicate that<br />
the pass/fail judgment result is FAIL. Both + and - tolerances can be set for each target color.<br />
To perform pass/fail judgment based on the specified box tolerances, follow the procedure given below:<br />
Note<br />
To use this function, make sure that the target color to be used is set.<br />
[Setting Procedure]<br />
screen<br />
1<br />
2<br />
Turn B to select “TARGET”, then press A.<br />
• “T * ” does not appear if “defined in COND.” mode is selected.<br />
Turn B to select “D”, then press A.<br />
“D” will change to “E”.<br />
3 Turn B to select the desired target color no. (T * ), then press A.<br />
“E” will return to “D”.<br />
• Keeping B held down to left or right will cause the target color No. to change continuously.<br />
E-81
4<br />
5<br />
6<br />
E-82<br />
Pass/Fail Judgment for Color Difference<br />
Turn B to select “TOLERANCE”, then press A.<br />
The currently set tolerances will be<br />
displayed.<br />
If they are satisfactory, turn B to select “BREAK”, then press A.<br />
The measurement screen will appear.<br />
Place the specimen measuring port to the specimen, and then press C (MEAS. button).<br />
<br />
Values for the items that have failed<br />
will be highlighted.<br />
• “#####” will be displayed if the color difference data has two or more decimal places.<br />
<br />
“FAIL” will be displayed and highlighted<br />
if any of the items has failed,<br />
and “PASS” will be displayed if all<br />
the items have passed.<br />
• Here the judgment result is “PASS”, and the results are displayed as shown above according to the conditions<br />
when the data was measured.<br />
• Here the judgment result is “FAIL”, and the results are displayed as shown above according to the conditions<br />
when the data was measured.
Pass/Fail Judgment for Color Difference<br />
Memo<br />
• If “PASS/FAIL” has been selected as the display mode, “PASS” will be displayed only when all the items have<br />
passed.<br />
• If “DIFF/ABS” has been selected as the display mode, the values for the items which have failed will be highlighted<br />
• If a color difference has not been set, when the target mode is “linked to each data.”, and the target color data<br />
number set at the time of measurement is deleted, “----” appears instead of “PASS/FAIL”.<br />
• If does not appear due to the auto power save function, this may be due the fact that it can take time to<br />
start measurement after C is pressed.<br />
Pass/Fail Judgment Based on Elliptical Tolerances<br />
This function is used to judge whether the measured color difference is within the elliptical tolerances specified<br />
for the target color.<br />
To perform pass/fail judgment based on the specified elliptical tolerances, follow the procedure given below:<br />
Note<br />
• To use this function, make sure that elliptical tolerances are set.<br />
• “PASS” or “FAIL” is displayed only if “PASS/FAIL” has been selected as the display mode.<br />
[Setting Procedure]<br />
screen<br />
1<br />
2<br />
Turn B to select “TARGET”, then press A.<br />
• “T*” does not appear if “defined in COND.” mode is selected.<br />
Turn B to select “D”, then press A.<br />
“D” will change to “E”.<br />
3 Turn B to select the desired target color no. (T * ), then press A.<br />
“E” will return to “D”.<br />
• Keeping B held down to left or right will cause the target color No. to change continuously.<br />
E-83
4<br />
5<br />
6<br />
E-84<br />
Pass/Fail Judgment for Color Difference<br />
Turn B to select “TOLERANCE”, then press A.<br />
The currently set tolerances will be<br />
displayed.<br />
If they are satisfactory, turn B to select “BREAK”, then press A.<br />
The measurement screen will appear.<br />
Place the specimen measuring port to the specimen, and then press C (MEAS.<br />
button).<br />
If “PASS/FAIL” has been selected<br />
as the display mode, a judgment will<br />
be made to check whether the measurement<br />
result is within the specified<br />
ellipse, and “PASS” or “FAIL” will<br />
be displayed accordingly.<br />
• Example when the result is “PASS”.<br />
• Example when the result is “FAIL”.<br />
Memo<br />
• If “PASS/FAIL” has been selected as the display mode, “PASS” will be displayed only when the color difference<br />
between the measured value and the target color is within each specified elliptical tolerance (up to four tolerances).<br />
• If “DIFF/ABS” has been selected as the display mode, the measured results will not be highlighted even if they<br />
are “FAIL”.<br />
• If a color difference has not been set, when the target mode is “linked to each data.”, and the target color data<br />
number set at the time of measurement is deleted, “----” appears instead of “PASS/FAIL”.<br />
• If does not appear due to the auto power save function, this may be due the fact that it can take time to<br />
start measurement after C is pressed.
Assessments<br />
This instrument allows assessment of measurement results by simultaneously displaying the direction of<br />
tint deviation from the target color, the color difference from the target color and pass/fail judgment<br />
based on the specified tolerances.<br />
Note<br />
To use this function, make sure that color difference tolerances are set in advance.<br />
Assessment by Box Tolerances<br />
[Setting Procedure]<br />
screen<br />
1<br />
2<br />
Turn B to select “TARGET”, then press A.<br />
Turn B to select “D”, then press A.<br />
“D” will change to “E”.<br />
3 Turn B to select the desired target color no. (T * ), then press A.<br />
“E” will return to “D”.<br />
4<br />
• Keeping B held down to left or right will cause the target color No. to change continuously.<br />
Turn B to select “TOLERANCE”, then press A.<br />
The currently set tolerances will be<br />
displayed.<br />
E-85
5<br />
6<br />
E-86<br />
Assessments<br />
If they are satisfactory, turn B to select “BREAK”, then press A.<br />
The measurement screen will appear.<br />
Place the specimen measuring port to the specimen, and then press C (MEAS.<br />
button).<br />
The color difference from the target color, pass/fail judgment result based on the specified box tolerances<br />
and direction of tint and brightness deviation will be displayed.<br />
• The color space to be used as the assessment axis differs depending on the selected color space.<br />
When “L*C*h, E”, “L*C*h, <strong>CM</strong>C1:1”, “L*C*h, <strong>CM</strong>C2:1” or “L*C*h, CIE94” is selected, assessment<br />
will be made based on the direction of tint and lightness deviation and color difference from the<br />
target color in the L*C*h axis.<br />
When a color space other than those given above is selected, assessment will be made based on the<br />
direction of tint and lightness deviation and color difference from the target color in the L*a*b* axis.<br />
Memo<br />
• Assessment results differ as shown in the table below depending on the type of specified color difference tolerances<br />
and pass/fail judgment result.<br />
Type<br />
Box<br />
tolerance<br />
Elliptical<br />
tolerance<br />
Specular<br />
component<br />
I+E<br />
SCI or SCE<br />
I+E<br />
SCI or SCE<br />
Displayed value<br />
Pass/fail<br />
judgment<br />
Display content<br />
PASS Measured value, with “PASS” to the right<br />
Color difference<br />
FAIL<br />
Highlighted measured value, with highlighted<br />
message to the right<br />
PASS Measured value, with “PASS” to the right<br />
E*<br />
FAIL<br />
Highlighted measured value, with highlighted<br />
“FAIL” to the right<br />
PASS Measured value, with “PASS” to the right.<br />
Color difference<br />
FAIL<br />
Highlighted measured value, with highlighted<br />
“FAIL” and message to the right<br />
PASS Measured value, with “PASS” to the right<br />
E*<br />
FAIL<br />
Highlighted measured value, with highlighted<br />
“FAIL” to the right<br />
Color difference No judgment Measured value, with message to the right<br />
PASS Measured value, with “PASS” to the right<br />
E*<br />
FAIL<br />
Measured value, with highlighted “FAIL” to the<br />
right
Assessments<br />
• The following deviation directions can be indicated by a message.<br />
L*: LIGHTER/DARKER<br />
a*: +RED (stronger red)/-RED (weaker red) / +GREEN (stronger green)/-GREEN (weaker green)<br />
b*: +YELLOW (stronger yellow)/-YELLOW (weaker yellow) / +BLUE (stronger blue)/-BLUE (weaker<br />
blue)<br />
C*: DULLER/VIVID<br />
H*: +RED (stronger red)/+YELLOW (stronger yellow) / +GREEN (stronger green)/+BLUE (stronger<br />
blue)<br />
For E*, only the pass/fail judgment result will be displayed by “PASS” or “FAIL”.<br />
Note<br />
• If color difference tolerances have not been specified, pass/fail judgment result (“PASS” or “FAIL”) will not<br />
be displayed.<br />
• If no color target has been selected, the tint and brightness deviation direction and color difference will not be<br />
displayed.<br />
• In the case of L*C*h, “-----” will be displayed for H* if “C*” value of the color target or measured value is<br />
excessively low.<br />
• No message may appear if the color difference is excessively small.<br />
Assessment by Elliptical Tolerances<br />
[Setting Procedure]<br />
screen<br />
1<br />
2<br />
Turn B to select “TARGET”, then press A.<br />
Turn B to select “D”, then press A.<br />
“D” will change to “E”.<br />
3 Turn B to select the desired target color no. (T * ), then press A.<br />
“E” will return to “D”.<br />
• Keeping B held down to left or right will cause the target color No. to change continuously.<br />
E-87
4<br />
5<br />
6<br />
E-88<br />
Assessments<br />
Turn B to select “TOLERANCE”, then press A.<br />
The currently set tolerances will be<br />
displayed.<br />
If they are satisfactory, turn B to select “BREAK”, then press A.<br />
The measurement screen will appear.<br />
Place the specimen measuring port to the specimen, and then press C (MEAS.<br />
button).<br />
The color difference, direction and amount of tint and brightness deviation from the target color will be displayed.<br />
In addition, on the right of “ E*” value, a pass/fail judgment result made based on the specified<br />
elliptical tolerances will be displayed.<br />
• The color space to be used as the assessment axis differs depending on the selected color space.<br />
When “L*C*h, E”, “L*C*h, <strong>CM</strong>C1:1”, “L*C*h, <strong>CM</strong>C2:1” or “L*C*h, CIE94” is selected:<br />
Assessment will be made based on the direction of tint and lightness deviation and color difference<br />
from the target color in the L*C*h axis. When a color space other than those given above is selected,<br />
assessment will be made based on the direction of tint and lightness deviation and color difference<br />
from the target color in the L*a*b* axis.<br />
Memo<br />
• Assessment results differ as shown in the table in page E-84 depending on the type of specified color difference<br />
tolerances and pass/fail judgment result.
Type<br />
Box<br />
tolerance<br />
Elliptical<br />
tolerance<br />
Specular<br />
component<br />
I+E<br />
SCI or SCE<br />
I+E<br />
SCI or SCE<br />
Displayed value<br />
Pass/fail<br />
judgment<br />
Display content<br />
Assessments<br />
Color difference PASS Measured value, with “PASS” to the right<br />
E* FAIL<br />
Highlighted measured value, with highlighted<br />
message to the right<br />
Color difference PASS Measured value, with “PASS” to the right<br />
E* FAIL<br />
Highlighted measured value, with highlighted<br />
“FAIL” to the right<br />
PASS Measured value, with “PASS” to the right.<br />
Color difference<br />
FAIL<br />
Highlighted measured value, with highlighted<br />
“FAIL” and message to the right<br />
PASS Measured value, with “PASS” to the right<br />
E*<br />
FAIL<br />
Highlighted measured value, with highlighted<br />
“FAIL” to the right<br />
Color difference No judgment Measured value, with message to the right<br />
PASS Measured value, with “PASS” to the right<br />
E*<br />
FAIL<br />
Measured value, with highlighted “FAIL” to the<br />
right<br />
• The following deviation directions can be indicated by a message.<br />
L*: LIGHTER/DARKER<br />
a*: +RED (stronger red)/-RED (weaker red)/+GREEN (stronger green)/-GREEN (weaker green)<br />
b*: +YELLOW (stronger yellow)/-YELLOW (weaker yellow)/BLUE (stronger blue)/-BLUE (weaker blue)<br />
C*: DULLER/VIVID<br />
H*: +RED (stronger red)/+YELLOW (stronger yellow/+GREEN (stronger green)/+BLUE (stronger blue)<br />
The pass/fail judgment made based on the specified elliptical tolerances will be displayed by “PASS” or “FAIL”<br />
on the right of “ E*”.<br />
Note<br />
• If color difference tolerances have not been specified, pass/fail judgment result (“PASS” or “FAIL”) will not<br />
be displayed.<br />
• If no color target has been selected, the tint and brightness deviation direction and color difference will not be<br />
displayed.<br />
• No message may appear if the color difference is excessively small.<br />
E-89
E-90<br />
Connecting to an External Device<br />
Connecting a PC or printer to the external output terminal on the instrument allows the transfer of data<br />
between the instrument and PC or printing of the measurement results.<br />
Connecting a Personal Computer<br />
Connecting a PC (PC-AT compatible) to the instrument with a RS-232C cable will allow uploading the<br />
data stored in the instrument’s memory to the PC or downloading data from the PC to the instrument.<br />
When connecting this instrument to the PC, use of the optional Color Data Software “SpectraMagic NX”<br />
(<strong>CM</strong>-S100w) is recommended.<br />
Memo<br />
When the instrument is connected to the PC, make sure that the instrument is set in remote mode. Remote mode allows<br />
the following functions:<br />
1. Outputting measured data and target color data to the PC<br />
2. Downloading target data from the PC<br />
3. Downloading tasks<br />
For details, refer to “Switching to Remote Mode” (page E-89).<br />
Note<br />
• When connecting, make sure that the connectors are correctly oriented and fastened securely with screws.<br />
• Before connecting, make sure that the power to both the instrument and PC is turned OFF.<br />
• When disconnecting the cable, be sure to grip the plug or connector and pull it. Do not pull on or forcibly bend<br />
the cable.<br />
• Do not touch the connector terminals with your hand. Doing so may cause them to get dirty or apply excessive<br />
force to them.<br />
• Make sure that the cable has a sufficient length. Tensioning the cable may cause connection failure or wire<br />
breakage.<br />
• When using a cable other than the one supplied as the standard accessory, make sure that the cable conforms<br />
to “RS-232C Pin Assignment and Cable Wiring Diagram” (page E-89). If it does not conform, a malfunction<br />
may occur or incorrect data may be transferred between the instrument and PC.<br />
Communication Parameters<br />
Item Setting<br />
Baud rate 9600 bps<br />
Character bits 8 bits<br />
Parity None<br />
Stop bits 1 bit<br />
SIP/SOP Connections<br />
• Accessories equipment connected the analog and digital interfaces must be certified to the respective<br />
IEC standards (i.e. IEC 950 for data processing equipment).<br />
• Furthermore all configurations shall comply with the system standard IEC 10101-1. Everybody who<br />
connects additional equipment to the signal input part or signal output part configures a electrical<br />
equipment for measurement system, and is therefore, responsible that the system complies with the requirements<br />
of the system standard (IEC 10101-1. If in doubt, consult the technical services department<br />
or your local representative).
RS-232C Pin Assignment and Cable Wiring Diagram<br />
Instrument<br />
1 8<br />
Pin No.<br />
2<br />
3<br />
5<br />
7<br />
8<br />
Signal<br />
RXD<br />
TXD<br />
GND<br />
RTS<br />
CTS<br />
Switching to Remote Mode<br />
Connecting to an External Device<br />
Personal Computer<br />
(For D-sub, 9-pin)<br />
5<br />
Signal<br />
RXD<br />
TXD<br />
GND<br />
RTS<br />
CTS<br />
4 3 2 1<br />
9 8 7 6<br />
Pin No.<br />
2<br />
3<br />
5<br />
7<br />
8<br />
To transfer data between the instrument and the PC, the instrument must be switched to remote mode.<br />
To switch to remote mode, follow the procedure given below.<br />
[Setting Procedure]<br />
Make sure that power to the instrument is turned OFF.<br />
1. Connect the instrument to the PC with the RS-232C cable.<br />
2. Turn the power ON.<br />
• When the power is turned ON for the<br />
first time, the screen will<br />
appear.<br />
• Normally, the screen displayed just<br />
before the power was turned OFF will<br />
appear, so turn the navigation wheel<br />
to display the screen.<br />
E-91
E-92<br />
Connecting to an External Device<br />
3. Turn B to select “MENU”, then press A.<br />
The screen will appear.<br />
4. Turn B to select “REMOTE”, then press A.<br />
The screen will appear.<br />
Memo<br />
To return to the screen, press A.
Outputting to a Printer<br />
Connecting to an External Device<br />
Connecting the instrument to a printer with a printer cable allows printing the measured data or the color<br />
difference target data stored in the instrument’s memory. Two printing methods are available. One is to<br />
print automatically each time measurement is taken (this is called “Auto Print”; measured data only), and<br />
the other is to print the currently displayed measured data, pass/fail results and color difference target<br />
data.<br />
Memo<br />
If “SPECT.GRAPH” is selected as the display mode, the spectral reflectance data of displayed data in each screen;<br />
the measured data in the measured data screen or the color difference target data in the screen, will be<br />
printed. If “COLOR GRAPH” is selected, the color difference and absolute data will be printed. If “PASS/FAIL” is<br />
selected, either “PASS” (or “FAIL”) or the color difference and absolute data will be printed.<br />
Note<br />
• When connecting the connectors, make sure that they are correctly oriented and fastened securely with screws.<br />
• Before connecting, make sure that the power to both the instrument and printer is turned OFF.<br />
• When disconnecting the cable, be sure to grip the plug or connector and pull it. Do not pull on or forcibly bend<br />
the cable.<br />
• Do not touch the connector terminals with your hands, allow them to get dirty or apply excessive force to them.<br />
• Make sure that the cable has a sufficient amount of slack. Pulling the cable taut may cause connection failure<br />
or wire breakage.<br />
• The instrument and printer must be connected using a printer cable that is wired as shown in “Printer Cable<br />
Wiring Diagram” (page E-92).<br />
Communication Parameters<br />
Item Setting<br />
Baud rate 9600 bps<br />
Character bits 8 bits<br />
Parity None<br />
Stop bits 1 bit<br />
Flow control RTS/CTS<br />
Applicable Printers: DPU-H245AS-A03 *serial connection/metric screw type (Seiko Instruments<br />
Inc.)<br />
In addition to the above printer, printers that meet the following specifications can be used.<br />
Item Specifications<br />
Number of print lines 27 or more lines, Data input: RS-232C<br />
Data control BUSY<br />
Baud rate 9600<br />
Character bits 8 bits<br />
Parity None<br />
Stop bits 1 bit<br />
Basic function CR (0DH) carriage return<br />
E-93
E-94<br />
Connecting to an External Device<br />
Printer Cable Wiring Diagram<br />
• For D-sub, 9pin<br />
Instrument<br />
1 8<br />
Pin No. Signal<br />
3<br />
5<br />
8<br />
TXD<br />
GND<br />
CTS<br />
• For D-sub, 25pin<br />
3<br />
5<br />
8<br />
Auto Print<br />
Instrument<br />
1 8<br />
Pin No. Signal<br />
TXD<br />
GND<br />
CTS<br />
Printer<br />
(For D-sub, 9-pin)<br />
5<br />
DATA<br />
GND<br />
BUSY<br />
4 3 2 1<br />
9 8 7 6<br />
Signal Pin No.<br />
3<br />
5<br />
8<br />
Printer<br />
(For D-sub, 25-pin)<br />
Signal Pin No.<br />
DATA<br />
BUSY<br />
GND<br />
If Auto Print has been setup beforehand, the measurement data can be printed as each measurement is<br />
made.<br />
Note<br />
The instrument and printer must be connected using a printer cable that is wired as shown in “Printer Cable Wiring<br />
Diagram” (page E-92).<br />
[Procedure]<br />
Make sure that power to the instrument is turned OFF.<br />
1. Connect the instrument to the printer with a printer cable.<br />
2<br />
5<br />
7
2. Turn the power ON.<br />
3. Turn B to select “MENU”, then press A.<br />
4. Turn B to select “AUTO PRINT”, then press A.<br />
5. Turn B to select “ON”, then press A.<br />
Measured data will be printed automatically<br />
each time measurement is taken.<br />
Printing Measured Data<br />
Connecting to an External Device<br />
Memo<br />
To print measured data, make sure that the instrument is connected to the printer with a printer cable.<br />
Note<br />
• The instrument and printer must be connected using a printer cable that is wired as shown in “Printer Cable<br />
Wiring Diagram” (page E-92).<br />
• Before connecting, make sure that the power to both the instrument and printer is turned OFF.<br />
E-95
E-96<br />
Connecting to an External Device<br />
[Procedure]<br />
This operation must be started from a screen in which measured data is displayed.<br />
1. Turn B to select “D”, then press A.<br />
“D” will change to “E”.<br />
2. Turn B to select the measured data to be printed, then press A.<br />
“E” will return to “D”.<br />
• Keeping B held down to left or right will cause the measured data No. (No. * ) to change continuously.<br />
3. Turn B to select “ ”, then press A.<br />
Memo<br />
• If “COLOR GRAPH” has been selected as the display mode, only numeric data will be printed.<br />
• If “PASS/FAIL” has been selected as the display mode, either pass/fail judgment results or color difference<br />
and absolute data will be printed.<br />
• If “SPECT.GRAPH” has been selected as the display mode, spectral reflectance data will be printed.<br />
• Print Example 1<br />
Display mode: “ABS. & DIFF.”
• Print Example 2<br />
Display mode: “SPECT.GRAPH”<br />
• Print Example 3<br />
Display mode: “COLOR GRAPH”<br />
Connecting to an External Device<br />
E-97
E-98<br />
Connecting to an External Device<br />
Printing Color Difference Target<br />
Memo<br />
To print color difference target data, make sure that the instrument is connected to the printer with a printer cable.<br />
Note<br />
• The instrument and printer must be connected using a printer cable that is wired as shown in “Printer Cable<br />
Wiring Diagram” (page E-92).<br />
• Before connecting, make sure that the power to both the instrument and printer is turned OFF.<br />
[Procedure]<br />
This operation must be started from the screen.<br />
1. Turn B to select “D”, then press A.<br />
“D” will change to “E”.<br />
2. Turn B to select the color difference target data to be printed, then press A.<br />
“E” will return to “D”.<br />
• Keeping B held down to left or right will cause the color difference target data No. (T * ) to change<br />
continuously.<br />
3. Turn B to select “ ”, then press A.<br />
Memo<br />
• If “SPECT.GRAPH” has been selected as the display mode, spectral reflectance data will be printed.<br />
• If a mode other than “SPECT.GRAPH” has been selected as the diaplay mode, only colorimetric value data<br />
will be printed.
TASK Mode<br />
What is TASK Mode?<br />
TASK mode is the function that allows you to perform measurement according to the messages displayed<br />
in the LCD indicating the measurement procedure. The messages can be created by using the previously<br />
used software SpectraMagic (Ver. 3.2 or higher; except for Ver. 3.5) with your PC and downloading it<br />
as a TASK. Up to ten steps can be set for each task, and up to six tasks can be downloaded to the instrument.<br />
After measurements are taken, the measured data can be sent to SpectraMagic (Ver.3.2 or higher;<br />
except for Ver.3.5) for statistical color control.<br />
Note<br />
• It is not possible to create a task using the instrument alone.<br />
• TASK mode cannot be selected if no task has been downloaded. To use TASK mode, a task must be downloaded<br />
to the instrument in advance.<br />
• When downloading a task, if the task has the same name (No.) as that of a task already existing in the instrument,<br />
the existing task will be overwritten by the downloaded task, if no measured data is contained. If the task<br />
contains measured data, an error message will be displayed on the instrument.<br />
• If a task for which messages are set in Japanese is downloaded, the messages may not be displayed properly if<br />
a language mode other than Japanese has been selected.<br />
Downloading a Task<br />
Before downloading a task, set the instrument to remote mode as shown below.<br />
Note<br />
• For details on downloading a task, read the help file of the optional, previously used Color Data Software<br />
“SpectraMagic” (Ver. 3.2 or higher; except for Ver. 3.5).<br />
• Before connecting the instrument to the PC, make sure that the power to both the instrument and printer is<br />
turned OFF.<br />
[Operating Procedure]<br />
Make sure that power to the instrument is turned OFF.<br />
1<br />
2<br />
Connect the instrument to the PC with the RS-232C cable.<br />
Turn the power ON.<br />
E-99
3<br />
4<br />
5<br />
E-100<br />
TASK Mode<br />
Turn B to select “MENU”, then press A.<br />
The screen will appear.<br />
Turn B to select “REMOTE”, then press A.<br />
The “REMOTE” screen will appear.<br />
Download a task using SpectraMagic (Ver.3.2 or higher; excluded Ver.3.5).<br />
Performing Measurement in TASK Mode<br />
The following two measurement methods are available for TASK mode.<br />
One is to perform manual average conducted by messages displaying the result after each measurement<br />
using a single target color. The measurement result obtained by this method will be the average of the<br />
measured data obtained by each measurement. The other is to perform measurements in a series using<br />
the specific target color for each measurement and obtain the measurement result for each measurement.<br />
Note<br />
• To perform measurement in TASK mode, a task must be downloaded to the instrument in advance. A task can<br />
be downloaded using the optional, previously used Color Data Software “SpectraMagic” (Ver. 3.2 or higher;<br />
except for Ver.3.5) from the PC connected to the instrument.<br />
• TASK mode doesn’t allow you to set measurement conditions and select target colors using the instrument alone.<br />
The measurement condition for TASK mode and target color to be used for measurement must be set using SpectraMagic<br />
and downloaded in the TASK together with the task. Measurement of the target color can also be performed<br />
by the instrument alone.<br />
• Prior to start of measurement, be sure to perform white calibration. If necessary, perform zero calibration before<br />
white calibration.<br />
Memo<br />
If power is turned OFF during TASK mode, the screen for TASK mode (see step 4 on page E-100) will<br />
be displayed when power is turned ON next time.<br />
To perform measurement in TASK mode, follow the procedure given below.
[Setting Procedure]<br />
Make sure that power to the instrument is turned OFF.<br />
1<br />
2<br />
3<br />
4<br />
While pressing A, turn the power ON.<br />
The screen<br />
will appear, with the item “LAN-<br />
GUAGE” highlighted.<br />
Turn B to select the desired language, then press A.<br />
TASK Mode<br />
(Back side)<br />
• When the cursor moves to the desired language, all the text will be displayed in the selected language.<br />
Turn B to select “TASK”, then press A.<br />
Turn B to select the desired target mode, then press A.<br />
Memo<br />
If you do not want to change the<br />
target mode, press A.<br />
TARGET<br />
linked to each data.<br />
defined in COND.<br />
E-101
E-102<br />
TASK Mode<br />
The screen will appear.<br />
5 Turn B to select “TASK * ”, then press A.<br />
6<br />
A message asking you to check the<br />
currently set mask and measurement<br />
area will appear.<br />
• Example when tasks 1, 2 and 5 have been downloaded.<br />
Check the Target Mask and measurement area selector switch, then press A.<br />
The screen will<br />
appear.<br />
Note that the White Calibration<br />
Plate No. is displayed.<br />
7 <br />
Turn B to select “ZERO”, then press C (MEAS. button).<br />
Memo<br />
For details of zero calibration, refer to page E-44.<br />
Note<br />
Never place the specimen measuring port toward the light source. Keep it more than 1m away from any<br />
reflective items (hands, desks, walls etc.).
8<br />
9<br />
<br />
Turn B to select “WHITE”, and then press C (MEAS. button).<br />
TASK Mode<br />
Note<br />
Place the instrument on the correct White Calibration Plate (i.e. the calibration plate whose plate No. is<br />
displayed in the screen).<br />
Memo<br />
• If the white calibration data has already been set, the procedure will move to step 8 automatically.<br />
• If does not appear due to the auto power save function, this may be due the fact that it can take time<br />
to start calibration after C is pressed.<br />
If a single target color has been selected for all measurement in a series, a message<br />
asking you whether to save the average will appear.<br />
To display the average of the measured<br />
data and save it as the measurement<br />
result at the end of<br />
measurements, select “YES” and<br />
press A.<br />
If you want to save individual measured<br />
data without calculating the average,<br />
select “NO” and press<br />
A.<br />
Memo<br />
This condition will be registered in the memory of the instrument as long as data is stored for the TASK. In<br />
this case, this step will be skipped when the same TASK is selected for the next time.<br />
A message “JOB 1” will appear.<br />
E-103
E-104<br />
TASK Mode<br />
10<br />
11<br />
Place the specimen measuring port to the specimen according to the message displayed,<br />
make sure that is displayed, then press C (MEAS. button).<br />
Memo<br />
If does not appear due to the auto power save function, this may be due the fact that it can take time<br />
to start measurement after C is pressed.<br />
<br />
Turn B to select “NEXT” then press A.<br />
The message for “JOB * ” displayed<br />
for the previous measurement will<br />
appear.<br />
<br />
Turn B to select “REDO”, then press A.<br />
The message “JOB * ” that was displayed<br />
just before the measurement<br />
was performed will appear.
Turn B to select “END”, then press A.<br />
Measurement will be quit.<br />
TASK Mode<br />
Memo<br />
If you made a setting to save the average at step 8, the average of all measurement in a series will be calculated<br />
and displayed at the end of the task’s last “JOB * ”. In this case, only the calculated average will be<br />
stored in the instrument’s memory. The measurement result for each “JOB * ” will not be saved.<br />
If you did not make a setting to save the average at step 8, the measurement result for individual measurement<br />
(“JOB * ”) will be stored in the instrument’s memory.<br />
Note<br />
• In TASK mode, only the data taken by the previous measurement will be displayed. By using the instrument<br />
alone, it is not possible to view the data taken by the measurement performed before.<br />
• The measurement results will be saved only after a series of measurements set as a task is completed. If TASK<br />
measurement is cancelled on the way, all data in the series will not be saved.<br />
E-105
E-106<br />
TASK Mode
Chapter 5<br />
Troubleshooting<br />
E-107
E-108<br />
Error Messages<br />
The following messages may appear while you are using the instrument. If such messages appear, take<br />
the necessary actions shown in the table below. If the trouble does not go away in spite of taking action,<br />
contact a KONICA MINOLTA SENSING-authorized service facility.<br />
Memo<br />
Messages that may be displayed on the LCD are given in the table below. For communication error check<br />
codes, refer to the separate document.<br />
MessageCorrective Action Symptom/Possible Cause Corrective Action<br />
OK02<br />
LOW ILLUMINATION<br />
OK10<br />
MAKE WHITE CALIBRA-<br />
TION !<br />
ER01<br />
MEMORY FULL<br />
ER02<br />
LOW BATTERY<br />
ER05<br />
ERROR IN FLASHING<br />
ER07<br />
ZERO CALIBRATION INCOM-<br />
PLETED<br />
ER11<br />
FAILED IN CALIBRATION<br />
Amount of light from the xenon<br />
lamp has dropped to 65% of its<br />
initial level.<br />
• Deterioration of xenon lamp<br />
• Dirt on integrating sphere<br />
The reliability of the white calibration<br />
data has dropped because<br />
a certain period of time has<br />
passed since the last white calibration.<br />
When operating in COND mode<br />
or TASK mode, the instrument<br />
has a total of 1700 measurement<br />
and color difference target data<br />
stored. (700 in the “defined in<br />
COND.” mode.).<br />
(When the instrument is powered<br />
by batteries)<br />
• Battery voltage drop<br />
Xenon lamp does not flash properly.<br />
• Xenon lamp has blown.<br />
• Faulty flash circuit<br />
• Faulty sensor<br />
Zero calibration has not been<br />
performed.<br />
Zero calibration or white calibration<br />
has not been performed correctly.<br />
Clean the integrating sphere as<br />
explained in “Cleaning Each<br />
Part” (page E-17). If the problem<br />
still remains, contact a KONICA<br />
MINOLTA SENSING-authorized<br />
service facility.<br />
Performing white calibration is<br />
recommended.<br />
Delete some data for securing necessary<br />
memory space. The<br />
memory of this instrument can<br />
store up to 1700 (700 in the<br />
“defined in COND.” mode)<br />
pieces of data in total. This<br />
amount includes the sample data<br />
for the COND and TASK modes<br />
as well as color difference target<br />
data.<br />
Replace the batteries with new<br />
ones.<br />
Contact a KONICA MINOLTA<br />
SENSING-authorized service facility.<br />
Perform zero calibration.<br />
For zero calibration, the specimen<br />
measuring port must be directed<br />
into the air. For white<br />
calibration, the White Calibration<br />
Plate must be used.<br />
The Target Mask is not correct. Attach the correct Target Mask.
MessageCorrective Action Symptom/Possible Cause Corrective Action<br />
ER13<br />
ERROR IN A/D<br />
ER17<br />
INCORRECT CLOCK OPERA-<br />
TION<br />
ER24<br />
WHITE CALIBRATION IN-<br />
COMPLETED<br />
ER25<br />
WRONG APERTURE<br />
ER27<br />
ERROR IN CHARGING<br />
ER30<br />
NO DATA IN MEMORY<br />
Failed during A/D conversion.<br />
• Faulty A/D converter<br />
• Break down of circuits relating<br />
to the A/D converter<br />
Clock IC is not working correctly.<br />
• Clock IF’s power voltage drop<br />
or breakdown of circuits relating<br />
to the clock IC.<br />
White calibration has not been<br />
performed.<br />
The measurement area set in<br />
screen does not match<br />
the lens position selector switch<br />
on the instrument.<br />
Charging for flashing of Xenon<br />
lamp can't be completed<br />
• Breakdown of charging circuit<br />
• Battery voltage drop<br />
Data has been lost since the<br />
memory’s backup battery is exhausted.<br />
Error Messages<br />
Turn the power OFF, and then<br />
turn it ON again. If this message<br />
keeps appearing, contact a<br />
KONICA MINOLTA SENSING<br />
-authorized service facility.<br />
Contact a KONICA MINOLTA<br />
SENSING-authorized service facility.<br />
White calibration must be performed<br />
each time the instrument<br />
is turned ON. White calibration<br />
must also be performed when the<br />
measurement area or specular<br />
component setting is changed.<br />
Change the measurement area<br />
setting or the position of the<br />
measurement area selector<br />
switch according to the area to be<br />
measured.<br />
Contact a KONICA MINOLTA<br />
SENSING-authorized service facility.<br />
Turn the power ON to charge the<br />
memory’s backup battery. The<br />
backup batteries can be fully<br />
charged in 25 hours when the<br />
power of this instrument is<br />
turned ON. After the batteries are<br />
fully charged, data backup can be<br />
stored for approximate 4.5<br />
months.<br />
E-109
E-110<br />
Troubleshooting<br />
If an abnormality has occurred with the instrument, take necessary actions as given in the table below. If<br />
the instrument still does not work properly, turn the power OFF, and then turn it ON again. If the symptom<br />
remains, contact a KONICA MINOLTA SENSING-authorized service facility.<br />
Symptom Check Point Action<br />
LCD is blank. Are batteries inserted? Is the AC adapter<br />
connected?<br />
“ ” does not appear.<br />
MEAS. button is not<br />
effective.<br />
Abnormal measurement<br />
result<br />
Measurement results<br />
fluctuate.<br />
Not possible to input<br />
data to the computer.<br />
No commands from<br />
computer are accepted.<br />
Commands cannot be<br />
accepted correctly.<br />
TASK mode does not<br />
function.<br />
Insert the batteries. Connect the AC<br />
adapter.<br />
Is the LCD contrast appropriate? Adjust the LCD contrast. (page E-32)<br />
Isn’t displayed? Or isn’t the bat- Replace the batteries with new ones.<br />
teries extremely low?<br />
Are batteries inserted? Is the AC adapter<br />
connected?<br />
Isn’t displayed? Or isn’t the batteries<br />
extremely low?<br />
Insert the batteries. Connect the AC<br />
adapter.<br />
Replace the batteries with new ones.<br />
Is measurement still in progress? Wait until measurement is complete,<br />
and then press the button.<br />
Is a measurement screen displayed? MEAS. button must be pressed while a<br />
measurement screen is displayed.<br />
Is the instrument directed perpendicular<br />
to the specimen?<br />
Make sure that the instrument is directed<br />
perpendicular to the specimen, to<br />
prevent leakage of light.<br />
Is the White Calibration Plate correct? Use the correct White Calibration Plate<br />
Was white calibration performed correctly?<br />
Was zero calibration performed correctly?<br />
Is instrument kept stationary during<br />
measurement?<br />
Is the RS-232C cable connected correctly?<br />
Is the RS-232C cable the one supplied<br />
with the instrument used?<br />
Do communications settings on the instrument<br />
match those on the computer?<br />
to perform white calibration. (page E-<br />
46)<br />
Direct the specimen measuring port<br />
into the air or use the optional Zero<br />
Calibration Box and perform zero calibration.<br />
Do not allow the instrument to move<br />
during measurement.<br />
Connect the instrument’s external output<br />
terminal to the computer’s RS-<br />
232C connector with the RS-232C cable<br />
supplied with the instrument.<br />
Set the same communications settings<br />
as those on the instrument to the computer.<br />
Has a task been downloaded? Download a task from the optional<br />
Color Data Software “SpectraMagic”<br />
(Ver.3.2 or higher; except for Ver.3.5).<br />
Not possible to print. Is the printer cable connected correctly?<br />
The printer must be connected to the<br />
external output terminal on the instrument<br />
using a printer cable that is wired<br />
as shown in “Printer Cable Wiring Diagram<br />
(page E-92).
Symptom Check Point Action<br />
Measurement data or<br />
settings are not held<br />
in memory, and disappear<br />
immediately.<br />
Relative gloss value<br />
is displayed as “G---”<br />
in the TASK mode.<br />
The instrument’s backup batteries may<br />
be low immediately after purchase or<br />
following a period of prolonged use.<br />
Turn the power of the instrument ON<br />
to charge the backup batteries. Under<br />
this condition, the batteries can be fully<br />
charged in 25 hours.<br />
In this case of the TASK mode, if the<br />
MASK/GLOSS setting wasn’t “ * /<br />
I+E”, relative gloss value is not calculated<br />
and is displayed as “G---”.<br />
Troubleshooting<br />
The backup batteries have an expected<br />
service life of approximately ten years.<br />
If you find that the instrument fails to<br />
retain data in memory even after the<br />
batteries have been fully charged, however,<br />
then it is likely that your batteries<br />
have reached the end of its life and requires<br />
replacement. Note that you cannot<br />
replace the batteries yourself. For<br />
information, please contact a KONICA<br />
MINOLTA SENSING-authorized<br />
service facility.<br />
Change the MASK/GLOSS setting of<br />
the TASK to “ * /I+E”, and redownload<br />
the TASK from SpectraMagic (Ver.3.2<br />
or higher; except for Ver.3.5) to the<br />
<strong>CM</strong>-<strong>2600d</strong>/<strong>2500d</strong>.<br />
E-111
E-112<br />
Troubleshooting
Chapter 6<br />
Appendix<br />
E-113
E-114<br />
Principles of Measurement<br />
Illuminating/Viewing System<br />
The flow of measurement is shown below.<br />
This instrument utilizes the D/8 geometry conforming to CIE No.15, ISO 7724/1, ASTM E1164, DIN<br />
5033 Tei17, and JIS Z8722-1982 (diffused illumination/8º viewing system) standards, and offers simultaneous<br />
SCI (specular component included) and SCE (specular component excluded) measurements.<br />
1 Illumination<br />
Light from xenon<br />
lamps diffuses in the integrating<br />
sphere and illuminates<br />
the specimen<br />
uniformly.<br />
2 Receiving<br />
a:Light reflected by the<br />
specimen is received.<br />
b:Light diffused in the<br />
integrating sphere is<br />
received.<br />
3 <strong>Sensing</strong><br />
Light is transmitted to<br />
the specimen-measuring<br />
and illuminationmonitoring<br />
optical system,<br />
where the light in<br />
the wavelength range<br />
of 360 to 740nm is divided<br />
into 10nm-pitch<br />
components and signal<br />
proportional to the light<br />
intensity of each component<br />
are output to the<br />
analog processing circuit.<br />
1 Light from xenon lamps diffuses on the inner surface of the integrating sphere and illuminates the<br />
specimen uniformly.<br />
2 a. The light reflected by the specimen surface at an angle of 8 degrees to the normal of the surface is<br />
received by the specimen-measuring optical system.<br />
b.The diffused light in the integrating sphere is received by the illumination-monitoring optical system<br />
and guided to the sensor.<br />
3 The light reflected by the specimen surface and the diffused light are divided into each wavelength<br />
component by the specimen-measuring optical system and illumination-monitoring optical sensor,<br />
respectively, and then signal proportional to the light intensity of each component are output to the<br />
analog processing circuit.<br />
By using the outputs from the specimen-measuring optical system and the illumination-monitoring sensor<br />
for calculation, compensation for slight fluctuation in spectral characteristic and the intensity of the<br />
illumination light is performed. (Double-beam system)
Illumination Area and Measurement Area<br />
Principles of Measurement<br />
The <strong>CM</strong>-<strong>2600d</strong> allows selection of either SAV (ø3 mm) or MAV (ø8 mm) measurement area according<br />
to the specimen and applications. A Target Mask (illumination area) suitable for the selected measurement<br />
area must be installed.<br />
Note<br />
With the <strong>CM</strong>-<strong>2500d</strong>, only MAV (ø8 mm) is available.<br />
Target Mask<br />
Since this instrument does not have automatic Target Mask matched to the selected measurement area<br />
must be attached correctly.<br />
Since the condition of the inner surface of the Target Masks affects measured values, do not touch the<br />
inner surface by hand, scratch it or allow it to get dirty.<br />
Note<br />
With the <strong>CM</strong>-<strong>2500d</strong>, it is not possible to exchange a Target Mask since only MAV (ø8 mm) is available.<br />
Measurement Area<br />
The measurement area can be switched between SAV and MAV by sliding the measurement area selector<br />
provided on the side of the instrument.<br />
Note<br />
With the <strong>CM</strong>-<strong>2500d</strong>, no measurement area selector is provided.<br />
E-115
E-116<br />
Principles of Measurement<br />
Simultaneous SCI/SCE Measurement<br />
The <strong>CM</strong>-<strong>2600d</strong>/<strong>2500d</strong> employs simultaneous SCI/SCE measurement method.<br />
With the conventional models, SCI (Specular Component Included) and SCE (Specular Component Excluded)<br />
need to be switched mechanically by opening/closing the optical trap provided inside the integrating<br />
sphere.<br />
This means mechanical switching has to be made each time the mode is switched from SCI to SCE or<br />
vice versa, and it is not possible to start measurement in the new mode until switching is complete.<br />
With the <strong>CM</strong>-<strong>2600d</strong>/<strong>2500d</strong>, both SCI and SCE data can be obtained simultaneously by calculating the<br />
data obtained by two illuminantions.<br />
Simultaneous SCI/SCE Measurement Method<br />
Two light sources 1 and 2 are located as shown in<br />
the figure, and light source 1 flashes first.<br />
Light source 1 is the diffused illumination type,<br />
and SCI measured data can be obtained as it<br />
flashes.<br />
Then, light source 2 flashes next.<br />
Light source 2 is provided for numeric control<br />
of the specular component. The data (i.e. amount<br />
of light reflected specularly from the surface of<br />
the specimen) obtained when this light source<br />
flashes and that obtained when light source 1<br />
flashed are used to calculate SCE data.<br />
To illuminating/viewing system<br />
specimen<br />
By carrying out the above measurement and calculation during a single measurement, both SCI and SCE<br />
data can be obtained simultaneously without mechanical switching that is required in the case of the conventional<br />
models.<br />
UV Control<br />
With the <strong>CM</strong>-<strong>2600d</strong>, two light sources, one contains UV (Ultraviolet) component and the other doesn’t,<br />
flash sequentially and a desired illumination containing the specific UV intensity is virtually created by<br />
calculation based on the two measured numeric data sets. In case of conventional models with a single<br />
light source, the position of UV cutoff filter in the flux from the light source is mechanically adjusted to<br />
control the UV intensity. The adjustment of the filter position requires repeated operations.<br />
Since the UV control in <strong>CM</strong>-<strong>2600d</strong> is performed by the calculation based on the data measured using two<br />
light sources, it is completed in a instance and the deterioration of a fluorescent standard which often happens<br />
in conventional models due to the repeated illumination during adjustment is prevented.<br />
Mechanism of UV Control<br />
Two light sources 1 (without UV cutoff filter) and<br />
2 (with a UV cutoff filter) are located as shown below.<br />
Light sources 1 and 2 flash sequentially within<br />
the measurement time of approximately 2 seconds.<br />
As a result, the spectral reflectance data with and<br />
without UV component can be obtained, based on<br />
which the calculation for UV intensity control is performed.<br />
These two spectral reflectance data are compared/merged<br />
to obtain the UV intensity correction<br />
data.<br />
light source 2<br />
light source 1<br />
specimen
Target Mode<br />
Relation Between Measured Data and Target Color<br />
• In “linked to each data.” mode, there is specific target color data associated with the selected number of the<br />
target color data at the time of measurement.<br />
• In “defined in COND.” mode, the target color data depends on the conditions.<br />
There is a unique link for the selected number of the target color data at the time of measurement, however, if<br />
the number of the target color is changed, the results are recalculated based on the new target color number.<br />
Deleting a Color Difference Target Data<br />
If target color data is deleted, the numbers for other target color data is renumbered.<br />
For example, if target color data numbers T1 to T10 have been set and T2 is deleted, the date that was<br />
numbered T3 is renumbered T2 and T4 becomes T3, and so on for the other numbers.<br />
• In “linked to each data.” mode, if the target color data number selected at the time of measurement is modified<br />
(deleted or change), then the link to that target color data is cut. The target color data associated with that measurement<br />
data is lost forever, and is not recalculated using other target color data.<br />
The color difference display based on the target color data does not occur and pass/fail judgments are not performed,<br />
and “-----” is displayed for the color difference. “T---” is displayed for the target color data number.<br />
• In “defined in COND.” mode, there is a link to the target color data number selected at the time of measurement.<br />
For example, if the current target color set for T2 was set as T3 at the time of measurement, and even if<br />
the actual target color data used at the time of measurement is deleted, the results are calculated and displayed<br />
based on the new T2 target color.<br />
Notes on Changing the Target Mode<br />
This instrument comes with two user selectable target modes, “linked to each data.” and “defined in<br />
COND.”<br />
Note<br />
• Once the target mode is changed, previous data will be cleared. It is recommended that you save previous data<br />
into other storage media in advance by using the Color Data Software that is optionally available.<br />
• For the target mode changing procedure, please read “Selecting the Target Mode” on page E-28.<br />
E-117
E-118<br />
Specifications<br />
Specifications<br />
Model <strong>CM</strong>-<strong>2600d</strong> <strong>CM</strong>-<strong>2500d</strong><br />
Illuminating/viewing system d/8 (diffused illumination, 8-degree viewing angle), equipped with<br />
simultaneous measurement (not switched mechanically) of SCI<br />
(specular component included)/SCE (specular component excluded).<br />
(Conforms to CIE No.15, ISO 7724/1, ASTM E1164, DIN 5033<br />
Tei17, JIS Z8722 Condition c, standard.)<br />
Size of integrating sphere ø52 mm<br />
Detector Silicon photodiode array (dual 40 elements)<br />
Spectral separation device Diffraction grating<br />
Wavelength range 360 nm to 740 nm<br />
Wavelength pitch 10 nm<br />
Half bandwidth Approx. 10 nm<br />
Reflectance range 0 to 175%, Display resolution: 0.01%<br />
Light sources 3 pulsed xenon lamps 2 pulsed xenon lamps<br />
Measurement time Approx. 1.5 seconds (approx. 2 Approx. 1.5 seconds<br />
seconds for fluorescent measurement)<br />
Minimum measurement interval<br />
3 seconds for SCI/SCE (4 seconds<br />
for fluorescent measurement)<br />
Battery performance Approx. 1000 times at 10-second intervals<br />
(when alkaline batteries used; at 23°C)<br />
Measurement/illumination<br />
area<br />
MAV: ø8 mm/ø11 mm<br />
SAV: ø3 mm/ø6 mm<br />
(Selectable between MAV and<br />
SAV)<br />
3 seconds for SCI/SCE<br />
MAV:ø8 mm/ø11 mm<br />
Repeatability Spectral Reflectance: Standard deviation within 0.1% (360 to 380<br />
nm: Standard deviation within 0.2%)<br />
Chromaticity Value: Standard deviation E*ab within 0.04 (When<br />
a White Calibration Plate is measured 30 times at 10-second intervals<br />
after white calibration)<br />
Inter instrument agreement E*ab within 0.2 (MAV/SCI) (Averaged for 12 BCRA Series II<br />
color tiles compared to values measured with master body; at 23°C)<br />
UV adjustment Instantaneous numerical adjustment<br />
(no mechanical adjustment<br />
required)<br />
* With UV400 nm cut filter<br />
No UV adjustment function for<br />
<strong>CM</strong>-<strong>2500d</strong><br />
Language modes English/Japanese/German/French/Spanish/Italian<br />
Measurement mode Single/averaging (auto mode: 3, 5, 8 times/manual mode)<br />
Interface Conforms to RS-232C<br />
Observer 2/10 degrees<br />
Observation illuminant A, C, D50, D65, F2, F6, F7, F8, F10, F11, F12 (simultaneous evaluation<br />
is possible using two light sources)
Model <strong>CM</strong>-<strong>2600d</strong> <strong>CM</strong>-<strong>2500d</strong><br />
Display Spectral value/graph, colorimetric value, color difference value/<br />
graph, PASS/FAIL result, Assessment (except in Japanese mode),<br />
relative gloss value<br />
Color space/colorimetric data L*a*b*, L*C*h, <strong>CM</strong>C (1:1), <strong>CM</strong>C (2:1), CIE94, Hunter Lab, Yxy,<br />
Munsell, XYZ, MI, WI (ASTM E313), YI (ASTM E313/ASTM<br />
D1925), ISO Brightness (ISO 2470), Density status A/T, WI/Tint<br />
(CIE/Ganz), CIE00<br />
Storable data sets 1700 pieces of data (as SCI/SCE 1 data) * 700 pieces of data in the<br />
“defined in COND.” mode.<br />
* Total of the sample data for the COND and TASK modes and color<br />
difference target data<br />
Tolerance judgment Tolerance for color difference (both box and elliptical tolerances can<br />
be set)<br />
Power AA-size battery (× 4), AC adapter<br />
Size 69 (W) × 96 (H) × 193 (D) mm<br />
Weight approx. 670 g (including “Measuring Base”/excluding batteries)<br />
Operating temperature/<br />
humidity range *1<br />
Storage temperature/humidity<br />
range<br />
Specifications<br />
5 to 40°C , less than 80% relative humidity at 35°C with no condensation<br />
0 to 45°C, less than 80% relative humidity at 35°C with no condensation<br />
Standard accessories White Calibration Plate: <strong>CM</strong>-A145<br />
Target Mask ø8 mm: <strong>CM</strong>-A146<br />
Target Mask ø3 mm: <strong>CM</strong>-A147 None<br />
RS-232C cable (D-sub 9-pin, for IBM, PC/AT): IF-A16<br />
AC adapter: AC-A17<br />
E:AA(R6) alkaline battery × 4<br />
Optional accessories Zero Calibration Box: <strong>CM</strong>-A32<br />
Hard Case: <strong>CM</strong>-A148<br />
Dust Cover Set: <strong>CM</strong>-A149<br />
Replacement Dust Cover: <strong>CM</strong>-A152 (polyolefin)<br />
Color Data Software “SpectraMagic NX” (<strong>CM</strong>-S100w)<br />
Printer cable (D-sub 9-pin, for serial connection): CR-A75<br />
*1 Operating temperature/humidity range of products for North America: 5 to 40°C, less than 80% relative humidity<br />
at 31°C with no condensation<br />
E-119
E-120<br />
Dimensions<br />
Dimensions<br />
The measurement area selector is not available with the <strong>CM</strong>-<strong>2500d</strong>.<br />
96<br />
193<br />
96<br />
69<br />
(mm)
Dimensions<br />
E-121
E-122<br />
Menu Structure<br />
Menu Structure<br />
The navigation wheel of the <strong>CM</strong>-<strong>2600d</strong>/<strong>2500d</strong> can be used to select menus and items in the LCD to set<br />
the measurement conditions and measurement results display.<br />
The following figure is the Menu Structure diagram of the <strong>CM</strong>-<strong>2600d</strong>/<strong>2500d</strong>. This is a tree diagram for<br />
the menus or the items that can be selected in the display of the instrument.<br />
Reading the menu structure diagram<br />
• is the display title in the diagram. Then words under the display title are the menus or items which can be<br />
selected in this display.<br />
• To the right of the menus or items is explanation of what will happen when the menu or item selected.<br />
• The number enclosed in parentheses “( )” in the display is the number of the page in this manual which explains<br />
the menu or item. For details, please refer to the indicated page.<br />
• In the following example, it is shown that selecting “COND * ” in the “” display will cause the<br />
“COND * ” menu for setting measurement conditions to appear.<br />
[Shown in the menu structure]<br />
[Real display examples]
Menu Structure diagram<br />
Common for both Measurement mode (COND / TASK)<br />
* Turn the power ON with navigation wheel.<br />
(page E-27)<br />
: Select the desired language (J/E/D/F/Es/I) (page E-27)<br />
: Select the desired mode (COND/TARGET) (page E-27)<br />
: Select the Target mode (“linked to each data.”/“defined in COND.”) (page E-28)<br />
<br />
LANGUAGE<br />
MODE<br />
TARGET<br />
(After settings, back to screen.)<br />
<br />
“COND” mode<br />
<br />
(page E-29)<br />
(page E-33)<br />
CALIBRATION : Calibration menu screen<br />
<br />
COND<br />
* : Measurement condition menu display<br />
<br />
ZERO : Execution of Zero Calibration(page E-44)<br />
WHITE : Execution of White Calibration(page E-46) (After settings, automatically back to measurement screen.)<br />
Measurement screen<br />
(page E-62)<br />
DEL : Delete the displayed data.(page E-70)<br />
: Select the data to display.<br />
DISP : Switch the measurement result screen.(page E-68)<br />
“T” : Display the selected color difference target color data.(page E-49)<br />
“P” : Print the measurement data.(page E-91)<br />
* When the printer is connected.<br />
PREV : (Back to measurement condition screen.)<br />
BREAK : (Back to measurement screen.)<br />
PREV : (Back to measurement condition screen.)<br />
TARGET : Display the color difference target color.<br />
(page E-48)<br />
<br />
Select the other target color no.<br />
(Back to measurement screen.)<br />
Print the target color data.<br />
(Back to measurement condition screen.)<br />
Display the target color data delete menu.<br />
* When the target color data is set.<br />
:<br />
:<br />
:<br />
:<br />
:<br />
BREAK<br />
“P”<br />
PREV<br />
DEL<br />
T<br />
* DELETE<br />
(page E-51)<br />
: Delete the displayed target color data.<br />
ALL DELETE : Delete all target color data.<br />
<br />
TOLERANCE Display the tolerance menu.<br />
* Only if there is the target color data.<br />
(page E-52)<br />
BOX : Display the box tolerance menu.<br />
(tolerance type)<br />
(page E-52~)<br />
Reset the settings.<br />
Box tolerance data settings<br />
Tolerance of other observer/illuminant<br />
* When the mask is set as I+E/Illuminant 2.<br />
<br />
:<br />
:<br />
:<br />
RESET<br />
ADJUST<br />
OBSERVER/ILLUMINANT, MASK<br />
BREAK : (Back to measurement condition screen.)<br />
PREV : (Back to tolerance type menu.)<br />
ELLIPTICAL : Display the elliptical tolerance menu.<br />
(page E-55~)<br />
Reset the settings.<br />
Elliptical tolerance data settings<br />
Tolerance of other observer/illuminant<br />
* When the mask is set as I+E/Illuminant 2.<br />
<br />
:<br />
:<br />
:<br />
RESET<br />
TOLERANCE<br />
OBSERVER/ILLUMINANT, MASK<br />
BREAK : (Back to measurement condition screen.)<br />
PREV : (Back to tolerance type menu.)<br />
FILE : Selected measurement condition menu (1/2 page)<br />
(1/2 page)<br />
(page E-33)<br />
2/2 : Selected measurement condition menu (2/2 page)<br />
(2/2)<br />
1/2 : Selected measurement condition menu (1/2 page)<br />
COND : Display the measurement condition setting menu.<br />
BREAK : (Back to measurement condition screen.)<br />
PREV : (Back to measurement condition menu.)<br />
(page E-34~38)<br />
(page E-39~43)<br />
COND : Display the measurement condition menu.<br />
(1/2 page)<br />
MASK/GLOSS<br />
UV SETTING<br />
ILLUMINANT1<br />
ILLUMINANT2<br />
OBSERVER<br />
DISPLAY<br />
(2/2 page)<br />
COLOR SPACE<br />
MANUAL AVG. TIMES<br />
MANUAL AVG. DEVIATION<br />
AUTO AVG.<br />
DELAY TIME<br />
BREAK : (Back to measurement condition screen.)<br />
PREV : (Back to measurement condition menu.)<br />
DATA DELETE : Display the global deletion menu.<br />
(page E-71)<br />
OK : Display the amount of deleted measured data.<br />
(After settings, back to measurement condition menu.)<br />
CANCEL : Cancel the global deletion.<br />
<br />
MENU : Initial setting menu display<br />
(page E-29)<br />
REMOTE : Display the transfer mode to connect an external device.<br />
<br />
(page E-89)<br />
<br />
(page E-92)<br />
: Print each measurement data automatically.<br />
: Auto print is not selected.<br />
AUTO PRINT : Display the auto print setting menu.<br />
<br />
ON<br />
OFF<br />
(page E-30)<br />
CLOCK : Display the clock setting menu.<br />
<br />
ADJUST : Start the clock setting.<br />
PREV : (Back to screen.)<br />
DISPLAY INVERT : Setting the display direction<br />
LCD CONTRAST : Display the LCD contrast setting menu.<br />
<br />
(page E-32)<br />
PREV : (Back to menu.)<br />
(page E-100)<br />
(page E-98)<br />
TASK :<br />
* Display the mask and measurement area confirmation message.<br />
(page E-100~)<br />
“TASK” Mode<br />
OK : Display the calibration menu.<br />
<br />
(After settings, automatically back to measurement screen.)<br />
ZERO : Execution of Zero Calibration(page E-100)<br />
WHITE : Execution of White Calibration(page E-101)<br />
Measurement screen<br />
(page E-102~)<br />
* The message defined for each Job in the Task will be displayed in sequence.<br />
BREAK : (Back to measurement condition screen.)<br />
PREV : (Back to task select menu screen.)<br />
MENU : Initial setting display (same as “COND” menu)<br />
Menu Structure<br />
(page E-29~)<br />
REMOTE<br />
AUTO PRINT<br />
CLOCK<br />
DISPLAY INVERT<br />
LCD CONTRAST<br />
E-123
E Es 9222-1856-40<br />
© 2002-2005 KONICA MINOLTA SENSING, INC. AFMAGA(1) Printed in Japan