User manual type 34003095 - OneRemote
User manual type 34003095 - OneRemote
User manual type 34003095 - OneRemote

Create successful ePaper yourself
Turn your PDF publications into a flip-book with our unique Google optimized e-Paper software.
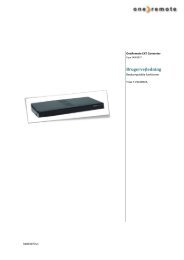
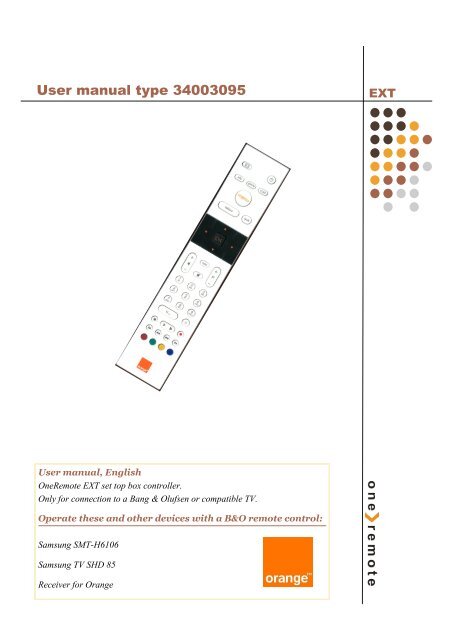
<strong>User</strong> <strong>manual</strong> <strong>type</strong> <strong>34003095</strong> EXT<br />
<strong>User</strong> <strong>manual</strong>, English<br />
<strong>OneRemote</strong> EXT set top box controller.<br />
Only for connection to a Bang & Olufsen or compatible TV.<br />
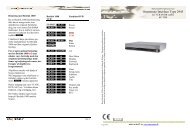
Operate these and other devices with a B&O remote control:<br />
Samsung SMT-H6106<br />
Samsung TV SHD 85<br />
Receiver for Orange
Operation with Beo4 or Beo5.<br />
Daily use Playback<br />
OO OK<br />
Q*1 MENU<br />
E*1 Retour<br />
W*1 P+<br />
R*1 P-<br />
e Quit<br />
o e C<br />
*1 As the coloured buttons has been assigned other direct functions, a<br />
O has to be pressed first, to get the coloured operation.<br />
oQ Green<br />
oW Yellow<br />
oR Blue<br />
oE Red<br />
Beolink 1000 and other remote controls.<br />
Operation is optimal with Beo4 or Beo5 that has coloured function<br />
buttons. Other remote controls can be used with limited operation.<br />
This is special operation keys included on these remote controls.<br />
g<br />
Pg<br />
Retour.<br />
Menu.<br />
x Quit.<br />
Px C.<br />
o Play / Pause press 1 sec.<br />
o 0 Play/ Pause alternative<br />
2<br />
q Stop<br />
oA Rew<br />
oS FF<br />
oD Next<br />
oF Previous<br />
o 8 Record<br />
Other operations<br />
o1 Guide<br />
o2 Info<br />
o3 VOD<br />
o 4 Liste<br />
o 6 Format<br />
o 9 Power <strong>manual</strong><br />
Special or alternative operations<br />
o 5 Menu<br />
m Menu<br />
Beolink 1000 Operation:<br />
P<br />
AsO on newer remote controls.<br />
hZ Green function key.<br />
hX Yellow function key.<br />
hC Blue function key.<br />
hV Red function key.
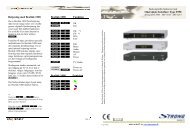
Congratulations.<br />
The EXT controller from www.oneremote.dk can fully operate your device using your Bang &<br />
Olufsen remote control terminal, via a Bang & Olufsen TV.<br />
Beo4 or Beo5 remote controls can be used. Beolink 1000 can be used with reduced functionality.<br />
This guide explains how.<br />
This EXT controller is ready for use, plug & play. See the opposite page regarding daily operation.<br />
Some operations can be altered, to improve interaction with other controllers or to your convenience.<br />
Refer to the installation section further on, if changes are needed.<br />
3
EXT controller.<br />
When a scart <strong>type</strong> connected source is selected with a<br />
Bang & Olufsen remote control, the B&O TV starts to<br />
parse control data from the remote control to the attached<br />
device, via the scart cable.<br />
The <strong>OneRemote</strong> EXT controller captures these data and<br />
converts these into IR data, that can operate the specific<br />
device.<br />
The converted IR data is being transmitted via a small IRemitter<br />
that has to placed in front of the device to be<br />
controlled. Here it emits the same IR data into the front of<br />
the device, that it was made to receive from its own remote control.<br />
As an EXT controller operates on data received via the scart cable, it will function only when attached to a B&O TV.<br />
If both the B&O TV and the device are equipped with DVI and/ or HDMI sockets, a suitable cable can be added to improve the<br />
picture quality. The EXT cable will still be needed for control data and maybe also the sound.<br />
Refer to the user <strong>manual</strong>s for both the TV and the device, about correct installation of HDMI/ DVI cables.<br />
In a setup with link rooms, all rooms will be able to operate the device, via the link system.<br />
4
Operating with <strong>OneRemote</strong><br />
To be able to operate the device correctly with a B&O remote control the user has to be familiar with operations with<br />
the original remote control as described in the device’s user <strong>manual</strong>.<br />
B&O remote controls are not equipped with many keys, so we have designed a ‘layout’ that works logically, even<br />
when shifting between different devices. To get a common layout for many devices, we therefore needed to redefine a<br />
few of the beo4 buttons to other functions:<br />
Coloured buttons.<br />
To make room for direct access to important functions, we have moved the coloured buttons, to a lower layer. To<br />
send a ‘red’ button command O must be pressed before the red button. O Ewill send the actual red command.<br />
The same goes with the other 3 coloured buttons. This way we are able to assign other functions to the coloured buttons,<br />
when they are pressed directly. In a <strong>OneRemote</strong> environment the coloured buttons is mostly assigned to these<br />
operations:<br />
Programme stepping, up/ down manoeuvring in menus.<br />
Most set top boxes or TV’s has 4 arrow buttons for moving up, down, left and right in on screen menus. In addition<br />
they have separate programme stepping buttons for zapping through programmes. B&O remote control does not<br />
have separate buttons for programme zapping. We therefore have chosen the blue and the yellow buttons to function<br />
as programme stepping buttons. The four up, down, left and right buttons have been assigned for manoeuvring in on<br />
screen menus, in our basic setup. It is possible to use the up and down arrow for programme stepping, refer to the<br />
installation section.<br />
Go, Record and Stop shifted operation.<br />
Some of the buttons has two or three functions. To get to these they have to be preceded with O, q or sometime<br />
r. The buttons that has been assigned secondary functions on this controller can be seen in the operating table<br />
on page 2.<br />
Option programming<br />
Q<br />
E<br />
W<br />
The <strong>OneRemote</strong> EXT controller can be programmed with different options, to fit different set ups.<br />
An option programming is done by pressing a series of buttons in a special scheme that does not occur during daily use. A programming<br />
must be ended within 10 seconds.<br />
To abort an ongoing programming sequence, press o<br />
Guide, EPG or similar.<br />
Back, Backup, Return or similar.<br />
Programme zapping. P+/ P- ,<br />
Channel up/ down or CH+/ CH-.<br />
5
Menu option.<br />
If the device is used in a setup that includes a Bang & Olufsen TV, sometimes the use of the m button creates a conflict. Some<br />
Bang & Olufsen TV act on the m and enters its own TV On Screen Menu regardless of which source it is set to.<br />
In these setups the Menu button must be disabled on the EXT controller. Instead of using the Menu button to access the devices<br />
‘Menu’, use the alternative menu operation o5.<br />
In order to set these options, press the following sequences within 10 seconds:<br />
qqqqqq80 Menu button deactivated<br />
qqqqqq81 Menu activated<br />
Power off option.<br />
An EXT controlled device will always automatically power on, when selected. But it is not always practical if a device automatically<br />
powers off, when another source is selected or the TV is turned off.<br />
An example could be a Satellite receiver that is being used in more than one room. If a user in a link room is watching programmes<br />
from the receiver, it is not practical that the receiver automatically powers off, when the user in the main room turns off the TV or<br />
selects another source. If a recorder has been timed to record from the receiver, it would also be a problem if the system automatically<br />
powers off the receiver.<br />
Many devices use so much time running a booting sequence that you might want them to never power off, for this reason only.<br />
In order to set these options, press the following sequences within 10 seconds:<br />
qqqqqq70 Power off deactivated<br />
qqqqqq71 Power off activated<br />
Power on option.<br />
An EXT controlled device will always automatically power on, when selected. But it is not always practical if a device automatically<br />
powers off, when another source is selected or the TV is turned off.<br />
An example could be a Satellite receiver that is being used in more than one room. If a user in a link room is watching programmes<br />
from the receiver, it is not practical that the receiver automatically powers off, when the user in the main room turns off the TV or<br />
selects another source. If a recorder has been timed to record from the receiver, it would also be a problem if the system automatically<br />
powers off the receiver.<br />
Many devices use so much time running a booting sequence that you might want them to never power off, for this reason only.<br />
In order to set these options, press the following sequences within 10 seconds:<br />
qqqqqq60 Power on deactivated<br />
qqqqqq61 Power on activated<br />
6
Installation<br />
The <strong>OneRemote</strong> EXT cable must be connected to the devices ’TV’ scart output socket and a scart input socket on the TV. Then<br />
the IR-emitter must be stuck in a way that it can emit IR-light in to the the devices IR-receiver, that normally receives the IRlight<br />
emitted thom the devices own remote control.<br />
Only scart input sockets can be used, that are able to send out linkdata to the EXT controller. Also the TV must be programmed<br />
to send out data to the scart socket, which is done in the TV’s ’Sources’ menu. Refer to the TV’s user <strong>manual</strong>.<br />
The EXT controller emulates DVD, VMEM, VTAPE, SAT, DTV, VAUX and other sources.<br />
There is no programming needed on the EXT controller.<br />
The scartplug in that end of the EXT cable where the power supply and the IR-emitter<br />
cable is attached, MUST be inserted in to the devices ’TV’ output. If not,<br />
the EXT controller might not be able to power on and off the device correctly.<br />
The control LED<br />
The EXT cable is equipped with a control LED build in to the scartplug, that is inserted in to the device. This LED<br />
assists in faultfinding if something is not operating correctly.<br />
Continous flashing<br />
When power is applied to the EXT controller, the LED will start flashing. The flash indicates that the EXT controller<br />
has not received a command data from the TV, since power on.<br />
As soon as a command is received from the TV, the LED wil stop flashing and light solid red or green.<br />
If the control LED continues flashing after you have selected the source on the TV where the cable is attached, the<br />
socket does not include control data or the TV has not been set up correctly. Refer to the TV’s user <strong>manual</strong>.<br />
LED— colour.<br />
The EXT controller will light red when it has detected a device that is powered on. It will either flash or light solid<br />
red.<br />
The EXT controller will light green when it is not connected to a device or if it is connected to a device that is powered<br />
off.<br />
If not connected to the TV output socket of a device, the EXT controller will not be able to measure if the device is<br />
powered on and therefore always light green.<br />
LED— short flash off.<br />
During use the LED will light red or green, depending on the powerstatus of the device.<br />
When receiving a controldata from the TV, the control LED will shortly go out to indicate this. If a button is pressed<br />
on the TV’s remotecontrol supposed to operate the device and teh LED does not indicate this, the TV has not been<br />
correctly set up.<br />
7
www.oneremote.dk<br />
Made in Denmark 34003097u1uk