Operate these devices using the modified Beo4 - OneRemote
Operate these devices using the modified Beo4 - OneRemote
Operate these devices using the modified Beo4 - OneRemote

Create successful ePaper yourself
Turn your PDF publications into a flip-book with our unique Google optimized e-Paper software.
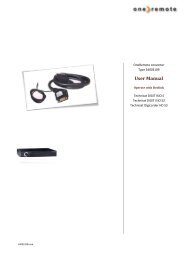
User guide type 35104377 RMB4<br />
User guide, English<br />
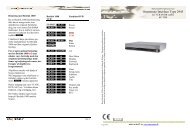
<strong>OneRemote</strong> RMB4 controller installed in a Bang & Olufsen <strong>Beo4</strong> remote control.<br />
<strong>Operate</strong> <strong><strong>the</strong>se</strong> <strong>devices</strong> <strong>using</strong> <strong>the</strong> <strong>modified</strong> <strong>Beo4</strong>:<br />
Sony KDL-NX700 ... and more<br />
<strong>Operate</strong> <strong>devices</strong> that are operate able with RCU’s like:<br />
Sony RM-ED031, RM-ED032, RM-ED033, RM-ED034 and RM-ED035.
<strong>Beo4</strong> Button Translation table.<br />
Daily operation Bravia Sync operation<br />
OO OK/ enter<br />
W*1*2 Prog +<br />
R*1*2 Prog -<br />
Q*1*2 Guide<br />
E*1*2 Return<br />
m Home<br />
e Exit<br />
o1 Digial/ analog<br />
o2 Favorite menu<br />
o 6 AV input<br />
*1<br />
If preferred it is possible to exchange <strong>the</strong> up/<br />
down arrow <strong>the</strong> operations with <strong>the</strong> blue and<br />
yellow buttons. See page 6.<br />
*2<br />
As <strong>the</strong> direct function of <strong>the</strong> coloured function<br />
buttons has been assigned to o<strong>the</strong>r functions,<br />
<strong><strong>the</strong>se</strong> have to be preceded with a o to<br />
retrieve <strong>the</strong> actual coloured function.<br />
oQ Green function<br />
oW Yellow function<br />
oE Red function<br />
oR Blue function<br />
2<br />
o Play press 1 sec.<br />
q Stop<br />
oAS Rew/ FF<br />
oDF Next/ Previous<br />
o8 Theatre<br />
o m Sync menu<br />
O<strong>the</strong>r operations<br />
o3 Options<br />
o 4 i+<br />
o 5 Subtitles<br />
o 7 Audio<br />
o 9 Scene<br />
Special/ alternative operations<br />
o 0 Play
Congratulations<br />
With a <strong>OneRemote</strong> RMB4 controller from<br />
www.oneremote.dk built in to your <strong>Beo4</strong> remote control, you<br />
can fully operate your TV with your Bang & Olufsen remote<br />
control terminal. This guide explains how.<br />
Refer to <strong>the</strong> installation section about <strong>the</strong> initial setup and<br />
option programming. There is no programming needed during<br />
daily use.<br />
3
RMB4 Internal controller for <strong>the</strong> <strong>Beo4</strong> remote control<br />
The <strong>OneRemote</strong> RMB4 controller is a small microcomputer module, which is specifically<br />
made to be built in to a Bang & Olufsen <strong>Beo4</strong> remote control.<br />
The RMB4 controller captures <strong>the</strong> commands that were meant for operating a Bang &<br />
Olufsen device. Before <strong>the</strong> commands are emitted from <strong>the</strong> <strong>Beo4</strong>, <strong><strong>the</strong>se</strong> commands are<br />
converted, and <strong>the</strong>refore able to operate a non Bang & Olufsen device.<br />
RMB4 controllers are dedicated controllers made for operating a specific product like<br />
an Apple iPod docking station, a flat screen TV, a curtain controller etc.<br />
The RMB4 controller makes <strong>the</strong> <strong>Beo4</strong> able to operate a third part device, but it is still<br />
able to operate any o<strong>the</strong>r Bang & Olufsen products.<br />
If a Bang & Olufsen audiomaster are in <strong>the</strong> room, it can be used for <strong>the</strong> sound. Speakers connected to an<br />
audiomaster is normally of a much better quality than <strong>the</strong> speakers in a TV.<br />
Only a simple audio cable is needed between <strong>the</strong> TV and <strong>the</strong> audiomaster. See <strong>the</strong> option programming section<br />
about AAUX mode on page 7.<br />
4
Operating with <strong>OneRemote</strong> - <strong>OneRemote</strong> environment.<br />
To be able to operate <strong>the</strong> device optimal with <strong>the</strong> <strong>Beo4</strong> <strong>the</strong> user has to be familiar with<br />
operations with <strong>the</strong> original remote control as described in <strong>the</strong> device’s user manual.<br />
The beo4 remote control is not equipped with as many keys as most o<strong>the</strong>r brands are<br />
<strong>using</strong>. We have designed a ‘layout’ that works logically, even when shifting between<br />
different <strong>OneRemote</strong> operated <strong>devices</strong>. To get a common layout for many <strong>devices</strong>, we<br />
<strong>the</strong>refore needed to redefine a few of <strong>the</strong> beo4 buttons to o<strong>the</strong>r functions:<br />
Coloured function buttons.<br />
To make room for easy access to more important functions, we have moved <strong>the</strong> coloured<br />
buttons, to a lower layer. To send a ‘color’ command from <strong>the</strong> device’s original<br />
RCU, a O must be pressed before <strong>the</strong> coloured button.<br />
This way we are able to assign o<strong>the</strong>r functions to <strong>the</strong> coloured buttons in direct mode.<br />
In a <strong>OneRemote</strong> environment <strong>the</strong> coloured buttons are assigned to <strong><strong>the</strong>se</strong> operations:<br />
Q<br />
E<br />
W<br />
R<br />
Guide, EPG or similar.<br />
Back, Backup, Return or similar.<br />
Programme zapping. P+/ P- ,<br />
Channel up/ down or CH+/ CH-.<br />
Programme stepping, up/ down manoeuvring in menus.<br />
Most set top boxes or TV’s has 4 arrow buttons for moving up, down, left and right in<br />
on screen menus. In addition <strong>the</strong>y have separate programme stepping buttons for zapping<br />
through programmes. B&O remote controls does not have separate buttons for<br />
programme zapping. We <strong>the</strong>refore have chosen <strong>the</strong> blue and <strong>the</strong> yellow buttons to function<br />
as programme stepping buttons, in direct mode. The four up, down, left and right<br />
buttons have been assigned for manoeuvring in on screen menus, in our basic setup. It<br />
is possible to use <strong>the</strong> up and down arrow for programme stepping, refer to <strong>the</strong> option<br />
section, page 6.<br />
Go or Record shifted operation.<br />
Some of <strong>the</strong> buttons has 2 or three functions. To get to <strong><strong>the</strong>se</strong> <strong>the</strong>y have to be preceded<br />
with O or r. The buttons that has been assigned secondary functions on this<br />
controller can be seen in <strong>the</strong> operating table on page 2.<br />
5
Option programming<br />
The <strong>OneRemote</strong> controller inside <strong>the</strong> <strong>Beo4</strong> can be programmed with different options, to<br />
make it fit different setups. One or more options might need to be set to fit your application.<br />
An option programming is carried out by pressing a series of buttons in a sequence that<br />
does not occur during daily use. The programming must be ended within 5 seconds.<br />
An ongoing programming sequence can be cancelled by pressing q.<br />
All option programming is initiated by pressing eOr followed by <strong>the</strong> actual<br />
option.<br />
Disable <strong>OneRemote</strong> Controller Option<br />
The <strong>OneRemote</strong> controller in <strong>the</strong> <strong>modified</strong> <strong>Beo4</strong> remote control can be enabled or disabled<br />
<strong>using</strong> this option. When disabled <strong>the</strong> <strong>Beo4</strong> remote control operates as an original<br />
<strong>Beo4</strong>.<br />
eOr20 Disables <strong>the</strong> <strong>OneRemote</strong> controller.<br />
eOr21 Enables <strong>the</strong> <strong>OneRemote</strong> controller. Factory setting.<br />
Zap Mode Option<br />
The <strong>Beo4</strong> buttonsW and R are being used for programme stepping, and <strong>the</strong><br />
D and Fbuttons are used to manoeuvre up and down in an on-screen menu. This<br />
is <strong>the</strong> default factory setting, as described in <strong>the</strong> chapter ‘Operating with <strong>OneRemote</strong>’.<br />
The zap mode option makes it possible to exchange <strong>the</strong> functions of <strong>the</strong> up & down buttons<br />
with <strong>the</strong> blue & yellow buttons.<br />
eOr90 Blue & Yellow used for programme zap.<br />
eOr91 Up & down used for programme zap. Factory setting.<br />
6
Volume and AAUX option.<br />
When <strong>the</strong> TV is being selected with t <strong>the</strong> TV automatically powers on.<br />
If <strong>the</strong> A.AUX mode is set, <strong>the</strong> <strong>OneRemote</strong> controller will turn on <strong>the</strong> TV, and also send<br />
an AAUX command in B&O format, to an B&O audiomaster. The audiomaster will<br />
<strong>the</strong>refore also turn on and open for it’s AAUX input.<br />
A scart to DIN audio cable between <strong>the</strong> TV and <strong>the</strong> audiomaster, can now move <strong>the</strong> TV<br />
sound to <strong>the</strong> speakers of <strong>the</strong> audiomaster and <strong>the</strong> sound quality will be significantly<br />
improved.<br />
With <strong>the</strong> A.AUX option any B&O audiomaster with connected speakers, can add a<br />
totally different sound experience to <strong>the</strong> TV. Older audiomasters from <strong>the</strong> 80’s or<br />
newer models can be used via a simple audio cable.<br />
These are <strong>the</strong> available volume options with this <strong>OneRemote</strong> controller:<br />
e Or00 Volume buttons are completely ignored<br />
e Or01 Volume buttons control volume on <strong>the</strong> TV<br />
e Or02 Volume button regulate a B&O Audiomaster.<br />
When TV is selected, <strong>the</strong> audiomaster automatic<br />
powers on and opens its AAUX socket.<br />
7
Discrete codes.<br />
Some televisions are able to switch to a specific source, <strong>using</strong> so called discrete IR<br />
codes. These are codes that usually is not available as buttons on <strong>the</strong> TV’s own remote<br />
control. The RMB4 controller is able to send <strong><strong>the</strong>se</strong> codes.<br />
Not all TV models understands <strong><strong>the</strong>se</strong> discrete codes, or only some of <strong>the</strong>m. Obviously a<br />
discrete code to select <strong>the</strong> source HDMI4, will not have any function on a TV with less<br />
than 4 HDMI sockets. But some TV models have not been manufactured with <strong>the</strong> use<br />
of discrete codes at all. The only way to find out if a TV accepts discrete codes, is testing<br />
<strong>the</strong> options that are mentioned below.<br />
If discrete codes will not work with a TV, sources must be accessed <strong>the</strong> same way as<br />
<strong>using</strong> <strong>the</strong> TVs original remote control. Using <strong>the</strong> AV button, Source button, Input button<br />
or else.<br />
When a video source button on <strong>the</strong> <strong>Beo4</strong> is pressed like T, f , <strong>the</strong><br />
<strong>OneRemote</strong> RMB4 controller checks if an option is set for this source. If an option is<br />
programmed, it will transmit <strong>the</strong> corresponding discrete code, o<strong>the</strong>rwise it will be ignored.<br />
8
Programming discrete source codes.<br />
The beo4 source selection buttons d f*1 T*1 a or c can each be<br />
programmed to open for a specific input socket on <strong>the</strong> TV.<br />
Programming is done by entering a 5 key code, as examples shown in <strong>the</strong> table below.<br />
1. Programming is initiated by pressing <strong>the</strong> source button on <strong>the</strong> <strong>Beo4</strong>, that is<br />
needed to transmit a discrete code to <strong>the</strong> TV. Then pressOr.<br />
2. Next enter <strong>the</strong> source code of <strong>the</strong> input <strong>the</strong> TV shall open. See <strong>the</strong> source code<br />
in <strong>the</strong> table on <strong>the</strong> page.<br />
3. Finally enter <strong>the</strong> IR-control code.<br />
Code 1 : Following commands will control <strong>the</strong> TV.<br />
Code 2 : Following commands will not be converted.<br />
Source option <strong>Beo4</strong> source TV source IR control<br />
T Or01 VMEM no new source TV control<br />
T Or02 VMEM no new source Beolink TX<br />
T Or11 VMEM opens source “1” TV control<br />
T Or72 VMEM opens source “7” Beolink TX<br />
d Or01 DVD no new source TV control<br />
d Or91 DVD opens source “9” TV control<br />
c Or81 PC opens source “8” TV control<br />
Examples of source selection.<br />
*1<br />
VMEM is <strong>the</strong> same button as VTAPE on previous versions of <strong>the</strong> beo4.<br />
DTV is <strong>the</strong> same button as SAT on previous versions of <strong>the</strong> beo4.<br />
DVD is <strong>the</strong> same as DVR on previous versions of <strong>the</strong> beo4.<br />
9
TV Source selection table<br />
0 No change<br />
1 HDMI 1<br />
2 HDMI 2<br />
3 HDMI 3<br />
4 HDMI 4<br />
5 Video 1<br />
6 Video 2<br />
7 Video 3<br />
8 Component 1<br />
9 Component 2<br />
10
Made in Denmark by www.oneremote.dk<br />
35104377u1uk