SmartLinx PROFIBUS DP - Siemens Industry Online Support
SmartLinx PROFIBUS DP - Siemens Industry Online Support
SmartLinx PROFIBUS DP - Siemens Industry Online Support

Create successful ePaper yourself
Turn your PDF publications into a flip-book with our unique Google optimized e-Paper software.
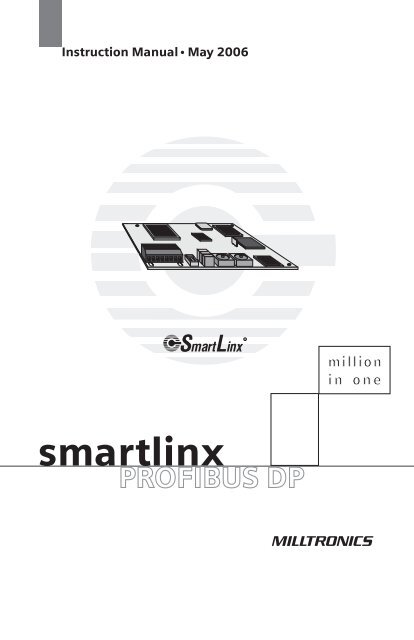
Instruction Manual May 2006<br />
smartlinx<br />
<strong>PROFIBUS</strong> <strong>DP</strong><br />
R
Safety Guidelines: Warning notices must be observed to ensure personal safety as well as that of<br />
others, and to protect the product and the connected equipment. These warning notices are<br />
accompanied by a clarification of the level of caution to be observed.<br />
Qualified Personnel: This device/system may only be set up and operated in conjunction with this<br />
manual. Qualified personnel are only authorized to install and operate this equipment in accordance with<br />
established safety practices and standards.<br />
Unit Repair and Excluded Liability:<br />
• The user is responsible for all changes and repairs made to the device by the user or the user’s<br />
agent.<br />
• All new components are to be provided by <strong>Siemens</strong> Milltronics Process Instruments Inc.<br />
• Restrict repair to faulty components only.<br />
• Do not reuse faulty components.<br />
Warning: This product can only function properly and safely if it is correctly transported, stored,<br />
installed, set up, operated, and maintained.<br />
Note: Always use product in accordance with specifications.<br />
Copyright <strong>Siemens</strong> Milltronics Process<br />
Instruments Inc. 2006. All Rights Reserved<br />
This document is available in bound version and in<br />
electronic version. We encourage users to purchase<br />
authorized bound manuals, or to view electronic versions<br />
as designed and authored by <strong>Siemens</strong> Milltronics Process<br />
Instruments Inc. <strong>Siemens</strong> Milltronics Process Instruments<br />
Inc. will not be responsible for the contents of partial or<br />
whole reproductions of either bound or electronic<br />
versions.<br />
© <strong>Siemens</strong> Milltronics Process Instruments Inc. 2006<br />
Disclaimer of Liability<br />
While we have verified the contents of this<br />
manual for agreement with the<br />
instrumentation described, variations<br />
remain possible. Thus we cannot<br />
guarantee full agreement. The contents of<br />
this manual are regularly reviewed and<br />
corrections are included in subsequent<br />
editions. We welcome all suggestions for<br />
improvement.<br />
Technical data subject to change.<br />
MILLTRONICS®is a registered trademark of <strong>Siemens</strong> Milltronics Process Instruments Inc.<br />
Contact SMPI Technical Publications at the following address:<br />
Technical Publications<br />
<strong>Siemens</strong> Milltronics Process Instruments Inc.<br />
1954 Technology Drive, P.O. Box 4225<br />
Peterborough, Ontario, Canada, K9J 7B1<br />
Email: techpubs.smpi@siemens.com<br />
• For a selection of <strong>Siemens</strong> Milltronics level measurement manuals, go to:<br />
www. siemens.com/processautomation. Under Process Instrumentation, select Level<br />
Measurement and then go to the manual archive listed under the product family.<br />
• For a selection of <strong>Siemens</strong> Milltronics weighing manuals, go to:<br />
www. siemens.com/processautomation. Under Weighing Technology, select Continuous<br />
Weighing Systems and then go to the manual archive listed under the product family.
Table of Contents<br />
<strong>SmartLinx</strong> <strong>PROFIBUS</strong> <strong>DP</strong> ..................................................................................................1<br />
Technical <strong>Support</strong> and Product Feedback ......................................................................................1<br />
Safety Notes............................................................................................................................................2<br />
The Manual .............................................................................................................................................2<br />
Specifications .....................................................................................................................3<br />
Installation...........................................................................................................................4<br />
Compatibility............................................................................................................................................4<br />
Software Compatibility................................................................................................................4<br />
Hardware Compatibility..............................................................................................................5<br />
Cable Connector.....................................................................................................................................7<br />
Termination Switch ...............................................................................................................................9<br />
Operation ...........................................................................................................................10<br />
Error Status LEDs.................................................................................................................................10<br />
Error Conditions of the Red Diagnostics Light ....................................................................11<br />
Operation LED .......................................................................................................................................11<br />
Communication Setup .....................................................................................................12<br />
GSD Files................................................................................................................................................12<br />
Baud Rate ..............................................................................................................................................12<br />
Bus Address..........................................................................................................................................12<br />
Configuring the Slave Device............................................................................................................13<br />
Map Element Selection ......................................................................................................................14<br />
P762 Map Element Selection parameter..............................................................................14<br />
Module Identification..........................................................................................................................16<br />
P794 <strong>SmartLinx</strong> Module Type..................................................................................................16<br />
P795 <strong>SmartLinx</strong> Protocol ..........................................................................................................16<br />
P634: Communication Totalizer Resolution....................................................................................17<br />
Application Layer .............................................................................................................18<br />
Parameter Indexes ..............................................................................................................................18<br />
Primary Index ..............................................................................................................................18<br />
Secondary Index ........................................................................................................................19<br />
Data Access Methods ........................................................................................................................19<br />
Direct Access..............................................................................................................................19<br />
Multiple Parameter Access (MPA) .......................................................................................20<br />
Single Parameter Access (SPA).............................................................................................21<br />
Data Map: Level Products .................................................................................................................23<br />
Write Block..................................................................................................................................23<br />
Read Block...................................................................................................................................26<br />
Data Map: Mass Dynamic Products ...............................................................................................30<br />
Write Block..................................................................................................................................30<br />
Read Block...................................................................................................................................34<br />
Data Types.............................................................................................................................................40<br />
i<br />
Table of Contents
Table of Contents<br />
Integer...........................................................................................................................................40<br />
Bit Values .....................................................................................................................................40<br />
Unsigned Double Precision Integer (UINT32) .....................................................................41<br />
Split Values..................................................................................................................................41<br />
Text Messages ...........................................................................................................................42<br />
Relay Function Codes (P111 in Level Products Only) .......................................................43<br />
Troubleshooting ...............................................................................................................45<br />
Generally................................................................................................................................................45<br />
Technical <strong>Support</strong> or Product Feedback........................................................................................45<br />
Appendix A – Reducing the amount of data being transferred over the Bus .......46<br />
Level Products ......................................................................................................................................46<br />
Write Block..................................................................................................................................47<br />
Read Block...................................................................................................................................49<br />
Mass Dynamics Products..................................................................................................................51<br />
Write Block..................................................................................................................................52<br />
Read Block...................................................................................................................................54<br />
Index .................................................................................................................................. 56<br />
ii
<strong>SmartLinx</strong> <strong>PROFIBUS</strong> <strong>DP</strong><br />
The <strong>Siemens</strong> Milltronics <strong>SmartLinx</strong> 1 <strong>PROFIBUS</strong> <strong>DP</strong> module is a plug-in communications<br />
card designed to interface a <strong>Siemens</strong> Milltronics <strong>SmartLinx</strong>-compatible instrument to a<br />
<strong>PROFIBUS</strong> <strong>DP</strong> network.<br />
Only those instruments which support the <strong>PROFIBUS</strong> <strong>DP</strong> protocol can use this card. See<br />
Compatible Instruments: on page 3 for a list of compatible <strong>Siemens</strong> Milltronics <strong>SmartLinx</strong><br />
instruments.<br />
<strong>Siemens</strong><br />
Milltronics<br />
instrument<br />
monitored<br />
process<br />
PLC master<br />
<strong>PROFIBUS</strong> <strong>DP</strong> at 9.6 Kbaud to 12 Mbaud<br />
<strong>PROFIBUS</strong> is an open standard controlled by <strong>PROFIBUS</strong> industry groups worldwide.<br />
More information is available on the web site at www.profibus.com.<br />
Note: <strong>Siemens</strong> Milltronics does not own the <strong>PROFIBUS</strong> <strong>DP</strong> protocol. All information<br />
regarding that protocol is subject to change without notice.<br />
Technical <strong>Support</strong> and Product Feedback<br />
For product feedback or technical support, please contact your local <strong>Siemens</strong> Milltronics<br />
representative or e-mail us at www.siemens.com/automation/support-request.<br />
1. <strong>SmartLinx</strong>® is a registered trademark of <strong>Siemens</strong> Milltronics Process Instruments Inc.<br />
7ML19981AQ03 <strong>SmartLinx</strong> <strong>PROFIBUS</strong> <strong>DP</strong> – INSTRUCTION MANUAL Page 1<br />
<strong>SmartLinx</strong> <strong>PROFIBUS</strong> <strong>DP</strong>
SmarttLinx <strong>PROFIBUS</strong> <strong>DP</strong><br />
Safety Notes<br />
Special attention must be paid to warnings and notes highlighted from the rest of the text<br />
by grey boxes.<br />
The Manual<br />
WARNING: relates to a caution symbol on the product, and means<br />
that failure to observe the necessary precautions can result in death,<br />
serious injury, and/or considerable material damage.<br />
WARNING: means that failure to observe the necessary precautions<br />
can result in death, serious injury, and/or considerable material<br />
damage.<br />
CAUTION: means that failure to observe the necessary precautions can<br />
result in considerable material damage.<br />
Note: means important information about the product or that part of the operating<br />
manual.<br />
Notes:<br />
• Please follow the installation and operating procedures for a quick, trouble-free<br />
installation and to ensure the maximum accuracy and reliability of your <strong>Siemens</strong><br />
Milltronics <strong>SmartLinx</strong> <strong>PROFIBUS</strong> <strong>DP</strong> module.<br />
• This manual applies to the <strong>SmartLinx</strong> <strong>PROFIBUS</strong> <strong>DP</strong> module only.<br />
This manual will help you install and connect a <strong>Siemens</strong> Milltronics <strong>SmartLinx</strong><br />
<strong>PROFIBUS</strong> <strong>DP</strong> module, and set it up for communication with a master device on a<br />
<strong>PROFIBUS</strong> <strong>DP</strong> network. The manual is targeted at a technical audience in the industrial<br />
communications field with a sound working knowledge of <strong>PROFIBUS</strong> <strong>DP</strong>. (Please see<br />
next page for more details.)<br />
We always welcome questions, comments, or suggestions about manual content, design,<br />
and accessibility.<br />
Please direct your questions or comments to techpubs.smpi@siemens.com. For the<br />
complete library of <strong>Siemens</strong> Milltronics manuals, go to<br />
www.siemens.com\processautomation.<br />
Page 2 <strong>SmartLinx</strong> <strong>PROFIBUS</strong> <strong>DP</strong> – INSTRUCTION MANUAL 7ML19981AQ03
Specifications<br />
Application:<br />
• compatible with a master device on a <strong>PROFIBUS</strong> bus<br />
Compatible Instruments:<br />
• AiRanger XPL Plus / SITRANS LU 10<br />
• AiRanger <strong>DP</strong>L Plus / SITRANS LU 02<br />
• AiRanger SPL / SITRANS LU 01<br />
• CraneRanger<br />
• InterRanger <strong>DP</strong>S 300<br />
• EnviroRanger ERS 500<br />
• Milltronics BW500<br />
• Milltronics SF500<br />
• MultiRanger 100/200<br />
• HydroRanger 200<br />
Communication Settings:<br />
• baud rate: 9.6 Kbaud to 12 Mbaud, automatically detected<br />
Connection:<br />
• varies by <strong>Siemens</strong> Milltronics <strong>SmartLinx</strong> ® instrument, (see page 7)<br />
Termination:<br />
Cable:<br />
• switch selectable, open or special active termination as per <strong>PROFIBUS</strong> specification<br />
(see Termination Switch on page 9)<br />
• Belden <strong>PROFIBUS</strong> cable 3079A, or equivalent<br />
7ML19981AQ03 <strong>SmartLinx</strong> <strong>PROFIBUS</strong> <strong>DP</strong> – INSTRUCTION MANUAL Page 3<br />
Specifications
Installation<br />
Installation<br />
The <strong>SmartLinx</strong> module is either shipped installed in the <strong>Siemens</strong> Milltronics instrument or<br />
shipped separately for on-site installation. Refer to the manual of your <strong>Siemens</strong><br />
Milltronics instrument for details on module location and physical installation.<br />
Compatibility<br />
For the <strong>SmartLinx</strong> <strong>PROFIBUS</strong> card there are different hardware and software<br />
configurations available depending on the equipment used.<br />
Software Compatibility<br />
If a device is <strong>SmartLinx</strong> ready, it will work with the correct <strong>SmartLinx</strong> card for that device.<br />
However, if the firmware version is a lower number than the one listed below, the P762<br />
Map Element Selection Parameter will not be available. Also, for the BW500 and the<br />
SF500, the read block will be a smaller size.<br />
Retrofits<br />
Product Software Rev. Product Software Rev.<br />
AiRanger XPL Plus /<br />
SITRANS LU 10<br />
Milltronics SF500<br />
AiRanger <strong>DP</strong>L Plus /<br />
SITRANS LU 02 5.23<br />
Milltronics BW500<br />
AiRanger SPL /<br />
SITRANS LU 01<br />
MultiRanger 100 1.04<br />
InterRanger <strong>DP</strong>S 300 MultiRanger 200<br />
HydroRanger 200<br />
1.03<br />
EnviroRanger ERS 500 5.06<br />
If you are replacing an older <strong>SmartLinx</strong> device with a new <strong>SmartLinx</strong> device, and you are<br />
using any product other than the BW500 or SF500, then you can use the default values for<br />
P762.<br />
If you are replacing a BW500 or SF500 with a new device, then set P762 primary index<br />
15 = 0, and P762 primary index 16 = 0.<br />
Page 4 <strong>SmartLinx</strong> <strong>PROFIBUS</strong> <strong>DP</strong> – INSTRUCTION MANUAL 7ML19981AQ03<br />
3.05
Hardware Compatibility<br />
All available <strong>SmartLinx</strong> card configurations are shown here for reference.<br />
The card shown below is compatible with the following <strong>Siemens</strong><br />
Milltronics units:<br />
• AiRanger XPL Plus / SITRANS LU 10<br />
• AiRanger <strong>DP</strong>L Plus / SITRANS LU 02<br />
• AiRanger SPL / SITRANS LU 01<br />
• CraneRanger<br />
• InterRanger <strong>DP</strong>S 300<br />
module connector (underside, 32-pin) to <strong>Siemens</strong> Milltronics host<br />
mounting hole<br />
address switches<br />
status LEDs<br />
termination switch<br />
terminal block, removable<br />
mounting hole<br />
7ML19981AQ03 <strong>SmartLinx</strong> <strong>PROFIBUS</strong> <strong>DP</strong> – INSTRUCTION MANUAL Page 5<br />
Installation
Installation<br />
The card shown below is compatible with the following <strong>Siemens</strong><br />
Milltronics units1 :<br />
• EnviroRanger ERS 500 (Wall Mount)<br />
• Milltronics BW5001 • Milltronics SF500 1<br />
address switches<br />
termination switch 1<br />
terminal block, removable<br />
• MultiRanger 100/200<br />
• HydroRanger 200<br />
module connector (underside, 34-pin) to <strong>Siemens</strong> Milltronics host<br />
mounting hole<br />
operation LED<br />
mounting hole<br />
status LEDs<br />
Note:<br />
• Install the <strong>SmartLinx</strong> card so that the mounting holes align and the pin connectors<br />
will mate correctly.<br />
• Correct cable routing is important for electromagnetic noise suppression. Follow<br />
the routing instructions contained your unit’s instruction manual.<br />
1.<br />
The termination switch is found only on the older <strong>SmartLinx</strong> cards, not on the<br />
new cards.<br />
Page 6 <strong>SmartLinx</strong> <strong>PROFIBUS</strong> <strong>DP</strong> – INSTRUCTION MANUAL 7ML19981AQ03
The card shown below is compatible with EnviroRanger ERS 500 (Rack or<br />
Panel Mount)<br />
Cable Connector<br />
module connector (underside, 34-pin) to <strong>Siemens</strong> Milltronics host<br />
mounting hole operation LED<br />
address switches<br />
termination switch<br />
module connector (underside, 10-pin)<br />
mounting hole<br />
status LEDs<br />
Connect using Belden <strong>PROFIBUS</strong> cable 3079A or equivalent and terminate according to<br />
<strong>PROFIBUS</strong> <strong>DP</strong> specification and conventions.<br />
AiRanger / SITRANS LU Series, CraneRanger, InterRanger <strong>DP</strong>S 300<br />
bus +5V (Vcc)<br />
bus ground (GND)<br />
A-line<br />
B-line<br />
bus shield<br />
A-line<br />
B-line<br />
bus cable shield<br />
Note: To daisy-chain devices, connect both the outgoing and the incoming wires to<br />
terminals 3 and 4. Then if you have to remove the connector, the bus will still be active.<br />
7ML19981AQ03 <strong>SmartLinx</strong> <strong>PROFIBUS</strong> <strong>DP</strong> – INSTRUCTION MANUAL Page 7<br />
Installation
Installation<br />
EnviroRanger ERS 500 (Wallmount), Milltronics BW500, Milltronics SF500,<br />
MultiRanger 100/200, HydroRanger 200<br />
bus +5V (Vcc)<br />
bus ground (GND)<br />
A-line<br />
B-line<br />
Notes:<br />
• To daisy-chain devices with the BW500, connect both wires to the existing A-line<br />
and B-line terminals.<br />
• RTS is used in some equipment to determine the direction of transmission. In<br />
normal applications only A-line, B-line, and shield, are used.<br />
EnviroRanger ERS 500 (Rack or Panel Mount)<br />
When using a <strong>SmartLinx</strong> card with the EnviroRanger (rack or panel mount) all wiring is<br />
made to the EnviroRanger terminal board. The <strong>PROFIBUS</strong> connections map to the<br />
EnviroRanger terminal board as shown:<br />
EnviroRanger Connection<br />
65 Gnd_bus<br />
66 RTS 1<br />
68 A<br />
69 B<br />
71 V_bus +5V<br />
67 bus cable shield<br />
bus cable shield<br />
RTS<br />
1. RTS is used in some equipment to determine the direction of transmission.<br />
In normal applications only A-line, B-line, and shield, are used.<br />
Page 8 <strong>SmartLinx</strong> <strong>PROFIBUS</strong> <strong>DP</strong> – INSTRUCTION MANUAL 7ML19981AQ03
Termination Switch 1<br />
+5V<br />
Line A<br />
Line B<br />
GND<br />
Termination Setting Switch Position<br />
open (not used) off<br />
390Ω<br />
220Ω<br />
390Ω<br />
<strong>PROFIBUS</strong> <strong>DP</strong> requires termination of the bus at both end points. See the <strong>PROFIBUS</strong> <strong>DP</strong><br />
specifications for details.<br />
1. The termination switch is not present on all cards.<br />
7ML19981AQ03 <strong>SmartLinx</strong> <strong>PROFIBUS</strong> <strong>DP</strong> – INSTRUCTION MANUAL Page 9<br />
on<br />
Installation
Operation<br />
Operation<br />
Communication on the <strong>PROFIBUS</strong> <strong>DP</strong> link is indicated by the <strong>SmartLinx</strong> LEDs.<br />
Error Status LEDs<br />
AiRanger / SITRANS LU Series, CraneRanger, InterRanger <strong>DP</strong>S 300<br />
EnviroRanger ERS 500, Milltronics BW500, Milltronics SF500,<br />
MultiRanger 100/ 200, HydroRanger 200<br />
Not used<br />
Diagnostics<br />
Off: Module is ok<br />
Red<br />
(blinking):<br />
Module is in an error<br />
state. See the error<br />
descriptions<br />
(page 11) and use the<br />
master to solve the<br />
problem.<br />
Green LED<br />
ON module is operational<br />
Amber LED<br />
ON data is being exchanged<br />
OFF data is not being exchanged<br />
Red LED<br />
ON no communication between bus and module / Bus error<br />
OFF normal operation<br />
<strong>Online</strong><br />
Green module is online<br />
Offline<br />
Page 10 <strong>SmartLinx</strong> <strong>PROFIBUS</strong> <strong>DP</strong> – INSTRUCTION MANUAL 7ML19981AQ03<br />
Red<br />
Module is offline and<br />
no communication is<br />
possible.
Error Conditions of the Red Diagnostics Light<br />
1Hz – Error in Configuration<br />
Indicates that the I/O length variable set during initialization is not equal to the length set<br />
during configuration of the network. See Configuring the Slave Device on page 13 for<br />
lengths supported by the <strong>SmartLinx</strong> module, and see your PLC documentation for setting<br />
the I/O length variable.<br />
2Hz – Error in User Parameter Data<br />
Indicates that the length and / or contents of the user parameter data set during<br />
initialization of the module is greater than the length and / or contents set during<br />
configuration of the network. See Configuring the Slave Device on page 13 for supported<br />
lengths.<br />
4Hz – Error in Initialization<br />
Consult your <strong>Siemens</strong> Milltronics representative.<br />
Operation LED<br />
EnviroRanger ERS 500, Milltronics BW500, Milltronics SF500,<br />
MultiRanger 100/200, HydroRanger (200 only)<br />
LED<br />
• blinks orange as the module is initialized<br />
• blinks green during normal operation<br />
7ML19981AQ03 <strong>SmartLinx</strong> <strong>PROFIBUS</strong> <strong>DP</strong> – INSTRUCTION MANUAL Page 11<br />
Operation
Communications Setup<br />
Communication Setup<br />
The <strong>SmartLinx</strong> <strong>PROFIBUS</strong> <strong>DP</strong> module is a slave on the bus, and does not use any<br />
<strong>Siemens</strong> Milltronics instrument parameters for configuration. Set the rotary switches on<br />
the module to the desired slave address: other settings are provided in the GSD file or are<br />
automatically detected.<br />
GSD Files<br />
<strong>PROFIBUS</strong> master devices require a configuration file for each slave device on the<br />
network. This file configures the master for the capabilities and limitations of the slave.<br />
For the <strong>SmartLinx</strong> <strong>PROFIBUS</strong> <strong>DP</strong> module these files are:<br />
• AiRanger / SITRANS LU Series hms_1002.gsd<br />
• BW500, SF500, hms1003.gsd<br />
HydroRanger 200,<br />
MultiRanger 100/200, and ERS 500<br />
Both files are supplied on the floppy disk that is shipped with the module.<br />
The file hms_1002.gsd uses the manufacturer’s I.D. number of 1002 hexadecimal<br />
(4,098 decimal). The file hms1003.gsd uses the manufacturer’s I.D. number<br />
1003 hexadecimal (4,099 decimal).<br />
Baud Rate<br />
The <strong>SmartLinx</strong> <strong>PROFIBUS</strong> module automatically configures itself to the correct baud rate<br />
for the <strong>PROFIBUS</strong> <strong>DP</strong> network. Follow the <strong>PROFIBUS</strong> guidelines with regards to bus<br />
length and baud rate.<br />
Bus Address<br />
Set the two rotary switches to the address for this slave.<br />
Use a slave address switch in the range 03 to 99.<br />
This example shows the value “06”.<br />
Page 12 <strong>SmartLinx</strong> <strong>PROFIBUS</strong> <strong>DP</strong> – INSTRUCTION MANUAL 7ML19981AQ03
Configuring the Slave Device<br />
Use the configuration software (or any equivalent master commands) to configure the<br />
slave. Refer to the information that came with the <strong>PROFIBUS</strong> master. The <strong>Siemens</strong><br />
Milltronics instrument appears as a modular type slave, and should be configured as<br />
shown below.<br />
After you import the GSD file, you can find the hardware in the hardware catalogue. If you<br />
are using Step 7, go to <strong>PROFIBUS</strong> <strong>DP</strong> > Additional Field Devices > General.<br />
• For AiRanger / SITRANS LU products, select AB-DT-P<strong>DP</strong>.<br />
• For all other products, select Anybus-S_P<strong>DP</strong>.<br />
Then define two universal modules: one input module and one output module.<br />
The data size of the input and output modules is dependent on P762, and on the type of<br />
unit the module is plugged into, (either Level or Mass Dynamics). (The following<br />
instructions assume that P762 is set to the default values shown in the chart on page 14.)<br />
Level Products (includes AiRanger / SITRANS LU Series, ERS 500,<br />
MultiRanger 100/200, HydroRanger 200)<br />
• 42 words input (see Write Block on page 23)<br />
• 13 words output (see Read Block on page 26)<br />
• read and write data as 16-bit words (see Data Types on page 40)<br />
Mass Dynamics Products (includes BW500, SF500)<br />
• 34 1 words input (see Write Block on page 30)<br />
• 19 words output (see Read Block on page 34)<br />
• read and write data as 16-bit words (see Data Types on page 40)<br />
If your <strong>PROFIBUS</strong> master is not capable of handling the block sizes listed above then use<br />
multiple smaller blocks. (See next page for examples.)<br />
1. 34 is the correct value for BW500/SF500 units that have firmware V 3.05 or<br />
greater and have all the values of P762 turned on. For older units, the input size<br />
is 31 words.<br />
7ML19981AQ03 <strong>SmartLinx</strong> <strong>PROFIBUS</strong> <strong>DP</strong> – INSTRUCTION MANUAL Page 13<br />
Communications Setup
Communications Setup<br />
Example:<br />
An S5-115U with an IM 308C master would use the following:<br />
For Level products:<br />
Inputs: 3 address blocks of 16, 16, and 10 words<br />
Outputs: 1 address block of 13 words<br />
For Mass Dynamics products:<br />
Inputs: 3 address blocks of 16 words, 16 words, and 2 words 1<br />
Outputs: 2 address blocks of 16 and 3 words<br />
Notes:<br />
• Data is read and written with the most significant byte (MSB) first.<br />
• The address and size of the Reads and Writes in the PLC must match the <strong>Siemens</strong><br />
Milltronics device (see above). If the PLC size is smaller than the <strong>Siemens</strong><br />
Milltronics size, an error will be displayed and only the first portion of the data will<br />
be read.<br />
• <strong>PROFIBUS</strong> <strong>DP</strong> diagnostic bytes are not supported, however, some diagnostic<br />
information can be accessed via reading and writing the data areas. See<br />
Application Layer on page 18.<br />
Map Element Selection<br />
P762 Map Element Selection parameter<br />
P762 allows you to select what elements to include in the Input and Output Tables. By<br />
selecting only the data required, you can reduce the amount of data being transferred<br />
over the bus.<br />
Notes:<br />
• P762 should only be modified by an advanced user who wants to limit the amount of<br />
data being transferred. See Appendix A – Reducing the amount of data being<br />
transferred over the Bus on page 46 for more details.<br />
• Changes do not take effect until after a power cycle.<br />
The chart on page 15 gives the default values for this parameter. If the default values are<br />
used then the configuration and Data Map (see page 24) in the main body of this manual<br />
remain correct. If any of these values is changed, then the Data Map will be shortened<br />
and the configuration will change. Please see Appendix A on page 46 for details on how<br />
to use P762.<br />
1. This applies to BW500/SF500 units that have firmware V 3.05 or greater and have<br />
all the values of P762 turned on--it does not apply to older units.<br />
Page 14 <strong>SmartLinx</strong> <strong>PROFIBUS</strong> <strong>DP</strong> – INSTRUCTION MANUAL 7ML19981AQ03
P762<br />
Index<br />
AiRanger / SITRANS LU,<br />
EnviroRanger, MultiRanger<br />
Name of area Default<br />
value<br />
1 Instrument status 1<br />
2 Reading 10<br />
3 Alarm 10<br />
4 Point on Priority 1<br />
5 MPA 1<br />
6 SPA 1<br />
7 Operating Mode 1<br />
Range<br />
0 = No<br />
1=Yes<br />
0= No<br />
1…10 =<br />
include that<br />
number of<br />
items<br />
0= No<br />
1…10 =<br />
include that<br />
number of<br />
items<br />
0 = No<br />
1=Yes<br />
0 = No<br />
1=Yes<br />
0 = No<br />
1=Yes<br />
0 = No<br />
1=Yes<br />
BW500, SF500<br />
Name of<br />
area<br />
Instrument<br />
status<br />
Default<br />
value<br />
Range<br />
7ML19981AQ03 <strong>SmartLinx</strong> <strong>PROFIBUS</strong> <strong>DP</strong> – INSTRUCTION MANUAL Page 15<br />
1<br />
Rate 1<br />
Load 1<br />
Speed 1<br />
Total 1<br />
Relay<br />
Status<br />
1<br />
DI Status 1<br />
8 SPA 1<br />
9<br />
Command<br />
Control<br />
10 MultiSpan 1<br />
11 PID 1<br />
12 Batch 1<br />
13<br />
Batch<br />
Prewarn<br />
14 Word Order 1<br />
15 Status 2 1 1<br />
1. For firmware V 3.05, the default is 0. For all higher versions, the default is 1.<br />
1<br />
1<br />
0 = No<br />
1=Yes<br />
0 = No<br />
1=Yes<br />
0 = No<br />
1=Yes<br />
0 = No<br />
1=Yes<br />
0 = No<br />
1=Yes<br />
0 = No<br />
1=Yes<br />
0 = No<br />
1=Yes<br />
0 = No<br />
1=Yes<br />
0 = No<br />
1=Yes<br />
0 = No<br />
1=Yes<br />
0 = No<br />
1=Yes<br />
0 = No<br />
1=Yes<br />
0 = No<br />
1=Yes<br />
0 = No<br />
1=Yes<br />
0 = No<br />
1=Yes<br />
16 Batch Total 1 1 0 = No<br />
1=Yes<br />
Communications Setup
Communications Setup<br />
Module Identification<br />
Parameters P794 and P795 are used together to identify the module type and protocol<br />
used.<br />
P794 <strong>SmartLinx</strong> Module Type<br />
Identifies the module used.<br />
Value Module<br />
0 No module present<br />
1 Anybus DT module<br />
2 Anybus S module<br />
P795 <strong>SmartLinx</strong> Protocol<br />
Identifies the protocol used: the value varies according to the module, and whether it is a<br />
type 1 or type 2.<br />
<strong>Siemens</strong> Milltronics<br />
Instrument<br />
ERS 500<br />
BW500 / SF500<br />
MultiRanger 100 / 200<br />
AiRanger / SITRANS LU<br />
Card P794 value P795 value<br />
AB RIO 1 72<br />
<strong>PROFIBUS</strong> <strong>DP</strong> 2 1<br />
DeviceNet 2 37<br />
AB RIO 1 72<br />
<strong>PROFIBUS</strong> <strong>DP</strong> 1 0<br />
DeviceNet 1 24<br />
Modbus RTU 1 57<br />
Modem Card 1 133<br />
Page 16 <strong>SmartLinx</strong> <strong>PROFIBUS</strong> <strong>DP</strong> – INSTRUCTION MANUAL 7ML19981AQ03
P634: Communication Totalizer Resolution<br />
Parameter P634 is used to set the number of fixed decimal places for Total 1 and Total 2<br />
for <strong>SmartLinx</strong> communication.<br />
Note: P634 applies only to Milltronics BW500 and Milltronics SF500.<br />
P634 Index Description Value # of decimal places<br />
Primary Index 1 Total 1 for <strong>SmartLinx</strong> communication<br />
Primary Index 2 Total 2 for <strong>SmartLinx</strong> communication<br />
1. Factory setting.<br />
3 * 1<br />
2 2<br />
1 1<br />
0 0<br />
3 * 3<br />
2 2<br />
1 1<br />
0 0<br />
7ML19981AQ03 <strong>SmartLinx</strong> <strong>PROFIBUS</strong> <strong>DP</strong> – INSTRUCTION MANUAL Page 17<br />
3<br />
Communications Setup
Applicaton Layer<br />
Application Layer<br />
This section describes the meaning of data read from and written to the <strong>Siemens</strong><br />
Milltronics <strong>SmartLinx</strong> instrument slave memory. The output words (PLC master Write<br />
operation) and input words (PLC master Read operation) are described in the Data Map<br />
for Level Products on page 23 and the Data Map for Mass Dynamic Products on page 30.<br />
Parameter Indexes<br />
Most parameters used on <strong>Siemens</strong> Milltronics <strong>SmartLinx</strong> instruments are indexed.<br />
Indexing allows a parameter to relate to more than one input or output. For example,<br />
many parameters are indexed by measurement point while others are indexed by relay<br />
output or discrete input.<br />
The way that indexes are handled in the memory map depends on the data access<br />
method used.<br />
Primary Index<br />
An index that relates to an input or output is called a Primary Index. (On some older<br />
<strong>Siemens</strong> Milltronics products the primary index is called a point.)<br />
Example:<br />
P111[3] = 52<br />
means P111 (Relay Control Function) for relay 3 is set to value 52.<br />
52<br />
Page 18 <strong>SmartLinx</strong> <strong>PROFIBUS</strong> <strong>DP</strong> – INSTRUCTION MANUAL 7ML19981AQ03
Secondary Index<br />
Sometimes a parameter requires a second index to allow for multiple values on an<br />
indexed input or output. For example a measurement point which calculates a reading on<br />
volume can require characterization breakpoints. These breakpoints are given on a<br />
secondary index (the primary index relates to the transducer input).<br />
An index that relates to a previously indexed parameter is called a secondary index. (On<br />
some older <strong>Siemens</strong> Milltronics products the secondary index is called a mark.)<br />
Example:<br />
P054[1,3] = 1.6m<br />
means P054 (Breakpoint Levels) for breakpoint 3 on transducer 1 is set to 1.6m<br />
[1]<br />
[2]<br />
[3]<br />
[4]<br />
Data Access Methods<br />
There are three different methods used in the memory mapping to give access to the<br />
<strong>SmartLinx</strong> Instrument parameter table. They are:<br />
• Direct Access<br />
• Multiple Parameter Access (MPA)<br />
• Single Parameter Access (SPA)<br />
Direct Access<br />
P054<br />
[1] [2] [3] [4] [5]<br />
1.6m<br />
Certain values are mapped directly into words. These words can be monitored<br />
continuously but they are not configurable.<br />
7ML19981AQ03 <strong>SmartLinx</strong> <strong>PROFIBUS</strong> <strong>DP</strong> – INSTRUCTION MANUAL Page 19<br />
Application Layer
Applicaton Layer<br />
Multiple Parameter Access (MPA)<br />
Note:<br />
• MPA is used on Level products only.<br />
• In <strong>Siemens</strong> Milltronics’ products, the memory is arranged as Parameter number,<br />
Primary Index, Secondary Index.<br />
This is a hand-shaking method where the user specifies the parameter number,<br />
secondary index, decimal place, and format, then the <strong>SmartLinx</strong> writes into a certain area<br />
all 10 primary indexes of that parameter.<br />
Using Multiple Parameter Access (MPA)<br />
1. In the output table of the PLC (Write Block) write the values for the parameter<br />
number, secondary Index, decimal place and format in the correct location.<br />
2. Monitor the Input table of the PLC (Read Block), and watch for the values you wrote<br />
to appear in the appropriate locations of the Read block, then go to Step 3.<br />
3. Read the requested values in the appropriate location of the Read Block. These<br />
values are continuously updated. Continue reading from these words until values<br />
for another parameter are required. At that time, go to step 1.<br />
Note: MPA values are only updated in Run mode (word 12 = 0).<br />
Parameter Indexing with MPA<br />
Primary Index<br />
The primary index is implicit in the memory address. MPA values are returned through<br />
words 21 to 30 of the Read block (see page 26).<br />
Secondary Index<br />
The secondary index is nearly always left at zero. See the manual for the <strong>Siemens</strong><br />
Milltronics <strong>SmartLinx</strong> instrument for information on parameters, including those which<br />
require a secondary index.<br />
Page 20 <strong>SmartLinx</strong> <strong>PROFIBUS</strong> <strong>DP</strong> – INSTRUCTION MANUAL 7ML19981AQ03
Single Parameter Access (SPA)<br />
Note: SPA is used on both Level and Mass Dynamics products.<br />
This is a hand-shaking method where the PLC specifies:<br />
• parameter number<br />
• primary index<br />
• secondary index<br />
• decimal place<br />
• format<br />
• read/write flag<br />
• value<br />
With this method any value in the <strong>Siemens</strong> Milltronics product can be read or written.<br />
Note: Parameter P999 (Master Reset) is not accessible via the <strong>SmartLinx</strong> interface on<br />
Level products.<br />
Using Single Parameter Access (SPA)<br />
SPA allows continuous monitoring or demand programming of a parameter.<br />
Reading a Parameter<br />
1. Set the Read/Write flag in the output table (Write Block) to 0, “Read”.<br />
2. Write the Parameter Number, Primary Index, Secondary Index, Decimal Place and<br />
Format in the correct locations.<br />
Note: If there is no secondary index, then place a 0 in this location.<br />
3. Monitor the Input table of the PLC (Read Block) and watch for the values you wrote<br />
to appear in the appropriate locations, then go to Step 4.<br />
4. Read the requested parameter value in the Input table (Read Block). These values<br />
are continuously updated. Continue reading from these words until values for other<br />
parameters are required. At that time, go back to step 1.<br />
7ML19981AQ03 <strong>SmartLinx</strong> <strong>PROFIBUS</strong> <strong>DP</strong> – INSTRUCTION MANUAL Page 21<br />
Application Layer
Applicaton Layer<br />
Writing a Parameter<br />
1. Set the Read/Write flag in the output table (Write Block) to 0, “Read”.<br />
2. Write the Parameter Number, Primary Index, Secondary Index, Decimal Place and<br />
Format in the correct locations.<br />
3. Write the new value of the parameter into the correct location of the output memory<br />
(Write Block)<br />
4. Verify the unit is in program mode (not needed for BW500). For Level see bit 10 of<br />
status word in Read Block.<br />
5. If the unit is not in program mode, write a 1 to the operating mode word in the output<br />
memory (Write Block). Please note that writing a 1 will only work if the word is<br />
currently a 0: if not, you need to change it to 0 before writing a 1 to it can take effect.<br />
6. Set the Read / Write flag in the output table (Write Block) to a 1 “write”.<br />
7. Monitor the Input table of the PLC (Read Block) and watch for the values you wrote<br />
to appear in the appropriate locations.<br />
8. Set Read / Write flag back to 0.<br />
9. Place unit in Run mode.<br />
Note: Parameters for Level Products should only be written to while the unit is in<br />
PROGRAM mode. If the level instrument is still in RUN mode, the written value might be<br />
ignored.<br />
Page 22 <strong>SmartLinx</strong> <strong>PROFIBUS</strong> <strong>DP</strong> – INSTRUCTION MANUAL 7ML19981AQ03
Data Map: Level Products<br />
Note: The data maps shown for the Write and Read Blocks apply if P762 is set to the<br />
default values (see page 14). If any of these values is changed, the data map will be<br />
shortened and the configuration will change. (See Appendix A – Reducing the amount<br />
of data being transferred over the Bus, on page 46.)<br />
This section describes the meaning of the data read from and written to the <strong>Siemens</strong><br />
Milltronics <strong>SmartLinx</strong> instrument.<br />
Write Block<br />
Word Description Access Data Type<br />
0 measurement point on priority direct bitmapped<br />
1 parameter number<br />
integer<br />
2<br />
3<br />
secondary index (mark)<br />
decimal place<br />
MPA<br />
integer<br />
integer<br />
4 format 0/1<br />
5 parameter number<br />
integer<br />
6 primary index (point) integer<br />
7 secondary index (mark) integer<br />
8 new value SPA integer<br />
9 decimal place integer<br />
10 format 0/1<br />
11 read/write flag 0/1<br />
12 operating mode direct 0/1<br />
Word 0: Point-on-Priority<br />
Bits 00-09 set the priority status of corresponding indexed points 1 to 10.<br />
bit 09 08 07 06 05 04 03 02 01 00<br />
index 10 9 8 7 6 5 4 3 2 1<br />
bit status 0 = normal<br />
1 = priority<br />
For example, if bits 00 and 02 are set to 1, then points 3 and 1 are on priority scan. All<br />
other bits are reserved and contain 0.<br />
bit 09 08 07 06 05 04 03 02 01 00<br />
index 0 0 0 0 0 0 0 1 0 1<br />
7ML19981AQ03 <strong>SmartLinx</strong> <strong>PROFIBUS</strong> <strong>DP</strong> – INSTRUCTION MANUAL Page 23<br />
Application Layer
Applicaton Layer<br />
In order to use word 00 to control point-on-priority, you must configure the <strong>Siemens</strong><br />
Milltronics <strong>SmartLinx</strong> instrument to permit this. For each point, set parameter P720 to 1, to<br />
permit priority control for that point.<br />
Note: Point on Priority only applies to the AiRanger XPL+ / SITRANS LU 10.<br />
Word 1: Parameter Number, MPA<br />
Specifies the parameter number for the returned values in words 21 to 30. (See Read<br />
Block on page 26.)<br />
Word 2: Secondary Index, MPA<br />
Specifies the secondary index for the parameter specified by word 1. This word is ignored<br />
for parameters that don’t use multiple indexes. (See Parameter Indexes on page 18 for<br />
more information.)<br />
Word 3: Decimal Place, MPA<br />
Specifies the number of decimal places to shift the returned values in words 21 to 30 of<br />
the Read Block. Positive values indicate that the decimal place shifts to the left, and<br />
negative values indicate that the decimal place shifts to the right.<br />
For example:<br />
word 3 = 1: all returned values have the decimal place shifted 1 space to the left<br />
and a returned value of 5,213 is interpreted as 521.3<br />
word 3 = –1: a returned value of 5,213 is interpreted as 52,130<br />
Word 4: Format, MPA<br />
Sets the format for the returned values in words 21 to 30.<br />
0 = normal<br />
1 = percent<br />
Note: When the format is selected as “percent” the decimal place value (word 3 of the<br />
Write block) is ignored and two decimal places are always used. For example, a value<br />
of 5947 represents 59.47%.<br />
Word 5: Parameter, SPA<br />
Specifies the parameter number for Single Parameter Access (SPA): see page 21.<br />
Page 24 <strong>SmartLinx</strong> <strong>PROFIBUS</strong> <strong>DP</strong> – INSTRUCTION MANUAL 7ML19981AQ03
Word 6: Primary Index, SPA<br />
Specifies the primary index number for the parameter in word 5.<br />
Word 7: Secondary Index, SPA<br />
Specifies the secondary index for the parameter in word 5. This word is ignored for<br />
parameters that don’t use multiple indexes. (See Parameter Indexes on page 18 for more<br />
information.)<br />
Word 8: New Value, SPA<br />
This word contains the value written to the specified parameter and index. The format of<br />
this word is specified by words 9 to 10.<br />
To write a value, ensure word 11 = 1 and word 12 =1. (See also: Data Types on page 40.)<br />
Word 9: Decimal Place, SPA<br />
This word specifies the number of decimal places for the value in word 8 of the Write<br />
Block, and word 38 of the Read Block. Positive values indicate that the decimal place<br />
shifts to the left, and negative values indicate that the decimal place shifts to the right.<br />
For example:<br />
word 9 = 1: all returned values have the decimal place shifted 1 space to the left<br />
and a returned value of 5,213 is interpreted as 521.3<br />
word 9 = –1: a returned value of 5,213 is interpreted as 52,130<br />
Word 10: Format, SPA<br />
This word sets the format for the value in word 8 of the Write Block and word 38 of the<br />
Read Block.<br />
0 = normal<br />
1 = percent<br />
Word 11: Read/Write Flag, SPA<br />
This word instructs the read/write application of word 8.<br />
0 = read parameter as described by words 5, 6, 7, 9 and 10; word 8 ignored<br />
1 = set parameter to the value described by words 5 to 10<br />
7ML19981AQ03 <strong>SmartLinx</strong> <strong>PROFIBUS</strong> <strong>DP</strong> – INSTRUCTION MANUAL Page 25<br />
Application Layer
Applicaton Layer<br />
Word 12: Operating Mode<br />
This word sets the operating mode of the <strong>Siemens</strong> Milltronics <strong>SmartLinx</strong> instrument.<br />
The operating mode can get out of sync if the remote instrument resets back to run mode<br />
locally. This can happen due to a time-out or through local programming. The mode is<br />
always reported correctly through the Read block. (See bit 10 of Word 0: Instrument<br />
Status on page 27.)<br />
To reset the instrument to program mode, write 0 to synchronize the <strong>SmartLinx</strong> module<br />
with the instrument and then write 1 to set the instrument to program mode.<br />
0 = run mode<br />
1 = program mode<br />
Read Block<br />
Values in words 0 to 20, and word 41, are directly available: no write operation is required<br />
to request them.<br />
Values in words 21 to 41 are determined by the write operation that requested them,<br />
either MPA or SPA. (See Write Block on page 23.)<br />
Words Description Access Data Type<br />
0 instrument status<br />
bitmapped<br />
1-10 point reading direct integer<br />
11-20 point alarm and status bitmapped<br />
21-30 returned values<br />
integer<br />
31 decimal place integer<br />
32 format MPA 0/1<br />
33 parameter number integer<br />
34 secondary index integer<br />
35 parameter<br />
integer<br />
36 primary index integer<br />
37 secondary index integer<br />
38 returned value SPA integer<br />
39 decimal place integer<br />
40 format 0/1<br />
41 read/write flag 0/1<br />
Page 26 <strong>SmartLinx</strong> <strong>PROFIBUS</strong> <strong>DP</strong> – INSTRUCTION MANUAL 7ML19981AQ03
Word 0: Instrument Status<br />
Bit Description<br />
00 to 09<br />
10<br />
11 to 15<br />
Words 1 to 10: Point Reading<br />
These words contain the value of parameter P920 (Reading) for points 1 to 10,<br />
respectively. The reading is expressed as a percent of full scale, multiplied by 100, giving<br />
a range of –20,000 to 20,000 which corresponds to –200.00% to 200.00%. Refer to the<br />
<strong>Siemens</strong> Milltronics <strong>SmartLinx</strong> instrument documentation for a definition of “P920”.<br />
Words 11 to 20: Point Alarm and Status<br />
These words contain the corresponding alarm and status bits for indexed measurement<br />
points 1 to 10, respectively.<br />
Bit status:<br />
0 = false<br />
1 = true<br />
Measurement Point Status<br />
Indicates the operation of measurement points 1 to 10.<br />
bit 09 08 07 06 05 04 03 02 01 00<br />
index<br />
10 9 8 7 6 5 4 3 2 1<br />
0 = operational<br />
1 = non-operational<br />
’Non-operational’ means that either the point is not configured or there is an error in<br />
the reading. Further information is available in the Point Alarm and Status words<br />
(Words 11 to 20).<br />
Operating Mode<br />
0 = <strong>Siemens</strong> Milltronics <strong>SmartLinx</strong> instrument in RUN mode<br />
1 = <strong>Siemens</strong> Milltronics <strong>SmartLinx</strong> instrument in PROGRAM mode<br />
Reserved.<br />
(These bits are reserved and set to 0.)<br />
Note: These values may contain numeric level data for inoperative or malfunctioning<br />
points: refer to read word 0, and read words 11 to 20, for the actual operational status of<br />
the measurement points.<br />
Bit description<br />
00 point not configured<br />
01 point failsafe timer expired<br />
02 point failed (cable shorted, open, or transceiver problem)<br />
03 point temperature sensor failed<br />
04 to 12 reserved for future use<br />
13 level emptying<br />
14 level filling<br />
15 scan mode priority<br />
7ML19981AQ03 <strong>SmartLinx</strong> <strong>PROFIBUS</strong> <strong>DP</strong> – INSTRUCTION MANUAL Page 27<br />
Application Layer
Applicaton Layer<br />
If the product is an AiRanger / SITRANS LU Version 5.19 or above, only:<br />
Bit Description<br />
04 Low-Low Alarm (1 = ON)<br />
05 Low Alarm (1=ON)<br />
06 High Alarm (1 = ON)<br />
07 High-High Alarm (1 = ON)<br />
These words contain values requested by writing to words 1 to 4 of the Write Block. The<br />
type of data and format are specified with that request, and returned in Read words 31 to<br />
34.<br />
Words 31 and 32; 33 and 34: Decimal Place, Format, Parameter Number and Secondary<br />
Index, MPA<br />
These words contain the last values written to Write block words 1 and 4. These words<br />
indicate what information is contained in Read block words 21 to 30. These words are<br />
provided since there can be a delay between writing a request via a Write, and the<br />
appearance of the requested values.<br />
Use these words as an indicator that the requested information is updated.<br />
Words 35 to 37 and 39 to 41: Parameter Number / Primary Index / Secondary<br />
Index and Decimal Place / Format / Read Write Flag, SPA<br />
These words contain the last values written to words 5 to 7 and 9 to 11 of the Write block.<br />
They confirm that the parameter value has been written. These words are not updated<br />
until the value has been successfully transferred and stored in the <strong>Siemens</strong> Milltronics<br />
<strong>SmartLinx</strong> instrument.<br />
See Write formats on page 24 for details.<br />
Page 28 <strong>SmartLinx</strong> <strong>PROFIBUS</strong> <strong>DP</strong> – INSTRUCTION MANUAL 7ML19981AQ03
Word 38: Returned Value, SPA<br />
This word contains the current value of the parameter identified by words 35 to 37 and 39<br />
to 40, regardless of the value of word 11 (Write flag).<br />
If this value does not change when a new value is written to word 8 (Parameter Value)<br />
then check the following:<br />
1. Words 5 to 7 and 9 to 10 of the Write block should match words 35 to 37 and 39 to 40<br />
of the Read block: if not, then the instrument hasn’t responded yet.<br />
2. If words 5 to 7 and 9 to 10 of the Write block do match words 35 to 37 and 39 to 40, of<br />
the Read block, then the parameter value has not been updated. Check that the<br />
<strong>Siemens</strong> Milltronics <strong>SmartLinx</strong> instrument is in PROGRAM mode and that the<br />
program lock (P000) is not on, then try again.<br />
7ML19981AQ03 <strong>SmartLinx</strong> <strong>PROFIBUS</strong> <strong>DP</strong> – INSTRUCTION MANUAL Page 29<br />
Application Layer
Applicaton Layer<br />
Data Map: Mass Dynamic Products<br />
Note: The data maps shown for the Write and Read Blocks apply if P762 is set to the<br />
default values (see page 14). If any of these values is changed, the data map will be<br />
shortened and the configuration will change. (See Appendix A – Reducing the amount<br />
of data being transferred over the Bus, on page 46.)<br />
This section describes the meaning of the data read from and written to the <strong>Siemens</strong><br />
Milltronics <strong>SmartLinx</strong> instrument.<br />
Write Block<br />
Word 0: Parameter, SPA<br />
Description Start End Size Data Type<br />
parameter number, SPA 0 0 1 integer<br />
primary index, SPA 1 1 1 integer<br />
secondary index, SPA 2 2 1 integer<br />
new value, SPA 3 4 2 UINT32<br />
decimal place, SPA 5 5 1 integer<br />
format, SPA 6 6 1 integer<br />
read/write flag, SPA 7 7 1 integer<br />
command control 8 8 1 bitmapped<br />
multispan selection 9 9 1 1-4<br />
PID 1 setpoint value 10 11 2 UINT32<br />
PID 2 setpoint value 12 13 2 UINT32<br />
batch setpoint value 14 15 2 UINT32<br />
batch prewarn setpoint value 16 17 2 UINT32<br />
word order 18 18 1 0/1<br />
Notes:<br />
• All the 32 bit numbers (except for the SPA numbers) have a fixed decimal place of 3<br />
digits. For example PID 1 setpoint value of 3,245 is a value of 3.245 in the BW500.<br />
• To make a change to any parameter in the BW500 using <strong>SmartLinx</strong>, P799<br />
Communications Control must be set to 1.<br />
Specifies the parameter number for Single Parameter Access (SPA): see page 21.<br />
Word 1: Primary Index, SPA<br />
Specifies the primary index number for the parameter specified by word 0.<br />
Word 2: Secondary Index, SPA<br />
Specifies the secondary index for the parameter specified by word 0. This word is ignored<br />
for parameters that don’t use multiple indexes.<br />
Page 30 <strong>SmartLinx</strong> <strong>PROFIBUS</strong> <strong>DP</strong> – INSTRUCTION MANUAL 7ML19981AQ03
Words 3 and 4: New Value, SPA<br />
The new value of the specified parameter and index.<br />
Word 5: Decimal Place, SPA<br />
This word specifies the number of decimal places for the value in words 3 and 4. Positive<br />
values indicate that the decimal place shifts to the left, and negative values indicate that<br />
the decimal place shifts to the right.<br />
For example:<br />
word 5 = 1: all returned values have the decimal place shifted 1 space to the left<br />
and a returned value of 5,213 is interpreted as 521.3<br />
word 5 = –1: a returned value of 5,213 is interpreted as 52,130<br />
Word 6: Format, SPA<br />
This word is always set to 0.<br />
Word 7: Read / Write Flag, SPA<br />
This word determines whether the instrument will allow parameter values to be written.<br />
0 = Read<br />
1 = Write<br />
7ML19981AQ03 <strong>SmartLinx</strong> <strong>PROFIBUS</strong> <strong>DP</strong> – INSTRUCTION MANUAL Page 31<br />
Application Layer
Applicaton Layer<br />
Word 8: Command Control, Operational Commands<br />
The command control word is used to control the unit. Each bit gives access to a<br />
command or state as if the operator was using the keypad.<br />
Bits initiating a command (7 to 12) must change state in order to cause the command to<br />
begin. For example, to reset totalizer 1, Bit 9 must be set to 0, then changed to 1. It can<br />
stay set or clear for any period.<br />
Bit # Description Bit Clear (0) Bit Set (1)<br />
00 PID 1 mode manual auto<br />
01 PID 1 freeze no yes<br />
02 PID 1 setpoint source local remote<br />
03 PID 2 mode manual auto<br />
04 PID 2 freeze no yes<br />
05 PID 2 setpoint source local remote<br />
06 zero no change start<br />
07 span no change start<br />
08 reset totalizer 1 no change reset<br />
09 reset totalizer 2 no change reset<br />
10 reset batch totalizer no change reset<br />
11 print print<br />
12 reserved<br />
13 reserved<br />
14 reserved<br />
15 reserved<br />
Bit 00 and 03: PID Mode<br />
Sets the mode of PID control to either manual (output determined by P410 – PID Manual)<br />
or auto (output determined by PID control in instrument).<br />
Bit 02 and 05 Setpoint Source<br />
Controls the location of the setpoint. If it is set as “local”, then the setpoint used is internal<br />
to the BW500. If the setpoint source is set to “remote”, then the setpoint is controlled by a<br />
mA input.<br />
For setpoint control through communications this must be set to “local.”<br />
Bit 01 and 04: Freeze<br />
Suspends PID function when PID Mode = 1 (auto) and holds the output at the last value.<br />
PID functionality resumes when the freeze bit is cleared.<br />
Page 32 <strong>SmartLinx</strong> <strong>PROFIBUS</strong> <strong>DP</strong> – INSTRUCTION MANUAL 7ML19981AQ03
Bit 06: Zero<br />
Sets the zero point for calibration of the belt scale.<br />
This is a momentary setting that must be reset to 0 once the input is accepted. To check<br />
that the input was accepted read word 0, bit 7 (zero status) and ensure it shows 1. Once it<br />
shows a 1 then reset this bit to 0<br />
Bit 07: Span<br />
Sets the span for calibration of the belt scale.<br />
This is a momentary setting that must be reset to 0 once the input is accepted. To check<br />
that the input has been accepted, read word 0, bit 8 (Span Status) and ensure it shows a<br />
1. Once it shows 1 then reset this bit to 0.<br />
Bit 08: Reset Totalizer 1<br />
Causes the internal totalizer 1 to be reset to 0.<br />
This is a momentary setting that must be reset to 0 once the input is accepted. To reset<br />
this back to 0, the use of a timer is recommended.<br />
Bit 09: Reset Totalizer 2<br />
Causes the internal totalizer 2 to be reset to 0.<br />
This is a momentary setting that must be reset to 0 once the input is accepted. To reset<br />
this back to 0, the use of a timer is recommended.<br />
Bit 10: Reset Batch Totalizer<br />
Causes the batch totalizer to be reset to 0.<br />
This is a momentary setting that must be reset to 0 once the input is accepted. To reset<br />
this back to 0, the use of a timer is recommended.<br />
Bit 11: Print<br />
Starts print operation. One of the communications ports on the BW500 must be<br />
configured for a printer.<br />
This is a momentary setting that must be reset to 0 once the input is accepted. To reset<br />
this back to 0, the use of a timer is recommended.<br />
7ML19981AQ03 <strong>SmartLinx</strong> <strong>PROFIBUS</strong> <strong>DP</strong> – INSTRUCTION MANUAL Page 33<br />
Application Layer
Applicaton Layer<br />
Word 9: Multispan Selection<br />
Sets the current span (1 to 4). Any parameters that relate to span will use this value to<br />
determine which span is referenced. See the manual for the BW500 for more information<br />
on multispan.<br />
Words 10 to 13: PID Setpoints<br />
Contain the current setpoint values as P415 in the Milltronics BW500.<br />
To write these setpoints bits 02 and 05 in word 8 - Control must be set to “local.”<br />
Words 14 and 15: Batch Setpoint<br />
Contain the current setpoint value as P564 in the Milltronics BW500.<br />
Words 16 and 17: Batch Prewarn Setpoint<br />
Contain the current setpoint value as P567 in the Milltronics BW500.<br />
Word 18: Word Order<br />
This word controls which word comes first in the UINT32 integers. For a value 0, the most<br />
significant word is given first. For a value 1, the least significant word is given first.<br />
0 = MSW first<br />
1 = LSW first<br />
Read Block<br />
Values returned in the words in the Read are in response to the Write to the <strong>Siemens</strong><br />
Milltronics <strong>SmartLinx</strong> instrument.<br />
Words 0 through 20 have values with fixed meanings and formats. This means that you do<br />
not have to start communications with a Write in order to use Read, the data is always<br />
there.<br />
Words 22 through 29 are values returned in response to writing words 0 through 7 for<br />
Single Parameter Access (SPA): (see “Write Block” on page 30).<br />
Description Start End Size Type<br />
instrument status 1 0 0 1 bitmapped<br />
rate 1 2 2 UINT32<br />
load 3 4 2 UINT32<br />
speed 5 6 2 UINT32<br />
total 1 7 8 2 UINT32<br />
total 2 9 10 2 UINT32<br />
relay status 11 11 1 bitmapped<br />
discrete input status 12 12 1 bitmapped<br />
multispan selection 13 13 1 integer<br />
PID 1 setpoint value 14 15 2 UINT32<br />
PID 2 setpoint value 16 17 2 UINT32<br />
batch setpoint value 18 19 2 UINT32<br />
Page 34 <strong>SmartLinx</strong> <strong>PROFIBUS</strong> <strong>DP</strong> – INSTRUCTION MANUAL 7ML19981AQ03
Description Start End Size Type<br />
batch prewarn setpoint value 20 21 2 UINT32<br />
parameter, SPA 22 22 1 integer<br />
primary index, SPA 23 23 1 integer<br />
secondary index, SPA 24 24 1 integer<br />
new value, SPA 25 26 2 UINT32<br />
decimal place, SPA 27 27 1 integer<br />
format, SPA 28 28 1 integer<br />
read / write flag, SPA 29 29 1 1/0<br />
word order 30 30 1 1/0<br />
Instrument Status 2 1<br />
31 31 1 bitmapped<br />
Batch Total 1 32 33 2 UINT32<br />
1. This is only available in firmware V 3.05 or higher. In V 3.05, these locations are<br />
"turned off" in P762. In higher firmware, they are defaulted on.<br />
7ML19981AQ03 <strong>SmartLinx</strong> <strong>PROFIBUS</strong> <strong>DP</strong> – INSTRUCTION MANUAL Page 35<br />
Application Layer
Applicaton Layer<br />
Word 0: Instrument Status 1<br />
This word is used to feed back the current operating state of the product. Each bit gives<br />
the state of different parts of the product, some mutually exclusive, others are not. The<br />
state should be checked to verify operation.<br />
Bit # Description Bit Clear (0) Bit Set (1)<br />
0 PID 1 mode manual auto<br />
1 PID 1 freeze no yes<br />
2 PID 1 setpoint source local remote<br />
3 PID 2 mode manual auto<br />
4 PID 2 freeze no yes<br />
5 PID 2 setpoint source local remote<br />
6 zero no in progress<br />
7 span no in progress<br />
8 reset totalizer 1 no change reset<br />
9 reset totalizer 2 no change reset<br />
10 reset batch totalizer no change reset<br />
11 printing not printing printing<br />
12 write privileges no yes<br />
13 system configured not configured run mode<br />
14 mode calibration mode run mode<br />
15 totalizing not totalizing totalizing<br />
Bits 0 to 5: PID Status<br />
These bits give the status of the product. For example Bit 0 is the mode of the PID 1<br />
controller (if used). It indicates whether the PID is in manual or auto modes.<br />
Bit 6: Zero Status<br />
Indicates whether the unit is currently performing a Zero calibration.<br />
Bit 7: Span Status<br />
Indicates whether the unit is currently performing a Span calibration.<br />
Bits 8 to 11: Totalizer Status<br />
Indicate “1” if the reset totalizer or print operations are taking place (these are<br />
momentary and will only stay set for a very short period).<br />
Bit 12: Write Privileges<br />
Indicates whether the PLC can write parameters/commands to the product. This is<br />
controlled by parameter P799.<br />
P799 = 1 PLC may change the <strong>Siemens</strong> Milltronics <strong>SmartLinx</strong> instrument’s<br />
parameters<br />
P799 = 0 PLC can only read<br />
Page 36 <strong>SmartLinx</strong> <strong>PROFIBUS</strong> <strong>DP</strong> – INSTRUCTION MANUAL 7ML19981AQ03
Bit 13: Configuration Status<br />
Indicates whether the unit is configured (all required parameters have been entered).<br />
Bit 14: Program Mode<br />
Indicates program (calibration) mode:<br />
0 = PROGRAM mode<br />
1 = RUN mode<br />
Bit 15: Totalizing Status<br />
Indicates whether the unit is totalizing.<br />
Words 1, 2: Rate<br />
Contains the current rate reading in engineering units. (See the Milltronics BW500<br />
manual for a full description of this reading.)<br />
Words 3, 4: Load<br />
Contains the current load reading in engineering units. (See the Milltronics BW500<br />
manual for a full description of this reading.)<br />
Words 5, 6: Speed<br />
Contains the current speed reading in engineering units. (See the Milltronics BW500<br />
manual for a full description of this reading.)<br />
Words 7, 8: Total 1 1<br />
Contains the current value for totalizer 1 in engineering units. (See the Milltronics BW500<br />
manual for a full description of this reading.)<br />
Words 9, 10: Total 2 1<br />
Contains the current value for totalizer 2 in engineering units. (See the Milltronics BW500<br />
manual for a full description of this reading.)<br />
Word 11: Relay Status<br />
Shows the current logical status of all relays.<br />
bit 04 03 02 01 00<br />
relay 05 04 03 02 01<br />
0 = relay not asserted<br />
1 = relay asserted<br />
“Asserted” indicates that the function controlling the relay is in an active state. Relay<br />
contacts can open or close based on this state: see your instrument manual for details.<br />
1. The number of fixed decimal places for this value is controlled by P634 primary<br />
indexes 1 and 2. The default setting is 3. (See page 17 for details.)<br />
7ML19981AQ03 <strong>SmartLinx</strong> <strong>PROFIBUS</strong> <strong>DP</strong> – INSTRUCTION MANUAL Page 37<br />
Application Layer
Applicaton Layer<br />
Word 12: Discrete Input Status<br />
Shows the current logical status of all discrete inputs.<br />
bit 04 03 02 01 00<br />
input 05 04 03 02 01<br />
0 = discrete input open<br />
1 = discrete input closed<br />
Word 13: Multispan Selection<br />
Shows the currently selected span (1 to 4).<br />
Words 14, 15: PID 1 Setpoint Value<br />
Contains the current setpoint value for PID 1 in engineering units. (See the Milltronics<br />
BW500 manual for a full description of this reading.)<br />
Words 16, 17: PID 2 Setpoint Value<br />
Contains the current setpoint value for PID 2 in engineering units. (See the Milltronics<br />
BW500 manual for a full description of this reading.)<br />
Words 18, 19: Batch Setpoint Value<br />
Contains the value of P564 – Batch Setpoint. (See the Milltronics BW500 manual for a full<br />
description of this parameter.)<br />
Words 20, 21: Batch Prewarn Setpoint Value<br />
Contains the value of P567: Batch Prewarn Setpoint. (See the Milltronics BW500 manual<br />
for a full description of this parameter.)<br />
Words 22 to 24: Parameter Number / Primary Index / Secondary Index, SPA;<br />
words 27 to 29: Decimal Place, Format, Read/Write flag<br />
These words contain the last values written to words 0 to 2 and words 5 to 7 of the Write<br />
area. They confirm that the parameter value has been written. These words are not<br />
updated until the value has been successfully transferred and stored in the <strong>Siemens</strong><br />
Milltronics <strong>SmartLinx</strong> instrument.<br />
Use these words as an indicator that the requested information has been updated.<br />
Words 25, 26: Value, SPA<br />
The returned value of the specified parameter and index.<br />
Page 38 <strong>SmartLinx</strong> <strong>PROFIBUS</strong> <strong>DP</strong> – INSTRUCTION MANUAL 7ML19981AQ03
Word 30: Word Order<br />
The placement of the most significant word (MSW).<br />
0 = MSW first<br />
1 = MSW second<br />
Word 31 Instrument Status 2<br />
This word is used to feed back the current operating state of the product. Each bit gives<br />
the state of different parts of the product, some mutually exclusive, others are not. The<br />
state should be checked to verify operation.<br />
Bit # Description Bit Clear (0) Bit Set (1)<br />
0 Totalizer 1 overflow no overflow overflow condition<br />
1 Totalizer 2 overflow no overflow overflow condition<br />
Bits 0 Totalizer 1 overflow<br />
If Totalizer 1 has overflowed, (that is, has exceeded the spaces available in <strong>SmartLinx</strong>),<br />
this bit is set. The overflow condition can be changed by reducing Communication<br />
Totalizer resolution (P634).<br />
Bit 1 Totalizer 2 overflow<br />
If Totalizer 2 has overflowed, (that is, has exceeded the spaces available in <strong>SmartLinx</strong>),<br />
this bit is set. The overflow condition can be changed by reducing Communication<br />
Totalizer resolution (P634).<br />
Word 32 Batch Totalizer<br />
Contains the current value for the Batch Totalizer in engineering units. (See the<br />
Milltronics BW500 manual for a full description of this reading).<br />
7ML19981AQ03 <strong>SmartLinx</strong> <strong>PROFIBUS</strong> <strong>DP</strong> – INSTRUCTION MANUAL Page 39<br />
Application Layer
Applicaton Layer<br />
Data Types<br />
The <strong>Siemens</strong> Milltronics <strong>SmartLinx</strong> instrument parameters take on many values in<br />
various formats, as discussed in the <strong>Siemens</strong> Milltronics <strong>SmartLinx</strong> instrument manual.<br />
For the convenience of the programmer, those values are converted to and from 16-bit<br />
integer numbers, since those are easily handled by most PLCs.<br />
Integer<br />
Level Products<br />
Integer parameter values are by far the most common. For example, parameter P920<br />
(Reading) returns a number representing the current reading (either level or volume,<br />
depending on the <strong>Siemens</strong> Milltronics <strong>SmartLinx</strong> instrument configuration).<br />
You can request numeric values in units or percent of span, and you can specify the<br />
number of decimal places.<br />
Numeric values must be in the range –20,000 to +20,000 to be valid. If a parameter is<br />
requested and its value is more than +20,000, the number 32,767 is returned; if it is less<br />
than –20,000, the number –32,768 is returned. If this happens, increase the number of<br />
decimal places for that parameter.<br />
If a parameter cannot be expressed in terms of percent (e.g. span), or has no meaningful<br />
value, the special number 22,222 is returned. Try requesting the parameter in units, or<br />
refer to the <strong>Siemens</strong> Milltronics <strong>SmartLinx</strong> instrument manual to understand the format<br />
and use of the requested parameter.<br />
Mass Dynamics Products<br />
Integers used on the Mass Dynamics products can have any valid value. So, the entire<br />
range from –32,768 to 32,767 or 0 to 65,535 is available and no values are used as error<br />
conditions.<br />
Bit Values<br />
Bits are packed into registers in groups of 16 bits (1 word). In this manual bits are<br />
numbered from 00 to 15, with bit 00 referring to the least significant bit and bit 15 referring<br />
to the most significant bit.<br />
15 14 13 12 11 10 09 08 07 06 05 04 03 02 01 00<br />
MSB LSB<br />
Page 40 <strong>SmartLinx</strong> <strong>PROFIBUS</strong> <strong>DP</strong> – INSTRUCTION MANUAL 7ML19981AQ03
Unsigned Double Precision Integer (UINT32)<br />
Note: Used for Mass Dynamics products only.<br />
Large numbers are put into unsigned 32-bit integers. By default they are set up so that the<br />
first word (register) is the most significant word (MSW) and the second word (register) is<br />
the least significant word (LSW) depending on the setting of the word order bit.<br />
For example, when reading words 7 and 8 on the Mass Dynamics block (Total 1), the 32<br />
bits would look as follows:<br />
The whole is read as a 32-bit integer.<br />
Split Values<br />
Certain parameters are actually a pair of numbers separated by a colon, in the format<br />
xx:yy.<br />
One example is P807, Transducer Noise, where:<br />
xx = the average noise value in dB.<br />
yy = the peak noise in dB.<br />
The number which corresponds to xx:yy, either for reading or setting a parameter, is<br />
determined by the following formula:<br />
For storing to the <strong>Siemens</strong> Milltronics device:<br />
value = (xx + 128) x 256 + (yy + 128)<br />
For reading from the <strong>Siemens</strong> Milltronics device:<br />
xx = (value / 256) – 128<br />
yy = (value % 256) – 128<br />
Where:<br />
% is the modulus operator.<br />
The modulus can be computed by following these steps:<br />
value 1 = value / 256<br />
value 2 = remainder of value 1<br />
value 3 = value 2 x 256<br />
yy = value 3 - 128<br />
word 7 word 8<br />
15 MSW 0 15 LSW 0<br />
31 32-bit integer value (UINT32) 0<br />
Note: Used for Level products only<br />
7ML19981AQ03 <strong>SmartLinx</strong> <strong>PROFIBUS</strong> <strong>DP</strong> – INSTRUCTION MANUAL Page 41<br />
Application Layer
Applicaton Layer<br />
It may simplify programming to notice:<br />
xx = (most significant byte of value) – 128<br />
yy = (least significant byte of value) – 128<br />
Text Messages<br />
Note: Used for Level products only<br />
If a <strong>Siemens</strong> Milltronics device parameter returns a text message, that message is<br />
converted to an integer and provided in the register. The numbers are shown in the table<br />
below:<br />
Number Text Message as displayed on LCD<br />
22222 invalid value<br />
30000 off<br />
30001 on<br />
30002 ≡ ≡ ≡ ≡<br />
30003 (parameter does not exist)<br />
30004 err<br />
30005 err1<br />
30006 open<br />
30007 shrt<br />
30008 pass<br />
30009 fail<br />
30010 hold<br />
30011 lo<br />
30012 hi<br />
30013 de<br />
30014 en<br />
30015 - - - - (parameter has not been set)<br />
–32768 value is less than –20,000<br />
32767 value is greater than 20,000<br />
Page 42 <strong>SmartLinx</strong> <strong>PROFIBUS</strong> <strong>DP</strong> – INSTRUCTION MANUAL 7ML19981AQ03
Relay Function Codes (P111 in Level Products Only)<br />
If a <strong>Siemens</strong> Milltronics instrument parameter returns a relay function code, that<br />
message is converted to a number and provided in the register. The numbers are shown<br />
in the table below.<br />
(See the <strong>Siemens</strong> Milltronics <strong>SmartLinx</strong> instrument manual for full information on P111).<br />
Relay Function Code Number P111<br />
off, relay not used 0 0<br />
undesignated level alarm 1 1<br />
low-low level alarm 2 1 – LL<br />
low level alarm 3 1 – L<br />
high level alarm 4 1 – H<br />
high-high level alarm 5 1 – HH<br />
in bounds alarm 6 2<br />
in bounds alarm 7 2 – B1<br />
in bounds alarm 8 2 – B2<br />
out of bounds alarm 9 3<br />
out of bounds alarm 10 3 – B1<br />
out of bounds alarm 11 3 – B2<br />
rate of level change alarm 12 4<br />
rate of level change alarm 13 4 – R1<br />
rate of level change alarm 14 4 – R2<br />
temperature alarm 15 5<br />
loss of echo (LOE) alarm 20 6<br />
transducer cable fault alarm 16 7<br />
pump efficiency alarm 17 8<br />
clock failure alarm 18 9<br />
time of day alarm 19 10<br />
pump failure alarm 21 11<br />
totalizer 22 40<br />
flow sampler 23 41<br />
fixed duty assist 25 50<br />
fixed duty backup 26 51<br />
alternate duty assist 30 52<br />
alternate duty backup 31 53<br />
service ratio duty assist 35 54<br />
service ratio duty backup 36 55<br />
first in first out (FIFO) 40 56<br />
time 45 60<br />
overflow 50 61<br />
aeration 55 62<br />
gate 60 63<br />
7ML19981AQ03 <strong>SmartLinx</strong> <strong>PROFIBUS</strong> <strong>DP</strong> – INSTRUCTION MANUAL Page 43<br />
Application Layer
Applicaton Layer<br />
Relay Function Code Number P111<br />
flush valve 65 64<br />
communication 66 65<br />
pump failure alarm 70 11<br />
power failure alarm 71 12<br />
unknown function 200<br />
Page 44 <strong>SmartLinx</strong> <strong>PROFIBUS</strong> <strong>DP</strong> – INSTRUCTION MANUAL 7ML19981AQ03
Troubleshooting<br />
Generally<br />
In all cases, first check P794 and P795, to verify that you have the correct card for your<br />
device. Next check that the <strong>SmartLinx</strong> module has passed its on-going built-in self test<br />
(<strong>Siemens</strong> Milltronics <strong>SmartLinx</strong> instrument parameter P790). The result should be “pass”.<br />
If “fail” is indicated, either the module is defective, or the module connector on the<br />
<strong>Siemens</strong> Milltronics <strong>SmartLinx</strong> instrument is defective.<br />
If “err1” is indicated, the <strong>Siemens</strong> Milltronics software doesn’t recognize the ID number<br />
of the installed module. Please contact <strong>Siemens</strong> Milltronics or your distributor for<br />
instructions and/or upgraded <strong>Siemens</strong> Milltronics <strong>SmartLinx</strong> instrument software.<br />
Make sure the <strong>Siemens</strong> Milltronics device is set to a unique address, and does not<br />
conflict with any other slave(s) on the bus.<br />
Check the configuration of the scanning master, and make sure it is functioning properly.<br />
1. If you have configured the <strong>Siemens</strong> Milltronics device in the Master and<br />
downloaded it to the processor, but the device is not coming on line:<br />
• Check which GSD file you use, and make sure you used the correct one (see<br />
GSD Files on page 12).<br />
• Check the wiring to the card. In particular, check that you have line A and B<br />
connected correctly.<br />
• Verify that you set the correct address on the card. Also, please note that the<br />
card does not see a charge until the power has been cycled.<br />
• Verify that the Read and Write Block sizes are correct. This is particularly<br />
important if you are using P762.<br />
2. If the network was working fine until you connected to the <strong>Siemens</strong> Milltronics<br />
device, at which time other devices dropped out:<br />
• Check the termination switch on the <strong>PROFIBUS</strong> card. The network cable has to<br />
be terminated at both ends of the LAN, but not in between.<br />
• Check your grounding. The <strong>PROFIBUS</strong> specifications require that all devices be<br />
on the same ground. Improper grounding can cause strange effects.<br />
Technical <strong>Support</strong> or Product Feedback<br />
For product feedback or technical support, please contact your local <strong>Siemens</strong> Milltronics<br />
representative or e-mail us at www.siemens.com/automation/support-request.<br />
7ML19981AQ03 <strong>SmartLinx</strong> <strong>PROFIBUS</strong> <strong>DP</strong> – INSTRUCTION MANUAL Page 45<br />
Troubleshooting
Appendix A<br />
Appendix A – Reducing the amount of<br />
data being transferred over the Bus<br />
You can limit the amount of data being transferred over the Bus, and save both bandwidth<br />
and memory, by using P762. However, when you reduce the size of the data map, the<br />
configuration will change. If the data block sizes in the device do not match what is<br />
configured in the master, no communications will occur. Therefore it is critical to calculate<br />
the size of the new map. The calculation is different for level applications and for mass<br />
dynamics applications.<br />
The following sections provide explanations and examples of the calculation required,<br />
together with a worksheet to use as a template. The first section explains how it works<br />
with level products, and the second explains how it works with mass dynamics products.<br />
In each section, the Write Block map is calculated first, followed by the Read Block.<br />
Level Products<br />
The Smartlinx map 1 is controlled by the values of the indices of P762. By turning on an<br />
index (setting the value to one or more), you activate both the read and write blocks<br />
associated with that index. The table below shows which values in the read/write blocks<br />
are turned on by each P762 index.<br />
Name of area P762<br />
Point Value<br />
Read area turned<br />
On<br />
Write area turned on<br />
Status 1 1 Instrument status -------------------<br />
Reading 2 1 -10 1-10 point readings -------------------<br />
Alarm 3 1-10<br />
1-10 point alarm and<br />
status<br />
-------------------<br />
Point on Priority 4 1 -------------------<br />
Measurement point on<br />
Priority<br />
Returned Values (1-10) Parameter number<br />
Decimal place Secondary index<br />
MPA 5 1 Format Decimal place<br />
Parameter number Format<br />
Secondary index --------------------<br />
Parameter Number Parameter Number<br />
Primary index Primary index<br />
Secondary index Secondary index<br />
SPA 6 1 Returned Value New Value<br />
Decimal Place Decimal Place<br />
Format Format<br />
Read/Write Read/ Write<br />
Operating Mode 7 1 ----------------------- Operating Mode<br />
1. For examples of the data maps before modification, see pages 48 and 50.<br />
Page 46 <strong>SmartLinx</strong> <strong>PROFIBUS</strong> <strong>DP</strong> – INSTRUCTION MANUAL 7ML19981AQ03
Write Block<br />
The standard Write block is made up of the following sections: point on priority, MPA,<br />
SPA, and operating mode. If any of these sections is ‘turned off’ by setting the<br />
corresponding part of P762 to a zero, the new map will shift down accordingly and the<br />
size will be reduced by that amount. Multiply the parameter value by the memory size,<br />
then add up the results to get the total.<br />
Name of area P762<br />
Point<br />
Write Block Template for Level Products<br />
value Memory size for Write<br />
block per value<br />
Status 1 0<br />
Reading 2 0<br />
Alarm 3 0<br />
Point on Priority 4 1<br />
MPA 5 4<br />
SPA 6 7<br />
Operating mode 7 1<br />
Total words:<br />
Result of multiplying<br />
value * memory size<br />
7ML19981AQ03 <strong>SmartLinx</strong> <strong>PROFIBUS</strong> <strong>DP</strong> – INSTRUCTION MANUAL Page 47<br />
Appendix A
Appendix A<br />
Example 1:<br />
If you want only Point status, and to read<br />
the first 7 point readings, the chart is:<br />
Name<br />
of area<br />
The output data block (Write block) is now<br />
0 words in size (0 bytes).<br />
No map<br />
P762<br />
Point value<br />
Memory<br />
size for<br />
Write block<br />
per value<br />
Original Write Block Data Map for Level Products<br />
Words Description Access Data Type<br />
0 measurement point on priority direct bitmapped<br />
1 parameter number<br />
value *<br />
memory<br />
size<br />
Status 1 1 0 0<br />
Reading 2 7 0 0<br />
Alarm 3 0 0 0<br />
Point on<br />
Priority<br />
4 0 1 0<br />
MPA 5 0 4 0<br />
SPA<br />
Operati<br />
6 0 7 0<br />
ng<br />
mode<br />
7 0 1 0<br />
Total words: 0<br />
Example 2:<br />
If you want only SPA, then the chart is:<br />
Name of<br />
area<br />
P762<br />
Point value<br />
The output data block (Write block) is now<br />
7 words in size (14 bytes) and the Word<br />
numbers have shifted to a lower value<br />
New Write Block Data Map<br />
integer<br />
2 parameter secondary index<br />
MPA<br />
1 integer<br />
3 decimal place integer<br />
4 format 0/1<br />
Memory<br />
size for<br />
Write block<br />
per value<br />
value *<br />
memory<br />
size<br />
Status 1 0 0 0<br />
Reading 2 0 0 0<br />
Alarm 3 0 0 0<br />
Point on<br />
Priority<br />
4 0 1 0<br />
MPA 5 0 4 0<br />
SPA<br />
Operati<br />
6 1 7 7<br />
ng<br />
mode<br />
7 0 1 0<br />
Total words: 7<br />
Word Description<br />
0 Parameter number<br />
1 Parameter primary index<br />
2 Parameter secondary index<br />
3 Parameter value<br />
4 Decimal place<br />
5 Format<br />
6 Read / Write flag<br />
Page 48 <strong>SmartLinx</strong> <strong>PROFIBUS</strong> <strong>DP</strong> – INSTRUCTION MANUAL 7ML19981AQ03
Words Description Access Data Type<br />
Read Block<br />
5 parameter number<br />
integer<br />
6 parameter primary index integer<br />
7 parameter secondary index integer<br />
8 parameter value SPA integer<br />
9 decimal place integer<br />
10 format 0/1<br />
11 read/write flag 0/1<br />
12 operating mode direct 0/1<br />
1. The primary index is implicit in the address of the returned parameter values.<br />
The standard Read block is made up of the following sections: status, reading, alarm,<br />
MPA, and SPA. If any of these sections is ‘turned off’ by setting the corresponding part of<br />
P762 to a zero, the new map will shift down accordingly and the size will be reduced by<br />
that amount for the Read block. Multiply the parameter value by the memory size, then<br />
add up the results to get the total.<br />
Name of area P762 Point value<br />
Read Block Template for Level Products<br />
Memory size for<br />
Read block per<br />
value<br />
Status 1 1<br />
Reading 2 1<br />
Alarm 3 1<br />
Point on Priority 4 0<br />
MPA 5 14<br />
SPA 6 7<br />
Operating mode 7 0<br />
Total Words:<br />
Result of<br />
multiplying value *<br />
memory size<br />
7ML19981AQ03 <strong>SmartLinx</strong> <strong>PROFIBUS</strong> <strong>DP</strong> – INSTRUCTION MANUAL Page 49<br />
Appendix A
Appendix A<br />
Example 1:<br />
If you want only Instrument status, and to<br />
read the first 7 point readings, then the<br />
chart is:<br />
Name of<br />
area<br />
P762<br />
Point value<br />
The input data block (Read block) is now 8<br />
words in size (16 bytes), and the Word<br />
numbers have shifted to a lower value.<br />
New Read Block Data map:<br />
Memory<br />
size for<br />
Read block<br />
per value<br />
value *<br />
memory<br />
size<br />
Status 1 1 1 1<br />
Reading 2 7 1 7<br />
Alarm 3 0 1 0<br />
Point on<br />
Priority<br />
4 0 0 0<br />
MPA 5 0 14 0<br />
SPA 6 0 7 0<br />
Operatin<br />
g mode<br />
7 0 0 0<br />
Total<br />
words:<br />
8<br />
Word Description<br />
0 Instrument status<br />
1 Reading for point 1<br />
2 Reading for point 2<br />
3 Reading for point 3<br />
4 Reading for point 4<br />
5 Reading for point 5<br />
6 Reading for point 6<br />
7 Reading for point 7<br />
Original Read Block Data map for Level Products<br />
Example 2:<br />
If you want only SPA, then the chart is:<br />
Name of<br />
area<br />
P762<br />
Point value<br />
The input data block (Read block) is now 7<br />
words in size (14 bytes), and the Word<br />
numbers have shifted to a lower value.<br />
New Read Block Data map:<br />
Memory<br />
size for<br />
Read block<br />
per value<br />
Words Description Access Data Type<br />
0 instrument status<br />
bitmapped<br />
1-10 point reading direct integer<br />
11-20 point alarm and status bitmapped<br />
21-30 returned values<br />
integer<br />
31 decimal place integer<br />
32 format MPA 0/1<br />
33 parameter number integer<br />
34 parameter secondary index integer<br />
value *<br />
memory<br />
size<br />
Status 1 0 1 0<br />
Reading 2 0 1 0<br />
Alarm 3 0 1 0<br />
Point on<br />
Priority<br />
4 0 0 0<br />
MPA 5 0 14 0<br />
SPA 6 1 7 7<br />
Operatin<br />
g mode<br />
7 0 0 0<br />
Total<br />
words:<br />
7<br />
Word Description<br />
0 Parameter number<br />
1 Parameter primary index<br />
2 Parameter secondary index<br />
3 Parameter returned value<br />
4 Decimal place<br />
5 Format<br />
6 Read/Write flag<br />
Page 50 <strong>SmartLinx</strong> <strong>PROFIBUS</strong> <strong>DP</strong> – INSTRUCTION MANUAL 7ML19981AQ03
Words Description Access Data Type<br />
35 parameter<br />
integer<br />
36 parameter primary index integer<br />
37 parameter secondary index integer<br />
38 value SPA integer<br />
39 decimal place integer<br />
40 format 0/1<br />
41 read/write flag 0/1<br />
Mass Dynamics Products<br />
The Smartlinx map 1 is controlled by the values of the indices of P762. By turning on an<br />
index (setting the value to one or more), you activate both the read and write blocks<br />
associated with that index. The table below shows which values in the read/write blocks<br />
are turned on by each P762 index.<br />
Name of area<br />
P762<br />
Point<br />
Value<br />
Read area<br />
turned On<br />
1. For examples of the data maps before modification, see pages 53 and 55<br />
Write area turned<br />
on<br />
Status 1 1 Instrument status -------------------<br />
Rate 2 1 Rate -------------------<br />
Load 3 1 Load -------------------<br />
Speed 4 1 Speed -------------------<br />
Total 1<br />
Total 5 1<br />
Total 2<br />
-------------------<br />
Relay Status 6 1 Relay Status -------------------<br />
DI Status 7 1<br />
Discrete Input<br />
Status<br />
-------------------<br />
Parameter Number Parameter Number<br />
Primary index Primary index<br />
Secondary index Secondary index<br />
SPA 8 1 Returned Value New Value<br />
Decimal Place Decimal Place<br />
Format Format<br />
Read/Write Read/ Write<br />
Command Control 9 1 ------------------- Command Control<br />
Multispan 10 1 ------------------- Multispan Selection<br />
PID 1 setpoint value<br />
PID 11 1 -------------------<br />
PID 2 setpoint value<br />
Batch 12 1 ------------------- Batch Setpoint Value<br />
7ML19981AQ03 <strong>SmartLinx</strong> <strong>PROFIBUS</strong> <strong>DP</strong> – INSTRUCTION MANUAL Page 51<br />
Appendix A
Appendix A<br />
Batch Prewarn 13 1 -------------------<br />
Batch Prewarn Setpoint<br />
Value<br />
Word Order 14 1 Word order Word order<br />
Status 2 15 1 Instrument Status 2 -------------------<br />
Batch Total 16 1 Batch Total -------------------<br />
Write Block<br />
The standard Write block is made up of the following sections: SPA, command control,<br />
multispan, PID, batch, batch prewarn, word order. If any of these sections is ‘turned off’<br />
by setting the corresponding part of P762 to a zero, the new map will shift down<br />
accordingly and the size will be reduced by that amount. Multiply the parameter value by<br />
the memory size, then add up the results to get the total<br />
Write Block Template for Mass Dynamic Products<br />
Name of area P762<br />
Point value<br />
Memory size for<br />
Write block per value<br />
Status 1 0<br />
Rate 2 0<br />
Load 3 0<br />
Speed 4 0<br />
Total 5 0<br />
Relay Status 6 0<br />
DI Status 7 0<br />
SPA 8 8<br />
Command Control 9 1<br />
Multispan 10 1<br />
PID 11 4<br />
Batch 12 2<br />
Batch Prewarn 13 2<br />
Word Order 14 1<br />
Status 2 15 0<br />
Batch Total 16 0<br />
Total words:<br />
Result of multiplying<br />
value * memory size<br />
Page 52 <strong>SmartLinx</strong> <strong>PROFIBUS</strong> <strong>DP</strong> – INSTRUCTION MANUAL 7ML19981AQ03
Example 1:<br />
If you want only rate, load, and batch prewarn, then the chart is:<br />
Name of area<br />
P762<br />
Point<br />
The input data block (Write block) is now 2 words in size (4 bytes) and the Word numbers<br />
have shifted to a lower value:<br />
New Write Block Data Map:<br />
value<br />
Memory size for Write<br />
block per value<br />
Original Write Block Data Map for Mass Dynamic Products<br />
value *<br />
memory size<br />
Status 1 0 0 0<br />
Rate 2 1 0 0<br />
Load 3 1 0 0<br />
Speed 4 0 0 0<br />
Total 5 0 0 0<br />
Relay Status 6 0 0 0<br />
DI Status 7 0 0 0<br />
SPA 8 0 8 0<br />
Command Control 9 0 1 0<br />
Multispan 10 0 1 0<br />
PID 11 0 4 0<br />
Batch 12 0 2 0<br />
Batch Prewarn 13 1 2 2<br />
Word Order 14 0 1 0<br />
Status 2 15 0 0 0<br />
Batch Total 16 0 0 0<br />
Total words: 2<br />
Word Description<br />
0-1 Batch prewarn<br />
Description Start End Size Data Type<br />
parameter number, SPA 0 0 1 integer<br />
primary index, SPA 1 1 1 integer<br />
secondary index, SPA 2 2 1 integer<br />
value, SPA 3 4 2 UINT32<br />
decimal place, SPA 5 5 1 integer<br />
format, SPA 6 6 1 integer<br />
read / write flag, SPA 7 7 1 integer<br />
command control 8 8 1 bitmapped<br />
multispan selection 9 9 1 1-4<br />
PID 1 setpoint value 10 11 2 UINT32<br />
PID 2 setpoint value 12 13 2 UINT32<br />
batch setpoint value 14 15 2 UINT32<br />
batch prewarn setpoint value 16 17 2 UINT32<br />
word order 18 18 1 0/1<br />
7ML19981AQ03 <strong>SmartLinx</strong> <strong>PROFIBUS</strong> <strong>DP</strong> – INSTRUCTION MANUAL Page 53<br />
Appendix A
Appendix A<br />
Read Block<br />
The standard Read block is made up of the following sections: status, rate, load, speed,<br />
total, relay status, DI status, multispan, PID, batch, batch prewarn, SPA, Word order. If any<br />
of these sections is ‘turned off’ by setting the corresponding part of P762 to a zero, the<br />
new map will shift down accordingly and the size will be reduced by that amount, for the<br />
Read block. Multiply the parameter value by the memory size, then add up the results to<br />
get the total.<br />
Name of<br />
area<br />
Read Block Template for Mass Dynamic Products<br />
P762<br />
Point<br />
value<br />
Memory size for Read block<br />
per value<br />
Status 1 1<br />
Rate 2 2<br />
Load 3 2<br />
Speed 4 2<br />
Total 5 4<br />
Relay Status 6 1<br />
DI Status 7 1<br />
SPA 8 8<br />
Command<br />
Control<br />
9 0<br />
Multispan 10 1<br />
PID 11 4<br />
Batch 12 2<br />
Batch Prewarn 13 2<br />
Word Order 14 1<br />
Status 2 15 1<br />
Batch Total 16 2<br />
Total words:<br />
Example 1<br />
If you want only rate, load, and batch prewarn, the chart is:<br />
Name of area P762 Point value<br />
Memory size for Read<br />
block per value<br />
Result of multiplying<br />
value * memory size<br />
value *<br />
memory size<br />
Status 1 0 1 0<br />
Rate 2 1 2 2<br />
Load 3 1 2 2<br />
Speed 4 0 2 0<br />
Total 5 0 4 0<br />
Relay Status 6 0 1 0<br />
DI Status 7 0 1 0<br />
SPA 8 0 8 0<br />
Command Control 9 0 0 0<br />
Multispan 10 0 1 0<br />
PID 11 0 4 0<br />
Batch 12 0 2 0<br />
Page 54 <strong>SmartLinx</strong> <strong>PROFIBUS</strong> <strong>DP</strong> – INSTRUCTION MANUAL 7ML19981AQ03
Name of area P762 Point value<br />
Memory size for Read<br />
block per value<br />
value *<br />
memory size<br />
Batch Prewarn 13 1 2 2<br />
Word Order 14 0 1 0<br />
Status 2 15 0 1 0<br />
Batch Total 16 0 2 0<br />
Total words: 6<br />
The input data block (Read block) is now 6 words in size (12 bytes) and the Word numbers<br />
have shifted to a lower value:<br />
New Read Block Data Map<br />
Word Description<br />
0-1 Rate<br />
2-3 Load<br />
4-5 Batch prewarn<br />
Original Read Block Data Map for Mass Dynamic Products<br />
Description Start End Size Type<br />
instrument status 0 0 1 bitmapped<br />
rate 1 2 2 UINT32<br />
load 3 4 2 UINT32<br />
speed 5 6 2 UINT32<br />
total 1 7 8 2 UINT32<br />
total 2 9 10 2 UINT32<br />
relay status 11 11 1 bitmapped<br />
discrete input status 12 12 1 bitmapped<br />
multispan selection 13 13 1 integer<br />
PID 1 setpoint value 14 15 2 UINT32<br />
PID 2 setpoint value 16 17 2 UINT32<br />
batch setpoint value 18 19 2 UINT32<br />
batch prewarn setpoint value 20 21 2 UINT32<br />
parameter, SPA 22 22 1 integer<br />
primary index, SPA 23 23 1 integer<br />
secondary index, SPA 24 24 1 integer<br />
value, SPA 25 26 2 UINT32<br />
decimal place, SPA 27 27 1 integer<br />
format, SPA 28 28 1 integer<br />
read / write flag, SPA 29 29 1 1/0<br />
word order 30 30 1 1/0<br />
instrument status 2 1<br />
31 31 1 bitmapped<br />
batch total 1<br />
32 33 2 UINT32<br />
1.<br />
This is only available in firmware V 3.05 or higher<br />
7ML19981AQ03 <strong>SmartLinx</strong> <strong>PROFIBUS</strong> <strong>DP</strong> – INSTRUCTION MANUAL Page 55<br />
Appendix A
Index<br />
Index<br />
A<br />
AiRanger Series<br />
connection 7<br />
operation 10<br />
Alarm and Status 27<br />
Application Layer 18<br />
B<br />
Batch Prewarn Setpoint 34<br />
Batch Prewarn Setpoint Value 38<br />
Batch Setpoint 34<br />
Batch Setpoint Value 38<br />
Baud Rate 12<br />
Bit Values 40<br />
Bus Address 12<br />
C<br />
Cable<br />
connector 7<br />
routing 6<br />
Command Control, Operational Commands<br />
32<br />
Communication Setup 12<br />
Communication Speed 12<br />
Compatibility 4<br />
Compatible Instruments 3<br />
Configuration<br />
files 12<br />
slave device 13<br />
Configuration Status 37<br />
CraneRanger<br />
connection 7<br />
operation 10<br />
D<br />
Data Access Methods 19<br />
Data Map<br />
level products 23<br />
mass dynamics products 30<br />
Data Types 40<br />
Bit Values 40<br />
integer 40<br />
mass dynamic products 40<br />
Numeric 40<br />
P111 Values 43<br />
Split Values 41<br />
text messages 42<br />
UINT32 41<br />
Decimal Place 24, 25, 28, 31<br />
Direct Access 19<br />
Discrete Input Status 38<br />
E<br />
EnviroRanger ERS 500<br />
Operation 10, 11<br />
EnviroRanger ERS 500 (rack and panel)<br />
connection 8<br />
EnviroRanger ERS 500 (wall mount)<br />
connection 8<br />
Error Conditions 11<br />
Error Status LEDs 10<br />
F<br />
Flag 28<br />
Format 24, 25, 28, 31<br />
Freeze 32<br />
G<br />
GSD Files 12<br />
I<br />
Index 28<br />
alarm and status 27<br />
direct access 19<br />
MPA 20<br />
point reading 27<br />
primary 18<br />
secondary 19<br />
Indexed Parameters 18<br />
Installation 4<br />
Instrument<br />
compatibility 4<br />
Instrument Status 36<br />
Integer 40<br />
InterRanger <strong>DP</strong>S 300<br />
connection 7<br />
operation 10<br />
L<br />
LEDs<br />
Error state 10<br />
LEDs 10<br />
level products<br />
data map 23<br />
Load 37<br />
M<br />
manual 2<br />
overview 2<br />
Mark 19<br />
Mass Dynamics<br />
data map 30<br />
Master Reset 21<br />
Page 56 <strong>SmartLinx</strong> Profibus-<strong>DP</strong> – INSTRUCTION MANUAL 7ML1998IAQ03
Measurement Point Status 27<br />
Milltronics BW500<br />
connection 8<br />
Milltronics BW500<br />
Operation 10, 11<br />
MPA<br />
overview 20<br />
parameter indexing 20<br />
using 20<br />
Multiple Parameter Access 19, 20<br />
Multispan Selection 34, 38<br />
N<br />
Network Address 12<br />
Numeric Values 40<br />
O<br />
Operating Mode 26<br />
Operation 10<br />
Operation LED 11<br />
P<br />
P999 21<br />
Parameter 24, 30<br />
Parameter Indexes 18<br />
parameter indexing 21<br />
Parameter Number 24, 28, 38<br />
Parameter Number and Secondary Index 28<br />
Parameter Secondary Index 24<br />
PID 1 Setpoint Value 38<br />
PID 2 Setpoint Value 38<br />
PID Mode 32<br />
PID Setpoints 34<br />
PID Status 36, 39<br />
Point 18, 28<br />
Point Alarm and Status 27<br />
Point Reading 27<br />
Point-on-Priority 23<br />
Primary Index 18, 25, 30, 38<br />
Print 33<br />
Print Status 36<br />
Program Mode 37<br />
R<br />
Rate 37<br />
Read<br />
level products 26<br />
mass dynamics products 34<br />
Read/Write Flag 25<br />
Reading 27<br />
MPA 20<br />
SPA 21<br />
Relay Function Codes 43<br />
Relay Status 37<br />
Returned Values 28<br />
S<br />
Secondary Index 19, 25, 30, 38<br />
Setpoint Source 32<br />
Setup<br />
communication 12<br />
Single Parameter Access 21<br />
<strong>SmartLinx</strong>® <strong>PROFIBUS</strong> <strong>DP</strong> 1<br />
SPA<br />
overview 21<br />
reading 21<br />
using 21<br />
writing 22<br />
Span 33<br />
Span Status 36<br />
Specifications 3<br />
Speed 37<br />
Split Values 41<br />
Status 10<br />
T<br />
target audience 2<br />
Terminal Block<br />
connector 7<br />
Termination Switch 9<br />
Text Messages 42<br />
Total 1 37<br />
Total 2 37<br />
Totalizer Reset 33<br />
Totalizer Status 36<br />
Totalizing Status 37<br />
Troubleshooting 45<br />
U<br />
UINT32 41<br />
Unsigned Double Precision Integer 41<br />
Using<br />
MPA 20<br />
SPA 21<br />
V<br />
Value 25, 29, 31, 38<br />
W<br />
Wiring<br />
connector 7<br />
Word Order 34, 39<br />
Write<br />
level products 23<br />
mass dynamics products 30<br />
Write Privileges 36<br />
Writing 22<br />
Z<br />
Zero 33<br />
Zero Status 36<br />
7ML1998IAQ03 <strong>SmartLinx</strong> Profibus-<strong>DP</strong> – INSTRUCTION MANUAL Page 57<br />
Index
www.siemens.com/processautomation<br />
*7ml19981aq03*<br />
Rev. 3.2