Installation Instructions - F2299/01 - 31VSSR Series ... - Clipsal
Installation Instructions - F2299/01 - 31VSSR Series ... - Clipsal
Installation Instructions - F2299/01 - 31VSSR Series ... - Clipsal

Create successful ePaper yourself
Turn your PDF publications into a flip-book with our unique Google optimized e-Paper software.
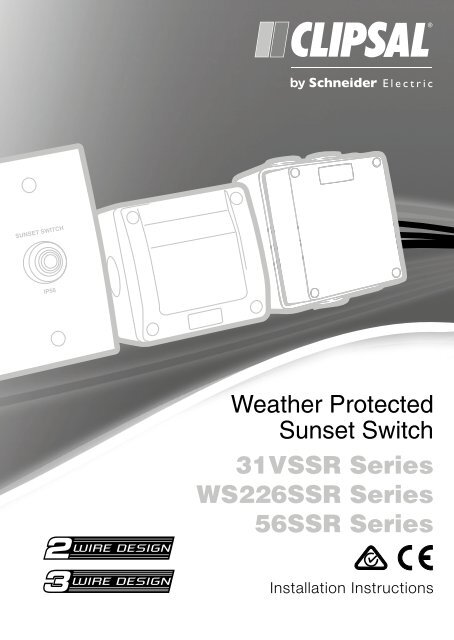
Weather Protected<br />
Sunset Switch<br />
<strong>31VSSR</strong> <strong>Series</strong><br />
WS226SSR <strong>Series</strong><br />
56SSR <strong>Series</strong><br />
<strong>Installation</strong> <strong>Instructions</strong>
<strong>31VSSR</strong>, WS226SSR & 56SSR <strong>Series</strong> Weather Protected Sunset Switch <strong>Installation</strong> <strong>Instructions</strong><br />
Contents<br />
1.0 Product Range.......................................................................................................................... 3<br />
2.0 Description ............................................................................................................................... 3<br />
3.0 Features .................................................................................................................................... 4<br />
4.0 Operation .................................................................................................................................. 4<br />
5.0 Installer Adjustable Settings .................................................................................................. 5<br />
5.1 Timer Setting ..................................................................................................................... 5<br />
5.2 Lux Setting ......................................................................................................................... 5<br />
6.0 Test Mode ................................................................................................................................. 5<br />
7.0 Switching Hysteresis ............................................................................................................... 6<br />
8.0 Power-Up Sequence................................................................................................................. 6<br />
9.0 <strong>Installation</strong> ................................................................................................................................ 7<br />
10.0 Important Warning ................................................................................................................... 7<br />
11.0 Wiring Diagrams – Two-Wire Designs .................................................................................... 8<br />
11.1 Automatic Operation .......................................................................................................... 8<br />
11.2 Automatic with Override OFF ............................................................................................ 8<br />
11.3 Automatic with Override ON .............................................................................................. 8<br />
11.4 ON / OFF / AUTO Operation (Override ON or OFF) .......................................................... 8<br />
12.0 Wiring Diagrams – Three-Wire Designs ................................................................................. 9<br />
12.1 Automatic Operation .......................................................................................................... 9<br />
12.2 Automatic with Override OFF ............................................................................................ 9<br />
12.3 Automatic with Override ON .............................................................................................. 9<br />
12.4 ON / OFF / AUTO Operation (Override ON or OFF) .......................................................... 9<br />
13.0 Special Loads ......................................................................................................................... 10<br />
14.0 Electrical Specifications ........................................................................................................ 11<br />
15.0 Warranty .................................................................................................................................. 12<br />
2 of 12<br />
© 2<strong>01</strong>1 Schneider Electric
<strong>31VSSR</strong>, WS226SSR & 56SSR <strong>Series</strong> Weather Protected Sunset Switch <strong>Installation</strong> <strong>Instructions</strong><br />
1.0 Product Range<br />
Two-Wire Designs<br />
<strong>31VSSR</strong>/2 Sunset Switch, 2-Wire, 220-240Va, 50Hz, 10AX, IP56 (Standard Range)<br />
WS226SSR/2 Sunset Switch, 2-Wire, 220-240Va, 50Hz, 10AX, IP66 (Weathershield Range)<br />
56SSR/2 Sunset Switch, 2-Wire, 220-240Va, 50Hz, 10AX, IP66 (56 <strong>Series</strong>)<br />
Three-Wire Designs<br />
<strong>31VSSR</strong>/3 Sunset Switch, 3-Wire, 220-240Va, 50Hz, 10AX, IP56 (Standard Range)<br />
WS226SSR/3 Sunset Switch, 3-Wire, 220-240Va, 50Hz, 10AX, IP66 (Weathershield Range)<br />
56SSR/3 Sunset Switch, 3-Wire, 220-240Va, 50Hz, 10AX, IP66 (56 <strong>Series</strong>)<br />
2.0 Description<br />
The <strong>Clipsal</strong> Sunset Switch <strong>Series</strong> is a range of high quality, weather protected photoelectric daylight<br />
sensors, with adjustable time and lux facilities.<br />
The products are designed to automatically activate lighting at sunset, ensuring outside areas are<br />
illuminated after dark. Providing safety and security, the Sunset Switch product range is suitable for<br />
use in domestic, commercial and industrial installations. Typical applications include garden lighting,<br />
verandahs, car parks, street lighting, advertising signs and perimeter lighting for commercial /<br />
industrial business premises.<br />
The <strong>Clipsal</strong> Sunset Switch Range is available in both Two-Wire and Three-Wire design<br />
configurations. All units in the range have a powerful 10AX switching capability, and are suitable for a<br />
wide range of load types, including incandescent, inductive and fluorescent loads.<br />
<strong>Clipsal</strong> offers Sunset Switches in three different product series, as represented below:<br />
© 2<strong>01</strong>1 Schneider Electric<br />
Standard <strong>Series</strong><br />
Weathershield<br />
Range<br />
56 <strong>Series</strong><br />
<strong>31VSSR</strong>/2 WS226SSR/2 56VSSR/2<br />
<strong>31VSSR</strong>/3 WS226SSR/3 56VSSR/3<br />
3 of 12
<strong>31VSSR</strong>, WS226SSR & 56SSR <strong>Series</strong> Weather Protected Sunset Switch <strong>Installation</strong> <strong>Instructions</strong><br />
3.0 Features<br />
• State-of-the-art low current consumption Two and Three Wire designs<br />
• Adjustable Time Setting selection<br />
• Adjustable Lux Setting selection<br />
• 10AX switch load rating<br />
• Suitable for a wide range of load types:<br />
Incandescent (tungsten filament) lamps<br />
240V halogen / dichroic Lamps<br />
Low voltage downlights using electronic transformers<br />
Low voltage downlights using iron-core transformers<br />
Fluorescent lighting loads*<br />
Compact fluorescent light loads*<br />
LED lighting loads*<br />
Small motor loads (limited to 2A)<br />
• Suitable for new installations or retro-fit applications<br />
• Complies with Australian and International Standards<br />
* Two-Wire devices may require power factor correction capacitors to be fitted, else otherwise a 31CAP Load Correction<br />
Device to be installed to ensure correct operation. Refer to the “Special Loads” section of this instruction manual for<br />
more information.<br />
4.0 Operation<br />
A Sunset Switch operates lighting loads automatically after dark, when the ambient light fades below<br />
a pre-determined level. Lights turn ‘ON’ automatically at Dusk and remain on until the pre-set timer<br />
period has elapsed or until Dawn (whichever occurs first).<br />
Both Time and Lux settings are installer adjustable, and can be set to suit the specific application.<br />
No adjustment is required to suit the seasons.<br />
4 of 12<br />
2H<br />
DD<br />
4H 6H<br />
8H<br />
56SSR / 2<br />
SUNSET SWITCH<br />
2 WIRE<br />
220-240V~<br />
50Hz 10AX µ<br />
Test 20 500Lux DD<br />
LOOP LOOP A/L LOAD<br />
2H<br />
4H 6H<br />
8H<br />
56SSR / 3<br />
SUNSET SWITCH<br />
3 WIRE<br />
220-240V~<br />
50Hz 10AX µ<br />
Test 20 500Lux<br />
LOOP N A/L LOAD<br />
(2-Wire Base) (3-Wire Base)<br />
SWITCHING DELAY TIME APPROXIMATELY 90 SECONDS<br />
© 2<strong>01</strong>1 Schneider Electric
<strong>31VSSR</strong>, WS226SSR & 56SSR <strong>Series</strong> Weather Protected Sunset Switch <strong>Installation</strong> <strong>Instructions</strong><br />
5.0 Installer Adjustable Settings<br />
5.1 Timer Setting<br />
<strong>Clipsal</strong> Sunset Switches incorporate an installer adjustable Timer Setting. The load<br />
will be activated for the preset period of time. Simply set the multi-position switch to<br />
the desired setting.<br />
Symbol Meaning Switching Conditions<br />
DD Dusk to Dawn ON: The load with switch ON at Dusk.<br />
OFF: The load with switch OFF at Dawn.<br />
2H 2 Hours ON: The load with switch ON at Dusk.<br />
4H 4 Hours<br />
6H 6 Hours<br />
8H 8 Hours<br />
6.0 Test Mode<br />
© 2<strong>01</strong>1 Schneider Electric<br />
2H<br />
DD<br />
4H 6H<br />
OFF: The load with switch OFF after the preset time has elapsed,<br />
OR at Dawn (whichever comes first).<br />
Test TEST MODE Sets the light switching threshold to the current ambient light level.<br />
Refer to Section 6.0: Test Mode for more information.<br />
5.2 Lux Setting<br />
<strong>Clipsal</strong> Sunset Switches incorporate an installer adjustable Lux Setting. The load<br />
will be switched according to the ambient light threshold set. Simply rotate the<br />
potentiometer to the desired setting.<br />
ADJUSTABLE RANGE: 20 to 500 lux<br />
Note: The factory default setting of approximately 20 lux will suffice for most applications.<br />
8H<br />
Test<br />
20 500Lux<br />
A special “Test Mode” has been provided to enable the installer to set the current ambient light level<br />
as the ON switching threshold (Dusk setting).<br />
In Test Mode the Switching Hysteresis time delay is disabled, allowing you to “seek” the current light<br />
level, without needing to wait for the normal switching delay time.<br />
Step 1: Wire up the product and connect the load. Apply power.<br />
Step 2: Set the Timer to “Test” mode.<br />
Step 3: Set the Lux setting to 500 lux maximum (fully clockwise). The load will be ON.<br />
Step 4: Wait until the ambient light level reaches the desired switching threshold.<br />
Step 5: Turn the lux dial slowly anticlockwise until the load switches OFF*.<br />
Step 6: Exit Test Mode by setting the desired Timer Setting (DD, 2H, 4H, 6H, 8H).<br />
*Note: If you overshoot the required setting, simply return the lux dial to maximum and repeat.<br />
For two-wire versions, you must wait at maximum lux until the load turns ON (max. 10 seconds)<br />
before re-trying.<br />
WARNING:<br />
EXERCISE EXTREME CARE WHEN WORKING WITH THE LIVE PRODUCT.<br />
5 of 12
<strong>31VSSR</strong>, WS226SSR & 56SSR <strong>Series</strong> Weather Protected Sunset Switch <strong>Installation</strong> <strong>Instructions</strong><br />
7.0 Switching Hysteresis<br />
<strong>Clipsal</strong> Sunset Switches incorporate switching hysteresis, designed to ensure reliable operation<br />
of the product. Switching hysteresis is essentially an offset between the ON and OFF switching<br />
thresholds, making the product more immune to rapid fluctuations in the ambient lighting levels, and<br />
consequently less likely to false trigger.<br />
8.0 Power-Up Sequence<br />
When power is applied for the first time, or re-applied after a power failure / lamp replacement, the<br />
Sunset Switch will remain idle for a short period (Warm-Up Time). During this period, the load will<br />
not be turned on, even if the ambient light level is below the switching threshold.<br />
6 of 12<br />
Example applications where rapid fluctuations<br />
in the ambient light level may be experienced:<br />
• Dim light due to passing cloud cover<br />
• Lightning during a storm<br />
• Light from the headlamps of passing cars<br />
• Artificial light from the switched load<br />
The switching hysteresis feature also intentionally introduces a Switching Delay Time of<br />
approximately 90 seconds.<br />
During this time, the Sunset Switch continuously monitors the ambient light level in order to<br />
validate the transition from light to dark, or dark to light conditions. This reduces the risk of false<br />
triggering due to momentary fluctuations in the ambient light levels.<br />
Type Models Warm-Up Time<br />
Two Wire Designs <strong>31VSSR</strong>/2<br />
WS226SSR/2<br />
56SSR/2<br />
3.5 minutes (approx)<br />
Three-Wire Designs <strong>31VSSR</strong>/3<br />
WS226SSR/3<br />
56SSR/3<br />
90 seconds (approx)<br />
Note: If power is interrupted during an active timer period, then the timer will be restarted upon<br />
restoration of power.<br />
© 2<strong>01</strong>1 Schneider Electric
<strong>31VSSR</strong>, WS226SSR & 56SSR <strong>Series</strong> Weather Protected Sunset Switch <strong>Installation</strong> <strong>Instructions</strong><br />
9.0 <strong>Installation</strong><br />
The Sunset Switch may be positioned on any exterior surface facing away from any direct artificial<br />
light. Most light we see is reflected light. Accordingly, the Sunset Switch unit should be positioned so<br />
that it is NOT exposed to direct sunlight. Prolonged exposure to an ambient temperature exceeding<br />
the specified range may degrade the performance of the product.<br />
The Sunset Switch must be installed in such a way that artificial light (such as the load that is being<br />
switched) has no impact on the operation. If the Sunset Switch is installed too close to the load<br />
being switched, then the load may turn on and off repeatedly.<br />
Even when operating interior lights, it is recommended that the Sunset Switch is still positioned<br />
outside. It is also suggested that the unit is positioned out of normal reach to avoid shadows and<br />
other likely sources of interference with the sensor operation.<br />
The unit should be mounted using the gaskets supplied. If the unit is to be mounted in an exposed<br />
position, all entries into the mounting box should be sealed with a silicone sealant.<br />
Sunset Switch Mounting Accessories:<br />
<strong>Series</strong> Models Mounting Accessories<br />
<strong>31VSSR</strong> <strong>31VSSR</strong>/2<br />
<strong>31VSSR</strong>/3<br />
WS226SSR WS226SSR/2<br />
WS226SSR/3<br />
56SSR 56SSR/2<br />
56SSR/3<br />
*Note that the WS226SSR <strong>Series</strong> Sunset Switch is compatible for mounting on many commonly<br />
available backboxes, including HPM 170 <strong>Series</strong> backboxes. Separate mounting screws with a<br />
different thread type are provided to enable field retro-fit to the HPM backboxes.<br />
10.0 Important Warning<br />
It is illegal for persons other than an appropriately licenced electrical contractor or other persons<br />
authorised by legislation to work on the fixed wiring of any electrical installation. Penalties for<br />
conviction are severe!<br />
© 2<strong>01</strong>1 Schneider Electric<br />
• 238 Backbox<br />
• Mounting Gasket<br />
• Mounting Screws<br />
• Screw Caps<br />
• WS226 Backbox<br />
• Mounting Screws*<br />
• Screw Caps<br />
• Test Cover<br />
• 56ES1 Backbox<br />
• Mounting Screws<br />
• Screw Caps<br />
7 of 12
<strong>31VSSR</strong>, WS226SSR & 56SSR <strong>Series</strong> Weather Protected Sunset Switch <strong>Installation</strong> <strong>Instructions</strong><br />
11.0 Wiring Diagrams – Two-Wire Designs<br />
11.1 Automatic Operation<br />
IMPORTANT NOTES:<br />
• When switching power to Two-Wire Design Sunset Switches in any of the above override<br />
configurations shown in 11.2 – 11.4, the product will remain idle for approximately 3.5 minutes<br />
(Warm-Up Time), even if the ambient light level is below the set threshold.<br />
• Two or more Two-Wire Sunset Switches cannot be connected in parallel or series to control the<br />
same load from two different locations. If multiple Sunset Switches are required to be connected<br />
in parallel, please use the equivalent Three-Wire product.<br />
8 of 12<br />
2-WIRE<br />
SUNSET<br />
SWITCH<br />
11.2 Automatic with Override OFF<br />
2-WIRE<br />
SUNSET<br />
SWITCH<br />
11.3 Automatic with Override ON<br />
2-WIRE<br />
SUNSET<br />
SWITCH<br />
11.4 ON / OFF / AUTO Operation (Override ON or OFF)<br />
2-WIRE<br />
SUNSET<br />
SWITCH<br />
A/L<br />
LOAD<br />
A/L<br />
LOAD<br />
A/L<br />
LOAD<br />
A/L<br />
LOAD<br />
AUTO<br />
OFF<br />
30M or 30MAM<br />
ON<br />
AUTO<br />
30M or 30MAM<br />
AUTO<br />
OFF<br />
ON<br />
39MAOM<br />
3 Position Switch<br />
LOAD<br />
LOAD<br />
LOAD<br />
LOAD<br />
10A RCD / MCB<br />
10A RCD / MCB<br />
10A RCD / MCB<br />
10A RCD / MCB<br />
A<br />
N<br />
A<br />
N<br />
A<br />
N<br />
A<br />
N<br />
© 2<strong>01</strong>1 Schneider Electric
<strong>31VSSR</strong>, WS226SSR & 56SSR <strong>Series</strong> Weather Protected Sunset Switch <strong>Installation</strong> <strong>Instructions</strong><br />
12.0 Wiring Diagrams – Three-Wire Designs<br />
12.1 Automatic Operation<br />
3-WIRE<br />
SUNSET<br />
SWITCH<br />
12.2 Automatic with Override OFF<br />
3-WIRE<br />
SUNSET<br />
SWITCH<br />
12.3 Automatic with Override ON<br />
3-WIRE<br />
SUNSET<br />
SWITCH<br />
12.4 ON / OFF / AUTO Operation (Override ON or OFF)<br />
3-WIRE<br />
SUNSET<br />
SWITCH<br />
A/L<br />
LOAD<br />
NEUTRAL<br />
A/L<br />
LOAD<br />
NEUTRAL<br />
A/L<br />
LOAD<br />
NEUTRAL<br />
A/L<br />
LOAD<br />
NEUTRAL<br />
IMPORTANT NOTES:<br />
• When switching power to Three-Wire Design Sunset Switches in any of the above override<br />
configurations shown in 12.3 – 12.4, the product will remain idle for approximately 90 seconds<br />
(Warm-Up Time), even if the ambient light level is below the set threshold.<br />
• All electrical installations must be carried out in accordance with local wiring rules<br />
(AS/NZS3000 Australia and New Zealand).<br />
© 2<strong>01</strong>1 Schneider Electric<br />
ON<br />
AUTO<br />
OFF<br />
30M or 30MAM<br />
AUTO<br />
30M or 30MAM<br />
OFF<br />
ON<br />
AUTO<br />
39MAOM<br />
3 Position Switch<br />
LOAD<br />
LOAD<br />
LOAD<br />
LOAD<br />
10A Fuse or MCB<br />
10A Fuse or MCB<br />
10A Fuse or MCB<br />
10A Fuse or MCB<br />
A<br />
N<br />
A<br />
N<br />
A<br />
N<br />
A<br />
N<br />
9 of 12
<strong>31VSSR</strong>, WS226SSR & 56SSR <strong>Series</strong> Weather Protected Sunset Switch <strong>Installation</strong> <strong>Instructions</strong><br />
13.0 Special Loads<br />
Product Selection<br />
Be sure to select the appropriate product to suit your application:<br />
• The <strong>31VSSR</strong>/2, WS226SSR/2 and 56SSR/2 Sunset Switches are Two-Wire devices. These<br />
products do not require a Neutral connection, but can only switch a limited range of load types<br />
without special consideration.<br />
• The <strong>31VSSR</strong>/3, WS226SSR/3 and 56SSR/3 Sunset Switches are Three-Wire devices. These<br />
products require a Neutral connection to operate, and are capable of switching a wide range of<br />
load types.<br />
*Please refer to Electrical Specifications for further information about compatible load types.<br />
Handling Special Loads with Two-Wire Devices<br />
Two-Wire devices draw their power through the load. If a Two-Wire device is used in conjunction with<br />
a load which cannot provide enough continuous load current in the off-state, or the load is sensitive<br />
to a high off-state leakage current, then occasionally unexpected operation may result.<br />
Ultimate success depends upon the compatibility of the load type, and may vary depending on the<br />
make / model of the load.<br />
In case abnormal operation is experienced, a 31CAP Load Correction Device fitted in parallel with<br />
the load may help to resolve the situation. Success varies from manufacturer to manufacturer. It is<br />
recommended to thoroughly test during installation. <strong>Installation</strong> must be compliant with local wiring<br />
rules.<br />
Line<br />
10 of 12<br />
Catalogue<br />
Number<br />
<strong>31VSSR</strong>/2<br />
WS226SSR/2<br />
56SSR/2<br />
<strong>31VSSR</strong>/3<br />
WS226SSR/3<br />
56SSR/3<br />
Neutral<br />
Neutral<br />
Required<br />
Sunset<br />
Line<br />
Switch Load<br />
Minimum<br />
Load*<br />
Maximum<br />
Load*<br />
31CAP Req’d<br />
for some<br />
Load Types<br />
NO 5W 10AX YES<br />
YES 0W 10AX NO<br />
Affected Load Type Example Load Typical Symptoms<br />
• Small loads (
<strong>31VSSR</strong>, WS226SSR & 56SSR <strong>Series</strong> Weather Protected Sunset Switch <strong>Installation</strong> <strong>Instructions</strong><br />
14.0 Electrical Specifications<br />
Parameter<br />
© 2<strong>01</strong>1 Schneider Electric<br />
<strong>31VSSR</strong>/2<br />
WS226SSR/2<br />
56SSR/2<br />
<strong>31VSSR</strong>/3<br />
WS226SSR/3<br />
56SSR/3<br />
Nominal Operating Voltage 220 – 240Va<br />
Nominal Operating Frequency 50Hz<br />
Maximum Load Current 10AX<br />
Minimum Load 5W 0W<br />
Maximum Off-State Leakage<br />
Current<br />
10mA 20mA<br />
Compatible Loads*<br />
*For Two-Wire Design Sunset<br />
Switches, certain loads may<br />
require special handling (Power<br />
Factor Correction Capacitor<br />
or 31CAP to be fitted). Refer<br />
“Special Loads” section.<br />
• Incandescent Loads<br />
• MV Halogen Loads<br />
• Iron Core LV Lighting Transformers (EI and Toroidal Types)<br />
• Electronic LV Lighting Transformers<br />
• Linear Fluorescent Ballasts<br />
• Compact Fluorescent Loads<br />
• LED Lighting Drivers<br />
• HID Lamps (HPS, MH Lamps)<br />
• Small Motor Loads (2A max.)<br />
Adjustable Lux Switching<br />
Threshold<br />
Approximately 20 - 500 lux<br />
Adjustable Timer Range Dusk till Dawn, 2H, 4H, 6H, 8H<br />
Timer Accuracy ± 10%<br />
Warm-Up Time 3.5 minutes 90 seconds<br />
International Protection Rating <strong>31VSSR</strong> <strong>Series</strong> : IP56<br />
WS226SSR <strong>Series</strong> : IP66<br />
56SSR <strong>Series</strong> : IP66<br />
Operating Temperature Range 0 to 45°C<br />
Operating Humidity Range 10 to 95% R.H.<br />
Safety Compliances AS/NZS3100, AS/NZS3133, IEC60669-2-1<br />
EMC Emission Compliance AS/NZS CIRSPR14, CISPR15<br />
Specifications Typical @ 240Va 25°C<br />
No User Serviceable Parts Inside<br />
WARNING:<br />
• Operation outside of these specifications may result in unexpected behaviour, or even<br />
product failure.<br />
• Timer accuracy may be affected by voltage, temperature and humidity.<br />
• Warranty may be voided when controlling any incompatible load types as determined by<br />
Schneider Electric (Australia) Pty Ltd.<br />
11 of 12
15.0 Warranty<br />
1. This <strong>Clipsal</strong> product is guaranteed against faulty workmanship and materials for a period of<br />
two (2) years from the date of installation.<br />
2. This warranty is expressly subject to the <strong>Clipsal</strong> product being installed, wired, tested,<br />
operated and used in accordance with the manufacturer’s instructions.<br />
3. The warrantor is Schneider Electric (Australia) Pty Ltd of 33-37 Port Wakefield Road, Gepps<br />
Cross, South Australia 5094. With registered offices in all Australian States.<br />
4. Schneider Electric (Australia) Pty Ltd reserves the right, at its discretion, to either repair<br />
free of parts and labour charges, replace or offer refund in respect to any article found to be<br />
faulty due to materials, parts or workmanship.<br />
5. All costs of a claim shall be met by Schneider Electric (Australia) Pty Ltd, however should<br />
the product that is the subject of the claim be found to be in good working order all such<br />
costs shall be met by the claimant.<br />
6. When making a claim the consumer shall forward the <strong>Clipsal</strong> product to the nearest office<br />
of <strong>Clipsal</strong> by Schneider Electric with adequate particulars of the defect within 28 days of the<br />
fault occurring. The product should be returned securely packed, complete with details of<br />
the date and place of purchase, description of load, and circumstances of malfunction.<br />
7. The benefits conferred herein are in addition to, and in no way shall be deemed to derogate;<br />
either expressly or by implication, any or all other rights and remedies in respect to the<br />
<strong>Clipsal</strong> product, which the consumer has under the Commonwealth Competition and<br />
Consumer Act or any other similar State or Territory Laws.<br />
Copyright Notice<br />
The concepts, products and designs described in this document are the subject of international<br />
patents, and protected by international law. © Copyright Schneider Electric (Australia) Pty Ltd. All<br />
rights reserved.<br />
Trademarks<br />
• <strong>Clipsal</strong> is a registered trademark of Schneider Electric (Australia) Pty Ltd.<br />
• <strong>Clipsal</strong> by Schneider Electric is a registered trademark of Schneider Electric (Australia) Pty Ltd.<br />
All other logos and trademarks are the property of their respective owners.<br />
Disclaimer<br />
Schneider Electric (Australia) Pty Ltd reserves the right to change specifications or designs<br />
described in this manual without notice and without obligation.<br />
Schneider Electric (Australia) Pty Ltd<br />
Contact us: clipsal.com/feedback<br />
National Customer Care Enquiries:<br />
Tel 1300 2025 25<br />
Fax 1300 2025 56<br />
Schneider Electric (Australia) Pty Ltd reserves the right to change specifications, modify<br />
designs and discontinue items without incurring obligation and whilst every effort is made to<br />
ensure that descriptions, specifications and other information in this catalogue are correct, no<br />
warranty is given in respect thereof and the company shall not be liable for any error therein.<br />
© 2<strong>01</strong>1 Schneider Electric. All Rights Reserved.<br />
Trademarks are owned by Schneider Electric Industries SAS or its affiliated companies.<br />
<strong>F2299</strong>/<strong>01</strong> CLIPCOM 23617 September 2<strong>01</strong>1