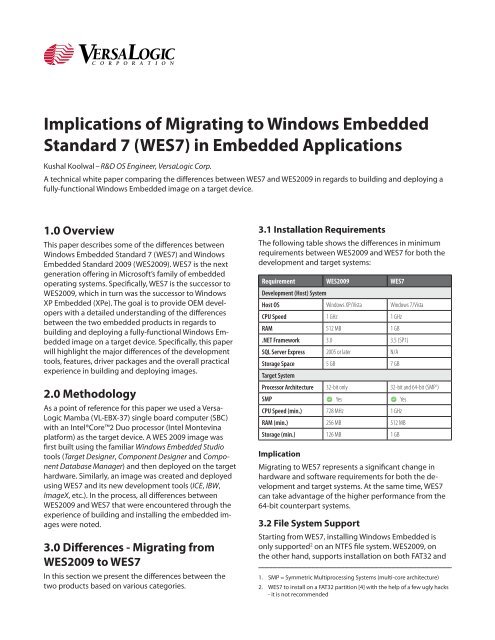
Implications of Migrating to Windows Embedded Standard 7 (WES7 ...
Implications of Migrating to Windows Embedded Standard 7 (WES7 ...
Implications of Migrating to Windows Embedded Standard 7 (WES7 ...

Create successful ePaper yourself
Turn your PDF publications into a flip-book with our unique Google optimized e-Paper software.
<strong>Implications</strong> <strong>of</strong> <strong>Migrating</strong> <strong>to</strong> <strong>Windows</strong> <strong>Embedded</strong><br />
<strong>Standard</strong> 7 (<strong>WES7</strong>) in <strong>Embedded</strong> Applications<br />
Kushal Koolwal – R&D OS Engineer, VersaLogic Corp.<br />
A technical white paper comparing the differences between <strong>WES7</strong> and WES2009 in regards <strong>to</strong> building and deploying a<br />
fully-functional <strong>Windows</strong> <strong>Embedded</strong> image on a target device.<br />
1.0 Overview<br />
This paper describes some <strong>of</strong> the differences between<br />
<strong>Windows</strong> <strong>Embedded</strong> <strong>Standard</strong> 7 (<strong>WES7</strong>) and <strong>Windows</strong><br />
<strong>Embedded</strong> <strong>Standard</strong> 2009 (WES2009). <strong>WES7</strong> is the next<br />
generation <strong>of</strong>fering in Micros<strong>of</strong>t’s family <strong>of</strong> embedded<br />
operating systems. Specifically, <strong>WES7</strong> is the successor <strong>to</strong><br />
WES2009, which in turn was the successor <strong>to</strong> <strong>Windows</strong><br />
XP <strong>Embedded</strong> (XPe). The goal is <strong>to</strong> provide OEM developers<br />
with a detailed understanding <strong>of</strong> the differences<br />
between the two embedded products in regards <strong>to</strong><br />
building and deploying a fully-functional <strong>Windows</strong> <strong>Embedded</strong><br />
image on a target device. Specifically, this paper<br />
will highlight the major differences <strong>of</strong> the development<br />
<strong>to</strong>ols, features, driver packages and the overall practical<br />
experience in building and deploying images.<br />
2.0 Methodology<br />
As a point <strong>of</strong> reference for this paper we used a Versa-<br />
Logic Mamba (VL-EBX-37) single board computer (SBC)<br />
with an Intel®Core2 Duo processor (Intel Montevina<br />
platform) as the target device. A WES 2009 image was<br />
first built using the familiar <strong>Windows</strong> <strong>Embedded</strong> Studio<br />
<strong>to</strong>ols (Target Designer, Component Designer and Component<br />
Database Manager) and then deployed on the target<br />
hardware. Similarly, an image was created and deployed<br />
using <strong>WES7</strong> and its new development <strong>to</strong>ols (ICE, IBW,<br />
ImageX, etc.). In the process, all differences between<br />
WES2009 and <strong>WES7</strong> that were encountered through the<br />
experience <strong>of</strong> building and installing the embedded images<br />
were noted.<br />
3.0 Differences - <strong>Migrating</strong> from<br />
WES2009 <strong>to</strong> <strong>WES7</strong><br />
In this section we present the differences between the<br />
two products based on various categories.<br />
3.1 Installation Requirements<br />
The following table shows the differences in minimum<br />
requirements between WES2009 and <strong>WES7</strong> for both the<br />
development and target systems:<br />
Requirement WES2009 <strong>WES7</strong><br />
Development (Host) System<br />
Host OS <strong>Windows</strong> XP/Vista <strong>Windows</strong> 7/Vista<br />
CPU Speed 1 GHz 1 GHz<br />
RAM 512 MB 1 GB<br />
.NET Framework 3.0 3.5 (SP1)<br />
SQL Server Express 2005 or later N/A<br />
S<strong>to</strong>rage Space 5 GB 7 GB<br />
Target System<br />
Processor Architecture 32-bit only 32-bit and 64-bit (SMP 1 )<br />
SMP Yes Yes<br />
CPU Speed (min.) 728 MHz 1 GHz<br />
RAM (min.) 256 MB 512 MB<br />
S<strong>to</strong>rage (min.) 126 MB 1 GB<br />
Implication<br />
<strong>Migrating</strong> <strong>to</strong> <strong>WES7</strong> represents a significant change in<br />
hardware and s<strong>of</strong>tware requirements for both the development<br />
and target systems. At the same time, <strong>WES7</strong><br />
can take advantage <strong>of</strong> the higher performance from the<br />
64-bit counterpart systems.<br />
3.2 File System Support<br />
Starting from <strong>WES7</strong>, installing <strong>Windows</strong> <strong>Embedded</strong> is<br />
only supported 2 on an NTFS file system. WES2009, on<br />
the other hand, supports installation on both FAT32 and<br />
1.<br />
2.<br />
SMP = Symmetric Multiprocessing Systems (multi-core architecture)<br />
<strong>WES7</strong> <strong>to</strong> install on a FAT32 partition [4] with the help <strong>of</strong> a few ugly hacks<br />
- it is not recommended
NTFS [3] file systems. However, <strong>WES7</strong> does support reading<br />
and writing <strong>to</strong> a FAT32 partition.<br />
WES2009 <strong>WES7</strong><br />
FAT32 NTFS FAT32 NTFS<br />
Installs On Yes Yes No Yes<br />
Read/Write Support Yes Yes Yes Yes<br />
Implication<br />
If your existing production system is a multi-boot OS<br />
environment in which one or more OSs are installed on a<br />
FAT32 partition and they share data with a WES2009 partition,<br />
you would have <strong>to</strong> make necessary adjustments<br />
<strong>to</strong> your s<strong>to</strong>rage partition structure before you migrate <strong>to</strong><br />
<strong>WES7</strong> because FAT32 cannot access NTFS partitions.<br />
3.3 HAL Independence<br />
One <strong>of</strong> the great and much awaited features in <strong>WES7</strong> is<br />
Hardware Abstraction Layer (HAL) independence, which<br />
means that one can maintain a single <strong>Windows</strong> image<br />
that can boot on various computer platforms without<br />
having <strong>to</strong> reinstall or maintain separate images for each<br />
platform. For example, in WES2009 an OEM developer<br />
had <strong>to</strong> select one and only one particular HAL type from<br />
the following [5]:<br />
•<br />
•<br />
•<br />
•<br />
ACPI Uni/Multi-processor PC<br />
Advanced Configuration and Power Interface (ACPI) PC<br />
MPS Uni/Multi-processor PC<br />
<strong>Standard</strong> PC<br />
For example, if there are two similar target systems,<br />
say a 586-based system (which requires the Advanced<br />
Configuration and Power Interface (ACPI) PC HAL) and<br />
a 686-based system (which requires the ACPI Uni/Multiprocessor<br />
PC HAL), you will need <strong>to</strong> create and maintain<br />
two separate images (one for each system), even though<br />
most <strong>of</strong> the hardware (IDE, Ethernet, video, audio, etc.) is<br />
the same on both systems. With <strong>WES7</strong>, there is no such<br />
thing as HALs; it just has a single HAL which au<strong>to</strong>matically<br />
takes care <strong>of</strong> different x86-based platform architectures<br />
and hence the same core image will now boot on both<br />
platforms. However, you must maintain separate images<br />
for 32-bit and 64-bit systems. WIM (<strong>Windows</strong> Imaging<br />
Format) technologies and an ImageX <strong>to</strong>ol enable developers<br />
<strong>to</strong> take advantage <strong>of</strong> HAL independence. Please<br />
see the section “Maintaining Images” for more details.<br />
Implication<br />
Having HAL independence enables OEM developers <strong>to</strong><br />
save time and effort by having a single core image that<br />
can boot across all platforms; there is no longer a need <strong>to</strong><br />
maintain multiple platform-specific images.<br />
3.4 ACPI<br />
You can install WES2009 on target boards that do not<br />
have ACPI, since <strong>Windows</strong> XP supports non-ACPI HAL<br />
types which <strong>WES7</strong> does not support. <strong>WES7</strong> 3 requires ACPI<br />
<strong>to</strong> be present on the target computer; otherwise <strong>WES7</strong><br />
installation fails with a “BIOS (firmware) is not ACPI compliant”<br />
error message. Also, you need ACPI 2.0 or greater<br />
[6] and APCI support, at least at the BIOS (firmware)<br />
level 4 , in order for <strong>WES7</strong> <strong>to</strong> install on your target board;<br />
otherwise you will likely see errors during installation.<br />
WES2009 <strong>WES7</strong><br />
Installs with ACPI Yes Yes<br />
Installs without ACPI Yes No<br />
ACPI Version Any 2.0 or greater<br />
Implication<br />
In embedded applications there are many low-cost,<br />
low-power boards that are designed for a highly specialized<br />
purpose, <strong>of</strong>ten without any support for ACPI, which<br />
in turn makes them incompatible with <strong>WES7</strong>. In such a<br />
scenario, you will have <strong>to</strong> continue <strong>to</strong> use WES2009.<br />
3.5 Toolkit<br />
The <strong>to</strong>olkit in <strong>WES7</strong> has a completely different set <strong>of</strong> <strong>to</strong>ols<br />
than WES2009 for configuring and building images.<br />
WES2009 <strong>WES7</strong><br />
Target Designer + Component Designer Image Configuration Edi<strong>to</strong>r (ICE)<br />
Component Database + Reposi<strong>to</strong>ries Distribution Share<br />
SLX (Project File) XML (Project File, aka Answer File)<br />
9000 Drivers (as Components) 500 Drivers<br />
1000 OS Components 150 OS Feature Set<br />
Development Tools<br />
As shown in the table above, <strong>WES7</strong> comes with an entirely<br />
different set <strong>of</strong> <strong>to</strong>ols than WES2009. Tools like Target<br />
Designer, Component Database Manager and Component<br />
Designer are no longer present in <strong>WES7</strong>. Instead, <strong>WES7</strong><br />
comes with a master IDE <strong>to</strong>ol called Image Configuration<br />
Edi<strong>to</strong>r (ICE) which encompasses most <strong>of</strong> the functionality<br />
<strong>of</strong> the WES2009 <strong>to</strong>ols. Tasks like adding 3rd party drivers,<br />
cus<strong>to</strong>m files, applications, etc., which were accomplished<br />
using the Component Designer in WES2009, are now<br />
achieved in <strong>WES7</strong> using the “$OEM$” 5 and “Out-<strong>of</strong>-box<br />
Drivers” folders (contained within each Distribution<br />
Share). Also, tasks like adding registry entries, executing<br />
a program (batch/.exe file), etc. are accomplished by setting<br />
the SMI properties <strong>of</strong> the <strong>WES7</strong> core components in<br />
3.<br />
4.<br />
5.<br />
This is true for <strong>Windows</strong> 7 and <strong>Windows</strong> Vista also since <strong>WES7</strong> is based on<br />
<strong>Windows</strong> 7, which in turn is based on <strong>Windows</strong> Vista<br />
When the BIOS transfers control <strong>to</strong> the Operating System, it also passes<br />
ACPI tables (if the BIOS has them) <strong>to</strong> the OS and this is how the OS (in<br />
this case <strong>WES7</strong>) detects whether the system has ACPI support or not<br />
To figure out destination folders where the files will be copied using the<br />
$OEM$ folder, please see [7]
ICE. Please see “Appendix II: Example - Adding 3rd Party<br />
Materials” for a step-by-step example.<br />
Distribution Shares<br />
<strong>WES7</strong> includes two Distribution Shares (DSs): one each for<br />
32-bit and 64-bit architectures. These DSs provide respective<br />
applications and drivers for each <strong>of</strong> the architecture<br />
types.<br />
Image Size<br />
As <strong>WES7</strong> is completely based on Vista/<strong>Windows</strong> 7 technologies,<br />
there is considerable change in their runtime<br />
image sizes due <strong>to</strong> the fundamental change in the building<br />
blocks <strong>of</strong> the OS (i.e., components). Components in<br />
WES2009 are replaced by Feature Sets and Driver Packages,<br />
which are an aggregation <strong>of</strong> the WES2009 components.<br />
With WES2009, one could create a bootable image<br />
at just under 50 MB. With <strong>WES7</strong>, a minimum bootable<br />
image is around 300 MB (almost 6 times larger in size). A<br />
relatively large image size in <strong>WES7</strong> can also be attributed<br />
<strong>to</strong> the way in which Vista/<strong>Windows</strong> 7 is designed as it<br />
requires more space <strong>to</strong> install compared <strong>to</strong> <strong>Windows</strong> XP.<br />
Components in WES2009 vs. Features Sets and<br />
Driver Packages in <strong>WES7</strong><br />
In WES2009, all <strong>of</strong> the OS building blocks (like drivers<br />
and components) were provided as Components, which<br />
provided no clear distinction between drivers and OS<br />
components. For example, OS components like <strong>Windows</strong><br />
Media Player, Remote Desk<strong>to</strong>p, Internet Explorer and a<br />
driver for an AMD PCNET Ethernet adapter were all categorized<br />
as Components.<br />
Moreover, with 10,000+ components in WES2009, it is<br />
very challenging for OEM developers <strong>to</strong> build a bootable<br />
image the first time without missing boot-critical components.<br />
<strong>WES7</strong> simplifies this by providing an eCore (<strong>Embedded</strong><br />
Core) package which gets included in every project at<br />
minimum and makes sure that the image has boot critical<br />
and bus enumera<strong>to</strong>r drivers. Also, <strong>WES7</strong> aggregates<br />
numerous feature packages <strong>to</strong> form one single large<br />
package, thereby reducing the number <strong>of</strong> feature packages<br />
by almost 1/6 (~150 packages) that <strong>of</strong> WES2009.<br />
By eliminating some <strong>of</strong> the old legacy drivers, the number<br />
<strong>of</strong> driver packages in <strong>WES7</strong> is reduced by nearly half<br />
as compared <strong>to</strong> WES2009. There are approximately 100<br />
important drivers that are included in the eCore package<br />
6 , giving OEM developers a jump start in building<br />
their image. In WES2009, all drivers had <strong>to</strong> be manually<br />
selected in the Target Designer as components, making<br />
the image building process quite tedious.<br />
Project Files<br />
There are no more familiar SLX project files in <strong>WES7</strong>. With<br />
WES2009, an SLX file was used <strong>to</strong> keep track <strong>of</strong> project<br />
settings like which components were are added along<br />
with their configuration settings. Starting with <strong>WES7</strong>, all<br />
project configurations, like features, drivers, applications,<br />
language packs, etc. <strong>to</strong> add, are maintained in an XMLbased<br />
file called the Answer File. When you use ICE <strong>to</strong> add<br />
various components <strong>to</strong> your OS image, all <strong>of</strong> the actions<br />
are entered as corresponding XML entries in<strong>to</strong> the<br />
Answer File, including the DS (32-bit or 64-bit) you have<br />
selected. The output <strong>of</strong> ICE is always an Answer File.<br />
In WES2009, a developer would check the dependencies<br />
<strong>of</strong> the components before building the final image. This<br />
dependency check concept is also included in <strong>WES7</strong>, but<br />
in the form <strong>of</strong> “validating” the XML-based Answer File.<br />
You can go <strong>to</strong> Validate Ý Validate Only at anytime in ICE<br />
<strong>to</strong> check if all <strong>of</strong> the dependencies are satisfied or not.<br />
Please see “Appendix-I: Target Designer and ICE Screenshots”<br />
for an overview <strong>of</strong> the layout.<br />
Implication<br />
Although <strong>WES7</strong> has comparable <strong>to</strong>ols <strong>to</strong> WES2009, it<br />
provides a completely different methodology for creating<br />
images. By eliminating the time consuming process <strong>of</strong><br />
selecting all <strong>of</strong> the appropriate components, drivers, etc.<br />
<strong>to</strong> produce a functional image, OEMs are able <strong>to</strong> focus on<br />
building the project’s application.<br />
3.6 Image Building Model<br />
<strong>WES7</strong> comes with 3 installation discs:<br />
a. Toolkit DVD (contains ICE and DS)<br />
b. 32-bit <strong>Windows</strong> <strong>Embedded</strong> <strong>Standard</strong> 7 DVD<br />
(contains WinPE, IBW and DS)<br />
64-bit <strong>Windows</strong> <strong>Embedded</strong> <strong>Standard</strong> 7 DVD<br />
(contains WinPE, IBW and DS)<br />
The Toolkit DVD is used <strong>to</strong> install the IDE <strong>to</strong>ol ICE and<br />
associated DS (32-bit/64-bit) on the development computer.<br />
The 32-bit and 64-bit <strong>Windows</strong> <strong>Embedded</strong> <strong>Standard</strong><br />
7 DVDs are bootable WinPE DVDs that contain the<br />
Image Builder Wizard (IBW) and the corresponding 32-bit<br />
or 64-bit DS. These DVDs are typically used <strong>to</strong> boot in<strong>to</strong><br />
<strong>Windows</strong> PE on the target device and apply the runtime<br />
image created with ICE or <strong>to</strong> pro<strong>to</strong>type image creation<br />
using the wizard and various templates available in IBW.<br />
6.<br />
c.<br />
ä<br />
eCore consists <strong>of</strong> NT kernel, boot critical drivers, WinLogon, NetLogon,<br />
Filesystems, command shell, networking stack, RPC, etc.
Image Building<br />
Model<br />
WES2009 <strong>WES7</strong><br />
1. System<br />
Tap.exe Ý<br />
Analysis<br />
Devices.pmq Ý<br />
Import in<strong>to</strong> TD<br />
2. Image<br />
Configured on<br />
Configuration developer machine<br />
using TD<br />
3. Image<br />
Using Component<br />
Cus<strong>to</strong>mization Designer<br />
ICE/Advanced<br />
Method<br />
Tap.exe Ý<br />
Devices.pmq Ý<br />
Import in<strong>to</strong> ICE<br />
Configured on<br />
developer machine<br />
using ICE<br />
Using ICE<br />
4. Project File SLX file is ready Valid Answer File<br />
is ready<br />
Image<br />
Building7 5. Build on developer<br />
machine using TD<br />
6. Adding<br />
Requires rebuilding<br />
Components<br />
Post-Build<br />
<strong>of</strong> the entire image<br />
Always build on<br />
target device using<br />
IBW<br />
IBW/Express<br />
Method<br />
Boot from WinPE<br />
IBW DVD<br />
IBW runs tap.exe<br />
IBW maps corresponding<br />
drivers<br />
from DS based on<br />
tap file<br />
Select an application<br />
template or manually<br />
select Feature Sets<br />
and Driver Packages<br />
from the DS<br />
A valid Answer File is<br />
created based on the<br />
selection<br />
IBW starts assembling<br />
and building<br />
the image<br />
Can be added <strong>of</strong>fline and online using DISM<br />
With <strong>WES7</strong>, the image building process has been completely<br />
overhauled. In WES2009, a developer first has<br />
<strong>to</strong> configure and build an image on the development<br />
system. With <strong>WES7</strong>, a developer can bypass the ICE/Advanced<br />
Method entirely and quickly install (configure and<br />
build) <strong>WES7</strong> images directly on the target device using<br />
the IBW/Express Method for quick pro<strong>to</strong>typing by booting<br />
<strong>of</strong>f <strong>of</strong> WinPE/IBW DVDs as shown above.<br />
The Image Builder (IBW) program can install images in<br />
two modes:<br />
a. Interactive Mode - Using guided step-by-step wizard<br />
b. Unattended Mode - Using Ununattend.xml Answer File<br />
The following steps occur in Interactive Mode upon booting<br />
from the IBW WinPE disc:<br />
1. WinPE is launched<br />
2.<br />
3.<br />
4.<br />
5.<br />
(Optional) Image Builder asks if you want <strong>to</strong> deploy an<br />
Answer File or WIM image<br />
Tap.exe is run by IBW and the devices.pmq file is<br />
generated<br />
IBW maps the corresponding drivers from the DS<br />
based on the above PMQ file<br />
IBW gives the developer an option <strong>to</strong> select an application<br />
template or manually select a Feature Set and<br />
additional driver packages from the DS<br />
6. A valid Answer File is created based on the selection<br />
7.<br />
IBW starts assembling and building the image based<br />
on the Answer File, run through the Configuration<br />
Passes and then reboots <strong>to</strong> the “<strong>Windows</strong> Welcome”<br />
screen<br />
In Unattended Mode an Answer File (Unattended.xml) can<br />
be created using ICE on the development machine and<br />
supplied <strong>to</strong> the Image Builder when booting from the IBW<br />
WinPE disc on the target device, thereby au<strong>to</strong>mating the<br />
installation process. To create fully unattended Answer<br />
Files please refer <strong>to</strong> [8].<br />
No matter whether ICE is used <strong>to</strong> create an Answer File or<br />
IBW is used directly on the target device, Image Builder ultimately<br />
does all <strong>of</strong> the heavy lifting on the target device<br />
<strong>to</strong> build the <strong>WES7</strong> image. In certain situations, this can be<br />
a major drawback.<br />
FBA vs. Image Builder Phase<br />
With WES2009, when you copy your image generated<br />
from Target Designer <strong>to</strong> your target device media (like a<br />
hard drive or CompactFlash) and boot from it, the FBA<br />
(First Boot Agent) program is executed <strong>to</strong> install the rest <strong>of</strong><br />
the WES209 system. The FBA process has phases numbered<br />
from 0 <strong>to</strong> 65535 [9]. Depending on the phases,<br />
different settings are applied <strong>to</strong> the image. One can configure<br />
actions that take place at a particular FBA phase by<br />
creating a component using Component Designer.<br />
With <strong>WES7</strong>, the FBA model is replaced by a Configuration<br />
Pass [10] model which is executed by IBW on the target<br />
device. Following is a table describing the passes that are<br />
executed 8 on the target device during installation <strong>of</strong> a<br />
<strong>WES7</strong> image:<br />
Image Builder<br />
Logical Phases<br />
Configuration<br />
Pass<br />
Executed by Command <strong>to</strong><br />
IBW Sysprep<br />
Execute the<br />
Pass<br />
Host OS windowsPE Yes No N/A<br />
<strong>of</strong>flineServicing Yes No<br />
Generalize No Yes sysprep /generalize<br />
Online Config. specialize Yes No N/A<br />
<strong>Windows</strong><br />
Welcome<br />
auditSystem No Yes sysprep /audit<br />
auditUser No Yes<br />
oobeSystem Yes Yes sysprep /oobe<br />
One can configure various actions <strong>to</strong> occur in each <strong>of</strong><br />
these passes by modifying the properties in the Answer<br />
File for that particular pass using ICE.<br />
Implication<br />
The image building process has gone through a significant<br />
change since WES2009. With <strong>WES7</strong>, OEM developers<br />
are able <strong>to</strong> configure and build images over the target<br />
device and have the option <strong>of</strong> completely au<strong>to</strong>mating<br />
<strong>WES7</strong> installation. Although replacing the entire FBA<br />
process with the IBW and Configuration Passes introduces<br />
a significant learning curve, this new model gives OEM<br />
7.<br />
8.<br />
Image Builder in <strong>WES7</strong> replaces winnt.exe and winnt32.exe in WES2009<br />
All the passes are executed in sequence which have “Yes” in the “Executed<br />
by IBW” column
developers more control and flexibility over the image<br />
configuration and building process. One drawback <strong>of</strong> the<br />
building model is that if the target device is low performance,<br />
it could take hours <strong>to</strong> build the <strong>WES7</strong> image 9 .<br />
3.7 Deploying an Image<br />
In WES2009, one <strong>of</strong> the common methods <strong>to</strong> test (and<br />
sometimes deploy) an image on the target device during<br />
the development phase is <strong>to</strong> copy the contents from the<br />
“C:\<strong>Windows</strong> <strong>Embedded</strong> Images” folder on the development<br />
machine <strong>to</strong> the root (usually Drive C:) <strong>of</strong> a <strong>Windows</strong><br />
XP bootable partition on a target s<strong>to</strong>rage device (hard<br />
drive, CompactFlash, USB drive, etc.) and boot from it.<br />
With <strong>WES7</strong>, if you are using ICE 10 , once you finish preparing<br />
your Answer File you have the following options <strong>to</strong><br />
test/deploy your image:<br />
1.<br />
2.<br />
You can create a WinPE/IBW bootable 11 USB Flash<br />
Drive (UFD) using ICE by Tools Ý Create Media Ý<br />
Create IBW Image from Answer File and then<br />
copying the contents generated <strong>to</strong> the UFD <strong>of</strong> the<br />
development machine (similar <strong>to</strong> copying the build<br />
direc<strong>to</strong>ry in WES2009 as mentioned above).<br />
Alternatively, you can create a WinPE/IBW bootable<br />
CD/DVD-ROM [11] (similar <strong>to</strong> creating a bootable UFD<br />
as mentioned above) <strong>to</strong> install <strong>WES7</strong> on the target<br />
device.<br />
Note: Unlike WES2009, this bootable CD/DVD is not for running<br />
<strong>WES7</strong> directly from the CD/DVD-ROM.<br />
Once you prepare your install media (UFD or CD/DVD),<br />
you can boot from it on the target device and IBW will<br />
start installing <strong>WES7</strong>.<br />
Following is a brief table comparing alternate deployment<br />
methods:<br />
Method WES2009 <strong>WES7</strong><br />
PXE Boot Yes No (replaced by WDS 12 )<br />
Remote Boot Yes No 13<br />
USB Boot Yes Yes<br />
CD/DVD Yes No<br />
WDS No Yes<br />
Sysprep an Image<br />
Let’s take a look at an example which describes the differences<br />
between WES2009 and <strong>WES7</strong> when sysprep’ing<br />
an image, which is a common technique used for mass<br />
deployment on target devices.<br />
ä<br />
Steps WES2009 <strong>WES7</strong><br />
1. Image configuration Target Designer on development<br />
machine<br />
2. Add Sysprep <strong>to</strong>ol Add “Sysprep Component14 ” N/A<br />
3. Configure Sysprep Right-clicking on the<br />
<strong>to</strong>ol<br />
component<br />
4. Booting image on Your preferred method <strong>to</strong><br />
target device<br />
boot<br />
ICE on development machine<br />
N/A<br />
Your preferred method <strong>to</strong><br />
boot<br />
5. Locate sysprep <strong>to</strong>ol C:\sysprep\sysprep C:\<strong>Windows</strong>\System32\<br />
direc<strong>to</strong>ry on target<br />
image<br />
sysprep<br />
6. Sysprep your target sysprep<br />
image<br />
15 .exe -reseal -reboot<br />
-- or --<br />
fbreseal.exe (if you are<br />
using the “System Cloning”<br />
component [12])<br />
sysprep.exe /generalize<br />
/oobe 16 /reboot<br />
-- or --<br />
sysprep.exe /generalize /audit<br />
/reboot<br />
As you can see, the switch reseal is replaced by generalize.<br />
They both achieve the same purpose (removing SID,<br />
computer name, user settings, etc.). Many features <strong>of</strong> the<br />
Sysprep <strong>to</strong>ol, such as the audit and fac<strong>to</strong>ry mode, were<br />
not supported in WES2009 for the ConfigMgr OSD 17 functionality<br />
which is now supported in <strong>WES7</strong>. You also need<br />
<strong>to</strong> delete the Sysprep <strong>to</strong>ol in <strong>WES7</strong>, unlike in WES2009<br />
where it is deleted au<strong>to</strong>matically once you have resealed<br />
your image. In <strong>WES7</strong>, a developer can reseal an image<br />
multiple times until it is finalized, whereas in WES2009<br />
you can only reseal an image once.<br />
Implication<br />
A lot <strong>of</strong> the new deployment methods in <strong>WES7</strong> make<br />
uses <strong>of</strong> the existing <strong>Windows</strong> 7 deployment techniques.<br />
This allows OEMs <strong>to</strong> leverage the benefits <strong>of</strong> these advanced<br />
technologies while simultaneously reducing the<br />
learning curve.<br />
3.8 Log Files<br />
Log files are another area where things have changed<br />
considerably with respect <strong>to</strong> <strong>WES7</strong>. In WES2009, <strong>to</strong> debug<br />
issues during the image install (FBA) process, one would<br />
9.<br />
10.<br />
11.<br />
Micros<strong>of</strong>t is working on giving users a more intuitive option <strong>to</strong> build<br />
<strong>WES7</strong> images <strong>of</strong>fline using DISM<br />
As mentioned earlier, there are two methods <strong>to</strong> build images in <strong>WES7</strong><br />
- using ICE or IBW<br />
First you need <strong>to</strong> make a UFD bootable as a separate step [20] - ICE does<br />
not do it for you au<strong>to</strong>matically<br />
12. <strong>Windows</strong> Deployment Services<br />
13.<br />
14.<br />
15.<br />
Since <strong>WES7</strong> images are considerably large, this is not a very practical<br />
method. However, one could possibly do it if the target device has sufficient<br />
RAM.<br />
You can also use the “System Cloning” component in WES2009, but you<br />
cannot use both<br />
Both the sysprep.exe in WES2009 and <strong>WES7</strong> will launch in GUI mode if<br />
you don’t specify any switch<br />
16. The option oobe tells Sysprep <strong>to</strong> boot in<strong>to</strong> the <strong>Windows</strong> Welcome screen<br />
17.<br />
System Center Configuration Manager (ConfigMgr) Operating System<br />
Deployment (OSD)
typically look at the following files in the installation<br />
partition (usually C:\) <strong>of</strong> the target device:<br />
•<br />
•<br />
C:\<strong>Windows</strong>\setupapi<br />
C:\<strong>Windows</strong>\FBA\FBALOG<br />
With <strong>WES7</strong>, Image Builder logs its actions in different<br />
direc<strong>to</strong>ries and s<strong>to</strong>rage media (ram disk, hard drive, etc.)<br />
depending upon the installation phase 18 :<br />
Installation Phase Log Files Location User Interaction<br />
Au<strong>to</strong>run<br />
(Just when WinPE is<br />
about <strong>to</strong> load)<br />
No log files are created Before clicking “Build<br />
an Image” or “Deploy an<br />
Answer File or WIM”<br />
WinPE X:\ 19 <strong>Windows</strong>\Sources\Panther\setupact.log<br />
X:\<strong>Windows</strong>\Sources\Panther\setuperr.<br />
log<br />
During Installation C:\<strong>Windows</strong>.~BT\Panther\Sources\<br />
setupact.Log<br />
C:\<strong>Windows</strong>.~BT\Panther\Sources\<br />
setuperr.Log<br />
After Installation C:\<strong>Windows</strong>\Panther\setupact.Log 20<br />
Roll back<br />
(optional)<br />
Sysprep<br />
(optional)<br />
C:\<strong>Windows</strong>\Panther\setuperr.Log<br />
C:\<strong>Windows</strong>\inf\setupapi.Dev.Log<br />
C:\<strong>Windows</strong>\inf\setupapi.App.Log<br />
Before clicking “Next” on<br />
the disk configuration<br />
screen<br />
Once disk partition is<br />
selected<br />
After installation<br />
completes and windows<br />
prepares <strong>to</strong> start for the<br />
first time<br />
C:\<strong>Windows</strong>.~BT\Sources\Rollback\* If fatal error occurs and<br />
setup fails and decides<br />
<strong>to</strong> roll back<br />
C:\<strong>Windows</strong>\System32\Sysprep\Panther<br />
- Generalize<br />
C:\<strong>Windows</strong>\Panther\Unattendgc<br />
- Unattended actions<br />
How <strong>to</strong> Access Log Files on a RAM Disk?<br />
When you execute<br />
Sysprep command with<br />
different parameters<br />
A RAM disk is destroyed if system power is turned <strong>of</strong>f. To<br />
copy the log files from the RAM disk before the power is<br />
turned <strong>of</strong>f:<br />
a.<br />
b.<br />
Press Shift + F10 keys and a WinPE command prompt<br />
will appear<br />
Execute wpeinit, which starts various WinPE services<br />
(including networking)<br />
Use the net use command <strong>to</strong> move the log files from the<br />
X:\ drive <strong>to</strong> a network share.<br />
IBW Log Files<br />
a.<br />
b.<br />
setupact.log - All the actions <strong>of</strong> IBW are logged in this<br />
file<br />
setuperr.log - Any error(s) encountered by IBW will be<br />
logged in this file<br />
Driver and Application Installation Log Files<br />
With <strong>WES7</strong>, there are two separate log files, as a part <strong>of</strong><br />
SetupAPI logs, for driver and applications installation:<br />
a. SetupAPI.dev.log - Plug-N-Play device installation<br />
b.<br />
event log file which is helpful for diagnosing driver<br />
setup issues<br />
SetupAPI.app.log - Application installation including<br />
log file<br />
Sysprep Log Files<br />
Sysprep logs Image Builder actions in different direc<strong>to</strong>ries<br />
depending upon the configuration pass. Because the<br />
generalize pass deletes certain Image Builder log files,<br />
Sysprep logs generalize actions outside <strong>of</strong> the standard<br />
Image Builder log files.<br />
Implication<br />
The location and names <strong>of</strong> log files have changed completely<br />
in <strong>WES7</strong> because <strong>of</strong> the fundamental change in<br />
the Image Building process (IBW instead <strong>of</strong> FBA). Moreover,<br />
log files in <strong>WES7</strong> are categorized in<strong>to</strong> different locations<br />
and file names depending upon the type <strong>of</strong> action<br />
performed by Image Builder and DISM. This makes the<br />
debugging process much easier and intuitive.<br />
3.9 Maintaining Images<br />
The latest WIM (<strong>Windows</strong> Imaging Format), a “hardwareagnostic”<br />
file-based format, can be used for maintaining<br />
HAL-independent images. You can start by creating a<br />
<strong>WES7</strong> core image, capturing it with the ImageX [13] <strong>to</strong>ol<br />
that is supplied with <strong>WES7</strong>, and then mounting the image<br />
(.wim) on your development computer file system<br />
and making any necessary updates (servicing) <strong>of</strong>fline<br />
(adding drivers, applying 3rd party updates, installating<br />
applications, etc.) for your respective platform. Because<br />
several images can be created inside one single image,<br />
maintaining <strong>WES7</strong> images is very easy and efficient. However,<br />
separate images are required for different processor<br />
architectures (32-bit vs. 64-bit platforms) since the drivers<br />
are not compatible across processor architectures.<br />
WES2009 has a deployment <strong>to</strong>ol called SDI (System Development<br />
Image) which is somewhat similar <strong>to</strong> ImageX,<br />
although it lacks some <strong>of</strong> the advanced features like<br />
servicing images <strong>of</strong>fline and creating multiple instances<br />
<strong>of</strong> images in one single file [14].<br />
Implication<br />
With new technologies like WIM and <strong>to</strong>ols like ImageX,<br />
<strong>WES7</strong> provides a cost-effective means <strong>of</strong> maintaining OS<br />
images since a single image can be deployed on a variety<br />
<strong>of</strong> target platforms.<br />
18.<br />
19.<br />
ä<br />
There are no <strong>of</strong>ficial installation phase names. These phases roughly<br />
equate <strong>to</strong> one or two “Configuration Passes” discussed previously<br />
Drive letter X denotes that log files are s<strong>to</strong>red in a RAM disk (a temporary<br />
disk like space in RAM)<br />
20.<br />
Log files get moved/copied from the RAM disk <strong>to</strong> the hard drive once the<br />
system knows what the target partition will be
3.10 Localization<br />
The localization i.e. language packs (LPs) support in <strong>WES7</strong><br />
has been redesigned from scratch and now includes language-neutral<br />
design in terms <strong>of</strong> OS components, meaning<br />
that the localized resources are now separated from<br />
the non-localized resources. This enables OEMs <strong>to</strong> quickly<br />
localize a particular language, fixing non-localized bugs<br />
without having <strong>to</strong> re-ship the entire binary.<br />
What can be localized?<br />
WES2009 <strong>WES7</strong><br />
OS Image Yes Yes<br />
Developer Tools No Yes<br />
Documentation No Yes<br />
Localization Features<br />
Language Install Source MUI Language Packs (LPs)<br />
Adding Language(s) Offline No Yes<br />
Included in Main Install Disc No Yes<br />
Language-Neutral Design No Yes<br />
No. <strong>of</strong> Languages Support 23 36<br />
OS Binaries Have <strong>to</strong> be fully localized Only apply <strong>to</strong> relevant LP<br />
Resulting OS Footprint Large Small<br />
Moreover, the LPs only contain language resources for<br />
the corresponding design-neutral parts <strong>of</strong> the feature<br />
sets, drivers, etc. and hence the resulting OS footprint is<br />
smaller in size relative <strong>to</strong> WES2009.<br />
Implication<br />
The improvement in <strong>WES7</strong> localization reduces the need<br />
for servicing security and feature updates significantly.<br />
3.11 Application Development<br />
Applications for <strong>WES7</strong> can be developed with <strong>to</strong>ols like<br />
Visual Studio 2008 just like in WES2009 or XPe. Almost all<br />
target applications in embedded projects have dependencies<br />
which need <strong>to</strong> be satisfied by the OS image in<br />
order for the application <strong>to</strong> run successfully in <strong>Windows</strong>.<br />
These dependencies are classified in<strong>to</strong> two categories:<br />
a. Static Dependencies (linked at compile time)<br />
b.<br />
Dynamic/Runtime Dependencies (runtime DLLs<br />
called)<br />
In WES2009, one would use 3rd party <strong>to</strong>ols like Process<br />
Moni<strong>to</strong>r 21 [15] and Dependency Walker Path [16] <strong>to</strong> find<br />
dependencies. The relevant components could then be<br />
included in the SLX file. This can be a time consuming<br />
and frustrating process, especially when an application<br />
has a significant number <strong>of</strong> dependencies.<br />
Static Dependencies in <strong>WES7</strong><br />
In <strong>WES7</strong>, there are new <strong>to</strong>ols that make including applications<br />
in a <strong>WES7</strong> project nearly seamless. First <strong>of</strong> all, ICE<br />
has an SDA (Static Dependency Analyzer) <strong>to</strong>ol for analyz-<br />
ing static dependences for .exe, .dll, and .msi files. This<br />
is done in ICE via Tools Ý Analyze Static Dependencies<br />
and then browsing <strong>to</strong> the file (usually an .exe, .dll, etc.) <strong>to</strong><br />
analyze.<br />
Dynamic Dependencies in <strong>WES7</strong><br />
SDA is not a comprehensive dependency analysis <strong>to</strong>ol<br />
and the Process Moni<strong>to</strong>r must be used in <strong>WES7</strong> <strong>to</strong> analyze<br />
required dynamic dependencies 22 . However, there is another<br />
<strong>to</strong>ol called Package Mapper [17] for <strong>WES7</strong> which can<br />
process output from Process Moni<strong>to</strong>r, which is usually a<br />
file that lists all <strong>of</strong> the binaries that are required and maps<br />
those dependencies (binaries) <strong>to</strong> <strong>WES7</strong> packages. The resulting<br />
file is an Answer File which can now be consumed<br />
by ICE. The process looks like this:<br />
Process Moni<strong>to</strong>r Ý Package Mapper Ý Answer<br />
File Ý Build Image<br />
Templates<br />
Templates are where <strong>WES7</strong> steals the show from<br />
WES2009 when it comes <strong>to</strong> supporting a target application.<br />
The output <strong>of</strong> Process Moni<strong>to</strong>r contains unnecessary<br />
files, noise, registry entries, etc. and thus it could<br />
take weeks <strong>to</strong> identify dependencies. <strong>WES7</strong> now has a<br />
dedicated website which provides various templates for<br />
your target application. For example, let’s say you want<br />
“<strong>Windows</strong> Live Messenger” in your target OS image.<br />
Instead <strong>of</strong> analyzing dependencies that are required <strong>to</strong><br />
run the Messenger service, you can simply go the <strong>WES7</strong><br />
compatible application website [18] and download the<br />
“<strong>Windows</strong> Live Messenger” template and import it in<strong>to</strong><br />
ICE via File Ý Import Ý Import Template. The imported<br />
template can then be added <strong>to</strong> the Answer File.<br />
Implication<br />
Finding target application dependencies can be a challenging<br />
and time-consuming process. From an OEM<br />
perspective, the powerful <strong>to</strong>ols in <strong>WES7</strong> help save time<br />
and resources by performing all <strong>of</strong> the complicated<br />
analysis beforehand and providing a ready-<strong>to</strong>-use template<br />
for a project. Independent S<strong>of</strong>tware Vendors (ISVs)<br />
can work with Micros<strong>of</strong>t’s WES team <strong>to</strong> create and upload<br />
a template for their application on the <strong>WES7</strong> Compatible<br />
Application website [19].<br />
4.0 Conclusion<br />
With its new set <strong>of</strong> powerful <strong>to</strong>ols and technologies,<br />
<strong>WES7</strong> is a dramatic improvement over its predecessors,<br />
especially given the degree <strong>of</strong> cus<strong>to</strong>mization and<br />
flexibility that it <strong>of</strong>fers in regards <strong>to</strong> image configuration<br />
and building. <strong>WES7</strong> delivers the power and reliability <strong>of</strong><br />
21.<br />
It combines the features <strong>of</strong> two legacy Sysinternals utilities: Filemon and<br />
Regmon<br />
22.<br />
You can use Process Moni<strong>to</strong>r <strong>to</strong> analyze static and dynamic dependencies<br />
and hence completely bypass the built-in dependency <strong>to</strong>ol in <strong>WES7</strong>
the <strong>Windows</strong> 7 operating systems, while also providing<br />
the essential features <strong>of</strong> an embedded operating system<br />
- componentization and cus<strong>to</strong>mization. The focus has<br />
been <strong>to</strong> reduce time <strong>to</strong> market by enabling OEM developers<br />
<strong>to</strong> spend more time on their core competency <strong>of</strong><br />
application development and less time figuring out the<br />
correct set <strong>of</strong> components required <strong>to</strong> build a fully-functional<br />
image. Although <strong>WES7</strong> lacks a few features which<br />
were available with its predecessors, overall it is a sleek<br />
embedded operating system. There is definitely a significant<br />
learning curve in transitioning <strong>to</strong> <strong>WES7</strong>, but the<br />
benefits far outweigh the costs.<br />
Kushal Koolwal<br />
R&D OS Engineer, VersaLogic Corp.<br />
In his current position, Kushal works with multiple embedded<br />
operating systems (Linux, <strong>Windows</strong> <strong>Embedded</strong>,<br />
QNX, etc.) <strong>to</strong> ensure they run efficiently on VersaLogic’s<br />
embedded computers. Kushal completed his bachelor’s<br />
degree in Computer Engineering in 2004 in India. He then<br />
pursued a Master’s degree in Computer Science, which he<br />
received in 2006, followed by an MBA in 2008, both from<br />
the University <strong>of</strong> Oregon. Additionally, Kushal is a database/web<br />
developer using .NET technologies and blogs<br />
about Linux solutions and businesses. Kushal’s hobbies<br />
include traveling, playing sports and dancing.<br />
References<br />
[1] http://msdn.micros<strong>of</strong>t.com/en-us/library/ff794877.aspx<br />
[2] http://msdn.micros<strong>of</strong>t.com/en-us/library/ff793769.aspx<br />
[3] http://windows.micros<strong>of</strong>t.com/en-US/windows-vista/Comparing-NTFSand-FAT-file-systems<br />
[4] http://www.<strong>to</strong>mstricks.com/how-<strong>to</strong>-install-windows-vista-on-a-fat32partition-instead-<strong>of</strong>-ntfs/<br />
[5] http://support.micros<strong>of</strong>t.com/kb/299340<br />
[6] http://download.micros<strong>of</strong>t.com/download/5/b/9/5b97017b-e28a-4baeba48-174cf47d23cd/CPA002_WH06.ppt<br />
[7] http://unattended.msfn.org/unattended.xp/view/web/18/<br />
[8] http://msdn.micros<strong>of</strong>t.com/en-us/library/ff794599.aspx<br />
[9] http://msdn.micros<strong>of</strong>t.com/en-us/library/dd450713.aspx<br />
[10] http://msdn.micros<strong>of</strong>t.com/en-us/library/ff794273.aspx<br />
[11] http://msdn.micros<strong>of</strong>t.com/en-us/library/ff793723.aspx<br />
[12] http://msdn.micros<strong>of</strong>t.com/en-us/library/dd450718.aspx<br />
[13] http://technet.micros<strong>of</strong>t.com/en-us/library/cc507842.aspx<br />
[14] http://msdn.micros<strong>of</strong>t.com/en-us/library/ms940108%28Win<strong>Embedded</strong><br />
.5%29.aspx<br />
[15] http://technet.micros<strong>of</strong>t.com/en-us/sysinternals/bb896645.aspx<br />
[16] http://www.dependencywalker.com/<br />
[17] http://code.msdn.micros<strong>of</strong>t.com/packagemapper<br />
[18] http://www.micros<strong>of</strong>t.com/windowsembedded/en-us/products/westandard/applications.mspx<br />
[19] http://www.micros<strong>of</strong>t.com/windowsembedded/en-us/products/westandard/template_faq.mspx<br />
[20] http://msdn.micros<strong>of</strong>t.com/en-us/library/ff795043.aspx<br />
Appendix-I:<br />
Target Designer and ICE Screenshots<br />
Target Designer:<br />
ä
Image Configuration Edi<strong>to</strong>r (ICE):<br />
Appendix-II:<br />
Example - Adding 3rd Party Materials<br />
23.<br />
24.<br />
ä<br />
You can also install the driver silently by passing the “quiet” argument:<br />
setup.exe /quiet. This way user won’t be presented with any wizard during<br />
driver installation.<br />
Depending on the type <strong>of</strong> registry entries you are trying <strong>to</strong> add, you<br />
might need <strong>to</strong> execute it with the following command: psexec -s reg<br />
import C:\example.reg<br />
Adding Files<br />
.txt, .jpg, .etc<br />
files<br />
Adding Drivers<br />
INF-based<br />
.sys, .dll files<br />
WES2009 <strong>WES7</strong><br />
1.Create an SLD component in<br />
“Component Designer”<br />
2.Add your file and its path in the<br />
“Files” tab<br />
3.Create a new reposi<strong>to</strong>ry<br />
4.Import your SLD file in “Component<br />
Database Manager”<br />
5.Finally, add the newly created<br />
component in your Project File (SLX)<br />
in “Target Designer”<br />
1.Create a SLD component in<br />
“Component Designer”<br />
2.Import your driver INF file<br />
3.Make sure necessary files,<br />
resources and registry entries are<br />
added<br />
4.Import your .SLD file in “Component<br />
Database Manager”<br />
5.Finally, add the newly created<br />
component in your Project File (SLX)<br />
in “Target Designer”<br />
MSI-based No direct support for installing<br />
MSI-based drivers. You need <strong>to</strong> first<br />
extract the files by running the MSI<br />
installer on an existing <strong>Windows</strong><br />
machine and then follow the<br />
procedure for the INF-based drivers<br />
as mentioned above.<br />
Adding Registry<br />
.reg files 1.Create an SLD component in<br />
“Component Designer”<br />
Adding Applications<br />
2.Now you can add your registry<br />
branch in the Registry tab<br />
3.Import your .SLD file in “Component<br />
Database Manager”<br />
4.Finally, add the newly created<br />
component in your Project File (SLX)<br />
in “Target Designer”<br />
.exe files 1.Use <strong>to</strong>ols like Dependency Walker<br />
and Process Moni<strong>to</strong>r <strong>to</strong> find all<br />
dependencies<br />
2.Map all <strong>of</strong> the found dependencies<br />
<strong>to</strong> the components in Target Designer<br />
and add them <strong>to</strong> the SLX file (a very<br />
time-consuming process)<br />
3.Build the image<br />
1.Right-click on “$OEM$ Folders” in<br />
ICE and select “Explore From Here”<br />
and copy your file depending on<br />
where you want your file <strong>to</strong> reside<br />
on the final image on the target<br />
2.Right-click again on “$OEM$<br />
Folders” in ICE and select “Insert OEM<br />
Folders Path”<br />
1.Right-click on the “Out-<strong>of</strong>-Box<br />
Drivers” folder in ICE and select “Explore<br />
from Here” and copy your driver<br />
files (.inf, .sys, .dll) in a new folder<br />
inside “Out-<strong>of</strong>-Box drivers” folder.<br />
2.Select Insert Ý Driver<br />
Path Ý Pass 2 OfflineServing<br />
1.Add your MSI file in the OEM folder<br />
as explained in “Adding Files” above<br />
2.Go <strong>to</strong> Insert Ý Synchronous<br />
Command Ý Pass 4 Specialize and<br />
type the following command: cmd.<br />
exe /c C:\ 23<br />
1.Create a .reg file with the registry<br />
entries that you would like <strong>to</strong> add<br />
2.Add your registry file (example.<br />
reg) in the OEM folder as explained<br />
in “Adding Files”<br />
3.Go <strong>to</strong> Insert Ý Synchronous<br />
Command Ý Pass 7 Specialize and<br />
type the following command: cmd.<br />
exe /c reg import C:\<br />
24<br />
1.Check the application template<br />
website and import the template if<br />
your application is listed<br />
2.If you don’t find a template, use<br />
the SDA <strong>to</strong>ol in ICE <strong>to</strong> resolve dependency<br />
and include the required<br />
package(s) in your Answer File<br />
3.If there are still missing dependencies,<br />
use the Process Moni<strong>to</strong>r <strong>to</strong>ol <strong>to</strong><br />
find runtime/dynamic dependencies<br />
and use Package Mapper <strong>to</strong> generate<br />
your Answer File<br />
4.Build the image
So far, various differences between the <strong>to</strong>ols and the process<br />
<strong>of</strong> configuring images at a higher conceptual level<br />
have been discussed. In this section we will provide actual<br />
examples <strong>of</strong> how things are done differently in <strong>WES7</strong><br />
as compared <strong>to</strong> WES2009. In particular we will focus on<br />
how <strong>to</strong> add 3rd party material in an OS image.<br />
Synchronous Commands<br />
They can be run in Pass 1, 4, 6, 7<br />
Driver Path<br />
Driver files (INF-based) can be added in Pass 1, 2, 5<br />
OEM Folders Path<br />
This folder is always inserted in Pass 1<br />
A leading supplier <strong>of</strong> industrial computers since 1976, VersaLogic focuses on high-quality board-level products for embedded OEM applications. Its 5+ year<br />
production life guarantee and outstanding warranties demonstrate a commitment <strong>to</strong> service. Product platforms include EBX, PC/104, PC/104-Plus, PCI-104,<br />
EPIC, SUMIT, and SPX. For five consecutive years, VersaLogic has received the coveted Platinum level vendor rating based on independent user surveys by<br />
technology research firm VDC Research Group, Inc. VersaLogic is registered <strong>to</strong> the ISO 9001:2008 standard. For more information, visit www.VersaLogic.com.<br />
REV. 11/29/10