
You also want an ePaper? Increase the reach of your titles
YUMPU automatically turns print PDFs into web optimized ePapers that Google loves.
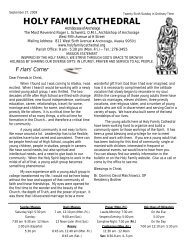
STEP 6<br />
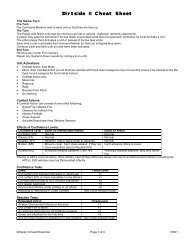
STEP 7<br />
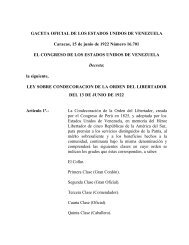
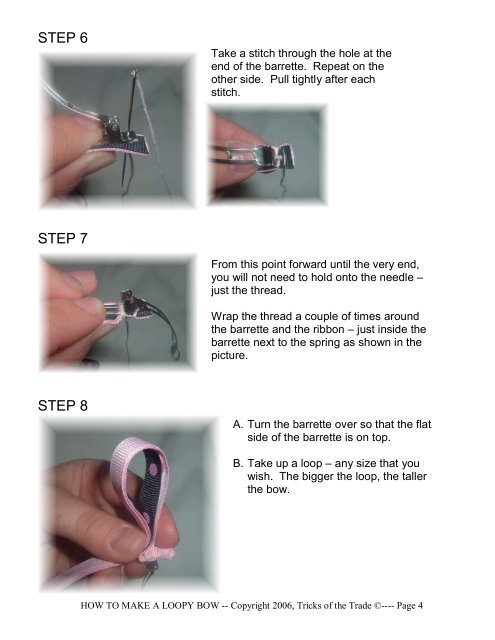
STEP 8<br />
Take a stitch through the hole at the<br />
end of the barrette. Repeat on the<br />
other side. Pull tightly after each<br />
stitch.<br />
From this point forward until the very end,<br />
you will not need <strong>to</strong> hold on<strong>to</strong> the needle –<br />
just the thread.<br />
Wrap the thread a couple of times around<br />
the barrette and the ribbon – just inside the<br />
barrette next <strong>to</strong> the spring as shown in the<br />
picture.<br />
A. Turn the barrette over so that the flat<br />
side of the barrette is on <strong>to</strong>p.<br />
B. Take up a loop – any size that you<br />
wish. The bigger the loop, the taller<br />
the bow.<br />
HOW TO MAKE A LOOPY BOW -- Copyright 2006, Tricks of the Trade ©---- Page 4