OPN DL Installation and User Guide - Electronic Reading Systems Ltd.
OPN DL Installation and User Guide - Electronic Reading Systems Ltd.
OPN DL Installation and User Guide - Electronic Reading Systems Ltd.

You also want an ePaper? Increase the reach of your titles
YUMPU automatically turns print PDFs into web optimized ePapers that Google loves.
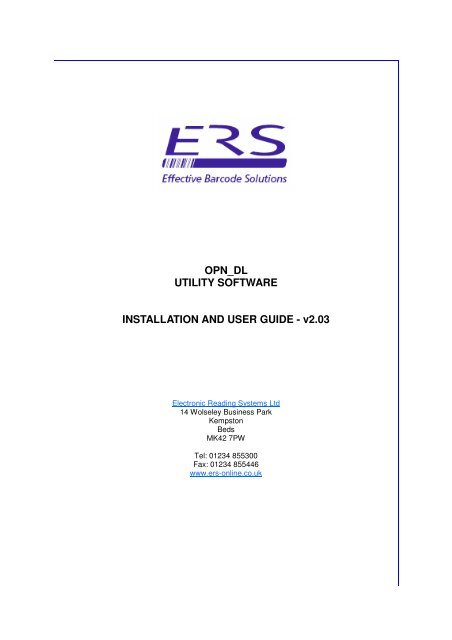
<strong>OPN</strong>_<strong>DL</strong><br />
UTILITY SOFTWARE<br />
INSTALLATION AND USER GUIDE - v2.03<br />
<strong>Electronic</strong> <strong>Reading</strong> <strong>Systems</strong> <strong>Ltd</strong><br />
14 Wolseley Business Park<br />
Kempston<br />
Beds<br />
MK42 7PW<br />
Tel: 01234 855300<br />
Fax: 01234 855446<br />
www.ers-online.co.uk
1.0 INTRODUCTION<br />
CONTENTS<br />
2.0 INSTALLING <strong>OPN</strong>_<strong>DL</strong> & DRIVERS<br />
2.1 Installing the <strong>OPN</strong>_<strong>DL</strong> Application<br />
2.2 Installing the <strong>OPN</strong>2001 Drivers<br />
3.0 USING <strong>OPN</strong>_<strong>DL</strong><br />
3.1 Running <strong>OPN</strong>_<strong>DL</strong><br />
3.2 Downloading Stored Data from the <strong>OPN</strong>2001<br />
3.3 Format of the Output Data File<br />
3.4 Backup Data Files<br />
4.0 CONFIGURING THE <strong>OPN</strong>2001<br />
4.1 The Configurable Parameters<br />
4.2 Saving the displayed configuration to Disk<br />
4.3 Retrieving a Configuration from disk<br />
4.4 Cloning Devices<br />
5.0 SHUTTING DOWN <strong>OPN</strong>_<strong>DL</strong>
1.0 INTRODUCTION<br />
<strong>OPN</strong>_<strong>DL</strong> is a simple to use utility program for use with the <strong>OPN</strong>2001.<br />
The software allows stored data to be collected from the terminals <strong>and</strong> provides<br />
facilities to allow configuration of the <strong>OPN</strong>2001s.<br />
<strong>Electronic</strong> <strong>Reading</strong> <strong>Systems</strong> <strong>Ltd</strong> Tel: 01234 855300 Fax: 01234 855446 www.ers-online.co.uk
2.0 INSTALLING <strong>OPN</strong>_<strong>DL</strong> AND DRIVERS<br />
NOTE: Previous versions of the <strong>OPN</strong>_<strong>DL</strong> application installer automatically installed both the<br />
<strong>OPN</strong>_<strong>DL</strong> application <strong>and</strong> the <strong>OPN</strong>2001 hardware drivers. This led to differences in the installation<br />
procedure for Windows XP (totally automatic), <strong>and</strong> Vista/ Windows7. For this reason, the <strong>OPN</strong>_<strong>DL</strong><br />
installer no longer attempts to install the hardware drivers automatically. As a result the application<br />
<strong>and</strong> drivers are now installed as 2 separate procedures summarised in sections 2.1 <strong>and</strong> 2.2 below.<br />
Note: Do not connect the <strong>OPN</strong>2001 data collector onto your PC until after the drivers have been<br />
manually installed - see section 2.2 below<br />
2.1 INSTALLING <strong>OPN</strong>_<strong>DL</strong> APPLICATION<br />
NOTE: The .NET 2.0 Framework is a prerequisite of the <strong>OPN</strong>_<strong>DL</strong> application.<br />
The .NET 2.0 Framework may be downloaded from the ERS website or direct from Microsoft.<br />
(Approximately 22MB download)<br />
To install the <strong>OPN</strong>_<strong>DL</strong> utility execute the Microsoft Installer <strong>OPN</strong>_<strong>DL</strong>.msi <strong>and</strong><br />
proceed as show below:<br />
Note: The software must be installed from<br />
a logon with full Administrative rights<br />
5) Click Close.<br />
<strong>OPN</strong>_<strong>DL</strong> is now installed.<br />
4) Click Next<br />
3) Click Next<br />
2) Click Next<br />
1) Click Run<br />
NOTE: These screenshots are based on XP. Other<br />
operating systems may differ in style <strong>and</strong> detail.<br />
For example additional security warnings will normally<br />
be presented under Vista <strong>and</strong> Windows7 )<br />
<strong>Electronic</strong> <strong>Reading</strong> <strong>Systems</strong> <strong>Ltd</strong> Tel: 01234 855300 Fax: 01234 855446 www.ers-online.co.uk
2.2 INSTALLING <strong>OPN</strong>2001 DRIVERS<br />
To install the <strong>OPN</strong>2001 drivers run the <strong>OPN</strong>2001 Driver Installer<br />
USB Drivers Installer.exe <strong>and</strong> proceed as follows:<br />
Note: Do not connect the <strong>OPN</strong>2001 data collector onto your PC until after the drivers have been<br />
manually installed below<br />
2) Click Next<br />
3) Click Next<br />
1) Click Run<br />
4) Click Next<br />
5) Click Next.<br />
The <strong>OPN</strong> drivers are now installed<br />
<strong>Electronic</strong> <strong>Reading</strong> <strong>Systems</strong> <strong>Ltd</strong> Tel: 01234 855300 Fax: 01234 855446 www.ers-online.co.uk
<strong>OPN</strong> Hardware Drivers:<br />
Note 1: The drivers automatically allocate a ‘virtual’ COM port for the <strong>OPN</strong>2001 allowing it to operate<br />
just as if it were plugged into one of the PC COM ports.<br />
The <strong>OPN</strong>_<strong>DL</strong> utility will automatically detect the COM port allocated to the <strong>OPN</strong>2001, avoiding the<br />
requirement for manual configuring of the software.<br />
Note 2: If the <strong>OPN</strong>2001 is subsequently connected to a different USB port on the PC it will be seen<br />
as a new device. The Found New Hardware wizard will then automatically run to allow the <strong>OPN</strong>2001<br />
to be installed to this USB Port. In this case a new virtual COM port will be assigned for the device<br />
when used via this USB port.<br />
Note 3: <strong>OPN</strong>_<strong>DL</strong> expects that only 1 <strong>OPN</strong>2001 will be connected to the PC. In the event that multiple<br />
devices are simultaneously connected, <strong>OPN</strong>_<strong>DL</strong> will communicate only with the 1st <strong>OPN</strong>2001<br />
found when searching for devices. If that device is disconnected <strong>OPN</strong>_<strong>DL</strong> will re-enter ’search’ mode<br />
finding the ‘next’ connected device.<br />
<strong>Electronic</strong> <strong>Reading</strong> <strong>Systems</strong> <strong>Ltd</strong> Tel: 01234 855300 Fax: 01234 855446 www.ers-online.co.uk
3.0 USING <strong>OPN</strong>_<strong>DL</strong><br />
<strong>OPN</strong>_<strong>DL</strong> software provides the following facilities:<br />
• Downloading stored data from the <strong>OPN</strong>2001<br />
• Configuring the <strong>OPN</strong>2001<br />
3.1 Running <strong>OPN</strong>_<strong>DL</strong><br />
The installation procedure above will create an icon for <strong>OPN</strong>_<strong>DL</strong> on the PC desktop.<br />
<strong>OPN</strong>_<strong>DL</strong> can be run from the desktop icon or from the Start menu.<br />
4) The Change Parameters facility will only<br />
be displayed when a device is connected.<br />
1) <strong>OPN</strong>_<strong>DL</strong> splash screen<br />
2) Click OK to set default operating mode for<br />
<strong>OPN</strong>_<strong>DL</strong><br />
(This message will be displayed only when<br />
running <strong>OPN</strong>_<strong>DL</strong> for the 1st time).<br />
3) <strong>OPN</strong>_<strong>DL</strong> will automatically search for a connected device<br />
<strong>and</strong> will display an appropriate message.<br />
The example screenshots shown here illustrate the connection<br />
of an <strong>OPN</strong>2001 which currently contains no stored data.<br />
<strong>Electronic</strong> <strong>Reading</strong> <strong>Systems</strong> <strong>Ltd</strong> Tel: 01234 855300 Fax: 01234 855446 www.ers-online.co.uk
3.2 Downloading Stored Data from the <strong>OPN</strong>2001<br />
To download stored data from the <strong>OPN</strong>2001 proceed as follows:<br />
1) Execute <strong>OPN</strong>_<strong>DL</strong> 2) Select the required download option by clicking as<br />
required to enable or disable. The option will be<br />
highlighted when enabled.<br />
The selected settings will be stored <strong>and</strong> will remain as<br />
default settings until subsequently changed by the<br />
operator if required.<br />
Store DTS allows the date/ time stamp for each stored<br />
barcode to be included in the output data file.<br />
Clear After Download allows <strong>OPN</strong>_<strong>DL</strong> to<br />
automatically clear the <strong>OPN</strong>2001 memory after a<br />
successful download.<br />
3) Connect the <strong>OPN</strong>2001 to a suitable USB<br />
port on the PC.<br />
<strong>OPN</strong>_<strong>DL</strong> will automatically connect to the<br />
device <strong>and</strong> attempt to download stored data.<br />
<strong>Electronic</strong> <strong>Reading</strong> <strong>Systems</strong> <strong>Ltd</strong> Tel: 01234 855300 Fax: 01234 855446 www.ers-online.co.uk
4) Specify the required location, name <strong>and</strong> file type (.txt<br />
or .xls) for the output data file <strong>and</strong> click Save.<br />
(The default path for the output file is the My Documents<br />
folder in the current user profile).<br />
The specified path <strong>and</strong> filename will be remembered<br />
<strong>and</strong> will be used as default for subsequent downloads<br />
until changed by the operator.<br />
5) <strong>OPN</strong>_<strong>DL</strong> will overwrite the data file if it already<br />
exists.<br />
Click Yes to confirm overwrite, NO to return to<br />
the Save as screen above for selection of a new<br />
output file.<br />
6) <strong>OPN</strong>_<strong>DL</strong> confirms that the data records<br />
have been written to the output data file.<br />
7) To download another <strong>OPN</strong>2001 simply unplug the<br />
device <strong>and</strong> plug-in another.<br />
Note: <strong>OPN</strong>_<strong>DL</strong> will automatically synchronise the real-time clock in the <strong>OPN</strong>2001 to the PC clock<br />
every time the device is connected.<br />
<strong>Electronic</strong> <strong>Reading</strong> <strong>Systems</strong> <strong>Ltd</strong> Tel: 01234 855300 Fax: 01234 855446 www.ers-online.co.uk
3.3 Format of the Output Data File<br />
The data collected from the scanner may be written to a simple ASCII text file or to<br />
an .xls spreadsheet.<br />
If written as a text file the data records will be written in the following format::<br />
Barcode, ScanDate<br />
5025874103041,20/06/2008 08:31:11<br />
88834561,20/06/2008 08:31:13<br />
50259635874,20/06/2008 08:31:13<br />
74-1-GX,20/06/2008 08:31:14<br />
If written as an .xls document the data will be presented in Excel as:<br />
Note that the date/time stamp will only be present in the output data file if the Store<br />
DTS option from the <strong>OPN</strong>_<strong>DL</strong> main screen is set to ON when the device is<br />
downloaded:<br />
<strong>Electronic</strong> <strong>Reading</strong> <strong>Systems</strong> <strong>Ltd</strong> Tel: 01234 855300 Fax: 01234 855446 www.ers-online.co.uk
3.4 Backup Data Files<br />
In addition to the output data file produced above <strong>OPN</strong>_<strong>DL</strong> also writes a file to a<br />
history folder located in the Application Data folder for All <strong>User</strong>s.<br />
For example for XP the back up data files will be stored at:<br />
C:\Documents <strong>and</strong> Settings\All <strong>User</strong>s\Application Data\<strong>Electronic</strong> <strong>Reading</strong><br />
<strong>Systems</strong> <strong>Ltd</strong>\<strong>OPN</strong>_<strong>DL</strong>\HISTORY<br />
These history files are written in the text file format as shown in section 3.3 above,<br />
<strong>and</strong> are named with the date/time of creation as <strong>OPN</strong>_ddmmyyyyhhmmss.txt<br />
Where ddmmyyyy is the date (day, month <strong>and</strong> year)<br />
<strong>and</strong> hhmmss is the time (hours, minutes <strong>and</strong> seconds)<br />
For example:<br />
<strong>OPN</strong>_20062008083134.txt<br />
<strong>Electronic</strong> <strong>Reading</strong> <strong>Systems</strong> <strong>Ltd</strong> Tel: 01234 855300 Fax: 01234 855446 www.ers-online.co.uk
4.0 CONFIGURING THE DATA COLLECTOR<br />
To configure the data collector connect the <strong>OPN</strong>2001 <strong>and</strong> proceed as follows:<br />
4) To set an <strong>OPN</strong>2001<br />
into the factory default<br />
state click Set Defaults.<br />
5) To clone <strong>OPN</strong>2001s<br />
see section 4.4 below.<br />
1) Click Change Parameters<br />
Note: If the Change Parameters button is not<br />
displayed, unplug <strong>and</strong> re-plug the data collector<br />
2) Select Symbology Parameters<br />
or Device Parameters as required<br />
6) Click to exit Configuration<br />
Mode.<br />
3) The configuration of the connected<br />
<strong>OPN</strong>2001 is automatically extracted <strong>and</strong><br />
displayed.<br />
Use the relevant drop down lists to<br />
change settings as required.<br />
Note: Selecting a setting via the drop<br />
down lists will immediately load that<br />
setting down to the device <strong>and</strong> verify.<br />
<strong>Electronic</strong> <strong>Reading</strong> <strong>Systems</strong> <strong>Ltd</strong> Tel: 01234 855300 Fax: 01234 855446 www.ers-online.co.uk
4.1 Configurable Parameters<br />
The configurable parameters for the <strong>OPN</strong>2001 are displayed under two tabs<br />
grouping together those parameters related to the barcode symbology <strong>and</strong> those<br />
associated with the operation of the <strong>OPN</strong>2001 itself:<br />
Note: Setting the bleeper volume.<br />
To set the bleeper volume ensure that Volume<br />
<strong>and</strong> Override <strong>OPN</strong> volume are both set to ON.<br />
Now select the required volume setting from the<br />
drop down menu under Default Override Setting.<br />
Selecting a new volume setting from the<br />
menu will immediately download that setting to<br />
the <strong>OPN</strong>2001<br />
(Note: the LOW+1 volume setting is currently<br />
the lowest available setting in the <strong>OPN</strong>2001.<br />
Setting the volume to LOW has no affect).<br />
Further details of the configurable parameters follow:<br />
<strong>Electronic</strong> <strong>Reading</strong> <strong>Systems</strong> <strong>Ltd</strong> Tel: 01234 855300 Fax: 01234 855446 www.ers-online.co.uk
CODE 39<br />
EAN/ UPC<br />
2 of 5<br />
EAN128/<br />
Code128<br />
SYMBOLOGY PARAMETERS<br />
PARAMETER COMMENTS DEFAULT<br />
St<strong>and</strong>ard Enable/ Disable (ON/ OFF) ON<br />
Full ASCII Enable/ Disable (ON/ OFF) OFF<br />
Check Digit Verify check digit (ON/ OFF) OFF<br />
Send Check Digit Transmit Check digit (ON/ OFF) OFF<br />
EAN +UPC Enable/Disable (ON/OFF) ON<br />
Convert UPCE to A ON/ OFF OFF<br />
Convert EAN8 to<br />
EAN13 Type<br />
Convert EAN8 to<br />
EAN13<br />
Add zeroes + change code type to EAN13<br />
(ON/ OFF)<br />
Add zeroes. Do not change code type (ON/<br />
OFF)<br />
UPC A Preamble NONE/ SYSTEM CHR/ SYSTEM + COUN-<br />
TRYCODE<br />
Security Level 0<br />
OFF<br />
OFF<br />
SYSTEM CHR<br />
Addon NO ADDON/ ADDON ONLY/ BOTH NO ADDON<br />
Addon Redundancy # times to decode UPC/ EAN barcode without<br />
addon (2—20)<br />
Send UPC A Check<br />
Digit<br />
Send UPC E Check<br />
digit<br />
ON/ OFF ON<br />
ON/ OFF ON<br />
UPC E Preamble NONE/ SYSTEM CHR/ SYSTEM + COUNTRY<br />
CODE<br />
Interleaved 2 of 5 Enable/ Disable (ON/ OFF) ON<br />
Interleaved 2 of 5<br />
check digit<br />
Convert Interleaved<br />
2 of 5 to EAN13<br />
Send Interleaved<br />
2 of 5 Check Digit<br />
Interleaved 2 of 5<br />
Length1/ Length 2<br />
Verify Check Digit (ON/ OFF) OFF<br />
ON/ OFF OFF<br />
Transmit Check digit (ON/ OFF) OFF<br />
1 Discrete Length (L1= length, L2 = 0)<br />
2 Discrete Lengths (L1 > L2)<br />
Length within Range (L1 L2)<br />
Length within Range (L1
SOUND<br />
BARCODE<br />
SCANNING<br />
MEMORY<br />
BATTERY<br />
DEVICE PARAMETERS<br />
PARAMETER COMMENTS DEFAULT<br />
Volume Enable/ Disable beeper (ON/ OFF) ON<br />
Override <strong>OPN</strong><br />
Volume<br />
Default Override Volume<br />
Setting<br />
Enable/ Disable (ON/ OFF).<br />
When enabled <strong>OPN</strong>_<strong>DL</strong> will send the Default<br />
Override Volume Setting.<br />
OFF/ HIGH/ MEDIUM/ LOW/ LOW+1/LOW+2<br />
Host Connect Beep ON<br />
Beeper Toggle Enable/ Disable feature allowing operator to<br />
toggle beeper ON/ OFF using scan key (ON/<br />
OFF)<br />
Host Complete Beep ON/ OFF ON<br />
Max Barcode Length 1 - 30 30<br />
OFF<br />
OFF<br />
Scanner on-time 1 - 10 Secs. (100mS increments) 30 (3<br />
Secs)<br />
Reject Redundant<br />
Barcode<br />
Good Decode LED Ontime<br />
Auto Clear<br />
OFF - Any code will be accepted<br />
Mode1 - A code will be rejected if identical to<br />
previously scanned code<br />
Mode 2 - A code will be rejected if identical to<br />
any previously scanned code<br />
ON<br />
OFF<br />
250mS - 1 Sec (250mS increments) 4 (1 Sec.)<br />
Clear Barcodes after download (ON/ OFF)<br />
(Overrides the Clear After Download setting<br />
in <strong>OPN</strong>_<strong>DL</strong>)<br />
Store RTC Store real-time clock data (ON/ OFF)<br />
Store RTC Store DTS Output File Result<br />
OFF OFF No DTS in file<br />
OFF ON DTS = 01/01/0001 00:00:00<br />
ON OFF No DTS in file<br />
ON ON DTS = scanned date/time<br />
Delete Enable Determines operation of recessed Delete key.<br />
Clear All function (ON/OFF)/ Delete Barcode<br />
(ON/OFF)/ Set all to default (ON/OFF)<br />
Thus a setting of ON/ OFF/ ON will enable<br />
Clear All, <strong>and</strong> Delete Barcode but disable Set<br />
All to default<br />
Low Battery Warning Determines how low battery condition will be<br />
h<strong>and</strong>led.<br />
0 = No operation<br />
1 = Ignore low battery<br />
2 = Indicate, laser turned off<br />
3 = Indicate, operate normally<br />
OFF<br />
ON<br />
ON/ON/ON<br />
<strong>Electronic</strong> <strong>Reading</strong> <strong>Systems</strong> <strong>Ltd</strong> Tel: 01234 855300 Fax: 01234 855446 www.ers-online.co.uk<br />
3
4.2 SAVING DISPLAYED CONFIGURATION TO DISK<br />
To save the displayed configuration to disk click the diskette icon from the menu bar<br />
1) Click the Diskette icon to save the<br />
displayed configuration to disk<br />
2) Specify the required location <strong>and</strong><br />
name for the file <strong>and</strong> click Save<br />
<strong>Electronic</strong> <strong>Reading</strong> <strong>Systems</strong> <strong>Ltd</strong> Tel: 01234 855300 Fax: 01234 855446 www.ers-online.co.uk
4.3 RETRIEVING THE CONFIGURATION FROM DISK<br />
To load a configuration from disk click the windows ‘folder’ icon from the menu bar:<br />
1) Click the Windows ’Folder’ icon to<br />
retrieve a saved configuration from<br />
disk<br />
2) Select the file to be retrieved <strong>and</strong> click Open.<br />
This will load the configuration into the <strong>OPN</strong>2001.<br />
The display will be updated to reflect the new<br />
settings.<br />
<strong>Electronic</strong> <strong>Reading</strong> <strong>Systems</strong> <strong>Ltd</strong> Tel: 01234 855300 Fax: 01234 855446 www.ers-online.co.uk
4.4 CLONING DEVICES<br />
To clone devices to the displayed configuration proceed as follows:<br />
1) Click Clone<br />
This will prevent <strong>OPN</strong>_<strong>DL</strong> from automatically<br />
extracting the configuration from connected devices,<br />
allowing the displayed configuration to be<br />
loaded to successive <strong>OPN</strong>2001s.<br />
2) Connect the 1st <strong>OPN</strong>2001 to be cloned.<br />
The displayed configuration will automatically<br />
be loaded to the device<br />
3) Configuration successfully loaded.<br />
Disconnect the <strong>OPN</strong>2001<br />
4) Connect next <strong>OPN</strong>2001 to<br />
be cloned, or click Finish to<br />
exit from Cloning mode.<br />
Note - Cloning device volume: The <strong>OPN</strong>2001 does not report its current bleeper volume to<br />
<strong>OPN</strong>_<strong>DL</strong>. This means that when cloning a device to a set of configuration parameters extracted from<br />
a ‘master’ device, all settings in the cloned device will match the master except for the bleeper volume,<br />
which will be set to a default level.<br />
The default level is set using the volume override parameter (see section 4.1). This allows a default<br />
volume level to be configured into the <strong>OPN</strong>_<strong>DL</strong> software which will be used when cloning devices.<br />
<strong>Electronic</strong> <strong>Reading</strong> <strong>Systems</strong> <strong>Ltd</strong> Tel: 01234 855300 Fax: 01234 855446 www.ers-online.co.uk
5.0 Shutting Down <strong>OPN</strong>_<strong>DL</strong><br />
It is necessary to disconnect the <strong>OPN</strong>2001 before closing the application.<br />
1) Click ‘Close’<br />
2) If necessary, disconnect<br />
<strong>OPN</strong>2001 <strong>and</strong> click OK<br />
<strong>Electronic</strong> <strong>Reading</strong> <strong>Systems</strong> <strong>Ltd</strong> Tel: 01234 855300 Fax: 01234 855446 www.ers-online.co.uk