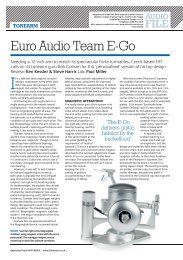
User manual EAT Forte S pdf - EuroAudioTeam.com
User manual EAT Forte S pdf - EuroAudioTeam.com
User manual EAT Forte S pdf - EuroAudioTeam.com

You also want an ePaper? Increase the reach of your titles
YUMPU automatically turns print PDFs into web optimized ePapers that Google loves.
EuroAudioteam, s.r.o.<br />
INSTRUCTIONS FOR USE<br />
<strong>EAT</strong> <strong>Forte</strong> S
Dear Music Lover,<br />
Wel<strong>com</strong>e! Congratulations on your purchase of our <strong>EAT</strong> <strong>Forte</strong> S turntable. Your <strong>EAT</strong> <strong>Forte</strong> S<br />
was hand-crafted by our team of skilled technicians. It has been tested rigorously and is ready<br />
for your enjoyment.<br />
Please take the time to read this <strong>manual</strong> carefully, to ensure that you obtain the ultimate<br />
performance from your <strong>EAT</strong> <strong>Forte</strong> S turntable. The tips contained within will ensure that your<br />
<strong>Forte</strong> will remain as-new condition for many years to <strong>com</strong>e!<br />
Your <strong>EAT</strong> Consultant is:<br />
Serial Number:<br />
2
<strong>EAT</strong> <strong>Forte</strong><br />
Controls, features and connections<br />
1 Main turntable chassis<br />
2 Platter<br />
3 2x Drive belt<br />
4 Speed control<br />
5 Arm board and Spirit level<br />
6 4 x Adjustable feet<br />
7 Record weight *<br />
Grounding cable (not shown) *<br />
Power supply (not shown) *<br />
Gloves (not shown)*<br />
Grease (not shown)*<br />
Small tool set (not shown)*<br />
!<br />
Warning of a hazard for the user, the unit or possible misuse.<br />
Before starting assembly, please familiarise yourself with the parts listed above. Separately<br />
packed items are marked with an asterisk (*).<br />
3
Set-up<br />
For safe and trouble-free installation, we would suggest that you assemble the unit with the<br />
assistance of a friend, due to the weight of the <strong>com</strong>plete turntable system.<br />
1) Open the shipping crate by unscrewing the top of the crate. Remove the wooden top.<br />
2) Remove the styrofoam top layer, with the accessories.<br />
3) Unpack the first part of the turntable: the main chassis. Remove the packaging fabric from<br />
the main turntable chassis. Install the earthing cable at the bottom of the main chassis. You<br />
will find the earthing cable inside the box of accessories.<br />
4) Unpack the last part of the turntable: the platter. Remove the plastic transport cover over<br />
the bearing shaft. Remove the red transport cap on the bottom of the platter. Please check to<br />
ensure there is enough grease on the bearing shaft. If the shaft is to dry, please use the grease<br />
that you find in the accessories box. Install the platter carefully. The best method is for one<br />
person to hold the platter with a second person locating the platter into the bearing into the<br />
correct position.<br />
IMPORTANT NOTE: Please check the level of the grease in the bearing shaft every three<br />
months, by removing the platter from the bearing.<br />
5) Set up the height and the levelling of the chassis by turning the feet to the left side or right.<br />
By turning the feet to the right, the chassis will raise; turning the feet to the left will lower the<br />
turntable. Finally, level the <strong>Forte</strong> with the spirit level in the accessories box.<br />
6) Install the two white drive belts. There are two different belt lengths. First, please install<br />
the shorter belt to the lower positioned motor pulley, the pulley closer to the front of the<br />
motor assembly. Second, install the longer belt to the higher motor pulley, at the rear of the<br />
motor assembly.<br />
7) Attach the power supply to the back of the turntable chassis.<br />
8) Switch on the motor unit. The small green light will indicate that power has been switched<br />
on.<br />
The speed control has 3 buttons: - 33<br />
4<br />
- STBY - STOP<br />
- 45<br />
By pressing the 33 button you switch on the motor to 33.3rpm.. Please, wait until the blue<br />
light indicator stabilize. If you wish to change speed to 45rpm. press the button on the right<br />
side - 45. Please, wait until the blue light stabilize. If you wish to stop the turntable please<br />
press the STBY- STOP button.
Useful tips<br />
The base and the record player should be positioned on a low-resonance surface, such as<br />
wood or multiple-layer ply board, to avoid structural vibrations disturbing replay.<br />
Mains power connection<br />
The turntable is supplied with a power supply suitable for your country's mains supply. Check<br />
the label before connecting to ensure <strong>com</strong>pliance with the mains rating in your home.<br />
If the player is not used over a long period of time, the drive belt can be removed to prevent<br />
undesired stretching.<br />
!<br />
As a safety precaution, always disconnect the record player from the mains power<br />
supply before maintenance!<br />
Technical specifications <strong>EAT</strong> <strong>Forte</strong> S<br />
* Electronic speed change * 33.33/* 45.11<br />
Speed variance ±0.09%<br />
Wow and flutter ±0.01%<br />
Signal-to-noise ratio -73dB<br />
Power consumption 4W<br />
Outboard power supply 16V/1.000mA AC, suitable for your country's mains supply<br />
Dimensions (WxHxD) 550x250x450mm<br />
Weight 44kg<br />
5
Pro-Ject 12CC Evolution Tonearm<br />
6<br />
1<br />
1 Headshell with finger lift<br />
2 Tonearm tube<br />
3 Tonearm rest and removable transport lock<br />
4 Tonearm lift lever<br />
5 Anti-skating weight *<br />
6 Anti-skating weight wire support<br />
7 Tonearm counterweight * 7a Downforce scale<br />
8 Anti-skating weight adjustment scale<br />
9 Tonearm base<br />
Cartridge downforce adjustment (Pro-Ject Evolution tonearms)<br />
Remove the transport lock (3) from the tonearm. Store it in the original packaging so they are<br />
available for any future transportation.<br />
Pushing carefully, turn the counterweight (7) onto the rear end of the tonearm tube (2), so the<br />
downforce scale (7a) shows towards the front of the player. Lower the armlift and position the<br />
cartridge in the space between arm rest and platter. Carefully rotate the counterweight (7)<br />
until the armtube is balanced (floating level). The arm should return to the balanced position<br />
if it is moved up or down. Do not forget to remove the cartridge stylus guard if fitted.<br />
Once the arm is correctly balanced, return it to the rest (3). Hold the counterweight (7)<br />
without moving it, and gently retate the downforce scale ring (7a) until the zero is in line with<br />
the anti-skating prong (8). Check whether the arm is still balanced.<br />
Rotate the counterweight counter-clockwise (seen from the front) to adjust the downforce<br />
according to the cartridge manufacturer's re<strong>com</strong>mendations. One mark on the scale represents<br />
1 mN (= 0.1g / 0.1 Pond) of downforce.<br />
Tonearm Pro-Ject 12cc Evolution: The counterweights (7) supplied are suitable for cartridges<br />
weighing between 4-7g, 6-9g, 8-12g or 10-15g.<br />
Adjust the downforce prior to installing the anti-skating weight.<br />
3<br />
4<br />
2<br />
9<br />
8<br />
5<br />
7a<br />
7<br />
6
Adjusting the azimuth (Pro-Ject Evolution tonearms)<br />
The cartridge stylus must be vertical in the record groove in order to<br />
trace the groove wall modulations correctly.<br />
A small screw at the bearing end of the arm allows incorrect azimuth<br />
to be corrected if your stylus is not mounted exactly perpendicular to<br />
the cartridge body (which is often the case).<br />
Slacken off the screw just enough to be able to revolve the arm tube<br />
without applying force. Note! Do not remove the screw <strong>com</strong>pletely!<br />
Screw<br />
With the aid of a good magnifying glass, adjust the stylus until it is vertical in the groove (i.e.<br />
perpendicular to the record's surface). Ideally this should correspond to the top surface of the<br />
cartridge body being parallel to the record surface, but in practice this is often not the case.<br />
When you are satisfied that the stylus is vertical, retighten the screw carefully.<br />
Under no circumstances should the arm tube be adjusted with the stylus still in the<br />
record groove! Irreparable damage may be caused to the cantilever suspension! The<br />
arm must be lifted to make each adjustment and lowered afterwards to check it.<br />
Anti-skating force adjustment (Pro-Ject Evolution tonearms)<br />
The anti-skating force must be adjusted corresponding to the downforce<br />
as follows:<br />
Downforce Groove in the stub (15)<br />
10-14mN 1 st from bearing rings<br />
15-19mN 2 nd " " "<br />
3 2 1<br />
20mN and bigger 3 rd " " "<br />
Hang the loop of the thread of the anti-skating weight in the groove of the anti-skating stub (15)<br />
corresponding to the downforce applied to your cartridge and hang the thread in the groove of<br />
the wire support (17).<br />
Adjusting the vertical tracking angle (VTA) (Pro-Ject Evolution tonearms)<br />
Put a record on the platter. When the stylus is lowered into the record groove, the tube (2) of<br />
the tonearm should be parallel to the surface of the record.<br />
If it is not parallel to the record surface, raise the stylus off the record, loosen both hexagon<br />
screws in the tonearm base (9) just enough to allow vertical movement of the arm pillar<br />
without force and slide the arm up or down until it is parallel.<br />
Carefully retighten the hexagon screws without applying excessive force (which would<br />
deform the arm pillar) – finger-tight is quite sufficient.<br />
Technical specifications Pro-Ject 12cc Evolution<br />
Tonearm medium mass<br />
Supplied counterweights cartridge weight 4-7g, 6-9g, 8-12g or 10-15g<br />
Downforce range 10-35mN<br />
Effective tonearm length 12in (304.8mm)<br />
Overhang 13.2mm<br />
Tonearm cable length approx. 120cm<br />
Weight 271g (without counterweight)<br />
8<br />
7
Ortofon RS tonearms<br />
8<br />
1<br />
1 Detachable headshell with finger lift<br />
2 Tonearm tube<br />
3 Tonearm rest and removable transport lock<br />
4 Tonearm lift lever<br />
5 Anti-skating force adjustment knob<br />
6 Downforce adjustment knob<br />
7 Tonearm counterweight with securing screw*<br />
8 Tonearm base<br />
Stylus pressure gauge (not shown) *<br />
2<br />
Cartridge downforce adjustment (Ortofon RS-Tonearm)<br />
Remove the transport lock (3) from the tonearm. Store it in the original packaging so they are<br />
available for any future transportation. Set the knob (5) to 0.<br />
Place the counterweight (7) halfway along the counterweight support rod at rear of arm,<br />
ensuring that the counterweight’s (7) securing screw uppermost. Lower the armlift and<br />
position the cartridge in the space between tonearm rest (3) and platter. Carefully move the<br />
counterweight (7) along the support rod, until the armtube (2) is balanced, i.e. floating level.<br />
The arm should return to the balanced position if it is moved up or down. Do not forget to<br />
remove the cartridge protection cap if fitted.<br />
With the power off, and the platter static, place the supplied stylus pressure gauge onto the<br />
platter.<br />
Carefully lower the armlift and position the tip of the stylus on the pressure gauge’s<br />
measuring tongue. The downforce will be displayed digitally.<br />
Adjust the downforce, using the knob (6), to the cartridge manufacturer's re<strong>com</strong>mendations.<br />
This adjustment must be done with the tonearm resting on the tonearm rest (3). Finally secure<br />
the counterweight with the securing screw (7).<br />
The counterweight (7) supplied is suitable for cartridges weighing between 18-40g.<br />
Anti-skating force adjustment (Ortofon RS and AS tonearms)<br />
The anti-skating force must be adjusted corresponding to the downforce. Rotate the knob (5)<br />
to adjust the anti-skating force. One mark on the scale represents 5mN (= 0.5g /0.5 Pond) of<br />
downforce.<br />
Adjusting the vertical tracking angle (VTA) (Ortofon RS and AS tonearms)<br />
Put a record on the platter. When the stylus is lowered into the record groove and the tonearm is<br />
not resting on the tonearm rest (3), the top surface of the cartridge body should be parallel to the<br />
surface of the record.<br />
4<br />
3<br />
5<br />
6<br />
8<br />
7
If it is not, loosen the hexagon screw in the tonearm base (8 RS tonearms or 7 AS tonearms)<br />
just enough to allow vertical movement of the arm pillar without force and slide the arm up or<br />
down until it is parallel.<br />
Carefully retighten the hexagon screw without applying excessive force (which would deform<br />
the arm pillar) – finger-tight is quite sufficient.<br />
Technical specifications Ortofon RS-212D and Ortofon RS-309D<br />
Tonearm medium mass<br />
Supplied counterweight cartridge weight 18-40g (including headshell)<br />
Downforce range 0-50mN<br />
Effective tonearm length RS-212D - 229mm/RS-309D - 326mm<br />
Overhang 15mm<br />
Offset angle RS-212D - 22 deg. / RS-309D - 19 deg.<br />
Tonearm cable length approx. 120cm<br />
Weight RS-212D - 655g/RS-309D - 725g<br />
(plus headshell and cartridge)<br />
Fitting and connecting the cartridge<br />
All cartridges with half-inch mounting holes can be fitted. Leaving the stylus's protection<br />
cover in place, fit the cartridge to the headshell using the screws supplied with the cartridge<br />
by passing one screw through each slot in the headshell (1). Do not tighten the nuts at this<br />
stage.<br />
Connect the tonearm wires to the cartridge pins as follows:<br />
white left channel positive (L+)<br />
red right channel positive (R+)<br />
green right channel return (R-)<br />
blue left channel return (L-)<br />
The full sound quality of the turntable can only be achieved if the cartridge is correctly adjusted.<br />
Dedicated tools, such as PRO-JECT’s alignment tool, will help you to ac<strong>com</strong>plish this. If you are<br />
not well-acquainted with the adjustment of cartridges, you are advised to call upon the skills of<br />
your PRO-JECT dealer to undertake this task for you.<br />
Please note: adjusting a cartridge and tonearm calls for the greatest care in order to<br />
avoid damaging the cartridge or tonearm bearings. Leave this work to your dealer if<br />
you are in any way unsure of the necessary steps and precautions to be taken.<br />
9
Service<br />
Should you encounter a problem which you are not able to correct or identify despite the above<br />
information, please contact your dealer for further advice. Only when the problem cannot be<br />
resolved there should the unit be sent to the distributor in your country.<br />
Guarantee repairs will only be effected if the unit is returned correctly packaged. For this reason<br />
we re<strong>com</strong>mend keeping the original packaging.<br />
Never return a record player without making sure that is it safely disassembled and correctly<br />
packaged in the original packaging. Please remove these parts and pack them separately: feet,<br />
counterweight, platter, cartridge and belt. Fit the cartridge protection cap. Insert the transport<br />
lock for the tonearm prior to carefully packaging the record player.<br />
Warranty<br />
10<br />
The manufacturer accepts no responsibility for damage caused by not adhering to these<br />
instructions for use and/or by transportation without the original packaging.<br />
Modification or change to any part of the product by unauthorised persons release the<br />
manufacturer from any liability over and above the lawful rights of the customer.<br />
<strong>EAT</strong> <strong>EuroAudioTeam</strong> is a Registered<br />
Trademark of Jozefina Lichtenegger.<br />
Copyright © 2010. All rights reserved.<br />
The information was correct at the time of<br />
going to press. The manufacturer reserves the<br />
right to make changes to the technical<br />
specification without prior notice as deemed<br />
necessary to uphold the ongoing process of<br />
technical development.