
You also want an ePaper? Increase the reach of your titles
YUMPU automatically turns print PDFs into web optimized ePapers that Google loves.
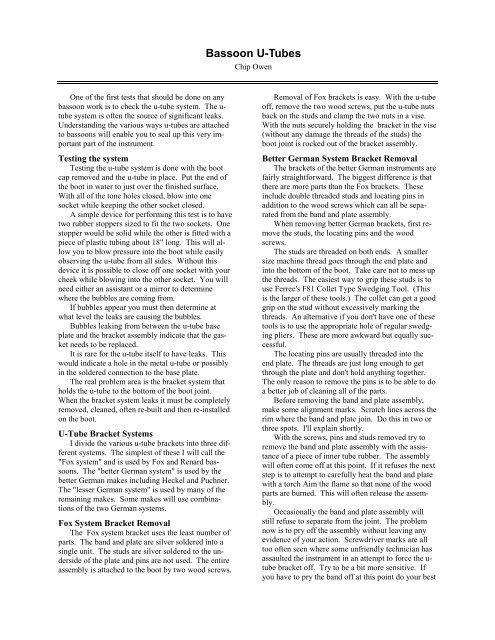
One of the first tests that should be done on any<br />
bassoon work is to check the u-tube system. The utube<br />
system is often the source of significant leaks.<br />
Understanding the various ways u-tubes are attached<br />
to bassoons will enable you to seal up this very important<br />
part of the instrument.<br />
Testing the system<br />
Testing the u-tube system is done with the boot<br />
cap removed and the u-tube in place. Put the end of<br />
the boot in water to just over the finished surface.<br />
With all of the tone holes closed, blow into one<br />
socket while keeping the other socket closed.<br />
A simple device for performing this test is to have<br />
two rubber stoppers sized to fit the two sockets. One<br />
stopper would be solid while the other is fitted with a<br />
piece of plastic tubing about 18" long. This will allow<br />
you to blow pressure into the boot while easily<br />
observing the u-tube from all sides. Without this<br />
device it is possible to close off one socket with your<br />
cheek while blowing into the other socket. You will<br />
need either an assistant or a mirror to determine<br />
where the bubbles are coming from.<br />
If bubbles appear you must then determine at<br />
what level the leaks are causing the bubbles.<br />
Bubbles leaking from between the u-tube base<br />
plate and the bracket assembly indicate that the gasket<br />
needs to be replaced.<br />
It is rare for the u-tube itself to have leaks. This<br />
would indicate a hole in the metal u-tube or possibly<br />
in the soldered connection to the base plate.<br />
The real problem area is the bracket system that<br />
holds the u-tube to the bottom of the boot joint.<br />
When the bracket system leaks it must be completely<br />
removed, cleaned, often re-built and then re-installed<br />
on the boot.<br />
U-Tube Bracket Systems<br />
I divide the various u-tube brackets into three different<br />
systems. The simplest of these I will call the<br />
"<strong>Fox</strong> system" and is used by <strong>Fox</strong> and Renard bassoons.<br />
The "better German system" is used by the<br />
better German makes including Heckel and Puchner.<br />
The "lesser German system" is used by many of the<br />
remaining makes. Some makes will use combinations<br />
of the two German systems.<br />
<strong>Fox</strong> System Bracket Removal<br />
The <strong>Fox</strong> system bracket uses the least number of<br />
parts. The band and plate are silver soldered into a<br />
single unit. The studs are silver soldered to the underside<br />
of the plate and pins are not used. The entire<br />
assembly is attached to the boot by two wood screws.<br />
<strong>Bassoon</strong> U-<strong>Tubes</strong><br />
Chip Owen<br />
Removal of <strong>Fox</strong> brackets is easy. With the u-tube<br />
off, remove the two wood screws, put the u-tube nuts<br />
back on the studs and clamp the two nuts in a vise.<br />
With the nuts securely holding the bracket in the vise<br />
(without any damage the threads of the studs) the<br />
boot joint is rocked out of the bracket assembly.<br />
Better German System Bracket Removal<br />
The brackets of the better German instruments are<br />
fairly straightforward. The biggest difference is that<br />
there are more parts than the <strong>Fox</strong> brackets. These<br />
include double threaded studs and locating pins in<br />
addition to the wood screws which can all be separated<br />
from the band and plate assembly.<br />
When removing better German brackets, first remove<br />
the studs, the locating pins and the wood<br />
screws.<br />
The studs are threaded on both ends. A smaller<br />
size machine thread goes through the end plate and<br />
into the bottom of the boot. Take care not to mess up<br />
the threads. The easiest way to grip these studs is to<br />
use Ferree's F81 Collet Type Swedging Tool. (This<br />
is the larger of these tools.) The collet can get a good<br />
grip on the stud without excessively marking the<br />
threads. An alternative if you don't have one of these<br />
tools is to use the appropriate hole of regular swedging<br />
pliers. These are more awkward but equally successful.<br />
The locating pins are usually threaded into the<br />
end plate. The threads are just long enough to get<br />
through the plate and don't hold anything together.<br />
The only reason to remove the pins is to be able to do<br />
a better job of cleaning all of the parts.<br />
Before removing the band and plate assembly,<br />
make some alignment marks. Scratch lines across the<br />
rim where the band and plate join. Do this in two or<br />
three spots. I'll explain shortly.<br />
With the screws, pins and studs removed try to<br />
remove the band and plate assembly with the assistance<br />
of a piece of inner tube rubber. The assembly<br />
will often come off at this point. If it refuses the next<br />
step is to attempt to carefully heat the band and plate<br />
with a torch Aim the flame so that none of the wood<br />
parts are burned. This will often release the assembly.<br />
Occasionally the band and plate assembly will<br />
still refuse to separate from the joint. The problem<br />
now is to pry off the assembly without leaving any<br />
evidence of your action. Screwdriver marks are all<br />
too often seen where some unfriendly technician has<br />
assaulted the instrument in an attempt to force the utube<br />
bracket off. Try to be a bit more sensitive. If<br />
you have to pry the band off at this point do your best
to keep the screwdriver or other prying tool from<br />
leaving marks on the instrument. Sometimes, rather<br />
than prying at the end of the band, it is possible to get<br />
some purchase under the end plate.<br />
When you get the band and plate assembly off<br />
check to see what is holding the two parts together.<br />
They may be silver soldered, soft soldered, or merely<br />
pressed together. This is why I had you scratch some<br />
alignment marks a few paragraphs back. You may<br />
choose, and I recommend it highly, to silver solder<br />
parts that have only been pressed together. If so,<br />
those alignment marks will help in insuring that the<br />
band and plate are put together correctly.<br />
Lesser German Bracket Removal<br />
The brackets of the lesser German instruments are<br />
very similar to the better German instruments except<br />
for a few frustrating details. Some of these details<br />
are minor, such as unthreaded alignment pins that<br />
have been driven through the plate into the wood.<br />
The defining difference is the way the band and plate<br />
are joined, or rather not joined, and the way the band<br />
is secured in place.<br />
In this type of u-tube bracket the band and plate<br />
are not joined in any way. They are two separate<br />
pieces secured in two different ways. The studs and<br />
screws secure the plate. The band is secured in place<br />
by screws or pins through the side of the band. The<br />
heads of the screws are often filed down smooth to<br />
the surface of the band, usually resulting in the complete<br />
elimination of the slot of the screw!<br />
I recommend that u-tube brackets of this type be<br />
rebuilt into better systems. Do whatever is necessary<br />
to get the band and the plate off the boot and silver<br />
solder them into a solid unit.<br />
To get the band off, the pins or screws will have<br />
to be removed in one way or another. On rare occasions,<br />
it is possible to slot them and unscrew them.<br />
Usually it is more productive to drill them out. In<br />
either event you will want to silver solder a plug into<br />
the hole. Be sure you have a piece of brass or nickel<br />
silver rod on hand to fill the hole. Plug the hole before<br />
you silver solder the plate to the band; it will be<br />
much easier to grind off the inside of the plug with<br />
the plate out of the way.<br />
Once the band and plate assembly has been properly<br />
joined into a single piece, this system effectively<br />
becomes the same as the better German brackets<br />
Cleaning the U-Tube and Bracket Parts<br />
Getting these parts looking like new is really very<br />
simple. Scrape off the gasket and any heavy encrustations<br />
from the inside of the bracket and soak all of<br />
the parts in paintbrush cleaner. The combination of<br />
solvents in paintbrush cleaner is effective at removing<br />
just about anything on these parts. You can leave<br />
BASSOON U-TUBES<br />
2<br />
parts in the cleaner for hours; I've never seen it cause<br />
any damage.<br />
After rinsing off the paint brush cleaner, immerse<br />
the parts in acid for a few minutes. I prefer muriatic<br />
acid diluted with an equal volume of water. Five<br />
minutes is enough time to take the oxidation off the<br />
metal.<br />
Use a scratch brush to brighten the metal. Keep<br />
the parts wet and lubricated by dipping them frequently<br />
into soapy water. Without the soapy water<br />
the parts will stay dull and dirty. Scratch brushing<br />
these parts leaves them in beautiful condition with<br />
just a few minutes work.<br />
Installing the Bracket<br />
The goal when installing the bracket is to be certain<br />
that no air can leak under the bracket. Silicone<br />
sealer is used to fill any gaps and to help secure the<br />
bracket. Use clear household silicone sealant.<br />
Before starting, dry fit the bracket to be certain<br />
exactly which way it goes. The various shapes and<br />
holes are almost never located in a way that the<br />
bracket can be reversed. Make note of just which<br />
way it fits so that you can install it the right way after<br />
applying the sealer. Also make sure that nothing will<br />
keep the bracket from seating correctly on the end of<br />
the boot.<br />
Apply the silicone sealer to both the end of the<br />
boot and the underside of the bracket. Place the<br />
bracket on the end of the boot and install the wood<br />
screws. If you used enough silicone it will be oozing<br />
out all over. Use a smooth tool, such as a piece of<br />
steel rod with a rounded end to assist in removing the<br />
excess silicone. Try to avoid getting the silicone on<br />
any finished surfaces. It probably won't hurt the existing<br />
finish but may cause difficulties if the instrument<br />
is ever refinished in the future. Wipe all of the<br />
silicone off wherever it appears. When you install<br />
the pins and studs watch for any more silicone that<br />
might ooze out.<br />
Toilet paper is convenient for cleaning up the silicone.<br />
It’s a messy job and being able to discard the<br />
mess is appropriate. A bit of light mineral oil on the<br />
paper helps to clean up the surfaces.<br />
The U-Tube<br />
When you scratch brushed the u-tube you probably<br />
found a few more dents than were obvious before<br />
it was clean. Remove these as much as possible. It is<br />
not unusual for small dents to come from the inside<br />
out. These are caused by stiff, hard cored swabs,<br />
such as cloths wrapped around a rod, being jammed<br />
too hard into the boot. Pull swabs that are pulled<br />
completely through the u-tube will avoid this kind of<br />
damage and do a far superior job of cleaning the<br />
bore.
Before gluing on a gasket check to see how well<br />
the u-tube fits the bracket. If either the bracket plate<br />
or the u-tube plate is excessively warped do whatever<br />
is necessary to flatten it. These plates don't bend<br />
easily and flattening can best be done by filing or belt<br />
sanding.<br />
Replacing the U-Tube Gasket<br />
The gasket should be glued with contact cement<br />
to the u-tube. It should never be attached to the<br />
bracket. 1/16" cork is the normal material for gaskets;<br />
granulated cork will work fine. Some bassoonists<br />
will request thicker cork and you should honor<br />
their request. 1/8" is not unreasonable; 3/16" cork is<br />
usually about as thick as you can get away with. Cut<br />
the bore holes and the stud holes out after attaching<br />
the cork to the u-tube. The pin holes will usually be<br />
punched out by the pins the first time you put the utube<br />
in place. Cork grease on the gasket will help<br />
seal the u-tube more effectively.<br />
Test your work to make sure that it is airtight.<br />
Revised October 19, 2001<br />
BASSOON U-TUBES<br />
3