
You also want an ePaper? Increase the reach of your titles
YUMPU automatically turns print PDFs into web optimized ePapers that Google loves.
ESPAÑOL FRANÇAIS ENGLISH<br />
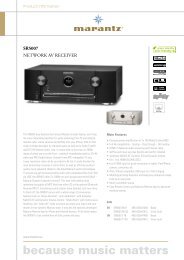
AV Surround Receiver<br />
SR7005
n SAFETY PRECAUTIONS<br />
CAUTION<br />
RISK OF ELECTRIC SHOCK<br />
DO NOT OPEN<br />
CAUTION:<br />
TO REDUCE THE RISK OF ELECTRIC SHOCK, DO NOT REMOVE<br />
COVER (OR BACK). NO USER-SERVICEABLE PARTS INSIDE.<br />
REFER SERVICING TO QUALIFIED SERVICE PERSONNEL.<br />
The lightning flash with arrowhead symbol, within an equilateral<br />
triangle, is intended to alert the user to the presence of<br />
uninsulated “dangerous voltage” within the product’s enclosure<br />
that may be of sufficient magnitude to constitute a risk of<br />
electric shock to persons.<br />
The exclamation point within an equilateral triangle is intended<br />
to alert the user to the presence of important operating<br />
and maintenance (servicing) instructions in the literature<br />
accompanying the appliance.<br />
WARNING:<br />
TO REDUCE THE RISK OF FIRE OR ELECTRIC SHOCK, DO NOT<br />
EXPOSE THIS APPLIANCE TO RAIN OR MOISTURE.<br />
Hot<br />
surface<br />
mark<br />
SVENSKA<br />
CAUTION:<br />
HOT SURFACE. DO NOT TOUCH.<br />
The top surface over the internal heat sink may become hot when<br />
operating this product continuously.<br />
Do not touch hot areas, especially around the “Hot surface mark” and<br />
the top panel.<br />
VORSICHT:<br />
HEISSE OBERFLÄCHE. NICHT ANFASSEN.<br />
Die Oberseite über dem inneren Kühlkörper könnte heiß werden,<br />
wenn dieses Produkt dauerhaft betrieben wird.<br />
Berühren Sie keine heißen Bereiche, hier besonders um die<br />
Kennzeichnung “Hot surface mark” und die Oberseite.<br />
PRECAUTION:<br />
SURFACE CHAUDE. NE PAS TOUCHER.<br />
La surface supérieure du dissipateur de chaleur peut devenir chaude<br />
si vous utilisez ce produit en continu.<br />
Ne touchez pas les zones chaudes, tout particulièrement vers<br />
l’inscription “Hot surface mark” et le panneau supérieur.<br />
ATTENZIONE:<br />
SUPERFICIE CALDA. NON TOCCARE.<br />
La superficie superiore al di sopra del dissipatore interno può<br />
riscaldarsi quando si adopera questo prodotto in maniera continuativa.<br />
Non toccare parti calde, in particolare quelle intorno alla dicitura “Hot<br />
surface mark” e al pannello superiore.<br />
NEDERLANDS<br />
ESPAÑOL<br />
ITALIANO<br />
IMPOTANT SAFETY<br />
INSTRUCTIONS<br />
1. Read these instructions.<br />
2. Keep these instructions.<br />
3. Heed all warnings.<br />
4. Follow all instructions.<br />
5. Do not use this apparatus near water.<br />
6. Clean only with dry cloth.<br />
7. Do not block any ventilation openings.<br />
Install in accordance with the manufacturer’s instructions.<br />
8. Do not install near any heat sources such as radiators, heat registers,<br />
stoves, or other apparatus (including amplifiers) that produce heat.<br />
9. Protect the power cord from being walked on or pinched particularly at<br />
plugs, convenience receptacles, and the point where they exit from the<br />
apparatus.<br />
10. Only use attachments/accessories specified by the manufacturer.<br />
11. Use only with the cart, stand, tripod, bracket, or table<br />
specified by the manufacturer, or sold with the apparatus.<br />
When a cart is used, use caution when moving the cart/<br />
apparatus combination to avoid injury from tip-over.<br />
12. Unplug this apparatus during lightning storms or when<br />
unused for long periods of time.<br />
13. Refer all servicing to qualified service personnel.<br />
Servicing is required when the apparatus has been damaged in any way,<br />
such as power-supply cord or plug is damaged, liquid has been spilled or<br />
objects have fallen into the apparatus, the apparatus has been exposed to<br />
rain or moisture, does not operate normally, or has been dropped.<br />
14. Batteries shall not be exposed to excessive heat such as sunshine, fire or<br />
the like.<br />
PRECAUCIÓN:<br />
SUPERFICIE CALIENTE. NO TOCAR.<br />
La superficie superior sobre el disipador de calor interno podría llegar<br />
a calentarse al operar este producto de forma continua.<br />
No toque las áreas calientes, especialmente las situadas alrededor de<br />
la “Hot surface mark” y del panel superior.<br />
WAARSCHUWING:<br />
HEET OPPERVLAK. NIET AANRAKEN.<br />
Bij ononderbroken bediening van dit product kan het oppervlak boven<br />
de interne koelplaat heet worden.<br />
Raak het toestel niet aan waar het heet is, vooral niet in de buurt van<br />
het “Hot surface mark” en het bovenpaneel.<br />
FÖRSIKTIHETSMÅTT:<br />
VARM YTA. RÖR EJ.<br />
Ytan ovanför den interna kylflänsen kan bli varm när produkten<br />
används kontinuerligt.<br />
Rör inte varma områden. Var särskilt försiktig vid märkningen “Hot<br />
surface mark” och på toppanelen.<br />
FRANÇAIS<br />
DEUTSCH<br />
ENGLISH<br />
CAUTION:<br />
To completely disconnect this product from the mains, disconnect<br />
the plug from the wall socket outlet.<br />
The mains plug is used to completely interrupt the power supply to<br />
the unit and must be within easy access by the user.<br />
VORSICHT:<br />
Um dieses Gerät vollständig von der Stromversorgung abzutrennen,<br />
ziehen Sie bitte den Stecker aus der Wandsteckdose.<br />
Der Netzstecker wird verwendet, um die Stromversorgung zum<br />
Gerät völlig zu unterbrechen; er muss für den Benutzer gut und<br />
einfach zu erreichen sein.<br />
PRECAUTION:<br />
Pour déconnecter complètement ce produit du courant secteur,<br />
débranchez la prise de la prise murale.<br />
La prise secteur est utilisée pour couper complètement<br />
l’alimentation de l’appareil et l’utilisateur doit pouvoir y accéder<br />
facilement.<br />
ATTENZIONE:<br />
Per scollegare completamente questo prodotto dalla rete di<br />
alimentazione elettrica, scollegare la spina dalla relativa presa a<br />
muro.<br />
La spina di rete viene utilizzata per interrompere completamente<br />
l’alimentazione all’unità e deve essere facilmente accessibile<br />
all’utente.<br />
PRECAUCIÓN:<br />
Para desconectar completamente este producto de la alimentación<br />
eléctrica, desconecte el enchufe del enchufe de la pared.<br />
El enchufe de la alimentación eléctrica se utiliza para interrumpir<br />
por completo el suministro de alimentación eléctrica a la unidad<br />
y debe de encontrarse en un lugar al que el usuario tenga fácil<br />
acceso.<br />
WAARSCHUWING:<br />
Om de voeding van dit product volledig te onderbreken moet de<br />
stekker uit het stopcontact worden getrokken.<br />
De netstekker wordt gebruikt om de stroomtoevoer naar het toestel<br />
volledig te onderbreken en moet voor de gebruiker gemakkelijk<br />
bereikbaar zijn.<br />
FÖRSIKTIHETSMÅTT:<br />
Koppla loss stickproppen från eluttaget för att helt skilja produkten<br />
från nätet.<br />
Stickproppen används för att helt bryta strömförsörjningen till<br />
apparaten, och den måste vara lättillgänglig för användaren.<br />
I
n NOTE ON USE / HINWEISE ZUM GEBRAUCH / OBSERVATIONS RELATIVES A L’UTILISATION / NOTE SULL’USO /<br />
NOTAS SOBRE EL USO / ALVORENS TE GEBRUIKEN / OBSERVERA ANGÅENDE ANVÄNDNINGEN<br />
II<br />
ENGLISH DEUTSCH FRANÇAIS ITALIANO ESPAÑOL NEDERLANDS SVENSKA<br />
WARNINGS WARNHINWEISE AVERTISSEMENTS AVVERTENZE ADVERTENCIAS WAARSCHUWINGEN VARNINGAR<br />
• Avoid high temperatures.<br />
Allow for sufficient heat<br />
dispersion when installed in a<br />
rack.<br />
• Handle the power cord carefully.<br />
Hold the plug when unplugging<br />
the cord.<br />
• Keep the unit free from<br />
moisture, water, and dust.<br />
• Unplug the power cord when<br />
not using the unit for long<br />
periods of time.<br />
• Do not obstruct the ventilation<br />
holes.<br />
• Do not let foreign objects into<br />
the unit.<br />
• Do not let insecticides,<br />
benzene, and thinner come in<br />
contact with the unit.<br />
• Never disassemble or modify<br />
the unit in any way.<br />
• Ventilation should not be<br />
impeded by covering the<br />
ventilation openings with<br />
items, such as newspapers,<br />
tablecloths or curtains.<br />
• Naked flame sources such as<br />
lighted candles should not be<br />
placed on the unit.<br />
• Observe and follow local<br />
regulations regarding battery<br />
disposal.<br />
• Do not expose the unit to<br />
dripping or splashing fluids.<br />
• Do not place objects filled with<br />
liquids, such as vases, on the<br />
unit.<br />
• Do not handle the mains cord<br />
with wet hands.<br />
• When the switch is in the OFF<br />
position, the equipment is not<br />
completely switched off from<br />
MAINS.<br />
• The equipment shall be<br />
installed near the power supply<br />
so that the power supply is<br />
easily accessible.<br />
• Vermeiden Sie hohe Temperaturen.<br />
Beachten Sie, dass eine<br />
ausreichende Belüftung<br />
gewährleistet wird, wenn das Gerät<br />
auf ein Regal gestellt wird.<br />
• Gehen Sie vorsichtig mit dem<br />
Netzkabel um.<br />
Halten Sie das Kabel am<br />
Stecker, wenn Sie den Stecker<br />
herausziehen.<br />
• Halten Sie das Gerät von<br />
Feuchtigkeit, Wasser und Staub<br />
fern.<br />
• Wenn das Gerät längere Zeit<br />
nicht verwendet werden soll,<br />
trennen Sie das Netzkabel vom<br />
Netzstecker.<br />
• Decken Sie den Lüftungsbereich<br />
nicht ab.<br />
• Lassen Sie keine fremden<br />
Gegenstände in das Gerät<br />
kommen.<br />
• Lassen Sie das Gerät nicht<br />
mit Insektiziden, Benzin oder<br />
Verdünnungsmitteln in Berührung<br />
kommen.<br />
• Versuchen Sie niemals das Gerät<br />
auseinander zu nehmen oder zu<br />
verändern.<br />
• Die Belüftung sollte auf keinen<br />
Fall durch das Abdecken der<br />
Belüftungsöffnungen durch<br />
Gegenstände wie beispielsweise<br />
Zeitungen, Tischtücher, Vorhänge<br />
o. Ä. behindert werden.<br />
• Auf dem Gerät sollten keinerlei<br />
direkte Feuerquellen wie<br />
beispielsweise angezündete<br />
Kerzen aufgestellt werden.<br />
• Bitte beachten Sie bei der<br />
Entsorgung der Batterien<br />
die örtlich geltenden<br />
Umweltbestimmungen.<br />
• Das Gerät sollte keiner tropfenden<br />
oder spritzenden Flüssigkeit<br />
ausgesetzt werden.<br />
• Auf dem Gerät sollten keine mit<br />
Flüssigkeit gefüllten Behälter wie<br />
beispielsweise Vasen aufgestellt<br />
werden.<br />
• Das Netzkabel nicht mit feuchten<br />
oder nassen Händen anfassen.<br />
• Wenn der Schalter ausgeschaltet<br />
ist (OFF-Position), ist das Gerät<br />
nicht vollständig vom Stromnetz<br />
(MAINS) abgetrennt.<br />
• Das Gerät sollte in der Nähe einer<br />
Netzsteckdose aufgestellt werden,<br />
damit es leicht an das Stromnetz<br />
angeschlossen werden kann.<br />
• Eviter des températures<br />
élevées.<br />
Tenir compte d’une dispersion<br />
de chaleur suffisante lors de<br />
l’installation sur une étagère.<br />
• Manipuler le cordon<br />
d’alimentation avec précaution.<br />
Tenir la prise lors du<br />
débranchement du cordon.<br />
• Protéger l’appareil contre<br />
l’humidité, l’eau et la poussière.<br />
• Débrancher le cordon<br />
d’alimentation lorsque l’appareil<br />
n’est pas utilisé pendant de<br />
longues périodes.<br />
• Ne pas obstruer les trous<br />
d’aération.<br />
• Ne pas laisser des objets<br />
étrangers dans l’appareil.<br />
• Ne pas mettre en contact des<br />
insecticides, du benzène et un<br />
diluant avec l’appareil.<br />
• Ne jamais démonter ou<br />
modifier l’appareil d’une<br />
manière ou d’une autre.<br />
• Ne pas recouvrir les orifi ces<br />
de ventilation avec des objets<br />
tels que des journaux, nappes<br />
ou rideaux. Cela entraverait la<br />
ventilation.<br />
• Ne jamais placer de flamme<br />
nue sur l'appareil, notamment<br />
des bougies allumées.<br />
• Veillez à respecter les lois en<br />
vigueur lorsque vous jetez les<br />
piles usagées.<br />
• L’appareil ne doit pas être<br />
exposé à l’eau ou à l’humidité.<br />
• Ne pas poser d’objet contenant<br />
du liquide, par exemple un<br />
vase, sur l’appareil.<br />
• Ne pas manipuler le cordon<br />
d’alimentation avec les mains<br />
mouillées.<br />
• Lorsque l’interrupteur est sur<br />
la position OFF, l’appareil n’est<br />
pas complètement déconnecté<br />
du SECTEUR (MAINS).<br />
• L’appareil sera installé près de<br />
la source d’alimentation, de<br />
sorte que cette dernière soit<br />
facilement accessible.<br />
• Evitate di esporre l’unità a<br />
temperature elevate.<br />
Assicuratevi che vi sia<br />
un’adeguata dispersione del<br />
calore quando installate l’unità<br />
in un mobile per componenti<br />
audio.<br />
• Manneggiate il cavo di<br />
alimentazione con attenzione.<br />
Tenete ferma la spina quando<br />
scollegate il cavo dalla presa.<br />
• Tenete l’unità lontana<br />
dall’umidità, dall’acqua e dalla<br />
polvere.<br />
• Scollegate il cavo di<br />
alimentazione quando<br />
prevedete di non utilizzare<br />
l’unità per un lungo periodo di<br />
tempo.<br />
• Non coprite i fori di<br />
ventilazione.<br />
• Non inserite corpi estranei<br />
all’interno dell’unità.<br />
• Assicuratevi che l’unità non<br />
entri in contatto con insetticidi,<br />
benzolo o solventi.<br />
• Non smontate né modificate<br />
l’unità in alcun modo.<br />
• Le aperture di ventilazione<br />
non devono essere ostruite<br />
coprendole con oggetti, quali<br />
giornali, tovaglie, tende e così<br />
via.<br />
• Non posizionate sull’unità fi<br />
amme libere, come ad esempio<br />
candele accese.<br />
• Prestate attenzione agli aspetti<br />
legati alla tutela dell’ambiente<br />
nello smaltimento delle<br />
batterie.<br />
• L’apparecchiatura non deve<br />
essere esposta a gocciolii o<br />
spruzzi.<br />
• Non posizionate sull’unità alcun<br />
oggetto contenente liquidi,<br />
come ad esempio i vasi.<br />
• Non toccare il cavo di<br />
alimentazione con le mani<br />
bagnate.<br />
• Quando l’interruttore<br />
è nella posizione OFF,<br />
l’apparecchiatura non è<br />
completamente scollegata da<br />
MAINS.<br />
• L’apparecchio va installato<br />
in prossimità della fonte di<br />
alimentazione, in modo che<br />
quest’ultima sia facilmente<br />
accessibile.<br />
• Evite altas temperaturas.<br />
Permite la suficiente dispersión<br />
del calor cuando está instalado<br />
en la consola.<br />
• Maneje el cordón de energía<br />
con cuidado.<br />
Sostenga el enchufe cuando<br />
desconecte el cordón de<br />
energía.<br />
• Mantenga el equipo libre de<br />
humedad, agua y polvo.<br />
• Desconecte el cordón de<br />
energía cuando no utilice el<br />
equipo por mucho tiempo.<br />
• No obstruya los orificios de<br />
ventilación.<br />
• No deje objetos extraños<br />
dentro del equipo.<br />
• No permita el contacto<br />
de insecticidas, gasolina y<br />
diluyentes con el equipo.<br />
• Nunca desarme o modifique el<br />
equipo de ninguna manera.<br />
• La ventilación no debe quedar<br />
obstruida por haberse cubierto<br />
las aperturas con objetos<br />
como periódicos, manteles o<br />
cortinas.<br />
• No deberán colocarse sobre<br />
el aparato fuentes inflamables<br />
sin protección, como velas<br />
encendidas.<br />
• A la hora de deshacerse de las<br />
pilas, respete la normativa para<br />
el cuidado del medio ambiente.<br />
• No exponer el aparato al goteo<br />
o salpicaduras cuando se<br />
utilice.<br />
• No colocar sobre el aparato<br />
objetos llenos de líquido, como<br />
jarros.<br />
• No maneje el cable de<br />
alimentación con las manos<br />
mojadas.<br />
• Cuando el interruptor está en la<br />
posición OFF, el equipo no está<br />
completamente desconectado<br />
de la alimentación MAINS.<br />
• El equipo se instalará cerca<br />
de la fuente de alimentación<br />
de manera que resulte fácil<br />
acceder a ella.<br />
• Vermijd hoge temperaturen.<br />
Zorg er bij installatie in een<br />
audiorack voor, dat de door het<br />
toestel geproduceerde warmte<br />
goed kan worden afgevoerd.<br />
• Hanteer het netsnoer<br />
voorzichtig.<br />
Houd het snoer bij de stekker<br />
vast wanneer deze moet<br />
worden aan- of losgekoppeld.<br />
• Laat geen vochtigheid,<br />
water of stof in het apparaat<br />
binnendringen.<br />
• Neem altijd het netsnoer uit<br />
het stopkontakt wanneer het<br />
apparaat gedurende een lange<br />
periode niet wordt gebruikt.<br />
• De ventilatieopeningen mogen<br />
niet worden beblokkeerd.<br />
• Laat geen vreemde<br />
voorwerpen in dit apparaat<br />
vallen.<br />
• Voorkom dat insecticiden,<br />
benzeen of verfverdunner met<br />
dit toestel in contact komen.<br />
• Dit toestel mag niet<br />
gedemonteerd of aangepast<br />
worden.<br />
• De ventilatie mag niet<br />
worden belemmerd door<br />
de ventilatieopeningen af<br />
te dekken met bijvoorbeeld<br />
kranten, een tafelkleed of<br />
gordijnen.<br />
• Plaats geen open vlammen,<br />
bijvoorbeeld een brandende<br />
kaars, op het apparaat.<br />
• Houd u steeds aan de<br />
milieuvoorschriften wanneer u<br />
gebruikte batterijen wegdoet.<br />
• Stel het apparaat niet bloot aan<br />
druppels of spatten.<br />
• Plaats geen voorwerpen gevuld<br />
met water, bijvoorbeeld een<br />
vaas, op het apparaat.<br />
• Raak het netsnoer niet met<br />
natte handen aan.<br />
• Als de schakelaar op OFF<br />
staat, is het apparaat niet<br />
volledig losgekoppeld van de<br />
netspanning (MAINS).<br />
• De apparatuur wordt in de<br />
buurt van het stopcontact<br />
geïnstalleerd, zodat dit altijd<br />
gemakkelijk toegankelijk is.<br />
• Undvik höga temperaturer.<br />
Se till att det finns möjlighet<br />
till god värmeavledning vid<br />
montering i ett rack.<br />
• Hantera nätkabeln varsamt.<br />
Håll i kabeln när den kopplas<br />
från el-uttaget.<br />
• Utsätt inte apparaten för fukt,<br />
vatten och damm.<br />
• Koppla loss nätkabeln om<br />
apparaten inte kommer att<br />
användas i lång tid.<br />
• Täpp inte till<br />
ventilationsöppningarna.<br />
• Se till att främmande föremål<br />
inte tränger in i apparaten.<br />
• Se till att inte insektsmedel<br />
på spraybruk, bensen och<br />
thinner kommer i kontakt med<br />
apparatens hölje.<br />
• Ta inte isär apparaten och<br />
försök inte bygga om den.<br />
• Ventilationen bör inte<br />
förhindras genom att täcka<br />
för ventilationsöppningarna<br />
med föremål såsom tidningar,<br />
bordsdukar eller gardiner.<br />
• Placera inte öppen eld, t.ex.<br />
tända ljus, på apparaten.<br />
• Tänk på miljöaspekterna när du<br />
bortskaffar batterier.<br />
• Apparaten får inte utsättas för<br />
vätska.<br />
• Placera inte föremål fyllda<br />
med vätska, t.ex. vaser, på<br />
apparaten.<br />
• Hantera inte nätsladden med<br />
våta händer.<br />
• Även om strömbrytaren står<br />
i det avstängda läget OFF,<br />
så är utrustningen inte helt<br />
bortkopplad från det elektriska<br />
nätet (MAINS).<br />
• Utrustningen ska vara<br />
installerad nära strömuttaget<br />
så att strömförsörjningen är lätt<br />
att tillgå.
• DECLARATION OF CONFORMITY<br />
We declare under our sole responsibility that this product, to which<br />
this declaration relates, is in conformity with the following standards:<br />
EN60065, EN55013, EN55020, EN61000-3-2 and EN61000-3-3.<br />
Following the provisions of Low Voltage Directive 2006/95/EC and<br />
EMC Directive 2004/108/EC, the EC regulation 1275/2008 and its<br />
frame work Directive 2009/125/EC for Energy-related Products (ErP).<br />
• ÜBEREINSTIMMUNGSERKLÄRUNG<br />
Wir erklären unter unserer Verantwortung, daß dieses Produkt, auf<br />
das sich diese Erklärung bezieht, den folgenden Standards entspricht:<br />
EN60065, EN55013, EN55020, EN61000-3-2 und EN61000-3-3.<br />
Gemäß den Bestimmungen der Niederspannungsrichtlinie 2006/95/<br />
EG und EMV Richtlinie 2004/108/EG, der Verordnung (EG) Nr.<br />
1275/2008 der Kommission und deren Rahmenrichtlinie 2009/125/EG<br />
zu energieverbrauchsrelevanten Produkten (ErP).<br />
• DECLARATION DE CONFORMITE<br />
Nous déclarons sous notre seule responsabilité que l’appareil, auquel<br />
se réfère cette déclaration, est conforme aux standards suivants:<br />
EN60065, EN55013, EN55020, EN61000-3-2 et EN61000-3-3.<br />
Selon la directive 2006/95/EC concernant la basse tension et la<br />
directive CEM 2004/108/EC, la réglementation européenne 1275/2008<br />
et la directive 2009/125/EC établissant un cadre de travail applicable<br />
aux produits liés à l'énergie (ErP).<br />
• DICHIARAZIONE DI CONFORMITÀ<br />
Dichiariamo con piena responsabilità che questo prodotto, al quale la<br />
nostra dichiarazione si riferisce, è conforme alle seguenti normative:<br />
EN60065, EN55013, EN55020, EN61000-3-2 e EN61000-3-3.<br />
Facendo seguito alle disposizioni della direttiva sul basso voltaggio<br />
2006/95/EC alla direttiva EMC 2004/108/EC, alla norma EC 1275/2008<br />
e alla relativa legge quadro 2009/125/EC in materia di prodotti<br />
alimentati ad energia (ErP).<br />
QUESTO PRODOTTO E’ CONFORME<br />
AL D.M. 28/08/95 N. 548<br />
• DECLARACIÓN DE CONFORMIDAD<br />
Declaramos bajo nuestra exclusiva responsabilidad que este producto<br />
al que hace referencia esta declaración, está conforme con los<br />
siguientes estándares:<br />
EN60065, EN55013, EN55020, EN61000-3-2 y EN61000-3-3.<br />
De acuerdo con la directiva sobre baja tensión 2006/95/CE y la<br />
directiva sobre CEM 2004/108/CE, la normativa CE 1275/2008 y su<br />
directiva marco 2009/125/EC para productos relacionados con la<br />
energía (ErP).<br />
• EENVORMIGHEIDSVERKLARING<br />
Wij verklaren uitsluitend op onze verantwoordelijkheid dat dit produkt,<br />
waarop deze verklaring betrekking heeft, in overeenstemming is met<br />
de volgende normen:<br />
EN60065, EN55013, EN55020, EN61000-3-2 en EN61000-3-3.<br />
Volgens de voorzieningen van lage spanningsrichtlijn 2006/95/<br />
EC en EMC-richtlijn 2004/108/EC, de EU-richtlijn 1275/2008 en de<br />
kaderrichtlijn 2009/125/EC voor energieverbruikende producten (ErP).<br />
• ÖVERENSSTÄMMELSESINTYG<br />
Härmed intygas helt på eget ansvar att denna produkt, vilken detta<br />
intyg avser, uppfyller följande standarder:<br />
EN60065, EN55013, EN55020, EN61000-3-2 och EN61000-3-3.<br />
Uppfyller reglerna i lågspänningsdirektivet 2006/95/EC och<br />
EMC-direktivet 2004/108/EC, EU-förordningen 1275/2008 och<br />
ramverksdirektivet 2009/125/EC för energirelaterade produkter (ErP).<br />
<strong>Marantz</strong> Europe<br />
A division of D&M Europe B.V.<br />
Beemdstraat 11, 5653 MA Eindhoven,<br />
The Netherlands<br />
SVENSKA<br />
NEDERLANDS<br />
ESPAÑOL<br />
ITALIANO<br />
A NOTE ABOUT RECYCLING:<br />
This product’s packaging materials are recyclable and can be reused. Please<br />
dispose of any materials in accordance with the local recycling regulations.<br />
When discarding the unit, comply with local rules or regulations.<br />
Batteries should never be thrown away or incinerated but disposed of in<br />
accordance with the local regulations concerning battery disposal.<br />
This product and the supplied accessories, excluding the batteries, constitute<br />
the applicable product according to the WEEE directive.<br />
HINWEIS ZUM RECYCLING:<br />
Das Verpackungsmaterial dieses Produktes ist zum Recyceln geeignet und kann<br />
wieder verwendet werden. Bitte entsorgen Sie alle Materialien entsprechend<br />
der örtlichen Recycling-Vorschriften.<br />
Beachten Sie bei der Entsorgung des Gerätes die örtlichen Vorschriften und<br />
Bestimmungen.<br />
Die Batterien dürfen nicht in den Hausmüll geworfen oder verbrannt werden;<br />
bitte entsorgen Sie die Batterien gemäß der örtlichen Vorschriften.<br />
Dieses Produkt und das im Lieferumfang enthaltene Zubehör (mit Ausnahme<br />
der Batterien!) entsprechen der WEEE-Direktive.<br />
UNE REMARQUE CONCERNANT LE RECYCLAGE:<br />
Les matériaux d’emballage de ce produit sont recyclables et peuvent être<br />
réutilisés. Veuillez disposer des matériaux conformément aux lois sur le recyclage<br />
en vigueur.<br />
Lorsque vous mettez cet appareil au rebut, respectez les lois ou réglementations en vigueur.<br />
Les piles ne doivent jamais être jetées ou incinérées, mais mises au rebut conformément aux lois<br />
en vigueur sur la mise au rebut des piles.<br />
Ce produit et les accessoires inclus, à l’exception des piles, sont des produits conformes à la<br />
directive DEEE.<br />
NOTA RELATIVA AL RICICLAGGIO:<br />
I materiali di imballaggio di questo prodotto sono riutilizzabili e riciclabili. Smaltire i materiali<br />
conformemente alle normative locali sul riciclaggio.<br />
Per lo smaltimento dell’unità, osservare le normative o le leggi locali in vigore.<br />
Non gettare le batterie, né incenerirle, ma smaltirle conformemente alla normativa locale sui<br />
rifiuti chimici.<br />
Questo prodotto e gli accessori inclusi nell’imballaggio sono applicabili alla direttiva RAEE, ad<br />
eccezione delle batterie.<br />
ACERCA DEL RECICLAJE:<br />
Los materiales de embalaje de este producto son reciclables y se pueden volver a utilizar.<br />
Disponga de estos materiales siguiendo los reglamentos de reciclaje de su localidad.<br />
Cuando se deshaga de la unidad, cumpla con las reglas o reglamentos locales.<br />
Las pilas nunca deberán tirarse ni incinerarse. Deberá disponer de ellas siguiendo los reglamentos<br />
de su localidad relacionados con los desperdicios químicos.<br />
Este producto junto con los accesorios empaquetados es el producto aplicable a la directiva<br />
RAEE excepto pilas.<br />
EEN AANTEKENING MET BETREKKING TOT DE RECYCLING:<br />
Het inpakmateriaal van dit product is recycleerbaar en kan opnieuw gebruikt worden. Er wordt<br />
verzocht om zich van elk afvalmateriaal te ontdoen volgens de plaatselijke voorschriften.<br />
Volg voor het wegdoen van de speler de voorschriften voor de verwijdering van wit- en bruingoed<br />
op.<br />
Batterijen mogen nooit worden weggegooid of verbrand, maar moeten volgens de plaatselijke<br />
voorschriften betreffende chemisch afval worden verwijderd.<br />
Op dit product en de meegeleverde accessoires, m.u.v. de batterijen is de richtlijn voor<br />
afgedankte elektrische en elektronische apparaten (WEEE) van toepassing.<br />
OBSERVERA ANGÅENDE ÅTERVINNING:<br />
Produktens emballage är återvinningsbart och kan återanvändas. Kassera det enligt lokala<br />
återvinningsbestämmelser.<br />
När du kasserar enheten ska du göra det i överensstämmelse med lokala regler och bestämmelser.<br />
Batterier får absolut inte kastas i soporna eller brännas. Kassera dem enligt lokala bestämmelser<br />
för kemiskt avfall.<br />
Denna apparat och de tillbehör som levereras med den uppfyller gällande WEEE-direktiv, med<br />
undantag av batterierna.<br />
FRANÇAIS<br />
DEUTSCH<br />
n CAUTIONS ON INSTALLATION<br />
VORSICHTSHINWEISE ZUR AUFSTELLUNG<br />
PRÉCAUTIONS D’INSTALLATION<br />
PRECAUZIONI SULL’INSTALLAZIONE<br />
EMPLAZAMIENTO DE LA INSTALACIÓN<br />
VOORZORGSMAATREGELEN BIJ DE<br />
INSTALLATIE<br />
FÖRSIKTIGHET VID INSTALLATIONEN<br />
z<br />
z z<br />
z<br />
ENGLISH<br />
Wall<br />
Wand<br />
Paroi<br />
Parete<br />
Pared<br />
Muur<br />
Vägg<br />
z For proper heat dispersal, do not install this unit in a<br />
confined space, such as a bookcase or similar enclosure.<br />
• More than 0.3 m is recommended.<br />
• Do not place any other equipment on this unit.<br />
z Stellen Sie das Gerät nicht an einem geschlossenen Ort,<br />
wie in einem Bücherregal oder einer ähnlichen Einrichtung<br />
auf, da dies eine ausreichende Belüftung des Geräts<br />
behindern könnte.<br />
• Empfohlen wird über 0,3 m.<br />
• Keine anderen Gegenstände auf das Gerät stellen.<br />
z Pour permettre la dissipation de chaleur requise, n’installez<br />
pas cette unité dans un espace confiné tel qu’une<br />
bibliothèque ou un endroit similaire.<br />
• Une distance de plus de 0,3 m est recommandée.<br />
• Ne placez aucun matériel sur cet appareil.<br />
z Per una dispersione adeguata del calore, non installare<br />
questa apparecchiatura in uno spazio ristretto, come ad<br />
esempio una libreria o simili.<br />
• Si raccomanda una distanza superiore ai 0,3 m.<br />
• Non posizionare alcun altro oggetto o dispositivo su questo<br />
dispositivo.<br />
z Para la dispersión del calor adecuadamente, no instale<br />
este equipo en un lugar confinado tal como una librería o<br />
unidad similar.<br />
• Se recomienda dejar más de 0,3 m alrededor.<br />
• No coloque ningún otro equipo sobre la unidad.<br />
z Plaats dit toestel niet in een kleine afgesloten ruimte, zoals<br />
een boekenkast e.d., omdat anders de warmte niet op<br />
gepaste wijze kan worden afgevoerd.<br />
• Meer dan 0,3 m is aanbevolen.<br />
• Plaats geen andere apparatuur op het toestel.<br />
z För att tillförsäkra god värmeavledning får utrustningen<br />
inte installeras i instängda utrymmen, som t.ex. en<br />
bokhylla eller liknande.<br />
• Mer än 0,3 m rekommenderas.<br />
• Placera ingen annan utrustning ovanpå den här enheten.<br />
III
IV<br />
АВ-РЕСИВЕР<br />
<strong>Marantz</strong> SR7005<br />
(РУКОВОДСТВО ПО ЭКСПЛУАТАЦИИ)<br />
Вы приобрели устройство радиоприемное/усилительное производства компании “D&M Холдингс Инк”, Япония (“D & M Holdings Inc.”, Japan). Модель SR7005<br />
является аудио-видео ресивером и предназначена для многоканального усиления звука в домашних аудиосистемах. Это изделие широко известно в кругах<br />
истинных ценителей высококлассного звука. Качество и безопасность подтверждены множеством тестов, проведенных как зарубежными, так и российскими<br />
испытательными лабораториями.<br />
Изготовитель в течение 3 лет (срок службы) после выпуска данного изделия обеспечивает наличие комплектующих в целях возможности проведения ремонта<br />
и технического обслуживания, по истечении которого эксплуатация и техническое обслуживание продолжается в соответствии с действующими нормативными<br />
документами. Изделие остается безопасным для жизни, здоровья человека и окружающей<br />
среды в течение всего срока эксплуатации. Гарантийный срок - 1 год.<br />
No сертификата<br />
соответствия<br />
Орган по<br />
сертификации<br />
Информация о Российской сертификации<br />
Нормативные документы<br />
РОСС JP.АЯ46.B13708 РОСТЕСТ-МОСКВА ГОСТ Р МЭК 60065-2005<br />
ГОСТ 5651-89 (Табл. 1 (поз. 11), табл. 2 (поз. 6.7))<br />
ГОСТ 22505-97, ГОСТ Р 51515-99<br />
ГОСТ Р 51317.3.2-2006 (Рaзд. 6, 7)<br />
ГОСТ Р 51317.3.3-2008<br />
См. в конце инструкции<br />
Основные технические характеристики<br />
Наименование<br />
сертифицированной продукции<br />
Срок действия<br />
сертификата<br />
Устройства радиоприемные До 11.04.2013<br />
ВНИМАНИЕ: Если Вы приобрели аудиоаппаратуру надлежащего качества, то, по Российским законам, она не подлежит возврату или обмену на аналогичный товар других<br />
размера, формы и т.д.<br />
D&M Холдингс Инк<br />
Здание D&M, 2-1 Ниссин-тё<br />
Кавасаки-ку, Кавасаки-си, Канагава<br />
2108569, Япония<br />
D&M Holdings Inc.<br />
D&M Building, 2-1 Nisshin-Cho<br />
Kawasaki-Ku, Kawasaki-Shi, Kanagawa<br />
2108569, Japan
Getting started<br />
SVENSKA<br />
NEDERLANDS<br />
ESPAÑOL<br />
Thank you for purchasing this <strong>Marantz</strong> product. To ensure proper operation, please read this user guide carefully before using the product.<br />
After reading them, be sure to keep them for future reference.<br />
Contents<br />
Getting started ··············································································1<br />
Accessories ··················································································2<br />
About this manual ·········································································2<br />
Features ························································································2<br />
Cautions on handling ····································································3<br />
Simple version (Simple setup guide) ··························4<br />
Basic version ··········································································13<br />
Connections ·················································································14<br />
Important information ·································································14<br />
Connecting an HDMI-compatible device ····································15<br />
Connecting a TV··········································································17<br />
Connecting a Blu-ray Disc player ················································17<br />
Connecting a DVD player ····························································18<br />
Connecting a set-top box (Satellite tuner/cable TV) ····················18<br />
Connecting a video cassette recorder ········································19<br />
Connecting a digital camcorder ··················································19<br />
Connecting an iPod or USB memory device to the USB port ·····20<br />
Connecting a CD player ······························································20<br />
Connecting a CD recorder ··························································21<br />
Connecting a record player ·························································21<br />
Connecting an antenna ·······························································22<br />
Connecting a wireless receiver (RX101) ·····································22<br />
Connect a device that has a multichannel output terminal ·········23<br />
Connecting a external power amplifier ·······································23<br />
Connecting to a home network (LAN) ········································24<br />
Playback (Basic operation) ·························································25<br />
Important information ·································································25<br />
Playing a Blu-ray Disc player/DVD player ····································26<br />
Playing a CD player ·····································································26<br />
Playing an iPod ® ·········································································27<br />
Playing a USB memory device ····················································28<br />
Tuning in radio stations ·······························································30<br />
Playing a network audio ······························································33<br />
Selecting a listening mode (Surround mode) ··························41<br />
Multi-channel playback ·······························································41<br />
Stereo playback ··········································································43<br />
Direct playback ···········································································43<br />
Dolby Virtual Speaker/Dolby Headphone playback ·····················43<br />
ITALIANO<br />
Advanced version ·······························································44<br />
Speaker installation/connection (Advanced connection) ·······45<br />
Install ··························································································45<br />
Connect ······················································································46<br />
Set up speakers ··········································································49<br />
Connections (Advanced connection)·········································50<br />
Connecting the remote control jacks ··········································50<br />
RS-232C connector ·····································································51<br />
DC OUT (TRIGGER OUT) jacks ···················································51<br />
Playback (Advanced operation) ·················································52<br />
Convenient functions ··································································52<br />
Playback in ZONE2/ZONE3 (Separate room) ··························58<br />
Audio output ···············································································58<br />
Video output ···············································································59<br />
Playback ······················································································59<br />
How to make detailed settings ··················································60<br />
Menu map ··················································································60<br />
Examples of menu and front display ··········································61<br />
Inputting characters ···································································62<br />
Input Setup ·················································································63<br />
Audio/Video Adjust ·····································································69<br />
Manual Setup··············································································74<br />
Information ·················································································84<br />
Other settings ··············································································85<br />
Remote control settings ·····························································85<br />
Switches light illumination on/off ···············································85<br />
Operating the connected devices by remote control unit ······86<br />
Operating AV equipment ····························································86<br />
Registering preset codes ····························································87<br />
Operating components ·······························································88<br />
Operating learn function ·····························································89<br />
Operating macro function ···························································91<br />
Setting the back light ··································································92<br />
FRANÇAIS<br />
DEUTSCH<br />
ENGLISH<br />
Information ·············································································93<br />
Part names and functions···························································94<br />
Front panel ··················································································94<br />
Display ························································································95<br />
Rear panel ···················································································96<br />
Remote control unit ····································································97<br />
Other information ·······································································99<br />
Trademark information ································································99<br />
Surround ···················································································100<br />
Relationship between video signals and monitor output ··········104<br />
Explanation of terms ·································································105<br />
Troubleshooting ········································································108<br />
Resetting the microprocessor ··················································110<br />
Specifications ············································································111<br />
List of preset codes ··································End of this manual<br />
1<br />
Simple version Basic version<br />
Advanced version Information
2<br />
ENGLISH DEUTSCH FRANÇAIS ITALIANO ESPAÑOL NEDERLANDS SVENSKA<br />
Accessories<br />
Check that the following parts are supplied with the product.<br />
q User guide ............................................................................... 1<br />
w Power cord .............................................................................. 1<br />
e Remote control unit (RC011SR) .............................................. 1<br />
r R03/AAA batteries ................................................................... 2<br />
t Setup microphone (ACM1H) ................................................... 1<br />
y AM loop antenna ..................................................................... 1<br />
u FM indoor antenna .................................................................. 1<br />
w<br />
About this manual<br />
e<br />
y u<br />
n Operation buttons<br />
The operations described in this guide are based mainly on remote<br />
control operation.<br />
n Symbols<br />
v<br />
NOTE<br />
This symbol indicates a reference page on which<br />
related information is described.<br />
This symbol indicates a supplementary information<br />
and tips for operations.<br />
This symbol indicates a supplementary information<br />
and tips for operations.<br />
n Illustrations<br />
Note that the illustrations in these instructions are for explanation<br />
purposes and may differ from the actual unit.<br />
t<br />
Features<br />
Fully Discrete, identical quality and power for all<br />
7 channels (125 W x 7ch, 8 Ω)<br />
The unit is equipped with a power amplifi er that reproduces highfi<br />
delity sound in surround mode with equal quality and power for all<br />
channels, true to the original sound.<br />
The power amplifi er circuit adopts a discrete-circuit confi guration<br />
that achieves high-quality surround sound reproduction.<br />
Current feedback amplifi er<br />
This unit uses a high-speed current feedback amplifi er circuit<br />
for its preamplifi er so that signals from a Blu-ray Disc player and<br />
other equipment that support high-defi nition audio formats can<br />
be amplifi ed with high fi delity. The high-speed current feedback<br />
amplifi er also reproduces a natural sound space.<br />
Supports HDMI 1.4a with 3D, ARC, Deep Color,<br />
x.v.Color , Auto Lipsync and HDMI control function<br />
This unit can output 3D video signals input from a Blu-ray Disc<br />
player to a TV that supports a 3D system. This unit also supports<br />
the ARC (Audio Return Channel) function, which reproduces TV<br />
sound with this unit via an HDMI cable used for connecting the<br />
unit and a TVz1 .<br />
z1 The TV should support the ARC function.<br />
Internet radio, music and photo streaming via<br />
networkz2 This unit can playback audio fi les and still images such as<br />
photographs that are stored on your computer via a network. You<br />
can also listen to internet radio and a whole host of other online<br />
musicz3 that uses network technology.<br />
z2 An internet connection is required.<br />
z3 You may be required to sign a service agreement with the<br />
companies that provide particular services.<br />
6-HDMI inputs and 2-outputs<br />
The unit is equipped with 6 HDMI input connectors for connecting<br />
devices with HDMI connectors, such as a Blu-ray Disc player,<br />
game machine, HD video camera, etc.<br />
One of the 6 input connectors of this unit is provided on the front<br />
panel so that you can easily connect and display images and videos<br />
recorded in a digital still camera or digital video camera.<br />
High defi nition audio support<br />
The unit is equipped with a decoder which supports high-quality<br />
digital audio format for Blu-ray Disc players such as Dolby TrueHD,<br />
DTS-HD Master Audio, etc.<br />
Audyssey DSX<br />
This unit is equipped with Audyssey DSX decoder. By connecting<br />
front height speakers to this unit and playing back through Audyssey<br />
DSX, you can experience a more powerful playback expression in<br />
the height audio range. By connecting front wide speakers, you<br />
can experience a more powerful playback expression in the wide<br />
audio range.<br />
Easy to use, Graphical User Interface<br />
This unit is equipped with an easy to see “Graphical User<br />
Interface” that uses menu displays and levels. The use of level<br />
displays increases operability of the unit.<br />
All sources are up-scaled to 1080p<br />
The unit is provided with an HDMI video up-scaling function that<br />
converts an analog video signal input to the unit to a 1080p (HD<br />
resolution) signal and supplies it to a TV via the HDMI connector.<br />
This enables the unit and a TV connected with a single HDMI cable<br />
and any video source to be reproduced precisely with HD level of<br />
quality.
Direct play for iPod® and iPhone® via USB<br />
Music data from an iPod can be played back if you connect the<br />
USB cable supplied with the iPod via the USB port of this unit, and<br />
also an iPod can be controlled with the remote control unit for this<br />
unit.<br />
M-XPort (<strong>Marantz</strong>-eXtension Port)<br />
This unit is equipped with the M-XPort, a <strong>Marantz</strong> original innovation<br />
that provides outstanding expandability. You can connect the<br />
Wireless Receiver RX101 (sold separately) to this port.<br />
Speaker terminal for front height channel<br />
The unit is equipped with dedicated front height channel speaker<br />
terminals on the rear panel. You can enjoy 7.1-channel playback<br />
using the front height channel and 7.1-channel playback using the<br />
surround back channel, without having to reconnect the speakers.<br />
Other features<br />
• Dolby Virtual Speaker (vpage 43)<br />
• Dolby Headphone (vpage 43)<br />
• DTS Neural Surround (vpage 42)<br />
Features<br />
SVENSKA<br />
NEDERLANDS<br />
Cautions on handling<br />
ESPAÑOL<br />
ITALIANO<br />
• Before turning the power switch on<br />
Check once again that all connections are correct and that there are<br />
no problems with the connection cables.<br />
• Power is supplied to some of the circuitry even when the unit is<br />
set to the standby mode. When going on vacation or leaving home<br />
for long periods of time, be sure to unplug the power cord from the<br />
power outlet.<br />
• About condensation<br />
If there is a major difference in temperature between the inside of<br />
the unit and the surroundings, condensation (dew) may form on<br />
the operating parts inside the unit, causing the unit not to operate<br />
properly.<br />
If this happens, let the unit sit for an hour or two with the power<br />
turned off and wait until there is little difference in temperature<br />
before using the unit.<br />
• Cautions on using mobile phones<br />
Using a mobile phone near this unit may result in noise. If that<br />
occurs, move the mobile phone away from this unit when it is in use.<br />
• Moving the unit<br />
Turn off the power and unplug the power cord from the power<br />
outlet. Next, disconnect the connection cables to other system units<br />
before moving the unit.<br />
• About Care<br />
• Wipe the cabinet and control panel clean with a soft cloth.<br />
• Follow the instructions when using a chemical cleaner.<br />
• Benzene, paint thinner or other organic solvents as well as<br />
insecticide may cause material changes and discoloration if brought<br />
into contact with the unit, and should therefore not be used.<br />
FRANÇAIS<br />
DEUTSCH<br />
ENGLISH<br />
3<br />
Simple version<br />
Basic version Advanced version Information
4<br />
ENGLISH DEUTSCH FRANÇAIS ITALIANO ESPAÑOL NEDERLANDS SVENSKA<br />
Simple<br />
version<br />
Simple version (Simple setup guide)<br />
Here, we explain the entire setup procedure, from unboxing the unit to using it in a home theater.<br />
The “Simple version” section provides the speaker installation, connection, and setup methods for the 7.1-channel system with surround<br />
back speakers. For the installing, connecting, and setup methods of speakers other than the 7.1-channel system (with surround back<br />
speakers), see page 45.<br />
n Before connecting the unit, turn off the power to all devices.<br />
n For operation of the connected devices, refer to the user manuals for each device.<br />
1<br />
Install<br />
(vpage 5)<br />
Enjoy better audio, using<br />
the correct install method.<br />
2<br />
Connect<br />
(vpage 5)<br />
Connect 7.1-channel<br />
speakers, a TV and<br />
Blu-ray Disc player<br />
equipped with an HDMI<br />
connector.<br />
Set up speakers (Audyssey® Auto Setup)<br />
STEP 1<br />
Preparation<br />
STEP 2<br />
Speaker<br />
Detection<br />
3<br />
STEP 3<br />
Measurement<br />
Turn on<br />
power (vpage 7)<br />
STEP 4<br />
Calculation<br />
4<br />
Set up<br />
speakers<br />
(vpage 7)<br />
Use the setup microphone<br />
(ACM1H) included with the<br />
product, for automatic<br />
setup.<br />
STEP 5<br />
Check<br />
STEP 6<br />
Store<br />
5<br />
Play back<br />
disc (vpage 12)<br />
Enjoy Blu-ray Disc and DVD<br />
in surround sound.<br />
Finish
SVENSKA<br />
NEDERLANDS<br />
ESPAÑOL<br />
ITALIANO<br />
Speakers<br />
Carefully check the left (L) and right (R)<br />
channels and + (red) and – (black) polarities<br />
on the speakers being connected to the<br />
this unit, and be sure to interconnect the<br />
channels and polarities correctly.<br />
Connecting the speaker cables<br />
Peel off about 10 mm of sheathing from the tip<br />
of the speaker cable, then either twist the core<br />
wire tightly or terminate it.<br />
FRANÇAIS<br />
DEUTSCH<br />
ENGLISH<br />
1 Install 1 2 3 4 5 2 Connect 1 2 3 4 5<br />
This unit can perform 2.0/2.1 to 7.1-channel surround playback.<br />
This page provides the speaker installation procedure for the<br />
7.1-channel playback using surround back speakers as an example.<br />
The default setting is 7.1-channel. You can also perform 5.1-channel playback.<br />
To perform 5.1-channel playback, connect5.1-channel speakers only.<br />
Use Audyssey Auto Setup function of this unit to automatically detect the<br />
number of connected speakers and perform optimal settings for the speakers<br />
to be used.<br />
90 – 110˚<br />
FL FR<br />
SW<br />
22 – 30˚<br />
SL SR<br />
Listening<br />
position<br />
C<br />
SBL SBR<br />
135 – 150˚<br />
FL Front speaker (L) • Install the surround speakers in a position 60<br />
FR Front speaker (R)<br />
to 90 cm higher than ear level.<br />
C Center speaker<br />
SW Subwoofer<br />
Surround<br />
SL Surround speaker (L)<br />
SR Surround speaker (R)<br />
SBL Surround back speaker (L)<br />
SBR Surround back speaker (R)<br />
Front<br />
speaker<br />
speaker<br />
60 – 90 cm<br />
Surround back<br />
speaker<br />
• Point slightly<br />
downwards<br />
GViewed from the sideH<br />
NOTE<br />
• Connect so that the speaker cable core wires<br />
do not protrude from the speaker terminal.<br />
The protection circuit may be activated if the<br />
core wires touch the rear panel or if the + and –<br />
sides touch each other (vpage 107 “Protection<br />
Circuit”).<br />
• Never touch the speaker terminals while the<br />
power supply is connected. Doing so could<br />
result in electric shock.<br />
• Use speakers with the speaker impedances<br />
shown below.<br />
Speaker<br />
Speaker terminals<br />
impedance<br />
FRONT A 6 − 8 Ω<br />
FRONT A + FRONT B 8 Ω<br />
CENTER<br />
SURROUND<br />
SURR. BACK / AMP ASSIGN 6 − 8 Ω<br />
FRONT B/HEIGHT<br />
FRONT WIDE<br />
The “Simple version” section provides the speaker installation, connection, and setup methods for the 7.1-channel system with surround back speakers.<br />
For the installing, connecting, and setup methods of speakers other than the 7.1-channel system (with surround back speakers), see page 45.<br />
5<br />
Simple version<br />
Basic version Advanced version Information
6<br />
ENGLISH DEUTSCH FRANÇAIS ITALIANO ESPAÑOL NEDERLANDS SVENSKA<br />
Connect<br />
Audio cable<br />
(sold separately)<br />
FL FR<br />
SW<br />
Subwoofer with<br />
built-in amplifi er<br />
C<br />
Speaker cables<br />
(sold separately)<br />
SL SR<br />
SBL SBR<br />
Blu-ray Disc player and TV<br />
Use only an HDMI (High Defi nition Multimedia Interface) cable that bears the HDMI<br />
logo (a genuine HDMI product). Using a cable without the HDMI logo (a non-genuine<br />
HDMI product) may result in abnormal playback.<br />
When outputting Deep Color or 1080p, etc., we recommend you use a “High Speed<br />
HDMI cable” or a “High Speed HDMI cable with Ethernet”for enhanced high-quality<br />
playback.<br />
Blu-ray Disc player<br />
HDMI<br />
OUT<br />
NOTE<br />
HDMI cable<br />
(sold separately)<br />
To household power outlet<br />
(AC 230 V, 50 Hz) Power cord<br />
(supplied)<br />
HDMI cable<br />
(sold separately)<br />
TV<br />
HDMI<br />
IN<br />
• Do not plug in the power cord until all connections have been completed.<br />
• Do not bundle power cords together with connection cables. Doing so can result in humming or noise.<br />
The “Simple version” section provides the speaker installation, connection, and setup methods for the 7.1-channel system with surround back speakers.<br />
For the installing, connecting, and setup methods of speakers other than the 7.1-channel system (with surround back speakers), see page 45.
3<br />
1 Turn<br />
2<br />
Change<br />
3 <strong>Press</strong><br />
SVENSKA<br />
NEDERLANDS<br />
Turn on power 1 2 3 4 5<br />
on the TV and subwoofer<br />
power.<br />
Power on<br />
the TV input to the input of<br />
this unit.<br />
ON to turn on power to the unit.<br />
The power indicator switches off, and power<br />
is supplied to the unit.<br />
Power on<br />
Power on<br />
NOTE<br />
Before you use the remote control unit for the fi rst<br />
time, be sure to insert the batteries (vpage 98<br />
“Inserting the batteries”).<br />
ESPAÑOL<br />
4<br />
ITALIANO<br />
FRANÇAIS<br />
DEUTSCH<br />
ENGLISH<br />
Set up speakers<br />
(Audyssey® Auto Setup) 1 2 3 4 5<br />
The acoustic characteristics of the connected speakers and listening room are<br />
measured and the optimum settings are made automatically. This is called<br />
“Audyssey Auto Setup”.<br />
To perform measurement, place the setup microphone in multiple locations all<br />
around the listening area. For best results, we recommend you measure in six<br />
or more positions, as shown in the illustration (up to eight positions).<br />
• When performing Audyssey Auto Setup, MultEQ® XT/Dynamic EQ®/Dynamic<br />
Volume® functions become active (vpage 70, 71).<br />
• To set up the speakers manually, use “Speaker Setup” (vpage 74) on the menu.<br />
NOTE<br />
• Make the room as quiet as possible. Background noise can disrupt the room measurements. Close<br />
windows, silence cell phones, televisions, radios, air conditioners, fl uorescent lights, home appliances,<br />
light dimmers, or other devices as measurements may be affected by these sounds.<br />
• Cell phones should be placed away from all audio electronics during the measurement process as Radio<br />
Frequency Interference (RFI) may cause measurement disruptions (even if the cell phone is not in use).<br />
• Do not unplug the setup microphone from the main unit until Audyssey Auto Setup is completed.<br />
• Do not stand between the speakers and setup microphone or allow obstacles in the path while the<br />
measurements are being made. This will cause inaccurate readings.<br />
• Loud test sounds may be played during Audyssey Auto setup. This is part of<br />
normal operation. If there is background noise in room, these test signals will<br />
increase in volume.<br />
• Operating VOLUME +, – during the measurements will cancel the measurements.<br />
• Measurement cannot be performed when headphones are connected.<br />
7<br />
Simple version<br />
Basic version Advanced version Information
8<br />
ENGLISH DEUTSCH FRANÇAIS ITALIANO ESPAÑOL NEDERLANDS SVENSKA<br />
Set up speakers (Audyssey® Auto Setup)<br />
About setup microphone placement<br />
• Measurements are performed by placing the setup microphone<br />
successively at multiple positions throughout the entire listening<br />
area, as shown in GExample qH. For best results, we recommend<br />
you measure in six or more positions, as shown in the illustration<br />
(up to eight positions).<br />
• Even if the listening environment is small as shown in GExample wH,<br />
measuring at multiple points throughout the listening environment<br />
results in more effective correction.<br />
( : Measuring positions)<br />
GExample qH GExample wH<br />
FL SW C FR<br />
FL SW C FR<br />
SL *M<br />
SBL SBR<br />
SR<br />
( : Measuring positions)<br />
SL *M<br />
SBL SBR<br />
FL Front speaker (L) SL Surround speaker (L)<br />
FR Front speaker (R) SR Surround speaker (R)<br />
C Center speaker SBL Surround back speaker (L)<br />
SW Subwoofer SBR Surround back speaker (R)<br />
About the main listening position (*M)<br />
The main listening position is the position where listeners would<br />
normally sit or where one would normally sit alone within the listening<br />
environment. Before starting Audyssey Auto Setup, place the setup<br />
microphone in the main listening position. Audyssey MultEQ ® XT uses<br />
the measurements from this position to calculate speaker distance,<br />
level, polarity, and the optimum crossover value for the subwoofer.<br />
SR<br />
1<br />
Prepare the setup microphone<br />
Mount the setup microphone on a tripod or stand<br />
and place it in the main listening position.<br />
When placing the setup microphone, adjust the height of the<br />
sound receptor to the level of the listener’s ear.<br />
Sound receptor<br />
Setup<br />
microphone<br />
NOTE<br />
• Do not hold the setup microphone in your hand during<br />
measurements.<br />
• Avoid placing the setup microphone close to a seat back or wall as<br />
sound refl ections may give inaccurate results.<br />
2 Set up the subwoofer<br />
If using a subwoofer capable of the following<br />
adjustments, set up the subwoofer as shown below.<br />
n When using a subwoofer with a direct mode<br />
Set the direct mode to “On” and disable the volume adjustment<br />
and crossover frequency setting.<br />
n When using a subwoofer without a direct mode<br />
Make the following settings:<br />
• Volume : “12 o’clock position”<br />
• Crossover frequency : “Maximum/Highest Frequency”<br />
• Low pass fi lter : “Off”<br />
• Standby mode : “Off”<br />
The “Simple version” section provides the speaker installation, connection, and setup methods for the 7.1-channel system with surround back speakers.<br />
For the installing, connecting, and setup methods of speakers other than the 7.1-channel system (with surround back speakers), see page 45.<br />
NOTE<br />
When you use two subwoofers, please adjust the subwoofer volume<br />
controls individually so that each subwoofer level is as close as<br />
possible to 75 dB using the test tone (vpage 76) before Audyssey<br />
Auto Setup.<br />
3 Set up the remote control unit<br />
n Set up the operation mode<br />
<strong>Press</strong> AMP to set the remote control unit to amplifi er<br />
operation mode.<br />
<strong>Press</strong> AMP
STEP 1<br />
Preparation<br />
4 Connect<br />
the setup microphone to the<br />
SETUP MIC jack of this unit.<br />
When the setup microphone is<br />
connected, the following screen is<br />
displayed.<br />
AUTO SETUP<br />
AUDYSSEY AUTO SETUP MultEQ XT<br />
STEP1 Preparation<br />
Connect the speakers<br />
and place them according<br />
to the recommendations<br />
in the manual.<br />
Set the following<br />
items if necessary.<br />
Amp Assign<br />
Channel Select<br />
Auto Setup Start<br />
Start Auto Setup<br />
[1/6]<br />
ENTER Enter RETURN Cancel<br />
This screen provides the method for setting<br />
up 7.1-channel playback using surround back<br />
speakers. For the method of setting up speakers<br />
other than the 7.1-channel system, select “Amp<br />
Assign” and perform step 3 and 4 of “Set up<br />
“Amp Assign”” (vpage 49).<br />
If unused channels are set with “Channel<br />
Select”, measuring time can be shortened. For<br />
setting, perform steps 5 to 9 of “Set up “Channel<br />
Select”” (vpage 49).<br />
5 Use<br />
ui to select “Auto Setup Start”<br />
and then press ENTER.<br />
Remote control operation<br />
buttons<br />
SVENSKA<br />
STEP 2<br />
Speaker Detection<br />
NEDERLANDS<br />
• In STEP 2, you will perform measurements at the<br />
main listening position.<br />
• This step automatically checks the speaker<br />
confi guration and speaker size, and calculates the<br />
channel level, distance, and crossover frequency.<br />
It also corrects distortion in the listening area.<br />
6 Select<br />
“Measure” and then press<br />
ENTER.<br />
When measuring begins, a test tone is<br />
output from each speaker.<br />
• Measurement requires several minutes.<br />
7<br />
The detected speakers are displayed.<br />
AUTO SETUP<br />
AUDYSSEY AUTO SETUP<br />
STEP2 Spkr Detect Check<br />
Front<br />
Center<br />
Subwoofer<br />
Surround<br />
S.Back<br />
F.Height<br />
F.Wide<br />
Yes<br />
Yes<br />
Yes<br />
Yes<br />
2spkrs<br />
No<br />
No<br />
Retry<br />
Next Measurement<br />
MultEQ XT<br />
[2/6]<br />
ENTER Enter RETURN Cancel<br />
Go to Step 3 (Measurement) after speaker check<br />
NOTE<br />
If a connected speaker is not displayed, the<br />
speaker may not be connected correctly. Check<br />
the speaker connection.<br />
8 Use<br />
ui to select “Next 1<br />
Measurement” and then press ENTER.<br />
Move the cursor<br />
(Up/Down/Left/Right)<br />
ESPAÑOL<br />
ITALIANO<br />
NOTE<br />
If “Caution” is displayed:<br />
Go to “Error messages” (vpage 11), check<br />
any related items, and perform the necessary<br />
procedures.<br />
If the problem is resolved, return and restart<br />
“Audyssey Auto Setup”.<br />
When performing Audyssey Auto<br />
Setup over again<br />
<strong>Press</strong> ui to select “Retry”, and then press ENTER.<br />
When measuring has stopped<br />
<strong>Press</strong> RETURN, to the “Cancel Auto Setup?”<br />
prompt is displayed.<br />
<strong>Press</strong> o to select “Yes”, then press ENTER.<br />
Setting up the speakers again<br />
Repeat the operation from step 4 of<br />
STEP1 Preparation .<br />
FRANÇAIS<br />
DEUTSCH<br />
ENGLISH<br />
Set up speakers (Audyssey® Auto Setup)<br />
STEP 3<br />
Measurement<br />
• In STEP 3, you will perform measurements at<br />
multiple positions (two to eight positions) other<br />
than the main listening position.<br />
• You can achieve a more effective correction of<br />
distortion within the listening area by performing<br />
measurements at multiple positions.<br />
9 Move<br />
the setup microphone to<br />
position 2, use ui to select<br />
“Measure”, and then press ENTER.<br />
The measurement of the second position<br />
starts. Measurements can be made in up to<br />
eight positions.<br />
AUTO SETUP<br />
AUDYSSEY AUTO SETUP<br />
STEP3 Measurement<br />
Please place the microphone<br />
at ear height<br />
at 2nd listening<br />
position.<br />
Measure<br />
Next Calculation<br />
MultEQ XT<br />
[3/6]<br />
ENTER Enter RETURN Cancel<br />
Start next measurement. Test Tone will start<br />
If you want to omit measurements from the next<br />
position onward, select “Next 1 Calculation”.<br />
(Go to STEP4 Calculation )<br />
Repeat step 9, measuring positions 3<br />
10 to 8.<br />
When measurement of position 8 is<br />
completed, a “Measurements fi nished.”<br />
message is displayed.<br />
AUTO SETUP<br />
AUDYSSEY AUTO SETUP<br />
STEP3 Measurement<br />
Measurements finished.<br />
Retry<br />
Next Calculation<br />
MultEQ XT<br />
[3/6]<br />
ENTER<br />
Proceed to Step 4 (Analyze)<br />
Enter RETURN Cancel<br />
Confi rm the setting Return to previous menu<br />
9<br />
Simple version<br />
Basic version Advanced version Information
10<br />
ENGLISH DEUTSCH FRANÇAIS ITALIANO ESPAÑOL NEDERLANDS SVENSKA<br />
Set up speakers (Audyssey® Auto Setup)<br />
STEP 4<br />
Calculation<br />
11 On the STEP3 screen, use ui<br />
to select “Next 1 Calculation”, and<br />
then press ENTER.<br />
Measuring results are analyzed, and the<br />
frequency response of each speaker in the<br />
listening room is determined.<br />
AUTO SETUP<br />
AUDYSSEY AUTO SETUP<br />
STEP4 Calculation<br />
Now calculating...<br />
Please wait.<br />
25%<br />
MultEQ XT<br />
[4/6]<br />
• Analysis takes several minutes to complete. The<br />
time required for this analysis depends on the<br />
number of speakers connected.<br />
The more connected speakers there are, the<br />
longer it takes to perform analysis.<br />
Remote control operation<br />
buttons<br />
STEP 5<br />
Check<br />
Use ui to select the item you want<br />
12 to check, and then press ENTER.<br />
AUTO SETUP<br />
AUDYSSEY AUTO SETUP<br />
STEP5 Check<br />
Check processing results.<br />
To proceed,press<br />
“Next”<br />
Spkr Config Check<br />
Distance Check<br />
Ch. Level Check<br />
Crossover Check<br />
Next Store<br />
MultEQ XT<br />
[5/6]<br />
ENTER Enter RETURN Cancel<br />
Select item to check<br />
• Subwoofers may measure a greater reported<br />
distance than the actual distance due to added<br />
electrical delay common in subwoofers.<br />
• If you want to check another item, press<br />
RETURN.<br />
Use ui to select “Next 1 Store”<br />
13 and then press ENTER.<br />
NOTE<br />
• If the result differs from the actual connection<br />
status, or if “Caution!” is displayed, see “Error<br />
messages” (vpage 11). Then carry out Audyssey<br />
Auto Setup again.<br />
• If the result still differs from the actual connection<br />
status after remeasurement or the error message<br />
still appears, it is possible that the speakers<br />
are not connected properly. Turn this unit off,<br />
check the speaker connections and repeat the<br />
measurement process from the beginning.<br />
• If you change speaker positions or orientation,<br />
perform Audyssey Auto Setup again to fi nd the<br />
optimal equalizer settings.<br />
Move the cursor<br />
(Up/Down/Left/Right)<br />
STEP 6<br />
Store Finish<br />
Select “Store” and then press ENTER.<br />
14 Save the measurement results.<br />
STEP6 Store<br />
<strong>Press</strong> “Store” to store<br />
calculation results.<br />
Store<br />
AUTO SETUP<br />
AUDYSSEY AUTO SETUP<br />
STEP6 Store<br />
Now storing...<br />
Please wait.<br />
25%<br />
AUTO SETUP<br />
AUDYSSEY AUTO SETUP<br />
MultEQ XT<br />
MultEQ XT<br />
[6/6]<br />
ENTER Enter RETURN Cancel<br />
Apply and store measurement result<br />
[6/6]<br />
• Saving the results requires about 10 seconds.<br />
• If the measuring results are not to be saved,<br />
press RETURN. A message “Cancel Auto<br />
Setup?” will be displayed. <strong>Press</strong> o then select<br />
“Yes”. All the measured Audyssey Auto Setup<br />
data will be erased.<br />
NOTE<br />
During saving of measurement results, be sure<br />
not to turn off the power.<br />
Unplug the setup microphone from<br />
15 the unit’s SETUP MIC jack.<br />
Set Dynamic Volume®.<br />
16<br />
AUTO SETUP<br />
AUDYSSEY AUTO SETUP<br />
Finish<br />
Storing complete.<br />
Auto Setup is now<br />
finished. Please unplug<br />
microphone.<br />
Turn on Dynamic Volume?<br />
Yes No<br />
MultEQ XT<br />
ENTER Exit<br />
Turn Dynamic Volume on and exit Auto Setup<br />
[6/6]<br />
• For details of Dynamic Volume settings, see<br />
page 71.<br />
n When turning Dynamic Volume on<br />
Use o to select “Yes“, and then press ENTER.<br />
• The unit automatically enters “Evening” mode.<br />
n When turning Dynamic Volume off<br />
Use p to select “No“, and then press ENTER.<br />
NOTE<br />
After performing Audyssey Auto Setup, do not<br />
change the speaker connections or subwoofer<br />
volume. In event of a change, perform Audyssey<br />
Auto Setup again.<br />
Confi rm the setting Return to previous menu
12<br />
ENGLISH DEUTSCH FRANÇAIS ITALIANO ESPAÑOL NEDERLANDS SVENSKA<br />
5<br />
1 <strong>Press</strong><br />
2 Play<br />
3 Adjust<br />
Play back disc 1 2 3 4 5<br />
BD two times in a row<br />
to switch an input source for a<br />
player used for playback.<br />
the component connected to<br />
this unit.<br />
Make the necessary settings on the<br />
player (language setting, subtitles<br />
setting, etc.) beforehand.<br />
the sound volume.<br />
VOLUME + ..................................... Volume up<br />
VOLUME – ................................ Volume down<br />
MUTE .................................................. Muting<br />
4 Set<br />
the listening mode.<br />
Set the listening mode according to the playback contents<br />
(cinema, music, etc.) or according to your liking (vpage 41<br />
“Selecting a listening mode (Surround mode)”).<br />
When power is switched to standby<br />
<strong>Press</strong> STANDBY.<br />
GPower indicator status in standby modeH<br />
• Normal standby : Red<br />
• When “HDMI Control” is set to “ON” :<br />
Orange<br />
• When “Network Standby” is set to “ON” :<br />
Orange<br />
You can also switch the power to standby by<br />
pressing ON/STANDBY on the main unit.<br />
NOTE<br />
During power standby, a minimal amount of power is consumed. To<br />
totally cut off the power, remove the power cord from the power<br />
outlet.
SVENSKA<br />
Basic<br />
version<br />
NEDERLANDS<br />
Basic version<br />
ESPAÑOL<br />
ITALIANO<br />
FRANÇAIS<br />
F Connections vpage 14<br />
F Playback (Basic operation) vpage 25<br />
F Selecting a listening mode (Surround mode) vpage 41<br />
DEUTSCH<br />
Here, we explain the connections and basic operation methods for this unit.<br />
ENGLISH<br />
n Refer to the pages indicated below for information on connecting and playing back the various<br />
media and external devices.<br />
Audio and Video Connection<br />
Playback<br />
TV vpage 16, 17 –<br />
Blu-ray Disc player vpage 16, 17 vpage 26<br />
DVD player vpage 16, 18 vpage 26<br />
Video cassette recorder vpage 16, 19 –<br />
Set-top box (Satellite tuner or cable TV) vpage 16, 18 –<br />
Game console vpage 16 –<br />
Digital camcorder vpage 19 –<br />
Audio Connection<br />
Playback<br />
iPod® vpage 20 vpage 27<br />
USB memory device vpage 20 vpage 28<br />
CD player vpage 20 vpage 26<br />
CD recorder vpage 21 –<br />
Record player vpage 21 –<br />
Radio vpage 22 vpage 30<br />
Wireless receiver (RX101) vpage 22 –<br />
Network Connection<br />
Playback<br />
Network vpage 24 vpage 33<br />
For speaker connections, see page 5.<br />
13<br />
Simple version<br />
Basic version<br />
Advanced version Information
14<br />
ENGLISH DEUTSCH FRANÇAIS ITALIANO ESPAÑOL NEDERLANDS SVENSKA<br />
Connections<br />
Important information<br />
• Make connections as follows before using this unit. Select an appropriate connection type<br />
according to the components to be connected.<br />
• You may need to make some settings on this unit depending on the connection method. Refer to<br />
each description for more information.<br />
• Select the cables (sold separately) according to the components being connected.<br />
NOTE<br />
• Do not plug in the power cord until all connections have been completed.<br />
• When making connections, also refer to the operating instructions of the other components being<br />
connected.<br />
• Be sure to connect the left and right channels properly (left with left, right with right).<br />
• Do not bundle power cords together with connection cables. Doing so can result in noise.<br />
Converting input video signals for output<br />
(Video conversion function)<br />
This unit is equipped with three types of video input connectors (HDMI, Component video and video) and<br />
three types of video output connectors (HDMI, Component video and video).<br />
Use the connectors corresponding to the components to be connected.<br />
This function automatically converts various formats of video signals input to this unit into the formats used<br />
to output the video signals from this unit to a monitor.<br />
Video device<br />
Output<br />
HDMI connector<br />
Component video<br />
connectors<br />
Video connector<br />
GFlow of video signals for MAIN ZONEH<br />
Input<br />
(IN)<br />
HDMI connector<br />
Component video<br />
connectors<br />
Video connector<br />
This unit<br />
HDMI connector<br />
Component video<br />
connectors<br />
Video connector<br />
Monitor<br />
Output<br />
(MONITOR OUT) Input<br />
HDMI connector<br />
Component video<br />
connectors<br />
Video connector<br />
Video device<br />
Output<br />
Component video<br />
connectors<br />
Video connector<br />
GFlow of video signals for ZONE2H<br />
This unit<br />
Input<br />
(IN)<br />
Component video<br />
connectors<br />
in Set as Necessary<br />
• Set when not using the video conversion function.<br />
“Video Convert” (vpage 66)<br />
• Set when changing the resolution of the video signal.<br />
“Resolution” (vpage 67)<br />
Monitor<br />
Output<br />
(MONITOR OUT) Input<br />
Component video<br />
connectors (OUT2/ZONE2)<br />
Component video<br />
connectors<br />
Video connector Video connector Video connector<br />
• The video conversion function supports the NTSC, PAL, SECAM, NTSC 4.43, PAL-N, PAL-M and PAL-60<br />
formats.<br />
• The resolution of the video signal input to this unit’s HDMI connector is the one set at “Resolution”<br />
(vpage 67). (1080p HDMI signals and 1080p component signals are output at 1080p, regardless of the<br />
setting.)<br />
• Resolutions of HDMI-compatible TVs can be checked at “HDMI Monitor 1 Information” or “HDMI<br />
Monitor 2 Information” (vpage 84).<br />
NOTE<br />
• HDMI signals cannot be converted into analog signals.<br />
• When a non-standard video signal from a game machine or some other source is input, the video<br />
conversion function might not operate.<br />
• Component video input signals cannot be converted into Video format.<br />
• A menu is output via the HDMI connector or component video connector.<br />
• When using component output terminal 2 for ZONE2 video signal output, set “Input Setup” – “Input<br />
Assign” – “Component” (vpage 66) in the menu to “ZONE2”.
Examples of screen display<br />
• Menu screen • Status display screen<br />
When the input source is<br />
switched<br />
MENU<br />
Audio/Video Adjust<br />
Information<br />
Auto Setup<br />
Manual Setup<br />
Input Setup<br />
Adjust various audio and video parameters<br />
Input BD<br />
Auto<br />
Mode STEREO<br />
SVENSKA<br />
NEDERLANDS<br />
Important information<br />
When the volume is adjusted<br />
Master Volume -80.0dB<br />
Status display: The operating status appears briefly on the screen<br />
when the input source is switched or the volume is<br />
changed.<br />
NOTE<br />
• If you operate the menu while playing back 3D video content, the playback video is replaced by the menu<br />
screen. The playback video is not displayed behind the menu screen.<br />
• This unit does not show the status display while playing back 3D video content.<br />
Connecting an HDMI-compatible device<br />
You can connect up to six HDMI-compatible devices to the unit.<br />
HDMI function<br />
This unit supports the following HDMI functions:<br />
• 3D<br />
• Deep Color (vpage 105)<br />
• Auto Lip Sync (vpage 77, 105)<br />
• x.v.Color, sYCC601 color, Adobe RGB color, Adobe YCC601 color (vpage 105, 107)<br />
• High definition digital audio format<br />
• ARC (Audio Return Channel)<br />
• Content Type<br />
• CEC (HDMI control)<br />
Copyright protection system<br />
In order to play back digital video and audio such as BD-Video or DVD-Video via HDMI connection, both<br />
this unit and TV or the player need to support the copyright protection system known as HDCP (Highbandwidth<br />
Digital Content Protection System). HDCP is copyright protection technology comprised of<br />
data encryption and authentication of the connected AV device. This unit supports HDCP.<br />
• If a device that does not support HDCP is connected, video and audio are not output correctly. Read<br />
the user guide of your television or player for more information.<br />
ESPAÑOL<br />
About HDMI cables<br />
ITALIANO<br />
FRANÇAIS<br />
DEUTSCH<br />
ENGLISH<br />
• When a device supporting Deep Color signal transfer is connected, use a cable compatible “High Speed<br />
HDMI cable” or “High Speed HDMI cable with Ethernet”.<br />
• When the ARC function is used, connect a device with a ”Standard HDMI cable with Ethernet” or “High<br />
Speed HDMI cable with Ethernet” for HDMI 1.4a.<br />
HDMI control function (vpage 52)<br />
This function allows you to operate external devices from the receiver and operate the receiver from<br />
external devices.<br />
NOTE<br />
• The HDMI control function may not work depending on the device it is connected to and its settings.<br />
• You cannot operate a TV or Blu-ray Disc player/DVD player that is not compatible with the HDMI control<br />
function.<br />
About 3D function<br />
This unit supports input and output of 3D (3 dimensional) video signals of the HDMI 1.4a standards.<br />
For playing the 3D video content, a player, and a TV that support the 3D function of the HDMI 1.4a<br />
standards are required in addition to this unit.<br />
NOTE<br />
• If you operate the menu while playing back 3D video content, the playback video is replaced by the menu<br />
screen. The playback video is not displayed behind the menu screen.<br />
• This unit does not show the status display while playing back 3D video content.<br />
About ARC (Audio Return Channel) function<br />
The Audio Return Channel in HDMI 1.4a enables a TV, via a single HDMI cable, to send audio data “upstream”<br />
to this unit.<br />
NOTE<br />
• To enable the ARC function, set “HDMI Control” to “ON” (vpage 77).<br />
• ARC function is only supported for the HDMI OUT 1 connector. In order to use the ARC function, connect<br />
the television to the HDMI OUT 1 connector.<br />
• When connecting a TV that does not support the ARC function, a separate connection using an audio<br />
cable is required. In this case, refer to “Connecting a TV” (vpage 17) for the connection method.<br />
About Content Type<br />
The HDMI specification version 1.4a enables simple, automated picture setting selection with no user<br />
intervention.<br />
NOTE<br />
To enable the Content Type, set “Video Mode” to “Auto” (vpage 66).<br />
15<br />
Simple version Basic version<br />
Advanced version Information
16<br />
ENGLISH DEUTSCH FRANÇAIS ITALIANO ESPAÑOL NEDERLANDS SVENSKA<br />
Connecting an HDMI-compatible device<br />
Cables used for connections<br />
HDMI cable<br />
Audio and video cable (sold separately)<br />
• This interface allows transfer of digital video signals and digital audio signals over a single HDMI cable.<br />
Blu-ray<br />
Disc<br />
player<br />
HDMI<br />
OUT<br />
Digital<br />
camcorder<br />
HDMI<br />
OUT<br />
DVD Set-top<br />
Video<br />
cassette Game<br />
player box recorder console TV 1 TV 2<br />
HDMI<br />
OUT<br />
HDMI<br />
OUT<br />
HDMI<br />
OUT<br />
HDMI<br />
OUT<br />
HDMI<br />
IN<br />
HDMI<br />
IN<br />
GRear panelH<br />
GFront panelH<br />
• When this unit is connected to other devices with HDMI cables, connect this unit and TV also with an<br />
HDMI cable.<br />
• When connecting a device that supports Deep Color transmission, please use a “High Speed HDMI<br />
cable” or “High Speed HDMI cable with Ethernet”.<br />
• Video signals are not output if the input video signals do not match the monitor’s resolution. In this case,<br />
switch the Blu-ray Disc/DVD player’s resolution to a resolution with which the monitor is compatible.<br />
• When this unit and monitor are connected with an HDMI cable, if the monitor is not compatible with<br />
HDMI audio signal playback, only the video signals are output to the monitor.<br />
NOTE<br />
• The HDMI signal is not simultaneously output to HDMI 1 and HDMI 2. Select<br />
the connector that you want to use in advance using “Monitor Out” (vpage 77)<br />
in the menu, or by pressing the HDMI button on the remote control unit or the<br />
HDMI OUT button on the main unit.<br />
• HDMI control function is only supported for the HDMI OUT 1 connector. In order<br />
to use the HDMI control function, connect the television to the HDMI OUT 1<br />
connector.<br />
• The audio signal from the HDMI output connector (sampling frequency, number<br />
of channels, etc.) may be limited by the HDMI audio specifications of the<br />
connected device regarding permissible inputs.<br />
• The front panel HDMI input connector is displayed as “HDMI6” in the “Input<br />
Setup” – “Input Assign” (vpage 65) in the menu.<br />
Connecting to a device equipped with a DVI-D connector<br />
When an HDMI/DVI conversion cable (sold separately) is used, the HDMI video signals are converted to<br />
DVI signals, allowing connection to a device equipped with a DVI-D connector.<br />
NOTE<br />
• No sound is output when connected to a device equipped with a DVI-D connector. Make separate audio<br />
connections.<br />
• Signals cannot be output to DVI-D devices that do not support HDCP.<br />
• Depending on the combination of devices, the video signals may not be output.<br />
n Settings related to HDMI connections<br />
Set as necessary. For details, see the respective reference pages.<br />
Input Assign (vpage 65)<br />
Set this to change the HDMI input connector to which the input source is assigned.<br />
HDMI Setup (vpage 77)<br />
Make settings for HDMI video/audio output.<br />
• RGB Range • Auto Lip Sync • HDMI Audio Out • Monitor Out<br />
• HDMI Control • Standby Source • Power Off Control<br />
NOTE<br />
The audio signals output from the HDMI connectors are only the HDMI input signals.
Connecting a TV<br />
SVENSKA<br />
NEDERLANDS<br />
• Select the connector to use and connect the device.<br />
• For video connections, see “Converting input video signals for output (Video conversion function)”<br />
(vpage 14).<br />
• For instructions on HDMI connections, see “Connecting an HDMI-compatible device” (vpage 15).<br />
To listen to TV audio through this device, use the optical digital connection.<br />
NOTE<br />
This connection is not required when a TV compatible with the ARC function (Audio Return Channel (HDMI<br />
1.4a standard function) is connected to this unit via an HDMI connection.<br />
For details, see “About ARC (Audio Return Channel) function” (vpage 15) or refer to the instruction<br />
manual for your TV.<br />
Cables used for connections<br />
Video cable (Yellow)<br />
Component video<br />
cable<br />
Optical cable<br />
TV<br />
VIDEO<br />
COMPONENT VIDEO<br />
IN<br />
Y PB PR<br />
Video cable (sold separately)<br />
(Green)<br />
(Blue)<br />
(Red)<br />
Audio cable (sold separately)<br />
VIDEO<br />
IN<br />
AUDIO<br />
OPTICAL<br />
OUT<br />
in Set as Necessary<br />
Set this to change the digital input connector to which the input source is assigned.<br />
“Input Assign” (vpage 65)<br />
Y<br />
PB<br />
PR<br />
Y<br />
PB<br />
PR<br />
ESPAÑOL<br />
ITALIANO<br />
FRANÇAIS<br />
Connecting a Blu-ray Disc player<br />
DEUTSCH<br />
ENGLISH<br />
• You can enjoy video and audio from a Blu-ray Disc.<br />
• Select the connector to use and connect the device.<br />
• For instructions on HDMI connections, see “Connecting an HDMI-compatible device” (vpage 15).<br />
Cables used for connections<br />
Video cable (Yellow)<br />
Component<br />
video cable<br />
Audio cable<br />
Video cable (sold separately)<br />
(Green)<br />
(Blue)<br />
(Red)<br />
Blu-ray Disc player<br />
VIDEO<br />
COMPONENT VIDEO<br />
OUT<br />
Y PB PR<br />
Y<br />
PB<br />
PR<br />
Audio cables (sold separately)<br />
(White) L<br />
(Red) R<br />
VIDEO<br />
OUT<br />
AUDIO<br />
AUDIO<br />
OUT<br />
L R<br />
L<br />
L<br />
R<br />
R<br />
in Set as Necessary<br />
Set this to change the digital input connector or component video input connector to which the input<br />
source is assigned.<br />
“Input Assign” (vpage 65)<br />
For HD audio (Dolby TrueHD, DTS-HD, Dolby Digital Plus and DTS Express) playback, connect with HDMI<br />
(vpage 15 “Connecting an HDMI-compatible device”).<br />
Y<br />
PB<br />
PR<br />
L<br />
R<br />
17<br />
Simple version Basic version<br />
Advanced version Information
18<br />
ENGLISH DEUTSCH FRANÇAIS ITALIANO ESPAÑOL NEDERLANDS SVENSKA<br />
Connecting a DVD player<br />
• You can enjoy video and audio from a DVD.<br />
• Select the connector to use and connect the device.<br />
• For instructions on HDMI connections, see “Connecting an HDMI-compatible device” (vpage 15).<br />
Cables used for connections<br />
Video cable (Yellow)<br />
Component<br />
video cable<br />
Audio cable<br />
Coaxial<br />
digital cable<br />
DVD player<br />
Video cable (sold separately)<br />
(Green)<br />
(Blue)<br />
(Red)<br />
Y<br />
PB<br />
PR<br />
Audio cables (sold separately)<br />
(White) L<br />
(Red) R<br />
(Orange)<br />
VIDEO AUDIO<br />
COMPONENT VIDEO VIDEO AUDIO COAXIAL<br />
OUT OUT OUT OUT<br />
Y PB PR<br />
L R<br />
L<br />
L<br />
R<br />
R<br />
in Set as Necessary<br />
Set this to change the digital input connector or component video input connector to which the input<br />
source is assigned.<br />
“Input Assign” (vpage 65)<br />
Y<br />
PB<br />
PR<br />
L<br />
R<br />
Connecting a set-top box (Satellite tuner/cable TV)<br />
• You can watch satellite or cable TV.<br />
• Select the connector to use and connect the device.<br />
• For instructions on HDMI connections, see “Connecting an HDMI-compatible device” (vpage 15).<br />
Cables used for connections<br />
Video cable (Yellow)<br />
Component<br />
video cable<br />
Audio cable<br />
Coaxial<br />
digital cable<br />
Video cable (sold separately)<br />
(Green)<br />
(Blue)<br />
(Red)<br />
Y<br />
PB<br />
PR<br />
Audio cables (sold separately)<br />
(White) L<br />
(Red) R<br />
(Orange)<br />
Satellite tuner/Cable TV<br />
VIDEO AUDIO<br />
COMPONENT VIDEO VIDEO COAXIAL AUDIO<br />
OUT OUT OUT OUT<br />
Y PB PR<br />
L R<br />
L<br />
L<br />
R<br />
R<br />
in Set as Necessary<br />
Set this to change the digital input connector or component video input connector to which the input<br />
source is assigned.<br />
“Input Assign” (vpage 65)<br />
Y<br />
PB<br />
PR<br />
L<br />
R
Connecting a video cassette recorder<br />
• You can record video onto a video cassette tape.<br />
• Select the connector to use and connect the device.<br />
• When recording analog audio, use the analog connection.<br />
• For instructions on HDMI connections, see “Connecting an HDMIcompatible<br />
device” (vpage 15).<br />
Cables used for connections<br />
Video cable (Yellow)<br />
Component<br />
video cable<br />
Audio cable<br />
Video cable (sold separately)<br />
(Green)<br />
(Blue)<br />
(Red)<br />
Y<br />
PB<br />
PR<br />
Audio cable (sold separately)<br />
(White) L<br />
(Red) R<br />
Video cassette recorder<br />
VIDEO<br />
COMPONENT VIDEO<br />
OUT<br />
Y PB PR<br />
AUDIO VIDEO AUDIO<br />
VIDEO AUDIO VIDEO<br />
AUDIO<br />
OUT<br />
OUT IN<br />
IN<br />
L R<br />
L R<br />
L<br />
L<br />
R<br />
R<br />
Y<br />
PB<br />
PR<br />
L<br />
R<br />
L<br />
L<br />
R<br />
R<br />
SVENSKA<br />
NEDERLANDS<br />
ESPAÑOL<br />
ITALIANO<br />
in Set as Necessary<br />
Set this to change the digital input connector or component video<br />
input connector to which the input source is assigned.<br />
“Input Assign” (vpage 65)<br />
NOTE<br />
To record video signals through this unit, use the same type of video<br />
cable for connection between this unit and the player as used for<br />
connection between this unit and the recorder.<br />
FRANÇAIS<br />
DEUTSCH<br />
Connecting a digital camcorder<br />
ENGLISH<br />
• You can enjoy video and audio from a digital camcorder.<br />
• You can enjoy games by connecting a game machine via the AUX1<br />
input connector. In this case, select the input source to “AUX1”.<br />
• For instructions on HDMI connections, see “Connecting an HDMIcompatible<br />
device” (vpage 15).<br />
Cables used for connections<br />
Video cable (Yellow)<br />
Audio cable<br />
Optical cable<br />
VIDEO<br />
VIDEO<br />
OUT<br />
Digital camcorder<br />
Video cable (sold separately)<br />
Audio cable (sold separately)<br />
(White) L<br />
(Red) R<br />
AUDIO<br />
OPTICAL AUDIO<br />
OUT<br />
OUT<br />
L R<br />
L<br />
L<br />
R<br />
R<br />
in Set as Necessary<br />
Set this to change the digital input connector to which the input<br />
source is assigned.<br />
“Input Assign” (vpage 65)<br />
The front panel OPTICAL input terminal is displayed as “OPT3” in the<br />
“Input Setup” – “Input Assign” setting (vpage 65) in the menu.<br />
NOTE<br />
When a non-standard video signal from a game machine or some other<br />
source is input, the video conversion function might not operate. In<br />
this case, use the monitor output of the same connector as the input.<br />
L<br />
R<br />
19<br />
Simple version Basic version<br />
Advanced version Information
20<br />
ENGLISH DEUTSCH FRANÇAIS ITALIANO ESPAÑOL NEDERLANDS SVENSKA<br />
Connecting an iPod or USB memory device to the USB port<br />
You can enjoy music stored on an iPod or USB memory device.<br />
Cables used for connections<br />
To connect an iPod to this unit, use the USB cable supplied with the<br />
iPod.<br />
USB<br />
memory<br />
device<br />
or<br />
iPod<br />
<strong>Marantz</strong> does not guarantee that all USB memory devices will operate<br />
or receive power. When using a portable USB connection type HDD<br />
of the kind to which an AC adapter can be connected to supply power,<br />
use the AC adapter.<br />
NOTE<br />
• USB memory devices will not work via a USB hub.<br />
• Do not use an extension cable when connecting a USB memory<br />
device. This may cause radio interference with other devices.<br />
Supported iPod models<br />
Made for<br />
• iPod touch (2nd generation)<br />
• iPod touch (1st generation)<br />
• iPod classic<br />
• iPod with video<br />
• iPod nano (5th generation)<br />
• iPod nano (4th generation)<br />
• iPod nano (3rd generation)<br />
• iPod nano (2nd generation)<br />
• iPod nano (1st generation)<br />
• iPhone<br />
• iPhone 3G<br />
• iPhone 3GS<br />
Connecting a CD player<br />
• You can enjoy CD sound.<br />
• Select the connector to use and connect the device.<br />
Cables used for connections<br />
Audio cable<br />
Optical cable<br />
Audio cable (sold separately)<br />
(White) L<br />
(Red) R<br />
AUDIO<br />
AUDIO OPTICAL<br />
OUT OUT<br />
L R<br />
L<br />
L<br />
CD player<br />
R<br />
R<br />
in Set as Necessary<br />
Set this to change the digital input connector to which the input<br />
source is assigned.<br />
“Input Assign” (vpage 65)<br />
L<br />
R
Connecting a CD recorder<br />
• You can record audio on a CD or cassette tape.<br />
• Select the connector to use and connect the device.<br />
• When recording analog audio, use the analog connection.<br />
Cables used for connections<br />
Audio cable<br />
Optical cable<br />
Audio cable (sold separately)<br />
(White)<br />
L<br />
(Red) R<br />
CD recorder<br />
AUDIO<br />
OUT<br />
L<br />
L<br />
R<br />
R<br />
AUDIO<br />
OPTICAL<br />
OPTICAL<br />
OUT IN<br />
L<br />
R<br />
AUDIO<br />
SVENSKA<br />
AUDIO<br />
IN<br />
L R<br />
L R<br />
in Set as Necessary<br />
Set this to change the digital input connector to which the input source is assigned.<br />
“Input Assign” (vpage 65)<br />
L<br />
L<br />
R<br />
R<br />
NEDERLANDS<br />
To perform digital recording using the digital connector (OPT OUT), assign either one of the digital input<br />
connectors to “CDR” by selecting “Input Setup” – “Input Assign” setting (vpage 65).<br />
The above figure shows an example of changing the assignment of OPT1 connector to “CDR”.<br />
ESPAÑOL<br />
ITALIANO<br />
Connecting a record player<br />
You can enjoy playing records.<br />
Cables used for connections<br />
Audio cable<br />
Audio cable (sold separately)<br />
(White) L<br />
(Red) R<br />
Turntable (MM cartridge)<br />
AUDIO<br />
OUT<br />
L<br />
R<br />
GND<br />
FRANÇAIS<br />
L<br />
R<br />
DEUTSCH<br />
ENGLISH<br />
• This unit is compatible with record players with an MM cartridge. When you connect to a record player<br />
with an MC cartridge, use a commercially available MC head amp or a step-up transformer.<br />
• When you increase the volume without connecting the record player, there may be “booming” noise<br />
from the speakers.<br />
NOTE<br />
The SIGNAL GND terminal of this unit is not a safety ground connection. Connect it to reduce noise when<br />
noise is excessive. Note that depending on the record player, connecting the ground line may have the<br />
reverse effect of increasing noise. In this case, it is not necessary to connect the ground line.<br />
21<br />
Simple version Basic version<br />
Advanced version Information
22<br />
ENGLISH DEUTSCH FRANÇAIS ITALIANO ESPAÑOL NEDERLANDS SVENSKA<br />
Connecting an antenna<br />
• Connect the FM antenna or AM loop antenna supplied with the unit<br />
to enjoy listening to radio broadcasts.<br />
• After connecting the antenna and receiving a broadcast signal<br />
(vpage 30 “Listening to FM/AM broadcasts”), fix the antenna with<br />
tape in a position where the noise level becomes minimal.<br />
AM loop antenna<br />
(supplied)<br />
Direction of broadcasting station<br />
White<br />
q<br />
Black<br />
AM outdoor<br />
antenna<br />
w e<br />
Ground<br />
FM outdoor<br />
antenna<br />
75 Ω coaxial<br />
cable<br />
FM indoor<br />
antenna<br />
(supplied)<br />
n AM loop antenna assembly<br />
1 Put<br />
2 Insert<br />
the stand section<br />
through the bottom of the<br />
loop antenna from the<br />
rear and bend it forward.<br />
the projecting part<br />
into the square hole in<br />
the stand.<br />
n Using the AM loop antenna<br />
Suspending on a wall<br />
Loop<br />
antenna<br />
Suspend directly on a wall without assembling.<br />
Standing alone<br />
Use the procedure shown top to assemble.<br />
Nail, tack, etc.<br />
Stand<br />
Square<br />
hole<br />
Projecting<br />
part<br />
NOTE<br />
• Do not connect two FM antennas simultaneously.<br />
• Even if an external AM antenna is used, do not disconnect the AM<br />
loop antenna.<br />
• Make sure the AM loop antenna lead terminals do not touch metal<br />
parts of the panel.<br />
• If the signal has noise interference, connect the ground terminal<br />
(GND) to reduce noise.<br />
• If you are unable to receive a good broadcast signal, we recommend<br />
installing an outdoor antenna. For details, inquire at the retail store<br />
where you purchased the unit.<br />
Connecting a wireless receiver<br />
(RX101)<br />
By connecting a wireless receiver RX101 (sold separately) to this unit,<br />
you can receive and playback audio signals from other devices using<br />
the Bluetooth Communication Function.<br />
• Use a Bluetooth device that is A2DP compatible (vpage 105<br />
“A2DP”).<br />
• You can also use wireless receiver RX101 as an external IR receiver.<br />
• For instructions on the wireless receiver settings, refer to the<br />
RX101’s operating instructions.<br />
Bluetooth device<br />
(A2DP Compatibility)<br />
Wireless receiver RX101<br />
Remote control unit<br />
You can enjoy listening to music by connecting a wireless receiver<br />
via the M-XPort input connector. In this case, set the input source to<br />
“M-XPort”.<br />
NOTE<br />
To use wireless receiver RX101 as external IR receiver, set the<br />
remote sensor function of this unit to “Remote Lock:ON” (vpage 85<br />
“Remote control settings”).
SVENSKA<br />
Connect a device that has a multichannel output<br />
terminal<br />
NEDERLANDS<br />
• You can connect this unit to an external device fitted with multi-channel sound audio output jacks to enjoy<br />
music and video.<br />
• The video signal can be connected in the same way as a Blu-ray Disc player / DVD player (vpage 17<br />
“Connecting a Blu-ray Disc player”).<br />
Cables used for connections<br />
Audio cable<br />
Audio cable<br />
Audio cable (sold separately)<br />
(White) L<br />
(Red) R<br />
Blu-ray Disc player / DVD player /<br />
External decoder<br />
SUB-<br />
WOOFER<br />
FRONT<br />
L<br />
L<br />
L<br />
R<br />
R<br />
R<br />
AUDIO<br />
CENTER SURROUND SURROUND<br />
BACK<br />
L R L R<br />
L<br />
L<br />
R<br />
R<br />
L<br />
L<br />
R<br />
R<br />
L<br />
R<br />
in Set as Necessary<br />
To play analog signals input from 7.1CH INPUT<br />
terminals, set “Input Mode” (vpage 67) to<br />
“7.1CH IN”.<br />
“7.1CH IN” can also be selected with A/D on<br />
the remote control unit.<br />
When a device is connected to the SBL/SBR<br />
terminal of 7.1CH INPUT terminals, set “Amp<br />
Assign” (vpage 74) to “Normal”.<br />
ESPAÑOL<br />
ITALIANO<br />
FRANÇAIS<br />
Connecting a external power amplifier<br />
DEUTSCH<br />
ENGLISH<br />
• You can use this unit as a pre-amp by connecting a commercially available power amp to the PRE OUT<br />
connector. Adding a power amp to each of the channels provides an even greater sound presence.<br />
• Select the terminal to use and connect the device.<br />
Cables used for connections<br />
Audio cable<br />
Audio cable<br />
Audio cable (sold separately)<br />
(White) L<br />
(Red) R<br />
Power amplifier<br />
SUB-<br />
WOOFER<br />
FRONT<br />
L<br />
L<br />
L<br />
R<br />
R<br />
R<br />
L<br />
R<br />
AUDIO<br />
CENTER SURROUND SURROUND<br />
BACK<br />
L R L R<br />
• When using just one surround back speaker, connect it to the left channel (L) terminal.<br />
• Use the volume control on the subwoofer to control subwoofer volume.<br />
• If the subwoofer volume sounds low, use the volume control provided on the subwoofer to adjust the<br />
volume.<br />
NOTE<br />
• When an external power amp is connected to the PRE OUT terminal, do not connect speakers to the<br />
speaker terminals.<br />
• Depending on the settings in the “Amp Assign” (vpage 74) menu or listening mode, the channel output<br />
from the SBL terminal or SBR terminal of the PRE OUT terminal differs.<br />
L<br />
L<br />
R<br />
R<br />
L<br />
L<br />
R<br />
R<br />
23<br />
Simple version Basic version<br />
Advanced version Information
24<br />
ENGLISH DEUTSCH FRANÇAIS ITALIANO ESPAÑOL NEDERLANDS SVENSKA<br />
Connecting to a home network (LAN)<br />
• This unit lets you play via your home network (LAN) music files<br />
stored on a computer and music content such as that from Internet<br />
radio.<br />
You can also operate this unit from a computer using the Web<br />
control function.<br />
• You can update by downloading the latest firmware from the<br />
<strong>Marantz</strong> website.<br />
For more information, on the menu, select “Firmware Update”<br />
(vpage 83).<br />
• See “Network Setup” on the menu (vpage 78) for more information<br />
on network setting.<br />
Cables used for connections<br />
Ethernet<br />
cable<br />
Router<br />
Internet<br />
Cable (sold separately)<br />
Modem<br />
To WAN side<br />
To LAN port<br />
To LAN port<br />
Computer<br />
LAN port/<br />
Ethernet<br />
connector<br />
For connections to the Internet, contact an ISP (Internet<br />
Service Provider) or a computer shop.<br />
Required system<br />
n Broadband internet connection<br />
n Modem<br />
Device that connects to the broadband circuit and conducts<br />
communications on the Internet.<br />
A type that is integrated with a router is also available.<br />
n Router<br />
When using this unit, we recommend you use a router equipped<br />
with the following functions:<br />
• Built-in DHCP server<br />
This function automatically assigns IP addresses on the LAN.<br />
• Built-in 100BASE-TX switch<br />
When connecting multiple devices, we recommend a switching<br />
hub with a speed of 100 Mbps or greater.<br />
n Ethernet cable (CAT-5 or greater recommended)<br />
• Use only shielded STP or ScTP LAN cable which is available at<br />
retailer.<br />
• Some flat type Ethernet cables are easily affected by noise.<br />
We recommend using a normal type cable.<br />
• If you have an Internet provider contract for a line on which network<br />
settings are made manually, make the settings at “Network Setup”<br />
(vpage 78).<br />
• With this unit, it is possible to use the DHCP and Auto IP functions<br />
to make the network settings automatically.<br />
• When using this unit with the broadband router’s DHCP function<br />
enabled, this unit automatically performs the IP address setting and<br />
other settings.<br />
When using this unit connected to a network with no DHCP<br />
function, make the settings for the IP address, etc., at “Network<br />
Setup” (vpage 78).<br />
• When setting manually, check the setting contents with the network<br />
administrator.<br />
NOTE<br />
• A contract with an ISP is required to connect to the Internet.<br />
No additional contract is needed if you already have a broadband<br />
connection to the Internet.<br />
• The types of routers that can be used depend on the ISP. Contact an<br />
ISP or a computer shop for details.<br />
• <strong>Marantz</strong> assumes no responsibility whatsoever for any<br />
communication errors or troubles resulting from customer’s network<br />
environment or connected devices.<br />
• This unit is not compatible with PPPoE. A PPPoE-compatible router<br />
is required if you have a contract for a type of line set by PPPoE.<br />
• Do not connect an NETWORK connector directly to the LAN port/<br />
Ethernet connector on your computer.
Playback (Basic operation)<br />
n Selecting the input source (vpage 25)<br />
n Adjusting the master volume (vpage 26)<br />
n Turning off the sound temporarily (vpage 26)<br />
n Playing a Blu-ray Disc player/DVD player<br />
(vpage 26)<br />
n Playing a CD player (vpage 26)<br />
n Playing an iPod® (vpage 27)<br />
n Playing a USB memory device (vpage 28)<br />
n Tuning in radio stations (vpage 30)<br />
n Playing a network audio (vpage 33)<br />
Selecting a listening mode (Surround mode)<br />
(vpage 41)<br />
Playback (Advanced operation) (vpage 52)<br />
Important information<br />
Before starting playback, make the connections between the different<br />
components and the settings on the receiver.<br />
NOTE<br />
Also refer to the operating instructions of the connected components<br />
when playing them.<br />
Selecting the input source<br />
<strong>Press</strong> the input source select button<br />
(BD, DVD, VCR, SAT, GAME, AUX1,<br />
NET/USB, TV, CD, CDR, TUNE, M-XP)<br />
twice to play back that source.<br />
The desired input source can be selected<br />
directly.<br />
You can also use the following operation to select an input<br />
source.<br />
SVENSKA<br />
NEDERLANDS<br />
ESPAÑOL<br />
ITALIANO<br />
• Select input source “PHONO” to play back music from a record<br />
player connected to the PHONO input connector.<br />
• Select the input source “PHONO” using one of the following<br />
methods.<br />
q “Source select ” menu (“Using the “Source Select” menu”<br />
provided on the right)<br />
w INPUT df on the remote control unit (“Operating the remote<br />
control unit” provided on the right)<br />
e INPUT SELECTOR knob on the main unit (“Operating the main<br />
unit” provided on the right)<br />
n Using the “Source Select” menu<br />
q <strong>Press</strong> AMP and the press SOURCE SEL.<br />
Display the “Source Select” menu.<br />
q<br />
w<br />
e<br />
Source Select :Flickr<br />
Recent Source<br />
The currently selected input<br />
source is highlighted.<br />
ENTER<br />
Select<br />
Enter<br />
q Input Source<br />
The name of the highlighted input source is displayed.<br />
w Recently used sources<br />
The recently used input sources (up to fi ve) are displayed.<br />
e Icons for the input sources in the different categories are<br />
displayed.<br />
w Use uio p to select the input source,<br />
then press ENTER.<br />
The input source is set and the source<br />
selection menu is turned off.<br />
FRANÇAIS<br />
DEUTSCH<br />
ENGLISH<br />
• When using with an iPod connected directly to the USB port of this<br />
unit, select “ (NET/USB)” for the input source.<br />
• Input sources that are not going to be used can be set ahead of time.<br />
Make this setting at “Source Delete” (vpage 81).<br />
• To turn off the source selection menu without selecting an input<br />
source, press SOURCE SEL again.<br />
n Using the button on the remote control unit<br />
<strong>Press</strong> INPUT df.<br />
• When INPUT df is pressed, the input<br />
source is switched in the order shown<br />
below.<br />
BD DVD VCR SAT GAME AUX1 NET/USB<br />
M-XPort TUNER PHONO CDR CD TV<br />
n Using the knob on the main unit<br />
Turn INPUT SELECTOR.<br />
• Turning INPUT SELECTOR switches<br />
the input source, as shown below.<br />
BD DVD VCR SAT GAME AUX1 NET/USB<br />
M-XPort TUNER PHONO<br />
CDR CD TV<br />
25<br />
Simple version Basic version<br />
Advanced version Information
26<br />
ENGLISH DEUTSCH FRANÇAIS ITALIANO ESPAÑOL NEDERLANDS SVENSKA<br />
Important information<br />
Adjusting the master volume<br />
Use VOLUME to adjust the volume.<br />
n When the “Volume Display” setting<br />
(vpage 81) is “Relative”<br />
GAdjustable rangeH<br />
– – – –80.5dB – 18.0dB<br />
n When the “Volume Display” setting (vpage 81) is<br />
“Absolute”<br />
GAdjustable rangeH 0.0 – 99.0<br />
• The adjustable range may vary depending on input signal and<br />
channel level settings.<br />
You can also operate via the main unit.<br />
In this case, perform the following<br />
operations.<br />
Turn VOLUME to adjust the volume.<br />
Turning off the sound temporarily<br />
<strong>Press</strong> MUTE.<br />
• The sound is reduced to the level set at “Mute Level” (vpage 81).<br />
• To cancel, press MUTE again. Muting can also be canceled by<br />
adjusting the master volume.<br />
Set the front speakers to be used<br />
<strong>Press</strong> SPKR A/B.<br />
• Each time you press SPKR A/B, the front<br />
speaker setting will change as follows.<br />
Front A Front B Front A+B<br />
Playing a Blu-ray Disc player/DVD<br />
player<br />
The following describes the procedure for playing Blu-ray Disc player/<br />
DVD player.<br />
1 Prepare<br />
2 <strong>Press</strong><br />
3 <strong>Press</strong><br />
4 Play<br />
for playback.<br />
q Turn on the power of the TV,<br />
subwoofer and player.<br />
w Change the TV input to the input of<br />
this unit.<br />
e Load the disc in the player.<br />
ON to turn on power to the<br />
unit.<br />
BD or DVD twice to switch<br />
the input source for the player<br />
used for playback.<br />
the component connected to this unit.<br />
Make the necessary settings on the player (language setting,<br />
subtitles setting, etc.) beforehand.<br />
Playing a CD player<br />
The following describes the procedure for playing CD player.<br />
1 Prepare<br />
2 <strong>Press</strong><br />
3 <strong>Press</strong><br />
4<br />
Play<br />
for playback.<br />
q Turn on the power of the subwoofer<br />
and player.<br />
w Load the disc in the player.<br />
ON to turn on power to the<br />
unit.<br />
CD twice to switch the input<br />
source to the CD player.<br />
the component connected to<br />
this unit.
Playing an iPod®<br />
You can play back both video, photo and audio.<br />
1 Connect<br />
2 <strong>Press</strong><br />
3 <strong>Press</strong><br />
4 Use<br />
the iPod® to the USB<br />
port (vpage 20 “Connecting an<br />
iPod or USB memory device to<br />
the USB port”).<br />
ON to turn on power to the<br />
unit.<br />
NET/USB twice to switch<br />
the input source to “NET/USB”.<br />
Favorite<br />
Internet Radio<br />
Media Server<br />
iPod<br />
Flickr<br />
Last.fm<br />
Napster<br />
[1/8]<br />
ui to select “iPod”, then<br />
press ENTER or p.<br />
iPod<br />
Playlists<br />
Artists<br />
Albums<br />
Songs<br />
Podcasts<br />
Genres<br />
Composers<br />
[1/8]<br />
SEARCH Search<br />
NOTE<br />
If the connections screen is not displayed, the iPod may not be<br />
properly connected. Reconnect it.<br />
SVENSKA<br />
5 <strong>Press</strong><br />
NEDERLANDS<br />
ESPAÑOL<br />
ITALIANO<br />
SEARCH/INFO and hold it down for 2 seconds<br />
or more to select the display mode.<br />
• There are two modes for displaying the contents recorded on the<br />
iPod.<br />
Remote mode Display iPod information on the TV screen.<br />
• The unit display shows single-byte<br />
alphanumeric characters and some<br />
symbols only. “.” is displayed in place<br />
of incompatible characters.<br />
• In ”Remote mode”, the iPod display is<br />
as shown at right.<br />
OK to disconnect.<br />
Direct mode Display iPod information on the iPod screen.<br />
• “Direct iPod” is displayed on the display of this unit.<br />
Playable<br />
fi les<br />
Active<br />
buttons<br />
Display mode Remote mode Direct mode<br />
Music fi le P P<br />
Video fi le<br />
Remote<br />
z<br />
control unit<br />
(This unit)<br />
P P<br />
iPod ® P<br />
zOnly the sound is played.<br />
6 Use<br />
7 <strong>Press</strong><br />
ui to select the item, then press ENTER or p<br />
to select the fi le to be played.<br />
ENTER, p or 1.<br />
Playback starts.<br />
FRANÇAIS<br />
DEUTSCH<br />
ENGLISH<br />
• You can specify the duration of the on-screen display to be displayed<br />
(default: 30 sec) at menu “NET/USB” (vpage 81). <strong>Press</strong> uio p<br />
to return to the original screen.<br />
• To play back compressed audio with extended bass or treble<br />
reproduction, we recommend playback in M-DAX mode (vpage 73).<br />
The default setting is “OFF”.<br />
• In Remote mode, press STATUS during<br />
playback to check the title name, artist<br />
name, and album name.<br />
NOTE<br />
• Depending on the type of iPod and the software version, some<br />
functions may not operate.<br />
• Note that <strong>Marantz</strong> will accept no responsibility whatsoever for any<br />
problems arising with the data on an iPod when using this unit in<br />
conjunction with the iPod.<br />
27<br />
Simple version Basic version<br />
Advanced version Information
28<br />
ENGLISH DEUTSCH FRANÇAIS ITALIANO ESPAÑOL NEDERLANDS SVENSKA<br />
Playing an iPod®<br />
n iPod operation<br />
Operation buttons Function<br />
Cursor operation /<br />
uio p<br />
Auto search (cue, ui) /<br />
Manual search (<strong>Press</strong> and hold, ui)<br />
ENTER<br />
Enter / Pause<br />
(<strong>Press</strong> and release)<br />
ENTER<br />
Stop<br />
(<strong>Press</strong> and hold)<br />
SEARCH<br />
Page search<br />
(<strong>Press</strong> and release)<br />
z1 / Character searchz2 SEARCH<br />
Remote / Direct mode switching<br />
(<strong>Press</strong> and hold)<br />
RETURN Return<br />
6 7<br />
Manual search<br />
(<strong>Press</strong> and hold) (fast-reverse/fast-forward)<br />
1 Playback / Pause<br />
8 9 Auto search (cue)<br />
3 Pause<br />
2 Stop<br />
REPEAT Repeat playback<br />
RANDOM Random playback<br />
TV power on/standby<br />
TV POWER<br />
(Default : <strong>Marantz</strong>)<br />
Switch TV input<br />
TV INPUT<br />
(Default : <strong>Marantz</strong>)<br />
z1 When the menu screen is displayed, press<br />
SEARCH/INFO, then press o (previous page) or<br />
p (next page).<br />
To cancel, press ui or SEARCH/INFO twice.<br />
z2 When the menu screen is displayed, press<br />
SEARCH/INFO twice, then press o p to select<br />
the first letter you want to search mode.<br />
• If it is not possible to search the list, “unsorted<br />
list.” is displayed.<br />
To cancel, press ui or SEARCH/INFO.<br />
• Repeat playback and shuffle playback can also<br />
be set from “Input Setup” – “Playback Mode”<br />
(vpage 68) in the menu.<br />
• If the list is not in alphabetical order, you may not be<br />
able to perform a character search.<br />
Playing a USB memory device<br />
Playing back music or still picture (JPEG) files recorded on a USB<br />
memory device.<br />
Important information<br />
n USB memory devices<br />
A USB memory device can be connected to the USB port of this<br />
unit to play music and still picture (JPEG) files stored on the USB<br />
memory device.<br />
Also, files stored on an iPod can be played when the iPod is<br />
connected directly to the USB port of this unit. See “Connecting<br />
an iPod or USB memory device to the USB port” (vpage 20).<br />
• Only USB memory devices conforming to mass storage class and<br />
MTP (Media Transfer Protocol) standards can be played on this<br />
unit.<br />
• This unit is compatible with USB memory devices in “FAT16” or<br />
“FAT32” format.<br />
Album art function<br />
When an MP3 music file includes album art data, the album art can be<br />
displayed while playing the file.<br />
Slide show function<br />
Still picture (JPEG) files stored on USB memory devices can be played<br />
as slide shows.<br />
The duration each picture is displayed can be set.<br />
This unit plays back image (JPEG) files in the orientation in which they<br />
are stored in the folder.<br />
GCompatible formatsH<br />
USB memory devices z1<br />
WMA (Windows Media Audio) Pz2 MP3 (MPEG-1 Audio Layer-3) P<br />
WAV P<br />
MPEG-4 AAC Pz3 FLAC (Free Lossless Audio Codec) P<br />
JPEG P<br />
z1 USB<br />
• This unit is compatible with MP3 ID3-Tag (Ver. 2) standard.<br />
• This unit can show the artwork that was embedded by using<br />
MP3 ID3-Tag Ver. 2.3 or 2.4.<br />
• This unit is compatible with WMA META tags.<br />
• WAV format Quantization bit rate: 16 bits.<br />
• FLAC format Quantization bit rate: 16/20/24 bits.<br />
z2 Copyright-protected files can be played on certain portable<br />
players compatible with MTP.<br />
z3 Only files that are not protected by copyright can be played on<br />
this unit.<br />
Content downloaded from pay sites on the Internet are copyright<br />
protected. Also, files encoded in WMA format when ripped from<br />
a CD, etc. on a computer may be copyright protected, depending<br />
on the computer’s settings.<br />
GCompatible formatsH<br />
Sampling<br />
frequency<br />
Bit rate Extension<br />
WMA (Windows<br />
Media Audio)<br />
32/44.1/48 kHz 48 – 192 kbps .wma<br />
MP3 (MPEG-1<br />
Audio Layer-3)<br />
32/44.1/48 kHz 32 – 320 kbps .mp3<br />
WAV 32/44.1/48 kHz – .wav<br />
.aac/<br />
MPEG-4 AAC 32/44.1/48 kHz 16 – 320 kbps .m4a/<br />
.mp4<br />
FLAC (Free<br />
Lossless Audio<br />
Codec)<br />
32/44.1/48/<br />
96 kHz<br />
– .flac
Playing fi les stored on USB memory<br />
devices<br />
1 Connect<br />
2 <strong>Press</strong><br />
3 <strong>Press</strong><br />
the USB memory device<br />
to the USB port (vpage 20<br />
“Connecting an iPod or USB<br />
memory device to the USB port”).<br />
NET/USB twice to switch<br />
the input source to “NET/USB”.<br />
favorite<br />
Internet Radio<br />
Media Server<br />
USB<br />
Flickr<br />
Last.fm<br />
Napster<br />
[1/8]<br />
ui to select “USB”, then press ENTER or p.<br />
USB<br />
D&M1<br />
D&M2<br />
D&M3<br />
Music1.mp4<br />
Music2.mp3<br />
Music3.m4a<br />
Music4.m4a<br />
[1/7]<br />
• Selecting in the “Source Select” menu, lets you directly select<br />
“USB”.<br />
4 <strong>Press</strong><br />
5 <strong>Press</strong><br />
ui to select the search item or folder, then<br />
press ENTER or p.<br />
ui to select the fi le, then press ENTER, p or<br />
1.<br />
Playback starts.<br />
SVENSKA<br />
NEDERLANDS<br />
ESPAÑOL<br />
ITALIANO<br />
• You can specify the duration of the on-screen display to be displayed<br />
(default: 30 sec) at menu “NET/USB” (vpage 81). <strong>Press</strong> uio p<br />
to return to the original screen.<br />
• To play back compressed audio with extended bass or treble<br />
reproduction, we recommend playback in M-DAX mode (vpage 73).<br />
The default setting is “OFF”.<br />
• If the USB memory device is divided into multiple partitions, only the<br />
top partition can be selected.<br />
• This unit is compatible with MP3 fi les conforming to “MPEG-1 Audio<br />
Layer-3” standards.<br />
NOTE<br />
• Note that <strong>Marantz</strong> will accept no responsibility whatsoever for any<br />
problems arising with the data on a USB memory device when using<br />
this unit in conjunction with the USB memory device.<br />
• USB memory devices will not work via a USB hub.<br />
• <strong>Marantz</strong> does not guarantee that all USB memory devices will<br />
operate or be supplied power. When using a USB portable hard disk<br />
that can draw power from an AC adapter, we recommend using the<br />
AC adapter.<br />
• It is not possible to connect and use a computer via the USB port of<br />
this unit using a USB cable.<br />
FRANÇAIS<br />
n USB operation<br />
DEUTSCH<br />
ENGLISH<br />
Playing a USB memory device<br />
Operation buttons Function<br />
PRESET +, – Preset channel selection<br />
uio p<br />
Cursor operation /<br />
Auto search (cue, ui)<br />
ENTER<br />
(<strong>Press</strong> and release)<br />
Enter / Pause<br />
ENTER<br />
(<strong>Press</strong> and hold)<br />
Stop<br />
SEARCH Page searchz1 / Character searchz2 RETURN Return<br />
1 Playback / Pause<br />
8 9 Auto search (cue)<br />
3 Pause<br />
2 Stop<br />
1 – 8 Preset channel selection<br />
SHIFT Preset channel block selection<br />
REPEAT Repeat playback<br />
RANDOM Random playback<br />
TV POWER<br />
TV power on/standby<br />
(Default : <strong>Marantz</strong>)<br />
TV INPUT<br />
Switch TV input<br />
(Default : <strong>Marantz</strong>)<br />
z1 When the menu screen is displayed, press<br />
SEARCH/INFO, then press o (previous page) or<br />
p (next page).<br />
To cancel, press ui or SEARCH/INFO twice.<br />
z2 When the menu screen is displayed, press<br />
SEARCH/INFO twice, then press o p to select<br />
the fi rst letter you want to search mode.<br />
• If it is not possible to search the list, “unsorted<br />
list.” is displayed.<br />
To cancel, press ui or SEARCH/INFO.<br />
• Repeat playback and shuffl e playback can also<br />
be set from “Input Setup” – “Playback Mode”<br />
(vpage 68) in the menu.<br />
• If the list is not in alphabetical order, you may not be<br />
able to perform a character search.<br />
29<br />
Simple version Basic version<br />
Advanced version Information
30<br />
ENGLISH DEUTSCH FRANÇAIS ITALIANO ESPAÑOL NEDERLANDS SVENSKA<br />
Tuning in radio stations<br />
Listening to FM/AM broadcasts<br />
1<br />
<strong>Press</strong><br />
2<br />
<strong>Press</strong><br />
TUNE twice to switch the<br />
input source to “TUNER”.<br />
BAND to select “FM” or<br />
“AM”.<br />
FM When listening to an FM broadcast.<br />
AM When listening to an AM broadcast.<br />
3 Tune<br />
CH A1<br />
TUNER<br />
TUNING<br />
PRESET<br />
Tuning<br />
Preset<br />
FM 87.50MHz<br />
Band<br />
AUTO<br />
Now Playing<br />
Mode<br />
BAND T.MODE<br />
MEMORY Memory<br />
SEARCH Search<br />
in the desired broadcast station.<br />
q To tune in automatically (Auto tuning)<br />
<strong>Press</strong> T.MODE to light the “AUTO” indicator on the display, then<br />
use TUNING + or TUNING – to select the station you want to<br />
hear.<br />
w To tune in manually (Manual tuning)<br />
<strong>Press</strong> T.MODE to turn off the display’s “AUTO” indicator, then<br />
use TUNING + or TUNING – to select the station you want to<br />
hear.<br />
• If the desired station cannot be tuned in with auto tuning, tune it in<br />
manually.<br />
• When tuning in stations manually, press and hold TUNING + or<br />
TUNING – to change frequencies continuously.<br />
• You can specify the duration of the on-screen display to be displayed<br />
(default: 30 sec) at menu “TUNER” (vpage 82). <strong>Press</strong> uio p to<br />
return to the original screen.<br />
• You can also operate via the main unit. In<br />
this case, perform the following operations.<br />
<strong>Press</strong> ui to select the radio station.<br />
n Presetting radio stations (Manual preset)<br />
Your favorite broadcast stations can be preset so that you can tune<br />
them in easily. Up to 56 stations can be preset.<br />
• Stations can be preset automatically at “Auto Preset” (vpage 64).<br />
If “Auto Preset” is performed after performing “Manual Preset”, the<br />
“Manual Preset” settings will be overwritten.<br />
1<br />
Tune<br />
2 <strong>Press</strong><br />
3 <strong>Press</strong><br />
4 <strong>Press</strong><br />
in the broadcast station you<br />
want to preset.<br />
MEMORY.<br />
SHIFT/TOP MENU to select<br />
the block (A to G) in which to<br />
preset the channel (1 to 8 per<br />
block), then press PRESET +,<br />
PRESET – or 1 – 8 to select the<br />
preset number.<br />
MEMORY again to complete<br />
the setting.<br />
• To preset other stations, repeat steps 1 to<br />
4.<br />
Default settings<br />
Block (A – G)<br />
and<br />
Channel (1 – 8)<br />
Default Settings<br />
A1 – A8<br />
87.5 / 89.1 / 98.1 / 108.0 / 90.1 / 90.1 / 90.1 /<br />
90.1 MHz<br />
B1 – B8<br />
522 / 603 / 999 / 1404 / 1611 kHz,<br />
90.1 / 90.1 / 90.1 MHz<br />
C1 – C8 90.1 MHz<br />
D1 – D8 90.1 MHz<br />
E1 – E8 90.1 MHz<br />
F1 – F8 90.1 MHz<br />
G1 – G8 90.1 MHz<br />
Specify a name for the preset broadcast station<br />
(Preset Name) (vpage 64)<br />
n Listening to preset stations<br />
1 <strong>Press</strong><br />
2 <strong>Press</strong><br />
SHIFT/TOP MENU to select<br />
the memory block (A to G).<br />
PRESET +, PRESET – or<br />
1 – 8 to select the desired preset<br />
channel.<br />
You can also operate via the main unit. In this<br />
case, perform the following operations.<br />
<strong>Press</strong> o p to select the preset radio station.<br />
n Direct frequency tuning<br />
You can enter the receiving frequency directly to tune in.<br />
1 <strong>Press</strong><br />
2<br />
Input<br />
SEARCH/INFO.<br />
frequencies using the 0 – 9.<br />
• If o is pressed, the immediately preceding<br />
input is cancelled.<br />
3 When<br />
setting is completed, press<br />
ENTER.<br />
The preset frequency is tuned in.
RDS (Radio Data System)<br />
RDS (works only on the FM band) is a broadcasting service which<br />
allows a station to send additional information along with the regular<br />
radio program signal.<br />
NOTE<br />
The operations described as follows using<br />
SEARCH/INFO will not function in areas in<br />
which there are no RDS broadcasts.<br />
n RDS search<br />
Use this function to automatically tune to FM stations that provide<br />
the RDS service.<br />
1 <strong>Press</strong><br />
2 <strong>Press</strong><br />
3 <strong>Press</strong><br />
TUNE twice to switch the<br />
input source to “TUNER”.<br />
SEARCH/INFO to select<br />
“RDS SEARCH”.<br />
CH A<br />
TUNER<br />
Program Category STEREO AUTO<br />
RDS<br />
PTY<br />
: RDS Station<br />
: Program Category<br />
Now Playing<br />
TP<br />
RT<br />
: Traffic FM ***.**<br />
Information MHz<br />
: Radio Text ON<br />
PS Name<br />
Jamp to album<br />
A5 FM 90.10MHz<br />
SEARCH Mode PRESET Tuning<br />
TUNING Tuning BAND Band T.MODE Mode<br />
PRESET Preset MEMORY Memory SEARCH Search<br />
PRESET + or PRESET –.<br />
The search for RDS stations begins<br />
automatically.<br />
• If no RDS stations are found with the above operation, all the<br />
reception bands are searched.<br />
• When a broadcast station is found, that station’s name appears on<br />
the display.<br />
• If no RDS station is found when all the frequencies have been<br />
searched, “NO RDS” is displayed.<br />
SVENSKA<br />
NEDERLANDS<br />
PTY (Program Type)<br />
ESPAÑOL<br />
PTY identifies the type of RDS program.<br />
The program types and their displays are as follows:<br />
NEWS News WEATHER Weather<br />
AFFAIRS Current Affairs FINANCE Finance<br />
INFO Information CHILDREN Children’s<br />
SPORT Sports<br />
program<br />
EDUCATE Education SOCIAL Social Affairs<br />
DRAMA Drama RELIGION Religion<br />
CULTURE Culture PHONE IN Phone In<br />
SCIENCE Science TRAVEL Travel<br />
VARIED Varied LEISURE Leisure<br />
POP M Pop Music JAZZ Jazz Music<br />
ROCK M Rock Music COUNTRY Country Music<br />
EASY M Easy Listening NATION M National Music<br />
Music<br />
OLDIES Oldies Music<br />
LIGHT M Light Classical FOLK M Folk Music<br />
CLASSICS Serious Classical DOCUMENT Documentary<br />
OTHER M Other Music<br />
ITALIANO<br />
n PTY search<br />
Use this function to find RDS stations broadcasting a designated<br />
program type (PTY).<br />
1 <strong>Press</strong><br />
2 <strong>Press</strong><br />
3 Watching<br />
TUNE twice to switch the<br />
input source to “TUNER”.<br />
SEARCH/INFO to select<br />
“PTY SEARCH”.<br />
CH A<br />
TUNER<br />
Program Category STEREO AUTO<br />
RDS<br />
NEWS<br />
Now Playing<br />
PTY<br />
AFFAIRS<br />
TP<br />
RT<br />
FM ***.**<br />
INFO MHz<br />
SPORT<br />
PS Name<br />
Jamp to album<br />
A5 FM 90.10MHz<br />
SEARCH Mode PRESET Tuning<br />
TUNING Tuning BAND Band T.MODE Mode<br />
PRESET Preset MEMORY Memory SEARCH Search<br />
the display, press ui<br />
to call out the desired program<br />
type.<br />
4 <strong>Press</strong><br />
FRANÇAIS<br />
DEUTSCH<br />
ENGLISH<br />
Tuning in radio stations<br />
PRESET + or PRESET –.<br />
PTY search begins automatically.<br />
• If there is no station broadcasting the designated program type<br />
with the above operation, all the reception bands are searched.<br />
• The station name is displayed on the display after searching stops.<br />
• If no station broadcasting the designated program type is found<br />
when all the frequencies have been searched, “NO PROGRAMME”<br />
is displayed.<br />
TP (Traffic Program)<br />
TP identifies programs that carry traffic announcements.<br />
This allows you to easily find out the latest traffic conditions in your<br />
area before leaving home.<br />
n TP search<br />
Use this function to find RDS stations broadcasting traffic programs<br />
(TP stations).<br />
1 <strong>Press</strong><br />
2 <strong>Press</strong><br />
3 <strong>Press</strong><br />
TUNE twice to switch the<br />
input source to “TUNER”.<br />
SEARCH/INFO to select<br />
“TP SEARCH”.<br />
CH A<br />
TUNER<br />
Program Category STEREO AUTO<br />
RDS<br />
PTY<br />
: RDS Station<br />
: Program Category<br />
Now Playing<br />
TP<br />
RT<br />
: Traffic FM ***.**<br />
Information MHz<br />
: Radio Text ON<br />
PS Name<br />
Jamp to album<br />
A5 FM 90.10MHz<br />
SEARCH Mode PRESET Tuning<br />
TUNING Tuning BAND Band T.MODE Mode<br />
PRESET Preset MEMORY Memory SEARCH Search<br />
PRESET + or PRESET –.<br />
TP search begins automatically.<br />
• If no TP station is found with the above operation, all the reception<br />
bands are searched.<br />
• The station name is displayed on the display after searching stops.<br />
• If no other TP station is found when all the frequencies have been<br />
searched, “NO PROGRAMME” is displayed.<br />
31<br />
Simple version Basic version<br />
Advanced version Information
32<br />
ENGLISH DEUTSCH FRANÇAIS ITALIANO ESPAÑOL NEDERLANDS SVENSKA<br />
Tuning in radio stations<br />
RT (Radio Text)<br />
RT allows RDS stations to send text messages that appear on the<br />
display.<br />
“RT” appears on the display when radio text data is received.<br />
1 <strong>Press</strong><br />
2 <strong>Press</strong><br />
TUNE twice to switch the<br />
input source to “TUNER”.<br />
SEARCH/INFO to select<br />
“RT”.<br />
CH A<br />
TUNER<br />
Program Category STEREO AUTO<br />
RDS<br />
PTY<br />
: RDS Station<br />
: Program Category<br />
Now Playing<br />
TP<br />
RT<br />
: Traffic FM ***.**<br />
Information MHz<br />
: Radio Text ON<br />
PS Name<br />
Jamp to album<br />
A5 FM 90.10MHz<br />
SEARCH Mode PRESET Tuning<br />
TUNING Tuning BAND Band T.MODE Mode<br />
PRESET Preset MEMORY Memory SEARCH Search<br />
• While receiving an RDS broadcast station, the text data broadcast<br />
from the station is displayed.<br />
• To turn the display off, press o p.<br />
• If no text data is being broadcast, “NO TEXT DATA” is displayed.<br />
n Tuner (FM/AM) operation<br />
Operation buttons Function<br />
PRESET +, – Preset channel selection<br />
uio p Cursor operation<br />
ENTER Enter setting<br />
SEARCH Direct frequency tuning / RDS search<br />
RETURN Return<br />
BAND FM/AM switching<br />
T.MODE Switch search modes<br />
TUNING +, – Tuning (up/down)<br />
0 – 9<br />
Preset channel selection (1 – 8) /<br />
Direct frequency tuning (0 – 9)<br />
SHIFT Preset channel block selection<br />
MEMORY Preset memory registration<br />
TV POWER<br />
TV power on/standby<br />
(Default : <strong>Marantz</strong>)<br />
TV INPUT<br />
Switch TV input<br />
(Default : <strong>Marantz</strong>)<br />
Switching the tuning increment<br />
The tuning increment factory settings are 9 kHz for AM, and 0.05 MHz<br />
for FM.<br />
1 While<br />
2 <strong>Press</strong><br />
3 <strong>Press</strong><br />
PURE DIRECT o p<br />
ON/STANDBY<br />
SURROUND MODE<br />
pressing down SURROUND MODE and PURE<br />
DIRECT, press ON/STANDBY to turn on the power.<br />
“AM9/FM50” appears on the display.<br />
o p.<br />
“AM10/FM200” appears on the display, and the tuning<br />
increment is switched to AM and FM are 10 kHz and 0.2 MHz.<br />
ON/STANDBY.<br />
• The tuner preset memory will be cleared if this operation is<br />
performed.<br />
• This setting will not revert to the default values even when the<br />
microprocessor is reset.
34<br />
ENGLISH DEUTSCH FRANÇAIS ITALIANO ESPAÑOL NEDERLANDS SVENSKA<br />
Playing a network audio<br />
n About Last.fm<br />
Last.fm learns what you love... and it’s a great way to discover<br />
new music.<br />
Your new <strong>Marantz</strong> AV receiver is very clever. You can create a free<br />
Last.fm profi le when you start using your <strong>Marantz</strong> AV receiver and<br />
magically keep track of all the songs you hear.<br />
When you sign in at www.last.fm, you can see your top music<br />
charts, view thousands of reviews, biographies and artwork, and<br />
get recommendations for local performances you won’t want to<br />
miss.<br />
With an affordable subscription you can enjoy an endless choice<br />
of personalised ad-free radio stations. Check out www.last.fm/<br />
subscribe today for more details.<br />
Your subscription also gives you access to Last.fm radio on a great<br />
range of music products, including your <strong>Marantz</strong> AV Receiver. This<br />
feature is not available in all countries. Visit www.last.fm/hardware<br />
to fi nd out more.<br />
Listening to internet radio<br />
1 Prepare<br />
2 <strong>Press</strong><br />
3 <strong>Press</strong><br />
for playback.<br />
q Check the network environment,<br />
then turn on this unit’s power<br />
(vpage 24 “Connecting to a home<br />
network (LAN)”).<br />
w If settings are required, make the<br />
“Network Connecting” (vpage 78).<br />
NET/USB twice to switch<br />
the input source to “NET/USB”.<br />
ui to select “Internet<br />
Radio”, then press ENTER or p.<br />
• Selecting in the “Source Select” menu, lets you directly select<br />
“Internet Radio”.<br />
4 <strong>Press</strong><br />
5<br />
Repeat<br />
6 <strong>Press</strong><br />
ui to select the item you want to play, then<br />
press ENTER or p.<br />
step 4 until the station list is displayed.<br />
The station list is displayed.<br />
ui to select the station, then press ENTER or<br />
p.<br />
Playback starts once buffering reaches “100%”.<br />
• There are many Internet radio stations on the Internet, and the<br />
quality of the programs they broadcast as well as the bit rate of the<br />
tracks varies widely.<br />
Generally, the higher the bit rate, the higher the sound quality, but<br />
depending on the communication lines and server traffi c, the music<br />
or audio signals being streamed may be interrupted. Inversely, lower<br />
bit rates mean a lower sound quality but less tendency for the sound<br />
to be interrupted.<br />
• “Server Full” or “Connection Down” is displayed if the station is<br />
busy or not broadcasting.<br />
• On this unit, folder and fi le names can be displayed as titles. Any<br />
characters that cannot be displayed are replaced with “.” (period).<br />
• To play back compressed audio with extended bass or treble<br />
reproduction, we recommend playback in M-DAX mode (vpage 73).<br />
The default setting is “OFF”.<br />
• You can specify the duration of the on-screen display to be displayed<br />
(default: 30 sec) at menu “NET/USB” (vvpage 81. <strong>Press</strong> uio<br />
p to return to the original screen.<br />
• When STATUS is pressed, the display<br />
can be switched between the title<br />
name and radio station name.<br />
n Recently played internet radio stations<br />
Recently played internet radio stations can be selected from<br />
“Recently Played”.<br />
Up to 20 stations stored in “Recently Played”.<br />
1 <strong>Press</strong><br />
2 <strong>Press</strong><br />
ui to select “Recently<br />
Played”, then press ENTER or p.<br />
ui to select the item you<br />
want to play, then press ENTER or<br />
p.<br />
n Searching stations by keyword<br />
(Alphabetic strings)<br />
1 <strong>Press</strong><br />
ui to select “Search by Keyword”, then press<br />
ENTER or p.<br />
Search by Keyword<br />
Enter Station<br />
Input<br />
Submit<br />
RETURN Cancel<br />
SEARCH Keyboard INSERT Insert DELETE Delete<br />
• For character input, see page 62.<br />
2 Input the characters, then press ENTER.
n Presetting internet radio stations<br />
Preset Internet radio stations can be selected directly.<br />
1 While<br />
2 <strong>Press</strong><br />
3 <strong>Press</strong><br />
4 <strong>Press</strong><br />
the Internet radio station<br />
you want to preset is playing,<br />
press MEMORY.<br />
ui to select “Preset”,<br />
then press ENTER.<br />
SHIFT/TOP MENU, then<br />
press PRESET +, PRESET – or<br />
1 – 8 to select the desired preset<br />
number.<br />
MEMORY again to complete<br />
the setting.<br />
The Internet radio station is now preset.<br />
NOTE<br />
If registered at a number that has already been preset, the previously<br />
registered setting is cleared.<br />
n Listening to preset internet radio stations<br />
After pressing SHIFT/TOP MENU, press<br />
PRESET +, PRESET – or 1 – 8 to select<br />
the registered preset number.<br />
This unit automatically connects to the<br />
Internet and playback begins.<br />
SVENSKA<br />
NEDERLANDS<br />
ESPAÑOL<br />
ITALIANO<br />
n Registering internet radio stations as your<br />
favorites<br />
Favorites are listed at the top of the menu screen, so when a<br />
station is registered as a favorite it can be tuned in easily.<br />
1 <strong>Press</strong><br />
2 <strong>Press</strong><br />
3 <strong>Press</strong><br />
MEMORY while the Internet<br />
radio station you want to register<br />
is playing.<br />
ui to select “Favorites”,<br />
then press ENTER.<br />
o to select “Add”.<br />
The Internet radio station is registered.<br />
• If you do not want to register the station,<br />
press p.<br />
n Listening to internet radio stations registered in<br />
your favorites<br />
1 <strong>Press</strong><br />
2 <strong>Press</strong><br />
AMP and then press<br />
SOURCE SEL to display the<br />
Source Select menu, then select<br />
(vpage 25).<br />
NET/USB and then press<br />
ui to select the Internet radio<br />
station, then press ENTER or p.<br />
This unit automatically connects to the<br />
Internet and playback begins.<br />
n Clearing internet radio stations from your<br />
favorites<br />
1 <strong>Press</strong><br />
2 <strong>Press</strong><br />
AMP and then press<br />
SOURCE SEL to display the<br />
Source Select menu, then select<br />
(vpage 25).<br />
NET/USB and then press<br />
ui to select the Internet radio<br />
station you want to clear, then<br />
press MEMORY.<br />
3 <strong>Press</strong><br />
FRANÇAIS<br />
DEUTSCH<br />
ENGLISH<br />
Playing a network audio<br />
o to select “Remove”.<br />
The selected Internet radio station is cleared.<br />
• To cancel the operation without clearing the station, press p.<br />
n Internet radio operation<br />
Operation buttons Function<br />
PRESET +, – Preset channel selection<br />
uio p Cursor operation<br />
ENTER<br />
(<strong>Press</strong> and release)<br />
Enter<br />
ENTER<br />
(<strong>Press</strong> and hold)<br />
Stop<br />
SEARCH Page searchz1 / Character searchz2 RETURN Return<br />
2 Stop<br />
1 – 8 Preset channel selection<br />
SHIFT Preset channel block selection<br />
MEMORY Favorites / Preset memory registration<br />
TV POWER<br />
TV power on/standby<br />
(Default : <strong>Marantz</strong>)<br />
TV INPUT<br />
Switch TV input<br />
(Default : <strong>Marantz</strong>)<br />
z1 When the menu screen is displayed, press<br />
SEARCH/INFO, then press o (previous page) or<br />
p (next page).<br />
To cancel, press ui or SEARCH/INFO twice.<br />
z2 When the menu screen is displayed, press<br />
SEARCH/INFO twice, then press o p to select<br />
the fi rst letter you want to search mode.<br />
• If it is not possible to search the list, “unsorted<br />
list.” is displayed.<br />
To cancel, press ui or SEARCH/INFO.<br />
If the list is not in alphabetical order, you may<br />
not be able to perform a character search.<br />
35<br />
Simple version Basic version<br />
Advanced version Information
36<br />
ENGLISH DEUTSCH FRANÇAIS ITALIANO ESPAÑOL NEDERLANDS SVENSKA<br />
Playing a network audio<br />
Playing files stored on a computer<br />
Use this procedure to play music files, image files or playlists.<br />
1 Prepare<br />
2 <strong>Press</strong><br />
3 <strong>Press</strong><br />
4 Use<br />
5<br />
Repeat<br />
6 <strong>Press</strong><br />
for playback.<br />
q Check the network environment,<br />
then turn on this unit’s power<br />
(vpage 24 “Connecting to a home<br />
network (LAN)”).<br />
w If settings are required, make the<br />
“Network Connecting” (vpage 78).<br />
e Prepare the computer<br />
(vComputer’s operating<br />
instructions).<br />
AMP and then press<br />
SOURCE SEL to display the<br />
Source Select menu, then select<br />
(vpage 25).<br />
NET/USB and then use ui to select the server<br />
including the file to be played, then press ENTER or<br />
p.<br />
ui to select the search item or folder, then<br />
press ENTER or p.<br />
step 4 until the file is displayed.<br />
ui to select the file, then press ENTER or p.<br />
Playback starts once buffering reaches “100%”.<br />
• Connections to the required system and specific settings must be<br />
made in order to play music files (vpage 24).<br />
• Before starting, you must launch the computer’s server software<br />
and set the files as server contents. For details, see the operating<br />
instructions of your server software.<br />
• Depending on the size of the still picture (JPEG) file, some time may<br />
be required for the file to be displayed.<br />
• The order in which the tracks/files are displayed depends on<br />
the server specifications. If the tracks/ files are not displayed in<br />
alphabetical order due to the server specifications, searching by the<br />
first letter may not work properly.<br />
• WMA Lossless files can be played when using a server supporting<br />
transcoding, such as Windows Media Player Ver. 11.<br />
• To play back compressed audio with extended bass or treble<br />
reproduction, we recommend playback in M-DAX mode (vpage 73).<br />
The default setting is “OFF”.<br />
• You can specify the duration of the on-screen display to be displayed<br />
(default: 30 sec) at menu “NET/USB” (vpage 81). <strong>Press</strong> uio p<br />
to return to the original screen.<br />
• Use STATUS to switch between<br />
displaying the title name, artist name<br />
or album name.<br />
n Playing files that have been preset or registered<br />
in your favorites<br />
Files can be preset, registered in your favorites and played using<br />
the same operations as for Internet radio stations (vpage 35).<br />
NOTE<br />
• Presettings are erased by overwriting them.<br />
• When the operations described below is performed, the media<br />
server’s database is updated and it may no longer be possible to<br />
play preset or favorite music files.<br />
• When you quit the media server and then restart it.<br />
• When music files are deleted or added on the media server.<br />
n Media server operation<br />
Operation buttons Function<br />
PRESET +, – Preset channel selection<br />
uio p<br />
Cursor operation /<br />
Auto search (cue, ui)<br />
ENTER<br />
(<strong>Press</strong> and release)<br />
Enter / Pause<br />
ENTER<br />
(<strong>Press</strong> and hold)<br />
Stop<br />
SEARCH Page searchz1 / Character searchz2 RETURN Return<br />
1 Playback / Pause<br />
8 9 Auto search (cue)<br />
3 Pause<br />
2 Stop<br />
1 – 8 Preset channel selection<br />
SHIFT Preset channel block selection<br />
MEMORY Favorites / Preset memory registration<br />
TV POWER<br />
TV power on/standby<br />
(Default : <strong>Marantz</strong>)<br />
TV INPUT<br />
Switch TV input<br />
(Default : <strong>Marantz</strong>)<br />
• Repeat playback (vpage 68 “Repeat”)<br />
• Random playback (vpage 68 “Random”)<br />
z1 When the menu screen is displayed, press<br />
SEARCH/INFO, then press o (previous page) or<br />
p (next page).<br />
To cancel, press ui or SEARCH/INFO twice.<br />
z2 When the menu screen is displayed, press<br />
SEARCH/INFO twice, then press o p to select<br />
the first letter you want to search mode.<br />
• If it is not possible to search the list, “unsorted<br />
list.” is displayed.<br />
To cancel, press ui or SEARCH/INFO.<br />
If the list is not in alphabetical order, you may<br />
not be able to perform a character search.
Viewing photographs on the Flickr site<br />
You can view photographs shared by particular users, or all of the<br />
photographs shared on Flickr.<br />
n Viewing photographs shared by particular users<br />
1 Prepare<br />
2 <strong>Press</strong><br />
3 <strong>Press</strong><br />
4<br />
Enter<br />
for playback.<br />
q Check the network environment,<br />
then turn on this unit’s power<br />
(vpage 24 “Connecting to a home<br />
network (LAN)”).<br />
w If settings are required, make the<br />
“Network Connecting” (vpage 78).<br />
AMP and then press<br />
SOURCE SEL to display the<br />
Source Select menu, then select<br />
(vpage 25).<br />
Flickr<br />
Add Flickr Contact<br />
All Content<br />
[1/2]<br />
NET/USB and then use ui to select “Add<br />
Flickr Contact”, then press ENTER or p.<br />
“Username”.<br />
• For character input, see page 62.<br />
5 After<br />
inputting the “Username”, then press ENTER.<br />
The “Username” entered in step 4 is displayed.<br />
• If the Username you typed in cannot be found, “The Flickr Contact<br />
you entered could not be found” appears. Check and type in the<br />
correct Username.<br />
SVENSKA<br />
6 <strong>Press</strong><br />
NEDERLANDS<br />
ESPAÑOL<br />
ITALIANO<br />
ui to select the folder, and then press ENTER<br />
or p.<br />
Favorites Displays the favorite photographs of the specifi ed<br />
user.<br />
Photostream Displays a list of shared photographs.<br />
PhotoSets Displays the folder (photograph album) list.<br />
Contacts Displays a Username registered for Flickr Contact by<br />
a particular user.<br />
Remove this<br />
Contact<br />
7 <strong>Press</strong><br />
Deletes a user from Flickr Contact.<br />
ui to select the fi le, and then press ENTER<br />
or p.<br />
The selected fi le is displayed.<br />
n Viewing all photographs on Flickr<br />
1 Prepare<br />
2 <strong>Press</strong><br />
for playback.<br />
q Check the network environment,<br />
then turn on this unit’s power<br />
(vpage 24 “Connecting to a home<br />
network (LAN)”).<br />
w If settings are required, make the<br />
“Network Connecting” (vpage 78).<br />
AMP and then press<br />
SOURCE SEL to display the<br />
Source Select menu, then select<br />
(vpage 25).<br />
Flickr<br />
Add Flickr Contact<br />
All Content<br />
[1/2]<br />
3 <strong>Press</strong><br />
4 <strong>Press</strong><br />
FRANÇAIS<br />
DEUTSCH<br />
ENGLISH<br />
Playing a network audio<br />
NET/USB and then use ui to select “All<br />
Content”, then press ENTER or p.<br />
ui to select the folder, and then press ENTER<br />
or p.<br />
Interestingness Displays photographs that are popular from the<br />
number of user comments or number of times they<br />
are added as favorites.<br />
Recent Displays the most recently added photographs.<br />
Search by text Search for photographs by keyword.<br />
5 <strong>Press</strong><br />
ui to select the fi le, and then press ENTER<br />
or p.<br />
The selected fi le is displayed.<br />
NOTE<br />
Depending on the fi le format, some photographs cannot be viewed.<br />
n Flickr operation<br />
Operation buttons Function<br />
PRESET +, – Preset channel selection<br />
uio p<br />
Cursor operation /<br />
Auto search (cue, ui)<br />
ENTER<br />
(<strong>Press</strong> and release)<br />
Enter<br />
ENTER<br />
(<strong>Press</strong> and hold)<br />
Stop<br />
SEARCH Page Searchz RETURN Return<br />
2 Stop<br />
1 – 8 Preset channel selection<br />
SHIFT Preset channel block selection<br />
TV POWER<br />
TV power on/standby<br />
(Default : <strong>Marantz</strong>)<br />
TV INPUT<br />
Switch TV input<br />
(Default : <strong>Marantz</strong>)<br />
z When the menu screen is displayed, press<br />
SEARCH/INFO, then press o (previous page) or p<br />
(next page).<br />
To cancel, press ui or SEARCH/INFO.<br />
37<br />
Simple version Basic version<br />
Advanced version Information
38<br />
ENGLISH DEUTSCH FRANÇAIS ITALIANO ESPAÑOL NEDERLANDS SVENSKA<br />
Playing a network audio<br />
Listening to Napster<br />
1 Prepare<br />
2 <strong>Press</strong><br />
3 <strong>Press</strong><br />
for playback.<br />
q Check the network environment,<br />
then turn on this unit’s power<br />
(vpage 24 “Connecting to a home<br />
network (LAN)”).<br />
w If settings are required, make the<br />
“Network Connecting” (vpage 78).<br />
AMP and then press<br />
SOURCE SEL to display the<br />
Source Select menu, then select<br />
(vpage 25).<br />
NET/USB and then use ui p to input<br />
“Username” and “Password”.<br />
Napster Account<br />
Username<br />
Password<br />
OK<br />
Enter Username<br />
• For character input, see page 62.<br />
4 After<br />
RETURN Cancel<br />
inputting the “Username” and “Password”,<br />
select “OK”, then press ENTER.<br />
If the “Username” and “Password” match, the top menu for<br />
Napster is displayed.<br />
NOTE<br />
• The password should be no longer than 99 characters.<br />
• <strong>Press</strong> RETURN to cancel the input. When “Cancel input?” is<br />
displayed, select “Yes”, then press ENTER.<br />
n Searching from Napster menu<br />
1 Use<br />
2<br />
Repeat<br />
3 Use<br />
ui to select search item or<br />
folder, then press ENTER or p.<br />
step 1 until the track is<br />
displayed.<br />
ui to select the track item, then press ENTER<br />
or p.<br />
n Entering a character search for the track you<br />
want to listen to<br />
1 <strong>Press</strong> SEARCH/INFO.<br />
Napster<br />
My Napster Library<br />
Top 100s<br />
Search by Artist<br />
New Releases<br />
Radio Search by Albums<br />
Napster Playlists Search by Track<br />
E<br />
Staff Picks<br />
[1/8]<br />
• You can search by artist name, album name or track name.<br />
2 Use<br />
ui to select the search item, then press ENTER.<br />
The search display appears.<br />
Search by Artist<br />
Enter Artist Name<br />
Input<br />
Submit<br />
RETURN Cancel<br />
SEARCH Keyboard INSERT Insert DELETE Delete<br />
• For character input, see page 62.<br />
3 Input the characters, then press ENTER.<br />
n Registering tracks in my Napster library<br />
1 <strong>Press</strong><br />
2<br />
Select<br />
p while the track you wish<br />
to register is playing.<br />
“Add to my library”, then<br />
press ENTER or p.<br />
The track is entered in the Library.<br />
Listening to tracks registered in my Napster library<br />
1 Use<br />
2 Use<br />
ui to select “My Napster<br />
Library”, then press ENTER or<br />
p.<br />
ui to select the information<br />
or track, then press ENTER.<br />
• To play back compressed audio with extended bass or treble<br />
reproduction, we recommend playback in M-DAX mode (vpage 73).<br />
The default setting is “OFF”.<br />
• You can specify the duration of the on-screen display to be displayed<br />
(default: 30 sec) at menu “NET/USB” (vpage 81). <strong>Press</strong> uio p<br />
to return to the original screen.<br />
• Use STATUS to switch between<br />
displaying the title name, artist name or<br />
album name.
n Napster operation<br />
Operation buttons Function<br />
PRESET +, – Preset channel selection<br />
uio p<br />
ENTER<br />
(<strong>Press</strong> and release)<br />
ENTER<br />
(<strong>Press</strong> and hold)<br />
Cursor operation /<br />
Auto search (cue, ui)<br />
Enter / Pause<br />
Stop<br />
SEARCH Search menu / Page search z<br />
RETURN Return<br />
1 Playback / Pause<br />
8 9 Auto search (cue)<br />
2 Stop<br />
1 – 8 Preset channel selection<br />
SHIFT Preset channel block selection<br />
TV POWER<br />
TV INPUT<br />
TV power on/standby<br />
(Default : <strong>Marantz</strong>)<br />
Switch TV input<br />
(Default : <strong>Marantz</strong>)<br />
• Repeat playback (vpage 68 “Repeat”)<br />
• Random playback (vpage 68 “Random”)<br />
z When the menu screen is displayed, press<br />
SEARCH/INFO twice, then press o (previous<br />
page) or p (next page).<br />
To cancel, press ui or SEARCH/INFO.<br />
SVENSKA<br />
NEDERLANDS<br />
ESPAÑOL<br />
How to listen to Last.fm on this unit<br />
ITALIANO<br />
Last.fm radio is not available in all countries. Please check www.last.<br />
fm/hardware for more information. You’ll also need a subscription. Get<br />
one today at www.last.fm/subscribe.<br />
1 Prepare<br />
2 <strong>Press</strong><br />
for playback.<br />
q Make sure this unit is connected to<br />
the Internet, then turn on this unit’s<br />
power (vpage 24 “Connecting to a<br />
home network (LAN)”).<br />
w If settings are required, follow the<br />
“Network Connecting” (vpage 78).<br />
AMP and then press<br />
SOURCE SEL to display the<br />
Source Select menu, then select<br />
(vpage 25). Then press NET/<br />
USB.<br />
Last.fm Account<br />
I have a Last.fm account<br />
I am new to Last.fm<br />
RETURN Cancel<br />
• If you do not have a Last.fm account, press i to select “I am new<br />
to Last.fm”. Then press ENTER.<br />
Create an account in accordance with the instructions on the<br />
screen.<br />
3 If<br />
you have a Last.fm account, press ui to select “I<br />
have a Last.fm account”. Then press ENTER or p.<br />
Lasst.fm Account<br />
Username<br />
Password<br />
OK<br />
Enter Username<br />
This service is currently<br />
available in limited countries.<br />
RETURN Cancel<br />
4 Use<br />
FRANÇAIS<br />
DEUTSCH<br />
ENGLISH<br />
Playing a network audio<br />
ui p to enter your username and password.<br />
• For character input, see page 62.<br />
5 After<br />
inputting the username and password, select<br />
“OK”, then press ENTER.<br />
If the username and password match, the top menu for Last.<br />
fm is displayed.<br />
• The types of characters that can be input are as shown below.<br />
Username:<br />
GUpper case charactersH ABCDEFGHIJKLMNOPQRSTUVW<br />
XYZ<br />
GLower case charactersH abcdefghijklmnopqrstuvwxyz<br />
GSymbolsH _ -<br />
GNumbersH 0123456789<br />
Password:<br />
GUpper case charactersH ABCDEFGHIJKLMNOPQRSTUVW<br />
XYZ<br />
GLower case charactersH abcdefghijklmnopqrstuvwxyz<br />
GSymbolsH ! # “ $ % & ‘ ( ) z + , - . / : ; < = > ? @ [ \ ] ^ ` { | }<br />
˜ (Space)<br />
GNumbersH 0123456789<br />
6 Use<br />
ui to select menu and then press ENTER.<br />
Popular Stations Play popular artists and tags in your area.<br />
You Recent<br />
Stations<br />
Play your recent stations.<br />
Your stations You can play tracks from the following personalised<br />
stations (“Your Recommeded Radio”, “Your<br />
Library”, “Your Neighborhood”, “Your Friends’<br />
Radio”, “Your Top Tags”,“Your Top Artists”.<br />
Search Stations You can search station by Artist or Tag.<br />
39<br />
Simple version Basic version<br />
Advanced version Information
40<br />
ENGLISH DEUTSCH FRANÇAIS ITALIANO ESPAÑOL NEDERLANDS SVENSKA<br />
Playing a network audio<br />
7 Use<br />
8 Menu<br />
ui to select a station, and press ENTER or 1<br />
to start playback.<br />
Playback starts and the following screen appears.<br />
00:03<br />
100%<br />
rock Radio<br />
Song<br />
Artist<br />
Album<br />
Now Playing<br />
MP3 128kbps<br />
Skip Select<br />
Menu<br />
items on playback screen.<br />
Love this track Loving tracks improves your Last.fm<br />
recommendations, and you can optionally share<br />
them on popular social networks.<br />
Ban this track If you ban a track, we won’t play it again. You can<br />
undo this on the Last.fm website.<br />
Scrobbling Scrobbling sends the tracks you played to your<br />
Last.fm account. You can see charts of the music<br />
you’ve been listening to, get recommendations for<br />
new music and events in your area and share your<br />
listening tastes with your friends. You can turn this<br />
service on or off using this option. The more you<br />
scrobble, the better your recommendations will<br />
become.<br />
Menu [1/3]<br />
Love this track<br />
Ban this track<br />
Scrobbling(On)<br />
NOTE<br />
• The password should be no longer than 99 characters.<br />
• <strong>Press</strong> RETURN to cancel the input. When “Cancel input?” is<br />
displayed, select “Yes”, then press ENTER.<br />
• To play back compressed audio with extended bass or treble<br />
reproduction, we recommend playback in M-DAX mode (vpage 73).<br />
The default setting is “OFF”.<br />
• You can specify the duration of the on-screen display to be displayed<br />
(default: 30 sec) at menu “NET/USB” (vpage 81). <strong>Press</strong> uio p<br />
to return to the original screen.<br />
• Use STATUS to switch between<br />
displaying the title name, artist name or<br />
album name.<br />
n Last.fm operation<br />
Operation buttons Function<br />
uio p<br />
Cursor operation /<br />
Auto search (cue, i)<br />
ENTER<br />
(<strong>Press</strong> and release)<br />
Enter<br />
ENTER<br />
(<strong>Press</strong> and hold)<br />
Stop<br />
SEARCH Page searchz RETURN Return<br />
1 Playback<br />
9 Auto search (cue)<br />
2 Stop<br />
TV POWER<br />
TV power on/standby<br />
(Default : <strong>Marantz</strong>)<br />
TV INPUT<br />
Switch TV input<br />
(Default : <strong>Marantz</strong>)<br />
z When the menu screen is displayed, press<br />
SEARCH/INFO, then press o (previous page) or p<br />
(next page).<br />
To cancel, press ui or SEARCH/INFO.
SVENSKA<br />
NEDERLANDS<br />
Selecting a listening mode (Surround mode)<br />
This unit can play input audio signals in multi-channel surround mode or in stereo mode.<br />
Select a listening mode suitable for the playback contents (cinema, music, etc.) or according to your liking.<br />
Listening mode<br />
Input audio<br />
signal<br />
2-channel<br />
Multi channel<br />
2-channel<br />
Multi channel<br />
2-channel<br />
Multi channel<br />
2-channel<br />
Multi channel<br />
Playback Listening mode<br />
Surround<br />
Stereo<br />
Stereo<br />
Surround<br />
Virtual<br />
Surround<br />
Multi-channel<br />
playback (vpage 41)<br />
Stereo playback<br />
(vpage 43)<br />
Direct playback<br />
(vpage 43)<br />
Dolby Virtual Speaker/<br />
Dolby Headphone<br />
playback (vpage 43)<br />
ESPAÑOL<br />
ITALIANO<br />
For 2-channel signal input:<br />
• Surround-channel signals are created and played with surround playback.<br />
For multichannel signal input:<br />
• The surround signal recorded in source is played as surround playback.<br />
(The sound is played according to the settings of the speaker size in<br />
“Speaker Config.” (vpage 74).)<br />
• Surround-back-channel or front-height-channel signals that are not<br />
recorded in source can be created.<br />
• If multichannel signals are input, they are mixed down to 2-channel audio<br />
and are played.<br />
• Subwoofer signals are also output.<br />
Sound recorded in source is played as is.<br />
• Surround back signals or front height signals are not created.<br />
• In this mode, the following items cannot be adjusted.<br />
• Tone (vpage 70) • MultEQ ® XT (vpage 70)<br />
• Dynamic EQ ® (vpage 71) • Dynamic Volume ® (vpage 71)<br />
• M-DAX (vpage 73)<br />
Virtual Surround processing is performed on 2-channel or multichannel<br />
input signals that are played back.<br />
• Some listening modes cannot be selected, depending on the audio format or number of channels of the input signal.<br />
For details, see “Types of input signals, and corresponding surround modes” (vpage 102).<br />
• Adjust the sound field effect with the menu “Surround Parameter” (vpage 69) to enjoy your favorite sound mode.<br />
• You can select the listening mode by pressing SURROUND MODE on the main unit.<br />
<strong>Press</strong> SURROUND MODE and the modes are switched as shown below.<br />
AUTO*(STEREO) STEREO DOLBY PLgz DOLBY PLg(x) Movie<br />
DOLBY PLg(x) Music<br />
DOLBY PLg(x) Game<br />
DOLBY VS<br />
NEURAL MULTI CH STEREO DTS NEO:6 music DTS NEO:6 cinema<br />
z For “AUTO”, press AUTO on the amplifier or remote control unit.<br />
FRANÇAIS<br />
DEUTSCH<br />
Multi-channel playback<br />
n Surround playback of 2-channel sources<br />
1<br />
Playing<br />
2 <strong>Press</strong><br />
the source (vpage 26 –<br />
40).<br />
SURR. to select the<br />
surround decoder to play back<br />
multichannel sound.<br />
• If SURROUND MODE on the main unit is<br />
pressed, the same function as with the<br />
remote control unit can be obtained.<br />
• Each time SURR. is pressed, the surround<br />
mode is switched.<br />
Which decoder can be selected depends on<br />
the settings of “Amp Assign” (vpage 74)<br />
or “Speaker Config.” (vpage 74).<br />
ENGLISH<br />
DOLBY PLgz z1 This mode is for 7.1-channel surround playback<br />
using the front height speakers.<br />
• “PLgz Height” is displayed.<br />
DOLBY PLgx z2 This mode is for 7.1-channel or 6.1-channel<br />
surround playback using the surround back<br />
speakers.<br />
• “PLgx Movie”, “PLgx Music” or “PLgx Game”<br />
is displayed.<br />
DOLBY PLg This mode is for 5.1-channel surround playback.<br />
Select this mode if no front height speaker nor<br />
surround back speaker is to be used.<br />
• “PLg Movie”, “PLg Music”, “PLg Game” is<br />
displayed.<br />
DTS NEO:6 This mode is for 7.1-channel, 6.1-channel or<br />
5.1-channel surround playback using the surround<br />
back speakers.<br />
• “DTS NEO:6 Cinema” or “DTS NEO:6 Music” is<br />
displayed.<br />
MULTI CH<br />
STEREO<br />
This mode is for enjoying stereo sound from all<br />
speakers.<br />
41<br />
Simple version Basic version<br />
Advanced version Information
42<br />
ENGLISH DEUTSCH FRANÇAIS ITALIANO ESPAÑOL NEDERLANDS SVENSKA<br />
Multi-channel playback<br />
NEURAL z3 This mode is for 7.1-channel, 6.1-channel or<br />
5.1-channel surround playback using the surround<br />
back speakers.<br />
• “NEURAL” is displayed.<br />
z1 This can be selected when the “Amp Assign” (vpage 74)<br />
setting in the menu is set to “Normal” is set to “A”.<br />
z2 This can be selected when “Amp Assign” is set to “Normal” or<br />
“Speaker Config.” – “S.Back” is not set to “None”.<br />
z3 This mode supports analog 2-channel audio, and linear PCM 2<br />
channel (44.1 kHz, 48 kHz) audio.<br />
GViews on the displayH<br />
q w<br />
q Shows a decoder to be<br />
used.<br />
w Shows Audyssey<br />
DSX processing.<br />
n Surround playback of multi-channel sources<br />
(Dolby Digital, DTS etc.)<br />
the source (vpage 26 –<br />
40).<br />
1<br />
Playing<br />
2 <strong>Press</strong><br />
SURR. to select the<br />
surround decoder to play back<br />
multichannel sound.<br />
• If SURROUND MODE on the main unit is<br />
pressed, the same function as with the<br />
remote control unit can be obtained.<br />
• Select the surround mode while viewing<br />
the display on the screen (v“Displaying<br />
the currently playing surround mode” at<br />
right).<br />
• Which decoder can be selected depends on the input signal,<br />
the settings of “Amp Assign” (vpage 74) or “Speaker Config.”<br />
(vpage 74).<br />
Displaying the currently playing surround mode<br />
Input signal Surround mode Display<br />
DOLBY DIGITAL<br />
(2ch)<br />
NEURAL NEURAL<br />
DOLBY DIGITAL DOLBY DIGITAL<br />
DOLBY DIGITAL DOLBY DIGITAL EX DOLBY DIGITAL EX<br />
(other than 2ch) / DOLBY DIGITAL + PLgx Movie DOLBY D + PL x MV<br />
DOLBY DIGITAL EX DOLBY DIGITAL + PLgx Music DOLBY D + PL x MS<br />
DOLBY DIGITAL + PLgz DOLBY D PL z<br />
DOLBY DIGITAL Plus DOLBY DIGITAL +<br />
DOLBY DIGITAL Plus + EX DOLBY D + EX<br />
DOLBY DIGITAL Plus<br />
DOLBY DIGITAL Plus + PLgx<br />
Movie<br />
DOLBY D + PL x MV<br />
DOLBY DIGITAL Plus + PLgx<br />
Music<br />
DOLBY D + PL x MS<br />
DOLBY DIGITAL Plus + PLgz DOLBY D + PL z<br />
DOLBY TrueHD DOLBY TrueHD<br />
DOLBY TrueHD + EX DOLBY HD EX<br />
DOLBY TrueHD DOLBY TrueHD + PLgx Movie DOLBY HD +PL x MV<br />
DOLBY TrueHD + PLgx Music DOLBY HD +PL x MS<br />
DOLBY TrueHD + PLgz DOLBY HD PL z<br />
DTS SURROUND DTS SURROUND<br />
DTS + PLgx Movie DTS PL x MV<br />
DTS (5.1ch) / DTS + PLgx Music DTS PL x MS<br />
DTS-ES Discrete 6.1 / DTS + PLgz HEIGHT DTS PL z<br />
DTS-ES Matrix 6.1 / DTS + NEO:6 DTS NEO:6<br />
DTS 96/24<br />
DTS ES MTRX6.1z1 DTS ES MTRX6.1<br />
DTS ES DSCRT6.1z2 DTS ES DSCRT6.1<br />
DTS 96/24z3 DTS 96/24<br />
DTS-HD HI RES DTS-HD HI RES<br />
DTS-HD MSTR DTS-HD MSTR<br />
DTS-HD + NEO:6 DTS-HD NEO:6<br />
DTS-HD<br />
DTS-HD + PLgx MOVIE DTS-HD PL x MV<br />
DTS-HD + PLgx MUSIC DTS-HD PL x MS<br />
DTS-HD + PLgz HEIGHT DTS-HD PL z<br />
DTS Express DTS Express<br />
MULTI CH IN MULTI CH IN<br />
MULTI IN + Dolby EX MULTI Dolby EX<br />
PCM (multi ch)<br />
MULTI IN + PLgx MOVIE<br />
MULTI IN + PLgx MUSIC<br />
MULTI IN PL x MV<br />
MULTI IN PL x MS<br />
MULTI IN + PLgz HEIGHT MULTI IN PL z<br />
MULTI CH IN 7.1 MULTI CH IN 7.1<br />
All Input signal Dolby VIRTUAL SPEAKER DOLBY VS<br />
All signals indicated<br />
above<br />
Audyssey DSXz4 Audyssey DSX<br />
z1 This is displayed when the input signal is<br />
“DTS-ES Matrix 6.1”.<br />
z2 This is displayed when the input signal is<br />
“DTS-ES Discrete 6.1”.<br />
z3 This is displayed when the input signal is<br />
“DTS 96/24”.<br />
z4 This surround mode is displayed when<br />
“Audyssey DSX” (vpage 71) is set to<br />
“ON–Height–” or “ON-–Wide–”.<br />
GViews on the displayH<br />
q w<br />
q Shows a decoder to be used.<br />
• A DOLBY DIGITAL Plus decoder is displayed<br />
as “DOLBY D +”.<br />
w Shows a decoder that creates sound output<br />
from the surround back speakers.<br />
• “+ PLgz” indicates the front height sound<br />
from front height speakers.<br />
For an input signal that can be reproduced in<br />
each surround mode, see “Surround modes and<br />
parameters” (vpage 100).
Stereo playback<br />
This is the mode for playing in stereo. The tone can be adjusted.<br />
• Sound is output from the front left and right speakers and subwoofer.<br />
• If multichannel signals are input, they are mixed down to 2-channel<br />
audio and are played.<br />
1<br />
Playing<br />
2 <strong>Press</strong><br />
the source (vpage 26 –<br />
40).<br />
STEREO.<br />
Stereo playback begins.<br />
Direct playback<br />
Sound recorded in source is played as is.<br />
• Surround back signals or front height signals are not created.<br />
• In this mode, the following items cannot be adjusted.<br />
• Tone (vpage 70) • MultEQ ® XT (vpage 70)<br />
• Dynamic EQ ® (vpage 71) • Dynamic Volume ® (vpage 71)<br />
• M-DAX (vpage 73)<br />
1<br />
Playing<br />
2 <strong>Press</strong><br />
the source (vpage 26 –<br />
40).<br />
P.DIRECT to select the<br />
direct mode.<br />
• If PURE DIRECT on the main unit is<br />
pressed, the same function as with the<br />
remote control unit can be obtained.<br />
• Each time P.DIRECT is pressed, the<br />
direct mode is switched.<br />
Source Direct This mode plays back tracks at high sound quality<br />
without passing through the sound quality adjustment<br />
circuits.<br />
Pure Direct z This mode plays back tracks at the closest to the<br />
original sound quality.<br />
Auto This mode detects the type of input digital signal,<br />
and automatically selects the corresponding mode<br />
for playback.<br />
z The following circuits that affect sound quality are set to off.<br />
• Main unit’s display circuit (The display is turned off.)<br />
• Analog video input/output circuit<br />
SVENSKA<br />
NEDERLANDS<br />
ESPAÑOL<br />
ITALIANO<br />
• To cancel, press P.DIRECT again.<br />
• Video signals are only output when HDMI signals are played in the<br />
PURE DIRECT mode.<br />
NOTE<br />
When in the PURE DIRECT mode, the menu screen is not displayed.<br />
Dolby Virtual Speaker/Dolby<br />
Headphone playback<br />
n Dolby Virtual Speaker mode<br />
This delivers a full surround sound experience from two stereo<br />
speakers.<br />
• Sound is output from the front left and right speakers.<br />
• If multichannel signals are input, they are mixed down to 2-channnel<br />
audio.<br />
1<br />
Playing<br />
2 <strong>Press</strong><br />
the source (vpage 26 –<br />
40).<br />
SURR. to select “DOLBY<br />
VS”.<br />
FRANÇAIS<br />
DEUTSCH<br />
ENGLISH<br />
n Dolby Headphone mode<br />
You can enjoy listening to multi-channel surround sound through<br />
headphones using this mode.<br />
<strong>Press</strong> SURR. to select the Dolby<br />
Headphone mode.<br />
• If SURROUND MODE on the main unit is<br />
pressed, the same function as with the<br />
remote control unit can be obtained.<br />
• Each time SURR. is pressed, the Dolby<br />
Headphone mode is switched.<br />
DOLBY<br />
HEADPHONE<br />
DOLBY HP<br />
BYPASS<br />
DOLBY HP<br />
PLg Movie<br />
DOLBY HP<br />
PLg Music<br />
This is the surround mode for listening with<br />
headphones.<br />
The surround sound field is played through regular<br />
headphones.<br />
The sound is played in the normal stereo mode<br />
rather than the surround mode when listening with<br />
headphones.<br />
This mode is best suited for movie sources.<br />
This mode is best suited for music sources.<br />
NOTE<br />
• The surround mode returns to the previous setting as soon as the<br />
plug is removed from the jack.<br />
• You can select Dolby HP PLg Movie or Dolby HP PLg Music when a<br />
2-channel source is played back.<br />
43<br />
Simple version Basic version<br />
Advanced version Information
44<br />
ENGLISH DEUTSCH FRANÇAIS ITALIANO ESPAÑOL NEDERLANDS SVENSKA<br />
Advanced<br />
version<br />
Advanced version<br />
Here, we explain functions and operations that let you make better use of this unit.<br />
F Speaker installation/connection (Advanced connection) vpage 45<br />
F Playback (Advanced operation) vpage 52<br />
F Playback in ZONE2/ZONE3 (Separate room) vpage 58<br />
F How to make detailed settings vpage 60<br />
F Operating the connected devices by remote control unit vpage 86
SVENSKA<br />
NEDERLANDS<br />
ESPAÑOL<br />
Speaker installation/connection (Advanced connection)<br />
This section provides the installation, connection,<br />
and setup methods of speaker systems other<br />
than the 7.1-channel system (with surround back<br />
speakers).<br />
For the speaker installation, connection, and setup<br />
methods of the 7.1-channel system with surround<br />
back speakers, see “Simple version (Simple setup<br />
guide)” (vpage 4).<br />
Use Audyssey® Auto Setup function of this unit<br />
to automatically detect the number of connected<br />
speakers and perform optimal settings for the<br />
speakers to be used.<br />
Procedure for speaker settings<br />
Install<br />
Connect (vpage 46)<br />
Set up speakers (vpage 49)<br />
Install<br />
This unit is compatible with Audyssey DSX (vpage 105) and<br />
Dolby Pro Logic gz (vpage 106), which offers an even wider and<br />
deeper surround sensation.<br />
When using Audyssey DSX, install front wide speakers or front<br />
height speakers.<br />
When using Dolby Pro Logic gz, install front height speakers.<br />
ITALIANO<br />
Install the surround back speakers in a position 60 to 90 cm higher<br />
than ear level.<br />
Front height<br />
speaker<br />
• Point slightly<br />
downwards<br />
At least 1 m z1<br />
Front<br />
speaker<br />
Front wide<br />
speaker<br />
z2<br />
45˚<br />
Surround<br />
speaker<br />
60 – 90 cm<br />
GViewed from the sideH<br />
z1 Recommended for Dolby Pro Logic gz<br />
z2 Recommended for Audyssey DSX<br />
Surround back<br />
speaker<br />
• Point slightly<br />
downwards<br />
NOTE<br />
Sound is not output simultaneously from the surround back speakers,<br />
front height speakers, and front wide speakers. You can switch<br />
between speakers by changing the settings in surround mode or<br />
Audyssey DSX.<br />
FRANÇAIS<br />
DEUTSCH<br />
ENGLISH<br />
When 7.1ch (Surround back / Front height / Front<br />
wide speaker) installed<br />
FWL<br />
FHL<br />
FL SW<br />
FR<br />
z3<br />
z2<br />
z1<br />
FHR<br />
FWR<br />
SL SR<br />
C<br />
Listening<br />
position<br />
z5<br />
z4<br />
SBL SBR<br />
z1 22˚ – 30˚ z2 22˚ – 45˚ z3 55˚ – 60˚<br />
z4 90˚ – 110˚ z5 135˚ – 150˚<br />
When 6.1ch (Surround back speaker) installed<br />
FL FR<br />
SW<br />
z2<br />
z1<br />
SL SR<br />
SB<br />
C<br />
Listening position<br />
z1 22˚ – 30˚ z2 90˚ – 110˚<br />
45<br />
Simple version Basic version<br />
Advanced version<br />
Information
46<br />
ENGLISH DEUTSCH FRANÇAIS ITALIANO ESPAÑOL NEDERLANDS SVENSKA<br />
Install<br />
When 5.1ch installed<br />
FL FR<br />
SW<br />
z2<br />
SL SR<br />
Listening<br />
position<br />
C<br />
z1<br />
z1 22˚ – 30˚ z2 120˚<br />
When Front A/B speakers installed<br />
FL(B) FL(A)<br />
SW<br />
FR(A) FR(B)<br />
Listening position<br />
FL Front speaker (L) SBL Surround back speaker (L)<br />
FR Front speaker (R) SBR Surround back speaker (R)<br />
C Center speaker FHL Front height speaker (L)<br />
SW Subwoofer FHR Front height speaker (R)<br />
SL Surround speaker (L) FWL Front wide speaker (L)<br />
SR Surround speaker (R) FWR Front wide speaker (R)<br />
SB Surround back speaker<br />
Connect<br />
• For the method of connecting the 7.1-channel system with surround back speakers, see page 5.<br />
• For the method of connecting the TV, see page 6.<br />
7.1-channel (Surround back / Front height / Front wide speaker) connection<br />
For 7.1-channel (Surround back / Front height / Front wide speaker) playback, set “Set up “Amp Assign”” (vpage 49) to “Normal”.<br />
FWL<br />
FL FR<br />
SW<br />
SL SR<br />
C<br />
SBL SBR<br />
For speaker impedance and speaker cable connections, see page 5.<br />
FHL<br />
FHR<br />
FWR
6.1-channel (Surround back speaker) connection<br />
SVENSKA<br />
NEDERLANDS<br />
If using only one surround back speaker (with a 6.1-channel connection), connect to the “L” side of the<br />
SURR. BACK/AMP ASSIGN terminal.<br />
For speaker settings in this case, see “When 6.1ch (Surround back speaker) installed” (vpage 45).<br />
For 6.1-channel (Surround back speaker) playback, set “Set up “Amp Assign”” (vpage 49) to “Normal”.<br />
FL FR<br />
SW<br />
SL SR<br />
SB<br />
C<br />
ESPAÑOL<br />
ITALIANO<br />
5.1-channel connection<br />
For speaker impedance and speaker cable connections, see page 5.<br />
FRANÇAIS<br />
DEUTSCH<br />
For 5.1-channel playback, set “Set up “Amp Assign”” (vpage 49) to “Normal”.<br />
FL FR<br />
SW<br />
SL SR<br />
C<br />
ENGLISH<br />
Connect<br />
47<br />
Simple version Basic version<br />
Advanced version<br />
Information
48<br />
ENGLISH DEUTSCH FRANÇAIS ITALIANO ESPAÑOL NEDERLANDS SVENSKA<br />
Connect<br />
Front A/B connection<br />
The second set of front speakers can be connected to the FRONT B/<br />
HEIGHT terminals.<br />
In this case, perform the settings using the SPKR A/B button on the<br />
remote control or main unit (vpage 26 “Set the front speakers to be<br />
used”).<br />
SW<br />
FL(B) FL(A)<br />
FR(A) FR(B)<br />
For surround playback of a multichannel source, if you connect the<br />
center speaker, surround speakers, surround back speakers (or front<br />
wide speakers) and subwoofers, 7.1-channel playback is available.<br />
Front speakers can be used separately, depending on the speaker’s<br />
specifications or playback source such as front speakers (A) for<br />
multichannel playback and front speakers (B) for 2-channel playback.<br />
NOTE<br />
When using the A front speakers and B front speakers simultaneously,<br />
make sure you check the impedance of the connected speakers<br />
(vpage 5).<br />
2.1-channel connection<br />
FL SW<br />
FR<br />
n For connecting two subwoofers<br />
Two subwoofers can be connected to this unit.<br />
The same signal is output from each subwoofer terminal.<br />
For speaker impedance and speaker cable connections, see page 5.<br />
Bi-Amp connection<br />
A bi-amp connection is to connect separate amplifiers to the tweeter<br />
terminals and woofer terminals of speakers compatible with the<br />
bi-amp function. This prevents the back electromotive force (returned<br />
force without output) of the woofer sent to the tweeter, which affects<br />
the sound quality of the tweeter, and you can enjoy playback with<br />
higher-quality sound.<br />
In this case, set “Set up “Amp Assign”” (vpage 49) to “SPKR-C”.<br />
q w<br />
q w<br />
(L)<br />
FL FR<br />
When making a bi-amp connection, the same signal is output from the<br />
FRONT terminal and the SURR.BACK/AMP ASSIGN terminal.<br />
For surround playback of a multichannel source, if you connect the<br />
center speaker, surround speakers and subwoofers, 5.1-channel<br />
playback is available.<br />
NOTE<br />
• Use speakers compatible with bi-amp connections.<br />
• When making bi-amp connections, be sure to remove the shortcircuiting<br />
plate or wire between the speaker’s woofer and tweeter<br />
terminals.<br />
(R)
SVENSKA<br />
NEDERLANDS<br />
ESPAÑOL<br />
ITALIANO<br />
FRANÇAIS<br />
DEUTSCH<br />
ENGLISH<br />
Set up speakers around items indicate the settings.<br />
This section provides the setup methods of speaker systems other than the 7.1-channel system<br />
(with surround back speakers).<br />
For the setup methods of the 7.1-channel system with surround back speakers, see “Simple<br />
version”, “Set up speakers (Audyssey ® Auto Setup)” (vpage 7) of “Simple version”.<br />
First install and connect the speakers to this unit.<br />
Before Auto Setup measurement, the settings shown below can be made.<br />
• Changing the amplifier assignment (Amp Assign)<br />
The signal output from the SURR.BACK/AMP ASSIGN speaker terminal of this unit can be switched to<br />
match your speaker environment (vpage 49 “Set up “Amp Assign””).<br />
• Setting the channels to be used (Channel Select)<br />
If channels that are not to be used are set in advance, measurement for the set channels is skipped, and<br />
measuring time can be reduced (vpage 49 “Set up “Channel Select””).<br />
1<br />
Set up the<br />
remote control unit<br />
n Set up the operation mode<br />
<strong>Press</strong> AMP to set the remote control unit<br />
to amplifier operation mode.<br />
<strong>Press</strong> AMP<br />
Remote control operation<br />
buttons<br />
2 Connect<br />
the setup microphone.<br />
When the setup microphone is<br />
connected, the following screen is<br />
displayed.<br />
AUTO SETUP<br />
AUDYSSEY AUTO SETUP MultEQ XT<br />
STEP1 Preparation<br />
Connect the speakers<br />
and place them according<br />
to the recommendations<br />
in the manual.<br />
Set the following<br />
items if necessary.<br />
Amp Assign<br />
Channel Select<br />
Auto Setup Start<br />
Start Auto Setup<br />
[1/6]<br />
ENTER Enter RETURN Cancel<br />
Move the cursor<br />
(Up/Down/Left/Right)<br />
3 Set up “Amp Assign”<br />
Use ui to select “Amp Assign”,<br />
and then press ENTER.<br />
4 Use<br />
AUTO SETUP<br />
AUDYSSEY AUTO SETUP<br />
STEP1 Preparation<br />
Connect the speakers<br />
and place them according<br />
to the recommendations<br />
in the manual.<br />
Set the following<br />
items if necessary.<br />
Amp Assign<br />
Channel Select<br />
Auto Setup Start<br />
MultEQ XT<br />
[1/6]<br />
ENTER Enter RETURN Cancel<br />
Set use of surround back ch. for your system<br />
o p to select the configuration<br />
of the connected speakers, and then<br />
press RETURN.<br />
Normal Set when using surround<br />
ZONE2<br />
back, front height or front wide<br />
speakers. In this case, go to step<br />
5.<br />
Set for connecting the speakers<br />
for ZONE2 to the SURR. BACK/<br />
AMP ASSIGN terminals.<br />
ZONE3 Set for connecting the speakers<br />
for ZONE3 to the SURR. BACK/<br />
AMP ASSIGN terminals.<br />
SPKR-C Set for connecting a tweeter<br />
of a front speaker to the SURR.<br />
BACK/AMP ASSIGN terminals<br />
and a woofer of the front speaker<br />
to the FRONT terminals.<br />
5<br />
6 Use<br />
Set up “Channel Select”<br />
Use ui to select “Channel Select”,<br />
and then press ENTER.<br />
AUTO SETUP<br />
AUDYSSEY AUTO SETUP<br />
STEP1 Preparation<br />
Connect the speakers<br />
and place them according<br />
to the recommendations<br />
in the manual.<br />
Set the following<br />
items if necessary.<br />
Amp Assign<br />
Channel Select<br />
Auto Setup Start<br />
MultEQ XT<br />
[1/6]<br />
ENTER Enter RETURN Cancel<br />
Skip unused ch’s measurement for timesaving<br />
ui to select a channel.<br />
Subwoofer Select for no subwoofers to be<br />
used. In this case, go to step 7.<br />
Surround<br />
Back<br />
Front<br />
Height<br />
Front Wide<br />
7 GWhen<br />
Select for no surround back<br />
speakers to be used. In this case,<br />
go to step 8.<br />
• “Surround Back” can be set when<br />
“Amp Assign” is set to “Normal”.<br />
Select for no front height speakers<br />
to be used. In this case, go to step<br />
9.<br />
• “Front Height” can be set when<br />
“Amp Assign” is set to “Normal”.<br />
Select for no front wide speakers to<br />
be used. In this case, go to step 9.<br />
• “Front Wide” can be set when<br />
“Amp Assign” is set to “Normal”.<br />
“Subwoofer” is selected in<br />
step 6H<br />
Use o p to select the item.<br />
Measure Set for measuring a subwoofer.<br />
Skip Set for no measuring of a subwoofer.<br />
Confirm the setting Return to previous menu<br />
49<br />
Simple version Basic version<br />
Advanced version<br />
Information
50<br />
ENGLISH DEUTSCH FRANÇAIS ITALIANO ESPAÑOL NEDERLANDS SVENSKA<br />
Set up speakers<br />
8 GWhen<br />
“Surround Back” is selected<br />
in step 6H<br />
Use o p to select the item.<br />
Measure<br />
(2spkrs)<br />
Measure<br />
(1spkr)<br />
Set for measuring two surround back<br />
speakers.<br />
Set for measuring a surround back<br />
speaker.<br />
Skip Set for no measuring of a surround<br />
back speaker.<br />
9<br />
GWhen “Front Height” or “Front<br />
Wide” is selected in step 6H<br />
Use o p to select the item.<br />
Measure Set to measure the front height<br />
speakers or front wide speakers.<br />
Skip Set when you do not want to measure<br />
the front height speakers or front wide<br />
speakers.<br />
<strong>Press</strong> RETURN.<br />
10 Proceed to page 9 STEP1 Preparation<br />
step 5.<br />
NOTE<br />
After performing Audyssey ® Auto Setup, do not<br />
change the speaker connections or subwoofer<br />
volume. In event of a change, perform Audyssey<br />
Auto Setup again.<br />
Remote control operation<br />
buttons<br />
Connections (Advanced connection)<br />
REMOTE CONTROL jacks<br />
When you use this unit connected to <strong>Marantz</strong> audio components, it sends operation signals to operate each component.<br />
n Connection<br />
Use the remote connection cable (supplied with a <strong>Marantz</strong> audio component you want to connect) to connect the REMOTE CONTROL OUT<br />
terminal of this unit to the REMOTE CONTROL IN terminal of the component to be connected.<br />
n Setting<br />
Set the remote control switch located on the rear panel of the connected audio component to “EXTERNAL” or “EXT.” to use this feature.<br />
• This setting will disable remote sensor reception of the connected audio component.<br />
• To operate the connected audio component, point the remote control at the remote sensor of this unit.<br />
Wireless receiver RX101 (vpage 22)<br />
Move the cursor<br />
(Up/Down/Left/Right)<br />
Remote control unit<br />
NOTE<br />
To use wireless receiver RX101 as external<br />
IR receiver, set the remote sensor function<br />
of this unit to “Remote Lock:ON” (vpage 85<br />
“Remote control settings”).<br />
REMOTE<br />
CONTROL<br />
IN OUT<br />
REMOTE<br />
CONTROL<br />
IN OUT<br />
REMOTE<br />
CONTROL<br />
IN OUT<br />
CD recorder DVD player<br />
CD player<br />
EXTERNAL INTERNAL EXTERNAL INTERNAL EXTERNAL INTERNAL<br />
Confirm the setting Return to previous menu
RS-232C connector<br />
By connecting an external serial controller, you can control all sorts of<br />
household electrical devices (including lights, electric curtains, and air<br />
conditioning units) in addition to your audio and video devices.<br />
External serial controller<br />
Perform the operation below beforehand.<br />
q Turn on the power of this unit.<br />
w Turn off the power of this unit from the external controller.<br />
e Check that the unit is in the standby mode.<br />
SVENSKA<br />
NEDERLANDS<br />
ESPAÑOL<br />
DC OUT (TRIGGER OUT) jacks<br />
ITALIANO<br />
When a device with DC IN jack is connected, the connected device’s<br />
power on/standby can be controlled through linked operation to this<br />
unit.<br />
The DC OUT jack outputs a maximum 12 V/150 mA electrical signal.<br />
12 V/150 mA trigger-compatible device<br />
in Set as Necessary<br />
Set to change the conditions for linked operation via the DC OUT<br />
1 or 2 jack.<br />
“Trigger Out 1” or “Trigger Out 2” (vpage 82)<br />
NOTE<br />
If the permissible trigger input level for the connected device is larger<br />
than 12V/150 mA, or has shorted, the DC OUT jack cannot be used.<br />
In this case, turn off the power to the unit, and disconnect it.<br />
FRANÇAIS<br />
DEUTSCH<br />
ENGLISH<br />
51<br />
Simple version Basic version<br />
Advanced version<br />
Information
52<br />
ENGLISH DEUTSCH FRANÇAIS ITALIANO ESPAÑOL NEDERLANDS SVENSKA<br />
Playback (Advanced operation)<br />
Playback (Basic operation) (vpage 25)<br />
Selecting a listening mode (Surround mode)<br />
(vpage 41)<br />
n HDMI control function (vpage 52)<br />
n Sleep timer function (vpage 53)<br />
n Adjusting the volume of the speakers (vpage 53)<br />
n Operating a wireless LAN-compatible mobile<br />
terminal to play music and still pictures (vpage 54)<br />
n Web control function (vpage 55)<br />
n Panel lock function (vpage 57)<br />
n Various memory functions (vpage 57)<br />
Convenient functions<br />
HDMI control function<br />
When you make an HDMI connection with a TV or player compatible<br />
with this unit and HDMI control functions, you can perform the<br />
following operations by setting the HDMI control function of each<br />
device.<br />
n This unit power off can be linked to the TV power off<br />
step.<br />
n You can switch audio output devices with a TV<br />
operation.<br />
When you set “Output audio from amp” in the TV audio output<br />
setup operation, you can switch the amp power on.<br />
n You can adjust this unit volume in the TV volume<br />
adjustment operation.<br />
n You can switch this unit input sources through<br />
linkage to TV input switching.<br />
n When playing the player, this unit input source<br />
switches to the source for that player.<br />
NOTE<br />
• The HDMI control function only supports the HDMI OUT 1 connector.<br />
To use the HDMI control function, connect the television to the<br />
HDMI OUT 1 connector.<br />
• When “HDMI Control” is set to “ON”, it consumes more<br />
standby power.<br />
• The HDMI control function controls operations of a TV that is<br />
compatible with the HDMI control function. Make sure that the TV<br />
and HDMI are connected when you perform HDMI control.<br />
• Some functions may not operate depending on the connected TV or<br />
player. Check the user guide of each device for details beforehand.<br />
• When “Power Off Control” on the menu is set to “OFF” (vpage 77),<br />
this unit is not set to standby even if the connected device is in the<br />
standby mode.<br />
• When connection changes are implemented, such as adding<br />
connections to HDMI devices, linked operations may be initialized.<br />
In this case, you will need to reconfi gure the settings.<br />
• When “HDMI Control” is set to “ON”, it is not possible to assign an<br />
HDMI connector to “TV” at “Input Assign” (vpage 65).<br />
1 Set<br />
2<br />
Turn<br />
3<br />
Set<br />
the HDMI output connector corresponding with<br />
the HDMI control function.<br />
Set “HDMI Control” (vpage 77) to “ON“.<br />
the power on for all the equipment connected<br />
by HDMI cable.<br />
the HDMI control function for all equipment<br />
connected by HDMI cable.<br />
• Please consult the operating instructions for the connected<br />
equipment to check the settings.<br />
• Carry out steps 2 and 3 should any of the equipment be unplugged.<br />
4<br />
Switch<br />
5<br />
Switch<br />
6<br />
When<br />
the television input to the HDMI input<br />
connected to this unit.<br />
this unit input to the HDMI input source and<br />
check if the picture from the player is ok.<br />
you turn the TV’s power to standby, check<br />
that the power of this unit also goes to standby.<br />
If the HDMI control function does not operate properly, check the<br />
following points.<br />
• Is the TV or player compatible with the HDMI control function?<br />
• Is “HDMI Control” (vpage 77) set to “ON”?<br />
• Is “Power Off Control” (vpage 77) set to “All” or “Video”?<br />
• Are the HDMI control function settings of all equipment correct?<br />
• Is the television connected to the HDMI OUT 1 connector?<br />
NOTE<br />
Should any of the operations below be performed, the interlocking<br />
function may be reset, in which case, repeat steps 2 and 3.<br />
• “Input Assign” – “HDMI” (vpage 65) setting has changed.<br />
• “Monitor Out” (vpage 77) setting is changed.<br />
• There is a change to the connection between the equipment and the<br />
HDMI, or an increase in equipment.
Sleep timer function<br />
The power automatically goes into standby once the set time has<br />
elapsed.<br />
This is convenient for playing sources while going to sleep.<br />
1 <strong>Press</strong><br />
2 <strong>Press</strong><br />
AMP to set the remote<br />
control unit to amplifier operation<br />
mode.<br />
SLEEP and display the time<br />
you want to set.<br />
The indicator on the display lights.<br />
• If SLLEP on the main unit is pressed,<br />
the same function as with the remote<br />
control unit can be obtained.<br />
• The time switches as shown below each time SLEEP is pressed.<br />
OFF 10 min 20 30 40 50<br />
120<br />
110<br />
100<br />
To cancel the sleep timer<br />
90<br />
<strong>Press</strong> SLEEP to set “OFF”.<br />
The indicator on the display turns off.<br />
80 70<br />
• The sleep timer setting is canceled if this unit’s power is set to<br />
standby or turned off.<br />
• When power to the main zone is turned off with the sleep timer,<br />
power in ZONE2 and ZONE3 are also turned off.<br />
60<br />
SVENSKA<br />
NEDERLANDS<br />
ESPAÑOL<br />
Adjusting the volume of the speakers<br />
You can adjust the channel level either according to the playback<br />
sources or to suit your taste, as described below.<br />
n Adjusting the volume of the different speakers<br />
1 <strong>Press</strong><br />
2 <strong>Press</strong><br />
3 Use<br />
4 Use<br />
AMP to set the remote<br />
control unit to amplifier operation<br />
mode.<br />
CH LVL.<br />
CHANNEL LEVEL<br />
Front L<br />
Front R<br />
Center<br />
Subwoofer<br />
Surround L<br />
Surround R<br />
S.Back L<br />
S.Back R<br />
Fader<br />
Select<br />
0.0dB<br />
0.0dB<br />
0.0dB<br />
0.0dB<br />
0.0dB<br />
0.0dB<br />
0.0dB<br />
0.0dB<br />
Front Rear<br />
ITALIANO<br />
ui to select the speaker.<br />
The speaker that can be set switches each time one of the<br />
buttons is pressed.<br />
o p to adjust the volume.<br />
• In the case of a subwoofer, pressing o when it is at “–12 dB” will<br />
change the setting to “OFF”.<br />
• When a headphone jack is inserted, the headphone channel level<br />
can be adjusted.<br />
• When the input mode setting is “7.1CH IN”, you can adjust the<br />
channel level while the 7.1CH INPUT connector is being used. In<br />
that case, “7.1CH IN Level” appears at the top of the screen.<br />
FRANÇAIS<br />
DEUTSCH<br />
ENGLISH<br />
Convenient functions<br />
n Adjusting the volume of groups of speakers<br />
(Fader function)<br />
This function lets you adjust (fade) the sound all at once from the<br />
front (front speaker / front height speaker / front wide speaker /<br />
center speaker) or rear (surround speaker / surround back speaker).<br />
1 <strong>Press</strong><br />
2 <strong>Press</strong><br />
3<br />
<strong>Press</strong><br />
4<br />
Use<br />
AMP to set the remote<br />
control unit to amplifier operation<br />
mode.<br />
CH LVL.<br />
CHANNEL LEVEL<br />
Front L<br />
Front R<br />
Center<br />
Subwoofer<br />
Surround L<br />
Surround R<br />
S.Back L<br />
S.Back R<br />
Fader<br />
Select<br />
0.0dB<br />
0.0dB<br />
0.0dB<br />
0.0dB<br />
0.0dB<br />
0.0dB<br />
0.0dB<br />
0.0dB<br />
Front Rear<br />
i to select “Fader”, then select the item to be<br />
adjusting using o p.<br />
o p to adjust the volume of the speakers.<br />
(o : front, p: rear)<br />
• The fader function does not affect the subwoofer.<br />
• The fader can be adjusted until the volume of the speaker is adjusted<br />
to the lowest value of –12 dB.<br />
53<br />
Simple version Basic version<br />
Advanced version<br />
Information
54<br />
ENGLISH DEUTSCH FRANÇAIS ITALIANO ESPAÑOL NEDERLANDS SVENSKA<br />
Convenient functions<br />
Operating a wireless LAN-compatible mobile terminal to play<br />
music and still pictures<br />
• Perform this procedure using a wireless LAN-compatible mobile terminal conforming to the DLNA (Digital<br />
Living Network Alliance) standard.<br />
• This function allows you to play content located on a computer (media server) or mobile terminal device<br />
connected on a network by operating a mobile terminal device on the same network.<br />
• There are two types of operations on the mobile terminal device.<br />
n Playing content on a computer (Media server)<br />
1<br />
From<br />
2<br />
From<br />
This unit<br />
Wireless LANcompatible<br />
router<br />
Streaming Streaming<br />
e Start playback.<br />
r Operate.<br />
Mobile terminal device<br />
q Select content.<br />
w Select a player.<br />
Computer<br />
(Media server)<br />
the mobile terminal device, browse the media server on the same network<br />
and choose the content you want to play.<br />
the mobile terminal device, select this unit from among the products on the<br />
network.<br />
Playback of the content selected in step 1 begins.<br />
• When selecting this unit from the mobile terminal device, the name of this unit is displayed at “Friendly<br />
Name” (vpage 79 “Friendly Name Edit”).<br />
• The following operations are possible from the mobile terminal device:<br />
• File operations (play, stop, pause, track search)<br />
• Volume adjustment<br />
n Playing contents on a mobile terminal device<br />
1<br />
Select<br />
2<br />
From<br />
This unit<br />
e Start playback.<br />
r Operate.<br />
Wireless LANcompatible<br />
router<br />
Mobile terminal device<br />
q Select content.<br />
w Select a player.<br />
the content you want to play from among the mobile terminal devices.<br />
the mobile terminal device, select this unit from among the products on the<br />
network.<br />
Playback of the content selected in step 1 begins.<br />
• When selecting this unit from the mobile terminal device, the name of this unit is displayed at “Friendly<br />
Name” (vpage 79 “Friendly Name Edit”).<br />
• The following operations are possible from the mobile terminal device:<br />
• File operations (play, stop, pause, track search)<br />
• Volume adjustment<br />
• is displayed on the menu screen while the mobile terminal device is being operated.<br />
• For the various settings and operating procedures, see the operating instructions of the mobile terminal<br />
devices being used.<br />
• When selecting this unit from the mobile terminal device, the name of this unit is displayed at “Friendly<br />
Name”. “Friendly Name” can be edited at “Friendly Name Edit” (vpage 79) as desired so that it is easily<br />
distinguishable from other devices.<br />
• When playback is started from the mobile terminal device, this unit’s input source automatically switches<br />
to “NET/USB”. Also, when the “Network Standby” setting (vpage 79) is set to “ON”, the power<br />
automatically turns on.<br />
NOTE<br />
When operations related to browsing or playback (play, stop, pause, track search) are performed on this<br />
unit while operating the mobile terminal device, the connection to the network is disconnected.
56<br />
ENGLISH DEUTSCH FRANÇAIS ITALIANO ESPAÑOL NEDERLANDS SVENSKA<br />
Convenient functions<br />
Q0<br />
GExample 2H Setup menu screen<br />
SETUP MENU<br />
SOURCE SELECT<br />
SOURCE SELECT ReLoad<br />
Source DVD<br />
Input Assign<br />
Q2<br />
Q3<br />
AUDIO/VIDEO ADJUST<br />
Video<br />
MANUAL SETUP<br />
Video Select SOURCE<br />
Video Mode Auto Game Movie<br />
INFORMATION<br />
Video Convert ON OFF<br />
SAVE<br />
LOAD Q1<br />
i/p Scaler<br />
Resolution(analog)<br />
Resolution(HDMI)<br />
Analog Analog & HDMI OFF<br />
Auto 480p/576p 1080i 720p<br />
Auto 480p/576p 1080i 720p<br />
1080p<br />
1080p<br />
1080p:24Hz<br />
1080p:24Hz<br />
Progressive Mode AUTO VIDEO1 VIDEO2<br />
Aspect<br />
Input Mode<br />
Input Mode Auto<br />
Decode Mode Auto<br />
Full Normal<br />
Rename DVD Set Def<br />
Source Level(analog) 0 dB Set<br />
Source Level(digital) 0 dB Set<br />
<br />
NET AUDIO/USB ><br />
iPod Direct ><br />
RELOAD<br />
GExample 4H PDA menu screen<br />
<strong>Marantz</strong> Web Controller<br />
Main Zone Control<br />
Multi Zone2 Control<br />
Multi Zone3 Control<br />
Q8 Select this item to operate each zone.<br />
NOTE<br />
You cannot change setup menu operations and zone name on the<br />
PDA menu screen.<br />
W3<br />
W4<br />
W5<br />
Q8<br />
GExample 5H Net Audio operating screen<br />
NET AUDIO/USB(MAIN ZONE)<br />
Now Playing<br />
HOT LOVE & EMOTION<br />
/VIRGINELLE<br />
128kbps<br />
PRESET OFF PRESET MEMORY A1 MEMORY CHARACTER SEARCH<br />
< -75.5dB ><br />
W0<br />
ONE<br />
Q9<br />
W1<br />
REPEAT RANDOM<br />
ALL OFF ON OFF<br />
∞ -80 -70 -60 -50 -40 -30 -20 -10 0 10 18<br />
Q9 Click the menu items. from which you want to play.<br />
W0 Click “v” to select the preset channel you want to play.<br />
W1 When registering presets, click “v” to select the channel you<br />
want to register, and then click “MEMORY”.<br />
W2 When searching using an acronym, click “v” and select from the<br />
displayed characters.<br />
W3 Click this item to play back repeatedly.<br />
W4 Click this item when selecting menu items.<br />
W5 Click to stop playback.<br />
W6 Click this item to play back randomly.<br />
W2<br />
W6<br />
GExample 6H Dedicated iPod Touch screen<br />
Main Zone<br />
Zone Power<br />
Source<br />
iPod Direct NetAudio/USB<br />
Volume<br />
Down Up<br />
-60 -50 -40 -30 -20 -10 0<br />
• When accessed from the iPod Touch browser, an optimized<br />
operation screen is displayed.
Panel lock function<br />
To prevent accidental operation of this unit, you can disable operation<br />
of the buttons on the front panel.<br />
n Disabling all key button operations<br />
ON/STANDBY<br />
AUTO DISPLAY<br />
<strong>Press</strong> ON/STANDBY while you press and hold AUTO and<br />
DISPLAY with the unit in standby mode.<br />
“Panel Lock:ON” appears on the display and all button operations<br />
except ON/STANDBY are disabled.<br />
n Disabling all button operations except VOLUME<br />
ON/STANDBY VOLUME<br />
PURE DIRECT DISPLAY<br />
<strong>Press</strong> ON/STANDBY while you press and hold PURE<br />
DIRECT and DISPLAY with the unit in standby mode.<br />
“Panel Lock:ON” appears on the display and all button operations<br />
except ON/STANDBY and VOLUME are disabled.<br />
SVENSKA<br />
NEDERLANDS<br />
ESPAÑOL<br />
n Canceling the Panel lock function<br />
ON/STANDBY i<br />
DISPLAY<br />
ITALIANO<br />
<strong>Press</strong> ON/STANDBY while you press and hold i and<br />
DISPLAY with the unit in standby mode.<br />
The Panel lock function is canceled.<br />
Even when the Panel lock function is set, you can operate the unit<br />
using the remote control unit.<br />
FRANÇAIS<br />
DEUTSCH<br />
Various memory functions<br />
ENGLISH<br />
Convenient functions<br />
n Personal memory plus function<br />
This function sets the settings (input mode, surround mode, HDMI<br />
output mode, MultEQ ® XT, Dynamic EQ ® , Dynamic Volume ® ,<br />
audio delay etc.) last selected for the individual input sources.<br />
The surround parameters, tone settings and the volumes of the<br />
different speakers are stored for the individual surround modes.<br />
n Last function memory<br />
This function stores the settings which were made before going<br />
into the standby mode.<br />
When the power is turned back on, the settings are restored.<br />
57<br />
Simple version Basic version<br />
Advanced version<br />
Information
58<br />
ENGLISH DEUTSCH FRANÇAIS ITALIANO ESPAÑOL NEDERLANDS SVENSKA<br />
Playback in ZONE2/ZONE3 (Separate room)<br />
• You can operate this unit so as to enjoy audio in a room (ZONE2, ZONE3) other than the MAIN ZONE<br />
(room where the unit is located).<br />
• You can simultaneously play back the same source in both the MAIN ZONE, ZONE2 and ZONE3. You can<br />
also play back separate sources in the MAIN ZONE, ZONE2 and ZONE3.<br />
Audio output<br />
There are two methods to do this, as described below. Choose one of the methods.<br />
q Zone playback by speaker output<br />
w Zone playback by audio output (PRE OUT)<br />
Use an external amplifier.<br />
q Zone playback by speaker output<br />
The ZONE2 and ZONE3 audio signals are output from this unit’s SURR.BACK/AMP ASSIGN speaker<br />
terminals using the amplifier assignment function.<br />
n Connecting and setting the speakers<br />
“Amp Assign” setting (vpage 74) and<br />
audio signals output<br />
ZONE2 ZONE2<br />
ZONE3 ZONE3<br />
Output signal :<br />
Stereo (L / R)<br />
Output signal :<br />
Stereo (L / R)<br />
Connecting the speakers<br />
ZONE2<br />
(L) (R)<br />
w q w q<br />
ZONE3<br />
(L) (R)<br />
w q w q<br />
w Zone playback by audio output (PRE OUT)<br />
n Audio connections (ZONE2, ZONE3)<br />
The audio signals of this unit’s ZONE2 and ZONE3 audio output terminals are output to the ZONE2 and<br />
ZONE3 amplifiers and played on these amplifiers.<br />
ZONE2 MAIN ZONE<br />
ZONE3<br />
AUX IN<br />
L<br />
R<br />
This unit<br />
L<br />
R<br />
AUX IN<br />
We recommend using high quality pin-plug cables for audio connections in order to prevent noise.<br />
NOTE<br />
• When the input source to which the digital input connectors (OPTICAL/COAXIAL) are assigned is selected<br />
in ZONE2 or ZONE3, playback is only possible if the digital signal being input is in PCM (2-channel) format.<br />
• It is not possible to play the digital audio signals input from the HDMI terminals in ZONE2 and ZONE3.<br />
Use analog connections for ZONE2 or ZONE3 playback.<br />
• When certain digital signals are being input, noise may be output from the ZONE2 and ZONE3 audio<br />
output connectors.<br />
• The menu screen is not output.
60<br />
ENGLISH DEUTSCH FRANÇAIS ITALIANO ESPAÑOL NEDERLANDS SVENSKA<br />
How to make detailed settings<br />
Menu map<br />
For menu operation, connect a TV to this unit and<br />
display the menu on the TV screen. For menu<br />
operations, see the following page.<br />
MENU<br />
Audio/Video Adjust<br />
Information<br />
Auto Setup<br />
Manual Setup<br />
Input Setup<br />
Adjust various audio and video parameters<br />
Items that only need to be set<br />
once<br />
Set these for example upon purchase.<br />
Once these items are set, there is<br />
no need to set them again unless<br />
the speaker layout or the connected<br />
speakers have been changed.<br />
Setting items Detailed items Description Page<br />
1. Audio/Video Adjust<br />
Audio Adjust Adjuts various audio parameters. 69<br />
Picture Adjust Adjusts the picture quality. 73<br />
AUDIO/VIDEO ADJUST<br />
Audio Adjust<br />
Picture Adjust<br />
2. Information<br />
INFORMATION<br />
Status<br />
Adjust Audio various Input Signal audio parameters<br />
HDMI Information<br />
Preset Channel<br />
3. Auto Setup<br />
AUTO SETUP<br />
Shows information about current settings<br />
Audyssey Auto Setup<br />
Parameter Check<br />
4. Manual Setup<br />
MANUAL SETUP<br />
Speaker Setup<br />
Optimize HDMI Setup settings for speakers in use<br />
Audio Setup<br />
Network Setup<br />
Zone Setup<br />
Option Setup<br />
5. Input Setup<br />
(Example: TUNER)<br />
Make detailed speaker settings<br />
INPUT SETUP<br />
Auto Preset<br />
Preset Skip<br />
Preset Name<br />
Video<br />
Input Mode<br />
Rename<br />
Source Level<br />
Displayed items of the “Input Setup”<br />
menu differs, depending on the<br />
selected input source.<br />
Status Shows information about current settings. 84<br />
Audio Input Signal Shows information about audio input signals. 84<br />
HDMI Information Displays the HDMI input/output signals and HDMI monitor information. 84<br />
Preset Channel Shows information about tuner or network preset channels. 84<br />
Audyssey Auto Setup Makes the optimum settings for the speakers being used automatically. 7<br />
Parameter Check Checks Audyssey ® Auto Setup measurement results.<br />
This item is only displayed after Audyssey Auto Setup procedure has been<br />
performed.<br />
11<br />
Speaker Setup Sets the speaker size and distance, the channel level, etc. 74<br />
HDMI Setup Makes settings for HDMI video/audio output. 77<br />
Audio Setup Makes settings for audio playback. 77<br />
Network Setup Makes network settings. 78<br />
Zone Setup Makes settings for audio playback in a multi-zone (ZONE2/ZONE3) system. 80<br />
Option Setup Makes various other settings. 81<br />
Auto Preset Uses the auto preset function to program radio stations. 64<br />
Preset Skip Sets the preset memories that you do not want to display when tuning. 64<br />
Preset Name Assigns name to a preset memory. 64<br />
Input Assign Changes input connector assignment. 65<br />
Video Makes the video settings. 66<br />
Input Mode Sets the audio input mode and decode mode. 67<br />
Rename Changes the display name for this source. 68<br />
Source Level Adjusts the playback level of the audio input. 68<br />
Playback Mode Makes settings for iPod, USB memory device or network source playback. 68<br />
Still Picture Makes settings for still picture playback. 68
Examples of menu and front display<br />
SVENSKA<br />
NEDERLANDS<br />
Below we describe typical examples of displays on the TV screen and on the set’s display window.<br />
Top menu display<br />
Display when changing settings<br />
Display when inputting characters<br />
Display when resetting<br />
w<br />
w<br />
q<br />
MENU<br />
ESPAÑOL<br />
ITALIANO<br />
FRANÇAIS<br />
DEUTSCH<br />
Menu display Front display Description<br />
Audio/Video Adjust<br />
Information<br />
Auto Setup<br />
Manual Setup<br />
Input Setup<br />
q<br />
Adjust various audio and video parameters<br />
Default<br />
BD<br />
DVD<br />
VCR<br />
SAT<br />
GAME<br />
AUX1<br />
TV<br />
INPUT SETUP<br />
INPUT ASSIGN<br />
q<br />
[ HDMI ]<br />
HDMI1<br />
HDMI2<br />
HDMI4<br />
HDMI3<br />
HDMI5<br />
HDMI6<br />
None<br />
[ DIGITAL ]<br />
None<br />
Coax1<br />
None<br />
Coax2<br />
None<br />
Opt3<br />
Opt1<br />
[ COMP ]<br />
1-RCA<br />
2-RCA<br />
4-RCA<br />
3-RCA<br />
None<br />
None<br />
None<br />
Select ENTER Enter RETURN Return<br />
Change HDMI input connector assignment<br />
Default<br />
BD<br />
DVD<br />
VCR<br />
SAT<br />
GAME<br />
AUX1<br />
TV<br />
INPUT SETUP<br />
INPUT ASSIGN<br />
e<br />
<strong>Press</strong> ENTER.<br />
[ HDMI ]<br />
HDMI1<br />
HDMI2<br />
HDMI4<br />
HDMI3<br />
HDMI5<br />
HDMI6<br />
None<br />
[ DIGITAL ]<br />
None<br />
Coax1<br />
None<br />
Coax2<br />
None<br />
Opt3<br />
Opt1<br />
[ COMP ]<br />
1-RCA<br />
2-RCA<br />
4-RCA<br />
3-RCA<br />
None<br />
None<br />
None<br />
Select ENTER Enter RETURN Cancel<br />
Assign HDMI 1 input connector<br />
INPUT SETUP<br />
RENAME<br />
DVD<br />
Default<br />
DVD<br />
Input ENTER Enter RETURN Cancel<br />
SHIFT a/A SEARCH Keyboard<br />
INPUT SETUP<br />
RENAME<br />
DVD<br />
Default<br />
w<br />
DVD<br />
ENTER Enter<br />
q<br />
RETURN Return<br />
*MENU<br />
A/V Adjust –<br />
w<br />
*Input Assign<br />
BD [HDMI1 ]<br />
<strong>Press</strong> ENTER.<br />
*Input Assign<br />
BD •HDMI1 –<br />
*Rename:DVD<br />
•DVD –<br />
*Rename<br />
Default<br />
q<br />
q<br />
<strong>Press</strong> ENTER.<br />
*Rename<br />
Default? :•No<br />
q<br />
e<br />
q The menu items are displayed here.<br />
w The selected line is displayed here.<br />
The currently selected item is displayed on the display.<br />
Use ui to move to the item you want to set.<br />
ENGLISH<br />
q Use uio p to move to the item you want to set.<br />
w <strong>Press</strong> ENTER to set to the mode in which the setting can be made.<br />
e “0” and “1” is displayed at the sides of item whose setting can be<br />
changed. Use o p to change to the desired setting.<br />
q When o p is pressed, the cursor moves to the left or right.<br />
w When ui is pressed at the position where you want to input the<br />
character, the character is input.<br />
For inputting characters on a keyboard screen or with the number buttons<br />
on the remote control unit, see page 62.<br />
q <strong>Press</strong> i to select “Default”, then press ENTER to set.<br />
w <strong>Press</strong> o to select “Yes”, then press ENTER.<br />
61<br />
Simple version Basic version<br />
Advanced version<br />
Information
62<br />
ENGLISH DEUTSCH FRANÇAIS ITALIANO ESPAÑOL NEDERLANDS SVENSKA<br />
Inputting characters<br />
You can change the names as desired using the “Preset Name”<br />
(vpage 64), “Rename” (vpage 68), “Napster Account” (vpage 79),<br />
“Last.fm Account” (vpage 79), “Zone Rename” (vpage 82) and<br />
character input for the network functions.<br />
For inputting characters, there are three methods, as shown below.<br />
Method for inputting characters<br />
Method Operations<br />
Using the cursor buttons<br />
(Normal screen)<br />
Using the keyboard<br />
screen<br />
Normal screen<br />
n Display of a normal input screen<br />
DVD<br />
Default<br />
• Operating with the remote control unit<br />
or the main unit.<br />
• Use uio p and ENTER to input<br />
characters.<br />
• Operating with the remote control unit.<br />
• Select a character on the TV screen to<br />
input characters.<br />
GRename / Zone RenameH<br />
INPUT SETUP<br />
RENAME<br />
DVD q<br />
Input ENTER Enter RETURN Cancel<br />
SHIFT a/A SEARCH Keyboard<br />
w<br />
GAccount input / Search by text / Proxy Name /<br />
Friendly Name EditH<br />
Edit<br />
MANUAL SETUP NETWORK SETUP OTHER<br />
FRIENDLY NAME EDIT<br />
Default<br />
marantz:[SR7005]<br />
Input ENTER Enter RETURN Cancel<br />
SEARCH Keyboard INSERT Insert DELETE Delete<br />
q Character input section<br />
w Guide for operation buttons<br />
Using the cursor buttons<br />
1<br />
Display<br />
2<br />
Use<br />
3<br />
Use<br />
the screen for inputting characters<br />
(vpage 60 “Menu map”).<br />
o p to set the cursor to the character you want<br />
to change.<br />
ui to change the character,<br />
then press ENTER.<br />
• The types of characters that can be input<br />
are as shown below.<br />
GUpper case charactersH<br />
ABCDEFGHIJKLMNOPQRSTUVWXYZ<br />
GLower case charactersH<br />
abcdefghijklmnopqrstuvwxyz<br />
GSymbolsH ! “ # $ % & ‘ ( ) z + , - . / : ; <<br />
= > ? @ [ \ ] ^ _ ` { | } ˜<br />
GNumbersH 0123456789 (Space)<br />
• The input character type can be switched by pressing SHIFT/TOP<br />
MENU while the display name is being changed.<br />
4 Repeat<br />
steps 2 and 3 to change the name then press<br />
ENTER to register it.<br />
q<br />
w<br />
Keyboard screen<br />
n Display of a keyboard input screen<br />
e<br />
r<br />
t<br />
e<br />
BD<br />
A<br />
N<br />
0<br />
$<br />
GRename / Zone RenameH<br />
INPUT SETUP<br />
RENAME<br />
B<br />
O<br />
1<br />
%<br />
C<br />
P<br />
2<br />
&<br />
D<br />
Q<br />
3<br />
’<br />
E<br />
R<br />
4<br />
(<br />
w<br />
F<br />
S<br />
5<br />
)<br />
G<br />
T<br />
6<br />
z<br />
BD<br />
H<br />
U<br />
7<br />
+<br />
I<br />
V<br />
8<br />
,<br />
Select ENTER Input<br />
SHIFT a/A SEARCH Normal<br />
J<br />
W<br />
9<br />
;<br />
y<br />
K<br />
X<br />
!<br />
<<br />
L<br />
Y<br />
”<br />
=<br />
M<br />
Z<br />
#<br />
><br />
Clear Space 0 1 O K<br />
RETURN Cancel<br />
GAccount input / Search by text / Proxy Name /<br />
Friendly Name EditH<br />
MANUAL SETUP NETWORK SETUP OTHER<br />
FRIENDLY NAME EDIT<br />
Edit<br />
a<br />
n<br />
0<br />
_<br />
w<br />
b<br />
o<br />
1<br />
/<br />
c<br />
p<br />
2<br />
:<br />
d<br />
q<br />
3<br />
˜<br />
e<br />
r<br />
4<br />
?<br />
marantz:[SR7005]<br />
f<br />
s<br />
5<br />
[<br />
g<br />
t<br />
6<br />
\<br />
h<br />
u<br />
7<br />
]<br />
i<br />
v<br />
8<br />
^<br />
Select ENTER Input<br />
SHIFT a/A SEARCH Normal<br />
j<br />
w<br />
9<br />
ˋ<br />
k<br />
x<br />
.<br />
{<br />
l<br />
y<br />
@<br />
|<br />
r<br />
t y o Q0<br />
m<br />
z<br />
-<br />
}<br />
Clear Space 0 1 Ins Del O K<br />
q Character input section<br />
w Cursor<br />
e Keyboard section<br />
r Clear key<br />
t Space key<br />
y Cursor keys<br />
u OK key<br />
i Guide for operation buttons<br />
o Insert key<br />
Q0 Delete key<br />
RETURN Cancel<br />
q<br />
u<br />
i<br />
q<br />
u<br />
i
1<br />
Display<br />
2 <strong>Press</strong><br />
3 Select<br />
4 Select<br />
Inputting characters<br />
the screen for inputting characters<br />
(vpage 60 “Menu map”).<br />
SEARCH/INFO while a normal screen is<br />
displayed.<br />
A keyboard screen is displayed.<br />
a character to be changed.<br />
q <strong>Press</strong> uio p to select<br />
or .<br />
w <strong>Press</strong> ENTER to place the<br />
cursor at the character to be<br />
changed.<br />
Each time ENTER is pressed, the<br />
cursor moves by one character.<br />
a character to be input with uio p then<br />
press ENTER.<br />
• The types of characters that can be input are as shown below.<br />
GUpper case characters/Numbers/SymbolsH<br />
ABCDEFGHIJKLMNOPQRSTUVWXYZ<br />
0123456789<br />
! “ # $ % & ’ ( ) z + , ; < = ><br />
GLower case characters/Numbers/SymbolsH<br />
abcdefghijklmnopqrstuvwxyz<br />
0123456789<br />
. @ - _ / : ˜ ? [ \ ] ^ ` { | }<br />
• The input character type can be switched by pressing SHIFT/TOP<br />
MENU while the display name is being changed.<br />
5<br />
Repeat<br />
6 Use<br />
steps 3 and 4 to change the name.<br />
uio p to select , then press ENTER.<br />
Remote control operation<br />
buttons<br />
SVENSKA<br />
Move the cursor<br />
(Up/Down/Left/Right)<br />
NEDERLANDS<br />
ESPAÑOL<br />
Input Setup<br />
ITALIANO<br />
FRANÇAIS<br />
DEUTSCH<br />
Perform settings related to input source playback.<br />
• You do not have to change the settings to use the unit. Make settings when needed.<br />
Menu operation<br />
1 <strong>Press</strong><br />
2 <strong>Press</strong><br />
3<br />
Use<br />
4 <strong>Press</strong><br />
AMP to set the remote control unit to amplifier operation<br />
mode.<br />
MENU.<br />
The menu is displayed on the TV screen.<br />
ui to select the menu to be set or operated.<br />
ENTER or p to enter the setting.<br />
• To return to the previous item, press RETURN.<br />
• Exiting the Menu, press MENU while the menu is displayed.<br />
The menu display disappears.<br />
Important information<br />
ENGLISH<br />
n About the display of input sources<br />
In this section, the configurable input sources for each item are shown as follows.<br />
BD DVD VCR SAT GAME AUX1 NET/USB TV CD CDR PHONO TUNER<br />
M-XPort<br />
NOTE<br />
Input sources that have been set to “Delete” at “Source Delete” (vpage 81) cannot be selected.<br />
Confirm the setting Return to previous menu<br />
63<br />
Simple version Basic version<br />
Advanced version<br />
Information
64<br />
ENGLISH DEUTSCH FRANÇAIS ITALIANO ESPAÑOL NEDERLANDS SVENSKA<br />
Input Setup<br />
Items that can be set with the Input Setup procedure<br />
Start<br />
INPUT SETUP<br />
AUTO PRESET<br />
ENTER Enter RETURN Return<br />
Start the auto preset process<br />
Default<br />
BD<br />
DVD<br />
VCR<br />
SAT<br />
GAME<br />
AUX1<br />
TV<br />
INPUT SETUP<br />
INPUT ASSIGN<br />
Select ENTER Enter RETURN Return<br />
Change HDMI input connector assignment<br />
INPUT SETUP<br />
RENAME<br />
DVD<br />
Default<br />
Slide Show<br />
Interval<br />
Auto Preset (vpage 64)<br />
Input Assign (vpage 65)<br />
[ HDMI ]<br />
HDMI1<br />
HDMI2<br />
HDMI4<br />
HDMI3<br />
HDMI5<br />
HDMI6<br />
None<br />
[ DIGITAL ]<br />
None<br />
Coax1<br />
None<br />
Coax2<br />
None<br />
Opt3<br />
Opt1<br />
Rename (vpage 68)<br />
DVD<br />
[ COMP ]<br />
1-RCA<br />
2-RCA<br />
4-RCA<br />
3-RCA<br />
None<br />
None<br />
None<br />
RETURN Return<br />
Still Picture (vpage 68)<br />
INPUT SETUP<br />
STILL PICTURE<br />
OFF<br />
5sec<br />
RETURN Return<br />
Display only the selected still picture image<br />
Remote control operation<br />
buttons<br />
Preset Skip (vpage 64) Preset Name (vpage 64)<br />
INPUT SETUP<br />
PRESET SKIP<br />
Block<br />
A Block Presets<br />
A1 FM 87.50MHz<br />
A2 FM 89.10MHz<br />
A3 FM 98.10MHz<br />
A4 FM 108.00MHz<br />
A5 FM 90.10MHz<br />
A6 AM 90.10MHz<br />
A7 AM 90.10MHz<br />
A8 AM 90.10MHz<br />
Change memory blocks<br />
INPUT SETUP<br />
VIDEO<br />
Video Select<br />
Video Mode<br />
Video Convert<br />
i/p Scaler<br />
Resolution(Analog)<br />
Resolution(HDMI)<br />
Progressive Mode<br />
Aspect<br />
A<br />
ON<br />
ON<br />
ON<br />
ON<br />
ON<br />
ON<br />
ON<br />
ON<br />
ON<br />
Select desired video input source<br />
Analog Input<br />
Digital Input<br />
[1/7]<br />
Source<br />
Auto<br />
ON<br />
Analog & HDMI<br />
Auto<br />
Auto<br />
Auto<br />
Full<br />
RETURN Return<br />
RETURN Return<br />
INPUT SETUP<br />
PRESET NAME<br />
Block<br />
A1 FM 87.50MHz<br />
A2 FM 89.10MHz<br />
A3 FM 98.10MHz<br />
A4 FM 108.00MHz<br />
A5 FM 90.10MHz<br />
A6 AM 90.10MHz<br />
A7 AM 90.10MHz<br />
A8 AM 90.10MHz<br />
Change memory blocks<br />
INPUT SETUP<br />
INPUT MODE<br />
Input Mode<br />
Decode Mode<br />
[1/7]<br />
A<br />
[ ]<br />
[ ]<br />
[ ]<br />
[ ]<br />
[ ]<br />
[ ]<br />
[ ]<br />
[ ]<br />
Auto<br />
Auto<br />
RETURN Return<br />
Video (vpage 66) Input Mode (vpage 67)<br />
Source Level (vpage 68)<br />
INPUT SETUP<br />
SOURCE LEVEL<br />
0dB<br />
0dB<br />
RETURN Return<br />
Compensate analog audio input playback level<br />
RETURN Return<br />
Automatically detect input signal and playback<br />
Playback Mode (vpage 68)<br />
INPUT SETUP<br />
PLAYBACK MODE<br />
Repeat<br />
Random<br />
Direct Play<br />
Cancel repeat mode<br />
OFF<br />
OFF<br />
Favorite<br />
Move the cursor<br />
(Up/Down/Left/Right)<br />
RETURN Return<br />
Auto Preset<br />
Use the auto preset function to program radio stations.<br />
Setting items Setting details<br />
Start<br />
Start the auto preset<br />
process.<br />
TUNER<br />
If an FM station cannot be preset automatically, select the desired<br />
station by tuning it in manually, then preset it manually.<br />
Preset Skip Default settings are underlined.<br />
Set preset channel to be skipped when selecting.<br />
Setting items Setting details<br />
A – G<br />
Set the preset channels you<br />
do not want to display. You<br />
can set by preset memory<br />
block (A to G) or by preset<br />
channel (1 to 8).<br />
TUNER<br />
Preset Name<br />
Assign name to a preset memory.<br />
1 – 8 : Set by individual preset channels in the currently selected preset<br />
memory block.<br />
• ON : Display the selected preset channel.<br />
• Skip : Do not display the selected preset channel.<br />
If you set “Block Presets” to “Skip”, you can skip the preset memory<br />
blocks (A to G).<br />
Setting items Setting details<br />
A1 – G8<br />
Select the preset channel.<br />
TUNER<br />
Default<br />
The changed preset name<br />
is returned to the default<br />
setting.<br />
• Up to eight characters can be input.<br />
• For character input, see page 62.<br />
Yes : Reset to the defaults.<br />
No : Do not reset to the defaults.<br />
Confirm the setting Return to previous menu
Input Assign<br />
Examples of input assign menu screen displays<br />
q<br />
Default<br />
BD<br />
DVD<br />
VCR<br />
SAT<br />
GAME<br />
AUX1<br />
TV<br />
INPUT SETUP<br />
INPUT ASSIGN<br />
[ HDMI ]<br />
HDMI1<br />
HDMI2<br />
HDMI4<br />
HDMI3<br />
HDMI5<br />
HDMI6<br />
None<br />
[ DIGITAL ]<br />
None<br />
Coax1<br />
None<br />
Coax2<br />
None<br />
Opt3<br />
Opt1<br />
[ COMP ]<br />
1-RCA<br />
2-RCA<br />
4-RCA<br />
3-RCA<br />
None<br />
None<br />
None<br />
w e r<br />
Select ENTER Enter RETURN Return<br />
Change HDMI input connector assignment<br />
Input assignments menu operations<br />
1<br />
Use<br />
2 <strong>Press</strong><br />
3 <strong>Press</strong><br />
SVENSKA<br />
q Input Source<br />
w HDMI input<br />
e Digital audio input<br />
r Component video input<br />
uio p to move the highlight to the item you want to set.<br />
ENTER, then use o p to select the input connector to be<br />
assigned.<br />
ENTER to register the setting.<br />
NEDERLANDS<br />
NOTE<br />
If all “HDMI”, “Digital” and “Component” assignment of the Game source are set to “None”, Game<br />
source cannot be selected with the input source selection.<br />
Remote control operation<br />
buttons<br />
Move the cursor<br />
(Up/Down/Left/Right)<br />
ESPAÑOL<br />
ITALIANO<br />
FRANÇAIS<br />
DEUTSCH<br />
Setting items Setting details<br />
HDMI<br />
Set this to change the HDMI<br />
input connectors assigned<br />
to the input sources.<br />
BD DVD VCR<br />
SAT<br />
TV<br />
GAME AUX1<br />
Digital<br />
Set this to change the digital<br />
input connectors assigned<br />
to the input sources.<br />
BD DVD VCR<br />
SAT GAME AUX1<br />
TV CD CDR<br />
ENGLISH<br />
Input Setup<br />
HDMI 1 / HDMI 2 / HDMI 3 / HDMI 4 / HDMI 5 / HDMI 6<br />
None : Do not assign an HDMI input connector to the selected input<br />
source.<br />
• At time of purchase, the settings of the different input sources are as<br />
shown below.<br />
Input<br />
BD DVD VCR SAT GAME AUX1 TV<br />
source<br />
Default<br />
setting<br />
HDMI 1 HDMI 2 HDMI 4<br />
HDMI<br />
3<br />
HDMI<br />
5<br />
HDMI<br />
6<br />
None<br />
• An input source to which an HDMI input connector cannot be assigned<br />
is displayed as “– – –”.<br />
• To play the video signal assigned at “HDMI” combined with the audio<br />
signal assigned at “Input Assign“ – “Digital”, select “Digital” at “Input<br />
Mode” (vpage 67).<br />
• The audio signals input from the analog and digital connectors are not<br />
output to the monitor.<br />
• When “HDMI Control” (vpage 77) is set to “ON”, HDMI input connector<br />
cannot be assigned to “TV”.<br />
Coax1 – 2 (COAXIAL) / Opt1 – 3 (OPTICAL)<br />
None : Do not assign a digital input connector to the selected input source.<br />
• At time of purchase, the settings of the different input sources are as<br />
shown below.<br />
Input source BD DVD VCR SAT GAME AUX1<br />
Default<br />
setting<br />
None<br />
Coax<br />
1<br />
None<br />
Input source TV CD CDR<br />
Default<br />
setting<br />
Opt<br />
1<br />
Opt<br />
2<br />
None<br />
Coax<br />
2<br />
Confirm the setting Return to previous menu<br />
None<br />
Opt<br />
3<br />
65<br />
Simple version Basic version<br />
Advanced version<br />
Information
66<br />
ENGLISH DEUTSCH FRANÇAIS ITALIANO ESPAÑOL NEDERLANDS SVENSKA<br />
Input Setup<br />
Setting items Setting details<br />
Component<br />
Set this to change the<br />
component video input<br />
connectors assigned to the<br />
input sources.<br />
BD DVD VCR<br />
SAT<br />
TV<br />
GAME AUX1<br />
Default<br />
The “Input Assign” settings<br />
are returned to the default<br />
settings.<br />
1-RCA / 2-RCA / 3-RCA / 4-RCA (Component video)<br />
None : Do not assign a component video input connector to the selected<br />
input source.<br />
• At time of purchase, the settings of the different input sources are as<br />
shown below.<br />
Input<br />
source<br />
BD DVD VCR SAT GAME AUX1 TV<br />
Default<br />
setting<br />
1-RCA 2-RCA 4-RCA 3-RCA None None None<br />
An input source to which an component video input connector cannot be<br />
assigned is displayed as “– – –”.<br />
Yes : Reset to the defaults.<br />
No : Do not reset to the defaults.<br />
If you select “Default” and press ENTER, the message “Default<br />
Setting?” is displayed. Select “Yes” or “No”, and then press ENTER.<br />
Video Default settings are underlined.<br />
Set the source video.<br />
z “GAME” or “TV” can be set when “HDMI” (vpage 65) or “Component” (vpage 66) has been<br />
assigned.<br />
Setting items Setting details<br />
Video Select<br />
Video of another input<br />
source is played back<br />
combined with the playing<br />
audio.<br />
Remote control operation<br />
buttons<br />
Source : Play the picture and sound of the input source.<br />
BD / DVD / VCR / SAT / GAME / AUX1 / TV : Select video input source to<br />
view. This can be set for individual input sources.<br />
“GAME” and “TV” can be selected only when a component video is<br />
assigned as an input source.<br />
NOTE<br />
• It is not possible to select HDMI input signals.<br />
• Input sources for which “Delete” is selected<br />
at “Source Delete” (vpage 81) cannot be<br />
selected.<br />
• This can also be set by pressing V.SEL on the<br />
remote control unit.<br />
Move the cursor<br />
(Up/Down/Left/Right)<br />
Setting items Setting details<br />
Video Mode<br />
Make settings for video<br />
processing.<br />
BD DVD VCR<br />
SAT GAME z<br />
AUX1 TV z<br />
Video Convert<br />
The input video signal is<br />
converted automatically<br />
in conjunction with the<br />
connected TV (vpage 14<br />
“Converting input video<br />
signals for output (Video<br />
conversion function)”).<br />
BD DVD VCR<br />
SAT GAME z<br />
AUX1 TV z<br />
i/p Scaler<br />
Convert the input source’s<br />
resolution to the resolution<br />
set at “Resolution”.<br />
BD DVD VCR<br />
SAT GAME z<br />
AUX1 NET/USB<br />
TV z<br />
Auto : Process video automatically based on the HDMI content<br />
information.<br />
Movie : Process video normally.<br />
Game : Always process video appropriate for game content.<br />
• If “Video Mode” is set to “Auto”, the mode is switched according to the<br />
input contents.<br />
• If a source is played in both MAIN ZONE (audio and video) and ZONE2<br />
(audio only) modes in the same room, audio in MAIN ZONE and ZONE2<br />
modes may sound out of synchronization, but this is not malfunction. In<br />
this case, setting to “Game” mode may improve audio synchronization.<br />
ON : The input video signal is converted.<br />
OFF : The input video signal is not converted.<br />
• When a non-standard video signal from a game machine or some other<br />
source is input, the video conversion function might not operate. In this<br />
case set “Video Convert” to “OFF”.<br />
• When “Video Convert” is set to “OFF”, the video conversion function<br />
does not work. In this case, connect this unit and TV with the same type<br />
of cable.<br />
Analog : Use i/p scaler function for analog video signal.<br />
Analog & HDMI : Use i/p scaler function for analog and HDMI video signal.<br />
HDMI : Use i/p scaler function for HDMI video signal.<br />
OFF : Do not use i/p scaler function.<br />
• “Analog & HDMI” and “HDMI” can be set for input sources for which an<br />
HDMI input connector is assigned.<br />
• Which items can be set depend on the input source assigned to each<br />
input connector.<br />
• This function is not effective when the input signal is x.v.Color, 3D,<br />
sYCC 601 color, Adobe RGB color, Adobe YCC 601 color or computer<br />
resolution.<br />
Confirm the setting Return to previous menu
SVENSKA<br />
Setting items Setting details<br />
Resolution<br />
Set the output resolution.<br />
Resolution (Analog) :<br />
Analog Video<br />
Resolution (HDMI) : HDMI<br />
BD DVD VCR<br />
SAT GAME z<br />
AUX1 NET/USB<br />
TV z<br />
Progressive Mode<br />
Set an appropriate<br />
progressive conversion<br />
mode for the source video<br />
signal.<br />
BD DVD VCR<br />
SAT GAME z<br />
AUX1 TV z<br />
Aspect<br />
Set the aspect ratio for the<br />
video signals output to the<br />
HDMI.<br />
BD DVD VCR<br />
SAT GAME z<br />
AUX1 NET/USB<br />
TV z<br />
NEDERLANDS<br />
Auto : The number of pixels the TV connected to the HDMI output<br />
connector supports is detected automatically and the appropriate output<br />
resolution is set.<br />
480p / 576p / 1080i / 720p / 1080p / 1080p:24Hz : Set the output resolution.<br />
• This item can be set when “i/p Scaler” is set to anything other than<br />
“OFF”.<br />
• When “i/p Scaler” is set to ”Analog & HDMI”, the resolution of both the<br />
analog video input signal and HDMI input signal can be set.<br />
• To watch 1080p/24Hz pictures, use a TV that supports 1080p/24Hz video<br />
signals.<br />
• When set to “1080p/24Hz”, you can enjoy film-like pictures for film<br />
sources (in 24 Hz). For video sources and mixed sources, we recommend<br />
setting the resolution to “1080p”.<br />
• It is not possible to convert a 50 Hz signal into 1080p/24Hz. It is output<br />
at a resolution of 1080p/50Hz.<br />
Auto : The video signal is automatically detected and the appropriate<br />
mode is set.<br />
Video1 : Select mode suitable for video playback<br />
Video2 : Select mode suitable for video and 30-frame film material<br />
playback.<br />
This item can be set when “i/p Scaler” is set to anything other than<br />
“OFF”.<br />
Full : Output at 16:9 aspect ratio.<br />
Normal : Output at 4:3 aspect ratio.<br />
“Aspect” can be set when “i/p Scaler” is set to anything other than<br />
“OFF”.<br />
z “GAME” or “TV” can be set when “HDMI” (vpage 65) or “Component” (vpage 66) has been<br />
assigned.<br />
Remote control operation<br />
buttons<br />
Move the cursor<br />
(Up/Down/Left/Right)<br />
ESPAÑOL<br />
ITALIANO<br />
FRANÇAIS<br />
DEUTSCH<br />
ENGLISH<br />
Input Setup<br />
Input Mode Default settings are underlined.<br />
The input modes available for selection may vary depending on the input source.<br />
Setting items Setting details<br />
Input Mode<br />
Set the audio input modes<br />
for the different input<br />
sources.<br />
Decode Mode<br />
Set the decode mode for<br />
input source.<br />
BD DVD VCR<br />
SAT GAME AUX1<br />
TV CD CDR<br />
Auto : Automatically detect input signal and perform playback.<br />
HDMI : Play only signals from HDMI input.<br />
Digital : Play only signals from digital input.<br />
Analog : Play only signals from analog input.<br />
7.1CH IN : Only signals input from the 7.1CH INPUT terminal will be<br />
played back.<br />
• This can also be set by pressing A/D on the<br />
remote control unit.<br />
• Each time A/D is pressed, the setting is changed<br />
as shown below.<br />
Auto HDMI Digital Analog<br />
7.1CH IN<br />
• “HDMI” can be set for input sources for which “HDMI” is assigned at<br />
“Input Assign” (vpage 65).<br />
• “Digital” can be set for input sources for which “Digital” is assigned at<br />
“Input Assign” (vpage 65).<br />
• If the input source is set to “TV” or “Game”, it cannot be set to “Analog”.<br />
• When digital signals are properly input, the indicator lights on<br />
the display. If the indicator does not light, check the digital input<br />
connector assignment and the connections.<br />
• The surround mode cannot be set if the input mode is set to “7.1CH IN”.<br />
• If “HDMI Control” is set to “ON” and a TV compatible with the ARC is<br />
connected via the HDMI OUT connectors, the input mode whose input<br />
source is “TV” is fixed to ARC.<br />
Auto : Detect type of digital input signal and decode and play automatically.<br />
PCM : Decode and play only PCM input signals.<br />
DTS : Decode and play only DTS input signals.<br />
• This item can be set for input sources for which “HDMI” or “Digital” is<br />
assigned at “Input Assign” (vpage 65).<br />
• Normally set this mode to “Auto”. Set “PCM” and “DTS” when<br />
inputting the corresponding input signal.<br />
Confirm the setting Return to previous menu<br />
67<br />
Simple version Basic version<br />
Advanced version<br />
Information
68<br />
ENGLISH DEUTSCH FRANÇAIS ITALIANO ESPAÑOL NEDERLANDS SVENSKA<br />
Input Setup<br />
Rename<br />
Change the display name of the selected input source.<br />
Setting items Setting details<br />
Rename<br />
Change the display name of<br />
the selected input source.<br />
Default<br />
The input source name<br />
is returned to the default<br />
setting.<br />
• Up to eight characters can be input.<br />
• For character input, see page 62.<br />
Yes : Reset to the defaults.<br />
No : Do not reset to the defaults.<br />
Source Level Default settings are underlined.<br />
• This function corrects the playback level of the selected input source’s audio input.<br />
• Make this setting if there are differences in the input volume levels between the different sources.<br />
–12dB – +12dB (0dB)<br />
Setting details<br />
The analog input level and digital input level can be adjusted independently for input sources for<br />
which “HDMI” or “Digital” is assigned at “Input Assign“ (vpage 65).<br />
Playback Mode<br />
Make settings for repeat playback mode or random playback mode.<br />
Setting items Setting details<br />
Repeat<br />
Make settings for repeat<br />
mode.<br />
NET/USB<br />
Random<br />
Make random mode<br />
settings.<br />
NET/USB<br />
Remote control operation<br />
buttons<br />
All : All files are played repeatedly.<br />
One : A file being played is played repeatedly.<br />
OFF : Repeat playback mode is canceled.<br />
ON : Enable random playback.<br />
OFF : Disable random playback.<br />
Move the cursor<br />
(Up/Down/Left/Right)<br />
Still Picture Default settings are underlined.<br />
Make settings for playing back still picture images.<br />
Setting items Setting details<br />
Slide Show<br />
Make slide show settings.<br />
NET/USB<br />
Interval<br />
Set the playback time per<br />
image.<br />
NET/USB<br />
ON : Display still picture images in a slide show.<br />
OFF : Display only the selected still picture image.<br />
5sec – 60sec<br />
Confirm the setting Return to previous menu
Audio/Video Adjust<br />
SVENSKA<br />
NEDERLANDS<br />
The sound being played in the surround mode can be adjusted to your liking.<br />
The items (parameters) that can be adjusted depend on the signal being input and the currently set<br />
surround mode. For details on the adjustable parameters, see “Surround modes and parameters”<br />
(vpage 100).<br />
Menu operation<br />
1 <strong>Press</strong><br />
2 <strong>Press</strong><br />
3<br />
Use<br />
4 <strong>Press</strong><br />
AMP to set the remote control unit to amplifier operation<br />
mode.<br />
MENU.<br />
The menu is displayed on the TV screen.<br />
ui to select the menu to be set or operated.<br />
ENTER or p to enter the setting.<br />
• To return to the previous item, press RETURN.<br />
• Exiting the Menu, press MENU while the menu is displayed.<br />
The menu display disappears.<br />
Items that can be set with the Audio/Video Adjust procedure<br />
Audio Adjust (vpage 69)<br />
n Surround Parameter (vpage 69)<br />
n Tone (vpage 70)<br />
n Audyssey Settings (vpage 70)<br />
n A-DSX Soundstage (vpage 71)<br />
n Manual EQ (vpage 72)<br />
n M-DAX (vpage 73)<br />
n Audio Delay (vpage 73)<br />
Picture Adjust (vpage 73)<br />
Remote control operation<br />
buttons<br />
Move the cursor<br />
(Up/Down/Left/Right)<br />
ESPAÑOL<br />
Audio Adjust<br />
ITALIANO<br />
FRANÇAIS<br />
DEUTSCH<br />
ENGLISH<br />
n Surround Parameter Default settings are underlined.<br />
Adjust surround sound parameters. It may not be possible to set this item depending on the input<br />
signal.<br />
Setting items Setting details<br />
HT-EQ<br />
Soften the treble range<br />
of movie soundtracks for<br />
better understanding.<br />
DRC<br />
Compress dynamic range<br />
(difference between loud<br />
and soft sounds).<br />
D.Comp<br />
Compress dynamic range<br />
(difference between loud<br />
and soft sounds).<br />
LFE<br />
Adjust the low-frequency<br />
effects level (LFE).<br />
C.Image<br />
Assign center channel<br />
signal to front left and right<br />
channels for wider sound.<br />
Panorama<br />
Assign front L/R signal also<br />
to surround channels for<br />
wider sound.<br />
Dimension<br />
Shift sound image center<br />
to front or rear to adjust<br />
playback balance.<br />
C.Width<br />
Assign center channel<br />
signal to front left and right<br />
channels for wider sound.<br />
ON : “HT-EQ” is used.<br />
OFF : “HT-EQ” is not used.<br />
Auto : Automatic dynamic range compression on/off control according to<br />
source. This can be set in the Dolby TrueHD mode.<br />
Low / Mid / High : These set the compression level.<br />
OFF : Dynamic range compression always off.<br />
Low / Mid / High : These set the compression level.<br />
OFF : Turn dynamic range compression off.<br />
–10dB – 0dB<br />
For proper playback of the different sources, we recommend setting<br />
to the values below.<br />
• Dolby Digital sources : “0dB”<br />
• DTS movie sources : “0dB”<br />
• DTS music sources : “–10dB”<br />
0.0 – 1.0 (0.3)<br />
ON : Set.<br />
OFF : Do not set.<br />
0 – 6 (3)<br />
0 – 7 (3)<br />
Confirm the setting Return to previous menu<br />
69<br />
Simple version Basic version<br />
Advanced version<br />
Information
70<br />
ENGLISH DEUTSCH FRANÇAIS ITALIANO ESPAÑOL NEDERLANDS SVENSKA<br />
Audio/Video Adjust<br />
Setting items Setting details<br />
Height Gain<br />
Control the front height<br />
channel volume.<br />
Default<br />
The “Surround Parameter”<br />
settings are returned to the<br />
default settings.<br />
n Tone<br />
Adjust the tonal quality of the sound.<br />
Low : Reduce the front height channel volume.<br />
Mid : Front height channel sound is output with standard sound volume.<br />
High : Increase the front height channel volume.<br />
NOTE<br />
“Height Gain” is displayed for the following settings.<br />
• When “Amp Assign” (vpage 74) is set to “Normal”.<br />
• When the “Speaker Config.” – “F.Height” setting (vpage 75) is set<br />
other than to “None”.<br />
• When surround mode is “PLgz” or the PLgz decoder is used.<br />
Yes : Reset to the defaults.<br />
No : Do not reset to the defaults.<br />
Setting items Setting details<br />
Tone Control<br />
Set the tone control function<br />
to ON and OFF.<br />
Bass<br />
Adjust low frequency range<br />
(bass).<br />
Treble<br />
Adjust high frequency range<br />
(treble).<br />
ON : Allow tone adjustment (bass, treble).<br />
OFF : Playback without tone adjustment.<br />
“Tone Control” can be set when “Dynamic EQ” (vpage 71) is set to<br />
“OFF”.<br />
NOTE<br />
• “Tone Control” settings are not reflected to ZONE2 and ZONE3.<br />
• The tone cannot be adjusted in the direct mode.<br />
–6dB – +6dB<br />
“Bass” can be set when “Tone Control” is set to “ON”.<br />
–6dB – +6dB<br />
Remote control operation<br />
buttons<br />
“Treble” can be set when “Tone Control” is set to “ON”.<br />
Move the cursor<br />
(Up/Down/Left/Right)<br />
n Audyssey Settings Default settings are underlined.<br />
Set MultEQ ® XT, Dynamic EQ ® and Dynamic Volume ® . These can be selected after Audyssey ® Auto<br />
Setup has been performed. For additional information on Audyssey technology, please see page 105.<br />
NOTE<br />
If you have not performed Auto Setup, or if you change the speaker settings after performing Auto Setup,<br />
you may not be able to select Dynamic EQ/Dynamic Volume, and “Run Audyssey” may be displayed.<br />
In this case, either perform Audyssey Auto Setup over again or perform “Restore” (vpage 11) to return to<br />
the settings after Audyssey Auto Setup was run.<br />
Setting items Setting details<br />
MultEQ XT<br />
Select one equalizer from<br />
three modes. MultEQ XT<br />
corrects both time and<br />
frequency response<br />
problems in the listening<br />
area based on Audyssey<br />
Auto Setup calibration. We<br />
recommend “Audyssey”.<br />
MultEQ XT is the<br />
prerequisite function for<br />
Dynamic EQ and Dynamic<br />
Volume.<br />
Audyssey : Optimize the frequency response of all speakers.<br />
Audyssey Byp.L/R : Optimize frequency response of speakers except<br />
front L and R speakers.<br />
Audyssey Flat : Optimize frequency response of all speakers to flat<br />
response.<br />
Manual : Apply frequency response set with “Manual EQ” (vpage 72).<br />
OFF : Turn “MultEQ XT” equalizer off.<br />
• “Audyssey”, “Audyssey Byp. L/R” and “Audyssey Flat” can be<br />
selected after Audyssey Auto Setup has been performed. “Audyssey”<br />
is automatically selected after performing Audyssey Auto Setup. When<br />
“Audyssey”, “Audyssey Byp. L/R” or “Audyssey Flat” is selected,<br />
illuminates.<br />
• After running Audyssey Auto Setup, if the<br />
Speaker Configuration, Distance, Channel<br />
Level, and Crossover Frequency have changed<br />
without increasing the number of speakers<br />
measured, only illuminates.<br />
• <strong>Press</strong>ing MULTEQ makes this setting.<br />
NOTE<br />
• “MultEQ XT” and “Manual” cannot be selected when “EQ Customize”<br />
is set to “Not Used” (vpage 77).<br />
• When using headphones, “MultEQ XT” is automatically set to “OFF”.<br />
Confirm the setting Return to previous menu
SVENSKA<br />
Setting items Setting details<br />
Dynamic EQ ®<br />
Solve the problem of<br />
deteriorating sound quality<br />
as volume is decreased<br />
by taking into account<br />
human perception and<br />
room acoustics. Works with<br />
MultEQ XT.<br />
Reference Level Offset<br />
Audyssey Dynamic EQ is<br />
referenced to the standard<br />
film mix level. It makes<br />
adjustments to maintain<br />
the reference response<br />
and surround envelopment<br />
when the volume is turned<br />
down from 0 dB. However,<br />
film reference level is not<br />
always used in music or<br />
other non-film content.<br />
Dynamic EQ Reference<br />
Level Offset provides three<br />
offsets from the film level<br />
reference (5 dB, 10 dB, and<br />
15 dB) that can be selected<br />
when the mix level of the<br />
content is not within the<br />
standard.<br />
Remote control operation<br />
buttons<br />
ON : Use Dynamic EQ.<br />
OFF : Do not use Dynamic EQ.<br />
• is displayed when set to “ON”.<br />
• Buttons on the remote control unit or main unit<br />
can be used for operations.<br />
<strong>Press</strong> DYN EQ/VOL.<br />
Each time DYN EQ/VOL is pressed, the setting is<br />
changed as shown below.<br />
Dynamic EQ : ON<br />
Dynamic Volume : Heavy<br />
Dynamic EQ : OFF<br />
Dynamic Volume : OFF<br />
Dynamic EQ : ON<br />
Dynamic Volume : OFF<br />
Dynamic EQ : ON<br />
Dynamic Volume : Medium<br />
NEDERLANDS<br />
Dynamic EQ : ON<br />
Dynamic Volume : Light<br />
0dB (Film Ref) : This is the default setting and should be used when<br />
listening to movies.<br />
5dB : Select this setting for content that has a very wide dynamic range,<br />
such as classical music.<br />
10dB : Select this setting for jazz or other music that has a wider dynamic<br />
range. This setting should also be selected for TV content as that is usually<br />
mixed at 10 dB below film reference.<br />
15dB : Select this setting for pop/rock music or other program material<br />
that is mixed at very high listening levels and has a compressed dynamic<br />
range.<br />
Setting is enabled when “Dynamic EQ” is “ON” (vpage 71).<br />
Move the cursor<br />
(Up/Down/Left/Right)<br />
ESPAÑOL<br />
ITALIANO<br />
FRANÇAIS<br />
DEUTSCH<br />
Setting items Setting details<br />
Dynamic Volume ®<br />
Solve the problem of large<br />
variations in volume level<br />
between TV, movies and<br />
other content (between<br />
quiet passages and<br />
loud passages, etc.) by<br />
automatically adjusting to<br />
the user’s preferred volume<br />
setting.<br />
Heavy : Most adjustment to softest and loudest sounds.<br />
Medium : Medium adjustment to loudest and softest sound.<br />
Light : Least adjustment to loudest and softest sounds.<br />
OFF : Do not use “Dynamic Volume”.<br />
• is displayed when set to “ON”.<br />
• If “Dynamic Volume” is set to “Yes” in Auto<br />
Setup (vpage 10), the setting is automatically<br />
changed to “Evening”.<br />
• Buttons on the remote control unit or main unit<br />
can be used for operations.<br />
<strong>Press</strong> DYN EQ/VOL.<br />
Each time DYN EQ/VOL is pressed, the setting is<br />
changed as shown below.<br />
Dynamic EQ : ON<br />
Dynamic Volume : Heavy<br />
Dynamic EQ : OFF<br />
Dynamic Volume : OFF<br />
Dynamic EQ : ON<br />
Dynamic Volume : OFF<br />
Dynamic EQ : ON<br />
Dynamic Volume : Medium<br />
ENGLISH<br />
Audio/Video Adjust<br />
Dynamic EQ : ON<br />
Dynamic Volume : Light<br />
n A-DSX Soundstage Default settings are underlined.<br />
Adjust Audyssey DSX setting and sound stage parameters.<br />
Setting items Setting details<br />
Audyssey DSX<br />
Provides more immersive<br />
surround sound by adding<br />
the new channels.<br />
ON-Height- : Turn on A-DSX processing for height<br />
expansion.<br />
ON-Wide- : Turn on A-DSX processing for wide<br />
expansion.<br />
OFF : Do not set Audyssey DSX.<br />
• This can also be set by pressing A-DSX.<br />
• The indicator illuminates on the display.<br />
Audyssey DSX : ON -Height-<br />
OFF Audyssey DSX : ON -Wide-<br />
Confirm the setting Return to previous menu<br />
71<br />
Simple version Basic version<br />
Advanced version<br />
Information
72<br />
ENGLISH DEUTSCH FRANÇAIS ITALIANO ESPAÑOL NEDERLANDS SVENSKA<br />
Audio/Video Adjust<br />
Setting items Setting details<br />
Stage Width<br />
–10 – +10 (0)<br />
Adjust sound stage width<br />
when using front wide<br />
speakers.<br />
Stage Height<br />
–10 – +10 (0)<br />
Adjust sound stage height<br />
when using front height<br />
• “Audyssey DSX” can be set when you are using front height speakers<br />
speakers.<br />
or front wide speakers.<br />
• “Audyssey DSX” is only valid when using a center speaker.<br />
• “Audyssey DSX” is only enabled when the listening mode is set other<br />
than STEREO, PLgz Height, MULTI CH STEREO, NEURAL, DOLBY VS,<br />
DIRECT, PURE DIRECT.<br />
• “A-DSX Soundstage” cannot be configured if the HD Audio source being<br />
played includes Front height and Front wide channels. In this case, the<br />
respective channels are played back using the input signals.<br />
About Audyssey Dynamic Surround Expansion (A-DSX)<br />
Audyssey DSX is a scalable surround expansion system that adds<br />
new channels to improve the surround impression. Based on research<br />
in human hearing Audyssey DSX adds a pair of Wide channels in the<br />
front because that information is critical in the rendering of a realistic<br />
soundstage.<br />
Audyssey DSX then adds a pair of Height channels above the main<br />
front channels to reproduce the next most important acoustical and<br />
perceptual cues related to soundstage depth. In addition to creating<br />
these new channels, Audyssey DSX applies Surround Envelopment<br />
Processing to enhance the blend between the front and side/back<br />
surround channels. The result is a much more seamless and enveloping<br />
home theater experience.<br />
Remote control operation<br />
buttons<br />
Move the cursor<br />
(Up/Down/Left/Right)<br />
n Manual EQ Default settings are underlined.<br />
Use the graphic equalizer to adjust the tone of each speaker.<br />
“Manual EQ” can be set when “MultEQ XT” setting (vpage 70) is “Manual”<br />
Setting items Setting details<br />
Adjust CH<br />
Correct the tone of each<br />
speaker.<br />
Base Curve Copy<br />
Copy “Audyssey Flat” curve<br />
from MultEQ ® XT.<br />
Default<br />
The “Manual EQ” settings<br />
are returned to the default<br />
settings.<br />
q Select the speaker tone adjustment method.<br />
All : Adjust the tone of all speakers together.<br />
L/R : Adjust the tone of left and right speakers together.<br />
Each : Adjust the tone of each speaker.<br />
w Select the speaker.<br />
e Select the adjustment frequency band.<br />
63Hz / 125Hz / 250Hz / 500Hz / 1kHz / 2kHz / 4kHz / 8kHz / 16kHz<br />
• Select the speakers you want to adjust when “L/R” or “Each” is<br />
selected.<br />
r Adjust the level.<br />
–20.0dB – +6.0dB (0.0dB)<br />
Yes : Copy.<br />
No : Do not copy.<br />
“Base Curve Copy” is displayed after Audyssey ® Auto Setup has<br />
been performed.<br />
Yes : Reset to the defaults.<br />
No : Do not reset to the defaults.<br />
Confirm the setting Return to previous menu
SVENSKA<br />
NEDERLANDS<br />
n M-DAX Default settings are underlined.<br />
Compressed audio formats such as MP3, WMA (Windows Media Audio) and MPEG-4 AAC reduce the<br />
amount of data by eliminating signal components that are hard for the human ear to hear. The M-DAX<br />
function generates the signals eliminated upon compression, restoring the sound to conditions near<br />
those of the original sound before compression. It also corrects the sense of volume of the bass to<br />
obtain richer sound with compressed audio signals.<br />
Setting details<br />
OFF : Do not use M-DAX.<br />
LOW : Optimized mode for compressed sources with normal highs.<br />
MID : Apply suitable bass and treble boost for all compressed sources.<br />
HIGH : Optimized mode for compressed sources with very weak highs.<br />
• This item can be set with analog signals or when a PCM signal (fs = 44.1/48<br />
kHz) is input.<br />
• This cannot be set when the surround mode is set to “DIRECT” or “PURE<br />
DIRECT”.<br />
• This item default setting is “OFF”.<br />
• If a setting other than “OFF” is selected, the M-DAX indicator lights.<br />
• <strong>Press</strong>ing M-DAX on the remote control unit or the main unit makes this setting.<br />
OFF LOW MID<br />
HIGH<br />
n Audio Delay Default settings are underlined.<br />
While viewing video, manually adjust the time to delay audio output.<br />
0ms – 200ms<br />
Setting details<br />
• This item can be set within the range of 0 to 100 ms when “Auto Lip Sync” is set to “ON” and when<br />
a TV compatible with Auto Lip Sync is connected.<br />
• Store “Audio Delay” for each input source.<br />
• Audio Delay for game mode can be set when “Video Mode” (vpage 66) is set<br />
to “Auto” or “Game”.<br />
• This can also be set by pressing A.DELAY on the remote control unit.<br />
Remote control operation<br />
buttons<br />
Move the cursor<br />
(Up/Down/Left/Right)<br />
ESPAÑOL<br />
ITALIANO<br />
FRANÇAIS<br />
DEUTSCH<br />
ENGLISH<br />
Audio/Video Adjust<br />
Picture Adjust Default settings are underlined.<br />
• This item can be set when the input source is BD DVD VCR SAT GAME AUX1 NET/USB TV .<br />
• With input sources other than the ones above, this item can be set when “Video Select” is selected. In<br />
this case, the original input source settings are called out.<br />
• Can be set when the “Video Convert” setting (vpage 66) is “ON”.<br />
• “GAME” or “TV” can be set when “HDMI” (vpage 65) or “Component” (vpage 66) has been assigned.<br />
Setting items Setting details<br />
Contrast<br />
–6 – +6 (0)<br />
Adjust picture contrast.<br />
Brightness<br />
0 – +12<br />
Adjust picture brightness.<br />
Chroma Level<br />
–6 – +6 (0)<br />
Adjust picture chroma level<br />
(saturation).<br />
Hue<br />
–6 – +6 (0)<br />
Adjust color hue.<br />
DNR<br />
OFF / Low / Mid / High<br />
Reduce overall picture<br />
noise.<br />
Enhancer<br />
0 – +12<br />
Emphasize picture contours.<br />
• “DNR” and “Enhancer” are each effective with HDMI output.<br />
• The value set at “Picture Adjust” is stored in the memory individually for each input source.<br />
Confirm the setting Return to previous menu<br />
73<br />
Simple version Basic version<br />
Advanced version<br />
Information
SVENSKA<br />
Setting items Setting details<br />
Speaker Config.<br />
(Continued)<br />
Remote control operation<br />
buttons<br />
NEDERLANDS<br />
Surround : Set the presence and size of the surround speakers.<br />
• Large : Use a large speaker that can adequately play back low<br />
frequencies.<br />
• Small : Use a small speaker that has inadequate playback capacity for<br />
low frequencies.<br />
• None : Select when the surround speakers are not connected.<br />
• When “Surround” is set to “Large”, “S.Back”, “F.Height” and “F.Wide”<br />
can be set to “Large”.<br />
• When “Surround” is set to “None”, “S.Back”, “F.Height” and “F.Wide”<br />
can automatically set to “None”.<br />
S.Back : Set the presence, size and number of surround back speakers.<br />
• Large : Use a large speaker that can adequately play back low<br />
frequencies.<br />
• Small : Use a small speaker that has inadequate playback capacity for<br />
low frequencies.<br />
• None : Select when the surround back speakers are not connected.<br />
• 2spkrs : Use two surround back speakers.<br />
• 1spkr : Use only one surround back speaker. When you select this<br />
setting, connect the surround back speaker to the left (L) channel.<br />
Even when the “S.Back“ setting is other than “None”, sound may<br />
not be emitted from the surround back speaker, depending on the<br />
playback source.<br />
NOTE<br />
When “Amp Assign” setting (vpage 74) is other than “Normal”, you<br />
cannot make the “S.Back” setting.<br />
F.Height : Set the presence and size of the front height speakers.<br />
• Large : Use a large speaker that can adequately play back low<br />
frequencies.<br />
• Small : Use a small speaker that has inadequate playback capacity for<br />
low frequencies.<br />
• None : Select when the front height speakers are not connected.<br />
NOTE<br />
When “Amp Assign” setting (vpage 74) is other than “Normal”, you<br />
cannot make the “F.Height” setting.<br />
Move the cursor<br />
(Up/Down/Left/Right)<br />
ESPAÑOL<br />
ITALIANO<br />
FRANÇAIS<br />
DEUTSCH<br />
Setting items Setting details<br />
Speaker Config.<br />
(Continued)<br />
Bass Setting<br />
Set subwoofer and LFE<br />
signal range playback.<br />
Distance<br />
Set distance from listening<br />
position to speakers.<br />
Measure beforehand the<br />
distance from the listening<br />
position to each speaker.<br />
Confirm the setting Return to previous menu<br />
ENGLISH<br />
Manual Setup<br />
F.Wide : Set the presence and size of the front wide speakers.<br />
• Large : Use a large speaker that can adequately play back low<br />
frequencies.<br />
• Small : Use a small speaker that has inadequate playback capacity for<br />
low frequencies.<br />
• None : Select when the front wide speakers are not connected.<br />
NOTE<br />
When “Amp Assign” setting (vpage 74) is other than “Normal”, you<br />
cannot make the “F.Wide” setting.<br />
Subwoofer Mode : Select low range signals to be reproduced by<br />
subwoofer.<br />
• LFE : The low range signal of the channel set to “Small” speaker size is<br />
added to the LFE signal output from the subwoofer.<br />
• LFE+Main : The low range signal of all channels is added to the LFE<br />
signal output from the subwoofer.<br />
• “Subwoofer Mode” can be set when “Speaker Config.” – “Subwoofer”<br />
(vpage 74) is set to “Yes”.<br />
• Play music or a movie source and select the mode offering the strongest<br />
bass.<br />
• Select “LFE+Main” if you want the bass signals to always be produced<br />
from the subwoofer.<br />
NOTE<br />
If “Front” and “Center” for “Speaker Config.” are set to “Large”, and<br />
“Subwoofer Mode” is set to “LFE”, no sound may be output from the<br />
subwoofers, depending on the input signal or selected surround mode.<br />
LPF for LFE : Set LFE signal playback range.<br />
• 80Hz / 90Hz / 100Hz / 110Hz / 120Hz / 150Hz / 200Hz / 250Hz<br />
Unit : Set the unit of distance.<br />
• Meters / Feet<br />
Step : Set the minimum variable width of the distance.<br />
• 0.1m / 0.01m<br />
• 1ft / 0.1ft<br />
Front L / Front R / Center / Subwoofer / Surround L / Surround R /<br />
S.Back Lz / S.Back Rz / F.Height L / F.Height R / F.Wide L / F.Wide R<br />
: Select the speaker.<br />
z When the “Speaker Config.” – “S.Back” setting (vpage 75) is set to<br />
“1spkr”, “S.Back” is displayed.<br />
• 0.00m – 18.00m / 0.0ft – 60.0ft : Set the distance.<br />
75<br />
Simple version Basic version<br />
Advanced version<br />
Information
76<br />
ENGLISH DEUTSCH FRANÇAIS ITALIANO ESPAÑOL NEDERLANDS SVENSKA<br />
Manual Setup<br />
Distance<br />
(Continued)<br />
Setting items Setting details<br />
Channel Level<br />
Set the volume of the test<br />
tone to be the same when it<br />
is output from each speaker.<br />
Remote control operation<br />
buttons<br />
• The speakers that can be selected differ depending on the “Amp Assign”<br />
(vpage 74) and “Speaker Config.” (vpage 74) settings.<br />
• Default settings :<br />
Front L / Front R / Center / Subwoofer / F.Height L / F.Height R / F.Wide L /<br />
F.Wide R : 3.6 m (12.0 ft)<br />
Surround L / Surround R / S.Back L / S.Back R : 3.0 m (10.0 ft)<br />
• Set the difference in the distance between the speakers to less than<br />
6.0 m (20 ft).<br />
NOTE<br />
Speakers set to “None” in “Speaker Config.” (vpage 74) are not displayed.<br />
Default : The “Distance” settings are returned to the default settings.<br />
• Yes : Reset to the defaults.<br />
• No : Do not reset to the defaults.<br />
When you select “Default” and press ENTER, the “Default Setting?”<br />
prompt is displayed. Select either “Yes” or “No”, and press ENTER.<br />
Test Tone Start : Output test tone.<br />
• Front L / F.Height L / Center / F.Height R / Front R / F.Wide R /<br />
Surround R / S.Back R z / S.Back L z / Surround L / F.Wide L /<br />
Subwoofer : Select the speaker.<br />
z When the “Speaker Config.” – “S.Back” setting (vpage 75) is set to<br />
“1spkr”, “S.Back” is displayed.<br />
• –12.0dB – +12.0dB (0.0dB) : Adjust the volume.<br />
• When o is pressed while the subwoofer volume is set to “–12 dB”, the<br />
“Subwoofer” setting switches to “OFF”.<br />
• When “Channel Level” is adjusted, the adjusted values are set for all the<br />
surround modes. To adjust the channel level separately for the different<br />
surround modes, use the operation see page 53.<br />
• When you press TEST TONE on the remote control unit, you can enter<br />
this setting item immediately.<br />
NOTE<br />
• Speakers set to “None” in the “Speaker Config.” (vpage 74) settings<br />
are not displayed.<br />
• When a headphones jack is inserted in the PHONES jack of this unit, the<br />
“Channel Level” is not displayed.<br />
Default : The “Channel Level” settings are returned to the default settings.<br />
• Yes : Reset to the defaults.<br />
• No : Do not reset to the defaults.<br />
When you select “Default” and press ENTER, the “Default Setting?”<br />
prompt is displayed. Select either “Yes” or “No”, and press ENTER.<br />
Move the cursor<br />
(Up/Down/Left/Right)<br />
Setting items Setting details<br />
Crossover Frequency<br />
Set the maximum frequency<br />
of the bass signal output<br />
from each channel to<br />
the subwoofer. Set the<br />
Crossover Frequency to<br />
suit the bass reproduction<br />
capability of the speaker<br />
being used.<br />
Crossover : Set the crossover frequency.<br />
• 40Hz / 60Hz / 80Hz / 90Hz / 100Hz / 110Hz / 120Hz / 150Hz / 200Hz /<br />
250Hz<br />
Advanced : Specify crossover frequency for each speaker.<br />
• Front / Center / Surround / S.Back / F.Height / F.Wide : Select the<br />
speaker.<br />
• 40Hz / 60Hz / 80Hz / 90Hz / 100Hz / 110Hz / 120Hz / 150Hz / 200Hz /<br />
250Hz : Set the crossover frequency.<br />
• “Crossover Frequency” can be set when the “Bass Setting” –<br />
“Subwoofer Mode” (vpage 75) setting is “LFE+Main”, or when you<br />
have a speaker that is set to “Small”.<br />
• Always set the crossover frequency to “80Hz”. When using small<br />
speakers, however, we recommend setting the crossover frequency to<br />
a higher frequency.<br />
• For speakers set to “Small”, sound below the crossover frequency<br />
is cut from the sound output. The cut bass sound is output from the<br />
subwoofer or front speakers.<br />
• The speakers that can be set when “Advanced” is selected differ<br />
depending on to the “Subwoofer Mode” setting (vpage 75).<br />
• When “LFE” is selected, speakers set to “Small” at “Speaker Config.”<br />
can be set. If the speakers are set to “Large”, “Full Band” is displayed<br />
and the setting cannot be made.<br />
• If set to “LFE+Main”, this setting can be made regardless of the<br />
speaker size.<br />
Confirm the setting Return to previous menu
SVENSKA<br />
NEDERLANDS<br />
HDMI Setup Default settings are underlined.<br />
Make settings for HDMI video/audio output.<br />
Setting items Setting details<br />
RGB Range<br />
Set the video range of RGB<br />
output from the HDMI<br />
connector.<br />
Auto Lip Sync<br />
Make automatic<br />
compensation for timing<br />
shift in audio and video<br />
output.<br />
HDMI Audio Out<br />
Select HDMI audio output<br />
device.<br />
Monitor Out<br />
Make settings for HDMI<br />
monitor output.<br />
HDMI Control<br />
You can link operations with<br />
devices connected to HDMI<br />
and compatible with HDMI<br />
Control.<br />
Remote control operation<br />
buttons<br />
Normal : Output with RGB video range (16 (black) to 235 (white)).<br />
Enhanced : Output with RGB video range (0 (black) to 255 (white)).<br />
This setting is active when using a TV equipped with a DVI terminal.<br />
ON : Compensated.<br />
OFF : Not compensated.<br />
AMP : Play back through speakers connected to the receiver.<br />
TV : Play back through TV connected to the receiver.<br />
When the HDMI control function is activated, priority is given to the TV<br />
audio setting (vpage 52 “HDMI control function”).<br />
Monitor 1 : A TV connected to the HDMI OUT 1 terminal is always used.<br />
Monitor 2 : A TV connected to the HDMI OUT 2 terminal is always used.<br />
With “Resolution” (vpage 67) not set to “Auto”, check whether<br />
the TV you are using is compatible with the resolution under “HDMI<br />
Information” – “HDMI Monitor 1 Information” and “HDMI Monitor 2<br />
Information” (vpage 84).<br />
ON : Use HDMI control function.<br />
OFF : Do not use HDMI control function.<br />
• When a device that is not compatible with the HDMI control function is<br />
connected, set “HDMI Control” to “OFF”.<br />
• Please consult the operating instructions for each connected component<br />
to check the settings.<br />
• Refer to “HDMI control function” (vpage 52) for more information about<br />
the HDMI control function.<br />
NOTE<br />
• When “HDMI Control” is set to “ON”, it consumes more standby<br />
power. If you are not using this unit for an extended period, it is<br />
recommended that you unplug the power cord from the power outlet.<br />
• “HDMI Control” does not work when the power to the equipment is off.<br />
Either turn power on or set to standby.<br />
• The HDMI control function controls operations of a TV that is compatible<br />
with the HDMI control function. Make sure that the TV and HDMI are<br />
connected when you perform HDMI control.<br />
• If the “HDMI Control” settings have been changed, always reset the<br />
power to connected devices after the change.<br />
Move the cursor<br />
(Up/Down/Left/Right)<br />
ESPAÑOL<br />
ITALIANO<br />
FRANÇAIS<br />
DEUTSCH<br />
Setting items Setting details<br />
Standby Source<br />
Sets the HDMI input source<br />
to put into standby when<br />
the power is on.<br />
Power Off Control<br />
Links the power standby<br />
of this unit to external<br />
equipment.<br />
Confirm the setting Return to previous menu<br />
ENGLISH<br />
Manual Setup<br />
Last : This item is set at the last-used input source.<br />
HDMI1 / HDMI2 / HDMI3 / HDMI4 / HDMI5 / HDMI6 : Put the respective<br />
input source into standby.<br />
“Standby Source” can be set when “HDMI Control” is set to “ON”.<br />
All : If power to a connected TV is turned off independently of the input<br />
source, power to this unit is automatically set to standby.<br />
Video : If power to a connected TV is turned off when the input source<br />
is BD / DVD / VCR / SAT / GAME / AUX1 / TV, power to this unit is<br />
automatically set to standby.<br />
OFF : This unit does not link with power to a TV.<br />
“Power Off Control” can be set when “HDMI Control” is set to “ON”.<br />
Audio Setup Default settings are underlined.<br />
Make settings for audio playback.<br />
Setting items Setting details<br />
7.1ch IN SW Level<br />
Setup playback method for<br />
analog signals inputted from<br />
7.1CH INPUT connectors.<br />
EQ Customize<br />
Set so that unused equalizer<br />
settings are not displayed<br />
when MULTEQ is pressed.<br />
Subwoofer Level : Set playback level of subwoofer signal input from the<br />
7.1CH INPUT connector.<br />
• +10dB : This is the recommended level.<br />
• +15dB / +5dB / 0dB : Select the level according to the player being used.<br />
Audyssey Byp. L/R : Set when not using “Audyssey Byp. L/R” equalizer.<br />
• Used : Use.<br />
• Not Used : Do not use.<br />
Set so that “Audyssey Byp. L/R” settings can be made when<br />
Audyssey ® Auto Setup is performed.<br />
Audyssey Flat : Set when not using “Audyssey Flat” equalizer.<br />
• Used : Use.<br />
• Not Used : Do not use.<br />
Set so that “Audyssey Flat” settings can be made when Audyssey<br />
Auto Setup is performed.<br />
Manual : Set when not using the “Manual” equalizer.<br />
• Used : Use.<br />
• Not Used : Do not use.<br />
77<br />
Simple version Basic version<br />
Advanced version<br />
Information
78<br />
ENGLISH DEUTSCH FRANÇAIS ITALIANO ESPAÑOL NEDERLANDS SVENSKA<br />
Manual Setup<br />
Network Setup Default settings are underlined.<br />
Make network settings.<br />
Setting items Setting details<br />
Network Connecting<br />
Make settings for wired<br />
LAN.<br />
Remote control operation<br />
buttons<br />
1. Connect the LAN cable (vpage 24 “Connecting to a home network<br />
(LAN)”).<br />
2. Turn on this unit (vpage 7 “Turn on power”).<br />
This unit performs automatic network setup due to the DHCP function.<br />
When connecting to a network that has no DHCP function, perform the<br />
setting in step 3.<br />
3. Set the IP address at the “Network Connecting”.<br />
MANUAL SETUP NETWORK SETUP<br />
NETWORK CONNECTING<br />
DHCP OFF<br />
IP Address 192.168.100.19<br />
Exit<br />
Detail<br />
ENTER Enter<br />
Set IP address and proxy manually<br />
RETURN Return<br />
MANUAL SETUP NETWORK SETUP<br />
NETWORK CONNECTING<br />
DHCP OFF<br />
IP Address [192.168.100.019]<br />
Subnet Mask [255.255.255.000]<br />
Default Gateway [000.000.000.000]<br />
Primary DNS [000.000.000.000]<br />
Secondary DNS [000.000.000.000]<br />
Proxy<br />
Exit<br />
q r e<br />
Set IP address manually<br />
w<br />
Move the cursor<br />
(Up/Down/Left/Right)<br />
RETURN Return<br />
q On the menu, select “Network Connecting” – “Detail” and press<br />
ENTER.<br />
w Use o p to set “DHCP” to “OFF”, then press i.<br />
The DHCP function is disabled.<br />
e Use uip to input the address and press ENTER.<br />
• IP Address : Set the IP address within the ranges shown below.<br />
The Network Audio function cannot be used if other IP addresses<br />
are set.<br />
CLASS A: 10.0.0.0 – 10.255.255.255<br />
CLASS B: 172.16.0.0 – 172.31.255.255<br />
CLASS C: 192.168.0.0 – 192.168.255.255<br />
• Subnet Mask : When connecting an xDSL modem or terminal<br />
adapter directly to this unit, input the subnet mask indicated in<br />
the documentation supplied by your provider. Normally input<br />
255.255.255.0.<br />
• Default Gateway : When connected to a gateway (router), input its<br />
IP address.<br />
• Primary DNS, Secondary DNS : If there is only one DNS address<br />
indicated in the documentation supplied by your provider, input it at<br />
“Primary DNS”. If there are two or more DNS addresses, input the<br />
first one at “Secondary DNS”.<br />
Setting items Setting details<br />
Network Connecting<br />
(Continued)<br />
r Use i to select “Exit” and press ENTER.<br />
Setup is complete.<br />
• When connecting to the network via a Proxy server, select “Proxy” and<br />
press ENTER (vpage 78 “Proxy settings”).<br />
• If you are using a broadband router (DHCP function), there is no need<br />
to make the settings at “IP Address” and “Proxy”, since the DHCP<br />
function is set to “ON” in this unit’s default settings.<br />
• If this unit is being used connected to a network without the DHCP<br />
function, the network settings must be made. In this case, some<br />
knowledge of networks is required. For details, consult a network<br />
administrator.<br />
• If you cannot connect to the Internet, recheck the connections and<br />
settings (vpage 24).<br />
• If you do not understand about Internet connection, contact your ISP<br />
(Internet Service Provider) or the store from which you purchased your<br />
computer.<br />
• When you want to cancel the setting during IP address input, press<br />
RETURN.<br />
Proxy settings : Make this setting when connecting to the Internet via a<br />
proxy server.<br />
MANUAL SETUP NETWORK SETUP<br />
NETWORK CONNECTING<br />
DHCP ON<br />
IP Address 192.168.100.19<br />
Exit<br />
Detail<br />
ENTER Enter<br />
Set IP address and proxy manually<br />
RETURN Return<br />
MANUAL SETUP NETWORK SETUP<br />
NETWORK CONNECTING<br />
Proxy server is used<br />
MANUAL SETUP NETWORK SETUP<br />
NETWORK CONNECTING<br />
ENTER Enter<br />
Set if using proxy server<br />
Proxy ON<br />
Proxy r Address<br />
Address [000.000.000.000]<br />
Port [00000]<br />
Confirm the setting Return to previous menu<br />
Exit<br />
q<br />
y<br />
DHCP ON<br />
IP Address [192.168.100.019]<br />
Subnet Mask [255.255.255.000]<br />
Default gateway [000.000.000.000]<br />
Primary DNS [000.000.000.000]<br />
Secondary DNS [000.000.000.000]<br />
Proxy<br />
w<br />
Exit<br />
e<br />
u<br />
RETURN Return<br />
t<br />
RETURN Return<br />
q On the menu, select “Network Connecting” – “Detail” and press<br />
ENTER.<br />
w Use ui to set “Proxy” and press ENTER.<br />
e Use o p to set “Proxy” to “ON” and press i.<br />
The proxy server is enabled.
SVENSKA<br />
Setting items Setting details<br />
Network Connecting<br />
(Continued)<br />
Other<br />
Network function on/off<br />
setting during standby, and<br />
PC language setting.<br />
Remote control operation<br />
buttons<br />
NEDERLANDS<br />
r Use o p to select the proxy server input method, and then press i.<br />
Address : Select when inputting by address.<br />
Name : Select when inputting by domain name.<br />
t Use uio p to input the proxy server address or domain name and<br />
press ENTER.<br />
When “Address” is selected in step r : Input the address<br />
When“Name” is selected in step r : Input the domain name<br />
• For character input, see page 62.<br />
y Use uio p to input the proxy server port number and press ENTER.<br />
u Use i to select “Exit” and press ENTER.<br />
Setup is complete.<br />
Network Standby : Set the network function on/off during standby.<br />
• ON : Network is on during standby. Main unit operable with a network<br />
compatible controller.<br />
• OFF : Suspend network function during standby.<br />
Set to “ON” when using the web control function.<br />
PC Language : Select computer environment language.<br />
• ara / chi (smpl) / chi (trad) / cze / dan / dut / eng / fin / fre / ger / gre /<br />
heb / hun / ita / jpn / kor / nor / pol / por / por(BR) / rus / spa / swe / tur<br />
Friendly Name Edit : The Friendly Name is the name of this unit displayed<br />
on the network. Up to 63 characters can be input. The default Friendly<br />
Name on first use is “marantz:[SR7005]”.<br />
• For character input, see page 62.<br />
Default : Restores Friendly Name, which you had changed, to the default<br />
setting.<br />
• Yes : Reset to the defaults.<br />
• No : Do not reset to the defaults.<br />
When you select “Default” and press ENTER, the “Default Setting?”<br />
prompt is displayed. Select either “Yes” or “No”, and press ENTER.<br />
Move the cursor<br />
(Up/Down/Left/Right)<br />
ESPAÑOL<br />
Other<br />
(Continued)<br />
ITALIANO<br />
FRANÇAIS<br />
DEUTSCH<br />
Setting items Setting details<br />
Napster Account<br />
Set or change Username<br />
and Password (vpage 38<br />
“Listening to Napster”).<br />
Last.fm Account<br />
Set or change Username<br />
and Password (vpage 39<br />
“How to listen to Last.fm on<br />
this unit”).<br />
Last.fm Display<br />
Set whether or not to<br />
display Last.fm item on the<br />
menu.<br />
Network Information<br />
Display network information.<br />
Confirm the setting Return to previous menu<br />
ENGLISH<br />
Manual Setup<br />
Update Notification : Displays a notification message on this unit’s menu<br />
screen when the latest firmware is released with “Firmware Update”. The<br />
notification message is displayed for about 20 seconds when the power<br />
is turned on. Connect to broadband Internet (vpage 24) when using this<br />
function.<br />
• ON : Display update message.<br />
• OFF : Do not display update message.<br />
• When you press ENTER during display of the notification message,<br />
the “Check for Update” screen is displayed. (Refer to page 83 for more<br />
information on “Firmware Update”)<br />
• <strong>Press</strong> RETURN to erase the notification message.<br />
Upgrade Notification : Display a notification message on this unit’s<br />
menu screen when downloadable firmware is released with “Add New<br />
Feature”. The notification message is displayed for about 20 seconds<br />
when the power is turned on. Connect to broadband Internet (vpage 24)<br />
when using this function.<br />
• ON : Display upgrade message.<br />
• OFF : Do not display upgrade message.<br />
• When you press ENTER during display of the notification message,<br />
the “Add New Feature” screen is displayed. (Refer to page 83 for more<br />
information on “Add New Feature”)<br />
• <strong>Press</strong> RETURN to erase the notification message.<br />
Username / Password<br />
• For character input, see page 62.<br />
Username / Password / Clear<br />
• For character input, see page 62.<br />
Display : Display Last.fm item on the menu.<br />
Hidden : Do not display Last.fm item on the menu.<br />
Friendly Name / DHCP= ON/OFF / IP Address / MAC Address<br />
79<br />
Simple version Basic version<br />
Advanced version<br />
Information
80<br />
ENGLISH DEUTSCH FRANÇAIS ITALIANO ESPAÑOL NEDERLANDS SVENSKA<br />
Manual Setup<br />
Zone Setup Default settings are underlined.<br />
Set the audio to play back with multi-zone (ZONE2, ZONE3).<br />
Setting items Setting details<br />
Bass<br />
–10dB – +10dB (0dB)<br />
Adjust low frequency range<br />
(bass).<br />
Treble<br />
–10dB – +10dB (0dB)<br />
Adjust high frequency range<br />
(treble).<br />
HPF<br />
Make settings for cutting<br />
the low range to reduce<br />
distortion in the bass.<br />
Level Lch<br />
Adjust the left channel<br />
output level.<br />
Level Rch<br />
Adjust the right channel<br />
output level.<br />
Channel<br />
Set the signal output from<br />
multi-zone.<br />
Volume Level<br />
Set the volume output level.<br />
Volume Limit<br />
Make a setting for<br />
maximum volume.<br />
Remote control operation<br />
buttons<br />
ON : The low range is attenuated.<br />
OFF : The low range is not attenuated.<br />
–12dB – +12dB (0dB)<br />
The “Level Lch” can be set when “Channel“ (vpage 80) is set to<br />
“Stereo“.<br />
–12dB – +12dB (0dB)<br />
The “Level Rch” can be set when “Channel“ (vpage 80) is set to<br />
“Stereo“.<br />
Stereo : Select stereo output.<br />
Mono : Select mono output.<br />
Variable : Volume adjustment is enabled by main unit and remote control<br />
unit.<br />
–40dB (41) : Fix volume at –40 dB. Set when adjusting volume by external<br />
amplifier.<br />
0dB (81) : Fix volume at 0 dB. Set when adjusting volume by external<br />
amplifier.<br />
When “Amp Assign” (vpage 74) is set to “ZONE2” or “ZONE3”, the<br />
“Volume Level” setting is automatically set to “Variable”.<br />
OFF : Do not set a maximum volume.<br />
–20dB (61) / –10dB (71) / 0dB (81)<br />
• This can be set when the multi-zone “Volume Level” setting (vpage 80)<br />
is “Variable”.<br />
• This is displayed from 0 to 99 when “Volume Display” (vpage 81) is set<br />
to “Absolute”.<br />
Move the cursor<br />
(Up/Down/Left/Right)<br />
Setting items Setting details<br />
Power On Level<br />
Define the volume setting<br />
that is active when the<br />
power is turned on.<br />
Mute Level<br />
Set the amount of<br />
attenuation when muting<br />
is on.<br />
Last : Use the memorized setting from the last session.<br />
– – – (0) : Always mute when power is turned on.<br />
–80dB – 18dB (1 – 99) : The volume is adjusted to the set level.<br />
• This can be set when the multi-zone “Volume Level” setting (vpage 80)<br />
is “Variable”.<br />
• This is displayed from 0 to 99 when “Volume Display” (vpage 81) is set<br />
to “Absolute”.<br />
Full : The sound is muted entirely.<br />
–40dB : The sound is attenuated by 40 dB down.<br />
–20dB : The sound is attenuated by 20 dB down.<br />
Confirm the setting Return to previous menu
SVENSKA<br />
NEDERLANDS<br />
Option Setup Default settings are underlined.<br />
Make various other settings.<br />
Setting items Setting details<br />
Volume Control<br />
Set the MAIN ZONE (room<br />
where the unit is located)<br />
volume setting.<br />
Source Delete<br />
Remove from the display<br />
input sources that are not<br />
used.<br />
GUI<br />
Make the settings related to<br />
displays on the TV screen.<br />
Remote control operation<br />
buttons<br />
Volume Display : Set how volume is displayed.<br />
• Relative : Display ---dB (Min), in the range –80.5 dB – 18 dB.<br />
• Absolute : Display in the range 0 (Min) – 99.<br />
• The “Volume Display” setting is applied also to the “Volume Limit” and<br />
“Power On Level” display method.<br />
• The “Volume Display” setting applies to all zones.<br />
Volume Limit : Make a setting for maximum volume.<br />
• OFF : Do not set a maximum volume.<br />
• –20dB (61) / –10dB (71) / 0dB (81)<br />
Power On Level : Define the volume setting that is active when the<br />
power is turned on.<br />
• Last : Use the memorized setting from the last session.<br />
• – – – (0) : Always use the muting on condition when power is turned on.<br />
• –80dB – 18dB (1 – 99) : The volume is adjusted to the set level.<br />
Mute Level : Set the amount of attenuation when muting is on.<br />
• Full : The sound is muted entirely.<br />
• –40dB : The sound is attenuated by 40 dB down.<br />
• –20dB : The sound is attenuated by 20 dB down.<br />
BD / DVD / VCR / SAT / GAME / AUX1 / NET/USB /<br />
TV / CD / CDR / PHONO / TUNER / M-XPort :<br />
Select input source that is not used.<br />
• ON : Use this source.<br />
• Delete : Do not use this source.<br />
NOTE<br />
• Input sources being used in the various zones<br />
cannot be deleted.<br />
• Input sources set to “Delete” cannot be selected<br />
using SOURCE SEL.<br />
Screensaver : Make screensaver settings.<br />
• ON : The screensaver is activated during menu display, NET/USB, iPod or<br />
TUNER screen display if no operation is performed for an approximately<br />
3-minute continuous period. When you press uio p, the screensaver<br />
is cancelled and the screen before that screen saver started is displayed.<br />
• OFF : Screensaver is not activated.<br />
Move the cursor<br />
(Up/Down/Left/Right)<br />
ESPAÑOL<br />
GUI<br />
(Continued)<br />
ITALIANO<br />
FRANÇAIS<br />
DEUTSCH<br />
Setting items Setting details<br />
Confirm the setting Return to previous menu<br />
ENGLISH<br />
Manual Setup<br />
Wall Paper : Set wallpaper to display in the background when playback<br />
is stopped, etc.<br />
• Picture : Set the background to a picture (<strong>Marantz</strong> logo).<br />
• Black : Set the background to black.<br />
Format : Set the video signal format to be output for the TV you are using.<br />
• NTSC : Select NTSC output.<br />
• PAL : Select PAL output.<br />
“Format” can also be set by the<br />
following procedure. However, the menu<br />
screen is not displayed.<br />
1. <strong>Press</strong> and hold the main unit’s A-DSX<br />
and RETURN for at least 3 seconds.<br />
“Video Format” appears on the<br />
display.<br />
2. <strong>Press</strong> o p and set the video signal<br />
format.<br />
3. <strong>Press</strong> the main unit’s ENTER, MENU<br />
or RETURN to complete the setting.<br />
NOTE<br />
When a format other than the video format of the connected TV is set, the<br />
picture will not be displayed properly.<br />
Text : Display the details of operation when switching surround mode,<br />
input mode, etc.<br />
• ON : Turn display on.<br />
• OFF : Turn display off.<br />
Master Volume : Display the master volume during adjustment.<br />
• Bottom : Display at the bottom.<br />
• Top : Display at the top.<br />
• OFF : Turn display off.<br />
When the master volume display is hard to see when superimposed<br />
on movie subtitles, set to “Top”.<br />
NET/USB : Set the NET/USB screen display time when the input source<br />
is “NET/USB”.<br />
• Always : Show display continuously.<br />
• 30sec : Show display for 30 seconds after operation.<br />
• 10sec : Show display for 10 seconds after operation.<br />
• OFF : Turn display off.<br />
81<br />
Simple version Basic version<br />
Advanced version<br />
Information
82<br />
ENGLISH DEUTSCH FRANÇAIS ITALIANO ESPAÑOL NEDERLANDS SVENSKA<br />
Manual Setup<br />
GUI<br />
(Continued)<br />
Setting items Setting details<br />
Component 2 Output<br />
Set whether to use the<br />
component 2 output<br />
terminal as MAIN ZONE or<br />
ZONE2.<br />
Zone Rename<br />
Change the display title of<br />
each zone to one you prefer.<br />
Trigger Out<br />
Select the condition for<br />
activating Trigger Out 1/2 for<br />
the input source, surround<br />
mode, etc.<br />
See “DC OUT (TRIGGER<br />
OUT) jacks” (vpage 51) for<br />
more information on trigger<br />
out.<br />
Remote control operation<br />
buttons<br />
TUNER : Set the tuner screen display time when the input source is<br />
“TUNER”.<br />
• Always : Show display continuously.<br />
• 30sec : Show display for 30 seconds after operation.<br />
• 10sec : Show display for 10 seconds after operation.<br />
• OFF : Turn display off.<br />
iPod : Set the iPod screen display time when the input source is “NET/<br />
USB”.<br />
• Always : Show display continuously.<br />
• 30sec : Show display for 30 seconds after operation.<br />
• 10sec : Show display for 10 seconds after operation.<br />
• OFF : Turn display off.<br />
MAIN ZONE : Use the component 2 output terminal as a monitor output<br />
for MAIN ZONE.<br />
ZONE2 : Use the component 2 output terminal as a monitor output for<br />
ZONE2.<br />
• Up to 10 characters can be input.<br />
• For character input, see page 62.<br />
Trigger Out 1 / Trigger Out 2<br />
n When setting for zone (MAIN ZONE / ZONE2 / ZONE3)<br />
Trigger out is activated through linkage to the power of the zone set<br />
to “ON”.<br />
n When setting for input source<br />
Activate trigger out when the input source set to “ON” is selected.<br />
Active for the zone set to “ON” with “When Setting for Zone”.<br />
n When setting for HDMI monitor<br />
Activate trigger out when the HDMI monitor set to “ON” is selected.<br />
Active when the “MAIN ZONE” set to “ON” with “When Setting<br />
for Zone” is selected, and when the input source set to “ON” with<br />
“When Setting for Input Source” is selected.<br />
• ON : Activate trigger on this mode.<br />
• – – – : Do not activate trigger on this mode.<br />
Default : The “Trigger Out” settings are returned to the default settings.<br />
• Yes : Reset to the defaults.<br />
• No : Do not reset to the defaults.<br />
Move the cursor<br />
(Up/Down/Left/Right)<br />
Setting items Setting details<br />
Display<br />
Set the display on/off<br />
setting.<br />
Setup Lock<br />
Protect settings from<br />
inadvertent change.<br />
Maintenance Mode<br />
Use when receiving<br />
maintenance from a <strong>Marantz</strong><br />
service engineer or custom<br />
installer.<br />
ON : Display is always on.<br />
Display Auto OFF : Display is off except<br />
when showing the status display.<br />
Display OFF : Display is always off.<br />
This can also be set by pressing<br />
DISPLAY.<br />
Each time DISPLAY is pressed, the<br />
setting is changed as shown below.<br />
ON Display Auto Off<br />
Display OFF<br />
ON : Turn protection on.<br />
OFF : Turn protection off.<br />
When canceling the setting, set “Setup Lock” to “OFF”.<br />
NOTE<br />
When “Setup Lock” is set to “ON”, the settings listed below can no<br />
longer be changed. Also, “SETUP LOCKED!” is displayed if you attempt<br />
to operate related settings.<br />
· Menu operations · Channel Level<br />
· M-DAX · MultEQ ® XT<br />
· Dynamic Volume ® · Dynamic EQ ®<br />
NOTE<br />
Only use this function if so instructed by a <strong>Marantz</strong> serviceperson or<br />
installer.<br />
Confirm the setting Return to previous menu
SVENSKA<br />
Setting items Setting details<br />
Firmware Update<br />
Update the firmware of the<br />
receiver.<br />
Add New Feature<br />
Display new features that<br />
can be downloaded to this<br />
unit and perform an update.<br />
Remote control operation<br />
buttons<br />
NEDERLANDS<br />
Check for Update : Check for firmware updates. You can also check<br />
approximately how long it will take to complete an update.<br />
Start : Execute the update process.<br />
When updating starts, the power indicator becomes red and the menu<br />
screen is shut down. The amount of update time which has elapsed is<br />
displayed.<br />
When updating is complete, the power indicator becomes green and<br />
normal status is resumed.<br />
• If updating fails, the set automatically retries, but if updating is still not<br />
possible, one of the messages shown below is displayed. If the display<br />
reads as shown below, check the settings and network environment,<br />
then update again.<br />
Display Description<br />
Updating fail Updating failed.<br />
Login failed Failure to log into server.<br />
Server is busy Server is busy. Wait a while then try again.<br />
Connection fail Failure in connecting to server.<br />
Download fail Downloading of the firmware has failed.<br />
Upgrade : Execute the upgrade process.<br />
When updating starts, the power indicator becomes red and the menu<br />
screen is shut down. The amount of update time which has elapsed is<br />
displayed.<br />
When upgrading is complete, the power indicator becomes green and<br />
normal status is resumed.<br />
• If the upgrade is not successful, an error message identical to those in<br />
“Firmware Update” will appear on the display. Check the settings and<br />
network environment, then update again.<br />
Upgrade Status : Display a list of the additional functions provided by the<br />
upgrade.<br />
See the <strong>Marantz</strong> website for details about updates.<br />
When the procedure is complete, “Registered” is displayed in this<br />
menu and updates can be carried out. If the procedure has not been<br />
carried out, “Not Registered” is displayed.<br />
The ID number shown on this screen is<br />
needed when carrying out the procedure.<br />
The ID number can also be displayed by<br />
pressing and holding o and RETURN for at<br />
least 3 seconds.<br />
Move the cursor<br />
(Up/Down/Left/Right)<br />
ESPAÑOL<br />
ITALIANO<br />
FRANÇAIS<br />
DEUTSCH<br />
Confirm the setting Return to previous menu<br />
ENGLISH<br />
Manual Setup<br />
Notes concerning use of “Firmware Update” and “Add New Feature”<br />
• In order to use these functions, you must have the correct system requirements and settings for a<br />
broadband Internet connection (vpage 24).<br />
• Do not turn off the power until updating or upgrating is completed.<br />
• Even with a broadband connection to the Internet, approximately 1 hour is required for the updating/<br />
upgrading procedure to be completed.<br />
• Once updating/upgrade starts, normal operations on this unit cannot be performed until updating/<br />
upgrading is completed.<br />
• Furthermore, updating/upgrading the firmware may reset the backup data for the parameters, etc. set<br />
for this unit.<br />
• The following backup data may be erased after an update or upgrade.<br />
• Internet radio preset channel<br />
• Internet radio Recently Played data<br />
• Username registered for Flickr Contact<br />
• Data in Internet radio, media server and USB memory device<br />
• If the update or upgrade fails, press and hold the ON/STANDBY on the main unit for<br />
more than 5 seconds, or remove and re-insert the power cord. “Update retry” appears<br />
on the display and update restarts from the point at which update failed. If the error<br />
continues despite this, check the network environment.<br />
• Information regarding the “Firmware Update” function and “Add New Feature” will be announced on<br />
the <strong>Marantz</strong> web site each time related plans are defined.<br />
• When usable new firmware is released with “Firmware Update” or “Add New Feature”, a notification<br />
message is displayed on the menu screen. When you do not want to be notified, set “Update Notification”<br />
(vpage 79) and “Upgrade Notification” (vpage 79) to “OFF”.<br />
83<br />
Simple version Basic version<br />
Advanced version<br />
Information
84<br />
ENGLISH DEUTSCH FRANÇAIS ITALIANO ESPAÑOL NEDERLANDS SVENSKA<br />
Information<br />
Show information about receiver settings, input signals, etc.<br />
Items Setting details<br />
Status<br />
Show information about<br />
current settings.<br />
Audio Input Signal<br />
Show information about<br />
audio input signals.<br />
Remote control operation<br />
buttons<br />
n MAIN ZONE<br />
This item shows information about settings for MAIN ZONE.<br />
The information displayed differs according to the input source.<br />
Select Source / Name / Surround Mode / Input Mode /<br />
Decode Mode / HDMI / Digital / Component / Video Select /<br />
Video Mode / Content Type / Video Convert / i/p Scaler /<br />
Resolution / Progressive Mode / Aspect etc.<br />
n ZONE2<br />
This item shows information about settings for ZONE2.<br />
Power / Select Source / Volume Level<br />
n ZONE3<br />
This item shows information about settings for ZONE3.<br />
Power / Select Source / Volume Level<br />
Surround Mode : The currently set surround mode.<br />
Signal : The input signal type.<br />
fs : The input signal’s sampling frequency.<br />
Format : The number of channels in the input signal (front, surround, LFE).<br />
Offset : The dialogue normalization correction value.<br />
Flag : This is displayed when inputting signals including a surround back<br />
channel. “MATRIX” is displayed with Dolby Digital EX and DTS-ES Matrix<br />
signals, “DISCRETE” with DTS-ES Discrete signals.<br />
Dialogue normalization function<br />
This function is automatically activated when playing Dolby Digital<br />
sources.<br />
It automatically corrects the standard signal level for individual program<br />
sources.<br />
The correction value can be checked using the STATUS.<br />
The figure is the corrected value.<br />
This cannot be changed.<br />
Move the cursor<br />
(Up/Down/Left/Right)<br />
Items Setting details<br />
HDMI Information<br />
Show information about<br />
HDMI input/output signals<br />
and monitor.<br />
Preset Channel<br />
Show information about<br />
preset channels.<br />
NET/USB TUNER<br />
HDMI Signal Information<br />
• Resolution / Color Space / Pixel Depth<br />
HDMI Monitor 1 Information / HDMI Monitor 2 Information<br />
• Interface / Supported resol.<br />
“HDMI Monitor 1 Information” or “HDMI Monitor 2 Information”<br />
displays information on the HDMI monitor currently being used.<br />
A / B / C / D / E / F / G<br />
A1 – A8 / B1 – B8 / C1 – C8 / D1 – D8 / E1 – E8 / F1 – F8 / G1 – G8<br />
Confirm the setting Return to previous menu
Other settings<br />
Remote control settings<br />
• When you connect a remote control receiver unit (purchased<br />
separately) to the REMOTE CONTROL IN terminal of this unit, use<br />
the following procedure to disable the remote sensor function of<br />
this unit.<br />
• The remote sensor function of remote control signals is enabled by<br />
default.<br />
ON/STANDBY<br />
STATUS ENTER<br />
n Disabling the sensor function of the remote<br />
control unit<br />
When the main unit is in standby mode, press ON/<br />
STANDBY while holding down STATUS and ENTER on<br />
the main unit.<br />
“Remote Lock:ON” is shown on the display, and the infrared light<br />
receiving function is disabled.<br />
n Enabling the remote sensor function<br />
When the main unit is in standby mode, press ON/<br />
STANDBY while holding down STATUS and ENTER on<br />
the main unit.<br />
The infrared light receiving function on the main unit is enabled.<br />
NOTE<br />
If a remote control receiver unit (purchased separately) is not<br />
connected, do not perform this setting. If you do, you will not be able<br />
to operate this unit using the remote control unit.<br />
SVENSKA<br />
NEDERLANDS<br />
ESPAÑOL<br />
Switches light illumination on/off<br />
You can switch the lighting around the main display on or off.<br />
• The factory setting is “ON”.<br />
DISPLAY<br />
ITALIANO<br />
<strong>Press</strong> and hold DISPLAY on the main unit for 3 seconds.<br />
• Carry out the same procedure if you want to change the settings<br />
again.<br />
FRANÇAIS<br />
DEUTSCH<br />
ENGLISH<br />
85<br />
Simple version Basic version<br />
Advanced version<br />
Information
88<br />
ENGLISH DEUTSCH FRANÇAIS ITALIANO ESPAÑOL NEDERLANDS SVENSKA<br />
Registering preset codes<br />
Default settings for preset codes<br />
The devices shown below are registered for each input source button<br />
as default. Settings can be changed according to the devices to be<br />
used.<br />
1 <strong>Press</strong><br />
2 Enter<br />
and hold down the<br />
input source select buttons for<br />
appliance to control and press<br />
SET until indicator blinks<br />
twice.<br />
The back light flashes.<br />
the appropriate preset code<br />
(4 digits) from the table below.<br />
The display flashes twice.<br />
Input source<br />
select<br />
buttons<br />
Category<br />
Blu-ray Disc<br />
player<br />
Preset<br />
code<br />
5000<br />
DVD player 2000<br />
Television 1000<br />
Satellite set<br />
top box<br />
4000<br />
CD player 3000<br />
NOTE<br />
After this procedure, the selected source<br />
reset to its initial code.<br />
Operating components<br />
The supplied remote control unit can control a component other than<br />
this unit.<br />
1<br />
Switch<br />
2<br />
Operate<br />
the input source<br />
(vpage 25).<br />
the component.<br />
• For details, refer to the component’s<br />
operating instructions.<br />
n Blu-ray Disc player / HD-DVD player /<br />
DVD player / DVD recorder operation<br />
Operation buttons Function<br />
SOURCE ON/OFF Power on/standby<br />
MENU (Popup) Menu<br />
TOP MENU Top menu<br />
uio p Cursor operation<br />
ENTER Enter<br />
6 7<br />
Manual search<br />
(fast-reverse/fast-forward)<br />
1 Playback<br />
8 9 Auto search (cue)<br />
3 Pause<br />
2 Stop<br />
0 – 9<br />
Select title, chapter or channel<br />
selection<br />
CLR Clear the inputting<br />
TV POWER<br />
TV power on/standby<br />
(Default : <strong>Marantz</strong>)<br />
TV INPUT<br />
Switch TV input<br />
(Default : <strong>Marantz</strong>)<br />
n CD player / CD recorder operation<br />
n TV operation<br />
Operation buttons Function<br />
SOURCE ON/OFF Power on/off<br />
6 7<br />
Manual search<br />
(fast-reverse/fast-forward)<br />
1 Playback<br />
8 9 Auto search (cue)<br />
3 Pause<br />
2 Stop<br />
CLR Clear the inputting<br />
TV POWER<br />
TV power on/standby<br />
(Default : <strong>Marantz</strong>)<br />
TV INPUT<br />
Switch TV input<br />
(Default : <strong>Marantz</strong>)<br />
Operation buttons Function<br />
SOURCE ON/OFF<br />
TV power on/standby<br />
(Default : <strong>Marantz</strong>)<br />
CHANNEL +, – Switch channels (up/down)<br />
CLR Clear the inputting<br />
TV POWER<br />
TV power on/standby<br />
(Default : <strong>Marantz</strong>)<br />
TV INPUT<br />
Switch TV input<br />
(Default : <strong>Marantz</strong>)
Operating components<br />
n Set top box for satellite (SAT) operation<br />
Operation buttons Function<br />
SOURCE ON/OFF Power on/standby<br />
CHANNEL +, – Switch channels (up/down)<br />
uio p Cursor operation<br />
ENTER Enter<br />
0 – 9 Channel selection<br />
CLR Clear the inputting<br />
TV POWER<br />
TV power on/standby<br />
(Default : <strong>Marantz</strong>)<br />
TV INPUT<br />
Switch TV input<br />
(Default : <strong>Marantz</strong>)<br />
SVENSKA<br />
NEDERLANDS<br />
ESPAÑOL<br />
Operating learn function<br />
ITALIANO<br />
• If the AV device is not a <strong>Marantz</strong> device, or if the device does not<br />
operate even when the preset code is registered, use the learning<br />
function. Remote codes for different devices can be remembered<br />
for use by the <strong>Marantz</strong> remote control included with this device.<br />
• This remote control unit is capable of learning around 160 codes.<br />
Remembering remote control codes from<br />
other devices<br />
1 Place<br />
2 <strong>Press</strong><br />
3 <strong>Press</strong><br />
4 Select<br />
the <strong>Marantz</strong> remote control and remote control<br />
from the other device approximately 5 cm apart,<br />
with the remote control signal transmission sections<br />
facing each other.<br />
5 cm<br />
and hold down SET and<br />
SOURCE SEL until the LEARN<br />
indicator blinks.<br />
input source select buttons<br />
to select the input source.<br />
The input source is shown in the remote<br />
control display.<br />
the button to be learned.<br />
LEARN indicator lights up.<br />
5 <strong>Press</strong><br />
FRANÇAIS<br />
DEUTSCH<br />
ENGLISH<br />
and hold the button that you want to register<br />
on the other remote control until “OK” is displayed<br />
on the <strong>Marantz</strong> remote control display.<br />
• If “NG” is shown on the remote control display, perform step 5<br />
again. If “NG” is shown again on the remote control display, the<br />
remote control may not be able to learn the code correctly. In this<br />
case, use the specialized remote control for the device.<br />
• If the remote control memory becomes full, “FULL” is shown<br />
on the remote control display. If you want to learn the code, you<br />
should erase other learned button.<br />
6<br />
Repeat<br />
7<br />
Repeat<br />
8<br />
When<br />
steps 4 and 5 to learn other buttons for the<br />
same input source.<br />
steps 3 to 6 to learn other input sources.<br />
programming of the remote control unit is<br />
completed, press SET.<br />
The LEARN display disappears, and the remote control unit<br />
exits learn mode.<br />
NOTE<br />
• The learning function is unavailable for all SOURCE ON/OFF, MACRO<br />
and HDMI in any mode.<br />
• The learning function is unavailable for all buttons in TUNER mode,<br />
AMP mode, NET/USB mode and M-XP mode.<br />
• The learning procedure does not operate correctly if the batteries<br />
have become worn.<br />
• If no buttons are pressed for approximately 1 minutes while in the<br />
LEARN mode, the remote control unit automatically exits from the<br />
LEARN mode.<br />
89<br />
Simple version Basic version<br />
Advanced version<br />
Information
90<br />
ENGLISH DEUTSCH FRANÇAIS ITALIANO ESPAÑOL NEDERLANDS SVENSKA<br />
Operating learn function<br />
Delete saved remote control codes<br />
Codes can be erased in three ways: by buttons, sources, and by all<br />
memory contents.<br />
n Delete remote control codes for each button<br />
1 <strong>Press</strong><br />
2 <strong>Press</strong><br />
3 <strong>Press</strong><br />
and hold down SET and<br />
SOURCE SEL until the LEARN<br />
indicator blinks.<br />
input source select buttons<br />
to select the input source you<br />
want to delete.<br />
The input source is shown in the remote<br />
control display.<br />
and hold down HDMI and<br />
press the learned button to be<br />
erased twice.<br />
“ERASE” is shown in the remote control<br />
display, and the mode returns to learning<br />
mode.<br />
• To return the normal mode, press SET.<br />
n Delete remote control codes for each input<br />
source<br />
1 <strong>Press</strong><br />
2 <strong>Press</strong><br />
3 <strong>Press</strong><br />
and hold down SET and<br />
SOURCE SEL until the LEARN<br />
indicator blinks.<br />
and hold down HDMI and<br />
press the learned input source<br />
select buttons to be erased twice.<br />
“ERASE” is shown in the remote control<br />
display.<br />
ENTER to continue erasing.<br />
The indicator blinks twice and the<br />
mode returns to LEARN mode.<br />
• To cancel the erasing operation, do not<br />
press ENTER, and simply press any other<br />
button.<br />
• To return the normal mode, press SET.<br />
n Delete remote control codes for all input<br />
sources<br />
1 <strong>Press</strong><br />
2 <strong>Press</strong><br />
3 <strong>Press</strong><br />
and hold down SET and<br />
SOURCE SEL until the LEARN<br />
indicator blinks.<br />
and hold down HDMI and<br />
press ON and STANDBY .<br />
LEARN indicator lights.<br />
ENTER to continue erasing.<br />
“ERASE” is shown in the remote<br />
control display, and the mode returns<br />
to learning mode.<br />
• To cancel the erasing operation, do not<br />
press ENTER and simply press any other<br />
button.<br />
• To return the normal mode, press SET.<br />
NOTE<br />
Erasing codes will return to the factory preset code, or there will leave<br />
empty if the button has no factory preset code.
Operating macro function<br />
• When the macro function is used, operations that usually require a<br />
complicated series of multiple button operations can be performed<br />
easily just by pressing the MACRO button.<br />
• This device can remember up to 6 macro functions.<br />
• Each macro can record a maximum of 10 steps.<br />
[Example] To playback a DVD<br />
q Turn this unit’s power on<br />
↓<br />
w Switch this unit's input source to DVD<br />
↓<br />
e Turn the TV’s power on<br />
↓<br />
r DVD Playback<br />
Recording macro operations<br />
[Example] Recording DVD playback operations to the number “1”<br />
button<br />
1 <strong>Press</strong><br />
2 <strong>Press</strong><br />
and hold SET and MACRO<br />
together until “MACRO”<br />
flashes in the LEARN indicator,<br />
MACRO indicator and remote<br />
control display.<br />
the macro operation<br />
number (“1”) that you want to<br />
record to.<br />
“M1-01” is shown in the remote control<br />
display.<br />
• If the number that you want to record to<br />
has already been recorded to, the recorded<br />
number flashes in the display.<br />
3 <strong>Press</strong><br />
the input source switch<br />
button (“DVD”) of the operation<br />
that you want to record along<br />
with the command button (“1”).<br />
The macro operation step number is<br />
shown in the remote control display.<br />
• To record the amp input source, press AMP first, followed by the<br />
input source switching button.<br />
SVENSKA<br />
4 When<br />
NEDERLANDS<br />
ESPAÑOL<br />
ITALIANO<br />
the macro operation recording is complete,<br />
press and hold ENTER until the LEARN indicator<br />
and MACRO indicator switch off.<br />
NOTE<br />
The RETURN, uio p, ENTER, VOLUME +, – and CLR buttons cannot<br />
be recorded as macro operations.<br />
Checking recorded macro operations<br />
[Example] Checking the recorded macro operations to button “1”<br />
1 <strong>Press</strong><br />
2 <strong>Press</strong><br />
3 <strong>Press</strong><br />
4 Repeat<br />
5 When<br />
and hold MACRO and<br />
MENU together until “MACRO”<br />
flashes in the LEARN indicator,<br />
MACRO indicator and remote<br />
control display.<br />
the number button (“1”)<br />
that you want to check.<br />
The LEARN indicator, MACRO indicator<br />
and “M1-01” flashes in the remote<br />
control display.<br />
the VOLUME +, –.<br />
• The LEARN indicator switches off,<br />
and “M1-01” is shown in the remote<br />
control display.<br />
• The recorded macro operation is<br />
performed.<br />
step 3 until the final number of the macro<br />
operation is displayed.<br />
• The display returns to that of step 1.<br />
• When the macro operation number is displayed, the<br />
corresponding macro operation is performed.<br />
the macro operation check is complete, press<br />
and hold ENTER until the MACRO indicator switches<br />
off.<br />
FRANÇAIS<br />
DEUTSCH<br />
Editing recorded macro operations<br />
ENGLISH<br />
[Example] Changing macro operation “1” recorded on number button<br />
“1” to “3”, and changing the number button to“2”<br />
1 <strong>Press</strong><br />
2 <strong>Press</strong><br />
3 <strong>Press</strong><br />
and hold MACRO and<br />
MENU together until “MACRO”<br />
flashes in the LEARN indicator,<br />
MACRO indicator and remote<br />
control display.<br />
the number button (“1”)<br />
that you want to change.<br />
The LEARN indicator, MACRO indicator<br />
and “M1-01” flashes in the remote<br />
control display.<br />
ui to select the macro<br />
operation button (“2”) to edit.<br />
After the macro operation button is<br />
displayed, the recorded operation is<br />
performed.<br />
• When the macro operation is updated as a recorded step, press<br />
the input source switching button, and then press the new step<br />
button (“2”).<br />
• To insert a new macro operation between recorded steps, after<br />
performing step 3, press MEMORY and then press the new step<br />
button (“2”).<br />
When a new step is introduced, if the total number of steps is<br />
already 10, the 10th step is deleted after the new step is introduced.<br />
• To delete recorded macro operations, after step 3, call the step<br />
number that you want to delete, and press CLR.<br />
• To return to step 1, press ENTER.<br />
4 When<br />
the macro operation edit is complete, press and<br />
hold ENTER until the MACRO indicator switches off.<br />
91<br />
Simple version Basic version<br />
Advanced version<br />
Information
SVENSKA<br />
Information<br />
NEDERLANDS<br />
Information<br />
ESPAÑOL<br />
ITALIANO<br />
Here, we list various information related to this unit.<br />
Please refer to this information as needed.<br />
F Part names and functions vpage 94<br />
F Other information vpage 99<br />
F Troubleshooting vpage 108<br />
F Specifications vpage 111<br />
F Index vpage 112<br />
FRANÇAIS<br />
DEUTSCH<br />
ENGLISH<br />
93<br />
Simple version Basic version<br />
Advanced version Information
94<br />
ENGLISH DEUTSCH FRANÇAIS ITALIANO ESPAÑOL NEDERLANDS SVENSKA<br />
Part names and functions<br />
Front panel<br />
For buttons not explained here, see the page indicated in parentheses ( ).<br />
u y t<br />
q w e<br />
q Power operation button<br />
(ON/STANDBY) ······································ (7, 12)<br />
Turns power to this unit on and off (standby).<br />
w Power indicator ·········································· (12)<br />
e Door<br />
When you are using buttons and/or terminals<br />
behind the door, press the bottom of the door<br />
to open it. When not using buttons and/or<br />
terminals behind the door, close it. Be careful<br />
not to catch your fingers when closing the door.<br />
r<br />
r VOLUME control knob ······························· (26)<br />
t Remote control sensor ······························ (98)<br />
y Main display ················································ (95)<br />
u INPUT SELECTOR knob ····························· (25)<br />
GWith the door openH<br />
W2 W1 W0 Q9<br />
Q8<br />
Q7 Q6 Q5 Q4<br />
W3<br />
W4 W5 W6 W7 W8 W9 E0 E1 E2<br />
i o Q0 Q1 Q2 Q3<br />
i Headphones jack<br />
When the headphones are plugged into this<br />
jack, audio will no longer be output from the<br />
connected speakers or from the PRE OUT<br />
connectors.<br />
NOTE<br />
To prevent hearing loss, do not raise the volume<br />
level excessively when using headphones.<br />
o SETUP MIC jack ······································ (9, 49)<br />
Q0 iPod/USB port ············································ (20)<br />
Q1 HDMI connector ·········································· (16)<br />
Q2 DIGITAL connector ····································· (19)<br />
Q3 AUX1 INPUT connectors ··························· (19)<br />
Q4 RETURN button ·································· (61 – 63)<br />
Q5 ENTER button ····································· (61 – 63)<br />
Q6 Cursor buttons (uio p) ·················· (61 – 63)<br />
Q7 MENU button ·············································· (95)<br />
Q8 Sub display ················································· (63)<br />
E3<br />
Q9 Audyssey DSX button (A-DSX) ············· (71)<br />
W0 M-DAX button / indicator ·························· (73)<br />
W1 PURE DIRECT button / indicator ··············· (43)<br />
W2 Dynamic EQ ® /Dynamic Volume ® button<br />
(DYNAMIC EQ/VOL) ··································· (71)<br />
W3 SURROUND MODE button ························ (41)<br />
W4 AUTO button ······································ (57, 110)<br />
W5 DISPLAY button ···································· (57, 82)<br />
W6 STATUS button ·········································· (84)<br />
W7 Speaker A/B switching button<br />
(SPKR A/B) ·················································· (26)<br />
W8 HDMI OUT button ······································ (16)<br />
W9 ZONE SELECT button ································ (59)<br />
E0 ZONE2 ON/OFF button ······························ (59)<br />
E1 ZONE3 ON/OFF button ······························ (59)<br />
E2 SLEEP button ·············································· (53)<br />
E3 BAND button ·············································· (30)
Display<br />
Main Display<br />
q w<br />
e<br />
q Light illumination<br />
When the power to this device is switched on, the surrounding<br />
area is lit blue. The settings can be changed so the light does not<br />
switch on (vpage 85 “Switches light illumination on/off”).<br />
w Master volume indicator<br />
e Input source indicator<br />
The currently selected input source name is displayed.<br />
If the input source name has been changed using “Input Setup” –<br />
“Rename” (vpage 68) in the menu, the input source name after<br />
the change is displayed.<br />
SVENSKA<br />
Sub Display<br />
NEDERLANDS<br />
ESPAÑOL<br />
ITALIANO<br />
FRANÇAIS<br />
Q5 Q4Q3<br />
Q2 Q1 Q0 o<br />
DEUTSCH<br />
q w<br />
e r t y<br />
q Input signal indicators<br />
w Input signal channel indicators<br />
These light when digital signals are input.<br />
When playing HD Audio sources, the indicator lights when a<br />
signal from an extension channel (a channel other than the front,<br />
center, surround, surround back or LFE channel) is input.<br />
If there are two or more extension channels, the and<br />
indicators light.<br />
e Information display<br />
The input source name, surround mode, setting values and other<br />
information are displayed here.<br />
r Front height/front wide channel indicators<br />
When audio is output from the front height channels, the “H”<br />
indicator lights. When audio is output from the front wide channels,<br />
the “W” indicator lights.<br />
t Front speaker indicator<br />
This lights according to the setting of the front A and B speakers.<br />
y Monitor output indicator<br />
These light according to the HDMI monitor output setting.<br />
u Master volume indicator<br />
i MUTE indicator<br />
This lights when the mute mode is select (vpage 26).<br />
o AUDYSSEY indicators<br />
Lighting is as follows, depending on the setting of “Dynamic EQ ® ”<br />
(vpage 71) and “Dynamic Volume ® ” (vpage 71).<br />
When “Dynamic EQ” and “Dynamic Volume” are<br />
“ON”.<br />
When “Dynamic EQ” is “ON” and “Dynamic<br />
Volume” is “OFF”.<br />
When “Dynamic EQ” and “Dynamic Volume” are<br />
“OFF”.<br />
i<br />
u<br />
ENGLISH<br />
Q0 Sleep timer indicator<br />
This lights when the sleep mode is selected (vpage 53).<br />
Q1 Multi-zone indicators<br />
This lights up when ZONE2, ZONE3 (separate room) power is<br />
turned on (vpage 59).<br />
Q2 Input mode indicators<br />
Set the audio input modes for the different input sources (vpage 67).<br />
Q3 HDMI indicator<br />
This lights when playing using HDMI connections.<br />
Q4 Tuner reception mode indicators<br />
These light according to the reception conditions when the input<br />
source is set to “TUNER”.<br />
STEREO : In the FM mode, this light when receiving stereo<br />
broadcasts.<br />
TUNED : Lights when the broadcast is properly tuned in.<br />
AUTO : This light when in the auto tuning mode.<br />
RDS : This light when receiving RDS broadcasts.<br />
Q5 Decoder indicators<br />
These light when the respective decoders are operating.<br />
95<br />
Simple version Basic version<br />
Advanced version<br />
Information
96<br />
ENGLISH DEUTSCH FRANÇAIS ITALIANO ESPAÑOL NEDERLANDS SVENSKA<br />
Rear panel<br />
See the page indicated in parentheses ( ).<br />
Q6 Q5 Q4 Q3 Q2 Q1 Q0 o<br />
i<br />
Q7<br />
Q6<br />
q w e<br />
r t<br />
y<br />
u<br />
q RS-232C connector ·································································· (51)<br />
w FM/AM antenna terminals ····················································· (22)<br />
e Analog audio connectors ···········································(17 – 21, 23)<br />
r PRE OUT connectors ··············································(6, 23, 46 – 48)<br />
t 7.1CH INPUT connectors ························································ (23)<br />
y Speaker terminals ························································(6, 46 – 48)<br />
u AC inlet (AC IN) ·········································································· (6)<br />
i COMPONENT VIDEO connectors ····································(17 – 19)<br />
o HDMI connectors ····································································· (16)<br />
Q0 Digital audio connectors ··················································(17 – 21)<br />
Q1 NETWORK connector ······························································ (24)<br />
Q2 FLASHER IN jack<br />
Used when using a control BOX or other such control devices to<br />
control this unit.<br />
Q3 REMOTE CONTROL jacks ················································(17 – 19)<br />
Q4 M-XPort jack ············································································ (21)<br />
Q5 DC OUT jacks ··········································································· (50)<br />
Q6 VIDEO connectors ··································································· (22)<br />
Q7 SIGNAL GND terminal ···························································· (51)<br />
NOTE<br />
Do not touch the inner pins of the connectors on the rear panel.<br />
Electrostatic discharge may cause permanent damage to the unit.
Remote control unit<br />
For buttons not explained here, see the page indicated in parentheses ( ).<br />
q<br />
w<br />
e<br />
r<br />
t<br />
y<br />
u<br />
i<br />
o<br />
Q0<br />
Q1<br />
Q2<br />
Q3<br />
Q4<br />
Q5<br />
Q6<br />
Q7<br />
Q8<br />
Q9<br />
W0<br />
W1<br />
W2<br />
W3<br />
W4<br />
W5<br />
W6<br />
W7<br />
W8<br />
R4<br />
R5<br />
SVENSKA<br />
q w e r<br />
W9<br />
E0<br />
E1<br />
E2<br />
E3<br />
E4<br />
E5<br />
E6<br />
E7<br />
NEDERLANDS<br />
E8<br />
E9<br />
R0<br />
R1<br />
R2<br />
R3<br />
ESPAÑOL<br />
ITALIANO<br />
q Display<br />
qLEARN indicator ······································· (89)<br />
wMACRO indicator ······································ (91)<br />
eInformation display<br />
r indicator ················································· (87)<br />
w SOURCE power button ·················· (59, 88, 89)<br />
e SET button ······································ (87, 89, 91)<br />
r HDMI button ········································· (16, 90)<br />
t Input mode button (A/D) ··························· (67)<br />
y Input source select buttons ······················· (25)<br />
u Source select button (SOURCE SEL) ········ (25)<br />
i INPUT buttons (d, f) ····················· (25, 59, 87)<br />
o DISPLAY/<br />
Tuner mode (T.MODE) button ············ (30, 82)<br />
Q0 SHIFT/TOP MENU button ·············· (30, 35, 62)<br />
Q1 Cursor buttons (uio p) ·················· (61 – 63)<br />
Q2 MENU button ·············································· (63)<br />
Q3 MACRO button ··········································· (91)<br />
Q4 Number buttons ······················· (30, 35, 87, 91)<br />
Q5 Clear button (CLR) ······································ (92)<br />
Q6 TUNING buttons (+, –) ······························· (30)<br />
Q7 Remote control signal transmitter<br />
Q8 Power buttons (ON, STANDBY) ············ (7, 12)<br />
Q9 Speaker A/B button (SPKR A/B) ··············· (26)<br />
W0 TEST TONE button ····································· (76)<br />
W1 Muting button (MUTE) ······························ (26)<br />
W2 Light button ················································ (92)<br />
W3 Master volume control buttons<br />
(VOLUME +, –)· ··········································· (26)<br />
W4 Surround mode (SURR.) /<br />
MEMORY button ···························· (30, 35, 41)<br />
W5 SEARCH/<br />
Information (INFO) button ············· (27, 30, 63)<br />
W6 ENTER button ····································· (61 – 63)<br />
W7 RETURN button ·································· (61 – 63)<br />
FRANÇAIS<br />
DEUTSCH<br />
ENGLISH<br />
W8 System buttons ···· (28, 29, 35 – 37, 39, 40, 88)<br />
• Pause button (3)<br />
• Play button (1)<br />
• Stop button (2)<br />
• Skip buttons (8, 9)<br />
• Search buttons (6, 7)<br />
FM/AM band switching button (BAND) ··· (30)<br />
W9 STEREO button ··········································· (43)<br />
E0 AUTO buttons ······························· (41, 57, 110)<br />
E1 MULTEQ ® button ······································· (70)<br />
E2 Audio delay button (A.DELAY) ·················· (73)<br />
E3 M-DAX button ············································ (73)<br />
E4 Channel level button (CH LVL) ·················· (53)<br />
E5 SLEEP button ·············································· (53)<br />
E6 INSERT button ············································ (62)<br />
E7 DELETE button ··········································· (62)<br />
E8 Pure direct button (P.DIRECT) ··················· (43)<br />
E9 REPEAT button ····································· (28, 29)<br />
R0 RANDOM button ·································· (28, 29)<br />
R1 Audyssey DSX button (A-DSX) ················· (71)<br />
R2 Dynamic EQ ® /Dynamic Volume ® button<br />
(DYN EQ/VOL) ············································ (71)<br />
R3 Video select button (V.SEL) ······················ (66)<br />
R4 TV operation buttons<br />
(TV POWER / INPUT) ································· (88)<br />
R5 CHANNEL/<br />
PRESET buttons (+, –) ·············· (30, 31, 35, 88)<br />
NOTE<br />
The SATR button cannot be used.<br />
97<br />
Simple version Basic version<br />
Advanced version<br />
Information
98<br />
ENGLISH DEUTSCH FRANÇAIS ITALIANO ESPAÑOL NEDERLANDS SVENSKA<br />
Remote control unit<br />
Inserting the batteries<br />
q Remove the rear lid in the<br />
direction of the arrow and<br />
remove it.<br />
e Put the rear cover back on.<br />
w Load the two batteries<br />
properly as indicated by<br />
the marks in the battery<br />
compartment.<br />
R03/AAA<br />
NOTE<br />
• Insert the specified batteries in the remote control unit.<br />
• Replace the batteries with new ones if the set does not operate<br />
even when the remote control unit is operated close to the unit. (The<br />
supplied batteries are only for verifying operation.)<br />
• When inserting the batteries, be sure to do so in the proper direction,<br />
following the q and w marks in the battery compartment.<br />
• To prevent damage or leakage of battery fluid:<br />
• Do not use a new battery together with an old one.<br />
• Do not use two different types of batteries.<br />
• Do not attempt to charge dry batteries.<br />
• Do not short-circuit, disassemble, heat or dispose of batteries in<br />
flames.<br />
• Do not keep the battery in a place exposed to direct sunlight or in<br />
places with extremely high temperatures, such as near a heater.<br />
• If the battery fluid should leak, carefully wipe the fluid off the inside<br />
of the battery compartment and insert new batteries.<br />
• Remove the batteries from the remote control unit if it will not be in<br />
use for long periods.<br />
• Used batteries should be disposed of in accordance with the local<br />
regulations regarding battery disposal.<br />
Operating range of the remote control unit<br />
Point the remote control unit at the remote sensor when operating it.<br />
NOTE<br />
Approx. 7 m<br />
The set may function improperly or the remote control unit may not<br />
operate if the remote control sensor is exposed to direct sunlight,<br />
strong artificial light from an inverter type fluorescent lamp or infrared<br />
light.<br />
30°<br />
30°
Other information<br />
n Trademark information (vpage 99)<br />
n Surround (vpage 100)<br />
n Relationship between video signals and monitor<br />
output (vpage 104)<br />
n Explanation of terms (vpage 105)<br />
Trademark information<br />
This product uses the following technologies:<br />
Manufactured under license from<br />
Audyssey Laboratories. U.S. and<br />
foreign patents pending. Audyssey<br />
MultEQ ® XT is a registered trademark<br />
of Audyssey Laboratories. Audyssey<br />
Dynamic EQ ® is a registered<br />
trademark of Audyssey Laboratories.<br />
Audyssey Dynamic Volume ® is a<br />
registered trademark of Audyssey<br />
Laboratories. Audyssey Dynamic<br />
Surround Expansion is a trademark<br />
of Audyssey Laboratories.<br />
DLNA ® , the DLNA Logo and DLNA<br />
CERTIFIED ® are trademarks, service<br />
marks, or certifi cation marks of the<br />
Digital Living Network Alliance.<br />
Device Class: DMP (Digital Media<br />
Player)<br />
DLNA Certifi ed ® Product Function:<br />
FINDS, PLAYS<br />
Content Type: audio, images, videos<br />
(Check supported media formats.)<br />
DLNA consumer website: www.dlna.<br />
org<br />
Some content may not be compatible<br />
with other DLNA Certifi ed ® products<br />
(example: optional media formats)<br />
SVENSKA<br />
NEDERLANDS<br />
ESPAÑOL<br />
ITALIANO<br />
Manufactured under license from<br />
Dolby Laboratories. “Dolby”, “Pro<br />
Logic” and the double-D symbol are<br />
trademarks of Dolby Laboratories.<br />
Manufactured under license under<br />
U.S. Patent #’s: 5,451,942; 5,956,674;<br />
5,974,380; 5,978,762; 6,226,616;<br />
6,487,535; 7,212,872; 7,333,929;<br />
7,392,195; 7,272,567 & other U.S.<br />
and worldwide patents issued &<br />
pending. DTS and the Symbol are<br />
registered trademarks, & DTS-HD,<br />
DTS-HD Master Audio, and the DTS<br />
logos are trademarks of DTS, Inc.<br />
Product includes software. © DTS,<br />
Inc. All Rights Reserved.<br />
Manufactured under license from<br />
DTS Licensing Limited. DTS and the<br />
Symbol are registered trademarks,<br />
& DTS Neural Surround and the DTS<br />
logos are trademark of DTS, Inc.<br />
Product includes software. © DTS,<br />
Inc. All Rights Reserved.<br />
HDMI, the HDMI Logo and High-<br />
Defi nition Multimedia Interface are<br />
trademarks or registered trademarks<br />
of HDMI Licensing LLC in the United<br />
States and other countries.<br />
FRANÇAIS<br />
DEUTSCH<br />
ENGLISH<br />
“Made for iPod” and “Made for<br />
iPhone” mean that an electronic<br />
accessory has been designed to<br />
connect specifi cally to iPod, or<br />
iPhone, respectively, and has been<br />
certifi ed by the developer to meet<br />
Apple performance standards.<br />
Apple is not responsible for the<br />
operation of this device or its<br />
compliance with safety and regulatory<br />
standards.<br />
iPhone, iPod, iPod classic, iPod nano,<br />
iPod shuffl e, and iPod touch are<br />
trademarks of Apple Inc., registered<br />
in the U.S. and other countries.<br />
• Individual users are permitted to<br />
use iPhone, iPod, iPod classic,<br />
iPod nano, iPod shuffl e, and iPod<br />
touch for private copy and playback<br />
of non-copyrighted contents and<br />
contents whose copy and playback<br />
is permitted by law. Copyright<br />
infringement is prohibited by law.<br />
This item incorporates copy protection technology that is protected<br />
by U.S. patents and other intellectual property rights of Rovi<br />
Corporation. Reverse engineering and disassembly are prohibited<br />
99<br />
Simple version Basic version<br />
Advanced version<br />
Information
100<br />
ENGLISH DEUTSCH FRANÇAIS ITALIANO ESPAÑOL NEDERLANDS SVENSKA<br />
Surround<br />
This unit is equipped with a digital signal processing circuit that lets you play program sources in the surround mode to achieve the same sense of presence as in a movie theater.<br />
Surround modes and parameters<br />
This table shows the speakers that can be used in each surround mode and the surround parameters adjustable in each surround mode.<br />
Symbols in the table<br />
S This indicates the audio output channels or surround parameters that can be set.<br />
D This indicates the audio output channels. The output channels depend on the settings of “Speaker Config.” (vpage 74).<br />
Surround mode (vpage 41)<br />
Front<br />
L/R<br />
Center<br />
Surround<br />
L/R<br />
Channel output Surround Parameter (vpage 69)<br />
Surround back<br />
L/R<br />
Front height<br />
L/R<br />
Front wide<br />
L/R<br />
Subwoofer<br />
HT-EQ<br />
z5<br />
(vpage 69)<br />
DRC<br />
z6<br />
(vpage 69)<br />
D. Comp<br />
z7<br />
(vpage 69)<br />
PURE DIRECT (2channel) S Dz4 S S<br />
PURE DIRECT (Multi-channel) S D D Dz1 Dz1 Dz1 D S S S<br />
DIRECT (2channel) S Dz4 S S<br />
DIRECT (Multi-channel) S D D Dz1 Dz1 Dz1 D S S S<br />
STEREO S D S S S S<br />
MULTI CH IN S D D D D S S<br />
DOLBY PRO LOGIC gz S D D D D S S S<br />
DOLBY PRO LOGIC gx S D D D D S S S<br />
DOLBY PRO LOGIC g S D D D S S S<br />
DOLBY PRO LOGIC g A-DSX S D D Dz2 Dz3 D S S S<br />
DTS NEO:6 S D D D D S S S<br />
DTS NEO:6 A-DSX S D D Dz2 Dz3 D S S S<br />
Audyssey DSX S D D Dz2 Dz3 D S S S S<br />
DOLBY DIGITAL S D D D D D S S S<br />
DOLBY DIGITAL Plus S D D D D D S S S<br />
DOLBY TrueHD S D D D D D S S S<br />
DTS SURROUND S D D D D D S S S<br />
DTS 96/24 S D D D D D S S S<br />
DTS-HD S D D D D D S S S<br />
DTS Express S D D D D D S S S<br />
MULTI CH STEREO S D D D D S S S<br />
NEURAL S D D D D S<br />
DOLBY VIRTUAL SPEAKER S D S<br />
DOLBY HEADPHONE S<br />
z1 A signal for each channel contained in an input signal is output as audio.<br />
z2 If “Audyssey DSX” (vpage 71) is set to “ON–Height–”, sound is output from the front height speakers.<br />
z3 If “Audyssey DSX” (vpage 71) is set to “ON–Wide–”, sound is output from the front wide speakers.<br />
z4 Only when “Subwoofer Mode” is set to “LFE+Main” (vpage 75), sound is output from the subwoofer.<br />
z5 For HD Audio whose sampling frequency of an input signal is more than 96 kHz, this sound parameter cannot be set.<br />
z6 This item can be selected when a Dolby TrueHD signal is played.<br />
z7 This item can be selected when a Dolby Digital or DTS signal is played.<br />
z8 This item can be selected when a Dolby Digital or DTS signal or DVD-Audio is played.<br />
LFE<br />
z8<br />
(vpage 69)
Surround mode (vpage 41)<br />
Height Gain<br />
(vpage 70)<br />
Panorama<br />
(vpage 69)<br />
SVENSKA<br />
Surround Parameter (vpage 69)<br />
PRO LOGIC g/gx Music mode only<br />
Dimension<br />
(vpage 69)<br />
NEDERLANDS<br />
C.Width<br />
(vpage 69)<br />
NEO:6 Music mode<br />
only<br />
C.Image<br />
(vpage 69)<br />
ESPAÑOL<br />
Tone<br />
z9<br />
(vpage 70)<br />
ITALIANO<br />
MultEQ ® XT<br />
(vpage 70)<br />
FRANÇAIS<br />
DEUTSCH<br />
Audyssey Settings z10 (vpage 70) Audyssey DSX<br />
Soundstage<br />
Dynamic EQ ®<br />
z11<br />
(vpage 71)<br />
Dynamic Volume ®<br />
z12<br />
(vpage 71)<br />
z10<br />
(vpage 71)<br />
PURE DIRECT (2 channel)<br />
PURE DIRECT (Multi-channel)<br />
DIRECT (2 channel)<br />
DIRECT (Multi-channel)<br />
STEREO S S S S S<br />
MULTI CH IN S S S S S<br />
DOLBY PRO LOGIC gz S S S S S S<br />
DOLBY PRO LOGIC gx S S S S S S S S S<br />
DOLBY PRO LOGIC g S S S S S S S S S<br />
DOLBY PRO LOGIC g A-DSX S S S S S S S S S<br />
DTS NEO:6 S S S S S S S<br />
DTS NEO:6 A-DSX S S S S S S S<br />
Audyssey DSX S S S S S<br />
DOLBY DIGITAL S S S S S<br />
DOLBY DIGITAL Plus S S S S S<br />
DOLBY TrueHD S S S S S<br />
DTS SURROUND S S S S S<br />
DTS 96/24 S S S S S<br />
DTS-HD S S S S S<br />
DTS Express S S S S S<br />
MULTI CH STEREO S S S S S<br />
NEURAL S S S S S<br />
DOLBY VIRTUAL SPEAKER S S S S S<br />
DOLBY HEADPHONE S S S S S<br />
z9 This item cannot be set when “Dynamic EQ” (vpage 71) is set to “ON”.<br />
z10 For HD Audio whose sampling frequency of an input signal is more than 96 kHz, this sound parameter cannot be set.<br />
z11 This item cannot be set when “MultEQ XT” (vpage 70) is set to “OFF” or “Manual”.<br />
z12 This item cannot be set when “Dynamic EQ” (vpage 71) is set to “OFF”.<br />
z13 This item can be set when the input signal is analog, PCM 48 kHz or 44.1 kHz.<br />
ENGLISH<br />
Surround<br />
M-DAX<br />
z13<br />
(vpage 73)<br />
101<br />
Simple version Basic version<br />
Advanced version<br />
Information
102<br />
ENGLISH DEUTSCH FRANÇAIS ITALIANO ESPAÑOL NEDERLANDS SVENSKA<br />
Surround<br />
n Types of input signals, and corresponding surround modes<br />
This table shows the input signal that can be played in each surround mode. Check the audio signal of the input source then select the surround mode.<br />
Symbols in the table<br />
S This indicates the selectable surround mode.<br />
Surround mode (vpage 41) NOTE<br />
ANALOG<br />
LINEAR PCM<br />
(multi ch)<br />
Input signal types and formats<br />
PCM DTS-HD DTS DOLBY DOLBY DIGITAL<br />
LINEAR PCM<br />
(2ch)<br />
DTS-HD<br />
Master<br />
Audio<br />
DTS-HD<br />
High<br />
Resolution<br />
Audio<br />
DTS<br />
EXPRESS<br />
DTS ES<br />
DSCRT<br />
(With Flag)<br />
DTS SURROUND<br />
DTS-HD MSTR z5 S<br />
DTS-HD HI RES z5 S<br />
DTS ES DSCRT6.1 z1z3 S<br />
DTS ES MTRX6.1 z1z3 S<br />
DTS SURROUND z5 S S S<br />
DTS 96/24 z5 S<br />
DTS (–HD) + PLgx MOVIE z2z3 S S S S S S S<br />
DTS (–HD) + PLgx MUSIC z1z3 S S S S S S S<br />
DTS (–HD) + PLgz z4 S S S S S S S<br />
DTS EXPRESS z5 S<br />
DTS (–HD) + NEO:6 z1z3 S S S S S S<br />
DTS NEO:6 CINEMA z5 S S S<br />
DTS NEO:6 MUSIC z5 S S S<br />
DTS NEO:6 CINEMA A-DSX S S S<br />
DTS NEO:6 MUSIC A-DSX S S S<br />
Audyssey DSX S S S S S S S<br />
DOLBY SURROUND<br />
DOLBY TrueHD z5 S<br />
DOLBY DIGITAL+ z5 S<br />
DOLBY DIGITAL EX z1z3 S S S S<br />
DOLBY (D+) (HD) +EX z1z3 S S<br />
DOLBY DIGITAL z5 S S S S<br />
DOLBY (D) (D+) (HD) +PLgx MOVIE z2z3 S S S S S S<br />
DOLBY (D) (D+) (HD) +PLgx MUSIC z1z3 S S S S S S<br />
DOLBY (D) (D+) (HD) +PLgz z4 S S S S S S<br />
DOLBY PRO LOGIC gx MOVIE z1z3 S S S<br />
DOLBY PRO LOGIC gx MUSIC z1z3 S S S<br />
DOLBY PRO LOGIC gx GAME z1z3 S S S<br />
DOLBY PRO LOGIC gz z4 S S S<br />
DOLBY PRO LOGIC g MOVIE z5 S S S<br />
DOLBY PRO LOGIC g MUSIC z5 S S S<br />
DOLBY PRO LOGIC g GAME z5 S S S<br />
z1 If “Speaker Config.” – “S.Back” (vpage 75) is set to “None”, this surround mode cannot be selected.<br />
z2 If “Speaker Config.” – “S.Back” (vpage 75) is set to “1spkr” or “None”, this surround mode cannot be selected.<br />
z3 This surround mode can be selected when “Amp Assign” (vpage 74) is set to “Normal”.<br />
z4 If “Speaker Config.” – “F.Height” (vpage 75) is set to “None”, this surround mode cannot be selected.<br />
z5 The same was when “Audyssey DSX” (vpage 71) setting is set to “ON”.<br />
DTS ES<br />
MTRX<br />
(With Flag)<br />
DTS<br />
(5.1ch)<br />
DTS 96/24<br />
DOLBY<br />
TrueHD<br />
DOLBY<br />
DIGITAL Plus<br />
DOLBY<br />
DIGITAL EX<br />
(With Flag)<br />
DOLBY<br />
DIGITAL EX<br />
(With no<br />
Flag)<br />
DOLBY<br />
DIGITAL<br />
(5.1/5/4ch)<br />
DOLBY<br />
DIGITAL<br />
(4/3ch)<br />
DOLBY<br />
DIGITAL<br />
(2ch)
Surround mode (vpage 41) NOTE<br />
ANALOG<br />
LINEAR PCM<br />
(multi ch)<br />
SVENSKA<br />
NEDERLANDS<br />
ESPAÑOL<br />
ITALIANO<br />
Input signal types and formats<br />
FRANÇAIS<br />
DEUTSCH<br />
PCM DTS-HD DTS DOLBY DOLBY DIGITAL<br />
LINEAR PCM<br />
(2ch)<br />
DTS-HD<br />
Master<br />
Audio<br />
DTS-HD<br />
High<br />
Resolution<br />
Audio<br />
DTS<br />
EXPRESS<br />
DTS ES<br />
DSCRT<br />
(With Flag)<br />
ENGLISH<br />
DOLBY SURROUND<br />
DOLBY PRO LOGIC g MOVIE A-DSX S S S<br />
DOLBY PRO LOGIC g MUSIC A-DSX S S S<br />
DOLBY PRO LOGIC g GAME A-DSX S S S<br />
Audyssey DSX S S S S S S<br />
DOLBY VIRTUAL SPEAKER S S S S S S S S S S S S S S S S S<br />
DOLBY HEADPHONE S S S S S S S S S S S S S S S S S<br />
MULTI CH IN<br />
MULTI CH IN z5 S<br />
MULTI CH IN + PLgx MOVIE z2z3 S<br />
MULTI CH IN + PLgx MUSIC z1z3 S<br />
MULTI CH IN + PLgz z4 S<br />
MULTI CH IN + Dolby EX z3 S<br />
MULTI CH IN 7.1 z3 S (7.1)<br />
Audyssey DSX S<br />
DIRECT<br />
DIRECT S S S S S S S S S S S S S S S S S<br />
PURE DIRECT<br />
PURE DIRECT S S S S S S S S S S S S S S S S S<br />
MULTI CH STEREO S S S S S S S S S S S S<br />
STEREO<br />
STEREO S S S S S S S S S S S S S S S S S<br />
NEURAL<br />
NEURAL S S S<br />
AUTO<br />
AUTO S S S S S S S S S S S S S S S S S<br />
z1 If “Speaker Config.” – “S.Back” (vpage 75) is set to “None”, this surround mode cannot be selected.<br />
z2 If “Speaker Config.” – “S.Back” (vpage 75) is set to “1spkr” or “None”, this surround mode cannot be selected.<br />
z3 This surround mode can be selected when “Amp Assign” (vpage 74) is set to “Normal”.<br />
z4 If “Speaker Config.” – “F.Height” (vpage 75) is set to “None”, this surround mode cannot be selected.<br />
z5 The same was when “Audyssey DSX” (vpage 71) setting is set to “ON”.<br />
DTS ES<br />
MTRX<br />
(With Flag)<br />
DTS<br />
(5.1ch)<br />
DTS 96/24<br />
DOLBY<br />
TrueHD<br />
DOLBY<br />
DIGITAL Plus<br />
DOLBY<br />
DIGITAL EX<br />
(With Flag)<br />
DOLBY<br />
DIGITAL EX<br />
(With no<br />
Flag)<br />
DOLBY<br />
DIGITAL<br />
(5.1/5/4ch)<br />
DOLBY<br />
DIGITAL<br />
(4/3ch)<br />
Surround<br />
DOLBY<br />
DIGITAL<br />
(2ch)<br />
103<br />
Simple version Basic version<br />
Advanced version<br />
Information
104<br />
ENGLISH DEUTSCH FRANÇAIS ITALIANO ESPAÑOL NEDERLANDS SVENSKA<br />
Relationship between video signals and monitor output<br />
MAIN ZONE MONITOR OUT<br />
Video Convert<br />
HDMI<br />
Input Signals<br />
COMPONENT VIDEO HDMI<br />
Output Signals<br />
COMPONENT VIDEO HDMI<br />
Menu displayed<br />
COMPONENT VIDEO<br />
1 ON A A A Wall paper A A Only the menu is<br />
displayed<br />
A z2<br />
2 OFF A A A A A A A<br />
A<br />
z2<br />
A<br />
3 ON A A S VIDEO VIDEO VIDEO S (VIDEO) A (VIDEO) z3 A (VIDEO)<br />
4 ON A S (1080p) A<br />
A<br />
A (COMPONENT) z2<br />
5<br />
6<br />
ON<br />
ON<br />
A<br />
A<br />
S (1080i ~ 480p)<br />
S (480i/576i)<br />
A<br />
A<br />
COMPONENT<br />
A<br />
A<br />
7 ON A S (1080p) S<br />
COMPONENT<br />
S (COMPONENT)<br />
A (COMPONENT) z3<br />
A (COMPONENT)<br />
8<br />
9<br />
ON z1<br />
ON<br />
A<br />
A<br />
S (1080p)<br />
S (1080i ~ 480p)<br />
S<br />
S<br />
–<br />
COMPONENT<br />
VIDEO<br />
–<br />
S (COMPONENT)<br />
S (VIDEO)<br />
A (COMPONENT)<br />
A (VIDEO)<br />
z3<br />
10 ON A S (480i/576i) S<br />
11 ON S A A<br />
HDMI<br />
A A<br />
S (HDMI)<br />
A z2<br />
12<br />
13<br />
ON<br />
ON<br />
S<br />
S<br />
A<br />
S<br />
S<br />
A<br />
A<br />
COMPONENT<br />
VIDEO<br />
A<br />
A (COMPONENT)<br />
A<br />
A (VIDEO)<br />
z2<br />
14 ON S S S VIDEO<br />
A<br />
A (VIDEO)<br />
15 OFF A A S A A VIDEO<br />
16 OFF A S A A<br />
A<br />
COMPONENT<br />
A (COMPONENT)<br />
Only the menu is<br />
displayed<br />
z2<br />
A<br />
17 OFF A S S A VIDEO A (VIDEO)<br />
18 OFF S A A<br />
A A<br />
A<br />
HDMI<br />
z2<br />
A<br />
19 OFF S A S A VIDEO A (VIDEO)<br />
20 OFF S S A<br />
A<br />
COMPONENT<br />
A (COMPONENT) z2<br />
A<br />
21 OFF S S S VIDEO A (VIDEO)<br />
S Video signal input present<br />
A No video signal input<br />
z1 When no HDMI monitor is connected or the HDMI monitor’s power is not on<br />
ZONE2 MONITOR OUT<br />
Input Signals Output Signals<br />
COMPONENT VIDEO COMPONENT VIDEO<br />
1 A A A A<br />
2 A S A S<br />
3 S A S A<br />
4 S S S S<br />
A<br />
A z2 A (VIDEO)<br />
A No video signal output S ( ) Superimposed on the picture indicated in ( ).<br />
A ( ) Only the picture in ( ) is output.<br />
A Neither the picture nor the menu is output.<br />
z2 Only the menu is displayed when no HDMI monitor is<br />
connected or the HDMI monitor’s power is not on.<br />
z3 If an HDMI monitor is not connected or power of an HDMI<br />
monitor is not turned on, the menu is superimposed on a video<br />
image in parenthesis.<br />
• The main zone video conversion function is compatible with the following formats: NTSC, PAL, SECAM, NTSC4.43, PAL-N, PAL-M and<br />
PAL-60.<br />
• When SECAM signals of video input are up-converted, the signals are output in PAL format from the S-Video and Video connectors.<br />
• The menu display cannot be superimposed when x.v.Color signals and computer’s resolution (e.g. VGA) are input.<br />
NOTE<br />
• If you operate the menu while playing back 3D video content, the playback video is replaced by the menu screen. The playback video is<br />
not displayed behind the menu screen.<br />
• This unit does not show the status display while playing back 3D video content.
Explanation of terms<br />
A<br />
A2DP<br />
A2DP is one profile of Bluetooth definded for<br />
in-car devices or AV devices that use wireless<br />
communication instead of a cable.<br />
Adobe RGB color, Adobe YCC601 color<br />
Like x.v.Color, each of these color spaces defines<br />
a palette of available colors that is larger than the<br />
traditional RGB color model.<br />
Audyssey Dynamic Surround Expansion<br />
(A-DSX)<br />
Realistic reproduction of sound relies on the<br />
ability of audio systems to match human hearing<br />
performance. Three key requirements are: (1)<br />
frequency response, (2) dynamic range, and (3)<br />
accurate spatial reproduction. The requirements for<br />
frequency response have already been surpassed<br />
with sampling rates that exceed human hearing.<br />
The dynamic range limits of human perception<br />
have also been met with current digital audio<br />
systems operating capable of signal to noise ratios<br />
that approach 120 dB. Accurate spatial sound<br />
rendering, however, has not yet reached the limits<br />
of perception as human perception relies on the<br />
combination of sounds arriving from many more<br />
directions than what 5.1-channel surround sound<br />
systems provide. Audyssey DSX technology was<br />
developed to overcome the spatial sound rendering<br />
limitations faced by 5.1-channel surround sound<br />
formats.<br />
The ITU 5.1-channel channel standard recommends<br />
three front loudspeakers and two rear loudspeakers.<br />
The Left (L) and Right (R) front loudspeakers should<br />
be placed at ±30° relative to the central listening<br />
position. The Center (C) loudspeaker should be at<br />
0° and the surround loudspeakers (SL, SR) should<br />
be placed between 100° and 120°. All loudspeakers<br />
must be equidistant from the center listening<br />
position or compensated with time delay if that<br />
is not possible. A separate low-frequency effects<br />
(LFE) channel is used to reproduce additional bass<br />
content from the subwoofer.<br />
There are certain things that 5.1-channel surround<br />
sound systems do well compared to 2-channel<br />
stereo. For example, it is possible to move sounds<br />
across the front seamlessly. It is also possible to<br />
create ambience behind the listener. But 5.1 channel<br />
surround systems do not provide enough channels<br />
from which to render the required refl ected<br />
SVENSKA<br />
NEDERLANDS<br />
sound components for a seamless and enveloping<br />
soundstage. Unfortunately, the additional two back<br />
surround channels in 7.1-channel systems are not<br />
in the right place to provide a significant perceptual<br />
improvement.<br />
Adding more channels to a surround system is<br />
not for special effects. Accurate spatial sound<br />
reproduction requires rendering of directional<br />
sound cues and non-directional ambient cues.<br />
Refl ections arriving after the direct sound play a<br />
critical role in the perception of soundstage width<br />
and depth. To have the most impact, additional<br />
surround channels should be used to control the<br />
direction, time of arrival, and frequency response<br />
of the refl ected sound to render an expanded<br />
soundstage that reproduces sound with better<br />
localization and envelopment than what 5.1-channel<br />
systems provide.<br />
Research in the perception of auditory source width<br />
has shown that there are strong preferences in the<br />
direction of refl ected sound and the perception of<br />
soundstage width and spaciousness. The single<br />
most important direction of side-wall refl ections<br />
is ±60°. DSX provides a pair of Wide channels<br />
(LW and RW) at ±60° with appropriate frequency<br />
response and perceptual processing to match the<br />
requirements of human hearing. In fact, the Wide<br />
channels are much more critical in the presentation<br />
of a realistic soundstage than then Back Surround<br />
channels found in traditional 7.1-channel systems. A<br />
more enveloping 7.1-channel system is one in which<br />
Wide speakers are used instead of Back Surround<br />
speakers. Adding surround channels behind the<br />
listener has a very small impact compared to the<br />
increase in envelopment and soundstage width that<br />
the front wide channels will provide.<br />
After side refl ections, the next most important<br />
acoustical and perceptual cues come from refl<br />
ections above the front stage. DSX provides a pair<br />
of Height channels (LH and RH) at a ±45° azimuth<br />
angle and elevated to a 45° angle in the median<br />
plane.<br />
In addition to creating new Wide and Height<br />
channels, DSX also provides Surround Processing<br />
to enhance the envelopment of the Surround and<br />
Back Surround channels (if present). DSX Surround<br />
Processing processes the standard surround signals<br />
in the time and frequency domains to improve the<br />
perceived sense of envelopment and blending with<br />
the other speakers in the surround system.<br />
ESPAÑOL<br />
ITALIANO<br />
Audyssey Dynamic Surround Expansion is a scalable<br />
system that can adapt to the practical needs of the<br />
user. The first level of surround stage enhancement<br />
comes from adding the Wide channels. The second<br />
level comes from adding the Height channels. If it<br />
is practical to have both Wides and Heights then<br />
the surround performance will be further enhanced.<br />
DSX automatically reconfigures its processing to<br />
optimize surround rendering over any number of<br />
available speakers beyond that of 5.1-channel.<br />
Audyssey Dynamic EQ ®<br />
Audyssey Dynamic EQ solves the problem of<br />
deteriorating sound quality as volume is decreased<br />
by taking into account human perception and room<br />
acoustics. Audyssey Dynamic EQ works in tandem<br />
with Audyssey MultEQ XT to provide well-balanced<br />
sound for every listener at any volume level.<br />
Audyssey Dynamic Volume ®<br />
Audyssey Dynamic Volume solves the problem of<br />
large variations in volume level between television<br />
programs, commercials, and between the soft and<br />
loud passages of movies. Audyssey Dynamic EQ<br />
is integrated into Dynamic Volume so that as the<br />
playback volume is adjusted automatically, the<br />
perceived bass response, tonal balance, surround<br />
impression, and dialog clarity remain the same.<br />
Audyssey MultEQ ® XT<br />
Audyssey MultEQ XT is a room equalization<br />
solution that calibrates any audio system so that<br />
it can achieve optimum performance for every<br />
listener in a large listening area. Based on several<br />
room measurements, MultEQ XT calculates an<br />
equalization solution that corrects for both time<br />
and frequency response problems in the listening<br />
area and also performs a fully automated surround<br />
system setup.<br />
Auto Lip Sync<br />
If you connect the receiver to a TV that supports the<br />
Auto Lip Sync function, it can automatically correct<br />
delay between the audio and video.<br />
B<br />
Bluetooth<br />
Bluetooth is a short-distance wireless<br />
communication technology used for connecting<br />
handheld devices several meters apart. This enables<br />
notebook computers, PDA s, mobile phones, etc. to<br />
connect without a cable for transmitting audio and<br />
data.<br />
FRANÇAIS<br />
DEUTSCH<br />
ENGLISH<br />
D<br />
Deep Color<br />
This technology allows expression of more number<br />
of colors than the conventional 8 bits and can<br />
reproduce colors close to natural ones without color<br />
streak.<br />
DLNA<br />
DLNA and DLNA CERTIFIED are trademarks and/<br />
or service marks of Digital Living Network Alliance.<br />
Some contents may not be compatible with other<br />
DLNA CERTIFIED products.<br />
Dolby Digital<br />
Dolby Digital is a multi-channel digital signal format<br />
developed by Dolby Laboratories.<br />
A total of 5.1 channels are played: 3 front channels<br />
(“FL”, “FR” and “C”), 2 surround channels<br />
(“SL” and “SR”) and the “LFE” channel for low<br />
frequencies.<br />
Because of this, there is no crosstalk between<br />
channels and a realistic sound field with a “threedimensional”<br />
feeling (sense of distance, movement<br />
and positioning) is achieved.<br />
A realistic, powerful sense of presence is achieved<br />
when playing movie sources in AV rooms as well.<br />
Dolby Digital EX<br />
Dolby Digital EX is a 6.1-channel surround format<br />
proposed by Dolby Laboratories that allows users<br />
to enjoy in their homes the “DOLBY DIGITAL<br />
SURROUND EX” audio format jointly developed by<br />
Dolby Laboratories and Lucas Films.<br />
The 6.1 channels of sound, including surround back<br />
channels, provide improved sound positioning and<br />
expression of space.<br />
Dolby Digital Plus<br />
Dolby Digital Plus is an improved Dolby Digital signal<br />
format that is compatible with up to 7.1 channels<br />
of discrete digital sound and also improves sound<br />
quality thanks to extra data bit rate performance.<br />
It is upwardly compatible with conventional Dolby<br />
Digital, so it offers greater flexibility in response to<br />
the source signal and the conditions of the playback<br />
equipment.<br />
105<br />
Simple version Basic version<br />
Advanced version<br />
Information
106<br />
ENGLISH DEUTSCH FRANÇAIS ITALIANO ESPAÑOL NEDERLANDS SVENSKA<br />
Explanation of terms<br />
Dolby Headphone<br />
The Dolby Headphone technology provides<br />
a surround sound listening experience over<br />
headphones.<br />
When listening to multichannel content such<br />
as DVD movies over headphones, the listening<br />
experience is fundamentally different than listening<br />
to speakers. Since the headphone speaker drivers<br />
are covering the pinna of the ear, the listening<br />
experience differs greatly from traditional speaker<br />
playback. Dolby utilizes patented headphone<br />
perspective curves to solve this problem and<br />
provides a non-fatiguing, immersive, home theater<br />
listening experience. Dolby Headphone also<br />
delivers exceptional 3D audio from stereo material.<br />
Dolby TrueHD<br />
Dolby TrueHD is a high definition audio technology<br />
developed by Dolby Laboratories, using lossless<br />
coding technology to faithfully reproduce the sound<br />
of the studio master.<br />
This format provides the facility to support up to<br />
8 audio channels with a sampling frequency of<br />
96kHz/24bit resolution and up to 6 audio channels<br />
with a sampling frequency of 192kHz/24bit<br />
resolution. Dolby TrueHD is adopted for applications<br />
that put very high importance on sound quality.<br />
Dolby Pro Logic g<br />
Dolby Pro Logic g is a matrix decoding technology<br />
developed by Dolby Laboratories.<br />
Regular music such as that on CDs is encoded into<br />
5 channels to achieve an excellent surround effect.<br />
The surround channel signals are converted into<br />
stereo and full band signals (with a frequency<br />
response of 20 Hz to 20 kHz or greater) to create<br />
a “three-dimensional” sound image offering a rich<br />
sense of presence for all stereo sources.<br />
Dolby Pro Logic gx<br />
Dolby Pro Logic gx is a further improved version of<br />
the Dolby Pro Logic g matrix decoding technology.<br />
Audio signals recorded in 2 channels are decoded<br />
to achieve a natural sound with up to 7.1 channels.<br />
There are three modes: “Music” suited for playing<br />
music, “Movie” suited for playing movies, and<br />
“Game” which is optimized for playing games.<br />
Dolby Pro Logic gz<br />
Dolby Pro Logic gz introduces a new dimension to<br />
Home Entertainment through the addition of a pair<br />
of front height channels. Compatible with stereo,<br />
5.1-channel and 7.1-channel content, Dolby Pro<br />
Logic gz provides enhanced spaciousness, depth<br />
and dimension to movies, concert video and video<br />
game playback while maintaining the full integrity<br />
of the source mix.<br />
Dolby Pro Logic gz identifies and decodes spatial<br />
cues that occur naturally in all content, directing<br />
this information to the front height channels,<br />
complementing the performance of left and right<br />
surround sound speakers. Content that is encoded<br />
with Dolby Pro Logic gz height channel information<br />
can be even more revealing, with perceptually<br />
discrete height channel information bringing an<br />
exciting new dimension to home entertainment.<br />
Dolby Pro Logic gz, with front height channels is<br />
also an ideal alternative for households that cannot<br />
support the placement of back surround speakers<br />
of a typical 7.1-channel system but may have<br />
bookshelf space available to support the addition of<br />
height speakers.<br />
Dolby Virtual Speaker<br />
Dolby Virtual Speaker is a technology certified<br />
by Dolby Laboratories that creates a virtualized<br />
surround sound experience from two speakers<br />
using a multichannel Dolby Digital source.<br />
Additionally, Dolby Virtual Speaker can simulate the<br />
surround sound effect produced by Dolby Pro Logic<br />
or Dolby Pro Logic g.<br />
Dolby Virtual Speaker retains all the original<br />
Multichannel audio information and provides the<br />
listener with the sensation of being surrounded by<br />
additional speakers.<br />
Downmix<br />
This function converts the number of channels of<br />
surround audio to less number of channels and<br />
plays back.<br />
DTS<br />
This is an abbreviation of Digital Theater System,<br />
which is a digital audio system developed by DTS.<br />
When playing back audio by connecting this system<br />
with a device such as DTS amplifier, accurate sound<br />
field position and realistic sound effect as if you are<br />
in a movie theater can be obtained.<br />
DTS 96/24<br />
DTS 96/24 is a digital audio format enabling high<br />
sound quality playback in 5.1 channels with a<br />
sampling frequency of 96 kHz and 24 bit quantization<br />
on DVD-Video.<br />
DTS Digital Surround<br />
DTS Digital Surround is the standard digital surround<br />
format of DTS, Inc., compatible with a sampling<br />
frequency of 44.1 or 48 kHz and up to 5.1 channels<br />
of digital discrete surround sound.<br />
DTS-ES Discrete 6.1<br />
DTS-ES Discrete 6.1 is a 6.1-channel discrete<br />
digital audio format adding a surround back (SB)<br />
channel to the DTS digital surround sound.<br />
Decoding of conventional 5.1-channel audio signals<br />
is also possible according to the decoder.<br />
DTS-ES Matrix 6.1<br />
DTS-ES Matrix 6.1 is a 6.1-channel discrete digital<br />
audio format inserting a surround back (SB) channel<br />
to the DTS digital surround sound through matrix<br />
encoding. Decoding of conventional 5.1-channel<br />
audio signals is also possible according to the<br />
decoder.<br />
DTS Express<br />
DTS Express is an audio format supporting low bit<br />
rates (max. 5.1 channels, 24 to 256 kbps).<br />
DTS-HD<br />
This audio technology provides higher sound quality<br />
and enhanced functionality than the conventional<br />
DTS and is adopted as an optional audio for Blu-ray<br />
Disc. This technology supports multi-channel, high<br />
data transfer speed, high sampling frequency, and<br />
lossless audio playback. Maximum 7.1-channels are<br />
supported in Blu-ray Disc.<br />
DTS-HD High Resolution Audio<br />
DTS-HD High Resolution Audio is an improved<br />
version of the conventional DTS, DTS-ES and<br />
DTS 96/24 signals formats, compatible with<br />
sampling frequencies of 96 or 48 kHz and up to<br />
7.1 channels of discrete digital sound. High data<br />
bit rate performance provides high quality sound.<br />
This format is fully compatible with conventional<br />
products, including conventional DTS digital<br />
surround 5.1-channel data.<br />
DTS-HD Master Audio<br />
DTS-HD Master Audio is a lossless audio format<br />
created by Digital Theater System (DTS). This<br />
format provides the facility to support up to 8 audio<br />
channels with a sampling frequency of 96kHz/24bit<br />
resolution and up to 6 audio channels with a<br />
sampling frequency of 192kHz/24bit resolution.<br />
It is fully compatible with conventional products,<br />
including conventional DTS digital surround<br />
5.1-channel data.<br />
DTS Neural Surround<br />
DTS Neural Surround has been chosen as the<br />
surround sound format for XM Satellite Radio’s<br />
“XM HD Surround”, TV sports broadcasting, 7.1<br />
games, Music Direct Internet streaming as well as<br />
leading FM/HD radio stations. It delivers the rich<br />
envelopment and discrete image detail of surround<br />
sound by unmasking the audio details, typically<br />
lost by other playback modes. Audiences will<br />
experience the deep ambience and subtle details of<br />
movies, music and games.<br />
DTS NEO:6 Surround<br />
DTS NEO:6 is a matrix decoding technology<br />
for achieving 6.1-channel surround playback<br />
with 2-channel sources. It includes “DTS NEO:6<br />
Cinema” suited for playing movies and “DTS<br />
NEO:6 Music” suited for playing music.<br />
Dynamic range<br />
The difference between the maximum undistorted<br />
sound level and the minimum discernible level<br />
above the noise emitted by the device.<br />
F<br />
FLAC (Free Lossless Audio Codec)<br />
FLAC (Free Lossless Audio Codec) is a codec for<br />
audio data compression.<br />
H<br />
HDCP<br />
When transmitting digital signals between devices,<br />
this copyright protection technology encrypts<br />
the signals to prevent content from being copied<br />
without authorization.<br />
HDMI<br />
This is an abbreviation of High-Definition Multimedia<br />
Interface, which is an AV digital interface that can<br />
be connected to a TV or amplifier. Video signal and<br />
audio signal can be connected using 1 cable.
L<br />
LFE<br />
This is an abbreviation of Low Frequency Effect,<br />
which is an output channel that emphasizes<br />
low frequency effect sound. Surround audio is<br />
intensified by outputting 20 Hz to 120 Hz deep<br />
bass.<br />
M<br />
MAIN ZONE<br />
The room where this unit is placed is called the<br />
MAIN ZONE .<br />
MP3 (MPEG Audio Layer-3)<br />
This is an internationally standardized audio data<br />
compression scheme, using the “MPEG-1” video<br />
compression standard. It compresses the data<br />
volume to about one eleventh its original size while<br />
maintaining sound quality equivalent to a music CD.<br />
MPEG (Moving Picture Experts Group), MPEG-2,<br />
MPEG-4<br />
These are the names for digital compression format<br />
standards used for the encoding of video and audio.<br />
Video standards include “MPEG-1 Video”, “MPEG-<br />
2 Video”, “MPEG-4 Visual”, “MPEG-4 AVC”. Audio<br />
standards include “MPEG-1 Audio”, “MPEG-2<br />
Audio”, “MPEG-4 AAC”.<br />
P<br />
Pairing<br />
Pairing is an operation required for settings to<br />
connect two Bluetooth devices. Pairing enables<br />
Bluetooth devices to access each other.<br />
Progressive (sequential scanning)<br />
This is a scanning system of video signal that<br />
displays 1 frame of video as one image. Compared<br />
to the interlace system, this system provides<br />
images with less flickering and bleeding.<br />
Protection Circuit<br />
This is a function to prevent damage to components<br />
within the power supply when an abnormality<br />
such as an overload, excess voltage occurs or<br />
temperature for any reason.<br />
In this unit, the power indicator blinks and the unit<br />
enters standby mode when an abnormality occurs.<br />
SVENSKA<br />
NEDERLANDS<br />
S<br />
Sampling frequency<br />
Sampling involves taking a reading of a sound wave<br />
(analog signal) at regular intervals and expressing<br />
the height of the wave at each reading in digitized<br />
format (producing a digital signal).<br />
The number of readings taken in one second is<br />
called the “sampling frequency”. The larger the<br />
value, the closer the reproduced sound is to the<br />
original.<br />
Speaker impedance<br />
This is an AC resistance value, indicated in Ω<br />
(ohms). Greater power can be obtained with this<br />
value smaller.<br />
sYCC601 color<br />
Like x.v.Color, each of these color spaces defines<br />
a palette of available colors that is larger than the<br />
traditional RGB color model.<br />
V<br />
vTuner<br />
This is a free online content server for Internet<br />
radio. Note that usage fees are included in upgrade<br />
costs.<br />
For inquiries about this service, visit the vTuner site<br />
below.<br />
vTuner website: http://www.radiomarantz.com<br />
This product is protected by certain intellectual<br />
property rights of Nothing Else Matters Software<br />
and BridgeCo. Use or distribution of such technology<br />
outside of this product is prohibited without a<br />
license from Nothing Else Matters Software and<br />
BridgeCo or an authorized subsidiary.<br />
ESPAÑOL<br />
ITALIANO<br />
W<br />
WAV (Wave)<br />
WAV is a standard audio format of Windows. The<br />
file size tends to increase, but sound near the<br />
original sound can be maintained.<br />
Windows Media DRM<br />
This is a copyright protection technology developed<br />
by Microsoft.<br />
Content providers are using the digital rights<br />
management technology for Windows Media<br />
contained in this device (WM-DRM) to protect<br />
the integrity of their content (Secure Content) so<br />
that their intellectual property, including copyright,<br />
in such content is not misappropriated. This<br />
device uses WM-DRM software to play Secure<br />
Content (WM-DRM Software). If the security of<br />
the WM-DRM Software in this device has been<br />
compromised, owners of Secure Content (Secure<br />
Content Owners) may request that Microsoft<br />
revoke the WM-DRM Software’s right to acquire<br />
new licenses to copy, display and/or play Secure<br />
Content. Revocation does not alter the WM-DRM<br />
Software’s ability to play unprotected content.<br />
A list of revoked WM-DRM Software is sent to<br />
your device whenever you download a license for<br />
Secure Content from the Internet or from a PC.<br />
Microsoft may, in conjunction with such license,<br />
also download revocation list onto your device on<br />
behalf of Secure Content Owners.<br />
Windows Media Player Ver.11<br />
This is a media player distributed free of charge by<br />
Microsoft Corporation.<br />
It can be used to play playlists created with<br />
Windows Media Player Ver. 11 as well as files in<br />
such formats as WMA, DRM WMA, MP3 and WAV.<br />
WMA (Windows Media Audio)<br />
This is audio compression technology developed by<br />
Microsoft Corporation.<br />
WMA data can be encoded using Windows<br />
Media ® Player Ver.7, 7.1, Windows Media ® Player<br />
for Windows ® XP and Windows Media ® Player 9<br />
Series.<br />
To encode WMA files, only use applications<br />
authorized by Microsoft Corporation. If you use<br />
an unauthorized application, the file may not work<br />
properly.<br />
FRANÇAIS<br />
DEUTSCH<br />
ENGLISH<br />
Explanation of terms<br />
X<br />
x.v.Color<br />
This function lets HDTVs display colors more<br />
accurately. It enables display with natural, vivid<br />
colors. “x.v.Color” is a Sony registered trademark.<br />
Z<br />
ZONE2<br />
This unit can operate in a room other than the room<br />
where this unit is placed (MAIN ZONE) (ZONE2<br />
playback). The room for ZONE2 playback is called<br />
ZONE2.<br />
ZONE3<br />
This unit can operate in a room other than the room<br />
where this unit is placed (MAIN ZONE) (ZONE3<br />
playback). The room for ZONE3 playback is called<br />
ZONE3.<br />
107<br />
Simple version Basic version<br />
Advanced version<br />
Information
108<br />
ENGLISH DEUTSCH FRANÇAIS ITALIANO ESPAÑOL NEDERLANDS SVENSKA<br />
Troubleshooting<br />
If a problem should arise, first check the following:<br />
1. Are the connections correct?<br />
2. Is the set being operated as described in the user guide?<br />
3. Are the other components operating properly?<br />
If this unit does not operate properly, check the items listed in the table below. Should the problem persist,<br />
there may be a malfunction.<br />
In this case, disconnect the power immediately and contact your store of purchase.<br />
GGeneralH<br />
Symptom Cause/Solution Page<br />
Power does not turn • Check whether the power plug is correctly inserted into the power 6<br />
on.<br />
outlet.<br />
• The protection circuit is active. Disconnect the power plug from<br />
the electric outlet, wait 5 to 10 seconds and then insert it back<br />
into the outlet.<br />
5, 107<br />
Display is off. • Set “Display” on the menu to something other than “OFF”. 82<br />
The power indicator<br />
is blinking red<br />
in intervals of<br />
approximately 2<br />
seconds.<br />
The power indicator<br />
is blinking red<br />
in intervals of<br />
approximately 0.5<br />
seconds.<br />
After turning on the<br />
power, the power<br />
indicator is blinking<br />
red in intervals of<br />
approximately 0.5<br />
seconds.<br />
Set does not operate<br />
properly.<br />
• The temperature inside the unit has risen. Please turn off power<br />
once, and re-apply the power after the temperature has fallen<br />
sufficiently.<br />
• Please re-install this unit in a place having good ventilation.<br />
• Please use speakers which have the specified impedance.<br />
• The speaker cable has shorted (is touching). Firmly twist the core<br />
wire in the speaker cable, and then re-connect it to the speaker<br />
terminal.<br />
• This unit amplifier circuit has failed. Turn off the power and please<br />
contact the <strong>Marantz</strong> service adviser.<br />
• Reset the microprocessor. 110<br />
GVideoH<br />
Symptom Cause/Solution Page<br />
No picture appears. • Check the TV connection.<br />
6<br />
• Set the TV input correctly.<br />
7<br />
–<br />
–<br />
5<br />
5<br />
–<br />
GAudioH<br />
Symptom Cause/Solution Page<br />
Audio is not output. • Check the connections for all devices.<br />
6, 16 – 23<br />
• Check the speaker connections.<br />
6, 46 – 48,<br />
50, 51<br />
–<br />
26, 59<br />
26, 59<br />
25, 59<br />
67<br />
94<br />
No sound is<br />
produced from<br />
surround speaker.<br />
No sound is<br />
produced from<br />
surround back<br />
speaker.<br />
No sound is<br />
produced from front<br />
height speaker.<br />
No sound is<br />
produced from front<br />
wide speaker.<br />
No sound is<br />
produced from<br />
subwoofer.<br />
DTS sound is not<br />
output.<br />
Dolby TrueHD, DTS-<br />
HD, Dolby Digital<br />
Plus audio is not<br />
output.<br />
• Check whether the audio device power is turned on.<br />
• Adjust the master volume.<br />
• Cancel the mute mode.<br />
• Select a suitable input source.<br />
• Select a suitable input mode.<br />
• Disconnect the headphones. No sound is output from the speakers<br />
or the PRE OUT connectors when headphones are connected.<br />
• Check if the surround speakers are connected to the SURROUND<br />
terminals.<br />
• Set “Amp Assign” on the menu to “Normal”.<br />
• Set “Speaker Config.” – “S.Back” on the menu to something<br />
other than “None”.<br />
• Set the surround mode to something other than “STEREO”.<br />
• Set “Amp Assign” on the menu to “Normal”.<br />
• Set “Speaker Config.” – “Surround” on the menu to something<br />
other than “None”.<br />
• Set “Amp Assign” on the menu to “Normal”.<br />
• Set “Speaker Config.” – “Surround” on the menu to something<br />
other than “None”.<br />
• Check the subwoofer connections.<br />
• Turn on the subwoofer’s power.<br />
• Set “Speaker Config.” – “Subwoofer” on the menu to “Yes”.<br />
• If “Front” and “Center” for “Speaker Config.” are set to “Large”,<br />
and “Subwoofer Mode” is set to “LFE”, no sound may be output<br />
from the subwoofers, depending on the input signal or selected<br />
surround mode.<br />
–<br />
74<br />
75<br />
43<br />
74<br />
75<br />
74<br />
75<br />
6, 46 – 48<br />
7<br />
74<br />
74<br />
• Set “Decode Mode” on the menu to “Auto” or “DTS”. 67<br />
• Make HDMI connections. 16
GHDMIH<br />
SVENSKA<br />
NEDERLANDS<br />
Symptom Cause/Solution Page<br />
No audio is<br />
output with HDMI<br />
connection.<br />
No video is<br />
output with HDMI<br />
connection.<br />
When the following<br />
operations are<br />
performed on<br />
devices compatible<br />
with HDMI control,<br />
the same operations<br />
occur on this unit.<br />
• Power ON/OFF<br />
• Switching audio<br />
output devices<br />
• Adjust volume<br />
• Switch input source<br />
• Check the connection of the HDMI connectors.<br />
• When outputting HDMI audio from the speakers, set “HDMI<br />
Audio Out” on the menu to “AMP”.<br />
• When outputting HDMI audio from a TV, set “HDMI Audio Out”<br />
on the menu to “TV”.<br />
• Check the connection of the HDMI connectors.<br />
• Set the input source to match the connected HDMI connector.<br />
• Check whether the TV is compatible with copyright protection<br />
(HDCP). If connected to a device not compatible with HDCP, video<br />
will not be output correctly.<br />
• Set “HDMI Control” on the menu to “OFF”. To operate power<br />
only for each device, set “Power Off Control” to “OFF”.<br />
16<br />
77<br />
77<br />
16<br />
16, 25<br />
15<br />
52, 77<br />
GRadioH<br />
Symptom Cause/Solution Page<br />
Reception fails, or • Change the antenna orientation or position.<br />
22<br />
there is a lot of noise • Separate the AM loop antenna from the unit.<br />
22<br />
or distortion. • Use an FM outdoor antenna.<br />
22<br />
• Separate the antenna from other connection cables.<br />
22<br />
GM-XPortH<br />
Symptom Cause/Solution Page<br />
Audio is not output • Check that the Bluetooth device and Wireless receiver (RX101) –<br />
when a wireless<br />
receiver (RX101 is<br />
connected).<br />
are correctly paired.<br />
ESPAÑOL<br />
ITALIANO<br />
FRANÇAIS<br />
DEUTSCH<br />
ENGLISH<br />
GInternet radio / Media server / iPod / USB memory device / Flickr / Napster / Last.fmH<br />
Symptom Cause/Solution Page<br />
When a USB • The set cannot recognize a USB memory device. Check the 20<br />
memory device is connection.<br />
connected, “USB” is • A USB memory device not conforming to mass storage class or –<br />
not displayed on the MTP standards is connected. Connect a USB memory device<br />
menu.<br />
conforming to mass storage class or MTP standards.<br />
• A USB memory device that the set cannot recognize is connected.<br />
This is not a malfunction. <strong>Marantz</strong> does not guarantee that all USB<br />
memory devices will operate or receive power.<br />
–<br />
• USB memory device is connected via USB hub. Connect the USB<br />
memory device directly to the USB port.<br />
–<br />
Files on a USB • USB memory device is in format other than FAT16 or FAT32. –<br />
memory device Set the format to FAT16 or FAT32. For details, refer to the USB<br />
cannot be played. memory device’s operating instructions.<br />
• USB memory device is divided into multiple partitions. When<br />
divided into multiple partitions, only files stored in the top partition<br />
can be played.<br />
–<br />
• Files are stored in a non-compatible format. Record the files in a<br />
compatible format.<br />
28<br />
• You are attempting to play a file that is copyright protected. Files<br />
that are copyright protected cannot be played on this set.<br />
28<br />
The file names • Characters that cannot be displayed are used. This is not a –<br />
are not displayed malfunction. On this set, characters that cannot be displayed are<br />
properly (“...”, etc.). replaced with a “.”.<br />
Internet radio cannot • Ethernet cable is not properly connected or network is 24<br />
be played.<br />
disconnected. Check the connection status.<br />
• Program is being broadcast in non-compatible format. Only<br />
Internet radio programs in MP3 and WMA can be played on this<br />
set.<br />
33<br />
• The computer’s or router’s firewall is activated. Check the<br />
computer’s or router’s firewall settings.<br />
–<br />
• Radio station is not currently broadcasting. Choose a radio station<br />
that is currently broadcasting.<br />
33, 34<br />
• IP address is wrong. Check the set’s IP address.<br />
79<br />
Files stored on a • Files are stored in a non-compatible format. Record in a compatible 33<br />
computer cannot be format.<br />
played.<br />
• You are attempting to play a file that is copyright protected. Files<br />
that are copyright protected cannot be played on this set.<br />
33<br />
• Set and computer are connected by USB cable. The set’s USB<br />
port cannot be used for connection to a computer.<br />
–<br />
Server is not found, • The computer’s or router’s firewall is activated. Check the –<br />
or it is not possible computer’s or router’s firewall settings.<br />
to connect to the • Computer’s power is not turned on. Turn on the power.<br />
–<br />
server.<br />
• Server is not running. Launch the server.<br />
–<br />
• Set’s IP address is wrong. Check the set’s IP address.<br />
79<br />
• Connecting to the media server may take a few minutes the first<br />
time you attempt to make a connection.<br />
–<br />
iPod cannot be • Some iPods do not support being used connected directly to the 20<br />
played.<br />
USB port.<br />
109<br />
Simple version Basic version<br />
Advanced version<br />
Information
110<br />
ENGLISH DEUTSCH FRANÇAIS ITALIANO ESPAÑOL NEDERLANDS SVENSKA<br />
Symptom Cause/Solution Page<br />
When an iPod is • “No Connection” may display if you connect an iPod that has –<br />
connected, “No only a small amount of charge remaining in its battery to this unit.<br />
Connection” is<br />
displayed.<br />
Should this occur, charge the iPod before connecting it to this unit.<br />
Cannot connect to • Radio station is not currently broadcasting. Wait a while before –<br />
preset or favorite trying again.<br />
radio stations. • Radio station is not currently in service. It is not possible to<br />
connect to radio stations that are no longer in service.<br />
–<br />
For some radio • Station is congested or not currently broadcasting. Wait a while –<br />
stations, “Server<br />
Full” or “Connection<br />
Down” is displayed<br />
and station cannot be<br />
connected to.<br />
before trying again.<br />
Sound is broken • Network’s signal transfer speed is slow or communications lines –<br />
during playback. or radio station is congested. This is not a malfunction. When<br />
playing broadcast data with a high bit rate, the sound may be<br />
broken, depending on the communications conditions.<br />
Sound quality is poor<br />
or played sound is<br />
noisy.<br />
• File being played has a low bit rate. This is not a malfunction. –<br />
Cannot compile • This unit does not respond to playlist compilation. When the –<br />
Playlist.<br />
playlist is compiled in PC Application, it is registered to “My<br />
Library”. In this way, the playlist can be played in this unit<br />
Cannot delete<br />
Tracks, Playlists,<br />
Channels registered<br />
in “My Library”<br />
• Cannot be done with this unit. Delete from PC Application. –<br />
Cannot login to • Login information is incorrect. Check if the Username for Napster 79<br />
Napster. (“Incorrect has been properly entered. Re-enter the Password. (Password is<br />
Username or<br />
not displayed.)<br />
Password” is<br />
displayed.)<br />
http://www.napster.com/choose/index_default.html<br />
GRemote Control UnitH<br />
Symptom Cause/Solution Page<br />
The set cannot be • Batteries are worn out. Replace with new batteries.<br />
98<br />
operated with the • Operate the remote control unit within a distance of about 7 m 98<br />
remote control unit. from this unit and at an angle of within 30°.<br />
• Remove any obstacle between this unit and the remote control<br />
unit.<br />
98<br />
• Insert the batteries in the proper direction, checking the q and<br />
w marks.<br />
98<br />
• The set’s remote control sensor is exposed to strong light (direct<br />
sunlight, inverter type fluorescent bulb light, etc.). Move the set<br />
to a place in which the remote control sensor will not be exposed<br />
to strong light.<br />
98<br />
Resetting the microprocessor<br />
Perform this procedure if the display is abnormal or if operations cannot be performed.<br />
When the microprocessor is reset, all the settings are reset to their default values.<br />
Various setting details can be saved and reset on this device. If setting details are saved before returning<br />
to the default values, after returning to the default settings, setting details can be returned to the same<br />
values as before returning to the defaults.<br />
1 When<br />
2 Turn<br />
3 <strong>Press</strong><br />
4<br />
Once<br />
5 <strong>Press</strong><br />
ON/STANDBY AUTO MENU ENTER<br />
SURROUND MODE SLEEP<br />
the power is ON, press and hold SLEEP and ENTER for more than 3 seconds.<br />
After “MEMORY SAVING” is shown on the display, “COMPLETE”is shown to inform you that the<br />
settings have been saved.<br />
off the power using ON/STANDBY.<br />
ON/STANDBY while simultaneously pressing SURROUND MODE and AUTO.<br />
the display starts flashing at intervals of about 1 second, release the two<br />
buttons.<br />
and hold SLEEP and MENU for more than 3 seconds.<br />
After “MEMORY LOAD” is shown on the display, “COMPLETE” is shown to inform you that the<br />
settings have returned to those saved in step 1.<br />
• To return all of the settings to the default values, perform steps 2 to 4 without performing step 1.<br />
• If in step 3 the display does not flash at intervals of about 1 second, start over from step 1.
Specifications<br />
SVENSKA<br />
n Audio section<br />
• Power amplifier<br />
Rated output: Front:<br />
125 W + 125 W (8 Ω, 20 Hz – 20 kHz with 0.08 % T.H.D.)<br />
Center:<br />
125 W (8 Ω, 20 Hz – 20 kHz with 0.08 % T.H.D.)<br />
Surround:<br />
125 W + 125 W (8 Ω, 20 Hz – 20 kHz with 0.08 % T.H.D.)<br />
Surround back / Front height / Front wide:<br />
125 W + 125 W (8 Ω, 20 Hz – 20 kHz with 0.08 % T.H.D.)<br />
Maximum effective output power: Front:<br />
195 W + 195 W (6 Ω, 1 kHz with 10 % T.H.D.)<br />
Center:<br />
195 W (6 Ω, 1 kHz with 10 % T.H.D.)<br />
Surround:<br />
195 W + 195 W (6 Ω, 1 kHz with 10 % T.H.D.)<br />
Surround back / Front height / Front wide:<br />
195 W + 195 W (6 Ω, 1 kHz with 10 % T.H.D.)<br />
Output connectors: 6 – 8 Ω<br />
• Analog<br />
Input sensitivity/Input impedance: 200 mV/47 kΩ<br />
Frequency response: 10 Hz – 100 kHz — +1, –3 dB (DIRECT mode)<br />
S/N: 96 dB (IHF–A weighted, DIRECT mode)<br />
Distortion: 0.008 % (20 Hz ~ 20 kHz) (DIRECT mode)<br />
Rated output: 1.2 V<br />
• Digital<br />
D/A output: Rated output — 2 V (at 0 dB playback)<br />
Total harmonic distortion — 0.008 % (1 kHz, at 0 dB)<br />
S/N ratio — 102 dB<br />
Dynamic range — 100 dB<br />
Digital input: Format — Digital audio interface<br />
• Phono equalizer (PHONO input — REC OUT)<br />
Input sensitivity: 2.5 mV<br />
RIAA deviation: ±1 dB (20 Hz to 20 kHz)<br />
S/N: 74 dB (A weighting, with 5 mV input)<br />
Rated output: 150 mV<br />
Distortion factor: 0.03 % (1 kHz, 3 V)<br />
n Video section<br />
• Standard video connectors<br />
Input/output level and impedance: 1 Vp-p, 75 Ω<br />
Frequency response: 5 Hz – 10 MHz — +1, –3 dB<br />
NEDERLANDS<br />
ESPAÑOL<br />
ITALIANO<br />
FRANÇAIS<br />
DEUTSCH<br />
ENGLISH<br />
• Color component video connector<br />
Input/output level and impedance: Y (brightness) signal — 1 Vp-p, 75 Ω<br />
PB / CB signal — 0.7 Vp-p, 75 Ω<br />
PR / CR signal — 0.7 Vp-p, 75 Ω<br />
Frequency response: 5 Hz – 60 MHz — +0, –3 dB (when “Video Convert” set to “OFF”)<br />
n Tuner section [FM] [AM]<br />
(Note: μV at 75 Ω, 0 dBf = 1 x 10 –15 W)<br />
Receiving Range: 87.5 MHz – 108.0 MHz 522 kHz – 1611 kHz<br />
Usable Sensitivity: 1.2 μV (12.8 dBf) 18 μV<br />
50 dB Quieting Sensitivity: MONO 2.0 μV (17.3 dBf)<br />
STEREO 42 μV (34.5 dBf)<br />
S/N (IHF-A): MONO 72 dB<br />
STEREO 67 dB<br />
Total harmonic Distortion (at 1 kHz): MONO 0.3 %<br />
STEREO 0.7 %<br />
n General<br />
Power supply: AC 230 V, 50 Hz<br />
Power consumption: 700 W<br />
0.2 W (Standby)<br />
4.0 W (CEC standby)<br />
Maximum external dimensions: 440 (W) x 187 (H) x 406 (D) mm<br />
Weight: 13.0 kg<br />
n Remote control unit (RC011SR)<br />
Batteries: R03/AAA Type (two batteries)<br />
For purposes of improvement, specifications and design are subject to change without notice.<br />
111<br />
Simple version Basic version<br />
Advanced version<br />
Information
112<br />
ENGLISH DEUTSCH FRANÇAIS ITALIANO ESPAÑOL NEDERLANDS SVENSKA<br />
Index<br />
v Numerics<br />
2.1-channel ························································· 48<br />
3D ······································································· 15<br />
5.1-channel ··················································· 46, 47<br />
6.1-channel ··················································· 45, 47<br />
7.1-channel ··············································· 5, 45, 46<br />
v A<br />
A2DP ·························································· 22, 105<br />
Accessories ·························································· 2<br />
Add New Feature ··············································· 83<br />
Adjust CH ··························································· 72<br />
Adjusting the master volume ····························· 26<br />
Adobe RGB color / Adobe YCC601 color ········· 105<br />
A-DSX Soundstage ············································· 71<br />
AM loop antenna ················································ 22<br />
Amp Assign ························································ 74<br />
ARC ···································································· 15<br />
Aspect ································································ 67<br />
Audio Adjust ······················································· 69<br />
Audio cable ······················· 6, 17, 18, 19, 20, 21, 23<br />
Audio Delay ························································ 73<br />
Audio Setup ························································ 77<br />
Audio/Video Adjust ············································· 69<br />
Audyssey Auto Setup ····································· 7, 49<br />
Audyssey DSX ···················································· 71<br />
Audyssey Dynamic EQ ······························· 71, 105<br />
Audyssey Dynamic Surround Expansion<br />
(A-DSX) ····························································· 105<br />
Audyssey Dynamic Volume ······················· 71, 105<br />
Audyssey MultEQ XT ··························· 70, 95, 105<br />
Audyssey Settings ············································· 70<br />
Auto Lip Sync ············································· 77, 105<br />
Auto Preset ························································ 64<br />
Auto Setup ····················································· 7, 49<br />
v B<br />
Base Curve Copy ················································ 72<br />
Bass ····························································· 70, 80<br />
Bass Setting ······················································· 75<br />
Bi-amp ································································ 48<br />
Bluetooth ···················································· 22, 105<br />
Brightness ·························································· 73<br />
v C<br />
Cable<br />
Audio cable ····················· 6, 17, 18, 19, 20, 21, 23<br />
Coaxial digital cable ········································· 18<br />
Component video cable ························ 17, 18, 19<br />
Ethernet cable·················································· 24<br />
HDMI cable ·················································· 6, 16<br />
Optical cable ··································· 17, 19, 20, 21<br />
Speaker cable ···················································· 6<br />
Video cable ··········································· 17, 18, 19<br />
Channel ······························································ 80<br />
Channel Level ··············································· 53, 76<br />
Characters ·························································· 62<br />
Chroma Level ····················································· 73<br />
C.Image ······························································ 69<br />
Coaxial digital cable ············································ 18<br />
Component video cable ························· 17, 18, 19<br />
Condensation ······················································· 3<br />
Connection<br />
7.1CH INPUT terminal ······································ 23<br />
Antenna ··························································· 22<br />
Blu-ray Disc player ··································6, 16, 17<br />
Cable TV ··························································· 18<br />
CD player ························································· 20<br />
CD recorder ····················································· 21<br />
DC OUT (TRIGGER OUT) jacks ························ 51<br />
Digital camcorder ······································· 16, 19<br />
DVD player ················································· 16, 18<br />
External power amplifier ·································· 23<br />
Game console ·················································· 16<br />
HDMI ······························································· 15<br />
Home network (LAN) ······································· 24<br />
iPod (USB) ························································ 20<br />
Power cord ························································· 6<br />
Record player ··················································· 21<br />
Remote control jacks ······································· 50<br />
RS-232C connector ·········································· 51<br />
Satellite tuner ··················································· 18<br />
Set-top box ················································ 16, 18<br />
Speaker ························································ 5, 46<br />
TV····························································6, 16, 17<br />
USB memory device ········································ 20<br />
Video cassette recorder ····························· 16, 19<br />
Wireless receiver (RX101) ································ 22<br />
Contrast ······························································ 73<br />
Crossover Frequency ········································· 76<br />
C.Width ······························································ 69<br />
v D<br />
D.Comp ······························································ 69<br />
Decode Mode ···················································· 67<br />
Deep Color ················································· 15, 105<br />
Dimension ·························································· 69<br />
Direct mode ······················································· 27<br />
Display ································································ 82<br />
Distance ····························································· 75<br />
DLNA ································································ 105<br />
DNR ···································································· 73<br />
Dolby<br />
Dolby Digital············································· 42, 105<br />
Dolby Digital EX ······································· 42, 105<br />
Dolby Digital Plus ····································· 42, 105<br />
Dolby Headphone ···································· 43, 106<br />
Dolby Pro Logic II ··········································· 106<br />
Dolby Pro Logic IIx ········································· 106<br />
Dolby Pro Logic IIz ··································· 45, 106<br />
Dolby TrueHD ··········································· 42, 106<br />
Dolby Virtual Speaker ······························· 43, 106<br />
Downmix ·························································· 106<br />
DRC ···································································· 69<br />
DTS ···························································· 42, 106<br />
DTS 96/24 ················································ 42, 106<br />
DTS-ES Discrete 6.1 ································ 42, 106<br />
DTS-ES Matrix 6.1 ··································· 42, 106<br />
DTS-HD ···················································· 42, 106<br />
DTS-HD High Resolution Audio ····················· 106<br />
DTS-HD Master Audio ··································· 106<br />
DTS Digital Surround ····································· 106<br />
DTS Express ·················································· 106<br />
DTS NEO:6 Surround ··························· 41, 106<br />
DTS Neural Surround ······························· 42, 106<br />
Dynamic EQ ······················································· 71<br />
Dynamic range ················································· 106<br />
Dynamic Volume ················································ 71<br />
v E<br />
Enhancer ···························································· 73<br />
EQ Customize ···················································· 77<br />
Error messages (Auto Setup) ····························· 11<br />
Ethernet cable ···················································· 24<br />
v F<br />
Fader function ···················································· 53<br />
F.Height ······························································ 75<br />
Firmware Update ··············································· 83<br />
FLAC ································································ 106<br />
Flickr ····························································· 33, 37<br />
FM indoor antenna ············································· 22<br />
Front A/B (connection) ································· 46, 48<br />
Front height speaker ···································· 45, 46<br />
Front Panel ························································· 94<br />
Front wide speaker ······································ 45, 46<br />
F.Wide ································································ 75<br />
v G<br />
GUI ····································································· 81<br />
v H<br />
HDCP ························································· 15, 106<br />
HDMI ·························································· 15, 106<br />
HDMI 1.4a ·························································· 15<br />
HDMI Audio Out ················································ 77<br />
HDMI cable ···················································· 6, 16<br />
HDMI Control ··············································· 52, 77<br />
HDMI Setup ······················································· 77<br />
Headphones ······················································· 94<br />
Height Gain ························································ 70<br />
HPF ···································································· 80<br />
HT-EQ ································································· 69<br />
Hue ····································································· 73<br />
v I<br />
Information ························································· 84<br />
Audio Input Signal ············································ 84<br />
HDMI Information ············································ 84<br />
Preset Channel ················································ 84<br />
Status ······························································· 84<br />
Input Assign ······················································· 65<br />
Input Mode ························································· 67<br />
Input Setup ························································· 63<br />
Input signal ················································· 42, 102<br />
Inputting characters ··········································· 62<br />
Interval ······························································· 68<br />
i/p Scaler ····························································· 66<br />
v L<br />
Last.fm ······························································· 39<br />
Learn function ···················································· 89<br />
Level Lch ···························································· 80<br />
Level Rch ··························································· 80<br />
LFE ····························································· 69, 107<br />
Listening mode ·················································· 41<br />
Listening position ················································· 8<br />
v M<br />
Macro function ··················································· 91<br />
Maintenance Mode ············································ 82<br />
MAIN ZONE ····················································· 107<br />
Manual EQ ························································· 72<br />
Manual Setup ····················································· 74<br />
Master volume display ······································· 81<br />
M-DAX ································································ 73<br />
Menu map ·························································· 60<br />
Monitor Out ························································ 77<br />
MP3 ·································································· 107<br />
MPEG ······························································· 107<br />
MPEG-4 AAC ···················································· 107<br />
MultEQ XT ·························································· 70<br />
Mute Level ··················································· 80, 81<br />
M-XPort ······························································ 22
v N<br />
Napster ························································· 33, 38<br />
Network Setup ··················································· 78<br />
Last.fm Display ················································ 79<br />
Network Connecting ········································ 78<br />
Network Information ········································ 79<br />
Other································································ 79<br />
v O<br />
Optical cable ····································· 17, 19, 20, 21<br />
Option Setup ······················································ 81<br />
Display ····························································· 82<br />
GUI··································································· 81<br />
Setup Lock ······················································· 82<br />
Source Delete ·················································· 81<br />
Trigger Out ······················································· 82<br />
Volume Control ················································ 81<br />
Zone Rename ·················································· 82<br />
v P<br />
Pairing ······························································ 107<br />
Panel lock function ············································· 57<br />
Panorama ··························································· 69<br />
Parameter Check ················································ 11<br />
Picture Adjust ····················································· 73<br />
Playback<br />
Blu-ray Disc player ··········································· 26<br />
CD player ························································· 26<br />
Direct ······························································· 43<br />
DVD player ······················································· 26<br />
Flickr································································· 37<br />
FM/AM broadcasts ·········································· 30<br />
Internet radio ··················································· 34<br />
iPod(USB) ························································· 27<br />
Last.fm····························································· 39<br />
Media server ···················································· 36<br />
MP3 ··························································· 28, 33<br />
MPEG-4 AAC ··················································· 33<br />
Multi-channel ··················································· 41<br />
Napster ···························································· 38<br />
Network audio ················································· 33<br />
Pure direct ······················································· 43<br />
Stereo ······························································ 43<br />
USB memory device ········································ 28<br />
WMA ························································· 28, 33<br />
ZONE2 ····························································· 59<br />
ZONE3 ····························································· 59<br />
Playback Mode ··················································· 68<br />
Power Off Control ·············································· 77<br />
Power On Level ··········································· 80, 81<br />
Preset codes ······················································ 87<br />
SVENSKA<br />
NEDERLANDS<br />
Preset Name ······················································ 64<br />
Preset Skip ························································· 64<br />
Presetting radio stations ···································· 30<br />
Progressive ······················································ 107<br />
Progressive Mode ·············································· 67<br />
Protection circuit ·············································· 107<br />
PTY ····································································· 31<br />
v R<br />
Random ······························································ 68<br />
RDS ···································································· 31<br />
Rear panel ·························································· 96<br />
Reference Level Offset ······································ 71<br />
Remote control settings ····································· 85<br />
Remote control unit ····································· 86, 97<br />
Inserting the batteries ······································ 98<br />
Operating AV equipment ································· 86<br />
Operating components ···································· 88<br />
Registering Preset Codes ································ 87<br />
Remote mode ···················································· 27<br />
Rename ······························································ 68<br />
Repeat ································································ 68<br />
Resetting the microprocessor ·························· 110<br />
Resolution ·························································· 67<br />
RGB Range ························································· 77<br />
RT ······································································· 32<br />
v S<br />
Sampling frequency ········································· 107<br />
S.Back ································································ 75<br />
Screensaver ······················································· 81<br />
Selecting the input source ································· 25<br />
Setup Lock ························································· 82<br />
Sleep timer ························································· 53<br />
Slide Show ························································· 68<br />
Source Delete ···················································· 81<br />
Source Level ······················································ 68<br />
Speaker<br />
Connect ······················································· 5, 46<br />
Install ··························································· 5, 45<br />
Set up ···························································7, 49<br />
Speaker cable ······················································· 6<br />
Speaker Config. ·················································· 74<br />
Speaker impedance ······································ 5, 107<br />
Speaker Setup ···················································· 74<br />
Stage Height ······················································ 72<br />
Stage Width ······················································· 72<br />
Standby Source ·················································· 77<br />
Still Picture ························································· 68<br />
Subwoofer setting ················································ 8<br />
Surround back speaker ······················· 5, 45, 46, 47<br />
Surround Mode ·········································· 41, 100<br />
ESPAÑOL<br />
ITALIANO<br />
Surround Parameter ··········································· 69<br />
Switcheing the light illumination ························ 85<br />
Switching the front speakers ····························· 26<br />
Switching the tuning increment ························· 32<br />
sYCC601 color ·················································· 107<br />
v T<br />
Tone ··································································· 70<br />
Tone Control ······················································· 70<br />
TP ······································································· 31<br />
Trademark ·························································· 99<br />
Treble ··························································· 70, 80<br />
Trigger Out ························································· 82<br />
Troubleshooting ··············································· 108<br />
Turning off the sound temporarily ······················ 26<br />
Turn off power (standby) ···································· 12<br />
Turn on power ······················································ 7<br />
v V<br />
Video ·································································· 66<br />
Video cable ············································· 17, 18, 19<br />
Video conversion ················································ 14<br />
Video Convert ····················································· 66<br />
Video Mode ························································ 66<br />
Video Select ······················································· 66<br />
Volume Control ·················································· 81<br />
Volume Level ····················································· 80<br />
Volume Limit ················································ 80, 81<br />
vTuner ······························································ 107<br />
v W<br />
WAV ································································· 107<br />
Web control ························································ 55<br />
Windows Media DRM ······································ 107<br />
Windows Media Player Ver.11 ························· 107<br />
Wireless LAN-compatible mobile terminal ········· 54<br />
WMA ································································ 107<br />
v X<br />
x.v.Color ····················································· 15, 107<br />
v Z<br />
ZONE2 ·················································· 58, 95, 107<br />
ZONE3 ·················································· 58, 95, 107<br />
Zone Rename ····················································· 82<br />
Zone Setup ························································· 80<br />
FRANÇAIS<br />
DEUTSCH<br />
ENGLISH<br />
113<br />
Simple version Basic version<br />
Advanced version<br />
Information
List of preset codes / Liste de codes préréglés / Lista de códigos pre-ajustados / Liste von voreingestellten Codes<br />
Lista dei codici pre-regolati / Lijst van vooringestelde codes / Förteckning över förinställda koder<br />
Device select : BD<br />
Blu-ray Disc Player<br />
D Denon 5034, 5035, 5036<br />
H Hitachi 5031, 5032, 5033<br />
I Integra 5013<br />
J JWC<br />
5014, 5015, 5017, 5018,<br />
5019, 5020<br />
L LG 5010, 5011<br />
M <strong>Marantz</strong> 5000, 5026, 5027<br />
Mitsubishi 5024, 5025<br />
O Onkyo 5013<br />
P Panasonic 5001, 5002, 5003<br />
Philips 5004<br />
Pioneer 5005<br />
R RCA 5012<br />
S Samsung 5005<br />
Sharp 5028, 5029, 5030<br />
Sony 5007, 5008, 5009, 5016<br />
T Toshiba 5012<br />
Y Yamaha 5021, 5022, 5023<br />
Device select : DVD<br />
DVD Player<br />
A Aiwa 2036, 2037<br />
Apex<br />
2012, 2017, 2018, 2019,<br />
2021, 2034<br />
B BOSE 2038, 2039, 2063<br />
D Denon 2047, 2048<br />
F Funai 2049<br />
G GE 2009, 2020, 2029, 2033<br />
H Harman Kardon 2061<br />
Hitachi 2008, 2012, 2031<br />
J JVC<br />
2006, 2010, 2040, 2041,<br />
2042, 2043<br />
K Kenwood 2053, 2054<br />
Koss 2058<br />
M Magnavox 2007, 2011, 2023, 2025<br />
<strong>Marantz</strong> 2025, 2065<br />
<strong>Marantz</strong> (Blu-ray) 2064<br />
Mitsubishi 2011, 0215<br />
O Onkyo 2062<br />
Oritron 2009, 2030<br />
P Panasonic 2003, 2015, 2016, 2055<br />
Philips 2007, 2011, 2058<br />
Pioneer 2002, 2014, 2056<br />
Proscan 2009, 2020, 2032<br />
R RCA<br />
2005, 2009, 2020, 2035,<br />
2057<br />
S Sampo 2041<br />
1 PRESET CODE<br />
Samsung<br />
2008, 2012, 2022, 2024,<br />
2027<br />
Sanyo 2050, 2052<br />
Sharp 2044, 2045<br />
Sherwood 2051<br />
Sony 2001, 2013, 2059<br />
T Toshiba 2004, 2008, 2026, 2028<br />
Y Yamaha 2046, 2060<br />
Z Zenith 2010<br />
Device select : SAT<br />
Satellite Receiver<br />
A Alphastar 4027<br />
Amstrad 4046, 4047, 4050<br />
Atsky 4048<br />
B B Sky B 4021, 4045, 4046<br />
C Chaparral 4039<br />
D DIRECTV 4001, 4016, 4044<br />
DISH Network 4030<br />
Drake 4026<br />
E Echostar<br />
4007, 4017, 4018, 4019,<br />
4020, 4062, 4063, 4064<br />
Eurosky 4047, 4056<br />
Express Vu 4017<br />
F Foxtel 4051<br />
Freesat 4056<br />
Fujitsu 4025<br />
G GE 4002, 4008, 4009<br />
General Instruments 4036, 4037<br />
Gradiente 4044, 4057<br />
H Hitachi 4001, 4015<br />
Hughes 4001, 4016<br />
Humax<br />
4049, 4050, 4051, 4052,<br />
4053<br />
J Janeil 4025<br />
JVC 4017<br />
M Mitsubishi 4001<br />
N Nokia 4058, 4059, 4060, 4061<br />
O Optima 4048<br />
P Panasonic 4004, 4010<br />
Philips 4031, 4035, 4044, 4057<br />
Proscan 4002, 4008, 4009, 4011<br />
R Radio Shack 4036, 4037<br />
RCA 4002, 4008, 4009, 4029<br />
Realistic 4040<br />
Rural Cable 4036<br />
S Samsung<br />
4022, 4027, 4042, 4043,<br />
4050, 4054, 4055<br />
Schneider 4041, 4043<br />
SKY 4044, 4045, 4057<br />
Skyplus 4048<br />
Skysat 4041, 4047, 4056<br />
Sony<br />
4003, 4012, 4014, 4065,<br />
4066, 4067<br />
Star Choice 4032<br />
Star Trak 4024<br />
STS 4038<br />
SuperDish 4028<br />
T Teac 4049<br />
Thomson 4046, 4056<br />
Toshiba 4001, 4034<br />
U Uniden 4005, 4006, 4013<br />
Universum 4056<br />
V Video Pall 4025<br />
Z Zenith 4023, 4025, 4033<br />
Device select : TV<br />
Television<br />
A Acer 1141<br />
Admiral 1002, 1009, 1089<br />
Aiko 1059<br />
Aiwa 1117, 1118<br />
Akai 1001<br />
Amtron 1023<br />
Anam 1113<br />
Anam National 1023, 1069, 1092<br />
AOC 1003, 1024, 1049, 1127<br />
Audiovox 1023<br />
B Bell & Howell 1009, 1025<br />
Benq 1104, 1142<br />
Broksonic 1003, 1097, 1098, 1113<br />
C Celebrity 1001<br />
Citizen<br />
1003, 1013, 1023, 1026,<br />
1059, 1063<br />
Colortyme 1003, 1043<br />
Contec 1113<br />
Contec/Cony 1023, 1045, 1047<br />
Craig 1020, 1022, 1023, 1113<br />
Crown 1023, 1067<br />
Curtis Mathes<br />
1003, 1013, 1025, 1026,<br />
1062, 1103, 1110<br />
D Daewoo<br />
1003, 1013, 1024, 1035,<br />
1036, 1059, 1084, 1101<br />
Daytron 1003, 1013, 1016<br />
Dimensia 1103, 1110<br />
Dumont 1003, 1010, 1153<br />
E Electroband 1001<br />
Electrohome 1001, 1003, 1069, 1133<br />
1003, 1013, 1015, 1020,<br />
1021, 1022, 1023, 1025,<br />
Emerson 1038, 1044, 1045, 1048,<br />
1055, 1061, 1094, 1096,<br />
1099, 1101, 1113<br />
Envision 1003<br />
F Fisher 1025, 1051, 1091, 1160<br />
Fujitsu 1038, 1124, 1125, 1155<br />
Funai 1023, 1038, 1113<br />
G Gateway 1150<br />
GE<br />
1003, 1018, 1022, 1046,<br />
1054, 1069, 1085, 1103,<br />
1110, 1113, 1133, 1136,<br />
1153<br />
Goldstar<br />
1003, 1013, 1024, 1030,<br />
1045, 1080, 1100<br />
1112, 1154<br />
H Hallmark 1003<br />
Hisense 1116<br />
1003, 1012, 1031, 1032,<br />
1037, 1041, 1045, 1047,<br />
Hitachi<br />
1065, 1068, 1082, 1088,<br />
1094, 1139, 1140, 1145,<br />
1159<br />
I Infi nity 1067<br />
J Janeil 1134<br />
JBL 1067<br />
1003, 1013, 1018, 1019,<br />
1024, 1026, 1046, 1047,<br />
JC Penney 1054, 1063, 1083, 1085,<br />
1100, 1103, 1110, 1112,<br />
1133, 1154<br />
Jensen 1003<br />
JVC<br />
1028, 1029, 1045, 1047,<br />
1050, 1060, 1065<br />
K Kawasho 1001, 1003<br />
Kenwood 1003<br />
Kloss Novabeam 1023, 1056, 1057, 1134<br />
KTV<br />
1013, 1023, 1033, 1034,<br />
1073, 1099, 1113<br />
L LG 1024, 1030<br />
M M.Wards 1002, 1009, 1038<br />
Magnavox<br />
1003, 1052, 1053, 1056,<br />
1057, 1063, 1067, 1081,<br />
1106<br />
<strong>Marantz</strong> 1003, 1031, 1067, 1122<br />
Mitsubishi<br />
1003, 1024, 1051, 1115,<br />
1122, 1133<br />
Motorola 1014, 1069<br />
N NEC<br />
1003, 1012, 1024, 1043,<br />
1069<br />
NET-TV 1137, 1150<br />
O Orion 1020, 1096<br />
1017, 1067, 1069, 1095,<br />
P Panasonic<br />
Philips<br />
1111<br />
1003, 1011, 1045, 1052,<br />
1054, 1056, 1057, 1058,<br />
1063, 1067, 1069, 1106<br />
Pioneer<br />
1003, 1018, 1037, 1070,<br />
1071, 1094, 1145, 1147,<br />
1149<br />
Plasmsync 1135<br />
Portland 1003, 1013, 1024, 1059<br />
Price Club 1026<br />
Prism 1018<br />
Proscan<br />
1004, 1005, 1006, 1007,<br />
1008, 1085, 1103, 1110<br />
Proton 1003, 1045<br />
Q Quasar<br />
1010, 1069, 1073, 1111,<br />
1153<br />
R Radio Shack<br />
1003, 1013, 1015, 1023,<br />
1024, 1025, 1045, 1100,<br />
1103, 1110, 1113<br />
1003, 1004, 1005, 1006,<br />
1007, 1008, 1014, 1024,<br />
RCA<br />
1049, 1069, 1075, 1079,<br />
1085, 1087, 1088, 1093,<br />
1094, 1101, 1103, 1110,<br />
1113, 1153<br />
Realistic<br />
1013, 1015, 1023, 1025,<br />
1045, 1100, 1103, 1110<br />
Runco 1010, 1153<br />
S Sampo 1150<br />
1003, 1013, 1024, 1026,<br />
1040, 1045, 1062, 1078,<br />
Samsung 1083, 1090, 1100, 1105,<br />
1114, 1120, 1121, 1146,<br />
1148, 1157<br />
Sansui 1119<br />
1003, 1025, 1051, 1072,<br />
Sanyo<br />
1077, 1091, 1156, 1157,<br />
1158<br />
1003, 1013, 1014, 1015,<br />
Sharp<br />
1045, 1055, 1064, 1066,<br />
1076, 1089, 1123<br />
Signature 1009<br />
Sony 1001, 1102, 1108<br />
Soundesign<br />
1003, 1023, 1038, 1063,<br />
1113<br />
Starlite 1023<br />
Supre-Macy 1134<br />
1003, 1039, 1042, 1052,<br />
Sylvania 1053, 1056, 1057, 1063,<br />
1067, 1089, 1151<br />
Symphonic 1023, 1039, 1044<br />
T Tandy 1014<br />
Tatung 1069<br />
Technics 1018<br />
Techwood 1003, 1018<br />
1003, 1009, 1013, 1023,<br />
Teknika<br />
1024, 1026, 1038, 1045,<br />
1047, 1059, 1063, 1111,<br />
1113<br />
Telecaption 1074<br />
1003, 1019, 1025, 1026,<br />
Toshiba<br />
1042, 1074, 1098, 1107,<br />
1111, 1135, 1136<br />
Totevision 1013<br />
U Universal 1046, 1054<br />
V Video Concepts 1113<br />
1006, 1022, 1109, 1128,<br />
Viewsonic 1129, 1130, 1131, 1138,<br />
1143, 1145, 1150<br />
1003, 1009, 1015, 1024,<br />
W Wards<br />
1038, 1044, 1046, 1052,<br />
1054, 1056, 1057, 1067,<br />
1086, 1103, 1110<br />
White<br />
Westinghouse<br />
1001, 1101<br />
Y Yamaha 1003, 1024<br />
Z Zenith<br />
1003, 1009, 1010, 1132,<br />
1144, 1153
Device select : CD<br />
CD Player<br />
A AIWA 3001, 3002, 3003<br />
AKAI 3004, 3005, 3006<br />
AUDIO 3007<br />
AUDIO LABS 3008<br />
C CALIFORNIA 3008<br />
CARVER 3010, 3011, 3009<br />
CASIO 3012, 3020<br />
CURTIS 3020, 3012<br />
D DENON 3013<br />
E EMERSON 3014<br />
F FISHER<br />
3011, 3015, 3016, 3017,<br />
3018<br />
G GE 3019<br />
GENEXXA 3014, 3021, 3020<br />
H HARMON 3022, 3023, 3051<br />
HITACHI 3020<br />
I INKEL 3024<br />
J JC PENNEY 3012, 3020, 3025<br />
JVC 3026, 3027<br />
K KARDON 3022, 3051, 3023<br />
KRELL 3010<br />
L LUXMAN 3035, 3036, 3037, 3038<br />
LX I 3012, 3020, 3014<br />
M MAGNAVOX 3010, 3039, 3040<br />
MARANTZ 3010, 3041, 3042, 3043<br />
MATHES 3012, 3020<br />
MCS 3012, 3020<br />
MGA 3023<br />
MISSION 3010<br />
MITSUBISHI 3023, 3044<br />
N NAD 3034, 3045<br />
NAKAMICHI 3046, 3047, 3048<br />
NEC MCS 3025<br />
NIKKO 3007, 3016<br />
3049, 3050, 3051, 3052,<br />
O ONKYO<br />
3055, 3102, 3103<br />
OPTIMUS<br />
3011, 3014, 3020, 3028,<br />
3053, 3054, 3056, 3057,<br />
3058, 3059<br />
P PANASONIC 3008, 3060, 3061<br />
PHILIPS 3009, 3010, 3010, 3040<br />
PIONEER<br />
3020, 3021, 3062, 3063,<br />
3064<br />
Q QUASAR 3008<br />
3011, 3014, 3065, 3066,<br />
R RCA<br />
3067, 3068, 3069<br />
REALISTIC<br />
3011, 3014, 3020, 3042,<br />
3054, 3057<br />
ROTEL 3010<br />
RS ORIGINAL 3070<br />
S SAE 3010, 3083<br />
SAMSUNG 3071<br />
SANSUI 3014, 3068, 3072, 3073<br />
SANYO<br />
3011, 3018, 3074, 3075,<br />
3076<br />
SCOTT 3014<br />
SEARS<br />
3012, 3014, 3020, 3028,<br />
3042<br />
SHARP 3028, 3042, 3077<br />
SHERWOOD<br />
3042, 3056, 3070, 3078,<br />
3024<br />
SHURE 3025<br />
3039, 3079, 3080, 3081,<br />
SONY<br />
3082, 3097, 3098, 3099,<br />
3100, 3101<br />
SYLVANIA 3010<br />
SYMPHONIC 3083<br />
T TEAC<br />
3016, 3042, 3057, 3083,<br />
3084, 3085, 3086<br />
TECHNICA<br />
3007, 3008, 3061, 3087,<br />
3088<br />
THETA DIGITAL 3040<br />
TOSHIBA 3045<br />
V VICTOR 3026<br />
Y YAMAHA<br />
3007, 3089, 3090, 3091,<br />
3092<br />
Z ZENITH<br />
3016, 3093, 3094, 3095,<br />
3096<br />
PRESET CODE 2
Dimensions / Dimensions / Dimensions / Abmessungen / Dimensioni / Afmetingen / Storlek<br />
Unit : mm (in)<br />
440.0 (17 3/8)<br />
22.5<br />
(15/16)<br />
360.0 (14 3/16)<br />
23.5<br />
(15/16)<br />
170.5 (6 3/4)<br />
16.5<br />
(11/16)<br />
406.0 (16)<br />
187.0 (7 3/8)
D&M Holdings Inc.<br />
Printed in China 5411 10492 038M