

Rolgordijnen-Rollerblind-Store enrouleur
Rolgordijnen-Rollerblind-Store enrouleur
Rolgordijnen-Rollerblind-Store enrouleur

Create successful ePaper yourself
Turn your PDF publications into a flip-book with our unique Google optimized e-Paper software.
ROLGORDIJNEN<br />
STORES ENROULEURS / ROLLER BLINDS
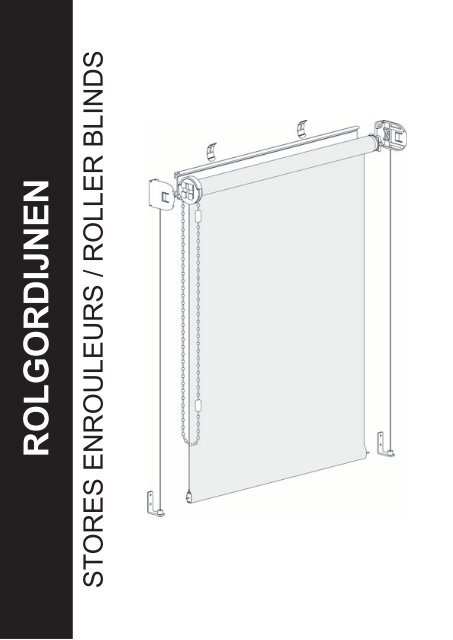
Plaatsing rolgordijnen buisdiameter 28 mm<br />
Installation des stores <strong>enrouleur</strong>s diamètre du tube 28 mm<br />
Fitting rollerblinds tube diameter 28 mm (1.1 inch)<br />
A. Installatie zonder montage profiel<br />
Installation sans profile de montage<br />
Installation without mounting profile<br />
1. Benodigdheden<br />
Matériel nécessaire<br />
Requirements<br />
Schroevendraaier<br />
Tournevis<br />
Screwdriver<br />
rolgordijn + 2 steunen<br />
store <strong>enrouleur</strong> + 2 supports<br />
rollerblind + 2 brackets<br />
4 vijzen<br />
4 vis<br />
4 screws<br />
2. Noodzakelijke ruimte voor plaatsing<br />
Place nécessaire pour l’installation<br />
Required space for installation<br />
55 mm<br />
2.2 inch<br />
3. Plaatsing<br />
Installation<br />
Fitting<br />
45 mm<br />
1.8 inch<br />
45 mm<br />
1.8 inch<br />
55 mm<br />
2.2 inch<br />
Schroef de steunen op de<br />
noodzakelijke afstand van elkaar.<br />
Installe les supports à la distance<br />
necessaire<br />
Install the brackets at the required<br />
distance from each other<br />
Schuif het rolgordijn in de steunen tot je een klik hoort<br />
Zorg dat de opening van de bediening naar beneden<br />
is gericht<br />
Glisser le store dans les supports. L’ouverture du<br />
commande doit être dirigée vers le bas.<br />
Slide the blind in the brackets untill you hear a click<br />
The opening of the clutch must point downwards.<br />
B. Installatie met montage profiel<br />
Installation avec profile de montage<br />
Installation with mounting profile<br />
1. Benodigdheden<br />
Matériel nécessaire<br />
Requirements<br />
Schroevendraaier<br />
Tournevis<br />
Screwdriver<br />
vijzen<br />
vis<br />
screws<br />
rolgordijn met montage profiel + clips<br />
store <strong>enrouleur</strong> avec profile de montage + clips<br />
rollerblind with mounting profile + brackets<br />
2. Noodzakelijke ruimte voor plaatsing<br />
Place nécessaire pour l’installation<br />
Required space for installation<br />
13 mm<br />
1/2"<br />
55 mm<br />
2.2 inch<br />
45 mm<br />
1.8 inch<br />
45 mm<br />
1.8 inch<br />
3. Plaatsing<br />
Installation<br />
Fitting<br />
Plaats de steun tegen het plafond of de wand met<br />
het lipje naar onder of naar de kamer gericht<br />
Placer le support contre le plafond ou contre le<br />
mur avec la lèvre dirigée vers le bas ou vers la pièce<br />
Mount the bracket against the ceiling or against the<br />
wall with the tab facing down or facing the room<br />
55 mm<br />
2.2 inch<br />
Klik het montage profiel in de kliksteun<br />
Clipsez le profile de montage dans le support<br />
Click the profile into place in the bracket
C. Optie zijgeleiding<br />
Option guidage latéral<br />
Guided option<br />
Plaatsing in de dag<br />
Installation dans le jour<br />
Inside mount fitting<br />
D.Afhalen van het rolgordijn<br />
Enlèvement du store <strong>enrouleur</strong><br />
Removing the rollerblind<br />
Plaats de zijgeleiding steunen. Zorg dat de zijgeleiding perfect verticaal hangt.<br />
Afhankelijk van de plaatsing gebruik het steuntje voor in de dag of op de dag.<br />
(zie foto’s)<br />
Placez les supports du guidage latéral. Le guidage doit être parfaitement vertical.<br />
Dépendant du placement utilisez le support pour placement dans le jour ou sur le<br />
jour (regardez les photos)<br />
Install the guiding brackets. Make sure the the guideline is perfectly vertical.<br />
Depending on the placement use the inside mount or outside mount bracket.<br />
(see pictures)<br />
Plaatsing op de dag<br />
Installation sur le jour<br />
Outside mount fitting<br />
Schuif een platte schroevendraaier in de opening vooraan de steun. Duw het lipje van<br />
de steun naar buiten en trek het rolgordijn voorzichtig uit de steun.<br />
Placez un tournevis plat dans l’ouverture au fond du support. Poussez la lèvre du<br />
support à l’extérieur et tirez gentillement à le store.<br />
Place a flat screwdriver in the opening at the front of the bracket. Push the tab at the<br />
side of the bracket to the outside. Gently pull the blind out of the brackets.
Plaatsing rolgordijnen buisdiameter 42 mm<br />
Installation des stores <strong>enrouleur</strong>s diamètre du tube 42 mm<br />
Fitting rollerblinds tube diameter 42 mm (1.65 inch)<br />
A. Installatie zonder montage profiel<br />
Installation sans profile de montage<br />
Installation without mounting profile<br />
1. Benodigdheden<br />
Matériel nécessaire<br />
Requirements<br />
Schroevendraaier<br />
Tournevis<br />
Screwdriver<br />
rolgordijn + 2 steunen<br />
store <strong>enrouleur</strong> + 2 supports<br />
rollerblind + 2 brackets<br />
4 vijzen<br />
4 vis<br />
4 screws<br />
2. Noodzakelijke ruimte voor plaatsing<br />
Place nécessaire pour l’installation<br />
Required space for installation<br />
3. Plaatsing<br />
Installation<br />
Fitting<br />
68 mm<br />
2.7 inch<br />
56 mm<br />
2.2 inch<br />
56 mm<br />
2.2 inch<br />
68 mm<br />
2.7 inch<br />
Schroef de steunen op de<br />
noodzakelijke afstand van elkaar.<br />
Installe les supports à la distance<br />
necessaire<br />
Install the brackets at the required<br />
distance from each other<br />
Schuif het rolgordijn in de steunen tot je een klik hoort<br />
Zorg dat de opening van de bediening naar beneden<br />
is gericht<br />
Glisser le store dans les supports. L’ouverture du<br />
commande doit être dirigée vers le bas.<br />
Slide the blind in the brackets untill you hear a click<br />
The opening of the clutch must point downwards.<br />
B. Installatie met montage profiel<br />
Installation avec profile de montage<br />
Installation with mounting profile<br />
1. Benodigdheden<br />
Matériel nécessaire<br />
Requirements<br />
Schroevendraaier<br />
Tournevis<br />
Screwdriver<br />
vijzen<br />
vis<br />
screws<br />
rolgordijn met montage profiel + clips<br />
store <strong>enrouleur</strong> avec profile de montage + clips<br />
rollerblind with mounting profile + brackets<br />
2. Noodzakelijke ruimte voor plaatsing<br />
Place nécessaire pour l’installation<br />
Required space for installation<br />
13 mm<br />
1/2"<br />
68 mm<br />
2.7 inch<br />
68 mm<br />
2.7 inch<br />
56 mm<br />
2.2 inch<br />
73 mm<br />
2.9 inch<br />
3. Plaatsing<br />
Installation<br />
Fitting<br />
Plaats de steun tegen het plafond of de wand met<br />
het lipje naar onder of naar de kamer gericht<br />
Placer le support contre le plafond ou contre le<br />
mur avec la lèvre dirigée vers le bas ou vers la pièce<br />
Mount the bracket against the ceiling or against the<br />
wall with the tab facing down or facing the room<br />
68 mm<br />
2.7 inch<br />
Klik het montage profiel in de kliksteun<br />
Clipsez le profile de montage dans le support<br />
Click the profile into place in the bracket
C. Optie cassette<br />
Option cassettel<br />
Cassette option<br />
Plaatsing idem als met montage profiel<br />
Installation est égale comme l’installation avec profil de montage<br />
The fitting is the same as the fitting with mounting profile<br />
Noodzakelijke ruimte voor plaatsing<br />
Place nécessaire pour l’installation<br />
Required space for installation<br />
93 mm<br />
3.7 inch<br />
86 mm<br />
3.4 inch<br />
D. Optie zijgeleiding<br />
Option guidage latéral<br />
Guided option<br />
Plaatsing in de dag<br />
Installation dans le jour<br />
Inside mount fitting<br />
93 mm<br />
3.7 inch<br />
E.Afhalen van het rolgordijn<br />
Enlèvement du store <strong>enrouleur</strong><br />
Removing the rollerblind<br />
86 mm<br />
3.4 inch<br />
93 mm<br />
3.7 inch<br />
Plaats de zijgeleiding steunen. Zorg dat de zijgeleiding perfect verticaal hangt.<br />
Afhankelijk van de plaatsing gebruik het steuntje voor in de dag of op de dag.<br />
(zie foto’s)<br />
Placez les supports du guidage latéral. Le guidage doit être parfaitement vertical.<br />
Dépendant du placement utilisez le support pour placement dans le jour ou sur le<br />
jour (regardez les photos)<br />
Install the guiding brackets. Make sure the the guideline is perfectly vertical.<br />
Depending on the placement use the inside mount or outside mount bracket.<br />
(see pictures)<br />
86 mm<br />
3.4 inch<br />
Plaatsing op de dag<br />
Installation sur le jour<br />
Outside mount fitting<br />
93 mm<br />
3.7 inch<br />
Schuif een platte schroevendraaier in de opening vooraan de steun. Duw het lipje van<br />
de steun naar buiten en trek het rolgordijn voorzichtig uit de steun.<br />
Placez un tournevis plat dans l’ouverture au fond du support. Poussez la lèvre du<br />
support à l’extérieur et tirez gentillement à le store.<br />
Place a flat screwdriver in the opening at the front of the bracket. Push the tab at the<br />
side of the bracket to the outside. Gently pull the blind out of the brackets.<br />
86 mm<br />
3.4 inch
Plaatsing rolgordijnen buisdiameter 50 mm<br />
Installation des stores <strong>enrouleur</strong>s diamètre du tube 50 mm<br />
Fitting rollerblinds tube diameter 50 mm (2 inch)<br />
A. Installatie zonder montage profiel<br />
Installation sans profile de montage<br />
Installation without mounting profile<br />
1. Benodigdheden<br />
Matériel nécessaire<br />
Requirements<br />
Schroevendraaier<br />
Tournevis<br />
Screwdriver<br />
4 vijzen<br />
4 vis<br />
4 screws<br />
rolgordijn + 2 steunen<br />
store <strong>enrouleur</strong> + 2 supports<br />
rollerblind + 2 brackets<br />
2. Noodzakelijke ruimte voor plaatsing<br />
Place nécessaire pour l’installation<br />
Required space for installation<br />
3. Plaatsing<br />
Installation<br />
Fitting Schroef de steunen op de<br />
noodzakelijke afstand van elkaar.<br />
Installez les supports à la distance<br />
necessaire<br />
Install the brackets at the required<br />
distance from each other<br />
1<br />
93 mm<br />
3.7 inch<br />
66 mm<br />
2.6 inch<br />
2<br />
66 mm<br />
2.6 inch<br />
93 mm<br />
3.7 inch<br />
1) Sluit de steun aan de<br />
bedieningskant en schuif de<br />
bediening erin<br />
Fermez le support à la côté du<br />
commande et glissez le store<br />
dans l’ouverture<br />
Close the bracket at the clutch<br />
side and slide the blind in the<br />
opening<br />
2) Open de ander steun, Schuif de eindplug erin en<br />
sluit de steun. Plaats de eindkappen op de steunen<br />
Ouvrez l’ autre support, glissez le store dedans et<br />
fermez le support. Placez les couvertures<br />
Open the other bracket, Slide the endplug in the<br />
bracket and close it. Slide the endcaps over the<br />
brackets<br />
B. Installatie met montage profiel<br />
Installation avec profile de montage<br />
Installation with mounting profile<br />
1. Benodigdheden<br />
Matériel nécessaire<br />
Requirements<br />
Schroevendraaier<br />
Tournevis<br />
Screwdriver<br />
vijzen<br />
vis<br />
screws<br />
rolgordijn met montage profiel + clips<br />
store <strong>enrouleur</strong> avec profile de montage + clips<br />
rollerblind with mounting profile + brackets<br />
2. Noodzakelijke ruimte voor plaatsing<br />
Place nécessaire pour l’installation<br />
Required space for installation<br />
13 mm<br />
1/2"<br />
93 mm<br />
3.7 inch<br />
66 mm<br />
2.6 inch<br />
66 mm<br />
2.6 inch<br />
3. Plaatsing<br />
Installation<br />
Fitting<br />
Plaats de steun tegen het plafond of de wand met<br />
het lipje naar onder of naar de kamer gericht<br />
Placer le support contre le plafond ou contre le<br />
mur avec la lèvre dirigée vers le bas ou vers la pièce<br />
Mount the bracket against the ceiling or against the<br />
wall with the tab facing down or facing the room<br />
93 mm<br />
3.7 inch<br />
Klik het montage profiel in de kliksteun<br />
Clipsez le profile de montage dans le support<br />
Click the profile into place in the bracket
Plaatsing rolgordijnen buisdiameter 78 mm<br />
Installation des stores <strong>enrouleur</strong>s diamètre du tube 78 mm<br />
Fitting rollerblinds tube diameter 78 mm (3.1 inch)<br />
A. Installatie met draaistang<br />
Installation méchanisme manuel<br />
Installation with crank mechanism<br />
1. Benodigdheden<br />
Matériel nécessaire<br />
Requirements<br />
3. Plaatsing<br />
Installation<br />
Fitting<br />
1<br />
Schroevendraaier<br />
Tournevis<br />
Screwdriver<br />
4 vijzen<br />
4 vis<br />
4 screws<br />
rolgordijn + 2 steunen<br />
store <strong>enrouleur</strong> + 2 supports<br />
rollerblind + 2 brackets<br />
Plaats de bediening in de steun<br />
Installez la commande dans le support<br />
Install the clutch in the bracket.<br />
2. Noodzakelijke ruimte voor plaatsing<br />
Place nécessaire pour l’installation<br />
Required space for installation<br />
130 mm<br />
5.12 inch<br />
100 mm<br />
4 inch<br />
Schroef de steunen op de noodzakelijke afstand van elkaar.<br />
Installez les supports à la distance necessaire<br />
Install the brackets at the required distance from each other<br />
4 Schuif het rolgordijn in de bediening<br />
Glissez le store dans la commande<br />
Glide the blind in the clutch<br />
5<br />
6<br />
Plaats het eindstuk in de steun<br />
Installez l’ embout dans le support<br />
Install the endpiece in the bracket.<br />
100 mm<br />
4 inch<br />
2 3<br />
130 mm<br />
5.12 inch<br />
Duw de eindplug in het eindstuk en<br />
bevestig het met de veiligheidspin<br />
Poussez le store dans l’embout et fixez<br />
le store avec le goupille de sécurité<br />
Push the endplug in the endpiece and<br />
fasten it with the cotter<br />
Maak de draaistang aan de bediening vast d.m.v. een pin en plaats<br />
de draaistang houder op de gewenste plaats<br />
Attachez la tige tournant au commande par le goupille et installez<br />
le titulaire à la place souhaitable<br />
Attach the crank to the cluth by inserting the clamp an place the crank<br />
holder at the desired place
B. Optie zijgeleiding<br />
Option guidage latéral<br />
Guided option<br />
Plaatsing in de dag ? 2-4 mm<br />
Installation dans le jour ? 2-4 mm<br />
Inside mount fitting ? 2-4 mm<br />
Plaatsing in de dag ? 5 mm<br />
Installation dans le jour ? 5 mm<br />
Inside mount fitting ? 5 mm<br />
C. Installatie met motor<br />
Installation avec moteur<br />
Installation with motor<br />
Plaats de zijgeleiding steunen. Zorg dat de zijgeleiding perfect verticaal hangt.<br />
Afhankelijk van de plaatsing gebruik het steuntje voor in de dag of op de dag.<br />
(zie foto’s)<br />
Placez les supports du guidage latéral. Le guidage doit être parfaitement vertical.<br />
Dépendant du placement utilisez le support pour placement dans le jour ou sur le<br />
jour (regardez les photos)<br />
Install the guiding brackets. Make sure the the guideline is perfectly vertical.<br />
Depending on the placement use the inside mount or outside mount bracket.<br />
(see pictures)<br />
Plaatsing op de dag ? 2-4 mm<br />
Installation sur le jour ? 2-4 mm<br />
Outside mount fitting ? 2-4 mm<br />
Plaatsing op de dag ? 5 mm<br />
Installation sur le jour ? 5 mm<br />
Outside mount fitting ? 5 mm<br />
Plaatsing op de dag ? 2-4 mm<br />
Installation sur le jour ? 2-4 mm<br />
Outside mount fitting ? 2-4 mm<br />
1) Plaats de motor in de motor adaptor aan de bedieningszijdede<br />
Installez le moteur dans l’ adaptateur au côté de contrôle<br />
Place the motor head in the motor adaptor at the operating side<br />
2) Plaats de as in de asadaptor aan de niet bedieningszijde. Bevestig de as<br />
met de veiligheids pin<br />
Installez l’axe dans l’adaptateur de l’axe au côté non-contrôle. Fixez l’axe avec<br />
le goupille de sécurité.<br />
Push the shaft in the endpiece at the non-contoling side. Fix the shaft with<br />
the safety pin<br />
3) Bevestig met de ronde veiligheids pin de motor in de motor adaptor<br />
Fixez le moteur dans l’adaptateur avec le goupille de sécurité rond<br />
Fix the motor in the motor adaptor with the round safety pin<br />
4) Sluit aan op het elektrisch netwerk. Laat dit steeds doen door een erkend<br />
elektricien<br />
Connectez le moteur sur le réseau électrique. Laissez la connection faire par<br />
un électricien accepté<br />
Connect the motor to the electric power network. This needs to be done by<br />
a recognized electricien
Plaatsing rolgordijnen dakramen<br />
Installation des stores <strong>enrouleur</strong>s pour lucarnes<br />
Fitting rollerblinds for skylight windows<br />
1. Benodigdheden<br />
Matériel nécessaire<br />
Requirements<br />
2. Plaatsing<br />
Installation<br />
Fitting<br />
Schroevendraaier<br />
Tournevis<br />
Screwdriver<br />
2 steunen<br />
2 supports<br />
2 brackets<br />
4 vijzen<br />
4 vis<br />
4 screws<br />
Klik het systeem in de steunen:<br />
1. eerst de voorkant<br />
2. vervolgens de achterkant van het systeem<br />
Claquez le système dans les supports:<br />
1. d’abord le front<br />
2. aprés la dernière du système<br />
Click the system in the brackets:<br />
1. first the front<br />
2. secondly the back of the system<br />
Plaats de steuntjes op minimum 10 cm van de zijkant. Duw het<br />
installatie flapje van het steuntje tegen het raamkozijn voor de<br />
ideale plaatsing. Schroef de steun vast en breek het installatie<br />
flapje van het steuntje af.<br />
Installez les supports à une distance de minimum 10 cm du<br />
côté de la fenêtre. Poussez l’aide de l’installation jusqu’au cadre<br />
de la fenêtre. Visez les supports et cueillisez l’aide du support.<br />
Place the brackets in a minimum distance of 10 cm (4") of the side<br />
of the window frame. Press the mounting presser of the bracket to<br />
the window frame. Screw the brackets and break off the mounting<br />
presser.<br />
1. Schuif de zijframen in het systeem en vijs ze vast in het raamkozijn<br />
Glissez les longerons dans le système et visez les dans le cadre de<br />
la fenêtre<br />
Slide the side frames into the system and screw them to the widowframe<br />
2. Wind de geleidingskoorden van de transportclips af<br />
Déroulez les cordes de guides de les agraffes de transport<br />
Wind the guiding cords of the shipping clips<br />
3. Klik de eindstukjes van de geleidingskoorden vast onderaan de zijframen<br />
Fixez les embouts des cordes de guidages en bas dans leslongerons<br />
Click the endpieces of the guiding cords at the bottom in the sideframes<br />
De geleidingskoorden moeten onder lichte spanning staan. Is die niet het<br />
geval, dan moet u de koorden inkorten d.m.v. een knoopje<br />
Les cordes de guidages doivent être en tension. Si ça n’est pas le cas,<br />
on devez raccoucir les cordes avec un noeud.<br />
The guiding cords must be under light tension. Is this is not the case you<br />
have the shorten the cords with a knot.