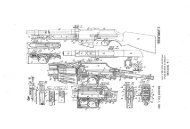
COLT AUTOMATIC MACHINE GUN - Replica Plans and Blueprints
COLT AUTOMATIC MACHINE GUN - Replica Plans and Blueprints
COLT AUTOMATIC MACHINE GUN - Replica Plans and Blueprints
Create successful ePaper yourself
Turn your PDF publications into a flip-book with our unique Google optimized e-Paper software.
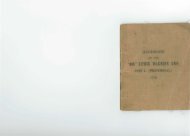
No.17o8<br />
HANDBOOK OF THE<br />
<strong>COLT</strong> <strong>AUTOMATIC</strong> <strong>MACHINE</strong> <strong>GUN</strong><br />
CALIBER .30<br />
WITH<br />
PACK OUTFITS AND ACCESSORIES<br />
(SIXTEEN PLATES)<br />
AUGUST J7, 1901<br />
REVISED APRIL 13; 1903<br />
REVISED MAY 1, 1905<br />
REVISED JULY 25, 1906<br />
REVISED DECEMBER 21, 1907<br />
REVISED MARCH 20, 1913<br />
REVISED JULY 31, 1916<br />
WASHINGTON<br />
GOVERNMENT PRINTING OFFICE<br />
1917
WAR DEPARTMENT,<br />
OFFICE OF THE CHIEF OF ORDNANCE,<br />
Washington, July 91, 1916.<br />
This manual is published for the information <strong>and</strong> government of the Regular<br />
Army <strong>and</strong> National Guard of the United States.<br />
By order of the Secretary of War:<br />
WILLIAM CROZIER,<br />
Brigadier General, Chief of Ordnance.<br />
s
'"-l<br />
HANDBOOK OF <strong>COLT</strong> AUTOMA'l'IC <strong>MACHINE</strong> <strong>GUN</strong>, CAL •• 30. l!)<br />
F mirth.-The extractor <strong>and</strong> firing pin can be removed from the<br />
bolt by pushing out the small pins that hold them in place.<br />
ASSE:UBLI:'>G.<br />
Fi1·st.-Insert the bolt <strong>and</strong> push forward as far as it will go.<br />
Second.-Place h<strong>and</strong> on gas lever holding it up against bottom<br />
plate.<br />
Th.ird.-Push in bolt pin from left-h<strong>and</strong> side as far as it will go.<br />
Fourt.h.-Then release the gas lever.<br />
Fifth.-Replace h<strong>and</strong>le, locking it in position with h<strong>and</strong>le lock.<br />
OPERATDW THE <strong>GUN</strong>.<br />
PR};P.\RIXG THE Gl.::s' }'OR FIRING.<br />
(1) Remove the gun <strong>and</strong> tripod from pack.<br />
(2) Place the gun in position on the erected tripod <strong>and</strong> secure it.<br />
with the gun pin.<br />
(3) Raise the rear-sight leaf.<br />
( 4) Place the ammunition box on the ribs on left side of the mount,<br />
in position for firing.<br />
FIRING.<br />
(1) Set the rear sight forrange <strong>and</strong> deflection.<br />
(2) Load by inserting the brass tip of the cartridge belt through<br />
the cartridge-shaped opening on the left of the gun <strong>and</strong> drawing it<br />
out on the other side of the gun as far as it will go. This brings the<br />
first cartridge on top of the feed wheel. Let go of the belt.<br />
(3) Swing the gas lever downward <strong>and</strong> to the rear until it strikes<br />
the bottom plate of the receiver. When released the lever resumes its<br />
normal position.<br />
( 4) If desired to hold the gun ready for firing push the safety<br />
latch from "fire" to "safe"; otherwise fire the piece by pulling the<br />
trigger to the rear. If the trigger is held, firing :will continue until<br />
the supply in cartridge belt is exhausted. Releasing the trigger stops<br />
the fire at any time.<br />
PREPARI:s'G THE <strong>GUN</strong> FOR PACKING.<br />
(1) Remove the cartridge belt from gun if partially fired. This<br />
can be accomplished by pushing the knurled head on the feed throwoff<br />
screw forward <strong>and</strong> then drawing the belt out to the left.<br />
(2) Operate the lever once by h<strong>and</strong>, to eject the loaded cartridge<br />
that remains in the chamber.<br />
(3) !.temove the ammunition box.<br />
( 4) Lower the rear-sight leaf.<br />
(5) Remove the gun from tripod.<br />
CLEANIXG AXD CARE OF THE GUX.<br />
In order that the gun may work smoothly it is necessary that it be<br />
thoroughly cleaned <strong>and</strong> oiled after firing. All tracing of fouling
FIG:t<br />
FIG.2.<br />
<strong>GUN</strong>,.SECTIONAL.YIE'ftc.<br />
PlATE 11.


