
You also want an ePaper? Increase the reach of your titles
YUMPU automatically turns print PDFs into web optimized ePapers that Google loves.
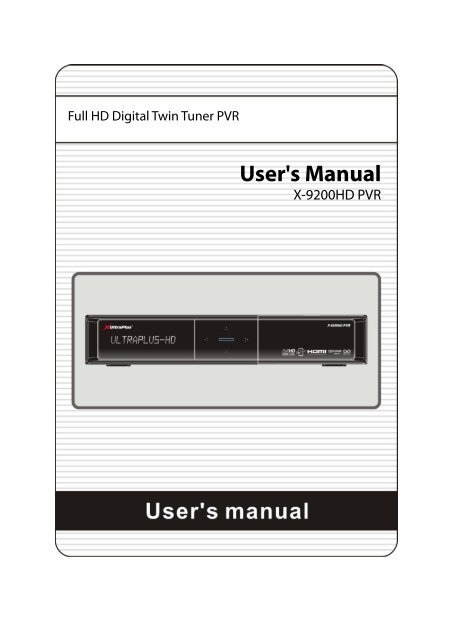
Full HD Digital Twin Tuner PVR<br />
<strong>User's</strong> <strong>Manual</strong><br />
X-9200HD PVR
INDEX<br />
INDEX ................................................................................................................................... 3<br />
Precautions ......................................................................................................................... 5<br />
1. Important Safety Instructions ...................................................................................................... 5<br />
2. Notice ......................................................................................................................................... 5<br />
3. Copyright .................................................................................................................................... 6<br />
4. Disclaimer ................................................................................................................................... 6<br />
5. Trademarks ................................................................................................................................ 6<br />
Before You Begin ................................................................................................................ 7<br />
1. Main Features ............................................................................................................................ 7<br />
2. Accessories ................................................................................................................................ 8<br />
Hardware Description ......................................................................................................... 9<br />
1. Front Panel Configuration .......................................................................................................... 9<br />
2. VFD(Vacuum Fluorescent Display) ............................................................................................ 9<br />
3. Rear Panel Configuration ......................................................................................................... 10<br />
4. Remote Control Unit ................................................................................................................. 13<br />
5. Multi-Brand IR Remote Controller Setting ................................................................................ 16<br />
Connections diagram ....................................................................................................... 17<br />
1. Receiver to AC power ............................................................................................................... 17<br />
2. Receiver to TV with Digital A/V Output ..................................................................................... 17<br />
3. Receiver to TV with Analog A/V Output .................................................................................... 18<br />
4. Receiver to TV and VCR .......................................................................................................... 19<br />
5. Connecting to Antenna Cable .................................................................................................. 20<br />
5.1 In case of S2 + S2 (Satellite + Satellite) tuners ................................................................ 20<br />
5.2 In case of T(T2) + T(T2) (Terrestrial + Terrestrial) tuners ................................................. 21<br />
5.3 In case of C + C (Cable + Cable) tuners .......................................................................... 21<br />
5.4 In case of S2 + T(T2) (Satellite + Terrestrial) tuners ........................................................ 22<br />
5.5 In case of S2 + C (Satellite + Cable) tuners ..................................................................... 22<br />
5.6 In case of T(T2) + C (Terrestrial + Cable) tuners ............................................................. 22<br />
Guide of Functions ........................................................................................................... 23<br />
1. Selecting a Service ................................................................................................................... 23<br />
1.1 Using CH UP/DOWN buttons .............................................................................................. 23<br />
1.2 Using Service List ............................................................................................................... 23<br />
1.3 Using Simple Service List ................................................................................................... 23<br />
1.4 Using Recent Service List ................................................................................................... 24<br />
2. Information Window .................................................................................................................. 24<br />
3. Multi-Picture Display. ................................................................................................................ 24<br />
4. Electronic Program Guide (EPG) ............................................................................................. 24<br />
5. Favorite Group ......................................................................................................................... 25<br />
6. Volume Control ......................................................................................................................... 25<br />
7. Pause ....................................................................................................................................... 25<br />
8. Subtitle ...................................................................................................................................... 26<br />
9. Audio Control ............................................................................................................................ 26<br />
10. Teletext ..................................................................................................................................... 27<br />
11. PIP (Picture in Picture) ............................................................................................................. 27<br />
3
PVR (Personal Video Re<strong>co</strong>rder) Function ....................................................................... 29<br />
1. Re<strong>co</strong>rding ................................................................................................................................. 29<br />
1.1 Re<strong>co</strong>rding methods ............................................................................................................. 29<br />
1.2 Re<strong>co</strong>rding Edit ..................................................................................................................... 31<br />
1.3 Long Time re<strong>co</strong>rding ........................................................................................................... 31<br />
1.4 Pause during re<strong>co</strong>rding ....................................................................................................... 31<br />
2. Time Shifting ............................................................................................................................. 33<br />
3. Playback (Play List) .................................................................................................................. 34<br />
3.1 Re<strong>co</strong>rded Files .................................................................................................................... 34<br />
3.2 Imported Files ..................................................................................................................... 35<br />
3.3 Music ................................................................................................................................... 35<br />
3.4 Photo ................................................................................................................................... 35<br />
4. Bookmark ................................................................................................................................. 36<br />
5. Trick mode ................................................................................................................................ 36<br />
Menu Map .......................................................................................................................... 37<br />
Main Menu of Guide .......................................................................................................... 38<br />
1. System Tools ............................................................................................................................ 38<br />
1.1 Storage Manager ................................................................................................................. 38<br />
1.2 Timer Settings ..................................................................................................................... 39<br />
1.3 Service List Manager .......................................................................................................... 39<br />
1.4 Data Transfer....................................................................................................................... 41<br />
2. Configuration ............................................................................................................................ 42<br />
2.1 Re<strong>co</strong>rding Option ................................................................................................................ 42<br />
2.2 Parental Control .................................................................................................................. 43<br />
2.3 Display Setting .................................................................................................................... 43<br />
2.4 Time Setting ........................................................................................................................ 45<br />
2.5 Language Setting ................................................................................................................ 45<br />
2.6 A/V Output Setting .............................................................................................................. 46<br />
3. Installation ................................................................................................................................ 47<br />
3.1 Dish Setting ......................................................................................................................... 48<br />
3.2 Positioner Setting ................................................................................................................ 49<br />
3.3 Service Search .................................................................................................................... 50<br />
3.4 Network Setting ................................................................................................................... 54<br />
3.5 System Re<strong>co</strong>very ................................................................................................................ 55<br />
3.6 System Information ............................................................................................................. 55<br />
4. Utility ......................................................................................................................................... 56<br />
4.1 Calculator ............................................................................................................................ 56<br />
4.2 Calendar .............................................................................................................................. 56<br />
4.3 CAS (Conditional Access System) ...................................................................................... 56<br />
4.4 Plugin .................................................................................................................................. 57<br />
4.5 YouTube .............................................................................................................................. 58<br />
Troubleshooting ................................................................................................................ 60<br />
Specifications .................................................................................................................... 61<br />
Code Table for Universal Remote Control Unit ............................................................... 64<br />
1. Key Table .................................................................................................................................. 64<br />
2. TV Brands ................................................................................................................................ 66<br />
3. VCR Brands ............................................................................................................................. 73<br />
4. DVD Brands ............................................................................................................................. 78<br />
4
Precautions<br />
1. Important Safety Instructions<br />
Read these instructions.<br />
Keep these instructions.<br />
Heed all warnings.<br />
Follow all instructions.<br />
Do not use this apparatus near water.<br />
Clean only with dry cloth.<br />
Do not block any ventilation openings. Install in ac<strong>co</strong>rdance with the manufacturer’s instructions.<br />
Do not install near any heat sources such as radiators, heat registers, stoves, or other apparatus<br />
(including amplifiers) that produce heat.<br />
Do not alter the mains plug in any way. If the provided plug does not fit <strong>co</strong>nsult an electrician for<br />
replacement of the obsolete outlet.<br />
Protect the power <strong>co</strong>rd from being walked on or pinched particularly at plugs, <strong>co</strong>nvenience<br />
receptacles, and the point where they exit from the apparatus.<br />
Only use attachments/accessories specified by the manufacturer.<br />
Use only with the cart, stand, tripod, bracket, or table specified by the manufacturer, or sold with the<br />
apparatus. When a cart is used, use caution when moving the cart/apparatus <strong>co</strong>mbination to avoid<br />
injury from tip-over.<br />
Unplug this apparatus during lightning storms or when unused for long periods of time.<br />
Refer all servicing to qualified service personnel. Servicing is required when the apparatus has been<br />
damaged in any way, such as power-supply <strong>co</strong>rd or plug is damaged, liquid has been spilled or objects<br />
have fallen into the apparatus, the apparatus has been exposed to rain or moisture, does not operate<br />
normally, or has been dropped.<br />
2. Notice<br />
WARNING : To Prevent fire or shock hazard do not expose the set to rain or moisture.<br />
These servicing instructions are for use by qualified service personnel only. To reduce the risk of<br />
electric shock, do not perform any servicing other than that <strong>co</strong>ntained in the operating instructions<br />
unless you are qualified to do so.<br />
The apparatus shall not be exposed to dripping or splashing and that no objects filled with liquids,<br />
such as vases, shall be placed on the apparatus.<br />
The mains plug is used as the dis<strong>co</strong>nnect device. The dis<strong>co</strong>nnect device shall remain readily operable.<br />
5
3. Copyright<br />
The Lightning Flash with arrowhead symbol<br />
within an equilateral triangle, is intended to<br />
alert the user to the presence of un-insulated<br />
"dangerous voltage" within the product<br />
enclosure that may be of sufficient magnitude<br />
to <strong>co</strong>nstitute a risk of shock to persons<br />
To reduce the risk of electric shock, do not remove<br />
the <strong>co</strong>ver (or back).<br />
No user serviceable parts are inside.<br />
Refer servicing to qualified service personnel.<br />
6<br />
The exclamation point within an<br />
equilateral triangle is intended to alert<br />
the user to the presence of important<br />
operating and maintenance<br />
(servicing) instructions in the<br />
literature ac<strong>co</strong>mpanying the product<br />
This manual is protected by <strong>co</strong>pyright laws.<br />
Copy, use and reproduction of this manual in part or whole without Manufacturer’s prior written<br />
approval are prohibited.<br />
4. Disclaimer<br />
The manufacturers, distributors and agents are not liable to any kind of damage caused by the<br />
use of the information <strong>co</strong>ntained in this manual.<br />
The instruction and descriptions which this manual <strong>co</strong>ntains are based on the time of this<br />
manual's production.<br />
The manufacturer <strong>co</strong>nstantly updates it with new functions and technology.<br />
All the specifications are subject to change without prior notice.<br />
5. Trademarks<br />
HDMI, the HDMI logo and High-Definition Multimedia Interface are<br />
trademarks or registered trademarks of HDMI Licensing LLC<br />
Manufactured under license from Dolby Laboratories.<br />
Dolby and the double-D symbol are trademarks of Dolby Laboratories.
Before You Begin<br />
1. Main Features<br />
With DVB-S/S2 Tuner(s) Installed<br />
Supports MPEG4 /MPEG2 - HD/SD and Fully DVB-S2 /DVB-S Compliant<br />
Intelligent Blind Scan for both SD and HD TV & Multi-Satellite Search<br />
Multi-LNB Controlled by DiSEqC Control Version 1.0, 1.1, 1.2 and USALS<br />
With DVB-C Tuner(s) Installed*<br />
Supports MPEG4 /MPEG2 - HD/SD and Fully DVB-C Compliant<br />
With DVB-T Tuner(s) Installed*<br />
Supports MPEG4 /MPEG2 - HD/SD and Fully DVB-T Compliant<br />
With DVB-T2 Tuner(s) Installed*<br />
Supports MPEG4 /MPEG2 - HD/SD and Fully DVB-T2 Compliant<br />
Common features<br />
Changeable Twin Tuner Full HDTV PVR Receiver ( DVB-S/S2, DVB-C, DVB-T, DVB-T2 )*<br />
Supports MPEG4 /MPEG2 - HD/SD( H.264/ MPEG4 HD )<br />
Powerful <strong>co</strong>mpatibility through Embedded Linux OS<br />
Time Shifting, Re<strong>co</strong>rding & Playback with Internal HDD (SATA) / External HDD (e-SATA or USB 2.0)<br />
Simultaneously Re<strong>co</strong>rds 3 Services and allows Watching of 2 others (PIP)<br />
Powerful Extended EPG supported with Event Re<strong>co</strong>rding<br />
3 USB 2.0 Host ports (MP3 Player & JPEG Viewer)<br />
Xvid file play back supported<br />
External SATA <strong>co</strong>nnection supported (Separate power is needed for Ext. HDD drive)<br />
Ethernet port Supported<br />
Intelligent Blind Scan for both SD and HD TV & Multi-Satellite Search<br />
Premium Grade White VFD Display (12 Digit Alphanumeric)<br />
Premium Grade Universal remote <strong>co</strong>ntrol unit<br />
Multi-LNB Controlled by DiSEqC Control Version 1.0, 1.1, 1.2 and USALS<br />
Full HD On-Screen Display<br />
Favorite Service Groups<br />
Powerful Service Control by Favorites, Lock, Skip, Move and Delete<br />
Service sorting by Name, Transponder and CAS<br />
User Friendly & Multi-language Supported (OSD & Menu)<br />
Teletext / Subtitles Supported<br />
Supports upto 10,000 Services<br />
PIP (Picture-in-Picture)<br />
Parental Lock / System Lock / Installation Lock<br />
HDMI Video & Audio Output (576i, 576p, 720p, 1080i, 1080p)<br />
Supports Y/Pb/Pr(<strong>co</strong>mponent) Output in HD<br />
CVBS(<strong>co</strong>mposite) Video & Audio Output via RCA<br />
CVBS, RGB, Y/C Video & Audio Output via TV SCART<br />
Optical Output for Digital Audio(SPDIF)<br />
Software & Service channel Database upgrade via USB & RS-232C port<br />
2 Smart card readers and 2 Common Interface Slots<br />
1W Stand-by Power Consumption<br />
* Tuner availability is dependent on geographic region.<br />
7
2. Accessories<br />
<strong>User's</strong> <strong>Manual</strong><br />
AAA size Batteries X2<br />
Loop through Cable<br />
8<br />
Remote Control<br />
HDMI Cable (Option)<br />
AC Power Cord
Hardware Description<br />
1. Front Panel Configuration<br />
1. POWER BUTTON : Press to switch between STANDBY and POWER ON modes.<br />
2. Vol Up/Down BUTTON : Press to change audio volume in normal mode or to navigate menu in<br />
menu mode.<br />
3. CH Up/Down BUTTON : Press to change services in normal mode, or to move highlighted-bar in<br />
menu mode.<br />
4. Remote Sensor : Receives signal from remote <strong>co</strong>ntroller.<br />
5. VFD Display : The VFD display allows 12 alpha numeric characters to be displayed. These characters<br />
are used to display the current status of the receiver e.g. service name, service information and so on.<br />
6. USB (Front) : Used to <strong>co</strong>nnect external USB storage devices.<br />
7. SMART CARD READER : Insert smart card for encrypted service access.<br />
8. PCMCIA : To receive other pay-tv services you need a CA-Module (Viaccess, Irdeto, Nagravison, etc.)<br />
and a smart card from the service provider.<br />
2. VFD(Vacuum Fluorescent Display)<br />
1. Remote Indication LED : The LED indicates when a<br />
key on the Remote Controller is pressed.<br />
2. Information : Display information including service<br />
name and other information.<br />
9
3. Rear Panel Configuration<br />
1. VCR SCART : Connects to a VCR or DVD re<strong>co</strong>rder using a SCART cable.<br />
2. TV SCART : Connects to the TV using a SCART cable.<br />
3. SPDIF : Connects to the audio system using a S/PDIF cable. (digital audio)<br />
4. VIDEO : Connects to the TV or VCR using a RCA cable. (Composite video output / Yellow)<br />
5. AUDIO L/R : Connects to the TV or VCR using a RCA cable. (Stereo audio output / White, Red)<br />
6. Component : Connects to the TV or VCR using a <strong>co</strong>mponent cable. ( YPbPr)<br />
7. USB : Used to <strong>co</strong>nnect to external USB storage devices or WiFi adaptors.<br />
8. HDMI : Connects to a TV using an HDMI cable for the best quality picture and audio.<br />
9. RS-232C : Serial port for firmware update and data transfer.<br />
10. Ethernet : Local area network port for direct <strong>co</strong>mputer <strong>co</strong>nnection.<br />
11. e-SATA : Connects to the external HDD via an e-SATA cable.<br />
12. A/C Switch : Power switch<br />
13. A/C power cable socket : Connects to A/C power <strong>co</strong>rd.<br />
Two tuners can be installed in different <strong>co</strong>mbinations as follows.<br />
Professional installation of these tuners is re<strong>co</strong>mmended please <strong>co</strong>nsult your<br />
dealer. Tuner availability is dependent on geographic region<br />
10
In case of S2 + S2<br />
[ TUNER 1 ]<br />
1. LNB IN (Caution : LNB1 in on the left bottom)<br />
Satellite IF signal input socket of the first tuner (TUNER 1).<br />
Connects a satellite antenna LNB cable.<br />
2. LNB OUT<br />
Satellite IF signal output socket of the first tuner (TUNER 1).<br />
Connects to a se<strong>co</strong>nd tuner (TUNER 2) for loop-through.<br />
[ TUNER 2 ]<br />
3. LNB IN (Caution : LNB2 in on the right bottom)<br />
Satellite IF signal input socket of the se<strong>co</strong>nd tuner (TUNER<br />
2). In the case of a loop-through <strong>co</strong>nfiguration a short<br />
cable <strong>co</strong>nnects LNB Out from the first tuner (TUNER 1) to this <strong>co</strong>nnector.<br />
4. LNB OUT<br />
Satellite IF signal output socket of the se<strong>co</strong>nd tuner (TUNER 2). Can be used to <strong>co</strong>nnect to another STB.<br />
In case of T(T2) + T(T2)<br />
[ TUNER 1 ]<br />
1. ANT IN<br />
Terrestrial signal input socket of the first tuner (TUNER 1).<br />
Connects to a UHF aerial.<br />
2. LOOP OUT<br />
Terrestrial signal output socket of the first tuner (TUNER 1).<br />
Connects to a se<strong>co</strong>nd tuner (TUNER 2) for loop-through.<br />
[ TUNER 2 ]<br />
3. ANT IN<br />
Terrestrial signal input socket of the se<strong>co</strong>nd tuner (TUNER<br />
2). In the case of a loop-through <strong>co</strong>nfiguration a short<br />
cable <strong>co</strong>nnects Loop Out from the first tuner (TUNER 1) to<br />
this <strong>co</strong>nnector.<br />
4. LOOP OUT<br />
Terrestrial signal output socket of the se<strong>co</strong>nd tuner (TUNER 2). Can be used to <strong>co</strong>nnect to another STB.<br />
In case of C + C<br />
[ TUNER 1 ]<br />
1. CABLE IN<br />
Cable signal input socket of the first tuner (TUNER 1).<br />
Connects to a cable TV network.<br />
2. CABLE OUT<br />
Cable signal output socket of the first tuner (TUNER 1).<br />
Connects to a se<strong>co</strong>nd tuner (TUNER 2) for loop-through.<br />
[ TUNER 2 ]<br />
3. CABLE IN<br />
Cable signal input socket for the se<strong>co</strong>nd tuner (TUNER 2).<br />
In the case of a loop-through <strong>co</strong>nfiguration a short cable<br />
<strong>co</strong>nnects Cable Out from the first tuner (TUNER 1) to this<br />
<strong>co</strong>nnector.<br />
4. CABLE OUT<br />
Cable signal output socket of the se<strong>co</strong>nd tuner (TUNER 2). Connects to another STB or Cablemodem.<br />
11
In case of S2 + T(T2)<br />
[ TUNER 1 ]<br />
1. LNB IN (Caution : LNB1 in on the left bottom)<br />
Satellite IF signal input socket of the first tuner (TUNER 1).<br />
Connects a satellite antenna LNB cable.<br />
2. LNB OUT<br />
Satellite IF signal output socket tof the first tuner (TUNER<br />
1). Connects to another STB for loop-through.<br />
[ TUNER 2 ]<br />
1. ANT IN<br />
Terrestrial signal input socket of the se<strong>co</strong>nd tuner (TUNER<br />
2). Connects to a UHF aerial.<br />
2. LOOP OUT<br />
Terrestrial signal output socket of the se<strong>co</strong>nd tuner<br />
(TUNER 2). Can be used to <strong>co</strong>nnect to another STB.<br />
In case of S2 + C<br />
[ TUNER 1 ]<br />
1. LNB IN (Caution : Socket on the left bottom)<br />
Satellite IF signal input socket of the first tuner (TUNER 1).<br />
Connects a satellite antenna LNB cable.<br />
2. LNB OUT<br />
Satellite IF signal output socket tof the first tuner (TUNER<br />
1). Connects to another STB for loop-through.<br />
[ TUNER 2 ]<br />
3. CABLE IN<br />
Cable signal input socket of the se<strong>co</strong>nd tuner (TUNER 2).<br />
Connects to a cable TV network.<br />
4. CABLE OUT<br />
Cable signal output socket of the se<strong>co</strong>nd tuner (TUNER 2).<br />
Connects to another STB or Cablemodem.<br />
In case of T(T2) + C<br />
[ TUNER 1 ]<br />
1. ANT IN<br />
Terrestrial signal input socket of the first tuner (TUNER 1).<br />
Connects to a UHF aerial.<br />
2. LOOP OUT<br />
Terrestrial signal output socket of the first tuner (TUNER 1).<br />
Can be used to <strong>co</strong>nnect to another STB<br />
[ TUNER 2 ]<br />
3. CABLE IN<br />
Cable signal input socket of the se<strong>co</strong>nd tuner (TUNER 2).<br />
Connects to a cable TV network.<br />
4. CABLE OUT<br />
Cable signal output socket of the se<strong>co</strong>nd tuner (TUNER 2).<br />
Connects to another STB or Cablemodem.<br />
12
4. Remote Control Unit<br />
1. POWER : Turns the STB On/Off.<br />
2. MUTE : Turns the sound On/Off.<br />
3. Universal Buttons<br />
a. TV : Change the mode of the Remote Controller to TV Mode.<br />
b. STB : Change the mode of the Remote Controller to STB Mode.<br />
c. DVD : Change the mode of the Remote Controller to DVD Mode.<br />
4. MODE<br />
a. V.Format : You can switch the Display Format (4:3 / 16:9)<br />
b. Sleep : To adjust the sleep timer.<br />
c. TV/RADIO : Switches between TV and Radio.<br />
d. Resolution : To select the resolution format. Each time you press the Resolution button, the<br />
resolution changes in the following sequence: 576i > 576p > 720p > 1080i > 1080p<br />
5. Playback Control Buttons<br />
a. Rewind : Rewinds at high speed. Each time you press this button the rewind speed is increased.<br />
b. Fast Forward : Fast forwards at high speed. Each time you press this button the speed is increased.<br />
c. Previous File : To play the previous MP3 file in MP3 play mode. This button is also used to jump<br />
back to beginning of re<strong>co</strong>rding during a playback.<br />
d. Next File : To play the next file. This button is also used to jump to end of re<strong>co</strong>rding during a<br />
playback.<br />
e. Play / Time shift : Display the progress bar during playback when no progress bar is displayed. It<br />
starts playback at normal speed. It also returns to normal speed from trick mode.<br />
f. Re<strong>co</strong>rding : To start Re<strong>co</strong>rding.<br />
g. Repetition (*): This key is used to play back a re<strong>co</strong>rding repeatedly.<br />
h. Pause : This key is used to pause the video. Press once more to resume the video.<br />
i. STOP : To stop time shifting, play back or re<strong>co</strong>rding.<br />
NOTE : (*) This Repetition may not be available until a new firmware version is installed.<br />
13
6. Color Buttons<br />
a. RED : Used for special functions in the menu. The RED key is used to sort lists in the service list or<br />
go to previous day search in the EPG or make/delete the current position as a bookmark.<br />
b. GREEN : Used for special functions in the menu. The GREEN key is used to set the favorites setting<br />
in the service list or go to the next bookmark position.<br />
c. YELLOW : Used for special functions in the menu. Yellow key is used to find services in the service<br />
list or change the audio track..<br />
d. BLUE : Used for special functions in the menu. The Blue key is used to set service list options in the<br />
service list or display Multi-Picture.<br />
7. Information : Shows the information about the current program. If you press it twice, the detailed<br />
information box will be shown.<br />
8. Recall : Moves to previous service.<br />
9. ARROW Buttons<br />
a. Up & Down Key : To change the value of a selected item with preprogrammed values in the menu.<br />
b. Left & Right Buttons : To move the cursor left and right in the menu.<br />
10. OK or Service List : Show the service list in non-menu mode and select an item or <strong>co</strong>nfirm in menu<br />
mode.<br />
11. Menu : To enter the main menu or to move to the previous menu.<br />
12. EXIT : Exit from the menu or pop-up window.<br />
13. Page Up& Down : Move to the next or previous page if more than one page are available. This button<br />
is also used to change the location of the sub picture in PIP.<br />
14. Favorite : To display the satellites programmed into the receiver and the favorite groups.<br />
14
15. Volume Up & Down : To change the Volume.<br />
16. Channel Up & Down: To change the TV or Radio channel.<br />
17. EPG(Electronic Program Guide) : Show the TV/Radio program guide.<br />
18. Play List : To show the file list for the SATA HDD or USB Storage Device.<br />
19. PIP Buttons<br />
a. PIP(Picture in Picture) : To activate the PIP window.<br />
b. PIP Swap : Switching between main-picture and sub-picture<br />
c. PIP(Picture in Picture) Service List : To show the sub-picture service list.<br />
20. Numeric : Allows numerical data entry and changing of services directly.<br />
21. Subtitle : To show subtitles.<br />
22. Teletext : To show the digital teletext.<br />
15
5. Multi-Brand IR Remote Controller Setting<br />
NOTE : If there is no input for 10 se<strong>co</strong>nds after selecting set mode, set mode is<br />
canceled.<br />
1. Direct Code Entry<br />
Step 1 : Turn on the DEVICE what you want to set up (TV / DVD / VCR)<br />
Step 2 : Press the DEVICE and OK buttons at the same time for about 2 se<strong>co</strong>nds.<br />
DEVICE LED will blink twice.<br />
Step 3 : Input the 3 digit <strong>co</strong>de number applicable to you device.<br />
(Refer to ‘Code Table for Universal Remote Control Unit’ in the rear section of this manual)<br />
DEVICE LED will blink twice and the DEVICE turns off.<br />
If you enter a wrong DEVICE <strong>co</strong>de, DEVICE will blink once<br />
Step 4 : If your DEVICE turns off, press OK button.<br />
DEVICE LED will blink twice.<br />
2. Auto Code Search<br />
Step 1 : Turn on the DEVICE what you want to set up (TV / DVD / VCR)<br />
Step 2 : Press the DEVICE and OK buttons at the same time for about 2 se<strong>co</strong>nds.<br />
DEVICE LED will blink twice.<br />
Step 3 : Press the UP or Down buttons within 10 se<strong>co</strong>nds to enter the Search mode.<br />
Step 4 : Press the UP or Down buttons until the DEVICE turns off.<br />
Step 5 : If your DEVICE turns off, press OK button.<br />
DEVICE LED will blink twice.<br />
3. Code No. Checking (Number Call)<br />
Step 1 : Press the DEVICE and OK buttons at the same time for about 2 se<strong>co</strong>nds.<br />
DEVICE LED will blink twice.<br />
Step 2 : Press the INFO button within 3 se<strong>co</strong>nds.<br />
LED will blink ac<strong>co</strong>rding to the <strong>co</strong>de number of the device.<br />
( Case of digit '0', it blinks 10 times.)<br />
16
Connections diagram<br />
1. Receiver to AC power<br />
Connect the power <strong>co</strong>rd between the AC power <strong>co</strong>rd socket of receiver and the AC outlet.<br />
2. Receiver to TV with Digital A/V Output<br />
Connect the HDMI Cable to the HDMI Connector of the TV.<br />
Connect the SPDIF Cable to the Digital audio input of the Digital Audio Equipment.<br />
NOTE : Depending on the A/V equipment you own, there are various ways you can <strong>co</strong>nnect<br />
the STB. To choose the best <strong>co</strong>nnection option, please refer to the manual of the<br />
equipment you would like to <strong>co</strong>nnect to. To get High Definition playback of High<br />
Definition <strong>co</strong>ntent, we re<strong>co</strong>mmend that you <strong>co</strong>nnect your high definition display<br />
with a HDMI cable. HDMI supports standard, enhanced or high-definition video<br />
and multichannel audio in a single cable.<br />
17
3. Receiver to TV with Analog A/V Output<br />
Connect the TV SCART to the SCART input of the TV.<br />
Connect the Component to the Component input of the TV.<br />
Connect the Composite to the Composite input of the TV.<br />
NOTE : HDMI or <strong>co</strong>mponent (YPbPr) is re<strong>co</strong>mmended for Digital TVs.<br />
The SCART cable <strong>co</strong>nnection is re<strong>co</strong>mmended for analogue TVs or VCRs<br />
The <strong>co</strong>mposite <strong>co</strong>nnection(RCA cable) is re<strong>co</strong>mmended for analogue TVs<br />
You cannot view high definition video with the SCART and the <strong>co</strong>mposite video<br />
<strong>co</strong>nnector.<br />
18
4. Receiver to TV and VCR<br />
Connect the TV SCART to the SCART input of the TV.<br />
Connect the VCR SCART to the SCART input of the VCR.<br />
19
5. Connecting to Antenna Cable<br />
5.1 In case of S2 + S2 (Satellite + Satellite) tuners<br />
Connecting one dish to both tuners by Loop through<br />
Connecting each Dish to each Tuner<br />
Connecting multiple dishes to each Tuner via a Multi-switch<br />
20
5.2 In case of T(T2) + T(T2) (Terrestrial + Terrestrial) tuners<br />
Connecting one aerial to both tuners by Loop through<br />
Connecting two aerials to each Tuner<br />
5.3 In case of C + C (Cable + Cable) tuners<br />
Connecting one cable network to both tuners by Loop through<br />
Connecting one cable to each Tuner<br />
21
5.4 In case of S2 + T(T2) (Satellite + Terrestrial) tuners<br />
Connecting a dish to LNB IN<br />
Connecting an aerial to ANT IN<br />
5.5 In case of S2 + C (Satellite + Cable) tuners<br />
Connecting a dish to LNB IN<br />
Connecting a cable network to CABLE IN<br />
5.6 In case of T(T2) + C (Terrestrial + Cable) tuners<br />
Connecting an aerial to ANT IN<br />
Connecting a cable network to CABLE IN<br />
22
Guide of Functions<br />
1. Selecting a Service<br />
To select the desired service (channel), please refer to the instructions below.<br />
1.1 Using CH UP/DOWN buttons<br />
You can navigate between services by pressing CH UP/DOWN buttons. Whenever you press the CH<br />
UP(DOWN) button, the current service will be changed to the next/previous service. Please press the<br />
CH UP or CH DOWN button until you find the service you want to watch.<br />
1.2 Using Service List<br />
To select the desired service in the service list, you<br />
should firstly display the service list by pressing the<br />
OK button.<br />
Use the ARROW buttons to select a desired service<br />
and press the OK button.<br />
You will see that the service is changed in the small<br />
screen on the top-right.<br />
To watch that service, press the OK button once more.<br />
To watch the previous service, press the EXIT button.<br />
In the Service List window, you can also select additional functions with the COLOURED buttons. Press<br />
the RED button, and you can sort the services by Name, Transponder(TP), Group, Tuner and CAS<br />
(Conditional Access System).<br />
Press the GREEN button, and you can add the services to one of 10 Favorite Lists.<br />
Press you the YELLOW button, and can search & find the service via a virtual keyboard.<br />
Press the BLUE button, and you can adjust service list options.<br />
NOTE : If you use a loop-through <strong>co</strong>nfiguration, you cannot use the sort list option.<br />
1.3 Using Simple Service List<br />
If you press NUMERIC buttons or UP/DOWN<br />
ARROW button, instant service list will be displayed.<br />
Select the desired service by using the ARROW<br />
buttons, and press OK button to watch.<br />
You can also enter the service number directly by<br />
using the NUMERIC buttons.<br />
23
1.4 Using Recent Service List<br />
To display recent service list, press the RECALL<br />
button for a short time.<br />
To return to the previous service that you were<br />
watching, press RECALL button twice or for a longer<br />
time.<br />
Choose the service from the recent service list, use<br />
the ARROW button to select, and then press the OK<br />
button.<br />
Press EXIT button to exit from the recent service list.<br />
2. Information Window<br />
If you want to display information about the current<br />
service that you are watching, press the INFO button.<br />
Then the Information window will be displayed.<br />
This Information window is automatically displayed<br />
when changing between the services.<br />
This window <strong>co</strong>ntains much useful information such<br />
as service number, service name, encryption type,<br />
teletext, subtitle, Audio indication for Dolby Digital,<br />
duration of the service and so on.<br />
By pressing the INFO button once again, you can get more detailed information about the service.<br />
3. Multi-Picture Display.<br />
Press the BLUE button to display multiple pictures and<br />
use the RED button to select the display options for 9 or<br />
12 multiple pictures.<br />
4. Electronic Program Guide (EPG)<br />
The Electronic Program Guide (EPG) helps you to<br />
navigate through all the possible viewing options. And<br />
the EPG supplies additional information about each<br />
channel, such as program listings, start/end times and<br />
detailed information about the program listings for all<br />
available services. The availability and size of<br />
information of these program details can vary,<br />
depending on the particular broadcasters, individual<br />
services. E.g. Freeview provides a full 7 day EPG, with<br />
full descriptions of programs broadcast.<br />
24
Press the EPG button, the EPG menu will be displayed.<br />
Use the ARROW buttons to move to other services or to see previous/next guide.<br />
Press the EPG button once to view full EPG with multi service list, and press it twice to view the<br />
additional EPG information of a specific channel service. Keep pressing the EPG button to toggle<br />
between the full and detailed menus of EPG.<br />
Press the GREEN button to view next day EPG and the RED button to view EPG for a previous day.<br />
Select the program by using the ARROW buttons then set the event timer by pressing OK.<br />
You can schedule a re<strong>co</strong>rding with the EPG menu as follows.<br />
- Press RECORD button to schedule the event. This schedule can be checked in the Timer Settings, in<br />
the System tool menu.<br />
- To cancel the schedule of the re<strong>co</strong>rding, press the OK button with the desired event selected.<br />
- To edit the schedule of the re<strong>co</strong>rding, press the RECORD button with the desired event selected.<br />
5. Favorite Group<br />
Press the FAV(Favorite) button to view all favorite<br />
groups such as sports, movie, drama, satellite group<br />
and so on. Scroll through the various favorite groups<br />
using the UP/DOWN ARROW buttons, and select the<br />
desired favorite group by pressing OK button.<br />
6. Volume Control<br />
To adjust the audio volume, press the VOL UP/<br />
DOWN buttons.<br />
The Audio volume <strong>co</strong>ntrol bar will be displayed at<br />
the top of the screen and will disappear after 4<br />
se<strong>co</strong>nds.<br />
If necessary, press the MUTE button to turn on/off<br />
the audio.<br />
7. Pause<br />
NOTE : The mute function remains set while you change services.<br />
The PAUSE button is used to freeze the video. Press<br />
the PAUSE button once more to resume the video.<br />
25
8. Subtitle<br />
You can select the language for a Subtitle, if the<br />
program provides subtitle information.<br />
Press the SUBTITLE button on your remote <strong>co</strong>ntrol<br />
unit.<br />
Select the desired subtitle language then press the<br />
OK button.<br />
The subtitles will be displayed in the selected<br />
language at the bottom of the screen.<br />
To turn OFF the subtitles from the screen, Select ‘Off’ from the subtitle language list.<br />
NOTE : If a program does not provide subtitle information, the SUBTITLE button will not be active.<br />
9. Audio Control<br />
Press the YELLOW button while watching live TV to display the Audio Control menu. You can set the<br />
Audio Track / Sound Mode / Sound Level.<br />
Audio Track :<br />
You can see all the audio tracks of the service you<br />
are watching. Use the ARROW buttons to choose<br />
the preferred audio track. If you select Auto, the<br />
audio track will be selected ac<strong>co</strong>rding to the audio<br />
language setting in the language setting menu.<br />
Sound Mode :<br />
To set sound mode, Stereo / Mono / Left / Right.<br />
Sound Level :<br />
To set sound level, Low(-30%) / Normal /<br />
High(+30%) / Off.<br />
26
10. Teletext<br />
When the TELETEXT i<strong>co</strong>n on the INFO Banner is displayed, press the TELETEXT button to view the<br />
teletext.<br />
11. PIP (Picture in Picture)<br />
When you press the PIP button, a sub picture screen will appear on the main screen view.<br />
If you press the PIP button one more time, the primary picture and the sub picture will appear<br />
together side-by-side with the same size. The picture of the left side is the primary and the picture on<br />
the right side is sub. If you press the PIP button one more time, the sub picture will disappear.<br />
In the PIP mode, you can change primary and sub with the PIP SWAP button.<br />
27
If you press the PAGE UP/DOWN button, the location of the sub picture is changed.<br />
If you press the PIP SERVICE LIST button, you will<br />
see the list of services available for the sub picture.<br />
You can change the service of the sub picture from<br />
the service list shown.<br />
NOTE : Changing services of sub the picture<br />
<strong>co</strong>uld be limited the tuner <strong>co</strong>nnection or<br />
a re<strong>co</strong>rding event.<br />
28
PVR (Personal Video Re<strong>co</strong>rder) Function<br />
1. Re<strong>co</strong>rding<br />
You can select a re<strong>co</strong>rding storage device with the following sequence :<br />
Menu > Configuration > Re<strong>co</strong>rding Option > Re<strong>co</strong>rd Device.<br />
Default is set to ‘Hard Disk’.<br />
1.1 Re<strong>co</strong>rding methods<br />
There are 3 re<strong>co</strong>rding methods.<br />
(Instant Re<strong>co</strong>rding / Time Scheduled Re<strong>co</strong>rding / Event Scheduled Re<strong>co</strong>rding).<br />
Instant Re<strong>co</strong>rding :<br />
You may press the RECORD button to start your<br />
re<strong>co</strong>rding instantly at anytime.<br />
Time Scheduled Re<strong>co</strong>rding :<br />
- In Timer Settings menu, you may set the time &<br />
program to re<strong>co</strong>rd your desired channel.<br />
(Go to Main Menu > System Tools > Timer<br />
Settings)<br />
- Press the GREEN button to activate a new timer<br />
edit screen.<br />
- In the Timer Edit screen, you may choose start<br />
date/time, duration, service, mode, type<br />
(Re<strong>co</strong>rding/Play), Tuner (Auto/1/2) then simply<br />
press the Yes button to schedule your re<strong>co</strong>rding<br />
event. Please note that a minimum of 3 minutes is<br />
required from the current time to the Start time<br />
for the re<strong>co</strong>rding process to take place.<br />
29
Event Scheduled Re<strong>co</strong>rding via EPG :<br />
- In the EPG menu screen, you can choose the<br />
event you wish to schedule or re<strong>co</strong>rd.<br />
- While watching the LIVE TV screen, press the EPG<br />
button to access the EPG menu screen.<br />
- Go to the event which you wish to view at the<br />
time indicated on the EPG schedule, then press<br />
OK. The event has been scheduled as indicated<br />
by the BLUE play i<strong>co</strong>n. This BLUE play i<strong>co</strong>n<br />
means that you want to just watch the event at<br />
the scheduled time.<br />
- Press the OK button one more time, then the<br />
event will be scheduled to be re<strong>co</strong>rded as<br />
indicated by the RED dot i<strong>co</strong>n. This RED dot i<strong>co</strong>n<br />
means that you want to re<strong>co</strong>rd the event at the<br />
scheduled time.<br />
When you set an event for scheduled re<strong>co</strong>rding<br />
via the EPG menu. It automatically sets a Timer<br />
Event in the Main Menu > System Tools > Timer<br />
Settings.<br />
30
1.2 Re<strong>co</strong>rding Edit<br />
Press the REC button while re<strong>co</strong>rding to see the re<strong>co</strong>rding message window.<br />
Pause : Select Pause Re<strong>co</strong>rding then press OK to pause the current re<strong>co</strong>rding process.<br />
Duration : Set re<strong>co</strong>rding duration. Press LEFT/RIGHT ARROW button to change re<strong>co</strong>rding duration.<br />
Stop Position :<br />
Set the finishing time of re<strong>co</strong>rding.<br />
- End of current event : finish re<strong>co</strong>rding at the end<br />
of current event<br />
- End of next event : finish re<strong>co</strong>rding at the end of<br />
next event.<br />
- Not Available : EPG is not available.<br />
Re<strong>co</strong>rd Slot : When you are re<strong>co</strong>rding 3 services,<br />
you can select Primary / Se<strong>co</strong>ndary / Tertiary by<br />
pressing Left/Right Arrow button, then go to<br />
Change Service and press OK button to show that<br />
re<strong>co</strong>rding service.<br />
1.3 Long Time re<strong>co</strong>rding<br />
If filesystem limitations exist during very long re<strong>co</strong>rding processes of 4GB(Giga Byte) or more, additional<br />
files may be created every 4GB. (For example; aaa.ts, aaa.ts1, aaa.ts2… and so on).<br />
You must remember not to delete any of duplicated files. These files are only able to be viewed with<br />
your PC not with the receiver (STB).<br />
1.4 Pause during re<strong>co</strong>rding<br />
When the PAUSE button is pressed during<br />
re<strong>co</strong>rding, only the live video is paused, and<br />
re<strong>co</strong>rding <strong>co</strong>ntinues.<br />
31
Press PAUSE button once again and event will<br />
resume from the pause time.<br />
During re<strong>co</strong>rding, press the PLAY/TIMESHIFT<br />
button to show the Play bar screen.<br />
While the Play bar is shown on your screen, you may<br />
use the LEFT/RIGHT Arrow button to move<br />
(forward & backward) freely within re<strong>co</strong>rded time.<br />
If you press YELLOW button in the Play bar, you can<br />
set the Position Jump time at Auto / 10sec / 30sec /<br />
1min / 2min / 4min / 10min. Then press LEFT/RIGHT<br />
Arrow button to jump as you set the time.<br />
If you press the STOP button, it will go to LIVE and<br />
you may press the PREV FILE button to view the<br />
re<strong>co</strong>rded file from the beginning.<br />
STB can re<strong>co</strong>rd up to 3 different services<br />
simultaneously.<br />
When re<strong>co</strong>rding 3 services at the same time, you can<br />
press the STOP button to see a message window of<br />
current re<strong>co</strong>rding status / information.<br />
If you select one of the 3 or 2 re<strong>co</strong>rdings and press<br />
the OK button, that re<strong>co</strong>rding service will be<br />
stopped.<br />
If you press the STOP button during re<strong>co</strong>rding 1<br />
service, a re<strong>co</strong>rding stop message window will appear. Then select YES to stop re<strong>co</strong>rding.<br />
NOTE : If you want to re<strong>co</strong>rd up to 3 services, please format the storage device with<br />
'Journaled(JFS)' file system.<br />
Menu > Storage Manager > Format > File System > select 'Journaled(JFS)'.<br />
32
2. Time Shifting<br />
You can select a storage device to host the temporary<br />
file for the Time shift with the following sequence:<br />
Menu > Configuration > Re<strong>co</strong>rding Option > TimeShift<br />
Device.<br />
Default storage device is set to ‘Hard Disk( internal<br />
SATA)’<br />
If you press the PAUSE button during Time shift, the<br />
live video is paused but the time shift buffer will<br />
<strong>co</strong>ntinue to re<strong>co</strong>rd.<br />
Press the PAUSE button once again, then the event will resume from the paused time.<br />
While watching live TV, press the PLAY/TIMESHIFT button to show the play bar on your screen.<br />
When the play bar is displayed on your screen, you<br />
may use the LEFT/RIGHT Arrow buttons to move<br />
freely through the re<strong>co</strong>rded times bar.<br />
If you press YELLOW button in the Play bar, you can<br />
set the Position Jump time at Auto / 10sec / 30sec /<br />
1min / 2min / 4min / 10min. Then press LEFT/RIGHT<br />
Arrow button to jump by the skip size you have set.<br />
If you press the STOP button while time-shifting,<br />
you will be returned to live TV. You can also use<br />
PREV FILE button to move to a start location of the Time-shifted file.<br />
33
3. Playback (Play List)<br />
You can playback many files with the Playlist which you<br />
access by the PLAYLIST button.<br />
In the Playlist, you can check and playback re<strong>co</strong>rded files,<br />
multimedia movie files, MP3 music files, and image files.<br />
With the LEFT/RIGHT ARROW button, go to the<br />
Re<strong>co</strong>rded Files, Imported Files, Music and Photo<br />
category and check & for playback files in each category.<br />
If press the PLAYLIST button, you can see all playable<br />
files. In this mode, the Green button is not used. You<br />
can press the LEFT/RIGHT Arrow button to move to<br />
from Re<strong>co</strong>rded Files / Imported Files / Music / Photo / Play List menu<br />
3.1 Re<strong>co</strong>rded Files<br />
If you press RIGHT Arrow button in Play List, you<br />
can go to Re<strong>co</strong>rded Files menu.<br />
Locate the re<strong>co</strong>rded file(s) you wish to play with the<br />
UP/DOWN button and press the OK button to<br />
playback the re<strong>co</strong>rded file(s).<br />
To choose a particular selection of files, select the<br />
desired files by pressing the RED button. Press the<br />
OK button to begin to play the selected files.<br />
Select Device : Press PLAYLIST button one more<br />
time in the Playlist mode to see “Select Device”<br />
window, and select the device which has the file you<br />
want to play.<br />
NOTE : “Select Device” window shows devices<br />
which are currently <strong>co</strong>nnected to the<br />
STB.<br />
Sorting : If you press the YELLOW button, you can<br />
sort the files by Time / Name / Size / Type.<br />
34
File Option :<br />
If you press the BLUE button, you can select Delete,<br />
New Folder, Move to Folder, Copy to Device,<br />
Rename, Lock/Unlock. You can select multiple files<br />
together and delete or move all of them at once.<br />
- Delete : To delete file(s)<br />
- New Folder : To make a new folder. The default<br />
name of the folder is “Group#”.<br />
- Move to Folder : To move the selected file(s) to a<br />
folder you want. This option is available if there is<br />
no folder.<br />
- Copy to Device : To <strong>co</strong>py the file(s) to other storage device. This option is not available if only one<br />
storage device is <strong>co</strong>nnected.<br />
- Rename : To rename the folder or file.<br />
- Lock / Unlock : To lock and/or unlock the file with your PIN Code. You must select a file to do this<br />
option.<br />
3.2 Imported Files<br />
If you press RIGHT ARROW button in Re<strong>co</strong>rded Files,<br />
you can go to Imported File menu.<br />
Locate the file(s) you wish to play with the<br />
UP/DOWN button and press the OK button to enjoy<br />
the movie.<br />
To choose a particular selection of files, select a<br />
desired file and press the RED button. Press the OK<br />
button to begin the selected files.<br />
You can use the same ‘Select Device’, ‘Sorting’ and ‘File Option’ features as in the Re<strong>co</strong>rded Files.<br />
3.3 Music<br />
If you press the RIGHT ARROW button in Imported<br />
Files, you can go to Music menu.<br />
If you press the RECALL button, you can enjoy<br />
music with Shuffle playback and repeat.<br />
You can use the same ‘Select Device’, ‘Sorting’ and<br />
‘File Option’ features as in the Re<strong>co</strong>rded Files.<br />
3.4 Photo<br />
If you press the RIGHT ARROW button in Music, you<br />
can go to the Image Photo menu.<br />
If you press the RED button or OK button, you can<br />
start the slide show of image files. Press the EXIT<br />
button to stop slide show.<br />
- RED button : Auto Slide show<br />
- OK button : <strong>Manual</strong> Slide show<br />
If you press the GREEN button, you can adjust the<br />
Slide Time, Repetition, Title, Down-scale.<br />
You can use the same ‘Select Device’, ‘Sorting’ and ‘File Option’ features as in the Re<strong>co</strong>rded Files.<br />
35
4. Bookmark<br />
When the Play bar is displayed, you may move to desired time and book mark it by pressing the RED<br />
button. Bookmark(s) are indicated with a Green line on the play bar. Also, you may press the RED<br />
button to activate the play bar to mark your bookmark(s).<br />
When the play bar is on, user can move / jump between the bookmarks by pressing the GREEN button.<br />
If you wish to delete any Bookmarks, go to that<br />
bookmark by pressing the GREEN button, then<br />
press the RED button to delete the current<br />
bookmarks.<br />
5. Trick mode<br />
The user can change the speed of a fast forward play<br />
with FF(Fast Forward) button. Press FF button to<br />
change the speed to x2, x4, x6, and x8. If you<br />
once again press FF button in its x8 mode, it returns<br />
to normal(x1) speed play.<br />
You can also change rewind speed with the<br />
REWIND button. Press REWIND button to change<br />
the speed to x2, x4, x6, and x8. If you press the<br />
REWIND button again in it is at the x8 mode, it<br />
returns to normal speed.<br />
You may press the PAUSE button at any time to pause a pre-re<strong>co</strong>rded event. Press the PAUSE button<br />
once again to resume play of the re<strong>co</strong>rded event.<br />
36
Menu Map<br />
System Tools<br />
Configuration<br />
Installation<br />
Utilities<br />
Main Menu<br />
37<br />
1. Storage Manager<br />
2. Timer Settings<br />
3. Service List Manager<br />
4. Data Transfer<br />
1. Re<strong>co</strong>rding Option<br />
2. Parental Control<br />
3. Display Setting<br />
4. Time Setting<br />
5. Language Setting<br />
6. A/V Output Setting<br />
1. Dish Setting<br />
2. Service Search<br />
3. Terrestrial Search<br />
4. Cable Search<br />
5. Network Setting<br />
6. System Re<strong>co</strong>very<br />
7. System Information<br />
1. Calculator<br />
2. Calendar<br />
3. CAS<br />
4. Plugin<br />
5. YouTube
Main Menu of Guide<br />
To display the menu, press the MENU button at any<br />
time. You can select the sub menus by using the<br />
ARROW buttons.<br />
The selected sub menu be<strong>co</strong>mes highlighted. After<br />
selecting (highlighting) the sub menu you want to<br />
access, press the OK button. If you want to return to the<br />
previous menu, press the MENU button. And if you<br />
want to exit from the menu, press the EXIT button.<br />
1. System Tools<br />
1.1 Storage Manager<br />
The items in this menu allow you to access and<br />
<strong>co</strong>ntrol the storage devices that you want.<br />
Current Device : Select the storage device you want<br />
to access with the ARROW/OK buttons.<br />
Status : You can see the information of current<br />
<strong>co</strong>nnected devices, such as ‘Mounted’, ‘Not<br />
Available’<br />
File System : It shows the file system of the current<br />
device. You can also select desired file system that you want when you format the device.<br />
NOTE : You must select FAT32 file system, if you want to access the USB storage devices in<br />
Windows<br />
Total : Displays total size of current device.<br />
Free : Displays free size of current device.<br />
Format : If you press the OK button to format current device, the device will be formatted with above<br />
file system.<br />
NOTE : When file system is ‘Unknown’, the device will be formatted with ‘Journaled’.<br />
Storage Check : Check the current <strong>co</strong>nnected device.<br />
Play List : Press OK button to move to ‘Play List’ menu directly.<br />
38
1.2 Timer Settings<br />
Insert a new timer entry or modify an existing timer entry.<br />
To add new timer entry : Press the GREEN button.<br />
Timer Edit window will popup. You can set the<br />
specific start date, time, duration and service for its<br />
reservation. And you can choose one of Timer<br />
Modes as 'Once' or 'Daily' or 'Weekly'. You can<br />
choose timer operation type as ‘Re<strong>co</strong>rding’ or just to<br />
'Play'.<br />
- If you choose 'Re<strong>co</strong>rding', it will start re<strong>co</strong>rding at<br />
that time.<br />
- If you choose 'Play', it will change and tune to the service that you wish to watch.<br />
- If you set Alarm Confirm Message to ‘On’, alarm message will activate. Or choose ‘Off’ to disable.<br />
To modify existing timer entry : Choose the timer entry which you wish to modify and press the OK<br />
button.<br />
To delete an existing timer entry : Choose the timer entry that you want to delete and press the RED<br />
button.<br />
Press YELLOW button to enter to Calendar.<br />
Press BLUE button if you want to delete all the<br />
event(s).<br />
NOTE : If you reserve one or more event<br />
through the EPG menu, the reserved<br />
event(s) will be added to Timer Settings<br />
automatically.<br />
1.3 Service List Manager<br />
Service List Manager menu will appear when you press the OK button.<br />
You can select Edit Mode by pressing the YELLOW button.<br />
Lock Services : All service lists will be shown on the<br />
left side of the window, the middle will show the list<br />
of service to be locked. By using the ARROW and OK<br />
buttons, you may move the chosen service to the<br />
middle window to lock that service. Services can<br />
also be moved back from the middle to the left side<br />
to un-lock them.<br />
Move Services : All service lists will be shown on left<br />
side of the window, services to be moved will be<br />
shown on the middle window. Move the service to<br />
the middle window by using the ARROW and OK<br />
buttons, then the middle window service will be<br />
moved to a specified location when the desired<br />
location is selected from the left window.<br />
39
Delete Services : All service lists will be shown on<br />
left side of the window. By using the ARROW and<br />
OK buttons you may select services to be deleted by<br />
placing them in the middle window. The press the<br />
GREEN button to delete the selected services.<br />
Skip Services : All services will be shown on left side<br />
of the window, the middle window will only show<br />
the services that are chosen to be skipped. By using<br />
the ARROW and OK buttons you may move the<br />
selected services from the left to middle window to<br />
skip them.<br />
Set Favorite Services : Use the ARROW and OK<br />
buttons to select your desired favorite group. Once,<br />
favorite group is chosen, the left side window will<br />
show all service lists and the middle window will<br />
only show the selected services of the favorite<br />
group selected. By using the ARROW and OK<br />
buttons, you may ADD the desired services to a<br />
favorite group or DELETE any from the favorite<br />
group. The name of the favorite group can be edited by pressing the GREEN button.<br />
You can go to Select Favorite Group by pressing GREEN button. In this mode, you can select Lock<br />
Group / Edit Group Name / Add Group / Delete Group.<br />
Edit Services : All services name will be shown on<br />
the left side of the window.<br />
Move the highlighted bar to the service where you<br />
want to edit its name and press the OK button for<br />
Edit Service menu. Then move the highlighted<br />
bar which you want to edit.<br />
You can edit Service Name, Video Stream Type,<br />
Video PID, Audio Stream Type, Audio PID, PCR<br />
PID.<br />
40
1.4 Data Transfer<br />
When the data transfer task is in process, the Front USB slot is set to a default device slot. But, if no<br />
USB device is <strong>co</strong>nnected on a front USB slot, then the Rear USB slot is set as a device to be used for the<br />
data transfer process.<br />
NOTE : If no USB device is <strong>co</strong>nnected on either two (Front & Rear) USB slots, then the<br />
Menu item will not be available.<br />
Transfer all System data to USB storage : If you<br />
want to transfer and use BOTH of the current system<br />
parameters and service data in the future, this menu<br />
will allow you to store all data to your USB device.<br />
Press OK button to store all current data to an<br />
external USB storage.<br />
Transfer Service data to USB storage : If you want<br />
to transfer and use ONLY the service data in the<br />
future, this menu allows you to store current service data. Press the OK button to store the current<br />
service data to your external USB storage. The service data can also be viewed and edited on a PC with<br />
an appropriate editor.<br />
Data download from USB storage device : This menu allows you to download the saved data from<br />
the external USB storage to your STB. Press OK button to download data.<br />
41
2. Configuration<br />
2.1 Re<strong>co</strong>rding Option<br />
Alarm Confirm Message : Turn ‘ON’ this Alarm<br />
message to indicate and show the alert pop-up<br />
message when a reserved re<strong>co</strong>rding event is about<br />
to start. The alert message will show 3 minutes<br />
before the start time of the reserved re<strong>co</strong>rding event.<br />
Re<strong>co</strong>rding Stop Message :<br />
- Set 'On' : When you press the STOP button while<br />
re<strong>co</strong>rding, then a <strong>co</strong>nfirmation window is<br />
displayed.<br />
- Set 'Off' : When you press the STOP button while re<strong>co</strong>rding, the STB will stop the re<strong>co</strong>rding process<br />
immediately / instantly without asking the additional <strong>co</strong>nfirmation from the user.<br />
Extra Re<strong>co</strong>rding Time Before(Start) & After(Finish) :<br />
- You can add an extra re<strong>co</strong>rding time before start / after finish (1min /2min /3min /4min /5min/<br />
10min/ 15min/ off) to scheduled re<strong>co</strong>rding events. If you set an extra re<strong>co</strong>rding time by using the<br />
ARROW and OK buttons, the scheduled re<strong>co</strong>rding event will have a ‘Start’ / ‘Finish’ time of<br />
additional re<strong>co</strong>rding time added to the basic event. This option only works for events scheduled<br />
from the EPG. If you schedule a service re<strong>co</strong>rding in the Timer Settings menu, this option has no<br />
affect.<br />
TimeShift Start : You can choose the method of TimeShift function.<br />
- Auto : TimeShift function is automatically activated.<br />
- Off : TimeShift function will be disabled.<br />
- <strong>Manual</strong> : TimeShift will be activated when the Pause key is pressed.<br />
TimeShift Duration : You can adjust TimeShift duration in 30 minute intervals. (Off /30min /60min<br />
/90min /120min). This duration defines the maximum time length of the TimeShift as long as the<br />
storage device has enough memory space left.<br />
Playback Position Jump : When you use LEFT/RIGHT ARROW button to move back/forward through<br />
the re<strong>co</strong>rded time bar, You can select the time intervals. (10 Sec / 30 Sec / 1Min / 2 Min / 4 Min / 10<br />
Min / Auto).<br />
Playback Numeric Function : This selection of function defines the operation type of the NUMERIC<br />
buttons of your remote <strong>co</strong>ntrol unit (RCU) while the ‘Playbar’ is displayed on the screen.<br />
- Commercial Skip : When the NUMERIC buttons (1 to 9) are pressed the video will move forward<br />
ac<strong>co</strong>rding to the NUMERIC buttons pressed. For example ; when ‘1’ is pressed, 1min move forward,<br />
‘5’ is pressed, 5min move forward from current position. When ‘0’ is pressed, it will move back for<br />
1minute.<br />
- Percentage Move : When the NUMERIC buttons are pressed, the video will move to the location of<br />
that % percentage of numbers pressed. For example ; if you press ‘10’, you will move to the 10%<br />
location of the total video length. If you press ‘99’, you will move to the end of the video clip<br />
re<strong>co</strong>rded.<br />
TimeShift Device : You can select the TimeShift Device you wish to use.<br />
- Hard Disk, USB1(Front), USB2(Rear Top), USB3(Rear Bottom), Network Drive.<br />
Re<strong>co</strong>rd Device : You can select the Re<strong>co</strong>rding device you wish to use.<br />
- Hard Disk, USB1(Front), USB2(Rear Top), USB3(Rear Bottom), Network Drive.<br />
SATA Disk Select : You can choose between Internal, or External SATA HDDs.<br />
42
2.2 Parental Control<br />
User’s access rights to a service and programs are<br />
<strong>co</strong>ntrolled by a 4-digit secret <strong>co</strong>de that is defined by<br />
the user. Whenever you attempt to access the<br />
parental <strong>co</strong>ntrol menu, a pop-up window will ask you<br />
to input a PIN <strong>co</strong>de. (If necessary, you can change it.)<br />
NOTE : The default PIN <strong>co</strong>de is ‘0000’<br />
Censorship : Set the parental guidance rating of<br />
highlighted censorship classification. The parental<br />
level is given as an age-based number.<br />
Change Pin <strong>co</strong>de : To change your PIN <strong>co</strong>de, input<br />
the new PIN <strong>co</strong>de using the NUMERIC buttons. To<br />
verify the new PIN <strong>co</strong>de, input the new PIN <strong>co</strong>de<br />
again.<br />
System : Set the access rights to the System menu.<br />
Installation : Set the access rights to the Installation<br />
menu.<br />
Configuration : Set the access rights to the<br />
Configuration menu.<br />
Edit Service : Set the access rights to the Edit menu.<br />
Plugin : Plugin Set the access rights to the Plugin menu.<br />
2.3 Display Setting<br />
Info Box position : Set a position of the information<br />
window.<br />
Info Box Display Time : Set the time duration of the<br />
information window being displayed on the screen<br />
after changing services.<br />
Info Box Event Type : Set the event type<br />
that display in left bottom part of the information<br />
window.<br />
- Present Event with Time :<br />
Display the present event name with time. (Default)<br />
- Present and Follow Event :<br />
Display the present and following event name.<br />
Volume Bar Display Time : Set the time duration of the volume bar being displayed on the screen<br />
after changing volume.<br />
EPG Time scale : You can set the time scale in hours which is displayed for a program in the EPG<br />
window.<br />
Zapping Mode : You can set the zapping mode as follows (zapping mode is when changing services).<br />
- Black screen : Display a black screen when changing between services.<br />
- Freeze : Display the last still picture when changing services.<br />
Simple Service List : To set the simple service list ‘On’ to display or ‘Off ‘.<br />
- On : Press UP/DOWN ARROW button to display the simple service list while watching live TV.<br />
- Off : If you set Off, channel Up/Down when you press UP/DOWN ARROW button.<br />
Front Display Scroll : You can set how the VFD Display Scrolls.<br />
- Once : Scroll the service name only once.<br />
- Continuous : Continually scroll the service name, if the letters of the service name is over 12<br />
characters.<br />
43
- Off : Scroll off.<br />
Front LED Lighting Time : You can adjust the lighting time of the front LED.<br />
Front LED Brightness : You can adjust brightness of the front LED with 4 steps. By setting ‘off’ this<br />
option, will turn off the front LED lighting.<br />
44
2.4 Time Setting<br />
Time Setting : To set the current time, you can use<br />
two modes; Auto or <strong>Manual</strong>.<br />
Local Offset : Enter the offset value by using the<br />
standardized information of current service area.<br />
Daylight Saving : If you want to apply daylight<br />
saving, select the <strong>co</strong>unter by using the ARROW<br />
buttons.<br />
Clock Mode : Select the type of clock display(12<br />
Hours or 24 Hours) using ARROW buttons.<br />
Wake Up Mode : Enter the time for the receiver to automatically power ON. And you can choose one<br />
of Wake Up Mode as ‘off’ or ‘Once’ or ‘Daily’ or ‘Weekly’.<br />
- Wake Up Date : Select the date when the STB is turn on. Press the OK button to display calendar.<br />
- Wake Up Days : Select a day of the week when the STB is turn on.<br />
- Wake Up Time : Enter the wake up time of the STB using the NUMERIC buttons.<br />
- Wake Up Service : Select the service when the STB is turn on. Press the OK button to display the<br />
service list.<br />
Sleep Mode : Enter the time for the receiver to automatically switch OFF and go to standby mode.<br />
And you can choose one of the Wake Up Mode as ‘off’ or ‘Once’ or ‘Daily’ or ‘Weekly’.<br />
- Sleep Date : Select the date when the STB is turn off. Press the OK button to display the calendar.<br />
- Sleep Days : Select a day of the week when STB is turn off.<br />
- Sleep Time : Enter the turn-off time of the STB using the NUMERIC buttons.<br />
2.5 Language Setting<br />
Menu Language : Select the desired menu<br />
language by using the ARROW buttons.<br />
NOTE : The menu and operation languages can<br />
differ depending on the <strong>co</strong>untry sold.<br />
Available languages are subject to<br />
change without prior notice.<br />
Audio Language : Select the default language for<br />
the audio when changing services. If no other<br />
language is provided, then the default language will be automatically selected.<br />
Subtitle Language : Select the default language for subtitles when changing service.<br />
Teletext Language : Select the default language for Teletext.<br />
User Font file : Select a font you want to use.<br />
NOTE : To show and use the User Font, please install a desired font file(*.ttf) to the<br />
/Var/Font directory(folder) of your receiver(STB) by using the network. Then press<br />
LEFT/RIGHT button to select a font and press OK button.<br />
45
2.6 A/V Output Setting<br />
TV Type : Select the TV types.(PAL/NTSC/Auto) In<br />
Auto mode, the STB is automatically selects NTSC or<br />
PAL ac<strong>co</strong>rding to the format the of the broadcast.<br />
TV Aspect Ratio Select the aspect ratio of the TV<br />
which is <strong>co</strong>nnected to the STB (4:3/16:9). This menu<br />
must be set prior to selecting the Display Format<br />
function.<br />
Display Resolution : Select the Display Resolution<br />
of the screen by using ARROW or OK button. You can also change the resolution with Resolution<br />
button in the remote. Each time you press the Resolution button, the resolution changes in the<br />
following sequence: 576i > 576p > 720p > 1080i > 1080p.<br />
NOTE : Please note that your TV may not show a picture depending on the Display Resolution set by<br />
your STB as well as if set to PAL when NTSC is required or vice versa. If you set the Display<br />
Resolution as SD(576i), your TV cannot display anything when the TV is <strong>co</strong>nnected to the<br />
Component Video(YPbPr). If you set the Display Resolution as HD(more than 576p), your TV<br />
cannot display anything when the TV is <strong>co</strong>nnected to the SCART or Composite Video output of<br />
the STB. In case of HDMI, your TV can display a picture for all of the resolution settings of<br />
the STB. It is possible that your TV may not display a picture with 576i,or 1080p because some<br />
HDTV’s do not support 576i or 1080p.<br />
Display Format : In case of a 4:3 ratio TV set, you can select Letter Box or Pan&Scan. In case of a 16:9<br />
ratio TV set, you can select Pillar Box or Full Screen.<br />
- 16:9 Display format on 4:3 TV set<br />
Letter Box : You can see the full screen of 16:9, but top and bottom edges of your TV screen<br />
display black horizontal Pillars.<br />
Pan&Scan : The picture is displayed in full on your 4:3 TV screen, but left and right sides of the<br />
original picture cannot be displayed.<br />
- 4:3 Display format on 16:9 TV set<br />
Pillar Box : You can see the full screen of 4:3, but left and right sides of your TV screen display black<br />
vertical Pillars. 4:3<br />
Full Screen : The picture is displayed in full on your 16:9 TV screen, but left and right sides of the<br />
original picture is displayed with widening of the screen from left and right.<br />
Because of the artificial widening, the TV picture will be distorted.<br />
Video Output Mode : Ac<strong>co</strong>rding to Display Resolution, you can select the Video Output Mode.<br />
- In case of More than 576p(HD) : The ‘RGB’ output will be disabled automatically. You can select<br />
Video Output Mode (CVBS, YPbPr, YC).<br />
- In case of 576i(SD) : The ‘YPbPr’ output will be disabled automatically. You can select Video Output<br />
Mode (CVBS, RGB, YC).<br />
HDMI Dolby Digital : Set the Dolby Digital mode 'On' or 'Off' in status of HDMI output.<br />
Dolby Digital Default : Set the Dolby Digital Default mode 'On' or 'Off'. If you set 'On', Dolby Audio<br />
will play on the service that support Dolby Audio.<br />
Sound Mode : Set the audio mode output among the RCA jack, optical SPDIF and HDMI<br />
(Stereo/Mono/Left/Right).<br />
Standby Power : You can select the standby power.<br />
- ‘On’ : Front window displays clock besides standby red LED in case of standby mode.<br />
- ‘Off’ : Front red window only displays standby LED in case of standby mode.<br />
Audio Sync Delay : To adjust Audio Sync. You can adjust from 0ms to 400ms.<br />
46
3. Installation<br />
The installation menu of your receiver will reflect the type of tuner(s) (Satellite, Terrestrial, Cable) you<br />
have installed.<br />
NOTE : If only one tuner is installed, it must be installed in the outer position (TUNER 1) .<br />
Different types of Installation Menus based on the tuner settings<br />
S+S(S) T+T(T) C+C(C) S+T S+C T+C<br />
Dish Setting<br />
Satellite Search<br />
Terrestrial Search Cable Search<br />
47<br />
Dish Setting Dish Setting Terrestrial Search<br />
Satellite Search Satellite Search<br />
Terrestrial Search Cable Search<br />
Cable Search<br />
Network Setting Network Setting Network Setting Network Setting Network Setting Network Setting<br />
System Re<strong>co</strong>very System Re<strong>co</strong>very System Re<strong>co</strong>very System Re<strong>co</strong>very<br />
System<br />
Information<br />
System<br />
Information<br />
System<br />
Information<br />
System<br />
Information<br />
System<br />
Re<strong>co</strong>very<br />
System<br />
Information<br />
System Re<strong>co</strong>very<br />
System<br />
Information
3.1 Dish Setting<br />
Select the satellite/antenna and LNB settings for<br />
service search. The values that are set in this menu<br />
will be available for selection in other service<br />
searching menus.<br />
Satellite :<br />
Select the satellite which you want to do a search for.<br />
- Press the LEFT/RIGHT ARROW button to select<br />
the satellite.<br />
- If you press the OK button, the entire satellite list will be displayed.<br />
- Select the desired satellite name to search.<br />
- If the desired satellite name is not listed then select User Defined.<br />
Tuner Connection : You can set <strong>co</strong>nnection type, Separate or Loop-Through.<br />
NOTE : Tuner Connection menu is disabled if receiver is not <strong>co</strong>nfigured with twin satellite<br />
tuners.<br />
- Separate : Set the <strong>co</strong>nnection type option to ‘Separate’, if each of the tuners are <strong>co</strong>nnected to<br />
different LNBs (TUNER 1 / TUNER 2) individually / independently, or when the tuners are <strong>co</strong>nnected<br />
through a multiswitch. Due to the independent & separate <strong>co</strong>nnections between the two Tuners &<br />
LNBs, the user can watch all the services scanned by one TUNER 1, while the other TUNER 2 is<br />
re<strong>co</strong>rding.<br />
- Loop-Through : Set the <strong>co</strong>nnection type option to ‘Loop-Through’, if you have <strong>co</strong>nnected the LNB<br />
OUT (TUNER 1) and LNB IN (TUNER 2) with a loop-through cable. In this case, you would have some<br />
limitations in using some features such as dual re<strong>co</strong>rding.<br />
This <strong>co</strong>nfiguration allows both tuners to use a single LNB or a number of LNBs <strong>co</strong>nnected with a<br />
22KHz or DiSEqC switch. However, this will limit the possible tuning range (Satellite & Polarization)<br />
of the 2nd tuner, while the 1st tuner is re<strong>co</strong>rding because the input signal of 2nd tuner is dependent<br />
of the signal which the 1st tuner is using.<br />
NOTE : User should make the appropriate <strong>co</strong>nnection by choosing the right tuner <strong>co</strong>nnections.<br />
Mis<strong>co</strong>nfiguration of these settings may cause the loss of signal reception. We strongly<br />
re<strong>co</strong>mmend you seek professional advice if your knowledge is limited.<br />
Tuner : Select the tuner which you want to set (Tuner 1/ Tuner 2). If you set ‘Loop-Through’ on the<br />
menu(Installation-Dish Setting-Tuner Connection), this menu(Tuner) will be disabled automatically.<br />
Frequency : Select the satellite frequency which you want to use to check the signal.<br />
LNB Power : Select the LNB power on or off.<br />
LNB Type : Select the LNB type.<br />
LNB Frequency : Select the local oscillator (L.O.). frequency that is specified for the LNB used.<br />
- Use the LEFT/RIGHT ARROW buttons to select the LNB frequency.<br />
- If the required LNB frequency is not listed, then enter the frequency manually using the NUMERIC<br />
buttons.<br />
- When you select Universal LNB type, both 9750 and 10600 are supported at the same time. And<br />
then the LNB 22KHz setting is disabled (as this is used for L.O. switching).<br />
LNB 22KHz : : If you use a separate 22KHz tone switch box, enable the 22KHz tone if you are<br />
<strong>co</strong>nnecting to the 22KHz side of the switch, and disable it if you are <strong>co</strong>nnection to the 0KHz side of the<br />
switch.<br />
DiSEqC Switch : If you use DiSEqC 1.0 or DiSEqC 1.1 switch, select one of the DiSEqC inputs.<br />
48
3.2 Positioner Setting<br />
Satellite : Select the satellite which you want to<br />
search for the Service.<br />
- Press the LEFT/RIGHT ARROW button to select<br />
the satellite.<br />
- If you press the OK button, a <strong>co</strong>mplete satellite<br />
list will be displayed.<br />
- Select the wanted satellite name.<br />
- If the desired satellite name is not listed then<br />
select User Defined.<br />
Tuner : Select tuner that you want to set (Tuner 1/ Tuner 2). If you have set ‘Loop-Through’ in the<br />
menu(Installation-Dish Setting-Tuner Connection), this menu(Tuner) will be automatically disabled.<br />
Frequency : Select the satellite frequency you want to use to check for a signal.<br />
Positioner : Select the positioner.<br />
- None : (No Positioner)<br />
- Using DiSEqC 1.2 :<br />
Move : To move the dish, press LEFT/RIGHT<br />
button.<br />
Fine Move : To move the dish in smaller steps,<br />
press the LEFT/RIGHT ARROW button.<br />
Step : Set to positioner moving steps as 1, 2, 3, 4<br />
Positioner Command : To use various positioner<br />
<strong>co</strong>mmands, press the OK button. Then, available<br />
positioner <strong>co</strong>mmands will appear.<br />
- Using USALS :<br />
Move : To move the dish, press the LEFT/RIGHT<br />
button.<br />
Fine Move : To move the dish in smaller steps,,<br />
press the LEFT/RIGHT ARROW button.<br />
Step : Set to positioner moving steps as 1, 2, 3, 4<br />
Dish Longitude : Enter the longitude position of<br />
the antenna using the NUMERIC buttons.<br />
Dish Latitude : Enter the latitude using the<br />
NUMERIC buttons.<br />
Go To : Press the OK button to rotate the dish to<br />
the selected antenna position.<br />
Dish Setting : Press the OK button to move to Dish Setting menu directly.<br />
Service Search : Press the OK button to move to Service Search menu directly.<br />
49
3.3 Service Search<br />
You can select the following search mode.<br />
3.3.1 Satellite Search<br />
Auto Search Mode :<br />
- Satellite : Press the OK button to select the target<br />
satellite to be searched.<br />
- Tuner : Select tuner what you want to set (Tuner<br />
1/ Tuner 2). If you set ‘Loop-Through’ on the<br />
menu (Installation-Dish Setting-Tuner<br />
Connection), this menu (Tuner) will be<br />
automatically disabled.<br />
- Search Type : Select the search type.<br />
- Network Search : You can select ‘Off’ or ‘On’.<br />
When you select ‘On’, you can find more transponders using the home network. As it refers to NIT<br />
during searching, if there is the frequency information of other transponder, it searches the other<br />
transponder besides the transponder that the user inputs.<br />
- Time Calibration : You can select ‘Simple’, ‘Full’ and ‘Off’ to get TDT(Time Data Table) from each<br />
TP<br />
- Dish Setting : Press the OK button to move to Dish Setting menu directly.<br />
- Positioner Setting : Press the OK button to move to the Positioner Setting menu directly.<br />
- Start Search : Press the OK button to start search.<br />
<strong>Manual</strong> Search Mode :<br />
- Satellite : Press the OK button to select the target<br />
satellite for search.<br />
- Tuner : Select tuner what you want to set (Tuner<br />
1/ Tuner 2). If you set ‘Loop-Through’ on the<br />
menu (Installation-Dish Setting-Tuner<br />
Connection), this menu (Tuner) will be<br />
automatically disabled.<br />
- Frequency : Select the frequency from the list to<br />
search.<br />
- Symbol rate : Enter the symbol rate using the NUMERIC buttons.<br />
- Polarity : Select the polarity. (Vertical/Horizontal)<br />
- Search Type : Select the search type.<br />
- Network Search : You can select ‘Off’ or ‘On’. When you select ‘On’, you can find more<br />
transponders using the home network. As it refers to NIT during searching, if there is the frequency<br />
information of other transponder, it searches the other transponder besides the transponder that<br />
the user inputs.<br />
- Dish Setting : Press the OK button to move to Dish Setting menu directly.<br />
- Transmission : You can select ‘DVB’ and ‘DVB-S2’.<br />
- Start Search : Press the OK button to start search.<br />
50
Blind Search Mode :<br />
- Satellite : Press the OK button to select multiple<br />
satellites.<br />
- Tuner : Select tuner what you want to set (Tuner<br />
1/ Tuner 2). If you set ‘Loop-Through’ on the<br />
menu (Installation-Dish Setting-Tuner<br />
Connection), this menu (Tuner) will be<br />
automatically disabled.<br />
- Frequency : Set Auto to search whole frequency,<br />
Set <strong>Manual</strong> to search only desired frequency.<br />
- Polarity :<br />
Select the polarity. (All Polarity/Vertical/Horizontal)<br />
- Search Type : Select the search type.<br />
- Dish Setting : Press the OK button to move to the Dish Setting menu directly.<br />
- Start Search : Press the OK button to start a search.<br />
Advanced Search Mode :<br />
- Satellite : Press the OK button to select the target<br />
satellite for search.<br />
- Tuner : Select tuner what you want to set (Tuner<br />
1/ Tuner 2). If you set ‘Loop-Through’ on the<br />
menu (Installation-Dish Setting-Tuner<br />
Connection), this menu (Tuner) will be<br />
automatically disabled.<br />
- Frequency : Select the frequency from the list to<br />
search.<br />
- Symbol rate : Enter the symbol rate by using the<br />
NUMERIC buttons.<br />
- Polarity : Select the polarity. (Vertical/Horizontal)<br />
- Video PID : Enter the video PID using the NUMERIC buttons.<br />
- Audio PID : Enter the audio PID using the NUMERIC buttons.<br />
- PCR PID : Enter the PCR PID using the NUMERIC buttons.<br />
- Transmission : You can select ‘DVB’ and ‘DVB-S2’<br />
- Start Search : Press the OK button to start a search.<br />
51
3.3.2 Terrestrial Search<br />
Auto Search Mode<br />
- Search Type :<br />
Select the search type. (All Service/FTA Only/TV<br />
Only)<br />
- Antenna 5V : If you want to out the power of<br />
antenna, select the power on.<br />
- Start Search : Press OK button to start search.<br />
<strong>Manual</strong> Search Mode<br />
- Channel : Select the channel what you want to<br />
search<br />
- Frequency : Information of channel frequency.<br />
- Bandwidth : Information of channel bandwidth.<br />
- Search Type :<br />
Select the search type. (All Service/FTA Only/TV<br />
Only)<br />
- Start Search : Press OK button to start search.<br />
3.3.3 Cable Search<br />
Auto Search Mode<br />
- Search Type :<br />
Select the search type. (All Service/FTA Only/TV<br />
Only).<br />
- Start Search : Press OK button to start search.<br />
<strong>Manual</strong> Search Mode<br />
- Frequency : Select the frequency what you want<br />
to search. Or enter the frequency manually using<br />
NUMERIC buttons.<br />
- Symbol rate : Enter the symbol rate using<br />
NUMERIC buttons.<br />
- QAM Mode : Select the <strong>co</strong>nstellation using<br />
ARROW buttons. (AUTO / QAM16 / QAM32 /<br />
QAM64 / QAM128 / QAM256)<br />
- Search Type :<br />
Select the search type. (All Service/FTA Only/TV Only)<br />
52
- Start Search : Press OK button to start search.<br />
53
3.4 Network Setting<br />
To use a Network <strong>co</strong>nnected to the STB Ethernet<br />
port, you have to prepare the STB Network settings.<br />
When the STB and a PC are <strong>co</strong>nnected via a network,<br />
you can access the files of the STB storage device<br />
such as the SATA Hard Disk Drive (HDD) or USB<br />
storage device.<br />
NOTE : If you use DHCP function of router, you<br />
can set easily network <strong>co</strong>nfiguration.<br />
DHCP : You can select On/Off for the Dynamic Host Configuration Proto<strong>co</strong>l (DHCP) to get the all<br />
<strong>co</strong>nfiguration from the router.<br />
- If you select ‘On’ : You will obtain the <strong>co</strong>nfiguration from network and be set up automatically. In<br />
this case, the remaining item (IP Address, Subnet Mask, Gateway, First DNS, Se<strong>co</strong>nd DNS) are<br />
automatically set and you don’t have to <strong>co</strong>nfigure them manually.<br />
- If you select ‘Off’ : You have to input the IP address manually together with the following data.<br />
- IP Address, Subnet Mask, Gateway, First DNS, Se<strong>co</strong>nd DNS : You can input the address with the OK<br />
button, NUMERIC buttons and the LEFT/RIGHT buttons. You can move to the next item of Subnet<br />
Mast with the DOWN button and you can <strong>co</strong>nfigure the following items in the same way.<br />
Firmware Upgrade Server : To upgrade the firmware by downloading from a internet server.<br />
NOTE : Server installation and settings must be <strong>co</strong>ntrolled by expert server manager. A storage<br />
device must be <strong>co</strong>nnected with your receiver(STB) when firmware upgrade from server.<br />
MAC Address : This will display the MAC address of the STB Ethernet interface and is a fixed<br />
assignment unique to each STB.<br />
Control of the files via the network<br />
and your PC :<br />
- Check the IP Address of the STB on<br />
the Network Setting menu.<br />
- Press Enter button on your PC, after<br />
writing IP Address on the web<br />
browser address line.<br />
e.g. \\192.168.1.10\storage<br />
- You can see the folder name of HDD,<br />
USB1, USB2 and USB3 in the Storage<br />
folder.<br />
- HDD : SATA HDD (internal HDD or<br />
external-SATA)<br />
- USB1 : Front USB Storage Device<br />
- USB2 : Rear Top USB Storage Device<br />
- USB3 : Rear Bottom USB Storage Device<br />
- You may be able to load and retrieve data between the PC and the STB via the browser<br />
54
Dynamic settings (RED key)<br />
- You can make your DDNS setting in this menu by<br />
pressing the RED <strong>co</strong>lored button.<br />
- For more details about your DDNS settings,<br />
please ask your local DDNS service provider.<br />
Wireless LAN can be supported by using the ‘USB to<br />
Wi-Fi’ module <strong>co</strong>nnected (*Option)<br />
- By pressing the BLUE <strong>co</strong>lored button, you can<br />
automatically find and apply the settings for your<br />
AP.<br />
- For the information on the Wireless Wi-Fi settings,<br />
please refer to the AP manual.<br />
NOTE : The speed and latency of the Wireless<br />
LAN function is slower than the Wired LAN. So, it may take much longer to <strong>co</strong>py files.<br />
NOTE : Only a limited range of Wireless LAN adaptors are supported. So, you MUST check<br />
that they are supported types BEFORE you purchase.<br />
3.5 System Re<strong>co</strong>very<br />
System restore to factory default : Restore the<br />
factory set values in case the user has en<strong>co</strong>untered<br />
some problems after changing parameters in error.<br />
Press the OK button to erase all services and restore<br />
default setting.<br />
Reset Configuration data : Maintain the<br />
service data and reset the <strong>co</strong>nfiguration data.<br />
Reset Service data : Maintain <strong>co</strong>nfiguration<br />
data and reset the service data.<br />
System restore to stored position : Restore the stored values including service data and system<br />
parameters. Press the OK button to restore all data.<br />
Store system data : If you want to use system parameters and service data in the future, this menu<br />
allows you to store current state. Press the OK button to store current state.<br />
Delete store position : Delete stored system data.<br />
3.6 System Information<br />
This menu displays general information about the hardware and software version of your receiver.<br />
55
4. Utility<br />
4.1 Calculator<br />
To use the calculator, highlight the calculator an<br />
d press the OK button.<br />
4.2 Calendar<br />
To display the calendar, highlight the calendar and<br />
press the OK button. Utilize the ARROW buttons to<br />
choose the date. If you press PAGE UP/DOWN<br />
button, you can see the past/next month of the<br />
calendar.<br />
4.3 CAS (Conditional Access System)<br />
Smart Card Slot<br />
- Conax smart card menu :<br />
To watch scrambled services, you need to have an<br />
appropriate Conax smart card from the service<br />
provider. Insert a valid smart card into smart card<br />
slot. The message ‘Smart card Initializing…’ will<br />
appear on the screen. After the message<br />
disappears, you can watch the service you want.<br />
- Smart card information :<br />
You can view the current status of the smart card.<br />
Select the slot which you want to view using the<br />
ARROW buttons. And press the OK button.<br />
CAM Initializing<br />
To watch scrambled services, you need to have a<br />
Common Interface Conditional Access<br />
Module(CAM) and an appropriate smart card from<br />
the provider. Insert the CAM together with a valid<br />
smart card into CI slot (two slots available). The<br />
message of ‘CI Initializing…’ will appear on the<br />
screen. After the message disappears, you can<br />
watch the service you want.<br />
CAM information<br />
You can view the current status of the CAM. Select the slot which you want to view using the ARROW<br />
buttons, and press the OK button. If the CAM is available, you can view information about each slot.<br />
NOTE : The displayed information of each CAMs may be different depending on the CAM used.<br />
CI message<br />
- On : To display the CI message on live TV service.<br />
- Off : To disable the CI message on live TV service.<br />
56
4.4 Plugin<br />
If you have the program file for Plugin, you can download the file(s) to Plugin then enjoy the program.<br />
Download Plugin File<br />
- In the USB storage, please create a new folder<br />
name ‘plugin’ and in this ‘plugin’ folder, create a<br />
folder name ‘bin’. (plugin > bin)<br />
- Store(Copy) the plugin file in the ‘bin’ folder.<br />
- Connect the USB storage to the receiver. When<br />
Software Download menu is appeared, then press<br />
LEFT/RIGHT ARROW buttons to move to User<br />
Data Download mode.<br />
- Press RED button to start download the<br />
plugin file that you want.<br />
NOTE : You can also download by Menu > System Tools > Data Transfer > Data<br />
download from USB storage.<br />
Plugin Menu<br />
- RED button : To set the plugin Start Type. You<br />
can select Auto or <strong>Manual</strong>.<br />
- GREEN button : To Start the plugin. You will see<br />
‘Started’ in State if the plugin is started.<br />
- BLUE button : Press BLUE button if you want to<br />
delete the plugin file.<br />
We provide a special feature called WebZeal which is for Web-Browsing. You can simply enjoy the<br />
WebZeal when you want web surfing.<br />
WebZeal Plugin File Download. [64MB Model]<br />
- Stored the WebZeal file to the USB storage device.<br />
File name : ‘WebZeal-201xxxxx.tar.bz’.<br />
- Connect the USB storage device to your receiver.<br />
- When USB storage device is <strong>co</strong>nnected, Software<br />
Download window menu will appear. Or you may<br />
go to Data Transfer menu > Data download<br />
from USB storage.<br />
- In this menu, press LEFT/RIGHT ARROW buttons<br />
to move to Un<strong>co</strong>mpress File mode then you will<br />
see the file name ‘WebZeal-201xxxxx.tar.bz’.<br />
- Press RED button to download the WebZeal.<br />
NOTE : Upgrading time takes approximately 10 minutes.<br />
Executing WebZeal with USB Storage device<br />
- Stored the WebZeal file to the USB storage device.<br />
File name : ‘WebZeal-201xxxxx.tar.bz’.<br />
- Connect the USB storage device to your receiver<br />
then go to Menu > System Tools > Storage<br />
Manager.<br />
Set the Current Device to File Mount Drive.<br />
Set the Mount File Name to WebZeal-<br />
57
201xxxxx.mnt<br />
Press Connect then go to Menu > Utilities > Plugin to start the WebZeal.<br />
NOTE : If you are using WebZeal by File Mount Drive, current USB storage device will not<br />
allow to use PVR functions such as re<strong>co</strong>rding and time-shift. But it can be use when<br />
WebZeal is not in use.<br />
WebZeal Option<br />
- RED button : Press to set the current web page as<br />
home.<br />
- GREEN button : Press to add the current web<br />
page to favorite.<br />
- YELLOW/BLUE button : Press to adjust the<br />
page Zoom In and Zoom Out as you want.<br />
- MENU button : Press MENU button to show<br />
simple internet menu.<br />
4.5 YouTube (Note: Availabilty of this function is subject to change, please ask your Retailer)<br />
Required settings : Before you can enjoy the YouTube feature with your STB, please make sure of the<br />
following <strong>co</strong>nditions.<br />
- Set-top-box should be <strong>co</strong>nnected with Ethernet cable, with proper network settings.<br />
(Please refer to the “Network setting” section of the manual).<br />
Sufficient capacity for buffering is required via a USB memory stick or HDD.<br />
NOTE : a) The size of the required USB memory device for buffering depends on the size of<br />
the <strong>co</strong>ntents that you wish to watch from the YouTube service. So it is re<strong>co</strong>mmended<br />
to use a sufficiently large sized USB device for buffering.<br />
b) Problems can be caused due to the network environment : Problems such as<br />
flickering and freezing of the screen can occur while you are watching the YouTube<br />
service. These kind of problems can often occur due to the latency and slow speed of<br />
the network. This may also cause the STB to be halted, it may be necessary to reset<br />
the STB.<br />
About YouTube feature<br />
- YouTube menu is located in the ‘Menu > Utilities<br />
> YouTube’.<br />
- On the right side of the screen, you can see the<br />
list of thumbnails of the <strong>co</strong>ntents.<br />
- Press the PAGE UP/DOWN buttons to navigate<br />
quickly in the service list on the right.<br />
- On the left side of the screen, the detailed<br />
information of the selected thumbnail is being<br />
displayed.-<br />
- Use the ARROW buttons to navigate through the<br />
menu<br />
- And press the OK / Play buttons to start viewing the selected <strong>co</strong>ntent.<br />
- While playing, use the PAUSE / STOP buttons to pause, or stop playing the service.<br />
- Trick play modes (FAST FORWARD / REWIND) are not support in the STB’s YouTube menu.<br />
- Use the VOLUME UP / DOWN / MUTE buttons to adjust the audio sound.<br />
- Press the MENU / EXIT buttons to exit from the service, or to the menu while you are watching the<br />
service.<br />
58
Using the Hot (<strong>co</strong>lored) buttons in the YouTube menu :<br />
- RED (Full screen) : Press this button to view the service in full screen size. This button only functions<br />
while the service <strong>co</strong>ntent is being played.<br />
- Yellow (Search) : Press this button and input the name of the <strong>co</strong>ntent that you wish to search in<br />
YouTube. When the virtual keyboard is displayed, you can also use the dedicated hot <strong>co</strong>lored<br />
buttons for each functions.<br />
- Green (Location) : Press and choose your location from the list of world-wide, and many <strong>co</strong>untry<br />
names in this list. Based on your selected location, <strong>co</strong>rresponding <strong>co</strong>ntents list will be provided.<br />
- Blue (Category) : Press this blue button to view the list of categories, then choose the one you<br />
prefer to view the list of <strong>co</strong>ntents in the selected category.<br />
59
Troubleshooting<br />
Problem Solution<br />
Does not display any message<br />
on the front panel.<br />
No Picture<br />
Poor picture quality<br />
No Sound<br />
Remote Control does not<br />
operate<br />
No or Bad Signal<br />
Check the main power cable and check that it is plugged into a<br />
suitable power outlet.<br />
Check the STB main power switch ‘ON’ at the rear of the STB.<br />
See ‘Does not display any message on the front panel’ above.<br />
To match the STB system with your TV system (PAL/NTSC),<br />
press V.Format button until a picture is displayed.<br />
Check the video output port is firmly <strong>co</strong>nnected to the TV or<br />
VCR.<br />
Check that you have selected the Video Input on your TV.<br />
Press the STB button on the remote to assure you are<br />
<strong>co</strong>ntrolling the STB and no other device with the remote.<br />
Check the brightness level of the TV.<br />
Check the resolution that your TV supports, and set the proper<br />
resolution with the remote Resolution button to obtain a<br />
picture.<br />
See ‘No Picture’ above.<br />
Check the signal level, if this is low then tries adjusting the<br />
alignment of your dish.<br />
See ‘No Picture’ above.<br />
Check the volume level of the TV and STB.<br />
Check the Mute status of the TV and STB.<br />
Point remote <strong>co</strong>ntrol directly towards the STB.<br />
Check that the STB button lights up when you press any<br />
button<br />
Check and replace batteries.<br />
[ For DVB-S2 tuner model only]<br />
Check the LNB ; Replace the LNB if necessary.<br />
Check the cable from the LNB.<br />
Check the position of the dish; realign dish if necessary.<br />
If you are using a DiSEqC 1.0 switch, check that you have<br />
<strong>co</strong>nnected and programmed the STB to match the <strong>co</strong>nnections<br />
to the switch.<br />
[ For DVB-T(T2) tuner model only ]<br />
Check the <strong>co</strong>nnection of Aerial cable.<br />
[ For DVB-C tuner model only ]<br />
Check the Cable <strong>co</strong>nnection.<br />
[Common features for all types of DVB receivers ]<br />
Check the ‘Signal Level’ and the ‘Signal Quality’.<br />
60
Specifications<br />
Tuner & Channel De<strong>co</strong>der [S2 tuner]<br />
Input Connector<br />
Loop through out<br />
Frequency Range<br />
Input Impedance<br />
Signal Level<br />
LNB Power<br />
22KHz Tone<br />
DiSEqC Control<br />
Demodulation<br />
Input Symbol Rate<br />
FEC De<strong>co</strong>der<br />
Tuner & Channel De<strong>co</strong>der [T tuner]<br />
Input Connector<br />
Loop through out<br />
Frequency Range<br />
Demodulation<br />
Channel Bandwidth<br />
FET mode<br />
Code Rate<br />
Guard Interval<br />
F-type, IEC 169-24, Female<br />
F-type, IEC 169-24, Female<br />
950MHz ~ 2150MHz<br />
75Ω, unbalanced<br />
-65 to -25dBm<br />
13/18VDC, max.400mA<br />
(22±2)KHz, (0.6±0.2)V<br />
V1.0/1.2/USALS Compatible<br />
QPSK / 8PSK<br />
2 ~ 45 Ms/s(QPSK of DVB-S)<br />
2 ~ 45 Ms/s(QPSK of DVB-S2)<br />
2 ~ 37 Ms/s(8PSK of DVB-S2)<br />
1/2, 2/3, 3/4, 5/6 and 7/8 with<br />
Constraint Length K=7(DVB-S)<br />
1/2, 3/5, 2/3, 3/4, 4/5, 5/6, 8/9 and 9/10 (DVB-S2)<br />
IEC 169-2, Female<br />
IEC 169-2, Male<br />
VHF III : 174~230 MHz<br />
UHF IV : 470~606 MHz<br />
UHF V : 606~862 MHz<br />
OFDM<br />
6, 7, 8 MHz<br />
2K, 8K<br />
1/2, 2/3, 3/4, 5/6, 7/8<br />
1/4, 1/8, 1/16, 1/32<br />
Tuner & Channel De<strong>co</strong>der [T2 tuner]<br />
Input Connector<br />
Loop through out<br />
Frequency Range<br />
Demodulation<br />
Channel Bandwidth<br />
FET mode<br />
Code Rate<br />
Guard Interval<br />
IEC 169-2, Female<br />
IEC 169-2, Male<br />
VHF III : 174~230 MHz<br />
UHF IV : 470~606 MHz<br />
UHF V : 606~862 MHz<br />
OFDM<br />
6, 7, 8 MHz<br />
1K, 2K, 4K, 8K, 16K, 32K<br />
1/2, 2/3, 3/4, 3/5, 4/5, 5/6<br />
1/4, 5/32, 1/8, 5/64, 1/16, 1/32, 1/64, 1/128<br />
61
Tuner & Channel De<strong>co</strong>der [C tuner]<br />
Input Connector<br />
Loop through out<br />
Frequency Range<br />
Demodulation<br />
IF Bandwidth<br />
Symbol rate<br />
MPEG Transport Stream A/V De<strong>co</strong>ding<br />
Main System<br />
Transport Stream<br />
Profile Level<br />
Input Rate<br />
Video Formats<br />
Video Resolution<br />
Audio De<strong>co</strong>ding<br />
Audio Mode<br />
Sampling Rate<br />
Main Processor<br />
Memory<br />
IEC 169-2, Female<br />
IEC 169-2, Male<br />
50MHz ~ 1GHz<br />
16, 32, 64, 128, 256 QAM(for Annex A/C)<br />
64, 256 QAM(for Annex B)<br />
8 MHz(-3dB) TYP(for Annex A/C)<br />
6 MHz(-3dB) TYP(for Annex B)<br />
1 Msps ~ 7 Msps(for Annex A/C)<br />
5.057 Msps(for 64QAM, Annex B)<br />
5.361 Msps(for 256QAM, Annex B)<br />
H.264(MPEG-4 part 10, MPEG-4/AVC and H26L)<br />
MPEG-II ISO/IEC 13818-2/11172-2<br />
MPEG-4/AVC MP@L4, MPEG-II MP@HL<br />
Max. 80Mbit/s<br />
4:3 Letter Box, 4:3 PanScan, 16 : 9<br />
720 x 576i, 720 x 576p, 720 x 480i, 720 x 480p<br />
1280 x 720p, 1920 x 1080i, 1920 x 1080p (only available on HDMI)<br />
Dolby Digital, MPEG-1 Layer 1,2 and 3<br />
Stereo/Joint stereo/Mono, Dolby Digital bitstream<br />
32KHz, 44.1KHz and 48KHz(Ac<strong>co</strong>rding to input)<br />
STi chipset<br />
Flash-ROM : 64 Mbyte<br />
SDRAM : 256 Mbytes<br />
EEPROM : 256 bytes<br />
62
Audio / Video & Data IN/OUT<br />
Front Panel<br />
Power Supply<br />
TV SCART<br />
VCR SCART<br />
RCA<br />
Component<br />
HDMI<br />
OPTICAL<br />
RS-232C<br />
USB<br />
Ethernet<br />
e-SATA<br />
Slot<br />
Display<br />
Buttons<br />
Input Voltage<br />
Type<br />
Power Consumption<br />
Standby Power<br />
Protection<br />
Physical Specification<br />
Size (W x H x D)<br />
Weight (Net)<br />
Operating Temp.<br />
Storage Temp.<br />
RGB, Y/C, CVBS Video, Audio L, R Output<br />
CVBS Video, Audio L, R Output<br />
RGB Video input, CVBS Video, Audio L, R Input<br />
CVBS Video Output, Audio L, R Output<br />
YPbPr Video Output<br />
Video & Audio Output<br />
Dolby Digital (SPDIF)<br />
9 pin D-SUB (Male) type, Transfer rate 115Kbps<br />
USB 2.0 Host Front & Rear Support. (5V DC 500 mA Max.)<br />
RJ45 <strong>co</strong>nnector, 100 Mbps<br />
External SATA<br />
1 USB 2.0 Host port<br />
2 Common interface PCMCIA slost<br />
2 Smart Card Slots<br />
VFD(Vacuum Fluorescent Display) - 12Digit<br />
5 Buttons (Standby, CH UP/DOWN, Volume UP/DOWN)<br />
AC 100 ~ 250V, 50/60Hz<br />
SMPS<br />
Max. 55W<br />
Max. 1W<br />
Separate Internal Fuse & Lighting protection<br />
340mm X 60mm X 230mm<br />
2.0 Kg (Excluding HDD)<br />
0°C ~ +45°C<br />
-10°C ~ +70°C<br />
63
Code Table for Universal Remote Control Unit<br />
1. Key Table<br />
No KEY NAME TV DVD VCR<br />
1<br />
2 V<br />
3 V V<br />
4 V V V<br />
5 V<br />
6 V.Format<br />
7 SLEEP<br />
8 TV/RAD, Source V<br />
9 Resolution<br />
10 V V<br />
11 V V<br />
12 V V<br />
13 V<br />
14 V<br />
15 V V<br />
16 V V<br />
17 V V<br />
18<br />
19 V<br />
20 V<br />
21 V<br />
22 V<br />
23 INFO<br />
24 RECALL<br />
25 MENU V V<br />
26 EXIT V V<br />
27 V V<br />
28 V V<br />
29 V V<br />
30 V V<br />
31 OK V V<br />
32<br />
33 FAV<br />
34<br />
64
No KEY NAME TV DVD VCR<br />
35 VOL + V<br />
36 VOL - V<br />
37 CH + V V<br />
38 CH - V V<br />
39 EPG<br />
40<br />
41<br />
42<br />
43<br />
44 0 V V V<br />
45 1 V V V<br />
46 2 V V V<br />
47 3 V V V<br />
48 4 V V V<br />
49 5 V V V<br />
50 6 V V V<br />
51 7 V V V<br />
52 8 V V V<br />
53 9 V V V<br />
54<br />
55<br />
65
2. TV Brands<br />
Refer to ‘5.Multi-Brand IR Remote Controller Setting’ in the 16 page of this manual<br />
TV Brands Code<br />
ADMIRAL 050 134<br />
AKAI 093 049 123<br />
ALBA 068<br />
ALBIRAL 116<br />
ALCATEL 022<br />
AMSTRAD 158 021<br />
ANAM 155 156 157<br />
ARC EN CIEL 028 039 043 145 081<br />
ARISTONA<br />
099<br />
149<br />
049<br />
078<br />
050 019 142<br />
ARTHUR MARTIN<br />
053<br />
123<br />
139<br />
125<br />
117<br />
128<br />
120 122<br />
ASA 050 055 057 113 134<br />
ATLANTIC 099 111<br />
AUDIOSONIC 054<br />
AUSIND 053<br />
AUTOVOX<br />
099<br />
069<br />
144 055 019 057<br />
BAIRD 083<br />
BASICLINE 006<br />
BAUR 011<br />
BEKO 023 049<br />
BLAUPUNKT 094 100 102 111 114<br />
BRANDT<br />
028<br />
081<br />
039 040 043 145<br />
BRION VEGA 050<br />
BRUNS 048 050<br />
BSR 059 110 132<br />
BUSH 033 068 124 074<br />
CENTURY 098 101 050 079 136<br />
CGE<br />
016<br />
136<br />
101 124 079 132<br />
CIHAN 065<br />
CLARIVOX 048 116<br />
CONDOR 099 111<br />
CONTEC 087<br />
CONTINENTAL EDITION<br />
028<br />
081<br />
039 040 043 145<br />
CROSLEY 101 050 109<br />
CROWN 147<br />
CTC CLATRONIC 046<br />
66
TV Brands Code<br />
DAEWOO 089<br />
DECCA 099 060 063 115 118<br />
DEGRAAF 036<br />
DIXI 049 090<br />
DRYNATRON 049<br />
DUAL 099 141<br />
DUAL-TEC 096 099 132<br />
DUMONT 046 050 057 073<br />
ELBE 016 116<br />
ELBIT 065<br />
ELCIT<br />
046<br />
127<br />
097<br />
132<br />
103 050 109<br />
ELMAN 046 132<br />
ELTA 090<br />
EMERSON 158 098 050<br />
ERRES 049 142<br />
EUROPHON<br />
098<br />
115<br />
046<br />
132<br />
097 099 051<br />
FERGUSON<br />
146<br />
061<br />
040<br />
116<br />
041<br />
149<br />
150 057<br />
FIDELITY 099 149<br />
FINLUX<br />
034<br />
109<br />
046<br />
113<br />
053<br />
073<br />
055<br />
074<br />
057<br />
079<br />
FISHER<br />
015<br />
136<br />
048 050 052 109<br />
FORGESTONE 149<br />
FORMENTI 099 053 109 111 125<br />
FORTRESS 137<br />
FRABA 075<br />
FRONTECH 054<br />
FUJITSU 025<br />
FUNAI 054 059<br />
GBC 109 132<br />
GEC<br />
099<br />
088<br />
060 109 115 134<br />
GELOSO 103 109 132 134 090<br />
GOLDSTAR<br />
092<br />
075<br />
003<br />
076<br />
017<br />
077<br />
099<br />
090<br />
049<br />
152<br />
GOODMANS 033 049 060 077<br />
GORENJE 066 136<br />
GREATZ<br />
001<br />
128<br />
058<br />
129<br />
109<br />
130<br />
122<br />
134<br />
123<br />
67
TV Brands Code<br />
GRANADA<br />
033<br />
142<br />
099<br />
115<br />
049<br />
125<br />
058<br />
134<br />
060<br />
GRUNDIG<br />
094<br />
112<br />
100<br />
114<br />
057<br />
082<br />
058 108<br />
HANSEATIC<br />
033<br />
139<br />
047<br />
111<br />
099 049 109<br />
HANTAREX 097<br />
HEMMERMANN 127<br />
HIFIVOX 028 039 043 145 081<br />
HINARI 158 033 045 143 090<br />
014 033 034 036 099<br />
HITACHI<br />
145<br />
067<br />
056<br />
117<br />
109<br />
132<br />
139<br />
134<br />
110<br />
084<br />
091 081 088<br />
HYPER 093 099<br />
IMPERIAL<br />
016<br />
133<br />
101 124 079 132<br />
INGELEN<br />
001<br />
129<br />
058<br />
130<br />
109<br />
134<br />
122 128<br />
INKEL 000<br />
INNO HIT<br />
093<br />
077<br />
098<br />
090<br />
097 099 143<br />
047 049 050 145 058<br />
INTERFUNK<br />
109<br />
091<br />
142 123 128 129<br />
IRRADIO 093 143 053 077 090<br />
001 140 058 105 109<br />
ITT<br />
122 123 128 148 129<br />
130 134 135 083 089<br />
JVC 033 154<br />
KTV 099<br />
KAISUI 006<br />
KARCHER 006<br />
KENDO 098<br />
KENNEDY 144 019 109<br />
KORTING 050 059 111<br />
KRIESLER<br />
099<br />
149<br />
049<br />
078<br />
050 019 142<br />
LENOIR 099<br />
LOEWE OPTA<br />
008<br />
115<br />
097<br />
072<br />
047 049 050<br />
LOGIK 118 149<br />
68
TV Brands Code<br />
LUMA 049 120 134<br />
LUXOR<br />
058<br />
129<br />
139<br />
135<br />
117<br />
083<br />
120 123<br />
McMICHAEL 088<br />
MEMOREX 090<br />
MAGNAFON<br />
046<br />
115<br />
097 099 051 053<br />
MARANTZ 049<br />
MATSUI<br />
158<br />
068<br />
099<br />
134<br />
106<br />
090<br />
060 118<br />
MAGNADYNE<br />
046<br />
115<br />
097<br />
127<br />
103<br />
132<br />
050 109<br />
METZ 094 050 114 133<br />
MINERVA 094 100 057 058 114<br />
MISTRAL 149<br />
033 035 047 049 050<br />
MITSUBISHI<br />
062<br />
138<br />
118 119 148 080<br />
MIVAR 097 099 115 077<br />
MULTITECH 046 099 115 136<br />
MURPHY 134<br />
MAONIS 096 144 019 110 134<br />
NATIONAL 042 104 109<br />
NEC 033 085<br />
NECKERMANN 099 050 139 120 136<br />
NEI 049<br />
NIKKAI 060<br />
NOBLEX 015<br />
NOBLIKO 098 046 099 053 057<br />
NOGAMATIC 028 039 043 145 081<br />
001 140 058 105 109<br />
NOKIA<br />
122 123 128 148 129<br />
130 134 135 083 089<br />
NORDMENDE<br />
028<br />
131<br />
032<br />
091<br />
039<br />
081<br />
043 145<br />
OCEANIC 109 064 123<br />
ONCEAS 099<br />
OPTONICA 137<br />
ORION<br />
158<br />
090<br />
059 118 068 127<br />
OSAKI 060<br />
OSIO 077<br />
69
TV Brands Code<br />
OSUME 087<br />
OTTO VERSAND 033 047 049 109 139<br />
P.T ACTTRON 065<br />
PAEL 099 053<br />
PANASONIC<br />
030<br />
109<br />
042<br />
121<br />
095<br />
126<br />
104 107<br />
PATHE CINEMA 099 111 116 132<br />
PERDIO 060<br />
PHILCO<br />
016<br />
124<br />
030<br />
079<br />
101<br />
132<br />
050<br />
136<br />
109<br />
009 010 013 018 024<br />
PHILIPS<br />
099 049 050 019 142<br />
148 149 078 088<br />
PHOENIX 099 053 109 111 125<br />
PHONOLA<br />
099<br />
149<br />
049<br />
078<br />
050 019 142<br />
PIONEER 020 049 145 091<br />
PRANDONI-PRINCE 098 097 053 115 134<br />
PREMIER 124<br />
PRINCE 098 097 053 134<br />
PROTECH 049 054<br />
PYE<br />
099<br />
148<br />
049<br />
149<br />
050<br />
078<br />
019 142<br />
QUASAR 046 097 051 053 077<br />
047 099 100 049 053<br />
QUELLE<br />
055<br />
113<br />
057<br />
114<br />
058<br />
118<br />
111<br />
123<br />
112<br />
073<br />
074 128<br />
RADIOLA<br />
099<br />
149<br />
049<br />
078<br />
050 019 142<br />
RADIOMARELLI<br />
046<br />
062<br />
097<br />
127<br />
103<br />
132<br />
050 109<br />
RANK 074<br />
RBM 074<br />
REDIFFUSION 062 123 134<br />
REX<br />
096<br />
069<br />
144<br />
134<br />
019 141 110<br />
ROBOTRON 048 050<br />
RTF 048 050<br />
028 031 032 037 039<br />
SABA<br />
040 043 097 050 145<br />
115 120 086 091 081<br />
70
TV Brands Code<br />
SAISHO<br />
158<br />
090<br />
099 118 119 068<br />
SALORA<br />
053<br />
123<br />
139<br />
125<br />
117<br />
128<br />
120<br />
135<br />
122<br />
083<br />
SAMBERS<br />
046<br />
077<br />
097 051 053 115<br />
SAMPO 121<br />
SEG 046<br />
SEI 158 059<br />
SAMSUNG<br />
015<br />
136<br />
026<br />
090<br />
099<br />
151<br />
054<br />
153<br />
077<br />
001 002 005 033 044<br />
SANYO<br />
048 060 113 118 071<br />
054 136<br />
SBR 049 142 148 149 088<br />
SCHAUB LORENZ<br />
001<br />
128<br />
058<br />
129<br />
109<br />
130<br />
122<br />
134<br />
123<br />
096 099 049 050 052<br />
SCHNEIDER<br />
019 141 109 142 125<br />
149 078 132<br />
SELECO<br />
016<br />
110<br />
096<br />
069<br />
144<br />
134<br />
019 141<br />
SHARP 033 087 137<br />
SIAREM 046 097 050 109 115<br />
SICATEL 116<br />
SIEMENS<br />
005<br />
114<br />
094<br />
087<br />
036 100 111<br />
SIERA<br />
099<br />
149<br />
049<br />
078<br />
050 019 142<br />
SILVER 054<br />
SINGER 016 046 050 109<br />
SINUDYNE<br />
158<br />
127<br />
046 050 059 109<br />
SONOKO 049 090<br />
SONY<br />
146<br />
118<br />
007 027 033 038<br />
STERN<br />
096<br />
134<br />
144 019 110 069<br />
TANDBERG 133<br />
TANDY 099 060 137<br />
TASHIKO 002 033<br />
71
TV Brands Code<br />
TATUNG<br />
099<br />
118<br />
060 063 065 115<br />
TEC 096 099 132<br />
TELEAVIA<br />
028<br />
091<br />
039<br />
081<br />
040 043 145<br />
TELEFUNKEN<br />
028<br />
091<br />
041 145 150 086<br />
TELETECH 090<br />
TELEVIDEON 099 053 109 111 125<br />
TENSAI 049<br />
TOSHIBA 004 016 033 070 074<br />
TRANS CONTINENTS 098 097 053 134<br />
THOMSON<br />
012<br />
043<br />
028<br />
145<br />
032<br />
091<br />
039<br />
081<br />
040<br />
THORN-FERGUSON<br />
014<br />
057<br />
040<br />
061<br />
041<br />
116<br />
054<br />
149<br />
150<br />
086<br />
TOCOM 029<br />
TRIUMPH 158<br />
UHER 052 111 125<br />
ULTRA VOX<br />
098<br />
120<br />
046 099 050 109<br />
UNIVERSUM 092 034 054 077<br />
UNIVOX 116<br />
VEGAVOX 079<br />
VOXSON 050 134<br />
WATSON 111<br />
WATT RADIO<br />
046<br />
127<br />
099 051 109 116<br />
WEGA 033<br />
WHITE<br />
WESTINGHOUSE<br />
099 111<br />
YOKO 099<br />
ZANUSSI<br />
096<br />
134<br />
144 019 110 069<br />
ZOPPAS 096 144 019 110 134<br />
72
3. VCR Brands<br />
VCR Brands Code<br />
AKAI 122 133 142 152 132<br />
ALBA 108 120<br />
AMSTRAD 111<br />
ANITSCH 109<br />
ARC EN CIEL 142 156 152<br />
ARISTONA 145 131<br />
ASA 118<br />
AWIA 111 142<br />
BAIRD 142 133<br />
BAUER. BOSCH 114 143<br />
BRIONVEGA 141<br />
BUSH 108 120<br />
BLAUPUNKT<br />
114 143 155 131 154<br />
140<br />
BRANDT ELECTRONIQUE 142 156 152<br />
C.EDISON 141<br />
CANON 114<br />
CAPEHART 120<br />
CGE 111 142 152<br />
CONTINENTAL EDISON 142 156 152<br />
CRAIG 100 113<br />
CURTIS MATHES 119<br />
DAEWOO 101 120 121<br />
DAYTRON 120<br />
DECCA 111 142<br />
DEGRAAF 103 106 111 145 118<br />
DUAL 142 152<br />
DUMONT 103 111 118<br />
DYNATECH 111<br />
EMERSON 102 110 111 119 125<br />
FERGUSON<br />
142 159 130 152 134<br />
136<br />
FIDELITY 111<br />
FINLANDIA 103 118<br />
FINLUX 103 106 111 118<br />
FISHER 100 103 105<br />
73
VCR Brands Code<br />
FUNAI 111<br />
GE 119<br />
GENERAL 114<br />
GOLDSTAR 104 162<br />
GOODMANS 108 111 146<br />
GRAETZ<br />
141 142 156 150 152<br />
138<br />
GRANADA 103 105 118<br />
GRUNDIG<br />
HANSEATIC 143<br />
HARMAN-KARDON 104<br />
114 143 118 155 131<br />
153 154<br />
HIFIVOX 142 156 152<br />
HINARI 102 108 124 127<br />
HITACHI 106 107 111 142 157<br />
IMPERIAL 111<br />
INGELEN 142 156 152 138<br />
INGERSOL 127<br />
ITT<br />
JENSEN 142<br />
JVC<br />
105 141 142 156 150<br />
152 133 138<br />
142 156 160 130 152<br />
163<br />
KENWOOD 105 142 160<br />
KRIESLER 145 131<br />
KUBA 143<br />
LLOYD 111<br />
LOEWE OPTA 114 118 129 131<br />
LOGIK 108 127<br />
LUXOR 133 138<br />
MAGNADYNE 141<br />
MAGNASONIC 138<br />
MAGNAVOX 119<br />
MARANTZ 104 114 146 118 131<br />
MATUI 110 125 127<br />
MEMOREX 100 103 105 111 145<br />
METZ 114 143 131 154 137<br />
74
VCR Brands Code<br />
MGA 117<br />
MINERVA 155 154<br />
MINOLTA 106 107<br />
MITSUBISHI 160 117 149<br />
MTC 111 113<br />
MULTITECH 108 111<br />
MURPHY 111<br />
NAONIS 142 156 152<br />
NATIONAL 140<br />
NEC 104 142 160 152<br />
NECKERMANN 102 141 114 142 152<br />
NOGAMATIC 142 156 152<br />
NOKIA<br />
NORDMENDE<br />
103 105 141 142 156<br />
150 152 133 138<br />
139 142 156 152 153<br />
135<br />
OPTONICA 145 146<br />
ORION 102 110 125 127<br />
OSAKI 111<br />
OTTO VERAND 143<br />
P. CINEMA 114<br />
PALLADIUM 141 114<br />
PANASONIC 123 151 140<br />
PATHE MARCONI 142 156 152<br />
PENTAX 106 107<br />
PERDIO 111<br />
PHILIPS<br />
112 114 145 146 118<br />
129 131<br />
PHONOLA 114 145 118 129 131<br />
PIONEER 160<br />
PORTLAND 120<br />
PROLINE 111<br />
PYE 114 145 118 129 131<br />
QUARTZ 105<br />
QUELLE 102 144 154<br />
RADIOLA 145 131<br />
RADIOMARELLI 141<br />
75
VCR Brands Code<br />
RCA 119<br />
REALISTIC<br />
100 103 105 111 113<br />
145 146<br />
REX 142 156 152<br />
SABA 139 142 156 152 135<br />
SAISHO 102 110 125 127<br />
SALORA 105 117<br />
SAMSUNG 113 119 132 161<br />
SANSUI 142 160<br />
SANYO 100 103 105 125 138<br />
SBR 118 129<br />
SCHAUB LORENZ<br />
141 142 156 150 152<br />
138<br />
SCHNEIDER 108 111 145 131<br />
SEI-SINUDYNE 127<br />
SELECO 142 156 152<br />
SENTRA 120<br />
SHARP 145 146 1105 148<br />
SHINTOM 108<br />
SIEMENS<br />
114 143 155 131 154<br />
138<br />
SIERA 145 131<br />
SINUDYNE 127<br />
SONY 144 115 116 126 128<br />
STERN 142 156 152<br />
STS 106<br />
SUNKAI 125<br />
SYLVANIA 111 117<br />
SYMPHONIC 111 117<br />
TASHIKO 111<br />
TATUNG 111 142<br />
TEAC 111 142<br />
TEKNIKA 111<br />
TELEAVIA 142 156 152<br />
TELEFUNKEN 142 156 152<br />
TENOSAL 108<br />
THOMSON 142 156 152<br />
76
VCR Brands Code<br />
THORN-FERGUSON<br />
139<br />
134<br />
142<br />
136<br />
159 130 152<br />
TOSHIBA<br />
101 142 156 117 158<br />
152<br />
TOTELEVISION 113<br />
UHER 142<br />
ULTRA VOX 141<br />
UNITECH 113<br />
UNIVERSUM 141 114 143<br />
URANYA 141<br />
VECTOR 104<br />
VICTOR 142 160<br />
VIDITAL 141<br />
WESTING HOUSE 141<br />
WARDS 119<br />
YAMAHA 104 142<br />
ZANUSSI 142 156 152<br />
ZENDER 152<br />
ZOPPAS 142 156<br />
77
4. DVD Brands<br />
DVD Brands Code<br />
AIWA 002<br />
AKAI 007 044<br />
ALBA 036<br />
ANAM 074<br />
ANSONIC 152<br />
AMES 051<br />
APEX<br />
003<br />
044<br />
011<br />
047<br />
025<br />
048<br />
037<br />
054<br />
039<br />
040<br />
AUDIOSONIC 044<br />
A-TREMD 061<br />
BROKSONIC 000<br />
BULE SKY 158 036<br />
BUSH 067 044 000 152<br />
CAT 036<br />
CLASSIC 051<br />
CELESTIAL 158<br />
CENTREX 158<br />
CINEULTRA 036<br />
CONIA 158<br />
COMBRIDGE AUDIO 088<br />
CROWN 044<br />
CYBERCOM 152<br />
CYBERRHOME 061<br />
DAEWOO 005 045 052<br />
DAEWOO<br />
036<br />
INTERNATIONAL<br />
DEC 036<br />
DENON 041 050<br />
DENVER 036<br />
DENZEL 083<br />
DIGITREX 011 158<br />
DIK 152<br />
DK DIGITAL 152<br />
DRAGON 152<br />
DUAL 083 152<br />
ELTA 004 010 044<br />
ENZER 083<br />
EMERSON 013 019 032 067<br />
FISHER 015<br />
FUNAI 019 032<br />
GE 044 062<br />
GOLDSTAR 013 067<br />
GOLEMANS 044<br />
GO-VIDEO 012 016 021<br />
78
DVD Brands Code<br />
GRADIENTE 008<br />
HARMAN/KARDON 023<br />
HITEKER 011 158<br />
HOHER 152<br />
HITACHI<br />
001<br />
083<br />
035 004 070 067<br />
INTEGRA 057<br />
JEKEN 036<br />
JVC 014 028 067<br />
KENWOOD 036 041<br />
KENDO 036<br />
KISS 083<br />
KLH 044<br />
KONKA 042 049 056 063<br />
KOSS 008<br />
LASONIC 006<br />
LECSON 088<br />
LENCO 036 152<br />
LENOXX 044<br />
NEXIA 036<br />
LIFETEC 152<br />
LG 013 072 067 059<br />
LUXMAN 004 070<br />
MAGNAVOX 026 027<br />
MARANTZ 013 026 027<br />
MDS 036<br />
MEDION 152<br />
MEMOREX 018<br />
MICROSOFT 020<br />
MICROSTAR 152<br />
MINTEK 044<br />
MITAUBISHI 055<br />
MONYKA 083<br />
MUSTEK 051<br />
NAD 013 065<br />
NAKAMICHI 058<br />
NORDMENDE 152<br />
MBO 044<br />
NEUFUNK 083<br />
ONKYO 056<br />
OMNI 044 036<br />
OPTIMUS 001<br />
ORITRON 008<br />
PALSONIC 158 067<br />
PANASONIC 041 068<br />
79
DVD Brands Code<br />
PACIFIC 018 152<br />
PHILIPS 026 027 064 045<br />
PHONOTREND 036<br />
PIONEER 001<br />
PROLINE 008 158 085<br />
PROSCAN 062<br />
PROSONIC 036<br />
RADIOSHACK 038 066 067<br />
RAITE 083<br />
REC 067<br />
REOC 053<br />
REVOY 036<br />
RCA 038 044 062 066 067<br />
ROADSTAR 067 044 036<br />
ROTEL 067<br />
SAMSUNG 012 021 070 071<br />
SAMPO 022<br />
SANSUI 000<br />
SANYO 015<br />
SCOTT 158<br />
SEG 029 083<br />
SILVASCHNEIDER 152<br />
SHARP 020 067<br />
SHANGHAI 158<br />
SHERWOOD 009 073<br />
SHINCO 044<br />
SINGER 044<br />
SM ELECTRONIC 044<br />
SONY 033 034 004 070<br />
SOUNDWORKS 088<br />
SYLVANIA 019 032<br />
SYLMPHONIC 019 032<br />
SVA 158<br />
TEAC 001 067<br />
TECHNICS 041 068<br />
TEASAI 044<br />
TEVION 018 031 046 053 060<br />
THETA DIGITAL 001<br />
TOSHIBA 000 017 024 026<br />
TOKAI 083<br />
UMAX 044<br />
UNITED 035<br />
UNIVERSUM 067<br />
VOXSON 152<br />
WELKIN 152<br />
80
DVD Brands Code<br />
WESDER 036<br />
WHARFEDALE 059 085 088<br />
WINDY SAM 040 070<br />
XMS 067<br />
YAMAHA 041 043<br />
YAMAKAWA 030 083<br />
ZENITH 068 013 069 067<br />
81
Memo<br />
82
Full HD Digital Twin Tuner PVR<br />
X-9200HD PVR<br />
V.11051 (Eng)