Ljungmann AG 42B - TextFiles.com
Ljungmann AG 42B - TextFiles.com
Ljungmann AG 42B - TextFiles.com

You also want an ePaper? Increase the reach of your titles
YUMPU automatically turns print PDFs into web optimized ePapers that Google loves.
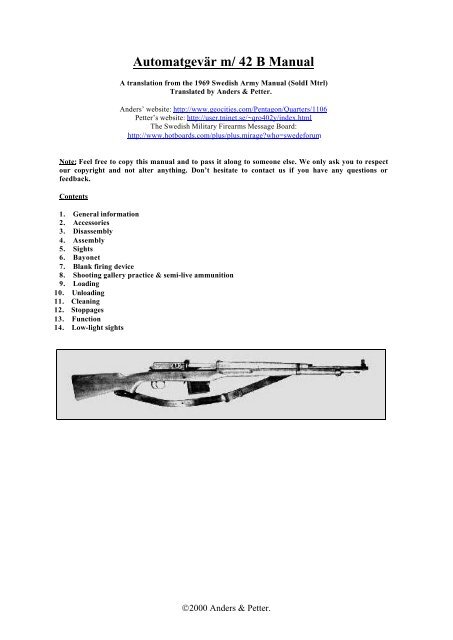
Automatgevär m/ 42 B Manual<br />
A translation from the 1969 Swedish Army Manual (SoldI Mtrl)<br />
Translated by Anders & Petter.<br />
Anders’ website: http://www.geocities.<strong>com</strong>/Pentagon/Quarters/1106<br />
Petter’s website: http://user.tninet.se/~qro402y/index.html<br />
The Swedish Military Firearms Message Board:<br />
http://www.hotboards.<strong>com</strong>/plus/plus.mirage?who=swedeforum<br />
Note: Feel free to copy this manual and to pass it along to someone else. We only ask you to respect<br />
our copyright and not alter anything. Don’t hesitate to contact us if you have any questions or<br />
feedback.<br />
Contents<br />
1. General information<br />
2. Accessories<br />
3. Disassembly<br />
4. Assembly<br />
5. Sights<br />
6. Bayonet<br />
7. Blank firing device<br />
8. Shooting gallery practice & semi-live ammunition<br />
9. Loading<br />
10. Unloading<br />
11. Cleaning<br />
12. Stoppages<br />
13. Function<br />
14. Low-light sights<br />
©2000 Anders & Petter.
General information<br />
The caliber is 6,5 millimeter. The magazine holds<br />
10 rounds. The rifle is used with 6,5mm<br />
ammunition.<br />
The rifle chambers a new round automatically<br />
between each shot fired. The trigger must be<br />
pulled for each shot fired. The trigger must be<br />
fully released in order to fire the next round.<br />
The rifle weighs 5 kilo with a full magazine. A<br />
bayonet can be fitted.<br />
Automatgevär m/42 B Manual<br />
The rifle is safe when the safety lever is to the right.<br />
The rifle is ready to fire when the safety lever is to the left.<br />
1. Accessories (see picture below)<br />
• Mörkerriktmedel = Low Light Sights<br />
• Universalnyckel = Universal tool<br />
• Läskända = Cleaning Rod Tip<br />
• Borstviskare = Bore Brush<br />
• Oljekanna = Oilcan<br />
• Oljedosa = Oiler<br />
• Gevärsrem med knapp = Rifle sling with button<br />
• Patronlägesläsk = Chamber brush<br />
• Reservdelsfodral – Case<br />
• Ask för reservdelar – Spare parts box<br />
• Utdragare – Extractor<br />
• Stift för tändstift – Firing pin retaining pin<br />
• Intryckningsdon – Extractor tool<br />
• Fjäder för utdragare – Extractor spring<br />
• Stift för utdragare – Extractor pin<br />
• Tändstift – Firing pin<br />
• Tändstiftsfjäder – Firing pin spring<br />
©2000 Anders & Petter.<br />
2
2. Disassembly<br />
Automatgevär m/42 B Manual<br />
Before disassembling the rifle make sure it is unloaded.<br />
If necessary, first remove the magazine. Push in the rear magazine latch with the index finger of the left<br />
hand. With the right hand, grip the magazine and pull the forward magazine latch. Pull down the magazine.<br />
The soldier is not allowed to disassemble the magazine.<br />
©2000 Anders & Petter.<br />
3
Automatgevär m/42 B Manual<br />
Push the cover forward a few centimeters until it is possible to lift out the receiver cap (safety assembly)<br />
and hold it there.<br />
Hold the safety lever pointing rearwards and lift out the safety assembly.<br />
Slowly release the cover. Remove cover and spring.<br />
Cock the hammer and remove the bolt assembly. Take the bolt assembly apart.<br />
NOTE: Dryfiring a disassembled rifle is not allowed !<br />
©2000 Anders & Petter.<br />
4
1. Säkringsspärr – safety lever<br />
2. Säkringsstång – Safety plunger<br />
3. Låsstyckshake – Bolt carrier latch<br />
4. Grepp – Grip knobs<br />
5. Hylsbuffert – Case buffer<br />
6. Framföringsfjäder – Follower spring<br />
7. Styrlister – Guide rails<br />
8. Hylsa – Bolt body<br />
9. Tändstift – Firing pin<br />
10. Utdragare – Extractor<br />
Automatgevär m/42 B Manual<br />
The case buffer protects the spent cases and also throws them in the right direction when firing. On the<br />
underside of the cover there is a rod which holds the recoil spring. The recoil spring consists of two parts,<br />
joined together by a splice cap. The springs are fragile, do not attempt to remove them from the cap.The<br />
forward end of the bolt carrier has a cylindrical portion. When the bolt carrier is forward in firing mode this<br />
part covers the rear end of the gas tube. The gas required for the functioning of the weapon is guided to the<br />
action through the barrel’s gas cylinder and the gas tube.<br />
• Låsstycke – Bolt carrier<br />
• Sikte – Sight<br />
• Gasrör – Gas tube<br />
• Gaskanal – Gas cylinder<br />
The front end of the barrel has a muzzle brake, basically consisting of a cylindrical part, perforated by a<br />
series of holes. The muzzle brake reduces felt recoil.<br />
The muzzle plug is screwed on to the muzzle. The sight holder is fastened between the plug and the sight<br />
base. The sight holder locks the sight in place on the sight base.The muzzle plug can be removed with the<br />
universal tool. The muzzle plug and the sight holder should not be removed when performing daily<br />
(general) maintenance.<br />
The cleaning rod is seated in the forend below the barrel.<br />
©2000 Anders & Petter.<br />
5
Automatgevär m/42 B Manual<br />
• Mynningsbroms – Muzzle brake<br />
• Ståndmärke med ritsa – Front sight alignment mark<br />
• Kornskruv – Front sight screw<br />
• Korn – Front sight<br />
• Kornhållare – Front sight carrier<br />
• Mynningspropp – Muzzle plug<br />
• Kornklack – Front sight base<br />
• Läskstång – Cleaning rod<br />
Removal of firing pin;<br />
Push out the retaining pin. Push against the non-slotted end.<br />
Remove the firing pin and spring.<br />
The firing pin should not be removed for general maintenance.<br />
Removal of extractor;<br />
Take out the extractor tool from the tool case.<br />
Insert the tool into the slot in the extractor with the pointed end against the extractor pin (see picture<br />
above).<br />
Push the pin down and remove the extractor by tilting it down across the bolt face.<br />
The extractor should only be removed if it (or the spring) needs replacing.<br />
©2000 Anders & Petter.<br />
6
3. Assembly<br />
The extractor is installed in the bolt as follows;<br />
Automatgevär m/42 B Manual<br />
Place the extractors lower inside edge on the pinhead. Note that the head should not be placed in the cut on<br />
the underside of the extractor.<br />
Push the extractor straight down (<strong>com</strong>press the spring) until it is lined up with it’s slot in the bolt.<br />
Still holding it down, push it in until the pin slides into it’s position.<br />
The firing pin is inserted into the bolt with the flat surface positioned so that the retaining pin can be<br />
inserted.<br />
Aided by the picture above, assemble the bolt and bolt carrier.<br />
Insert the bolt assembly into the receiver, as far as it goes. If the magazine has not been removed the<br />
follower must be pushed down while doing this.<br />
Fit the cover and push it forward until it locks to the bolt carrier. To avoid damage to the recoil spring and<br />
rod make sure that they are properly guided into the slot in the carrier.<br />
Hold the safety lever pointing straight rearwards, insert the receiver cap (safety assembly) and turn the<br />
safety to the left.<br />
Hold the cover. Push in the locking latch and slowly release the cover.<br />
Release the trigger and turn the safety on.<br />
Insert the magazine.<br />
©2000 Anders & Petter.<br />
7
4. Sights<br />
Automatgevär m/42 B Manual<br />
The sight has two range tags, one for spitzer (torped) ammunition and one for round nose (ogival).Which one<br />
is installed can be seen between the sight screw and the range window. The bullet image (spitzer or round<br />
nose bullet) should match the ammunition used. With the sight screw the sight can be adjusted for every 100<br />
m. From 100 to 700 m with spitzer ammunition, or 100 to 600 m with round nose.<br />
The range tags are changed as follows;<br />
Push in the lower barrel band spring to release the band.<br />
Pull the barrel band forward. If needed, lightly tap the band.<br />
Lift the forward part of the hand guard and remove it.<br />
Remove the sight screw and the range tag inside it.<br />
Insert the proper range tag.<br />
Reinstall the parts in reverse order.<br />
©2000 Anders & Petter.<br />
8
Automatgevär m/42 B Manual<br />
The sight and the sight base have alignment marks. When the rifle is sighted in, these two should normally<br />
be lined up with each other.<br />
If windage needs to be adjusted, proceed as follows;<br />
Release the muzzle plug 3-4 turns.<br />
Using the universal tool, turn the front sight screw right (left) if point of impact is to be moved to the right<br />
(left). I full turn of the screw equals 8,5 cm at 100 m distance. Note that the screw has some play. Count the<br />
turns from where the screw starts to pull.<br />
Elevation is set to achieve a point of impact 10 cm above point of aim at 100 m. Elevation adjustments<br />
should only be carried out by an armourer.<br />
6. Bayonet<br />
The bayonet is attached to the rifle by placing the handle over the cleaning rod and the ring over the<br />
muzzle. Then push it down until it locks.. To remove the bayonet, pull out the lock button and lift it off.<br />
7. Blank firing device<br />
The blank firing device must be used when shooting blank ammunition.<br />
©2000 Anders & Petter.<br />
9
Automatgevär m/42 B Manual<br />
Installation of blank firing device;<br />
Remove the muzzle plug, but not the sight carrier. Screw on the device. To avoid damage to the threads<br />
make sure it is turned all the way in. Push the locking tab down over the sight until it snaps into place.<br />
Remove in the reverse order.<br />
8. Shooting gallery practice & semi-live ammunition<br />
Gallery (kammarammunition) and semi-live (practice) ammunition is used during certain training. This<br />
ammunition does not produce enough pressure to reliably cycle the action. Reloading should instead be<br />
performed manually as follows;<br />
Hold the rifle (in “fire” mode) at the ready.<br />
Push the receiver cover forward to locking position.<br />
Cycle the action.<br />
9. Loading<br />
From standing, hold the rifle in the left hand with the muzzle facing slightly upwards and the stock<br />
supported against the waist or belt. With the right hand;<br />
Turn the safety on.<br />
Push the receiver cover forward until it locks to the bolt carrier.<br />
Pull the cover back (action opens).<br />
Insert a clip into its cut-out.<br />
With the thumb as close to the clip as possible, push the rounds down into the magazine.<br />
Remove the clip and insert another one.<br />
Repeat.<br />
Turn the safety off.<br />
Pull the cover back.<br />
©2000 Anders & Petter.<br />
10
Turn the safety on.<br />
10. Unloading<br />
Automatgevär m/42 B Manual<br />
Grip the rifle with the left hand around the receiver behind the magazine.<br />
With the right hand;<br />
Turn the safety on.<br />
Push the cover forward until it locks with the bolt carrier.<br />
Pull the cover back. The chambered round will then eject to the right. The left hand fingers should be<br />
placed to catch the round. Take it with the right hand.<br />
Repeat this procedure until the magazine is empty.<br />
Push down the cartridge follower and then push the cover forward.<br />
With the thumb, push in the cover locking lever and slowly release the cover to the rear.<br />
Turn the safety off, release the trigger and turn the safety on.<br />
IMPORTANT NOTICE:<br />
Do not forget to make sure that the safety is on before poking with your fingers inside the receiver (when<br />
loading or unloading). If you ignore this advice you will have a very painful experience often referred to as<br />
a “Ljungman thumb” (Ed.’s note)<br />
11. Cleaning<br />
The chamber and the magazine should always receive special attention. The chamber is cleaned with the<br />
cleaning tool. The magazine is cleaned by pushing down the follower and then wiping out the inside.<br />
Lube the magazine with # 042 lubricant. Cartridges and action should be lubed when loading the rifle.<br />
During longer firing pauses the chamber should be cleaned with the tool and lubed with # 042 lubricant.<br />
12. Stoppages<br />
If a malfunction occurs, proceed as follows;<br />
Keep the rifle at the ready position.<br />
Note; if a dud round occurs the rifle should be kept in this position for at least 5 seconds before any further<br />
action is taken.<br />
Turn the safety on.<br />
Open the action. Check that a case or a cartridge ejects when doing so.<br />
Turn the safety off and push the cover back so that the bolt assembly slams home. While doing this, check<br />
that a cartridge is chambered and that the bolt is fully forward.<br />
Continue firing.<br />
If another malfunction occurs, or if the bolt does not close properly, repeat the above process and recover<br />
the case or cartridge that is ejected. Then check the following;<br />
©2000 Anders & Petter.<br />
11
Automatgevär m/42 B Manual<br />
Check the primer for strike marks. If it looks normal, the ammunition is probably faulty. Continue firing. If<br />
there is no mark in the primer, replace the firing pin.<br />
If the case remains in the chamber the extractor is faulty. Replace extractor.<br />
If the case is extracted but not ejected, the ejector is probably faulty. The ejector should only be replaced by<br />
an armourer.<br />
If there is no cartridge in the chamber the magazine might be dirty. Clean the magazine.<br />
If the bolt does not close <strong>com</strong>pletely it might be because the chamber is dirty. Clean the chamber. If the bolt<br />
is far from closing (at least 1 cm of the case visible) there is probably case neck remnants in the chamber.<br />
The chamber must in most cases be cleaned out by an armourer.<br />
13. Function<br />
When the rifle is loaded and ready to fire the bolt assembly is in the forward position and a cartridge is in<br />
the chamber. The bolt carrier pushes down on the rear end of the bolt in front of the locking lug in the<br />
bottom of the receiver. The bolt carrier encloses the rear end of the gas tube.<br />
The hammer is locked back against the sear.<br />
When the trigger is released the hammer strikes against the firing pin whereupon the shot is fired. The<br />
powder gases pushes the bullet through the bore and at the same time pushes against the bolt. The bolt does<br />
not move as it is locked against the locking lug. When the bullet passes the gas cylinder gas flows through<br />
the gas tube and pushes the bolt carrier back. When the carrier has moved a few millimeters back the bolt is<br />
lifted out of it’s lock and follows the carrier backwards.<br />
During the rearward movement the empty cartridge case is pulled out of the chamber and thrown out of the<br />
weapon. The hammer is cocked and the recoil spring is squeezed together. The rearward movement is<br />
stopped by the receiver cap.<br />
When the movement has stopped the recoil spring pushes the bolt assembly forward. A cartridge is thereby<br />
pushed out of the magazine and into the chamber. The bolt assembly stops in the forward locked position.<br />
To be able to fire once again the trigger has to be released so that it grips the sear.<br />
When the magazine is empty the cartridge follower pushes up the bolt lock so that the bolt assembly stops<br />
in the rear position.<br />
14. Low-light sights<br />
• Korn – Front sight<br />
• Sikte – Rear sight<br />
• Fodral – Case<br />
©2000 Anders & Petter.<br />
12
Install the sights as the picture below shows.<br />
• Siktplåt – Sight plate<br />
• Fästskruv – Lock screw<br />
• Hållare – Carrier<br />
• Spärr – Lock tab<br />
Automatgevär m/42 B Manual<br />
Sight adjustment;<br />
Elevation is adjusted by turning the rifle’s sight screw. If the sight is raised (lowered) 100 m point of<br />
impact with the night sights will be raised (lowered) 5 cm (10 cm) at 50 m (100 m).<br />
Windage is adjusted by loosening the sight plate’s adjustment screws and moving the plate sideways. If the<br />
rifle hits to the right (left) the plate is moved to the right (left). Moving the sightplate 1 mm will move point<br />
of impact 7,5 cm (15 cm) at 50 m (100 m).<br />
©2000 Anders & Petter.<br />
13