Quark LWIR Video Camera
Quark LWIR Video Camera
Quark LWIR Video Camera

You also want an ePaper? Increase the reach of your titles
YUMPU automatically turns print PDFs into web optimized ePapers that Google loves.
Document Number: 102-PS241-01<br />
Version: 100<br />
Issue Date: October 2011<br />
FLIR Commercial Systems<br />
70 Castilian Drive<br />
Goleta, CA 93117<br />
Phone: +1.805.964.9797<br />
www.flir.com<br />
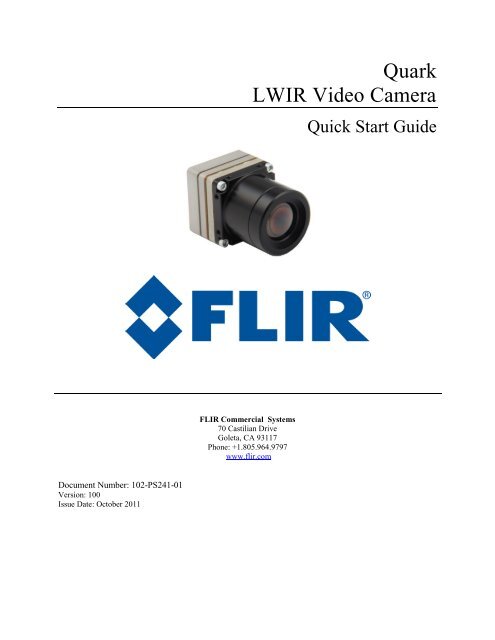
<strong>Quark</strong><br />
<strong>LWIR</strong> <strong>Video</strong> <strong>Camera</strong><br />
Quick Start Guide
<strong>Quark</strong> Quick Start Guide<br />
Table of Contents<br />
1.0 Document .......................................................................................................................................... 3<br />
1.1 Revision History ........................................................................................................................... 3<br />
1.2 Scope ............................................................................................................................................. 3<br />
2.0 Unpacking the <strong>Camera</strong> ...................................................................................................................... 4<br />
3.0 Basic Accessories .............................................................................................................................. 4<br />
3.1 <strong>Quark</strong> VPC Module Accessory ..................................................................................................... 4<br />
4.0 Connecting to the <strong>Camera</strong> ................................................................................................................. 5<br />
4.1 FLIR <strong>Camera</strong> Controller GUI ....................................................................................................... 5<br />
4.2 Physical Connection ...................................................................................................................... 5<br />
4.3 Software Connection ..................................................................................................................... 6<br />
4.4 Troubleshooting the FLIR <strong>Camera</strong> Controller GUI ...................................................................... 9<br />
Table of Figures<br />
Figure 1: <strong>Quark</strong> <strong>Camera</strong> and VPC Module Accessory Kit ........................................................................... 4<br />
Figure 2: BNC to RCA Adapter .................................................................................................................... 5<br />
Figure 3: VPC Physical Connections ............................................................................................................ 6<br />
Figure 4: Device Manager showing proper driver installation ..................................................................... 6<br />
Figure 5: FLIR <strong>Camera</strong> Controller GUI Status Tab – Not Connected.......................................................... 7<br />
Figure 6: FLIR <strong>Camera</strong> Controller GUI Connection Window Part 1 ........................................................... 8<br />
Figure 7: FLIR <strong>Camera</strong> Controller GUI Connection Window Part 2 ........................................................... 8<br />
Figure 8: FLIR <strong>Camera</strong> Controller GUI Status Tab – Connected ................................................................ 9<br />
Figure 9: FLIR <strong>Camera</strong> Controller Error Message ....................................................................................... 9
1.0 Document<br />
1.1 Revision History<br />
Version Date Comments<br />
100 10/14/2011 Initial Release<br />
<strong>Quark</strong> Quick Start Guide<br />
1.2 Scope<br />
<strong>Quark</strong> is a miniature infrared imaging core from FLIR Systems®. This Quick Start includes<br />
information required for first-time use of the <strong>Quark</strong> <strong>Camera</strong>.<br />
The FLIR website will have the newest version of this document as well as offer access to many other<br />
supplemental resources: http://www.flir.com/cvs/cores/resources/<br />
Here is a sample of some of the resources that can be found:<br />
Document Title Document<br />
Number<br />
Description<br />
<strong>Quark</strong> Quick Start Guide 102-PS241-01 Quick Start Guide for first-time use<br />
FLIR <strong>Camera</strong> Controller GUI 102-PS242-02 Detailed Descriptions for functions and adjustments<br />
User’s Guide<br />
for FLIR cameras using the FLIR <strong>Camera</strong> Controller<br />
GUI<br />
<strong>Quark</strong> Product Specification 102-PS241-40 Product specification and feature description<br />
<strong>Quark</strong> Electrical IDD 102-PS241-41 Written for Electrical Engineers to have all necessary<br />
information to interface to a <strong>Quark</strong> camera<br />
Tau 2/<strong>Quark</strong> Software IDD 102-PS242-42 Written for Software Engineers to have all necessary<br />
information for serial control of Tau 2 and <strong>Quark</strong><br />
Assorted Mechanical<br />
Various There are drawings and 3D models for various<br />
Drawings and Models<br />
camera configurations for mechanical integration<br />
Application Notes Various Written for Systems Engineers and general users of<br />
advanced features such as Gain Calibration,<br />
Supplemental FFC Calibration, NVFFC Calibration,<br />
<strong>Camera</strong> Link, On-Screen Symbology, AGC/DDE<br />
explanation, <strong>Camera</strong> Mounting, Spectral Response,<br />
Optical Interface for lens design, and others.<br />
There is also a large amount of information in the Frequently Asked Questions (FAQ) section on the<br />
FLIR website: http://www.flir.com/cvs/cores/knowledgebase/. Additionally, a FLIR Applications<br />
Engineer can be contacted at 888.747.FLIR (888.747.3547).<br />
102_PS242-01 Rev100 October 2011 Page 3 of 10
<strong>Quark</strong> Quick Start Guide<br />
2.0 Unpacking the <strong>Camera</strong><br />
When unpacking the camera, please heed customary electrostatic-discharge (ESD) sensitive device<br />
precautions including static-safe work station and proper grounding. The <strong>Quark</strong> camera is packaged in<br />
foam to prevent damage during shipping. It is also placed in a conductive anti-static bag to protect from<br />
electrostatic-discharge damage.<br />
Disassembling the camera can cause permanent damage and will void the warranty. Operating the camera<br />
outside of the specified input voltage range or the specified operating temperature range can cause<br />
permanent damage. The camera back is not sealed. Avoid exposure to dust and moisture. This camera<br />
contains electrostatic-discharge-sensitive electronics and should be handled appropriately.<br />
3.0 Basic Accessories<br />
The <strong>Quark</strong> <strong>Camera</strong> can be simply used with the <strong>Quark</strong> VPC Module Accessory, which provides an easy<br />
way to evaluate the camera core and access analog video during development. You can find this and other<br />
accessories at http://www.flirshop.com.<br />
3.1 <strong>Quark</strong> VPC Module Accessory<br />
The <strong>Quark</strong> VPC module accessory includes USB-A to USB-mini B cable for power and communications,<br />
USB power supply, European power adapter, MCX-to-BNC cable for analog video, and mounting<br />
screws.<br />
USB Cable VPC Module <strong>Video</strong> Cable<br />
Socket head cap screws<br />
(M1.6 × 0.35 × 6 mm)<br />
Figure 1: <strong>Quark</strong> <strong>Camera</strong> and VPC Module Accessory Kit<br />
102_PS242-01 Rev100 October 2011 Page 4 of 10
<strong>Quark</strong> Quick Start Guide<br />
4.0 Connecting to the <strong>Camera</strong><br />
This section describes installation of necessary software, physical camera connections, and software<br />
connection to the camera.<br />
4.1 FLIR <strong>Camera</strong> Controller GUI<br />
The FLIR <strong>Camera</strong> Controller GUI provides communication between a PC and a <strong>Quark</strong> camera using<br />
either the USB interface or some other means of serial communication.<br />
1. If you have an older version of the FLIR <strong>Camera</strong> Controller GUI loaded on your PC, you should<br />
first uninstall it using the Windows Uninstall utility via the Windows Control Panel before<br />
proceeding with this installation.<br />
2. The newest version of the FLIR <strong>Camera</strong> Controller GUI can be found at the following URL:<br />
http://www.flir.com/cvs/cores/resources/software/tau/<br />
3. Click on the link to download the GUI and save it to your computer.<br />
4. Extract the file using WinZip or other software. This can typically be done by right-clicking on<br />
the zip file and selecting “Extract”.<br />
5. Open the directory where you saved the file and double-click “setup.exe”.<br />
6. Walk through the installation steps.<br />
7. When the primary installation is completed, you will be prompted to install Silicon Laboratories<br />
drivers. This portion of the installation is necessary for using a USB connection to the camera.<br />
8. The program will install to Start→All Programs→FLIR Systems→<strong>Camera</strong> Controller GUI<br />
4.2 Physical Connection<br />
This section describes physical connections to the camera and assumes that you have the VPC Module.<br />
1. Plug the accessory directly into the rear of the camera. There is a black 60-pin connector that will<br />
mate. Use the included socket head cap screws to secure the expansion board to the camera.<br />
These will insert on the four corners of the board.<br />
2. Connect the analog video cable to the VPC on the back of the <strong>Quark</strong> <strong>Camera</strong>. There is an MCX<br />
mini coaxial connector on the back of the accessories. The opposite end of the cable has a<br />
standard coaxial connector. Connect this to the video input of an analog monitor. It may be<br />
necessary to use a BNC Female to Phono Plug (RCA) Adapter. These are readily available at<br />
electronics stores and allow the camera to be connected to the standard yellow video input on a<br />
monitor.<br />
Figure 2: BNC to RCA Adapter<br />
3. Connect the USB-mini B cable to the VPC Module and the USB-A end to your computer. (If you<br />
have sound enabled on your computer, you should hear a chime and see a notification that the<br />
device has been connected).<br />
102_PS242-01 Rev100 October 2011 Page 5 of 10
Figure 3: VPC Physical Connections<br />
<strong>Quark</strong> Quick Start Guide<br />
4. Analog video should appear within a few seconds after connecting the USB cable. Verify analog<br />
video is displayed on the monitor to ensure the camera is properly powered.<br />
5. Additional Information: Access the Device Manager to verify proper driver installation and<br />
identify communications port. Connection issues are most often caused by attempting to use<br />
the wrong COM Port to connect to the camera.<br />
a. Right-Click on “My Computer” and select “Manage”. This is typically either on the<br />
desktop or available through the start menu.<br />
b. Select “Device Manager” on the left Pane.<br />
c. Expand the tree for “Ports (COM & LPT)”.<br />
d. Note the COM Port number used for Silicon Labs. The following example shows COM3.<br />
Figure 4: Device Manager showing proper driver installation<br />
4.3 Software Connection<br />
This section describes simple communication with the camera using the FLIR <strong>Camera</strong> Controller GUI<br />
and assumes that the camera is connected to the PC using a USB cable and either the VPC Module. Please<br />
refer to the FLIR <strong>Camera</strong> Controller GUI User’s Guide for more details on functionality of the FLIR<br />
<strong>Camera</strong> Controller GUI and the <strong>Quark</strong> camera.<br />
102_PS242-01 Rev100 October 2011 Page 6 of 10
<strong>Quark</strong> Quick Start Guide<br />
1. Run the FLIR <strong>Camera</strong> Controller GUI by clicking on the start menu and accessing Start→All<br />
Programs→FLIR Systems→<strong>Camera</strong> Controller GUI. (The software may take up to 30 seconds to<br />
load the first time.<br />
2. When the GUI first opens, it will display “Not Connected” on the bottom left. The first step is to<br />
connect to the camera.<br />
Figure 5: FLIR <strong>Camera</strong> Controller GUI Status Tab – Not Connected<br />
3. Connect to the camera by selecting Tools→ Connection<br />
102_PS242-01 Rev100 October 2011 Page 7 of 10
1<br />
Figure 6: FLIR <strong>Camera</strong> Controller GUI Connection Window Part 1<br />
<strong>Quark</strong> Quick Start Guide<br />
4. Select Serial (RS-232), select 921600 as the Baud Rate for fastest communication, and click<br />
Next. If you only have one serial communication port on your computer, the button will say<br />
Finish.<br />
Figure 7: FLIR <strong>Camera</strong> Controller GUI Connection Window Part 2<br />
5. Select the Com port seen in the Device Manager and click Finish.<br />
6. The GUI will now automatically connect to the camera and refresh information in the software.<br />
The status LED will turn green and it will display “Connected” on the bottom left. It is also<br />
possible to retrieve the part number and serial number of your camera from this screen.<br />
102_PS242-01 Rev100 October 2011 Page 8 of 10<br />
2<br />
3
Figure 8: FLIR <strong>Camera</strong> Controller GUI Status Tab – Connected<br />
<strong>Quark</strong> Quick Start Guide<br />
4.4 Troubleshooting the FLIR <strong>Camera</strong> Controller GUI<br />
If the FLIR <strong>Camera</strong> Controller GUI does not link with the camera, you may see the popup shown below<br />
which indicates that the GUI has not been able to communicate with the camera.<br />
If this is the case, verify the following:<br />
Figure 9: FLIR <strong>Camera</strong> Controller Error Message<br />
The USB Cable is properly connected to both the computer and the Accessory Module so that<br />
there is a green LED illuminated on the accessory.<br />
Verify that you selected the proper port if it was not detected automatically. Select Advanced,<br />
then Next in the Tools→Connection dialog box. Also, try disconnecting and then re-connecting<br />
the cable to the PC. If the GUI was launched before the cable was connected, close the GUI,<br />
connect the cable, and then re-launch the GUI.<br />
The Baud rate must be set in the Tools→Connection dialog box. The <strong>Quark</strong> camera supports<br />
Baud rates of 57600 and 921600. In the factory default configuration, the <strong>Quark</strong> camera<br />
automatically detects if the Baud Rate of the first incoming message is 57600 or 921600 and will<br />
communicate at that Baud Rate until reset.<br />
The Port may be occupied by another application. Shut down any other applications that may be<br />
using the port. Also, multiple instances of the FLIR <strong>Camera</strong> Controller GUI Program can be<br />
initiated using different ports so be sure the camera you are interested in controlling is actually<br />
connected to the physical port that was verified in the Device Manager in Section 3.2, step 5.<br />
Verify that the camera is powered by checking that the camera is producing an image on an<br />
analog monitor<br />
If you cannot initiate serial communication with the camera after verifying these items, refer to the<br />
frequently asked questions (FAQ) at http://www.flir.com/cvs/cores/knowledgebase/. Additionally, a<br />
FLIR Applications Engineer can be contacted at 888.747.FLIR (888.747.3547).<br />
102_PS242-01 Rev100 October 2011 Page 9 of 10
<strong>Quark</strong> Quick Start Guide<br />
© FLIR Commercial Systems, 2011. All rights reserved worldwide. No parts of this manual, in whole or in<br />
part, may be copied, photocopied, translated, or transmitted to any electronic medium or machine readable<br />
form without the prior written permission of FLIR Commercial Systems<br />
Names and marks appearing on the p r o d u c t s herein are either registered trademarks or trademarks of<br />
FLIR Commercial Systems and/or its subsidiaries. All other trademarks, trade names, or company names<br />
referenced herein are used for identification only and are the property of their respective owners.<br />
Liberation fonts are copyright 2009 by RedHat and are used under authority of the GNU public license.<br />
Information about these fonts and t h e G N U public license can be found at:<br />
https://www.redhat.com/promo/fonts/.<br />
This product is protected by patents, design patents, patents pending, or design patents pending.<br />
If you have q u estions that are not covered in this manual, or need service, contact FLIR Commercial Systems<br />
Customer Support at 805.964.9797 for additional information prior to returning a camera.<br />
This documentation is subject to change without notice.<br />
This equipment must be disposed of as electronic waste.<br />
Contact your nearest FLIR Commercial Systems, Inc. representative for instructions on how to<br />
return the p r o d u c t to FLIR for proper disposal.<br />
FCC Notice. This device is a subassembly designed for incorporation into other products in order to provide an infrared camera<br />
function. It is not an end-product fit for consumer use. When incorporated into a host device, the end-product will generate, use,<br />
and radiate radio frequency energy that may cause radio interference. As such, the end-product incorporating this subassembly<br />
must be tested and approved under the rules of the Federal Communications Commission (FCC) before the end-product may be<br />
offered for sale or lease, advertised, imported, sold, or leased in the United States. The FCC regulations are designed to provide<br />
reasonable protection against interference to radio communications. See 47 C.F.R. §§ 2.803 and 15.1 et seq.<br />
Industry Canada Notice. This device is a subassembly designed for incorporation into other products in order to provide an<br />
infrared camera function. It is not an end-product fit for consumer use. When incorporated into a host device, the end-product<br />
will generate, use, and radiate radio frequency energy that may cause radio interference. As such, the end-product incorporating<br />
this subassembly must be tested for compliance with the Interference-Causing Equipment Standard, Digital Apparatus, ICES-<br />
003, of Industry Canada before the product incorporating this device may be: manufactured or offered for sale or lease, imported,<br />
distributed, sold, or leased in Canada.<br />
Avis d’Industrie Canada. Cet appareil est un sous-ensemble conçu pour être intégré à un autre produit afin de fournir une<br />
fonction de caméra infrarouge. Ce n’est pas un produit final destiné aux consommateurs. Une fois intégré à un dispositif hôte, le<br />
produit final va générer, utiliser et émettre de l’énergie radiofréquence qui pourrait provoquer de l’interférence radio. En tant que<br />
tel, le produit final intégrant ce sous-ensemble doit être testé pour en vérifier la conformité avec la Norme sur le matériel<br />
brouilleur pour les appareils numériques (NMB-003) d’Industrie Canada avant que le produit intégrant ce dispositif puisse être<br />
fabriqué, mis en vente ou en location, importé, distribué, vendu ou loué au Canada.<br />
EU Notice. This device is a subassembly or component intended only for product evaluation, development or incorporation into<br />
other products in order to provide an infrared camera function. It is not a finished end-product fit for general consumer use.<br />
Persons handling this device must have appropriate electronics training and observe good engineering practice standards. As<br />
such, this product does not fall within the scope of the European Union (EU) directives regarding electromagnetic compatibility<br />
(EMC). Any end-product intended for general consumer use that incorporates this device must be tested in accordance and<br />
comply with all applicable EU EMC and other relevant directives.<br />
102_PS242-01 Rev100 October 2011 Page 10 of 10