LSC-40C SPECIFICATIONS - Besser Company
LSC-40C SPECIFICATIONS - Besser Company
LSC-40C SPECIFICATIONS - Besser Company

Create successful ePaper yourself
Turn your PDF publications into a flip-book with our unique Google optimized e-Paper software.
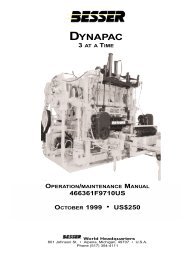
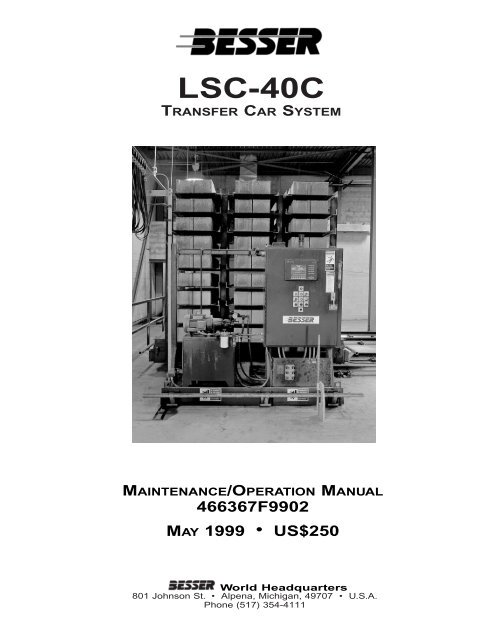
<strong>LSC</strong>-<strong>40C</strong><br />
TRANSFER CAR SYSTEM<br />
MAINTENANCE/OPERATION MANUAL<br />
466367F9902<br />
MAY 1999 • US$250<br />
World Headquarters<br />
801 Johnson St. • Alpena, Michigan, 49707 • U.S.A.<br />
Phone (517) 354-4111
COMPANY NAME: ..............................................................<br />
SERIAL NUMBER: ..............................................................<br />
ASSEMBLY NUMBER: ..............................................................<br />
WIRING DIAGRAM NUMBER: ..............................................................<br />
INSTALLATION DRAWING NUMBER: ............................................................
466367F9902US F1 07JE99<br />
<strong>LSC</strong>-<strong>40C</strong><br />
TABLE OF CONTENTS<br />
Table of Contents<br />
<strong>LSC</strong>-<strong>40C</strong> Machine Maintenance/Operation<br />
LIST OF FIGURES . . . . . . . . . . . . . . . . . . . . . . . . . . . . . . . . . . . . . . . . . . . . . . . . . . . .iv<br />
LIST OF TABLES . . . . . . . . . . . . . . . . . . . . . . . . . . . . . . . . . . . . . . . . . . . . . . . . . . . . .vi<br />
<strong>SPECIFICATIONS</strong> . . . . . . . . . . . . . . . . . . . . . . . . . . . . . . . . . . . . . . . . . . . . . . . . . . . . .vii<br />
ELECTRICAL DATA . . . . . . . . . . . . . . . . . . . . . . . . . . . . . . . . . . . . . . . . . . . . . . . . . . .ix<br />
SAFETY BULLETIN . . . . . . . . . . . . . . . . . . . . . . . . . . . . . . . . . . . . . . . . . . . . . . . . . . .x<br />
SAFETY SIGNS . . . . . . . . . . . . . . . . . . . . . . . . . . . . . . . . . . . . . . . . . . . . . . . . . . . . . .xi<br />
SECTION 1 INTRODUCTION<br />
1.1 MECHANICAL COMPONENT OVERVIEW . . . . . . . . . . . . . . . . . . . . . . .1-1<br />
1.1.1 Racks . . . . . . . . . . . . . . . . . . . . . . . . . . . . . . . . . . . . . . . . . . . . . .1-1<br />
1.1.2 Rail System . . . . . . . . . . . . . . . . . . . . . . . . . . . . . . . . . . . . . . . . . .1-3<br />
1.1.3 Crawler . . . . . . . . . . . . . . . . . . . . . . . . . . . . . . . . . . . . . . . . . . . . .1-3<br />
1.1.4 Car . . . . . . . . . . . . . . . . . . . . . . . . . . . . . . . . . . . . . . . . . . . . . . . .1-3<br />
1.1.5 Side Shifter . . . . . . . . . . . . . . . . . . . . . . . . . . . . . . . . . . . . . . . . . .1-3<br />
1.1.6 Rack Conveyor . . . . . . . . . . . . . . . . . . . . . . . . . . . . . . . . . . . . . . .1-3<br />
1.2 ELECTRONIC COMPONENT OVERVIEW . . . . . . . . . . . . . . . . . . . . . . .1-3<br />
1.2.1 Small Logic Controller/Graphic Control Station . . . . . . . . . . . . . . . .1-3<br />
1.2.2 Sensors . . . . . . . . . . . . . . . . . . . . . . . . . . . . . . . . . . . . . . . . . . . .1-3<br />
1.2.3 Actuators . . . . . . . . . . . . . . . . . . . . . . . . . . . . . . . . . . . . . . . . . . . .1-3<br />
1.3 START-UP PROCEDURE . . . . . . . . . . . . . . . . . . . . . . . . . . . . . . . . . . . .1-4<br />
1.4 SHUT-DOWN PROCEDURE . . . . . . . . . . . . . . . . . . . . . . . . . . . . . . . . .1-4<br />
SECTION 2 MECHANICAL OPERATION<br />
2.1 TRANSPORT CURED RACK TO SIDE SHIFTER . . . . . . . . . . . . . . . . . .2-1<br />
2.2 RETRIEVE GREEN RACK FROM RACK CONVEYOR . . . . . . . . . . . . . .2-2<br />
2.3 TRANSPORT GREEN RACK TO KILN . . . . . . . . . . . . . . . . . . . . . . . . . .2-3<br />
2.4 RETRIEVE CURED RACK FROM STORAGE . . . . . . . . . . . . . . . . . . . .2-4<br />
2.5 TRANSPORT CURED RACK TO RACK CONVEYOR . . . . . . . . . . . . . . .2-5<br />
2.6 RETRIEVE GREEN RACK FROM SIDE SHIFTER . . . . . . . . . . . . . . . . .2-6<br />
2.7 TRANSPORT GREEN RACK TO KILN . . . . . . . . . . . . . . . . . . . . . . . . . .2-7<br />
2.8 RETRIEVE CURED RACK FROM STORAGE . . . . . . . . . . . . . . . . . . . .2-8<br />
SECTION 3 CAR CONTROL SYSTEMS<br />
3.1 CAR MANUAL CONTROLS . . . . . . . . . . . . . . . . . . . . . . . . . . . . . . . . . .3-2<br />
3.2 CAR GRAPHIC CONTROLS SCREEN . . . . . . . . . . . . . . . . . . . . . . . . .3-3<br />
i
Table of Contents<br />
<strong>LSC</strong>-<strong>40C</strong> Machine Maintenance/Operation TABLE OF CONTENTS<br />
3.2.1 Main Menu Screen . . . . . . . . . . . . . . . . . . . . . . . . . . . . . . . . . . . .3-4<br />
3.2.2 Car Program Screen . . . . . . . . . . . . . . . . . . . . . . . . . . . . . . . . . . .3-5<br />
3.2.3 Crawler Fault Diagnostic Screen . . . . . . . . . . . . . . . . . . . . . . . . . .3-6<br />
3.2.4 Rack Shuttle Main Menu Screen . . . . . . . . . . . . . . . . . . . . . . . . . .3-8<br />
3.2.5 Rack Shuttle Program Screen . . . . . . . . . . . . . . . . . . . . . . . . . . . .3-9<br />
3.2.6 Kiln Sequence Table Screen . . . . . . . . . . . . . . . . . . . . . . . . . . . . .3-10<br />
3.2.7 Kiln Map Screen . . . . . . . . . . . . . . . . . . . . . . . . . . . . . . . . . . . . . .3-11<br />
3.2.8 Electrical Part Numbers Screen . . . . . . . . . . . . . . . . . . . . . . . . . . .3-12<br />
3.2.9 Transfer Car Switch Locations Screen . . . . . . . . . . . . . . . . . . . . . .3-13<br />
3.2.10 Input/Output Status Screen . . . . . . . . . . . . . . . . . . . . . . . . . . . . .3-15<br />
3.3 SENSOR TYPES . . . . . . . . . . . . . . . . . . . . . . . . . . . . . . . . . . . . . . . . . .3-16<br />
3.4 SAFETY BARS . . . . . . . . . . . . . . . . . . . . . . . . . . . . . . . . . . . . . . . . . . .3-16<br />
3.5 CAR SENSORS . . . . . . . . . . . . . . . . . . . . . . . . . . . . . . . . . . . . . . . . . . .3-16<br />
3.5.1 Motion Control Sensors . . . . . . . . . . . . . . . . . . . . . . . . . . . . . . . . .3-16<br />
3.5.2 Crawler Location Sensor . . . . . . . . . . . . . . . . . . . . . . . . . . . . . . . .3-18<br />
3.5.3 Raillock Position . . . . . . . . . . . . . . . . . . . . . . . . . . . . . . . . . . . . . .3-18<br />
3.6 CAR INPUT/OUTPUT MODULES . . . . . . . . . . . . . . . . . . . . . . . . . . . . .3-19<br />
SECTION 4 CRAWLER CONTROL SYSTEMS<br />
4.1 CRAWLER CONTROL STATION . . . . . . . . . . . . . . . . . . . . . . . . . . . . . .4-1<br />
4.2 SENSOR TYPES . . . . . . . . . . . . . . . . . . . . . . . . . . . . . . . . . . . . . . . . . .4-2<br />
4.3 SAFETY BARS . . . . . . . . . . . . . . . . . . . . . . . . . . . . . . . . . . . . . . . . . . .4-2<br />
4.4 CRAWLER SENSORS . . . . . . . . . . . . . . . . . . . . . . . . . . . . . . . . . . . . . .4-2<br />
4.4.1 Raillock Sensors . . . . . . . . . . . . . . . . . . . . . . . . . . . . . . . . . . . . . .4-4<br />
4.4.2 Motion Control Sensors . . . . . . . . . . . . . . . . . . . . . . . . . . . . . . . . .4-4<br />
4.4.3 Pendant Control Station Sensors . . . . . . . . . . . . . . . . . . . . . . . . . .4-4<br />
4.4.4 Elevator Position Sensors . . . . . . . . . . . . . . . . . . . . . . . . . . . . . . .4-4<br />
4.4.5 Cable Reel Sensors . . . . . . . . . . . . . . . . . . . . . . . . . . . . . . . . . . .4-4<br />
4.5 SIDE SHIFTER INTERFACE . . . . . . . . . . . . . . . . . . . . . . . . . . . . . . . . .4-4<br />
4.6 CRAWLER INPUT/ OUTPUT MODULES . . . . . . . . . . . . . . . . . . . . . . . .4-4<br />
SECTION 5 MAINTENANCE<br />
5.1 MAINTENANCE OVERVIEW . . . . . . . . . . . . . . . . . . . . . . . . . . . . . . . . .5-1<br />
5.2 SENSOR MAINTENANCE . . . . . . . . . . . . . . . . . . . . . . . . . . . . . . . . . . .5-1<br />
5.2.1 Sensor Position . . . . . . . . . . . . . . . . . . . . . . . . . . . . . . . . . . . . . . .5-1<br />
5.2.2 Sensor Cleaning . . . . . . . . . . . . . . . . . . . . . . . . . . . . . . . . . . . . . .5-2<br />
5.2.3 Enter Side Shifter Emitter . . . . . . . . . . . . . . . . . . . . . . . . . . . . . . .5-2<br />
5.3 SAFETY DEVICES . . . . . . . . . . . . . . . . . . . . . . . . . . . . . . . . . . . . . . . .5-2<br />
ii 466367F9902US F1 07JE99
466367F9902US F1 07JE99<br />
Table of Contents<br />
TABLE OF CONTENTS <strong>LSC</strong>-<strong>40C</strong> Machine Maintenance/Operation<br />
5.4 HYDRAULIC SYSTEMS . . . . . . . . . . . . . . . . . . . . . . . . . . . . . . . . . . . . .5-2<br />
5.4.1 Leakage . . . . . . . . . . . . . . . . . . . . . . . . . . . . . . . . . . . . . . . . . . . .5-2<br />
5.4.2 Hydraulic Fittings . . . . . . . . . . . . . . . . . . . . . . . . . . . . . . . . . . . . . .5-2<br />
5.4.3 Hydraulic Filters . . . . . . . . . . . . . . . . . . . . . . . . . . . . . . . . . . . . . .5-3<br />
5.4.4 Fluid Condition . . . . . . . . . . . . . . . . . . . . . . . . . . . . . . . . . . . . . . .5-4<br />
5.5 RAILS . . . . . . . . . . . . . . . . . . . . . . . . . . . . . . . . . . . . . . . . . . . . . . . . . .5-4<br />
5.6 CABLE REEL . . . . . . . . . . . . . . . . . . . . . . . . . . . . . . . . . . . . . . . . . . . .5-4<br />
5.6.1 Cable Replacement for Unmounted Reel . . . . . . . . . . . . . . . . . . . .5-7<br />
5.6.2 Spring Replacement . . . . . . . . . . . . . . . . . . . . . . . . . . . . . . . . . . .5-8<br />
5.7 LITHIUM BATTERIES . . . . . . . . . . . . . . . . . . . . . . . . . . . . . . . . . . . . . .5-10<br />
5.8 MAINTENANCE TIME TABLE . . . . . . . . . . . . . . . . . . . . . . . . . . . . . . . .5-11<br />
SECTION 6 TROUBLESHOOTING<br />
6.1 CAR DIAGNOSTICS . . . . . . . . . . . . . . . . . . . . . . . . . . . . . . . . . . . . . . .6-1<br />
6.2 CRAWLER DIAGNOSTICS . . . . . . . . . . . . . . . . . . . . . . . . . . . . . . . . . .6-1<br />
6.3 OTHER DIAGNOSTIC CHECKS . . . . . . . . . . . . . . . . . . . . . . . . . . . . . .6-2<br />
6.3.1 Battery . . . . . . . . . . . . . . . . . . . . . . . . . . . . . . . . . . . . . . . . . . . . .6-2<br />
6.3.2 Fuses . . . . . . . . . . . . . . . . . . . . . . . . . . . . . . . . . . . . . . . . . . . . . .6-2<br />
6.3.3 Circuit Breakers . . . . . . . . . . . . . . . . . . . . . . . . . . . . . . . . . . . . . . .6-3<br />
6.3.4 Memory Loss . . . . . . . . . . . . . . . . . . . . . . . . . . . . . . . . . . . . . . . .6-4<br />
6.3.5 Hydraulics Failure . . . . . . . . . . . . . . . . . . . . . . . . . . . . . . . . . . . . .6-4<br />
6.4 TECHNICAL ASSISTANCE . . . . . . . . . . . . . . . . . . . . . . . . . . . . . . . . . .6-4<br />
iii
List of Figures<br />
<strong>LSC</strong>-<strong>40C</strong> Machine Maintenance/Operation TABLE OF CONTENTS<br />
<strong>LSC</strong>-<strong>40C</strong><br />
LIST OF FIGURES<br />
SECTION 1 INTRODUCTION<br />
1.1 Car Components . . . . . . . . . . . . . . . . . . . . . . . . . . . . . . . . . . . . . . . . . .1-1<br />
1.2 Car . . . . . . . . . . . . . . . . . . . . . . . . . . . . . . . . . . . . . . . . . . . . . . . . . . . .1-1<br />
1.3 Crawler Components . . . . . . . . . . . . . . . . . . . . . . . . . . . . . . . . . . . . . . .1-2<br />
1.4 Crawler . . . . . . . . . . . . . . . . . . . . . . . . . . . . . . . . . . . . . . . . . . . . . . . . .1-2<br />
1.5 Mechanical Components . . . . . . . . . . . . . . . . . . . . . . . . . . . . . . . . . . . .1-2<br />
1.6 Car Manual Control Panel . . . . . . . . . . . . . . . . . . . . . . . . . . . . . . . . . . .1-4<br />
1.7 Crawler Manual Control Station . . . . . . . . . . . . . . . . . . . . . . . . . . . . . . .1-5<br />
SECTION 2 MECHANICAL OPERATION<br />
2.1 Transport Cured Rack to Side Shifter . . . . . . . . . . . . . . . . . . . . . . . . . . .2-1<br />
2.2 Retrieving a Green Rack . . . . . . . . . . . . . . . . . . . . . . . . . . . . . . . . . . . .2-2<br />
2.3 Transporting a Green Rack . . . . . . . . . . . . . . . . . . . . . . . . . . . . . . . . . .2-3<br />
2.4 Retrieving a Cured Rack . . . . . . . . . . . . . . . . . . . . . . . . . . . . . . . . . . . .2-4<br />
2.5 Transporting a Cured Rack . . . . . . . . . . . . . . . . . . . . . . . . . . . . . . . . . . .2-5<br />
2.6 Retrieving Green Rack from Side Shifter . . . . . . . . . . . . . . . . . . . . . . . .2-6<br />
2.7 Transporting a Green Rack . . . . . . . . . . . . . . . . . . . . . . . . . . . . . . . . . .2-7<br />
2.8 Retrieving a Cured Rack . . . . . . . . . . . . . . . . . . . . . . . . . . . . . . . . . . . .2-8<br />
SECTION 3 CAR CONTROL SYSTEMS<br />
3.1 Car Control Panel . . . . . . . . . . . . . . . . . . . . . . . . . . . . . . . . . . . . . . . . .3-1<br />
3.2 Car Manual Controls . . . . . . . . . . . . . . . . . . . . . . . . . . . . . . . . . . . . . . .3-2<br />
3.3 Car Graphic Control Screen3-3<br />
3.4 Main Menu Screen . . . . . . . . . . . . . . . . . . . . . . . . . . . . . . . . . . . . . . . . .3-4<br />
3.5 Car Program Screen . . . . . . . . . . . . . . . . . . . . . . . . . . . . . . . . . . . . . . .3-5<br />
3.6 Crawler Fault Diagnostic Screen . . . . . . . . . . . . . . . . . . . . . . . . . . . . . . .3-6<br />
3.7 Rack Shuttle Main Menu Screen . . . . . . . . . . . . . . . . . . . . . . . . . . . . . .3-8<br />
3.8 Rack Shuttle Program Screen . . . . . . . . . . . . . . . . . . . . . . . . . . . . . . . .3-9<br />
3.9 Kiln Sequence Table Screen . . . . . . . . . . . . . . . . . . . . . . . . . . . . . . . . . .3-10<br />
3.10 Kiln Map Screen . . . . . . . . . . . . . . . . . . . . . . . . . . . . . . . . . . . . . . . . . .3-11<br />
3.11 Electrical Part Numbers Screen . . . . . . . . . . . . . . . . . . . . . . . . . . . . . . .3-12<br />
3.12 Transfer Car Switch Locations Screen . . . . . . . . . . . . . . . . . . . . . . . . . .3-13<br />
iv 466367F9902US F1 07JE99
466367F9902US F1 07JE99<br />
List of Figures<br />
TABLE OF CONTENTS <strong>LSC</strong>-<strong>40C</strong> Machine Maintenance/Operation<br />
3.13 Input/Output Status Screen . . . . . . . . . . . . . . . . . . . . . . . . . . . . . . . . . .3-15<br />
3.14 Car Sensor Locations . . . . . . . . . . . . . . . . . . . . . . . . . . . . . . . . . . . . . . .3-16<br />
3.15 Raillock Operation . . . . . . . . . . . . . . . . . . . . . . . . . . . . . . . . . . . . . . . . .3-18<br />
3.16 Car Input/Output Modules . . . . . . . . . . . . . . . . . . . . . . . . . . . . . . . . . . .3-19<br />
SECTION 4 CRAWLER CONTROL STATION<br />
4.1 Crawler Control Station . . . . . . . . . . . . . . . . . . . . . . . . . . . . . . . . . . . . .4-1<br />
4.2 Crawler Sensor Locations . . . . . . . . . . . . . . . . . . . . . . . . . . . . . . . . . . .4-2<br />
4.3 Crawler Input/Output Modules . . . . . . . . . . . . . . . . . . . . . . . . . . . . . . . .4-4<br />
SECTION 5 MAINTENANCE<br />
5.1 Sensor Adjustments . . . . . . . . . . . . . . . . . . . . . . . . . . . . . . . . . . . . . . . .5-1<br />
5.2 Pipe Threads . . . . . . . . . . . . . . . . . . . . . . . . . . . . . . . . . . . . . . . . . . . . .5-2<br />
5.3 Flare Fitting . . . . . . . . . . . . . . . . . . . . . . . . . . . . . . . . . . . . . . . . . . . . . .5-3<br />
5.4 Hydraulic Filter . . . . . . . . . . . . . . . . . . . . . . . . . . . . . . . . . . . . . . . . . . . .5-3<br />
5.5 Cable Reel Assembly . . . . . . . . . . . . . . . . . . . . . . . . . . . . . . . . . . . . . . .5-6<br />
5.6 Cable Winding . . . . . . . . . . . . . . . . . . . . . . . . . . . . . . . . . . . . . . . . . . . .5-6<br />
5.7 Spring Replacement . . . . . . . . . . . . . . . . . . . . . . . . . . . . . . . . . . . . . . . .5-7<br />
5.8 Lithium Battery and EEPROM . . . . . . . . . . . . . . . . . . . . . . . . . . . . . . . .5-10<br />
SECTION 6 TROUBLESHOOTING<br />
6.1 Car Battery, Fuses, EEPROM and Circuit Breakers . . . . . . . . . . . . . . . .6-2<br />
6.2 Crawler Battery, Fuses, EEPROM and Circuit Breakers . . . . . . . . . . . . .6-3<br />
6.3 External Hydraulic Valves . . . . . . . . . . . . . . . . . . . . . . . . . . . . . . . . . . . .6-4<br />
v
List of Tables<br />
<strong>LSC</strong>-<strong>40C</strong> Machine Maintenance/Operation TABLE OF CONTENTS<br />
<strong>LSC</strong>-<strong>40C</strong><br />
LIST OF TABLES<br />
SECTION 6 TROUBLESHOOTING<br />
3.1 Crawler Fault Diagnostics . . . . . . . . . . . . . . . . . . . . . . . . . . . . . . . . . . . .3-7<br />
3.2 Transfer Car Fault Diagnostics . . . . . . . . . . . . . . . . . . . . . . . . . . . . . . . .3-12<br />
3.3 Car Sensor Functions . . . . . . . . . . . . . . . . . . . . . . . . . . . . . . . . . . . . . .3-16<br />
3.4 Car Input/Output Signals . . . . . . . . . . . . . . . . . . . . . . . . . . . . . . . . . . . .3-19<br />
4.1 Crawler Sensor Functions . . . . . . . . . . . . . . . . . . . . . . . . . . . . . . . . . . .4-3<br />
4.2 Crawler Input/Output Signals . . . . . . . . . . . . . . . . . . . . . . . . . . . . . . . . .4-5<br />
5.1 Maintenance Time Table . . . . . . . . . . . . . . . . . . . . . . . . . . . . . . . . . . . . .5-7<br />
vi 466367F9902US F1 07JE99
466367F9902US F1 07JE99<br />
Specifications<br />
TABLE OF CONTENTS <strong>LSC</strong>-<strong>40C</strong> Machine Maintenance/Operation<br />
<strong>LSC</strong>-<strong>40C</strong><br />
<strong>SPECIFICATIONS</strong><br />
TOTAL WEIGHT:<br />
CAR: 3,700 pounds [1,682 kg]<br />
CRAWLER: 4,250 pounds [1,932 kg]<br />
MINIMUM HYDRAULIC PRESSURE: 850 psi [59 bar]<br />
MACHINE SPEED: Up to 10 cycles per minute<br />
PRODUCTION CAPACITY: Up to 3 bay x 9 high x 6 deep<br />
PALLET REQUIREMENTS:<br />
WIDTH<br />
WIDTH & DEPTH = Actual size of steel pallet.<br />
XMAX & YMAX = Maximum production area of steel pallet.<br />
WIDTH<br />
26.000 (660)<br />
26.000 (660)<br />
26.000 (660)<br />
29.000 (737)<br />
29.000 (737)<br />
35.433 (900)<br />
37.000 (940)<br />
37.000 (940)<br />
37.000 (940)<br />
37.000 (940)<br />
37.750 (940)<br />
38.500 (978)<br />
38.500 (978)<br />
38.500 (978)<br />
39.375 (1000)<br />
39.375 (1000)<br />
18.500 (470)<br />
20.500 (521)<br />
26.000 (660)<br />
18.500 (470)<br />
20.500 (470)<br />
21.654 (550)<br />
21.654 (550)<br />
18.500 (470)<br />
20.500 (521)<br />
26.000 (660)<br />
18.500 (470)<br />
18.500 (470)<br />
20.500 (521)<br />
26.000 (660)<br />
18.500 (470)<br />
20.500 (521)<br />
Table A Steel Pallet Specifications<br />
DEPTH<br />
25.000 (635)<br />
25.000 (635)<br />
25.000 (635)<br />
28.000 (635)<br />
28.000 (635)<br />
34.433 (875)<br />
36.000 (914)<br />
36.000 (914)<br />
36.000 (914)<br />
36.000 (914)<br />
36.750 (934)<br />
37.500 (953)<br />
37.500 (953)<br />
37.500 (953)<br />
38.375 (975)<br />
38.375 (975)<br />
XMAX<br />
17.500 (445)<br />
19.500 (495)<br />
25.000 (635)<br />
17.500 (445)<br />
19.500 (495)<br />
20.654 (525)<br />
20.654 (525)<br />
17.500 (445)<br />
19.500 (495)<br />
25.000 (635)<br />
17.500 (445)<br />
17.500 (445)<br />
19.500 (495)<br />
25.000 (635)<br />
17.500 (445)<br />
19.500 (495)<br />
YMAX<br />
DEPTH THICK X Y PALLET #<br />
.313 (8)<br />
.313 (8)<br />
.313 (8)<br />
.313 (8)<br />
.313 (8)<br />
.315 (8)<br />
.375 (10)<br />
.375 (10)<br />
.375 (10)<br />
.375 (10)<br />
.375 (10)<br />
.375 (10)<br />
.375 (10)<br />
.375 (10)<br />
.375 (10)<br />
.375 (10)<br />
470750F0001<br />
470750F0002<br />
470750F0003<br />
470750F0004<br />
470750F0005<br />
470750F0006<br />
470750F0007<br />
470750F0008<br />
470750F0009<br />
470750F0010<br />
470750F0011<br />
470750F0012<br />
470750F0013<br />
470750F0014<br />
470750F0015<br />
470750F0016<br />
vii
Specifications<br />
<strong>LSC</strong>-<strong>40C</strong> Machine Maintenance/Operation TABLE OF CONTENTS<br />
OPERATING CONDITIONS: <strong>Besser</strong> machinery and equipment is designed to<br />
comply with the essential health and safety regulations<br />
(EHSR) that apply to directives which are applicable to<br />
an industrial environment.<br />
Buyer shall utilize this equipment in a manner consistent<br />
with its design and only in an industrial environment.<br />
OPERATING RANGES: Here are the normal operating ranges for machine<br />
sensors (limit, proximity) and control devices<br />
contained within the control panels.<br />
Ambient operating temperature range: 32° to 122°F [0° to 50°C]<br />
Humidity range: 10 to 95% (non-condensing)<br />
Line voltage: 90 to 132 volts – AC 50/60 Hz<br />
viii 466367F9902US F1 07JE99
PLANT POWER<br />
SUPPLY<br />
(VOLTS)<br />
380V<br />
50 HZ<br />
415V<br />
50 HZ<br />
440V-480V<br />
50HZ<br />
440V-480V<br />
60 HZ<br />
575V<br />
60 HZ<br />
TOTAL<br />
HORSEPOWER<br />
10<br />
10<br />
10<br />
10<br />
10<br />
Table B Electrical Data<br />
466367F9902US F1 07JE99<br />
TOTAL<br />
KILOWATTS<br />
(KW)<br />
7.5<br />
7.5<br />
7.5<br />
7.5<br />
7.5<br />
Electrical Data<br />
TABLE OF CONTENTS <strong>LSC</strong>-<strong>40C</strong> Machine Maintenance/Operation<br />
<strong>LSC</strong>-<strong>40C</strong><br />
ELECTRICAL DATA<br />
CONTROL<br />
PANEL<br />
TRANSFORMER<br />
(VOLT-AMPS)<br />
1250<br />
1250<br />
1250<br />
1250<br />
1250<br />
BRANCH<br />
CIRCUIT<br />
DISTRIBUTION<br />
SEARCH (AMPS)<br />
60<br />
30<br />
30<br />
30<br />
30<br />
BRANCH<br />
CIRCUIT<br />
FUSE PRS-R<br />
(AMPTS)<br />
35<br />
30<br />
30<br />
30<br />
20<br />
BRANCH<br />
CIRCUIT<br />
FEEDER<br />
THHN<br />
10 AWG<br />
2<br />
5.3 MM<br />
10 AWG<br />
2<br />
5.3 MM<br />
10 AWG<br />
2<br />
5.3 MM<br />
10 AWG<br />
2<br />
5.3 MM<br />
10 AWG<br />
2<br />
5.3 MM<br />
BRANCH<br />
CIRCUIT<br />
FEEDER<br />
CONDUIT<br />
.5 IN<br />
15 MM<br />
.5 IN<br />
15 MM<br />
.5 IN<br />
15 MM<br />
.5 IN<br />
15 MM<br />
.5 IN<br />
15 MM<br />
SHORT<br />
CIRCUIT<br />
INTERRUPTING<br />
CAPACITY (AIC)<br />
200,000<br />
200,000<br />
200,000<br />
200,000<br />
200,000<br />
Please consult the table above to find the appropriate electrical data for your <strong>LSC</strong>-<strong>40C</strong>. First, find your<br />
corresponding plant power supply in the left column. Then find the corresponding electrical data on the<br />
same row as your power plant supply.<br />
Ex: Your power plant supply is 460V at 60 Hz. According to the table, you will then get these values:<br />
PLANT POWER SUPPLY: 460 volt – 60 hertz<br />
TOTAL HORSEPOWER: 10<br />
TOTAL KILOWATTS: 7.5<br />
TOTAL ELECTRICAL CAPACITY: 10.0 Hp [7.46 Kw]<br />
CAR PANEL CONTROL TRANSFORMER: 750 volt-amps<br />
CRAWLER PANEL CONTROL TRANSFORMER: 500 volt-amps<br />
BRANCH CIRCUIT<br />
Distribution Switch Recommended: 30 amp<br />
Fuse Recommended [FRS–R]: 30 amp<br />
Feeder Recommended [THHN]: No. 10 AWG – [5.3 sq. mm]<br />
Feeder Conduit Recommended: 0.5 in. – [15 mm]<br />
Short Circuit Interrupting Capacity: 200,000 AIC<br />
ix
Safety Bulletin<br />
<strong>LSC</strong>-<strong>40C</strong> Machine Maintenance/Operation TABLE OF CONTENTS<br />
SAFETY BULLETIN<br />
This notice is issued to advise you that some previously accepted shop practices may not be keeping up<br />
with changing Federal and State Safety and Health Standards. Your current shop practices may not<br />
emphasize the need for proper precautions to insure safe operation and use of machines, tools, automatic<br />
loaders and allied equipment and/or warn against the use of certain solvents or other cleaning substances<br />
that are now considered unsafe or prohibited by law. Since many of your shop practices may not reflect<br />
current safety practices and procedures, particularly with regard to the safe operation of equipment, it is<br />
important that you review your practices to ensure compliance with Federal and State Safety and Health<br />
Standards.<br />
IMPORTANT<br />
The operation of any machine or power-operated device can be extremely hazardous unless<br />
proper safety precautions are strictly observed. Observe the following safety precautions:<br />
Always be sure proper guarding is in place for all pinch, catch, shear, crush and nip points.<br />
Always make sure that all personnel are clear of the equipment before starting it.<br />
Always be sure the equipment is properly grounded.<br />
Always turn the main electrical panel off and lock it out in accordance with published lockout/tagout<br />
procedures prior to making adjustments, repairs, and maintenance.<br />
Always wear appropriate protective equipment like safety glasses, safety shoes, hearing<br />
protection and hard hats.<br />
Always keep chemical and flammable material away from electrical or operating equipment.<br />
Always maintain a safe work area that is free from slipping and tripping hazards.<br />
Always be sure appropriate safety devices are used when providing maintenance and repairs to all<br />
equipment.<br />
Never exceed the rated capacity of a machine or tool.<br />
Never modify machinery in any way without prior written approval of the <strong>Besser</strong> Engineering<br />
Department.<br />
Never operate equipment unless proper maintenance has been regularly performed.<br />
Never operate any equipment if unusual or excessive noise or vibration occurs.<br />
Never operate any equipment while any part of the body is in the proximity of potentially hazardous<br />
areas.<br />
Never use any toxic flammable substance as a solvent cleaner.<br />
Never allow the operation or repair of equipment by untrained personnel.<br />
Never climb or stand on equipment when it is operational.<br />
It is important that you review Federal and State Safety and Health Standards on a continual basis. All<br />
shop supervisors, maintenance personnel, machine operators, tool operators, and any other person<br />
involved in the setup, operation, maintenance, repair or adjustment of <strong>Besser</strong>-built equipment should read<br />
and understand this bulletin and Federal and State Safety and Health Standards on which this bulletin is<br />
based.<br />
x 466367F9902US F1 07JE99
Safety Signs<br />
TABLE OF CONTENTS <strong>LSC</strong>-<strong>40C</strong> Machine Maintenance/Operation<br />
SAFETY SIGNS<br />
Sign Description Required<br />
1 All Panels ............................................................................................................1<br />
2 Mixer ...................................................................................................................4<br />
3 Concrete Products Machine................................................................................1<br />
Depalleter............................................................................................................2<br />
4 Mixer ...................................................................................................................2<br />
5 Skiploader ...........................................................................................................4<br />
6 Skiploader/Mixer Platforms .................................................................................8<br />
7 Skiploader/Mixer Platforms .................................................................................8<br />
8 Vertical: Pallet Transport System ........................................................................2<br />
Horizontal: <strong>LSC</strong>-40/<strong>LSC</strong>-100...............................................................................6<br />
Pallet Transport System ......................................................................................4<br />
9 <strong>Besser</strong>-Matic .......................................................................................................4<br />
10 <strong>Besser</strong>-Matic .......................................................................................................4<br />
11 Skiploader ...........................................................................................................4<br />
12 All Panels ............................................................................................................1<br />
13 Overhead Block Transfer.....................................................................................4<br />
14 Concrete Products Machine................................................................................1<br />
15 Concrete Products Machine................................................................................2<br />
16 Conveyors .........................................................................................................12<br />
17 Cuber ..................................................................................................................8<br />
18 Cuber ..................................................................................................................3<br />
Block Turnovers...................................................................................................2<br />
Slat Conveyors....................................................................................................2<br />
466367F9902US F1 07JE99<br />
To order safety decals, contact your local <strong>Besser</strong> representative<br />
or the <strong>Besser</strong> Central Order Department.<br />
Thank you!<br />
xi
Safety Signs<br />
<strong>LSC</strong>-<strong>40C</strong> Machine Maintenance/Operation TABLE OF CONTENTS<br />
DANGER ANGER<br />
PELIGR PELIGRO<br />
High voltage.<br />
Follow lockout<br />
procedure before<br />
servicing panel<br />
or machine.<br />
Large 113236F0409<br />
High Voltage<br />
Width 4 1/2 inch<br />
Height 9 5/8 inch<br />
Small 113236F0204<br />
High Voltage<br />
Width 2 inch<br />
Height 4 1/8 inch<br />
DANGER ANGER<br />
PELIGR PELIGRO<br />
Mixer blade hazard.<br />
Close front panel<br />
and stay clear<br />
during operation.<br />
Follow lockout<br />
procedure before<br />
servicing.<br />
1 2 3<br />
DANGER ANGER<br />
PELIGR PELIGRO<br />
Nip points.<br />
Stay clear. Follow<br />
lockout procedure<br />
before servicing.<br />
114692F1006<br />
Nip Points<br />
Width 5 3/4 inch<br />
Height 9 1/2 inch<br />
113237F0410<br />
Mixer Blade Hazard<br />
Width 4 1/2 inch<br />
Height 10 1/4 inch<br />
DANGER ANGER<br />
PELIGR PELIGRO<br />
Crush hazard.<br />
Stay clear.<br />
Follow lockout<br />
procedure before<br />
servicing.<br />
4 5 6<br />
114688F0906<br />
Crush Hazard<br />
Width 6 1/4 inch<br />
Height 9 1/2 inch<br />
DANGER ANGER<br />
PELIGR PELIGRO<br />
Crush hazards.<br />
Stay clear of<br />
machine.<br />
Follow lockout<br />
procedure<br />
before servicing.<br />
113240F0307<br />
Crush Hazard<br />
Width 3 1/2 inch<br />
Height 7 1/2 inch<br />
WARNING ARNING<br />
MUCHO<br />
CUID CUIDADO ADO<br />
Fall hazard.<br />
Stay clear.<br />
114689F0804<br />
Fall Hazard<br />
Width 4 1/2 inch<br />
Height 7 3/4 inch<br />
xii 466367F9902US F1 07JE99
WARNING ARNING<br />
MUCHO<br />
CUID CUIDADO ADO<br />
Falling objects.<br />
Hard hat area.<br />
114690F0805<br />
Falling Objects<br />
Width 4 3/4 inch<br />
Height 8 inch<br />
466367F9902US F1 07JE99<br />
Safety Signs<br />
TABLE OF CONTENTS <strong>LSC</strong>-<strong>40C</strong> Machine Maintenance/Operation<br />
DANGER ANGER<br />
PELIGR PELIGRO<br />
Crush hazard.<br />
Stay clear of car<br />
and crawler.<br />
Follow lockout<br />
procedure before<br />
servicing.<br />
7 8<br />
9<br />
DANGER ANGER<br />
PELIGR PELIGRO<br />
Falling objects.<br />
Stay clear of<br />
transfer area.<br />
Follow lockout<br />
procedure before<br />
servicing.<br />
Vertical: 113245F0704<br />
Crush Hazard<br />
Width 4 1/8 inch<br />
Height 7 inch<br />
Horizontal: 113245F1005<br />
Crush Hazard<br />
Width 10 inch<br />
Height 5 3/4 inch<br />
DANGER ANGER<br />
PELIGR PELIGRO<br />
Shear hazard.<br />
Fall hazard.<br />
Stay clear. Follow<br />
lockout procedure<br />
before servicing.<br />
10 11<br />
12<br />
113243F0410<br />
Falling Objects<br />
Width 4 1/2 inch<br />
Height 10 inch<br />
114691F1006<br />
Shear and Fall Hazards<br />
Width 5 3/4 inch<br />
Height 9 3/4 inch<br />
DANGER ANGER<br />
PELIGR PELIGRO<br />
Crush hazard.<br />
Stay clear of<br />
transfer area.<br />
Follow lockout<br />
procedure before<br />
servicing.<br />
113242F0409<br />
Crush Hazard<br />
Width 4 1/2 inch<br />
Height 9 5/8 inch<br />
SUGGESTED<br />
LOCKOUT<br />
PROCEDURE<br />
1. Announce lockout<br />
to other employees.<br />
2. Turn power off at<br />
main panel.<br />
3. Lockout power in<br />
off position.<br />
4. Put key in pocket.<br />
5. Clear machine of<br />
all personnel.<br />
6. Test lockout by<br />
hitting run button.<br />
7. Block, chain or<br />
release stored<br />
energy sources.<br />
8. Clear machine of<br />
personnel before<br />
restarting machine.<br />
113249F0410<br />
Safety Instructions Decal –<br />
Suggested Lock-out Procedure<br />
Width 4 inch<br />
Height 10 inch<br />
xiii
Safety Signs<br />
<strong>LSC</strong>-<strong>40C</strong> Machine Maintenance/Operation TABLE OF CONTENTS<br />
13<br />
15<br />
17<br />
113238F1005<br />
Crush Hazard<br />
Width 10 inch<br />
Height 5 3/4 inch<br />
DANGER ANGER<br />
PELIGR PELIGRO<br />
Crush hazard.<br />
Stay clear of<br />
machine. Follow<br />
lockout procedure<br />
before servicing.<br />
DANGER ANGER<br />
PELIGR PELIGRO<br />
Crush and pinch<br />
points. Stay clear<br />
of machine. Follow<br />
lockout procedure<br />
before servicing.<br />
113241F0605<br />
Crush and Pinch Points<br />
Width 6 5/8 inch<br />
Height 4 inch<br />
113427F1006<br />
Crush Hazard<br />
Width 10 inch<br />
Height 6 inch<br />
DANGER ANGER<br />
PELIGR PELIGRO<br />
Crush hazard.<br />
Follow lockout<br />
procedure and<br />
secure elevator<br />
before servicing.<br />
113239F0604<br />
Crush Hazard<br />
Width 6 5/8 inch<br />
Height 4 inch<br />
113246F0704<br />
Nip Hazard<br />
Width 7 inch<br />
Height 4 1/2 inch<br />
DANGER ANGER<br />
PELIGR PELIGRO<br />
Crush hazards.<br />
Stay clear of<br />
machine. Follow<br />
lockout procedure<br />
before servicing.<br />
DANGER ANGER<br />
MUCHO<br />
CUID CUIDADO ADO<br />
Nip hazard.<br />
stay clear of<br />
conveyor. Follow<br />
lockout procedure<br />
before servicing.<br />
113250F1006<br />
Crush and Pinch Hazard<br />
Width 10 inch<br />
Height 6 inch<br />
DANGER ANGER<br />
PELIGR PELIGRO<br />
Crush and pinchpoints.<br />
Stay off<br />
conveyor. Follow<br />
lockout procedure<br />
before servicing.<br />
xiv 466367F9902US F1 07JE99<br />
14<br />
16<br />
18
The <strong>LSC</strong>-<strong>40C</strong> is an automated concrete<br />
product transport system. The <strong>LSC</strong>-<strong>40C</strong> transfers<br />
racks of green concrete product back and forth<br />
from the Loader/Unloader area to kilns for curing.<br />
The <strong>LSC</strong>-<strong>40C</strong> consists of a rail network, two<br />
mobile vehicles, and a programmable logic controller<br />
system.<br />
1.1 MECHANICAL COMPONENT<br />
OVERVIEW<br />
Figures 1.1 through 1.5 illustrate the basic<br />
mechanical components of the <strong>LSC</strong>-<strong>40C</strong> system.<br />
1.1.1 Racks<br />
The racks carry the concrete product as they<br />
move from one area to another.<br />
FRONT<br />
Figure 1.1 Car Components<br />
Sensor<br />
466367F9902US F1 07JE99<br />
Safety<br />
Bar<br />
Raillock<br />
SECTION 1<br />
MAINTENANCE/OPERATION <strong>LSC</strong>-<strong>40C</strong> Machine Maintenance/Operation<br />
SECTION 1<br />
INTRODUCTION<br />
Limit<br />
Switch<br />
Figure 1.2 Car<br />
RIGHT<br />
LEFT<br />
Trailer<br />
Control<br />
Panel<br />
Power<br />
Unit<br />
REAR<br />
Panel<br />
1-1
SECTION 1<br />
<strong>LSC</strong>-<strong>40C</strong> Machine Maintenance/Operation MAINTENANCE/OPERATION<br />
Safety<br />
Bar<br />
Limit<br />
Switch<br />
LEFT<br />
FORWARD<br />
REVERSE<br />
Figure 1.3 Crawler Components<br />
Crawler<br />
on Car<br />
Figure 1.5 Mechanical Components<br />
Sensor<br />
Control<br />
Panel<br />
RIGHT<br />
Rack<br />
Figure 1.4 Crawler<br />
1-2 466367F9902US F1 07JE99<br />
Kilns<br />
Car<br />
Rails<br />
Side<br />
Shifter<br />
Stabilizers<br />
Crawler<br />
Rails<br />
Actuators<br />
Accumulators<br />
Rack<br />
Conveyor
1.1.2 Rail System<br />
There are two different rail paths and gauges.<br />
Wide gauge rails carry the car. Narrow gauge<br />
rails at right angles to the car rails carry the<br />
crawler to the side shifter, the rack conveyor and<br />
into the kilns.<br />
1.1.3 Crawler<br />
The crawler lifts and transports racks between<br />
the car and the:<br />
• Side shifter<br />
• Rack conveyor<br />
• Kilns<br />
1.1.4 Car<br />
The car carries the crawler between the<br />
Loader/Unloader area and the kiln area.<br />
1.1.5 Side Shifter<br />
The side shifter loads, shifts and stores racks<br />
until removed by the crawler.<br />
1.1.6 Rack Conveyor<br />
The rack conveyor receives cured racks from<br />
the crawler and transports them to the Unloader.<br />
1.2 ELECTRONIC COMPONENT<br />
OVERVIEW<br />
A range of electronic components monitor and<br />
control <strong>LSC</strong>-<strong>40C</strong> operation. This section provides<br />
only a brief overview of three components that<br />
are fundamental to the mechanical operation of<br />
the system:<br />
• Logic controller/graphic control station<br />
• Sensors<br />
• Actuators<br />
Sections 3 and 4 provide details of electronic<br />
components including sensor function.<br />
466367F9902US F1 07JE99<br />
SECTION 1<br />
MAINTENANCE/OPERATION <strong>LSC</strong>-<strong>40C</strong> Machine Maintenance/Operation<br />
1.2.1 Small Logic Controller/Graphic<br />
Control Station<br />
Both car and crawler have Small Logic<br />
Controllers (SLC-500) which control the sequence<br />
of operations of each vehicle. The car’s graphic<br />
control station functions as a man-machine interface.<br />
The crawler has two control stations located<br />
at each end of the crawler. The control stations<br />
use indicator lamps to show operational status<br />
and faults.<br />
1.2.2 Sensors<br />
Sensors located on the car and crawler monitor<br />
and control all mechanical operations. Sensors<br />
are also essential to the <strong>LSC</strong>-<strong>40C</strong> safety protection<br />
system. There are three types of sensors:<br />
• Limit switches (LS) are spring-loaded<br />
electromechanical devices that monitor the<br />
position of:<br />
– Safety bars on both the car and crawler<br />
– Car raillocks<br />
• Proximity sensors (PRS) on both the car<br />
and the crawler monitor a magnetic field to<br />
signal various operating conditions. For<br />
example, upward-sensing PRSs on the<br />
crawler detect the presence of a rack as<br />
part of the control process for crawler movement.<br />
Downward-sensing PRSs on the car<br />
detect floor-level actuators as part of the<br />
control process for car movement.<br />
• A photo-electric sensor (PER) provides a<br />
light and reflection process as a means by<br />
which crawler movements are controlled<br />
when traveling on the rails leading to the<br />
side shifter.<br />
1.2.3 Actuators<br />
Actuators are floor-level steel plates installed<br />
on the centerline of every set of crawler rails.<br />
Downward-sensing proximity sensors on the car<br />
use the actuators to help control car movement.<br />
1-3
SECTION 1<br />
<strong>LSC</strong>-<strong>40C</strong> Machine Maintenance/Operation MAINTENANCE/OPERATION<br />
1.3 START-UP PROCEDURE<br />
Refer to Figures 1.6 and 1.7.<br />
1. Ensure all switches are off.<br />
2. Turn the power on. The indicator light will<br />
illuminate.<br />
3. Pull out the emergency stop. Press the<br />
energize MCR push button.<br />
4. Turn the pump on.<br />
5. Turn hand-off-auto switch to hand.<br />
6. Manually position the car in front of any<br />
station.<br />
7. Ensure that the screen has been properly<br />
programmed.<br />
8. Turn the hand-off-auto switch to auto.<br />
Press button to<br />
energize MCR.<br />
Position left to place car<br />
in manual mode; position<br />
right to place car in<br />
automatic mode; position<br />
to center when car is not<br />
operating.<br />
Press left to retract<br />
the left raillock.<br />
Press right to extend<br />
the left raillock.<br />
Press up to move<br />
the car forward.<br />
Press down to move<br />
the car in reverse.<br />
Figure 1.6 Car Manual Control Panel<br />
Indicates panel<br />
power is on.<br />
HAND OFF AUTO<br />
U<br />
N<br />
L<br />
O<br />
C<br />
K<br />
ENERGIZE<br />
MCR<br />
POWER ON<br />
PUMP START<br />
9. Press auto start push button.<br />
1.4 SHUT-DOWN PROCEDURE<br />
Refer to Figures 1.6 and 1.7.<br />
1. Ensure that the machine has stopped at a<br />
chosen location.<br />
2. Turn hand-off-auto switch to off.<br />
3. Depress and lock emergency stop switch.<br />
4. If maintaining warm oil is desired, turn the<br />
oil heater switch on.<br />
5. If warm oil is not required, turn power off.<br />
HEATER<br />
OFF ON<br />
LEFT RAILLOCKS CAR FORWARD RIGHT RAILLOCKS<br />
L<br />
O<br />
C<br />
K<br />
AUTO START<br />
CAR REVERSE<br />
MANUAL<br />
ACCELERATOR<br />
Press to start hydraulic pump.<br />
CAR/CRAWLER<br />
EMERGENCY STOP<br />
Press to accelerate the car's<br />
forward or reverse motion.<br />
Turn switch to ON position<br />
to warm hydraulic fluid.<br />
While operating, the heater<br />
remains on to maintain a<br />
constant 100° F [38° C].<br />
Press to stop all system<br />
operations. The<br />
Emergency Stop can be<br />
locked down to prevent<br />
inadvertent operation.<br />
Press to begin<br />
automatic operation<br />
Press left to retract<br />
the right raillock.<br />
Press right to extend<br />
the right raillock.<br />
1-4 466367F9902US F1 07JE99<br />
U<br />
N<br />
L<br />
O<br />
C<br />
K<br />
WARNING:<br />
The horn blows for 2 seconds prior to<br />
the car moving. In case of emergency<br />
press the emergency stop.<br />
L<br />
O<br />
C<br />
K
Pressing button will<br />
step indicator light<br />
to next station.<br />
Signal flashes when a<br />
fault is detected.<br />
466367F9902US F1 07JE99<br />
Indicates status when no faults are<br />
detected. Fault indicators blink<br />
individually or in combination to identify<br />
fault conditions. Refer to the Crawler<br />
Fault Diagnostic Screen section<br />
for more information.<br />
Turn left to operate the<br />
crawler manually.<br />
Turn right to turn<br />
operation over to the<br />
computer. Turn the<br />
handle off when the<br />
<strong>LSC</strong>-40 is not operating.<br />
Turn left to lower<br />
the crawler elevator.<br />
Turn right to raise<br />
the crawler elevator.<br />
Switch spring loaded<br />
to center.<br />
SECTION 1<br />
MAINTENANCE/OPERATION <strong>LSC</strong>-<strong>40C</strong> Machine Maintenance/Operation<br />
LOADER<br />
STATION/FAULT<br />
R R R<br />
1<br />
2 3 4<br />
R R<br />
R G R R<br />
FAULT<br />
HAND OFF AUTO<br />
ELEVATOR<br />
DOWN<br />
OFF<br />
UP<br />
Figure 1.7 Crawler Manual Control Station<br />
KILN STORAGE UNLOADER<br />
OIL HEATER<br />
STATION INCREMENT<br />
AUTO START<br />
PUMP START<br />
Press to start hydraulic pump.<br />
CRAWLER<br />
CENTERED<br />
PENDANT STATION<br />
EXTENDED<br />
CRAWLER EMERGENCY<br />
STOP<br />
PULL TO PUSH TO<br />
START<br />
STOP<br />
HEATER<br />
OFF<br />
Signal lights<br />
when the heater<br />
is functioning.<br />
ON<br />
In manual mode only,<br />
signal lights when crawler<br />
"look-down" proximity relay<br />
sensors sense car actuators.<br />
Signal lights when<br />
the pendant station<br />
is removed from its<br />
housing.<br />
Press to stop crawler<br />
operations. The<br />
Emergency Stop can be<br />
locked down to prevent<br />
inadvertent operation.<br />
Press to begin<br />
automatic operation.<br />
Turn on to warm hydraulic fluid.<br />
Under normal operations, the<br />
heater remains on to maintain<br />
a constant 100°F [38°C]. The<br />
heater switch is only used on one<br />
of the two crawler control stations.<br />
1-5
SECTION 1<br />
<strong>LSC</strong>-<strong>40C</strong> Machine Maintenance/Operation MAINTENANCE/OPERATION<br />
1-6 466367F9902US F1 07JE99
This section is an overview of <strong>LSC</strong>-<strong>40C</strong><br />
operation with a focus on mechanical systems<br />
and movement of components. Steps in a typical<br />
operating cycle of the Unloader side shifter are:<br />
• 2.1 Transport Cured Rack to Side Shifter<br />
• 2.2 Retrieve Green Rack from Rack<br />
Conveyor<br />
• 2.3 Transport Green Rack to Kiln<br />
• 2.4 Retrieve Cured Rack from Storage<br />
Steps in a typical operating cycle of the<br />
Loader side shifter are:<br />
• 2.5 Transport Cured Rack to Rack Conveyor<br />
• 2.6 Retrieve Green Rack from Side Shifter<br />
• 2.7 Transport Green Rack to Kiln<br />
• 2.8 Retrieve Cured Rack from Storage<br />
2.1 TRANSPORT CURED RACK TO SIDE<br />
SHIFTER<br />
Figure 2.1 shows the sequence to transport<br />
cured rack to side shifter.<br />
1. The car stops and locks at the rails leading<br />
to the side shifter.<br />
2. The raillocks extend and the crawler immediately<br />
moves off the car at fast speed.<br />
3. If PER-101 at the wait station is on, the<br />
crawler proceeds towards the side shifter<br />
without stopping.<br />
Side<br />
Shifter<br />
Figure 2.1 Transport Cured Rack to Side Shifter<br />
466367F9902US F1 07JE99<br />
SECTION 2<br />
MAINTENANCE/OPERATION <strong>LSC</strong>-<strong>40C</strong> Machine Maintenance/Operation<br />
SECTION 2<br />
MECHANICAL OPERATION<br />
Rack<br />
Conveyor<br />
Car stops. Loaded crawler<br />
moves towards side shifter.<br />
Side<br />
Shifter<br />
Side<br />
Shifter<br />
Loaded crawler moves to<br />
side shifter and lowers<br />
to unload cured rack.<br />
4. If PER-101 at the wait station is off,<br />
PER-17 on the crawler comes in contact<br />
with the actuator signaling the crawler to<br />
decelerate. The crawler stops when its trailing<br />
sensor comes in contact with the actuator<br />
near PER-101. When the <strong>Besser</strong>-Matic<br />
signals through PER-102, the crawler<br />
moves at fast speed onto the side shifter.<br />
5. The leading sensor on the crawler comes<br />
in contact with the actuator on the side<br />
shifter signaling the crawler to decelerate.<br />
6. The crawler stops when its trailing sensor<br />
comes in contact with the actuator on the<br />
side shifter.<br />
7. The stopped crawler is centered on the<br />
side shifter. The crawler elevator lowers to<br />
unload the cured rack.<br />
8. The unloaded crawler moves at fast speed<br />
towards the car.<br />
9. The crawler raillock sensors sense the<br />
car raillock actuators. When the leading<br />
sensor on the crawler comes in contact<br />
with the first car actuator, the crawler<br />
decelerates.<br />
10. The crawler stops centered on car when<br />
the leading and trailing actuators come in<br />
contact with the car actuators.<br />
Rack<br />
Conveyor<br />
Side<br />
Shifter<br />
Side<br />
Shifter<br />
Rack<br />
Conveyor<br />
Crawler returns to car.<br />
2-1
SECTION 2<br />
<strong>LSC</strong>-<strong>40C</strong> Machine Maintenance/Operation MAINTENANCE/OPERATION<br />
2.2 RETRIEVE GREEN RACK FROM RACK<br />
CONVEYOR<br />
Figure 2.2 shows the sequence to retrieve a<br />
green rack.<br />
1. The car stops and locks at the rails leading<br />
to the rack conveyor.<br />
2. The raillocks extend and the crawler<br />
immediately moves off the car at fast<br />
speed.<br />
3. The leading sensor on the crawler<br />
comes in contact with the actuator on the<br />
rack conveyor signaling the crawler<br />
to decelerate.<br />
4. The crawler stops when its trailing sensor<br />
comes in contact with the actuator on the<br />
rack conveyor.<br />
PER-102<br />
Actuator<br />
PER-101<br />
Rack<br />
Conveyor<br />
Car stops.<br />
Crawler moves towards<br />
rack conveyor.<br />
Figure 2.2 Retrieving a Green Rack<br />
Side<br />
Shifter<br />
Side Side<br />
Shifter Shifter<br />
PER-100 signals crawler<br />
to load. Crawler elevates<br />
green rack.<br />
5. The crawler waits for a signal from the<br />
<strong>Besser</strong>-Matic through PER-100 to raise<br />
the crawler and load the green rack onto<br />
the crawler.<br />
6. The loaded crawler moves at medium<br />
speed towards the car.<br />
7. The crawler raillock sensors sense the<br />
car raillock actuators. When the leading<br />
sensor on the crawler comes in contact<br />
with the first car actuator, the crawler<br />
decelerates.<br />
8. The crawler stops centered on car when<br />
the leading and trailing actuators come in<br />
contact with the car actuators.<br />
Rack<br />
Conveyor<br />
Side Side<br />
Shifter Shifter<br />
Rack<br />
Conveyor<br />
Crawler with green rack<br />
centers on car.<br />
2-2 466367F9902US F1 07JE99
2.3 TRANSPORT GREEN RACK TO KILN<br />
Figure 2.3 shows the sequence for placing a<br />
rack of green product in the kiln for curing.<br />
1. The car moves along the car rails at fast<br />
speed. The car slows when the selected<br />
kiln actuator triggers the first downwardsensing<br />
PRS and stops when the same<br />
actuator triggers the center downwardsensing<br />
PRS.<br />
2. The raillocks extend.<br />
3. The loaded crawler moves off the car onto<br />
the kiln rails at slow speed.<br />
Car with loaded crawler<br />
moves to kiln rails.<br />
Figure 2.3 Transporting a Green Rack<br />
466367F9902US F1 07JE99<br />
SECTION 2<br />
MAINTENANCE/OPERATION <strong>LSC</strong>-<strong>40C</strong> Machine Maintenance/Operation<br />
Crawler moves<br />
into kiln.<br />
4. The crawler stops when the “look-up”<br />
PRS pair is triggered by the edge of the<br />
first rack. If there is no rack inside the kiln,<br />
the end-of-kiln safety stop simulates the<br />
presence of a rack and causes the<br />
crawler to stop.<br />
5. The crawler lowers the green rack onto<br />
curbs along the kiln rails.<br />
6. The empty crawler starts in reverse direction<br />
at fast speed. The crawler slows when<br />
sensors are triggered by the car raillock<br />
actuators and stops when the crawler<br />
centers on the car.<br />
7. The raillocks retract.<br />
Crawler deposits green<br />
rack and reverses.<br />
Empty crawler<br />
returns to car.<br />
2-3
SECTION 2<br />
<strong>LSC</strong>-<strong>40C</strong> Machine Maintenance/Operation MAINTENANCE/OPERATION<br />
2.4 RETRIEVE CURED RACK FROM<br />
STORAGE<br />
Figure 2.4 shows the sequence to retrieve a<br />
cured rack from a kiln.<br />
1. The car moves along the car rails at fast<br />
speed. The car slows when the selected<br />
kiln actuator triggers the first downwardsensing<br />
PRS and stops when the same<br />
actuator triggers the center downwardsensing<br />
PRS.<br />
2. The raillocks extend.<br />
3. The empty crawler moves off the car onto<br />
the kiln rails at fast speed.<br />
Car with empty crawler<br />
moves to kiln.<br />
Figure 2.4 Retrieving a Cured Rack<br />
Crawler moves<br />
into kiln.<br />
4. The crawler slows when the rack triggers<br />
the leading “look-up” PRS pair on top of<br />
the crawler and stops when the rack triggers<br />
the trailing “look-up” PRS pair.<br />
5. The crawler elevator lifts the cured rack<br />
from the kiln curbs.<br />
6. The loaded crawler starts in reverse direction<br />
at fast speed. The crawler slows when<br />
sensors are triggered by the car raillock<br />
actuators and stops when the crawler<br />
centers on the car.<br />
7. The raillocks retract.<br />
Crawler elevates cured<br />
rack and returns to car.<br />
Loaded crawler<br />
centers on car.<br />
2-4 466367F9902US F1 07JE99
2.5 TRANSPORT CURED RACK TO RACK<br />
CONVEYOR<br />
Figure 2.5 shows the sequence to transport a<br />
cured rack to the rack conveyor.<br />
1. The car stops and locks at the rails leading<br />
to the rack conveyor.<br />
2. The crawler waits for a signal from<br />
PER-100 and then proceeds forward at<br />
fast speed.<br />
3. The leading sensor on the crawler<br />
comes in contact with the actuator on<br />
the rack conveyor signaling the crawler<br />
to decelerate.<br />
4. The crawler stops when its trailing sensor<br />
comes in contact with the actuator on the<br />
side shifter.<br />
PER-102<br />
Actuator<br />
PER-101<br />
466367F9902US F1 07JE99<br />
Side<br />
Shifter<br />
SECTION 2<br />
MAINTENANCE/OPERATION <strong>LSC</strong>-40 Machine Maintenance/Operation<br />
Rack<br />
Conveyor<br />
Car stops. Loaded crawler<br />
moves to rack conveyor.<br />
Figure 2.5 Transporting a Cured Rack<br />
Side<br />
Shifter<br />
Loaded crawler moves<br />
into rack conveyor.<br />
5. The crawler lowers to unload the cured<br />
rack.<br />
6. The unloaded crawler moves at fast speed<br />
towards the car.<br />
7. The crawler raillock sensors sense the<br />
car raillock actuators. When the leading<br />
sensor on the crawler comes in contact<br />
with the first car actuator, the crawler<br />
decelerates.<br />
8. The crawler stops centered on car when<br />
the leading and trailing actuators come in<br />
contact with the car actuators.<br />
Rack<br />
Conveyor<br />
Rack<br />
Conveyor<br />
Side<br />
Shifter<br />
Crawler lowers cured rack<br />
and returns to car.<br />
2-5
SECTION 2<br />
<strong>LSC</strong>-40 Machine Maintenance/Operation MAINTENANCE/OPERATION<br />
2.6 RETRIEVE GREEN RACK FROM SIDE<br />
SHIFTER<br />
Figure 2.6 shows the sequence to retrieve<br />
green rack from the side shifter.<br />
1. The car stops and locks at the rails leading<br />
to the side shifter.<br />
2. The raillocks extend and the crawler<br />
immediately moves off the car at fast<br />
speed.<br />
3. If PER-101 at the wait station is on, the<br />
crawler proceeds towards the side shifter<br />
without stopping.<br />
4. If PER-101 at the wait station is off,<br />
PER-17 on the crawler comes in contact<br />
with the actuator signaling the crawler to<br />
decelerate. The crawler stops when its<br />
trailing sensor comes in contact with the<br />
actuator near PER-101. When the <strong>Besser</strong>-<br />
Matic signals through PER-102, the<br />
crawler moves at fast speed onto the side<br />
shifter.<br />
Side<br />
Shifter<br />
Rack<br />
Conveyor<br />
Car stops. Crawler moves<br />
towards side shifter.<br />
Side<br />
Shifter<br />
Figure 2.6 Retrieving Green Rack from Side Shifter<br />
Side<br />
Shifter<br />
Crawler moves onto<br />
side shifter and raises<br />
to load green rack.<br />
5. The leading sensor on the crawler comes<br />
in contact with the actuator on the side<br />
shifter signaling the crawler to decelerate.<br />
6. The crawler stops when its trailing sensor<br />
comes in contact with the actuator on the<br />
side shifter.<br />
7. The stopped crawler is centered on the<br />
side shifter. The crawler elevator raises to<br />
load the green rack.<br />
8. The loaded crawler moves at medium<br />
speed towards the car.<br />
9. The crawler raillock sensors sense the<br />
car raillock actuators. When the leading<br />
sensor on the crawler comes in contact<br />
with the first car actuator, the crawler<br />
decelerates.<br />
10. The crawler stops centered on car when<br />
the leading and trailing actuators come in<br />
contact with the car actuators.<br />
Rack<br />
Conveyor<br />
Side Side<br />
Shifter Shifter<br />
Rack<br />
Conveyor<br />
Crawler with green rack<br />
centers on car.<br />
2-6 466367F9902US F1 07JE99
2.7 TRANSPORT GREEN RACK TO KILN<br />
Figure 2.7 shows the sequence for placing a<br />
rack of green product in the kiln for curing.<br />
1. The car moves along the car rails at fast<br />
speed. The car slows when the selected<br />
kiln actuator triggers the first downwardsensing<br />
PRS and stops when the same<br />
actuator triggers the center downwardsensing<br />
PRS.<br />
2. The raillocks extend.<br />
3. The loaded crawler moves off the car onto<br />
the kiln rails at slow speed.<br />
Car with loaded crawler<br />
moves to kiln rails.<br />
Figure 2.7 Transporting a Green Rack<br />
466367F9902US F1 07JE99<br />
SECTION 2<br />
MAINTENANCE/OPERATION <strong>LSC</strong>-40 Machine Maintenance/Operation<br />
Crawler moves<br />
into kiln.<br />
4. The crawler stops when the “look-up”<br />
PRS pair is triggered by the edge of the<br />
first rack. If there is no rack inside the kiln,<br />
the end-of-kiln safety stop simulates the<br />
presence of a rack and causes the<br />
crawler to stop.<br />
5. The crawler lowers the green rack onto<br />
curbs along the kiln rails.<br />
6. The empty crawler starts in reverse direction<br />
at fast speed. The crawler slows when<br />
sensors are triggered by the car raillock<br />
actuators and stops when the crawler<br />
centers on the car.<br />
7. The raillocks retract.<br />
Crawler deposits green<br />
rack and reverses.<br />
Empty crawler<br />
returns to car.<br />
2-7
SECTION 2<br />
<strong>LSC</strong>-40 Machine Maintenance/Operation MAINTENANCE/OPERATION<br />
2.8 RETRIEVE CURED RACK FROM<br />
STORAGE<br />
Figure 2.8 shows the sequence to retrieve a<br />
cured rack from a kiln.<br />
1. The car moves along the car rails at fast<br />
speed. The car slows when the selected<br />
kiln actuator triggers the first downwardsensing<br />
PRS and stops when the same<br />
actuator triggers the center downwardsensing<br />
PRS.<br />
2. The raillocks extend.<br />
3. The empty crawler moves off the car onto<br />
the kiln rails at fast speed.<br />
Car with empty crawler<br />
moves to kiln.<br />
Figure 2.8 Retrieving a Cured Rack<br />
Crawler moves<br />
into kiln.<br />
4. The crawler slows when the rack triggers<br />
the leading “look-up” PRS pair on top of<br />
the crawler and stops when the rack triggers<br />
the trailing “look-up” PRS pair.<br />
5. The crawler elevator lifts the cured rack<br />
from the kiln curbs.<br />
6. The loaded crawler starts in reverse direction<br />
at fast speed. The crawler slows when<br />
sensors are triggered by the car raillock<br />
actuators and stops when the crawler<br />
centers on the car.<br />
7. The raillocks retract.<br />
Crawler elevates cured<br />
rack and returns to car.<br />
Loaded crawler<br />
centers on car.<br />
2-8 466367F9902US F1 07JE99
Figure 3.1 shows the complete car control<br />
panel with the graphic control screen on top and<br />
the manual controls below. This section discusses<br />
the man/machine interface of the <strong>LSC</strong>-<strong>40C</strong> car<br />
control systems.<br />
F1<br />
466367F9902US F1 07JE99<br />
SEQUENCE:<br />
LOADING KILN:<br />
F1<br />
PROGRAM<br />
CAR<br />
F9<br />
Figure 3.1 Car Control Panel<br />
CAR INFORMATION:<br />
OPERATOR ACTION:<br />
F2<br />
RESET<br />
RACK<br />
ALARM<br />
F2<br />
F10<br />
SECTION 3<br />
MAINTENANCE/OPERATION <strong>LSC</strong>-<strong>40C</strong> Machine Maintenance/Operation<br />
SECTION 3<br />
CAR control systems<br />
F3<br />
RAIL<br />
LOCKS<br />
ENABLED<br />
F3<br />
F11<br />
MAIN MENU<br />
LOCATION:<br />
OPERATOR MESSAGE CENTER<br />
F4<br />
CRAWLER<br />
DIAG.<br />
CENTER<br />
F4<br />
F12<br />
HAND OFF AUTO<br />
U<br />
N<br />
L<br />
O<br />
C<br />
K<br />
ENERGIZE<br />
MCR<br />
RACK COUNT:<br />
UNLOADING KILN:<br />
F5<br />
KILN<br />
MAP<br />
F5<br />
F13<br />
F6<br />
INPUT/<br />
OUTPUT<br />
STATUS<br />
F6<br />
F14<br />
F7 F8<br />
DATA<br />
TABLE<br />
DISPLAY<br />
F7<br />
F15<br />
HEATER<br />
OFF ON<br />
LEFT RAILLOCKS CAR FORWARD RIGHT RAILLOCKS<br />
L<br />
O<br />
C<br />
K<br />
POWER ON<br />
PUMP START<br />
AUTO START<br />
CAR REVERSE<br />
MANUAL<br />
ACCELERATOR<br />
CAR/CRAWLER<br />
EMERGENCY STOP<br />
U<br />
N<br />
L<br />
O<br />
C<br />
K<br />
L<br />
O<br />
C<br />
K<br />
SENSOR<br />
WIRING &<br />
LOCATION<br />
F8<br />
F16<br />
A<br />
D<br />
7<br />
4<br />
1<br />
B<br />
E<br />
8<br />
5<br />
2<br />
C<br />
F<br />
9<br />
6<br />
3<br />
0<br />
. -<br />
3-1
SECTION 3<br />
<strong>LSC</strong>-40A Machine Maintenance/Operation MAINTENANCE/OPERATION<br />
3.1 CAR MANUAL CONTROLS<br />
Figure 3.2 shows the hand operated section<br />
with the function of all manual controls.<br />
Press button to<br />
energize MCR.<br />
Turn left to operate<br />
the car manually.<br />
Turn right to turn operation<br />
over to the computer.<br />
Turn the handle off when the<br />
car is not operating.<br />
Press left to retract<br />
the left raillock.<br />
Press right to extend<br />
the left raillock.<br />
Press up to move<br />
the car forward.<br />
Press down to move<br />
the car in reverse.<br />
Figure 3.2 Car Manual Controls<br />
Indicates panel<br />
power is on.<br />
ENERGIZE<br />
MCR<br />
HAND OFF AUTO<br />
POWER ON<br />
PUMP START<br />
AUTO START<br />
HEATER<br />
OFF ON<br />
LEFT RAILLOCKS CAR FORWARD RIGHT RAILLOCKS<br />
MANUAL CAR<br />
ACCELERATOR<br />
Press to start hydraulic pump.<br />
CAR/CRAWLER/<br />
EMERGENCY STOP<br />
Press to speed up the car's<br />
forward or reverse motion.<br />
Turn switch to on position<br />
to warm hydraulic fluid.<br />
While operating, the heater<br />
remains on to maintain a<br />
constant 100° temperature.<br />
Press to stop all system<br />
operations. The<br />
Emergency Stop can be<br />
locked down to prevent<br />
inadvertent operation.<br />
Press to begin<br />
automatic operation.<br />
Press left to retract<br />
the right raillock.<br />
Press right to extend<br />
the right raillock.<br />
3-2 466367F9902US F1 07JE99
3.2 CAR GRAPHIC CONTROLS SCREEN<br />
A Small Logic Controller (SLC) located on the<br />
car control panel runs the car. Figure 3.3 calls out<br />
each of the elements in the graphic control screen.<br />
• 3.2.1 Main Menu Screen<br />
• 3.2.2 Car Program Screen<br />
• 3.2.3 Crawler Fault Diagnostic Screen<br />
• 3.2.4 Rack Shuttle Program Screen<br />
• 3.2.5 Kiln Sequence Table Screen<br />
Describes the<br />
other screen<br />
choices available<br />
Describes the<br />
programming area<br />
of the screen<br />
F1<br />
F9<br />
466367F9902US F1 07JE99<br />
SEQUENCE:<br />
LOADING KILN:<br />
CAR INFORMATION:<br />
OPERATOR ACTION:<br />
F1<br />
PROGRAM<br />
CAR<br />
F2<br />
RESET<br />
RACK<br />
ALARM<br />
F2<br />
F10<br />
Figure 3.3 Car Graphic Control Screen<br />
SECTION 3<br />
MAINTENANCE/OPERATION <strong>LSC</strong>-40A Machine Maintenance/Operation<br />
F3<br />
RAIL<br />
LOCKS<br />
ENABLED<br />
F3<br />
F11<br />
Provides<br />
information to<br />
program for<br />
operation<br />
MAIN MENU<br />
LOCATION:<br />
OPERATOR MESSAGE CENTER<br />
F4<br />
CRAWLER<br />
DIAG.<br />
CENTER<br />
F4<br />
F12<br />
RACK COUNT:<br />
UNLOADING KILN:<br />
F5<br />
KILN<br />
MAP<br />
F5<br />
F13<br />
F6<br />
INPUT/<br />
OUTPUT<br />
STATUS<br />
F6<br />
F14<br />
Selects the new<br />
screen described above<br />
All computer functions are accessible from the<br />
Main Menu Screen or one of its subscreens. This<br />
section contains an illustration and function table<br />
for each screen used in operation:<br />
• 3.2.6 Kiln Map Screen<br />
• 3.2.7 Electrical Part Numbers Screen<br />
• 3.2.8 Transfer Car Switch Locations<br />
Screen<br />
• 3.2.9 Input/Output Status Screen<br />
F7 F8<br />
DATA<br />
TABLE<br />
DISPLAY<br />
F7<br />
F15<br />
Instructs about<br />
operator or car<br />
actions<br />
SENSOR<br />
WIRING &<br />
LOCATION<br />
F8<br />
F16<br />
A<br />
D<br />
7<br />
4<br />
1<br />
Alphanumeric<br />
Keypad<br />
B<br />
E<br />
8<br />
5<br />
2<br />
C<br />
F<br />
0<br />
. -<br />
Deletes<br />
the choice<br />
selected Arrow<br />
confirms<br />
choice<br />
9<br />
6<br />
3<br />
Use arrows to<br />
move between<br />
choices in the<br />
information area<br />
3-3
SECTION 3<br />
<strong>LSC</strong>-<strong>40C</strong> Machine Maintenance/Operation MAINTENANCE/OPERATION<br />
3.2.1 Main Menu Screen<br />
The Main Menu Screen gives an overview of<br />
programming options. The screen provides information<br />
about the car, such as its location, but this<br />
screen cannot program the car’s action. If any of<br />
the information shown, such as Location,<br />
Sequence, Rack Count, Loading and Unloading<br />
Shows the current<br />
load/unload<br />
sequence number.<br />
Shows the kiln<br />
being loaded with<br />
green racks.<br />
Moves to the car program<br />
screen. Many of the<br />
modifications in the program<br />
car screens only need<br />
programming once unless<br />
there is a power loss or any<br />
manual operation.<br />
Figure 3.4 Main Menu Screen<br />
Reports the car<br />
location and status.<br />
SEQUENCE:<br />
LOADING KILN:<br />
CAR INFORMATION:<br />
OPERATOR ACTION:<br />
F1<br />
PROGRAM<br />
CAR<br />
F2<br />
RESET<br />
RACK<br />
ALARM<br />
Resumes normal car operation<br />
after last rack is placed in kiln.<br />
Use to enable or<br />
disable the rail locks.<br />
F3<br />
RAIL<br />
LOCKS<br />
ENABLED<br />
MAIN MENU<br />
LOCATION:<br />
In case of a crawler<br />
fault, this key defines and<br />
describes each of the<br />
fifteen different fault types.<br />
Kiln, is incorrect, the Main Menu Screen allows<br />
the operator access to other screens to modify<br />
the choices or correct a problem. Press the function<br />
key and the corresponding screen will appear.<br />
Make changes on that screen and then return to<br />
the Main Menu when completed.<br />
Shows the current stage within<br />
the sequence. The initial rack to be<br />
loaded or unloaded in a kiln is rack # 1.<br />
The rack count increases by 1 for each<br />
load/unload cycle.<br />
RACK COUNT:<br />
OPERATOR MESSAGE CENTER<br />
F4<br />
CRAWLER<br />
DIAG.<br />
CENTER<br />
UNLOADING KILN:<br />
Use to display the<br />
system electronics status.<br />
Use to view rack locations<br />
of product in the kilns,<br />
set or change the<br />
product type and number<br />
of full pallets on a rack.<br />
Shows the kiln<br />
from which<br />
cured racks are<br />
being unloaded.<br />
Displays a car<br />
sensor location map.<br />
Used for extensive<br />
diagnostics.<br />
3-4 466367F9902US F1 07JE99<br />
F5<br />
KILN<br />
MAP<br />
F6<br />
INPUT/<br />
OUTPUT<br />
STATUS<br />
F7 F8<br />
DATA<br />
TABLE<br />
DISPLAY<br />
SENSOR<br />
WIRING &<br />
LOCATION
3.2.2 Car Program Screen<br />
The Car Program Screen programs and modifies<br />
the actions of the car. In the Operator<br />
Message Center, “<strong>LSC</strong> car informs” tells the operator<br />
what the car is doing. If a problem occurs,<br />
“operator action” will instruct the appropriate<br />
response needed. Press the corresponding function<br />
key to program. The cursor will appear and<br />
466367F9902US F1 07JE99<br />
SEQUENCE:<br />
LOADING KILN:<br />
F1<br />
MAIN<br />
MENU<br />
Displays<br />
Main Menu.<br />
CAR INFORMATION:<br />
OPERATOR ACTION:<br />
F2<br />
PROGRAM<br />
SEQ.<br />
TABLE<br />
Use to set up the load<br />
and unload sequence for<br />
each kiln. The sequence<br />
needs initial programming<br />
but may never need modification.<br />
Use to change the location<br />
display area at the top of the screen<br />
if the car is in a different location than<br />
the one shown.<br />
Figure 3.5 Car Program Screen<br />
SECTION 3<br />
MAINTENANCE/OPERATION <strong>LSC</strong>-<strong>40C</strong> Machine Maintenance/Operation<br />
CAR PROGRAM SCREEN<br />
F3<br />
STEP<br />
CAR<br />
LOCATION<br />
LOCATION:<br />
F4<br />
MODIFY<br />
SEQ.<br />
the choice may be altered by using the arrows<br />
and keys on the alphanumeric keyboard. After<br />
reaching the desired setting, press enter to register<br />
the change on all screens. If the operator<br />
needs more information prior to altering a selection,<br />
return to the Main Menu and select the corresponding<br />
screen.<br />
RACK COUNT:<br />
OPERATOR MESSAGE CENTER<br />
Use to make changes to<br />
the kiln load/unload<br />
sequence in operation.<br />
UNLOADING KILN:<br />
F5<br />
MODIFY<br />
RACK<br />
COUNT<br />
F6<br />
ELECT<br />
PART<br />
NUMBERS<br />
F7 F8<br />
ENABLE HELP<br />
RACK<br />
SHUTTLE<br />
Lists the five basic steps<br />
necessary for automatic<br />
operation.<br />
Use to enable rack shuttle routine.<br />
Use to view a list of the parts used (with<br />
part numbers and quantities).<br />
Use if the rack count number shown on<br />
screen does not match the rack being<br />
moved. For example, a rack count of three<br />
indicates that the third rack is being loaded<br />
or unloaded. If the number of racks already in<br />
kiln is different, adjust the rack count number<br />
accordingly.<br />
3-5
SECTION 3<br />
<strong>LSC</strong>-<strong>40C</strong> Machine Maintenance/Operation MAINTENANCE/OPERATION<br />
3.2.3 Crawler Fault Diagnostic Screen<br />
The Crawler Fault Diagnostic Screen identifies<br />
the problems indicated on the crawler by the combination<br />
of flashing lamps. The four lamps are<br />
numbered 1, 2, 3 and 4. Once the combination is<br />
identified, find the combination in the list and identify<br />
the correct fault number. Use the function key<br />
to change the crawler fault number indicated. The<br />
RAWLER FAULT DIAGNOSTIC SCREEN<br />
.... FAULT 1<br />
.... FAULT 2<br />
.... FAULT 3<br />
.... FAULT 4<br />
,2..<br />
FAULT 5<br />
ENTER CRAWLER FAULT NUMBER: -<br />
INFORMS:<br />
DEVICE:<br />
BER:<br />
MBERS:<br />
R ACTION:<br />
LAMPS 1,3....<br />
FAULT 6<br />
LAMPS 1,4....<br />
FAULT 7<br />
LAMPS 2,3....<br />
FAULT 8<br />
LAMPS 2,4....<br />
FAULT 9<br />
LAMPS 3,4....<br />
FAULT 10<br />
OPERATOR MESSAGE CENTER<br />
F2 F3 F4 F5 F6 F7 F8<br />
displays<br />
Menu.<br />
Figure 3.6 Crawler Fault Diagnostic Screen<br />
LAMPS 1,2,3....<br />
FAULT 11<br />
LAMPS 1,2,4....<br />
FAULT 12<br />
LAMPS 1,3,4....<br />
FAULT 13<br />
LAMPS 2,3,4....<br />
FAULT 14<br />
LAMPS 1,2,3,4 .. FAULT 15<br />
CRAWLER<br />
SENSOR<br />
LOCATIONS<br />
Displays physical location<br />
of crawler sensors.<br />
CHANGE<br />
FAULT<br />
CODE<br />
Use to view a different fault<br />
code and operator action.<br />
choice may be altered by using the numeric keyboard.<br />
Press F8 to view fault screen. Along with<br />
the fault number, each fault screen displays the<br />
name of the suspected device, the I/O number,<br />
and operator action.<br />
3-6 466367F9902US F1 07JE99
CRAWLER FAULT DIAGNOSTICS<br />
Fault Lamps Crawler Suspect I / O Wire Operator Action<br />
Informs Device No. No.<br />
1 2 3 4<br />
1 • Oil level low fault Float switch I:1/14 2, 16 Add oil until correct level is<br />
obtained.<br />
466367F9902US F1 07JE99<br />
SECTION 3<br />
2 • Kickbar is tripped LS-1, LS-2 I:1/13 6, 5, 2 Check for mechanical binding<br />
or switch adjustment/failure.<br />
3 • Cable reel PRS-14 I:1/3 2,12 Check for mechanical binding<br />
under speed fault or switch adjustment/failure.<br />
4 • Elevator position PRS-3A, PRS-3B I:0/3, I:0/4 2, 24 or Check elevator position or<br />
error 2, 23 switch adjustment/failure.<br />
5 • • Crawler is not off PRS-4, PRS-5 I:0/5, I:0/6, 2 & 35, 34, Check for kiln full of racks or<br />
car, can’t elevate PRS-6, PRS-7 I:0/7, I:1/8 33, 32 switch adjustment/failure.<br />
6 • • Raillock prox stuck PRS-4, PRS-5 I:0/5, I:0/6, 2 & 35, 34, Retract raillocks or check<br />
on fault PRS-6, PRS-7 I:0/7, I:1/8 33, 32 raillocks proxes for fault.<br />
7 • • Only one raillock PRS-4, PRS-5 I:0/5, I:0/6, 2 & 35, 34 Check switch adjustment or<br />
was detected PRS-6, PRS-7 I:0/7, I:1/8 33, 32 switch failure.<br />
8 • • Elevator up fault PRS-3B, 11CB I:0/4, 0:2/0 2 & 23 or Check for mechanical binding or<br />
& elevator up 57 & 7 switch adjustment/failure.<br />
solenoid<br />
9 • • Elevator down fault PRS-3A, 12CB I:0/3, 0:2/1 2 & 24 or Check for mechanical binding or<br />
or elevator down 46 & 7 switch adjustment/failure.<br />
solenoid<br />
10 • • Decel & stop look- PRS-8, PRS-9 I:0/9, I:0/10, 2 & 27 Check for switch failure.<br />
down prox stuck PRS-10, PRS-11 I:0/11, I:1/0 28, 25, 26<br />
on fault<br />
11 • • • Look up prox switch PRS-15 thru Consult wiring Consult wiring Check each prox switch for<br />
stuck on fault PRS-23 diagram diagram failure.<br />
12 • • • Forward lookup PRS-20 thru I:1/8, I:1/9 2 & 42, 44 Check each prox for proper<br />
prox fault PRS-23 I:1/10, I:1/11 30, 31 operation.<br />
13 • • • Reverse lookup PRS-15, PRS-16 I:1/4, I:1/5, 2 & 37, 39, Check each prox switch for<br />
14 • • • Reserved for future<br />
prox fault PRS-18, PRS-19 I:1/6, I:1/7 15, 17 proper operation.<br />
diagnostics<br />
15 • • • • Reserved for future<br />
diagnostics<br />
Table 3.1 Crawler Fault Diagnostics<br />
MAINTENANCE/OPERATION <strong>LSC</strong>-<strong>40C</strong> Machine Maintenance/Operation<br />
3-7
SECTION 3<br />
<strong>LSC</strong>-<strong>40C</strong> Machine Maintenance/Operation MAINTENANCE/OPERATION<br />
3.2.4 Rack Shuttle Main Menu Screen<br />
The Rack Shuttle Main Menu Screen gives an<br />
overview of programming options. The screen provides<br />
information about the car, such as its location,<br />
but this screen cannot program the car’s<br />
action. If any of the information shown, such as<br />
Location, Sequence, Rack Count, Loading and<br />
Unloading Kiln, is incorrect, the Rack Shuttle Main<br />
Shows the current<br />
load/unload<br />
sequence number.<br />
Shows the kiln<br />
being loaded with<br />
green racks.<br />
Reports the car<br />
location and status.<br />
SEQUENCE:<br />
LOADING KILN:<br />
F1<br />
PROGRAM<br />
CAR<br />
Moves to the car program<br />
screen. Many of the<br />
modifications in the program<br />
car screens only need<br />
programming once unless<br />
there is a power loss or any<br />
manual operation.<br />
CAR INFORMATION:<br />
OPERATOR ACTION:<br />
F2<br />
RESET<br />
RACK<br />
ALARM<br />
Resumes normal car operation<br />
after last rack is placed in kiln.<br />
Use to enable or<br />
disable the rail locks.<br />
Figure 3.7 Rack Shuttle Main Menu Screen<br />
RACK SHUTTLE MAIN MENU<br />
F3<br />
RAIL<br />
LOCKS<br />
ENABLED<br />
LOCATION:<br />
F4<br />
CRAWLER<br />
DIAG.<br />
CENTER<br />
Menu Screen allows the operator access to other<br />
screens to modify the choices or correct a problem.<br />
Press the function key and the corresponding<br />
screen will appear. Make changes on that screen<br />
and then return to the Rack Shuttle Main Menu<br />
when completed.<br />
RACK COUNT:<br />
OPERATOR MESSAGE CENTER<br />
UNLOADING KILN:<br />
3-8 466367F9902US F1 07JE99<br />
F5<br />
KILN<br />
MAP<br />
In case of a crawler<br />
fault, this key defines and<br />
describes each of the<br />
fifteen different fault types.<br />
Shows the current stage within<br />
the sequence. The initial rack to be<br />
loaded or unloaded in a kiln is rack # 1.<br />
The rack count increases by 1 for each<br />
load/unload cycle.<br />
F6<br />
INPUT/<br />
OUTPUT<br />
STATUS<br />
F7 F8<br />
DATA<br />
TABLE<br />
DISPLAY<br />
SENSOR<br />
WIRING &<br />
LOCATION<br />
Use to display the<br />
system electronics status.<br />
Use to view rack locations<br />
of product in the kilns,<br />
set or change the<br />
product type and number<br />
of full pallets on a rack.<br />
Shows the kiln<br />
from which<br />
cured racks are<br />
being unloaded.<br />
Displays a car<br />
sensor location map.<br />
Used for extensive<br />
diagnostics.
3.2.5 Rack Shuttle Program Screen<br />
The Rack Shuttle Program Screen programs<br />
and modifies the movement of racks between<br />
kilns. In the Operator Message Center, the “<strong>LSC</strong><br />
car informs” tells the operator what the car is<br />
doing. If a problem occurs, “operator action” will<br />
instruct the appropriate response needed. Press<br />
the corresponding function key to program. The<br />
cursor will appear and the choice may be altered<br />
466367F9902US F1 07JE99<br />
RACK NO.:<br />
LOADING KILN:<br />
<strong>LSC</strong> CAR INFORMS:<br />
OPERATOR ACTION:<br />
F1<br />
MAIN<br />
MENU<br />
Displays<br />
Main Menu.<br />
Use to change the location<br />
display area at the top of the<br />
screen if the car is in a different<br />
location than the one shown.<br />
Use if the rack number shown<br />
on screen does not match the<br />
number of racks to be shuttled<br />
between the load and unload kilns.<br />
SECTION 3<br />
MAINTENANCE/OPERATION <strong>LSC</strong>-<strong>40C</strong> Machine Maintenance/Operation<br />
RACK SHUTTLE PROGRAM SCREEN<br />
LOCATION:<br />
F2 F3<br />
STEP<br />
CAR<br />
LOCATION<br />
Figure 3.8 Rack Shuttle Program Screen<br />
MODIFY<br />
NUMBER<br />
OF RACK<br />
F4<br />
MODIFY<br />
RACK<br />
COUNT<br />
by using the arrows and keys on the alphanumeric<br />
keyboard. After reaching the desired setting,<br />
press enter to register the change on all screens.<br />
If the operator needs more information prior to<br />
altering a selection, return to the Main Menu and<br />
select the corresponding screen.<br />
RACK COUNT:<br />
OPERATOR MESSAGE CENTER<br />
UNLOADING KILN:<br />
F5<br />
MODIFY<br />
LOADING<br />
KILN<br />
F6<br />
MODIFY<br />
UNLOAD<br />
KILN<br />
F7 F8<br />
DISABLE HELP<br />
RACK<br />
SHUTTLE<br />
Lists the six basic steps<br />
necessary for rack shuttle.<br />
Use to return to normal operation.<br />
Use if the unloading kiln number shown<br />
on screen does not match the kiln being loaded.<br />
Use if the loading kiln number shown<br />
on screen does not match the kiln being loaded.<br />
Use if the rack count number shown on<br />
screen does not match the rack being<br />
moved. For example, a rack count of three<br />
indicates that the third rack is being loaded<br />
or unloaded. If the number of racks already in<br />
the kiln is different, adjust the rack count number<br />
accordingly.<br />
3-9
SECTION 3<br />
<strong>LSC</strong>-<strong>40C</strong> Machine Maintenance/Operation MAINTENANCE/OPERATION<br />
3.2.6 Kiln Sequence Table Screen<br />
The Kiln Sequence Table programs the<br />
sequence of kiln loading and unloading. The operation<br />
cycles vary with the number of rack locations<br />
per kiln. The sequence of loading and<br />
unloading may be altered to fill or unload a certain<br />
kiln, but the Sequence Number column does<br />
not change.<br />
When programming the sequence, keep the<br />
following in mind:<br />
• The sequence always begins with the loading<br />
of the empty kiln.<br />
• To repeat the sequence over from the top,<br />
enter zeros in the sequence number row at<br />
the end of the sequence.<br />
SEQUENCE<br />
NUMBER<br />
F1<br />
MAIN<br />
MENU<br />
01<br />
02<br />
03<br />
04<br />
05<br />
06<br />
07<br />
08<br />
09<br />
10<br />
11<br />
12<br />
Displays the<br />
Main Menu.<br />
LOAD<br />
KILN<br />
01<br />
02<br />
03<br />
04<br />
05<br />
06<br />
07<br />
08<br />
09<br />
10<br />
00<br />
00<br />
KILN SEQUENCE TABLE<br />
UNLOAD<br />
KILN<br />
02<br />
03<br />
04<br />
05<br />
06<br />
07<br />
08<br />
09<br />
10<br />
01<br />
00<br />
00<br />
F2 F3 F4 F5 09 F6 09 F7 10 F8<br />
MODIFY<br />
SEQ.<br />
TABLE<br />
Use to change<br />
any of the kiln<br />
numbers in<br />
the table.<br />
Figure 3.9 Kiln Sequence Table Screen<br />
SEQUENCE<br />
NUMBER<br />
13<br />
14<br />
15<br />
SEQUENCE<br />
16<br />
17 NUMBER<br />
18<br />
19<br />
20<br />
21<br />
22<br />
23<br />
24<br />
F1<br />
01<br />
02<br />
03<br />
04<br />
05<br />
06<br />
07<br />
08<br />
10<br />
11<br />
12<br />
LOAD<br />
KILN<br />
00<br />
00<br />
00<br />
00LOAD<br />
00KILN<br />
00<br />
00<br />
00<br />
00<br />
00<br />
00<br />
00<br />
MODIFY<br />
LOAD<br />
KILN<br />
01<br />
02<br />
03<br />
04<br />
05<br />
06<br />
07<br />
08<br />
10<br />
00<br />
00<br />
• The load kiln number for any sequence<br />
should be the same as the unload kiln<br />
number of the previous sequence number<br />
row.<br />
Press the function key to modify the<br />
sequence. The cursor appears on the left side<br />
when the modification mode is active. Modify the<br />
number th the right of the cursor or use the arrow<br />
keys to move the box to another row or column<br />
for modification. Press enter when complete. The<br />
new sequence will register on all screens.<br />
MODIFY<br />
UNLOAD<br />
KILN #<br />
3-10 466367F9902US F1 07JE99<br />
UNLOAD<br />
KILN<br />
KILN SEQUENCE TABLE<br />
00<br />
00<br />
00<br />
00 UNLOAD<br />
00KILN<br />
00<br />
00 02<br />
00 03<br />
00 04<br />
00 05<br />
00 06<br />
00 07<br />
08<br />
09<br />
F2 F3 F4 F5 F6 F7 F8<br />
Use if loading kiln<br />
number shown<br />
on screen does<br />
not match the kiln<br />
being loaded.<br />
01<br />
00<br />
00<br />
Use if the unloading<br />
kiln number shown<br />
on screen does not<br />
match the kiln<br />
being loaded.<br />
SEQUENCE<br />
NUMBER<br />
13<br />
14<br />
15<br />
16<br />
17<br />
18<br />
19<br />
20<br />
21<br />
22<br />
23<br />
24<br />
DISCARD<br />
NEW<br />
TABLE<br />
ACCEPT<br />
NEW<br />
TABLE<br />
LOAD<br />
KILN<br />
00<br />
00<br />
00<br />
00<br />
00<br />
00<br />
00<br />
00<br />
00<br />
00<br />
00<br />
00<br />
Discards the new<br />
information entered.<br />
Reverts to prior data.<br />
UNLOAD<br />
KILN<br />
00<br />
00<br />
00<br />
00<br />
00<br />
00<br />
00<br />
00<br />
00<br />
00<br />
00<br />
00<br />
Accepts the new<br />
information entered.
3.2.7 Kiln Map Screen<br />
The Kiln Map is a grid where each column<br />
represents a rack location (kiln depth) and each<br />
row represents a kiln number (kiln). For each<br />
product type used in operation, the operator may<br />
edit the product number code and the number of<br />
pallets. Both of these operations may also be controlled<br />
by a plant integration package.<br />
To modify the kiln map:<br />
1. Press F2. Enter the kiln number.<br />
2. Press F3. Enter the kiln depth. A flashing<br />
green arrow appears. To modify or add a<br />
rack, press F5. To delete a rack, press F7.<br />
3. Press F1 when information is correct.<br />
K<br />
I<br />
L<br />
N<br />
#<br />
466367F9902US F1 07JE99<br />
456 PRODUCT NUMBER<br />
002 FULL PALLETS/RACK<br />
01<br />
02<br />
03<br />
04<br />
05<br />
SECTION 3<br />
MAINTENANCE/OPERATION <strong>LSC</strong>-<strong>40C</strong> Machine Maintenance/Operation<br />
KILN MAP<br />
REAR KILN DEPTH ENTRANCE<br />
01 02 03 04 05 06 07 08 09 10 11 12 13 14<br />
005<br />
005<br />
021<br />
000<br />
031<br />
000<br />
041<br />
000<br />
F1<br />
EXIT<br />
Use to exit<br />
kiln map.<br />
Figure 3.10 Kiln Map Screen<br />
001<br />
000<br />
022<br />
000<br />
032<br />
000<br />
042<br />
000<br />
003<br />
396<br />
023<br />
000<br />
033<br />
000<br />
043<br />
000<br />
004<br />
396<br />
024<br />
000<br />
034<br />
000<br />
044<br />
000<br />
008<br />
132<br />
025<br />
000<br />
035<br />
000<br />
045<br />
000<br />
006<br />
396<br />
026<br />
000<br />
036<br />
000<br />
046<br />
000<br />
007<br />
007<br />
027<br />
000<br />
037<br />
000<br />
047<br />
000<br />
KILN: 00 DEPTH: 00<br />
SELECT<br />
KILN<br />
#<br />
SELECT<br />
KILN<br />
DEPTH<br />
PRODUCT<br />
NUMBER<br />
008<br />
000<br />
038<br />
000<br />
048<br />
000<br />
RACK<br />
ADD OR<br />
MODIFY<br />
009<br />
000<br />
029<br />
000<br />
049<br />
000<br />
To modify the product number:<br />
1. Press F4 and the cursor will appear in the<br />
upper left corner.<br />
2. Enter the appropriate product number<br />
(0-999) and pallet number (0-999).<br />
030<br />
000<br />
050<br />
000<br />
F2 F3 F4 F5 F6 F7 F8<br />
Use to modify<br />
kiln number.<br />
RACK<br />
DELETE<br />
Use to add or<br />
modify rack location<br />
parameters.<br />
Use to modify<br />
kiln depth.<br />
Use to modify product<br />
number and the number<br />
of pallets per rack.<br />
Use to delete<br />
rack location<br />
parameters.<br />
NEXT<br />
PAGE<br />
Use to move to<br />
next page.<br />
3-11
SECTION 3<br />
<strong>LSC</strong>-<strong>40C</strong> Machine Maintenance/Operation MAINTENANCE/OPERATION<br />
3.2.8 Electrical Part Numbers Screen<br />
The Electrical Part Numbers for replacement<br />
are listed here to simplify ordering.<br />
1<br />
1<br />
1<br />
1<br />
2<br />
2<br />
13<br />
1<br />
1<br />
1<br />
1<br />
1<br />
F1<br />
MAIN<br />
MENU<br />
Displays<br />
Main Menu.<br />
Figure 3.11 Electrical Part Numbers Screen<br />
ELECTRICAL PART NUMBERS<br />
QTY PART # DESCRIPTION<br />
114763<br />
113773FL524<br />
113772F00A7<br />
113772F00P2<br />
113772FIA16<br />
113772F00A8<br />
113118F0012<br />
112974F1030<br />
112974F0015<br />
113773F00M2<br />
113773F00BA<br />
113115F0003<br />
MAN MACHINE INTERFACE<br />
PROCESSOR<br />
RACK<br />
POWER SUPPLY<br />
INPUT MODULE<br />
OUTPUT MODULE<br />
1.2 AMP CIRCUIT BREAKERS - OUTPUT MODULE<br />
3.0 AMP FUSE - POWER SUPPLY<br />
1.5 AMP FUSE - MAN MACHINE INTERFACE<br />
EEPROM MODULE FOR PROCESSOR<br />
LITHIUM BATTERY FOR PROCESSOR<br />
4 POLE RELAY<br />
F2 F3 F4 F5 F6 F7 F8<br />
3-12 466367F9902US F1 07JE99
3.2.9 Transfer Car Switch Locations Screen<br />
The Transfer Car Switch Locations Screen<br />
shows switch problems. When a switch faults, this<br />
switch flashes on this screen.<br />
LS-8<br />
Pump<br />
Control<br />
Panel<br />
466367F9902US F1 07JE99<br />
SECTION 3<br />
MAINTENANCE/OPERATION <strong>LSC</strong>-<strong>40C</strong> Machine Maintenance/Operation<br />
PRS-5<br />
PRS-11<br />
Figure 3.12 Transfer Car Switch Locations Screen<br />
TRANSFER CAR FAULT DIAGNOSTICS<br />
Fault<br />
PRS-12<br />
LS-2<br />
LS-1<br />
PRS-4<br />
PRS-6<br />
PRS-10<br />
Car Suspect Affected Wire<br />
Information Sensor Input No.<br />
The Operator Message Center displays information<br />
about the faults along with the appropriate<br />
action required by the operator.<br />
PRS-3<br />
LS-7<br />
PRS-9<br />
Operator Action<br />
1 LS-7 on the kickbar is not LS-7 I:2/3 11, 13 Check for mechanical binding<br />
tripped. or switch adjustment/failure.<br />
2 LS-8 on the kickbar is not LS-8 I:2/4 11, 12 Check for mechanical binding<br />
tripped. or switch adjustment/failure.<br />
3 The car is not centered on the PRS-4 I:1/5 2, 41 Place car on actuator or check<br />
actuator in front of station. PRS-4 adjustment/failure.<br />
4 The car is not centered on the PRS-10 I:1/9 2, 38 Place car on actuator or check<br />
actuator in front of station. PRS-10 adjustment/failure.<br />
5 The left raillock must be LS-2 I:1/3 2, 34, 35 Check for mechanical binding<br />
retracted before car movement. or switch adjustment/failure.<br />
6 The right raillock must be LS-1 I:1/2 2, 33, 35 Check for mechanical binding<br />
retracted before car movement. or switch adjustment/failure.<br />
Table 3.2 Transfer Car Fault Diagnostics<br />
3-13
SECTION 3<br />
<strong>LSC</strong>-<strong>40C</strong> Machine Maintenance/Operation MAINTENANCE/OPERATION<br />
TRANSFER CAR FAULT DIAGNOSTICS<br />
Fault<br />
Car Suspect Affected Wire<br />
Information Sensor Input No.<br />
Operator Action<br />
7 PRS-5 missed a count. PRS-5 I:1/6 2, 40 Check PRS-5: adjustment,<br />
wiring or failure.<br />
8 PRS-4 missed a count. PRS-4 I:1/5 2, 41 Check PRS-4: adjustment,<br />
wiring or failure.<br />
9 PRS-3 missed a count. PRS-3 I:1/4 2, 42 Check PRS-3: adjustment,<br />
wiring or failure.<br />
10 PRS-11 missed a count. PRS-11 I:1/10 2, 37 Check PRS-11: adjustment,<br />
wiring or failure.<br />
11 PRS-10 missed a count. PRS-10 I:1/9 2, 38 Check PRS-10: adjustment,<br />
wiring or failure.<br />
12 PRS-9 missed a count. PRS-9 I:1/8 2, 39 Check PRS-9: adjustment,<br />
wiring or failure.<br />
13 Crawler is not on home switch. PRS-6 I:1/7 2, 36 Check PRS-6: adjustment,<br />
wiring or failure.<br />
14 The car is not on the actuator PRS-4 and I:1/5, 2, 41 or Adjust car speed or check PRS-4<br />
in front of station. PRS-10 I:1/9 2, 38 and PRS-10 adjustment/failure.<br />
15 The crawler has left the car and PRS-6 I:1/7 2, 36 Check PRS-6: adjustment, wiring<br />
has not returned. or sensor failure.<br />
16 Right raillock extend fault. LS-1 I:1/2 2, 33 Check LS-1, 14CB tripped or right<br />
raillock extend solenoid.<br />
17 Right raillock retract fault. LS-1 I:1/2 2, 33 Check LS-1, 13CB tripped or right<br />
raillock retract solenoid.<br />
18 Left raillock extend fault. LS-2 I:1/3 2, 35 Check LS-2, 6CB tripped or left<br />
raillock extend solenoid.<br />
19 Left raillock retract fault. LS-2 I:1/3 2, 35 Check LS-2, 5CB tripped or left<br />
raillock retract solenoid.<br />
20 The crawler has failed to leave PRS-6 I:1/7 2, 36 Ensure crawler in auto, check<br />
the car. raillock for binding, or PRS-6.<br />
21 The car has encountered an PRS-12 I:2/9 2, 76 Check that the kiln door is open,<br />
unexpected door location. or PRS-12.<br />
Table 3.2 Transfer Car Fault Diagnostics<br />
3-14 466367F9902US F1 07JE99
3.2.10 Input/Output Status Screen<br />
The Input/Output Status Screen shows the<br />
current status and provides a description of each<br />
signal.<br />
466367F9902US F1 07JE99<br />
ADDRESS STATUS DESCRIPTION<br />
I : 1/00<br />
I : 1/01<br />
I : 1/02<br />
I : 1/03<br />
I : 1/04<br />
I : 1/05<br />
I : 1/06<br />
I : 1/07<br />
I : 1/08<br />
I : 1/09<br />
I : 1/10<br />
I : 1/11<br />
I : 1/12<br />
I : 1/13<br />
I : 1/14<br />
I : 1/15<br />
F1<br />
MAIN<br />
MENU<br />
OFF<br />
OFF<br />
ON<br />
OFF<br />
OFF<br />
ON<br />
OFF<br />
OFF<br />
OFF<br />
OFF<br />
OFF<br />
OFF<br />
OFF<br />
OFF<br />
OFF<br />
OFF<br />
Displays<br />
Main Menu.<br />
Figure 3.13 Input/Output Status Screen<br />
SECTION 3<br />
MAINTENANCE/OPERATION <strong>LSC</strong>-<strong>40C</strong> Machine Maintenance/Operation<br />
INPUT/OUTPUT STATUS<br />
CAR IN AUTOMATIC<br />
CAR IN HAND<br />
LS-1 RIGHT RAILLOCKS RET<br />
LS-2 LEFT RAILLOCKS RET<br />
PRS-3 LEFT FWD DECEL<br />
PRS-4 LEFT CENTER STOP<br />
PRS-5 LEFT REV DECEL<br />
PRS-6 CRAWLER ON CAR<br />
PRS-9 RIGHT FWD DECEL<br />
PRS-10 RIGHT CENTER STOP<br />
PRS-11 RIGHT REV DECEL<br />
BMMS LOADER READY INTLK<br />
BMMS UNLOAD READY INTLK<br />
KILN DOOR IS AUTOMATIC<br />
KILN DOOR IS CLOSED<br />
KILN DOOR IS OPEN<br />
ADDRESS STATUS DESCRIPTION<br />
I : 2/00<br />
I : 2/01<br />
I : 2/02<br />
I : 2/03<br />
I : 2/04<br />
I : 2/05<br />
I : 2/06<br />
I : 2/07<br />
I : 2/08<br />
I : 2/09<br />
I : 2/10<br />
I : 2/11<br />
I : 2/12<br />
I : 2/13<br />
I : 2/14<br />
I : 2/15<br />
F2 F3 F4 F5 F6 F7 F8<br />
LIMIT<br />
SWITCH<br />
LOCATION<br />
ON<br />
ON<br />
ON<br />
ON<br />
ON<br />
ON<br />
ON<br />
ON<br />
ON<br />
ON<br />
ON<br />
ON<br />
ON<br />
ON<br />
ON<br />
ON<br />
Shows the<br />
limit switch<br />
location on<br />
the car.<br />
PREV<br />
PAGE<br />
PAGE 1<br />
OIL HEATER<br />
E-STOP ENERGIZED<br />
MCR ENERGIZED<br />
LS-7 FWD KICKBAR TRIPPED<br />
LS-8 REV KICKBAR TRIPPED<br />
OIL LEVEL OK<br />
PUMP STARTED<br />
H-O-A SWITCH IN AUTO<br />
MANUAL LEFT LOCKS EXTEND<br />
PRS-12 KILN DOOR SAFETY<br />
MANUAL RIGHT LOCKS EXTEND<br />
RESERVED<br />
MANUAL CAR FORWARD<br />
MANUAL CAR REVERSE<br />
PUMP OVERLOAD OK<br />
RESERVED<br />
NEXT<br />
PAGE<br />
Use to go<br />
back one page.<br />
Use to advance<br />
one page.<br />
3-15
SECTION 3<br />
<strong>LSC</strong>-<strong>40C</strong> Machine Maintenance/Operation MAINTENANCE/OPERATION<br />
3.3 SENSOR TYPES<br />
Sensors located on the car monitor, report<br />
and control all system operations. Sensors are<br />
also essential to the car safety protection system.<br />
There are two types of sensors:<br />
• Limit switches (LS) are spring-loaded<br />
electromechanical devices that break a circuit<br />
based on mechanical actions.<br />
• Proximity sensors (PRS) monitor a magnetic<br />
field to signal various operating conditions.<br />
The face of the PRS must be within<br />
1/4 inch [6 mm] of the actuator for the sensor<br />
to activate.<br />
3.4 SAFETY BARS<br />
Safety bars protect plant personnel and equipment<br />
from inadvertent contact with the car. Safety<br />
bars are located on the leading sides of the car.<br />
When a safety bar meets any obstacle, a fail-safe<br />
limit switch (LS-7 or LS-8) signals the control system<br />
to immediately:<br />
• Stop car movement<br />
• Stop the car hydraulic pump<br />
There is one LS for each safety bar. Each LS<br />
provides independent safety signals to the car<br />
control panel.<br />
LEFT<br />
Raillock With<br />
Sensors<br />
LS-7<br />
RIGHT<br />
Raillock With<br />
Sensors<br />
Figure 3.14 Car Sensor Locations<br />
PRS-9<br />
PRS-10<br />
PRS-6<br />
LS-1<br />
3.5 CAR SENSORS<br />
This section covers the function of the following<br />
car sensors:<br />
• 3.5.1 Motion Control Sensors<br />
• 3.5.2 Crawler Location Sensor<br />
• 3.5.3 Raillock Position<br />
Figure 3.14 shows the location of all car sensors.<br />
Table 3.3 lists all car sensors along with the<br />
corresponding function and input/output terminals.<br />
3.5.1 Motion Control Sensors<br />
PRS-3, 4, 5, 9, 10 and 11 are “look-down”<br />
sensors installed on the car frame. If an <strong>LSC</strong>-<strong>40C</strong><br />
installation has kilns on both sides of the car rail,<br />
all six sensors are installed and active as shown<br />
in Figure 3.14. If an installation has kilns on only<br />
one side of the car rails, sensors will be installed<br />
and active on that side only.<br />
Floor-mounted actuators are positioned on the<br />
centerline of each set of crawler rails. A PRS triggers<br />
when it comes within 1/4 inch [6 mm] of an<br />
actuator. The leading sensor signals the car to<br />
change to slow speed. The center sensor signals<br />
the car to stop.<br />
PRS-4<br />
PRS-11<br />
PRS-3 PRS-5<br />
LS-2<br />
3-16 466367F9902US F1 07JE99<br />
Car<br />
Trailer<br />
LS-8
CAR SENSORS<br />
466367F9902US F1 07JE99<br />
SECTION 3<br />
MAINTENANCE/OPERATION <strong>LSC</strong>-<strong>40C</strong> Machine Maintenance/Operation<br />
Sensor Function Input/Output<br />
Module Terminal<br />
LS-1 Right Raillock Retracted * 2<br />
I:1<br />
LS-2 Left Raillock Retracted * 3<br />
LS-7 3<br />
Safety Bar Tripped<br />
I:2<br />
LS-8 4<br />
PRS-3 Left Forward Decelerate * 4<br />
PRS-4 Car Stop On Center - Left * 5<br />
PRS-5 Left Reverse Decelerate * 6<br />
PRS-6 Crawler on Car I:1 7<br />
PRS-9 Right Forward Decelerate * 8<br />
PRS-10 Car Stop On Center - Right * 9<br />
PRS-11 Right Reverse Decelerate * 10<br />
* If Used<br />
Table 3.3 Car Sensor Functions<br />
3-17
SECTION 3<br />
<strong>LSC</strong>-<strong>40C</strong> Machine Maintenance/Operation MAINTENANCE/OPERATION<br />
3.5.2 Crawler Location Sensor<br />
PRS-6 is a proximity switch that reports<br />
crawler location status. When the crawler is on<br />
the car, PRS-6 is triggered and signals to the<br />
control system that the crawler is in position.<br />
When the crawler moves out of position, off the<br />
car, PRS-6 is released and reports this status to<br />
the car control system. A broken or obscured sensor<br />
will cause PRS-6 to report an incorrect status.<br />
3.5.3 Raillock Position<br />
LS-1 and LS-2 are limit switches that report<br />
the position of the raillocks. If raillocks are<br />
installed on only one side of the car, only one LS<br />
will be installed and active. Figure 3.15 shows<br />
raillock operation. When the car raillocks extend,<br />
the top-of-car rails match crawler rails and the<br />
crawler can move on and off the car. When the<br />
crawler is on the car, the raillocks are retracted.<br />
Top of<br />
Crawler Rails<br />
Top of<br />
Car Rails<br />
Top of<br />
Crawler Rails<br />
Top of<br />
Car Rails<br />
Figure 3.15 Raillock Operation<br />
Car Raillocks<br />
Retracted<br />
Car Raillocks<br />
Extended<br />
The LS signals whether the raillocks are<br />
extended or retracted. The crawler can move on<br />
and off the car only when the raillocks are extended.<br />
Car movement requires the raillocks to be<br />
retracted.<br />
3-18 466367F9902US F1 07JE99
3.6 CAR INPUT/OUTPUT MODULES<br />
Figure 3.16 shows the configuration of the<br />
SLC-500 processor which is located inside the<br />
car control panel. Table 3.4 lists all car I/O signals<br />
identified by module, terminal and function.<br />
The input module contains sixteen identical<br />
solid-state input circuits to accept the on/off status<br />
of user devices such as push buttons, limit switches<br />
and photo sensors. Each input has a red status<br />
indicator visible from the front of the module<br />
which lights when the corresponding input is<br />
turned on by an external device. If the status indicator<br />
will not light when power is applied to the<br />
input, replace the input module.<br />
SLC-500<br />
CONTROLLER<br />
Figure 3.16 Car Input/Output Modules<br />
466367F9902US F1 07JE99<br />
SECTION 3<br />
MAINTENANCE/OPERATION <strong>LSC</strong>-<strong>40C</strong> Machine Maintenance/Operation<br />
0 4 8 12<br />
1 5 9 13<br />
2 6 10 14<br />
3 7 11 15<br />
The output module contains eight identical<br />
solid-state output circuits to control the on/off status<br />
of user devices such as indicator lights or<br />
solenoids. Each output has a red load side status<br />
indicator visible from the front of the module,<br />
which lights when the corresponding output is<br />
turned on by the PLU.<br />
0 4 8 12<br />
1 5 9 13<br />
2 6 10 14<br />
3 7 11 15<br />
-<br />
0 4<br />
1 5<br />
2 6<br />
3 7<br />
0 4<br />
1 5<br />
2 6<br />
3 7<br />
I:1 I:2 O:4 O:5<br />
3-19
SECTION 3<br />
<strong>LSC</strong>-<strong>40C</strong> Machine Maintenance/Operation MAINTENANCE/OPERATION<br />
CAR INPUT/OUTPUT SIGNALS<br />
Module Terminal Function Sensor<br />
0 Automatic<br />
1 Hand<br />
2 Right Raillock Retracted * LS-1<br />
3 Left Raillock Retracted * LS-2<br />
4 Left Forward Decelerate * PRS-3<br />
5 Car Stop On Center - Left * PRS-4<br />
6 Left Reverse Decelerate * PRS-5<br />
I:1 7 Crawler On Car PRS-6<br />
8 Right Forward Decelerate * PRS-9<br />
9 Car Stop On Center - Right * PRS-10<br />
10 Right Reverse Decelerate * PRS-11<br />
11 BMMS Loader Ready<br />
12 BMMS Unloader Ready<br />
13 Kiln Door in Automatic *<br />
14 Kiln Door is Closed *<br />
15 Kiln Door is Open *<br />
0 Heater On<br />
1 Emergency Stop Energized<br />
2 MCR Energized<br />
3 Kickbar Tripped LS-7<br />
4 Kickbar Tripped LS-8<br />
5 Oil Level O.K.<br />
6 Pump Started<br />
I:2 7 Hand/Off/Auto in Automatic<br />
8 Manual Left Raillock Extend<br />
9 PRS-12<br />
10<br />
11<br />
Manual Right Raillock Extend<br />
12 Manual Car Forward<br />
13 Manual Car Reverse<br />
14 Pump Overload Tripped<br />
15 NOT USED<br />
0 Unlock Left Raillock<br />
1 Lock Left Raillock<br />
2 Forward Slow<br />
3 Forward Medium<br />
O:4 4 Forward Fast<br />
5 Reverse Slow<br />
6 Reverse Medium<br />
7 Reverse Fast<br />
0 Unlock Right Raillock<br />
1 Lock Right Raillock<br />
O:5 2<br />
3<br />
Alarm Horn<br />
4 Open Kiln Door *<br />
5 Close Kiln Door *<br />
*If Used<br />
6<br />
7<br />
NOT USED<br />
NOT USED<br />
Table 3.4 Car Input/Output Signals<br />
3-20 466367F9902US F1 07JE99
This section covers the location and operation<br />
of <strong>LSC</strong>-<strong>40C</strong> control devices.<br />
4.1 CRAWLER CONTROL STATION<br />
The crawler has two control panels that allow<br />
independent operation from either end. Both<br />
Pressing button will<br />
step indicator light<br />
to next station.<br />
Signal flashes when a<br />
fault is detected.<br />
466367F9902US F1 07JE99<br />
SECTION 4<br />
MAINTENANCE/OPERATION <strong>LSC</strong>-<strong>40C</strong> Machine Maintenance/Operation<br />
SECTION 4<br />
CRAWLER CONTROL SYSTEMS<br />
Indicates status when no faults are<br />
detected. Fault indicators blink<br />
individually or in combination to identify<br />
fault conditions. Refer to the Crawler<br />
Fault Diagnostic Screen section<br />
for more information.<br />
Turn left to operate the<br />
crawler manually.<br />
Turn right to turn<br />
operation over to the<br />
computer. Turn the<br />
handle off when the<br />
<strong>LSC</strong>-40 is not operating.<br />
Turn left to lower<br />
the crawler elevator.<br />
Turn right to raise<br />
the crawler elevator.<br />
Switch spring loaded<br />
to center.<br />
Figure 4.1 Crawler Control Station<br />
LOADER<br />
STATION/FAULT<br />
R R R<br />
1<br />
2 3 4<br />
R G R R<br />
FAULT<br />
HAND OFF AUTO<br />
ELEVATOR<br />
DOWN<br />
OFF<br />
UP<br />
KILN STORAGE UNLOADER<br />
OIL HEATER<br />
STATION INCREMENT<br />
AUTO START<br />
PUMP START<br />
crawler control panels consist of a button center,<br />
but only the control panel on the oil tank end has<br />
an oil heater light and a speed control center.<br />
Figure 4.1 shows the crawler control panel with<br />
the function of all manual crawler controls.<br />
CRAWLER<br />
CENTERED<br />
R R<br />
Press to start hydraulic pump.<br />
PENDANT STATION<br />
EXTENDED<br />
Signal lights<br />
when the heater<br />
is functioning.<br />
CRAWLER EMERGENCY<br />
STOP<br />
PULL TO PUSH TO<br />
START<br />
STOP<br />
HEATER<br />
OFF<br />
ON<br />
In manual mode only,<br />
signal lights when crawler<br />
"look-down" proximity relay<br />
sensors sense car actuators.<br />
Signal lights when<br />
the pendant station<br />
is removed from its<br />
housing.<br />
Press to stop crawler<br />
operations. The<br />
Emergency Stop can be<br />
locked down to prevent<br />
inadvertent operation.<br />
Press to begin<br />
automatic operation.<br />
Turn on to warm hydraulic fluid.<br />
Under normal operations, the<br />
heater remains on to maintain<br />
a constant 100°F [38°C]. The<br />
heater switch is only used on one<br />
of the two crawler control stations.<br />
4-1
SECTION 4<br />
<strong>LSC</strong>-<strong>40C</strong> Machine Maintenance/Operation MAINTENANCE/OPERATION<br />
4.2 SENSOR TYPES<br />
Sensors located on the crawler monitor, report<br />
and control all system operations. Sensors are<br />
also essential to the crawler safety protection system.<br />
There are three types of sensors:<br />
• Limit switches (LS) are spring-loaded<br />
electromechanical devices that break a circuit<br />
based on mechanical actions.<br />
• Proximity sensors (PRS) monitor a magnetic<br />
field to signal various operating conditions.<br />
The face of the PRS must be within<br />
1/4 inch [6 mm] of the actuator for the sensor<br />
to activate.<br />
• Photo-electric sensors (PER) provide a light<br />
and reflection process as a means by which<br />
crawler movement is controlled.<br />
Sensor function and location are covered further<br />
under the separate equipment items.<br />
4-2<br />
LS-1<br />
PRS-23<br />
PRS-15<br />
PRS-16<br />
PRS-22<br />
Figure 4.2 Crawler Sensor Locations<br />
PRS-6<br />
PRS-14<br />
PRS-10<br />
PRS-11<br />
PRS-7<br />
PRS-3A<br />
4.3 SAFETY BARS<br />
Safety bars protect plant personnel and equipment<br />
from inadvertent contact with the crawler.<br />
Safety bars are located on the leading sides of<br />
the crawler. When a safety bar meets any obstacle,<br />
a fail-safe limit switch (LS-1 or LS-2) signals<br />
the control system to immediately:<br />
• Stop car movement<br />
• Stop crawler hydraulic pump<br />
• Blast horn signal<br />
There is one LS for each safety bar. Each LS<br />
provides independent safety signals to the crawler<br />
control center.<br />
4.4 CRAWLER SENSORS<br />
This section covers location and operation of<br />
the following crawler sensors:<br />
• 4.4.1 Raillock Sensors<br />
• 4.4.2 Motion Control Sensors<br />
• 4.4.3 Pendant Control Station Sensors<br />
• 4.4.4 Elevator Position Sensors<br />
• 4.4.5 Cable Reel Sensor<br />
Figure 4.2 shows the location and type of all<br />
crawler sensors. Table 4.1 lists all crawler sensors<br />
along with the corresponding function and<br />
input/output terminals.<br />
PRS-3B<br />
PRS-4<br />
PRS-20<br />
PRS-21<br />
PRS-8<br />
PRS-9<br />
PRS-18<br />
PRS-19<br />
PRS-5<br />
PER-17<br />
PRS-12<br />
LS-2<br />
466367F9902US F1 07JE99
CRAWLER SENSORS<br />
*If Used<br />
466367F9902US F1 07JE99<br />
SECTION 4<br />
Sensor Function Input/Output<br />
Module Terminal<br />
LS-1 Kickbar Safety<br />
LS-2 Kickbar Safety<br />
PER-17 Enter Side Shifter I:1 12<br />
PRS-3A Elevator Down 3<br />
PRS-3B Elevator Up 4<br />
PRS-4 Left Front Raillock Extended 5<br />
PRS-5 Right Front Raillock Extended 6<br />
PRS-6 Left Rear Raillock Extended I:0 7<br />
PRS-7 Right Rear Raillock Extended 8<br />
PRS-8 Forward Creep 9<br />
PRS-9 Forward Creep Safety 10<br />
PRS-10 Reverse Creep 11<br />
PRS-11 Reverse Creep Safety 0<br />
PRS-12 Manual Forward 1<br />
PRS-13 Manual Reverse 2<br />
PRS-14 Reel Motion Detector 3<br />
PRS-15* (Used with Reverse Plant) Stops Crawler<br />
in Kiln and Decelerates Crawler in Storage<br />
4<br />
PRS-16* Safety for PRS-15 5<br />
PRS-18* (Used with Reverse Plant) Stops Crawler in 6<br />
Storage I:1<br />
PRS-19* Safety for PRS-18 7<br />
PRS-20* (Used with Forward Plant) Stops Crawler<br />
in Kiln and Decelerates Crawler in Storage<br />
8<br />
PRS-21* Safety for PRS-20 9<br />
PRS-22* (Used with Forward Plant) Stops Crawler<br />
in Storage<br />
10<br />
PRS-23* Safety for PRS-22 11<br />
Table 4.1 Crawler Sensor Functions<br />
MAINTENANCE/OPERATION <strong>LSC</strong>-<strong>40C</strong> Machine Maintenance/Operation<br />
4-3
SECTION 4<br />
<strong>LSC</strong>-<strong>40C</strong> Machine Maintenance/Operation MAINTENANCE/OPERATION<br />
4.4.1 Raillock Sensors<br />
PRS-4, 5, 6 and 7 on the crawler monitor the<br />
car raillocks.<br />
The two PRSs on each end of the crawler correspond<br />
with the raillocks on the car. The crawler<br />
can move on and off the car only when both sensors<br />
are triggered by the extended raillocks.<br />
4.4.2 Motion Control Sensors<br />
Eight PRSs on the crawler monitor crawler<br />
motion in relation to rack position. As shown in<br />
Figure 4.2, PRS-15, 16, 18, 19, 20, 21, 22 and 23<br />
are paired and each one of the sensors has an<br />
independent signal. As an <strong>LSC</strong>-<strong>40C</strong> fail-safe safety<br />
feature, both PRSs in the pair must report an<br />
identical signal. A fault condition occurs if the signals<br />
do not match each other.<br />
The function of these eight sensors is controlled<br />
by system logic and depends on:<br />
• Crawler travel direction<br />
• Rack present on crawler<br />
4.4.3 Pendant Control Station Sensors<br />
PRS-12 and PRS-13 signal when the pendant<br />
control is removed from the holder. In this<br />
state, <strong>LSC</strong>-<strong>40C</strong> stops automatic operation and the<br />
pendant control buttons become active. When a<br />
pendant is removed, the Pendant Station Extend<br />
signal light on the crawler control panel will light.<br />
4.4.4 Elevator Position Sensors<br />
Two different sensors monitor elevator position.<br />
PRS-3A reports when the elevator is down.<br />
PRS-3B reports when the elevator is up.<br />
4.4.5 Cable Reel Sensors<br />
PRS-14 monitors cable reel motion.<br />
4.5 SIDE SHIFTER INTERFACE<br />
Emitters 101 and 102 are floor level sensors<br />
installed along the left crawler rail leading to the<br />
side shifter. These sensors receive signals from<br />
the side shifter to regulate crawler movement<br />
based on the ready state of the side shifter.<br />
4.6 CRAWLER INPUT/OUTPUT MODULES<br />
Figure 4.3 shows the configuration of the<br />
SLC-500 processor which is located under the<br />
doors on the floor of the crawler. Table 4.2 lists all<br />
crawler I/O signals identified by module, terminal,<br />
function and related sensor for I/O signals that<br />
correspond to an installed sensor.<br />
The input module contains sixteen identical<br />
solid-state input circuits to accept the ON/OFF<br />
status of user devices such as push buttons, limit<br />
switches and photo sensors. Each input has a red<br />
status indicator visible from the front of the module<br />
which lights when the corresponding input is<br />
turned on by an external device. If the status indicator<br />
does not light when power is applied to the<br />
input, replace the input module.<br />
The output module contains eight identical<br />
solid-state output circuits to control the ON/OFF<br />
status of user devices such as indicator lights or<br />
solenoids. Each output has a red load side status<br />
indicator visible from the front of the module<br />
which lights when the corresponding output is<br />
turned on by the CPU.<br />
SLC-500<br />
CONTROLLER<br />
0 4 8<br />
1 5 9<br />
2 6 10<br />
3 7 11<br />
0 4 8 12<br />
1 5 9 13<br />
2 6 10 14<br />
3 7 11 15<br />
4-4 466367F9902US F1 07JE99<br />
O:0<br />
0 4<br />
1 5<br />
2 6<br />
3 7<br />
POWER<br />
PC RUN<br />
CPU FAULT<br />
FORCED I/O<br />
BATTERY LOW<br />
I:0<br />
Figure 4.3 Crawler Input/Output Modules<br />
0 4<br />
1 5<br />
2 6<br />
3 7<br />
I:1 O:2
CRAWLER INPUT/OUTPUT SIGNALS<br />
466367F9902US F1 07JE99<br />
SECTION 4<br />
MAINTENANCE/OPERATION <strong>LSC</strong>-<strong>40C</strong> Machine Maintenance/Operation<br />
Module Terminal Function Sensor<br />
0 Automatic<br />
1 Hand<br />
2 Station Increment<br />
3 Elevator Down PRS-3A<br />
4 Elevator Up PRS-3B<br />
I:0 5 Left Front Raillock Extended PRS-4<br />
6 Right Front Raillock Extended PRS-5<br />
7 Left Rear Front Raillock Extended PRS-6<br />
8 Right Rear Raillocks Extended PRS-7<br />
9 Forward Creep PRS-8<br />
10 Forward Creep Safety PRS-9<br />
11 Reverse Creep PRS-10<br />
0 Reverse Creep Safety PRS-11<br />
1 Manual Forward<br />
2 Manual Reverse<br />
3 Reel Motion Detector PRS-14<br />
4 (Used With Reverse Plant) Stops Crawler<br />
in Kiln and Decelerates Crawler in Storage PRS-15<br />
5 Safety for PRS-15 PRS-16<br />
6 (Used With Reverse Plant) Stops<br />
Crawler in Storage PRS-18<br />
I:1 7 Safety for PRS-18 PRS-19<br />
8 (Used With Forward Plant) Stops Crawler in<br />
Kiln and Decelerates Crawler in Storage PRS-20<br />
9 Safety for PRS-20 PRS-21<br />
10 (Used With Forward Plant) Stops Crawler in<br />
Storage PRS-22<br />
11 Safety for PRS-22 PRS-23<br />
12 Enter Side Shifter PER-17<br />
13 Kickbars Not Tripped<br />
14 Oil Level Low<br />
15 NOT USED<br />
0 Loader/Fault 1<br />
1 Kiln/Fault 2<br />
2 Storage/Fault 3<br />
O:0 3 Unloader/Fault 4<br />
4 Alarm Horn<br />
5 Crawler On Center Indicator<br />
6 Fault Indicator<br />
7 NOT USED<br />
0 Elevator Up<br />
1 Elevator Down<br />
2 Forward Slow<br />
3 Reverse Slow<br />
O:2 4 Forward Medium<br />
5 Reverse Medium<br />
6 Forward Fast<br />
7 Reverse Fast<br />
Table 4.2 Crawler Input/Output Signals<br />
4-5
SECTION 4<br />
<strong>LSC</strong>-<strong>40C</strong> Machine Operation/Maintenance OPERATION/MAINTENANCE<br />
4-6 466367F9902US F1 07JE99
5.1 MAINTENANCE OVERVIEW<br />
When properly installed and operating<br />
according to <strong>Besser</strong> guidelines, the <strong>LSC</strong>-<strong>40C</strong> can<br />
be expected to deliver efficient long-term<br />
performance. In order to obtain the long-term productivity<br />
benefits that <strong>Besser</strong> designed into the<br />
<strong>LSC</strong>-<strong>40C</strong>, the customer must perform the preventive<br />
maintenance services outlined in this section<br />
within the required intervals. Of particular importance<br />
is the regular inspection and servicing of<br />
the car and crawler hydraulic systems.<br />
This section provides guidelines for all routine<br />
system maintenance. The maintenance time table<br />
listed in Section 5.8 provides a general guide to<br />
scheduled service.<br />
Vertical<br />
WARNING:<br />
To prevent injury to personnel or damage<br />
to equipment, always follow applicable<br />
lockout/tagout procedures before<br />
servicing electrical components. Keep<br />
electrical equipment clean and dry.<br />
Figure 5.1 Sensor Adjustments<br />
466367F9902US F1 07JE99<br />
SECTION 5<br />
MAINTENANCE/OPERATION <strong>LSC</strong>-<strong>40C</strong> Machine Maintenance/Operation<br />
SECTION 5<br />
MAINTENANCE<br />
Lateral<br />
5.2 SENSOR MAINTENANCE<br />
For <strong>LSC</strong>-<strong>40C</strong> operation, all sensors must be<br />
in proper position and in good working order. The<br />
fail-safe system logic will not allow equipment to<br />
move unless the sensor signals correspond with<br />
what the program expects. In the event of a sensor<br />
fault, both the car and crawler diagnostics will<br />
help identify the problem sensor. Regular sensor<br />
cleaning and inspection can be effective in preventing<br />
problems from stopping operations.<br />
5.2.1 Sensor Position<br />
Vibration or accidental jarring could dislodge a<br />
sensor from its proper position. Figure 5.1 shows<br />
how to make vertical and horizontal adjustments<br />
of both “look-up” and “look-down” sensors.<br />
Vertical<br />
Lateral<br />
5-1
SECTION 5<br />
<strong>LSC</strong>-<strong>40C</strong> Machine Maintenance/Operation MAINTENANCE/OPERATION<br />
5.2.2 Sensor Cleaning<br />
Accumulated dust and debris on a sensor<br />
face could prevent a sensor from functioning<br />
properly. Both proximity and photo sensors need<br />
to be kept free of excessive dirt build-up.<br />
5.2.3 Enter Side Shifter Emitter<br />
PER-17 is a photo receiving relay on the<br />
crawler that requires a light beam from the emitters<br />
installed along the left crawler rail leading to<br />
the side shifter. An obscured emitter could prevent<br />
the crawler from receiving correct information<br />
from the side shifter.<br />
5.3 SAFETY DEVICES<br />
For protection of plant personnel, make sure<br />
that <strong>LSC</strong>-<strong>40C</strong> safety devices are checked regularly<br />
and maintained in good working condition. In<br />
particular, the following devices and components<br />
require regularly scheduled safety checks:<br />
• Car safety bars<br />
• Crawler safety bars<br />
• Car rail safety stops<br />
• End-of-kiln safety stops<br />
• Auxiliary rails safety stop<br />
• Signal light<br />
• Signal horn<br />
Any safety component that is not in proper<br />
working order must be repaired or replaced<br />
immediately. See the Parts List for replacement<br />
information of safety devices.<br />
5.4 HYDRAULIC SYSTEMS<br />
The car and crawler hydraulic systems are<br />
heavy duty systems that are designed to operate<br />
with minimal maintenance. However, any hydraulic<br />
fluid will break down over extended usage, particularly<br />
under extremely dusty conditions. Both car<br />
and crawler hydraulic systems are protected with<br />
an in-line filter. Regular filter inspection and<br />
replacement is essential for achieving the expected<br />
service life of hydraulic fluid.<br />
5.4.1 Leakage<br />
Leaking hydraulic fluid is never acceptable.<br />
Drips, leaks or accumulations of fluid anywhere<br />
along the equipment paths must be corrected. A<br />
fluid leak can result from various causes:<br />
• Damaged hose<br />
• Faulty motor<br />
• Loose fitting<br />
• Broken valve<br />
5-2<br />
To prevent further problems from occurring,<br />
determine the cause of the leak and repair immediately.<br />
5.4.2 Hydraulic Fittings<br />
Pipe Threads<br />
Use the following steps to assemble the pipe<br />
threads.<br />
NOTE:<br />
Do not use teflon tape. This may damage the<br />
directional valves.<br />
1. Assemble connection hand tight. Use<br />
Loctite ® thread sealant (<strong>Besser</strong> part<br />
number 113320).<br />
2. Mark male and female parts. See<br />
Figure 5.2.<br />
3. Rotate male part using Table 5.1.<br />
Figure 5.2 Pipe Threads<br />
xxx<br />
Mark hex nut<br />
Turns from Finger Tight (TFFT)<br />
Pipe Threads – NPTF<br />
Fitting Size<br />
-2 & -4<br />
-6<br />
-8 & -12<br />
-16 -20 -24 & -32<br />
Table 5.1 Pipe Threads<br />
TFFT<br />
2.0 to 3.0<br />
1.5 to 3.0<br />
2.0 to 3.0<br />
1.5 to 2.5<br />
466367F9902US F1 07JE99
Tube Fittings<br />
Use the following steps for the standard SAE<br />
37° flare type tube fitting. Use SAE J524B or SAE<br />
J525B tubing for best bending and flaring results.<br />
NOTE:<br />
Do not use pipe dope thread sealant or teflon tape.<br />
1. Cut the tubing with a tube cutter. If a fine<br />
tooth hacksaw is used, make sure cut-off<br />
is square.<br />
2. Remove burrs with deburring tool, emery<br />
paper or fine file. Clean all dirt and grit<br />
from the I.D. and O.D. of the tube.<br />
3. Place the nut and then the sleeve onto<br />
tube. The threaded end of nut and flared<br />
end of sleeve must face the end of tube.<br />
See Figure 5.3.<br />
4. Flare the tube end with a flaring tool to<br />
provide a 37° flare. Check the flare for<br />
correct diameter, excessive thin out and<br />
burrs or cracks.<br />
5. Lubricate all mating surfaces of nut, ferrule<br />
and body with a heavy lubricant.<br />
6. Assemble the nut and sleeve to body. Turn<br />
the nut hand tight then wrench tighten for<br />
a leakproof joint. See Table 5.2 for tightening<br />
information.<br />
Nut<br />
Figure 5.3 Flare Fitting<br />
466367F9902US F1 07JE99<br />
Threaded<br />
end of nut Flared end<br />
of sleeve<br />
Sleeve<br />
Flats from Finger Tight (TFFT)<br />
SAE 37° Swivels<br />
Fitting Size<br />
-04 & -05<br />
-06 -08 & -10<br />
-12 -16 & -20<br />
-24<br />
Table 5.2 SAE 37° Swivels<br />
SECTION 5<br />
MAINTENANCE/OPERATION <strong>LSC</strong>-<strong>40C</strong> Machine Maintenance/Operation<br />
End of<br />
Tube<br />
Rotation of Flats<br />
2.5<br />
2<br />
1<br />
.5 to .75<br />
5.4.3 Hydraulic Filters<br />
Figure 5.4 shows a typical hydraulic in-line filter<br />
that is located near the oil tanks on both the<br />
car and crawler. Remove the filter canister from<br />
the stationary cap by turning the canister counterclockwise.<br />
During initial operation of an <strong>LSC</strong>-<strong>40C</strong>,<br />
inspect the filter weekly. Replace the filter when<br />
the pointer of the filter gage is in the “red” area.<br />
After several weeks of adjusting to plant conditions,<br />
monthly filter inspection should be adequate.<br />
Figure 5.4 Hydraulic Filter<br />
Green-OK<br />
Red-Change<br />
Hydraulic<br />
Filter<br />
5-3
SECTION 5<br />
<strong>LSC</strong>-<strong>40C</strong> Machine Maintenance/Operation MAINTENANCE/OPERATION<br />
5.4.4 Fluid Condition<br />
Aside from contamination, hydraulic fluid can<br />
undergo physical and chemical changes that<br />
reduce its effectiveness. Resulting problems from<br />
using decomposed fluid include:<br />
• Accelerated pump wear<br />
• Reduced motor power<br />
• Slower equipment movement<br />
<strong>Besser</strong> <strong>Company</strong> offers an inspection kit<br />
(<strong>Besser</strong> Part No. 114546) to analyze hydraulic<br />
fluid condition. The kit analyzes the last four fluid<br />
samples providing a data comparison of:<br />
• Particle counts<br />
• Water content<br />
• Viscosity<br />
• Wear metal and additive content<br />
A diagnostic statement provides a layman<br />
explanation of the test and its results regarding<br />
the condition of the equipment and the hydraulic<br />
fluid. The information is graphed against ISO<br />
(International Standards Organization) standards<br />
to show the overall cleanliness of the system.<br />
5.5 RAILS<br />
<strong>LSC</strong>-<strong>40C</strong> equipment is sufficiently heavy that<br />
normal levels of concrete dust should not hinder<br />
movement. As often as required by plant conditions,<br />
clean out the grooves along the car and<br />
crawler rails to prevent a build-up of debris. Also,<br />
make sure that the top surfaces of the actuators<br />
are kept clean.<br />
5.6 CABLE REEL<br />
This section covers two cable reel service procedures:<br />
• Cable Replacement<br />
• Spring Replacement<br />
The cable is subjected to surface wear and<br />
fatigue from continual unwinding and winding. There<br />
are three internal cable reel springs. A loose or floppy<br />
cable that rewinds with reduced spring tension<br />
indicates the need for spring replacement.<br />
5-4 466367F9902US F1 07JE99
5.6.1 Cable Replacement for Unmounted Reel<br />
Replace the working cable by removing the reel<br />
and mounting bracket assembly from the crawler<br />
and securing the assembly in a bench vise.<br />
Before disconnecting any wires, note and record<br />
wire colors, circuit numbers and terminal numbers.<br />
This precaution will help ensure accurate<br />
reconnection. See Figures 5.5 and 5.6.<br />
To prepare the reel for new cable:<br />
1. Shut off and lock out main system power.<br />
2. Disconnect the working cable at the car<br />
control panel.<br />
3. Wind the old cable onto the reel and allow<br />
the reel springs to lose tension.<br />
4. Disconnect the cable reel sensor wire from<br />
the back of the mounting bracket. Leave<br />
the sensor installed in the bracket.<br />
5. Disconnect the crawler power wires at the<br />
crawler control panel.<br />
Slip Rings<br />
WARNING:<br />
Failure to properly lockout the cable<br />
reel prior to performing maintenance<br />
may cause injury to personnel.<br />
CAUTION:<br />
Do not allow the cable to freely<br />
rewind onto the reel. Hold the cable<br />
end as it rewinds, or control reel<br />
speed as the cable rewinds.<br />
Slip Ring<br />
Cover<br />
466367F9902US F1 07JE99<br />
Working<br />
Cable<br />
Conductors<br />
Figure 5.5 Cable Reel Assembly<br />
SECTION 5<br />
MAINTENANCE/OPERATION <strong>LSC</strong>-<strong>40C</strong> Machine Maintenance/Operation<br />
Non-Rotating<br />
Terminals<br />
6. Remove the reel from the crawler by<br />
unbolting the mounting bracket from the<br />
base of the crawler. Secure the reel and<br />
bracket assembly in a bench vise.<br />
7. Remove the slip ring cover and disconnect<br />
the working cable conductors from the<br />
non-rotating terminals.<br />
8. Remove the old working cable from the<br />
reel by pulling it sideways off the reel.<br />
Make sure that the removal process does<br />
not tension the spring.<br />
9. Loosen the tension relief clamp and pull<br />
the end of the old cable out of the cable<br />
entrance.<br />
To install the new cable:<br />
1. Place the storage reel with the new working<br />
cable on its side and unroll the new<br />
cable in a straight line. Straighten any<br />
twists in the working cable before winding<br />
the cable on the reel.<br />
2. Thread the new working cable through the<br />
cable entrance on the reel.<br />
3. Tighten the tension relief clamp.<br />
4. Install terminals on the ends of the<br />
working cable conductors. Reconnect the<br />
working cable conductors to the non-rotating<br />
terminals.<br />
5. Begin winding the new working cable onto<br />
the reel.<br />
6. After winding the new cable, tape or tie<br />
down the loose cable end to keep it from<br />
interfering with reel installation.<br />
7. Install the reel in the crawler and reconnect<br />
the crawler power wires at the<br />
crawler control panel.<br />
Winding<br />
Wedge<br />
Space<br />
Figure 5.6 Cable Winding<br />
5-5
SECTION 5<br />
<strong>LSC</strong>-40 Machine Operation/Maintenance OPERATION/MAINTENANCE<br />
To complete cable installation:<br />
1. Pre-tension the cable reel spring by turning<br />
the reel seven times in direction of<br />
arrow.<br />
2. Pull cable off reel from underside and<br />
route cable through crawler guide rollers.<br />
3. Feed cable through pivot fitting on car and<br />
into the car control panel.<br />
4. Make terminal connections inside car<br />
junction box.<br />
5. Restore system power.<br />
5.6.2 Spring Replacement<br />
See Figure 5.7. There are three internal cable<br />
reel springs. If one spring breaks, the working<br />
cable will rewind slowly with reduced tension or<br />
may not rewind fully. In case of a single broken<br />
spring, it is important to replace all springs. The<br />
unbroken spring is likely to be operating at<br />
reduced efficiency and could also be close to failure.<br />
To prepare the reel for new springs:<br />
1. Shut off and lock out main system power.<br />
5-6<br />
WARNING:<br />
Failure to properly lock out the cable<br />
reel prior to performing maintenance<br />
may cause injury to personnel.<br />
2. Disconnect the working cable at the car<br />
control panel.<br />
3. Wind the cable onto the reel and allow the<br />
reel springs to lose tension.<br />
CAUTION:<br />
Do not allow the cable to freely rewind<br />
onto the reel. Hold the cable end as it<br />
rewinds, or control reel speed as the<br />
cable rewinds.<br />
4. Disconnect the crawler power wires at the<br />
crawler control panel.<br />
5. Disconnect the cable reel sensor wire.<br />
6. Remove the reel from the crawler housing.<br />
Spool<br />
Side<br />
Shield<br />
Mounting Flange<br />
V Sealing<br />
Ring<br />
Shaft<br />
Collar<br />
Retaining<br />
Ring<br />
Plate<br />
Spring<br />
Slip Ring<br />
Housing<br />
Hood<br />
Figure 5.7 Spring Replacement<br />
Set Screw and<br />
Locking Nut<br />
466367F9902US F1 07JE99
7. Before starting disassembly, make sure<br />
that there is no tension on the springs.<br />
The outer mounting flange should turn<br />
freely.<br />
8. Loosen the screws holding the mounting<br />
flange and the spool side shield in place.<br />
After removing the spool shield, the other<br />
components can be pulled off the shaft.<br />
The spring removal process can be<br />
observed from Figure 5.7.<br />
WARNING:<br />
Exercise extreme care when working<br />
with cable reel springs. A spring under<br />
tension is dangerous and could cause<br />
serious injury.<br />
9. Unless a new working cable is being<br />
replaced at the same time, it is not necessary<br />
to remove the slip ring cover or disconnect<br />
the working cable conductors.<br />
NOTE:<br />
When installing new springs, pay close attention<br />
to the assembly sequence of the plate and<br />
springs.<br />
To assemble the cable reel:<br />
1. Follow the sequence shown in Figure 5.7.<br />
Press down on the shaft to secure components<br />
snugly.<br />
2. Replace springs or other components as<br />
needed.<br />
466367F9902US F1 07JE99<br />
SECTION 5<br />
OPERATION/MAINTENANCE <strong>LSC</strong>-40 Machine Operation/Maintenance<br />
To place cable reel back in service:<br />
1. Install the reel in the crawler and reconnect<br />
the crawler power wires and the<br />
cable reel sensor wire.<br />
2. Pre-tension the cable reel spring by turning<br />
the reel seven times in direction of<br />
arrow.<br />
3. Pull cable off reel from underside and<br />
route cable through crawler guide rollers.<br />
4. Feed cable through pivot fitting on car and<br />
into the car control panel.<br />
5. Make terminal connections inside car control<br />
panel.<br />
6. Restore system power.<br />
5-7
SECTION 5<br />
<strong>LSC</strong>-<strong>40C</strong> Machine Maintenance/Operation MAINTENANCE/OPERATION<br />
5.7 LITHIUM BATTERIES<br />
Each SLC-500 controller contains a lithium<br />
battery that maintains system memory when<br />
power is off. Figure 5.8 shows the shape and<br />
position of the battery which installs under the<br />
front panel of the SLC-500. Both batteries should<br />
be replaced annually or sooner if “Battery Good”<br />
indicator does not light. Failure to do so will result<br />
in loss of PC memory.<br />
5-8<br />
TERMINAL BLOCKS<br />
TEAL<br />
ISOLATION<br />
FILTER<br />
150 VA<br />
Figure 5.8 Lithium Battery and EEPROM<br />
CIRCUIT BREAKERS<br />
GROUND BARS<br />
DUCT<br />
CIRCUIT BREAKERS<br />
DUCT<br />
DUCT<br />
A. B. SLC-500<br />
20 I/O<br />
FIXED CONTROLLER<br />
To change a battery:<br />
1. Make sure power is on. Changing battery<br />
with power off may result in memory loss.<br />
2. Open battery door located on front of PLU.<br />
3. Remove battery from PLU.<br />
4. Insert new battery.<br />
5. Close battery door.<br />
If memory loss does occur due to a dead<br />
battery, refer to Troubleshooting, Section 6.3.4.<br />
INPUT I-1<br />
PCS-2 PCS-1 ACR<br />
INPUT O-2<br />
PUMP<br />
CONTACTOR<br />
PUMP<br />
OVERLOAD<br />
1 CB PUMP<br />
MOTOR<br />
CIRCUIT<br />
PROTECTION<br />
DUCT<br />
TRANSFORMER<br />
500 VA<br />
DUCT<br />
466367F9902US F1 07JE99
5.8 MAINTENANCE TIME TABLE<br />
Table 5.3 shows the suggested schedule for<br />
preventative maintenance of the <strong>LSC</strong>-<strong>40C</strong>. The<br />
service intervals shown apply under normal operating<br />
conditions. In cases of adverse conditions,<br />
such as excessive dust or very high temperatures,<br />
maintenance should be performed at more<br />
frequent intervals.<br />
466367F9902US F1 07JE99<br />
SECTION 5<br />
MAINTENANCE/OPERATION <strong>LSC</strong>-<strong>40C</strong> Machine Maintenance/Operation<br />
Equipment Scheduled Maintenance<br />
Car safety bars<br />
Crawler safety bars<br />
Signal light<br />
Signal horn Daily<br />
Sensors<br />
Safety decals<br />
Actuators<br />
Hydraulic fittings<br />
Hydraulic filter<br />
Quarterly<br />
Hydraulic fluid<br />
Cable<br />
Semi-Annually<br />
Cable springs<br />
Lithium batteries Annually<br />
Table 5.3 Maintenance Time Table<br />
5-9
SECTION 5<br />
<strong>LSC</strong>-40 Machine Operation/Maintenance OPERATION/MAINTENANCE<br />
5-10 466367F9902US F1 07JE99
Most troubleshooting is handled by the computer<br />
messages in the car and crawler diagnostics.<br />
Here are some common problems:<br />
• 6.1 Car Diagnostics<br />
• 6.2 Crawler Diagnostics<br />
• 6.3 Other Diagnostic Checks<br />
6.1 CAR DIAGNOSTICS<br />
If an error originates with the car, the Operator<br />
Message Center on the Car Program Screen displays<br />
an error message and the required operator<br />
action. See Section 3.2.8.<br />
466367F9902US F1 07JE99<br />
SECTION 6<br />
MAINTENANCE/OPERATION <strong>LSC</strong>-<strong>40C</strong> Machine Maintenance/Operation<br />
SECTION 6<br />
TROUBLESHOOTING<br />
6.2 CRAWLER DIAGNOSTICS<br />
If an error originates with the crawler, one or<br />
more lamps on the crawler control panel illuminate<br />
to identify the error condition. Use the<br />
Crawler Fault Diagnostic Charts to determine<br />
error and proper action. See Section 3.2.3.<br />
6-1
SECTION 6<br />
<strong>LSC</strong>-<strong>40C</strong> Machine Maintenance/Operation MAINTENANCE/OPERATION<br />
6.3 OTHER DIAGNOSTIC CHECKS<br />
• 6.3.1 Battery<br />
• 6.3.2 Fuses<br />
• 6.3.3 Circuit Breakers<br />
• 6.3.4 Memory Loss<br />
• 6.3.5 Hydraulics Failure<br />
6.3.1 Battery<br />
The car and the crawler each have power<br />
supplied by a lithium battery. The batteries are<br />
located in the power supplies inside the car and<br />
crawler control panels. Refer to Maintenance<br />
Section 5.7 to replace battery if a low signal<br />
activates. See Figures 6.1 and 6.2.<br />
6-2<br />
GROUND BAR<br />
ALARM & RADIO CONTROL<br />
TERMINAL BLOCKS<br />
DUCT 1.5 X 3 X 31.00<br />
POWER<br />
SUPPLY<br />
DUCT 1 X 3 X 15.50<br />
DUCT 1 X 3 X 15.00<br />
SLC 500<br />
PROCESSOR<br />
DUCT 1 X 3 X 15.50<br />
INPUT I-1<br />
6.3.2 Fuses<br />
A blown fuse may cause the power supply<br />
indicator light to illuminate on the controller.<br />
Check the two fuses located behind the lithium<br />
batteries, in the car and crawler control panels.<br />
Replace blown fuses with new fuses. See Figures<br />
6.1 and 6.2.<br />
NOISE SUPPRESSOR<br />
300 VA<br />
INPUT I-2<br />
-<br />
DUCT 2 X 3 X 17.00<br />
1 CB<br />
(LOCATION)<br />
OUTPUT 0-4<br />
OUTPUT 0-5<br />
TERMINAL BLOCKS<br />
ACR1 MCR RSCR<br />
2-CB<br />
3-CB<br />
5-CB<br />
6-CB<br />
7-CB<br />
8-CB<br />
9-CB<br />
10-CB<br />
11-CB<br />
12-CB<br />
13-CB<br />
14-CB<br />
15-CB<br />
16-CB<br />
17-CB<br />
Figure 6.1 Car Battery, Fuses, EEPROM and Circuit Breakers<br />
-<br />
BEACON<br />
TERMINAL BLOCKS<br />
1 MPC<br />
PUMP<br />
(LOCATION)<br />
DUCT 1 X 3 X 9.00<br />
PUMP CRAWLER<br />
AUX<br />
CONTACT<br />
OVERLOAD<br />
(LOCATION)<br />
1 CB<br />
(LOCATION)<br />
CRAWLER<br />
4-CB<br />
DUCT 1 X 3 X 11.00<br />
DUCT 1 X 3 X 11.00<br />
TRANSFORMER<br />
750 VA<br />
DUCT 1 X 3 X 11.00<br />
2-CB<br />
3-CB<br />
5-CB<br />
6-CB<br />
7-CB<br />
8-CB<br />
9-CB<br />
10-CB<br />
11-CB<br />
12-CB<br />
13-CB<br />
14-CB<br />
15-CB<br />
16-CB<br />
17-CB<br />
466367F9902US F1 07JE99
6.3.3 Circuit Breakers<br />
A tripped circuit breaker may result for no<br />
apparent reason and from no fault of the<br />
machine. Check the circuit breakers, located in<br />
the car and crawler control panels, and reset any<br />
tripped circuit breakers. See Figures 6.1 and 6.2.<br />
466367F9902US F1 07JE99<br />
SECTION 6<br />
MAINTENANCE/OPERATION <strong>LSC</strong>-<strong>40C</strong> Machine Maintenance/Operation<br />
TERMINAL BLOCKS<br />
TEAL<br />
ISOLATION<br />
FILTER<br />
150 VA<br />
DUCT<br />
A. B. SLC-500<br />
20 I/O<br />
FIXED CONTROLLER<br />
Figure 6.2 Crawler Battery, Fuses, EEPROM and Circuit Breakers<br />
CIRCUIT BREAKERS<br />
GROUND BARS<br />
DUCT<br />
CIRCUIT BREAKERS<br />
DUCT<br />
Persistent circuit breaker tripping indicates a<br />
problems exists. Correct the problem as required.<br />
INPUT I-1<br />
PCS-2 PCS-1 ACR<br />
INPUT O-2<br />
PUMP<br />
CONTACTOR<br />
PUMP<br />
OVERLOAD<br />
DUCT<br />
DUCT<br />
1 CB<br />
(LOCATION)<br />
1 CB PUMP<br />
MOTOR<br />
CIRCUIT<br />
PROTECTION<br />
TRANSFORMER<br />
500 VA<br />
6-3
SECTION 6<br />
<strong>LSC</strong>-<strong>40C</strong> Machine Maintenance/Operation MAINTENANCE/OPERATION<br />
6.3.4 Memory Loss<br />
Power to a panel may be lost due to:<br />
• Power surge or drop<br />
• Dead battery<br />
If power is lost a memory loss may result. To<br />
restore the memory:<br />
1. Turn the panel power off.<br />
2. Insert EEPROM into the inside of the<br />
processor.<br />
3. Restore the power. The SLC-500 will automatically<br />
read the EEPROM into its RAM<br />
and go into the run mode. The PLU light<br />
will illuminate to indicate a successful<br />
transfer.<br />
4. Turn the power off.<br />
5. Remove the EEPROM from the unit.<br />
6.3.5 Hydraulics Failure<br />
Failure of the hydraulics system can be<br />
caused by several problems:<br />
• High temperature<br />
• Clogged filter<br />
• Pump failure<br />
• System leakage<br />
If the hydraulics lock-up, use the external<br />
hydraulic valves to move the car or crawler. Figure<br />
6.3 shows the external hydraulics valves:<br />
• Left lift bar<br />
• Right lift bar<br />
• Wheel motors<br />
To use an external hydraulic source, open all<br />
valves counterclockwise to allow wheels or lift bar<br />
to move freely.<br />
6.4 TECHNICAL ASSISTANCE<br />
If these checks do not resolve the problem,<br />
please call <strong>Besser</strong> technical assistance. To best<br />
assist the <strong>Besser</strong> technical staff, be prepared with<br />
the following information:<br />
• Sequence of events that caused the shut<br />
down or problem<br />
• Part of the system that shuts down or malfunctions<br />
• Identification of the problem<br />
• <strong>LSC</strong>-<strong>40C</strong> computer screen report<br />
• Lights flashing on the car or crawler<br />
• Any input/output devices reporting trouble<br />
Lift Bar<br />
Cylinder Bypass<br />
6-4 466367F9902US F1 07JE99<br />
Left<br />
Wheel Motor<br />
Bypass<br />
Right<br />
Figure 6.3 External Hydraulic Valves