Digital Ink Pad - Aiptek Store
Digital Ink Pad - Aiptek Store
Digital Ink Pad - Aiptek Store
You also want an ePaper? Increase the reach of your titles
YUMPU automatically turns print PDFs into web optimized ePapers that Google loves.
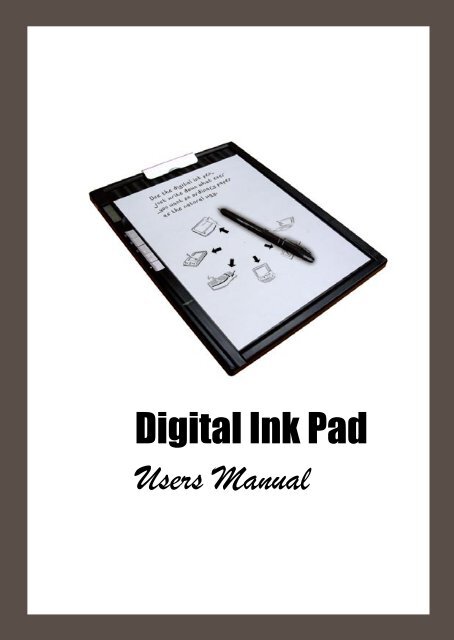
<strong>Digital</strong> <strong>Ink</strong> <strong>Pad</strong><br />
Users Manual
Welcome<br />
Dear user, thanks for purchasing this product.<br />
Much investment in time and effort has gone into its development,<br />
and it is our hope that it will give you many years of trouble-free service.<br />
Notice<br />
1. Purchasing new ink cartridges:<br />
The dimension of the pen cartridge is 2.3~2.4mm (diameter) x 67mm (length).<br />
You are recommended to use products of tested brands, such as KANGHER,<br />
MINI STAR, SCHMIDT 628F, and ROTRING.<br />
Note: Unqualified cartridges may affect the functionality of the digital pen.<br />
Cartridges of unspecified sizes may cause damage to the digital pen.<br />
2. Replace the battery of the digital pen when any of the followings occurs:<br />
a. The LED on the digital pen starts blinking.<br />
b. The strokes of the pen show serious distortion.<br />
c. Abnormal pen strokes appear on areas that you did not write on.<br />
d. The pen strokes appear to be seriously missing or dragging.<br />
3. Notes on maintaining the digital pad and the digital pen:<br />
a. Avoid using the device in places near sources of strong magnetic or<br />
electromagnetic fields.<br />
b. Do not place magnetic objects on the surface of the digital pad.<br />
c. Do not disassemble the digital pad or digital pen.<br />
d. Do not drop the device heavily to a hard surface. Severe impact may<br />
cause malfunction to the digital pad and digital pen.<br />
e. Do not press or knock heavily on the digital pen cartridge. Doing so may<br />
cause damage to the pen tip or the pen itself and result in malfunction.<br />
4. Notes on formatting memory:<br />
a. If the file information of the internal memory does not display correctly,<br />
please format the internal memory on the computer.<br />
b. If the file information of the purchased memory card does not display<br />
correctly, please format the memory card on the computer.<br />
5. Do not dispose of the digital pad or digital pen at will:<br />
If the device has become unusable, please dispose of the device according<br />
to the environmental regulations enforced by your country. If you need to<br />
disassemble the device, please refer to the instructions provided on the web<br />
site.
Getting Started<br />
The digital pad is a handy device that captures your handwriting. While you<br />
take notes on paper, the digital pad also digitally records everything you write<br />
or draw, so that you can present or edit your work on the computer. Besides,<br />
the digital pad can also serve as a regular tablet as well.<br />
Package Contents<br />
English<br />
<strong>Digital</strong> pad<br />
<strong>Digital</strong> pen<br />
•<br />
•<br />
•<br />
•<br />
•<br />
•<br />
•<br />
•<br />
•<br />
•<br />
Notepad<br />
<strong>Pad</strong> cover<br />
Two replacement ink cartridges<br />
Two dummy cartridges<br />
USB cable<br />
Four AAA batteries for digital pad<br />
ZA13 Zinc Air Battery for digital pen<br />
Quick start guide<br />
Software CD<br />
Battery charger (optional)
The parts of digital pad<br />
English<br />
USB Connector<br />
Back Side<br />
Compartment Cover<br />
Battery<br />
Compartment<br />
RESET<br />
ISP (online update)<br />
Power Button<br />
LCD Display<br />
Function Buttons<br />
Card Slot<br />
LED Indicator<br />
Paper Clip<br />
Cartridge<br />
Compartment<br />
When writing with the digital pen, the valid detectable height<br />
above the digital pad is about 13mm (around 135 sheets),<br />
and the valid writing area is as large as a letter size paper,<br />
about 216mm x 280mm (8.5”x11”).<br />
Writing<br />
area
Battery installation - digital pad<br />
The battery compartment is located in the back side of the digital pad. To<br />
open the compartment cover, press the dotted area on the surface of the<br />
cover and then slide it outward. After removing the cover, install four AAA<br />
batteries into the compartment as indicated. Then replace the cover.<br />
English<br />
Back Side<br />
Incorrect installation of batteries will cause damage to the digital ink pad.<br />
Four alkaline AAA batteries can support about 20 hours of continual writing.<br />
The actual lasting time is dependent on the brands and qualities of the<br />
batteries.<br />
Battery installation - digital pen<br />
Unscrew the rear tube from the front tube. Install the supplied ZA13<br />
(hearing aid type ) battery into the battery compartment and screw it onto<br />
the rear tube until tight. You can then depress the top of the pen and start<br />
using it.
Inserting a memory card (optional)<br />
English<br />
In addition to the internal memory, the digital pad can also store data on a<br />
Secure <strong>Digital</strong> (SD) card.<br />
To insert a memory card, gently push the card as indicated until the card<br />
reaches the bottom of the slot.<br />
The SD card comes with a write-protect switch. Normally, the card is nonwritable<br />
when write-protect switch is set to the<br />
position. To prevent data missing if you neglect to set the write-protect<br />
switch to the Unlock position during inking, this device sets specific<br />
definition that the SD card will become writable even the write-protect<br />
switch is set to the Lock position.<br />
When a memory card is inserted, the digital pad will use the card as the main<br />
storage medium. Files stored in the internal memory will become inaccessible<br />
until the card is removed.<br />
We suggest you use SD cards manufactured by Sandisk TM as they provide<br />
the best compatibility with the digital pad.<br />
The system will be powered off when you push out the SD Card.
Placing a paper or pad cover<br />
To hold a paper or pad cover on the digital pad, lift the paper clip upward<br />
and place the paper or pad cover on the surface of the pad. Then release<br />
the paper clip to hold the paper or pad cover.<br />
Paper clip<br />
English<br />
The digital pad can hold a A4/letter-size paper, but the maximum writing area<br />
cannot be larger than a letter-size paper, about 216mm x 280mm (8.5”x11”).
Recording Your Handwriting<br />
English<br />
Power on the digital pad<br />
To power on the digital pad, push the power button as indicated.<br />
If the digital pad cannot be powered on, please check:<br />
1. There are four AAA batteries installed in the digital pad.<br />
2. The batteries have enough power left.<br />
3. The polar(+ -) directions of the installed batteries are correct.<br />
If a memory card is inserted, the digital pad will take more time (about 4~5<br />
seconds) to boot up.<br />
After the digital pad is powered on, you can see the following icons<br />
display on the LCD panel:<br />
(a) Folder (A ~ Z).<br />
(b) Page number (1 ~ 99).<br />
(c) : Current page is blank.<br />
: Current page contains contents.<br />
(d) Appears when writing with the digital pen.<br />
(e) Battery life indicator. Blank indicates no<br />
power.<br />
(f) M: using internal memory;<br />
SD: using a SD card.<br />
(g) Memory storage indicator. Blank indicates<br />
no data.<br />
(a)<br />
(b)<br />
(c)<br />
(d)<br />
(e)<br />
(f)<br />
(g)
Start to record your handwriting<br />
The pen icon<br />
When you are using the digital pen to write or draw on the<br />
digital pad, the pen icon will appear on the LCD panel. Your<br />
handwriting will be captured when this pen icon is<br />
displaying on the LCD panel.<br />
English<br />
Check every time you write. If you do not see the pen icon while writing,<br />
please do the followings:<br />
1) Alter the pressure applied on the pen tip.<br />
2) Check the battery status of the digital pen.<br />
3) Switch off the digital pad and then switch it on again.<br />
4) Check if you are writing outside of the effective writing area.<br />
The storage device icon<br />
When you are using the internal memory for storage, the M icon will<br />
display on the LCD panel. When a memory card is inserted, the SD icon<br />
will display and all of your writing will be saved in the memory card.<br />
If you use a memory card for storage, those digital pages saved in the<br />
internal memory will become inaccessible until the memory card is removed.<br />
If the icon is incorrect, please power off the digital pad and then power it on<br />
again.<br />
M/SD icon blinking during writing indicates the data being stored in the<br />
memory. Please do not push out the SD card till SD icon stop blinking.<br />
The page icon<br />
When you start a new page, the displayed icon is<br />
captured and saved, the icon will become .<br />
. After your writing is
Page numbering<br />
English<br />
When you are taking notes spreading many pages of your notebook, you<br />
are recommended to write down a page number, such as A01, A02...,<br />
on each page of your notebook. If you are using a memory card, you are<br />
recommended to add a prefix (e.g. SDA01...) to make the page number<br />
distinctive.<br />
Low battery<br />
When the low battery ( ) icon is displaying on the LCD panel, you are<br />
recommended to replace the batteries immediately. When the batteries<br />
are exhausted, the icon will appear and the digital pad will be forced to<br />
shut down in a short period of time.<br />
Rechargeable batteries and alkaline batteries have different attributes. When<br />
using rechargeable batteries, it is normal that the battery icon changes from<br />
full power to 2/3 power after a short period of use.<br />
Memory full<br />
When the memory full ( ) icon is displaying on the LCD panel, it<br />
means the internal memory or memory card (depending on which you<br />
are using) has no more space to store your digital pages. Under such<br />
circumstances, you should erase some unwanted contents if you need<br />
to continue writing on the same pages. You can also use a new memory<br />
card, but the old pages will become inaccessible and you need to start<br />
writing on a whole new page.<br />
The size of one stored page depends on the strokes and words you write on<br />
the page. The more you write, the larger the file size will be.<br />
When the memory is full and no more space is available, the pen icon (p. 7)<br />
will not appear if you continue writing.
Operation with the function buttons<br />
Here are five function buttons on the left side of the digital pad. You can<br />
use them to perform many useful actions to assist<br />
your page management.<br />
Create a new blank page<br />
To create a new blank page, press the<br />
button.<br />
English<br />
Shift between pages<br />
To move to the previous page, press the button. To<br />
move to the next page, press the button. Note that<br />
you cannot move to a page that is not yet created.<br />
Function<br />
buttons<br />
When you switch the paper page, be sure to switch the digital page<br />
accordingly, so that the contents of both pages can stay aligned.<br />
Erase page contents<br />
To erase the digital contents of current page, press the button. Then a<br />
prompt message will appear on the LCD screen. Use the or button<br />
to select “Yes” and press the button to confirm. After the contents are<br />
erased, the page icon will become . You should then remove or cross<br />
out the same paper page and start a new page accordingly.<br />
The erased contents are gone forever and cannot be recovered.<br />
Erase paper contents with an eraser does not erase the digital contents<br />
accordingly.<br />
You cannot erase/clean a folder.<br />
When the prompt message appears, you can still record your writing as the<br />
pen icon displays.<br />
If you do not want to erase anything, simply select “No” and press the<br />
button upon seeing the prompt message.
Create a new folder<br />
English<br />
To create a new folder, press the button. You will see an English letter<br />
blinking on the LCD panel. Press the button and the letter will change.<br />
Then press the button again and a new folder is created.<br />
Shift between folders<br />
Press the button and you will see an English letter blinking on the LCD<br />
panel. Use the or button to select your desired folder and then<br />
press the button again to confirm.<br />
Button-Locked Function<br />
The 5 function buttons on <strong>Digital</strong> <strong>Ink</strong> <strong>Pad</strong> can be locked after<br />
pressing the 5 th button 3 seconds. During in locked status, if<br />
function is pressed, the TN LCD will show a “* LO” icon. And<br />
the TN LCD will back to the normal screen after a moment.<br />
Writing function is still as usual; only the button key pad is<br />
disabled.<br />
Unlock the Buttons<br />
If a user wants to release the “Button-Locked” status, just need to push the<br />
5 th button and then the 1 st button respectively. And after unlocking the key<br />
pad, the button switches can work as its default function.<br />
10
Turn off the digital pad<br />
To turn off the digital pad, press the power button indicated.<br />
English<br />
Next time when you power on the digital pad again, you will be automatically<br />
led to the last edited page.<br />
11
Replace the cartridge of the pen<br />
English<br />
The cartridge compartment can contain up to two replacement cartridges.<br />
When the ink cartridge is running out of ink or you want to use a dummy<br />
cartridge, you can replace the old cartridge with a new one.<br />
1.<br />
Open the cartridge compartment cover.<br />
Slide open the cartridge compartment cover<br />
on the lower right side of the digital pad.<br />
Inside the compartment you can find two<br />
replacement cartridges.<br />
2.<br />
Pull out the old cartridge.<br />
Insert the pen tip into the clip hole in the<br />
cartridge compartment. Tilt the pen to grip<br />
the pen tip, and then gently pull out the old cartridge. Or you can<br />
use the accessory tweezers to pull out the old cartridge.<br />
or<br />
3.<br />
Insert a new cartridge.<br />
Insert a new ink/dummy cartridge and gently slide the cartridge into<br />
the pen. Carefully press the cartridge tip against a hard surface until<br />
the cartridge clicks into place.<br />
When inserting the cartridge, do not use force. A successful insertion<br />
should leave a buffer space for the pen tip to “bounce” back after being<br />
pressed.<br />
12
Using the <strong>Digital</strong> <strong>Pad</strong> as a Tablet<br />
Driver installation<br />
Before using the digital pad as a tablet, you must install the tablet driver.<br />
1.<br />
Place the Driver CD into the CD-ROM drive.<br />
Place the accessory Driver CD into the CD-ROM drive of your<br />
computer, and the autorun screen will appear.<br />
English<br />
2.<br />
Start driver installation.<br />
* The actual display may differ.<br />
Click on the icon and the installation wizard will start.<br />
Follow the on-screen instructions to complete the installation.<br />
After the installation you may need to restart your computer for the<br />
tablet to work properly.<br />
13
English<br />
Connecting the digital pad to your PC<br />
1. Power on your computer.<br />
2.<br />
Press the power button of your computer to power on the computer.<br />
Connect the digital pad to the computer.<br />
Connect the mini connector of the USB cable into the digital pad,<br />
and then connect the other end into the computer.<br />
3.<br />
The digital pad is detected by the computer<br />
You can tell the computer has correctly detected the digital pad by<br />
the following signals:<br />
1) The LCD panel of the digital pad is displaying icons<br />
as indicated on the right.<br />
2) The icon appears on the system tray of your PC<br />
desktop.<br />
3) The LED light of the digital pad starts blinking.<br />
Do not connect two or more digital pads to your computer at the same<br />
time, as the computer may not be able to distinguish them.<br />
If the icons on the LCD do not display, please check if the USB cable<br />
is well connected at both ends. Unplug and re-plug the USB connector<br />
if you need to.<br />
In tablet mode, the power of the digital pad is provided by the<br />
computer and you can not use the digital pad to record your<br />
handwriting.<br />
When using the digital pad as a tablet, you are recommended to<br />
operate with a regular tablet pen. Or, you can replace the ink cartridge<br />
of the digital pen with a dummy cartridge. Refer to page 11 for more<br />
information.<br />
14
Operations in tablet mode<br />
Place the pad cover<br />
Before using the digital pad as a tablet, you are recommended<br />
to use the pad cover to protect the surface of the digital pad.<br />
Detectable area<br />
<strong>Pad</strong> Cover<br />
English<br />
When using the digital pad as a tablet, you can use the digital pen to<br />
navigate the mouse pointer. By default the detectable area is as indicated,<br />
and it is in proportion to the desktop screen. The LED light will light up<br />
when the digital pen is within the detectable area. When you start writing,<br />
the light will go out.<br />
A<br />
B<br />
A<br />
LED<br />
B<br />
Detectable area<br />
D<br />
C<br />
D<br />
C<br />
15
Defining tablet functions<br />
English<br />
When using the digital pad as a tablet, various functions of the digital pad<br />
can be defined in the tablet control panel. The control panel settings are<br />
different in different operating system –Windows 2000/XP and Windows<br />
Vista. Please follow the exact instruction depends on your O/S.<br />
In Windows 2000/XP<br />
1.<br />
Double-click the “USB Tablet” icon on the system tray<br />
Double-click on the “USB Tablet” icon to bring up the settings<br />
window.<br />
If the icon does not display, please check and make<br />
sure: 1. the tablet driver is installed; 2. the USB cable<br />
is well connected at both ends. Unplug and re-plug<br />
the USB connector if you need to.<br />
The following functions take effect when the digital<br />
pad is used as a tablet. They are not functional when<br />
the digital pad is in ink-capture mode (when the<br />
digital pad is not connected with a computer).<br />
2.<br />
Set unit and tracking mode<br />
Unit: You can select “inch” or “cm”<br />
as the default unit.<br />
Tracking mode: You can set the<br />
pointer tracking mode to “Pen” or<br />
”Mouse”. In “Pen” mode, absolute<br />
coordinates are used. In “Mouse”<br />
mode, you can use the digital pen<br />
to move the pointer in the same<br />
way as using a mouse.<br />
16
You can update the driver by downloading new driver from the Internet.<br />
3.<br />
Mouse-clicking functions and click pressure.<br />
You can change the mouse-click<br />
simulation settings here. You can<br />
also re-calibrate the pen offset value<br />
or reset the pressure of pen tip click<br />
according to your preference.<br />
English<br />
If you are using a regular tablet pen, the settings of the pen buttons<br />
are also adjustable in the control penal.<br />
If you change the pen you are using or the pressure of the pen<br />
appears abnormal, please cancel the “Auto Setting” and select<br />
“Adjust”.<br />
4.<br />
Hot key setting.<br />
Two of the five buttons on the digital<br />
pad are used for mouse-clicking; the<br />
rest three can be programmed here.<br />
By default they will create, open, or<br />
close a document when using an<br />
application. By a single click of the<br />
setting button, you can change their<br />
functions to run a program, link to an<br />
URL, or simulate a specific keyboard<br />
button.<br />
L<br />
R<br />
F1<br />
F2 F3<br />
Hot keys<br />
(F1~F3)<br />
17
In Windows Vista<br />
English<br />
In Windows Vista, there are two modes as your alternative in accord<br />
with your application need, <strong>Ink</strong> mode and Graphic mode. You can switch<br />
the different modes on the control panel according to your demand<br />
applications.<br />
<strong>Ink</strong>ing mode<br />
Supporting only single screen. Under <strong>Ink</strong>ing Mode, Microsoft default driver<br />
works and our driver Pen <strong>Pad</strong> does not provide pen setting function.<br />
Please use Vista Pen and Input Device to set pen function.<br />
1.<br />
Double-click the “USB Tablet” icon on the system tray.<br />
Double-click on the “USB Tablet” icon to bring up the<br />
settings window.<br />
If the icon does not display, please check and make sure:<br />
1. the tablet driver is installed; 2. the USB cable is well<br />
connected at both ends. Unplug and re-plug the USB<br />
connector if you need to.<br />
The following functions take effect when the digital pad is<br />
used as a tablet. They are not functional when the digital<br />
pad is in ink-capture mode (when the digital pad is not<br />
connected with a computer).<br />
18
2.<br />
Tablet information and set tablet mode.<br />
Tablet information: Such as<br />
Tablet Model, Tablet Length,<br />
Tablet Width, Driver Version,<br />
Firmware Version and so on.<br />
Vista Pen and Input Device:<br />
Click the icon to launch Pen and<br />
Input Device dialogue built in<br />
Windows Vista.<br />
English<br />
Tablet mode: You can switch<br />
between <strong>Ink</strong> Mode and Graphic<br />
Mode in accord with your<br />
application need.<br />
You can update the driver by downloading new driver from<br />
the Internet.<br />
3.<br />
Hot key setting.<br />
The right three buttons on the<br />
digital pad can be programmed<br />
here. By default they will create,<br />
open, or close a document when<br />
using an application. By a single<br />
click of the setting button, you can<br />
change their functions to run a<br />
program, link to an URL, or<br />
simulate a specific keyboard<br />
button.<br />
19
Graphic mode<br />
English<br />
Supporting multiple screen function. Under Graphic Mode, our driver Pen<br />
<strong>Pad</strong> works and you can set the pen functions through Pen <strong>Pad</strong>.<br />
1.<br />
Double-click the “USB Tablet” icon on the system tray.<br />
Double-click on the “USB Tablet” icon to bring up the<br />
settings window.<br />
If the icon does not display, please check and make sure:<br />
1. the tablet driver is installed; 2. the USB cable is well<br />
connected at both ends. Unplug and re-plug the USB<br />
connector if you need to.<br />
The following functions take effect when the digital pad is<br />
used as a tablet. They are not functional when the digital<br />
pad is in ink-capture mode (when the digital pad is not<br />
connected with a computer).<br />
2.<br />
Set unit and tracking mode.<br />
Unit: You can select “inch” or “cm”<br />
as the default unit.<br />
Tracking mode: You can set the<br />
pointer tracking mode to “Pen” or<br />
”Mouse”. In “Pen” mode, absolute<br />
coordinates are used. In “Mouse”<br />
mode, you can use the digital pen<br />
to move the pointer in the same<br />
way as using a mouse.<br />
Tablet mode: You can switch<br />
between <strong>Ink</strong> Mode and Graphic<br />
Mode in accord with your application need.<br />
20
You can update the driver by downloading new driver from<br />
the Internet.<br />
3.<br />
Mouse-clicking functions and click pressure.<br />
You can change the mouse-click<br />
simulation settings here. You can<br />
also re-calibrate the pen offset<br />
value or reset the pressure of pen<br />
tip click according to your<br />
preference.<br />
English<br />
▪ If you are using a regular tablet<br />
pen, the settings of the pen<br />
buttons are also adjustable in the<br />
control penal.<br />
▪ If you change the pen you are<br />
using or the pressure of the pen appears abnormal, please cancel<br />
the “Auto Setting” and select “Adjust”.<br />
4.<br />
Hot key setting.<br />
The right three buttons on the<br />
digital pad can be programmed<br />
here. By default they will create,<br />
open, or close a document when<br />
using an application. By a single<br />
click of the setting button, you can<br />
change their functions to run a<br />
program, link to an URL, or<br />
simulate a specific keyboard button.<br />
21
Appendix<br />
English<br />
Troubleshooting<br />
Problem<br />
The digital pad cannot be<br />
powered on.<br />
The content of the digital<br />
page gets overwritten.<br />
When writing on the<br />
digital pad, the pen icon<br />
does not display on the<br />
LCD screen.<br />
The pen icon keeps<br />
displaying on the LCD<br />
screen even though I am<br />
not writing at all.<br />
The pen strokes in the<br />
digital page become<br />
longer, shorter, or even<br />
missed in some parts.<br />
Solution<br />
a. Make sure the batteries are correctly<br />
installed in the digital pad.<br />
b. Make sure the batteries have enough<br />
power left.<br />
Change to a new digital page when turning<br />
a paper page.<br />
a. Try altering the force applied to the pen<br />
when writing.<br />
b. Make sure the battery in the digital pen<br />
has enough power.<br />
c. Make sure you are writing within the<br />
legal working area.<br />
d. There may be weak signal detection.<br />
Try powering off and then rebooting the<br />
digital pad.<br />
It may be caused by false signal detection.<br />
Try powering off and then rebooting the<br />
digital pad.<br />
a. Try using more force or slowing down<br />
your speed when writing.<br />
b. Try to keep the tilting angle of the pen<br />
and the pad more than 60 degrees.<br />
22
Problem<br />
The pen strokes in the<br />
digital page are seriously<br />
distorted, dragging, or<br />
missed.<br />
I feel apparent<br />
inconsistency and<br />
ruggedness when writing<br />
strokes.<br />
After installing a SD card,<br />
the LCD screen displays<br />
“M” instead of “SD”.<br />
Memory is full before all<br />
26 folders are completely<br />
taken up.<br />
Fail to create a new<br />
folder.<br />
After connecting the<br />
digital pad to a computer,<br />
the LCD display does not<br />
change, and the icon of<br />
removable disk does not<br />
show up on the computer<br />
desktop.<br />
After connecting the<br />
digital pad to a computer,<br />
the tablet icon does not<br />
display on the computer<br />
desktop.<br />
Solution<br />
a. If the digital pen has been used for a<br />
period of time, check if the battery power<br />
has been depleted.<br />
b. If the pen cartridge has been replaced,<br />
check if the cartridge was correctly<br />
installed. There should be about 1.5mm<br />
space for the pen tip to use as buffer while<br />
writing continuously.<br />
The pen cartridge may be incorrectly<br />
installed. Try removing the pen cartridge<br />
and then re-installing it into the pen barrel<br />
as instructed on the manual.<br />
Make sure the SD card is correctly installed<br />
into the digital pad and that the protection<br />
switch is set to “unlock”.<br />
You can save up to 2574 (26x99) pages in<br />
the digital pad. However, the actual number<br />
of pages can be saved is dependent on the<br />
capacity of the memory card.<br />
All 26 (A~Z) folders might have been<br />
created. Note: You cannot erase folders in<br />
digital pad. Please erase some pages and<br />
write on these pages, or use a computer to<br />
erase unwanted folders.<br />
a. Make sure the digital pad is correctly<br />
connected to your computer that the USB<br />
cable should be tight to the digital pad end.<br />
Try reconnecting the digital pad again.<br />
b. If you are using a USB hub, make<br />
sure the hub supplies enough power to<br />
the digital pad. You are recommended to<br />
connect the digital pad directly to the USB<br />
port of your computer.<br />
a. Make sure the tablet driver has been<br />
installed.<br />
b. The digital pad is not correctly detected<br />
by the computer. Try reconnecting the<br />
USB cable.<br />
English<br />
23
English<br />
Problem<br />
After connecting the<br />
digital pad to a computer,<br />
the effective working area<br />
is limited to only a portion<br />
of the computer screen.<br />
The LCD screen keeps<br />
displaying when I press<br />
the power button to<br />
power off<br />
Solution<br />
It may be caused by false detection<br />
of tablet driver. Try reconnecting the<br />
USB cable. The working area should<br />
automatically switch to the “full screen”<br />
setting every time you connect the digital<br />
pad to a computer.<br />
Press the Reset button on the back of the<br />
ink pad, the system will shut down and the<br />
LCD screen will go out. Press the power<br />
button again and your system can restart<br />
working.<br />
(Note: Your data stored will not be<br />
destroyed after reset)<br />
The digital note file set<br />
up time shown on PC<br />
doesn’t coincide with its<br />
real set-up time.<br />
Plug the <strong>Digital</strong> <strong>Ink</strong> <strong>Pad</strong> into your PC,<br />
and the device time will reset to the PC<br />
synchronously.<br />
After you replace the new batteries in the<br />
<strong>Digital</strong> <strong>Ink</strong> <strong>Pad</strong>, please plug your pad into<br />
the PC before you start taking notes.<br />
24
Specifications - digital ink pad<br />
Technology<br />
Dimension<br />
Active Area<br />
Weight<br />
Writing height<br />
Built-in Memory<br />
Expandable Storage<br />
Electromagnetic<br />
( 331.9 x 252.8 x 13.5 ) mm<br />
8 1/2” x 11” (Portrait in <strong>Ink</strong> Mode and<br />
Landscape in Tablet Mode)<br />
670.0g (642.8g without battery)<br />
Max. 13 mm (around 130 sheets)<br />
32 MB NAND flash<br />
Secure <strong>Digital</strong> Memory card<br />
Battery AAA battery x 4<br />
English<br />
Battery Life<br />
Power saving<br />
Power consumption<br />
Continuous Writing Time: more than 20 hr<br />
3 sec Auto-Standby; 15 min shut-down<br />
Writing Time: 80~90mA (240 ~ 270 mW)<br />
Standby Time: 15~20mA(45~60 mW)<br />
Power source<br />
<strong>Ink</strong>ing: 1.5V AAA Battery * 4<br />
USB port when connecting to computers<br />
Connection Interface<br />
Resolution<br />
Features<br />
Certification<br />
Operating System<br />
USB 2.0 compatible<br />
1000 Lpi<br />
<strong>Digital</strong> inking/Tablet/Mass Storage/Card<br />
Reader<br />
CE, FCC, BSMI<br />
Windows 2000/XP,Vista<br />
25
Specifications - digital ink pen<br />
English<br />
Diameter<br />
Length<br />
Weight<br />
Battery<br />
Battery Life (writing<br />
hours)<br />
11 mm<br />
141mm<br />
12.6 g with battery<br />
ZA13 Zinc Air Battery<br />
1500 hours<br />
26
82-804W91010v4.0


