Leggeanvisning Massiv Eik Plank Installation instructions ... - Boen
Leggeanvisning Massiv Eik Plank Installation instructions ... - Boen
Leggeanvisning Massiv Eik Plank Installation instructions ... - Boen

You also want an ePaper? Increase the reach of your titles
YUMPU automatically turns print PDFs into web optimized ePapers that Google loves.
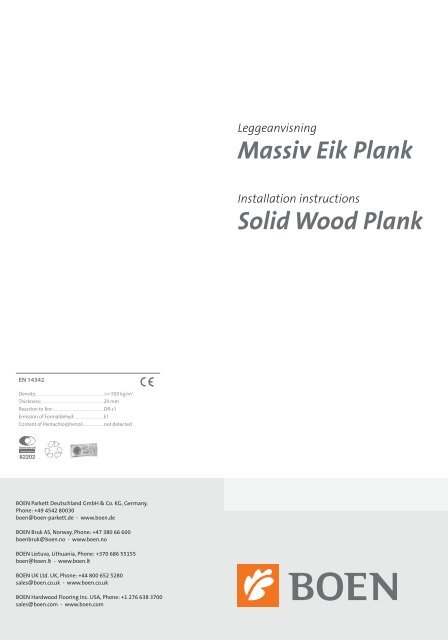
EN 14342<br />
Density:.............................................................>=.550.kg/m3 Thickness:.........................................................20.mm<br />
Reaction.to.fire:...............................................Dfl-s1<br />
Emission.of.Formaldehyd:...........................E1.<br />
Content.of.Pentachlorphenol:...................not.detected<br />
<strong>Boen</strong> Parkett Deutschland GmbH & Co. KG, Germany,<br />
Phone: +49 4542 80030<br />
boen@boen-parkett.de - www.boen.de<br />
<strong>Boen</strong> Bruk AS, norway, Phone: +47 380 66 600<br />
boenbruk@boen.no - www.boen.no<br />
<strong>Boen</strong> Lietuva, Lithuania, Phone: +370 686 55155<br />
boen@boen.lt - www.boen.lt<br />
<strong>Boen</strong> UK Ltd. UK, Phone: +44 800 652 5280<br />
sales@boen.co.uk - www.boen.co.uk<br />
<strong>Boen</strong> Hardwood Flooring Inc. USA, Phone: +1 276 638 3700<br />
sales@boen.com - www.boen.com<br />
<strong>Leggeanvisning</strong><br />
<strong>Massiv</strong> <strong>Eik</strong> <strong>Plank</strong><br />
<strong>Installation</strong> <strong>instructions</strong><br />
Solid Wood <strong>Plank</strong>
Norsk NO<br />
<strong>Massiv</strong> <strong>Eik</strong> <strong>Plank</strong><br />
TRADITIONAL<br />
enkel og robust – men med den edle og høyverdige karakter av ekte massiv<br />
plank. Den klassiske varianten leveres overflatebehandlet med naturolje.<br />
ANTIQUE<br />
Antique massiv eikeplank har særpreg av årelang slitasje og en røff sortering.<br />
Leveres mørkbeiset og overflatebehandlet med naturolje.<br />
HISTORICAL<br />
Særdeles rustikal - noe som gir den massive planken et historisk preg. Med<br />
ekte håndarbeid plugges og sparkles uregelmessigheter i eikeveden. Leveres<br />
mørkbeiset og overflatebehandlet med naturolje.<br />
STONEwASHED GRå<br />
Børstet, beiset og behandlet med naturolje. en overflate behandling med grå<br />
farge, som skaper et unikt gulv hvor årringene i treet fremheves.<br />
CHOCOLATE<br />
Børstet, beiset og behandlet med naturolje. en mørkbeiset rustikal variant<br />
som passer godt til lyst og elegant interiør.<br />
3 bREDDER<br />
Finnes i breddene 137 mm, 162 mm og 187 mm. Tykkelsen er 20 mm. Det gir<br />
et flott inntrykk å blande forskjellige bredder i gulvet, likedan kan Antique og<br />
Historical blandes. en slik miks gir et utpreget ”American style” inntrykk.<br />
OvERfLATEbEHANDLING<br />
<strong>Massiv</strong> <strong>Plank</strong> er behandlet med naturolje (oksiderende olje). Vedlikehold<br />
utføres med osmo Hardvoks-olje, eller tilsvarende olje (oksiderende olje). Det<br />
anbefales å påføre et strøk vedlikeholdsolje etter montering, og før gulvet<br />
tas i bruk. Daglig rengjøring utføres best med tørre rengjøringsmetoder,<br />
støvsuging eller tørrmopping. Ved vasking tilsettes vannet <strong>Boen</strong> Floor Soap,<br />
osmo Vask og Pleiemiddel 8016 eller annen tilsvarende fettholdig, svak<br />
alkalisk såpe. Bruk godt oppvridd klut.<br />
vIkTIG å vITE OM LEGGING<br />
<strong>Massiv</strong> plank kan ikke limes i not/fjær- forbindelsen som flytende gulv. Denne<br />
type gulv skal festes til underlaget, enten ved lim eller skruer. Dersom det<br />
skrues, må planken forborres dersom det ikke brukes selvborrende skruer.<br />
kLIMATISkE fORHOLD<br />
<strong>Boen</strong> <strong>Massiv</strong> <strong>Plank</strong> er tørket ned til 9 (+/- 1 %) trefuktighet, tilsvarende<br />
møbeltre. Det må derfor være en selvfølge at huset er oppvarmet og tørt.<br />
Alle vinduer og dører må være innsatt, og alt mure-, pusse- og støpearbeid<br />
avsluttet i god tid før parketten skal legges.<br />
Rommet skal være oppvarmet til minst 15 °C, og den relative fuktigheten<br />
mellom 40 og 60 %. Sørg for å holde rommet temperert også etter legging, og<br />
den relative luftfuktigheten mellom 40 og 60 %. Fuktsvingninger ut over dette<br />
kan medføre økt sprekkdannelse. <strong>Plank</strong>en skal lagres tørt, og pakkene skal ikke<br />
åpnes før gulvet skal legges.<br />
MASSIv PLANk På GULvvARME<br />
Generelt anbefaler vi ikke massive gulv på gulvvarmesystemer, da<br />
bevegelsene i massivt tre er betydelig større enn i en lamellkonstruksjon.<br />
Dersom det allikevel ønskes lagt i forbindelse med gulvvarme, må man regne<br />
med at det i fyringssesongen blir mer sprekker mellom bordene, og det blir i<br />
så fall uten garanti fra fabrikken.<br />
Våre massive plankegulv er relativt røffe i sortering og utseende, med<br />
fasede kanter. Sprekk mellom bordene vil ikke være så synlig sammenlignet<br />
med plank med skarpe kanter, og kundens forventning til gulvet må være<br />
avgjørende for valget.<br />
NB! Vintrene i Norge er ofte kalde og fyringssesongen kan medføre<br />
et veldig tørt inneklima med tøffe forhold for tregulv og spesielt<br />
massive gulv.<br />
<strong>Massiv</strong>e gulv krymper mye mer enn 3-lags gulv og i tørt inneklima<br />
er det normalt at det oppstår sprekker mellom gulvbordene.<br />
For å minimalisere sprekkdannelse må fukt tilføres slik at den<br />
relative fuktigheten opprettholdes på 40-60%.<br />
LEGGING På bjELkELAG/TILfARER<br />
20 mm <strong>Massiv</strong> <strong>Plank</strong> kan legges direkte på bjelker/tilfarere med maks. c/c<br />
60 cm til vanlig boligformål. Vi anbefaler at det legges ullpapp mellom<br />
bjelkelag og massiv bordene for å hindre knirk når man går. Gulv med større<br />
belastning/trafikk bør ikke ha større c/c avstand enn 40 cm. Løse tilfarere må<br />
ha min. dim. 36 x 68 mm, (bredde x høyde) og faste tilfarere 36 x 48 mm.<br />
Bruk el-forzinket selvborrende gulvskrue 4,2 x 57 mm (for hardt tre). Husk<br />
avstand til vegger og faste utspring på 3 mm pr. breddemeter gulv.<br />
OBS! <strong>Massiv</strong> plank skal limes i endeskjøtene ved legging på bjelkelag/tilfarere.<br />
Husk avstand til vegger og faste utspring på 3 mm pr. breddemeter gulv.<br />
LEGGING På UNDERGULv Av TRE<br />
På undergulv av tre eller plater legges<br />
først 1 lag ullpapp, før planken enten<br />
spikres eller skrues til undergulvet. Bruk<br />
den samme skruedimensjonen som<br />
nevnt under punktet BjeLKeLAG.<br />
<strong>Plank</strong>en legges med avstand til<br />
vegger og faste utspring på 3 mm pr.<br />
breddemeter gulv.<br />
LEGGING På bETONG<br />
På undergulv av betong må det limes<br />
til betongen. Undergulvet må være<br />
plant, tørt og fritt for sementklumper<br />
og lignende. Betongens RF skal som<br />
hovedregel være under 65 %, men ved<br />
å anvende et såkalt MS-Polymer lim<br />
aksepteres normalt en RF i betongen på<br />
maks. 85 %. Sjekk med limprodusenten,<br />
og følg limprodusentens anvisninger.<br />
Det må ikke benyttes vannholdig lim.<br />
Primer kan være nødvendig.<br />
Husk avstand til alle vegger og faste<br />
utspring på min. 3 mm pr. breddemeter<br />
gulv og at det ikke skal limes i not/fjær.<br />
fLyTENDE kONSTRUkSjON<br />
et flytende gulv er mulig ved å anvende eLASTILon® Strong selvklebende<br />
underlagsmatte. <strong>Plank</strong>en vil være limt til underlaget, i dette tilfelle den<br />
selvklebende matten, mens konstruksjonen totalt er et flytende gulv.<br />
Betonggulv må være plane og frie for sementklumper og lignende.<br />
Toleransegrensen 2 (+/- 3 mm målt med 2 m. rettholt). Betongens relative<br />
fuktighet (RF) skal være under 85 %. På betongen legges alltid i forbindelse<br />
med flytende gulv en 0,20 mm plastfolie for å isolere mot eventuell<br />
restfuktighet i betongen. Deretter legges matten eLASTILon® Strong.<br />
1. Før utlegging av elastilon®<br />
Strong skjæres bort ca. 40 cm av<br />
selve gummien, slik at en flik av<br />
beskyttelsesfolien blir til overs.<br />
2. elastilon® Strong rulles ut på tvers av<br />
leggeretningen for planken, med den<br />
beskyttende folien opp. Pass på at<br />
matten legges helt inn mot veggen,<br />
slik at fliken med folie kan brettes<br />
tilbake. Matten legges kant i kant.<br />
3. Legg de første 3 bordradene på<br />
plass, og lås de fast ved trekiler langs<br />
alle 3 veggene. Trekk ut fliken med<br />
overskytende folie til alle 3 bordradene<br />
fester seg i det selvklebende limet.<br />
4. De neste radene legges på plass, og<br />
beskyttelsesfolien trekkes ut etter<br />
hvert som bordradene legges. om<br />
nødvendig kan matten rettes og<br />
strekkes på under arbeidets gang. Det<br />
vil medvirke til at planken ligger tett i<br />
alle skjøter.<br />
1<br />
2<br />
3<br />
4
English Gb<br />
Solid wood <strong>Plank</strong> - installation<br />
TRADITIONAL<br />
Simple and robust – but with the noble and superior characteristics of<br />
genuine solid wood plank. The classic variant in our assortment of Solid<br />
Wood <strong>Plank</strong> comes with the surface pre-finished with natural oil.<br />
ANTIQUE<br />
The Antique Solid Wood oak <strong>Plank</strong> has the characteristics of years of wear. A dark<br />
stain is applied to the wood and then the surface is pre-finished with natural oil.<br />
HISTORICAL<br />
exceedingly rustic, giving the Solid Wood <strong>Plank</strong> an ancient appearance. Any<br />
irregularities in the oak wood are plugged and filled using genuine handwork. A<br />
dark stain is applied to the wood and the surface is pre-finished with natural oil.<br />
STONEwASHED GRAy<br />
These oak boards are very distinctive; the grain is accentuated by oiling with<br />
a very light-coloured oil. The boards distinguish themselves by natural haptics<br />
since the surface is brushed.<br />
CHOCOLATE<br />
The brushed surface has been oiled using coloured oil with a deep dark brown tint.<br />
3 wIDTHS<br />
The Solid Wood <strong>Plank</strong> comes in 3 widths, 137 mm, 162 mm and 187 mm and<br />
is 20 mm thick. A beautiful appearance is obtained when mixing different<br />
plank widths, likewise by mixing Antique and Historical. Such a mix gives a<br />
touch of pronounced “American Style”.<br />
SURfACE TREATMENT<br />
The Solid Wood <strong>Plank</strong> is pre-treated with natural oil (oxidising oil). Maintenance<br />
is carried out using osmo Hardwax oil 3062 (oxidising oil). We recommend the<br />
application of a single coat of maintenance oil after installation of the floor,<br />
before it is exposed to traffic. Daily cleaning should be carried out using the dry<br />
cleaning method i.e. vacuum cleaner or dry mop. When it is necessary to wash<br />
the floor, mix <strong>Boen</strong> Floor Soap, osmo Wash and Care or an equivalent fatty,<br />
weak alkaline soap in the water. Use a well rung cloth.<br />
IMPORTANT THINGS TO kNOw AbOUT INSTALLATION<br />
Solid Wood <strong>Plank</strong> must not be glued in the tongue and groove connection to<br />
give a floating installation. Instead, it must be attached to the sub-floor by<br />
means of gluing or screwing. When using screws, the screws should be self<br />
drilling, otherwise the planks should first be drilled out.<br />
CLIMATIC CONDITIONS<br />
<strong>Boen</strong> Solid Wood <strong>Plank</strong> is dried to 9 +/- 1 % moisture content. It is therefore<br />
a matter of course that the building is heated and dry. All windows and doors<br />
must be in place and all brick-work, rendering and concreting completed<br />
well in advance of the floor being installed. The room must be heated to<br />
a minimum of 15 °C with relative humidity between 40 and 60 %. ensure<br />
that the room is kept temperate after the floor is installed and that relative<br />
humidity remains between 40 and 60 %. Fluctuation in moisture in excess of<br />
this can result in an increase in the formation of gaps. Always store the solid<br />
wood planks in dry conditions and do not open the packaging until the floor is<br />
to be installed.<br />
Solid wood <strong>Plank</strong> And Under-floor Heating<br />
We do not generally recommend the installation of Solid Wood <strong>Plank</strong><br />
on underfloor heating systems, because the movement in solid wood is<br />
considerable greater than in a multi-layer hardwood floor construction. If<br />
however, the Solid Wood <strong>Plank</strong> is installed on under-floor heating, one must be<br />
prepared to accept some gaps forming between the planks and in such a case,<br />
will not be covered by the manufactures guarantee.<br />
our Solid Wood <strong>Plank</strong>s are of relatively rough gradings and appearance with<br />
bevelled edges. Gaps between boards will therefore not be so visible compared<br />
with planks with sharp edges. The customers’ expectation to the floor must be<br />
the deciding factor.<br />
NB! Winters can be very cold and the season for using a lot of heating<br />
which can result in very dry indoor climate leading to difficult<br />
conditions for wood flooring, especially solid wood flooring.<br />
Solid wood flooring shrinks much more than multi-layer flooring and in<br />
dry indoor climates it is normal that gaps appear between the boards.<br />
To minimise the formation of gaps, it is necessary to add moisture, to<br />
enable the relative humidity to remain between 40-60%.<br />
INSTALLED DIRECTLy ON jOISTS/SUPPORTS<br />
20 mm Solid Wood <strong>Plank</strong> can be installed directly on joists/supports<br />
which must have a fixed distance of maximum 60 cm for private houses,<br />
and maximum 40 cm for use in public areas. To avoid friction sound, we<br />
recommend laying builders paper between the joists and the solid wood<br />
boards. Loose supports must have a minimum dimension of 36 x 68 mm<br />
(width x height) and fixed supports 36 x 48 mm. Use self drilling elgalvanised<br />
screws (specially designed for fixing hardwood floors) 4,2 x 57 mm.<br />
Remember to leave a clearance to all walls and fixed projections of min. 3 mm<br />
per metre floor width.<br />
OBS! Solid wood boards must be glued at the end joins when installed on joists/<br />
supports. Remember a clearance of 3mm per metre room width, along all walls<br />
and projections.<br />
INSTALLED ON A wOODEN SUb-fLOOR<br />
With a sub-floor of wooden planks<br />
or wood sheeting, a layer of builders’<br />
paper must first be laid before screwing<br />
to the sub-floor. When installed on<br />
a sub-floor of wood or chipboard<br />
sheeting, a layer of builders’ paper<br />
should first be laid, before the planks<br />
are either nailed or screwed to the<br />
sub-floor. Use the same dimension of screw as stated in the afore mentioned<br />
<strong>instructions</strong>. The plank is installed with clearance to all walls and fixed<br />
projections of min. 3 mm per metre floor width.<br />
INSTALLATION ON CONCRETE<br />
With a concrete sub-floor the planks<br />
must be glued to the concrete. The<br />
sub-floor must be level, dry and void of<br />
cement lumps, etc. As a main rule, the<br />
relative humidity (RH) of the concrete<br />
must be less than 65 %, but, by utilising<br />
a so called MS-Polymer adhesive,<br />
manufacturers of this particular type<br />
of adhesive normally accept a RH in the<br />
concrete of max. 85 %.<br />
Water based adhesive must not be<br />
used. It may be necessary to use a<br />
Primer. Follow the manufacturers’<br />
<strong>instructions</strong> and remember to allow<br />
clearance to all walls and fixed projections of min. 3 mm per metre floor<br />
width. The boards must not be glued in the tongue/groove connection.<br />
A fLOATING fLOOR<br />
A floating floor is possible when using eLASTILon® Strong self-adhesive<br />
underlay. The plank will adhere to the self-adhesive underlay, while the total<br />
construction is a floating floor. The sub-floor must be level and void of cement<br />
lumps, etc. The tolerance limit is ± 3 mm per 2 m straight edge. The RH of the<br />
concrete must be less than 85 %. When installing a floating floor, a layer of<br />
0,20 mm plastic film must first be laid to insulate against any moisture in the<br />
concrete. After which the eLASTILon® Strong can be laid.<br />
1. Before the eLASTILon® Strong is rolled<br />
out, cut off approx. 40 cm of the<br />
actual rubber, in such a way that a flap<br />
of the protective plastic remains.<br />
2. Roll the eLASTILon® Strong out, square<br />
to the direction of the boards, with the<br />
protective plastic up. ensure that the<br />
eLASTILon® Strong is laid completely<br />
into the wall and in such a way that<br />
the flap of sheeting can be folded back.<br />
The underlay is laid edge to edge.<br />
3. Lay the first 3 row of boards on the<br />
underlay and fix them in place with<br />
wooden wedges along all 3 walls. Pull<br />
the flap of protective plastic from<br />
under the boards until all 3 rows are<br />
firmly attached to the self-adhesive<br />
underlay.<br />
4. The next rows are laid in place and the<br />
protective plastic is pulled out little<br />
by little as each row is fixed in place.<br />
If necessary, the eLASTILon® Strong<br />
can be aligned and stretched during<br />
installation. This contributes to all joins<br />
between planks being tight fitting.<br />
1<br />
2<br />
3<br />
4