
You also want an ePaper? Increase the reach of your titles
YUMPU automatically turns print PDFs into web optimized ePapers that Google loves.
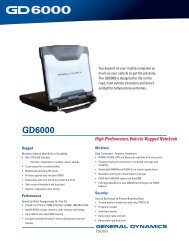
General Dynamics <strong>Itronix</strong> 72-0146-001<br />
<strong>GD8200</strong> <strong>User</strong> <strong>Guide</strong>
<strong>GD8200</strong> <strong>User</strong> <strong>Guide</strong><br />
Table of Contents<br />
Notices, Compliance and Safety..........................5<br />
Copyright Notices................................................. 5<br />
Disclaimer.............................................................. 5<br />
Trademark and Patent Notice............................. 5<br />
Compliance Statements...................................... 5<br />
Compliance Statement for Canada.................... 6<br />
Fax Branding......................................................... 6<br />
Warnings and Cautions....................................... 6<br />
Safety..................................................................... 7<br />
Service and Upgrade Safety and Precautions..................... 7<br />
Battery Pack Safety and Precautions.................................. 8<br />
Getting Started..........................................................9<br />
Standard Features................................................ 9<br />
Optional Features................................................. 9<br />
Operating System Information........................... 9<br />
Tips for New Owners........................................... 9<br />
Turning Off the Computer................................... 9<br />
Getting Familiar With Your Computer...............10<br />
Front View........................................................... 10<br />
Left Side View..................................................... 11<br />
Right Side View................................................... 12<br />
Back Edge View.................................................. 12<br />
Bottom View....................................................... 13<br />
Keyboard Basics................................................. 14<br />
Primary Keys...................................................................... 14<br />
Arrow Keys......................................................................... 15<br />
Function Keys and Key Combinations............................... 15<br />
Numeric Keypad................................................................. 16<br />
Lock Keys........................................................................... 16<br />
Windows ® Keys..................................................................17<br />
Radio ON/OFF Switch (option).......................... 17<br />
Turn all Radios On or Off....................................................17<br />
Application Launch Key..................................... 17<br />
Program the Application Launch Key in Windows ® 7........17<br />
Display................................................................. 18<br />
Install the Stylus Tether...................................................... 18<br />
Calibrate the Touchscreen................................................. 18<br />
Adjusting Display Brightness............................................. 18<br />
Adjusting Display Resolution............................................. 18<br />
Auto Dim Feature............................................................... 19<br />
Simultaneous or Extended Display................................... 19<br />
LCD Heater......................................................................... 19<br />
Cursor Visibility .................................................................. 19<br />
Lid Switch............................................................ 19<br />
LED Status Indicators......................................... 20<br />
Audio.................................................................... 21<br />
Adjust the Volume............................................................. 21<br />
Inserting the Card............................................................... 21<br />
Ejecting a Card................................................................... 21<br />
The PC Card Slot................................................. 21<br />
Touchpad............................................................. 22<br />
Selecting Objects............................................................... 22<br />
Dragging Objects............................................................... 22<br />
Scrolling.............................................................................. 22<br />
Zooming............................................................................. 22<br />
Rotating Objects................................................................ 22<br />
Application Gestures.......................................................... 22<br />
Adjusting the Touchpad Settings...................................... 23<br />
Touchpad Precautions....................................................... 23<br />
Smart Card or EXPRESS Card Slot (option)... 24<br />
Insert a Card....................................................................... 24<br />
Remove a Card................................................................... 24<br />
The Hard Disk Drive (HDD)................................ 24<br />
Replacing the hard disk drive............................................. 24<br />
Hard Disk Drive Heater...................................................... 25<br />
The Media Bay.................................................... 25<br />
Change Swappable Media Bay Device............................ 25<br />
Insert a Disk....................................................................... 25<br />
Remove a DVD or CD........................................................ 25<br />
Precautions for Handling DVDs and CDs.......................... 26<br />
Computer Security............................................. 26<br />
Security Slot....................................................................... 26<br />
BIOS Level Passwords...................................................... 26<br />
Smart Card Reader (Option).............................................. 26<br />
Fingerprint Scanner (Option).............................................. 26<br />
Stealth Mode...................................................................... 26<br />
Trusted Platform Module (TPM)........................................ 26<br />
Ports and Connectors........................................ 27<br />
ENERGY STAR ®..........................................................................................27<br />
Making Connections..............................................28<br />
Attaching Power................................................. 28<br />
To Attach AC Power........................................................... 28<br />
To Use the Vehicle Adapter (optional)............. 28<br />
USB Devices........................................................ 28<br />
General Dynamics <strong>Itronix</strong> | 72-0146-001
<strong>GD8200</strong> <strong>User</strong> <strong>Guide</strong><br />
Table of Contents<br />
External Keyboard or Pointing Device............................... 28<br />
Fax/Data Modem................................................ 29<br />
External Monitor or Video Device.................... 29<br />
Using Simultaneous Display.............................................. 29<br />
Using Extended Display..................................................... 29<br />
WLAN radio option............................................30<br />
About WLAN...................................................................... 30<br />
CRMA Express WWAN (option).......................30<br />
LTE...................................................................................... 30<br />
HSPA+................................................................................ 30<br />
HSPA.................................................................................. 30<br />
EDGE/GPRS/GSM Network.............................................. 30<br />
UMTS/GPRS/GSM Network............................................. 30<br />
EV-DO Rev. A/EV-DO Rev. 0/1xRTT/CDMA..................... 30<br />
EVDO Rev. A...................................................................... 31<br />
GPS (option)........................................................ 31<br />
Bluetooth ® (option)............................................. 31<br />
Antennas.............................................................. 31<br />
Improving Radio Coverage............................... 31<br />
On the Street...................................................................... 32<br />
Inside a Building................................................................. 32<br />
When to use Landline Communication........... 32<br />
Customizing Your BIOS.........................................38<br />
Starting the Setup Utility...................................38<br />
Navigation and Help..........................................38<br />
The Main Menu...................................................39<br />
39<br />
The Advanced Menu..........................................40<br />
OEM Function.................................................................... 41<br />
Fan Learning Function........................................................ 41<br />
Radio Configurations ................................................. 42<br />
Stealth Mode Configuration.............................................. 42<br />
Trusted Computing............................................................ 43<br />
PCH-FW Configuration...................................................... 44<br />
F81216 Secondary Super I/O Configuration..................... 45<br />
The Chipset Menu..............................................45<br />
The Boot Menu...................................................46<br />
The Security Menu............................................. 47<br />
The Save & Exit Menu.......................................48<br />
Optional Equipment and Accessories...............49<br />
Surge Protection.................................................49<br />
Vehicle Adapter...................................................49<br />
Connect the Vehicle Adapter............................................. 49<br />
Vehicle Dock........................................................49<br />
Charge a Battery Installed in the Computer...................... 49<br />
Communicating with Other Devices ................................ 50<br />
External Antennas.............................................................. 50<br />
Memory Upgrade...............................................50<br />
Maintenance and Storage....................................51<br />
Taking care of your AC adapter........................ 51<br />
Servicing Your Computer.................................. 51<br />
Storing Your Computer..................................... 51<br />
Taking Care of Your Batteries........................... 51<br />
Taking Care of Your Hard Drive........................ 52<br />
For Internal Hard Drives..................................................... 52<br />
For External PC Cards........................................ 52<br />
Cleaning Your Computer................................... 52<br />
Cleaning the Outside Case................................................ 52<br />
Cleaning the Display.......................................................... 52<br />
Cleaning the External Power Connector ........................ 52<br />
Cleaning the RJ-11/ RJ-45 / USB Connectors ................. 52<br />
Data Backup........................................................53<br />
Saving Important System Information ............................. 53<br />
Data Recovery.....................................................53<br />
Option 1: Restoring System Information ......................... 53<br />
Option 2 : Restoring a Backup .......................................... 53<br />
Option 3: Restoring Drive C:.............................................. 53<br />
Service and Support...............................................54<br />
Client Care Center (CCC)....................................54<br />
Services Expertise ............................................................ 54<br />
Product Support - Downloads..........................54<br />
Troubleshooting......................................................55<br />
Application Troubleshooting ........................... 55<br />
Battery Troubleshooting................................... 55<br />
Battery does not charge.................................................... 55<br />
Batteries take more than 7 hours to charge...................... 55<br />
Batteries don’t last very long............................................. 55<br />
Gas gauge isn’t full after charging the battery.................. 55<br />
Gas gauge reads “full” but the charging LED displays.... 55<br />
Battery seems to have less and less capacity.................. 55<br />
Display / Touchscreen........................................ 55<br />
Display performance is slow............................................. 55<br />
Unreadable display............................................................. 55<br />
General Dynamics <strong>Itronix</strong> | 72-0137-003
<strong>GD8200</strong> <strong>User</strong> <strong>Guide</strong><br />
Table of Contents<br />
Characters are difficult to read on the screen................... 56<br />
Cursor doesn’t display in the DOS editor.......................... 56<br />
Updates to display resolution don’t apply......................... 56<br />
Stylus on my touchscreen doesn’t work.......................... 56<br />
Touchscreen doesn’t respond after a suspend................ 56<br />
Hard Disk.............................................................56<br />
Hard disk will not start so the computer can’t boot up.... 56<br />
Computer does not startup properly................................. 56<br />
Keyboard and Mouse Troubleshooting...........56<br />
Something unexpected happens when I press a key...... 56<br />
Incorrect characters appear on the screen....................... 56<br />
Difficulty double-clicking the mouse fast enough............ 56<br />
Modem Troubleshooting...................................56<br />
Modem doesn’t work........................................................ 56<br />
Modem doesn’t dial a number.......................................... 56<br />
Modem does not establish a connection......................... 57<br />
PC Cards ............................................................ 57<br />
I can’t remove the PC card................................................ 57<br />
Read Error........................................................................... 57<br />
Computer locks when the PC card is removed................ 57<br />
Miscellaneous Troubleshooting....................... 57<br />
Computer shuts off unexpectedly..................................... 57<br />
Speaker volume is too high or too low............................. 57<br />
Computer won’t turn on.................................................... 57<br />
Computer won’t turn off.................................................... 57<br />
Computer enters suspend mode too quickly................... 57<br />
Computer doesn’t automatically suspend........................ 57<br />
System date and time are incorrect.................................. 57<br />
“Out of memory” error message..................................... 57<br />
Holding down the Power button to reset the computer<br />
doesn’t always work.......................................................... 57<br />
Computer doesn’t make any sounds................................ 58<br />
Fan stopped running.......................................................... 58<br />
Improve the program startup speed by cleaning up and moving<br />
files on the hard drive................................................... 58<br />
General Dynamics <strong>Itronix</strong> | 72-0137-001
<strong>GD8200</strong> <strong>User</strong> <strong>Guide</strong><br />
Notices, Compliance and Safety<br />
Identification: <strong>GD8200</strong> <strong>User</strong> <strong>Guide</strong><br />
Copyright Notices<br />
© Copyright 2011 General Dynamics. All rights reserved.<br />
No part of this document may be reproduced, transmitted,<br />
transcribed, stored in a retrieval system, or translated into<br />
any other language or computer language in whole or in<br />
part, in any form or by any means, whether it be electronic,<br />
mechanical, magnetic, optical, manual, or otherwise, without<br />
the prior written consent of General Dynamics <strong>Itronix</strong><br />
Corporation, 1000 Sawgrass Corporate Parkway, Suite 300,<br />
Sunrise, FL 33323.<br />
Disclaimer<br />
General Dynamics <strong>Itronix</strong> reserves the right to revise the<br />
manual and make periodic changes to the content without<br />
a direct or inferred obligation to notify any person of such<br />
revision or changes. General Dynamics <strong>Itronix</strong> Corporation<br />
does not assume responsibility for the use of this manual, nor<br />
for any patent infringements or other rights or third parties<br />
who may use the manual.<br />
This document contains proprietary information of General<br />
Dynamics <strong>Itronix</strong> Corporation.<br />
This product is available for purchase under General Dynamics<br />
<strong>Itronix</strong>’s standard terms and conditions of sale. Hardware<br />
products may be reconditioned, or be manufactured from<br />
parts and components that may be new, used, rebuilt, or<br />
recycled and in some cases, the hardware product may not<br />
be new and may have been previously installed. In any event,<br />
General Dynamics <strong>Itronix</strong> warranty terms apply.<br />
Trademark and Patent Notice<br />
<strong>Itronix</strong> is a registered trademark of General Dynamics <strong>Itronix</strong><br />
Corporation.<br />
Microsoft, MS, Windows ® , and MS-DOS are registered<br />
trademarks of Microsoft Corporation.<br />
The following United States Patent Numbers apply to any<br />
unit which incorporates a DVD drive - 5,434,678; 5,589,945;<br />
5,913,013; 6,151,444; and 6,208,805.<br />
This product incorporates copyright protection technology<br />
that is protected by U.S. patents and other intellectual property<br />
rights. Use of this copyright protection technology must be<br />
authorized by Macrovision, and is intended for home and<br />
other limited viewing uses only unless otherwise authorized<br />
by Macrovision. Reverse engineering or disassembly is<br />
prohibited.<br />
ENERGY STAR ® is a registered trademark of the U.S.<br />
Environmental Protection Agency. As an ENERGY STAR ®<br />
partner, General Dynamics <strong>Itronix</strong> has determined this<br />
computer meets ENERGY STAR ® program requirements for<br />
computers.<br />
Compliance Statements<br />
The <strong>GD8200</strong> fully-rugged notebook has been tested and found<br />
to comply with the limits for a Class B digital device, pursuant<br />
to Part 15 of the FCC Rules. These limits are designed to<br />
provide reasonable protection against harmful interference<br />
in a residential installation. This equipment generates, uses,<br />
and can radiate radio frequency energy and, if not installed<br />
and used in accordance with the instructions, may cause<br />
harmful interference to radio communications. However, there<br />
is no guarantee that interference will not occur in a particular<br />
installation.<br />
If this equipment does cause harmful interference to radio or<br />
television reception, which can be determined by turning the<br />
equipment off and on, the user is encouraged to try to correct<br />
the interference by one or more of the following measures:<br />
• Reorient or relocate the receiving antenna.<br />
• Increase the separation between the equipment and receiver.<br />
• Connect the equipment into an outlet on a circuit different from<br />
that to which the receiver is connected.<br />
• Consult the dealer or an experienced radio/TV technician for<br />
help.<br />
The <strong>GD8200</strong> fully-rugged notebook complies with Part 68<br />
of the FCC Rules. On the bottom of this equipment is a label<br />
that contains, among other information, the FCC registration<br />
number and ringer equivalence number (REN) for this<br />
equipment. If requested, this information must be provided to<br />
the telephone company.<br />
The REN is used to determine the quantity of devices which<br />
may be connected to the telephone line. Excessive RENs on the<br />
telephone line may result in the devices not ringing in response<br />
to an incoming call. In most, but not all areas, the sum of the<br />
RENs should not exceed five (5.0). To be certain of the number<br />
of devices that may be connected to the line, as determined by<br />
the total RENs, contact the telephone company to determine<br />
the maximum REN for the calling area.<br />
The <strong>GD8200</strong> fully-rugged notebook may be connected to the<br />
telephone network using the RJ-11 jack provided.<br />
If this equipment causes harm to the telephone network, the<br />
telephone company will notify you in advance that temporary<br />
discontinuance of service may be required. If advance notice<br />
isn’t practical, the telephone company will notify the customer<br />
as soon as possible. Also, you will be advised of your right to<br />
file a complaint with the FCC if you believe it is necessary.<br />
The telephone company may make changes in its facilities,<br />
equipment, operations, or procedures that could affect the<br />
operation of the equipment. If this happens, the telephone<br />
General Dynamics <strong>Itronix</strong> 72-0146-001
<strong>GD8200</strong> <strong>User</strong> <strong>Guide</strong><br />
Notices, Compliance and Safety<br />
company will provide advance notice in order for you to make<br />
the necessary modifications in order to maintain uninterrupted<br />
service.<br />
If trouble is experienced with this equipment, please contact<br />
the equipment manufacturer for repair and/or warranty<br />
information. Do not attempt repairs of this equipment<br />
yourself without obtaining manufacturer authorized parts and<br />
documentation. If the trouble is causing harm to the telephone<br />
network, the telephone company may request you remove the<br />
equipment from the network until the problem is resolved.<br />
Compliance Statement for Canada<br />
NOTICE The Industry Canada label identifies certified<br />
equipment. This certification means that the equipment meets<br />
certain telecommunications network protective, operational<br />
and safety requirements as prescribed in the appropriate<br />
Terminal Equipment Technical Requirements document(s). The<br />
Department does not guarantee the equipment will operate to<br />
the user’s satisfaction.<br />
Before installing this equipment, users should ensure that<br />
it is permissible to be connected to the facilities of the local<br />
telecommunications company. The equipment must also<br />
be installed using an acceptable method of connection. The<br />
customer should be aware that compliance with the above<br />
conditions may not prevent degradation of service in some<br />
situations.<br />
Repairs to certified equipment should be made by a<br />
representative designated by the supplier. Any repairs or<br />
alterations made by the user to this equipment, or equipment<br />
malfunctions, may give the telecommunications company<br />
cause to request the user to disconnect the equipment.<br />
<strong>User</strong>s should ensure for their own protection that the electrical<br />
ground connections of the power utility, telephone lines, and<br />
internal metallic water pipe system, if present, are connected<br />
together. This precaution may be particularly important in rural<br />
areas.<br />
CAUTION <strong>User</strong>s should not attempt to make such<br />
connections themselves, but should contact the appropriate<br />
electric inspection authority, or electrician, as appropriate.<br />
The Ringer Equivalence Numbers (REN) are:<br />
<strong>GD8200</strong> non-radio: 0.5B<br />
NOTICE The Ringer Equivalence Number (REN) assigned to<br />
each terminal device provides an indication of the maximum<br />
number of terminals allowed to be connected to a telephone<br />
interface. The termination on an interface may consist of any<br />
combination of devices subject only to the requirement that the<br />
sum of the Ringer Equivalence Numbers of all the devices does<br />
not exceed 5.<br />
The <strong>GD8200</strong> fully-rugged notebook may be connected to the<br />
telephone network using the RJ-11 jack provided.<br />
Fax Branding<br />
The Telephone Consumer Protection Act of 1991 makes it<br />
unlawful for any person to use a computer or other electronic<br />
device to send any message via a telephone fax machine<br />
unless such message clearly contains in a margin at the top<br />
or bottom of each transmitted page or on the first page of the<br />
transmission, the date and time it is sent and an identification<br />
of the business or other entity, or other individual sending the<br />
message and the telephone number of the sending machine or<br />
such business, other entity, or individual.<br />
In order to program this information into your fax machine, you<br />
should complete the following:<br />
This information is entered through the FAX application<br />
software you have installed. Consult your FAX software<br />
documentation for instructions about entering this information.<br />
Warnings and Cautions<br />
WARNING It is important that only authorized personnel<br />
service and attempt repairs on the equipment. Unauthorized<br />
service or repair may void the warranty and any maintenance<br />
contract in effect for the equipment. Unauthorized service<br />
personnel might be subject to shock hazard on some<br />
equipment if removal of protective covers is attempted.<br />
There is danger of explosion if the battery is incorrectly<br />
replaced. Replace only with the same or equivalent type<br />
recommended by the manufacturer. Dispose of used batteries<br />
according to the manufacturer’s instructions.<br />
The product you have purchased is powered by a rechargeable<br />
battery. The battery is recyclable and, under various state and<br />
local laws, it may be illegal to dispose of this battery into the<br />
municipal waste stream. Do not crush the battery or place it in<br />
a fire. Check with your local solid-waste officials for details on<br />
recycling options or proper disposal.<br />
CAUTION Internal components of the <strong>GD8200</strong> fully-rugged<br />
notebook will be damaged if exposed to contaminants. When<br />
dust covers, the PC card door, or the bottom access panel are<br />
open on the computer, shield the unit from all contaminants<br />
such as liquids, rain, snow, and dust.<br />
This device may contain a WLAN radio transmitter, a WPAN<br />
radio transmitter, and a WAN radio transmitter.<br />
Each internal radio may or may not have an individual FCC<br />
Identifier label. That FCC Identifier label is not applicable to this<br />
configuration. Only the external FCC ID label is applicable.<br />
General Dynamics <strong>Itronix</strong> 72-0146-001
<strong>GD8200</strong> <strong>User</strong> <strong>Guide</strong><br />
Notices, Compliance and Safety<br />
Only the antenna with which an intentional radiator is<br />
authorized may be used with the intentional radiator.<br />
The WAN embedded antenna location is in the upper center<br />
edge of the display screen and is not to be modified.<br />
The WPAN embedded antenna location is near the lower left<br />
edge of the Keyboard and is not to be modified.<br />
The WLAN embedded dual antennas are located internally in<br />
the upper right and left edges of the display screen and are not<br />
to be modified.<br />
To comply with FCC RF exposure requirements when using the<br />
WAN radio transmitter, a minimum separation distance of 20<br />
cm must be maintained between the upper center edge of the<br />
display screen antenna and all users/bystanders.<br />
When using the WLAN transmitter, a minimum separation<br />
distance of 20 cm must be maintained between the upper right<br />
and left edges of the display screen and all users/bystanders.,<br />
The WAN transmitter, WLAN transmitter and WPAN<br />
transmitter should be turned off before carrying the laptop PC<br />
in order to comply with FCC RF exposure requirements.<br />
The equipment has been approved to [Commission Decision<br />
“CTR21”] for pan-European single terminal connection to the<br />
Public Switched Telephone Network (PSTN). However, due to<br />
differences between individual PSTNs provided in different<br />
countries the approval does not, of itself, give an unconditional<br />
assurance of successful operation on every PSTN network<br />
termination point.<br />
In the event of problems, you should contact your equipment<br />
supplier in the first instance.<br />
Safety<br />
Do not proceed beyond a WARNING or CAUTION until the<br />
indicated conditions are fully understood and met.<br />
Read these instructions carefully. Following these guidelines<br />
will help prevent damage to your computer and help protect<br />
your personal safety.<br />
• Read and follow all WARNINGS, CAUTIONS and instructions<br />
marked on the product and noted in this documentation.<br />
• Before using your computer, read the Power Management<br />
section to familiarize yourself with basic battery information and<br />
ensure optimum performance.<br />
• CAUTION To reduce the risk of fire, only use a No. 26 AWG or<br />
larger telecommunication line cord.<br />
• CAUTION This notebook computer is designed to be used<br />
with the provided dedicated AC Adapter or Vehicle Adapter.<br />
• Unplug the computer from the power outlet before cleaning.<br />
Use a damp cloth for cleaning. Aerosols, solvents, or strong<br />
detergents are not recommended cleaning solutions and<br />
may void your warranty. For system decontamination<br />
recommendations please contact your service technician.<br />
• Slots and openings in the computer case are for ventilation<br />
purposes. Do not block or cover these openings or the system<br />
could overheat.<br />
• Do not place the product on a soft surface such as a bed, sofa, or<br />
rug where the ventilation slots and openings may be blocked.<br />
• Do not place this product near or over a radiator or heat register.<br />
• Do not place this product in a built-in installation unless proper<br />
ventilation is provided.<br />
• Do not operate the computer at temperatures above 140°F (60°C)<br />
or below -10°F (-23C).<br />
• Do not store the computer at temperatures above 167°F (75°C) or<br />
below -67°F (-55°C).<br />
• Do not step on or place anything on the power cord.<br />
• Do not slam the display lid when you close it.<br />
• Do not place any object on top of the computer.<br />
• If you use the computer with an extension cord, ensure that the<br />
total ampere ratings of all the devices sharing the extension do<br />
not exceed the rating of the extension cord or the rating of the<br />
wall outlet.<br />
• Do not push foreign objects into the computer through any of the<br />
slots or openings. Dangerous voltages are present, which could<br />
cause electric shock, fire, or damage sensitive components.<br />
• The computer is designed to withstand spills. If a spill occurs,<br />
immediately power off the computer and wipe it down.<br />
• For best results, use a power strip with a built-in surge protector.<br />
Do not use inferior extension cords as this may result in damage<br />
to your computer.<br />
• FAA regulations require that all transmit/receive devices be<br />
turned off during flight. If you have radios in your computer<br />
(including GPS) and your computer is equipped with a Radio<br />
ON/OFF Switch, please use it to turn your radios off during<br />
flight. If you have radios and you do not have a switch to turn<br />
the radios off, either leave your computer off during flight or<br />
contact your help desk for assistance.<br />
Service and Upgrade Safety and Precautions<br />
Do not service this product yourself. Opening or removing<br />
covers may expose you to dangerous voltage points or<br />
other risks and may void your warranty. Damage caused by<br />
servicing that is not authorized may void your warranty. If your<br />
computer needs service, remove power and turn it off, then<br />
contact authorized service personnel.<br />
Refer all servicing to authorized service personnel under the following<br />
conditions:<br />
• When the power cord or plug is damaged or frayed.<br />
• If the product does not operate normally when the operating<br />
instructions are followed. Adjust only those controls that are<br />
General Dynamics <strong>Itronix</strong> 72-0146-001
<strong>GD8200</strong> <strong>User</strong> <strong>Guide</strong><br />
Notices, Compliance and Safety<br />
covered by the instructions in this manual.<br />
• If the product exhibits a distinct change in performance,<br />
indicating a need for service.<br />
Before performing any manufacturer authorized service or upgrade,<br />
first follow these instructions:<br />
• Prevent damage from static electricity by following ESD<br />
precautions.<br />
• Place the computer on a clean, flat surface.<br />
• Turn off the computer and disconnect the power supply.<br />
• Undock the computer if it is in an office dock or vehicle dock.<br />
• Disconnect any attached peripherals.<br />
• Disconnect any attached network, telephone or<br />
telecommunication line.<br />
• Remove any PC Cards, EXPRESS Cards, Smart Cards, CDs, DVDs<br />
or any other media in your computer’s slots or bays.<br />
• Remove the battery (See Battery Removal).<br />
• Remove the hard drive (See Hard Disk Drive Removal).<br />
Battery Pack Safety and Precautions<br />
• WARNING! There is danger of explosion if the battery is<br />
incorrectly replaced. Replace only with a manufacturer approved<br />
battery.<br />
• WARNING! Dispose of used batteries promptly and<br />
according to the manufacturer’s instructions.<br />
• WARNING! Batteries may explode if not handled properly.<br />
Do not disassemble, open, puncture or dispose of battery packs<br />
in a fire. The battery pack could burst or explode releasing<br />
hazardous chemicals.<br />
• WARNING! Keep battery packs away from children.<br />
• Follow the safety instructions printed on the battery.<br />
• Only use approved manufacturer approved battery packs with<br />
your computer.<br />
• Do not abuse, deliberately pierce, or subject the battery pack to<br />
excessive impact.<br />
• Immediately discontinue use of the battery if it appears damaged<br />
or abnormal in any way and consult your local provider for<br />
advice.<br />
• Do not immerse the battery pack in liquid.<br />
• Do not short together the battery connections. Do not store the<br />
battery pack with metallic objects due to the risk of short circuit.<br />
• Battery chemical leakage is harmful. In the unlikely event of<br />
battery leakage; DO NOT TOUCH. In case of accidental contact<br />
with the eyes or skin, immediately wash with running water and<br />
seek medical advice. In the case of accidental ingestion, seek<br />
immediate medical attention.<br />
• Follow Battery Tips for use and storage.<br />
General Dynamics <strong>Itronix</strong> 72-0146-001
<strong>GD8200</strong> <strong>User</strong> <strong>Guide</strong><br />
Getting Started<br />
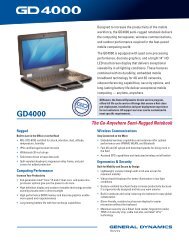
Standard Features<br />
• XGA Color DynaVue ® II Display<br />
• Shock-Mounted, Ruggedized, Removable Hard Disk Drive with<br />
Heater<br />
• Fully-Rugged Magnesium Case<br />
• Full-Size, 87-Key Sealed Keyboard with Embedded Numeric<br />
Keypad and 12 Function Keys<br />
• Multi-Touch Touchpad<br />
• Internal 56K V.92 Fax/Modem<br />
• Lid Switch: The lid switch can be configured to suspend your<br />
computer when the lid is closed and to resume when the lid is<br />
opened.<br />
• Application Launch Key and <strong>User</strong> Programmable Buttons<br />
• Internal Gigabit Ethernet LAN<br />
• Two USB 2.0 Ports<br />
• One USB 3.0 Port<br />
• Type II PC Card Slot<br />
• Audio Jacks for External and Internal Speakers and Microphone<br />
• Stealth Mode: This feature allows you to use the computer in<br />
an environment where sound and light could be dangerous or<br />
disruptive<br />
• Microsoft ® Windows ® 7 Operating System<br />
• Three-year Limited Warranty<br />
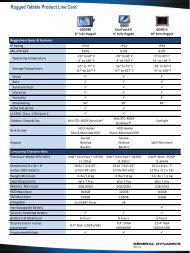
Optional Features<br />
Below is a list of some of the optional features supported by<br />
your computer. Contact your authorized dealer if you decide to<br />
perform a key component upgrade.<br />
• XGA Transmissive HiBright DynaVue ® II Touchscreen<br />
Display<br />
• Fingerprint Scanner<br />
• Radio ON/OFF Switch<br />
• Smart Card Reader (FIPS 201) or EXPRESS Card/54 Slot<br />
• Extra Media Bay Battery<br />
Operating System Information<br />
For information and help with Windows ® 7, select Start, Help<br />
and Support, How to get started with your computer. You can<br />
also browse or search help topics to learn more about using<br />
the Windows ® 7 Operating System.<br />
Tips for New Owners<br />
• Back up files often. <strong>User</strong>s who need to manage large amounts of<br />
data may wish to use backup devices.<br />
• Create a set of recovery CDs or DVDs to recover your hard disk<br />
in case it becomes corrupted. To do this, use the Recovery CD<br />
Wizard by selecting Start, Programs, Mobile Computer Tools.<br />
• Don’t leave passwords anywhere on your notebook or carrying<br />
case.<br />
• Install antivirus software and keep it updated.<br />
• For added security, consider using a computer lock with the computer’s<br />
Security Slot.<br />
• Develop ergonomic work habits to help prevent related health<br />
issues. The science of ergonomics studies the relationship<br />
between health and a suitable work environment. For more<br />
information on ergonomics, contact your nearest computer<br />
bookstore, local library, reputable website.<br />
Turning Off the Computer<br />
To turn off your computer select Start, Shut Down, Shut Down<br />
and follow the instructions on the screen.<br />
If you are going to be away from the computer for a short<br />
period, you can conserve power without shutting down the<br />
system. See Managing Power and Battery Tips for details.<br />
NOTE If you are unable to shut down your computer<br />
normally, follow the instructions in Troubleshooting.<br />
CAUTION Shutting off the computer improperly may result<br />
in data loss.<br />
• CRMA Express Radio Technology: Flexible, Upgradeable Radio<br />
Module for Significant Cost Savings<br />
• Integrated Wireless LAN Communications: 802.11a/b/g/n<br />
Wireless LAN with Mini-PCI Wireless Card Support<br />
• Bluetooth ®<br />
• GPS<br />
• Media Bay Device: DVD Multi Drive or Media Bay Battery<br />
• Backlit Keyboard<br />
• Hazloc<br />
• Memory<br />
General Dynamics <strong>Itronix</strong> 72-0146-001
<strong>GD8200</strong> <strong>User</strong> <strong>Guide</strong><br />
Getting Familiar With Your Computer<br />
1<br />
Front View<br />
2<br />
11<br />
3<br />
10<br />
9<br />
4<br />
8<br />
7<br />
6<br />
5<br />
# Feature Description<br />
1 Display Latch The display latch holds the display when closed<br />
2 Display 13.3-inch (4:3) XGA, sunlight-viewable, color display with an integrated DynaVue ® II<br />
touchscreen<br />
3 Internal Microphone Integrated, weatherized microphone can be used with various software applications that<br />
require audio input<br />
4 Right Tether Slot A stylus tether can be attached at this location<br />
5 Handle Integrated handle for convenient carrying<br />
6 Pen / Stylus Slot Store the provided custom touchscreen pen (stylus) in this slot below the touchpad<br />
7 Touchpad Buttons Use like the buttons on a mouse<br />
8 Touchpad Use for navigation<br />
9 Left Tether Slot A stylus tether can be attached at this location<br />
10 Keyboard Standard keyboard with embedded numeric keypad<br />
11 Button and LED strip Area above the keyboard with the POWER BUTTON, Radio ON/OFF Switch, Application<br />
Launch Key and LED Status Indicators<br />
General Dynamics <strong>Itronix</strong> 72-0146-001
<strong>GD8200</strong> <strong>User</strong> <strong>Guide</strong><br />
Getting Familiar With Your Computer<br />
Left Side View<br />
1 2 3 4 5 6 7 8 9<br />
# Icon Feature Description<br />
1 Back Handle Mount The back handle mount, located on both sides of the computer is used with an<br />
optional back handle.<br />
2 DC-in Jack Connects to an AC power adapter<br />
3 Network Jack (RJ45/LAN) Connects to an Ethernet-based network; connection speed is 10/100/1000 Mbps.<br />
4 Modem Jack (RJ11) Connects a phone line to the internal fax/data modem. It can transmit data using<br />
the 56 Kbps V.90 or V.92 protocol, and send and receive faxes at 14.4 Kbps.<br />
NOTE In some countries, local regulations may not permit the use of the fax/<br />
modem designed for this system. In this case, you may use a PCMCIA modem.<br />
5 Microphone Jack Connect a microphone to this jack to record audio<br />
6 Audio Out Jack Connect external speakers or a stereo headset to this jack to listen to multimedia<br />
7 Cooling Fan Exhaust Cooling Fan exhaust area. Do Not Block. This area may become hot as air vents<br />
from the computer.<br />
8 External Monitor Port Connects to a display monitor (up to 2048x1536 resolution)<br />
9 Smart Card Reader or<br />
Express Card Slot Option<br />
Depending on your configuration, use with a Smart Card or EXPRESS Card.<br />
General Dynamics <strong>Itronix</strong> 72-0146-001
<strong>GD8200</strong> <strong>User</strong> <strong>Guide</strong><br />
Getting Familiar With Your Computer<br />
Right Side View<br />
1<br />
2 3 4 5 6<br />
# Icon Feature Description<br />
1 One USB 3.0 Port Connects to USB devices (e.g., USB digital camera)<br />
2 Two USB 2.0 Ports Connects to USB devices (e.g., USB digital camera)<br />
3 Serial Port Connects your computer to serial devices such a fax/modem or a serial mouse.<br />
This port is identified as COM1<br />
4 PC Card Slot Use this slot for Type II PC Card devices<br />
5 Media Bay Combo DVD-ROM/CD-RW, DVD Multi-Drive (DVD-RAM/DVD-ROM/DVD-RW/CD-R/<br />
CD-ROM/CD-RW), or second battery module<br />
6 Back Handle Mount The back handle mount located on both sides of the computer is used with an<br />
optional back handle.<br />
Back Edge View<br />
1<br />
# Feature Description<br />
2 3 4<br />
1 Battery Release Lock Press this in (toward the display) to unlock the battery<br />
2 Battery Release Latches Slide these toward the center of the unit to release the battery<br />
3 Cooling Fan Intake Air intake for fan. Do NOT block this area<br />
4 Security Slot The security slot can be used with a standard laptop-locking device, such as a<br />
Kensington lock. You can connect the computer to a large object with the lock<br />
to prevent theft. See the documentation that comes with your lock for more<br />
information.<br />
General Dynamics <strong>Itronix</strong> 72-0146-001
<strong>GD8200</strong> <strong>User</strong> <strong>Guide</strong><br />
Getting Familiar With Your Computer<br />
Bottom View<br />
10<br />
1<br />
9<br />
2<br />
8<br />
7<br />
3<br />
6<br />
5<br />
4<br />
# Feature Description<br />
1 Dual External Antenna<br />
Connector (DEAC)<br />
The DEAC gives you the ability to switch the internal WLAN and WWAN to an external<br />
antenna to gain better performance when you are in a vehicle.<br />
2 CRMA Express Module Upgradeable WWAN radio module (optional)<br />
3 Memory compartment <strong>User</strong> expandable memory slot<br />
4 WLAN compartment Integrated wireless LAN radio<br />
5 Speakers Integrated stereo speakers for audio output<br />
6 Hard Disk Drive Locks Open and turn these to lock or unlock the removable hard disk drive<br />
7 Docking Connector 84-pin cradle connector that mates with the Vehicle Dock, or Office Dock<br />
8 Media Bay Release After unlocking the media drive, slide this to release the media drive.<br />
9 Media Bay Lock Slide Slide to unlock the media drive before releasing it<br />
10 Battery Pack Smart Lithium-Ion battery<br />
General Dynamics <strong>Itronix</strong> 72-0146-001
<strong>GD8200</strong> <strong>User</strong> <strong>Guide</strong><br />
Getting Familiar With Your Computer<br />
Keyboard Basics<br />
The <strong>GD8200</strong> features:<br />
• Full Size, Glow-in-the-Dark (GID) Keys on a 85-Key Keyboard<br />
• Twelve Function Keys<br />
• Embedded Numeric Keypad<br />
• Application Launch Key (Programmable Button)<br />
• Radio ON/OFF Switch<br />
• Ergonomically Designed Wide Palm Rest<br />
Primary Keys<br />
Key<br />
ALT<br />
BACKSPACE<br />
CAPS LOCK<br />
CTRL<br />
ENTER<br />
ESC<br />
PRTSC<br />
SHIFT<br />
FN<br />
SPACEBAR<br />
TAB<br />
Description<br />
The ALT (alternate) key is used with other keys to perform special tasks. On some operating systems<br />
pressing CTRL+ALT+DEL twice soft reboots the computer.<br />
The BACKSPACE key, sometimes represented on the keyboard as a left arrow, moves the cursor one position<br />
to the left. The character to the left of the cursor is erased.<br />
Pressing the CAPS LOCK key one time locks keys A through Z in the UPPER CASE position. Pressing the<br />
CAPS LOCK key again returns the letters to lower case. While in the upper case mode, pressing the SHIFT<br />
key results in lowercase characters when entered. You still have to use the SHIFT key to display characters<br />
located on the upper portion of the keyboard. For example, press SHIFT+8 to type an asterisk (*), even<br />
when the CAPS LOCK key is activated.<br />
The Caps Lock LED<br />
lights when the keyboard is in Caps Lock mode.<br />
The CTRL (control) key works with other keys to perform a variety of functions.<br />
The ENTER key signals the computer that you have completed your entry. This is your way of telling the<br />
computer to process the information that you have entered.<br />
The ESC (escape) key allows you to exit a pop-up window or message box.<br />
In Windows ® , pressing the PRTSC (print screen) key or ALT+PRTSC key copies the current screen or window<br />
to the clipboard so you can paste it into documents.<br />
The SHIFT key changes the keys A through Z to the UPPER CASE position. When you press an alphabetic<br />
key, the character appears as a capital letter. When you press SHIFT with other keys, the characters on the<br />
upper part of the keys appear. For example, pressing SHIFT+7 displays an ampersand (&).<br />
Some special FN (function) keys have been established to perform important tasks when pressed in<br />
combination with the FN key. These keys are described later in this document. The FN key legend is color<br />
keyed to other special keys on the keyboard.<br />
Use the SPACEBAR to enter a space and move the cursor one character to the right.<br />
The TAB key moves the cursor to the next tab stop or field. Tab stops are defined by your operating system<br />
or application program. Press the TAB key to move from one field or text box to another.<br />
General Dynamics <strong>Itronix</strong> 72-0146-001
<strong>GD8200</strong> <strong>User</strong> <strong>Guide</strong><br />
Getting Familiar With Your Computer<br />
Arrow Keys<br />
The arrow keys are defined by the software application.<br />
UP ARROW: Usually moves the cursor up one line. In some cases, you can use<br />
the up arrow to make selections from menus and scrollable list boxes.<br />
DOWN ARROW: Usually moves the cursor down one line. In Windows ® , you can<br />
use the down arrow to make selections from menus and scrollable list boxes.<br />
RIGHT ARROW: Usually moves the cursor one character position to the right.<br />
LEFT ARROW: Usually moves the cursor one character position to the left.<br />
Function Keys and Key Combinations<br />
Arrow Keys<br />
When using function keys, press and hold the FN key before pressing the other key in the key combination.<br />
Function Key Icon Function Description<br />
FN+F1 Screen blank Turns off the display screen backlight. Press it again to turn<br />
the light back on.<br />
FN+F2 Display toggle Switches the display output between the display screen,<br />
external monitor (if connected) and both the display screen<br />
and external monitor<br />
NOTE When a DVD or VCD is playing display toggle is<br />
disabled.<br />
FN+F3 Standby Puts the computer in standby mode.<br />
FN+F4<br />
FN+F5<br />
Keyboard Backlight<br />
Brightness Down<br />
Keyboard Backlight<br />
Brightness Up<br />
Decreases the keyboard backlight brightness if you have the<br />
optional EL keyboard.<br />
Increases the keyboard backlight brightness if you have the<br />
optional EL keyboard.<br />
FN+F6<br />
Display Brightness<br />
Down<br />
Decreases the screen brightness<br />
FN+F7 Display Brightness Up Increases the screen brightness<br />
FN+F8 Audio Volume Down Decreases the audio volume<br />
FN+F9 Audio Volume Up Increases the audio volume<br />
FN+F10 Speaker on/off Turns the speakers on and off; mutes the sound<br />
FN+F12 Stealth mode Provides the ability to disable sound and light features such<br />
as system beeps, fan, and display backlight<br />
FN+RIGHT ALT Touchpad on/off Toggles the Touchpad on and off<br />
FN+ LEFT SHIFT Keyboard backlight Toggles the keyboard backlight (option) on and off<br />
General Dynamics <strong>Itronix</strong> 72-0146-001
<strong>GD8200</strong> <strong>User</strong> <strong>Guide</strong><br />
Getting Familiar With Your Computer<br />
Numeric Keypad<br />
Standard Key Key with Numlock On<br />
7 7<br />
8 8<br />
9 9<br />
0 *<br />
U 4<br />
I 5<br />
O 6<br />
P -<br />
J 1<br />
K 2<br />
L 3<br />
; +<br />
M 0<br />
. .<br />
/ /<br />
ENTER<br />
Carriage Return<br />
The embedded numeric keypad consists of sixteen keys<br />
that make number intensive input more convenient. It is<br />
indicated by small characters located on the lower right<br />
corner of the key. Press NUMLK to enable or disable the<br />
numeric keypad.<br />
Numeric Keypad<br />
Lock Keys<br />
The keyboard has three lock keys you can toggle on and off.<br />
Lock Key<br />
CAPS LOCK<br />
NUM LOCK<br />
Description<br />
Pressing the CAPS LOCK key one time locks keys A through Z in the UPPER CASE position. Pressing the<br />
CAPS LOCK key again returns the letters to lower case. While in the upper case mode, pressing the SHIFT<br />
key results in lowercase characters when entered. You still have to use the SHIFT key to display characters<br />
located on the upper portion of the keyboard. For example, press SHIFT+8 to type an asterisk (*), even<br />
when the CAPS LOCK key is activated.<br />
The CAPS LOCK LED<br />
lights when the keyboard is in Caps Lock mode.<br />
When NUM LOCK is on, the embedded keypad is in numeric mode. The keys function as a calculator (with<br />
the arithmetic operators +, -, *, and /). Use this mode when you need to do a lot of numeric data entry.<br />
Alternately, connect an external keypad. See External keyboard.<br />
SCROLL LOCK<br />
The NUM LOCK LED<br />
lights when the keyboard is in Num Lock mode.<br />
Enters Scroll Lock mode. Scroll Lock varies between applications. It does not work with some applications.<br />
The SCROLL LOCK LED<br />
lights when the keyboard is in Scroll Lock mode.<br />
General Dynamics <strong>Itronix</strong> 72-0146-001
<strong>GD8200</strong> <strong>User</strong> <strong>Guide</strong><br />
Getting Familiar With Your Computer<br />
Windows ® Keys<br />
The keyboard has two keys that perform Windows ® -specific functions.<br />
Key Icon Description<br />
Windows ® Logo Key<br />
START BUTTON Combinations with this key perform special functions. Below are a few examples:<br />
+ TAB (Activates next Taskbar button)<br />
+ E (Opens My Computer in Windows ® Explorer)<br />
+ M (Minimizes all Windows)<br />
SHIFT +<br />
+ M (Restores Minimized Windows)<br />
+ R (Displays Run dialog box)<br />
Application Key<br />
Refer to Keyboard Shortcuts in Windows ® Help and Support for a complete list of Windows ®<br />
key combinations.<br />
Opens the application’s context menu (same as right-click)<br />
Radio ON/OFF Switch (option)<br />
The keyboard has two keys that perform Windows ® -specific functions.<br />
CAUTION FAA regulations require that all transmit/receive devices be turned off during flight. If you have radios in your<br />
computer (including GPS) and your computer is equipped with a Radio ON/OFF Switch, please use it to turn your radios off<br />
during flight. If you have radios and you do not have a switch to turn the radios off, either leave your computer off during flight or<br />
contact your help desk for assistance.<br />
The wireless Radio ON/OFF Switch is the middle button above the keyboard. This switch toggles the power on and off to all radio<br />
devices. Radio devices include GPS, Bluetooth ® , WLAN, and WWAN radios.<br />
Turn all Radios On or Off<br />
1. Slide the radio switch to the left to power off all radio devices (airplane mode).<br />
2. Slide the radio switch to the right to turn radio power on.<br />
Application Launch Key<br />
The application launch key is the right button above the keyboard. Press this key to open a specific application you have set<br />
following the instructions below:<br />
Program the Application Launch Key in Windows ® 7<br />
1. Select Mobile Computer Tools, OnScreenControl.<br />
2. Select Launch Key Settings, Set, and then select Run. Click on Configure. Select Browse and choose an application based on its<br />
path. To complete the settings, select Ok three times.<br />
General Dynamics <strong>Itronix</strong> 72-0146-001
<strong>GD8200</strong> <strong>User</strong> <strong>Guide</strong><br />
Getting Familiar With Your Computer<br />
Display<br />
The <strong>GD8200</strong> features a 13.3-inch, XGA, sunlight-viewable, color<br />
display with an integrated touchscreen. You can start programs<br />
and input data on the touchscreen using an approved pen<br />
(stylus) that comes with the computer. The Colorvue<br />
Transmissive display technology uses a built-in backlight for<br />
easy reading in most ambient light conditions. DynaVue ® II<br />
display technology provides improved outdoor visibility and<br />
even works well in sunlight.<br />
CAUTION To avoid damaging the display, do not slam it<br />
when you close it. Also, do not place any object on top of the<br />
computer when the display is closed.<br />
Press down to remove stylus<br />
smooth side<br />
Install the Stylus Tether<br />
1. Insert one tether loop through one of the holes on the end of<br />
the stylus, then pull it back through the adjacent hole.<br />
NOTE The holes in the stylus are notched on one side and<br />
smooth on the other. Feed the tether through the smooth side<br />
first, so that it lies inside the notch when finished.<br />
2. Insert the free end of the tether through the loop and pull the<br />
slack back through the loop to secure the stylus.<br />
3. Repeat these steps with the other end of the tether to attach it<br />
to one of the tether slots on the front on your computer.<br />
Calibrate the Touchscreen<br />
1. Press down on one side of the stylus to remove it from its slot<br />
below the Touchpad.<br />
2. From the Start menu select All Programs, HIDeGalaxTouch.<br />
3. Select 9 Points Linearization from the HIDeGalaxTouch dialogue<br />
box.<br />
4. Use an approved stylus and follow the instructions provided to<br />
complete touchscreen calibration.<br />
5. Click OK to save the new settings and click OK again to begin<br />
using your computer.<br />
Adjusting Display Brightness<br />
• Press FN + F6<br />
• Press FN + F7<br />
Adjusting Display Resolution<br />
Windows ® 7:<br />
to decrease display brightness<br />
to increase display brightness<br />
1. Click on the Start button and then on Control Panel.<br />
2. Under Appearance and Personalization, click on Adjust<br />
Screen Resolution.<br />
3. Use the slide bar to adjust the resolution.<br />
NOTE Using a lower resolution than the screen designation<br />
will reduce the area of the display.<br />
General Dynamics <strong>Itronix</strong> 72-0146-001
<strong>GD8200</strong> <strong>User</strong> <strong>Guide</strong><br />
Getting Familiar With Your Computer<br />
Auto Dim Feature<br />
To save the battery power, your computer automatically dims<br />
the display when the computer is not attached to external<br />
power.<br />
NOTE You may still use the display brightness function keys<br />
(FN+F6 and FN+F7) to adjust display brightness.<br />
See Managing Power for more information on power<br />
management features.<br />
Simultaneous or Extended Display<br />
This computer supports simultaneous LCD and external<br />
display output via the external monitor port located on the<br />
back edge of the computer. You can also connect other<br />
output display devices such as LCD projection panels for large<br />
audience presentations. See Attaching an External Monitor or<br />
Video Device for more information.<br />
FEATURE When using an external monitor you can extend<br />
your desktop. This allows you to open and view one program<br />
on the external monitor while viewing a different program on<br />
your laptop’s display.<br />
Windows ® 7:<br />
1. Select Start, Control Panel, Appearance and Personalization.<br />
2. Under Display select Connect to an external display.<br />
3. Select the drop-down menu next to Multiple Displays and<br />
click Extend these displays. Then click OK.<br />
Windows ® 7: Select Start, Control Panel, Hardware and Sound,<br />
and then choose Mouse. On the Mouse Properties window,<br />
select the Pointer Options tab to make cursor visibility adjustments.<br />
Lid Switch<br />
Your computer has a lid switch that can automatically suspend<br />
and resume your computer when you close and open the<br />
display. To change the power management settings for the lid<br />
switch, perform the following:<br />
Windows ® 7:<br />
1. On the System Tray area of the Taskbar, right-click the DynaPower<br />
icon .<br />
2. At the top of the grid, select the appropriate Power plan.<br />
3. Select the desired action settings for both battery or AC power.<br />
4. In the Power buttons and lid section, select the Lid Open Action<br />
and Lid Close Action.<br />
5. Select Save Changes and repeat steps 2 through 4 until all<br />
power plan settings you wish to modify.<br />
NOTE The Lid Close Action default is Sleep for Windows ® 7. The<br />
default Lid Open Action is Do Nothing.<br />
LCD Heater<br />
The <strong>GD8200</strong> has a CCFL heater to improve display brightness<br />
in a cold environment. The heater includes a film and heater<br />
strip that is bonded over the CCFL area of the display. It is<br />
designed to turn on when the temperature is cold enough<br />
to impact display brightness and does not require user<br />
intervention.<br />
Cursor Visibility<br />
To improve the visibility of the mouse cursor, you should:<br />
• Enable the “Pointer Trails” feature to add trailing cursors<br />
• Use a slow or medium speed/sensitivity level<br />
You can combine a higher level of acceleration with a slow<br />
or medium speed/sensitivity level. This allows you to move<br />
the mouse cursor quickly by increasing your finger pressure,<br />
while still providing a finer degree of control when you apply<br />
minimum pressure.<br />
NOTE To change the speed of the mouse, do the following:<br />
General Dynamics <strong>Itronix</strong> 72-0146-001
<strong>GD8200</strong> <strong>User</strong> <strong>Guide</strong><br />
Getting Familiar With Your Computer<br />
LED Status Indicators<br />
The activity indicators, located above the keyboard, light up<br />
when a particular function of the computer is active. Each<br />
indicator is marked with an icon.<br />
1<br />
2 3<br />
4 5 6 7 8 9 10<br />
# Icon Function LED Description<br />
1 Power Lit Power is ON<br />
Flashing<br />
Suspend to RAM<br />
2 Battery Lit Battery charging<br />
Flashing<br />
LED off<br />
Low Battery<br />
No battery / battery fully charged (will always be OFF without external<br />
power connected to the unit)<br />
3 External Power Lit External power is connected to the unit<br />
4 WWAN Communication Lit WWAN radio is on<br />
5 WLAN Communication Lit Wireless LAN, Bluetooth ® , and/or GPS radio(s) are on<br />
6 Media Bay Lit The computer is equipped with a DVD/CDRW Combo, CD-ROM,<br />
or DVD-ROM<br />
7 Disk Status (HW) Lit The hard disk drive is being accessed<br />
8 Caps Lock Lit The keyboard is in Caps Lock mode<br />
9 Number Lock Lit The keyboard is in Num Lock mode<br />
10 Scroll Lock Lit The keyboard is in Scroll Lock mode<br />
General Dynamics <strong>Itronix</strong> 72-0146-001
<strong>GD8200</strong> <strong>User</strong> <strong>Guide</strong><br />
Getting Familiar With Your Computer<br />
Audio<br />
Your computer includes 24-bit high-fidelity stereo audio<br />
output and an integrated microphone. You can also attach<br />
external audio devices via the audio in and out jacks on the<br />
left side of the computer.<br />
Adjust the Volume<br />
• To decrease volume, press FN+F8<br />
• To increase volume, press FN+F9<br />
• To mute the volume, press FN+F10<br />
You can also adjust the volume with the Windows ® volume<br />
control applet located on the taskbar. However, the volume<br />
control function keys override the Windows ® volume control<br />
applet. If your volume is too low or too high after setting the<br />
volume in the applet, adjust the volume with the function<br />
keys.<br />
Microphone<br />
The PC Card Slot<br />
Inserting the Card<br />
1. The top side of a PC Card is usually identified with a label.<br />
Insert the card into the slot with the top up and the edge with<br />
pinhole contacts or arrow, going in first. You will feel some<br />
resistance as the card slides into the back of the slot.<br />
2. PC Cards require drivers, or a program that allows the operating<br />
system to use a specific device. Many drivers are included<br />
with Windows ® so the PC Card will be automatically recognized;<br />
but if not, you will be prompted to install the driver included<br />
with your card.<br />
3. The PC Card becomes a removable disk drive and is assigned a<br />
letter drive.<br />
NOTE Please read the instructions included with individual<br />
PC Cards. Some cards may be inserted with power on, while<br />
others require that the computer be turned off.<br />
Ejecting a Card<br />
1. First, exit the application using the card.<br />
2. On the taskbar, left-click on the Safely Remove Hardware icon<br />
or .<br />
3. Press the slot eject button once to pop it out; then press it again<br />
to eject the PC Card.<br />
Audio Jacks<br />
Speakers<br />
Use the PC card slot, located on the right side of the computer under the media bay, as an interface between your computer and<br />
a variety of communications devices, such as network adapters, SCSI adapters, and fax/modems, or to provide additional data<br />
storage capacity. Your computer’s PC Card slot supports single Type I or II PC Cards, 32-bit CardBus cards, and Zoomed Video<br />
cards.<br />
CAUTION Do not remove or change any hardware while your computer is hibernating or in a Sleep/Standby state.<br />
General Dynamics <strong>Itronix</strong> 72-0146-001
<strong>GD8200</strong> <strong>User</strong> <strong>Guide</strong><br />
Getting Familiar With Your Computer<br />
Touchpad<br />
The integrated Touchpad is a pointing device that senses<br />
movement on its surface so the cursor responds as you move<br />
your finger over of the Touchpad. The buttons located directly<br />
below the Touchpad have the same function as a two-button<br />
mouse. Press these buttons to make selections, drag objects,<br />
or perform a variety of other functions depending on the software.<br />
Touchpad<br />
Selecting Objects<br />
1. Move the pointer over the object to be selected<br />
2. Double-tap the Touchpad or double-click the left Touchpad button.<br />
The Touchpad will respond like a mouse.<br />
Dragging Objects<br />
1. Place the cursor over the desired object.<br />
2. Press and hold the left button or tap the Touchpad two times as<br />
if you were double-clicking but do not remove your finger after<br />
the second tap.<br />
3. Move the cursor to the desired location and release the button<br />
or lift your finger to finish dragging.<br />
Scrolling<br />
Two-Finger Scrolling and Reverse Scrolling<br />
The two-finger scrolling feature allows you to scroll vertically<br />
or horizontally and initiate scrolling from anywhere on the<br />
Touchpad surface.<br />
4. Place two fingers down on the Touchpad surface. The fingers<br />
should be slightly separated.<br />
5. Using a straight continuous motion, slide both fingers in the<br />
desired direction.<br />
6. Lift both fingers up off the Touchpad surface to stop scrolling.<br />
The Reverse Scrolling Direction feature allows you to change<br />
standard scrolling behavior. Standard scrolling moves the<br />
scroll bar in the direction of finger motion. Reverse Direction<br />
Scrolling moves the document or object in the direction of<br />
finger motion.<br />
To enable this feature, select the Enable reverse scrolling direction<br />
check box.<br />
Zooming<br />
Pinch Zoom<br />
The Pinch Zoom gesture delivers smooth zooming functionality<br />
in many applications, including Microsoft ® Office 2003<br />
and 2007, MS IE 6,7, and 8, as well as Adobe Acrobat/Reader<br />
and PhotoShop CS3 and CS4, MS Windows ® Media Player<br />
11, WinDVD 9, and iTunes. This feature is enhanced with<br />
PointZoom(TM) for intelligent and contextual zoom control.<br />
Touchpad Buttons<br />
<strong>User</strong>s surfing the Web can pinch over a site’s text enlarging<br />
the font, pinch over a map and zoom the map - all in the same<br />
browser window.<br />
The Pinch Zoom gesture can be used to perform the same<br />
function as a scroll wheel on a standard Windows ® applications<br />
that support CTRL-SCROLL WHEEL zoom functionality.<br />
To use the Pinch Zoom gesture:<br />
1. Place two fingers down on the Touchpad surface.<br />
2. Slide the fingers further apart to zoom in or slide the fingers<br />
closer together to zoom out. For the best zooming experience,<br />
use the tips of your fingers.<br />
Rotating Objects<br />
Pivot Rotate<br />
The Pivot Rotate gesture allows objects such as a photo, PDF<br />
file, or other selected object, to be rotated in 90 degree increments.<br />
1. Place one finger down on the left “target” zone (adjustable<br />
scroll zone) of the touchpad surface and keep it stationary.<br />
2. Place another finger down near the middle of the Touchpad.<br />
3. Slide the second finger in a circular motion around the first<br />
finger. Ensure that the space between the two fingers remains<br />
the same while making the circular motion. Slide clockwise or<br />
counterclockwise to rotate the selected object in the desired<br />
direction.<br />
Application Gestures<br />
Three Finger Flick<br />
The Three-Finger Flick gesture enhances navigation for a<br />
variety of applications. It can be used to browse the Internet<br />
General Dynamics <strong>Itronix</strong> 72-0146-001
<strong>GD8200</strong> <strong>User</strong> <strong>Guide</strong><br />
Getting Familiar with Your Computer<br />
or scroll through photos in a photo viewer window. It can also<br />
be used to enter or exit slideshow mode and to play or pause<br />
certain multimedia applications.<br />
To enable this feature, select the Enable Three-Finger Flick<br />
check box.<br />
1. Place three fingers, slightly separated, down on the Touchpad<br />
surface.<br />
2. Flick your fingers in a straight, continuous motion in the desired<br />
direction, moving from one side of the Touchpad to the<br />
opposite side.<br />
3. Slide your fingers to the right or left to page forward or backward<br />
in a photo viewer or an Internet browser window, and<br />
then lift the fingers..<br />
To use the Three-Finger Flick gesture for slideshow mode,<br />
slide your fingers vertically.<br />
• Make sure the touchpad does not into come into contact with<br />
dirt, liquids or grease.<br />
• Keep the touchpad area dry and clean.<br />
• Do not touch the touchpad if your fingers are dirty.<br />
• Do not rest heavy objects on the touchpad or touchpad buttons.<br />
• Keep your fingers dry and clean when using the touchpad.<br />
• Avoid tapping too hard. The touchpad is sensitive to finger<br />
movements and responds best to light touches.<br />
• Slide fingers upward to launch slideshow mode.<br />
• Slide fingers downward to exit slideshow mode.<br />
Three-Finger Press<br />
The Three-Finger Press gesture provides a shortcut for launching<br />
one or more user-selectable applications and documents.<br />
To use the Three-Finger-Press gesture:<br />
1. Place three fingers down on the Touchpad surface. Ensure that<br />
there is a small gap between the fingers.<br />
2. Hold fingers still until the application or applications begin to<br />
launch.<br />
3. Lift fingers upward off the Touchpad surface.<br />
Adjusting the Touchpad Settings<br />
These settings allow you to change the orientation from righthanded<br />
to left-handed, and fine-tune the pointer movement<br />
and timing of clicks.<br />
Windows ® 7:<br />
1. Select Start, Control Panel, Hardware and Sound.<br />
2. Under Devices and Printers select Mouse. This will bring you<br />
to the Mouse Properties window.<br />
3. On the Buttons tab use the Devices drop-down menu to select<br />
Synaptics Touchpad V7.2 on PS/2 Port 1. Now you can<br />
choose Touchpad settings for the way you work.<br />
The Synaptics Touchpad can also be accessed via the<br />
system tray.<br />
Touchpad Precautions<br />
The touchpad is a sensitive device. If not properly cared for,<br />
it can be easily damaged. Please take note of the following<br />
precautions:<br />
icon in<br />
General Dynamics <strong>Itronix</strong> 72-0146-001
<strong>GD8200</strong> <strong>User</strong> <strong>Guide</strong><br />
Getting Familiar With Your Computer<br />
Smart Card or EXPRESS Card Slot (option)<br />
Your computer comes with a Smart Card Reader or ExpressCard slot (option) that supports ExpressCard/34 and ExpressCard/54.<br />
This slot is located on the left side of the computer.<br />
Insert a Card<br />
Insert the compatible card with the label side up into the slot until it clicks<br />
into place. The card will appear as a removable storage device that you can<br />
use for copying files.<br />
Remove a Card<br />
1. Make sure no operation is using the card (such as file copying or deletion).<br />
2. Press the card further into the slot to release the card. You will hear a click.<br />
3. Remove the card.<br />
CAUTION Do not remove or change any hardware while your computer is<br />
hibernating or in a Sleep/Standby state.<br />
The Hard Disk Drive (HDD)<br />
Your computer features a removable, shock-mounted hard disk to provide high-capacity storage and fast access. The operating<br />
system and most programs are stored here. Your computer identifies the hard disk drive as drive C. You can do a one-time<br />
configuration of your hard disk space through the HDD Space Setup Wizard. The Wizard can run when it is convenient for you;<br />
however, should be run after first start-up.<br />
See the BIOS Setup Utility to password protect your removable hard disk drive.<br />
Replacing the hard disk drive<br />
1. You should print these instructions<br />
before continuing. They will not be<br />
available after you shut down the<br />
computer in step two.<br />
2. Shut down the computer and remove<br />
power.<br />
3. Remove the battery (see Battery Removal)<br />
4. Turn the computer over so you are looking<br />
at the bottom.<br />
5. If installed, use a Phillips screwdriver to<br />
remove the two optional screws in the<br />
hard disk drive cover.<br />
6. Flip open the HDD locks and turn both of<br />
them toward the center of the computer.<br />
7. Lift the HDD cover off of the computer.<br />
8. Using the ribbon, remove the HDD from<br />
the computer.<br />
9. Line up the connectors and insert the HDD<br />
in the computer.<br />
10. Replace the door and turn the HDD locks<br />
toward the outside of the computer to<br />
lock it.<br />
11. If desired, install the optional HDD screws.<br />
Remove screws<br />
Turn toward inside<br />
Remove by the<br />
ribbon<br />
General Dynamics <strong>Itronix</strong> 72-0146-001
<strong>GD8200</strong> <strong>User</strong> <strong>Guide</strong><br />
Getting Familiar With Your Computer<br />
Hard Disk Drive Heater<br />
The hard disk drive heater warms the HDD before spinning<br />
up in temperatures below 5°C, the minimum safe operating<br />
temperature for the HDD. The heater is integrated and<br />
operates as needed when the computer is on. If the<br />
temperature is below 5°C when booting or resuming you will<br />
see the message “Warming internal hard drive. Please wait...”.<br />
The unit will continue booting when it detects the HDD is warm<br />
enough to operate safely.<br />
NOTE If you are using the computer in a cold temperature<br />
environment and the battery level is too low for the heater to<br />
operate, you will see the error message “Battery too low to<br />
warm the hard drive. Shutting down...” and the computer will<br />
shut down. Apply external power and reboot.<br />
The Media Bay<br />
Depending on your configuration, your computer may have an<br />
optional DVD multi-drive (DVD-RAM/DVD-ROM/DVD-RW/CD-R/<br />
CD-ROM/CD-RW) or media bay battery. The multi-drive allows<br />
you to read data from DVDs and CDs, including audio or video<br />
CDs, and enables you to burn your data onto a CD or DVD<br />
recordable disc. Please refer to the recording software online<br />
help for more information.<br />
If you have the media bay battery, it extends your unplugged<br />
runtime.<br />
Your notebook identifies the drive with the letter following the<br />
hard drive and/or recovery partition letter. If your hard drive is<br />
C, then the media bay will be E if you have a recovery partition.<br />
It will be D if you do not have a recovery partition.<br />
Change Swappable Media Bay Device<br />
1. Make sure the computer is not accessing the media bay drive.<br />
2. Open the media bay door cover.<br />
3. Left-click on the Safely Remove Hardware icon or on<br />
the Windows ® tray taskbar.<br />
4. Select the Media Bay device, then select Stop.<br />
5. Wait for the “safe to remove hardware” message, then click<br />
OK.<br />
6. Turn your computer over so you are looking at the bottom.<br />
7. If installed, remove the screw in the media bay lock.<br />
8. Slide the media bay lock toward the back of the computer and<br />
hold.<br />
9. While holding the media lock in the unlocked position, slide<br />
the media bay release toward the outside of the computer. The<br />
media bay should come part way out of the computer.<br />
10. Grasp the media bay device by the edges and pull straight out<br />
until it is clear from the slot.<br />
11. Re-insert the next media bay device by firmly pushing it back<br />
into the slot until it clicks into place.<br />
CAUTION Do not remove or change any hardware while<br />
your computer is hibernating or in a Sleep/Standby state.<br />
Insert a Disk<br />
1. Open the media bay<br />
door cover.<br />
2. Insert the disk into the<br />
media bay slot.<br />
Remove a DVD or CD<br />
1. Make sure the computer is not accessing the DVD drive.<br />
2. Press the eject button. The disk will automatically eject.<br />
3. Pick up the disk by the edges and remove it from the slot.<br />
CAUTION When the computer is reading from a DVD or<br />
CD, the Optical Disk Drive LED will flash on. Do not attempt to<br />
remove a disk while this light is active.<br />
Multi Drive Eject Button<br />
Media Bay<br />
Screw and Lock<br />
Media Bay<br />
Release<br />
General Dynamics <strong>Itronix</strong> 72-0146-001
<strong>GD8200</strong> <strong>User</strong> <strong>Guide</strong><br />
Getting Familiar With Your Computer<br />
Precautions for Handling DVDs and CDs<br />
Keep these precautions in mind when handling DVDs and CDs:<br />
• Always hold the disk by the edges; avoid touching the surface of<br />
the disk.<br />
• Use a clean, dry, cloth to remove dust, smudges, or fingerprints.<br />
Wipe from the center outward.<br />
• Do not write on the surface of the disk.<br />
• Extremes in temperature may damage disks. Store disks in a<br />
cool dry place.<br />
• Do not use benzene, thinners, or cleaners with detergent. Only<br />
use cleaning kits designed for DVDs or CDs.<br />
• Do not bend or drop the disks.<br />
Fingerprint Scanner (Option)<br />
The optional swipe style fingerprint scanner can be used for<br />
all standard security uses. The optional fingerprint scanner<br />
provides a greater level of security and convenience for your<br />
<strong>GD8200</strong> and your private data. Use the fingerprint scanner<br />
instead of passwords for the following:<br />
• During computer login<br />
• During login at secure websites<br />
• When opening password protected applications<br />
• To provide encryption security for individual files<br />
• Do not place objects on top of disks.<br />
Computer Security<br />
Your computer includes several security features to help<br />
prevent theft and protect data. These include a security slot,<br />
multiple levels of password protection, an optional fingerprint<br />
scanner, an optional Smart Card slot, stealth mode and Trusted<br />
Platform Module (TPM).<br />
Security Slot<br />
The security slot located on the back edge of the computer<br />
lets you connect a Kensington compatible computer security<br />
lock so you can connect the computer to an immovable object<br />
to prevent theft. Insert the lock into the notch and turn the key<br />
to secure the lock. Some keyless models are also available.<br />
See the documentation that comes with your lock for more<br />
information.<br />
BIOS Level Passwords<br />
Passwords protect your computer from unauthorized access.<br />
When set, no one can access the computer without entering<br />
the correct password.<br />
There are two types of passwords you can set:<br />
• Supervisor Password secures your computer against<br />
unauthorized entry to critical parameters in the BIOS Utility<br />
• <strong>User</strong> Password secures your computer against unauthorized use,<br />
and allows limited access to the BIOS Utility<br />
NOTE Do not forget to set your password! If you forget<br />
your password, please get in touch with your dealer or an<br />
authorized service center.<br />
Smart Card Reader (Option)<br />
If your computer has the Smart Card Reader option, you can<br />
use smart card technology for added security.<br />
Fingerprint<br />
scanner<br />
Fingerprint Scanner Software<br />
Before using the fingerprint scanner, you must first install<br />
compatible software. If the optional fingerprint scanner was<br />
present during initial user setup, you should have the “Install<br />
Finger Print Software” link on your desktop. Click this link and<br />
follow the instructions to install the software. A wizard may<br />
guide you through the process.<br />
CAUTION Before installing any third party software, ensure<br />
it is approved for use with this computer.<br />
When accessing some secure websites, you may need<br />
to specify you are using the fingerprint scanner instead<br />
of a password. Refer to the fingerprint scanner software<br />
documentation for setup information.<br />
Stealth Mode<br />
The stealth mode feature enables you to use the computer<br />
where light or sound could be dangerous or disruptive, such as<br />
a military or public safety environment. Enabling stealth mode<br />
allows you to disable sound and light features such as system<br />
beeps, the fan, and the display backlight. Refer to the BIOS<br />
Setup Utility section for information about how to configure<br />
stealth mode.<br />
NOTE The Stealth mode hotkey is Fn+F12.<br />
Trusted Platform Module (TPM)<br />
Enable or disable TPM in the System BIOS. TPM provides a<br />
platform root of trust which uniquely identifies a particular<br />
platform and provides various crypto capabilities including<br />
hardware-protected storage.<br />
General Dynamics <strong>Itronix</strong> 72-0146-001
<strong>GD8200</strong> <strong>User</strong> <strong>Guide</strong><br />
Getting Familiar With Your Computer<br />
Ports and Connectors Icon Connection Location<br />
RJ-11 Phone line/modem (internet and fax) Left Side<br />
RJ-45 Ethernet Left Side<br />
DC-in AC Adapter (power) Left Side<br />
2 USB Universal Serial Bus<br />
2.0<br />
1 USB Universal Serial Bus<br />
3.0<br />
USB Peripherals such as a mouse, printer or optical disk<br />
drive<br />
USB Peripherals such as a mouse, printer or optical disk<br />
drive<br />
Right Side<br />
Right Side<br />
External Monitor External Monitor Left Side<br />
Audio In Microphone Left Side<br />
Audio Out Speakers or headphones Left Side<br />
PC Card Slot Type II PC Cards Right Side<br />
Smart Card Reader or<br />
EXPRESS Card Slot<br />
Smart Cards or EXPRESS Cards<br />
Left Side<br />
Security Slot Computer lock such as a Kensington lock Back Edge<br />
Multi I/O Docking Connector Compatible office dock or vehicle dock Bottom<br />
Serial Port<br />
ENERGY STAR ®<br />
Connects your computer to serial devices such a fax/<br />
modem or a serial mouse. This port is identified as<br />
COM1<br />
General Dynamics <strong>Itronix</strong> is committed to designing mobile computers with the environment in mind.<br />
Not only do we design computers that withstand the environment – with rugged features that enable<br />
you to use them in extreme operating conditions, we design computers that use less energy, reducing<br />
environmental pollution.<br />
That’s why our ENERGY STAR ® compliant mobile computers meet or exceed the stringent ENERGY<br />
STAR ® standards set by the Environmental Protection Agency (EPA). According to the EPA, ENERGY<br />
STAR ® qualified products use as much as 60% less energy than standard equipment. By lowering energy<br />
consumption, our computers help customers save money while reducing greenhouse gas emissions.<br />
For more information about ENERGY STAR ® (in English), go to www.energystar.gov.<br />
To help you conserve energy on both AC and battery power, by default this computer:<br />
• turns off the display after 15 minutes of inactivity<br />
Right Edge<br />
• enters standby, a low power mode, after 15 minutes of inactivity, compared to 30 minutes required for ENERGY STAR ® compliance<br />
Press any key to wake the computer or turn the display back on after a period of inactivity.<br />
This computer was also designed with other power saving features that go beyond ENERGY STAR ® requirements. See the<br />
Managing Power section to make the most efficient use of those features.<br />
General Dynamics <strong>Itronix</strong> 72-0146-001
<strong>GD8200</strong> <strong>User</strong> <strong>Guide</strong><br />
Making Connections<br />
This section describes how to connect peripherals and<br />
hardware options that help you maximize your computer’s<br />
features.<br />
Before connecting peripherals, first read the manual included<br />
with the peripheral for connection and operation instructions.<br />
You can purchase most of these and other options directly<br />
from authorized dealers.<br />
If you are a mobile worker, you may want to purchase an<br />
approved docking solution such as the Vehicle Dock or Office<br />
Dock. These docks provide drop-in convenience, port expansion,<br />
and automatic battery recharging, enabling you to leverage<br />
your computer’s features without having to attach and<br />
reattach cables and connectors when you move your computer<br />
from office to vehicle.<br />
Attaching Power<br />
Your computer can be powered by battery, by attaching an<br />
AC Adapter or Vehicle Adapter to the DC power port, or by<br />
connecting the computer to a powered Vehicle Dock or Office<br />
Dock.<br />
NOTE When external power is properly applied, the External<br />
Power LED lights.<br />
CAUTION This notebook computer is designed to be used<br />
with the provided dedicated AC Adapter or Vehicle Adapter.<br />
To Attach AC Power<br />
1. Connect the AC<br />
adapter power cord to<br />
the AC adapter.<br />
2. Connect the AC<br />
adapter to the DC<br />
power port on the<br />
left side of your<br />
computer.<br />
3. Connect the AC<br />
adapter power cord to<br />
a properly grounded<br />
AC outlet.<br />
NOTE It is<br />
recommended you<br />
use a quality surge<br />
protector.<br />
To Use the Vehicle Adapter (optional)<br />
1. Insert the vehicle adapter’s power cord into the DC-in jack on<br />
the left side of the computer.<br />
2. Insert the 12V (cigarette lighter) adapter into the vehicle’s 12V<br />
socket, turning it slightly to make a good connection.<br />
CAUTION The vehicle adapter is not intended to be used<br />
continuously. It is intended to provide a convenient, temporary<br />
power source for powering and charging this computer<br />
while in transit in a vehicle. For permanent installations, it<br />
is recommended that the (fused) vehicle charger adapter be<br />
wired directly to the vehicle power supply. For additional<br />
information regarding permanent installation, contact your<br />
sales representative.<br />
3. The power LED illuminates to indicate that current is reaching<br />
the vehicle adapter. When you connect the vehicle adapter,<br />
it automatically begins charging the computer’s battery. At<br />
moderate temperatures, around 20°C (68ºF), the battery should<br />
charge from empty to 90% in less than three hours if the unit is<br />
suspended or off. It should take less than four hours if the unit<br />
is in use.<br />
NOTE As the battery temperature approaches the ends of its<br />
temperature range (5°C/ 41°F to 50°C/122°F), it may take longer<br />
to charge the battery.<br />
CAUTION Avoid exposing batteries to extremely hot or<br />
cold temperatures for long periods. To prevent possible<br />
damage to the battery, the <strong>GD8200</strong> laptop does not allow<br />
the battery to charge if the internal temperature of the<br />
battery gets too low (< 5°C or < 41°F) or too high (> 50°C or<br />
> 122°F).<br />
USB Devices<br />
Your computer comes with two universal serial bus (USB) 2.0<br />
ports and one USB 3.0 port on the right side of the computer.<br />
This enables you to attach various devices such as a keyboard,<br />
mouse, scanner, or printer. USB devices can be chained<br />
together on a single cable.<br />
External Keyboard or Pointing Device<br />
This computer has a keyboard with full-sized keys and an<br />
embedded numeric keypad. If you feel more comfortable using<br />
a desktop keyboard, you can connect a USB external keyboard<br />
to one of the USB ports. You can also connect a USB mouse or<br />
other pointing device to one of the USB ports.<br />
USB Ports<br />
General Dynamics <strong>Itronix</strong> 72-0146-001
<strong>GD8200</strong> <strong>User</strong> <strong>Guide</strong><br />
Ethernet (LAN)<br />
With the built-in Ethernet LAN, you can make LAN connections<br />
with 10/100/1000 Mbps connection speed. To use the network<br />
feature, connect an Ethernet cable from the network jack on<br />
the left side of the computer to a network jack or hub on your<br />
network.<br />
Ethernet Port (RJ45)<br />
Fax/Data Modem<br />
Modem Port (RJ11)<br />
You can use the fax/modem to connect to the Internet to send<br />
and receive data using the 56 Kbps V.92 protocol. When used<br />
with fax software, it can be used as a fax at 14.4 Kbps. In some<br />
countries, local regulations may not permit the use of the fax/<br />
modem designed for this system. In this case, you may use a<br />
PC Card modem. To use the fax/data modem port, connect<br />
a phone cable from the modem port on the left side of the<br />
computer to a telephone jack.<br />
CAUTION Plug your modem into an analog telephone jack<br />
only. Most homes use analog lines. Do not use digital lines,<br />
such as the PBX and ISDN systems found in many offices.<br />
Digital lines may damage your modem.<br />
To reduce the risk of fire, only use a No. 26 AWG or larger<br />
telecommunication line cord.<br />
Audio Devices<br />
Audio devices are easy to connect with the audio ports<br />
accessible from the left side of the computer. You can plug an<br />
external microphone (or an audio line-in device) into the line-in<br />
jack. Amplified speakers or headphones connect to the lineout<br />
jack.<br />
Making Connections<br />
External Monitor or Video Device<br />
You may use an external monitor simultaneously with your<br />
notebook’s display, instead of your notebook’s display, or as<br />
an extension of your notebook’s display. To attach an external<br />
monitor, do the following:<br />
4. Connect the video signal cable from the external monitor (or<br />
the VGA adapter) to the external monitor port on the left side of<br />
your computer.<br />
5. Connect the power cable from the external monitor to a power<br />
outlet and turn on the monitor.<br />
6. Read the monitor manual for additional instructions.<br />
Using Simultaneous Display<br />
Your computer takes advantage of Windows ® dual-display<br />
capability, allowing you to use your computer for presentation<br />
purposes. To use simultaneous display, connect an external<br />
display device to the external monitor port. You can then<br />
toggle the display output location by pressing FN+F2 . It<br />
will output to your computer’s display, the attached external<br />
display, or both displays simultaneously. Keep pressing FN+F2<br />
until you have the output option you want.<br />
Using Extended Display<br />
When using an external monitor you can extend your desktop.<br />
This allows you to open and view one program on the external<br />
monitor while viewing a different program on your laptop’s<br />
display.<br />
Windows ® 7:<br />
1. Select Start, Control Panel, Appearance and Personalization.<br />
2. Under Display select Connect to an external display.<br />
3. Select the drop-down menu next to Multiple Displays and<br />
click Extend these displays. Then click OK.<br />
Microphone Jack<br />
Headphone / Speaker Jack<br />
External Monitor Port<br />
General Dynamics <strong>Itronix</strong> 72-0146-001
<strong>GD8200</strong> <strong>User</strong> <strong>Guide</strong><br />
Wireless Communication<br />
Your <strong>GD8200</strong> supports up to 4 integrated radios for superior<br />
wireless communication (One radio per category listed below).<br />
• Wireless Local Area Network (WLAN)<br />
• Wireless Wide Area Network (WWAN) with CRMA Express<br />
• Global Positioning System (GPS)<br />
• Bluetooth ®<br />
Since each customer’s radio configuration is unique, please<br />
read the radio help installed on your desktop and refer to the<br />
manufacturer documentation to setup and use your radio(s).<br />
If you have the Radio ON/OFF option, slide the Radio ON/<br />
OFF Switch to the left to power off all radio devices (airplane<br />
mode).<br />
CAUTION FAA regulations require that all transmit/receive<br />
devices be turned off during flight. If you have radios in your<br />
computer (including GPS) and your computer is equipped with<br />
a Radio ON/OFF Switch, please use it to turn your radios off<br />
during flight. If you have radios and you do not have a switch<br />
to turn the radios off, either leave your computer off during<br />
flight or contact your help desk for assistance.<br />
WLAN radio option<br />
Your computer may include an integrated Wireless Local Area<br />
Network (WLAN) capability. See the radio help file on your<br />
desktop for more information.<br />
About WLAN<br />
WLAN provides all the features and benefits of traditional<br />
LAN technologies, such as Ethernet, without the limitations<br />
of wires or cables. It enables mobility and flexibility without<br />
compromising connectivity for today’s mobile user.<br />
CRMA Express WWAN (option)<br />
If you ordered the CRMA Express module option, your<br />
computer may support one or more of these Wireless Wide<br />
Area Network (WWAN) radios:<br />
LTE<br />
LTE (Long Term Evolution) is part of the GSM evolutionary<br />
path beyond 3G technology, following EDGE, UMTS, HSPA<br />
(HSDPA and HSUPA combined) and HSPA Evolution (HSPA+).<br />
The overall objective for LTE is to provide an extremely high<br />
performance radio-access technology that offers full vehicular<br />
speed mobility and that can readily coexist with HSPA and<br />
earlier networks.<br />
The main advantages with LTE are high throughput, low<br />
latency, plug and play, FDD and TDD in the same platform.<br />
LTE will also support seamless passing to cell towers with<br />
older network technology. LTE downlink peak data rates up to<br />
50Mbps with 10MHz (category 3, MIMO).<br />
HSPA+<br />
High-Speed Packet Access Plus (HSPA+) is also known as<br />
HSPA Evolution and Evolved HSPA. HSPA+ was standardized<br />
in recent releases. HSPA+ will apply some of the techniques<br />
developed for Long Term Evolution (LTE) and allow<br />
operators to extend the life of their HSPA networks. HSDPA+<br />
deployments/cards/modules can support up to 42 Mbps<br />
downlink and up to 5.76 Mbps in the uplink mode.<br />
HSPA<br />
High-Speed Packet Access (HSPA) combines High-Speed<br />
Download Packet Access (HSDPA) and High- Speed Uplaod<br />
Packet Access (HSUPA). It is a 3G GSM Mobile protocol in<br />
the HSPA family, which provides a roadmap for UMTS-based<br />
networks to increase their data transfer speeds and capacity.<br />
HSPA deployments/cards/modules can support 1.8 Mbps,<br />
3.6 Mbps, 7.2 Mbps and 14.4 Mbps in downlink mode and 2.0<br />
Mbps and 5.7 Mbps in the uplink mode.<br />
EDGE/GPRS/GSM Network<br />
The Enhanced Data Rates for Global Evolution (EDGE) network<br />
allows users to transfer data with download speeds up to<br />
237 Kbps (70-130 Kbps typical). It is more than three times the<br />
speed of GPRS. The EDGE network can help you perform at<br />
higher levels of productivity by providing real-time wireless<br />
access to critical business systems and applications.<br />
UMTS/GPRS/GSM Network<br />
Universal Mobile Telecommunications System (UMTS) - also<br />
referred to as wideband code division multiple access (W–<br />
CDMA), is one of the most significant advances in the evolution<br />
of telecommunications into 3G networks.<br />
UMTS is a worldwide standard for wide-area wireless<br />
data communication based on Global Systems for Mobile<br />
communications (GSM). UMTS provides broadband mobile<br />
access to business systems and applications that can help<br />
improve mobile users’ productivity.<br />
UMTS provides broadband speeds with download speeds up<br />
to 2Mbps (220-320 Kbps typical). It delivers four-to-six times<br />
the speed of dial-up Internet access and eight times the speed<br />
of GPRS wireless data service. UMTS allows mobile users to<br />
respond to urgent email and access the Internet.<br />
EV-DO Rev. A/EV-DO Rev. 0/1xRTT/CDMA<br />
CRMA Express is upgradeable and when WWAN radio<br />
technology changes, you can change with it. You can upgrade<br />
your radio to the various supported CRMA Express modules<br />
through General Dynamics <strong>Itronix</strong> service centers, giving you<br />
greater wireless access when you need it. After initialization<br />
the first time the unit is booted, refer to the radio help found on<br />
your desktop for information about setting up and using your<br />
radio.<br />
General Dynamics <strong>Itronix</strong> 72-0146-001
<strong>GD8200</strong> <strong>User</strong> <strong>Guide</strong><br />
Wireless Communication<br />
NOTE All WWAN radios are capable of backward<br />
compatibility to support slower technologies when necessary<br />
to provide the greatest possible coverage to the user.<br />
EVDO Rev. A<br />
EVDO Revision A (1x Evolution-Data Optimized) is a wireless<br />
radio broadband data standard that offers download<br />
speeds up to 3.1 Mbps (500 to 800 Kbps typical). Revision A<br />
integrates faster data technology and improves latency. These<br />
enhancements allow features such a VoIP and video calling.<br />
EV-DO Rev. 0<br />
Evolution Data Only or Evolution Data Optimized (EV-DO) Rev<br />
0 is a 3G wireless technology with average user download<br />
speeds up to 2.4 Mbps (400-700 kbps typical). When you spend<br />
a lot of time away from your desk, the faster speeds from<br />
EV-DO can lead to greater productivity. It’s more than just fast<br />
email retrieval. Get fast and secure access to your information<br />
and applications with EV-DO. EV-DO Rev 0 was upgraded to<br />
EV-DO Rev A.<br />
1XRTT - Single Carrier (1x) Radio Transmission Technology<br />
1xRTT is a pre-2G wireless technology based on the CDMA<br />
platform. It has the capability to provide ISDN like speeds that<br />
offer up to 144 Kbps (50-70 Kbps typical). 1xRTT is also referred<br />
to as CDMA2000. 1xRTT was upgraded to EV-DO.<br />
GPS (option)<br />
The Global Positioning System (GPS) is a worldwide radionavigation<br />
system formed from a constellation of satellites and<br />
their ground stations. GPS uses these satellites as reference<br />
points to calculate positions accurate within five meters.<br />
Bluetooth ® (option)<br />
Bluetooth ® is a short range, wireless technology. Bluetooth ®<br />
systems create a Wireless personal-area network (WPAN).<br />
When Bluetooth ® -capable devices come within range of one<br />
another, an electronic conversation automatically takes place<br />
to determine whether they have data to share or whether one<br />
needs to control the other. Then, the devices hop frequencies<br />
in unison so they stay in touch with one another and avoid<br />
interference with other devices.<br />
Bluetooth ® devices send out weak signals of 1 milliwatt. Class<br />
II Bluetooth ® devices have a range of about ten meters while<br />
Class I devices have a range up to 100 meters. The <strong>GD8200</strong><br />
Bluetooth ® option is a Class I device with the greater range.<br />
Even with the low power, the walls in your house won’t stop<br />
a Bluetooth ® signal. This makes the standard useful for<br />
controlling several devices in different rooms. However,<br />
obstructions such as walls do degrade the signal and reduce its<br />
range.<br />
Antennas<br />
The <strong>GD8200</strong> has several embedded antenna options to support<br />
wireless communications. They require no user action.<br />
CAUTION Use only the supplied or an approved antenna(s).<br />
Use of unauthorized antennas, modifications, or attachments<br />
may void your warranty and could impair call quality, damage<br />
the radio, or result in violation of FCC regulations.<br />
The <strong>GD8200</strong> may contain the radio transmitters listed below.<br />
The following statements are relevant when using these radios:<br />
This device may contain a WLAN radio transmitter, a WPAN<br />
radio transmitter, and a WAN radio transmitter.<br />
Each internal radio may or may not have an individual FCC<br />
Identifier label. That FCC Identifier label is not applicable to this<br />
configuration. Only the external FCC ID label is applicable.<br />
Only the antenna with which an intentional radiator is<br />
authorized may be used with the intentional radiator.<br />
The WAN embedded antenna location is in the upper center<br />
edge of the display screen and is not to be modified.<br />
The WPAN embedded antenna location is near the lower left<br />
edge of the Keyboard and is not to be modified.<br />
The WLAN embedded dual antennas are located internally in<br />
the upper right and left edges of the display screen and are not<br />
to be modified.<br />
To comply with FCC RF exposure requirements when using the<br />
WAN radio transmitter, a minimum separation distance of 20<br />
cm must be maintained between the upper center edge of the<br />
display screen antenna and all users/bystanders.<br />
When using the WLAN transmitter, a minimum separation<br />
distance of 20 cm must be maintained between the upper right<br />
and left edges of the display screen and all users/bystanders.<br />
The WAN transmitter, WLAN transmitter and WPAN<br />
transmitter should be turned off before carrying the Laptop PC<br />
in order to comply with FCC RF exposure requirements.<br />
Since each customer’s radio configuration is unique, please<br />
read the radio help installed on your desktop and refer to the<br />
manufacturer documentation to setup and use your radio(s).<br />
Improving Radio Coverage<br />
Radio connectivity between your computer and your wireless<br />
network may vary at different times of the day and in different<br />
types of weather. It may also be influence by terrain, buildings<br />
or even a crowded room. Follow these tips to improve radio<br />
coverage between your computer and your wireless network,<br />
depending on your location.<br />
General Dynamics <strong>Itronix</strong> 72-0146-001
<strong>GD8200</strong> <strong>User</strong> <strong>Guide</strong><br />
Wireless Communication<br />
On the Street<br />
• Try all sides of a building to see which side provides the<br />
strongest radio signal.<br />
• Move from under trees. Pine needles absorb radio signals more<br />
than leaves.<br />
• Move away from overhead electrical wires.<br />
• Move away from buildings. Radio signals reflect off other<br />
buildings.<br />
• Try not to hold the unit. If possible, place it in vehicle, on a<br />
cabinet or desk.<br />
• If holding the unit, turn the unit in 90-degree increments to avoid<br />
shielding it with your body.<br />
• Move several feet in any direction if needed for a stronger signal<br />
since the signal is 1-2 feet across.<br />
Inside a Building<br />
• Move toward windows.<br />
• Move above ground. Signals do not penetrate the ground so<br />
there will probably be no signal in basements.<br />
• Try the side of the building that is least likely to have coated<br />
windows. Reflective coatings on windows reflect radio signals.<br />
• Open blinds. Closed metal blinds can reflect radio signals.<br />
• Try different rooms. Dropped ceilings sometimes hide an<br />
accumulation of electrical cable.<br />
• Avoid sources of Electromagnetic Interference (EMI).<br />
Electromagnetic Interference (EMI) is generated by switching<br />
circuitry closets or un-interruptable power source (UPS) systems<br />
found near computer rooms and can block the radio signal.<br />
When to use Landline Communication<br />
If these tips do not improve radio signal strength, switch to<br />
landline communication. Switching to landline communication<br />
is faster than searching for and trying to improve the radio signal.<br />
General Dynamics <strong>Itronix</strong> 72-0146-001
<strong>GD8200</strong> <strong>User</strong> <strong>Guide</strong><br />
Operating with Battery Power<br />
The computer operates on AC or battery power. This section<br />
contains the information you need to know to operate the<br />
computer on battery power and describes how your computer<br />
manages and saves power. Effective use of power management<br />
options can greatly conserve and extend your battery life.<br />
Be sure to read the Battery Safety and Precautions section.<br />
Frequently Asked Battery Questions<br />
Does it harm the Lithium-Ion battery pack to frequently “top off” the<br />
batteries?<br />
No. Connect the computer to an approved charging source<br />
whenever available.<br />
What constitutes a charge cycle?<br />
A full recharge of the battery to 100%.<br />
Where can general battery charge state information be obtained?<br />
To see how much power the battery has left, move the<br />
cursor over the Power Saver icon ( or ) or DynaPower<br />
icon in the System Tray area of the Taskbar. The status<br />
will show as a pop-up.<br />
What effect will temperature have on battery life and performance?<br />
Using the computer at very low temperatures will reduce the<br />
battery performance and may decrease how long the battery<br />
lasts compared to operation at moderate temperatures. The<br />
battery performance will recover when the computer returns to<br />
a normal range, around 20°C (68°F). However, storing Lithium-<br />
Ion batteries at low temperatures reduces Lithium-Ion aging<br />
effects.<br />
The Battery<br />
• Employs current battery technology standards. The computer<br />
uses a “smart” Lithium-Ion battery to consistently provide the<br />
long battery life best suited for mobile users.<br />
• Uses a temperature sensor and memory device to gather and<br />
store information about the battery, such as how much charge is<br />
left and how many times it has been recharged.<br />
• Warns when the battery charge level is low by sounding an<br />
alarm beep or displaying a warning on the screen. If you receive<br />
a battery low warning you should save your work and recharge<br />
the battery as soon as possible.<br />
• Use the AC adapter whenever possible and consider carrying an<br />
extra fully-charged battery as backup.<br />
battery capacity. You only need to do this once with a new<br />
battery or with a battery that’s been stored without being used<br />
for a long time. If the computer will be stored for more than two<br />
weeks, it is recommended you remove the battery.<br />
Battery and Temperature<br />
The battery is most efficient at room temperature. It operates<br />
in a wide temperature range but the battery capacity is<br />
affected by higher or lower temperatures.<br />
WARNING Do not expose the battery to temperatures below<br />
0ºC (32ºF) or above 46ºC (115ºF). This may adversely affect the<br />
battery pack.<br />
NOTE While the battery may not provide 100% capacity<br />
at temperature extremes, its capacity is restored when the<br />
battery temperature return to a normal range, around 20°C<br />
Temperature<br />
(68°F).<br />
Replacing the Battery<br />
CAUTION Before removing the battery pack, make sure that<br />
you have an AC adapter connected to the computer or a media<br />
bay battery installed; otherwise, first turn off the computer.<br />
To Remove the Battery:<br />
Approximate Available Capacity<br />
0°C (32°F) 80%<br />
20°C (68°F) 100%<br />
45°C (113°F) 100%<br />
1. Plug in AC power or turn off the computer.<br />
2. Turn over the computer so you are looking at the bottom.<br />
3. Press and hold down the battery lock in the hinge to unlock the<br />
battery.<br />
4. Slide the battery release latches toward the inside of the computer<br />
to release the battery.<br />
5. Gently slide the battery out of the computer.<br />
Using a battery for the first time<br />
The first time you use the battery, you should:<br />
• Connect the AC adapter to the computer and a power source.<br />
• Calibrate the battery to set the gas gauge to accurately reflect<br />
Battery Release Latches<br />
Press down Battery Lock<br />
General Dynamics <strong>Itronix</strong> 72-0146-001
<strong>GD8200</strong> <strong>User</strong> <strong>Guide</strong><br />
Operating with Battery Power<br />
To Install the Battery:<br />
1. Turn the computer over so you are looking at the bottom.<br />
2. Line up the battery connector.<br />
WARNING Only use approved batteries when replacing the<br />
battery.<br />
Heat Considerations<br />
The computer’s processor has been specially designed to<br />
consume as little power as possible. However, working in a<br />
hot environment, or working for long periods may raise the<br />
temperature. Your computer takes the following steps to lower<br />
temperature:<br />
• The cooling fan turns on. You may hear the fan and feel air coming<br />
from a vent on the left side of the computer when this happens.<br />
3. Press gently on the battery until it clicks into place.<br />
NOTE When using a battery pack for the first time, it is<br />
recommended that you calibrate the battery so the gas gauge<br />
accurately displays battery capacity.<br />
Battery Charging<br />
To charge the battery, install the battery pack and plug the AC<br />
adapter into the computer and an electrical outlet. You can use<br />
your computer while charging the battery. However, this will<br />
increase the charging time.<br />
While the battery is charging, the Battery power Indicator<br />
will be active after 6-12 seconds and stay lit until the battery is<br />
fully charged. When the battery is fully charged, the LED turns<br />
off.<br />
If your computer is off or suspended, a fully discharged battery<br />
takes about 4 hours to recharge. If your computer is turned on<br />
it may take four to six (4- 6) hours to recharge the battery.<br />
System On<br />
Charging<br />
3-6 hours depending on<br />
temperature and processes<br />
running<br />
NOTE A fully charged battery can power the computer for<br />
approximately eight (8) hours, depending on usage patterns. If<br />
your computer also has the optional Media Bay battery, it will<br />
power the computer for an additional four (4) hours.<br />
When to Replace the Battery<br />
Discharging<br />
3.5 hours<br />
System Off 3 hours -<br />
Suspend<br />
to RAM<br />
Suspend<br />
to Disk<br />
72 hours<br />
7 days<br />
Over time, the battery’s capacity gradually decreases. We<br />
recommend that you replace your battery if it no longer<br />
provides 70% of its original rated capacity.<br />
• If the temperature continues to rise, processor activity is<br />
reduced. You may notice a slight loss of performance if this<br />
happens.<br />
• To prevent damage, if the computer gets too hot, the processor<br />
stops and the computer shuts down.<br />
Battery Calibration<br />
Over time, as the battery is repeatedly drained and recharged,<br />
battery runtime may decrease. Calibrate the battery the<br />
first time you use it and then periodically for maximum<br />
performance. The calibration process empties and charges the<br />
battery. This allows the Windows ® battery gauge to accurately<br />
monitor battery status.<br />
Battery calibration will take from 6 to 12 hours, depending on<br />
how much power the battery already contains. The unit will<br />
not suspend while calibration is running. It is okay to use your<br />
computer during battery calibration.<br />
CAUTIONS<br />
• Do not disconnect AC power while battery calibration is running.<br />
• Do not remove the battery while battery calibration is running.<br />
When to calibrate the battery:<br />
• The first time you use it<br />
• After it has been in storage<br />
• If the gas gauge has become inaccurate<br />
• Every three months for optimum performance<br />
Windows ® 7 Battery Calibration<br />
1. To run the Battery Calibration program select Start, All Programs,<br />
and Mobile Computer Tools.<br />
2. Next, select DynaPower Battery Calibration. If you get a<br />
pop-up window asking if you want to allow the program to<br />
make changes to the computer, select Yes.<br />
3. Select Start to begin calibrating or Cancel to exit.<br />
NOTE The battery calibration process may take up to 8 hours<br />
to complete.<br />
General Dynamics <strong>Itronix</strong> 72-0146-001
<strong>GD8200</strong> <strong>User</strong> <strong>Guide</strong><br />
Operating with Battery Power<br />
About Battery Calibration<br />
Battery calibration may take up to 12 hours to complete. After<br />
starting calibration, the application requires no further input<br />
from the user. During calibration it goes through three steps:<br />
1. Charge: The battery is fully charged to 100%.<br />
2. Discharge and Calibrate: The battery is discharged to zero,<br />
then calibrated but not charged. You may stop the process<br />
after this point and let the battery charge outside of the battery<br />
calibration application.<br />
3. Charge: If battery calibration continues running, the battery will<br />
fully charge to 100%.<br />
BIOS Level Battery Calibration<br />
You can also calibrate the battery from within the BIOS Setup<br />
Utility by following these steps:<br />
1. Plug in the AC adapter.<br />
2. Restart the computer. When the startup screen appears, just<br />
prior to the Windows ® logo screen, press the DEL key to enter<br />
the BIOS Setup Utility.<br />
3. At the “Choose the setup function” screen, use your arrow<br />
keys to select Battery Calibration and press ENTER.<br />
NOTE Make sure the AC adapter and battery are present.<br />
4. Choose Primary or Secondary battery and press ENTER.<br />
Monitoring Battery Power<br />
Low Battery Alarms<br />
CAUTION When battery power is low, the alarm beeps or<br />
displays a warning on your screen. Take immediate action,<br />
such as saving files or connecting to the AC adapter or data<br />
may be lost.<br />
When the computer alerts you that the battery is low,<br />
immediately do one of the following:<br />
• Connect the AC power adapter.<br />
• Save your work and then select Start, Shut Down.<br />
• Turn off the computer and replace the discharged battery with a<br />
charged battery (see Battery Charging).<br />
NOTE Do not restart the computer until you have connected<br />
to an AC adapter or replaced the discharged battery with a<br />
charged battery.<br />
Refer to Battery Tips for more information about how you<br />
can conserve battery power. Refer to Managing Power for<br />
information about how you can setup your computer to<br />
effectively manage power for your unique use patterns.<br />
Managing Power<br />
Your computer has power management capability so you can<br />
reduce the amount of energy used, especially during periods<br />
of inactivity. Effective use of power management options<br />
can greatly conserve and extend your battery life. The power<br />
management unit monitors system activity, such as hard drive,<br />
keyboard, mouse, or any devices attached to a port. If it does<br />
not detect activity for a period of time, the computer stops<br />
some or all of these devices to conserve energy.<br />
Your computer employs a power management scheme that<br />
supports ACPI (Advanced Configuration and Power Interface),<br />
allowing for maximum power conservation and maximum<br />
performance at the same time. Windows ® handles all powersaving<br />
chores for your computer.<br />
For more information search for Power Options in Microsoft ®<br />
Help and Support.<br />
Low-Power States<br />
Your computer can enter three different low-power states to<br />
conserve power: Standby/Sleep, Hibernate and Power Off.<br />
These states can be entered manually or after a period of<br />
inactivity. From the Power Saver or DynaPower utilities, you<br />
can configure the POWER BUTTON, SLEEP BUTTON (FN+F3)<br />
and LID SWITCH to initiate any of the low-power states.<br />
Standby/Sleep<br />
Most system devices are powered off, but the contents of<br />
system memory are retained. Standby/Sleep is sometimes<br />
referred to as Suspend to RAM. When the computer returns<br />
from Standby mode, the desktop appears with the same files<br />
and programs open as when the computer was suspended.<br />
Resume time is very quick.<br />
Select Battery Calibration<br />
Windows ® 7: Select Start and click on the arrow next to the<br />
Shut down menu. Then select Sleep to enter Standby/Sleep<br />
mode.<br />
General Dynamics <strong>Itronix</strong> 72-0146-001
<strong>GD8200</strong> <strong>User</strong> <strong>Guide</strong><br />
Operating with Battery Power<br />
Hibernate<br />
Hibernate, or Suspend to Disk, is similar to Standby except<br />
the current state of the computer is copied to the hard disk in<br />
a special file. Then, all devices in the computer are turned off.<br />
When the computer returns from hibernation, the desktop<br />
appears with the same files and programs open as when the<br />
computer was suspended. Hibernation saves more power than<br />
Standby, but takes slightly longer to resume.<br />
Windows ® 7: On the System tray area of the Taskbar, right click<br />
the DynaPower icon, then select DynaPower Grid and make<br />
your desired changes.<br />
Power Off<br />
All applications are closed and the system shuts down. To<br />
power off the computer select Start, Shut Down, Shut down.<br />
Then click OK.<br />
Battery Tips<br />
Tip 1. Avoid excessive heat and cold<br />
• Your battery will last longer during the day if it is used, charged<br />
and stored between 50°F and 86°F (10°C and 30°C).<br />
• Charge the battery nightly where the temperature will remain<br />
around 68°F (20°C). Your battery may not last as long through<br />
the day if you charge it at higher or lower temperatures.<br />
• Allow unrestricted airflow while the computer is connected<br />
to external power. Make sure that the fan inlet and outlet are<br />
unobstructed.<br />
• Avoid exposure to extreme temperatures for long periods as this<br />
can shorten battery charge life or damage the battery.<br />
How your battery behaves in warm conditions<br />
• To prevent possible battery damage, the system may not allow a<br />
charge if the battery temperature is above 122°F (50°C), such as<br />
in a closed, unattended vehicle during the summer. In this case,<br />
the Battery Power Indicator may indicate the computer<br />
has stopped charging your battery; however, your battery may<br />
not be fully charged.<br />
• If possible, turn off or suspend your computer while the battery<br />
is charging in a warm environment to avoid over-heating.<br />
• In warmer temperatures, your battery may take much longer to<br />
fully charge.<br />
How your battery behaves in cold conditions<br />
• When using a battery in cold conditions, the battery capacity<br />
may drain significantly faster than normal.<br />
• To prevent possible battery damage, the system will not allow a<br />
charge if the battery temperature is below 41°F (5°C), such as in<br />
a closed, unattended vehicle during the winter. In this case, the<br />
Battery Power Indicator may indicate the computer has<br />
stopped charging your battery; however, your battery may not be<br />
fully charged.<br />
• In cooler temperatures, your battery can take much longer to<br />
fully charge.<br />
Tip 2. Prevent wasted power<br />
• Manually turn off or suspend your computer whenever you are<br />
not using it.<br />
• Reduce the screen brightness. Decrease brightness by pushing<br />
FN + F6. Increase it by pushing FN + F7.<br />
• Enable the display’s automatic dimming feature.<br />
• Use the AC adapter or vehicle adapter whenever possible.<br />
• To help save power, use the DynaPower utility.<br />
• When running on battery power, make sure your system<br />
suspends automatically after a few minutes of inactivity. PC<br />
Cards, radios, custom applications, or modified system settings<br />
may affect battery power.<br />
• Remove PC Cards and unplug peripherals when you are not<br />
using them. They may draw power from the system even when<br />
not in use.<br />
• Avoid operating the fax/modem, or audio and video applications<br />
when using battery power. Operating a fax/modem, video, or<br />
audio equipment increases the computer’s power requirements.<br />
• Don’t use screen savers as they draw excessive current,<br />
especially “3D” screen savers.<br />
• Turn off the Wireless LAN when not using it. Turning on the<br />
Wireless LAN increases the computer’s power requirements.<br />
• Avoid or minimize using applications that keep the CPU busy a<br />
large percentage of the time. The following items will help you<br />
determine if your system is running such applications.<br />
Identifying power wasting programs<br />
To determine if applications or processes are keeping the CPU<br />
busy:<br />
1. Start the Task Manager utility. To open Windows ® Task<br />
Manager, right-click an empty space on the taskbar, and then<br />
click Task Manager.<br />
2. Select the Performance tab to view running applications, and<br />
the Process tab to view running processes.<br />
3. Watch the CPU ssage. It is okay if the processor usage is<br />
occasionally 100 percent, but if it is 100 percent most of the<br />
time, this may indicate a problem.<br />
What to do if applications are keeping the CPU busy<br />
• If possible, close applications that keep the CPU busy when you<br />
are not using them.<br />
• Turn off or suspend your computer whenever you are not using<br />
it. This will help to conserve power.<br />
General Dynamics <strong>Itronix</strong> 72-0146-001
<strong>GD8200</strong> <strong>User</strong> <strong>Guide</strong><br />
Operating with Battery Power<br />
Tip 3. Calibrate your battery<br />
Over time the accuracy of the Windows ® battery gas gauge<br />
may be affected by repeated charging and discharging of the<br />
battery. Calibrating the battery every 3 or 4 months helps to<br />
keep the gas gauge accurate. Refer to Battery Calibration for<br />
more information.<br />
• Fully charged Lithium-Ion batteries deteriorate faster than partly<br />
discharged ones. For ideal storage, charge the battery to 100%<br />
and then discharge them to 50% charge before storing.<br />
• Do not allow stored Lithium-Ion batteries to discharge<br />
completely, as this may permanently damage them. Stored<br />
batteries should be recharged to 50% capacity every six months.<br />
Tip 4. Get a good charge<br />
• Your computer will charge more quickly if it is turned off or<br />
suspended.<br />
• In warmer or cooler temperatures the battery can take much<br />
longer to fully charge.<br />
• If your battery is charged in a cold (less than 41°F/5°C) or very<br />
warm (greater than 122°F/50°C) environment, it is possible that<br />
the Battery Power Indicator will indicate that the charge<br />
has stopped; however, this does not necessarily mean that your<br />
battery is fully charged.<br />
Tip 5. Prevent data loss<br />
Follow these guidelines to prevent data loss when removing<br />
your battery or storing your computer:<br />
• You will lose data if you remove the battery while the computer<br />
is operating or suspended and AC power is disconnected. To<br />
prevent this, shutdown your computer or put it into hibernate<br />
(suspend-to-disk) mode before removing your battery.<br />
• If you plan to store your computer for more than a few days,<br />
shutdown your computer or put it into hibernate mode.<br />
Remove the battery before storing the computer.<br />
Tip 6. Clean terminals<br />
Dirty terminals can be a cause of charging problems. Clean<br />
battery terminals with a cotton swab dipped in isopropyl<br />
alcohol. Make sure that the alcohol has evaporated before<br />
reinstalling the battery.<br />
Tip 7. Storing batteries<br />
Stored Lithium-Ion battery packs gradually deteriorate,<br />
particularly if they are not stored in ideal conditions, and their<br />
life expectancy decreases. When storing Lithium-Ion battery<br />
packs for extended periods, consider these recommendations:<br />
• When storing batteries for extended periods store them between<br />
3°C to 7°C (38°F to 45°F) to slow self-discharge and battery aging.<br />
If you store batteries at normal ambient temperatures, use the<br />
following charging policy to maintain battery pack condition:<br />
• Charge installed batteries every 21 days to maintain their charge<br />
capacity.<br />
• Charge uninstalled batteries every 6 months.<br />
• Unused or stored batteries can lose power over time. When you<br />
install a battery that has not been used recently, connect external<br />
power to the computer and fully charge your battery.<br />
General Dynamics <strong>Itronix</strong> 72-0146-001
<strong>GD8200</strong> <strong>User</strong> <strong>Guide</strong><br />
Customizing Your BIOS<br />
When you turn your computer on, the system reads the BIOS<br />
Settings to test and initialize components and make sure everything<br />
runs properly when the system is operating. You can use the Setup<br />
Utility to change your computer’s startup configuration. For example,<br />
you can change your system’s security routine.<br />
The <strong>GD8200</strong> is configured with a set of default values. The<br />
default values may not be appropriate for your work environment.<br />
For example, you can set a boot password to protect<br />
your system when booting.<br />
CAUTION It is recommended that you use the default settings.<br />
If you set incorrect system option settings, the system<br />
may not run properly.<br />
In this section the default field values are shown in bold.<br />
Starting the Setup Utility<br />
You can only start the Setup Utility shortly after the computer<br />
has been turned on or rebooted. To execute a controlled<br />
reboot, select Start, Shut Down, Restart. Shortly after the<br />
computer restarts, the following prompt appears at the bottom<br />
of the screen:<br />
“Press F10 for HDD Recovery. Press F11 to display Boot Menu.<br />
Press DEL to enter Setup. Press TAB to show POST information”<br />
Press the DEL key when you see this prompt. The system will<br />
start the Setup Utility. Select “CMOS Setup Menu” and press<br />
ENTER.<br />
Navigation and Help<br />
The Setup Utility has five menu options in the Menu Bar at the<br />
top of the window. Press the left or right arrow keys to cycle<br />
through these menu screens:<br />
Main: Displays basic system information and allows you to<br />
set the date and time<br />
Advanced: Use to set the advanced features<br />
Chipset: Use to set System Agent and PCH-IO Configurations<br />
Boot: Use to select the sequence of boot devices that are<br />
searched to load an operating system<br />
Security: Use to set user and supervisor passwords<br />
Exit: Use to exit the current Setup session<br />
The Field Help Window is on the right side of each menu. It<br />
displays the help text for the currently selected field. This text<br />
updates as you move the cursor from field to field.<br />
The General Help Window describes the legend keys. You can<br />
display it by pressing F1 on any menu.<br />
CAUTION Incorrect settings can cause your system to malfunction.<br />
To correct mistakes, restore the Optimized Defaults<br />
by pressing F3.<br />
General Dynamics <strong>Itronix</strong> 72-0146-001
<strong>GD8200</strong> <strong>User</strong> <strong>Guide</strong><br />
Customizing Your BIOS<br />
The Main Menu<br />
The Main Menu displays detailed information about<br />
the computer, including the system time and date.<br />
Field Setting Description<br />
AMIBIOS Version N/A Displays the AMIBIOS version detected during boot up.<br />
CPU<br />
Configuration<br />
Memory<br />
Information<br />
NA<br />
N/A<br />
Displays the motherboard version detected during boot up.<br />
Displays amount of memory detected during the boot process.<br />
System Date MM/DD/YYYY Use this field to set the date. The date can be set from January 1, 1980 to December 31,<br />
2099. The value set takes effect immediately.<br />
NOTE Once a change is made, press ENTER to continue.<br />
System Time HH:MM:SS Use this field to set the time. The time is displayed in 24 hour format. The value set takes<br />
effect immediately.<br />
Access Level<br />
N/A<br />
NOTE Once a change is made, press ENTER to continue.<br />
General Dynamics <strong>Itronix</strong> 72-0146-001
<strong>GD8200</strong> <strong>User</strong> <strong>Guide</strong><br />
Customizing Your BIOS<br />
The Advanced Menu<br />
The Advanced Menu provides the user with the ability<br />
to configure specific system settings.<br />
Field Setting Description<br />
Legacy OpROM Support<br />
Enable or disable Legacy Network or Mass Storage Devices<br />
OEM Function sub-menu Test OEM Function<br />
Fan Learning Function sub-menu Fan calibration (learning) will take about two (2) minutes to finish.<br />
Radio Configurations sub-menu Configuration of WLAN, Bluetooth ® and CRMA Functions<br />
Stealth Mode Configuration sub-menu Configuring the stealth mode feature enables you to turn off sound<br />
and light in environments where sound and light could be dangerous or<br />
disruptive<br />
Trusted Computing sub-menu TPM Settings<br />
PCH-FW Configuration sub-menu Configure management engine technology parameters<br />
F81216 Secondary Super IO<br />
Configuration<br />
sub-ment<br />
Configure the system’s Super IO chip parameters<br />
General Dynamics <strong>Itronix</strong> 72-0146-001
<strong>GD8200</strong> <strong>User</strong> <strong>Guide</strong><br />
Customizing Your BIOS<br />
OEM Function<br />
Field Setting Description<br />
OEM Hide Item<br />
Wake up Function<br />
Enable Wake up from S4<br />
Enable Wake up from S5<br />
Enable<br />
Disable<br />
Enable<br />
Disable<br />
Enable<br />
Disable<br />
If Enabled, all unOEM setup items will be hidden.<br />
Enables or Disables the S4 or S5 Wake up function.<br />
The unit wakes from sleep when the S4 key is pressed if enabled.<br />
The unit wakes from sleep when the S5 key is pressed if enabled.<br />
Fan Learning Function<br />
Field Setting Description<br />
Start Fan Learning<br />
OK<br />
Cancel<br />
If FAN PWM shows DFLT the fan learning process has not been previously<br />
performed. To begin the learning process press ENTER. It will take about 120<br />
seconds to finish. The keyboard will not work during fan learning.<br />
Elapsed Time in<br />
Seconds<br />
Current Learning<br />
Stage<br />
View Fan Learning<br />
Result<br />
N/A<br />
N/A<br />
See Screen<br />
NOTE Fan learning is not required for fan function. It is a calibration process to<br />
optimize fan speed control.<br />
Displays the amount of time fan learning has been running in seconds.<br />
Displays the current fan learning stage.<br />
Lists information details for each step of fan learning. Use the up and down<br />
arrow keys to scroll through the fan learning result.<br />
General Dynamics <strong>Itronix</strong> 72-0146-001
<strong>GD8200</strong> <strong>User</strong> <strong>Guide</strong><br />
Customizing Your BIOS<br />
Radio Configurations<br />
The Radio Configurations menu is used to enable or<br />
disable the WLAN, Bluetooth ® , and CRMA functions.<br />
Field Setting Description<br />
WLAN Function<br />
Bluetooth ®<br />
Function<br />
CRMA Function<br />
Enable<br />
Disable<br />
Enable<br />
Disable<br />
Enable<br />
Disable<br />
Stealth Mode Configuration<br />
Stealth mode is a feature that allows the computer to<br />
be used in an environment where sound and light<br />
could be dangerous or disruptive. If stealth mode is<br />
disabled, the LEDs, fan, system beeps, audio, and<br />
display brightness operate normally.<br />
NOTE An Off setting indicates stealth mode is in effect<br />
for that option. For example, if stealth mode is enabled<br />
and the LED option is set to “off”, the LEDs will NOT<br />
illuminate to indicate activity.<br />
Enables or disables the WLAN function.<br />
Enables or disables the Bluetooth ® function.<br />
Enables or disables the CRMA function.<br />
General Dynamics <strong>Itronix</strong> 72-0146-001
<strong>GD8200</strong> <strong>User</strong> <strong>Guide</strong><br />
Customizing Your BIOS<br />
Field Setting Desription<br />
Stealth Mode<br />
LEDs<br />
Fan<br />
Audio<br />
System Beeps<br />
Display Brightness<br />
Radio<br />
Enable<br />
Disable<br />
Enable<br />
Disable<br />
Enable<br />
Disable<br />
Enable<br />
Disable<br />
Enable<br />
Disable<br />
Enable<br />
Disable<br />
Enable<br />
Disable<br />
Enabled: All LEDs and sound devices will be turned off<br />
Disabled: The computer functions normally and the options listed below are not<br />
accessible<br />
Enable: LEDs function normally<br />
Disable: LEDs are disabled<br />
The fan functions normally<br />
Disable: The fan is disabled. Heat management is then controlled solely through throttling.<br />
Enable: Audio is preserved across suspend/resume and boot. The default volume level is<br />
set to mid-range.<br />
Disable: Volume is set to 0 across suspend/resume and boot. Use the existing audio function<br />
keys to adjust volume.<br />
Enable: Beeps are heard during POST<br />
Disable: Beeps are disabled during the boot up or resume process<br />
Enable: Display brightness is preserved across suspend/resume and boot. It is restored to<br />
default when the brightness level is set at 0. The default level is mid-range.<br />
Disable: Brightness is set to 0 across suspend, resume and boot. FN+F7 increases display<br />
brightness gradually. FN+F6 decreases brightness gradually.<br />
Enable: The radio on/off switch functions normally and radio device power states are held<br />
though suspend/resume and boot.<br />
Disable: All wireless devices are disabledduring a suspend/resume or boot. The Radio<br />
ON/OFF Switch can be used to manually turn the radios on or off.<br />
Trusted Computing<br />
Trusted Platform Module (TPM) is a secure microcontroller<br />
with added cryptographic functions.<br />
After the TPM Support option on the Security menu is<br />
enabled, the TPM State menu appears. When you have<br />
finished making changes to the TPM State, go to the<br />
Exit menu and select Exit Saving Changes. The system<br />
will shutdown and reboot.<br />
General Dynamics <strong>Itronix</strong> 72-0146-001
<strong>GD8200</strong> <strong>User</strong> <strong>Guide</strong><br />
Customizing Your BIOS<br />
Field Setting Description<br />
TPM Support<br />
TPM State<br />
Enable<br />
Disabled<br />
Enable<br />
Disabled<br />
Enables Trusted Platform Module (TPM) support. Operating system will<br />
not show TPM. Reset of platform is required.<br />
Enables or Disables the TPM module.<br />
NOTE: Computer will reboot during restart in order to change the State of<br />
TPM.<br />
Pending TPM Operation None Displays any pending TPM operation.<br />
TPM Enabled Status None Displays the TPM Enabled Status.<br />
TPM Active Status None Displays the TPM Active Status.<br />
TPM Owner Status None Displays the TPM Owner Status.<br />
PCH-FW Configuration<br />
The PCH-FW Configuration is used to configure<br />
Management Engine technology parameters.<br />
Field Setting Description<br />
ME FW Version None Displays the Firmware Version<br />
ME Firmware Mode None Disables the Firmware Mode<br />
ME Firmware Type None Displays the Firmware Type<br />
ME Firmware SKU None Displays the Firmware SKU<br />
Firmware Update<br />
Configuration<br />
Sub-menu<br />
Provides the user with the ability to update the firmware configuration.<br />
General Dynamics <strong>Itronix</strong> 72-0146-001
<strong>GD8200</strong> <strong>User</strong> <strong>Guide</strong><br />
Customizing Your BIOS<br />
F81216 Secondary Super I/O Configuration<br />
This configuration option allows you to assign serial<br />
port settings.<br />
Field Setting Description<br />
Serial Port 0<br />
Configuration<br />
Serial Port 1<br />
Configuration<br />
Serial Port 2<br />
Configuration<br />
Serial Port 3<br />
Configuration<br />
The Chipset Menu<br />
Sub-menu<br />
Sub-menu<br />
Sub-menu<br />
Sub-menu<br />
The Chipset Menu provides the user with the ability<br />
to configure specific system settings.<br />
Allows the BIOS to select Serial Port 0 Base Addresses.<br />
Allows the BIOS to select Serial Port 1 Base Addresses.<br />
Allows the BIOS to select Serial Port 2 Base Addresses.<br />
Allows the BIOS to select Serial Port 3 Base Addresses.<br />
General Dynamics <strong>Itronix</strong> 72-0146-001
<strong>GD8200</strong> <strong>User</strong> <strong>Guide</strong><br />
Customizing Your BIOS<br />
Field Setting Description<br />
System Agent (SA)<br />
Configuration<br />
PCH-IO Configuration<br />
Sub-menu<br />
Sub-menu<br />
The Boot Menu<br />
Use these fields to set the devices from which the<br />
system should boot, in order of priority, depending<br />
on your configuration. The boot device fields are<br />
dynamic and change depending on the devices<br />
installed on your <strong>GD8200</strong> during that boot sequence.<br />
For example, if you have a DVD/CDRW Combo drive<br />
or a USB floppy drive installed, they appear as options<br />
in the boot device fields. If you only have a hard disk<br />
drive, it will be the only option that displays.<br />
When you select a device, it is disabled in the other<br />
boot device fields.<br />
Field Setting Description<br />
Setup Prompt Timeout<br />
Bootup NumLock State<br />
Quiet Boot<br />
GateA20 Active<br />
Option ROM Messages<br />
Interrupt 19 Capture<br />
Boot Option #1<br />
Boot Option #2<br />
Enter timeout in seconds<br />
On<br />
Off<br />
Enabled<br />
Disabled<br />
Upon Request<br />
Always<br />
Force Bios<br />
Keep Current<br />
Enabled<br />
Disabled<br />
P1: DV-W28SS-R<br />
PO: TOSHIBA MK5061G-<br />
SYN<br />
Disabled<br />
P1: DV-W28SS-R<br />
PO:TOSHIBA<br />
MK5061GSYN<br />
Disabled<br />
Number of seconds to wait for the setup activation key.<br />
Select the keyboard NumLock state.<br />
Enables or disables Quiet Boot option.<br />
UPON Request - GA20 can be disabled using BIOS services.<br />
ALWAYS - do not allow disabling GA20; this option is useful when an<br />
RT code is executed above 1MB.<br />
Set display mode for Option ROM.<br />
Enabled: Allows Option ROMS to trap Int 19.<br />
Sets the system boot order.<br />
Sets the system boot order.<br />
General Dynamics <strong>Itronix</strong> 72-0146-001
<strong>GD8200</strong> <strong>User</strong> <strong>Guide</strong><br />
Field Setting Description<br />
CD/DVD ROM Drive BBS<br />
Priorities<br />
Disabled<br />
Enabled<br />
If enabled, booting from the network is possible.<br />
Hard Drive BBS Priorities<br />
Disabled<br />
Enabled<br />
Enabled: displays OEM logo instead of POST messages<br />
Disabled: displays normal POST messages<br />
The Security Menu<br />
The Security Menu is used to configure security<br />
options for the system.<br />
Field Setting Description<br />
Administrator<br />
Password<br />
Create New Password<br />
<strong>User</strong> Password Create <strong>User</strong> Password Create the <strong>User</strong> password.<br />
Create the Supervisor password. This field must be set before a user level<br />
password can be set.<br />
HDD Security<br />
Configuration:<br />
HDD 0:TOSHIBA MK50<br />
Set HDD Password.<br />
General Dynamics <strong>Itronix</strong> 72-0146-001
<strong>GD8200</strong> <strong>User</strong> <strong>Guide</strong><br />
The Save & Exit Menu<br />
The Save & Exit menu is used to exit the BIOS Setup<br />
Utility.<br />
Field Setting Description<br />
Save Changes and Exit<br />
Yes<br />
No<br />
Exit system setup after saving the changes.<br />
Discard Changes and Exit<br />
Save Changes and Reset<br />
Discharge Changes and<br />
Reset<br />
Save Options<br />
Save Changes<br />
Discard Changes<br />
Restore Defaults<br />
Save as <strong>User</strong> Defaults<br />
Boot Override<br />
Launch EFI Shell from<br />
Filesystem Device<br />
Yes<br />
No<br />
Yes<br />
No<br />
Yes<br />
No<br />
Yes<br />
No<br />
Yes<br />
No<br />
Yes<br />
No<br />
Yes<br />
No<br />
Yes<br />
No<br />
Exit system setup without saving any changes.<br />
Reset the system after saving the changes.<br />
Reset the system setup without saving any changes.<br />
Save changes done so far to any of the setup options.<br />
Discard changes done so far to any of the setup options.<br />
Restore/Load default values for all the setup options.<br />
Save the changes done so far as <strong>User</strong> defaults.<br />
Restore the <strong>User</strong> defaults to all the setup options.<br />
Attempts to Launch EFI Shell spplication (SHELLx64.efi) from one of the<br />
available filesystem devices.<br />
General Dynamics <strong>Itronix</strong> 72-0146-001
<strong>GD8200</strong> <strong>User</strong> <strong>Guide</strong><br />
Optional Equipment and Accessories<br />
The <strong>GD8200</strong> fully-rugged notebook has several equipment and<br />
accessory options to further enhance your mobile computing<br />
experience from an optional shoulder strap to docking<br />
solutions. Click here for a current list of optional peripherals and<br />
accessories.<br />
CAUTION Only purchase accessories that are approved for<br />
use with your computer. Some accessories are proprietary<br />
items and can be obtained through your system vendor. If you<br />
use items that are not approved for use with this computer, you<br />
may cause your computer to malfunction, or to emit or receive<br />
electromagnetic radiation in excess of regulations. For nonproprietary<br />
accessories such as PC Cards or printers, ensure<br />
that the accessory functions properly with your computer<br />
before making the purchase. Your system vendor may be able<br />
to recommend reliable brands and models.<br />
Surge Protection<br />
A large number of computer and high technology equipment<br />
damage is directly related to AC power and telephone line<br />
problems. These problems can include surges, spikes, noise,<br />
interference, and weather-related issue that may cause<br />
glitches, hang-ups, crashes, performance slow downs, and<br />
computer down time. It is recommended that you use a<br />
quality surge protector with your computer and any attached<br />
peripherals.<br />
Vehicle Adapter<br />
The vehicle adapter is an optional device that supplies power<br />
from the vehicle battery to operate the computer and charge<br />
the battery installed in the unit. It typically connects to the<br />
vehicle battery using the cigarette lighter socket.<br />
CAUTION The vehicle adapter is only designed for<br />
temporary use. Use the optional vehicle dock to power<br />
and secure the <strong>GD8200</strong> for frequent or long term vehicle<br />
installations.<br />
To prevent possible damage to the battery, the system will<br />
not allow the battery to charge at extreme temperatures. Be<br />
aware of the following charging characteristics, especially if the<br />
computer is left unattended in a closed vehicle.<br />
Temperature<br />
122°F).<br />
Vehicle Dock<br />
The vehicle dock is designed to safely secure the computer in<br />
a vehicle. It includes a key lock for security. You can use the<br />
vehicle dock to:<br />
• Charge batteries with voltage from the vehicle battery<br />
• Communicate with other devices<br />
• Automatically connect to an external antenna<br />
CAUTIONS<br />
• Do not open the vehicle dock case. It has no user-replaceable<br />
parts. The vehicle dock is internally protected; it resets<br />
automatically if there is a power fault.<br />
• Do not use the vehicle dock to charge the computer battery<br />
overnight. Turn off the vehicle dock at the end of each work day<br />
to prevent draining the voltage in your vehicle’s battery below<br />
starting levels.<br />
Charge a Battery Installed in the Computer<br />
1. Place the computer onto the vehicle dock, making sure it is<br />
securely latched.<br />
2. If charging is required it begins automatically. The Battery<br />
Power Indicator lights.<br />
3. When the battery is fully charged, the Battery Power Indicator<br />
turns off.<br />
CAUTIONS<br />
• Refer to Battery Tips for recommended charging temperature<br />
ranges and other recommendations<br />
General Dynamics <strong>Itronix</strong> 72-0146-001
<strong>GD8200</strong> <strong>User</strong> <strong>Guide</strong><br />
Optional Equipment and Accessories<br />
• If you charge the battery daily rely on the gas gauge reading to<br />
determine battery capacity. The gas gauge may show that the<br />
battery is full while still charging. This happens because the<br />
charging process is trying to put a little more capacity into the<br />
battery. External power can be removed at this time since the<br />
battery is virtually full.<br />
• If your battery is new or has not been used for several weeks,<br />
rely on the indicator light to determine when the battery is fully<br />
charged. The gas gauge is unreliable in these cases; it may read<br />
100%, when the actual capacity is only 10%. Recalibrate the<br />
battery to correct this issue.<br />
operating speed, and wish to increase memory. The <strong>GD8200</strong><br />
comes with a user accessible memory sockets for memory<br />
upgrades. Please consult your dealer if you need to add more<br />
memory.<br />
CAUTIONS<br />
• First read and follow the guidelines in the Safety section.<br />
• Only use memory cards approved for use in your computer.<br />
Failure to do so may void your warranty.<br />
Communicating with Other Devices<br />
Connect external devices to the ports on the back of the dock,<br />
and then place the <strong>GD8200</strong> onto the vehicle dock. You can<br />
install or remove the computer from the vehicle dock without<br />
connecting or disconnecting the cables.<br />
External Antennas<br />
The vehicle dock integrates GPS and WWAN antennas with<br />
switching capability. You can also connect an external RF<br />
antenna to the dock using the SMA RF connector on the back<br />
of the vehicle dock. FCC regulations require that users of<br />
vehicle-mounted antennas must use only antennas authorized<br />
for use with the <strong>GD8200</strong> in order to meet FCC RF exposure<br />
limits. Please contact your organizations’s help desk for a list<br />
of approved vehicle-mounted antennas. Before mounting an<br />
external antenna, refer to the installation instructions provided<br />
with the antenna.<br />
Vehicle-mounted Antenna Placement<br />
WARNING Improper installation and/or operating<br />
configurations of permanent and magnetic vehicle-mounted<br />
antennas may cause FCC RF exposure limits to be exceeded.<br />
Vehicle-mounted antennas must be placed at least 20 cm from<br />
operators and bystanders and at least 92cm (36 inches) from<br />
any existing roof mounted antennas.<br />
1. Measure and identify an area 20 cm (8 inches) in from the<br />
edges of the vehicle roof.<br />
2. Place the antenna within that area.<br />
To maximize RF performance, position the antenna in the<br />
center of the vehicle roof.<br />
CAUTION Do not place any metal objects on top of the<br />
dock that might make contact with the metal pins of the<br />
contact connector. Doing so may cause an electrical short and<br />
subsequent damage to the dock.<br />
Memory Upgrade<br />
Adding memory allows the computer to operate faster, handle<br />
more tasks simultaneously, and work more smoothly with<br />
large files. <strong>User</strong>s who increase memory demands - by adding<br />
additional programs, for example - may notice a slowdown in<br />
General Dynamics <strong>Itronix</strong> 72-0146-001
<strong>GD8200</strong> <strong>User</strong> <strong>Guide</strong><br />
Maintenance and Storage<br />
The <strong>GD8200</strong> is rugged and weather resistant and you can<br />
use it under a wide range of environmental conditions.<br />
However, to ensure long use and continued high<br />
performance, follow these tips and precautions:<br />
Taking Care of Your Computer<br />
• Follow all warnings and instructions noted in this documentation<br />
and in the operating system documentation.<br />
• Read the Safety and Battery Tips sections.<br />
• Unplug the computer from the power outlet before cleaning.<br />
Use a damp cloth for cleaning. Aerosols, solvents, or strong<br />
detergents are not recommended cleaning solutions and<br />
may void your warranty. For system decontamination<br />
recommendations please contact your support representative.<br />
• Do not block or cover slots and openings in the unit case. These<br />
are for ventilation purposes and covering them could cause the<br />
system to overheat.<br />
• Do not use or store the computer near a source of heat or dust.<br />
• If you use the computer with an extension cord, ensure that the<br />
total ampere ratings of all the devices sharing the extension do<br />
not exceed the rating of the extension cord or the rating of the<br />
wall outlet.<br />
• Never insert objects into the computer through any of the slots<br />
or openings. Dangerous voltages are present, which could cause<br />
electric shock or fire, or damage sensitive components.<br />
• For best results, use a power strip with a built-in surge protector.<br />
Do not use inferior extension cords as this may result in damage<br />
to your computer.<br />
• Set the computer on a flat, stable surface. To prevent damage to<br />
the computer’s hard disk drive, avoid using the computer where<br />
it will be exposed to extreme vibration.<br />
• Do not operate the computer to temperatures below -23ºC<br />
(-10ºF) or above 60ºC (140ºF). Operate the computer within the<br />
recommended temperature ranges of -23°C to +60°C (-10°F to<br />
+140°F).<br />
• Do not subject the computer to magnetic fields.<br />
• Do not intentionally spill liquid on the computer.<br />
• Do not subject the computer to extreme shock and vibration.<br />
• Do not place objects on top of the computer.<br />
• Do not place the computer on uneven surfaces.<br />
• Periodically inspect the computer and accessories for wear,<br />
damage, loose or missing parts. Identifying and correcting<br />
potential problems early can help reduce the need to return the<br />
unit for service.<br />
• Periodically inspect the ports and connectors for damage and<br />
contamination.<br />
• Turn off the computer when you are not using it.<br />
• Charge the batteries daily or whenever their capacity is low.<br />
Taking care of your AC adapter<br />
• Do not connect the adapter to any other device.<br />
• Do not step on the power cord or place anything on top of it.<br />
Carefully route the power cord and any cables away from all<br />
potential traffic.<br />
• When unplugging the power cord, do not pull on the cord itself<br />
but pull on the plug.<br />
• The total ampere ratings of the equipment plugged in should<br />
not exceed the ampere rating of the cord if you are using an<br />
extension cord. Also, the total current rating of all equipment<br />
plugged into a single wall outlet should not exceed the fuse<br />
rating.<br />
Servicing Your Computer<br />
Contact your dealer or see your service technician if any of the<br />
following occurs:<br />
• The computer has been dropped and the body has been<br />
damaged.<br />
• Liquid has been spilled into the product.<br />
• The computer does not operate normally.<br />
See the Service and Support section for more information.<br />
Storing Your Computer<br />
1. Save and backup files and data before storing the computer.<br />
2. Remove any PC Cards, Smart Cards, or EXPRESS Cards from<br />
the card slots.<br />
3. Remove any media from the media bay.<br />
4. Exit all applications.<br />
5. Shut down and turn off the computer.<br />
Windows ® 7:<br />
Select Start, Shut down.<br />
6. Remove the battery from the unit and store it in a dry place.<br />
7. Store the computer within the recommended temperature<br />
ranges of -55°C to +75°C (-67°F to +167°F).<br />
8. If you use PC cards, refer to the manufacturer’s instructions you<br />
received with the card for storage and care information.<br />
Taking Care of Your Batteries<br />
• Read and follow all battery precautions in the Safety section.<br />
• Use only batteries of the same kind as replacements.<br />
• Turn the power off before removing or replacing batteries.<br />
• Do not tamper with the batteries.<br />
• Keep batteries away from children.<br />
General Dynamics <strong>Itronix</strong> 72-0146-001
<strong>GD8200</strong> <strong>User</strong> <strong>Guide</strong><br />
Maintenance and Storage<br />
• Before storing your battery, read and follow the<br />
recommendations in the Battery Tips section.<br />
• Dispose of used batteries according to local regulations. Recycle<br />
if at all possible.<br />
• Avoid exposing batteries to extremely hot or cold temperatures<br />
for long periods. To prevent possible damage to the battery,<br />
the <strong>GD8200</strong> does not allow the battery to charge if the internal<br />
temperature of the battery gets too low (< 5°C or < 41°F) or too<br />
high (> 50°C or > 122°F).<br />
• Charge the battery nightly where the temperature will remain<br />
around 20°C (68°F).<br />
• Recalibrate your battery when your battery performance<br />
degrades.<br />
Taking Care of Your Hard Drive<br />
The <strong>GD8200</strong> hard drive is a removable, shock-mounted drive.<br />
You can reduce the risk of damage to the hard drive and<br />
increase the reliability of the hard drive and data integrity by<br />
following the recommendations below.<br />
For Internal Hard Drives<br />
• Do not intentionally drop the computer. The unit is designed to<br />
withstand the day to day rigors of the mobile environment and<br />
provide years of reliable service. The useful life of the product<br />
can be enhanced by not intentionally abusing it.<br />
• Whenever possible, suspend the unit by pressing FN+F3 before<br />
moving it from one location to another. This unloads the read/<br />
write heads and spins down the disk, reducing exposure to high<br />
operating shocks.<br />
• Maintain the environmental seal of the computer by keeping all<br />
external access doors closed and latched.<br />
• Avoid exposing the unit to extreme temperatures or moisture<br />
when the doors are open.<br />
• Periodically backup or archive important files and data.<br />
For External PC Cards<br />
Each PC Card manufacturer provides specific guidelines for<br />
the care and handling of the product. In addition, follow these<br />
recommendations:<br />
• When the PC Card is not inserted in a PC Card socket, store the<br />
PC Card in a protective carrying case. This will help protect it<br />
from inadvertent shocks.<br />
• Always use care when handling PC Cards. Do not drop, bend,<br />
flex, or crush them.<br />
• Avoid exposing PC Cards to extreme moisture, heat, or sunlight.<br />
will be voided if drive seals are broken or screws have been<br />
removed.<br />
• Periodically backup or archive important files and data.<br />
• If you have problems with your PC Card, contact the<br />
manufacturer for more information and troubleshooting<br />
information.<br />
Cleaning Your Computer<br />
Cleaning the Outside Case<br />
1. Disconnect external power and turn off the computer.<br />
2. Remove the battery.<br />
3. Add a small amount of water to a soft cloth and clean the<br />
computer case. Do not use paper products because they can<br />
scratch the surface.<br />
4. Wipe off any excess liquid with a soft cloth.<br />
5. Reinstall the battery.<br />
CAUTION Aerosols, solvents, or strong detergents are not<br />
recommended cleaning solutions and may void your warranty.<br />
For system decontamination recommendations please contact<br />
your support representative.<br />
Cleaning the Display<br />
Use a soft, dry cloth. In some cases, you can use a small<br />
amount of water to remove streaks or smears. For difficult<br />
display cleaning tasks, use a 50/50 mixture of isopropyl alcohol<br />
and water. Do not use paper products because they can<br />
scratch the screen.<br />
Cleaning the External Power Connector<br />
The external power connector may sometimes be exposed<br />
to moisture and/or contamination causing an unreliable<br />
connection to the external power source. Clean the connector<br />
with a cotton swab dipped in electronics grade isopropyl<br />
alcohol.<br />
Cleaning the RJ-11/ RJ-45 / USB Connectors<br />
If the connector pins get dirty, clean the connector with a<br />
cotton swab dipped in electronics grade isopropyl alcohol.<br />
• Keep all debris out of the connector to ensure good electrical<br />
connections.<br />
• There are no user repairable parts in the PC Card slot. Do not<br />
attempt to disassemble any part of the device. The warranty<br />
General Dynamics <strong>Itronix</strong> 72-0146-001
<strong>GD8200</strong> <strong>User</strong> <strong>Guide</strong><br />
Maintenance and Storage<br />
Data Backup<br />
Regularly backup your data to ensure the greatest data<br />
integrity, provide the fastest recovery options, and minimize<br />
downtime.<br />
After you have installed all applications and have your<br />
computer configured as desired, create a backup of drive C:<br />
using the Hard Disk Backup and Recovery Utility. Then use the<br />
Backup Utility frequently to backup data. It is recommended<br />
you set the backup utility to run automatically.<br />
Saving Important System Information<br />
By default your computer is set up to automatically save<br />
certain critical information, such as the registry, on a regular<br />
basis. This information is saved as a restore point. You can also<br />
create restore points manually by using the System Restore<br />
Utility. Select Start, All Programs, Accessories, System Tools,<br />
System Restore. Then, follow the instructions in the Wizard.<br />
Backing Up Files in Windows ® 7:<br />
Select Start, Control Panel. Under System and Security select<br />
Back up your computer. From here you can set up backup, create<br />
a system image or create a system repair disc.<br />
Backing Up Drive C:<br />
Option 2 : Restoring a Backup<br />
Windows ® 7:<br />
Select Start, Control Panel, System and Security. Under<br />
Backup and Restore select Restore files from backup. From<br />
here you can select a backup file to restore.<br />
Option 3: Restoring Drive C:<br />
If you used the Hard Disk Backup and Recovery Utility to create<br />
a backup disk image you can use it to restore drive C:.<br />
CAUTION Restoring a previously saved disk image<br />
overwrites the entire contents of drive C:. Before running this<br />
process, save your data to another location, such as a USB<br />
flash drive.<br />
NOTE The Hard Disk Backup and Recovery Utility is only<br />
available on computers configured with a recovery partition.<br />
If it is not available, you will either need to contact your<br />
company’s help desk about obtaining a recovery CD or return<br />
your unit for service.<br />
Windows ® 7:<br />
Select Start, All Programs, Mobile Computer Tools, Hard Disk<br />
Backup and Recovery and follow the prompts.<br />
You can make an exact copy of drive C: and save the backup<br />
image on the recovery partition of your hard disk (usually drive<br />
D:). In the future, you can restore drive C: to its previous state<br />
if it becomes corrupted. To make a backup copy of drive C:,<br />
use the Hard Disk Backup and Recovery Utility. Select Start,<br />
All Programs, Mobile Computer Tools, Hard Disk Backup and<br />
Recovery. You will be prompted for additional information.<br />
NOTE The Hard Disk Backup and Recovery Utility is only<br />
available on computers configured with a recovery partition.<br />
Data Recovery<br />
There are several methods to restore your data. Start with the<br />
least destructive and fastest recovery options, listed below in<br />
the order in which you should restore data.<br />
1. Restore system information.<br />
2. Restore a backup using the Windows ® Backup Utility.<br />
3. Restore the entire contents of drive C:<br />
Option 1: Restoring System Information<br />
Windows ® 7:<br />
Select Start, Control Panel, System and Maintenance, Backup<br />
and Restore Center. On the Tasks menu on the left-hand side<br />
of the screen select Repair Windows ® using System Restore.<br />
General Dynamics <strong>Itronix</strong> 72-0146-001
<strong>GD8200</strong> <strong>User</strong> <strong>Guide</strong><br />
Service and Support<br />
We are committed to providing you world class support<br />
services that ensure the lowest total cost of ownership<br />
for your hardware investment. The icareServices program<br />
will help you maximize end user productivity and decrease<br />
overall system operating cost.<br />
Client Care Center (CCC)<br />
The General Dynamics <strong>Itronix</strong> Client Care Center provides<br />
world class service with a single entry point of access to meet<br />
all your needs including:<br />
• Troubleshooting and RMA origination<br />
• Dispatch of field support staff<br />
• Wireless carrier service activation<br />
• Hardware performance information<br />
• RMA status checks on service unit and warranty/service parts<br />
orders<br />
• New and refurbished platform, accessory, and add-on orders<br />
• Trial unit orders and status updates<br />
• Proof of delivery status updates for service and new unit orders<br />
• International new unit and accessory, peripheral and service<br />
parts orders<br />
• Centralized access for all invoicing and finance related issues<br />
Most of these services are available through the icareServeNet<br />
web based system.<br />
Go to the Support section of our website and select ServeNet<br />
Login for more information.<br />
Services Expertise<br />
The Technical Services and Client Services Account<br />
Management staff provide support with expertise that<br />
spans hardware platforms, industry applications and third<br />
party solutions. They regularly visit customers to garner<br />
feedback and input and provide training and post-installation<br />
support. For more information on our comprehensive service<br />
programs or current support phone numbers and email<br />
addresses, click here.<br />
Product Support - Downloads<br />
It is easy to get the software updates you need to keep your<br />
configuration current and get the most from your product.<br />
Go to the Support section of our website and select product<br />
downloads.<br />
NOTE Downloads are listed by model and/or product number<br />
(<strong>GD8200</strong>).<br />
General Dynamics <strong>Itronix</strong> 72-0146-001
<strong>GD8200</strong> <strong>User</strong> <strong>Guide</strong><br />
Troubleshooting<br />
This section is designed to help you determine and fix<br />
issues you might encounter while operating the <strong>GD8200</strong><br />
fully-rugged notebook. Try the following things in order:<br />
• First look through the categories in this section for a solution.<br />
• If you are having a problem with a computer application, use the<br />
Help that comes with the application to find a solution.<br />
• If you are having a problem with the operating system, refer to<br />
its Help and Support, found on the Start Menu.<br />
• If you still cannot resolve your problem, contact the help desk at<br />
your organization.<br />
Application Troubleshooting<br />
• If an application locks, a general protection fault (GPF) error is<br />
received, or a blue screen displays, restart the computer.<br />
Using Windows ® 7:<br />
Select Start and click on the arrow next to the Shut down<br />
menu. Then select Restart.<br />
Battery Troubleshooting<br />
Battery does not charge<br />
• To prevent possible damage to the battery, the computer does<br />
not allow the battery to charge if the internal temperature of<br />
the battery gets too low (< 5°C or < 41°F) or too high (> 50°C<br />
or > 122°F). If possible, charge the battery in a location with a<br />
moderate temperature of around 20°C (68°F).<br />
• If possible, turn off the computer while the battery is charging.<br />
• If the battery is new or has been stored for a week or more,<br />
follow this procedure:<br />
1. Make sure the computer is turned off.<br />
2. Remove the battery.<br />
3. Connect the AC adapter to the computer and an AC wall<br />
outlet, and then turn on the computer by pressing the<br />
POWER BUTTON.<br />
4. Let the computer complete the boot process. Then<br />
reinstall the battery.<br />
• Allow the system to remain idle for one hour with the AC adapter<br />
connected to the computer.<br />
• The Battery power Indicator<br />
charging.<br />
lights when the battery starts<br />
• If the battery still fails to start charging after an hour, remove the<br />
battery, wait several seconds, and then install it again.<br />
• If the battery does not begin charging within several minutes,<br />
return the unit for service.<br />
Batteries take more than 7 hours to charge<br />
• Under moderate temperatures, about 20°C (68ºF), the computer’s<br />
battery takes approximately 4 to 5 hours to completely charge.<br />
NOTE As the battery temperature approaches the ends of its<br />
temperature range (5°C/ 41°F to 50°C/122°F), it may take longer<br />
to charge the battery.<br />
Batteries don’t last very long<br />
• Calibrate the battery. If your battery is new or has not been<br />
used for several weeks, calibrating the battery accurately sets the<br />
gas gauge.<br />
• As your battery ages, its maximum capacity naturally decreases,<br />
and even the best maintained batteries eventually need to be<br />
retired. Consider replacing the battery if you are not getting the<br />
usage you need from it.<br />
• To meet ENERGY STAR ® requirements, Wake-on-LAN is enabled<br />
by default. If running on battery power this may decrease<br />
battery run-time. To change Wake-on-LAN settings, open the<br />
Device Manager, Network Adapters and select the LAN device.<br />
Open the device Properties and select Power Management.<br />
Disable the Wake-on-LAN setting by unchecking Allow this device<br />
to wake the computer.<br />
Gas gauge isn’t full after charging the battery<br />
This may indicate that the charging process terminated<br />
prematurely.<br />
Gas gauge reads “full” but the charging LED displays<br />
If you charge your battery daily, rely on the gas gauge reading<br />
to determine battery capacity. The charging process may<br />
continue even if the gas gauge reads full. External power can<br />
be removed because the battery is virtually full.<br />
Battery seems to have less and less capacity<br />
• If your battery is new, or if your are using it for the first time, you<br />
will need to calibrate it prior to using it.<br />
• As your battery ages, the maximum capacity that it can hold<br />
naturally decreases, and even the best maintained batteries<br />
eventually need to be retired. Consider replacing the battery if<br />
you are not getting the usage you need from it.<br />
Display / Touchscreen<br />
Display performance is slow<br />
The temperature may be too cold. Move the computer to a<br />
warmer operating environment.<br />
Unreadable display<br />
• Adjust the brightness level using FN+F6 and FN+F7.<br />
• The automatic power-saving mode may have shut off<br />
(suspended) the computer. Press any key to resume.<br />
General Dynamics <strong>Itronix</strong> 72-0146-001
<strong>GD8200</strong> <strong>User</strong> <strong>Guide</strong><br />
Troubleshooting<br />
• If the display brightness is unreadable after a resume or reboot<br />
but is easily adjusted with FN+F6 and FN+F7, you may have set<br />
Stealth mode in the BIOS Setup Utility. If you disable Stealth<br />
mode, the display and backlight will operate normally.<br />
Characters are difficult to read on the screen<br />
For Windows ® 7:<br />
Right click on the Windows ® Desktop, select Personalize,<br />
Window Color and Appearance to change the color and style<br />
of your windows.<br />
Cursor doesn’t display in the DOS editor<br />
Press FN+INS to change from insert mode to overwrite mode<br />
and enable a block cursor. When it defaults to insert mode, the<br />
DOS editor uses an underline cursor which is less visible than<br />
the block cursor for overwrite mode.<br />
Updates to display resolution don’t apply<br />
For Windows ® 7:<br />
Select Start and click on the arrow next to the Shut down<br />
menu. Then select Restart.<br />
Stylus on my touchscreen doesn’t work<br />
If you cannot select objects accurately with the stylus, you may<br />
need to calibrate the touchscreen.<br />
Touchscreen doesn’t respond after a suspend<br />
The touchscreen needs a few seconds to work after a suspend.<br />
Wait a moment and try again.<br />
Hard Disk<br />
Hard disk will not start so the computer can’t boot<br />
up<br />
This occurs if the unit is exposed to extreme low temperatures.<br />
This is not a hardware failure associated with the hard disk.<br />
The integrated hard disk drive heater will warm the drive to a<br />
safe operating temperature.<br />
Computer does not startup properly<br />
• Make sure you remove any USB drives from the unit before you<br />
start it.<br />
• Connect the AC adapter to charge the battery if it is not<br />
charged.<br />
NOTE Push the DC jack firmly into the computer until it<br />
“clicks”. If the AC adapter is connected and functioning properly,<br />
the Power LED on the AC adapter should be lit as well as<br />
the External Power LED on the GoBook MR-1.<br />
• If the AC adapter is connected but the unit will still not turn on,<br />
make sure the electrical outlet you are using is working<br />
• Check to make sure the battery is installed and charged properly<br />
• If the battery does not begin charging, perform the following:<br />
1. Remove the battery.<br />
2. Connect the AC adapter.<br />
3. Turn on the computer by pressing the POWER BUTTON.<br />
4. Reinstall the battery. The Battery LED is a steady blue<br />
while the battery is charging.<br />
Keyboard and Mouse Troubleshooting<br />
Something unexpected happens when I press a key<br />
You may have pressed a key combination that performs a<br />
Windows ® function. Make sure you are pressing the correct<br />
keys for the application you are running.<br />
Incorrect characters appear on the screen<br />
You may be in Num Lock mode. Press NUM LOCK to toggle<br />
Num Lock mode off. NUM LOCK is on the top row of buttons<br />
on your keyboard next to the F12 key.<br />
Difficulty double-clicking the mouse fast enough<br />
For Windows ® 7:<br />
1. Select Start, Control Panel, Hardware and Sound.<br />
2. Under Devices and Printers select Mouse. This will bring you<br />
to the Mouse Properties window.<br />
3. On the Buttons tab use the Devices drop-down menu to select<br />
your mouse. Then you can set double-click speed.<br />
Modem Troubleshooting<br />
Modem doesn’t work<br />
• When you first try to use HyperTerminal or similar application,<br />
the system responds with a message asking if you want to<br />
install the modem. Answer “Yes” to this question and follow the<br />
instructions on the screen to install it.<br />
• Make sure the communication settings are correct in your<br />
application. Refer to the online help for your application.<br />
NOTE HyperTerminal is not available with Windows ® 7.<br />
Modem doesn’t dial a number<br />
• If you are using an external modem, make sure the cables are<br />
attached correctly.<br />
• Make sure your communications parameters are correct in your<br />
application. Refer to the online help for your application.<br />
General Dynamics <strong>Itronix</strong> 72-0146-001
<strong>GD8200</strong> <strong>User</strong> <strong>Guide</strong><br />
Troubleshooting<br />
Modem does not establish a connection<br />
• You may have incorrect parameters selected for your application<br />
to talk with the remote modem. Refer to the online help for your<br />
application.<br />
• You may need to adjust your modem’s baud rate or protocol<br />
selection.<br />
PC Cards<br />
I can’t remove the PC card<br />
• Press the ejector button located inside the PC card door on the<br />
side of the computer. The button will pop out. Press the ejector<br />
button again to eject the PC card. Slide the card out.<br />
• If the ejector button malfunctions when you press it, release the<br />
button and then press it again.<br />
Read Error<br />
If a memory card that is not properly formatted is installed in<br />
the PC Card slot, it will cause this error.<br />
Computer locks when the PC card is removed<br />
Before you remove the card, select the PC card icon ( or )<br />
on the taskbar (in the tray area near the clock in the lower right<br />
corner) and choose “Stop [card name] card.”<br />
Miscellaneous Troubleshooting<br />
Computer shuts off unexpectedly<br />
• The computer has entered suspend mode. Press any key to<br />
resume from the standby state. Press the POWER BUTTON to<br />
resume from the hibernate state.<br />
• The battery capacity may be low. Connect external power to<br />
charge the battery, or replace the battery with a fully charged one.<br />
Speaker volume is too high or too low<br />
Refer to the audio section for instructions on adjusting volume.<br />
Computer won’t turn on<br />
• Make sure a fully charged battery is properly installed.<br />
• Connect external power to charge the battery if it is not charged.<br />
• If you are using the AC adapter check the electrical outlet you are<br />
using to make sure it is working properly.<br />
• If the computer does not turn on, reset the computer by holding<br />
down the POWER BUTTON for at least ten seconds, release it,<br />
then press the POWER BUTTON again.<br />
Computer won’t turn off<br />
For Windows ® 7:<br />
1. Select Start and click on the arrow next to the Shut down<br />
menu. Then select Restart to reboot the computer.<br />
2. If that does not work, press CTRL+ALT+DEL and then select<br />
Task Manager.<br />
3. If any programs are open, use your arrow keys to highlight<br />
each one and select End Task. Repeat this until all programs<br />
are closed.<br />
4. If that still does not work, press and hold the Power Button for<br />
approximately ten seconds and then release it.<br />
Computer enters suspend mode too quickly<br />
For Windows ® 7:<br />
Select Start, Control Panel, System and Security. Under<br />
Power Options select Change when the computer sleeps.<br />
Modify the Put the computer to sleep option.<br />
Computer doesn’t automatically suspend<br />
• Exit any application that uses COM ports.<br />
• Make sure external power is not connected. Depending on<br />
power settings, some systems will not suspend automatically<br />
when they are connected to external power.<br />
System date and time are incorrect<br />
Windows ® 7<br />
Select Start, Control Panel. Then select Clock, Language and<br />
Region. Under Date and Time, make the appropriate changes.<br />
“Out of memory” error message<br />
• Restart the computer.<br />
• Too many applications may be running at the same time. Close<br />
applications you don’t need.<br />
• Make sure you have enough space on your hard disk (at least<br />
15% free).<br />
Holding down the Power button to reset the computer<br />
doesn’t always work<br />
• Try resetting the computer again. If this doesn’t work, remove all<br />
power, including the battery pack, and allow the unit to remain<br />
idle for ten minutes. After ten minutes, connect external power<br />
and retry.<br />
• The LEDs, backlight, and/or keyboard backlight don’t illuminate.<br />
• You may have enabled Stealth mode in the Bios Setup Utility.<br />
Disable Stealth mode.<br />
General Dynamics <strong>Itronix</strong> 72-0146-001
<strong>GD8200</strong> <strong>User</strong> <strong>Guide</strong><br />
Troubleshooting<br />
Computer doesn’t make any sounds<br />
You may have enabled Stealth mode in the Bios Setup Utility.<br />
Disable Stealth mode.<br />
Fan stopped running<br />
You may have enabled Stealth mode in the Bios Setup Utility.<br />
Disable Stealth mode.<br />
Improve the program startup speed by cleaning up<br />
and moving files on the hard drive<br />
Using the Windows ® utilities to defragment your drive may<br />
improve the startup speed of programs.<br />
General Dynamics <strong>Itronix</strong> 72-0146-001