Installation guides - GE Lighting
Installation guides - GE Lighting
Installation guides - GE Lighting

You also want an ePaper? Increase the reach of your titles
YUMPU automatically turns print PDFs into web optimized ePapers that Google loves.
<strong>GE</strong> <strong>Lighting</strong><br />
M250A Roadway<br />
<strong>Installation</strong>, Use and Maintenance Manual<br />
READ THROUGHLY BEFORE INSTALLATION<br />
SAVE THESE INSTRUCTIONS FOR FUTURE USE<br />
These Instructions do not purport to cover all details<br />
or variations in luminaire nor to provide for every<br />
possible contingency to be met in connection with<br />
installation, operation or maintenance. Should<br />
further information be desired or should particular<br />
problem arise which are not covered sufficiently for<br />
the purchaser’s purpose, the matter should be<br />
referred to General Electric Company.<br />
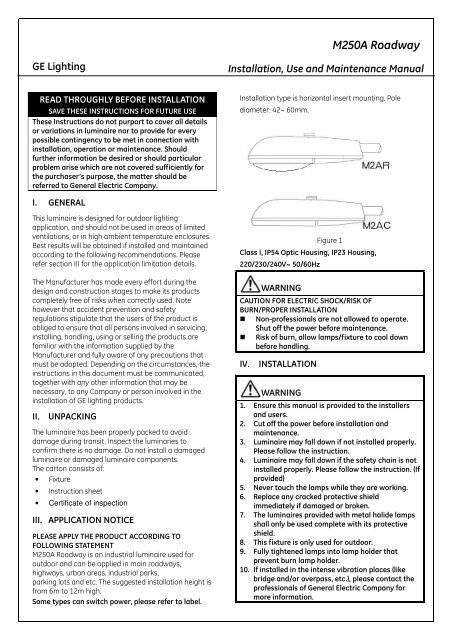
<strong>Installation</strong> type is horizontal insert mounting. Pole<br />
diameter: 42~ 60mm.<br />
I. <strong>GE</strong>NERAL<br />
This luminaire is designed for outdoor lighting<br />
application, and should not be used in areas of limited<br />
ventilations, or in high ambient temperature enclosures.<br />
Best results will be obtained if installed and maintained<br />
according to the following recommendations. Please<br />
refer section III for the application limitation details.<br />
The Manufacturer has made every effort during the<br />
design and construction stages to make its products<br />
completely free of risks when correctly used. Note<br />
however that accident prevention and safety<br />
regulations stipulate that the users of the product is<br />
obliged to ensure that all persons involved in servicing,<br />
installing, handling, using or selling the products are<br />
familiar with the information supplied by the<br />
Manufacturer and fully aware of any precautions that<br />
must be adopted. Depending on the circumstances, the<br />
instructions in this document must be communicated,<br />
together with any other information that may be<br />
necessary, to any Company or person involved in the<br />
installation of <strong>GE</strong> lighting products.<br />
II.<br />
UNPACKING<br />
The luminaire has been properly packed to avoid<br />
damage during transit. Inspect the luminaries to<br />
confirm there is no damage. Do not install a damaged<br />
luminaire or damaged luminaire components.<br />
The carton consists of:<br />
• Fixture<br />
• Instruction sheet<br />
• Certificate of inspection<br />
III. APPLICATION NOTICE<br />
PLEASE APPLY THE PRODUCT ACCORDING TO<br />
FOLLOWING STATEMENT<br />
M250A Roadway is an industrial luminaire used for<br />
outdoor and can be applied in main roadways,<br />
highways, urban areas, industrial parks,<br />
parking lots and etc. The suggested installation height is<br />
from 6m to 12m high.<br />
Some types can switch power, please refer to label.<br />
Figure 1<br />
Class I, IP54 Optic Housing, IP23 Housing,<br />
220/230/240V~ 50/60Hz<br />
WARNING<br />
CAUTION FOR ELECTRIC SHOCK/RISK OF<br />
BURN/PROPER INSTALLATION<br />
Non-professionals are not allowed to operate.<br />
Shut off the power before maintenance.<br />
Risk of burn, allow lamps/fixture to cool down<br />
before handling.<br />
IV.<br />
INSTALLATION<br />
WARNING<br />
1. Ensure this manual is provided to the installers<br />
and users.<br />
2. Cut off the power before installation and<br />
maintenance.<br />
3. Luminaire may fall down if not installed properly.<br />
Please follow the instruction.<br />
4. Luminaire may fall down if the safety chain is not<br />
installed properly. Please follow the instruction. (If<br />
provided)<br />
5. Never touch the lamps while they are working.<br />
6. Replace any cracked protective shield<br />
immediately if damaged or broken.<br />
7. The luminaires provided with metal halide lamps<br />
shall only be used complete with its protective<br />
shield.<br />
8. This fixture is only used for outdoor.<br />
9. Fully tightened lamps into lamp holder that<br />
prevent burn lamp holder.<br />
10. If installed in the intense vibration places (like<br />
bridge and/or overpass, etc.), please contact the<br />
professionals of General Electric Company for<br />
more information.
11. If installed in the places of high-salt environment<br />
(like coastal areas), please contact the<br />
professionals of General Electric Company for<br />
more information.<br />
CAUTION<br />
Risk of Injury<br />
Ware safety glasses and proper aid during<br />
installation and maintenance.<br />
For user who purchase empty housing from <strong>GE</strong><br />
This empty housing may not be suitable for all<br />
kinds of control gear. Independent test may<br />
required to conduct to ensure the quality and<br />
performance of finished fixture, as it may vary<br />
subject to the type of control gear, assembling<br />
method and other issue as the case may be.<br />
TOOLS/ACCESSRIES YOU WILL NEED<br />
Screwdriver – (6~12mm): used for drive the screw in for<br />
the power tray;<br />
Wire Stripper: used for removal the insulation of wire<br />
lead;<br />
Screwdriver – (3mm): use for connecting the power<br />
cord;<br />
Allen Key wrenches – (10mm) A/F: used for fixture<br />
mounting bracket connection.<br />
P PRE-INSTALLATION<br />
This luminaire has been properly packed so that no<br />
parts should have been damaged during transportation.<br />
Inspect to confirm. Remove power module ballast door<br />
by loosening captive screw and opening door to a<br />
vertical position.<br />
I INSTALL LUMINAIRE<br />
1) POLE INSTALL<br />
The pole clamp accommodates 42 to 60mm diameter<br />
pole. If necessary, adjust the two pole clamp bolts so<br />
that opening is slightly larger than pole size being used.<br />
Bird-shield behind slip-fitter clamp comes with an<br />
opening for Dia. 42mm pole. If a larger size is used,<br />
detach knockout to provide a larger opening. Insert<br />
mounting arm carefully through bird-shield and into<br />
back of the luminaire until it hits the leveling steps<br />
which stick down from top of housing.<br />
By selecting different step, the luminaire may be<br />
adjusted up or down with respect to pole. A circular pad<br />
is provided on top of housing for convenient application<br />
of hand level.<br />
To mount, hold luminaire approximately level and snug<br />
up bolts. If more upward tilt of front of luminaire is need,<br />
loosen the bolts slightly. Lift luminaire and insert it to the<br />
next set of leveling steps. If downward tilt is needed,<br />
reverse procedure by extracting the luminaire from the<br />
mounting arm to sit on a more rearward set of steps.<br />
Once the proper level has been achieved, tighten each<br />
bolt by 6-7 N.m torque, alternating between bolts. If a<br />
torque wrench is not available, correct torque may be<br />
achieved by turning bolts two to three full turns (or until<br />
bottoming occurs) past their “snug position”.<br />
<br />
WARNING<br />
Under no conditions should bolts be torqued to a<br />
level greater than 16 N.M.<br />
2)WIRING<br />
Three type wire diagram for the fixture. You can connect<br />
wire according to the diagram where attached inside of<br />
the housing. Make all electrical connections in<br />
accordance with the National Electrical Code and any<br />
applicable local code requirements including grounding.<br />
<br />
CAUTION<br />
Verify that supply voltage is correct by<br />
comparing it to nameplate.<br />
The door is mechanically interlocked with top housing in<br />
all positions except in vicinity of removal location.<br />
V. MAINTENANCE/ LAMP REPLACEMENT<br />
OPTICAL MAINTENANCE<br />
In order to maintain high efficiency of reflectors and<br />
refractors, a regular cleaning cycle should be<br />
established with frequency dependent on local<br />
conditions. Use a mild soap or detergent which is<br />
essentially neutral (pH approximately 6 to 8),<br />
nonabrasive, and which contains no chlorinated or<br />
aromatic hydrocarbons. Wash thoroughly, using a soft<br />
cloth, or brush if necessary, Rinse in clean, cold water<br />
and wipe dry.<br />
INSPECT AND REPLACE ANY DAMA<strong>GE</strong>D REFRACTORS OR<br />
GASKET IF APPLICABLE.<br />
FAILURE PARTS NEED TO BE REPLACED IF YOU INSPECT<br />
THE LAMP EXTINCT, FLICKING OR CYCLING. ORDER<br />
THE REPLACEMENT PART INDIVIDUALLY. CONTACT THE<br />
MANUFACTURES FOR THE MAINTENANCE SERVICE.<br />
LAMP INSTALLATION & REPLACEMENT<br />
Recommend using <strong>GE</strong> HPS and Mercury lamp.<br />
Open optical door by pulling-forward on bottom of latch<br />
to release it. Lower door to vertical and install proper<br />
lamp.<br />
<br />
CAUTION<br />
It is never necessary or advisable to allow door<br />
to drop free and swing.<br />
If the refractor/lens requires assembly to the door, it<br />
should be installed with its front edge under two tabs<br />
cast in front of area of door. The latch at back of the<br />
door should be turned counterclockwise to secure<br />
refractor in place. To close door, swing it shut. Hook
latch bail over catch in top housing, and press backward<br />
on bottom of latch until latch engages.<br />
Reconnect disconnect plug to complete wiring between<br />
top housing and door. Check for any possible<br />
interference of any wiring with door closure. Rotate<br />
door forward and tighten captive screw.<br />
LAMP-POSITION ADJUSTMENT<br />
The socket can be adjusted horizontally by loosening<br />
screw on bottom of support bracket, sliding socket<br />
bracket to desired location, and retighten.<br />
<br />
CAUTION<br />
Please note the lamp type, wattage shall be<br />
same as the indication of product label.<br />
If lamp is handled, fingerprint, grease or oils should be<br />
removed from lamp with isopropyl alcohol. This will<br />
remove material that will cause whitish spotting, and<br />
premature lamp failure. Dry lamp carefully with cotton<br />
or clean cloth.<br />
VI. PRODUCT INFORMATION<br />
PRODUCT BASIC INFO.<br />
Input V<br />
220/230/240V~ 50/60Hz<br />
(Refer to Label)<br />
Input I<br />
HPS:<br />
250W 1.3~1.4 A<br />
(Refer to Label)<br />
150W 0.79~0.86 A<br />
100W 0.54~0.57 A<br />
70W 0.39~0.41A<br />
Mercury:<br />
250W 1.28 A<br />
125W 0.68 A<br />
80W 0.44 A<br />
Recommended HPS:<br />
250W LU250/T/40<br />
<strong>GE</strong> lamp<br />
150W LU150/100/40<br />
100W LU100/100/MO/T/40<br />
70W LU70/90/T12/27<br />
Mercury:<br />
250W H250/40<br />
125W H125/27<br />
80W H80/27<br />
Effective wind 0.07m 2<br />
area<br />
Weight 250W-14 kg<br />
150W-12 kg<br />
125W-11 kg<br />
100W-10 kg<br />
80W-9.5 kg<br />
70W-9 kg<br />
PRODUCT DIMENTIONS AND OUTLINES<br />
<strong>GE</strong> <strong>Lighting</strong> Co., Ltd.<br />
No. 88, Lane 1517, Hu Yi Gong Road, Jiading District,<br />
Shanghai, 201802, P.R.C<br />
+86-800-820-8206<br />
www.gelighting.com