
Create successful ePaper yourself
Turn your PDF publications into a flip-book with our unique Google optimized e-Paper software.
TABLE OF CONTENTS<br />
1.Instruction......................................................................................................................................................2<br />
2. All Parts Distribution ....................................................................................................................................3<br />
3.Playing Instructions......................................................................................................................................6<br />
4.Adjusting the <strong>Claw</strong> Strength .......................................................................................................................6<br />
5.Electronic/Mechanical Meters ....................................................................................................................8<br />
6.Operation.......................................................................................................................................................9<br />
7.DIP Switch Setting Descriptions ..............................................................................................................11<br />
8.DIP Switch Setting .....................................................................................................................................12<br />
9.CPU Diagram..............................................................................................................................................13<br />
10.Drive Board for the <strong>Crane</strong>.......................................................................................................................14<br />
11.CPU Wiring Pinout ...................................................................................................................................15<br />
12.Error Codes...............................................................................................................................................20
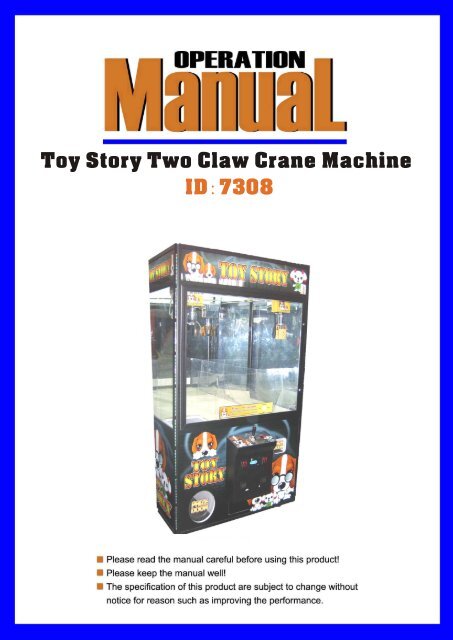
<strong>Toy</strong> <strong>Story</strong> <strong>Two</strong> <strong>Claw</strong> <strong>Crane</strong> <strong>Machine</strong>(<strong>ID</strong>:<strong>7308</strong>)<br />
SAFETY INSTRUCTIONS<br />
* WARNING! *<br />
BEFORE SETTING UP THE GAME, PLEASE READ THE FOLLOWING INSTRUCTIONS.<br />
* WARNING! *<br />
FAILURE TO FOLLOW THESE DIRECTIONS COULD CAUSE DAMAGE TO THE GAME.<br />
NOTICE FOR INSTALLATION<br />
• This machine is for indoor use, is not suitable for outdoor use.<br />
• After the machine was completely set up, please make sure that the machine is securely and safely<br />
placed on the floor.<br />
• Do not assemble or disassemble the game. or move the game without careful instructions.<br />
• Switch off the power and pull out the plug before moving the machine.<br />
• Place the game on flat floor. Do not put it on unsteady or vibrating location.<br />
• Do not place the game near equipment or areas that are humid, inflammable or of high temperature.<br />
• Do not place any heavy equipment on the top of the machine, or on top of the power cord.<br />
• Do not expose the circuit part in the machine to the air for a long time.<br />
NOTICE FOR OPERATION<br />
• Before plugging in or turning on the machine, please check if the power plug and power cord are in<br />
good conditions, and check if the voltage is set to the proper voltage that is suitable for your<br />
country.<br />
• Turn off the power before you check or inspect the machine.<br />
• Only qualified technicians are allowed to perform checking or maintenance of the game.<br />
• Suitable accessories and technical parts should be used for parts replacement<br />
• Hold the plug (not the wire) to remove the power cord from the wall outlet.<br />
• Do not plug or unplug the game with wet hand.<br />
• Do not pull or twist the power wire and fuses.<br />
1
<strong>Toy</strong> <strong>Story</strong> <strong>Two</strong> <strong>Claw</strong> <strong>Crane</strong> <strong>Machine</strong>(<strong>ID</strong>:<strong>7308</strong>)<br />
1.Introduction<br />
During delivery, the machine should be handled with care. Use a forklift to deliver the packaged machine. Be<br />
careful not to hit the machine by heavy equipment. This may cause damage to the machine.<br />
⑴Accerssories<br />
Check whether the machine is packed with the following Accessories:<br />
Accessories Quantity Remarks<br />
Operation Manual 1<br />
Keys 5 1866(3),1888(2)<br />
Power Cord 1<br />
String for the <strong>Claw</strong> Carriage<br />
1m<br />
Micro Switch 1 pcs with three terminals and long lever<br />
Micro Switch 1 pcs with two terminals and short lever<br />
Micro On/Off Switch<br />
for the Wheels<br />
1 pcs<br />
⑵Technical Parameters<br />
• Dimension: 920*1067*1983 mm<br />
• Weight: 160 KG<br />
• Power supply: see the back cover of the machine.<br />
⑶Location Requirements<br />
• Indoor temperature: between from 5℃ and 40℃.<br />
• Indoor humidity: low<br />
• U.V. radiation: Very low<br />
• Vibrations level: low<br />
2
<strong>Toy</strong> <strong>Story</strong> <strong>Two</strong> <strong>Claw</strong> <strong>Crane</strong> <strong>Machine</strong>(<strong>ID</strong>:<strong>7308</strong>)<br />
2.All Parts Distribution<br />
1.joystick<br />
2.counter board<br />
Coin mech meter: records the total coin Qty since the machine has started operation.<br />
Major/Minor Prize meter: records the total major/minor prize Qty since the machine has started<br />
operation.<br />
Service: Pressing this button = Inserting one coin. Press this button only during maintenance or testing<br />
the game.<br />
Clear data: Press it over five seconds, all data in the memory chip will be cleared.<br />
Test button: Press this button to get the machine into TEST Mode.<br />
3.coin funnel<br />
4.speaker<br />
5.coin selector<br />
Feature<br />
3
<strong>Toy</strong> <strong>Story</strong> <strong>Two</strong> <strong>Claw</strong> <strong>Crane</strong> <strong>Machine</strong>(<strong>ID</strong>:<strong>7308</strong>)<br />
High-accuracy adjustment<br />
Anti-false coin<br />
Anti-string trick<br />
Anti-cheating coin while machine leant<br />
Passage tested adjuster screw<br />
Coin entrance<br />
Coin path mouth adjustor block<br />
Magnet<br />
Main body of coin selector<br />
Blocking stick limitation<br />
adjustor piece<br />
Annular tester block<br />
Coin lead<br />
Specifications:<br />
1) Coin exit button: If the inserted coin gets blocked in the coin selector, press the button, it will come<br />
out of the exit.<br />
2) Coin exit button: If the inserted coin is not a suitable one, it will come out of the coin exit<br />
automatically.<br />
3) Acceptable coins: Different specifications of coins with a diameter from φ25mm to φ28mm and a<br />
thickness from1.5mm to 2.6mm from different countries.<br />
4) Coin path mouth adjustor block: Adjust the diameter of the coin. If you have to set inserting minor<br />
coin, move it right. Generally if you do not insert minor coins, move the block left. It controls coins<br />
with a diameter of 0.1mm.<br />
Passage tested adjuster screw: turn it clockwise, and then it becomes looser. Turn it anticlockwise<br />
and then it becomes tighter. Thickness can be controlled into 0.05mm.<br />
5) Blocking stick limitation piece: adjusts the upper limit of the diameter of the coin.<br />
6) Annular test block: controls floor level of diameter of acceptable coin, used together with blocking<br />
stick limitation adjuster piece, adjusts the diameter of the coin to vary within a limitation of 0.1mm.<br />
4
<strong>Toy</strong> <strong>Story</strong> <strong>Two</strong> <strong>Claw</strong> <strong>Crane</strong> <strong>Machine</strong>(<strong>ID</strong>:<strong>7308</strong>)<br />
Coins of different specifications are suitable for different types of annular tester block. As for test<br />
block of the same specification, the larger, and the tighter: the smaller, the looser.<br />
7) Magnet: Select the iron-contained quantity of coins. Those containing a large iron quantity easily<br />
get absorbed, while those containing a small iron quantity don’t get through hard at all; if ironall-over<br />
coins are used, get off the magnet.<br />
Note: please fixup the screws with glue after when the coin selector has been adjusted.<br />
6.voltmeter: used for testing voltage of claw.<br />
7. drive board for crane<br />
Refer to the later “Drive board for crane”.<br />
8. control for the rope lights<br />
9. fan<br />
10. main board<br />
Refer to the later “Main board”.<br />
11. power supply D-120A<br />
INPUT: 100-120VAC, 2.8A. 200-240VAC, 1.6A 50Hz/60Hz<br />
OUTPUT: V1:+5V 12A<br />
V2:+12V 5A<br />
12.filter<br />
5
<strong>Toy</strong> <strong>Story</strong> <strong>Two</strong> <strong>Claw</strong> <strong>Crane</strong> <strong>Machine</strong>(<strong>ID</strong>:<strong>7308</strong>)<br />
13. power supply S-350-48<br />
DC OUTPUT: 48V 7.3A<br />
AC INPUT: 100-120VAC/5.5A<br />
200-240VAC/4.0A<br />
3.Playing Instructions<br />
Insert coin. After the proper number of credits is achieved, the game will enter into play mode (eg. Default<br />
setting is 1 coin/token for every game. So, if 1 coin/token is inserted, then the game will start. If the setting is 2<br />
coin/token for each game, then the player needs to insert 2 coins / tokens to start the game.) . The “CREDIT”<br />
LED display on the console will show the no. of CREDITS.<br />
Within the play time limit, move the joystick to control the position of the claw. Move the claw to your targeted<br />
position. Press the red button on the top of the joystick to lower down the claw and try to catch the major prize.<br />
If the claw catches the major prize, the prize will come out through the prize door. Game finish.<br />
And if you failed, you will get the chances to catch minor prize for three times at most.<br />
If the claw catches the minor prize, the prize will come out through the prize door. Game finish.<br />
4.Adjusting The <strong>Claw</strong> Strength<br />
The Payout Ratio of the game for major prize depends on the <strong>Claw</strong> Strength, which is controlled by the voltage<br />
of the <strong>Claw</strong>.<br />
How to Adjust the <strong>Claw</strong> Strength:<br />
Enter the “TEST” mode: Press the “TEST” button for about 300ms, #1 crane enters into the “TEST” mode.<br />
When the LED displays “HX”, the claw carriage enters into the “TEST” mode. Please refer to Table 1 for the<br />
value of “X”. (#1 crane is for major prize, #2 crane is for minor prize. )<br />
For example, when the LED display is“H1”, the <strong>Claw</strong> Strength is strong (at this stage, power output to the claw<br />
carriage is 3 seconds per 10 seconds). You can adjust the voltage via Drive Board R 23. Please refer to Table<br />
1 below for details. Table 2 and 3 shows the relationship between Voltage Setting and Time.<br />
Setting Payout Ratio:<br />
Payout Ratio of major prizes is controlled by Main PCB - SW2^3~SW2^5.<br />
At initial clear stage, when the no. of game played already is less than the payout ratio, and then major prize<br />
will not be allowed to be given out. The Voltage setting will be same as Table 2.<br />
6
<strong>Toy</strong> <strong>Story</strong> <strong>Two</strong> <strong>Claw</strong> <strong>Crane</strong> <strong>Machine</strong>(<strong>ID</strong>:<strong>7308</strong>)<br />
However, if the voltage setting is not correctly adjusted, major prize may also be given out. In this case, please<br />
adjust the voltage according to Table 1.<br />
When the no. of game played is more than the payout ratio, then major prize is allowed to be given out. The<br />
Voltage setting will be same as Table 3. The opportunity of giving out prizes will be higher.<br />
<strong>Claw</strong> Strength Test Code # Potentiometer Voltage Setting(VDC) LED Display<br />
Strong 12 Drive Board 1 R23 40±3 H1<br />
#1 crane<br />
Medium 13 Drive Board 1 R24 30±3 H2<br />
Weak 14 Drive Board 1 R25 10±3 H3<br />
Strong 18 Drive Board 2 R23 30±3 H4<br />
#2 crane<br />
Medium 19 Drive Board 2 R24 unused unused<br />
Weak 20 Drive Board 2 R25 unused unused<br />
<strong>Claw</strong> carriage<br />
moving test<br />
VDC<br />
40<br />
30<br />
15<br />
10<br />
----- H5<br />
Table 1: Test Mode – <strong>Claw</strong> Strength, Voltage Setting and LED Display.<br />
strong Strength<br />
Variation between Medium and Weak<br />
1S Top Over<br />
Table 2: No Major Prize will be given out<br />
t<br />
VDC<br />
40 Strong<br />
30<br />
10<br />
f 1.5S Top Over<br />
Table 3: Major Prize is allowed to be given out<br />
t<br />
7
<strong>Toy</strong> <strong>Story</strong> <strong>Two</strong> <strong>Claw</strong> <strong>Crane</strong> <strong>Machine</strong>(<strong>ID</strong>:<strong>7308</strong>)<br />
Variations of the <strong>Claw</strong> Strength<br />
At the time the claw is initially initiated and begins to rise, the voltage to the claw is at the first voltage setting,<br />
which is set by the R23 potentiometer on the drive board for crane.<br />
The second claw voltage range, which is set by the R24 potentiometer on the drive board for crane, will appear<br />
while the claw is going up.<br />
When the claw reaches the top, the voltage to the claw is at the third voltage setting, which is set by the R25<br />
potentiometer on the drive board for crane. The claw will remain at this voltage until the crane move to the<br />
home position and the claw opens.<br />
<strong>Claw</strong> Voltage Reading During Non-Payout Time:<br />
When the claw goes down and reaches the prize, the claw strength will be at the 1 st voltage setting, then<br />
converting to the 2 nd voltage setting, and finally the 3 rd voltage setting.<br />
Example:<br />
1 st Voltage Setting 40VDC (set by the R23 potentiometer)<br />
2 nd Voltage Setting 30VDC (set by the R24 potentiometer)<br />
3 rd Voltage Setting 10VDC (set by the R25 potentiometer)<br />
<strong>Claw</strong> Voltage Reading During Payout Time:<br />
When the claw goes down and closes, the claw strength will be at the 1 st voltage setting, then converting to the<br />
2 nd voltage setting, and finally the 2 nd voltage setting.<br />
Example:<br />
1 st Voltage Setting 40VDC (set by the R23 potentiometer)<br />
2 nd Voltage Setting 30VDC (set by the R24 potentiometer)<br />
2 nd Voltage Setting 30VDC (set by the R24 potentiometer)<br />
Attention:<br />
Voltage cannot be adjusted to be too high. If the voltage is adjusted to be too high, this may cause damage to<br />
the PCB and the claw carriage<br />
If you do not adjust the <strong>Claw</strong> Strength according to the above instructions, you cannot control the strength of<br />
the claw.<br />
If the prize is not too heavy, it is highly recommended to always keep the voltage to be at a relatively lower<br />
level, so that the claw and the claw carriage can last longer.<br />
8
<strong>Toy</strong> <strong>Story</strong> <strong>Two</strong> <strong>Claw</strong> <strong>Crane</strong> <strong>Machine</strong>(<strong>ID</strong>:<strong>7308</strong>)<br />
5.Mechanical Coin Mech Meter<br />
The no. shown on the Mechanical Coin Mech will increase by one for every coin inserted in this mechanical<br />
coin mechanism. This coin mech has the function of “Continuous Play”. When the number of coins inserted<br />
reaches a certain level (Please see the details in the “SETTING” section), then the player is awarded a FREE<br />
game play. The “CREDIT” LED display will show”+1” and there will also be a BONUS sound.<br />
ATTENTION: The Time Interval between inserting the second coin after the first coin should be within 10<br />
seconds. If the second coin inserted is more than 10 seconds after the first coin is inserted, then it will not be<br />
regarded as continuous play.<br />
Prize Meter:<br />
The no. shown on the Prize Meter will increase by one when a prize is given out.<br />
6.Operation<br />
This game has two adjustable play modes. One is the free play mode, and the other one is coin play mode.<br />
When the machine is in free play mode, after pressing the reset button, no coin is required to start the game.<br />
The machine will be in play mode continuously. When the machine is in coin play mode, it can be in one of the<br />
following six modes: 1) Attract Mode 2) Test Mode 3) <strong>Claw</strong> Carriage Test Mode 4) Game Play Mode 5) Error<br />
state 6) Prize-Out Mode. Please refer to the Flow Chart below for details:<br />
Turn on Power<br />
Attract Mode<br />
Insert coin or press Servicebutton<br />
Play Mode<br />
Game ends<br />
Test completed<br />
Test Mode<br />
Press Test button to<br />
start testing<br />
System Error<br />
<strong>Claw</strong> Carriage Test<br />
Mode<br />
Error Mode<br />
System Error<br />
Press Reset button on main<br />
board after clearing t he error<br />
⑴Turn On The Power<br />
Before turning on the power, please check the plug and cord, and make sure that the game is set to the proper<br />
voltage.<br />
⑵Game Play Mode<br />
When the Game is started, the TIME and CREDIT LED on the console display the time and credit the player<br />
has. There is also MUSIC going with this.<br />
9
<strong>Toy</strong> <strong>Story</strong> <strong>Two</strong> <strong>Claw</strong> <strong>Crane</strong> <strong>Machine</strong>(<strong>ID</strong>:<strong>7308</strong>)<br />
⑶Attract Mode<br />
In ATTRACT MODE, the LEDs on the console display<br />
X X , which also changes continuously. It is also<br />
going with music. Press the “TEST” button on the front cabinet for over 300mss and the game will enter into<br />
TEST MODE. Insert Coin, and the machine will enter into GAME PLAY MODE.<br />
⑷Test Mode<br />
Test whether the LED is in good conditions, whether the lights, claw carriage and music are in working<br />
conditions. When machine is in ATTRACT MODE, press the “TEST” button, music will stop and the game will<br />
enter into “TEST MODE”.<br />
LED displays No of version → LED all turn off →LED all turn on → Testing Input →Testing Output →Testings<br />
Ticket Dispenser (Not applicable to this <strong>Machine</strong>) → Testing Music → Test is completed.<br />
⑸Error Mode<br />
During the game play, whenever there is ERROR, the system will enter into ERROR MODE. The Error code<br />
“EX” will be displayed. Alarm is activated, and you can check the errors according to the EROR CODES 1, 2, 3,<br />
4 ,5,7 and 8.. After clearing the error, reset the game and restart the machine. Please refer to the “ERROR<br />
CODES” table for details.<br />
⑹Prize Out Mode<br />
If a prize is given out, music “PRIZE-OUT” will be activiated. The no. displayed on the Prize meter will also<br />
increase by one.<br />
10
<strong>Toy</strong> <strong>Story</strong> <strong>Two</strong> <strong>Claw</strong> <strong>Crane</strong> <strong>Machine</strong>(<strong>ID</strong>:<strong>7308</strong>)<br />
7. Dip Switch Setting Descriptions<br />
Switch 1<br />
⑴Free Play<br />
If SW1 #4 is ON, free play is disabled. Coins are needed in order to start the game.<br />
If SW1 #4 is OFF, free play is allowed and no coins are required.<br />
⑵# of coins per play<br />
DIP SW1 #5 and #6 set the number of coins required to play one game.<br />
⑶Power Off Settings<br />
If SW1 #7 is ON, any parameters on the game will be saved when the power is OFF.<br />
If SW1 #7 is OFF, any parameters on the game will be cleared when the power is OFF.<br />
⑷Music In Attract Mode<br />
If SW1 #8 is ON, music is on when the game is not in use.<br />
If SW1 #8 is OFF, music is off when the game is not in use.<br />
Switch 2<br />
⑴Playtime<br />
DIP SW2 #1 and #2 set the time limit for each game.<br />
⑵Prize Payout Ratio<br />
DIP SW2 #3, #4 and #5 is used to configure the Major Prize Payout Ratio.<br />
⑶Award When Insert Coins Continuously<br />
DIP SW2 #6, #7 and #8 set how the players can get One Bonus coin when coins are inserted continuously.<br />
11
<strong>Toy</strong> <strong>Story</strong> <strong>Two</strong> <strong>Claw</strong> <strong>Crane</strong> <strong>Machine</strong>(<strong>ID</strong>:<strong>7308</strong>)<br />
8.Dip Switch Setting<br />
Functions<br />
SW<br />
1 2 3 4 5 6 7 8 FUNCTIONS<br />
ON<br />
Need to insert coins to start the Game<br />
OFF<br />
Free Play(No need to insert coins)<br />
ON OFF 4 Coins / Game<br />
ON OFF 3 Coins / Game<br />
OFF OFF 2 Coin / Game<br />
OFF OFF 1 Coins / Game<br />
ON<br />
SAVE PAREMETER when Power is<br />
OFF CLEAR PARAMETER when Power is<br />
ON<br />
OFF<br />
Music On when the game is in Attract<br />
Music Off when the game is in Attract<br />
ON ON TIME PER GAME PLAY: 60 seconds<br />
OFF ON TIME PER GAME PLAY: 50 seconds<br />
ON OFF TIME PER GAME PLAY: 40 seconds<br />
OFF OFF<br />
TIME PER GAME PLAY: 30 seconds<br />
ON ON ON WIN 1 PRIZE OUT OF 50 COINS<br />
OFF ON ON WIN 1 PRIZE OUT OF 30 COINS<br />
ON OFF ON WIN 1 PRIZE OUT OF 20 COINS<br />
OFF OFF ON<br />
WIN 1 PRIZE OUT OF 15 COINS<br />
ON ON OFF WIN 1 PRIZE OUT OF 10 COINS<br />
SW2<br />
OFF ON OFF WIN 1 PRIZE OUT OF 8 COINS<br />
ON OFF OFF WIN 1 PRIZE OUT OF 5 COINS<br />
OFF OFF OFF WIN 1 PRIZE OUT OF 3 COINS<br />
ON ON ON Get a Bonus Coin when insert 10 coins<br />
OFF ON ON Get a Bonus Coin when insert 8 coins<br />
ON OFF ON Get a Bonus Coin when insert 7 coins<br />
OFF OFF ON Get a Bonus Coin when insert 5 coins<br />
ON ON OFF Get a Bonus Coin when insert 4 coins<br />
OFF ON OFF Get a Bonus Coin when insert 3 coins<br />
ON OFF OFF Get a Bonus Coin when insert 2 coins<br />
OFF OFF OFF No Bonus Coin<br />
Remarks:<br />
Cells Highlighted in Grey Color – Factory Settings.<br />
12
<strong>Toy</strong> <strong>Story</strong> <strong>Two</strong> <strong>Claw</strong> <strong>Crane</strong> <strong>Machine</strong>(<strong>ID</strong>:<strong>7308</strong>)<br />
9.Cpu Diagram<br />
L+ L-<br />
1 2<br />
1 2<br />
R+ R-<br />
J12<br />
J11<br />
U20<br />
SOUND EPROM<br />
U19<br />
U7<br />
+5V GND GND +12V<br />
8<br />
1 7<br />
1 5<br />
J1<br />
J2<br />
J3 J4<br />
MAIN EPROM<br />
RESET LEDS<br />
JL-PCB-20050-IO_BOARD<br />
SW1<br />
SW2<br />
SW3<br />
SW4<br />
ON<br />
ON<br />
ON<br />
ON<br />
1 2 3 4 5 6 7 8 1 2 3 4 5 6 7 8 1 2 3 4 5 6 7 8 1 2 3 4 5 6 7 8<br />
JL-PCB-20060-MainBoard-V30E<br />
OUTPUT LDES(RED)<br />
1<br />
OutCON1<br />
OUTOP1<br />
OUTOP2<br />
OUTOP3<br />
OUTOP4<br />
OUTOP5<br />
OUTOP6<br />
OutCON2<br />
1 3 5 7 9 11 13 15 17 19 21<br />
1 3 5 7 9 11 13 15 17 19<br />
EMPTY SOCKET<br />
INOP1 INOP2 INOP3 INOP4 INOP5 INOP6 INOP7 INOP8<br />
INPUT LEDS(GREEN)<br />
J5<br />
1 3 5 7<br />
J10<br />
J9<br />
J8<br />
J7<br />
2 4 6 8 10 12 14 16 18<br />
2 4 6 8 10 12 14 16<br />
2 4 6 8 10 12 14<br />
1 6<br />
1 7<br />
1 5<br />
1 4<br />
InCON1<br />
InCON2<br />
J6<br />
⑴Connectors<br />
See the CPU WIRING PINOUT pages for more information.<br />
⑵Reset Button<br />
Press the RESET Button to resent the game.<br />
⑶Dip Switches<br />
There are 2 nos. of DIP switches on this board. They are labeled as SW1 and SW2.<br />
To turn on the Switch, move the switch UP.<br />
To turn off the Switch, move the switch DOWN.<br />
⑷Attention: Press the RESET button after any change to the DIP Switch settings.<br />
Please refer to the DIP SWITCH SETTINGS TABLE for function of each switch.<br />
13
<strong>Toy</strong> <strong>Story</strong> <strong>Two</strong> <strong>Claw</strong> <strong>Crane</strong> <strong>Machine</strong>(<strong>ID</strong>:<strong>7308</strong>)<br />
10.Drive Board For The <strong>Crane</strong><br />
J1:Power Input<br />
J2: <strong>Crane</strong> connector.<br />
J3: Main PC board connector.<br />
J4: <strong>Claw</strong> voltmeter output.<br />
14
<strong>Toy</strong> <strong>Story</strong> <strong>Two</strong> <strong>Claw</strong> <strong>Crane</strong> <strong>Machine</strong>(<strong>ID</strong>:<strong>7308</strong>)<br />
11.Cpu Wiring Pinout<br />
Plug code<br />
J1<br />
(Power<br />
Input<br />
Connector<br />
)<br />
J4<br />
(#2 Serial<br />
Output<br />
Connector<br />
)<br />
J5<br />
(Ticket Out<br />
Connector<br />
)<br />
J6<br />
(Base<br />
Function<br />
connector )<br />
Pin<br />
code<br />
Pin color<br />
Function<br />
PIN 1 4*0.75-Red +5V Input -----<br />
PIN 2 4*0.75-Black GND -----<br />
PIN 3 4*0.75-Black GND -----<br />
PIN 4 4*0.75-Yellow +12V Input -----<br />
PIN 1 6*0.3-Green CLK -----<br />
PIN 2 6*0.3-White DAT -----<br />
PIN 3 6*0.3-Brown LTH -----<br />
PIN 4 6*0.3-Yellow +12V Output -----<br />
PIN 5 6*0.3-Black GND -----<br />
PIN 6 6*0.3-Red +5V Output -----<br />
PIN 1 4*0.3-White #1 Ticket Out Drive -----<br />
PIN 2 4*0.3-White #2 Ticket Out Drive -----<br />
PIN 3 4*0.3-Yellow +12V Output -----<br />
PIN 4 4*0.3-Yellow +12V Output -----<br />
PIN 5 4*0.3-Black GND -----<br />
PIN 6 4*0.3-Black GND -----<br />
PIN 7 4*0.3-Green #1 Ticket Feedback -----<br />
PIN 8 4*0.3-Green #2 Ticket Feedback -----<br />
PIN 1 10*0.3-Yellow +12V Out -----<br />
PIN 2 Null +5V Out -----<br />
PIN 3 10*0.3-Black GND -----<br />
I/O<br />
code<br />
PIN 4 Null GND -----<br />
PIN 5<br />
10*0.3 -<br />
Blue/white<br />
Service IN #25<br />
PIN 6 Null No Connect -----<br />
PIN 7 Null No Connect -----<br />
PIN 8 Null No Connect -----<br />
PIN 9<br />
10*0.3 -<br />
Purple/white<br />
Test IN #27<br />
PIN<br />
10<br />
PIN<br />
11<br />
10*0.3 -<br />
Orange/white<br />
10*0.3 -<br />
Yellow/white<br />
Clear Data IN #28<br />
#1 Coin Mech Signal IN #30<br />
Function of I/O<br />
Power Input<br />
Digital LED Board Output<br />
Connection order<br />
Coin Qty LED (2 bits).<br />
Ticket<br />
Out<br />
Connector(unused in this<br />
machine)<br />
Base Function connector<br />
15
<strong>Toy</strong> <strong>Story</strong> <strong>Two</strong> <strong>Claw</strong> <strong>Crane</strong> <strong>Machine</strong>(<strong>ID</strong>:<strong>7308</strong>)<br />
J8<br />
(communica<br />
tion<br />
connector)<br />
J11<br />
(Volume<br />
Ctrl )<br />
J12<br />
(Speaker )<br />
InCON1<br />
(#1~#15<br />
Input )<br />
PIN<br />
12<br />
PIN<br />
13<br />
PIN<br />
14<br />
10*0.3 -<br />
Green/white<br />
10*0.3-Gray<br />
10*0.3-Brown<br />
#1 <strong>Crane</strong> test signal IN #31<br />
Major Prize Meter<br />
#1 Coin Mech Meter<br />
OUT<br />
#22<br />
OUT<br />
#23<br />
PIN 1 4*0.3-Red +5V Output -----<br />
PIN 2 4*0.3-Yellow +12V Output -----<br />
PIN 3 4*0.3-Green T+/R+(RS485) -----<br />
PIN 4 4*0.3-Brown GND -----<br />
PIN 5 4*0.3-Blue T-/R-(RS485) -----<br />
PIN 1 4*0.15-Green Right Signal Input -----<br />
PIN 2 4*0.15-White Left Signal Input -----<br />
PIN 3 4*0.15-Red Right Signal Output -----<br />
PIN 4 4*0.15-Yellow Left Signal Output -----<br />
PIN 5 Screening wire GND -----<br />
PIN 6 Screening wire GND -----<br />
PIN 1 2*0.75/white Left Speaker + -----<br />
PIN 2 2*0.75-Black Left Speaker - -----<br />
PIN 3 2*0.75-Red Right Speaker + -----<br />
Unused<br />
Volume Ctrl<br />
Speaker<br />
PIN 4 2*0.75-Black Right Speaker -( -----<br />
PIN 1 0.3-Brown/white Input IN #0 Joystick forward switch;<br />
PIN 2 0.3-Red/white Input IN #1 Joystick back switch;<br />
PIN 3 0.3-Orange/white Input IN #2 Joystick left switch;<br />
PIN 4 0.3-Yellow/white Input IN #3 Joystick right switch;<br />
PIN 5 0.3-Green/white Input IN #4 #1 crane forward switch<br />
PIN 6 0.3-Blue/white Input IN #5 #1 crane latter switch input<br />
PIN 7 0.3-Purple/white Input IN #6 #1 crane left switch input<br />
PIN 8 0.3-Gray/white Input IN #7<br />
#1 crane right switch<br />
input(reserved for future)<br />
PIN 9 0.3-Black/white Input IN #8 #1 crane up switch input<br />
PIN<br />
10<br />
PIN<br />
11<br />
PIN<br />
12<br />
0.3-Brown/white Input IN #9<br />
0.3-Red/white Input IN #10<br />
#1 crane down switch<br />
input<br />
0.3-Orange/white Input IN #11 #1 prize test input<br />
16
<strong>Toy</strong> <strong>Story</strong> <strong>Two</strong> <strong>Claw</strong> <strong>Crane</strong> <strong>Machine</strong>(<strong>ID</strong>:<strong>7308</strong>)<br />
InCON2<br />
(#16~#27<br />
Input )<br />
PIN<br />
13<br />
PIN<br />
14<br />
PIN<br />
15<br />
PIN<br />
16<br />
PIN<br />
17<br />
PIN<br />
18<br />
0.3-Yellow/white Input IN #12 #2 prize test input<br />
0.3-Green/white Input IN #13 Joystick button input<br />
0.3-Blue/white Input IN #14<br />
0.3-Black GND -----<br />
0.3-Red +5V Output -----<br />
0.3-Yellow +12V Output -----<br />
PIN 1 0.3-Brown/white Input IN #15<br />
PIN 2 0.3-Red/white Input IN #16<br />
PIN 3 0.3-Orange/white Input IN #17<br />
PIN 4 0.3-Yellow/white Input IN #18<br />
PIN 5 0.3-Green/white Input IN #19<br />
PIN 6 0.3-Black/white Input IN #20<br />
PIN 7 0.3-Purple Input IN #21<br />
PIN 8 0.3-Gray Input IN #22<br />
PIN 9 0.3-White Input IN #23<br />
PIN<br />
10<br />
PIN<br />
11<br />
PIN<br />
12<br />
PIN<br />
13<br />
PIN<br />
14<br />
PIN<br />
15<br />
PIN<br />
16<br />
0.3-SkyBlue Input IN #24<br />
0.3-Brown Input IN #25<br />
0.3-Pink Input IN #26<br />
NC<br />
0.3-Black GND -----<br />
0.3-Red +5V Output -----<br />
0.3-Yellow +12V Output -----<br />
#2 Coin Mech Signal<br />
(reserved for future)<br />
#2 crane upper switch<br />
input<br />
#2 crane down switch<br />
input<br />
17
<strong>Toy</strong> <strong>Story</strong> <strong>Two</strong> <strong>Claw</strong> <strong>Crane</strong> <strong>Machine</strong>(<strong>ID</strong>:<strong>7308</strong>)<br />
OutCON1<br />
(#1~#11<br />
Output )<br />
PIN 1 0.3-Brown Output<br />
OUT<br />
#0<br />
PIN 2 0.75-Yellow +12V Output -----<br />
PIN 3 0.3-Pink Output<br />
OUT<br />
#1<br />
PIN 4 0.75-Yellow +12V Output -----<br />
PIN 5 0.3-Orange Output<br />
OUT<br />
#2<br />
PIN 6 -----<br />
PIN 7 0.3-SkyBlue Output<br />
OUT<br />
#3<br />
PIN 8 -----<br />
PIN 9 0.3-Green Output<br />
OUT<br />
#4<br />
PIN<br />
10<br />
-----<br />
PIN<br />
0.3-Blue<br />
Output<br />
OUT<br />
11<br />
#5<br />
PIN<br />
12<br />
-----<br />
PIN<br />
0.3-Purple Output<br />
OUT<br />
13<br />
#6<br />
PIN<br />
14<br />
-----<br />
PIN<br />
0.3-Gray Output<br />
OUT<br />
15<br />
#7<br />
PIN<br />
16<br />
0.3-Yellow -----<br />
PIN<br />
17<br />
0.3-White Output<br />
OUT<br />
#8<br />
PIN<br />
18<br />
0.5-Yellow -----<br />
PIN<br />
0.3-SkyBlue Output<br />
OUT<br />
19<br />
#9<br />
PIN<br />
20<br />
-----<br />
Start indicator (reserved<br />
for future)<br />
#2 Coin Mech Meter<br />
(reserved for future)<br />
Coin indicator<br />
#1 crane forward control<br />
output<br />
#1 crane back control<br />
output<br />
#1 crane left control output<br />
#1 crane right control<br />
output<br />
18
<strong>Toy</strong> <strong>Story</strong> <strong>Two</strong> <strong>Claw</strong> <strong>Crane</strong> <strong>Machine</strong>(<strong>ID</strong>:<strong>7308</strong>)<br />
OutCON2<br />
(#12~#21<br />
Output )<br />
PIN<br />
21<br />
0.3-Brown Output<br />
OUT<br />
#10<br />
PIN<br />
22<br />
-----<br />
PIN 1 0.3-Orange Output<br />
OUT<br />
#11<br />
PIN 2 0.5-Yellow -----<br />
PIN 3 0.3-Green Output<br />
OUT<br />
#12<br />
PIN 4 -----<br />
PIN 5 0.3-Blue Output<br />
OUT<br />
#13<br />
PIN 6 -----<br />
PIN 7 0.3-Purple Output<br />
OUT<br />
#14<br />
PIN 8 -----<br />
PIN 9 0.3-Gray Output<br />
OUT<br />
#15<br />
PIN<br />
10<br />
-----<br />
PIN<br />
0.3-Brown Output<br />
OUT<br />
11<br />
#16<br />
PIN<br />
12<br />
-----<br />
PIN<br />
13<br />
0.3-Orange Output<br />
OUT<br />
#17<br />
PIN<br />
14<br />
-----<br />
PIN<br />
0.3-Green Output<br />
OUT<br />
15<br />
#18<br />
PIN<br />
16<br />
-----<br />
PIN<br />
0.3-Blue<br />
Output<br />
OUT<br />
17<br />
#19<br />
PIN<br />
18<br />
-----<br />
#1 crane up control output<br />
#1 crane down control<br />
output<br />
#1 claw power control<br />
output 0<br />
#1 claw power control<br />
output 1<br />
#2 crane up control output<br />
#2 crane down control<br />
output<br />
#2 claw power control<br />
output 0<br />
#2 claw power control<br />
output 1<br />
19
<strong>Toy</strong> <strong>Story</strong> <strong>Two</strong> <strong>Claw</strong> <strong>Crane</strong> <strong>Machine</strong>(<strong>ID</strong>:<strong>7308</strong>)<br />
PIN<br />
19<br />
0.3-SkyBlue<br />
Output<br />
OUT<br />
#20<br />
Minor Prize Meter<br />
PIN<br />
20<br />
-----<br />
Crystal Vibrator 11.0592Mhzis used in the Main PCB.<br />
12.Error Codes<br />
Error<br />
Codes<br />
E1<br />
E2<br />
E3<br />
E4<br />
E5<br />
E7<br />
E8<br />
Problem<br />
Coins Get Stuck In The<br />
Coin Mechanism<br />
Major Prize Out Abnormal<br />
Chip U12 – Error<br />
Minor Prize Out Abnormal<br />
#1 <strong>Claw</strong> Up Abnormal<br />
#1 <strong>Claw</strong> does not return<br />
to the HOME positions<br />
#2 <strong>Claw</strong> Up Abnormal<br />
Solution<br />
1) Check if the coins are jammed.<br />
2) Check if the coin feedback switch is in “NC” mode.<br />
1) Check if the #1 prize out door is being blocked or not.<br />
2) Check if the receiver is dirty or not.<br />
3) Check if the checkout console is sensitive or not.<br />
1) Check whether Chip U 12 is properly inserted or not.<br />
2) Replace Chip U12.<br />
1) Check if the #2 prize out door is being blocked or not.<br />
2) Check if the receiver is dirty or not.<br />
3) Check if the checkout console is sensitive or not.<br />
Check whether the motors for the #1 <strong>Claw</strong> or the switch are<br />
working properly or not.<br />
Check if the motors of the #1 crane and the limiting switches are<br />
working properly or not.<br />
Check whether the motors for the #2 <strong>Claw</strong> or the switch are<br />
working properly or not.<br />
Note: it won’t be informed in case of any change of the performance of the machine, contents of the manual or<br />
the program!<br />
20