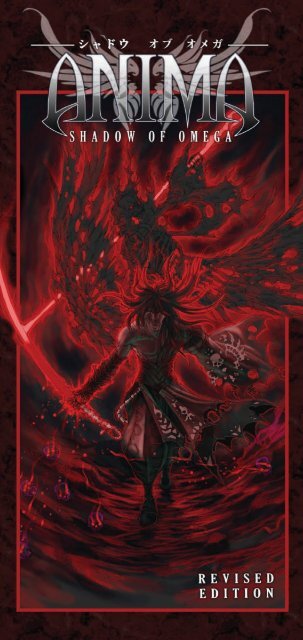
Anima: Shadow of Omega rules - Fantasy Flight Games
Anima: Shadow of Omega rules - Fantasy Flight Games
Anima: Shadow of Omega rules - Fantasy Flight Games

You also want an ePaper? Increase the reach of your titles
YUMPU automatically turns print PDFs into web optimized ePapers that Google loves.
This revised edition <strong>of</strong> <strong>Anima</strong>: <strong>Shadow</strong> <strong>of</strong> <strong>Omega</strong> has been<br />
overhauled to create a more enjoyable and dynamic game experience.<br />
Revisions include brighter art, enhanced graphics, more durable cards, and an updated rule<br />
book that incorporates errata. This edition also introduces the all-new Crisis! end-game<br />
design which creates exciting showdowns and dramatic finishes for every game.<br />
An i ma : Sh a d o w o f Om e g a is a game designed by Ca r lo s B. Ga r c ia<br />
Box art: Wen Yu Li<br />
Card illustrators: Salvador Espin · Raul Rossell<br />
· Luis NCT · S. Melero · Wen Yu Li<br />
Graphic design: Sergio Almagro · Carlos B. García<br />
Editor: José M. Rey<br />
Translators: Brant McFarland and James Torr<br />
<strong>Anima</strong>: <strong>Shadow</strong> <strong>of</strong> <strong>Omega</strong> © is a game edited by<br />
Edge Entertainment and <strong>Fantasy</strong> <strong>Flight</strong> <strong>Games</strong><br />
www.edgeent.com / www.animarpg.com / www.fantasyflightgames.com<br />
English edition and distribution: <strong>Fantasy</strong> <strong>Flight</strong> <strong>Games</strong><br />
English Producer: Sally Karkula · English Editor: Sam Stewart<br />
“Thanks to John Grams and Christian Petersen for their support”
GAIA AND OMEGA<br />
After being sealed, centuries ago, deep within the Tower at the End <strong>of</strong> the World<br />
by the Powers in the <strong>Shadow</strong>s, the ancient entity known only as <strong>Omega</strong> is about to<br />
break free. To do so, it is collecting souls with the Infinity Orb, an artifact capable <strong>of</strong><br />
altering the very <strong>rules</strong> <strong>of</strong> creation itself. Every time one <strong>of</strong> the chains that holds <strong>Omega</strong><br />
is broken, the natural order <strong>of</strong> Gaïa is disrupted and unexplainable catastrophes occur<br />
all over the world. The whole planet may eventually fall into chaos. However, a brave<br />
few have begun to make their way through the world, adventuring without any clear<br />
objective. Though unaware <strong>of</strong> their destiny, they are the only people who can stop<br />
<strong>Omega</strong>’s resurrection and the terrible destruction it will cause. It is up to you to gather<br />
a group <strong>of</strong> these adventurers, control their powers and abilities, and return the Infinity<br />
Orb to the nothingness from whence it came.<br />
OVERVIEW<br />
<strong>Anima</strong>: <strong>Shadow</strong>s <strong>of</strong> <strong>Omega</strong> is a non-collectible card game full <strong>of</strong> adventure, treachery,<br />
and fantasy designed for 2 to 5 players. A two player game will take roughly an hour,<br />
with larger games taking longer. All necessary components are included with the<br />
game; 110 illustrated cards, two six-sided dice, one ten-sided die, and five different<br />
colored counters.<br />
Game Objectives<br />
The objective <strong>of</strong> the game to complete a Basic Mission, and by doing so, gain access to<br />
the Final Mission. Each player draws two Basic Mission cards at the beginning <strong>of</strong> the game,<br />
and must complete at least one <strong>of</strong> them to attempt the Final Mission, which is the same<br />
for all players (see “Missions” on page 5). The Final Mission remains a secret to all players<br />
until a player completes at least one Basic Mission and chooses to reveal the Final Mission.<br />
All Parties must try to complete the Final Mission within the number <strong>of</strong> turns indicated in<br />
the Crisis! section <strong>of</strong> the card. If the adversary is not defeated within the specified number<br />
<strong>of</strong> turns, it will be unleashed. At this time, Parties who have not completed at least one<br />
Basic Mission are immediately destroyed and all remaining players will have just one chance<br />
to vanquish this adversary or be destroyed.<br />
If a player completes the Final Mission or defeats the ultimate adversary, he wins.<br />
Types <strong>of</strong> cards<br />
In <strong>Anima</strong>: Beyond Good and Evil there are five different types <strong>of</strong> cards: Characters,<br />
Areas, Encounters, Missions, and Advantages. The following is a breakdown <strong>of</strong><br />
each card type.<br />
3
Characters and Parties<br />
Each player controls a Party <strong>of</strong> Characters who move<br />
through the world and attempts to fulfill Missions. At the beginning<br />
<strong>of</strong> the game, each player controls one Character. However, there<br />
are several Areas where more Characters can be recruited (see<br />
“Areas” below). A group <strong>of</strong> one or more Characters controlled<br />
by a single player is known as a Party. Certain Event cards (like<br />
“Betrayal!”) may also add Characters to a Party. A Party can include<br />
a maximum <strong>of</strong> four Characters.<br />
In certain situations, due to Combat, Events, or the actions <strong>of</strong><br />
another player, a Character from a Party may die. When this happens, the Character<br />
card is placed in the Character discard pile. If a player loses all his Characters, he draws<br />
one from the Character deck and puts it in play, thereby creating a new Party.<br />
Each Character has a specific gender, as well as values for Combat Ability and Speed,<br />
which are used to determine the outcome <strong>of</strong> confrontations and the order <strong>of</strong> play. The<br />
Combat Ability and Speed values <strong>of</strong> a Party are calculated by adding the attributes <strong>of</strong> all<br />
Characters in the Party. For example, if a Party is has the Acrobatic Warrior (Combat<br />
Ability 4 and Speed 4) and the Warlock (Combat 3 and Speed 4), the Party’s values are<br />
Combat Ability 7 and Speed 8.<br />
Lastly, each Character’s abilities are listed at the bottom left <strong>of</strong> each card. There<br />
three icons: Magic, Ki, and Trickery. These icons determine which Advantage cards each<br />
Character may use. For example, a Character who is skilled only in Trickery may not be<br />
used to play a Magic card (see “Advantage” on page 5).<br />
· 1- Combat Value<br />
· 2- Speed Value<br />
· 3- Character Gender<br />
· 4- Skills<br />
· 5- Special Abilities<br />
Combat<br />
Speed<br />
Male<br />
Character<br />
Female<br />
Character<br />
1<br />
2<br />
3<br />
4<br />
5<br />
4<br />
· Spinning: Spinning a Character means turning that card 90 degrees<br />
horizontally. Some Characters have special Abilities that require the player to<br />
spin their card, and Characters are spun when an Ability Card is used. Spinning<br />
a Character indicates that the Character has already acted in a turn, and cannot<br />
use another power or Ability card until he is unspun. For example, if you spin the Witch<br />
at the beginning <strong>of</strong> the turn to cast a curse on another Character, the card remains spun<br />
until the next turn and cannot be used to play a Magic card. Whether a Character is<br />
spun or not does not affect whether that Character participates in confrontations, so the<br />
Character’s Combat and Speed are still added to the Party’s total.<br />
Area<br />
Area cards represent places in the world Characters can visit<br />
to obtain Advantages, recruit companions, or fulfill Mission<br />
objectives. Each Area card consists <strong>of</strong> two parts: the Exploration<br />
table, which is used when players explore the Area, and the<br />
Reward box, which indicates the reward for successfully exploring<br />
the Area. Certain Areas also have special <strong>rules</strong>, explained on the<br />
card. If the Area card bears the Trade symbol, it means players<br />
can trade while their Parties are in that Area (see “Trading” on<br />
page 9).<br />
Areas also have a level, indicating how dangerous they are. Levels are explained<br />
in greater detail in the Encounters section (page 6).
· 1- Trade<br />
· 2- Exploration Table<br />
· 3- Area Level<br />
· 4- Rewards<br />
· 5- Special Rules<br />
1<br />
2<br />
Trade<br />
Missions<br />
There are two different types <strong>of</strong> missions: Basic and Final. Each<br />
Basic Mission has an objective, and when a Party completes the<br />
objective, the Party’s player receives a reward indicated on the<br />
card. In addition, the player has an opportunity to attempt the<br />
Final Mission and win the game. However, a player does not have<br />
to attempt the Final Mission after finishing a Basic Mission. He may<br />
choose to complete his second Basic Mission (thereby gaining the<br />
advantages from this second mission) before moving on to the<br />
Final Mission.<br />
An uncompleted mission should be placed to the left <strong>of</strong> a player’s playing area faceup<br />
or facedown (depending on whether the mission is known to the other players or not.)<br />
Once it is completed, a mission is placed faceup on the right <strong>of</strong> the player’s play area to<br />
show that it has been completed.<br />
• Resistance Missions: Certain Missions require the Party to stay in a specific Area<br />
for several turns. In this situation, Characters do not need to Explore multiple times to<br />
remain in the Area (see “Exploration Phase” on page 9); they stay there automatically. The<br />
Mission takes place in the Exploration Phase, so other Parties can attack the Party during the<br />
Interaction Phase. If they are defeated, whether by enemies from the Mission or a rival player,<br />
the Party is expelled from the Area and must restart the Mission from the beginning.<br />
Advantage<br />
Advantage cards represent the capabilities a player has to<br />
achieve his objectives. There are two different types: Plot cards,<br />
used by the players to influence the game, and Ability cards, used<br />
in conjunction with a Characters to effect aspects <strong>of</strong> the game. A<br />
player can have a maximum <strong>of</strong> five Advantage cards in his hand.<br />
· Ability cards: Abilities represent a Character’s skills and<br />
talents. Each Character card grants the use <strong>of</strong> certain “powers”<br />
indicated on the card. There are three different types: Ki, Magic, and Trickery. A Character<br />
must be spun after using an Ability card and the icon on the Ability card must match an icon<br />
on that Character card.<br />
3<br />
5<br />
4<br />
Trickery Magic Ki<br />
· Plot cards: Plot cards are used without spinning a Character. Each one has different<br />
effects and duration. Unless specified otherwise, a Plot card’s effects are instantaneous,<br />
and do not remain in play.<br />
Plot<br />
5
· 1- Card Type<br />
· 2- Special Rules<br />
· 3- Phase<br />
· Organizations: Organizations are a special type <strong>of</strong> Plot card, representing a<br />
group or organization the Party can join. Players can play Organization cards to have<br />
their Party join that Organization, which confers new abilities - and imposes new<br />
requirements - on the Party. A Party can only belong to one Organization at a time. If<br />
a player wishes to switch Organizations, he must discard his current Organization card<br />
during the Reset phase, before playing a new Organization card.<br />
Certain Organizations are rivals, and their members are obliged to fight members <strong>of</strong> an<br />
opposing Organization. If two parties belonging to rival Organizations move into the same<br />
Area, they must declare Combat in the Interaction Phase (see page 9).<br />
Encounter<br />
When a Party visits an Area, they <strong>of</strong>ten encounter situations and<br />
problems - ranging from fighting creatures to suffering unfortunate<br />
accidents. These situations are referred to as Encounters.<br />
However, not all Encounter cards are negative - some even provide<br />
unexpected benefits. Encounters, like Areas, have a level indicating<br />
the difficulty <strong>of</strong> the Encounter. There are three different Levels 1,2,<br />
and 3. For an Encounter to take place, the Encounter’s level must<br />
be equal to or less than the Area where it occurs. This means, for<br />
example, that in The Village <strong>of</strong> Cornes (Level 1), a Party cannot run into the Dragon God<br />
(Level 3), but a Party can run up against a Dark Knight (Level 1).<br />
If the Encounter card is a higher level than the Area the Party occupies, the<br />
Encounter has no effect and goes directly to the Encounter discard pile.<br />
1<br />
2<br />
3<br />
· 1- Encounter Type<br />
· 2- Combat Ability<br />
· 3- Encounter Level<br />
· 4- Special Rules<br />
Event<br />
Creature<br />
1<br />
2<br />
4<br />
3<br />
· Creature: Creature Encounters are fought using Combat <strong>rules</strong> (see page 11).<br />
Each creature has its own Combat Ability and special capabilities. There are two types<br />
<strong>of</strong> Creatures - natural creatures, and supernatural (or Mystical) beings.<br />
6<br />
· Event: Events are problems and situations that effect a Party in a variety <strong>of</strong> ways.
· Preliminary Encounter: A Preliminary Encounter can be a Creature or<br />
an Event. Whenever a new Area is played, or one is pulled from the Discard Deck,<br />
an Encounter card is placed in front <strong>of</strong> the Area card. This Encounter is referred to as a<br />
Preliminary Encounter. If the Encounter is an Event, the Party entering the Area suffers<br />
its effects, then it is discarded. If the Encounter is a Creature, the Encounter remains in<br />
the Area until it has been defeated. Combats with Preliminary Encounters are resolved<br />
in the Movement phase.<br />
GAME TURN AND PHASES<br />
Each game turn consists <strong>of</strong> four different phases. The order <strong>of</strong> play amongst the players<br />
is determined by their Parties’ speeds. The Party with the highest speed goes first, then<br />
the Party with the next highest speed, and so on. If two Parties have the same speed, both<br />
roll a die. The Party with the higher result goes before the Party with the lower result.<br />
Each player has an opportunity to take actions during each phase. Once all players have<br />
performed their actions in a particular phase, the next phase starts. Once all players have<br />
acted in the Exploration phase, the turn ends and a new turn begins.<br />
The following is a summary <strong>of</strong> the phases:<br />
1. - Reset Phase<br />
• Straighten all spun cards and activate all incapacitated Characters.<br />
• Discard unwanted Characters from the Party.<br />
• Use any special ability or Advantage cards that must be used in this phase.<br />
2. - Movement Phase<br />
• Declare the Party’s movement:<br />
• Move to an Area already in play.<br />
• Seek new horizons (only one player per turn).<br />
• Rest.<br />
• Resolve any Preliminary Encounters.<br />
• After all movement is finished, reveal any Trap cards.<br />
3. - Interaction Phase<br />
• Trade with any other Party in any Area with a trade icon.<br />
• Declare Combat against any other Party in the same Area.<br />
4. - Exploration Phase<br />
• Explore any Area the Party is occupying.<br />
• If the Exploration is successful, request the reward.<br />
When are Advantage cards and special abilities used?<br />
Ability and Plot cards, as well as a Character’s special abilities, are normally used<br />
during specific phases, listed on the card. A player must wait until the correct phase<br />
to use them, unless they are an Interruption or Combat cards.<br />
• Interruption: These cards are used at any time to interrupt or modify an effect,<br />
result, or action. For example, the card Absorb Power allows a player to take the<br />
Advantage cards another player just used in a Combat. Naturally, Interruption cards can<br />
be used to react to other Interruption or Combat cards, even if the player is not part<br />
<strong>of</strong> the Combat.<br />
• Combat: Combat cards can be used by players when Combat begins. They must<br />
be used before either <strong>of</strong> the parties in the Combat have rolled dice, unless the card<br />
expressly states otherwise.<br />
7
SETUP AND PHASES<br />
Preparations<br />
First, the different types <strong>of</strong> cards are separated into piles and shuffled. Then, each<br />
pile is placed on the table according to the diagram below. Lastly, each player chooses<br />
a counter to represent his Party.<br />
Area<br />
Deck<br />
Encounter<br />
Deck<br />
Character<br />
Deck<br />
Advantage<br />
Deck<br />
Discard<br />
Area<br />
Deck<br />
Discard<br />
Encounter<br />
Deck<br />
Discard<br />
Character<br />
Deck<br />
Discard<br />
Advantage<br />
Deck<br />
Area Area Area<br />
Area<br />
Preliminary<br />
Encounter<br />
PLAYER<br />
Active<br />
Mission<br />
Character<br />
Spun<br />
Character<br />
Advantage<br />
card<br />
Completed<br />
Mission<br />
8<br />
Start <strong>of</strong> the game<br />
Each player draws two Mission cards, keeping them secret. These Mission cards are the<br />
objectives a player must meet to win the game. The rest <strong>of</strong> the Mission cards are placed<br />
aside without any player seeing what they are. Then, each player draws two Character and<br />
four Advantage cards. Of these, each player keeps one Character and three Advantages,<br />
discarding the rest. The discarded cards are shuffled with their respective piles.<br />
Then, a number <strong>of</strong> Area cards equal to the number <strong>of</strong> players are put into play, and a<br />
Preliminary Encounter is placed in front <strong>of</strong> each card facedown (see page 9).<br />
GAMEPLAY<br />
Each turn is made up <strong>of</strong> four phases; Reset, Movement, Interaction, and Exploration.<br />
The following section details the actions a player may take in each <strong>of</strong> these phases.<br />
Reset Phase<br />
At the beginning <strong>of</strong> the Reset phase, all players unspin their spun Characters and turn<br />
incapacitated Characters faceup. Then, beginning with the Party with the highest Speed,<br />
each player can perform any number <strong>of</strong> the following actions:<br />
· Discard and Expel: During this Phase, a player can discard any number <strong>of</strong><br />
Advantage cards or expel any Characters from his Party. This is the only way a player can<br />
voluntarily discard cards or Characters.<br />
The player with the least amount <strong>of</strong> Characters may automatically recruit any expelled<br />
Character, and the player with the least Advantage cards may pick up any one Advantage<br />
card discarded by the other Parties. If two or more players are tied for the fewest Character<br />
or Advantage cards, neither <strong>of</strong> them may take the discarded cards.<br />
If a player is holding the maximum number <strong>of</strong> Advantage cards (typically five), he<br />
can not draw additional cards. A player with four characters cannot recruit new
characters for his Party. Also, if a Party intends to leave an Area, the player must<br />
declare it during this phase.<br />
Movement Phase<br />
In this phase, each player declares where his party is going to go. Each player can<br />
choose to do one <strong>of</strong> the following:<br />
• Move to an Area in play: The Party moves to any Area on the table.<br />
If there is a Preliminary Encounter in front <strong>of</strong> the Area, the Party must overcome it to<br />
enter the Area. If the Party loses the Combat against the Creature or an Event causes a<br />
player to lose his turn, the player (and his party) cannot act for the rest <strong>of</strong> the turn and<br />
do not count as having entered the area. Otherwise, the player places his counter on the<br />
Area card to show his Party is in the Area.<br />
The maximum number <strong>of</strong> Areas on the table at any one time is equal to twice the<br />
number <strong>of</strong> players in the game (with 3 players, 6 Areas; 4 players, up to 8, etc).<br />
• Seek new horizons (only one player per turn): If a player chooses this option,<br />
he may perform one <strong>of</strong> two actions: draw a new card from the Areas deck and place it on<br />
the table, or select one Area from the discard pile and place it on the table. In either case,<br />
the player must draw an Encounter card and place it on top <strong>of</strong> the Area as a Preliminary<br />
Encounter. The player then moves his Party to this area, following the <strong>rules</strong> above. From<br />
this moment on, the Area is in play and any player can choose to visit it. Only one player<br />
per turn can seek new horizons, so it is only possible to play one new Area per turn.<br />
When a new Area is brought into play, if the total number <strong>of</strong> Area cards is greater than<br />
the allowed maximum (as explained in the last section), an Area is removed from play and<br />
placed in the Area discard pile. The player that put the new Area in play decides which Area<br />
is removed. Areas where there is a Party or an undefeated Primary Encounter present<br />
cannot be discarded. Another player may prevent a specific Area from being discarded by<br />
discarding one <strong>of</strong> his Advantage cards. If this happens, the player selecting an Area must<br />
choose a different Area to discard. If it is impossible to select an Area without violating one<br />
<strong>of</strong> the above conditions, the new Area is added without any other Areas being discarded.<br />
This is the only exception to the <strong>rules</strong> governing the maximum Area limit.<br />
· Rest: A Party may chose to rest rather than visit an Area or seek new horizons.<br />
To rest, the Party does nothing during the Movement Phase. If the Party is in an Area, it<br />
is expelled from that Area. Then, during the next turn, the Party receives +2 Combat<br />
Ability and +2 Speed.<br />
Interaction Phase<br />
During this phase, each Party may (but does not have to) select one <strong>of</strong> the following<br />
actions:<br />
· Trade: If two parties are in Areas with the Trade icon, they can freely trade Advantage<br />
or Character cards. There are no limits as to how many cards can be traded, except that<br />
both players must agree on the trade before enacting it.<br />
· Declare Combat: A Party can initiate Combat against any other Party located in<br />
the same Area, provided neither Party outnumbers the other Party by more than one<br />
Character. When Parties belonging to opposing Organizations are in the same Area, they<br />
must fight (unless one Party outnumbers the other by more than one Character). The<br />
loser <strong>of</strong> a Combat must allow the winner to take a random Advantage card from his hand<br />
and he is expelled from the Area. His Party can’t take any actions in the rest <strong>of</strong> the turn.<br />
Exploration Phase<br />
During this Phase, Parties who have successfully reached an Area and have not been<br />
expelled may explore the Area:<br />
• Explore: When a player declares he’s going to Explore the Area, he rolls a<br />
die and checks the result on the Exploration Table (found on the left side <strong>of</strong> the<br />
9
10<br />
Area card). The results may be different depending on the number rolled:<br />
-None: There is no Encounter, and the Player may claim the reward for<br />
exploring.<br />
-Encounter: The player draws the indicated number <strong>of</strong> cards from the<br />
Encounters deck. The player’s Party must then encounter each card in the order in<br />
which they are drawn. If the Party is defeated by a Creature, or an Event makes the<br />
player lose his turn or kills one <strong>of</strong> his Characters, he is expelled from the Area and<br />
cannot claim the Reward. Any Creatures drawn during the Exploration Phase are<br />
discarded after the Phase is over, whether or not they are defeated.<br />
Remember that an Encounter cannot be a higher level than the Area it is in. For<br />
example, if a Party visits Archangel (Level 1) and draws the <strong>Shadow</strong> <strong>of</strong> <strong>Omega</strong><br />
(Level 3) Encounter card, it is discarded. If an encounter is discarded because it is<br />
too high a level, the Party counts as successfully exploring the Area.<br />
-Special: Many different special effects can occur when exploring an Area.<br />
Unless these effects expel the Party from an Area, or force the player to lose a<br />
turn, the Party may continue exploring the Area.<br />
· Reward: Once a Party has successfully Explored an Area, the Party’s player can claim<br />
one reward. A Party can successfully explore an area multiple times, claiming a reward each<br />
time. Rewards are listed on the Area card and will be from among the following:<br />
-Advantage: Draw a number <strong>of</strong> Advantage cards equal to the Level <strong>of</strong> the Area.<br />
A player may not draw Advantage cards that would exceed his hand limit - so if he<br />
had four Advantage cards in hand, he could only draw one card regardless <strong>of</strong> the<br />
Area Level.<br />
-Recruit: The player draws a Character from the pile and adds it to his Party.<br />
If the Party already has four Characters, the player may not draw more.. A player<br />
cannot recruit in the same Area on consecutive turns.<br />
-Mission Objectives: Often, the reward for successfully exploring an Area is<br />
completing a mission objective. For example, the “The Palace” mission objective is<br />
located in Archangel. A player must chose between completing a mission<br />
objective or selecting another reward. The word “Mission” always<br />
appears next to this option.<br />
-Special: Some Areas, like “Americh” have special rewards that<br />
provide unique benefits. These effects are described on the card. The<br />
word (EX) always appears next to these rewards.<br />
End <strong>of</strong> Game<br />
The Final Mission remains secret to all players until at<br />
least one player has completed one <strong>of</strong> his Basic Missions. At<br />
the beginning <strong>of</strong> a Round, any player who has completed<br />
at least one Basic Mission can chose to reveal the Final<br />
Mission by drawing one Final Mission card from the Final<br />
Mission deck and turning it faceup. If two players decide<br />
to reveal the Final Mission simultaneously, the player<br />
with the higher speed does so first. There may be only<br />
one Final Mission in play. However, any player who has<br />
completed one Basic Mission may attempt the Final<br />
Mission.<br />
The Final Mission has a time limit, indicated<br />
by the Crisis! section on the card. The<br />
number in the heading <strong>of</strong> the Crisis!<br />
section shows how many turns the<br />
players have to complete the Quest<br />
section <strong>of</strong> the card.<br />
When the Final Mission is revealed, place<br />
the 10-sided die on the card. The number on<br />
the die face should match the time limit. At the<br />
end <strong>of</strong> each Exploration Phase, lower the die<br />
number by one. If a player completes the Final<br />
Mission’s objectives before the die reaches zero,
he wins the game. If no player completes the objectives within the time limit,<br />
the Crisis is unleashed.<br />
When a Crisis is unleashed, normal gameplay ends. All players who have not<br />
finished at least one Basic Mission lose the game automatically. If this leaves one player,<br />
he wins the game. If this leaves more than one player, they must immediately confront<br />
the menace described in the Crisis! section <strong>of</strong> the Final Mission card, no matter the<br />
status <strong>of</strong> their Party or what Area they are in.<br />
Each player has one chance to overcome the challenge listed in the Crisis! section.<br />
The players take their chance in turn, starting with the player who’s Party has the<br />
highest Speed. The first Party to overcome the challenge wins the game. If all the<br />
Parties fail to overcome the challenge, no one wins the game: <strong>Omega</strong> has broken free,<br />
destroying the world in the process. Players may not use Advantage cards to interrupt<br />
other players during a Crisis.<br />
COMBAT AND OTHER RULES<br />
This section further explores Combat, Speed, discards, and incapacitated Characters.<br />
Combat<br />
Parties <strong>of</strong>ten find themselves fighting against Creatures or other Parties. When fighting<br />
a Combat, each side calculates its Combat Ability and rolls a six-sided die, adding the die<br />
result to Combat Ability. The side with the higher total wins.<br />
If the results are a tie in Combat against a Creature, the Party wins. If there is a tie<br />
between two Parties, it remains a tie and neither side receives benefits or suffers drawbacks<br />
(they cannot face each other again in the same turn). If a Party ever looses a Combat by<br />
5 or more points, one Character from the Party (chosen by the player) dies, and must be<br />
discarded.<br />
If a Mission requires a Party to fight a opponent, the Party fights as if they were fighting a<br />
Creature. The opponent’s Combat Ability is equal to the Mission’s level, unless the Mission<br />
provides a specific value.<br />
Speed Check<br />
Some Missions and Events require a Speed Check. Calculate the Party’s total Speed and<br />
roll a die: if the combined total is equal to or greater than the difficulty listed on the Mission<br />
card the check is successful.<br />
Discards<br />
Whenever a card is discarded from play for any reason, it is placed in its respective discard<br />
pile. When one <strong>of</strong> the decks is used up, take its discard pile, shuffle it well, and put it into<br />
play as the draw deck.<br />
The only exception to this rule is the Areas deck. If all cards have been played, the<br />
discard pile is not shuffled: players who seek new horizons can choose any Area from the<br />
discard pile.<br />
Incapacitated characters<br />
Some cards incapacitate a Character during a turn. When this happens, the Character<br />
card is turned facedown. An incapacitated Character cannot act during the turn, and its<br />
Combat Ability is not added to the Party total. However, the Character counts toward the<br />
total number <strong>of</strong> Party members. During the Reset phase, incapacitated Characters are put<br />
in action again and turned faceup.<br />
Losing your turn<br />
When a player loses his turn (whether from being defeated in Combat or because <strong>of</strong> an<br />
event) he may not take any actions for the remainder <strong>of</strong> the turn. If his Party is in an Area,<br />
it is expelled from the Area.<br />
Speed changes<br />
If a Party’s Speed is modified during the Reset phase the order <strong>of</strong> play remains the<br />
same until the following turn.<br />
11
12<br />
OPTIONAL RULES<br />
The following are optional <strong>rules</strong> players can add to their games to make them more<br />
interesting or challenging:<br />
• Tree Structure for Areas: Place all <strong>of</strong> the Area cards in a tree or pyramid shape<br />
on the table, ordered by level (Level 1 Areas at the bottom and Level 3 Areas at the top).<br />
A Party outside the tree may only enter Level 1 Areas. Once a Party is in an Area, it may<br />
move to any other Area <strong>of</strong> the same level, or an Area that has a value <strong>of</strong> one greater or<br />
lesser than the Area it currently occupies. Each time a player moves up or down a level,<br />
they must draw a Preliminary Encounter card and encounter it. If the Party is defeated, it<br />
is expelled from the Area tree. At the beginning <strong>of</strong> the next turn, the Party must begin at<br />
a Level 1 Area. When the tree structure rule is in play, the card “Zeppelin Voyage” allows<br />
a Party to move to any Area, regardless <strong>of</strong> its level.<br />
· Multiple Missions: A player must complete both <strong>of</strong> his Basic Missions before<br />
attempting the Final Mission. This creates a longer game.<br />
EXAMPLE OF PLAY<br />
The following is an example <strong>of</strong> one turn <strong>of</strong> play in a three player game:<br />
· Player 1’s party consists <strong>of</strong> the Acrobat and the Illusionist (Combat 6, Speed 8).<br />
· Player 2’s party consists only <strong>of</strong> the Freelance (Combat 3, Speed 2).<br />
· Player 3’s party consists <strong>of</strong> the Thief and the Technician (Combat 4, Speed 7).<br />
Based on their Parties’ Speeds, Player 1 goes first, then Player 3. Player 2 goes last.<br />
Reset Phase<br />
First, all thee players unspin their spun characters. Then, Player 1 acts. He decides<br />
to put his “Organization: Black Sun” Advantage card into play, and do nothing else.<br />
Player 3 decides to use his Thief’s special ability to rob Player 1. Player 3 then spins<br />
his Character, rolls a die, and gets a 3; his attempt fails. Player 3 then discards an<br />
Advantage card he doesn’t want. Since Player 1 and Player 2 have the same number<br />
<strong>of</strong> cards in their hands, neither can pick up the discard. Because Player 3 can’t do<br />
anything else, his turn is over. Lastly, it’s Player 2’s turn, but he has nothing he wants<br />
to do. The Reset phase ends.<br />
Movement Phase<br />
Player 1 begins the Movement phase by declaring that his Party will go to Archangel,<br />
one <strong>of</strong> the Active Areas in play. There is no Preliminary Encounter, so he places his<br />
counter on the card and his Movement phase ends. Player 3 is next, and he decides to<br />
seek new horizons. He draws an Area card, The Lost Ruins (Level 2). He then draws<br />
the Preliminary Encounter “<strong>Shadow</strong> <strong>of</strong> <strong>Omega</strong>” (Level 3). This Encounter is higher<br />
than the Area’s level, so it is discarded. Player 3 places his counter on The Lost Ruins<br />
and has finished. Finally, Player 2 moves. He also goes to Archangel, so he places his<br />
counter there. The Movement phase ends.<br />
Interaction Phase<br />
Again, Player 1 goes first. He declares that he wants to trade with Player 2. Player 2<br />
accepts, and they freely exchange cards. Player 3 can neither attack nor trade with the<br />
other players. Player 2 already traded with Player 1, and he cannot fight because he<br />
is in Archangel; an Area where fighting is between Parties prohibited. The Interaction<br />
phase ends.<br />
Exploration Phase<br />
Player 1 declares he will explore Archangel, so he rolls a die and gets a 5. He checks<br />
the Archangel card and finds he must draw one Encounter. He takes the first card from<br />
the corresponding pile, and must face the Old Warrior. Player 1 rolls a 3 and adds his<br />
Combat level for a total <strong>of</strong> 9. Another player then rolls the die for the Old Warrior<br />
(Combat 2) and gets a 4, for a total <strong>of</strong> 6. Because this total is 3 points below Player<br />
1’s attack, the Creature has lost the combat. Player 1 then chooses his reward. He<br />
decides to recruit a Character and draws the top card on the Character deck,
which is the Weaponmaster. Now Player 3, who is in The Lost Ruins, takes his<br />
turn. He declares he’s going to Explore, so he rolls a die, and gets a 6. He must<br />
draw two Encounter cards. The first is the Dragon God, which is a level 3 Creature<br />
and is discarded (The Lost Ruins is a Level 2 Area). The second card is Treasure, allowing<br />
him draw two Advantage cards. Finally, he can choose his Reward. Because one <strong>of</strong> his<br />
missions is “Defeat Tiamat,” he chooses the Pit <strong>of</strong> Hell. Unfortunately, although he uses<br />
several Advantage cards to improve his Combat level, he still rolls lower than the player<br />
rolling for the Mission and loses the fight. Then, Player 2 explores in Archangel. He rolls<br />
a 2 and avoids any Encounters. He chooses to Recruit and draws the Warlock, who joins<br />
then his party.<br />
Now that all three players have finished the their actions, the turn is over and the next<br />
one will begin.<br />
GAME PHASES<br />
1. - Reset Phase<br />
• Straighten all spun cards and activate all incapacitated Characters.<br />
• Discard or expel unwanted cards from the Party<br />
• Use any special ability or Advantage card that must be used in this phase.<br />
2. - Movement Phase<br />
• Declare the Party’s movement:<br />
• Move to an Area already in play.<br />
• Seek new horizons (only one player per turn).<br />
• Rest.<br />
• Resolve any Preliminary Encounters.<br />
• After all movement is finished, reveal any Trap cards.<br />
3. - Interaction Phase<br />
• Trade with any other Character in any Area with a trade icon.<br />
• Declare Combat against any other Party in the same Area.<br />
4. - Exploration Phase<br />
• Explore any Area the Party is occupying.<br />
• If the Exploration is successful, receive the reward.<br />
ICONS<br />
Combat<br />
Male<br />
Character<br />
Speed<br />
Female<br />
Character<br />
Trickery<br />
Ki<br />
Magic<br />
Plot<br />
Creature<br />
Event<br />
Trade<br />
Spin<br />
13
16<br />
The <strong>Shadow</strong> <strong>of</strong> <strong>Omega</strong>