Trim Adjustments - Hewescraft
Trim Adjustments - Hewescraft
Trim Adjustments - Hewescraft

You also want an ePaper? Increase the reach of your titles
YUMPU automatically turns print PDFs into web optimized ePapers that Google loves.
Hewes Marine Company 09/12/07<br />
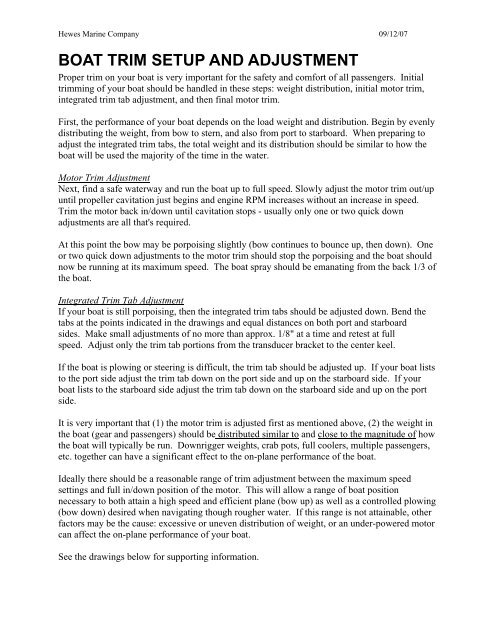
BOAT TRIM SETUP AND ADJUSTMENT<br />
Proper trim on your boat is very important for the safety and comfort of all passengers. Initial<br />
trimming of your boat should be handled in these steps: weight distribution, initial motor trim,<br />
integrated trim tab adjustment, and then final motor trim.<br />
First, the performance of your boat depends on the load weight and distribution. Begin by evenly<br />
distributing the weight, from bow to stern, and also from port to starboard. When preparing to<br />
adjust the integrated trim tabs, the total weight and its distribution should be similar to how the<br />
boat will be used the majority of the time in the water.<br />
Motor <strong>Trim</strong> Adjustment<br />
Next, find a safe waterway and run the boat up to full speed. Slowly adjust the motor trim out/up<br />
until propeller cavitation just begins and engine RPM increases without an increase in speed.<br />
<strong>Trim</strong> the motor back in/down until cavitation stops - usually only one or two quick down<br />
adjustments are all that's required.<br />
At this point the bow may be porpoising slightly (bow continues to bounce up, then down). One<br />
or two quick down adjustments to the motor trim should stop the porpoising and the boat should<br />
now be running at its maximum speed. The boat spray should be emanating from the back 1/3 of<br />
the boat.<br />
Integrated <strong>Trim</strong> Tab Adjustment<br />
If your boat is still porpoising, then the integrated trim tabs should be adjusted down. Bend the<br />
tabs at the points indicated in the drawings and equal distances on both port and starboard<br />
sides. Make small adjustments of no more than approx. 1/8" at a time and retest at full<br />
speed. Adjust only the trim tab portions from the transducer bracket to the center keel.<br />
If the boat is plowing or steering is difficult, the trim tab should be adjusted up. If your boat lists<br />
to the port side adjust the trim tab down on the port side and up on the starboard side. If your<br />
boat lists to the starboard side adjust the trim tab down on the starboard side and up on the port<br />
side.<br />
It is very important that (1) the motor trim is adjusted first as mentioned above, (2) the weight in<br />
the boat (gear and passengers) should be distributed similar to and close to the magnitude of how<br />
the boat will typically be run. Downrigger weights, crab pots, full coolers, multiple passengers,<br />
etc. together can have a significant effect to the on-plane performance of the boat.<br />
Ideally there should be a reasonable range of trim adjustment between the maximum speed<br />
settings and full in/down position of the motor. This will allow a range of boat position<br />
necessary to both attain a high speed and efficient plane (bow up) as well as a controlled plowing<br />
(bow down) desired when navigating though rougher water. If this range is not attainable, other<br />
factors may be the cause: excessive or uneven distribution of weight, or an under-powered motor<br />
can affect the on-plane performance of your boat.<br />
See the drawings below for supporting information.
Hewes Marine Company 09/12/07<br />
If your motor is equipped with an outboard jet the tabs inside (see drawing # JET103AA) the jet<br />
nozzle can be bent to correct for steering pull. Bend the tab in the same direction that the boat is<br />
pulling. To verify that your outboard jet is at the correct height refer to drawing # JET-TRIM.<br />
If you have an outboard prop the motor trim can also be adjusted for steering pull. Consult with<br />
your dealer and/or motor owner’s manual.<br />
CAUTION<br />
Before making adjustments to the trim tab, straighten tab to be<br />
flush with the bottom and then run the boat. Make the<br />
appropriate adjustments in increments of 1/8” or less. A small<br />
amount of adjustment yields large results.<br />
STANDARD TRIM TAB DRAWING<br />
(TAB101AA)
Hewes Marine Company 09/12/07<br />
OUTBOARD JET TRIM TAB DRAWING<br />
.<br />
OUTBOARD JET HEIGHT DRAWING