Combination Ovens Instructions - Heritage Food Service Equipment ...
Combination Ovens Instructions - Heritage Food Service Equipment ...
Combination Ovens Instructions - Heritage Food Service Equipment ...

Create successful ePaper yourself
Turn your PDF publications into a flip-book with our unique Google optimized e-Paper software.
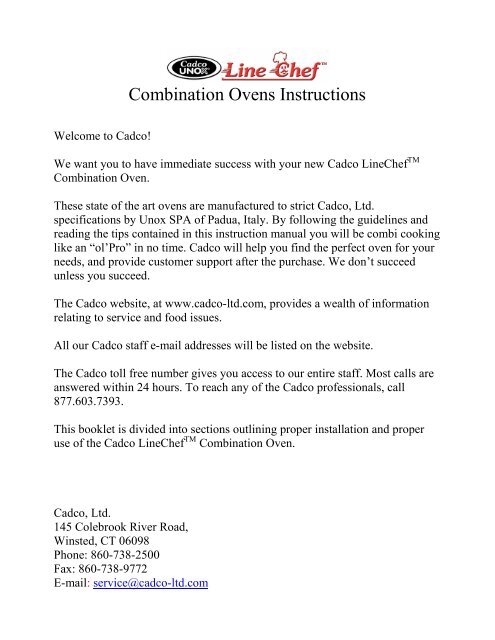
<strong>Combination</strong> <strong>Ovens</strong> <strong>Instructions</strong><br />
Welcome to Cadco!<br />
We want you to have immediate success with your new Cadco LineChef TM<br />
<strong>Combination</strong> Oven.<br />
These state of the art ovens are manufactured to strict Cadco, Ltd.<br />
specifications by Unox SPA of Padua, Italy. By following the guidelines and<br />
reading the tips contained in this instruction manual you will be combi cooking<br />
like an “ol’Pro” in no time. Cadco will help you find the perfect oven for your<br />
needs, and provide customer support after the purchase. We don’t succeed<br />
unless you succeed.<br />
The Cadco website, at www.cadco-ltd.com, provides a wealth of information<br />
relating to service and food issues.<br />
All our Cadco staff e-mail addresses will be listed on the website.<br />
The Cadco toll free number gives you access to our entire staff. Most calls are<br />
answered within 24 hours. To reach any of the Cadco professionals, call<br />
877.603.7393.<br />
This booklet is divided into sections outlining proper installation and proper<br />
use of the Cadco LineChef TM <strong>Combination</strong> Oven.<br />
Cadco, Ltd.<br />
145 Colebrook River Road,<br />
Winsted, CT 06098<br />
Phone: 860-738-2500<br />
Fax: 860-738-9772<br />
E-mail: service@cadco-ltd.com
Installation of the Cadco LineChef TM <strong>Combination</strong> Oven.<br />
• Installation should only be performed by certified professionals, following all local codes.<br />
Improper installation could result in injury or void the warranty.<br />
Data Plate:<br />
• The data plate is positioned on the right side panel.<br />
• The technical characteristics are identified in the enclosed “technical data” page.<br />
2. CERTIFICATIONS<br />
CSA C-US BRAND<br />
SERIE XAB - XAV<br />
Certificate of Compliance<br />
N.202281-1008284<br />
Applicable Requirements:<br />
CAN/CSA-C22.2 No. 100-1995 - Motors and Generators.<br />
CSA Std C22.2 No. 109-M1981 – Commercial Cooking Appliances.<br />
UL Std No. 197 - Commercial Electric Cooking Appliances.<br />
UL Std No. 1004 - Electric Motors<br />
The “C” and “US” indicator adjacent to the CSA Mark signifies that the product has been evaluated to<br />
the applicable ANSI/UL and CSA Standards, for use in the U.S. and Canada. This includes products<br />
eligible to bear the NRTL indicator. NRTL, i.e. Nationally Recognized Testing Laboratory, is a<br />
designation granted by the U.S. Occupational Safety<br />
and Health Administration (OSHA) to laboratories which have been recognized to perform certification<br />
to U.S. Standards.<br />
NSF BRAND<br />
SERIE XAB - XAV<br />
Certificate N. 79610/79610B<br />
N. 79610/79611/B<br />
NSF International recognizes UNOX SPA products as complying with ANSI/NSF 04. Standard 004 -<br />
Commercial Cooking, Rethermalization and Powered Hot <strong>Food</strong>.<br />
2
3.1 Check the installation location<br />
Before placing the appliance, please verify the overall measurements and the exact position of the<br />
electrical connections looking at the pictures on the attached file "TECHNICAL DATA".<br />
3.2 Feet assembly<br />
CAPO 203 (XAV 203)- CAPO 303( XAV 303) –CAPO 403 (XAV 403)<br />
You find the metal feet inside the appliance, in the carton box. They must absolutely be assembled in the<br />
oven.<br />
Do not ever use the appliance without its feet.<br />
Screw the support feet with the relative washer in the bottom of the appliance<br />
CAPO 603 (XAV 603)<br />
The CAPO 603 must be installed with the rack provided. The plastic feet that you find inside the oven<br />
must be installed . These feet are “insertion elements” for the racks.<br />
3.3 Positioning<br />
Make sure you have the correct power supply for the oven model you have purchased. Check the<br />
technical data sheets attached if you are in doubt.<br />
Do not install any Cadco <strong>Combination</strong> Oven directly on the floor.<br />
If the oven must be placed near walls, dividers, or moldings Cadco recommends they be made of noncombustible<br />
materials. Be sure to observe all safety and fire codes when positioning your Combi Steam<br />
Convection oven.<br />
All of our Combi Steam Convection ovens have a vapor vent in the back of the unit. When installing your<br />
convection oven, leave a space of 4” [minimum] between the back of the oven and the wall, and 2”<br />
minimum on the top and sides.<br />
Where applicable, ventilation hood requirements vary according to local codes.<br />
We do not suggest using the Cadco-Unox Combi Steam Convection <strong>Ovens</strong> for built in applications.<br />
Measure to make sure that your new oven will fit in your available space.<br />
3.4 Remove the protective film<br />
Carefully remove all the protective film from the external walls of the appliance. Pay attention not to<br />
leave any residue of glue on the sides.<br />
If there should be any residue, remove it with an appropriate solvent.<br />
4. INSTALLATION<br />
4.1 – ELECTRICAL CONNECTION<br />
4.2 – WATER CONNECTION<br />
4.1 Electrical connection<br />
a-The connection to the electrical power supply system must be done according to all governing codes.<br />
Before connecting the appliance, make sure that the voltage and the frequency correspond to those stated<br />
on the data plate of the appliance. The appliance must be placed so that the connection plug to the<br />
network can be easily reached.<br />
3
Place an omni-polar switch between the appliance and the network so that it is easily accessible. The<br />
contacts of this switch must have a minimum opening distance of 3 mm and the switch must have an<br />
appropriate input (for example, magneto-thermal switch).<br />
When the appliance is working the power supply voltage must not diverge from the value of the nominal<br />
voltage, written on the technical data plate, by more than ± 10%.<br />
b- The appliance must be connected to the ground line of the network.<br />
Power supply cable connection<br />
The appliance is provided with approved cable and plug.<br />
All the electrical connections and installations and all the electrical modifies must be done by qualified<br />
personnel according to actual laws.<br />
4.2 Water connection<br />
Connection to the water system<br />
This equipment is to be installed to comply with the applicable federal, state or local plumbing codes.<br />
It is necessary to place a mechanical filter between the water system and the water connection of the<br />
oven.<br />
Before connecting the water pipe to the oven, please let a certain quantity of water flow to clean the duct<br />
from any eventual remainder.<br />
The water used in the oven must have a nominal pressure of 2 bars.<br />
The water must have a hardness included between 0.5° and 5°F ( this in order to avoid formation of<br />
limestone deposits inside the electric valve and inside the cooking chamber).<br />
We suggest you to us a decalcification appliance in order to avoid fan balancing. You can find this part<br />
by the supplier facilities.<br />
Condensation water drain:<br />
The drain of the steam condensation water is placed on the back of the oven and must be connected to an<br />
open drain with a rigid or a flexible pipe. The diameter of the pipe cannot be smaller to the diameter of<br />
the drain connection. The length of the pipe cannot be longer than one meter.<br />
Please avoid narrow passages and elbows for metal ducts on flexible ducts along the whole run of the<br />
drain pipe.<br />
The drain pipe must remain at least 20 cm below the drain connection so that the down-flow of liquids is<br />
much easier.<br />
END OF MAINTENANCE PORTION OF THE BOOKLET.<br />
4
We are going to assume that you have followed all of your local codes and your new Cadco All-Purpose<br />
Oven is installed according to the procedures outlined in the installation section of this manual. Since you<br />
are all hooked up and ready to go, let’s talk about your new oven, and how it works.<br />
Remember! This manual contains important information relating to your Cadco <strong>Combination</strong> Oven!<br />
KEEP IT IN A SAFE PLACE!<br />
You have a one year parts and labor warranty on your new oven, keep it valid. Your Cadco <strong>Combination</strong><br />
Oven was designed to prepare food, don’t abuse it by using it for any other purpose.<br />
General Maintenance;<br />
• All maintenance operations must be done by qualified personnel.<br />
• Before starting any maintenance operation, disconnect the oven from the electrical power supply<br />
and wait for it to cool down.<br />
• The parts that need ordinary maintenance can be reached by removing the front control panel and<br />
the back of the oven.<br />
Replacing the oven light;<br />
• Disconnect the appliance from the power supply system and let it cool down.<br />
• Remove the lateral rack supports.<br />
• Unscrew the glass cover and replace the lamp with an identical bulb.<br />
• Screw the glass cover back in.<br />
• Replace the lateral rack supports.<br />
Replacing a fuse;<br />
If the control panel is not functioning but there is still power to the oven you may need a new fuse.<br />
To replace the fuse;<br />
• lightly press on the cover of the fuse holder and rotate it about 20° counter clockwise.<br />
• remove the cover of the fuse holder.<br />
• remove the fuse from the cover of the fuse holder.<br />
• replace the fuse with the one of the same size.<br />
• replace the cover of the fuse holder.<br />
• lightly press the cover and rotate it about 20° clockwise.<br />
2.3 Recovery of the safety thermostat<br />
The appliance is supplied with a safety thermostat with manual recovery. This safety thermostat is needed<br />
to protect the appliance from overheating. In case it is needed, it turns the appliance off.<br />
This safety thermostat can be reached removing the black cap you find on the bottom part of the back of<br />
the oven: in case you need to recover it, push the key you have on the center of the thermostat so that it<br />
starts working again.<br />
Cadco <strong>Combination</strong> <strong>Ovens</strong> have some features that are common to all models.<br />
Cadco All-Purpose Oven Features<br />
• A tone will indicate the end of the cooking cycle.<br />
• A light in the cooking cavity to easily monitor the food as it cooks.<br />
• Cool glass doors to minimize danger in the work place.<br />
• Easy clean glass doors reduce clean-up time.<br />
• Compact footprint to save valuable space in the kitchen.<br />
• Electronic probe for precise product cooking, insures safe temperatures.<br />
• Memory for up to 70 preset programs.<br />
• Automatically reversing fans for even cooking.<br />
• No boiler for simple maintenance.<br />
• Full one year warranty on parts and labor<br />
5
• 220v single phase power supply.<br />
• Thermostat accurate +-5f.<br />
• Temperatures up to 500°F.<br />
Your “CAPO” Oven can be used to:<br />
• bake all types of bread and pastry, both fresh and frozen.<br />
• Proof bakery products.<br />
• oven grill steaks.<br />
• cook meats, fresh or frozen.<br />
• retherm frozen entrees.<br />
• regeneration of refrigerated meals for banquet service.<br />
• steam meat, fish and all types of vegetables.<br />
• cook foods in multi step operations.<br />
• cook foods overnight, taking advantage of off peak power.<br />
Your operation has unique needs and methods of food preparation. Explore the different possibilities for<br />
food preparation with your new CAPO oven. Let us know the unique ways you are using your Cadco All-<br />
Purpose Oven to prepare better food, at a lower cost, with less effort. You could even have your operation<br />
featured on the Cadco website!<br />
Cooking principles<br />
Accurate times and temperatures assure perfectly cooked foods. Cooking is an art not a science, and<br />
therefore, very subjective. People will never agree on the meaning of “done”, or “perfectly cooked”.<br />
Here are some tips that will help ensure success with your combi oven cooking.<br />
• The temperature of the food going into the oven will affect the cooking time. Frozen foods take<br />
longer to cook than refrigerated foods.<br />
• Three trays of chicken will take longer to cook than three pieces of chicken.<br />
• To convert your conventional oven recipes to combi oven production simply reduce the cooking<br />
temperature by 25°F-30°F.<br />
• Most recipes can be converted by having shorter cooking times and/or reducing your cooking<br />
temperatures.<br />
• We suggest that you use an instant read probe or the oven probe to help you determine the actual<br />
internal temperature of your foods. This will help you safely determine correct cooking times and<br />
temperatures.<br />
• Preheat before you put product in the oven.<br />
• The oven operates between room temperature and 500°F.<br />
Proper air circulation is necessary for successful food preparation in all ovens. We suggest you allow a<br />
proper clearance of 1-3 inches between pans when cooking for best results.<br />
Never salt foods while they are in the oven. Salt can damage the interior surfaces of your oven and affect<br />
the efficiency of the electrical components.<br />
First use of the oven<br />
• Before cooking food product in the oven: wipe down the inside cooking cavity with hot water and<br />
soap. Never clean the cooking cavity with acids or corrosive chemicals.<br />
• Run the oven through a 20 minute steam cycle [212°F] to break in all of the new components.<br />
• The Cadco <strong>Combination</strong> Oven is now ready to begin cooking.<br />
6
3. CONTROL PANEL<br />
Time Display<br />
Window<br />
•<br />
Select Cycle •<br />
% Venturi [Dry] •<br />
• Time Select<br />
Dial<br />
•% Humidity<br />
Pause Fan •<br />
•Climate Dial<br />
•Oven Temp Set<br />
•Probe Target Set<br />
• Probe Plus Set<br />
Temp set •<br />
Light on •<br />
Add a Minute •<br />
•Temperature Set<br />
Dial<br />
• Manual Start<br />
Stop<br />
Program Number•<br />
Program Start •<br />
Prog. Memory •<br />
•Select Program<br />
Dial<br />
•Activate Controls<br />
7
TIME SECTION<br />
Cooking time control.<br />
• The time is displayed in hours and minutes. You can program it, in up to four cycles by pressing<br />
the touch pad and turning the “Time Dial” at the top.<br />
• The oven starts by pressing the “Start/Stop” touch pad and stops if when you press the touch pad<br />
again.<br />
• The digital control allows you to regulate cooking time up to a maximum of 9 hours and 59<br />
minutes for each cycle by turning the knob.<br />
• You can set all the values, such as temperature, steam, etc., for each cycle.<br />
• To switch from one cycle to another, you have to press the touch pad on the left side of the time<br />
knob.<br />
• The time you see displayed is the total of the cooking time set in each of the four cycles ( when<br />
the probe is being used the display will read “Prb” ).<br />
• The time you see displayed will be the time left until the product is done cooking.<br />
• At the end of the cooking process you’ll hear a continuous tone, and the “Time” window will<br />
blink.<br />
• Press the “Manual start/stop” touch pad to stop the tone and reset the oven.<br />
• If you read "000" on the time display and you turn the knob counter clockwise one click, the<br />
display will read “InF”. This sets the oven for infinite time.<br />
• In the 4 th or final cycle, you can program a “Hold” cycle by turning the “Time” dial from “000”<br />
counter clockwise one click, to indicate “Hld” in the “Time” window. The oven will now “Hold”<br />
at your chosen temperature until you change the setting.<br />
Climate Control;<br />
• This allows you to set the % of steam or the % of drying inside the cooking chamber.<br />
• Turning the knob clockwise you will set the % of steam you want inside the cooking chamber.<br />
Every green light indicates a 10% increase of humidity inside the cooking chamber, up to 100%.<br />
• Turning the knob counter clockwise will set the percentage of drying in the cooking chamber.<br />
Every red light means an increase of 10% up to 100%.<br />
Pause on;<br />
• If you push the "Pause on" key, you turn off the fans, the heating elements, the electric water<br />
valve and the Venturi system.<br />
• When this function is working, the red light above the “Pause on” touch pad is illuminated.<br />
• This function can be used to let yeast products rise inside the cooking chamber.<br />
Temperature Control;<br />
• You can set the temperature of the cooking cavity up to 500°F.<br />
• Turn the “Temperature” knob to set the cooking temperature inside the cooking cavity.<br />
• The “Set Temp” light shows the desired set cooking cavity temperature. The “Current Temp” is<br />
the actual oven cavity temperature<br />
• While the oven is working, the display continuously switches from the “Set Temp” to the<br />
“Current Temp” every 4 seconds.<br />
To set the convection oven using time cooking;<br />
• Activate the oven using the “On/Off touch pad” at the bottom of the control panel.<br />
• Press the “Change set mode” touch pad to illuminate the “set temp” light next to the “Cavity”<br />
icon.<br />
• Turn the “Time dial” to the desired cooking time.<br />
• Check that the “Climate % lights” are not illuminated.<br />
• Set the “Temperature” dial to your desired cooking temperature.<br />
• Press “Manual start/stop” touch pad to start cooking.<br />
• The oven will automatically turn off when the cooking time has elapsed.<br />
8
To set the oven for combi cooking using time;<br />
• Activate the oven using the “On/Off touch pad” at the bottom of the control panel.<br />
• Press the “Change set mode” touch pad to illuminate the “set temp” light next to the “Cavity”<br />
icon.<br />
• Turn the “Time dial” to the desired cooking time.<br />
• Set the “Climate % dial” to the desired % steam.<br />
• Turn the “Temperature” dial to set the desired cooking temperature.<br />
• Press “Manual start/stop” to start cooking.<br />
• The oven will automatically turn off when the cooking time has elapsed.<br />
The Probe;<br />
• You can set any internal product temperature between 32°F and 212°F ( 0°C and 100°C).<br />
• When the probe is active you’ll see the “Prb” message on the time display.<br />
• Turn the knob clockwise to set the temperature of the core temperature control probe.<br />
• Position “Set Temp” shows the set temperature.<br />
• The position “Actual Temp” shows the internal temperature of the food you are cooking.<br />
• While the oven is working, the display continuously switches from the “Set Temp” to the<br />
“Current Temp” every 4 seconds.<br />
• When the core temperature reaches the “Set Temp” the oven automatically goes to the next cycle<br />
if, one has been programmed in. If no other cycle has been programmed, the tone will sound and<br />
the oven will then end the cooking process.<br />
• The probe will always be used with Delta T.<br />
To set the convection oven using the probe cooking;<br />
• Activate the oven using the “On/Off touch pad” at the bottom of the control panel.<br />
• Press the “Change set mode” touch pad to illuminate the “set temp” light next to the “Cavity”<br />
icon.<br />
• Turn the “Temperature” dial to set the desired cooking temperature.<br />
• Press the “Change set mode” touch pad to light the “Probe” icon.<br />
• Insert the probe into the thickest part of the product being steamed.<br />
• Set the desired finished internal product temperature.<br />
• Press “Manual start/stop” to start cooking.<br />
• The oven will automatically turn off when the set internal product temperature has been reached.<br />
[or go to the next programed cycle]<br />
To set the CAPO for combi cooking using the probe;<br />
• Activate the oven using the “On/Off touch pad” at the bottom of the control panel.<br />
• Press the “Change set mode” touch pad to light the “Probe” icon.<br />
• Insert the probe into the thickest part of the product.<br />
• Set the desired finished internal product temperature.<br />
• Press the “Change set mode” touch pad to illuminate the “set temp” light next to the “Cavity”<br />
icon.<br />
• Set the “Climate % dial” to the desired % steam.<br />
• Turn the “Temperature” dial to set the desired cooking temperature.<br />
• Press “Manual start/stop” to start cooking.<br />
• The oven will automatically turn off when the set internal product temperature has been reached.<br />
To set the CAPO for steaming using the probe;<br />
• Activate the oven using the “On/Off touch pad” at the bottom of the control panel.<br />
• Press the “Change set mode” touch pad to light the “Probe” icon.<br />
• Insert the probe into the thickest part of the product being steamed.<br />
• Set the desired finished internal product temperature.<br />
9
• Press the “Change set mode” touch pad to illuminate the “set temp” light next to the “Cavity”<br />
icon.<br />
• Set the “Climate % dial” to 100% steam.<br />
• Set the “Temperature dial” to 212°F.<br />
• Press “Manual start/stop” to start cooking.<br />
• The oven will automatically turn off when the set internal product temperature has been reached.<br />
What is Delta T?<br />
• The Delta T feature will always be used with the probe.<br />
• Delta T reduces shrinkage by cooking with lower more gentle heat.<br />
• The Delta T maintains a constant temperature differential between the foods internal<br />
temperature and the temperature in the cooking cavity of the oven.<br />
• As the internal product temperature rises, the Delta T raises the oven cooking temperature.<br />
• We don’t set cooking time or cooking temperature with Delta T; we simply set the Delta T<br />
differential.<br />
I still don’t understand Delta T.<br />
Let’s use roast beef, a common example, to clairify our point about the Delta T and how it works.<br />
• Our target temperature for our finished roast beef is 130f. We set the probe for 130f.<br />
• Our beef roast has an internal temperature right out of the cooler, of 40 f.; we set our Delta T<br />
differential at 100°F. This means that the oven will begin cooking at a temperature of 140°F.<br />
[100°F + 40°F = 140°F].<br />
• As the internal product temperature rises so does our oven temperature. When our beef cooks to<br />
an internal temperature of 80°F. the oven temperature has been raised, by Delta T, to 180°F<br />
[100°F+ 80°F = 180°F]<br />
• When our beef is done, at an internal temperature of 130°F, the oven’s highest roasting<br />
temperature was 230°F [130°F+ 100°F = 230°F]<br />
• The oven automatically turns off at the end of the cooking cycle unless the hold mode is<br />
programed.<br />
To set the Delta T following our example;<br />
• Press the “Change set mode” touch pad to light the “Probe” icon.<br />
• Set the probe to the desired finished product temperature. [130°F]<br />
• Insert the probe into the thickest part of the product being cooked.<br />
• Press the “Change set mode” touch pad to illuminate the “set” light next to the “Delta T” icon.<br />
• Turn the temperature dial to show the desired Delta T differential temperature in the temperature<br />
window. [100°F]<br />
• Press “Manual start/stop” to start cooking.<br />
• Or enter it as a saved program for use at another time.<br />
"MANUAL START / STOP" key<br />
The "START / STOP" key is used when you want to start the cooking cycle. It can be used when you<br />
want to pause the cooking cycle. To continue the cooking cycle after it has been stopped, press START /<br />
STOP again.<br />
When the oven is functioning in a cook cycle the light above the “MANUAL START/STOP” touch pad<br />
is illuminated. When the oven is turned on, but it is not in a cook cycle, the led is turned off.<br />
"+ Minute" touch pad<br />
When the oven is working in the manual mode, the operator can press the “+ MINUTE” touch pad to add<br />
one additional minute of cooking time.<br />
10
When using the oven in a preset program mode, this touch pad can be used only at the end of the last time<br />
period. Each time the touch pad is pressed, you add one minute of cooking time with the same<br />
characteristics (temperature, steam, etc.) as the last time period programmed.<br />
"LIGHT on /off" touch pad<br />
When you briefly press this touch pad, you turn the oven light on for 30 seconds. Once the 30 seconds<br />
have passed, the light turns off.<br />
If you press the touch pad for 3 seconds, you turn the oven light on and it remains on until you press the<br />
touch pad again. After you press the touch pad the second time, the light turns off.<br />
Program the Oven;<br />
To set a multi step program [up to 4 cycles];<br />
This example is a multi step program used for rethermalizing frozen entrees such as Lasagna.<br />
• Press the “Change set mode” touch pad to illuminate the “set temp” light next to the “Cavity”<br />
icon.<br />
• Press the touch pad next to the “Time” dial to indicate “Cycle 1”.<br />
• Program, for example, a steam cycle of 20 minutes.<br />
• Press the touch pad next to the “Time” dial to indicate “Cycle 2”.<br />
• Program in a combi cycle of 35 minutes, at 325°F and 30% humidity.<br />
• Press “Manual start/stop” to start cooking. Or, you can save this program in memory for use at<br />
another time.<br />
To set a program into the memory;<br />
• Before you start programming the oven, turn the “Program” dial to an unused number. Unused<br />
numbers will show zero’s in the time and temperature windows.<br />
• The program number will appear in the window next to the “Number” dial.<br />
• Repeat all the steps as shown in our multi step program example above.<br />
• Press and hold the “Prog Mem” touch pad by the number dial until you hear the tone. The tone<br />
indicates that your new program has been accepted into memory.<br />
• Review the values in the cycles you have chosen by pressing the touch pad and moving the light<br />
to illuminate the various cycles you wish to check.<br />
To remove a program from memory;<br />
• Dial the number of the program you wish to eliminate into the “Program” window.<br />
• Zero out all values in each cycle of the memorized program.<br />
• Press and hold “Prog mem” until the tone sounds in each cycle of the program you wish to<br />
remove.<br />
• When the program number is dialed in, the indicator windows should all read zero, and only the<br />
cycle first light should be illuminated. This indicates a vacant program.<br />
Your Cadco <strong>Combination</strong> Oven has a memory bank that will store up to 70 cooking programs for one<br />
touch cooking.<br />
Procedure to save a program:<br />
• Using the “Program Selector Dial” on the lower part of the control panel, choose a vacant number<br />
for the program you are saving. The vacant/available numbers will show zeros in the “Time” and<br />
“Temperature” windows.<br />
• Set all the values to be used in each of the chosen [up to 4] cooking cycles.<br />
• Save the program by pressing the "PROG MEM" key [for 5 seconds] until you hear a continuous<br />
tone.<br />
• Your new program has now been saved in memory.<br />
11
Procedure to use a saved program:<br />
• Using the “Program Selector Dial” find the number of the program you have decided to use. The<br />
number will be displayed in the “Program” window.<br />
• Start the chosen program by pressing the "manual START /STOP" touch pad.<br />
Procedure to change a saved program:<br />
• Using the “Program Selector Dial” choose the number of the program you’d like to modify.<br />
• Change the values you’d like to modify in each mode.<br />
• Save the new program by pushing and holding the “PROG MEM" touch pad in each mode. After<br />
the changes have been made in each mode hold the “PROM MEM” touch pad for 5 seconds [until<br />
you hear the continuous tone].<br />
• The revised program is now ready for use.<br />
Automatic pre-heating;<br />
• The pre-heating function works only when you are using your preset programs.<br />
• The “PROG START” touch pad is located below the “PROGRAM” number window.<br />
• When you start the oven with “PROG START” touch pad, it preheats the cooking chamber but<br />
you do not see your program values in the display windows. When the oven reaches the pre-heat<br />
temperature, it lets you know with a continuous tone.<br />
• When you hear this tone you can put your product in the oven, close the door, and the selected<br />
program is preheated and will automatically start.<br />
• All the windows will show the active program values.<br />
"ON / OFF" power touch pad;<br />
• The "ON / OFF" touch pad located at the bottom of the control panel activates the ovens controls.<br />
When the control panel is off, the light is still illuminated and shows you there is power going to<br />
the oven.<br />
• When you activate the control panel, the light above the “On/Off” touch pad will go off and the<br />
control panel lights will illuminate.<br />
• The oven is now ready to operate.<br />
Venturi controls the % of dry air in the oven;<br />
• When you are cooking full loads or well done meats and you want to control the humidity level in<br />
the oven with venturi<br />
• In some bakery applications you want to create a dry cooking environment with venturi.<br />
• When switching cycles you may want to use the “Venturi” to go from moist air to dry air quickly.<br />
• Use venturi to brown products more quickly.<br />
Combi facts;<br />
• Steam retards browning. The higher the percentage of steam in the cooking cavity the longer your<br />
product will take to brown.<br />
• Steam reduces shrinkage when roasting meats.<br />
• Steam makes heat hotter.<br />
• Steam makes foods, generally, cook faster.<br />
• <strong>Food</strong>s retain more moisture when cooked with steam.<br />
Cooking chamber cleaning;<br />
At the end of each day or at established intervals, clean the cooking chamber using only non-caustic and<br />
non-abrasive products. Never clean the stainless steel with acids, aggressive detergents, or products<br />
containing corrosive agents that will cause pitting. Scrubbies and steel wool type products will scratch the<br />
surface of the oven, make it harder to clean and more prone to collect cooking residue.<br />
• Spray the warm cooking chamber with a non-abrasive solvent.<br />
12
• Allow the solvent to work for about 10 minutes.<br />
• Program the oven to steam for 20 minutes, and activate.<br />
• Wipe away the grease and residue with a cloth or paper towel. The operator may also spray the<br />
cooking chamber clean with the optional hose.<br />
Cleaning of the outside of the oven;<br />
Never use a jet of water or the hose to clean any external part of the oven. Stainless steel cleaner or a mild<br />
detergent and a cloth are all you will ever need to keep the outside of your oven in “Like New” condition.<br />
IN CASE OF MALFUNCTION;<br />
If there is a mechanical or electrical problem, turn off the oven immediately.<br />
• disconnect the electrical power supply.<br />
• consult a service center authorized by Cadco, Ltd.<br />
Rev. 11-7-07<br />
13