GT5-A604 - JBL
GT5-A604 - JBL
GT5-A604 - JBL
You also want an ePaper? Increase the reach of your titles
YUMPU automatically turns print PDFs into web optimized ePapers that Google loves.
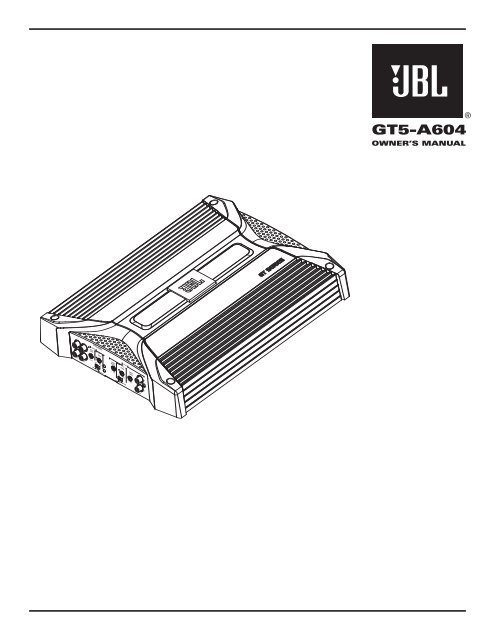
<strong>GT5</strong>-<strong>A604</strong><br />
OWNER’S MANUAL
4x<br />
2x<br />
1x<br />
9-1/4"<br />
235mm<br />
12"<br />
305mm<br />
2-1/8"<br />
54mm<br />
A B C D E F<br />
A<br />
B<br />
C
<strong>GT5</strong>-<strong>A604</strong> CAR AUDIO POWER AMPLIFIER OWNER’S MANUAL<br />
Installation Warnings and Tips<br />
• Disconnect the negative (–) lead from your vehicle’s<br />
battery.<br />
• At the installation sites, locate and make a note of<br />
all fuel lines, hydraulic brake lines, vacuum lines<br />
and electrical wiring. Use extreme caution when<br />
cutting or drilling in and around these areas.<br />
• Choose a safe mounting location away from moisture.<br />
• Make sure there is sufficient air circulation at the<br />
mounting location for the amplifier to cool itself.<br />
• Mount the amplifier, using the supplied hardware.<br />
Specifications<br />
• 60W RMS x 4 @ 4 ohms and ≤1% THD + N*<br />
• 80W RMS x 4 @ 2 ohms, 14.4V supply and<br />
≤1% THD + N*<br />
• 160W RMS x 2 @ 4 ohms, 14.4V supply and<br />
≤1% THD + N*<br />
• Total peak power: 640 watts<br />
• Frequency response: 10Hz – 100kHz (–3dB)*<br />
• Maximum input signal: 6V*<br />
• Maximum sensitivity: 200mV*<br />
• THD + N: 0.05%<br />
• Signal-to-noise ratio: 85dBA<br />
(reference 1W into 4 ohms)*<br />
• Signal-to-noise ratio: 102dBA<br />
(reference rated power into 4 ohms)<br />
* CEA-2006A-compliant<br />
Speaker Output Connectors<br />
• Connect the speakers to these terminals,<br />
observing proper polarity:<br />
• Four-channel operation: Connect the front<br />
left speaker to the Front L+ and L– terminals,<br />
and the front right speaker to the Front R+ and<br />
R– terminals. Repeat for rear speakers, using<br />
the Rear L+ and L– terminals, and the Rear R+<br />
and R– terminals.<br />
• Three-channel operation: Connect the stereo<br />
speakers to the Front terminals, as above.<br />
Connect the single speaker into which the<br />
amplifier’s rear channels will be bridged to the<br />
Rear R+ and Rear L– terminals.<br />
• Two-channel (bridged) operation: Connect one<br />
speaker to the Front R+ and Front L– terminals.<br />
Connect the other speaker to the Rear<br />
R+ and Rear L– terminals.<br />
• Minimum speaker impedance for stereo operation<br />
is 2 ohms. Minimum speaker impedance for<br />
bridged operation is 4 ohms.<br />
Fuses<br />
• Replace only with the same type and rating.<br />
Power Input Connectors<br />
• +12V: Connect to the positive terminal of the<br />
vehicle’s battery. 8 AWG wire is recommended.<br />
Install an appropriate fuse holder and fuse (40A<br />
minimum) within 18 inches of the battery. Make<br />
sure the wire is not damaged or pinched during<br />
installation. Install protective grommets when<br />
routing wires through the firewall or other sheet<br />
metal.<br />
• GND: Connect to the vehicle’s chassis. Refer to<br />
the picture below.<br />
Factory Bolt<br />
Note: Remove any paint<br />
below ring connector.<br />
Ring Connector<br />
Star Washer<br />
Ground Wire<br />
• REM: Connect to the “Remote Out” lead from<br />
the source unit or to a source of switched<br />
12V+ (ACC).<br />
Aux Output Connectors (RCA)<br />
• Summed, nonfiltered pass-through output.<br />
Front right and rear right inputs are combined<br />
and sent to the right AUX output. Front left<br />
and rear left inputs are combined and sent<br />
to the left AUX output. Connect to the input<br />
of an additional subwoofer amplifier.<br />
Front Input Connectors (RCA)<br />
• Connect to the front RCA outputs from the<br />
source unit or signal processor.<br />
Front Input-Level Control<br />
• Used to match the front input level of the<br />
amplifier to the output level of the source unit.<br />
• See for the adjustment procedure.<br />
Front Crossover-Frequency Control<br />
• 12dB/octave crossover, variable from<br />
32Hz to 320Hz.<br />
• See for the adjustment procedure.<br />
Front Crossover-Filter Selector<br />
• LP: Select for subwoofer(s).<br />
• FLAT: Select for full-range speakers when<br />
no subwoofer will be used in the system.<br />
• HP: Select for midrange speakers or<br />
full-range speakers when a subwoofer is<br />
used in the system.<br />
Power On LED<br />
• Illuminated when the amplifier is on.<br />
Protect LED<br />
• Illuminated under any of the following fault<br />
conditions: battery over/under voltage, short<br />
circuit in speaker wires, amplifier is too hot,<br />
amplifier’s output circuit has failed (DC voltage<br />
present in the amplifier’s output).<br />
Rear Bass-Boost Control<br />
• Provides up to 6dB of boost at 50Hz. Set<br />
the Bass-Boost control according to your<br />
preference, being careful not to apply enough<br />
boost to damage the speaker(s).<br />
Rear Crossover-Frequency Control<br />
• 12dB/octave crossover, variable from<br />
32Hz to 320Hz.<br />
• See adjustment procedure in .<br />
Rear Crossover-Filter Selector<br />
• LP: Select for subwoofer(s).<br />
• FLAT: Select for full-range speakers when<br />
no subwoofer will be used in the system.<br />
• HP: Select for midrange speakers or<br />
full-range speakers when a subwoofer is<br />
used in the system.<br />
Rear Input-Level Control<br />
• Used to match the rear input level of the<br />
amplifier to the output level of the source unit.<br />
• See for the adjustment procedure.<br />
Rear Input Connectors (RCA)<br />
• Connect to rear RCA outputs from the source<br />
unit or signal processor.<br />
Setting Input Level<br />
A Turn all Input-Level controls counterclockwise<br />
to 6V (minimum).<br />
B With a dynamic music track playing, turn head<br />
unit’s volume control to the 3/4 position.<br />
C Turn Front Input-Level control clockwise until<br />
the music is so loud that it no longer sounds<br />
clear (distortion is present in the output).<br />
D Turn Front-Input-Level control counterclockwise<br />
gradually, just until the music sounds<br />
clear, once again.<br />
E Front-level input is now adjusted correctly.<br />
F Adjust Rear Input-Level control so that the<br />
level of the rear speakers is proportionate to<br />
the level of the front speakers, according to<br />
your preference.<br />
Setting the Crossover<br />
A Crossover setting for 5" or larger full-range<br />
speakers when no subwoofer is included in<br />
the system.<br />
B Crossover setting for midrange and/or<br />
full-range speakers when a subwoofer<br />
is included in the system.<br />
C Crossover setting for subwoofers.<br />
Note: Acceptable frequency ranges indicated<br />
in gray.<br />
This product is designed for mobile applications and is not<br />
intended for connection to the mains.<br />
A valid serial number is required for warranty coverage.<br />
Features, specifications and appearance are subject to change<br />
without notice.
Declaration of Conformity<br />
www.jbl.com<br />
Harman Consumer Group, Inc.<br />
250 Crossways Park Drive, Woodbury, NY 11797<br />
www.jbl.com<br />
© 2008 Harman International Industries, Incorporated. All rights reserved.<br />
<strong>JBL</strong> is a trademark of Harman International Industries, Incorporated,<br />
registered in the United States and/or other countries.<br />
Part No. <strong>GT5</strong><strong>A604</strong>OM 3/08<br />
We, Harman Consumer Group, Inc.<br />
2, route de Tours<br />
72500 Château du Loir<br />
France<br />
declare in own responsibility that the product described in this owner’s<br />
manual is in compliance with technical standards:<br />
EN 55013:2001+A1:2003<br />
EN 55020:2002+A1:2003<br />
Klaus Lebherz<br />
Harman Consumer Group, Inc.<br />
Château du Loir, France 3/08


