
Create successful ePaper yourself
Turn your PDF publications into a flip-book with our unique Google optimized e-Paper software.
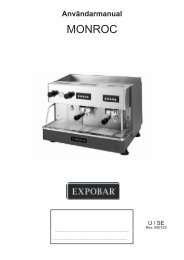
User manual<br />
MOCCA<br />
Your dealer<br />
U_EN<br />
Rev. 110607
1. Table (list) of contents MOCCA<br />
1. Table of contents page. 2<br />
2. General 3<br />
3. Overview of the components, front. 4<br />
3. Overview of the components, inside 5<br />
3. Activate with user card 6<br />
4. Installation and start 7-8<br />
Important! Safety and maintenance of grinder 8<br />
5. Operation Brewing of coffee in cup 9<br />
Brewing of jug 10<br />
Hot water 10<br />
6. Cleaning program<br />
Cleaning of In/Outlet valves 11<br />
Cleaning brewmechanism 12<br />
Cleaning of brew chamber 13<br />
Dismantling brew chamber 14<br />
7. Cleaning and care 15-16<br />
8. Messages shown on display 17<br />
9. PROGRAMMING Activate with user card 18<br />
10. Programming Main menu 19<br />
Clean Machine 20<br />
Counters 21-22<br />
10. Dimension sketch 23<br />
11. Storage / Transport 24<br />
2.
2. General MOCCA<br />
Thank you for choosing a <strong>Mocca</strong> machine. We hope you enjoy it !<br />
- The machine must be connected correctly for your own safety.<br />
Read the user guide before using the machine.<br />
- The guide contains important instructions for proper and safe use of the machine<br />
- Always keep the guide close at hand.<br />
The machine must be disconnected from mains electricity supply before carrying out any<br />
maintenance.<br />
All installation work must be carried out by qualifi ed personnel.<br />
<strong>Mocca</strong><br />
- Making coffee cup by cup<br />
- Jug facility with key switch<br />
- Brewing mechanism with coffee fi lter<br />
- Electronically temperature controlled<br />
- Adjustable coffee strength<br />
- Illuminated cup while brewing<br />
- Energy saving mode<br />
Facts:<br />
Height<br />
Width<br />
Depth<br />
Weight<br />
Tank volume<br />
Electricity:<br />
Water connection:<br />
675mm<br />
270mm<br />
530mm<br />
15 kg<br />
2.0 litre<br />
230V/2200W<br />
½” outside thread<br />
Capacity:<br />
Approx. cups of coffee 100 / fi lling, max 140/hour.<br />
3.
3. Overview of components, front MOCCA<br />
Display<br />
Strength of drinks ++ / - -<br />
Key switch<br />
Large coffee<br />
Small coffee<br />
Hot water<br />
Door lock<br />
Outlet<br />
(warm drinks)<br />
Drip tray insert<br />
Drip tray<br />
Options:<br />
Base cabinet with waste box<br />
4.
3. Overview of components, inside MOCCA<br />
Ingredients<br />
canister<br />
FUSE<br />
holder<br />
ON/OFF<br />
switch<br />
Door lock<br />
Brewing<br />
mechanism<br />
Outlet<br />
Coffee<br />
Waste box<br />
Outlet hot water<br />
Detail; Ingredients; Width; Height; Amount/unit<br />
Canister; Coffee 160 250 1<br />
5.
3. Overview. Activate with user card MOCCA<br />
5. Overview of components, function buttons AC12<br />
USER CARD.<br />
USER CARD Item number: 1602692.<br />
Is used for cleaning and setting jug beverages.<br />
The user card is supplied by your dealer.<br />
Insert the user card with the chip upwards, according to the illustration.<br />
The display will show the Service Menu, Clean Machine and you can now browse<br />
forwards through the menu.<br />
Service Menu<br />
Clean Machine<br />
To use the machine again. Remove the card and keep it in a safe place.<br />
Activate with a key.<br />
Choose coffee in jug<br />
6.
4. Service. Installation och igångsättning MOCCA<br />
1. Place the brewer on a fl at<br />
level and waterproof surface.<br />
Connect the electrical plug to a separate<br />
grounded wall socket 230V 10A<br />
90º<br />
OBSERVE!<br />
Make sure there is a space behind the<br />
machine for free flow of air.( minimum 10cm )<br />
2. Connect attached water tube to cold water with an R 1/2”.<br />
Make sure that the water hose not are kinked anywhere when machine is<br />
pushed into place.<br />
Please fl ush the water tube before connecting to machine, this to avoid any particles to<br />
damage the inlet valve.<br />
3. Open the water inlet.<br />
4. Turn on the ON-OFF switch.<br />
Water is been fi lled into the tank automatically<br />
with 2,0 litres of water. The heating will not start<br />
before the water level reaches the level sensor.<br />
Set temperature is approx 97ºC.<br />
5. Close door.<br />
Fuse<br />
holder<br />
ON/OFF<br />
switch<br />
7.
4. Service. Installation and start MOCCA<br />
6. Fill canisters with ingredients.<br />
Take out (this to avoid unnecessery spillage in<br />
the machine) ingredient canisters and fi ll them<br />
with ingredients.<br />
7. When placing the ingredient canister<br />
Make sure that the outlet pipe have the<br />
position of pointing straight into the<br />
brew mechanism. See (A).<br />
(A).<br />
When the water is heated up to right temperature<br />
the message ”Low temp” will disappear and<br />
”Low temp.” machine is ready to use.<br />
”Low temp”<br />
8.
5. Operation: Brewing of coffee in cup MOCCA<br />
1. Place a cup in the centre of the cup holder.<br />
2. The strength has a standard setting,<br />
if you wish to increase or decrease it, do as follows<br />
if not continue to point 3.<br />
2.<br />
Stronger drink;<br />
Increase by pushing + or ++ for 5% or 10%<br />
alternative<br />
Weaker drink;<br />
Decrease by pushing - or -- for 5% or 10%<br />
(the indication lamp will go up or down<br />
depending of choice).<br />
3. Choose drink by pushing on the button to the right<br />
of each menu. The display will show; ”Please wait”,<br />
and the cup will be illuminated.<br />
3.<br />
Wait until the light on cup and the message<br />
”Please wait”<br />
has been turned off before you take your cup.<br />
5. Operation; Hot water MOCCA<br />
4.<br />
4. Hot water<br />
9.
5. Operation: Brewing of coffee in jug MOCCA<br />
Brewing of jug<br />
1. Place a jug in the centre of drip tray.<br />
Serving jug 1,2L art.no. 1103091<br />
2. Turn on the key with jug symbole clockwise.<br />
3<br />
3<br />
3. 6 cups of brewing is standard setting.<br />
Change amount of cups by pushing + or - button.<br />
Optional up to 12 cups or down to 1 cup brewing.<br />
4. Push the button for drink 1.<br />
Wait until the light and message ”Please wait” has<br />
been turned off before you take out the jug.<br />
2<br />
4<br />
Button for Hot water.<br />
Serving jug 1,8L art.no. 110001<br />
Serving jug 1,2L art.no. 1103091<br />
10.
6. Cleaning program MOCCA<br />
Automatic cleaning of In/Outlet valves<br />
1. Open door. Put a container under the dispenser.<br />
2. Insert the user card in the card reader.<br />
3. Move through the menu until the display shows<br />
”Service Menu”, ”Clean Machine”.<br />
4. Press the E button.<br />
5. Move through the menu until the display shows<br />
Select Cleaning, Clean Valves.<br />
6. Press the E button.<br />
7. Dispenser valves will not start to open and close<br />
4 6<br />
with 3 pulses/second for a max of 6 seconds.<br />
Repeat the procedure 2 - 3 times.<br />
8. Remove the user card.<br />
Close door.<br />
Cleaning entails that the valves ”knock” off any lime scale and other particles<br />
that may get stuck in the cylinders and fl ushing them with water.<br />
11.
6. Cleaning program Clean brewing mechanism. MOCCA<br />
Automatic cleaning with brewing mechanism: Cleaning the brewer mechanism<br />
should be done once a week.<br />
Open door.<br />
1. Insert the user card in the card reader.<br />
2. Move through the menu until the display shows Service Menu, Clean Machine.<br />
3<br />
5<br />
10<br />
3. Press the E button.<br />
4. Move through the menu until the display shows Select Cleaning, Clean Brewer.<br />
5. Press the E button. The display shows; Open Door, Fill Detergent.<br />
6. Open the door. The display shows; Fill Detergent, Close Door.<br />
7. Put 25gr (one portion sachet) of cleaning agent (fi gure A) in brewing mechanism.<br />
See fi gure B. (Cleaning agent is provided by your dealer)<br />
8. Close the door. The display shows; Place Jug, Enter To Start.<br />
9. Put a 1 litre container under the coffee dispenser. A<br />
10. Press the E-button to start cleaning.<br />
B<br />
12.
6. Cleaning program Clean brewing mechanism. MOCCA<br />
Continuation: Automatic cleaning of the brewing mechanism:<br />
Cleaning of the brewing mechanism should be done once a week.<br />
11. Display indicates; Preparing Brewer, Please Wait.<br />
12. Display indicates; Cleaning Brewer, Time Left 300s.<br />
The machine counts down from 300 seconds.<br />
13. Display indicates; Rinsing Brewer, Cycles left 7.<br />
Display indicates Select Cleaning, Clean Brewer when the cleaning is complete.<br />
14. Remove the user card.<br />
Note: When the cleaning agent has been added, the process must no be interrupted<br />
but be allowed to run its course.<br />
IMPORTANT! After having performed the automatic cleaning of the brewing mechanism,<br />
you should perform one cleaning of the brewing chamber to remove any cleaning agent<br />
or coffee remains!<br />
Disassemble and clean the brewing chamber Open Brewer<br />
1. Insert the user card in the card reader.<br />
2. Move through the menu until the display shows Service Menu,<br />
Clean Machine.<br />
3. Press E-button.<br />
4. The display indicates Select Cleaning, Open Brewer.<br />
5. Press E-button.<br />
6. Display indicates; Open Brewer.<br />
7. Open the door, disassemble, clean and reassemble the brewing chamber.<br />
see page 14<br />
8. Close the door.<br />
9. Press the E-button to return to the normal setting.<br />
10. Remove the user card.<br />
11. Take a cup of coffee and discard.<br />
The function Open Brewer<br />
Can be used to rotate the brewing mechanism<br />
to the correct position.<br />
Note: ”The winder” should be in the 8 o’clock position,<br />
If not, remove again and repeat the process.<br />
8 o’clock<br />
position<br />
13.
6. Cleaning program Clean brewing mechanism. MOCCA<br />
Continuation: Automatic cleaning of the brewing mechanism:<br />
Cleaning of the brewing mechanism should be done once a week.<br />
Disassemble the brewing chamber:<br />
1. 2.<br />
3. Supplementary flushing/cleaning of the<br />
brewing chamber.<br />
4.<br />
Reassemble the brewing chamber<br />
Note: When the brewing chamber is<br />
reassembled, ensure that the rubber<br />
scraper (B) ends up between the rocker<br />
arms (A).<br />
Note: Rinse clean! To remove<br />
cleaning agent and coffee remains!<br />
14.
7. Cleaning and care. CLEANING MOCCA<br />
Cleaning when necessary.<br />
To clean the exterior of the<br />
machine, use a soft rag and liquid<br />
cleaning agent that is non-abrasive.<br />
A<br />
B<br />
Canister (A) and chute (B) can be washed in a dish washing machine!<br />
Note! Make sure that all parts are dry before use.<br />
To be washed when needed<br />
Drip tray and its insert to be washed by hand in ordinary dishwater.<br />
Must not be washed in a dish washing machine!<br />
15.
7. Cleaning and care. CLEANING MOCCA<br />
Disassembly and cleaning of coffee filter.<br />
A tool for disassembly of coffee fi lter is included with the machine<br />
3<br />
5 11<br />
Open the door.<br />
1. Insert the user card in the card reader<br />
2. Move through the menu until the display shows Service Menu, Clean Machine.<br />
3. Press E-button.<br />
4. Move through the menu until the display shows Select Cleaning, Open Brewer.<br />
5. Press the E button. the display shows. Open Brewer.<br />
6. The brewing mechanism rotates in position.<br />
7. Loosen the dispenser and insert the tool (A) through one of the holes in the<br />
front of the brewing mechanism all the way to the rear part of the cylinder wall<br />
(picture 1), the move the tool towards the rear section of the fi lter insert until the<br />
insert is ejected (picture 2).<br />
8. Clean the fi lter insert in 25gr cleaning agent dissolved in 3 dl water for max 10 minutes.<br />
Figure. 2 Figure.1<br />
97º Celsius<br />
10 minutes<br />
. 3 dl water<br />
9. Refi t the fi lter. Close the door.<br />
10. Press E-button and the brewing mechanism will return to the default position.<br />
11. Remove the user card.<br />
OBS! Dispense a cup of coffee and discard it to remove cleaning agent remains in the<br />
fi lter. After having been in contact with the cleaning agent, the fi lter must be<br />
washed with detergent and be carefully rinsed under running water.<br />
Is available from your dealer:<br />
Cleaning agent: for brewing mechanism Product no. 1104161<br />
Filter: for brewing mechanism Product no. 47200213<br />
Tool: for disassembly of fi lter Product no. 4720090<br />
16.
8. Message shown on display MOCCA<br />
Message on display:<br />
The display indicates:<br />
Energy saving mode<br />
Not available<br />
Heating Water<br />
Please Wait...<br />
Low Water Level<br />
Press Enter Key<br />
Filling Water<br />
Please wait<br />
Warning<br />
Low Temperature<br />
Low Temperature<br />
Blocked<br />
Empty Drip Tray<br />
Low Water Level<br />
Blocked<br />
Check<br />
Water Supply<br />
Empty Waste Box<br />
Change Brewer Filter<br />
Place Cup<br />
Bev. Disabled<br />
Door Open<br />
Change<br />
Water Filter<br />
The machine is in energy saving mode.<br />
Drink cannot be selected as jug.<br />
Low temperature in the water tank, the machine<br />
is heating up (blocked)<br />
Low water level in water tank.<br />
The machine is fi lling water.<br />
The temperature is low, it is still possible to<br />
dispense drink<br />
Temperature is low, the machine is blocked.<br />
The drip tray is full of water<br />
The water level in the water tank is low, it is not<br />
possible to dispense drink.<br />
The water has not reached the correct level in the water tank.<br />
Check the water hose, restart the machine.<br />
The waste box is full, open the door and empty out<br />
the grounds. When closing the door, press E to<br />
reset the counter. Selectable in main programme.<br />
The brewing fi lter is clogged. The fi lter needs<br />
replacing or to be cleaned.<br />
If the cup sensor has been activated, this is shown.<br />
if no cup has been placed on the drip tray.<br />
The drink has been disabled.<br />
The door is open.<br />
The water fi lter needs replacing, press the button E<br />
to reset the counter.<br />
17.
9. PROGRAMMING MOCCA<br />
Activate programming with the user card.<br />
1. Open door and insert the user card in the card reader.<br />
2. The display indicates: Service Menu, Clean Machine<br />
Function buttons programming<br />
Press this button if you wish to leave the submenu and return to the main menu.<br />
Press the enter button if you want to enter a menu, alter the value or a setting.<br />
Alter a value by pressing the button<br />
or the button.<br />
Confi rm the new setting by pressing the E-button.<br />
Press this button if you wish to increase a value<br />
or step forward in the menu.<br />
Press this button if you want to reduce a value<br />
or go back in the menu.<br />
Press the STOP button if you want to return to the start menu.<br />
ENERGY SAVING MODE button. Keep the STOP button pressed down<br />
for c. 5 seconds. The display shows; Energy Saving Mode. To return to<br />
normal setting, keep the Stop button pressed down for 5 sec.<br />
ENERGY SAVING MODE, the machine switches off the front display and<br />
decreases the temperature in the water tank to c. 65°C.<br />
18.
9. PROGRAMMING MAIN MENU MOCCA<br />
PROGRAMMING AND SETTINGS.<br />
The display shows<br />
Service Menu<br />
Clean Machine<br />
Press<br />
button<br />
The display shows<br />
Service Menu<br />
Counters<br />
Press<br />
button<br />
The display shows<br />
Press<br />
button<br />
19.
9. PROGRAMMERING Clean Machine MOCCA<br />
Alter Beverage Setup Clean Machine<br />
Step forwards in<br />
the menu until display shows<br />
Clean Machine<br />
Service Menu<br />
Clean Machine<br />
Press<br />
button<br />
Select Cleaning<br />
Clean Valves<br />
Press<br />
button<br />
Select Cleaning<br />
Clean prezzo<br />
20.
9. PROGRAMMING Counters MOCCA<br />
Se the number of performed cleanings or reset the counter:<br />
adjust, Counters, Beverage<br />
Step forwards in the menu until<br />
display shows Counters<br />
Service Menu<br />
Counters<br />
Press<br />
button<br />
Press<br />
Press<br />
Counters<br />
Beverages<br />
Beverage counter<br />
Per beverage<br />
Drink 1<br />
Served xxx<br />
To step forward in<br />
menu, Press<br />
Drink 2<br />
Served xxx<br />
Press<br />
Beverage counter<br />
Total Served<br />
Total Beverages<br />
Served xxx<br />
To step forward in<br />
menu, Press<br />
Press<br />
To step forward in<br />
menu, Press<br />
Beverage counters<br />
Clear counters<br />
Hold Enter to<br />
Clear counters<br />
Hold Enter to clear<br />
counters, 3 seconds<br />
Counters cleaned<br />
press ESCAPE<br />
To step backwards<br />
in the menu. Press<br />
21.
9. PROGRAMMING Counters MOCCA<br />
Se the number of performed cleanings or reset the counter:<br />
Counters, Cleaning Counter<br />
Step forwards in the menu until<br />
display shows Counters<br />
Service Menu<br />
Counters<br />
Press<br />
button<br />
Press<br />
Counters<br />
Cleaning counter<br />
Clean Counter<br />
Brewer 000<br />
To step forward in menu,<br />
Press<br />
Press<br />
button<br />
Clean Counter<br />
Total 000<br />
To step backwards in the<br />
menu.<br />
Press<br />
Counters<br />
Water Filter<br />
Press<br />
Water Filter<br />
Reset Filter<br />
To step forward in menu,<br />
Press<br />
Press<br />
Reset? NO/YES<br />
Months Left 6<br />
Standard = 6<br />
months<br />
Water Filter<br />
Interval 6<br />
Press<br />
Water Filter<br />
Interval 1-12<br />
To step backwards<br />
in the menu.<br />
Press<br />
22.
10. Dimension sketch. MOCCA<br />
23.
11. Storage/Transport. MOCCA<br />
Transport and no use in long time.<br />
1. Turn off the switch, pull out the plug and close incoming water tube.<br />
2. Empty the water tank.<br />
3. Keep machine free from frost.<br />
Long machine storage at temperatures below 0ºC (zero degrees celsius) can cause<br />
damage of the machine. Total emptying of water is recommended.<br />
24.
25.
<strong>Mocca</strong><br />
FÖR SERVICE<br />
Vänligen kontakta din återförsäljare<br />
Din återförsäljare / Your retail dealer<br />
...............................................................................<br />
...............................................................................<br />
...............................................................................<br />
CREM <strong>International</strong> AB<br />
Box 10, Viksgränd 2, SE-670 40 Åmotfors, Sweden<br />
Tel: +46 (0)570-477 00, Fax: +46 (0)570-47719<br />
E-mail: info.se@creminternational.com www.creminternational.com<br />
Art. nr/Art. no.1730134