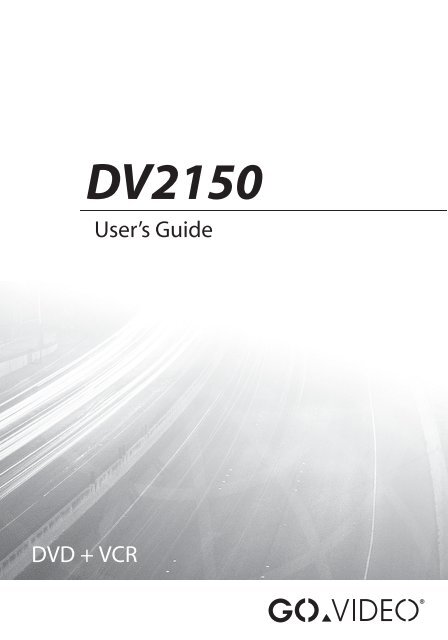
Go Video DV2150 Users Guide - Ltech@alliant.edu
Go Video DV2150 Users Guide - Ltech@alliant.edu
Go Video DV2150 Users Guide - Ltech@alliant.edu

You also want an ePaper? Increase the reach of your titles
YUMPU automatically turns print PDFs into web optimized ePapers that Google loves.
1
Congratulations!<br />
Congratulations on your purchase of this <strong>DV2150</strong> DVD+VCR. We know you will<br />
enjoy this product for many years to come. In case service is required, please take<br />
a moment to write down your serial number located on the rear panel of the<br />
DVD+VCR: ______________________________________<br />
<br />
<br />
<br />
<br />
<br />
<br />
<br />
<br />
<br />
<br />
<br />
<br />
<br />
CAUTION<br />
THIS PRODUCT UTILIZES A LASER. USE OF<br />
CONTROLS OR ADJUSTMENTS OR PERFORMANCE<br />
OF PROCEDURES OTHER THAN THOSE SPECIFIED<br />
HEREIN MAY RESULT IN HAZARDOUS RADIATION<br />
EXPOSURE. DO NOT OPEN THE COVER AND DO<br />
NOT REPAIR YOURSELF REFER SERVICING TO<br />
QUALIFIED PERSONNEL.<br />
WARNING<br />
TO REDUCE THE RISK OF FIRE, ELECTRIC SHOCK<br />
OR PRODUCT DAMAGE, DO NOT EXPOSE THIS<br />
APPARATUS TO MOISTURE AND ENSURE THAT<br />
OBJECTS FILLED WITH LIQUIDS, SUCH AS VASES,<br />
SHALL BE PLACED AWAY FROM THE APPARATUS.<br />
Macrovision Notice<br />
U.S. Patent Nos. 4,631,603; 4,577,216; 4,819,098;<br />
4,907,093; and 6,516,132.<br />
This product incorporates copyright protection<br />
technology that is protected by U.S. patents<br />
and other intellectual property rights. Use of<br />
this copyright protection technology must be<br />
authorized by Macrovision, and is intended for<br />
home and other limited viewing uses only unless<br />
otherwise authorized by Macrovision. Reverse<br />
engineering or disassembly is prohibited.<br />
FCC Notice<br />
This equipment has been tested and found to<br />
comply with the limits for a Class B digital device,<br />
pursuant to part 15 of the FCC Rules. These limits<br />
are designed to provide reasonable protection<br />
against harmful interference in a residential<br />
installation. This equipment generates, uses<br />
and can radiate radio frequency energy and, if<br />
not installed and used in accordance with the<br />
instructions, may cause harmful interference<br />
to radio communications. However, there is no<br />
guarantee that interference will not occur in a<br />
particular installation. If this equipment does<br />
cause harmful interference to radio or television<br />
reception, which can be determined by turning<br />
the equipment off and on, the user is encouraged<br />
to try to correct the interference by one or more<br />
of the following measures:<br />
• Reorient or relocate the receiving antenna.<br />
• Increase the separation between the equipment<br />
and receiver.<br />
• Connect the equipment into an outlet on<br />
a circuit different from that to which the<br />
receiver is connected.<br />
• Consult the dealer or an experienced radio/<br />
TV technician for help.<br />
Laser Product Notice<br />
1 CLASS 1 LASER PRODUCT<br />
2 DANGER: Visible and invisible laser radiation<br />
when open and interlock failed or defeated.<br />
Avoid direct exposure to beam.<br />
3 CAUTION: Do not open the top cover. There<br />
are no user serviceable parts inside the unit;<br />
leave all servicing to qualified service personnel.<br />
For DVD Players with 525p, but not 625p,<br />
progressive scan output<br />
CONSUMERS SHOULD NOTE THAT NOT ALL<br />
HIGH DEFINITION TELEVISION SETS ARE FULLY<br />
COMPATIBLE WITH THIS PRODUCT AND MAY<br />
CAUSE ARTIFACTS TO BE DISPLAYED IN THE<br />
PICTURE. IN CASE OF 525 PROGRESSIVE SCAN<br />
PICTURE PROBLEMS, IT IS RECOMMENDED THAT<br />
THE USER SWITCH THE CONNECTION TO THE<br />
‘STANDARD DEFINITION’ OUTPUT. IF THERE<br />
ARE QUESTIONS REGARDING YOUR TV SET<br />
COMPATIBILITY WITH THIS MODEL 525p DVD<br />
PLAYER, PLEASE CONTACT OUR CUSTOMER<br />
SERVICE CENTER.<br />
2 DVD+VCR User’s <strong>Guide</strong>
Table of Contents<br />
1 - Welcome<br />
Unpacking / 7<br />
Compatible Media / 7<br />
Front Panel / 8<br />
Front Panel Display / 9<br />
Rear Panel / 10<br />
Remote Control / 11<br />
2 - Connections<br />
BASIC<br />
Antenna/Basic Cable<br />
Connections / 13<br />
Cable Box/Satellite Receiver<br />
Connections / 14<br />
Basic TV Connections / 15<br />
ADVANCED<br />
Enhanced <strong>Video</strong> Options / 16<br />
Enhanced Audio Options / 17<br />
Rear AV Connections / 18<br />
Front AV Connections / 19<br />
3 - Setup<br />
VCR<br />
VCR Setup Menu Overview / 21<br />
About VCR Menu Navigation / 21<br />
Clock Settings /<br />
22<br />
Channel Settings / 23<br />
Other VCR Settings / 25<br />
DVD<br />
DVD Setup Menu Overview / 26<br />
About DVD Menu Navigation / 26<br />
Language Settings / 27<br />
<strong>Video</strong> Settings / 28<br />
Audio Settings / 29<br />
Other DVD Settings / 30<br />
4 - Operations<br />
PLAY<br />
Basic DVD+VCR Playback / 33<br />
Special DVD Playback Options / 34<br />
Special VCR Playback Options / 35<br />
Other Disc Playback / 36<br />
RECORD<br />
Basic Recording / 37<br />
Special Recording Options / 38<br />
Timer Recording / 39<br />
5 - Help<br />
Customer Support / 42<br />
Troubleshooting / 42<br />
Product Care & Handling / 44<br />
Technical Specifications / 45<br />
Warranty / 46<br />
Index / 47<br />
©2004 <strong>Go</strong><strong>Video</strong>. All rights reserved.<br />
Manufactured under license from Dolby Laboratories.<br />
“Dolby” and the double-D symbol are trademarks of Dolby Laboratories.<br />
“DTS” and “DTS Digital Surround” are trademarks of Digital Theater Systems, Inc.<br />
All other brand and product names are trademarks or registered trademarks of their respective companies.<br />
3
Important Safety Instructions<br />
1 Read Instructions – All the safety and operating<br />
instructions should be read before the<br />
product is operated.<br />
2 Retain Instructions – The safety and operating<br />
instructions should be retained for future<br />
reference.<br />
3 Heed Warnings – All warnings on the product<br />
and in the operating instructions should<br />
be adhered to.<br />
4 Follow Instructions – All operating and use<br />
instructions should be followed.<br />
5 Cleaning – Unplug this product from the<br />
wall outlet before cleaning. Do not use liquid<br />
cleaners or aerosol cleaners. Use a damp<br />
cloth for cleaning.<br />
6 Attachments – Do not use attachments not<br />
recommended by the product manufacturer<br />
as they may cause hazards.<br />
7 Water and Moisture – Do not use this product<br />
near water – for example, near a bathtub,<br />
wash bowl, kitchen sink, or laundry tub; in a<br />
wet basement; or near a swimming pool; and<br />
the like.<br />
8 Accessories – Do not place this product on<br />
an unstable cart, stand, tripod, bracket, or<br />
table. The product may fall, causing serious<br />
injury to a child or adult, and serious damage<br />
to the product. Use only with a cart, stand,<br />
tripod, bracket, or table recommended by the<br />
manufacturer, or sold with the product. Any<br />
mounting of the product should follow the<br />
manufacturer’s instructions, and should use<br />
a mounting accessory recommended by the<br />
manufacturer.<br />
9 A product and<br />
cart combination<br />
should be moved<br />
with care. Quick<br />
stops, excessive<br />
force, and<br />
uneven surfaces<br />
may cause the <br />
product and cart <br />
combination to<br />
overturn.<br />
10 Ventilation – Slots and openings in the<br />
cabinet are provided for ventilation and to<br />
ensure reliable operation of the product and<br />
to protect it from overheating, and these<br />
openings must not be blocked or covered.<br />
The openings should never be blocked by<br />
placing the product on a bed, sofa, rug, or<br />
other similar surface. This product should not<br />
be placed in a built-in installation such as a<br />
bookcase or rack unless proper ventilation is<br />
provided or the manufacturer’s instructions<br />
have been adhered to.<br />
11 Power Sources – This product should be<br />
operated only from the type of power source<br />
indicated on the marking label. If you are<br />
not sure of the type of power supply to your<br />
home, consult your product dealer or local<br />
power company. For products intended to<br />
operate from battery power, or other sources,<br />
refer to the operating instructions.<br />
12 Grounding or Polarization – This product<br />
may be equipped with a polarized alternating–current<br />
line plug (a plug having one<br />
blade wider than the other). This plug will fit<br />
into the power outlet only one way. This is a<br />
safety feature. If you are unable to insert the<br />
plug fully into the outlet, try reversing the<br />
plug. If the plug should still fail to fit, contact<br />
your electrician to replace your obsolete<br />
outlet. Do not defeat the safety purpose of<br />
the polarized plug.<br />
13 Power-Cord Protection – Power–supply<br />
cords should be routed so that they are not<br />
likely to be walked on or pinched by items<br />
placed upon or against them, paying particular<br />
attention to cords at plugs, convenience<br />
receptacles, and the point where they exit<br />
from the product.<br />
14 Protective Attachment Plug – The product<br />
is equipped with an attachment plug having<br />
overload protection. This is a safety feature.<br />
See Instruction Manual for replacement or<br />
resetting of protective device. If replacement<br />
of the plug is required, be sure the service<br />
technician has used a replacement plug<br />
specified by the manufacturer that has the<br />
same overload protection as the original<br />
plug.<br />
15 Outdoor Antenna Grounding – If an outside<br />
antenna or cable system is connected to the<br />
product, be sure the antenna or cable system<br />
is grounded so as to provide some protection<br />
against voltage surges and built-up static<br />
charges. Article 810 of the National Electrical<br />
Code, ANSI/NFPA 70, provides informa-<br />
4 DVD+VCR User’s <strong>Guide</strong>
Important Safety Instructions<br />
tion with regard to proper grounding of the<br />
mast and supporting structure, grounding<br />
of the lead-in wire to an antenna discharge<br />
unit, size of grounding conductors, location<br />
of antenna–discharge unit, connection to<br />
grounding electrodes, and requirements for<br />
the grounding electrode.<br />
16 Lightning – For added protection for this<br />
product during a lightning storm, or when<br />
it is left unattended and unused for long<br />
periods of time, unplug it from the wall outlet<br />
and disconnect the antenna or cable system.<br />
This will prevent damage to the product due<br />
to lightning and power lines surges.<br />
17 Power Lines – An outside antenna system<br />
should not be located in the vicinity of overhead<br />
power lines or other electric light or<br />
power circuits, or where it can fall into such<br />
power lines or circuits. When installing an<br />
outside antenna system, extreme care should<br />
be taken to keep from touching such power<br />
lines or circuits as contact with them might<br />
be fatal.<br />
18 Overloading – Do not overload wall outlets,<br />
extension cords, or integral convenience<br />
receptacles as this can result in a risk of fire or<br />
electric shock.<br />
19 Object and Liquid Entry – Never push<br />
objects of any kind into this product through<br />
openings as they may touch dangerous<br />
voltage points or short-out parts that could<br />
result in a fire or electric shock. Never spill<br />
liquid of any kind on the product.<br />
20 Servicing – Do not attempt to service this<br />
product yourself as opening or removing<br />
covers may expose you to dangerous voltage<br />
or other hazards. Refer all servicing to qualified<br />
service personnel.<br />
21 Damage Requiring Service – Unplug this<br />
product from the wall outlet and refer servicing<br />
to qualified service personnel under the<br />
following conditions:<br />
a When the power-supply cord or plug is<br />
damaged,<br />
b If liquid has been spilled, or objects have<br />
fallen into the product,<br />
c If the product has been exposed to rain or<br />
water,<br />
d If the product does not operate normally<br />
by following the operating instructions. Adjust<br />
only those controls that are covered by<br />
the operating instructions as an improper<br />
adjustment of other controls may result in<br />
damage and will often require extensive<br />
work by a qualified technician to restore<br />
the product to its normal operation,<br />
e If the product has been dropped or damaged<br />
in any way, and<br />
f When the product exhibits a distinct<br />
change in performance – this indicates a<br />
need for service.<br />
22 Replacement Parts – When replacement<br />
parts are required, be sure the service technician<br />
has used replacement parts specified by<br />
the manufacturer or have the same characteristics<br />
as the original part. Unauthorized<br />
substitutions may result in fire, electric shock,<br />
or other hazards.<br />
23 Safety Check<br />
– Upon completion of any<br />
service or repairs to this product, ask the<br />
service technician to perform safety checks<br />
to determine that the product is in proper<br />
operating condition.<br />
24 Wall or Ceiling Mounting – The product<br />
should be mounted to a wall or ceiling only<br />
as recommended by the manufacturer.<br />
25 Heat – The product should be situated away<br />
from heat sources such as radiators, heat<br />
registers, stoves, or other products (including<br />
amplifiers) that produce heat.<br />
5
1 Welcome<br />
DVD+VCR, including an overview of the front panel, rear<br />
This Chapter provides a basic introduction to the<br />
panel, and remote control.<br />
6 DVD+VCR User’s <strong>Guide</strong>
TITLE<br />
REC<br />
TRK- TRK+<br />
0<br />
SPEED<br />
ENTER<br />
CH-<br />
STOP<br />
REPEAT<br />
SKIP REPLAY LAST CH.<br />
MENU<br />
A-B<br />
PROG.<br />
Unpacking<br />
Check to make sure the following items are included with your DVD+VCR:<br />
EJECT POWER<br />
VCR DVD TV VIEW<br />
1 2 3<br />
4 5 6<br />
7 8 9<br />
100+/P.SCAN CLEAR<br />
SETUP CH+ DISPLAY<br />
SUBTITLE AUDIO SEARCH ZOOM<br />
REW PLAY FF<br />
PREV NEXT<br />
TV/VCR AUTO PLAY MARK ANGLE<br />
<br />
<br />
<br />
<br />
<br />
<br />
<br />
Compatible Media<br />
This DVD+VCR will play the following media:<br />
• DVD<br />
• Audio CD<br />
• <strong>Video</strong> CD/Super <strong>Video</strong> CD<br />
• MP3 files on CD-R/RW<br />
• JPEG files on CD-R/RW<br />
• DVD-R/RW<br />
• DVD+R/RW<br />
• VHS tape<br />
<br />
<br />
<br />
This DVD+VCR will record on the following media:<br />
• VHS tape<br />
1 - Welcome<br />
7
Front Panel<br />
Front panel overview:<br />
<br />
<br />
1 POWER button<br />
2 VCR deck<br />
3 DVD deck<br />
4 AUDIO/VIDEO IN jacks<br />
5 VCR EJECT button<br />
6 RECORD button<br />
7 CHANNEL / buttons<br />
8 Front Panel Display<br />
9 DVD•VCR SELECT button<br />
10 STOP button<br />
11 REW button<br />
12 PLAY/ button<br />
13 FF button<br />
14 DVD EJECT button<br />
NOTE:<br />
• CHILD LOCK - To lock the DVD+VCR to prevent unwanted operation, press and hold<br />
the POWER button on the remote control for 8 seconds. SAFE will flash on the front<br />
panel display. Press and hold POWER for 8 seconds to restore normal operation.<br />
8 DVD+VCR User’s <strong>Guide</strong>
Front Panel Display<br />
Front panel display overview:<br />
<br />
<br />
<br />
<br />
1 VHS tape loaded indicator<br />
2 VCR mode indicator<br />
3 DVD mode indicator<br />
4 Disc loaded indicator<br />
5 Record indicator<br />
6 DVD+VCR status indicator<br />
7 Timer Record indicator<br />
1 - Welcome<br />
9
Rear Panel<br />
Rear panel overview:<br />
AUDIO<br />
OUT<br />
DVD ONLY<br />
COMPONENT<br />
VIDEO OUT<br />
Pr<br />
VIDEO<br />
OUT<br />
VIDEO 1<br />
IN<br />
DVD + VCR<br />
IN<br />
(FROM ANT.)<br />
R<br />
R<br />
Pb<br />
AUDIO<br />
RF<br />
L<br />
S-VIDEO OUT<br />
L<br />
DIGITAL<br />
AUDIO OUT<br />
COAXIAL<br />
Y<br />
VIDEO<br />
OUT<br />
(TO TV)<br />
<br />
<br />
<br />
<br />
<br />
<br />
<br />
<br />
DVD Playback Only<br />
These jacks are for DVD playback only:<br />
1 STEREO AUDIO OUT jacks<br />
2 DIGITAL AUDIO OUT jack<br />
3 COMPONENT VIDEO OUT jacks<br />
4 S-VIDEO OUT jack<br />
DVD+VCR Playback<br />
These jacks are for both DVD and<br />
VCR playback:<br />
5 AUDIO/VIDEO OUT jacks<br />
6 AUDIO/VIDEO IN jacks<br />
7 ANTENNA IN jack<br />
8 ANTENNA OUT jack<br />
10 DVD+VCR User’s <strong>Guide</strong>
Remote Control<br />
Remote control overview:<br />
<br />
<br />
<br />
<br />
<br />
<br />
<br />
<br />
<br />
<br />
<br />
<br />
<br />
EJECT POWER<br />
VCR DVD TV VIEW<br />
1 2 3<br />
TRK- TRK+<br />
4 5 6<br />
7 8 9<br />
0<br />
100+/P.SCAN CLEAR<br />
SETUP CH+ DISPLAY<br />
TITLE<br />
ENTER<br />
CH-<br />
REW PLAY FF<br />
REPEAT<br />
MENU<br />
SUBTITLE AUDIO SEARCH ZOOM<br />
REC<br />
PREV STOP NEXT<br />
SPEED<br />
A-B<br />
TV/VCR AUTO PLAY MARK ANGLE<br />
SKIP REPLAY LAST CH. PROG.<br />
<br />
<br />
<br />
<br />
<br />
1 EJECT button<br />
2 VCR button<br />
DVD button<br />
TV VIEW button<br />
3 0-9 buttons<br />
TRACKING+/- buttons<br />
4 100+/P.SCAN button<br />
5 SETUP button<br />
6 ARROW buttons<br />
CH buttons<br />
7 TITLE button<br />
8 SUBTITLE button<br />
AUDIO button<br />
SEARCH button<br />
ZOOM button<br />
9 REW/FF buttons<br />
PLAY/PAUSE button<br />
10 PREV/NEXT buttons<br />
STOP button<br />
11 RECORD button<br />
RECORD SPEED button<br />
REPEAT button<br />
A-B REPEAT button<br />
12 TV/VCR button<br />
AUTO PLAY button<br />
MARK button<br />
ANGLE button<br />
13 SKIP button<br />
REPLAY button<br />
LAST CHANNEL button<br />
PROGRAM button<br />
14 POWER button<br />
15 CLEAR button<br />
16 DISPLAY button<br />
17 ENTER button<br />
18 DISC MENU button<br />
NOTE:<br />
• Press VCR to control the VCR deck and press DVD to control the DVD deck.<br />
• Press TV VIEW to switch among all inputs.<br />
1 - Welcome<br />
11
2 Connections<br />
This Chapter shows you how to connect the<br />
DVD+VCR to your TV and other home theater<br />
components.<br />
• For basic connections, see pages 13-15.<br />
• For advanced connections, see pages 16-19.<br />
12 DVD+VCR User’s <strong>Guide</strong>
Antenna/Basic Cable Connections<br />
If you are using an antenna or basic cable TV service:<br />
1 Connect the RF coaxial cable from the antenna or cable wall outlet to the rear<br />
panel of the DVD+VCR as shown.<br />
2 Connect the DVD+VCR to your TV; see page 15.<br />
<br />
<br />
<br />
AUDIO<br />
OUT<br />
DVD ONLY<br />
COMPONENT<br />
VIDEO OUT<br />
Pr<br />
VIDEO<br />
OUT<br />
VIDEO 1<br />
IN<br />
DVD + VCR<br />
IN<br />
(FROM ANT.)<br />
R<br />
R<br />
Pb<br />
AUDIO<br />
RF<br />
L<br />
S-VIDEO OUT<br />
L<br />
DIGITAL<br />
AUDIO OUT<br />
COAXIAL<br />
<br />
Y<br />
VIDEO<br />
OUT<br />
(TO TV)<br />
NOTE:<br />
• Do not connect the AC power cord until all other connections have<br />
been made.<br />
• The DVD+VCR receives broadcast channels 2-69 and cable TV<br />
channels 1-125.<br />
2 - Connections<br />
13
Cable Box/Satellite Receiver<br />
Connections<br />
If you are using a cable box or satellite receiver:<br />
1 Connect an RF cable from the wall outlet to the cable box/receiver.<br />
2 Connect an RF cable from the cable box/receiver to the DVD+VCR.<br />
3 Connect the DVD+VCR to your TV; see page 15.<br />
<br />
<br />
<br />
<br />
<br />
<br />
<br />
AUDIO<br />
OUT<br />
DVD ONLY<br />
COMPONENT<br />
VIDEO OUT<br />
Pr<br />
VIDEO<br />
OUT<br />
VIDEO 1<br />
IN<br />
DVD + VCR<br />
IN<br />
(FROM ANT.)<br />
R<br />
R<br />
Pb<br />
AUDIO<br />
RF<br />
L<br />
S-VIDEO OUT<br />
L<br />
DIGITAL<br />
AUDIO OUT<br />
COAXIAL<br />
Y<br />
VIDEO<br />
OUT<br />
(TO TV)<br />
<br />
NOTE:<br />
• With this connection, set the DVD+VCR to channel 3 or 4 and then select channels on<br />
the cable box/receiver. For Cable Box Setup options, see page 24.<br />
• If your cable box/receiver is equipped with AV Out jacks, use the Rear or Front AV<br />
Connections for better picture and sound quality; see pages 18-19.<br />
14 DVD+VCR User’s <strong>Guide</strong>
Basic TV Connections<br />
If your TV has standard RF or AV inputs:<br />
1 Connect the supplied RF cable from the DVD+VCR to your TV as shown.<br />
OR<br />
Connect the supplied audio/video cables from the DVD+VCR to your TV as shown.<br />
2 Connect the supplied power cable from the DVD+VCR to a standard wall outlet.<br />
3 Press POWER to turn on the DVD+VCR.<br />
4 Turn on your TV and set it to channel 3 or 4 (for the RF connection) or the appropriate<br />
<strong>Video</strong> input (for the AV connection).<br />
• The <strong>Go</strong><strong>Video</strong> splash screen appears.<br />
5 Continue with Chapter 3 to set up your DVD+VCR.<br />
<br />
AUDIO<br />
OUT<br />
DVD ONLY<br />
COMPONENT<br />
VIDEO OUT<br />
Pr<br />
VIDEO<br />
OUT<br />
VIDEO 1<br />
IN<br />
DVD + VCR<br />
IN<br />
(FROM ANT.)<br />
R<br />
R<br />
Pb<br />
AUDIO<br />
RF<br />
L<br />
S-VIDEO OUT<br />
L<br />
DIGITAL<br />
AUDIO OUT<br />
COAXIAL<br />
Y<br />
VIDEO<br />
OUT<br />
(TO TV)<br />
<br />
<br />
<br />
<br />
<br />
<br />
<br />
NOTE:<br />
• If your TV has S-<strong>Video</strong> or Component <strong>Video</strong> inputs, see page 16.<br />
• To change the RF Out channel to 3 or 4, see page 24.<br />
2 - Connections<br />
15
Enhanced <strong>Video</strong> Options<br />
If your TV has S-<strong>Video</strong> or Component <strong>Video</strong> inputs, you can enjoy<br />
superior picture quality (DVD playback only).<br />
1 Connect an S-<strong>Video</strong> cable OR set of Component <strong>Video</strong> cables<br />
from the DVD+VCR to your TV as shown.<br />
2 Select the S-<strong>Video</strong> or Component <strong>Video</strong> input on your TV to<br />
view the DVD+VCR.<br />
• If you use the S-<strong>Video</strong> Out or Component <strong>Video</strong> connection,<br />
you must set <strong>Video</strong> Out and Scan Mode in the DVD<br />
Setup menu; see page 28.<br />
<br />
<br />
<br />
<br />
<br />
AUDIO<br />
OUT<br />
DVD ONLY<br />
COMPONENT<br />
VIDEO OUT<br />
Pr<br />
VIDEO<br />
OUT<br />
VIDEO 1<br />
IN<br />
DVD + VCR<br />
IN<br />
(FROM ANT.)<br />
R<br />
R<br />
Pb<br />
AUDIO<br />
RF<br />
L<br />
S-VIDEO OUT<br />
L<br />
DIGITAL<br />
AUDIO OUT<br />
COAXIAL<br />
Y<br />
VIDEO<br />
OUT<br />
(TO TV)<br />
<br />
<br />
<br />
<br />
<br />
<br />
<br />
<br />
<br />
NOTE:<br />
• Be sure to choose one of the audio connection options on page 17.<br />
• The S-<strong>Video</strong> and Component <strong>Video</strong> connections are for DVD playback only!<br />
16 DVD+VCR User’s <strong>Guide</strong>
Enhanced Audio Options<br />
If you have a stereo system or digital audio receiver, you can enjoy<br />
superior sound quality.<br />
1 Connect left/right audio cables from the DVD+VCR to your<br />
stereo system as shown.<br />
OR<br />
Connect a digital coaxial cable from the DVD+VCR to your digital<br />
audio receiver as shown.<br />
2 Select the appropriate audio input on your stereo or receiver to<br />
hear the DVD+VCR.<br />
<br />
<br />
• If you used the coaxial connection, you must set Digital Out in the DVD Setup<br />
menu; see page 29.<br />
<br />
AUDIO<br />
OUT<br />
DVD ONLY<br />
COMPONENT<br />
VIDEO OUT<br />
Pr<br />
VIDEO<br />
OUT<br />
VIDEO 1<br />
IN<br />
DVD + VCR<br />
IN<br />
(FROM ANT.)<br />
R<br />
R<br />
Pb<br />
AUDIO<br />
RF<br />
L<br />
S-VIDEO OUT<br />
L<br />
DIGITAL<br />
AUDIO OUT<br />
COAXIAL<br />
Y<br />
VIDEO<br />
OUT<br />
(TO TV)<br />
<br />
<br />
<br />
<br />
<br />
<br />
NOTE:<br />
• If your receiver is equipped with a Dolby Digital and/or DTS decoder your can enjoy<br />
5.1 surround sound playback while watching DVD movies.<br />
2 - Connections<br />
17
Rear AV Connections<br />
You can view and record from an external device, such as a VCR, connected to the rear<br />
AV inputs.<br />
1 Connect standard audio/video cables from the outputs of the external device to<br />
the inputs of the DVD+VCR as shown.<br />
2 Press TV VIEW until <strong>Video</strong> 1 appears on the screen.<br />
<br />
AUDIO<br />
OUT<br />
DVD ONLY<br />
COMPONENT<br />
VIDEO OUT<br />
Pr<br />
VIDEO<br />
OUT<br />
VIDEO 1<br />
IN<br />
DVD + VCR<br />
IN<br />
(FROM ANT.)<br />
R<br />
R<br />
Pb<br />
AUDIO<br />
RF<br />
L<br />
S-VIDEO OUT<br />
L<br />
DIGITAL<br />
AUDIO OUT<br />
COAXIAL<br />
Y<br />
VIDEO<br />
OUT<br />
(TO TV)<br />
<br />
<br />
<br />
<br />
<br />
NOTE:<br />
• To record from the external device, see page 38.<br />
18 DVD+VCR User’s <strong>Guide</strong>
Front AV Connections<br />
You can view and record from an external device, such as a camcorder or video game,<br />
connected to the front panel AV inputs.<br />
1 Connect standard audio/video cables from the outputs of the external device to<br />
the inputs of the DVD+VCR as shown.<br />
2 Press TV VIEW until <strong>Video</strong> 2 appears on the screen.<br />
<br />
<br />
<br />
<br />
<br />
<br />
NOTE:<br />
• To record from the external device, see page 38.<br />
2 - Connections<br />
19
3 Setup<br />
This Chapter allows you to customize the<br />
DVD+VCR to meet your system requirements and<br />
personal preferences.<br />
Key settings:<br />
• To set the time and date, see page 22.<br />
• To search for TV channels, see page 23.<br />
20 DVD+VCR User’s <strong>Guide</strong>
VCR Setup Menu Overview<br />
The VCR Setup menu allows you to set your preferences for the VCR deck. Choose from<br />
these categories:<br />
• Clock Settings – see page 22<br />
• Channel Settings – see page 23-24<br />
• Other VCR Settings – see page 25<br />
About VCR Menu Navigation<br />
• Press VCR to switch to VCR mode.<br />
• Press SETUP to display the VCR Setup<br />
menu.<br />
• Use the keys to move up and down.<br />
• Use the keys to move left and right.<br />
• Press ENTER to make selections.<br />
• Press SETUP again to go back and exit the<br />
Setup menu.<br />
<br />
EJECT POWER<br />
VCR DVD TV VIEW<br />
1 2 3<br />
TRK- TRK+<br />
4 5 6<br />
7 8 9<br />
0<br />
100+/P.SCAN CLEAR<br />
<br />
SETUP CH+ DISPLAY<br />
ENTER<br />
<br />
TITLE<br />
MENU<br />
CH-<br />
SUBTITLE AUDIO SEARCH ZOOM<br />
REW PLAY FF<br />
PREV STOP NEXT<br />
REC<br />
SPEED<br />
REPEAT<br />
A-B<br />
TV/VCR AUTO PLAY MARK ANGLE<br />
SKIP REPLAY LAST CH. PROG.<br />
NOTE:<br />
• For DVD Setup, see page 26.<br />
3 - Setup<br />
21
Clock Settings<br />
Time & Date Set<br />
Allows you to set the date and time. This<br />
is necessary if you wish to record TV<br />
shows with the timer record feature.<br />
1 Press VCR, then press SETUP.<br />
2 Select Clock Set > Time and Date Set.<br />
3 Set the time and date:<br />
• Use to move the cursor.<br />
• Use to change each setting.<br />
4 When finished, press SETUP to exit.<br />
Auto Clock Set<br />
Automatically adjusts the clock for<br />
Daylight Saving Time. If you live in an<br />
area that does not use Daylight Saving<br />
Time, turn this feature off.<br />
1 Press VCR, then press SETUP.<br />
2 Select Clock Set > Auto Clock Set.<br />
3 Choose from the following:<br />
On - Adjusts the DVD+VCR’s clock automatically<br />
for Daylight Saving Time.<br />
Off - Ignores Daylight Saving Time.<br />
4 When finished, press SETUP to exit.<br />
22 DVD+VCR User’s <strong>Guide</strong>
Channel Settings<br />
Auto Channel Search<br />
Automatically searches for all available TV<br />
stations from antenna or cable TV. If you<br />
are using a cable box or satellite receiver,<br />
you do not need to run Auto Channel<br />
Search.<br />
1 Press VCR, then press SETUP.<br />
2 Select Channel Set > Auto Channel<br />
Search.<br />
3 Choose from the following:<br />
Cable TV - Select if the DVD+VCR is<br />
connected to a cable TV source.<br />
Antenna - Select if the DVD+VCR is<br />
connected to an antenna.<br />
Detect Automatically - Select to<br />
have the DVD+VCR detect your signal<br />
source automatically.<br />
4 The DVD+VCR searches for all available<br />
stations. This may take several<br />
minutes to complete.<br />
5 When finished, the DVD+VCR tunes to<br />
the lowest channel found.<br />
Add/Remove Channels<br />
Allows you to manually add or remove<br />
channels.<br />
1 Press VCR, then press SETUP.<br />
2 Select Channel Set > Add/Remove<br />
Channels.<br />
3 Add or remove channels:<br />
• Use to select the desired channel.<br />
• Press to add or to remove the<br />
channel.<br />
4 When finished, press SETUP to exit.<br />
3 - Setup<br />
23
Channel Settings (continued)<br />
Signal Type<br />
Specifies whether the DVD+VCR is<br />
connected to an antenna or cable TV<br />
source.<br />
1 Press VCR, then press SETUP.<br />
2 Select Channel Set > Signal Type.<br />
3 Choose from the following:<br />
Antenna - Select if the DVD+VCR is<br />
connected to an antenna.<br />
Cable - Select if the DVD+VCR is connected<br />
to a cable TV source.<br />
4 When finished, press SETUP to exit.<br />
Cable Box Setup<br />
Allows you to specify the channel or<br />
input the DVD+VCR uses to view an<br />
external cable box or satellite receiver.<br />
1 Press VCR, then press SETUP.<br />
2 Select Channel Set > Cable Box Setup.<br />
3 Set the cable box channel/input:<br />
• Use to select the cable box<br />
output channel (usually 3 or 4).<br />
• Use the TV VIEW button on the remote<br />
to select the <strong>Video</strong> 1 (rear) or<br />
<strong>Video</strong> 2 (front) input.<br />
4 When finished, press SETUP to exit.<br />
RF Output<br />
Sets the RF Output Channel (the channel<br />
you set on your TV to view the<br />
DVD+VCR).<br />
1 Press VCR, then press SETUP.<br />
2 Select Channel Set > RF Output.<br />
3 Set the RF Output Channel to 3 or 4.<br />
4 Set your TV to the channel you selected<br />
in step 3.<br />
5 When finished, press SETUP to exit.<br />
24 DVD+VCR User’s <strong>Guide</strong>
Other VCR Settings<br />
Auto Play<br />
Starts VCR playback automatically when<br />
you load a tape with its record safety tab<br />
removed.<br />
1 Press VCR, then press SETUP.<br />
2 Select Functions > Auto Play.<br />
3 Turn Auto Play on or off.<br />
4 When finished, press SETUP to exit.<br />
Auto TV/VCR<br />
Controls whether the DVD+VCR switches<br />
to VCR mode automatically when turned<br />
on.<br />
1 Press VCR, then press SETUP.<br />
2 Select Functions > Auto TV/VCR.<br />
3 Choose from the following:<br />
On - Select if you want the DVD+VCR<br />
to switch to VCR mode when it is<br />
turned on or a tape is inserted.<br />
Off - Select if you want the DVD+VCR<br />
to remain in TV mode when powered<br />
on.<br />
4 When finished, press SETUP to exit.<br />
Language Setting<br />
Sets the default language for the VCR<br />
Setup menu.<br />
1 Press VCR, then press SETUP.<br />
2 Select Language Select.<br />
3 Select your preferred language (English,<br />
Spanish, or French).<br />
4 When finished, press SETUP to exit.<br />
3 - Setup<br />
25
DVD Setup Menu Overview<br />
The DVD Setup menu allows you to set your preferences for the DVD deck. Choose<br />
from these categories:<br />
• Language Settings – see page 27<br />
• <strong>Video</strong> Settings – see pages 28<br />
• Audio Settings – see page 29<br />
• Other Settings – see page 30-31<br />
About DVD Menu Navigation<br />
• Press DVD to switch to DVD mode.<br />
• Press STOP to make sure DVD playback is<br />
stopped.<br />
• Press SETUP to display the DVD Setup menu.<br />
• Use the keys to move up and down.<br />
• Use the keys to move left and right.<br />
• Press ENTER to make selections.<br />
• Press SETUP again to exit the Setup menu.<br />
<br />
EJECT POWER<br />
VCR DVD TV VIEW<br />
1 2 3<br />
TRK- TRK+<br />
4 5 6<br />
7 8 9<br />
0<br />
100+/P.SCAN CLEAR<br />
<br />
SETUP CH+ DISPLAY<br />
ENTER<br />
<br />
TITLE<br />
MENU<br />
CH-<br />
SUBTITLE AUDIO SEARCH ZOOM<br />
REW PLAY FF<br />
<br />
PREV STOP NEXT<br />
REC<br />
SPEED<br />
REPEAT<br />
A-B<br />
TV/VCR AUTO PLAY MARK ANGLE<br />
SKIP REPLAY LAST CH. PROG.<br />
NOTE:<br />
• For VCR Setup, see page 21.<br />
26 DVD+VCR User’s <strong>Guide</strong>
Language Settings<br />
On-Screen Display Language<br />
Sets the default language for the DVD<br />
Setup menu and on-screen displays.<br />
1 In DVD Stop mode, press SETUP.<br />
2 Select Language > OSD Language.<br />
3 Select your preferred OSD language<br />
(English, French, or Spanish).<br />
Audio Language<br />
Sets your preferred language for DVD<br />
audio soundtracks.<br />
1 In DVD Stop mode, press SETUP.<br />
2 Select Language > Audio.<br />
3 Select your preferred DVD Audio language.<br />
• Select Auto to choose the DVD’s<br />
default Audio language.<br />
Subtitle Language<br />
Sets your preferred language for DVD<br />
subtitles.<br />
1 In DVD Stop mode, press SETUP.<br />
2 Select Language > Subtitle.<br />
3 Select your preferred DVD Subtitle<br />
language.<br />
• Select Off to disable subtitles.<br />
Disc Menu Language<br />
Sets your preferred language for DVD<br />
Disc Menus.<br />
1 In DVD Stop mode, press SETUP.<br />
2 Select Language > Menu.<br />
3 Select your preferred DVD Disc Menu<br />
language.<br />
• Select Auto to choose the DVD’s<br />
default Disc Menu language.<br />
NOTE:<br />
• For additional languages, choose “Others” and refer to the table on page 45.<br />
3 - Setup<br />
27
<strong>Video</strong> Settings<br />
TV Aspect Ratio<br />
Sets your preferred aspect ratio for DVD<br />
movies.<br />
1 In DVD Stop mode, press SETUP.<br />
2 Select <strong>Video</strong> > TV Aspect.<br />
3 Choose from the following:<br />
4:3 PS - Select if you have a standard<br />
TV and prefer to have widescreen<br />
movies cropped to fit the screen.<br />
4:3 LB - Select if you have a standard<br />
TV and prefer to watch widescreen<br />
movies with black bars above and<br />
below the picture.<br />
16:9 Wide - Select if you have a widescreen<br />
TV.<br />
<strong>Video</strong> Output<br />
Enables the Component <strong>Video</strong> or<br />
Progressive Scan output to your TV.<br />
1 In DVD Stop mode, press SETUP.<br />
2 Select <strong>Video</strong> > <strong>Video</strong> Out.<br />
3 Choose from the following:<br />
S-<strong>Video</strong> - Enables the S-<strong>Video</strong> output.<br />
Component - Enables the Component<br />
<strong>Video</strong> output.<br />
Scan Mode<br />
Sets the Component <strong>Video</strong> output to<br />
Interlace or Progressive Scan.<br />
1 In DVD Stop mode, press SETUP.<br />
2 Select <strong>Video</strong> > Scan Mode.<br />
3 Choose from the following:<br />
Progressive - Select if your TV supports<br />
Progressive Scan.<br />
Interlace - Select if your TV supports<br />
standard Interlace Scan.<br />
NOTE:<br />
• You can also press and hold the P.SCAN<br />
button for 5 seconds in Stop mode to<br />
switch between Interlace & Progressive<br />
Scan modes.<br />
28 DVD+VCR User’s <strong>Guide</strong>
Audio Settings<br />
Digital Out<br />
Sets the format of the digital audio signal<br />
from the rear panel Coaxial jack.<br />
1 In DVD Stop mode, press SETUP.<br />
2 Select Audio > Digital Out.<br />
3 Choose from the following:<br />
Bitstream - Select if the DVD+VCR is<br />
connected to a 5.1 channel amplifier/<br />
receiver with a Dolby Digital or DTS<br />
decoder.<br />
LPCM – Select if the DVD+VCR is connected<br />
to a 2-channel (stereo) digital<br />
amplifier.<br />
Dynamic Range<br />
Compresses the dynamic range of the<br />
audio output (the difference between the<br />
loudest and quietest passages) during<br />
DVD playback.<br />
1 In DVD Stop mode, press SETUP.<br />
2 Select Audio > Dynamic Range.<br />
3 Use the buttons to move the<br />
Dynamic Range slider from OFF (no<br />
compression) to FULL (maximum<br />
compression).<br />
3 - Setup<br />
29
Other DVD Settings<br />
On-Screen Display<br />
Enables the on-screen display (OSD),<br />
which provides feedback on the current<br />
status of the DVD+VCR.<br />
1 In DVD Stop mode, press SETUP.<br />
2 Select Others > OSD.<br />
3 Turn On-Screen Displays on or off.<br />
Screen Saver<br />
Enables the built-in screensaver, which<br />
appears automatically if the DVD+VCR is<br />
left in Stop for longer than 5 minutes.<br />
1 In DVD Stop mode, press SETUP.<br />
2 Select Others > Screen Saver.<br />
3 Turn the Screen Saver on or off.<br />
Closed Captions<br />
Enables closed captions, i.e., subtitles that<br />
appear while watching a movie.<br />
1 In DVD Stop mode, press SETUP.<br />
2 Select Others > Captions.<br />
3 Turn Closed Captions on or off.<br />
Restore Defaults<br />
Restores the DVD+VCR to its original<br />
factory settings.<br />
1 In DVD Stop mode, press SETUP.<br />
2 Select Others > Defaults.<br />
3 Select Reset and press ENTER.<br />
• The DVD+VCR will restore all menu<br />
settings (except Parental Control) to<br />
their original factory defaults.<br />
ENTER<br />
ENTER<br />
ENTER<br />
ENTER<br />
ENTER<br />
ENTER<br />
ENTER<br />
ENTER<br />
ENTER<br />
ENTER<br />
ENTER<br />
ENTER<br />
SETUP<br />
SETUP<br />
SETUP<br />
SETUP<br />
SETUP<br />
SETUP<br />
SETUP<br />
SETUP<br />
SETUP<br />
SETUP<br />
SETUP<br />
SETUP<br />
30 DVD+VCR User’s <strong>Guide</strong>
Other DVD Settings (continued)<br />
Parental Control<br />
Blocks playback of rated DVDs based on<br />
their content. Not all discs are rated.<br />
1 In DVD Stop mode, press SETUP.<br />
2 Select Others > Parental.<br />
3 Select the desired Parental Control<br />
rating from “1 Kids” to “8 Adult”, then<br />
press ENTER.<br />
4 Enter your password using the 0-9<br />
keys, then press ENTER.<br />
• The factory default password is<br />
3308. If you forget your password,<br />
this will always work.<br />
Password<br />
Changes the Parental Control password.<br />
1 In DVD Stop mode, press SETUP.<br />
2 Select Others > Password.<br />
3 Enter your old password using the 0-9<br />
keys.<br />
4 Enter your new password.<br />
5 Re-enter your new password and<br />
press ENTER.<br />
AutoPlay<br />
AutoPlay skips the ads and trailers and<br />
starts DVD playback automatically when<br />
you load a disc.<br />
1 In DVD Stop mode, press SETUP.<br />
2 Select Others > AutoPlay.<br />
3 Turn AutoPlay on or off.<br />
NOTE:<br />
• Even if AutoPlay is turned off in the menu system, you can still skip the<br />
ads and trailers on most discs by pressing the AUTO PLAY button on<br />
the remote control after the disc has loaded.<br />
• The AUTO PLAY button will not work on some DVDs when a Disc Menu<br />
or Warning screen is displayed.<br />
AUTO PLAY<br />
3 - Setup<br />
31
4 Operations<br />
This Chapter shows you how to use the most common<br />
features of the DVD+VCR, including playing<br />
tapes and discs, and recording TV shows.<br />
• For playback features, see pages 33-36.<br />
• For recording features, see pages 37-40.<br />
32 DVD+VCR User’s <strong>Guide</strong>
Basic DVD+VCR Playback<br />
Playing a DVD<br />
Follow these steps to play a DVD.<br />
1 Press POWER to turn on the<br />
DVD+VCR.<br />
2 Press DVD to control the DVD deck.<br />
3 Load your DVD in the disc tray with<br />
the label side up.<br />
• Press EJECT to<br />
open and close<br />
the disc tray.<br />
4 Press PLAY to<br />
start playback.<br />
• Many DVD discs<br />
play automatically<br />
when<br />
loaded.<br />
• If the DVD has<br />
a Disc Menu, or more than one Title,<br />
the Disc Menu may appear. If so, use<br />
to highlight options, and<br />
press ENTER to make selections.<br />
5 Press PLAYto pause and resume<br />
playback.<br />
6 Press STOP to stop playback.<br />
• One press stops and holds playback.<br />
Two presses resets the disc to the<br />
beginning.<br />
• For special DVD playback options,<br />
see page 34.<br />
Playing a Tape<br />
Follow these steps to play a VHS tape.<br />
1 Press POWER to turn on the<br />
DVD+VCR.<br />
2 Press VCR to control the VCR deck.<br />
3 Load your videotape in the VCR deck.<br />
4 Press PLAY to start playback.<br />
• Many prerecorded tapes play automatically<br />
when loaded.<br />
5 Press PLAYto pause and resume<br />
playback.<br />
6 Press STOP to stop playback.<br />
• For special VCR playback options,<br />
see page 35.<br />
4 - Operations<br />
33
P.SCAN<br />
Special DVD Playback Options<br />
1 TRK- 3<br />
TRK+<br />
DISPLAY<br />
LE MENU<br />
AUDIO SEARCH ZOOM<br />
/P.SCAN<br />
FF<br />
CLEAR<br />
1 TRK- 3<br />
TRK+<br />
100+/P.SCAN<br />
PLAY<br />
AUDIO SEARCH ZOOM<br />
EPEAT TV/VCR A-B<br />
AY MARK ANGLE<br />
REPLAY PROG.<br />
1 TRK- 3<br />
REW/FF<br />
Scans backward/forward<br />
at variable speeds. In Pause<br />
mode, plays in slow motion<br />
(forward only).<br />
PREV/NEXT<br />
Skips to the next or previous<br />
Chapter. In Pause<br />
mode, steps forward one<br />
frame at a time.<br />
DISPLAY<br />
Displays current playback<br />
information, including the<br />
Title and Chapter number,<br />
and the elapsed and remaining<br />
playback time.<br />
TRK+<br />
DISPLAY<br />
TITLE MENU<br />
DISPLAY<br />
CLEAR<br />
REW FF<br />
TITLE<br />
Displays the DVD Title<br />
Menu (if available).<br />
SUBTITLE AUDIO SEARCH ZOOM<br />
ITLE MENU<br />
DISPLAY<br />
00+/P.SCAN<br />
V NEXT<br />
STOP<br />
FF<br />
EV REWNEXTFF<br />
CLEAR<br />
PREV NEXT<br />
PLAY<br />
EPEAT TV/VCR A-B<br />
TITLE DISPLAY MENU<br />
100+/P.SCAN<br />
SUBTITLE AUDIO SEARCH ZOOM<br />
SUBTITLE AUDIO SEARCH ZOOM<br />
REW FF<br />
REW FF<br />
PREV NEXT<br />
CLEAR<br />
REPEAT TV/VCR A-B<br />
STOP<br />
PLAY<br />
MENU<br />
Displays the DVD Disc<br />
Menu (if available). Use<br />
the and ENTER<br />
keys to select options.<br />
PLAY<br />
STOP<br />
AUTO PLAY MARK ANGLE<br />
AY MARK ANGLE<br />
CLEAR<br />
REPEAT TV/VCR A-B<br />
PLAY<br />
PLAY STOP<br />
AUTO PLAY MARK ANGLE<br />
1 TRK- 3<br />
SKIP REPLAY PROG.<br />
TRK+<br />
TITLE MENU<br />
PREV NEXT<br />
AUDIO SEARCH ZOOM<br />
REPEAT TV/VCR A-B<br />
TITLE MENU<br />
SUBTITLE AUDIO SEARCH ZOOM<br />
PREV NEXT<br />
STOP<br />
CLEAR<br />
REPEAT TV/VCR A-B<br />
STOP<br />
AUTO PLAY MARK ANGLE<br />
SKIP REPLAY PROG.<br />
SEARCH<br />
Jumps to a specific Title,<br />
Chapter, or Time. Use the<br />
0-9 keys and press ENTER<br />
to start playback from the<br />
specified time.<br />
TITLE MENU<br />
REW FF<br />
100+/P.SCAN<br />
1 TRK- 3<br />
1 TRK- 3<br />
PREV NEXT<br />
CLEAR<br />
TRK+<br />
1 TRK- 3<br />
TRK+<br />
CLEAR<br />
DISPLAY<br />
TITLE<br />
PLAY<br />
MENU<br />
SUBTITLE AUDIO SEARCH ZOOM<br />
TITLE MENU<br />
PREV NEXT<br />
DISPLAY<br />
100+/P.SCAN<br />
DISPLAY<br />
REW FF<br />
PLAY<br />
100+/P.SCAN<br />
CLEAR<br />
CLEAR<br />
100+/P.SCAN<br />
DISPLAY<br />
TITLE MENU<br />
TITLE 100+/P.SCAN<br />
MENU PREV DISPLAY<br />
NEXT<br />
CLEAR<br />
REW FF<br />
REW FF<br />
REW<br />
PREV<br />
FF<br />
NEXT<br />
PREV NEXT<br />
REPEAT TV/VCR A-B<br />
REPEAT TV/VCR A-B<br />
AUTO PLAY MARK ANGLE<br />
REPEAT TV/VCR A-B<br />
SKIP REPLAY PROG.<br />
STOP<br />
STOPPLAY<br />
AUTO PLAY MARK ANGLE<br />
AUTO PLAY MARK ANGLE<br />
SKIP REPLAY PROG.<br />
SKIP REPLAY PROG.<br />
100+/P.SCAN<br />
CLEAR<br />
SUBTITLE<br />
Displays available subtitles<br />
on the DVD.<br />
AUDIO<br />
Displays available soundtracks/audio<br />
formats on<br />
the DVD.<br />
ANGLE<br />
Displays available camera<br />
angles on the DVD.<br />
STOP<br />
DISPLAY<br />
TITLE MENU<br />
SUBTITLE AUDIO SEARCH ZOOM<br />
100+/P.SCANREW FF DISPLAY<br />
PLAY<br />
STOP<br />
SUBTITLE AUDIO<br />
REPEAT<br />
SEARCH TV/VCR A-B<br />
ZOOM<br />
AUTO PLAY MARK ANGLE<br />
SUBTITLE AUDIO REPEAT SEARCH TV/VCRZOOMA-B<br />
SUBTITLE AUDIO SEARCH ZOOM<br />
SKIP REPLAY PROG.<br />
SKIP REPLAY PROG.<br />
SUBTITLE AUDIO SEARCH ZOOM<br />
TRK+<br />
REPEAT TV/VCR A-B<br />
1 TRK- 3<br />
TRK+<br />
1 TRK- 3<br />
TRK+<br />
PREV NEXT<br />
PLAY<br />
PLAY<br />
1 TRK- 3<br />
TRK+<br />
CLEAR<br />
REW FF<br />
CLEAR TITLE MENU<br />
REW FF<br />
PREV NEXT<br />
STOP<br />
AUTO PLAY MARK ANGLE<br />
SKIP REPLAY PROG.<br />
TITLE MENU<br />
SUBTITLE AUDIO SEARCH ZOOM<br />
PREV NEXT<br />
REPEAT TV/VCR A-B<br />
PLAY<br />
AUTO PLAY MARK ANGLE<br />
STOP<br />
SKIP REPLAY PROG.<br />
REPEAT TV/VCR A-B<br />
ZOOM<br />
Magnifies the on-screen<br />
image.<br />
STOP<br />
REPEAT<br />
Repeats the current Chapter<br />
or Title.<br />
PLAY<br />
STOP<br />
AUTO PLAY MARK ANGLE<br />
AUTO PLAY MARK ANGLE<br />
SKIP REPLAY PROG.<br />
SKIP REPLAY PROG.<br />
A-B<br />
Sets two points (A and B)<br />
to repeat in a loop. Select<br />
Off to resume normal play.<br />
MARK<br />
Bookmarks the current<br />
playback position.<br />
PROGRAM<br />
Programs a custom DVD<br />
playback order.<br />
REPLAY PROG.<br />
O PLAY MARK ANGLE<br />
KIP REPLAY PROG.<br />
34 DVD+VCR User’s <strong>Guide</strong>
1 TRK- 3<br />
100+/P.SCAN<br />
Special VCR Playback Options<br />
TRK+<br />
REW FF<br />
1 TRK- 3<br />
TRK+<br />
DISPLAY<br />
CLEAR<br />
DISPLAY<br />
100+/P.SCAN DISPLAY<br />
.SCAN<br />
TITLE MENU<br />
TITLE MENU<br />
LE MENU<br />
BTITLE AUDIO SEARCH ZOOM<br />
FF<br />
100+/P.SCAN<br />
CLEAR<br />
PREV NEXT<br />
REW FF<br />
PLAY<br />
1 TRK- 3<br />
SUBTITLE AUDIO SEARCH ZOOM<br />
AUDIO SEARCH ZOOM<br />
1 TRK- 3<br />
TRK+<br />
REPEAT TV/VCR A-B<br />
REW<br />
Scans backward at high<br />
speed. In Stop mode, rewinds<br />
the tape.<br />
FF<br />
Scans forward at high<br />
speed. In Stop mode, fastforwards<br />
the tape. In Pause<br />
mode, plays in slow motion<br />
(forward only).<br />
NEXT<br />
In Pause mode, steps forward<br />
one frame at a time.<br />
TRACKING+/-<br />
Manually r<strong>edu</strong>ces noise<br />
on the screen during tape<br />
playback.<br />
DISPLAY<br />
Displays the clock and current<br />
playback information,<br />
including elapsed time<br />
and playback status.<br />
AUDIO<br />
Sets tape audio to Hi Fi,<br />
Linear (Mono), or Mix.<br />
While watching TV, selects<br />
Stereo, Mono, or SAP (Secondary<br />
Audio Program).<br />
PLAY<br />
STOP<br />
PREV NEXT<br />
NEXT<br />
STOP DISPLAY<br />
100+/P.SCAN<br />
CLEAR<br />
TRK+<br />
REPEAT A-B<br />
PEAT TV/VCR A-B<br />
TV/VCR<br />
AUTO PLAY MARK ANGLE<br />
TITLE MENU<br />
DISPLAY<br />
TITLE MENU<br />
SUBTITLE AUDIO SEARCH ZOOM<br />
REW FF<br />
PREV NEXT<br />
TITLE MENU<br />
SUBTITLE AUDIO SEARCH ZOOM<br />
1 TRK- 3<br />
CLEAR<br />
TRK+<br />
CLEAR<br />
REW FF<br />
DISPLAY<br />
100+/P.SCAN<br />
TITLE PREV NEXT MENU<br />
AUTO PLAY MARK ANGLE<br />
Y MARK ANGLE<br />
SKIP REPLAY PROG.<br />
PLAY<br />
REPEAT TV/VCR A-B<br />
SUBTITLE AUDIO SEARCH ZOOM<br />
REW FF<br />
STOP<br />
REPEAT TV/VCR A-B<br />
SKIP REPLAY PROG.<br />
PREV NEXT<br />
CLEAR<br />
AUTO PLAY MARK ANGLE<br />
SKIP REPLAY PROG.<br />
BTITLE AUDIO SEARCH ZOOM<br />
PLAY<br />
STOP<br />
AUTO PLAY MARK ANGLE<br />
REPEAT TV/VCR A-B<br />
1 TRK- 3<br />
TRK+<br />
CLEAR<br />
PLAY<br />
STOP<br />
AUTO PLAY MARK ANGLE<br />
SKIP REPLAY PROG.<br />
PLAY<br />
STOP<br />
CLEAR<br />
Resets the current tape<br />
counter position to<br />
00:00:00.<br />
REW FF<br />
TITLE MENU<br />
PREV NEXT<br />
SUBTITLE AUDIO SEARCH ZOOM<br />
REW FF<br />
PREV NEXT<br />
CLEAR<br />
LAST CH.<br />
REPEAT TV/VCR A-B<br />
PLAY<br />
LAST CHANNEL<br />
Selects the last channel<br />
viewed while watching TV.<br />
AUTO PLAY MARK ANGLE<br />
SKIP<br />
Skips ahead 30 seconds<br />
while playing a tape (the<br />
typical length of a TV commercial).<br />
SKIP REPLAY PROG.<br />
REPEAT TV/VCR A-B<br />
PLAY<br />
AUTO PLAY MARK ANGLE<br />
SKIP REPLAY PROG.<br />
SETUP<br />
STOP<br />
STOP<br />
REPLAY<br />
Replays the last 15 seconds<br />
while playing a tape.<br />
SETUP<br />
Press SETUP, select “Functions”,<br />
and then choose<br />
from the following:<br />
Index Search<br />
Scans or searches for Index<br />
marks. Note: Index marks<br />
are placed at the start of<br />
every new recording.<br />
<strong>Go</strong>-To Search<br />
Fast-forwards or rewinds<br />
the tape to any counter<br />
position.<br />
Set Auto Repeat<br />
Sets the VCR to play the<br />
currently loaded tape in a<br />
continuous loop.<br />
SKIP REPLAY PROG.<br />
REPLAY PROG.<br />
REW FF<br />
PLAY<br />
PREV NEXT<br />
STOP<br />
REPEAT TV/VCR A-B<br />
4 - Operations<br />
35
Other Disc Playback<br />
Audio CD/MP3 CD Playback<br />
To play an Audio CD or MP3 files on<br />
CD-R/RW:<br />
1 Load the Audio CD or CD-R/RW in the<br />
disc tray.<br />
• Audio CDs begin playback automatically.<br />
JPEG CD Playback<br />
To play JPEG files on CD-R/RW:<br />
1 Load the CD-R/RW in the disc tray.<br />
• The following screen appears:<br />
2 Press PREV/ NEXT to browse the<br />
tracks.<br />
3 Press PLAYto start and pause playback.<br />
4 Press STOP to stop playback.<br />
5 Use the or 0-9 keys to select a<br />
specific audio track, then press ENTER.<br />
• Playback will start from the selected<br />
track.<br />
2 Press PLAYto start the slideshow.<br />
3 Press PREV/ NEXT to browse the<br />
pictures.<br />
4 Press STOP to stop the slideshow.<br />
MP3 File Requirements<br />
• Bit Rates must be 64~256 kbps<br />
• Maximum of 32 folders per disc<br />
• Maximum of 4 levels deep<br />
• Variable bit rate (VBR) files may<br />
sound distorted during playback<br />
• File names should be 8 characters<br />
or less, and must end in<br />
*.MP3<br />
• Some CD-RW discs may not<br />
play back correctly<br />
• CD-R discs should be written<br />
with ISO 9660 formatting using<br />
the ‘disc at once’ method<br />
NOTE:<br />
• REPEAT and A-B REPEAT work with Audio and MP3 CDs.<br />
36 DVD+VCR User’s <strong>Guide</strong>
Basic Recording<br />
Recording from TV<br />
Follow these steps to record a TV show to<br />
a VHS tape.<br />
1 Press POWER to turn on the<br />
DVD+VCR.<br />
2 Press VCR to control the VCR deck.<br />
3 Insert a recordable tape (a tape with<br />
the record safety tab intact).<br />
<br />
EJECT POWER<br />
VCR DVD TV VIEW<br />
1 2 3<br />
TRK- TRK+<br />
4 5 6<br />
7 8 9<br />
0<br />
100+/P.SCAN CLEAR<br />
SETUP CH+ DISPLAY<br />
4 Use the CH+/- or 0-9 buttons to select<br />
the channel you want to record.<br />
• If you are using a cable box/satellite<br />
receiver, set the DVD+VCR to the<br />
receiver’s output channel and select<br />
the channel to record on the cable<br />
box/receiver.<br />
5 Press SPEED to select the desired<br />
recording quality:<br />
SP - High quality.<br />
<br />
SLP - Average quality, but allows you<br />
to record 3 times longer than SP.<br />
6 Press REC to start recording.<br />
• To pause recording, press PLAY.<br />
• To resume recording, press PLAY or<br />
REC.<br />
• To view the status of your recording,<br />
press DISPLAY.<br />
• To add recording time in fixed increments,<br />
see One-Touch Recording on<br />
page 38.<br />
7 When finished, press STOP to stop<br />
recording.<br />
<br />
<br />
<br />
TITLE<br />
ENTER<br />
CH-<br />
REW PLAY FF<br />
REPEAT<br />
MENU<br />
SUBTITLE AUDIO SEARCH ZOOM<br />
REC<br />
PREV STOP NEXT<br />
SPEED<br />
A-B<br />
TV/VCR AUTO PLAY MARK ANGLE<br />
SKIP REPLAY LAST CH. PROG.<br />
NOTE:<br />
• If the DVD+VCR is left in Pause mode<br />
for five minutes, the recording is<br />
stopped automatically.<br />
4 - Operations<br />
37
Special Recording Options<br />
Recording from a Camcorder<br />
or other Device<br />
Follow these steps to record from a<br />
camcorder or other external device.<br />
1 Connect your external device to the<br />
front panel or rear panel inputs; see<br />
pages 18-19.<br />
2 Press TV VIEW repeatedly to select:<br />
<strong>Video</strong> 1 - If the device is connected to<br />
the rear Audio/<strong>Video</strong> Inputs.<br />
<strong>Video</strong> 2 - If the device is connected to<br />
the front Audio/<strong>Video</strong> Inputs.<br />
3 Insert a recordable VHS tape.<br />
4 Press VCR to control the VCR deck.<br />
5 Press SPEED to select the desired<br />
recording quality (SP or SLP).<br />
6 Cue the external device and start<br />
playback at the beginning of the<br />
scene you wish to record.<br />
7 Press REC on the DVD+VCR to start<br />
recording.<br />
• To pause recording, press PLAY.<br />
• To resume recording, press PLAY or<br />
REC.<br />
• To view the status of your recording,<br />
press DISPLAY.<br />
• To add recording time in fixed increments,<br />
see One-Touch Recording at<br />
right.<br />
8 When finished, press STOP to stop<br />
recording.<br />
One-Touch Recording<br />
1 Press REC repeatedly to add recording<br />
time in 30-minute or 1-hour increments<br />
(up to 9 hours with a T-180<br />
tape in SLP mode).<br />
2 Recording will stop automatically<br />
when the selected Record Length has<br />
elapsed.<br />
3 To cancel One-Touch Recording,<br />
press REC repeatedly until “Record<br />
Length” disappears from the onscreen<br />
display.<br />
Copying DVD to VHS<br />
1 Insert your DVD.<br />
• You cannot record copy-protected<br />
DVD discs.<br />
2 Insert a recordable VHS tape.<br />
3 Press DVD to control the DVD deck.<br />
4 Press PLAY to play the DVD.<br />
5 Press REC to start recording.<br />
6 When finished, press STOP to stop<br />
recording.<br />
Watch & Record Options<br />
• To watch a DVD while a VHS<br />
recording is in progress, press the<br />
DVD button and then press PLAY.<br />
• To watch another channel while<br />
a VHS recording is in progress,<br />
press TV/VCR then select the desired<br />
channel on your TV (Antenna<br />
or Basic Cable TV connections<br />
only).<br />
NOTE:<br />
• You cannot copy from DVD to VHS in Progressive Scan mode. To switch to Interlace<br />
Scan mode, press and hold P.SCAN for 5 seconds.<br />
38 DVD+VCR User’s <strong>Guide</strong>
Timer Recording<br />
Setting a Timer Recording<br />
Follow these steps to program a timer<br />
recording. Before you begin, make sure<br />
the Time and Date are set correctly (see<br />
page 22), and that your tape has enough<br />
available space to record the desired<br />
program.<br />
1 Insert a recordable tape (a tape with<br />
the record safety tab intact).<br />
2 Press VCR to control the VCR deck.<br />
3 Press PROG. to display the Timer<br />
Record menu.<br />
• You can also press SETUP and select<br />
Timer Recordings > Make a New<br />
Program.<br />
4 Press and ENTER to set how<br />
often to record:<br />
One Time - Record once.<br />
Daily - Record at the same time every<br />
day.<br />
Weekdays - Record at the same time<br />
Monday through Friday.<br />
Weekly - Record once a week on the<br />
selected day and time.<br />
5 Use the CH+/- or 0-9 buttons to select<br />
the channel you want to record and<br />
press .<br />
• If you are using a cable box/satellite<br />
receiver, set the DVD+VCR to the<br />
receiver’s output channel and select<br />
the channel to record on the cable<br />
box/receiver.<br />
• If you are recording from an external<br />
source, press TV VIEW to select<br />
the rear (<strong>Video</strong>1) or front (<strong>Video</strong>2)<br />
input.<br />
<br />
4 - Operations<br />
39
Timer Recording (continued)<br />
6 Use to select the source of the<br />
program (Antenna or Cable), then<br />
press .<br />
7 Use the (or 0-9) buttons to set<br />
the date, start time, and end time,<br />
pressingafter each.<br />
8 Use to set the Tape Speed to SP,<br />
SLP or AUTO, then press .<br />
• AUTO will start recording in SP and<br />
automatically switch to SLP if there<br />
is not enough room on the tape to<br />
complete the recording.<br />
9 When finished, press SETUP to save<br />
the Timer Recording.<br />
• The indicator is displayed on the<br />
front panel display.<br />
10 Power off the DVD+VCR.<br />
• At the sch<strong>edu</strong>led time, the Timer<br />
Recording will begin.<br />
• If the DVD+VCR is not ready (e.g., a<br />
recordable tape is not inserted or<br />
the tape is currently playing), an error<br />
message will appear on screen.<br />
NOTE:<br />
• To edit or cancel a timer recording, press SETUP then select<br />
Timer Recordings > Review/Cancel Programs. Press ENTER to<br />
edit, or press CLEAR to cancel the selected recording.<br />
40 DVD+VCR User’s <strong>Guide</strong>
5 Help<br />
This Chapter shows you how to get help, including<br />
troubleshooting, customer support, and warranty<br />
information.<br />
41
Customer Support<br />
The Troubleshooting section below will help you solve common issues with your<br />
DVD+VCR. If you don’t find the answers you need here, you can contact our Customer<br />
Service Department as follows:<br />
Phone (800) 736-7679<br />
E-Mail<br />
Web<br />
customersupport@govideo.com<br />
www.govideo.com<br />
Troubleshooting<br />
SYMPTOM CAUSE SOLUTION<br />
No power. The power cord is disconnected. Plug the power cord securely into the<br />
wall outlet.<br />
No picture.<br />
No sound.<br />
DVD+VCR does not start<br />
playback.<br />
The TV is not set to receive DVD+VCR<br />
signal output.<br />
The video cable is not connected<br />
securely.<br />
The TV power is turned off.<br />
Unit is in Progressive Scan mode.<br />
The equipment connected with<br />
the audio cable is not set to receive<br />
DVD+VCR signal output.<br />
The audio cables are not connected<br />
securely.<br />
The power of the equipment<br />
connected with the audio cable is<br />
turned off.<br />
The audio cables are damaged.<br />
Audio settings are incorrect in the<br />
DVD+VCR menu system.<br />
No disc/tape is inserted.<br />
An unplayable disc is inserted.<br />
The disc is placed upside down or is<br />
not placed within the guide.<br />
The disc is dirty.<br />
The Parental Control is set.<br />
Select the appropriate video input<br />
on the TV so the picture from the<br />
DVD+VCR appears on the TV screen.<br />
Connect the video cable securely.<br />
Turn on the TV.<br />
Press and hold the P.SCAN button<br />
for 5 seconds while in Stop mode to<br />
switch to Interlace Scan mode.<br />
Select the correct input mode on the<br />
audio receiver so you can listen to<br />
the sound from the DVD+VCR.<br />
Connect the audio cable securely.<br />
Turn on the equipment connected<br />
with the audio cable.<br />
Replace with new ones.<br />
Check the Digital Out setting; see<br />
page 29.<br />
Insert a disc or tape. Check that the<br />
disc/tape indicator on the front panel<br />
display is lit.<br />
Insert a playable disc. Check the disc<br />
type, color system, and regional code.<br />
Place the disc with the playback side<br />
down inside the guide.<br />
Clean the disc.<br />
Cancel the Parental Control function<br />
or change the rating level.<br />
42 DVD+VCR User’s <strong>Guide</strong>
Troubleshooting (continued)<br />
SYMPTOM CAUSE SOLUTION<br />
Picture from external input is<br />
distorted<br />
Some channels are skipped over<br />
when using CH <br />
Picture or sound of broadcasting<br />
channel is weak or missing.<br />
Camcorder image via AV input<br />
to DVD+VCR is not shown on TV<br />
screen.<br />
Cannot record or did not record<br />
successfully.<br />
Timer Recording does not work.<br />
Stereo Audio Recording and/or<br />
Playback not present.<br />
Remote control does not work<br />
properly.<br />
Disc Menu, Angle, Subtitle and/or<br />
Audio functions do not work.<br />
The video signal from the external<br />
device is copy-protected.<br />
The skipped channels were deleted<br />
with the Add/Remove feature.<br />
Antenna or cables are loose.<br />
Wrong TV Signal is selected in the<br />
DVD+VCR Setup menu.<br />
Camcorder is off.<br />
DVD+VCR’s input is not set to <strong>Video</strong> 1<br />
or <strong>Video</strong> 2.<br />
The source you are trying to record is<br />
copy- protected.<br />
When setting the recording channel,<br />
the channel is tuned to the TV’s own<br />
tuner.<br />
DVD+VCR is not set to the correct<br />
time.<br />
Timer has been programmed<br />
incorrectly. TIMER indicator light does<br />
not appear after programming timer.<br />
TV is not Stereo-compatible.<br />
Broadcast program is not in stereo<br />
format.<br />
DVD+VCR AV Out jacks are not<br />
connected to TV AV In jacks.<br />
DVD+VCR Audio/<strong>Video</strong> Out is not<br />
selected for viewing at the TV.<br />
The remote control is not pointed at<br />
the remote sensor of the DVD+VCR.<br />
The remote control is too far from the<br />
DVD+VCR.<br />
There is an obstacle in the path of the<br />
remote control and the DVD+VCR.<br />
The batteries in the remote control<br />
are dead.<br />
The remote is in the incorrect mode.<br />
Not all discs include these features.<br />
Connect the device directly to your<br />
TV.<br />
See “Add/Remove Channels” on page<br />
23.<br />
Tighten connections or replace cable.<br />
See “Signal Type” on page 24.<br />
Turn camcorder on and operate<br />
properly.<br />
Press TV VIEW to select the correct<br />
input.<br />
You cannot record the source.<br />
Select the channel on the DVD+VCR’s<br />
built-in TV tuner.<br />
Set date and time; see page 22.<br />
Reprogram Timer; see page 39.<br />
No solution.<br />
No solution.<br />
Make AV connections. Stereo is<br />
available only via AV output from<br />
DVD+VCR.<br />
Select AUX or AV source as TV input.<br />
Point the remote control at the<br />
remote sensor of the DVD+VCR.<br />
Operate the remote control within<br />
23 ft (7 m).<br />
Remove the obstacle.<br />
Replace the batteries with new ones.<br />
Press DVD for DVD control. Press VCR<br />
for VCR control.<br />
No solution.<br />
Poor quality VHS playback. The VCR heads are dirty. Use a head cleaner to clean the VCR<br />
heads.<br />
5 - Help<br />
43
Product Care & Handling<br />
Placement and handling<br />
• The picture and sound of a nearby TV,<br />
VCR, or radio may be distorted during<br />
playback. In this case, position the<br />
unit away from the TV, VCR, or radio,<br />
or turn off the unit after removing the<br />
disc.<br />
• Do not use volatile liquids, such as<br />
insecticide spray, near the unit. Do<br />
not leave rubber or plastic products<br />
in contact with the unit for a long<br />
period of time. They will leave marks<br />
on the surface.<br />
When Not in Use<br />
• When the unit is not in use, be sure to<br />
remove the disc or tape and turn off<br />
the power.<br />
• If you do not use the unit for a long<br />
period of time, remove the remote<br />
control batteries to prevent leakage.<br />
Moving<br />
•<br />
The original shipping carton and<br />
packing materials come in handy. For<br />
maximum protection, re-pack the<br />
unit as it was originally packaged at<br />
the factory.<br />
• Remember to eject any videotape or<br />
disc.<br />
Cleaning<br />
• Use a soft, dry cloth. If the surfaces are<br />
extremely dirty, use a soft cloth lightly<br />
moistened with a mild detergent<br />
solution. Do not use strong solvents<br />
such as alcohol, benzine, or thinner,<br />
as these might damage the surface of<br />
the unit.<br />
Maintenance<br />
• This is a high precision video device.<br />
For optimal performance, we recommend<br />
regular inspection and maintenance<br />
every 1,000 hours by qualified<br />
service personnel. Contact your<br />
dealer or nearest service center.<br />
Antenna Orientation<br />
• Antennas are subject to changes in<br />
direction or damage due to wind and<br />
rain. For best results, contact your<br />
nearest service center about proper<br />
orientation and/or replacement.<br />
Copyright<br />
• It is forbidden by law to copy, broadcast,<br />
show, broadcast via cable, play<br />
in public, or rent copyrighted material<br />
without permission.<br />
Tape and Disc Handling<br />
• To prevent damage to the unit, do<br />
not use moldy, stained, scratched or<br />
otherwise damaged tapes or discs.<br />
• Condensation may be present on<br />
your videotape. Allow the tape to dry<br />
completely before using it.<br />
• After playing, store discs and tapes in<br />
their cases to prevent damage.<br />
• Do not expose discs or tapes to high<br />
temperatures, humidity, mold, direct<br />
sunlight, dirt, dust or strong magnetic<br />
materials.<br />
Using the Remote Control<br />
• Operate remote control within 23 ft.<br />
(7m) of the unit.<br />
• Do not press two buttons at the<br />
same time.<br />
• Do not store in a dusty or humid<br />
location.<br />
44 DVD+VCR User’s <strong>Guide</strong>
Technical Specifications<br />
Specifications<br />
Power Supply ....................AC 120V, 60Hz<br />
Power Consumption ......24W (supplementary 4W)<br />
Weight .................................9.9 lbs (4.5kg)<br />
Dimensions (WxHxD).....17.1” x 3.7” x 10.0” (435mm x<br />
93mm x 255mm)<br />
Operating Temp. ..............<br />
41°F~95°F (5°C~35°C)<br />
Operating Humidity .......< 80% RH<br />
Channel Coverage ...........VHF: 2-13 CH / UHF: 14-69 CH /<br />
Cable: 1-125<br />
Signal Type .........................NTSC COLOR<br />
Antenna In/Out ................U/V-mixed: 75Ω unbalanced<br />
VIDEO Input .......................1.0 Vp-p unbalanced, RCA JACK<br />
AUDIO Input ......................-8.8dBm, RCA JACK<br />
VHF Output ........................3 or 4 CH<br />
VIDEO Output<br />
• DVD/VCR ..........................VIDEO output terminal, 1.0 Vpp<br />
unbalanced, RCA JACK<br />
• DVD ....................................S-VIDEO output (75Ω In load Y:<br />
1.0Vp-p, C:0.286Vp-p)<br />
COMPONENT output (75Ω In<br />
load Y: 1.0Vp-p, Pb:0.7Vp-p,<br />
Pr:0.7Vp-p)<br />
AUDIO Output<br />
• DVD/VCR ..........................Audio output terminal<br />
(2 kinds): -8.8dBm(VCR),<br />
2.0Vrms(DVD), RCA JACK<br />
• DVD ....................................Analogue AUDIO output (2<br />
CH): 2.0Vrms<br />
Digital audio output<br />
(COAXIAL)<br />
Playable Tapes ..................Very high dense tapes with<br />
VHS marks<br />
Playable Discs ...................DVD, VIDEO-CD, CD (12mm), CD<br />
(8mm), MP3, CD-R, CD-RW<br />
Tape Speed ........................SP: 33.35mm/s, SLP: 11.12mm/s<br />
Playtime ..............................SP: 2hrs, SLP: 6hrs (use of T-120<br />
tape)<br />
Clock display .....................12 hrs AM/PM<br />
Timer Recording ..............8 programs a year<br />
VIDEO S/N (VCR) ..............Over 45dB (Standard<br />
recording)<br />
Resolution<br />
• VCR .....................................Over 220 lines (Standard<br />
recording)<br />
• DVD ....................................Over 500 lines (DVD Disc PLAY)<br />
AUDIO<br />
• VCR .....................................Over 69dB (Hi-Fi), over 40dB<br />
(Mono)<br />
• DVD ....................................90dB<br />
Dynamic Range ................90dB<br />
Language Table<br />
• Specifications and product design are subject to change<br />
without notice.<br />
5 - Help<br />
45
Warranty<br />
<strong>Go</strong><strong>Video</strong> Limited Warranty<br />
Who Provides the Limited Warranty<br />
During the warranty period, the <strong>Go</strong><strong>Video</strong><br />
Warranty Administrator will honor service for 90<br />
days labor, 1 year parts from the original date of<br />
consumer purchase. See below for Commercial,<br />
Industrial or Educational use coverage. Remote<br />
controls are warrantied for 90 days from the date<br />
of purchase.<br />
Who is Protected<br />
This warranty protects the original consumer<br />
owner of this <strong>Go</strong><strong>Video</strong> product.<br />
What is Covered and How Long<br />
This warranty covers internal operating parts<br />
and service/labor to repair or replace covered<br />
parts in this <strong>Go</strong><strong>Video</strong> product for 90 days labor,<br />
1 year parts, from the date of purchase, defined<br />
as follows: (1) Original Consumer Retail Purchase;<br />
(2) First Rental Purchase Agreement; or (3) First<br />
Lease Purchase Agreement (the “Warranty<br />
Period”). Labor and replacement parts supplied<br />
during the Warranty Period are covered only for<br />
the remaining portion of the original Warranty<br />
Period. The <strong>Go</strong><strong>Video</strong> Warranty Administrator shall<br />
have no liability for service under this warranty<br />
if non-OEM (Original Equipment Manufacturer)<br />
replacement parts are used in the repair of your<br />
<strong>Go</strong><strong>Video</strong> product.<br />
What the Owner Must Do If Service is<br />
Required<br />
Please contact our customer service department<br />
at 1-800-736-7679 to repair or replace your<br />
product, at <strong>Go</strong><strong>Video</strong>’s option, if it proves to be<br />
defective in material or workmanship under<br />
normal use, during the warranty period listed<br />
above, effective from the date of original<br />
consumer purchase of the product. Repaired<br />
or replacement units are warrantied for the<br />
remaining period of the original warranty. Please<br />
retain dated sales receipt. Within the warranty<br />
period, the customer pays for inbound shipping<br />
charges and <strong>Go</strong><strong>Video</strong> pays return shipping<br />
charges.<br />
Other Warranty<br />
Coverage<br />
Commercial, Industrial or<br />
Educational use has the<br />
same warranty coverage as<br />
stated in this warranty.<br />
What are the Exceptions<br />
This warranty does not cover: (1) Normal<br />
maintenance service, such as cleaning. (2)<br />
Damage from misuse, abuse neglect or<br />
accident, natural disasters or Acts of <strong>Go</strong>d. (3)<br />
Cabinetry, decorative parts, A/C adapters, knobs<br />
or buttons. (4) The foreign country use of this<br />
product. (5) <strong>Go</strong><strong>Video</strong> product which has been<br />
electronically or mechanically modified in any<br />
way or incorporated into other products. (6)<br />
Installation and setup service adjustments. (7)<br />
Owner instruction. Your Owner’s <strong>Guide</strong> provides<br />
information regarding operating instructions and<br />
user controls. For additional information, contact<br />
your authorized <strong>Go</strong><strong>Video</strong> dealer.<br />
<strong>Go</strong><strong>Video</strong> is not responsible for any shipping, handling<br />
or insurance charges.<br />
This Exclusive Limited Warranty excludes all incidental<br />
and consequential damages. Some states do not allow<br />
the exclusion of incidental and consequential damages,<br />
so the above exclusion may not apply to you.<br />
ALL IMPLIED WARRANTIES, INCLUDING IMPLIED<br />
WARRANTIES OF MERCHANTABILITY AND<br />
FITNESS FOR A PARTICULAR PURPOSE ARE<br />
LIMITED IN DURATION TO THE DURATION OF THIS<br />
WARRANTY PERIOD. Some states do not allow<br />
limitations on how long an implied warranty lasts,<br />
so the above limitation may not apply to you.<br />
This Exclusive Limited Warranty gives you specific<br />
legal rights and you may also have other rights<br />
which vary from state to state.<br />
<strong>Go</strong><strong>Video</strong> Warranty Administrator<br />
7835 East McClain Drive<br />
Scottsdale, Arizona 85260-1732<br />
customersupport@govideo.com<br />
1-800-736-7679<br />
46 DVD+VCR User’s <strong>Guide</strong>
Index<br />
A<br />
A-B Repeat 34<br />
Add/Remove Channels 23<br />
Angle 34<br />
Aspect Ratio 28<br />
Audio 34, 35<br />
Audio CD Playback 36<br />
Audio Language 27<br />
Audio Settings 29<br />
Auto Channel Search 23<br />
Auto Clock Set 22<br />
Auto Play<br />
DVD 31<br />
VCR 25<br />
Auto Repeat 35<br />
Auto TV/VCR 25<br />
C<br />
Cable Box Setup 24<br />
Channel Settings 23<br />
Clear 35<br />
Clock Settings 22<br />
Closed Captions 30<br />
Compatible Media 7<br />
Connections<br />
Antenna/Basic Cable 13<br />
Basic TV 15<br />
Cable Box/Satellite Receiver<br />
14<br />
Component <strong>Video</strong> 16<br />
Digital Audio 17<br />
External Device 18, 19<br />
S-<strong>Video</strong> 16<br />
Stereo 17<br />
Copy<br />
DVD to VHS 38<br />
Customer Support 42<br />
D<br />
Daylight Saving Time 22<br />
Digital Out 29<br />
Disc Menu 34<br />
Disc Menu Language 27<br />
Display 34, 35<br />
Dynamic Range 29<br />
F<br />
Front Panel 8<br />
Front Panel Display 9<br />
G<br />
<strong>Go</strong>-To Search 35<br />
I<br />
Index Search 35<br />
L<br />
Language Table 45<br />
Last Channel 35<br />
M<br />
Mark 34<br />
MP3 Playback 36<br />
O<br />
On-Screen Display 30<br />
On-Screen Display Language<br />
DVD 27<br />
VCR 25<br />
One-Touch Recording 38<br />
P<br />
Parental Control 31<br />
Password 31<br />
Playback<br />
Audio CD 36<br />
DVD 33<br />
JPEG CD 36<br />
Special DVD Options 34<br />
Special VCR Options 35<br />
Tape 33<br />
Program 34<br />
Progressive Scan 28<br />
R<br />
Rear Panel 10<br />
Recording<br />
Basic 37<br />
Camcorder 38<br />
Timer Recording 39, 40<br />
Remote Control 11<br />
Repeat 34<br />
Replay 35<br />
Restore Defaults 30<br />
RF Output 24<br />
RF Output Channel 24<br />
S<br />
Safety Instructions 4, 5<br />
Scan Mode 28<br />
Screen Saver 30<br />
Search 34<br />
Setup 35<br />
Setup Menu<br />
DVD Navigation 26<br />
DVD Overview 26<br />
VCR Navigation 21<br />
VCR Overview 21<br />
Signal Type 24<br />
Skip 35<br />
Subtitles 34<br />
Subtitle Language 27<br />
T<br />
Technical Specifications 45<br />
Time & Date Set 22<br />
Title 34<br />
Tracking 35<br />
Troubleshooting 42, 43<br />
U<br />
Unpacking 7<br />
V<br />
<strong>Video</strong> Output 28<br />
W<br />
Warranty 46<br />
Watch & Record Options 38<br />
Z<br />
Zoom 34<br />
5 - Help<br />
47