User Manual TeraStation HD-HTGL/R5 - Buffalo
User Manual TeraStation HD-HTGL/R5 - Buffalo
User Manual TeraStation HD-HTGL/R5 - Buffalo

You also want an ePaper? Increase the reach of your titles
YUMPU automatically turns print PDFs into web optimized ePapers that Google loves.
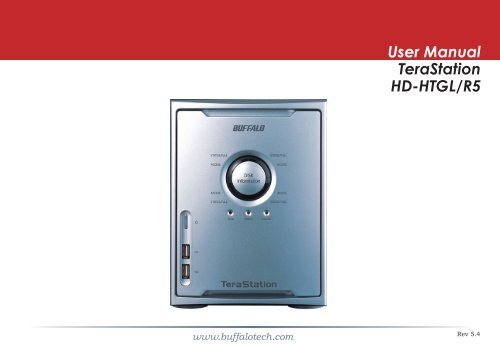
<strong>User</strong> <strong>Manual</strong><br />
<strong>TeraStation</strong><br />
<strong>HD</strong>-<strong>HTGL</strong>/<strong>R5</strong><br />
www.buffalotech.com<br />
Rev 5.4
Introduction<br />
Congratulations on your new <strong>TeraStation</strong>! This user manual is intended to assist you in configuring<br />
it. If you run into difficulties or need additional help, feel free to contact our 24/7 Technical<br />
Support at (866) 752-6210 (USA & Canada only). Technical Support in Europe is available between<br />
the hours of 9am - 6pm (GMT) Monday through Thursday and 9am-4:30 pm (GMT) Friday for this<br />
product. Customers in Europe can obtain Technical Support using the following information:<br />
Email: helpdesk@buffalo-technology.ie | Web: www.buffalo-technology.com<br />
This user manual uses images representative of <strong>TeraStation</strong> user interfaces and software. Because<br />
we’re constantly updating our product, the images and text in this manual may vary slightly from<br />
the images and text displayed by your <strong>TeraStation</strong>. These changes are minor and should not affect<br />
the ease of setup adversely. As time passes, future user interfaces, updated software, and later<br />
versions of this manual may be available for download at our web site: www.buffalotech.com.
Table of Contents<br />
<strong>TeraStation</strong> Quick Setup...................................................4<br />
TeraNavigator Setup..........................................................8<br />
Accessing <strong>TeraStation</strong> Data from a PC.............................14<br />
Accessing <strong>TeraStation</strong> Data from a Mac...........................17<br />
<strong>TeraStation</strong> Diagram.......................................................21<br />
Advanced Settings...........................................................24<br />
Basic Settings..................................................................25<br />
Network Settings.............................................................26<br />
Disk Management............................................................28<br />
Adding Extra Hard Drives................................................34<br />
Shared Folders................................................................38<br />
Groups............................................................................42<br />
<strong>User</strong>s...............................................................................43<br />
Printers ..........................................................................47<br />
Backups .........................................................................51<br />
PCast .............................................................................55<br />
Maintenance....................................................................56<br />
UPS.................................................................................57<br />
Client Utility....................................................................67<br />
Troubleshooting...............................................................69<br />
Changing a Failed Hard Drive..........................................70<br />
Technical Specifications...................................................78<br />
Technical Support...........................................................79
<strong>TeraStation</strong> Quick Setup<br />
Begin setting up your <strong>TeraStation</strong><br />
by plugging your power cable and<br />
Ethernet cable into the back of<br />
the <strong>TeraStation</strong> as shown.
<strong>TeraStation</strong> Quick Setup<br />
Connect your cables<br />
Plug the power cord into a 120<br />
volt wall socket.<br />
Plug the other end of the Ethernet cable<br />
into a hub, router, or switch in your<br />
network.
<strong>TeraStation</strong> Quick Setup<br />
Make sure that the power<br />
switch on the rear of the<br />
<strong>TeraStation</strong> is in the ON<br />
position, with the “I” symbol<br />
pressed down.<br />
Press the power button on the<br />
front panel. The LEDs will swirl<br />
as your <strong>TeraStation</strong> boots up.<br />
After your <strong>TeraStation</strong> has completed booting up and the LEDs have<br />
ceased to swirl, check the LINK/ACT LED on the front of the <strong>TeraStation</strong>.<br />
If it’s lit, then your <strong>TeraStation</strong> is connected properly, and you can go on<br />
to page 8. If it’s not lit, turn to page 7 for troubleshooting.
<strong>TeraStation</strong> Quick Setup<br />
The <strong>TeraStation</strong>’s Ethernet port will automatically adjust to use either a Crossover or Patch cable,<br />
so you may connect the <strong>TeraStation</strong> to your network with either type of Ethernet cable. <strong>Buffalo</strong><br />
Technology doesn’t recommend connecting the <strong>TeraStation</strong> directly to a PC.<br />
Verify that the LINK/ACT LED on the front of <strong>TeraStation</strong> is lit (see page 6’s picture). If it’s lit, go to<br />
page 8 to continue setting up <strong>TeraStation</strong>. If the LINK/ACT LED is still not lit, try the suggestions<br />
below to verify that you’re not suffering from common setup problems.<br />
Having problems? Make sure that:<br />
• the <strong>TeraStation</strong> and the router, hub or switch are both powered on,<br />
• the Ethernet cable is securely plugged in at both ends, and<br />
• the Ethernet cable is not damaged. Verify this by trying a different Ethernet cable.<br />
If problems persist, contact our 24/7 technical support at (866) 752-6210 (USA & Canada only).<br />
Technical Support in Europe is available between the hours of 9am - 6pm (GMT) Monday through<br />
Thursday and 9am-4:30 pm (GMT) Friday for this product. Customers in Europe can obtain<br />
Technical Support using the following information: Email: helpdesk@buffalo-technology.ie | Web:<br />
www.buffalo-technology.com
TeraNavigator Setup<br />
Insert the TeraNavigator CD into your PC’s CD-ROM drive. Setup should automatically launch. If<br />
it does not, manually launch setup.exe by pressing the Start menu and selecting the Run... option.<br />
When the Run dialog opens, type d:\setup.exe (where d is the drive letter of your CD-ROM drive).<br />
Press OK to continue.
TeraNavigator Setup<br />
TeraNavigator is now running. Please press the Install Client Utility icon, and then Start. When<br />
installation is finished, press Launch.
TeraNavigator Setup<br />
The <strong>TeraStation</strong> Client Utility allows you to easily configure <strong>TeraStation</strong>’s network settings. The tabs<br />
show the names of available <strong>TeraStation</strong>s. If you have more than one <strong>TeraStation</strong> on the network,<br />
click the tab of the one you want to select it. While a <strong>TeraStation</strong>’s tab is selected, its IP Address<br />
is visible and the View Shares button will take you directly to its network shares and folders. See<br />
page 66 for more information on <strong>TeraStation</strong> Client Utility. For now, make sure that the proper<br />
<strong>TeraStation</strong>’s tab is selected, click Setup, and choose Browser Management.<br />
10
TeraNavigator Setup<br />
This login prompt will appear. Enter admin for the user name. Until you change it, the<br />
password for the admin account will be password. Press the OK button when finished.<br />
<strong>User</strong> name: admin<br />
Password: password<br />
See page 44 to change your password.<br />
If you’ve forgotten your password, see<br />
page 60.<br />
If this login prompt does not appear,<br />
your DHCP server may not be<br />
functioning correctly. If DHCP is<br />
disabled, you may re-enable it, or verify<br />
that the <strong>TeraStation</strong>’s IP address (page<br />
10) is in the same range as that of<br />
your PC. See page 66 and page 67 to<br />
manually configure your <strong>TeraStation</strong>’s<br />
IP address if necessary.<br />
11
TeraNavigator Setup<br />
You are now logged in to the <strong>TeraStation</strong> Management Utility. Bookmark this page in your browser<br />
so it can be easily accessed for future configuration changes. You can also get here by typing<br />
http://TERASTATION_NAME into a Web browser, where TERASTATION_NAME is the name of your<br />
<strong>TeraStation</strong> that you set on page 13. For detailed explanations of each menu and setting, please<br />
refer to the Advanced Settings section (starting on page 24) of this manual. To continue setup, click<br />
on the Basic link on the left side.<br />
12
TeraNavigator Setup<br />
Here on the Basic page, begin by changing the<br />
name of your <strong>TeraStation</strong> in the <strong>TeraStation</strong><br />
Hostname field. A friendly, easy-to-remember<br />
name is recommended. The name cannot<br />
contain any spaces or special characters.<br />
Alphanumeric characters, hyphens, and<br />
underscores are allowed.<br />
A short description of the <strong>TeraStation</strong> can be<br />
entered into the <strong>TeraStation</strong> Description field.<br />
You’ll then see this description in Network<br />
Neighborhood on Windows machines.<br />
Make sure that the date and time are correct<br />
in Date and Time Setup. To synchronize clock<br />
settings with your computer, press Use Local<br />
Time.<br />
Once desired fields have been completed, press<br />
the Apply button at the bottom of the page.<br />
For more information on the Configuration<br />
Utility, turn to Advanced Settings, beginning on<br />
page 24.<br />
13
TeraNavigator Setup<br />
Congratulations! You’ve completed basic setup. For more detail on the other settings available in<br />
your <strong>TeraStation</strong>, turn to Advanced Settings, beginning on page 21.<br />
To access <strong>TeraStation</strong> data:<br />
Press the Start menu, select the Run... option. When the Run dialog opens, type \\<strong>TeraStation</strong>_<br />
Name (where ‘<strong>TeraStation</strong>_Name” is the <strong>TeraStation</strong> Hostname set on page 13). Press the OK<br />
button to continue.<br />
14
Accessing <strong>TeraStation</strong> Data from a PC<br />
<strong>TeraStation</strong>’s root directory will appear. You will see all of the configured shares, including share,<br />
the preconfigured data folder. All users can read and write to all folders unless otherwise configured.<br />
To set up security and password protection, or add other shares to your <strong>TeraStation</strong>, please refer<br />
to pages 38 - 41 of this manual. To change your RAID configuration, see pages 28 - 31. To setup<br />
a printer see the Printers section beginning on page 47. Drive letters can also be mapped to shares<br />
on your <strong>TeraStation</strong>; see page 16 for more information.<br />
Note: If this page does not appear, or if you<br />
receive a popup window from your firewall<br />
saying that a NetBios Session has been blocked<br />
from your <strong>TeraStation</strong>’s IP address, you will<br />
need to add your <strong>TeraStation</strong>’s IP address to<br />
your firewall’s trusted zone. You can get your<br />
<strong>TeraStation</strong>’s IP address from the <strong>TeraStation</strong><br />
Client Utility (see page 10). Consult your<br />
firewall documentation for more information on<br />
allowing network access to and from a specific<br />
IP address.<br />
15
Accessing <strong>TeraStation</strong> Data from a PC<br />
From the <strong>TeraStation</strong>’s Root Directory screen (see page 15), click the Tools pull down menu and<br />
select Map Network Drive; Map Network Drive will run. Select the drive letter you would like to map<br />
from the Drive: pull down menu. Enter \\<strong>TeraStation</strong>_Name\share_name in the Folder: field,<br />
where <strong>TeraStation</strong>_Name is the <strong>TeraStation</strong> Name set on page 13 and share_name is share (if you’re<br />
mapping to this preconfigured folder) or the name of another shared folder that you set up on page<br />
38. You may browse for a shared folder by pressing the Browse button and searching through the<br />
Entire Network and then the Microsoft Windows Network. Check the Reconnect at logon checkbox<br />
to have Windows connect to this mapped drive everytime it starts. When finished, press the Finish<br />
button. <strong>TeraStation</strong> is now mapped to a drive letter.<br />
16
Accessing <strong>TeraStation</strong> Data from a Mac<br />
If your Mac does not automatically detect your<br />
<strong>TeraStation</strong>’s Share folder and put it on your<br />
desktop, you will need to add the <strong>TeraStation</strong><br />
to the Mac’s server list. Begin by clicking Go,<br />
and then choose Connect to Server.<br />
In the Server Address field, enter your<br />
<strong>TeraStation</strong>’s IP address in the form smb://<br />
ipaddress (where “ipaddress” is your<br />
<strong>TeraStation</strong>’s IP address), and click Connect.<br />
If you don’t know your <strong>TeraStation</strong>’s IP<br />
address, see page 19.<br />
17
Accessing <strong>TeraStation</strong> Data from a Mac<br />
Select Guest and click on Connect. Note: If you have configured share<br />
permissions on your <strong>TeraStation</strong>, select Registered <strong>User</strong> and enter your<br />
Registered <strong>User</strong> credentials.<br />
Select the volume that you want to mount, such as share or share-mac,<br />
from the list of folders on the <strong>TeraStation</strong>.<br />
The share will open. A link to the shared folder will appear on your<br />
desktop.<br />
18
Accessing <strong>TeraStation</strong> Data from a Mac<br />
If you don’t know your <strong>TeraStation</strong>’s IP address, there are<br />
several ways to get it.<br />
One simple method is to use the <strong>TeraStation</strong> client utility<br />
(included on your CD) to find your <strong>TeraStation</strong>(s). Just click<br />
on the tab for your <strong>TeraStation</strong> and you’ll be able to read its<br />
IP address. You must have a Windows PC running on the<br />
network to use the <strong>TeraStation</strong> client. See page 66 for more<br />
on the <strong>TeraStation</strong> client utility.<br />
If you have an all-Mac network with no Windows PCs<br />
available, you may have to get the <strong>TeraStation</strong>’s IP address<br />
from your router’s configuration utility. Many <strong>Buffalo</strong><br />
routers list this information on the Client Monitor page, as<br />
shown to the right. Consult your router’s documentation for<br />
instructions on identifying the <strong>TeraStation</strong>’s IP address.<br />
19
<strong>TeraStation</strong> Expansion<br />
<strong>TeraStation</strong> has four USB 2.0 ports, two on the front panel and two on the rear. These ports can be<br />
used for adding external USB Hard Drives or a USB Printer. <strong>TeraStation</strong> will then share the USB<br />
devices, allowing everyone on the network to use them. Up to four external USB hard drives, or<br />
one printer and three hard drives, may be added to <strong>TeraStation</strong>. To connect a USB printer or hard<br />
drive to <strong>TeraStation</strong>, simply plug it into one of the four USB Ports.<br />
USB Hard Drive Information:<br />
You may plug in additional USB hard drives to any of the four USB ports on your <strong>TeraStation</strong>. See<br />
page 34 for setting up your USB hard drive under <strong>TeraStation</strong>. See page 38 for information on<br />
setting up shared folders on a USB Hard Drive. Page 37 will show you how to reformat the USB<br />
Hard Drive. Page 51 shows you how to set up <strong>TeraStation</strong> to backup to a USB Hard Drive.<br />
USB Printer Information:<br />
See page 47 to set up a USB Printer as a network printer on <strong>TeraStation</strong>.<br />
20
<strong>TeraStation</strong> Diagram<br />
1. Power Button – Press and release the Power<br />
Button to turn the <strong>TeraStation</strong> on. Hold it<br />
down for 3 seconds to turn the <strong>TeraStation</strong><br />
off.<br />
2. USB Ports – USB ports on both front and<br />
rear panels of the <strong>TeraStation</strong> may be used<br />
to connect USB hard drives, a printer, or an<br />
additional <strong>TeraStation</strong> to your <strong>TeraStation</strong>.<br />
See <strong>TeraStation</strong> Expansion on page 20 for<br />
more information on using <strong>TeraStation</strong>’s USB<br />
ports.<br />
3. Hard Drive Status (also 5, 8, and 10) – This LED will glow green when the corresponding hard<br />
drive is detected at boot, and will blink green when a disk check or format is in process. It will glow<br />
red when the hard drive is 90% full or more, and blink red if there is a problem with the drive.<br />
4. Hard Drive Access (also 6, 7, and 9) – This LED will blink green when the associated hard drive<br />
is accessed. During startup, it’s normal for all the lights on the front panel to light up in order,<br />
producing a pinwheel effect.<br />
21
<strong>TeraStation</strong> Diagram<br />
11. Diagnostic LED – The Diagnostic LED may<br />
flash when the <strong>TeraStation</strong> encounters an error.<br />
In this event, please contact our 24/7 technical<br />
support at (866) 752-6210 (USA & Canada<br />
only; see page 71 for European tech support<br />
information).<br />
12. Power – This LED glows a steady green<br />
while the <strong>TeraStation</strong> is operating normally. It<br />
blinks quickly during bootup and shutdown,<br />
and slowly while the <strong>TeraStation</strong> is in sleep<br />
mode.<br />
13. Link/Act – This LED will glow when the<br />
<strong>TeraStation</strong> is connected to a network, and blink<br />
during normal network activity. It changes color<br />
to indicate the speed of the connection: blue<br />
for a 1000Mbps connection, green for 100Mbps,<br />
and red for a 10Mbps connection.<br />
14. Power Socket – Plug the power cord into<br />
this socket.<br />
15. Power Switch – This is the <strong>TeraStation</strong>’s<br />
master power switch. While it is on, the power<br />
button on the front panel of the <strong>TeraStation</strong> may<br />
be used to start and shut down the unit. When<br />
this switch is off, no power goes to the unit. If<br />
this switch is left off for an extended period of<br />
time, the <strong>TeraStation</strong>’s internal system clock<br />
may need to be reset.<br />
16. Internal Fan – The internal fan will adjust<br />
its speed according to the temperature inside the<br />
<strong>TeraStation</strong>. To prevent possible overheating,<br />
keep the fan clear and clean of obstacles or<br />
dust.<br />
17. INIT Button – The INIT button restores<br />
your <strong>TeraStation</strong> to factory default settings. See<br />
page 60 for more information on using the INIT<br />
button.<br />
22
<strong>TeraStation</strong> Diagram<br />
18. UPS interface – An Uninterruptable Power<br />
Supply can use this interface to safely shut<br />
down your <strong>TeraStation</strong> in the event of a power<br />
failure. This interface is non-LPS. DP-1, DP-1P,<br />
DP-2, or DP-2P cables may be used to connect<br />
to the UPS.<br />
19. 10/100/100 Mbps Ethernet Port – Use<br />
this port to connect your <strong>TeraStation</strong> to a<br />
switch, a router, or another computer. The<br />
port is autosensing, so either a conventional<br />
Ethernet cable or a crossover Ethernet cable<br />
may be used.<br />
20. USB Ports – <strong>TeraStation</strong> offers four USB 2.0/1.1 ports for adding external drives or USB<br />
printers. Please see the <strong>TeraStation</strong> Expansion section on page 20 to learn more about using<br />
<strong>TeraStation</strong>’s USB Ports.<br />
23
Advanced Settings<br />
Browser Management Tool - Home<br />
Welcome to Advanced Settings! We’ll discuss<br />
the many adjustments you can make to<br />
your <strong>TeraStation</strong>. Begin by bringing up<br />
the Browser Management screen that you<br />
bookmarked on page 12. You are now at<br />
Home. Notice that Home is lit up in yellow<br />
in the screenshot to the left. You can return<br />
to this page at any time by clicking on Home<br />
from the menu at the left of your Browser<br />
Management screen. Here, you can see<br />
basic information about your <strong>TeraStation</strong>’s<br />
setup. Now, click the Basic link from the<br />
menu on the left side of your screen.<br />
24
Advanced Settings<br />
Basic<br />
You may modify your <strong>TeraStation</strong>’s hostname<br />
and description under Hostname Setup.<br />
Make sure that the date and time are correct<br />
in Date and Time Setup. To synchronize time<br />
settings with those in your computer, press<br />
Use Local Time. To have your system time<br />
automatically set by an NTP server, enable NTP<br />
Server and enter an IP address for the NTP<br />
server.<br />
Ensure that both the Display Language and the<br />
Windows Client Language are set to languages<br />
that you’re comfortable with.<br />
If you need to access your <strong>TeraStation</strong> with<br />
FTP or AppleTalk, enable these protocols under<br />
Network Sharing Services.<br />
Once desired fields have been completed, press<br />
the Apply button.<br />
25
Advanced Settings<br />
Network (IP Address Properties)<br />
In most networks, <strong>TeraStation</strong> will get its IP<br />
address automatically from a DHCP server.<br />
You may disable DHCP here. If DHCP is<br />
disabled and an IP address is not set manually,<br />
it will default to 192.168.11.150. The<br />
<strong>TeraStation</strong>’s IP Address, Subnet Mask, Default<br />
Gateway Address, and DNS Server address<br />
may all be entered manually under IP Address<br />
Properties.<br />
Ethernet Frame Size may also be set manually<br />
on this page.<br />
Click Apply after making any changes.<br />
26
Advanced Settings<br />
Network (Workgroup/Domain)<br />
To make your <strong>TeraStation</strong> a member of a workgroup or domain, enter the appropriate information<br />
into the fields on this page and click Apply. If the <strong>TeraStation</strong> is to be part of a Windows Domain,<br />
the <strong>TeraStation</strong> should be added beforehand to the Domain Controller with a computer account<br />
in Server Manager.<br />
27
Advanced Settings<br />
Disk Management (Drive Properties)<br />
This page shows the current properties of your hard<br />
drives and RAID Arrays. To change these settings, click<br />
on RAID Configuration at left.<br />
28
Note on RAID Arrays<br />
<strong>TeraStation</strong> uses RAID (“Redundant Array of Independent Disks”) technology to control the four<br />
hard drives in your <strong>TeraStation</strong>. RAID may be configured several ways:<br />
RAID Spanning - All four drives are striped into one large drive, giving the maximum capacity for<br />
your <strong>TeraStation</strong>. This size is the one listed on your <strong>TeraStation</strong>’s box and shows the total capacity<br />
of the <strong>TeraStation</strong> with no data used for redundancy. RAID Spanning is fast and efficient, but with<br />
no redundancy, if one hard drive fails, all data on the <strong>TeraStation</strong> is lost.<br />
RAID 1 (mirroring) - Hard drives (or spanned pairs of hard drives) are arranged in mirrored pairs.<br />
Each half of the pair reads and writes exactly the same data. This costs you half the total capacity<br />
of your <strong>TeraStation</strong>, but provides excellent redundancy. If a hard drive fails, the mirror continues<br />
to supply data, so you may work on normally. You may replace the damaged or defective drive at<br />
any time, and normal RAID 1 mirroring will then be automatically restored.<br />
RAID 5 (parity) - All drives in a RAID 5 array reserve part of their data space for parity information,<br />
allowing all data to be recovered if a single drive fails. The parity information takes up about one<br />
hard drive’s worth of space, so if you set up all four drives in the <strong>TeraStation</strong> as a RAID 5 array,<br />
your usable capacity will be about 3/4 of the total capacity of the <strong>TeraStation</strong>. RAID 5 is an<br />
excellent compromise between efficiency and security. If a single drive fails, no data is lost. After<br />
the damaged or defective drive is replaced, your <strong>TeraStation</strong> will automatically restore all data to<br />
the new drive and resume normal RAID 5 operation. This is how your <strong>TeraStation</strong> is set up out<br />
of the box.<br />
<strong>Buffalo</strong> Technology recommends RAID 5 for its excellent balance of efficiency and security.<br />
29
Advanced Settings<br />
Disk Management (RAID Configuration)<br />
This page shows your current RAID arrays.<br />
You may delete old arrays or create new ones<br />
by clicking on the underlined RAID Array #<br />
under RAID Array Configuration.<br />
You may also disable RAID Array Error Detection<br />
Response from this page. Normally, this is set<br />
to automatically shut down the RAID array<br />
when an error is detected. Though it is not<br />
recommended, you may disable that behavior<br />
by clicking Disable and then Apply under RAID<br />
Array Error Detection Response.<br />
Note that your <strong>TeraStation</strong> has four internal hard drives. Before creating a new RAID array, you<br />
may have to delete one or more pre-existing RAID Arrays to clear up the hard drives for your new<br />
one. This will destroy all data currently on the disks, so back up any important data before deleting<br />
RAID arrays. Whether you want to clear out an old array or create a new one, begin by clicking on<br />
the array’s underlined RAID Array #, under Name.<br />
30
Advanced Settings<br />
Disk Management (RAID Configuration)<br />
A configured RAID array may be deleted by pushing<br />
the Delete RAID Array button. This will free up all<br />
hard drives listed under Disk Structure.<br />
To configure an unconfigured array, put checks<br />
next to the hard disks you want included in<br />
the array (under Disk Structure) and choose<br />
your RAID mode. Click Setup RAID Array when<br />
ready. It may take several minutes to complete<br />
setting up the RAID array. When it’s finished, a<br />
Disk Check will run.<br />
31
Advanced Settings<br />
Disk Management (Disk Check)<br />
When RAID Configuration is done, you’ll see<br />
this screen. To configure a new array, click<br />
on RAID Array # and go back to the bottom of<br />
page 31. To setup shares turn to page 38.<br />
32
Advanced Settings<br />
Disk Management (RAID Configuration)<br />
You’ll see this screen when your new RAID<br />
Array is completely configured. Click on<br />
Shared Folders and turn to page 38 to begin<br />
setting up shares on your <strong>TeraStation</strong>.<br />
33
Advanced Settings<br />
Disk Management (USB Settings)<br />
If you’ve plugged an external USB hard<br />
drive into one of the USB ports on your<br />
<strong>TeraStation</strong>, you may set it up from this<br />
page. Click on its name under USB Disk<br />
Setup to begin.<br />
34
Advanced Settings<br />
Disk Management (USB hard drive setup)<br />
From here you can see your USB hard<br />
drive’s setup information. If the hard drive’s<br />
information isn’t displayed properly, try<br />
restarting your USB hard drive and then<br />
restarting your <strong>TeraStation</strong>. Some USB<br />
hard drives must be reformatted from within<br />
<strong>TeraStation</strong> before they can be assigned<br />
shares. Press Format USB Disk, or choose<br />
Disk Format from the left-side menu, to begin<br />
reformatting your USB hard disk. Turn to<br />
page 37 for more information on reformatting<br />
disks. Turn to page 38 to set up shares on<br />
your USB hard drives.<br />
35
Advanced Settings<br />
Disk Management (Disk Check)<br />
To initiate a comprehensive disk check on a hard drive or array of drives, select the hard drive or<br />
array that you want to check from the Target Disk dropbox and click the Select Target button.<br />
36
Advanced Settings<br />
Disk Management (Disk Format)<br />
To format a hard drive or array, select it from<br />
the Target Disk dropbox. Choose the file<br />
system desired from the File System dropbox<br />
(internal drives can only be formatted with<br />
XFS). Note that FAT32 has a 4 gigabyte file<br />
size limit. If you choose FAT32 for your file<br />
system, you will not be able to store files<br />
larger than 4 gigabytes on the drive. <strong>Buffalo</strong><br />
Technology recommends the XFS file system.<br />
Press Select Target Disk when done.<br />
Depending on the size of the target hard disk<br />
or array, a Disk Format may take several<br />
hours to complete.<br />
37
Advanced Settings<br />
Shared Folders<br />
To begin setting up shares on your <strong>TeraStation</strong>, select Shared Folders from the left side menu,<br />
and then click the Add button under Shared Folders Setup.<br />
38
Advanced Settings<br />
Add a new Shared Folder<br />
To add a new shared folder, enter a name for<br />
it in the Shared Folder Name box and choose<br />
which Disk Space it will reside in. You may<br />
also choose which operating systems the share<br />
will support by putting the appropriate checks<br />
next to Shared Folder OS Support, and whether<br />
the share supports the Recycle Bin by putting<br />
a dot next to Enable or Disable. Enter a<br />
Shared Folder Description and a Remote Backup<br />
Password if you desire. Click the Apply button<br />
to build the new shared folder.<br />
39
Advanced Settings<br />
Shared Folders (Access restrictions)<br />
To use Access Restrictions for a share, put a<br />
dot next to Enable.<br />
Highlight groups or users in the All Groups/<br />
<strong>User</strong>s column and use the left-pointing arrow<br />
buttons (located just to the left of each box) to<br />
move individual groups or users from the All<br />
Groups/<strong>User</strong>s column to the Read Only box (if<br />
you want to give them read access only) or all<br />
the way to the Writable box, if you want to give<br />
them full access to the share. Right-pointing<br />
arrows will move highlighted users or groups<br />
back to the right.<br />
Click Apply when you have your groups and<br />
users in the appropriate boxes.<br />
To set up new groups and users, see pages 42<br />
and 43.<br />
40
Advanced Settings<br />
Shared Folders (Anonymous FTP Setup)<br />
To allow Anonymous FTP, choose Enable for Anonymous FTP Server. Select a folder to share from<br />
the Anonymous <strong>User</strong> Public Shared Folder (only one folder may be shared by anonymous FTP) and<br />
choose whether you want the share to be Writable or Read Only. Click the Apply button to set up<br />
anonymous FTP.<br />
If FTP Server is disabled in the Basic window, this page will not be accessible.<br />
Anonymous FTP mode uses port 8021 (e.g. ftp://IP Address:8021).<br />
41
Advanced Settings<br />
Group Management<br />
To Delete a group, put a check next to its name and<br />
click Delete. To add a group to your <strong>TeraStation</strong>,<br />
click Add.<br />
Add a name and a description to the Add New<br />
Group fields. Put checks next to each Member <strong>User</strong><br />
that you want to be part of the group. Click Apply<br />
when your group is set up the way you want it.<br />
42
Advanced Settings<br />
<strong>User</strong> Management<br />
<strong>TeraStation</strong> is preconfigured with two users,<br />
admin and guest, out of the box. The guest<br />
account allows network users login access so<br />
that they can clear the print que. It has no<br />
password. The admin and guest user accounts<br />
cannot be deleted. To delete any other user, put<br />
a check next to their name and click Delete. To<br />
add a new user, click Add.<br />
The Add New <strong>User</strong> dialog will appear. Enter<br />
a <strong>User</strong> Name, Password, and <strong>User</strong> Description<br />
for the new user and click the Apply button. If<br />
a user will be accessing the <strong>TeraStation</strong> from<br />
a Windows 95/98 computer, their password<br />
should be 15 characters or less. Mac users’s<br />
passwords should be 9 characters or less.<br />
43
Advanced Settings<br />
<strong>User</strong> Management (changing passwords)<br />
To change an account’s password, click on the<br />
name of the account under <strong>User</strong> Settings. Note:<br />
if a user name and password are used to log into<br />
user’s windows computer or domain, the same<br />
user name and password should be used when<br />
creating the user’s account on the <strong>TeraStation</strong>, or<br />
problems accessing shared folders may occur.<br />
Enter the desired new password in both boxes<br />
and click Apply.<br />
44
Advanced Settings<br />
Troubleshooting Multiple Shares<br />
When adding multiple shares, you may see this<br />
error message.<br />
This is caused by having multiple shares to the<br />
same resource using different credentials. The<br />
error occurs when connecting to at least one secure, restricted share. Due to a constraint in<br />
Microsoft Windows, only one set of credentials can map drive letters for a network resurce such as<br />
the <strong>TeraStation</strong>. As such, only one username and password can be used while mapping a drive. If<br />
unsecure, unrestricted shares are mapped and then an attempt to map a secure, restricted share<br />
occurs, then this error will occur. To prevent this, you must create all mapped shares using the<br />
same login and password information. Please follow the steps on the next page to remedy this<br />
problem.<br />
45
Mapping Multiple Shares<br />
Advanced Settings<br />
When mapping any share, select the Connect using a different<br />
user name option. A login and password prompt will appear.<br />
Use the username and password required by any secure,<br />
restricted shares for all shares. All mapped shares must use<br />
the same username and password!<br />
If only unrestricted shares are being mapped, then it’s not necessary to set a username and<br />
password for shares. Multiple mapped drives to unrestricted shares can exist without a username<br />
or password as long as no restricted, secure shares are mapped.<br />
46
Advanced Settings<br />
Print Server (Settings)<br />
A USB printer, plugged into a USB port on either the front or the rear of your <strong>TeraStation</strong>, may be<br />
used as a Windows Print Server and/or an Apple Print Server on your network by choosing Enable<br />
on this page as appropriate and then clicking Apply.<br />
<strong>TeraStation</strong> supports most PostScript printers. It doesn’t support bi-directional printers.<br />
Non-PostScript printers are not supported by <strong>Buffalo</strong>. You may be able to get enough information<br />
from a printer’s documentation to get it to work, but our technical support cannot help you with<br />
this.<br />
47
USB Settings<br />
Print Server - Printer Share Installation<br />
If <strong>TeraStation</strong> is set up to share your printer (page 47), you can easily add the printer to any Windows<br />
PC on your network. Follow these steps for each PC that you want to be able to access the printer.<br />
Access the <strong>TeraStation</strong> by pressing Start, selecting the Run...<br />
option, and entering \\<strong>TeraStation</strong>_Name (where <strong>TeraStation</strong>_<br />
Name is the name you set on Page 13). Press the OK button<br />
when finished.<br />
Right click on the lp icon and select Connect. You’ll<br />
receive a warning that the server doesn’t have the<br />
proper drivers. Press the OK button to continue.<br />
48
USB Settings<br />
Print Server - Printer Share Installation (continued)<br />
The Add Printer Wizard will launch. Select the proper driver<br />
for your printer. If your printer is not in the list, you’ll have<br />
to insert the CD that came with your printer into your PC’s<br />
CD-ROM drive and press the Have Disk button. Refer to your<br />
printer documentation for further information on installing<br />
your printer if necessary. Press OK to finish.<br />
If lp is the only printer installed on the PC, then it will automatically be set as<br />
the default printer. If it’s not the only printer, you may make it the default<br />
printer by clicking Printers and Faxes in Control Panel, right clicking on the lp<br />
printer icon and selecting the Set as Default Printer option from the File dropdown<br />
menu.<br />
49
Advanced Settings<br />
Print Server (Delete Print Queue)<br />
If a corrupt print job is sent to a printer,<br />
printing may suddenly fail. If your print jobs<br />
seem to be locked up, clearing the print queue<br />
may resolve the issue.<br />
To execute the Delete Print Queue program,<br />
press the Delete button. This will clear all<br />
current print jobs. <strong>User</strong>s will have to re-send<br />
any incomplete print jobs to the printer.<br />
If there are still problems printing to the<br />
printer, then check the printer manufacturer’s<br />
documentation for troubleshooting<br />
information. Also, verify that the USB cable is<br />
securely fastened to both the printer and the<br />
<strong>TeraStation</strong>. Finally, you may try turning the <strong>TeraStation</strong> off, turning the printer off, turning the<br />
printer back on, and then turning the <strong>TeraStation</strong> back on again.<br />
Note that if a multi-function (all-in-one) printer is attached to the <strong>TeraStation</strong>, usually only<br />
the printing and fax functions will work. Other features, such as scanning, probably will not<br />
function.<br />
50
Advanced Settings<br />
Disk Backup<br />
To create a backup job, click on an underlined<br />
Job Number. The Edit Backup Job dialog will<br />
appear.<br />
If the Disk Sleep function is enabled, disable it<br />
(page 58) before creating a backup job.<br />
51
Advanced Settings<br />
Disk Backup (Edit Backup Job)<br />
A Backup Job can run regularly on a daily or<br />
weekly schedule, or immediately by appropriate<br />
choices in the Backup Job Schedule field. Date<br />
and Time for the backup may be entered,<br />
and Encryption and Compression enabled or<br />
disabled. Enable Overwrite Backup to have<br />
each scheduled backup write over the previous<br />
backup, or Differential Backups to backup only<br />
files changed since the previous backup.<br />
Select the folder to be backed up from the<br />
Source Backup Shared Folder dropbox, and<br />
the destination for the backup files from the<br />
Destination Backup Shared Folder dropbox.<br />
The destination folder may be on a USB<br />
drive attached to the <strong>TeraStation</strong>, or another<br />
<strong>TeraStation</strong> on the network. Click on Select.<br />
Click the Apply button when your backup job is<br />
set up the way you want it, or Clear Job to stop<br />
a job from running again.<br />
52
Advanced Settings<br />
Disk Backup (<strong>TeraStation</strong> List)<br />
Press Refresh to get a list of <strong>TeraStation</strong>s on your network.<br />
Note: Disk Backups between two <strong>TeraStation</strong>s use port 8873 for encrypted backups and port 873<br />
for backups with no encryption.<br />
53
Advanced Settings<br />
Disk Backup (Add <strong>TeraStation</strong>)<br />
To add a <strong>TeraStation</strong> to your network, enter its numerical IP address in the Remote <strong>TeraStation</strong> IP<br />
Address field and click the Add to List button.<br />
54
Advanced Settings<br />
PCast<br />
Clicking on PCast on the left-side menu takes<br />
you to this page. Use this field to set a share<br />
on your <strong>TeraStation</strong> as the media folder for your<br />
LinkTheater. Choose Enable for PCast Media<br />
Server and choose the share where you keep<br />
your media files as the Media Folder. If you<br />
choose to Enable a password, pick one that you<br />
can easily enter with your LinkTheater’s remote<br />
control.<br />
If you don’t have a LinkTheater, you can ignore<br />
this page.<br />
55
Advanced Settings<br />
Maintenance (Notification)<br />
If your <strong>TeraStation</strong> is remotely managed, you<br />
may choose to receive nightly status reports<br />
and be notified of any disk events by email.<br />
To set this up, enable Mail Notification and<br />
enter the IP address of your SMTP server*<br />
in the SMTP Server Address field. Select a<br />
Subject line for the emails (i.e. “<strong>TeraStation</strong><br />
report”) and enter the email address of each<br />
person you want to receive notification emails<br />
into a Recipient Mail Address field.<br />
* SMTP server must be of open type. There’s no provision for entering a username or password.<br />
56
Advanced Settings<br />
Maintenance (UPS Settings)<br />
You may enable Synchronize with UPS and<br />
UPS Automatic Shutdown from this page.<br />
Consult your Uninterruptable Power Supply’s<br />
documentation for further information about<br />
setting up your UPS system.<br />
<strong>TeraStation</strong>’s UPS interface is serial. USB-type<br />
UPS interfaces are not currently supported.<br />
See the next page for more information on<br />
<strong>TeraStation</strong>’s UPS interface.<br />
57
Advanced Settings<br />
Maintenance (UPS Settings)<br />
This is <strong>TeraStation</strong>’s serial port pin<br />
assignment for serial UPS products.<br />
58
Advanced Settings<br />
Maintenance (Disk Sleep Function)<br />
If there are regular periods when your <strong>TeraStation</strong> is not in use, you may want to schedule disk<br />
sleeping. Enable Disk Sleep, select the time that you want to initiate sleep mode, and select the<br />
time that you want the <strong>TeraStation</strong> to “wake up” and resume normal operation. Click Apply. To<br />
avoid conflicts, do not use the Disk Sleep Function concurrently with Disk Backup.<br />
59
Advanced Settings<br />
Maintenance (Shutdown)<br />
From the Shutdown page, press Apply to shutdown <strong>TeraStation</strong>. This has the same function as<br />
holding down the power button on the front of <strong>TeraStation</strong>, but may be done remotely.<br />
60
Advanced Settings<br />
Maintenance (Initialization)<br />
The INIT button on the rear of your <strong>TeraStation</strong> normally returns the<br />
<strong>TeraStation</strong> to factory settings when held down for 15 seconds. This affects<br />
Admin Password, Ethernet Frame Size, and IP Address. If the Remain option<br />
has been selected on the screen below, then the Admin Password will not be<br />
reset when the INIT button is held down.<br />
Pressing Apply for Restore Defaults from<br />
Maintenance/Initialization resets Admin<br />
Password, Hostname, <strong>TeraStation</strong> Description,<br />
NTP Settings, Workgroup Settings, Access<br />
Restrictions, <strong>User</strong> Settings, Group Settings,<br />
Mail Notifications, UPS Settings, Disk Sleep,<br />
and Disk Backup. If you select the Remain<br />
option for Admin Password and then click<br />
Apply, the admin password will no longer be<br />
reset when the INIT button on the <strong>TeraStation</strong><br />
is held down.<br />
61
Advanced Settings<br />
System Status (System Information)<br />
This page shows you the System Information for your <strong>TeraStation</strong>.<br />
62
Advanced Settings<br />
System Status (USB Details)<br />
This page shows you details on USB hard drives and printers plugged into your <strong>TeraStation</strong>.<br />
63
Advanced Settings<br />
System Status (Drive Properties)<br />
This page shows you the properties of all hard drives and<br />
RAID arrays in and attached to your <strong>TeraStation</strong>.<br />
64
Advanced Settings<br />
System Status (Network Information)<br />
This page shows you the System Information for your network connection.<br />
65
System Status<br />
<strong>User</strong> Access Status<br />
This page shows you the current status of all users on the system.<br />
66
<strong>TeraStation</strong> Client Utility<br />
This is the <strong>TeraStation</strong> Client Utility. Installed<br />
on your PC, it allows you to access each of the<br />
<strong>TeraStation</strong>s on your network. Click Refresh<br />
List to get tabs for each of your <strong>TeraStation</strong>s.<br />
Each tab shows the Host Name, Workgroup, IP<br />
Address, and Subnet Mask of the associated<br />
<strong>TeraStation</strong>, as well as the version of firmware<br />
it’s running.<br />
With a <strong>TeraStation</strong>’s tab selected, you can click<br />
on the View Shares button to go directly to its<br />
root share. Clicking the Setup pulldown menu<br />
and selecting Browser Management takes you<br />
to the browser management tool that we began<br />
exploring on page 24. And clicking Setup and<br />
choosing Modify IP Address takes you to the<br />
following screen . . .<br />
67
<strong>TeraStation</strong> Client Utility<br />
IP Address Setup<br />
Here, you may enter your IP address and Subnet Mask manually, or enable your <strong>TeraStation</strong> to<br />
acquire them automatically from a DHCP server. You’ll need the administrator password to use<br />
this screen. Press OK when you’re done.<br />
68
Troubleshooting<br />
If <strong>TeraStation</strong> encounters a disk error, it will be reported in the <strong>TeraStation</strong> status on the top of any<br />
of the Web-Based configuration screens. Run a Disk Scan in the event of this error. If that still<br />
does not resolve the problem, a Format is recommended. Formatting the drive will delete all of the<br />
data on it, so back up any data you can before formatting (if possible). Finally, if none of the above<br />
solutions help, please contact Technical Support (see pages 79 and 80 for contact information).<br />
DIAG LED codes:<br />
One blink every second: RAID array is operating normally<br />
One blink every four seconds: RAID error<br />
Four blinks every four seconds: Internal fan error<br />
Five blinks every four seconds: Flash ROM error<br />
Six blinks every four seconds: Hard drive error<br />
Seven blinks every four seconds: RAM, LAN, or <strong>HD</strong>D controller error (motherboard)<br />
69
Troubleshooting<br />
Should a Hard Drive Fail:<br />
When using RAID1 or RAID5 - The failed drive will have a red light blinking in the STATUS/FULL<br />
position of the front display. If you need to determine which drive has failed, restart the <strong>TeraStation</strong><br />
and watch which disk LED illuminates red. After replacing the failed drive, RAID will restore your<br />
array.<br />
When using Standard Mode - The failed drive will have a red light blinking in the STATUS/FULL<br />
position of the front display. To determine which drive has failed, restart the <strong>TeraStation</strong> and watch<br />
which Disk LED illuminates red. After replacing the failed drive, all data on that drive will be lost.<br />
Data on other dives should still be normally accessable.<br />
When using Spanning Mode - All drives will have a red light blinking in the STATUS/FULL position<br />
of the front display. Further troubleshooting will be required to determine which drive has failed in<br />
the array. Data recovery is not possible by replacing a drive. After replacing the failed drive, you will<br />
have to delete and recreate your RAID array to make the <strong>TeraStation</strong> usable again. All data on the<br />
array will be lost.<br />
If your <strong>TeraStation</strong> is still under warranty, contact tech support before replacing your hard drive.<br />
Replacing your hard drive yourself may void your warranty. If your warranty has expired, you may<br />
replace the hard drive with an exact replacement (available from <strong>Buffalo</strong> Technology), or with any IDE<br />
drive of at least the same capacity as the failed hard drive.<br />
70
Replacing a Hard Drive<br />
If a STATUS/FULL led is blinking, note the drive number before continuing. Use a clean, padded<br />
work area to dissassemble your <strong>TeraStation</strong>. You’ll need a #2 phillips screwdriver. You will be<br />
removing and replacing a total of 22 screws to replace a hard drive, so keep each screw that you<br />
remove carefully in a safe place. Be careful not to drop the <strong>TeraStation</strong>, or cut yourself on sharp<br />
interior metal parts. <strong>Buffalo</strong> Technology is not responsible for any damage that you do to yourself<br />
or your <strong>TeraStation</strong> while changing out a hard drive! Be careful.<br />
1 Remove all cables and place the unit on its top, exposing the four rubber<br />
feet.<br />
2 Remove the rubber feet. Each foot is held in place by one screw.<br />
M3 Screw 6mm<br />
71
Replacing a Hard Drive<br />
3 Remove the 3 screws from the rear panel as shown.<br />
M3 Screw 4mm<br />
4 Remove the cover by sliding it towards the rear of the <strong>TeraStation</strong>.<br />
5 Remove the front panel by removing the 4 screws on the sides of the<br />
<strong>TeraStation</strong> that hold it in place.<br />
M2.5 Screw 2.5mm<br />
72
Replacing a Hard Drive<br />
6 Unplug and detach the LED cable at the point indicated.<br />
7 Remove the three screws from the side panel.<br />
M3 Screw 4mm<br />
8 Remove the indicated screw from the base panel.<br />
M3 Screw 6mm<br />
73
Replacing a Hard Drive<br />
9 The side panel can be opened towards the front of the <strong>TeraStation</strong>.<br />
10 Unplug the power and hard drive cables from the motherboard.<br />
11 Remove the three screws as indicated from the hard drive chassis.<br />
M3 Screw 4mm<br />
74
Replacing a Hard Drive<br />
12 Place the <strong>TeraStation</strong> on its base and slide out the hard drive<br />
chassis.<br />
13 Remove the power plugs from all four hard drives.<br />
75
Replacing a Hard Drive<br />
14 Remove the 4 screws from the sides of the failed hard drive. Note that<br />
the hard drive chassis is marked with numbers corresponding to the<br />
drive numbers on the front display.<br />
4mm <strong>HD</strong> screw (note that the threads are coarser than<br />
the M3 screws; please do not get them mixed up!)<br />
15 Remove the failed hard drive from the chassis.<br />
16 Install the replacement hard drive.<br />
76
Replacing a Hard Drive<br />
17 Reassembly is the reverse of dissassembly.<br />
18 Reconnect cables and power to your <strong>TeraStation</strong>.<br />
19 Log in to the <strong>TeraStation</strong>’s web-based configuration tool.<br />
20 Click the error link on the first page of the management interface.<br />
21 Follow the steps shown in the manager to rebuild the RAID Array.<br />
The <strong>TeraStation</strong> should now be back in the state it was prior to the hard drive failure. If you were<br />
using RAID 5 or RAID 1, your data should be restored.<br />
77
Technical Specifications<br />
LAN Standards:<br />
Transmission Types:<br />
Access Media:<br />
Media Interface:<br />
78<br />
IEEE 802.3u 100BASE-TX; IEEE 802.3 10BASE-T<br />
1000Mbps/100Mbps/10Mbps; 100BASE-TX<br />
4B/5B, MLT-3;10BASE-T Manchester Coding<br />
CSMA/CD<br />
RJ-45<br />
USB Standard: USB 2.0<br />
Hi-Speed (HS)<br />
Full-Speed (FS)<br />
Low-Speed (LS)<br />
USB Connector: USB A Connector (4)<br />
Data Transmission Speed:<br />
UPS:<br />
Power Consumption:<br />
Dimensions:<br />
Weight:<br />
Operating Environment:<br />
Max: 480 Mbps (HS Mode)<br />
Max: 12 Mbps (FS Mode)<br />
UPS Compatible (Serial port connection)<br />
17W Maximum<br />
6.6” x 8.7” x 9.5” (168 x 221 x 241 mm.)<br />
15.8 lb. (7.2 kg.)<br />
32° - 95° F; 20-80% non-condensing
Contact Information (North America)<br />
<strong>Buffalo</strong> Technology USA Inc.<br />
4030 West Braker Lane, Suite 120<br />
Austin, TX 78759-5319<br />
GENERAL INQUIRIES<br />
Monday through Friday<br />
8:30am-5:30pm CST<br />
Direct: 512-794-8533 | Toll-free: 800-456-9799 | Fax: 512-794-8520 | Email: sales@<br />
buffalotech.com<br />
TECHNICAL SUPPORT<br />
North American Technical Support by phone is available 24 hours a day, 7 days a week. (USA<br />
and Canada).<br />
Toll-free: (866) 752-6210 | Email: info@buffalotech.com<br />
79
Contact Information (Europe)<br />
<strong>Buffalo</strong> Technology UK Ltd.<br />
176 Buckingham Avenue,<br />
Slough, Berkshire, SL1 4RD<br />
United Kingdom<br />
GENERAL INQUIRIES<br />
Email: sales@buffalo-technology.com<br />
TECHNICAL SUPPORT<br />
Phone (UK only): 08712 50 12 60*<br />
Phone: +353 61 70 80 50<br />
Email: helpdesk@buffalo-technology.ie<br />
*Calls cost 8.5p per minute<br />
Technical Support Operating Hours<br />
Monday - Friday (GMT)<br />
9:00 AM - 6:00 PM Monday-Thursday<br />
9:00 AM - 4:30 PM Friday<br />
80
GPL Information (North America)<br />
Thank you for your interest in <strong>Buffalo</strong> products. Our GPL software delivery policy is outlined below.<br />
For each individual product and revision, please send one individually packaged self addressed padded CD<br />
shipping envelope, containing a blank CD-R to the following address:<br />
<strong>Buffalo</strong> Technology USA Inc.<br />
4030 W. Braker Lane Suite 120<br />
Austin, TX 78759<br />
Attn. GPL Department<br />
Within the envelope containing the self addressed padded CD shipping envelope, please include a bank draft<br />
or money order for $20 (USD) (Made out to: <strong>Buffalo</strong> Technology) to cover our handling fee, postage and CD<br />
preparation. The CD-R should have the name of the product and revision number clearly written on the<br />
actual CD-R (not on the insert).<br />
We do not send GPL source in bulk on a DVD. And order confirmation is not required by the GNU General<br />
Public License.<br />
We are more than happy to comply with your request; however, we must ask you to comply with our GPL<br />
distribution policy, which complies with the GNU General Public License.<br />
Sincerely,<br />
<strong>Buffalo</strong> Technology GPL Department<br />
81
GPL Information (Europe)<br />
Thank you for your interest in <strong>Buffalo</strong> products. Our GPL software delivery policy is outlined below.<br />
For each individual product and revision, please send one individually packaged self addressed padded CD<br />
shipping envelope, containing a blank CD-R to the following address:<br />
<strong>Buffalo</strong> Technology Ireland Ltd<br />
Free Zone East, Shannon, Co. Clare<br />
Ireland<br />
Attn. GPL Department<br />
Within the envelope containing the self addressed padded CD shipping envelope, please include a bank draft<br />
or money order for €20 (Euro) (Made out to: <strong>Buffalo</strong> Technology) to cover our handling fee, postage and CD<br />
preparation. The CD-R should have the name of the product and revision number clearly written on the<br />
actual CD-R (not on the insert).<br />
We do not send GPL source in bulk on a DVD. And order confirmation is not required by the GNU General<br />
Public License.<br />
We are more than happy to comply with your request; however, we must ask you to comply with our GPL<br />
distribution policy, which complies with the GNU General Public License.<br />
Sincerely,<br />
<strong>Buffalo</strong> Technology GPL Department<br />
82