Quick Storage Setup Wizard - D-Link | Technical Support | Downloads
Quick Storage Setup Wizard - D-Link | Technical Support | Downloads
Quick Storage Setup Wizard - D-Link | Technical Support | Downloads

You also want an ePaper? Increase the reach of your titles
YUMPU automatically turns print PDFs into web optimized ePapers that Google loves.
System Requirements / Package Contents<br />
Package Contents<br />
• D-<strong>Link</strong> DNS-326 ShareCenter Duo<br />
• CD-ROM with Manual and Software<br />
• <strong>Quick</strong> Installation Guide<br />
• Power Adapter<br />
• Power Cable Clip<br />
• CAT5 Ethernet Cable<br />
Note: Using a power supply with a different voltage than the one included with the<br />
DNS-326 will cause damage and void the warranty for this product.<br />
If any of the above items are missing, please contact your reseller.<br />
System Requirements<br />
• 1GHz Processor / 512 MB RAM<br />
• 200MB available space<br />
• CD-ROM drive<br />
• Internet Explorer 6.0 or Mozilla Firefox 1.0 and above<br />
• 3.5” Internal SATA Hard Drives<br />
• Windows ® 7, Vista ® , or XP (Service Pack 2 or higher)<br />
D-<strong>Link</strong> DNS-326 <strong>Quick</strong> Install Guide<br />
2
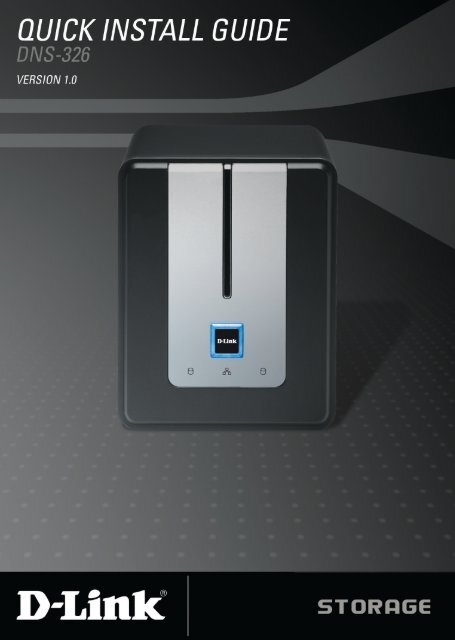
Hardware Overview<br />
Front View<br />
Hardware Overview<br />
Power Button<br />
Drive LED<br />
Drive LED<br />
Activity LED<br />
Power Button:<br />
Press and hold the button until it begins blinking to power on and to<br />
power down the device.<br />
Drive LEDs:<br />
These LEDs will turn a solid BLUE when drives are connected.<br />
The LEDs will blink when the drives are being accessed, formatted<br />
or synchronized. They will illuminate AMBER if a drive has failed.<br />
Activity LED:<br />
This LED will illuminate solid BLUE when there is an Ethernet<br />
connection. It will blink to indicate LAN traffic.<br />
3 D-<strong>Link</strong> DNS-326 <strong>Quick</strong> Install Guide
Hardware Overview<br />
Rear View<br />
Drive Eject Lever<br />
Drive Eject Lever<br />
Ethernet Port<br />
Power Receptacle<br />
Kensington lock hole<br />
USB Port<br />
Reset Button<br />
Power Receptacle:<br />
The 12V/3A and the 5V/3A power supply connects here.<br />
Ethernet Port:<br />
A Gigabit Ethernet port that connects the DNS-326 to the local<br />
network.<br />
USB Port:<br />
USB Print Server port for connecting a USB printer.<br />
Drive Eject Lever:<br />
Use the levers to eject the SATA hard drives.<br />
Reset Button:<br />
A pinhole button located beside the Ethernet port is used to reset the<br />
system to the factory default settings.<br />
Kensington Lock Hole:<br />
Insert a Kensington lock in the hole to secure your device.<br />
Note: After resetting the unit you will still have access to the data on your<br />
hard drives.<br />
D-<strong>Link</strong> DNS-326 <strong>Quick</strong> Install Guide<br />
4
<strong>Quick</strong> <strong>Storage</strong> <strong>Setup</strong> <strong>Wizard</strong><br />
<strong>Quick</strong> <strong>Storage</strong> <strong>Setup</strong> <strong>Wizard</strong><br />
When first powered on, during the initial boot sequence, the DNS-326<br />
will wait to be assigned an IP address via DHCP. If it does not receive<br />
an assigned IP address, by default it will boot up with a self-assigned<br />
IP address of 192.168.0.32.<br />
The <strong>Quick</strong> <strong>Storage</strong> <strong>Setup</strong> <strong>Wizard</strong> provided on the DNS-326 CD<br />
makes it simple to find any DNS-326 devices in your network. It<br />
is recommended to use the <strong>Quick</strong> <strong>Storage</strong> <strong>Setup</strong> <strong>Wizard</strong> when<br />
accessing and configuring the DNS-326 for the first time.<br />
To get started, insert the DNS-326 CD into your CD-ROM drive and<br />
click on <strong>Quick</strong> <strong>Storage</strong> <strong>Setup</strong>.<br />
5 D-<strong>Link</strong> DNS-326 <strong>Quick</strong> Install Guide
<strong>Quick</strong> <strong>Storage</strong> <strong>Setup</strong> <strong>Wizard</strong><br />
Click the checkbox to agree to use the <strong>Quick</strong> <strong>Storage</strong> <strong>Setup</strong> <strong>Wizard</strong>.<br />
Note: All data in the NAS will be deleted.<br />
The <strong>Quick</strong> <strong>Storage</strong> <strong>Setup</strong> wizard will now detect your computer’s<br />
network connection.<br />
D-<strong>Link</strong> DNS-326 <strong>Quick</strong> Install Guide<br />
6
<strong>Quick</strong> <strong>Storage</strong> <strong>Setup</strong> <strong>Wizard</strong><br />
Begin by installing the hard drive(s). Access the drive bays by sliding<br />
the faceplate up until it unlatches from the device.<br />
Once the faceplate is unlatched, pull it off of the device, exposing<br />
the drive bays.<br />
Insert a 3.5” SATA hard drive into each available drive bay. Make<br />
sure to align the drive connectors to the endpoints in the DNS-326.<br />
Gently push the drive in until it connects.<br />
Note: If only one 3.5” SATA drive is available place this drive in the LEFT bay while<br />
the opening (front) of the DNS-326 is facing you.<br />
7 D-<strong>Link</strong> DNS-326 <strong>Quick</strong> Install Guide
<strong>Quick</strong> <strong>Storage</strong> <strong>Setup</strong> <strong>Wizard</strong><br />
Attach the faceplate to the front of the device.<br />
Connect an Ethernet cable into the available Ethernet port. This cable<br />
should connect the DNS-326 to your local network or directly to a<br />
computer for configuration.<br />
Finally, connect the power adapter to the power receptacle. Hold<br />
down the power button for 3 seconds or until the power button begins<br />
blinking. Click Next to continue.<br />
D-<strong>Link</strong> DNS-326 <strong>Quick</strong> Install Guide<br />
8
<strong>Quick</strong> <strong>Storage</strong> <strong>Setup</strong> <strong>Wizard</strong><br />
Select your DNS-326 from the list. Click Next to continue.<br />
Note: If you have multiple DNS-326 units on your network and can<br />
not distinguish which unit you are configuring, click the [IDENTIFY]<br />
button to cause your units drive bay lights to turn purple.<br />
Enter the password to your DNS-326. By default, the admin password<br />
should be left blank. Click Next to continue.<br />
Create a password for your DNS-326. Click Next to continue.<br />
9 D-<strong>Link</strong> DNS-326 <strong>Quick</strong> Install Guide
<strong>Quick</strong> <strong>Storage</strong> <strong>Setup</strong> <strong>Wizard</strong><br />
Configure the Time and Daylight Savings Time for your DNS-326.<br />
Click Next to continue.<br />
Select an available NTP server to have your DNS-326 time updated<br />
automatically. Click Next to continue.<br />
Configure your LAN Settings for your DNS-326 as well as your<br />
devices Work Group, Network Name and a brief Description. Click<br />
Next to continue.<br />
D-<strong>Link</strong> DNS-326 <strong>Quick</strong> Install Guide<br />
10
<strong>Quick</strong> <strong>Storage</strong> <strong>Setup</strong> <strong>Wizard</strong><br />
Select whether you wish to use the DNS-326 for both NAS and iSCSI,<br />
NAS Only, or iSCSI only. Click Next to continue.<br />
Note: To skip configuring your hard drives using the wizard and use<br />
the Web UI for setup, click the Advanced button instead.<br />
Select whether to configure your drives as Normal (Standard) or Safe<br />
(RAID 1). Click Next to continue.<br />
Note: Safe (RAID 1) will be unavailable if only one drive is detected.<br />
11 D-<strong>Link</strong> DNS-326 <strong>Quick</strong> Install Guide
<strong>Quick</strong> <strong>Storage</strong> <strong>Setup</strong> <strong>Wizard</strong><br />
Select the how much drive space is designated for NAS and iSCSI.<br />
Select the drive letter you wish to assign to your Volume. Click Next<br />
to continue.<br />
Verify the Volume Size selected for your hard drives. Click Next to<br />
continue.<br />
Your DNS-326 will now be formatted. Once finished, your drive letters<br />
will become available under My Computer. Click Finish.<br />
Your DNS-326 setup is now complete.<br />
D-<strong>Link</strong> DNS-326 <strong>Quick</strong> Install Guide<br />
12
Notes<br />
Notes<br />
13 D-<strong>Link</strong> DNS-326 <strong>Quick</strong> Install Guide
Notes<br />
Notes<br />
D-<strong>Link</strong> DNS-326 <strong>Quick</strong> Install Guide<br />
14
Notes<br />
Notes<br />
15 D-<strong>Link</strong> DNS-326 <strong>Quick</strong> Install Guide
<strong>Technical</strong> <strong>Support</strong><br />
D-<strong>Link</strong>’s website contains the latest user documentation and<br />
software updates for D-<strong>Link</strong> products.<br />
U.S. and Canadian customers can contact D-<strong>Link</strong> <strong>Technical</strong><br />
<strong>Support</strong> through our website or by phone.<br />
United States<br />
Telephone<br />
(877) 453-5465<br />
World Wide Web<br />
http://support.dlink.com<br />
Canada<br />
Telephone<br />
(800) 361-5265<br />
World Wide Web<br />
http://support.dlink.ca<br />
Version 1.0<br />
January 19, 2010<br />
29072600DNS3260<br />
Copyright ©2009-2010 D-<strong>Link</strong> Corporation/D-<strong>Link</strong> Systems, Inc. All rights reserved. D-<strong>Link</strong> and the D-<strong>Link</strong> logo<br />
are registered trademarks of D-<strong>Link</strong> Corporation or its subsidiaries in the United States and other countries. Other<br />
trademarks are the property of their respective owners. Product specifications, size and shape are subject to<br />
change without notice, and actual product appearance may differ from that depicted on the packaging. Visit www.<br />
dlink.com for more details.<br />
D-<strong>Link</strong> DNS-326 <strong>Quick</strong> Install Guide<br />
16