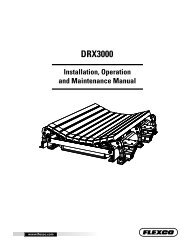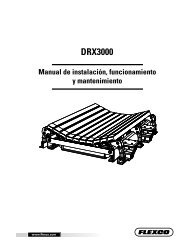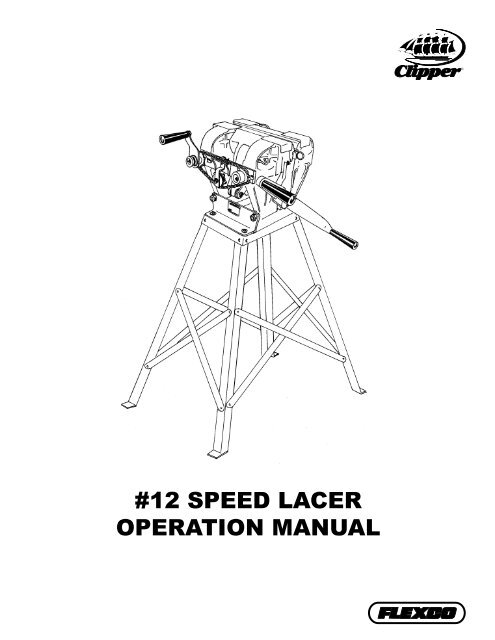
#12 SPEED LACER OPERATION MANUAL - Flexco
#12 SPEED LACER OPERATION MANUAL - Flexco
#12 SPEED LACER OPERATION MANUAL - Flexco

You also want an ePaper? Increase the reach of your titles
YUMPU automatically turns print PDFs into web optimized ePapers that Google loves.
<strong>#12</strong> <strong>SPEED</strong> <strong>LACER</strong><br />
<strong>OPERATION</strong> <strong>MANUAL</strong>
Your Lacer Identification:<br />
<strong>#12</strong> Speed Lacer<br />
Serial No.<br />
Date Purchased<br />
Please use the serial number when<br />
corresponding with your <strong>Flexco</strong> Distributor<br />
or with <strong>Flexco</strong> Customer Service. Proper<br />
identification will help us to quickly and<br />
efficiently answer your question or service<br />
you with repair parts.<br />
2525 Wisconsin Avenue • Downers Grove, IL 60515-4200<br />
Phone 630-971-0150 • Fax 630-971-1180<br />
Australia: 61-2-9680-3322 • China: 86-21-33528388 • England: 44-1274-600-942<br />
Germany: 49-7428-9406-0 • Mexico: 52 -55- 5674-5326 • South Africa: 27-11-608-4180<br />
© Flexible Steel Lacing Company. Clipper ® and Unibar ® are registered trademarks. Rev. 5/08. Lit Code 1140
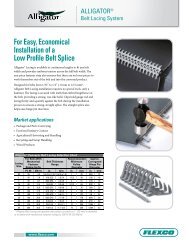
CONGRATULATIONS!<br />
Congratulations on your purchase of a Clipper ® <strong>#12</strong> Speed<br />
Lacer. The Clipper <strong>#12</strong> Speed Lacer is a fast and reliable<br />
method of handling all of your production belt lacing needs.<br />
Please read the manual carefully before attempting to use your<br />
lacer even if you are familiar with the machine. The manual<br />
provides important information regarding the lacer, maintenance<br />
tips, and proper lacing procedures.<br />
If you have any questions about your lacer, please contact your<br />
<strong>Flexco</strong> Distributor or our Customer Service department.
Table of Contents<br />
Lacer Identification Information......................Inside Front Cover<br />
Lacer Parts Drawing................................................................. 1<br />
Changing the Hook Retainer..................................................... 2<br />
Proper Lacing Procedures........................................................ 2<br />
Preparing the Belt for Lacing.................................................... 3<br />
Loading the Hook Retainer....................................................... 3<br />
Lacer Operation........................................................................ 4<br />
Continuous Lacing Wide Belts.................................................. 4<br />
Lacing Tips and Advice............................................................. 5<br />
Readjusting Lacer Jaws............................................................ 5<br />
Maintenance............................................................................. 6<br />
Optional Accessory - Chain Drive Attachment.......................... 6<br />
Parts List................................................................................... 7
<strong>#12</strong> Speed Lacer - Parts<br />
1
Changing the Hook Retainer<br />
Your <strong>#12</strong> Speed Lacer can lace any size Clipper fastener if the proper hook retainer is installed. The <strong>#12</strong><br />
Lacer comes standard with an HR2-12 (#2-7 and U2-U7). Hook Retainers are also available to lace hook<br />
sizes #25, #36, and #1 Series (See chart below).<br />
Hook Retainer<br />
HR25-12<br />
HR36-12<br />
HR1-12<br />
HR2-12<br />
Will lace hook sizes:<br />
All #25 hooks<br />
All #30 & #36 hooks, including UCM36 hooks<br />
All #1 hooks, including UX-1 hooks<br />
#2-7 and U2-U7<br />
To change hook retainers, turn adjusting lever counter-clockwise to open jaws until retainer can be<br />
removed. Lift hook retainer off the plungers and out from between jaws. The recesses on the bottom of the<br />
retainer must be placed down over the plungers to be in proper position.<br />
With your thumb on the hook retainer, press down until retainer is<br />
completely down on the plungers. Turn the adjusting lever to close<br />
the jaws just enough to keep the hook retainer from popping up. The<br />
retainer must fit into the slots on the jaw (see picture).<br />
Use of lacer pin: Every hook retainer comes with a lacer pin for<br />
securing hooks in the retainer. Insert pin into the retainer. Note: To<br />
ensure proper lace, use only the Clipper lacer pin. Your lacer is now<br />
ready for lacing. Please refer to the recommended lacing procedures<br />
and safety reminders on the following pages.<br />
Proper Position -<br />
Retainer fits into<br />
slots in jaw.<br />
Wrong Position -<br />
Retainer is not lined<br />
up with slots in jaw<br />
Proper Lacing Procedures<br />
Lacing Accessories Kit<br />
Included with your lacer is a Lacing Accessories Kit. This Kit will be referred to in the following lacing<br />
steps. We recommend their use to make lacing installation as easy and fast as possible. Other optional<br />
lacing accessories, such as a wide belt cutter, will be referred to and can be purchased from your <strong>Flexco</strong> ®<br />
Distributor.<br />
1. Hook Gauge - To select the proper size hook for your belt thickness.<br />
2. Rough Top Belt Skiver- Removes rough top from belt for best lacing results.<br />
3. Carding Paper Remover - Quick removal of carding paper from hook points. Prevents damage to hook<br />
retainer caused by using knives, screwdrivers and other sharp objects to remove carding paper.<br />
4. Scissors - To cut hook cards to proper size.<br />
1. 2. 3.<br />
4.<br />
2
Preparing the Belt for Lacing<br />
Preparing your belt is as important as the actual lacing of the fasteners.<br />
1. Square belt ends. The 845LD Belt Cutter aids with making a perpendicular<br />
cut to the belt edge. See Figure A. For belts with worn edges, it is<br />
necessary to find the center line of the belt. To do this, take an even<br />
measurement wider than the belt width; (Ex. 48" for a 42" belt) measure<br />
diagonally and mark the center point (Ex. 24"). See Figure B. Repeat this<br />
step four more times, moving the tape measure one foot along the belt for<br />
each position. See Figure C. On a typical belt with worn edges, the center<br />
points marked will not be in a straight line. Take a straight edge and draw a<br />
line as close to connecting the center points as possible. This will determine<br />
an average center line. Then draw a line perpendicular to the average<br />
center line. See Figure C. The belt end will be square when cut along this<br />
line. Use the 845LD Belt Cutter to cut the belt.<br />
2. Determine hook size needed. Use your Clipper Hook Gauge to select the<br />
proper size hook for the application.<br />
Fig. A<br />
Fig. B<br />
3. Determine the number of cards needed for the splice by laying cards of<br />
hooks across the belt end. Note: It is recommended that 1/4" (6-1/2 mm)<br />
on each belt edge be left unlaced. See Lacing Tips and Advice.<br />
Loading The Hook Retainer<br />
1. Turn adjusting lever counter-clockwise until jaws open wide enough for<br />
hooks to fit in easily.<br />
2. Remove loading strip from card of hooks (if applicable).<br />
3. Remove lacer pin, insert card of hooks with carding paper reading<br />
upside down (for easy removal of carding paper) (Fig. A). Reinsert lacer<br />
pin to lock hooks in place. Hooks should not be in the two Continuous<br />
Lacing Slots (last two slots on one end of the hook retainer which are<br />
extra deep).<br />
4. Close adjusting lever until hook legs are held firmly between jaws. Note:<br />
For #1, #25, #30 and #36 Series hooks, bringing jaws up snug to hook<br />
legs may cause over-compression on some belt thicknesses. For these<br />
hooks, size belt for proper clinch before loading hooks. To do this, place<br />
belt between lacer jaws, turn closing lever until jaws will not move further.<br />
Use adjusting lever to bring jaws up snug against belt.<br />
5. If using hooks with carding paper as shown in Fig. B, remove paper<br />
as noted below. If using hooks with carding paper as shown in Fig. C,<br />
remove after lacing.<br />
6. Use carding paper remover to begin working the paper off the hook<br />
points located at the bottom side of the printing (Fig. D). Once the paper<br />
has been pulled free from the points, uncurl and grasp paper, then push<br />
it up and away from the opposing hook points (Fig. E).<br />
Fig. C<br />
Fig. A<br />
Fig. B<br />
Fig. C<br />
Fig. D<br />
Fig. E<br />
3
Lacer Operation<br />
1. Position belt squarely over lacer. An overhead hanger or table abutting<br />
the lacer will be helpful. Leaving plenty of slack in the belt will make it<br />
easier to hold belt down on hook retainer.<br />
2. Hold belt down flush onto hook retainer (belt end will be perpendicular<br />
to hook retainer)<br />
Note: It is extremely important to have a belt across at least 3/4 the<br />
capacity of the lacer at all times when lacing. This will help equalize<br />
the pressure exerted along the length of the jaws and keeps the jaws<br />
in proper alignment. Adjustments for narrower belts can be easily done<br />
by using a scrap piece of belting the same thickness as the belt being<br />
laced. This filler strip will ensure that no undue stress will be put on the<br />
lacer that may cause damage to its parts.<br />
3. While holding belt in position with left hand, turn the Closing Lever with<br />
your right hand to start hooks into belt. Once hooks are started into belt,<br />
use both hands to finish turning the Closing Lever.<br />
4. Open jaws to examine hook clinch. Hooks are properly clinched when:<br />
A. Hook legs are parallel.<br />
B. Hook points slightly penetrate opposite side of belt (.005" - .015")<br />
C. 1/3-1/2 of the wire diameter is embedded into the belt.<br />
D. ‘Knuckles’ of the hook should not be higher than the legs when<br />
installed.<br />
5. If more clinch is required, turn the Adjusting Lever clockwise one eighth<br />
turn and cycle Closing Lever again. Continue this process until hooks<br />
are properly clinched.<br />
6. Remove Lacer Pin. Pull laced belt straight up from Hook Retainer with a<br />
gentle rocking motion.<br />
Fig A<br />
Continuous Lacing Belts Wider than 12"<br />
1. The Hook Retainer has two extra deep slots to assist with lacing wide<br />
belts. Position the hook retainer with the deep slots on the left end. It is<br />
necessary to lace left side of belt first. Then place the two already laced<br />
hooks in the extra deep slots (Fig. A).<br />
2. Determine number of cards needed for entire splice prior to lacing.<br />
Then lace any section less than the capacity of the lacer first. i.e.,<br />
Assume your belt is 18" wide. Using this method, there will always<br />
be belting between the full width of jaws and pressure exerted will be<br />
equalized. This will help keep lacer jaws in proper adjustment.<br />
3. After first section of the belt has been laced, note position of adjusting<br />
lever. It is critical to complete each laced section with the adjusting<br />
lever in the same position. This ensures hooks are all clinched<br />
exactly the same, giving maximum strength and performance. Using the<br />
positions of the clock as a reference will make this easy to remember.<br />
4. Now lace next section of belt. Turn adjusting lever counter-clockwise<br />
one turn to open jaws for easy insertion of hooks into hook retainer.<br />
Depending on size of hook the lacer may need to be opened further.<br />
4
5. Insert hooks into hook retainer, insert lacer pin, turn adjusting lever<br />
clockwise one turn to return lever to finished position. Remove carding<br />
paper from hooks.<br />
6. Carefully pull lacer pin back from two extra deep slots. Insert last two<br />
laced hooks into the extra deep slots. Do not push the lacer pin back<br />
into extra deep slots; this will avoid a ‘step’ in the splice.<br />
7. Holding belt firmly on hook retainer, continue with the standard lacing<br />
procedure from page 6.<br />
Caution: If belt is not held perpendicular to hook retainer, a step in the<br />
lacing may occur between laced sections, and splice will not perform to<br />
maximum capabilities (see illustration).<br />
Note: Since adjusting lever is already in the finished position, do not<br />
further adjust it. Simply turn closing lever.<br />
8. Continue this procedure until lacing is complete.<br />
Incorrect<br />
Lacing Tips and Advice<br />
1. For best lacing results, select the proper size fastener based on belt<br />
thickness and pulley diameter. Rough tops, chevrons, etc. should be<br />
skived back 1" (26mm) from belt ends.<br />
2. For an even belt splice, lace one less hook on trailing end of belt than<br />
on leading end.<br />
3. Leave 1/4" (6-1/2 mm) on each edge of belt unlaced. This guards<br />
against end hooks being torn out if the belt moves against a guide or<br />
structure. Also, it is best to chamfer (notch) the corners of the belt. (See<br />
Leading Edge illustration)<br />
4. Use proper connecting pin for the application. Connecting pin should be<br />
one continuous length and slightly shorter than belt width.<br />
Frame Arms - mark belt at centers<br />
Fig A<br />
Readjusting Lacer Jaws:<br />
1. Lace a belt that is 12" wide.<br />
2. Before removing lacer pin, mark belt at center of each frame arm<br />
(Fig. A).<br />
3. Remove belt from lacer.<br />
4. Using a micrometer, measure hook legs (preferably a long and a short<br />
leg at same time) at each mark on the belt. They should be within a<br />
tolerance of .004" (.1 mm) (Fig. B).<br />
5. If tolerance is not within the specified amount, adjust stationary tie rod<br />
nuts. Each notch will adjust jaw .004". Adjusting nuts too far will prevent<br />
jaws from opening wide enough to allow easy removal of the hook<br />
retainer. If possible, adjust nuts out (Fig. C).<br />
6. Make another sample lace, mark belt and mic hooks. If necessary,<br />
continue to adjust as needed.<br />
Fig B<br />
Fig C<br />
5
Parts List<br />
G0657 5/8 Retain Ring 5/8 E Clip<br />
03040 LH Top Guard<br />
03042 RH Top Guard<br />
03172 Aligning Bar Front/Rear <strong>#12</strong><br />
03177 LH Guide Plate<br />
03178 RH Guide Plate<br />
03179 Pivot Washer<br />
03180 Flat Pressure Plate<br />
03188 3/8 Lock Washer<br />
03190 Guide Plate Screw<br />
03196 3/32 x 1-1/2 Cotter Pin<br />
03198 Stationary Tie Rod Nut<br />
03201 Lower Stay Bolt<br />
03203 Upper Tie Rod<br />
03206 RH Frame Arm Assy<br />
includes: 03178, 03180,<br />
03271, 03190, G1180<br />
03207 LH Frame Arm Assy<br />
includes: 03177, 03180,<br />
03271, 03190, G1180<br />
03218 Frame Angle<br />
03248 3/8-16 Hex Nut<br />
03257 3/16 x 3/4 Spring Pin<br />
03271 3/16 x 1/2 Spring Pin<br />
03456 Chain Assy, Long<br />
03489 Oval Pressure Plate<br />
G0538 5/8-18 Hex Nut<br />
G0302 Toggle Link Pin<br />
G0544 Adjusting Tie Rod Nut Assy<br />
G0576 Adjusting Lever Assy<br />
G0578 Idler Sprocket Carrier<br />
G0526 Idler Bushing<br />
G0527 Serial Number Plate<br />
G0530 Danger Label<br />
03227 Washer, Flat, 3/8” N, .812 OD<br />
03245 Plastic Lever Handle<br />
03246 Plastic Knob Sleeve<br />
03247 3/8-16 x 3 Zinc Rd Hd Screw<br />
03015<br />
03205<br />
03204<br />
G1180<br />
03182<br />
03183<br />
03184<br />
03185<br />
03186<br />
03187<br />
03192<br />
03199<br />
03200<br />
03204<br />
03205<br />
03208<br />
03209<br />
03459<br />
03489<br />
03454<br />
G0534<br />
G0550<br />
G0552<br />
G0657<br />
G0269<br />
G0549<br />
Washer, Spring Lock #10<br />
LH Center Frame Assy<br />
RH Center Frame Assy<br />
Screw, Allen Hd 10-32x1/2<br />
Small Equalization Spring Washer<br />
Large Equalization Spring Washer<br />
Plunger Clip<br />
Screw, Slotted 10-32x5/16 Fil<br />
Plunger Spring<br />
Plunger<br />
Toggle Shaft Rollers<br />
Rack, <strong>#12</strong> Lacer<br />
Toggle Links <strong>#12</strong><br />
RH Center Frame Assy<br />
includes: 03015, 03184, 03185<br />
03186, 03187<br />
LH Center Frame Assy<br />
includes: 03015, 03184, 03185<br />
03186, 03187<br />
Toggle Shaft <strong>#12</strong><br />
Pinion Shaft<br />
Pinion Shaft Collar<br />
Oval Pressure Plate<br />
<strong>#12</strong> Jaw Assy<br />
Rack Support Roller<br />
Toggle Shaft Collar<br />
Rack Support Roller Shaft<br />
Retaining Ring E-Clip<br />
Tie Rod Spring<br />
Rack Support Spacing Roller<br />
G0577 Idler Sprocket<br />
03256 Bolt, Hex Hd Cap, 3/8-16 x 1-1/4<br />
G0187 Spring Pin, 1/8 x 3/4<br />
G1252 Screw, Allen Hd 5/16-24 x 5/8<br />
P2556 Washer, Spring Lock, 5/16 Reg<br />
P1420 Caution Label<br />
02987 Washer, Flat, 5/8 Narrow<br />
03926 Screw, Pan Hd, 8-32 x 1/2 Phillips Hd<br />
G4985 Toggle Link Ext Stop Washer<br />
Closing Lever Parts<br />
03188 3/8 Lock Washer<br />
03221 <strong>#12</strong> Closing Lever<br />
03245 Plastic Lever Handle<br />
03246 Plastic Knob Sleeve<br />
03247 3/8-16 x 3 Zinc Rd Hd Screw<br />
03248 3/8-16 Hex Nut<br />
03464 <strong>#12</strong> Lacer Key<br />
03465 1/4-20 x 1/2 Rd Hd Mach Screw<br />
03466 Fender Washer<br />
Hook Retainers & Lacer Pins<br />
03145 #25 Hook Retainer Assy<br />
03147 #25 Lacer Pin<br />
03168 #1 Hook Retainer Assy<br />
03169 #1 and #36 Lacer Pin<br />
03170 #36 Hook Retainer Assy<br />
03211 #HR-12 Hook Ret Acusteel w/ Pin 03222<br />
03222 #LP2-12 Lacer Pin .106<br />
P2556<br />
G1180<br />
03257<br />
03172<br />
G1180<br />
03179<br />
G0540<br />
G1252<br />
G0577<br />
03227<br />
G0578<br />
03256<br />
03248<br />
03179<br />
G0526<br />
G0576<br />
G5890<br />
03227<br />
03188<br />
03245<br />
03248<br />
G0544<br />
6<br />
03247<br />
03246<br />
03188<br />
03227
7<br />
03015<br />
03207<br />
03206<br />
03182<br />
03183<br />
03184<br />
03185<br />
03186<br />
03187<br />
03192<br />
03199<br />
03200<br />
03204<br />
03205<br />
03208<br />
03209<br />
03459<br />
G0534<br />
G0552<br />
03172<br />
G0657<br />
03040<br />
03042<br />
03177<br />
03177<br />
03180<br />
03190<br />
03196<br />
03198<br />
03201<br />
03203<br />
03218<br />
03271<br />
03454<br />
G0550<br />
G0538<br />
03257<br />
03257<br />
G0538<br />
G4985<br />
G0269<br />
03182<br />
G0269<br />
03459<br />
G0549<br />
G0549<br />
03185<br />
03015<br />
03184<br />
03186<br />
03187<br />
03200<br />
03192<br />
G0550<br />
G0538<br />
03218<br />
03206<br />
03207<br />
03203<br />
03179<br />
03198<br />
03196<br />
03257<br />
03180<br />
03180<br />
03183<br />
03183<br />
G0269<br />
G0269<br />
03182<br />
03178<br />
03190<br />
03271<br />
03179<br />
03042<br />
03040<br />
03178<br />
G0657<br />
G0530<br />
03926<br />
P1420<br />
G0226<br />
G1180<br />
G1180<br />
G0527<br />
02987<br />
G0302<br />
G1180<br />
03926<br />
03183<br />
03201
Maintenance<br />
To keep your lacer in top working condition some regular maintenance is<br />
required.<br />
Oiling:<br />
It is very important to oil the lacer frequently. Oil lacer parts as indicated.<br />
See illustration.<br />
Cleaning:<br />
1. Blow lacer with an air hose to free built up dust and dirt.<br />
2. Keep lacer covered when not in use.<br />
Adjusting:<br />
Adjust jaws as indicated on page 5.<br />
Oil these parts:<br />
Toggle Links & Shaft Roller<br />
Tie Rods<br />
Chain<br />
Plungers<br />
Jaws<br />
Optional Accessory - Chain Drive Attachment<br />
If you are lacing a fair amount of belts wider than 12" you may want to purchase a Chain Drive Attachment<br />
for your <strong>#12</strong> Lacer. This attachment moves the closing lever away from the center of lacer jaws, letting the<br />
operator completely close the lever without interfering with the belt. The closing action stays the same with<br />
no loss of clinching force.<br />
Instructions to install the Chain Drive Attachment:<br />
1. Remove bolts that fasten lacer to stand and remove lacer head.<br />
2. Place mounting bars on lacer stand extending to where adjusting lever side of lacer will be. Replace<br />
lacer head on bars and stand.<br />
3. Using flat washer on top, flat washer and split lock washer underneath, fasten lacer with 7 / 16 " bolts to<br />
the mounting bars. Tighten by hand - do not tighten completely.<br />
4. Remove closing lever by removing screw, handle washer and key. Set aside for later use.<br />
5. Place pillow block on left mounting bar extension (bar under adjusting lever handle) and fasten it<br />
loosely to the bar using first the external tooth washers then flat washer with 5 /16" x 1" bolts. Hand<br />
tighten - do not tighten completely.<br />
6. Place pillow block assembly shaft in place so shaft fits into pillow block and also extends to closing<br />
lever side of lacer. Fasten lightly as with pillow block, using external tooth washer, flat washer and 5 /16"<br />
x 1" bolts.<br />
7. Put sprocket shaft collar on 3 /4" shaft. Place outboard sprocket hub assembly (one with key welded in)<br />
on shaft so that sprocket is inside against collar. Place closing lever on shaft and use 3 /4" x 2" flat iron<br />
washer and cotter pin to secure closing lever on shaft.<br />
8. Place first the key that was set aside earlier, then 15 /32" collar, then lacer hub assembly on the pinion<br />
shaft from which the closing lever was originally removed. Using washer and screw that were set aside<br />
earlier, secure sprocket onto pinion shaft.<br />
9. Place chain on sprockets and install master link.<br />
10. Go to back of lacer. Pull sharply on aligning bar to back up lacer as far as possible. Tighten bolts that<br />
secure lacer to bars and stand.<br />
11. Go to adjusting lever side of lacer, pull sharply forward on sprocket shaft and securely fasten the bolts<br />
securing pillow block and pillow block assembly. Your chain drive attachment is now ready for use.<br />
8