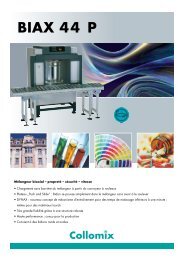
Operating Instructions Biaxialmixer BIAX 44P - Collomix
Operating Instructions Biaxialmixer BIAX 44P - Collomix
Operating Instructions Biaxialmixer BIAX 44P - Collomix

Create successful ePaper yourself
Turn your PDF publications into a flip-book with our unique Google optimized e-Paper software.
<strong>Operating</strong> <strong>Instructions</strong><br />
<strong>Biaxialmixer</strong><br />
<strong>BIAX</strong> <strong>44P</strong><br />
GB - Englisch<br />
Edition G 1.2-07
<strong>BIAX</strong> <strong>44P</strong> <strong>Collomix</strong> Rühr- und Mischgeräte GmbH<br />
D-85080 Gaimersheim<br />
Contents<br />
1. Layout drawings ...................................................................................3<br />
1.1. Machine components ............................................................................3<br />
1.2. Control and display components ...........................................................4<br />
2. General information ............................................................................5<br />
3. For your safety......................................................................................5<br />
3.1 Pictograms and symbols used in this manual .........................................5<br />
3.2 Proper use.............................................................................................5<br />
3.3 General safety instructions ....................................................................6<br />
3.4 Safety-relevant components ..................................................................6<br />
4. Using the machine for the first time ....................................................7<br />
4.1. Installing the machine – Transport notes................................................7<br />
4.2. Moving the machine..............................................................................7<br />
4.3. Activating the PERMA lubrication system ................................................8<br />
4.4. Trial run ................................................................................................8<br />
5. Operation .............................................................................................9<br />
5.1. Switching on the machine......................................................................9<br />
5.2. Closing door - parking position ............................................................9<br />
5.3. Opening door - starting position............................................................9<br />
5.4. Loading the container .........................................................................10<br />
5.5. Starting the mixing cycle.....................................................................11<br />
5.6. Ending the mixing cycle .......................................................................11<br />
5.7. Stand-by .............................................................................................11<br />
5.8. Triggering the EMEGENCY STOP function ............................................12<br />
6. Trouble-shooting ................................................................................13<br />
6.1. Initialization ........................................................................................13<br />
6.2. Error messages....................................................................................14<br />
7. Maintenance and cleaning.................................................................16<br />
7.1. Inspections..........................................................................................16<br />
7.2. Cleaning .............................................................................................16<br />
7.3. Maintenance .......................................................................................16<br />
7.4. Maintenance checklist .........................................................................17<br />
7.5. Layout of the main board ....................................................................18<br />
7.6. Layout of the extension board..............................................................19<br />
8. Annex..................................................................................................20<br />
8.1. Technical data.....................................................................................20<br />
8.2. Warranty.............................................................................................20<br />
8.3. Recycling and disposal.........................................................................21<br />
8.4. Declaration of CE conformity ...............................................................21<br />
2 Edition G 1.2-07
<strong>Collomix</strong> Rühr- und Mischgeräte Gmbh <strong>BIAX</strong> <strong>44P</strong><br />
D-85080 Gaimersheim<br />
1. Layout drawings<br />
1.1. Machine components<br />
3<br />
2<br />
1<br />
Machine components<br />
1. Lower clamping table 5. Emergency Stop<br />
2. Top clamping table 6. Automatic sliding door<br />
3. Main switch<br />
4. Control panel<br />
4 5<br />
6<br />
Edition G 1.2-07 3
<strong>BIAX</strong> <strong>44P</strong> <strong>Collomix</strong> Rühr- und Mischgeräte GmbH<br />
D-85080 Gaimersheim<br />
1.2. Control and display components<br />
11<br />
10. Control buttons<br />
Button E<br />
• STOP the automatic opening of the mixing unit prematurely<br />
• QUIT stand-by mode<br />
• STOP mixing cycle prematurely<br />
• ACKNOWLEDGE messages<br />
Button I • Mixing cycle I (works setting 1:00 minutes)<br />
Button II • Mixing cycle II (works setting 2:00 minutes)<br />
Button III • Mixing cycle III (works setting 3:00 minutes)<br />
+<br />
• CLOSING Door - Parking Position<br />
11. Display for 230V mains voltage and 24V control voltage<br />
12. LCD Display<br />
10<br />
13. EMERGENCY STOP button<br />
4 Edition G 1.2-07<br />
1<br />
2<br />
13
<strong>Collomix</strong> Rühr- und Mischgeräte Gmbh <strong>BIAX</strong> <strong>44P</strong><br />
D-85080 Gaimersheim<br />
2. General information<br />
The <strong>BIAX</strong> is a stationary mixer for closed, tightly closing, round, rectangular and oval<br />
containers made of metal or plastic. It can be used to mix paints, master batches, house<br />
paints, industrial paints and plasters as well as other low-viscosity materials.<br />
Practical applications are to be found in the wholesale and retail paint trade, in the paint,<br />
lacquer and chemical industries, and many other related sectors. This shaker is<br />
particularly ideal as a component in paint dosing systems.<br />
The clamped container rotates simultaneously about its longitudinal and transverse axis<br />
at 2 different speeds, which are adapted to the material in question.<br />
The required mixing time and the suitability of the container are to be determined before<br />
attempting to use the shaker.<br />
This manual is intended for persons who operate the machine.<br />
3. For your safety<br />
Although the machine has been developed, manufactured and tested in accordance with<br />
fundamental safety requirements, an element of risk is still present!<br />
� Therefore, read this manual before you work with the machine<br />
� Keep this manual within immediate reach of the machine<br />
3.1 Pictograms and symbols used in this manual<br />
The "caution" symbol is used to indicate a situation in which persons<br />
are at risk of suffering physical injury. The warning must be heeded at<br />
all costs.<br />
The "stop" symbol is used to indicate a situation in which the machine<br />
is at risk of being damaged.<br />
The "hazardous electric voltage" symbol is used to indicate live<br />
components that may pose a risk to life and limb.<br />
Those parts of the manual that are important for the correct and safe operation<br />
of the machine are printed in bold type.<br />
3.2 Proper use<br />
The machine must not be operated in any way other than described in this manual. The<br />
term ‘improper use’ applies in particular to the following:<br />
• Operation with defective or missing parts.<br />
• The bridging or deactivation of any safety devices.<br />
• Operation of the machine in areas with a potentially explosive atmosphere.<br />
• The use and installation of non-original replacement parts.<br />
• Running the machine for too long, which can potentially lead to the mixing container<br />
bursting.<br />
The consequences of improper use can be personal injury to the<br />
user or third party, as well as material damages to the appliance<br />
or mixing material.<br />
Edition G 1.2-07 5
<strong>BIAX</strong> <strong>44P</strong> <strong>Collomix</strong> Rühr- und Mischgeräte GmbH<br />
D-85080 Gaimersheim<br />
3.3 General safety instructions<br />
Observe the electrical regulations in force as well as the additional instructions listed in<br />
this manual when you install the machine. Installation and use of the machine for the<br />
first time must be carried out by a trained specialist.<br />
The machine is to be used only by persons who are acquainted with the working<br />
principles of the machine and also with the safety and accident prevention regulations in<br />
force in your country.<br />
Check that the machine is in the proper condition and that all parts<br />
are in good working order before beginning with your work. Do<br />
not operate the machine with any defective or missing parts.<br />
Any maintenance work or repairs must only be carried out by qualified personnel. Before<br />
performing any maintenance work or repairs be sure to disconnect the machine from the<br />
power supply by pulling out the power plug. Use only original replacement parts.<br />
Close the machine when not in use and turn off at the main switch. Projecting parts may<br />
injure you and others.<br />
3.4 Safety-relevant components<br />
Closed housing<br />
The housing is a stationary safeguard and partition that can only be opened with the use<br />
of tools.<br />
Machine door with interlock<br />
The door is an interlocking safeguard and partition. It is impossible to start the machine<br />
when the door is open. The door is not unlocked until after the mixing cycle is ended and<br />
the mixing container released.<br />
Latching magnet for the mixing unit<br />
The mixing unit is locked in vertical position by a magnetically actuated latching pin.<br />
When the magnet is deactivated, the latching pin is pushed back by spring force and<br />
releases the mixing unit.<br />
Clamping table switch<br />
A microswitch on the upper clamping table monitors whether a container is clamped in<br />
the mixing unit. It is impossible to start the mixing cycle when no container is clamped in<br />
place. For the switch to trigger a switching pulse it has to be pressed up by the springmounted<br />
upper clamping table.<br />
Emergency Stop function:<br />
With the Emergency Stop function you can<br />
• reliably interrupt the control voltage supply so that the machine is unable to move.<br />
• bring the machine to a halt when it is running.<br />
6 Edition G 1.2-07
<strong>Collomix</strong> Rühr- und Mischgeräte Gmbh <strong>BIAX</strong> <strong>44P</strong><br />
D-85080 Gaimersheim<br />
4. Using the machine for the first time<br />
4.1. Installing the machine – Transport notes<br />
Your biaxial mixer is delivered in reusable cardboard packaging on a wooden pallet.<br />
Please immediately check the packaging when received, as well as the appliance during<br />
unpacking, for any visible signs of external damage. Keep all parts of the original<br />
packaging for any necessary return transport.<br />
Use a suitable hoist to lift the machine off the pallet.<br />
Place the machine on firm, level ground. Slight unevenness can be compensated with the<br />
height-adjustable machine feet (SW17+19).<br />
4.2. Moving the machine<br />
The mixer has two transport rollers on the bottom of the housing. These transport rollers<br />
can be made to protrude out of the mixing compartment by turning two screws in the<br />
base plate of the mixing compartment.<br />
• Use a cordless screwdriver (counter-clockwise rotation) or some other suitable tool<br />
size SW 17 to turn out the transport rollers on both sides of the machine.<br />
• Carefully tilt the mixer and move it.<br />
• When you are finished moving the machine, turn the transport rollers back in and<br />
compensate any unevenness with the height-adjustable feet.<br />
Screw ���� Turning out the rollers ���� Moving the machine<br />
It is necessary to open the door in order to be able to firmly grip<br />
the machine during transport.<br />
Edition G 1.2-07 7
<strong>BIAX</strong> <strong>44P</strong> <strong>Collomix</strong> Rühr- und Mischgeräte GmbH<br />
D-85080 Gaimersheim<br />
4.3. Activating the PERMA lubrication system<br />
The machine comes with a PERMA © long-time lubricator which is to be installed before<br />
you use the machine for the first time. Proceed as follows:<br />
For an easier installation, first open the mixing unit completely.. The lubrication nipple on<br />
the hub is on the right side.<br />
Activate the PERMA cartridge by turning the grey activation screw into the cartridge<br />
until the holding clip is torn off completely. Remove also the black cap at the top of the<br />
cartridge.<br />
Screw the cartridge into the adapter which was fitted to the hub at the factory..<br />
Write the date of installation on the cartridge. The lubrication is guaranteed for<br />
approx. 1 year.<br />
Please read the accompanying original PERMA documentation.<br />
4.4. Trial run<br />
It is best to carry out a trial run with an empty mixing container when you are starting up<br />
the machine for the first time or after carrying out maintenance work or repairs.<br />
Remove all tools and any other loose items from the inside of the machine.<br />
If the machine wobbles while it is working, adjust the machine feet to compensate the<br />
differences in height.<br />
It is prohibited to operate the machine on its shipment pallet.<br />
8 Edition G 1.2-07<br />
PERMA © lubrication
<strong>Collomix</strong> Rühr- und Mischgeräte Gmbh <strong>BIAX</strong> <strong>44P</strong><br />
D-85080 Gaimersheim<br />
5. Operation<br />
5.1. Switching on the machine<br />
The machine is switched on with the main switch (3).<br />
After initialisation has been completed, the door can be opened by pressing button „E“.<br />
The machine is now in its starting position ready for mixing.<br />
5.2. Closing door - parking position<br />
When the machine is not used or before switching off the machine after work, the door<br />
can be closed by pressing buttons E and I simultaneously. The door is closing in and the<br />
machine is now in parking position.<br />
5.3. Opening door - starting position<br />
The door can be opened by pressing button E.The display indicates READY, the machine<br />
is now in starting position and ready for mixing.<br />
<strong>Collomix</strong> <strong>BIAX</strong> init...<br />
Version X.XX<br />
Edition G 1.2-07 9<br />
����<br />
<strong>Collomix</strong> <strong>BIAX</strong> init...<br />
d 80 / c 25 / v 144<br />
����<br />
<strong>Collomix</strong> <strong>BIAX</strong> init...<br />
000011 cycles<br />
����<br />
<strong>Collomix</strong> <strong>BIAX</strong> init...<br />
> Press "E" to quit<br />
<strong>Collomix</strong> <strong>BIAX</strong> init...<br />
> opening door<br />
����<br />
Ready<br />
1:00 2:00 3:00<br />
Ready<br />
1:00 2:00 3:00<br />
+<br />
Parkposition<br />
closing door<br />
����<br />
Parkposition<br />
press E for Ready<br />
Parkposition<br />
press E for Ready<br />
Parkposition<br />
opening door<br />
����<br />
Ready<br />
1:00 2:00 3:00
<strong>BIAX</strong> <strong>44P</strong> <strong>Collomix</strong> Rühr- und Mischgeräte GmbH<br />
D-85080 Gaimersheim<br />
5.4. Loading the container<br />
Simply push the mixing container with container handle into the mixer such that it is<br />
positioned in the centre of the lower clamping table. The container handle must point<br />
into the direction of the Handle Stop.<br />
For containers with diameters of less than 270 mm the handle must be secured<br />
with the help of elastic band or adhesive tape.<br />
Do not use damaged containers or place containers on top of each other!<br />
10 Edition G 1.2-07
<strong>Collomix</strong> Rühr- und Mischgeräte Gmbh <strong>BIAX</strong> <strong>44P</strong><br />
D-85080 Gaimersheim<br />
5.5. Starting the mixing cycle<br />
Start the mixing cycle by pressing one of the timer buttons I, II or III. The<br />
corresponding mixing time is indicated in the LCD display above the buttons.<br />
The doors are closing automatically and. The mixing container is clamped in place and<br />
the mixing cycle is started automatically.<br />
The remaining mixing time is indicated in the LCD display as the mixing cycle progresses.<br />
5.6. Ending the mixing cycle<br />
The mixing unit is automatically moved to the 12 o'clock position and the clamping<br />
pressure released when the mixing time is over.<br />
You can end the mixing cycle prematurely before the mixing time is over by pressing<br />
button E. The mixing cycle is immediately ended, the mixing unit positioned, the<br />
clamping pressure released, and the door unlocked.<br />
After the mixing cycle has been finished, the doors will open automatically.<br />
You can stop the automatic opening of the mixing unit prematurely by pressing<br />
button E<br />
5.7. Stand-by<br />
If approximately 60 minutes pass without the user actuating any function, the biaxial<br />
mixer will automatically switch to stand-by mode. All unnecessary consumers are<br />
switched off and the door can no longer be opened.<br />
To quit stand-by mode, press BUTTON E.<br />
Ready<br />
1:00 2:00 3:00<br />
E 000 Stand-by<br />
> press "E" to quit<br />
Edition G 1.2-07 11<br />
����<br />
����<br />
Mixing t = 1.00<br />
clamping<br />
����<br />
Mixing t = 1.00<br />
Pot clampt<br />
����<br />
Mixing t = 0.59<br />
mixing<br />
t = 0.00 or<br />
����<br />
Mixing t = 0.00<br />
wait<br />
����<br />
Mixing t = 0.00<br />
unclamping<br />
����<br />
Ready<br />
1:00 2:00 3:00<br />
����<br />
����<br />
Ready<br />
1:00 2:00 3:00
<strong>BIAX</strong> <strong>44P</strong> <strong>Collomix</strong> Rühr- und Mischgeräte GmbH<br />
D-85080 Gaimersheim<br />
5.8. Triggering the EMEGENCY STOP function<br />
You can press the Emergency Stop button to switch off the machine if ever the<br />
container develops a leak or its handle becomes loose or some other potentially<br />
dangerous situation for man or machine arises while the mixing cycle is in progress.<br />
After the EMERGENCY STOP button is pressed, the mixing unit will coast to a standstill<br />
and remain in this position. The mixing unit is not moved automatically to the 12<br />
o'clock position!<br />
Unlock the EMERGENCY STOP button by hand and press button E to cancel the<br />
error message.<br />
After the door has been opened, rotate the mixing unit by hand until it is locked in<br />
the 12 o’clock position.<br />
The machine is in base position; mixing can be continued.<br />
The EMERGENCY STOP button does not<br />
disconnect the machine from the mains power<br />
supply! Therefore, before performing any<br />
maintenance work or repairs always be sure to<br />
disconnect the machine from the mains by<br />
pulling out the power plug!<br />
12 Edition G 1.2-07<br />
E020 emergency stop<br />
> unlock switch<br />
����<br />
NOT-AUS Entriegeln<br />
����<br />
E020 emergency stop<br />
> press “E“ to quit<br />
����<br />
����<br />
E020 emergency stop<br />
wait<br />
����<br />
E020 emergency stop<br />
> press “E“ to quit<br />
����<br />
E020 emergency stop<br />
> opening door<br />
����<br />
please disclamp<br />
> press “E“ to quit<br />
����<br />
Mischeinheit per<br />
Hand positionieren<br />
����<br />
����<br />
disclamping<br />
����<br />
Ready<br />
1:00 2:00 3:00
<strong>Collomix</strong> Rühr- und Mischgeräte Gmbh <strong>BIAX</strong> <strong>44P</strong><br />
D-85080 Gaimersheim<br />
6. Trouble-shooting<br />
Using the trouble-shooting tables listed in this chapter, you can check whether you are able to correct the errors yourself or<br />
whether you need to call the customer service department.<br />
6.1. Initialization<br />
Before calling the customer service department, please make a note of the machine’s serial<br />
number, the error code being shown in the display and also the status of the LEDs on the control<br />
panel. The machine’s serial number can be found on the machine’s rating plate (9).<br />
Initialization is performed each time the mixer is switched on. The following error messages may appear as a result. Please<br />
note that all maintenance and servicing jobs must be left strictly to authorized and suitably trained personnel.<br />
LEDs Display Items to remedy / actions to take<br />
230 V<br />
24 V<br />
230 V<br />
24 V<br />
230 V<br />
24 V<br />
230 V<br />
24 V<br />
230 V<br />
24 V<br />
empty<br />
empty<br />
E020 emergency stop<br />
> press "E" to quit<br />
E060 not disclamped<br />
> press "E" to quit<br />
E080 MU unlocked<br />
> press "E" to quit<br />
• Check the power supply<br />
• Check the SI 3 fuse<br />
• Check the connector / cable of the control pcb<br />
• Check the connector / cable of the display pcb<br />
• The display is defective<br />
• The control pcb is defective<br />
• EMERGENCY STOP actuated<br />
• Check the connector / cable of the EMERGENCY STOP<br />
• EMERGENCY STOP switching element is defective<br />
• Container already clamped, unclamp by hand<br />
• The mixing unit is not in the 12 o'clock position<br />
• Check the clamping table proximity switch<br />
• Check the connector / cable of the clamping table proximity switch<br />
• Latching pin blocked<br />
• Check the connector / cable of the mixing unit magnet<br />
• The mixing unit magnet is defective<br />
• The mixing unit is not in the 12 o'clock position<br />
All maintenance and servicing jobs must be left strictly to authorized and suitably<br />
trained personnel. This applies in particular to work performed with the housing<br />
open.<br />
Edition G 1.2-07 13
<strong>BIAX</strong> <strong>44P</strong> <strong>Collomix</strong> Rühr- und Mischgeräte GmbH<br />
D-85080 Gaimersheim<br />
6.2. Error messages<br />
The following table provides an overview of possible errors and their remedies. Please note that all maintenance and<br />
servicing jobs must be left strictly to authorized and suitably trained personnel. This applies in particular to those jobs<br />
printed on a gray background which have to be performed with the housing open.<br />
Fault Machine status Items to remedy / actions to take<br />
E000 Stand-by • 60 minutes have passed without the<br />
user actuating any function; the<br />
machine is in stand-by mode<br />
14 Edition G 1.2-07<br />
• Press button E to cancel stand-by mode<br />
E010 door not open • The door has been opened • Check the "Door open" proximity switch<br />
• Check the extension board<br />
• The door is closed • Check the door motor<br />
• Check the extension board<br />
E020 Emergency stop • EMERGENCY STOP actuated • Release the EMERGENCY STOP<br />
• EMERGENCY STOP not actuated • Check the EMERGENCY STOP switching<br />
element<br />
• Check the lead/connector to the EMERGENCY<br />
STOP<br />
E025 door not closed • The door has been closed • Check the "Door closed" proximity switch<br />
• Check the extension board<br />
• The door is open • Check the door motor<br />
• Check the extension board<br />
E030 Pot not found • There is no container in the mixing unit • Load a container<br />
• A container is loaded in the mixing unit<br />
• The container is too small<br />
• Check the clamping table switch<br />
• Check the programmable cam<br />
• The threaded spindles are dirty • Clean and lubricate the threaded spindles<br />
E040 Max open • The mixing unit is fully open • Note that the maximum container height is<br />
400mm<br />
• The mixing unit is not fully open • Clean and lubricate the threaded spindles<br />
Clean and lubricate the guide columns<br />
E050 Pot defective • The container is defective<br />
• Press button "P" to reinitialize the machine<br />
• Correct the clamping pressure<br />
• The container is not defective • Check whether the clamping table / clamping<br />
table switch moves smoothly<br />
• Check the lead/connector to the "clamping"<br />
proximity switch<br />
• The "clamping" proximity switch/programmable<br />
cam/ clamping table microswitch or control pcb<br />
is defective
<strong>Collomix</strong> Rühr- und Mischgeräte Gmbh <strong>BIAX</strong> <strong>44P</strong><br />
D-85080 Gaimersheim<br />
Fault Machine status Items to remedy / actions to take<br />
E060 not disclamped • The container is clamped • check clamping motor, brushes and control pcb<br />
• The container is not clamped<br />
• The mixing unit is not at 12 o'clock position,<br />
move by hand<br />
• Check whether the clamping table / clamping<br />
table switch moves smoothly<br />
• Check the lead/connector to the "clamping"<br />
proximity switch<br />
E070 MU locked • Latching pin blocked • The latching pin is blocked – clean and<br />
lubricate, replace if necessary<br />
E080 MU unlocked • Latching pin blocked<br />
• Latching pin released • Check the lead/connector to the switch of the<br />
mixing unit magnet<br />
• The switch of the mixing unit magnet is<br />
defective<br />
• The mixing unit is not 12 at o'clock position,<br />
move by hand<br />
• Check the lead/connector to the switch of the<br />
mixing unit magnet<br />
• The switch of the mixing unit magnet is<br />
defective<br />
• Latching pin released • The latching pin is blocked – clean and<br />
lubricate, replace if necessary<br />
• Check the lead/connector to the mixing unit<br />
magnet<br />
• The mixing unit magnet is defective<br />
E120 Speed too low • The mixing unit rotates • Check the lead/connector to the "position"<br />
proximity switch<br />
• The mixing unit does not rotate<br />
• The "position" proximity switch is defective<br />
• Check the fuse for SI 2 motor<br />
• Check the lead/connector to the motor<br />
• The motor / rectifier or control pcb is defective<br />
E130 Speed too high • Decrease the motor speed<br />
The actions printed on a gray background have to be performed by authorized and suitably trained personnel.<br />
Edition G 1.2-07 15
<strong>BIAX</strong> <strong>44P</strong> <strong>Collomix</strong> Rühr- und Mischgeräte GmbH<br />
D-85080 Gaimersheim<br />
7. Maintenance and cleaning<br />
Regular maintenance is necessary to ensure that the machine remains in good working<br />
condition at all times. If the machine is in constant use, it is important to lubricate the<br />
most important parts in accordance with the schedule described below.<br />
How often you repeat the maintenance depends on how long the machine is<br />
operated.<br />
Always pull out the power plug before carrying out any maintenance work.<br />
7.1. Inspections<br />
Check all safety-relevant parts of the machine before beginning with your work. Arrange<br />
for authorized personnel to replace defective or damaged parts before you work again<br />
with the machine.<br />
7.2. Cleaning<br />
If any material escapes from the mixing container when it is inside the machine, remove<br />
it immediately. Use a rag or a spatula. Take care not to damage any connecting leads or<br />
sensors.<br />
Dirty threaded spindles can be cleaned with a rag or a wire brush. When you have<br />
finished cleaning the threaded spindles, lubricate them again with Molycote BR 2 Plus.<br />
Important! Never clean the machine with a high-pressure cleaner or the like. This<br />
could wash the lubricating grease out of the ball bearings, leaving them to run dry. This<br />
will result in serious damage. Ball bearings which have run dry must be replaced<br />
immediately!<br />
7.3. Maintenance<br />
Every week:<br />
• Remove any dirt from the machine.<br />
• Apply a thin coat of lubricating oil at the two guide columns of the mixing unit.<br />
Every 6 months:<br />
• Check the PERMA lubricating cartridge (2) and replace it when necessary<br />
• Lubricate the threaded spindle (4) and the spindle shaft (behind the threaded spindle)<br />
with Molykote BR 2 plus.<br />
• Check that the lock pin at the mixing unit magnet moves smoothly.<br />
• Check that all ball bearings move smoothly. Ball bearings are to be found on the two<br />
clamping jaws, on the drive shaft at the transmission gear and on the clamping tables.<br />
16 Edition G 1.2-07<br />
2<br />
1<br />
1 Guide columns<br />
2 PERMA cartridge<br />
4 threaded spindle<br />
4
<strong>Collomix</strong> Rühr- und Mischgeräte Gmbh <strong>BIAX</strong> <strong>44P</strong><br />
D-85080 Gaimersheim<br />
7.4. Maintenance checklist<br />
Maintenance checklist for <strong>BIAX</strong> 44 P<br />
Machine number<br />
Location of the machine<br />
Maintenance technician<br />
Cleaning the machine<br />
Clean the inside and the outside of the machine<br />
Counter total: Date of maintenance:<br />
Remove paint residues from the spindle and the spindle shaft with a steel brush<br />
Remove paint residues from between the upper clamping table and the clamping table carrier.<br />
Inspections<br />
Check the drive belt for wear and tension.<br />
Check that the latching pin on the mixing unit magnet moves smoothly.<br />
Check all ball bearings to see that they move smoothly. There are ball bearings on the two clamping<br />
jaws, the transmission drive shaft and the clamping tables.<br />
Check the state of wear of the carbon brushes. They should have a minimum length of<br />
approximately 9 mm.<br />
Lubricating the machine<br />
Check the amount of PERMA lubricant; if necessary, replace the cartridge.<br />
Lubricate the threaded spindles and the spine shaft with MOLIKOTE BR2+.<br />
Brush a little lubricating oil on the guide columns of the mixing unit.<br />
Brush a little lubricating oil on the latching pin.<br />
Miscellaneous<br />
Replace the fuses on the pcb: S1, S2 = 6.3 AT 250V; S3 = 4.0 AT 250V<br />
(use only sand-filled, flow fuses)<br />
Add more spare fuses as required<br />
Carry out a function test with a large and a small container.<br />
Comments<br />
Date:<br />
Signature of the maintenance technician:<br />
Edition G 1.2-07 17
<strong>BIAX</strong> <strong>44P</strong> <strong>Collomix</strong> Rühr- und Mischgeräte GmbH<br />
D-85080 Gaimersheim<br />
7.5. Layout of the main board<br />
24 V Fuse<br />
230V Mixer Motor<br />
Fuses:<br />
No. Value Function<br />
SI1 6.3A T 24 V fuse<br />
SI2 6.3A T 230V mixer motor<br />
SI3 4.0A T 230V primary transformer /<br />
electronics<br />
Connector assignment:<br />
ST 1 Lead Function<br />
1<br />
2<br />
violett<br />
violett<br />
24V AC from transformer<br />
ST 4 Lead Function<br />
1 blue Clamp motor<br />
4 red<br />
ST 6 Lead Function<br />
1<br />
2<br />
brown<br />
brown<br />
230V AC to transformer<br />
3 Schwarz L1<br />
4 Blau N Mains<br />
5 Grün/gelb PE<br />
ST 10 Lead Function<br />
1 white Emergency stop extension<br />
2 white board<br />
3<br />
4<br />
white<br />
white<br />
Emergency stop<br />
ST 14 Lead Function<br />
1 brown<br />
2 black "Clamp" proximity switch<br />
3 blue<br />
ST 15 Lead Function<br />
3<br />
4<br />
brown<br />
black<br />
proximity switch door closed<br />
18 Edition G 1.2-07<br />
Keyboard Display<br />
230V primary transformer and electronics<br />
ST 16 Lead Function<br />
1<br />
2<br />
green<br />
green<br />
Mixing unit magnet<br />
3<br />
4<br />
gray<br />
gray<br />
Mixing unit magnet switch<br />
ST 17 Lead Function<br />
1<br />
2<br />
braun<br />
schwarz<br />
proximity switch door open<br />
5 blau GND proximity switches door<br />
ST 18 Lead Function<br />
1 brown<br />
2 black “Position“ proximity switch<br />
3 blue<br />
ST 19 Lead Function<br />
3<br />
4<br />
ws<br />
ws<br />
Turn right FU<br />
7<br />
8<br />
rt+<br />
bl -<br />
Speed FU<br />
Jumper assignment:<br />
ST2 closed<br />
ST5 open<br />
ST 7 1-2 <strong>BIAX</strong> <strong>44P</strong><br />
ST 8 1-2 Service / 2-3 Operation<br />
ST 21 1-2 <strong>BIAX</strong> <strong>44P</strong><br />
LED signals:<br />
Display Meaning<br />
LD 1 "Clamp" proximity switch<br />
LD 2 “Position“ proximity switch<br />
LD 3 Mixing unit magnet switch<br />
LD 4 door closed<br />
LD 6 Mixing unit magnet<br />
LD 9 door open
<strong>Collomix</strong> Rühr- und Mischgeräte Gmbh <strong>BIAX</strong> <strong>44P</strong><br />
D-85080 Gaimersheim<br />
7.6. Layout of the extension board<br />
Fuses:<br />
No. Value Function<br />
SI1 6,3A T 24 V Fuse<br />
Connector assignment:<br />
ST 1 Lead Function<br />
1<br />
2<br />
violet<br />
violet<br />
24V AC from transformer<br />
ST 3 Lead Function<br />
1<br />
2<br />
blue<br />
brown<br />
Door motor<br />
ST 4 Lead Function<br />
1<br />
2<br />
white<br />
white<br />
Emergency stop main board<br />
LED signals:<br />
Display Meaning<br />
LD 9 Proximity switch „slide“<br />
Jumper assignment:<br />
ST 10 5-6 operation<br />
Edition G 1.2-07 19
<strong>BIAX</strong> <strong>44P</strong> <strong>Collomix</strong> Rühr- und Mischgeräte GmbH<br />
D-85080 Gaimersheim<br />
8. Annex<br />
8.1. Technical data<br />
Type of machine: <strong>BIAX</strong> 44 SX<br />
Supply voltage: 3~,N, PE; 400 Volt / 50 Hz<br />
Rated power: 2,2 kW<br />
Fuse: 16 A<br />
Speed/mixing unit: 140 UpM<br />
Max. container weight: - 40 kg<br />
container height: 115–440 mm<br />
Max. container base area: round 315 mm / oval 365 mm<br />
8.2. Warranty<br />
Machine weight: 235 kg<br />
Dimensions (w x d x h): 830 x 857 x 1112 mm<br />
The manufacturer undertakes to provide, as part of the general terms of supply and<br />
delivery, a twelve-month warranty. This warranty applies to single-shift operation and is<br />
counted from the date of initial start-up. It covers all defects arising from faulty material<br />
or workmanship. Please note that all warranty claims must be accompanied by the<br />
original delivery note or initial start-up report.<br />
All essential warranty repair work must only be carried out by adequately trained service<br />
engineers or by third parties with express prior authorization from <strong>Collomix</strong>. The carrying<br />
out of unauthorized repairs may render the warranty null and void.<br />
Please return any defective parts or machines carriage-paid to our factory. <strong>Collomix</strong><br />
reserves the right to decide on whether cost-free parts replacement is applicable. Parts<br />
and labor covered by the warranty will be supplied free of charge. The warranty does not<br />
cover travel costs, expenses or possible overnight accommodation resulting from<br />
warranty repairs carried out off our premises.<br />
Any further responsibility, with particular reference to damage claims, including foregone<br />
profit or other material losses on the part of the customer, is expressly excluded.<br />
Warranty and liability claims for personal or material damages are excluded if<br />
attributable to one or more of the following causes:<br />
• Incorrect operation of the machine, as defined in the operating instructions<br />
• Failure to observe the instructions in the operating manual with respect to set-up,<br />
initial start-up, operation and maintenance of the machine<br />
• Faults or damage caused by excessive accumulations of dirt and/or incorrect cleaning<br />
schedules, with particular reference to leaks and damaged containers<br />
• Operation of the machine with defective safety and/or protection devices<br />
• Unauthorized structural modifications to the machine<br />
• Incorrect monitoring of parts subject to wear and consumables<br />
• Unauthorized repairs and/or the fitting of non-original spare parts<br />
• Damage caused by the impact of foreign bodies or force majeure<br />
• We reserve the right to make amendments as a result of ongoing advances in the<br />
technical field.<br />
20 Edition G 1.2-07
<strong>Collomix</strong> Rühr- und Mischgeräte Gmbh <strong>BIAX</strong> <strong>44P</strong><br />
D-85080 Gaimersheim<br />
8.3. Recycling and disposal<br />
The transport packaging consists of recyclable material. Please dispose of it accordingly.<br />
At the end of the machine's working life, the materials used in its construction must be<br />
properly recycled. If you have any questions concerning the disposal of any materials,<br />
please contact the manufacturer.<br />
8.4. Declaration of CE conformity<br />
We declare herewith that this product conforms to the following standards and standardsetting<br />
documents:<br />
EN12100-1, EN12100-2, EN294, EN349, EN954-1, EN55011, EN1050, EN61000-6-2,<br />
EN61000-4-2, EN61000-4-3, EN61000-4-4, EN61000-4-5<br />
in accordance with directives 89/336 EWG, 98/37 EWG, 2006/95 EWG<br />
Alexander Essing<br />
Manufacturer:<br />
<strong>Collomix</strong> Rühr- und Mischgeräte GmbH<br />
Daimlerstr. 9, D-85080 Gaimersheim<br />
Federal Republic of Germany<br />
Tel.: ++49 (0)8458 32 98 - 0<br />
Fax: ++49 (0)8458 32 98 30<br />
This declaration of conformity will lose its validity if any changes<br />
or modifications are made to the machine without the<br />
manufacturer's approval.<br />
Edition G 1.2-07 21
<strong>BIAX</strong> <strong>44P</strong> <strong>Collomix</strong> Rühr- und Mischgeräte GmbH<br />
D-85080 Gaimersheim<br />
<strong>Collomix</strong> Rühr- und Mischgeräte GmbH<br />
Daimlerstr. 9, D-85080 Gaimersheim<br />
Federal Republic of Germany<br />
Tel.: ++49 (0)8458 32 98 - 0<br />
Fax: ++49 (0)8458 32 98 30<br />
22 Edition G 1.2-07