
Create successful ePaper yourself
Turn your PDF publications into a flip-book with our unique Google optimized e-Paper software.
Figure 2-3<br />
J. Using cut off section of shield as a guide, cut<br />
shaft the same amount. (Figure 2-6)<br />
Figure 2-6<br />
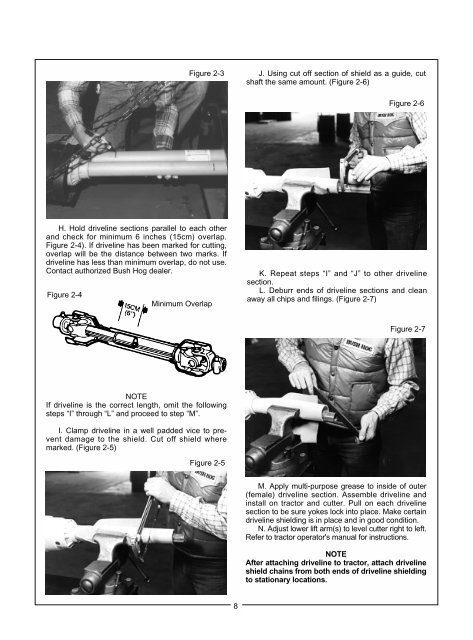
H. Hold driveline sections parallel to each other<br />
and check for minimum 6 inches (15cm) overlap.<br />
Figure 2-4). If driveline has been marked for cutting,<br />
overlap will be the distance between two marks. If<br />
driveline has less than minimum overlap, do not use.<br />
Contact authorized <strong>Bush</strong> <strong>Hog</strong> dealer.<br />
Figure 2-4<br />
Minimum Overlap<br />
K. Repeat steps “I” and “J” to other driveline<br />
section.<br />
L. Deburr ends of driveline sections and clean<br />
away all chips and filings. (Figure 2-7)<br />
Figure 2-7<br />
NOTE<br />
If driveline is the correct length, omit the following<br />
steps “I” through “L” and proceed to step “M”.<br />
I. Clamp driveline in a well padded vice to prevent<br />
damage to the shield. Cut off shield where<br />
marked. (Figure 2-5)<br />
Figure 2-5<br />
M. Apply multi-purpose grease to inside of outer<br />
(female) driveline section. Assemble driveline and<br />
install on tractor and cutter. Pull on each driveline<br />
section to be sure yokes lock into place. Make certain<br />
driveline shielding is in place and in good condition.<br />
N. Adjust lower lift arm(s) to level cutter right to left.<br />
Refer to tractor operator's manual for instructions.<br />
NOTE<br />
After attaching driveline to tractor, attach driveline<br />
shield chains from both ends of driveline shielding<br />
to stationary locations.<br />
8