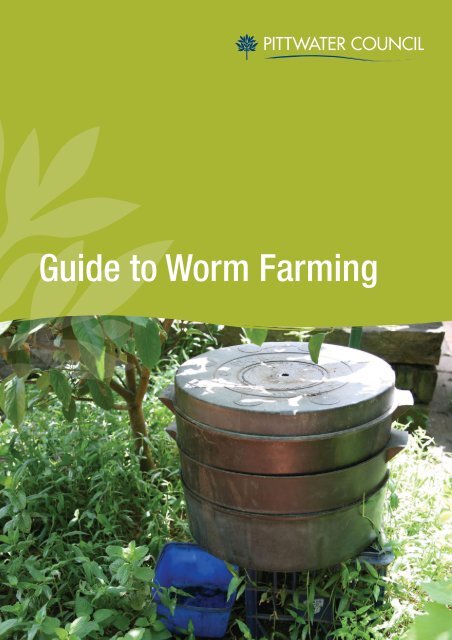
Guide to Worm Farming - Pittwater Council
Guide to Worm Farming - Pittwater Council
Guide to Worm Farming - Pittwater Council

You also want an ePaper? Increase the reach of your titles
YUMPU automatically turns print PDFs into web optimized ePapers that Google loves.
<strong>Guide</strong> <strong>to</strong> <strong>Worm</strong> <strong>Farming</strong>
Why <strong>Worm</strong> <strong>Farming</strong>?<br />
We all put things in our garbage bin that could be put <strong>to</strong> good use. Did<br />
you know that organic material such as food scraps make up around 60%<br />
of our household waste? If you fill your 80 litre garbage bin each week, that<br />
means you are throwing out 48 litres of organic material each week! When<br />
this waste goes <strong>to</strong> landfill it is costly <strong>to</strong> us and it harms our environment.<br />
The good news is that most organic material can easily be returned <strong>to</strong> the<br />
soil as useful fertiliser and compost in your own garden.<br />
Here are 3 more good reasons <strong>to</strong> start a worm farm in your garden or<br />
on your verandah.<br />
Your plants will love it!<br />
<strong>Worm</strong> castings and worm juice are nutrient rich, improving plant<br />
growth, increasing the capacity of the soil or potting mix <strong>to</strong> hold<br />
nutrients and water, and helps plants <strong>to</strong> resist disease.<br />
<strong>Worm</strong> farming is fun!<br />
<strong>Worm</strong>s, worms, and more worms!. Kids and adults of all ages<br />
can enjoy worm farming and it is a great way for the whole<br />
family <strong>to</strong> get involved in recycling food scraps.<br />
Reduce the amount of waste going <strong>to</strong> landfill!<br />
You can do this by simply recycling your food scraps at home.<br />
The worms and other micro-organisms break down the food<br />
scraps before they have a chance <strong>to</strong> rot. Did you know that<br />
around 90% of greenhouse gas emissions from landfills are a<br />
result of decomposing organic material such as food waste?<br />
<strong>Worm</strong>s - nature’s own natural recyclers!
The Essential Ingredients for a<br />
Good <strong>Worm</strong> Farm<br />
<strong>Worm</strong>s of course! You will need at least 1000 worms <strong>to</strong> start with. There are<br />
many different species of worms, but Red Wrigglers are the best because they<br />
don’t mind living in a crowded worm farm, they reproduce quickly and eat up<br />
<strong>to</strong> half their own body weight per day.<br />
<strong>Worm</strong>s need a comfortable bed. In a worm’s natural habitat under the<br />
ground, it is moist, cool, damp and dark. You can recreate these conditions<br />
easily using peat moss, shredded paper, grass clippings or straw as bedding.<br />
Feed your worms a mix of food scraps such as fruit and vegetable scraps,<br />
tea bags and coffee grounds. Just like humans, if we ate the same foods over<br />
and over, we would get quite bored with eating, so a variety of food scraps is<br />
the key <strong>to</strong> keeping the worms active, growing and multiplying.<br />
Suitable Bedding<br />
Peat Moss<br />
Straw<br />
Autumn leaves<br />
Sawdust<br />
Shredded newspaper<br />
Bark<br />
Brown paper bags<br />
Grass clippings<br />
Food Scraps & other ingredience<br />
Fruit and vegetable scraps<br />
Tea leaves & bags<br />
Vacuum cleaner dust<br />
Coffee grounds<br />
Green leaves<br />
Hair<br />
Egg shells<br />
Fresh weeds & manures
Maintaining your <strong>Worm</strong> Farm<br />
Using the ADAM Principles<br />
A<br />
is for Aliveness. Your worm farm is a living system. It’s the worms and microorganisms<br />
in the worm farm multiplying and digesting the organic material<br />
that produces heat and speeds up the process of breaking down the organic<br />
material, creating nature’s own fertiliser - worm castings and worm juice.<br />
D<br />
A<br />
is for Diversity. Feed your worms a variety of ingredients <strong>to</strong> keep the worms<br />
healthy, active and more interested in eating.<br />
is for Aeration. <strong>Worm</strong>s need air <strong>to</strong> breathe, just as people do. Place your worm<br />
farm in a shaded area with plenty of air moving around it, and make sure your<br />
worm farm has holes in the lid. As worms wriggle and move around the worm farm,<br />
they shift ingredients and naturally create air pockets as they go.<br />
M<br />
is for Moisture. <strong>Worm</strong>s need an environment that is moist, cool, damp and<br />
dark. Their bodies also need <strong>to</strong> stay moist <strong>to</strong> breathe, if they dry out they<br />
will die. Moisture is the key <strong>to</strong> any healthy and active ecosystem. The food scraps<br />
you add <strong>to</strong> your worm farm contain a lot of moisture, but you will also need a damp<br />
cover over the food scraps such as a hessian or calico bag, or damp newspaper.<br />
Keeping the worms active<br />
<strong>Worm</strong>s are very easy pets <strong>to</strong> look after as they do not need much attention. Just<br />
ensure your worm farm is placed in a shaded area of your garden or verandah,<br />
with food scraps covered with a moist hessian bag or damp newspaper. Keeping<br />
the cover moist may require a little watering once a week. <strong>Worm</strong>s will even survive<br />
if you go on holidays, as long as the worm farm remains moist.<br />
Optimal temperature for worms is between 13º and 25º Celcius. At this<br />
temperature, the worms will eat well and reproduce steadily. If the worm farm is<br />
<strong>to</strong>o cold or <strong>to</strong>o hot (below 13ºC or above 25ºC) they will not only s<strong>to</strong>p eating, but<br />
can die.
A FULLY OPERATIONAL<br />
CAN-O-WORMS<br />
VENTILATION HOLES<br />
LID<br />
LEVEL 4<br />
Third<br />
Working Tray<br />
LEVEL 3<br />
Second<br />
Working Tray<br />
LEVEL 2<br />
First<br />
Working Tray<br />
LEVEL 1<br />
Collec<strong>to</strong>r Tray<br />
TAP<br />
©1995 N. Nattrass Sourced from www.reln.com.au
LID<br />
VENTILATION HOLES<br />
Always keep a lid on your worm farm <strong>to</strong> maintain a<br />
dark, damp and cool environment, with a few holes in<br />
the lid for airflow.<br />
LEVEL 4<br />
Third<br />
Working Tray<br />
LEVEL 3<br />
Second<br />
Working Tray<br />
LEVEL 2<br />
First<br />
Working Tray<br />
This tray is used for food scraps when Level 3 is at<br />
least 2cm deep in worm castings. Start <strong>to</strong> add food<br />
scraps in this tray and cover with the hessian bag/<br />
paper used in Level 3, starting the process over again.<br />
In a few months, there should be no worms in the first<br />
working tray (Level 2), only worm castings. When this<br />
happens you can take out this tray using the worm<br />
castings on the garden as fertiliser, and then using<br />
this tray as Level 4 in the future.<br />
This tray is for food scraps. Place around 2cm of food<br />
scraps over half of the tray area and see how the<br />
worms go. Over time you will be able <strong>to</strong> assess how<br />
much food your worms can manage at any one time.<br />
Always cover the food scraps with a damp hessian<br />
cover or newspaper, don’t let the cover dry out. In a<br />
few months, when this tray has at least 2cm of worm<br />
castings (dark soil appearance), you can add the<br />
Level 4 tray <strong>to</strong> start the process over.<br />
This tray is for the bedding and where you introduce<br />
new worms <strong>to</strong> the system. You can use material<br />
such as peat moss, shredded paper, coconut fibre or<br />
similar, just put enough bedding in<strong>to</strong> the tray so that<br />
the next tray (Level 3) rests on <strong>to</strong>p of this bedding,<br />
this way the worms will easily reach Level 3.<br />
LEVEL 1<br />
Collec<strong>to</strong>r Tray<br />
This tray catches liquid fertiliser that drains from<br />
the upper levels of the worm farm. Simply drain this<br />
liquid by turning on the tap, and there you have your<br />
own organic fertiliser <strong>to</strong> use on your potted plants or<br />
garden.<br />
TAP<br />
The process starts here
Common Problems with <strong>Worm</strong><br />
Farms and what <strong>to</strong> do about them<br />
1. Smelly<br />
Your worm farm can start <strong>to</strong> smell if you are feeding your worms more than they<br />
can eat, or if the worm farm is <strong>to</strong>o wet. Food scraps contain a lot of moisture<br />
and if there are not enough worms or <strong>to</strong>o much food, the scraps will begin <strong>to</strong> rot<br />
before the worms have a chance <strong>to</strong> eat them.<br />
S<strong>to</strong>p feeding the worms<br />
Give them a chance <strong>to</strong> digest what they already have available <strong>to</strong> them before adding any<br />
more food scraps.<br />
Decrease moisture<br />
This will happen naturally as you increase aeration, either through lightly mixing the scraps<br />
with a trowel, adding more worms, or adding a handful of calcium, lime or egg shells. Don’t<br />
add any more water <strong>to</strong> the worm farm, only keep the hessian/ paper cover moist.<br />
2. Unwelcome visi<strong>to</strong>rs<br />
There are millions of friendly critters in your worm farm (in addition <strong>to</strong> the worms<br />
themselves) which help <strong>to</strong> break down the food waste. However, larger critters<br />
such as cockroaches, mice and rats are not welcome, so here’s how <strong>to</strong> reduce the<br />
attraction fac<strong>to</strong>r for vermin.<br />
Keep the worm farm moist. Vermin do not like a damp environment.<br />
Keep the worm farm at optimal temperature. Between 13ºC and 25ºC is ideal.<br />
If in doubt, leave them out. Reduce the amount of acidic ingredients such as citrus peels or<br />
onions. <strong>Worm</strong>s don’t like them as much, which means these ingredients will be slow <strong>to</strong> break<br />
down.<br />
Add some wood ash, egg or oyster shells, lime or calcium. These are natural<br />
ingredients which help <strong>to</strong> balance the composition of the worm farm.<br />
Always cover food scraps. Use a damp hessian cover or sheets of newspaper.<br />
Keep your worm farm off the ground. This will s<strong>to</strong>p any larger critters such as mice and<br />
rats being able climb in.
3. <strong>Worm</strong>s are not eating very much.<br />
If the worms are slow <strong>to</strong> process the food scraps, it could be lack of air, water,<br />
heat or worms. There are good ways <strong>to</strong> make this process quicker!<br />
<strong>Worm</strong> farm may be <strong>to</strong>o dry<br />
Add water, remember <strong>to</strong> give your worm farm a good soaking every 1 - 2 weeks and keep the<br />
hessian/ paper cover moist at all times. Position your worm farm in a shaded area.<br />
<strong>Worm</strong> farm may be <strong>to</strong>o wet<br />
The worms can drown if there is <strong>to</strong>o much water and they may not be getting enough air <strong>to</strong><br />
breath. Use a trowel <strong>to</strong> gently mix the material and add some lime, calcium or egg shells.<br />
Keep your worm farm covered with a lid<br />
As well as a moist cover over the food scraps, the worm farm will need <strong>to</strong> be covered by a lid <strong>to</strong><br />
keep the environment dark, damp and moist. A lid also provides extra warmth during the Winter<br />
months by keeping the heat in.<br />
Keep the worm farm at an optimal temperature<br />
Between 13ºC and 25ºC, is the optimal temperature for worms <strong>to</strong> thrive and reproduce.<br />
Make sure your worm farm has enough worms. 1000 is a good start.<br />
Where <strong>to</strong> use the worm castings<br />
From your worm farm <strong>Worm</strong> castings Drip line around tree<br />
In potted gardens<br />
Lawn <strong>to</strong>p-dressing
Notes:
Contact <strong>Pittwater</strong> <strong>Council</strong>’s Waste Education Team if you would like more information on<br />
reducing your household waste through composting and worm farming, recycling and green<br />
cleaning. Telephone: 9970 1194 Email: EC Education_Team@pittwater.nsw.gov.au<br />
Contact Kimbriki Recycling & Waste Disposal Centre for Free Eco Gardening Workshops,<br />
Recycled Garden Products (mulches, soils and potting mix) and Compost Bins ($45)<br />
Telephone: 9486 3512 Email: kimbriki@kimbriki.com Web: www.kimbriki.com<br />
PO Box 882, Mona Vale NSW 1660<br />
Phone: 02 9970 1111<br />
Email: pittwater_council@pittwater.nsw.gov.au<br />
Environmental Compliance / Printed on 100% recycled paper / Date: January 2008 / ECWRHA08