

TM 9-2320-283-10 - JATONKAM35s HOME ON THE WEB
TM 9-2320-283-10 - JATONKAM35s HOME ON THE WEB
TM 9-2320-283-10 - JATONKAM35s HOME ON THE WEB

Create successful ePaper yourself
Turn your PDF publications into a flip-book with our unique Google optimized e-Paper software.
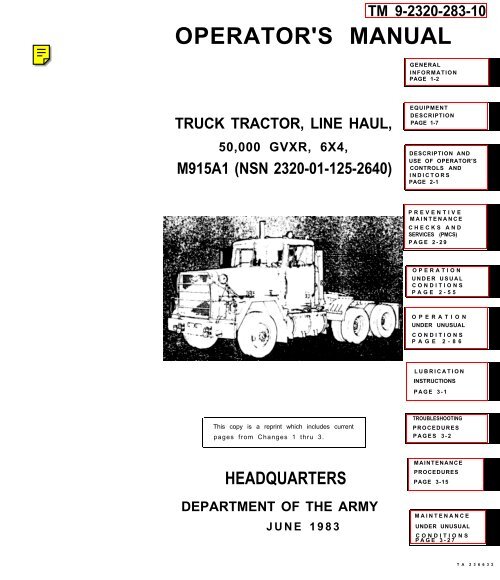
<strong>TM</strong> 9-<strong>2320</strong>-<strong>283</strong>-<strong>10</strong><br />
OPERATOR'S MANUAL<br />
GENERAL<br />
INFORMATI<strong>ON</strong><br />
PAGE 1-2<br />
TRUCK TRACTOR, LINE HAUL,<br />
50,000 GVXR, 6X4,<br />
M915A1 (NSN <strong>2320</strong>-01-125-2640)<br />
EQUIPMENT<br />
DESCRIPTI<strong>ON</strong><br />
PAGE 1-7<br />
DESCRIPTI<strong>ON</strong> AND<br />
USE OF OPERATOR'S<br />
C<strong>ON</strong>TROLS AND<br />
INDICTORS<br />
PAGE 2-1<br />
PREVENTIVE<br />
MAINTENANCE<br />
CHECKS AND<br />
SERVICES (PMCS)<br />
PAGE 2-29<br />
OPERATI<strong>ON</strong><br />
UNDER USUAL<br />
C<strong>ON</strong>DITI<strong>ON</strong>S<br />
PAGE 2-55<br />
OPERATI<strong>ON</strong><br />
UNDER UNUSUAL<br />
C<strong>ON</strong>DITI<strong>ON</strong>S<br />
PAGE 2-86<br />
LUBRICATI<strong>ON</strong><br />
INSTRUCTI<strong>ON</strong>S<br />
PAGE 3-1<br />
This copy is a reprint which includes current<br />
pages from Changes 1 thru 3.<br />
TROUBLESHOOTING<br />
PROCEDURES<br />
PAGES 3-2<br />
HEADQUARTERS<br />
DEPAR<strong>TM</strong>ENT OF <strong>THE</strong> ARMY<br />
JUNE 1983<br />
MAINTENANCE<br />
PROCEDURES<br />
PAGE 3-15<br />
MAINTENANCE<br />
UNDER UNUSUAL<br />
C<strong>ON</strong>DITI<strong>ON</strong>S<br />
PAGE 3-27<br />
T A 2 3 6 6 3 2
<strong>TM</strong> 9-<strong>2320</strong>-<strong>283</strong>-<strong>10</strong><br />
C3<br />
CHANGE<br />
NO. 3<br />
HEADQUARTERS<br />
DEPAR<strong>TM</strong>ENT OF <strong>THE</strong> ARMY<br />
Washington D.C., 7 June 1993<br />
OPERATOR'S<br />
TRUCK TRACTOR, LINE HAUL,<br />
50,000 GVWR 6 X 4,<br />
M915A1 (NSN <strong>2320</strong>-01-125-2640)<br />
<strong>TM</strong> 9-<strong>2320</strong>-<strong>283</strong>-<strong>10</strong>, 27 June 1933, is changed as follows:<br />
1. Remove old pages and insert new pages as indicated below.<br />
2. New or changed material is indicated by a vertical bar in the margin of the page.<br />
3. The Preventive Maintenance Checks and Services have been completely replaced;<br />
no change bars or pointing hands will appear on pages 2-33 through 2-54.6.<br />
Remove Pages<br />
Insert Pages<br />
2-45 and 2-46 2-45 and 2-46<br />
4. File this change sheet in front of the publication for references purposes.<br />
By Order of the Secretary of the Army:<br />
Official:<br />
MILT<strong>ON</strong> H. HAMILT<strong>ON</strong><br />
Administrative Assistant to the<br />
Secretary of the Army<br />
04445<br />
GORD<strong>ON</strong> R. SULLIVAN<br />
General, United States Army<br />
Chief of Staff<br />
Distribution:<br />
To be distributed in accordance with DA Form 12-38-E (Block 0321) requirements<br />
for <strong>TM</strong> 9-<strong>2320</strong>-<strong>283</strong>-<strong>10</strong>.<br />
Approved for public release; distribution is unlimited.
<strong>TM</strong> 9-<strong>2320</strong>-<strong>283</strong>-<strong>10</strong><br />
C2<br />
CHANGE<br />
NO.2<br />
HEADQUARTERS<br />
DEPAR<strong>TM</strong>ENT OF <strong>THE</strong> ARMY<br />
Washington D.C., 5 December 1991<br />
OPERATOR’S MANUAL<br />
TRUCK TRACTOR, LINE HAUL,<br />
50,000 GVWR 6 X 4,<br />
M915A1 (NSN <strong>2320</strong>-01-125-2640)<br />
<strong>TM</strong> 9-<strong>2320</strong>-<strong>283</strong>-<strong>10</strong>, 27 June 1983, is changed as follows:<br />
1. Remove old pages and insert new pages as indicated below.<br />
2. New or changed material is indicated by a vertical bar in the margin of the page.<br />
3. The Preventive Maintenance Checks and Services have been completely replaced;<br />
no change bars or pointing hands will appear on pages 2-33 through 2-54.6.<br />
Remove Pages<br />
Insert Pages<br />
2-33 through 2-54 2-33 through 2-54.<strong>10</strong><br />
4. File this change sheet in front of the publication for references purposes.<br />
By Order of the Secretary of the Army<br />
official:<br />
MILT<strong>ON</strong> H. HAMILT<strong>ON</strong><br />
Administrative Assistant to the<br />
Secretary of the Army<br />
00288<br />
GORD<strong>ON</strong> R. SULLIVAN<br />
General, United States Army<br />
Chief of Staff<br />
Distribution:<br />
To be distributed in accordance with DA Form 12-38-E, Block 0321, Operator maintenance<br />
requirements for <strong>TM</strong> 9-<strong>2320</strong>-<strong>283</strong>-<strong>10</strong>.<br />
Approved for public release; distribution is unlimited.
<strong>TM</strong> 9-<strong>2320</strong>-<strong>283</strong>-<strong>10</strong><br />
C1<br />
Change<br />
No. 1<br />
HEADQUARTERS<br />
DEPAR<strong>TM</strong>ENT OF <strong>THE</strong> ARMY<br />
Washington, D.C., 2 November 1989<br />
OPERATORS MANUAL<br />
TRUCK, TRACTOR, LINE HAUL,<br />
50,000 GVWR, 6X4<br />
M915Al (NSN <strong>2320</strong>-01-125-2640)<br />
<strong>TM</strong> 9-<strong>2320</strong>-<strong>283</strong>-<strong>10</strong>, 27 June 1983, is changed as follows:<br />
1. Remove old pages and insert new pages as indicated below.<br />
2. New or changed material is indicated by a vertical bar in the margin of the page.<br />
Remove Pages<br />
c and d<br />
v/vi (blank)<br />
1-7 and 1-8<br />
2-55 and 2-56<br />
2-85 and 2-86<br />
Insert Page<br />
c and d<br />
v/vi (blank)<br />
1-7 and 1-8<br />
2-55 and 2-56<br />
2-85 and 2-86<br />
3. File this change in front of the publication for reference purposes.<br />
By Order of the Secretary of the Army:<br />
Official:<br />
WILLIAM J. MEEHAN II<br />
Brigadier General, United States Army<br />
The Adjutant General<br />
CARL E. VU<strong>ON</strong>O<br />
General, United States Army<br />
Chief of Staff<br />
Distribution:<br />
To be distributed in accordance with DA Form 12-37-R, Operator maintenance<br />
requirements for Truck, Tractor, Line Haul, 6x4, 50,000 GVWR, M0151A1.
WARNING<br />
EXHAUST GASES CAN BE DEADLY<br />
<strong>TM</strong> 9-<strong>2320</strong>-<strong>283</strong>-<strong>10</strong><br />
Exhaust gases can produce symptoms of headache, dizziness,<br />
loss of muscular control or coma. Permanent brain<br />
damage or death can result from severe exposure. You<br />
can insure your safety by following these rules:<br />
• D<strong>ON</strong>'T operate the engine in an enclosed area unless<br />
it is properly ventilated.<br />
• D<strong>ON</strong>'T drive with any of your truck's inspection plates,<br />
cover plates, or the hood off unless necessary for<br />
maintenance purposes.<br />
If you notice exhaust odors or exposure symptoms, IM-<br />
MEDIATELY VENTILATE the cab. If the symptoms persist,<br />
remove the affected personnel and treat them as<br />
follows:<br />
• Expose them to fresh air.<br />
• Keep them warm.<br />
• D<strong>ON</strong>'T PERMIT PHYSICAL EXERCISE. If necessary,<br />
give artifical respiration. See FM 21-11.<br />
FILING <strong>THE</strong> RADIATOR<br />
Let radiator cool before removing cap. Remove radiator<br />
can in two steps. First, place a thick cloth over the cap<br />
and slowly rotate cap left to its first stop; pause, and let<br />
pressure escape from cooling system. Then rotate cap farther<br />
left until you can remove it. Failure to follow this procedure<br />
can result in serious burns.<br />
LIFTING <strong>THE</strong> TRUCK<br />
Improper use of lifting equipment and attachment of<br />
cables to the truck can result in serious personnel injury<br />
and equipment damage. OBSERVE ALL STANDARD<br />
RILES OF SAFETY.<br />
a
<strong>TM</strong> 9-<strong>2320</strong>-<strong>283</strong>-<strong>10</strong><br />
WARNING<br />
EXHAUST PIPE AND MUFFLER<br />
During normal operation the exhaust pipe and muffler can<br />
become very hot. Be careful not to touch these components<br />
with your bare hands. Do not allow your body<br />
to come in contact with the pipe or muffler. Exhaust<br />
system components may be hot enough to cause serious<br />
burns.<br />
PARKING<br />
Never use the parking brake for normal braking.<br />
BACKING OPERATI<strong>ON</strong>S<br />
Do not permit anyone to stand directly behind your tractor<br />
or the semitrailer during the coupling procedure. Failure<br />
to follow this warning can result in injury to personnel.<br />
DIESEL FUEL HANDLING<br />
When filling the fuel tank with diesel fuel be sure the hose<br />
nozzle or container contacts the filler tube on the fuel tank<br />
to carry off static electricity. DO NOT SMOKE OR PER-<br />
MIT ANY OPEN FLAME IN <strong>THE</strong> AREA OF <strong>THE</strong> TRUCK<br />
WHILE YOU ARE SERVICING <strong>THE</strong> DIESEL FUEL<br />
SYSTEM. Failure to follow this warning can result equipment<br />
COOLING FAN<br />
When working in the engine compartment with the engine<br />
running, stay clear of the cooling fan. The fan engage<br />
automatically at any time and could cause serious injury.<br />
b
<strong>TM</strong> 9-<strong>2320</strong>-<strong>283</strong>-<strong>10</strong><br />
SPARE WHEEL AND TIRE<br />
Use caution when raising or lowering the spare wheel and<br />
tire. It is very heavy, and if it should fall on a crew member,<br />
it could cause serious injury.<br />
HOOD SAFETY LATCH<br />
After raising hood, insert the S-shaped safety hook through<br />
two matching holes in the prop channels to prevent the<br />
hood from falling accidentally.<br />
JACKING UP <strong>THE</strong> TRUCK<br />
The hydraulic jack is intended only for lifting the truck,<br />
not for supporting the vehicle for performing maintenance.<br />
Do not get under the truck after it is raised unless it is properly<br />
supported with blocks or jack stands. FAILURE TO<br />
OBSERVE THIS WARNING CAN RESULT IN SERIOUS<br />
INJURY.<br />
SLIDING FIFTH WHEEL C<strong>ON</strong>TROL<br />
To prevent unintentional fifth wheel movement during<br />
vehicle operation, ALWAYS BE SURE CAB MOUNTED<br />
SLIDING FIFTH WHEEL C<strong>ON</strong>TROL IS IN <strong>THE</strong> LOCK POSI-<br />
TI<strong>ON</strong> before vehicle is moved. To prove fifth wheel is locked<br />
in position when coupled to a trailer, place transmit<br />
sion selector lever in FIRST GEAR (1), release park brakes,<br />
service brakes, apply trailer brake hand control, and tap<br />
accelerator pedal. This will cause the tractor mounted fifth<br />
wheel to be pulled sharply against the trailer mounted king<br />
pin. Set park brakes and shift selector lever back to<br />
NEUTRAL (N). Leave the cab and make a visual check of<br />
the fifth wheel sliding plate to verify it has not moved from<br />
the position selected. This will also verify the trailer king<br />
pin is securely locked into the fifth wheel jaws. The control<br />
should also be in the lock position any time the tractor<br />
is to be operated, even when not towing a trailer.<br />
NEVER MOVE C<strong>ON</strong>TROL TO <strong>THE</strong> UNLOCK POSITI<strong>ON</strong><br />
DURING NORMAL VEHICLE OPERATI<strong>ON</strong> AS LOSS OF<br />
C<strong>ON</strong>TROL CAN RESULT.
<strong>TM</strong> 9-<strong>2320</strong>-<strong>283</strong>-<strong>10</strong><br />
SEAT BELTS<br />
• Use of seat belts while operating your vehicle<br />
is mandatory as an aid in preventing personal<br />
injury in event of an accident.<br />
• The companion seat belt has nonlocking<br />
retractors. For proper use, webbing must first<br />
be completely extended from the nonlocking<br />
retractor device. All excess webbing must<br />
then be adjusted at the buckle.<br />
• This vehicle has been designed to operate safely<br />
and efficiently within the limits specified in<br />
this <strong>TM</strong>. Operation beyond these limits is<br />
prohibited IAW AR 70-1 without written approval<br />
from the Commander, U.S. Army Tank-<br />
Automotive Command, ATTN: AMSTA-CM-S,<br />
Warren, MI 48397-5000.<br />
d Change 1
TECHNICAL MANUAL<br />
<strong>TM</strong> 9-<strong>2320</strong>-<strong>283</strong>-<strong>10</strong><br />
HEADQUARTERS<br />
DEPAR<strong>TM</strong>ENT OF <strong>THE</strong> ARMY<br />
No. 9-<strong>2320</strong>-<strong>283</strong>-<strong>10</strong> WASHINGT<strong>ON</strong>, D.C., 27 June 1983<br />
OPERATOR’S MANUAL<br />
TRUCK TRACTOR, LINE HAUL, 50,000 GVWR, 6X4, M915A1 (NSN <strong>2320</strong>-01-1252640)<br />
REPORTING ERRORS AND<br />
RECOMMENDING IMPROVEMENTS<br />
You can help improve this manual. If you find any mistakes or if you know of<br />
a way to improve the procedures, please let us know. Mail your letter, DA<br />
Form 2028 (Recommended Changes to Publications and Blank Forms) or<br />
DA Form 2028-2 located in the back of this manual to Commander, US<br />
Army Tank-Automotive Command, ATTN: DRSTA-MB, Warren,<br />
Michigan 48090. A reply will be furnished directly to you.<br />
i/(ii blank)
<strong>TM</strong> 9-<strong>2320</strong>-<strong>283</strong>-<strong>10</strong><br />
TABLE OF C<strong>ON</strong>TENTS<br />
Page<br />
HOW TO USE THIS MANUAL .........................................<br />
v<br />
CHAPTER 1 INTRODUCTI<strong>ON</strong> ...................................... 1-1<br />
Section I General Information ................................... 1-2<br />
Section II Equipment Description ............................... 1-7<br />
CHAPTER 2 OPERATING INSTRUCTI<strong>ON</strong>S . . . . . . . . . . . . . . . . . . . . . . . . . . . 2-1<br />
Section I Description and Use of Operator’s Controls & Indicators ......2-1<br />
Section II Preventive Maintenance Checks and Services (PMCS) . . . . . 2-29<br />
Section III Operation Under Usual Conditions . . . . . . . . . . . . . . . . . . 2-55<br />
Section IV Operation Under Unusual Conditions ................... 2-86<br />
CHAPTER 3 MAINTENANCE INSTRUCTI<strong>ON</strong>S ....................... 3-1<br />
Section I Lubrication Instructions ............................. 3-1<br />
Section II Troubleshooting Procedures ............................ 3-2<br />
Section III Maintenance Procedures ........................... 3-15<br />
Section IV Maintenance Under Unusual Conditions ................. 3-27<br />
APPENDIX A REFERENCES . . . . . . . . . . . . . . . . . . . . . . . . . . . . . . . . . . . . . . . . . A-1<br />
APPENDIX B COMP<strong>ON</strong>ENTS OF END ITEM LIST . . . . . . . . . . . . . . . . . . . . . B-1<br />
APPENDIX C ADDITI<strong>ON</strong>AL AUTHORIZATI<strong>ON</strong> LIST . . . . . . . . . . . . . . . . . . . C-1<br />
APPENDIX D EXPENDABLE SUPPLIES AND MATERIALS . . . . . . . . . . . . . D-1<br />
SUBJECT INDEX . . . . . . . . . . . . . . . . . . . . . . . . . . . . . . . . . . . . . . . . . . . . . . . . . . . . I-1<br />
iii/iv(blank)
<strong>TM</strong> 9-<strong>2320</strong>-<strong>283</strong>-<strong>10</strong><br />
HOW TO USE THIS MANUAL<br />
This manual is designed to help you to operate and maintain the M915A1 truck tractor.<br />
Listed below are special features which have been included to make it easier to<br />
locate and to use the information you need.<br />
• A front cover Table of Contents is provided, giving you a quick reference to chapters<br />
and sections that you will be using often.<br />
• Warnings, subject headings, procedural steps, and certain other modules of information<br />
are highlighted in bold print or red as a visual aid for you.<br />
• Upper case type is used to emphasize statements of particular importance.<br />
FOLLOW <strong>THE</strong>SE GUIDELINES WHEN YOU USE THIS MANUAL:<br />
• Read all warnings and cautions.<br />
• Within a chapter or section, boxed headings are used to help categorize the material<br />
and to assist in finding subjects quickly.<br />
• The driver should read through this manual and become familiar with the content<br />
before attempting to operate the truck.<br />
Equipment description herein is non-metric and does not require metric conversion,<br />
common or special tools. Metric units are, therefore, not supplied. Tactical instructions,<br />
for sake of clarity, will also remain non-metric.<br />
WARNING<br />
This vehicle has been designed to operate safely<br />
and efficiently within the limits specified in<br />
this <strong>TM</strong>. Operation beyond these limits is<br />
prohibited IAW AR 70-1 without written approval<br />
from the Commander, U.S. Army Tank-<br />
Automotive Command, ATTN: AMSTA-CM-S,<br />
Warren, MI 48397-5000.<br />
Change 1 v/vi(blank)
<strong>TM</strong> 9-<strong>2320</strong>-<strong>283</strong>-<strong>10</strong><br />
CHAPTER 1<br />
INTRODUCTI<strong>ON</strong><br />
INDEX<br />
Page<br />
GENERAL INFORMATI<strong>ON</strong> ........................................ 1-1<br />
Identification of Equipment Major Components . . . . . . . . . . . . . . . . . . . . . 1-2<br />
Scope . . . . . . . . . . . . . . . . . . . . . . . . . . . . . . . . . . . . . . . . . . . ........... 1-4<br />
Maintenance Forms and Records . . . . . . . . . . . . . . . . . . . . . . . . . . . . . . 1-4<br />
Hand Receipt (-HR Manuals) . . . . . . . . . . . . . . . . . . . . . . . . . . . . . . . . 1-4<br />
Reporting Equipment Improvement Recommendations (EIR’s) . . . . . . 1-5<br />
Warranty Information . . . . . . . . . . . . . . . . . . . . . . . . . . . . . . . . . . . . 1-5<br />
Nomenclature . . . . . . . . . . . . . . . . . . . . . . . . . . . . . . . . . . . . . 1-6<br />
Abbreviations . . . . . . . . . . . . . . . . . . . . . . . . . . . . . . . . . . . . . . . . . . . . . . . . . 1-6<br />
EQUIPMENT DESCRIPTI<strong>ON</strong><br />
Equipment Purposes, Capabilities, and Features . . . . . . . . . . . . . . . . . . . . 1-7<br />
Performance Data . . . . . . . . . . . . . . . . . . . . . . . . . . . 1-8<br />
1-1
<strong>TM</strong> 9-<strong>2320</strong>-<strong>283</strong>-<strong>10</strong><br />
Section I. GENERAL INFORMATI<strong>ON</strong><br />
1<br />
2<br />
3<br />
4<br />
5<br />
6<br />
7<br />
8<br />
9<br />
FR<strong>ON</strong>T SPOTTER MIRRORS<br />
BRUSH GUARD<br />
NTC-400 BIG CAM III<br />
DIESEL ENGINE<br />
CLEARANCE LAMPS<br />
AIR HORN<br />
SIDE MIRRORS<br />
WORK LAMP RECEPTACLES<br />
CAB C<strong>ON</strong>TROLLED FIFTH<br />
WHEEL<br />
<strong>10</strong><br />
11<br />
12<br />
13<br />
14<br />
15<br />
16<br />
17<br />
FORWARD REAR AXLE 18<br />
QUARTER FENDER<br />
DRIVING AXLES<br />
AIR DRYER<br />
FUEL TANK<br />
FRESH AIR VENTS<br />
TURN SIGNAL LAMPS<br />
BLACKOUT MARKER<br />
LAMPS<br />
BLACKOUT DRIVE LAMP<br />
FR<strong>ON</strong>T AIR LINE<br />
C<strong>ON</strong>NECTORS<br />
TOWING EYES<br />
SERVICE HEADLAMPS<br />
Figure 1-1. M915A1 - Left Front View.<br />
TA 236633<br />
1-2
<strong>TM</strong> 9-<strong>2320</strong>-<strong>283</strong>-<strong>10</strong><br />
1<br />
2<br />
3<br />
4<br />
5<br />
6<br />
7<br />
8<br />
9<br />
<strong>10</strong><br />
TRAILER RAMPS<br />
CAB C<strong>ON</strong>TROLLED<br />
FIFTH WHEEL<br />
FORWARD-REAR AXLE<br />
QUARTER FENDER<br />
AIR HOSE TENDER<br />
SPARE WHEEL & TIRE<br />
SLIDING REAR CAB<br />
WINDOW & ST<strong>ON</strong>E SHIELD<br />
EXHAUST MUFFLER<br />
FR<strong>ON</strong>T WHEEL MUD FLAPS<br />
BATTERIES BOX<br />
HT 754CRD FIVE SPEED<br />
AUTOMATIC TRANSMISSI<strong>ON</strong><br />
11<br />
12<br />
13<br />
14<br />
15<br />
16<br />
17<br />
18<br />
SPARE WHEEL & TIRE<br />
CARRIER<br />
SPARE WHEEL & TIRE<br />
HOIST<br />
DRIVING AXLES<br />
REAR WHEEL MUD<br />
FLAPS<br />
BLACKOUT TAIL AND<br />
STOPLAMPS<br />
SERVICE TAIL AND<br />
STOPLAMPS<br />
REAR AIR LINE<br />
C<strong>ON</strong>NECTORS<br />
TOWING PINTLE<br />
Figure 1-2. M915A1 - Right Rear View. TA 236634<br />
1-3
<strong>TM</strong> 9-<strong>2320</strong>-<strong>283</strong>-<strong>10</strong><br />
1-1. Scope.<br />
This operator’s manual is for use in operating and maintaining the M915A1 line haul<br />
truck tractor. This vehicle is used to tow the M-872 Trailer with a towed load capacity<br />
of 30,000 Ibs (on the King Pin).<br />
1-2. Maintenance Forms and Records.<br />
Every mission begins and ends with the paperwork. There isn’t much of it, but you<br />
have to keep it up. The forms and records you will fill out have several uses. They<br />
are a permanent record of the services, repairs, and modifications made on your carrier.<br />
They are reports to organizational maintenance and to your commander. And they<br />
are a checklist for you when you want to know what is wrong with the carrier after<br />
its last use, and whether those faults have been fixed. Department of the Army forms<br />
and procedures used for equipment maintenance will be those prescribed by <strong>TM</strong> 38-756,<br />
The Army Maintenance Management System (TAMMS).<br />
1-3. Hand Receipt (-HR) Manuals.<br />
This manual has a companion document with a <strong>TM</strong> number followed by “-HR” (which<br />
stands for Hand Receipt). The <strong>TM</strong> 9-<strong>2320</strong>-<strong>283</strong>-<strong>10</strong>-HR consists of preprinted hand receipts<br />
(DA Form 2062) that list end item related equipment (i.e., COEI, Bll, and AAL) you<br />
must account for. As an aid to property accountability, additional -HR manuals may<br />
be requisitioned from the following source in accordance with procedures in Chapter<br />
3, AR 3<strong>10</strong>-2:<br />
Commander, Baltimore Adjutant General Publications Center<br />
2800 Eastern Blvd.<br />
Baltimore, MD 21220<br />
1-4
<strong>TM</strong> 9-<strong>2320</strong>-<strong>283</strong>-<strong>10</strong><br />
1-4. Reporting Equipment Improvement Recommendations (EIR’s).<br />
If your M915A1 Truck needs improvement, let us know. Send us an EIR. You, the<br />
user, are the only one who can tell us what you don’t like about your equipment. Let<br />
us know why you don’t like the design or performance. Put it on an SF 368 (Quality<br />
Deficiency Report). Mail it to us at:<br />
Commander, U.S. Army Tank-Automotive Command<br />
ATTN: DRSTA-MP<br />
Warren, Michigan 48090<br />
We’ll send you a reply.<br />
1-5. Warranty Information.<br />
The M915A1 Trucks are warranted by AM General Corporation in accordance with<br />
TB 9-2300-295-15/20 for a period of 15 months from date of acceptance, as shown on<br />
the Material Inspection and Receiving Report (DD Form 250), or 12,000 miles road<br />
travel, whichever occurs first. Report all defects in material or workmanship to your<br />
supervisor, who will take appropriate action through your Organizational Maintenance<br />
Shop.<br />
1-5
<strong>TM</strong> 9-<strong>2320</strong>-<strong>283</strong>-<strong>10</strong><br />
1-6. Nomenclature.<br />
COMM<strong>ON</strong> TERM<br />
OFFICIAL NAME<br />
• Engine Coolant<br />
-Antifreeze,<br />
mixture<br />
ethylene glycol<br />
• Cold Start system<br />
• Jake brake, Jacobs@ brake<br />
• Cable<br />
• Glad Hand<br />
• Pogo Stick<br />
- Ether quick-start system<br />
- Engine retarder<br />
-Wire rope<br />
- Quick disconnect coupling<br />
-Air hose tender<br />
1-7. Abbreviations.<br />
CID<br />
EIR’s<br />
F<br />
FWD<br />
GCWR<br />
GVW<br />
GVWR<br />
hp<br />
KP<br />
Ibs<br />
mph<br />
N/A<br />
PM<br />
PMCS<br />
Cubic Inch Displacement<br />
Equipment Improvement Recommendations<br />
Fahrenheit<br />
Forward<br />
Gross Combination Weight Rating<br />
Gross Vehicle Weight<br />
Gross Vehicle Weight Rating<br />
Horsepower<br />
King Pin<br />
pounds<br />
miles per hour<br />
Not Applicable<br />
Preventive Maintenance<br />
Preventive Maintenance Checks and Services<br />
1-6
<strong>TM</strong> 9-<strong>2320</strong>-<strong>283</strong>-<strong>10</strong><br />
(A)<br />
(B)<br />
(D)<br />
(M)<br />
(W)<br />
PMCS<br />
PMCS<br />
PMCS<br />
PMCS<br />
PMCS<br />
psi<br />
rpm<br />
vdc<br />
After Operation Preventive Maintenance Checks<br />
and Services<br />
Before Operation Preventive Maintenance Checks<br />
and Services<br />
During Operation Preventive Maintenance Checks<br />
and Services<br />
Monthly Preventive Maintenance Checks and<br />
Services<br />
Weekly Preventive Maintenance Checks and<br />
Services<br />
pounds per square inch<br />
revolutions per minute<br />
volts direct current<br />
Section II. EQUIPMENT DESCRIPTI<strong>ON</strong><br />
1-8. Equipment Purposes, Capabilities and Features.<br />
WARNING<br />
This vehicle has been designed to operate safely<br />
and efficiently within the limits specified in<br />
this <strong>TM</strong>. Operation beyond these limits is<br />
prohibited IAW AR 70-1 without written approval<br />
from the Commander, U.S. Army Tank-<br />
Automotive Command, ATTN: AMSTA-CM-S,<br />
Warren, MI 48397-5000.<br />
• The M915A1 is a line haul truck tractor used to haul semitrailers such as the M-872,<br />
on Class I good roads only with a maximum load of 30,000 pounds on 5th wheel.<br />
Change 1 1-7
<strong>TM</strong> 9-<strong>2320</strong>-<strong>283</strong>-<strong>10</strong><br />
CAPABILITIES AND FEATURES<br />
• The M915A1 truck tractor is capable of operation in temperatures from - 25°F to<br />
125°F and to -50°F with Arctic engine and personnel heater kits installed.<br />
• While operating on Class I good roads, the M915A1 tractor can maintain a speed<br />
of 55 mph on level roads and 25 mph while ascending a 3.0 percent grade at Gross<br />
Combination Weight Rating (GCWR).<br />
• The M915A1 can climb a 17 percent grade at GCWR in both forward and reverse<br />
directions (adequate traction assumed). It is capable of operating on side slopes<br />
up to <strong>10</strong> percent where adequate traction is available.<br />
• The M915A1 truck tractor can ford hard bottom water crossings up to 20 inches deep for 5<br />
minutes without damage or requiring maintenance before operations con continue.<br />
• Average cruising ranges at GCWR with a full tank of fuel (118 gallons) will vary<br />
based on many conditions. During on highway use under full power at 2<strong>10</strong>0 rpm<br />
with 373 to 400 hp, the fuel rate will be 20.5 to 21.4 gallons per hour. Varying loads,<br />
prolonged idle, offroad driving, and climatic conditions will affect the rate of fuel<br />
consumption. Traveling at an average of 40 miles per hour (mph) at rated GCWR<br />
will result in a 300 mile operating range with full fuel tank.<br />
• The vehicle clearance circle, wall to wall, is 72.00 feet. Curb to curb vehicle clearance<br />
circle is 69.00 feet.<br />
1-9. Performance Data.<br />
Performance data for the M915A1 truck tractor is listed in table 1 - 1.<br />
1-8
<strong>TM</strong> 9-<strong>2320</strong>-<strong>283</strong>-<strong>10</strong><br />
Table 1-1. Performance Data<br />
ITEM<br />
DATA<br />
DIMENSI<strong>ON</strong>S<br />
Length (overall chassis)<br />
(overall w/M-872 Trailer)<br />
Width (overall, including mirrors)<br />
(overall, mirrors folded)<br />
Height (over stack, empty)<br />
(over horn, empty)<br />
Ground Clearance<br />
Wheelbase<br />
Turning Radius<br />
Drive<br />
262.00 in.<br />
55.00 ft.<br />
124.00 in.<br />
96.00 in.<br />
142.00 in.<br />
115.50 in.<br />
<strong>10</strong>.40 in.<br />
167.00 in.<br />
53.50 ft.<br />
6x4<br />
ANGLE OF APPROACH<br />
38.00 degrees<br />
WEIGHTS<br />
Curb<br />
Gross Vehicle Weight Rating<br />
Gross Combination Weight Rating<br />
Front Axle (empty)<br />
Front Axle (loaded)<br />
Front Axle (rated capacity)<br />
Rear Axles (empty) (Combined)<br />
Rear Axles (loaded) (Combined)<br />
Rear Axles (rated capacity - tandem)<br />
*Tire Load Limit to 50,000 Ibs GVW<br />
19,720.00 Ibs<br />
50,000.00 lbs*<br />
<strong>10</strong>5,000.00 Ibs<br />
9,730.00 Ibs<br />
11,580.00 Ibs<br />
13,000.00 Ibs<br />
9,<strong>10</strong>0.00 Ibs<br />
36,540.00 Ibs<br />
40,000.00 Ibs<br />
PERFORMANCE<br />
Drawbar Pull (max) (at 0.7 coefficient)<br />
Maximum Towed Load (w/M872 Trailer)<br />
(28,400.00 Ibs KP)<br />
Maximum Speed Forward (at 2,<strong>10</strong>0 RPM-5th Gear)<br />
Minimum Sustained Speed (at 800/1200 RPM)<br />
Speed on Grade (3.90% grade)<br />
Maximum Grade (at GCWR)<br />
Maximum Side Slope (w/adequate tractive surface)<br />
Maximum Fording Depth (hardbottom water crossing)<br />
20,541.00 Ibs<br />
54,000.000 Ibs<br />
58.00 MPH<br />
1.50/2.00 MPH<br />
25.00 MPH<br />
19.90%<br />
<strong>10</strong>.00%<br />
20.00 in.<br />
1-9
<strong>TM</strong> 9-<strong>2320</strong>-<strong>283</strong>-<strong>10</strong><br />
Table 1-1. Performance Data - Continued<br />
ITEM<br />
DATA<br />
CAPACITIES<br />
Engine Oil (refill capacity includes filters)<br />
Engine Filters (refill capacity)<br />
Cooling System (refill capacity)<br />
Fuel (Tank Capacity)<br />
(usable capacity)<br />
Power Steering Reservoir<br />
Front Axle<br />
Transmission Oil<br />
Rear Axle (fwd/rear)<br />
44.00 qts<br />
4.75 qts<br />
17.25 gal.<br />
118.00 gal.<br />
112.00 gal.<br />
2.00 qts<br />
N/A<br />
8.00 gal.<br />
40/36 pts<br />
OPERATING MODE<br />
<strong>ON</strong> ROAD<br />
OPERATING TEMPERATURES<br />
Without Additional Kits<br />
With Arctic Kit<br />
-25°F to +125°F<br />
-50°F to +125°F<br />
ENGINE<br />
Make<br />
Model<br />
Type<br />
Cylinders<br />
Displacement<br />
Compression Ratio<br />
Torque (gross at 1,300 rpm)<br />
Maximum Horsepower (@2,<strong>10</strong>0 RPM)<br />
Maximum Governed Speed (Load)<br />
(No Load)<br />
Oil Filter (Type)<br />
Cummins<br />
NTC-400 Big Cam III<br />
4-Stroke, in-line Diesel<br />
6<br />
855 CID<br />
14.0:1<br />
1,250.00 lb-ft<br />
400<br />
2,<strong>10</strong>0 RPM<br />
2,460 RPM<br />
Full Flow & By-Pass Spin<br />
On Replacement Elements<br />
(engine mounted)<br />
(Quantity) 2<br />
1-<strong>10</strong>
<strong>TM</strong> 9-<strong>2320</strong>-<strong>283</strong>-<strong>10</strong><br />
Table 1-1. Performance Data - Continued<br />
ITEM<br />
DATA<br />
FUEL SYSTEM<br />
Type<br />
Diesel Injection<br />
Tank Quantity 1<br />
Tank Type<br />
Cylinder, 26 in. dia, Aluminum<br />
Air Cleaner (Type)<br />
Dry Element<br />
(Quantity) 1<br />
COOLING SYSTEM<br />
Radiator Working Pressure<br />
9 psi<br />
ELECTRICAL SYSTEM<br />
Type<br />
Alternator<br />
Circuit Breakers<br />
Batteries (type)<br />
(quantity)<br />
(volts)<br />
(connection)<br />
(capacity)<br />
Basic 12-volt, 24-volt Cranking<br />
12/24 Volt, 85/15 Amps<br />
Resettable<br />
(recycling for headlamps)<br />
Maintenance-free<br />
4<br />
12 ea<br />
Series/parallel<br />
950 Cold cranking amps @ 0°F<br />
@ 24-volts<br />
TRANSMISSI<strong>ON</strong> AND TORQUE C<strong>ON</strong>VERTER<br />
Make<br />
Model<br />
Type<br />
Shifter<br />
(transmission)<br />
(torque converter)<br />
Detroit Diesel Allison<br />
HT 754 CRD<br />
TC 498, Lock-up type<br />
5-Speed, Fully Automatic<br />
Remote Control Cable<br />
TIRES (Tactical Tires, if used, should<br />
replace commercial tires on all<br />
drive wheels)<br />
Type<br />
Size<br />
Weight (with wheel)<br />
Rated Capacity (single/dual) (on road)<br />
Load Range/Ply Rating<br />
Air Pressure (maximum cold) (Front)<br />
(Rear)<br />
Radial ply, on road<br />
(tubeless)<br />
11.00 in. x 22.50 in.<br />
(11R22.5)<br />
208.00 Ibs.<br />
6,040.00/5,300.00 Ibs<br />
G/14<br />
<strong>10</strong>5 psi<br />
95 psi<br />
1-11
<strong>TM</strong> 9-<strong>2320</strong>-<strong>283</strong>-<strong>10</strong><br />
Table 1-1. Performance Data - Continued<br />
ITEM<br />
DATA<br />
STEERING<br />
Ratio<br />
Gear Type<br />
Actuation<br />
Power Steering Pump (Gear Driven)<br />
20.4:1<br />
Ross Integral Power<br />
Hydraulic Power Booster<br />
Eaton B165R<br />
FIFTH WHEEL<br />
Type/Travel<br />
Rated Capacity<br />
Plate Diameter/Oscillation<br />
Pitch (fore/aft)<br />
King Pin size<br />
Cab Controlled-Air Lock Sliding/<br />
12.00 in.<br />
40,000 Ibs Vert.; 150,000 Ibs<br />
Drawbar<br />
36.00 in./fore and aft<br />
15/<strong>10</strong> degrees<br />
2.0 in.<br />
PINTLE<br />
Make/Model Holland/No. 760<br />
Rated Capacity<br />
25.00 Tons<br />
AXLES<br />
Front (Make)<br />
Rear (Make)<br />
(Type/Model)<br />
(Capacity at Ground)<br />
(Steering Angle)<br />
(Type/Model)<br />
(Capacity at Ground)<br />
(Gear Ratio)<br />
(Differential<br />
(Lubrication)<br />
(Forward-Rear)<br />
(Rear-Rear)<br />
Lockup)<br />
(Lube Capacity-fwd/rear)<br />
Eaton<br />
I-Beam/EFA 13F3<br />
13,000.00 Ibs<br />
40 degrees<br />
Eaton<br />
Tandem/DS-401P<br />
RS-401<br />
40,000.00 Ibs<br />
4.33:1<br />
Air Control<br />
Pressure<br />
40/36 pts<br />
BRAKE SYSTEM<br />
Actuation<br />
Fail-Safe (spring brakes)<br />
Pressure Range<br />
Air-mechanical (S-Cam)<br />
Forward-Rear (2)<br />
65-150 psi<br />
1-12
<strong>TM</strong> 9-<strong>2320</strong>-<strong>283</strong>-<strong>10</strong><br />
Table 1-1 Performance Data - Continued<br />
ITEM<br />
DATA<br />
WHEELS<br />
Make/Model<br />
Quantity<br />
Size (dia x rim width)<br />
No. of Studs/Bolt Circle<br />
Stud Size<br />
Rated Capacity (on road)<br />
Firestone/27404<br />
11<br />
22.50 in. x 8.25 in.<br />
<strong>10</strong>/11.25 in.<br />
1.125 in. dia.<br />
7,000.00 Ibs<br />
TOWING AND LIFTING EYES<br />
Quantity<br />
Maximum Load Capacity (Each-up to 45°<br />
angle from long.<br />
axis)<br />
12<br />
60,000.00 Ibs<br />
CAB<br />
Make<br />
Type<br />
AM General Corporation<br />
2-Passenger, all steel,<br />
w/butterfly hood<br />
ACCESSORIES -<br />
Fifth Wheel Mounted<br />
Recovery Kit<br />
- Arctic Heater Kit-Engine<br />
-<br />
(optional) (Fuel Fired)<br />
(See TB 9-<strong>2320</strong>-<strong>283</strong>-14)<br />
Arctic Heater Kit -<br />
Personnel (optional)<br />
(Fuel Fired)<br />
(See TB 9-<strong>2320</strong>-<strong>283</strong>-14)<br />
Tool Box - (1) under<br />
passenger seat and center<br />
of cab<br />
Air Horn - (1) on cab top<br />
Heater/Defroster - Fresh<br />
Air Type (Standard)<br />
1-13/1-14(blank)
<strong>TM</strong> 9-<strong>2320</strong>-<strong>283</strong>-<strong>10</strong><br />
CHAPTER 2<br />
OPERATING INSTRUCTI<strong>ON</strong>S<br />
INDEX<br />
Page<br />
DESCRIPTI<strong>ON</strong> AND USE OF OPERATOR’S<br />
C<strong>ON</strong>TROLS AND INDICATORS<br />
Instrument Panel Controls and Indicators . . . . . . . . . . . . . . . . . . . 2-3<br />
Cab Floor-mounted Controls . . . . . . . . . . . . . . . . . . . . . . . . . . . . . 2-19<br />
Steering Wheel and Column-mounted Controls . . . . . . . . . . . . . . . . . 2-23<br />
Seat Adjustment Controls . . . . . . . . . . . . . . . . . . . . . . . . . . 2-25<br />
Additional Cab Controls . . . . . . . . . . . . . . . . . . . . . . . . . . . . . . . . . . . 2-27<br />
PREVENTIVE MAINTENANCE CHECKS AND SERVICES<br />
Maintenance Forms and Records . . . . . . . . . . . . . . . . . . . . . . . . 2-31<br />
Preventive Maintenance Checks and Services . . . . . . . . . . . . . . 2-31<br />
OPERATI<strong>ON</strong> UNDER USUAL C<strong>ON</strong>DITI<strong>ON</strong>S<br />
Assembly and Preparation For Use ............................ 2-55<br />
Starting and Warmup ....................................... 2-56<br />
Cold Weather Starting ...................................... 2-58<br />
Driving ................................................... 2-60<br />
Stopping The Truck and Shutting Down The Engine ............. 2-69<br />
Parking ................................................... 2-69<br />
Fifth Wheel ................................................ 2-69<br />
Coupling and Uncoupling .................................... 2-71<br />
Operation of Auxiliary Equipment ............................. 2-80<br />
Decals, Data Plates and Instruction Plates ...................... 2-83<br />
2-1
<strong>TM</strong> 9-<strong>2320</strong>-<strong>283</strong>-<strong>10</strong><br />
INDEX (Continued)<br />
Page<br />
OPERATI<strong>ON</strong> UNDER UNUSUAL C<strong>ON</strong>DITI<strong>ON</strong>S<br />
Extreme Cold Weather . . . . . . . . . . . . . . . . . . . . . . . . . . . . . . . . . 2-86<br />
Extreme Hot Weather . . . . . . . . . . . . . . . . . . . . . . . . . . . . . . . . . . . 2-88<br />
Unusual Terrain . . . . . . . . . . . . . . . . . . . . . . . . . . . . . . . . . . . 2-89<br />
Fording . . . . . . . . . . . . . . . . . . . . . . . . . . . . . . . . . . . . . . . . . . . . . . . . . . . 2-92<br />
Manually Compressing the Spring Brake Power Springs . . . . . . . . . 2-94<br />
Manually Releasing (Resetting) The Spring Brake Power Springs . . . 2-95<br />
Towing ......................................................... 2-95<br />
2-2
<strong>TM</strong> 9-<strong>2320</strong>-<strong>283</strong>-<strong>10</strong><br />
Section I. DESCRIPTI<strong>ON</strong> AND USE OF OPERATOR’S<br />
C<strong>ON</strong>TROLS AND INDICATORS<br />
This section shows the location and describes the function and use of controls and<br />
indicators you will use in operating the M915A1 vehicle. Separate illustrations and<br />
keys are provided for the following groups of controls and indicators:<br />
• Instrument panel Figure 2-1 thru<br />
Figure 2-6<br />
• Cab floor-mounted foot controls Figure 2-7<br />
• Transmission range selector control and<br />
sliding fifth wheel control<br />
• Steering wheel and column-mounted controls<br />
• Seat adjustment controls<br />
Figure 2-8<br />
Figure 2-9<br />
Figure 2-<strong>10</strong><br />
• Additional cab controls Figure 2-11<br />
YOU SHOULD KNOW <strong>THE</strong> LOCATI<strong>ON</strong> AND UNDERSTAND <strong>THE</strong> PROPER USE OF<br />
EVERY C<strong>ON</strong>TROL AND INDICATOR BEFORE OPERATING YOUR TRUCK. USE<br />
THIS SECTI<strong>ON</strong> TO LEARN OR TO REFRESH YOUR MEMORY ABOUT EACH OF<br />
<strong>THE</strong> C<strong>ON</strong>TROLS AND INDICATORS YOU WILL BE USING WHILE OPERATING<br />
<strong>THE</strong> TRUCK.<br />
2-1. Instrument Panel Controls and Indicators.<br />
Figure 2-1 shows the entire instrument panel and identifies the major sections by name.<br />
A separate figure and key is provided for each individual panel section. (See Figures<br />
2-2 thru 2-6).<br />
Figure 2-7. Instrument Panel. TA 236635<br />
2-3
<strong>TM</strong> 9-<strong>2320</strong>-<strong>283</strong>-<strong>10</strong><br />
INSTRUMENT CLUSTER<br />
Figure 2-2. Instrument Cluster.<br />
KEY TO INSTRUMENT CLUSTER<br />
1 FUEL SUPPLY GAGE<br />
Indicates the amount of fuel you have when the<br />
ENGINE RUN switch is turned to <strong>ON</strong>.<br />
2-4<br />
TA 236636
<strong>TM</strong> 9-<strong>2320</strong>-<strong>283</strong>-<strong>10</strong><br />
KEY TO INSTRUMENT CLUSTER (Continued)<br />
2 VOL<strong>TM</strong>ETER<br />
indicates degree of battery charge or discharge in<br />
volts.<br />
Below 11 volts:<br />
Indicates a low battery or possible malfunction.<br />
Stop the truck and report the problem to Organizational<br />
Maintenance.<br />
Above 15 volts:<br />
Indicates the batteries are being overcharged due<br />
to a malfunction. Report the problem to Organizational<br />
Maintenance as soon as possible.<br />
Between 11 and 12 volts:<br />
Indicates battery is undercharged. Turn off all<br />
electrical circuits (if possible) and run engine at<br />
highest rpm permitted for the existing conditions.<br />
The voltmeter should indicate charge in the green<br />
area. If not, report to Organizational Maintenance.<br />
12 to 15 volts (Green Area) :<br />
Indicates normal operating range.<br />
3 TRANSMISSI<strong>ON</strong> OIL TEMPERATURE GAGE<br />
Registers transmission oil temperature in degrees<br />
Fahrenheit and Centigrade. Normal operating range<br />
on the Fahrenheit scale is <strong>10</strong>0oF to 250°F. Dial<br />
Face is also color coded for temperature ranges.<br />
See Key item 4 for Transmission Oil Temperature<br />
Gage Interpretation Decal.<br />
TA 236637<br />
2-5
<strong>TM</strong> 9-<strong>2320</strong>-<strong>283</strong>-<strong>10</strong><br />
KEY TO INSTRUMENT CLUSTER (Continued)<br />
4 TRANSMISSI<strong>ON</strong> OIL TEMPERATURE GAGE<br />
INTERPRETATI<strong>ON</strong> DECAL<br />
CAUTI<strong>ON</strong><br />
If transmission temperature rises to 300°F<br />
(red band) stop vehicle in a safe place, shift<br />
TRANSMISSI<strong>ON</strong><br />
to NEUTRAL, and operate engine at 1,500<br />
TEMPERATURE GAGE<br />
N<br />
RPM to reduce transmission temperature to GREEN O C<strong>ON</strong>TINOUS OPERATI<strong>ON</strong><br />
below 300°F (yellow or green band). If tem-<br />
perature cannot be lowered to a safe operating YELLOW A INTERMITTEN OPERATI<strong>ON</strong><br />
level (below 300°F/yellow or green band).<br />
during 3 minutes of idle at 1,500 RPM, stop<br />
engine and advise Organizational Maintenance.<br />
Continued vehicle operation with the gage<br />
indicating 300°F or above (red band) will<br />
cause transmission damage.<br />
RED<br />
R<br />
M<br />
L<br />
SHIFT TO NEUTRAL AND OPERATE<br />
ENGINE AT 1500 RPM TO REDUCE<br />
TRANSMISSI<strong>ON</strong><br />
TEMPERATURE<br />
5 ENGINE OIL PRESSURE GAGE<br />
CAUTI<strong>ON</strong><br />
At 1,700-2,<strong>10</strong>0 rpm, the minimum engine oil<br />
pressure for safe operation is 30 psi. If, in<br />
this rpm range, the gage does not show at<br />
least 30 psi, stop the engine immediately<br />
and investigate the cause.<br />
Registers engine oil pressure in pounds per square<br />
inch (psi) and kilopascals (kPa). Idle minimum is<br />
<strong>10</strong> psi. At rated engine speed (2,<strong>10</strong>0 rpm), normal<br />
range is 35-50 psi.<br />
2-6<br />
TA 236638
<strong>TM</strong> 9-<strong>2320</strong>-<strong>283</strong>-<strong>10</strong><br />
KEY TO INSTRUMENT CLUSTER (Continued)<br />
6 AIR PRESSURE GAGE<br />
CAUTI<strong>ON</strong><br />
Pressures below the normal operating range<br />
indicate a loss in air supply. This will result<br />
in a limited number of times the brakes can<br />
be applied before losing front wheel brakes.<br />
At the first sign of pressure loss or if excessive pressure<br />
is noted, STOP <strong>THE</strong> TRUCK AND INVESTI-<br />
GATE <strong>THE</strong> CAUSE.<br />
Registers air pressure (in psi) in the front brake<br />
system. Normal operating range is <strong>10</strong>5-140 psi.<br />
7 LOW AIR PRESSURE WARNING LAMP<br />
CAUTI<strong>ON</strong><br />
If this lamp comes on a buzzer sounds<br />
while you are driving, stop immediately and<br />
investigate the cause.<br />
Red warning lamp will light and buzzer will sound<br />
when either front or rear air system pressure is<br />
between 64 to 76 psi and below.<br />
8 AIR PRESSURE GAGE<br />
CAUTI<strong>ON</strong><br />
Pressures below the normal operating range<br />
indicates a loss in air supply and will result<br />
in a limited number of times the brakes can<br />
be applied before the forward rear axle emergency<br />
park/spring brakes are automactically<br />
activated. At the first sign of pressure loss<br />
or lift excessive pressure is noted STOP <strong>THE</strong><br />
TRUCK AND INVESTIGATE <strong>THE</strong> CAUSE.<br />
Registers air pressure (in psi) in the rear brake system.<br />
Normal operating range is <strong>10</strong>5-140 psi.<br />
TA 236639<br />
2-7
<strong>TM</strong> 9-<strong>2320</strong>-<strong>283</strong>-<strong>10</strong><br />
KEY TO INSTRUMENT CLUSTER (Continued)<br />
9 CIGAR LIGHTER<br />
Press to engage heating element. Lighter will disengage<br />
automatically when hot.<br />
<strong>10</strong> ENGINE START BUTT<strong>ON</strong><br />
CAUTI<strong>ON</strong><br />
DO NOT press the button for more than 15<br />
seconds at any one time. Allow 2 minute<br />
intervals between attempts to start. DO NOT<br />
press the button while the engine is running.<br />
Press button to energize starter solenoid. The ENG<br />
TEMP lamp will come on while the button is depressed.<br />
Release button when engine starts.<br />
ENGINE<br />
START<br />
11 ENGINE RUN SWITCH<br />
Rotate key to the right to turn this switch to the <strong>ON</strong> position. Low oil pressure<br />
warning lamp and park brake lamp will illuminate. If air pressure is below 60 psi,<br />
the low air pressure warning buzzer and lamp will also come on. After the engine<br />
is started, and systems have become operational, low oil pressure warning lamp,<br />
low air pressure warning lamp and low air pressure warning buzzer will go off,<br />
The park brake lamp will remain on until the park brake is released. Turn the<br />
key to the center (vertical) position to turn all systems off.<br />
2-8<br />
TA 236640
<strong>TM</strong> 9-<strong>2320</strong>-<strong>283</strong>-<strong>10</strong><br />
KEY TO INSTRUMENT CLUSTER (Continued)<br />
12 ENGINE WATER TEMPERATURE GAGE<br />
CAUTI<strong>ON</strong><br />
If this gage shows temperatures above 220°F<br />
shut off the engine immediately and refer to<br />
the troubleshooting procedures. Do not restart<br />
engine until coolant temperatures is within<br />
operating limits.<br />
Registers engine coolant temperature in degrees<br />
Fahrenheit and Centigrade. Normal range is 180°<br />
to 200°F.<br />
TACHOGRAPH SECTI<strong>ON</strong> OF INSTRUMENT PANEL<br />
Figure 2-3. Tachograph Section of Instrument Panel. TA 236641<br />
2-9
<strong>TM</strong> 9-<strong>2320</strong>-<strong>283</strong>-<strong>10</strong><br />
KEY TO TACHOGRAPH SECTI<strong>ON</strong> OF INSTRUMENT PANEL<br />
1 TACHOGRAPH<br />
CAUTI<strong>ON</strong><br />
Do not operate vehicle without<br />
a tachograph disk installed.<br />
Registers truck ground speed (mph/<br />
kph hand), engine speed (rpm<br />
hand), and distance traveled (odometer).<br />
The other two hands are<br />
clock hands. The tachograph records<br />
data on a 7-day graph for a<br />
permanent record.<br />
2 CLEARANCE LAMPS PUSHBUTT<strong>ON</strong><br />
Press this button to flash the truck and trailer clearance<br />
and marker lamps on and off. The CLEARAN-<br />
CE LAMP Indicator (key item 3) will come on whenever<br />
the headlamps switch is in either <strong>ON</strong> position.<br />
3 CLEARANCE LAMPS INDICATOR<br />
This lamp will illuminate when the headlamp switch<br />
is pulled out to either the first or second position.<br />
Intensity of the light may be varied by rotating the<br />
headlamp switch knob. Its purpose is to aid in locating<br />
the clearance lamps pushbutton at night.<br />
4 E<strong>THE</strong>R QUICK-START PUSHBUTT<strong>ON</strong><br />
CAUTI<strong>ON</strong><br />
Do not use this button without first reading<br />
throughly the cold weather starting procedure<br />
chapter 2, section III, paragraph 2-11.<br />
Press and release this button to inject ether for cold<br />
weather starting.<br />
TA 236642<br />
2-<strong>10</strong>
<strong>TM</strong> 9-<strong>2320</strong>-<strong>283</strong>-<strong>10</strong><br />
KEY TO TACHOGRAPH SECTI<strong>ON</strong> OF INSTRUMENT PANEL (Continued)<br />
5 E<strong>THE</strong>R QUICK-START INDICATOR LAMP<br />
This lamp will illuminate when the headlamp switch<br />
is pulled out to either the first or second position.<br />
Intensity of the light may be varied by rotating the<br />
headlamp switch knob. Its purpose is to aid in locating<br />
the ether quick-start pushbutton at night.<br />
C<strong>ON</strong>TROL PANEL<br />
Figure 2-4. Control Panel. TA 236643<br />
2-11
<strong>TM</strong> 9-<strong>2320</strong>-<strong>283</strong>-<strong>10</strong><br />
KEY TO C<strong>ON</strong>TROL PANEL<br />
1 WARNING AND INDICATOR LAMPS<br />
A. ENGINE OIL WARNING LAMP<br />
Red lamp comes on when engine oil pressure is<br />
below engine operating limits. Lamp comes on<br />
when oil pressure drops below <strong>10</strong> psi.<br />
B. ENGINE TEMPERATURE WARNING LAMP<br />
This red lamp comes on when the engine cooling<br />
system temperature is above operating limits.<br />
The lamp comes on when engine temperature<br />
exceeds 220°F.<br />
C. DIFFERENTIAL LOCKOUT INDICATOR LAMP<br />
Red lamp indicates when interaxle differential<br />
lockout switch is in LOCK position and driveline<br />
locking system is engaged.<br />
D. PTO INDICATOR LAMP<br />
Not used on M915A1 Vehicle.<br />
E. PARK BRAKE INDICATOR LAMP<br />
The red PARK BRAKE indicator comes on when<br />
the park brake control (see item 8) is actuated.<br />
F. HIGH BEAM INDICATOR LAMP<br />
This blue lamp comes on when the dimmer switch<br />
is set for high beam service lamps.<br />
2 HEADLAMPS SWITCH KNOB<br />
Pull knob halfway out to turn on the marker lamps,<br />
tail lamps, and instrument panel lamps, or all the way<br />
out to operate headlamps, tail lamps, marker lamps,<br />
and instrument panel lamps. The switch also turns on<br />
clearance lamps in either position.<br />
3 WIPER INDICATOR LAMP<br />
The wiper indicator comes on when you pull out the<br />
headlamp switch to either the first or second position.<br />
The indicator lamp is white and can be dimmed<br />
by rotating the headlamps switch knob. Its purpose<br />
is to aid in locating the wiper control at night.<br />
2-12 TA 236644
<strong>TM</strong> 9-<strong>2320</strong>-<strong>283</strong>-<strong>10</strong><br />
KEY TO C<strong>ON</strong>TROL PANEL (Continued)<br />
4 WIPER C<strong>ON</strong>TROL KNOB<br />
Pull the knob out to turn on wipers. Rotate the<br />
switch knob for HI and LOW operation. Push in the<br />
knob to turn the wipers off.<br />
5 WASHER INDICATOR LAMP<br />
The washer indicator comes on when you pull out the<br />
headlamps switch to either the first or second position.<br />
The indicator is white and can be dimmed by<br />
rotating the headlamps switch knob. Its purpose is<br />
to aid in locating the washer control knob at night.<br />
6 WASHER C<strong>ON</strong>TROL KNOB<br />
Press the knob to spray cleaning solvent on the<br />
windshield. Release the button to stop spray.<br />
7 DIFFERENTIAL LOCK/UNLOCK C<strong>ON</strong>TROL<br />
CAUTI<strong>ON</strong><br />
Do not place switch in the lock position<br />
while the truck is moving or any wheel is<br />
spinning.<br />
Controls inter-axle differential lockup. In poor<br />
traction conditions (ice, snow, etc.), stop the truck<br />
and place switch in the LOCK position to lockup<br />
the drive line. When traction is back to normal, place<br />
switch in the UNLOCK position while the truck is<br />
moving. Use the UNLOCK position for all normal<br />
driving conditions.<br />
NOTE<br />
The differential lockout indicator will come<br />
on when the control is in the lock position.<br />
TA 236645<br />
2-13
<strong>TM</strong> 9-<strong>2320</strong>-<strong>283</strong>-<strong>10</strong><br />
KEY TO C<strong>ON</strong>TROL PANEL (Continued)<br />
8 PARK BRAKE C<strong>ON</strong>TROL<br />
WARNING<br />
Never use the parking brake for normal braking.<br />
Pull out to apply parking brakes; push in to release<br />
parking brakes.<br />
NOTE<br />
The Park Brake Indicator will come on when<br />
the control is in the applied position.<br />
9 TRAILER AIR SUPPLY C<strong>ON</strong>TROL<br />
Supplies air to trailer air reservoirs. Push in to supply<br />
air to (charge) trailer reservoirs after releasing PARK<br />
BRAKE. Pull out to shut off air to trailer. When<br />
PARK BRAKE Control is applied (pulled out),<br />
TRAILER AIR SUPPLY C<strong>ON</strong>TROL will automatically<br />
pop-out.<br />
CAUTI<strong>ON</strong><br />
If tractor air system pressure drops to 60 PSI,<br />
the trailer air supply protection valve will trip,<br />
fully applying trailer spring brakes. Brakes will<br />
not release until more than 60 psi is reached.<br />
<strong>10</strong> ENGINE RETARDER SELECTI<strong>ON</strong> SWITCH<br />
Selects the number of engine cylinders desired for<br />
the braking action. HIGH position provides maximum<br />
engine braking (6 cylinders), MED position<br />
provides braking on 4 cylinders, and LOW position<br />
provides braking on 2 cylinders.<br />
TA 236708<br />
2-14
<strong>TM</strong> 9-<strong>2320</strong>-<strong>283</strong>-<strong>10</strong><br />
KEY TO C<strong>ON</strong>TROL PANEL (Continued)<br />
11 OPERATI<strong>ON</strong> SWITCH<br />
CAUTI<strong>ON</strong><br />
Do not leave the Operation switch in the<br />
BLACK OUT position for extended periods<br />
without the engine running. The batteries can<br />
run down and cause starting problems. Pull<br />
out and place this switch in the up (BLACK-<br />
OUT) position and pull out headlamps switch<br />
to 1st position to turn on front and rear blackout<br />
marker lamps. Pull headlamps switch to<br />
the 2nd position to turn on blackout drive<br />
lamp. Blackout brake lamps will operate with<br />
headlamps switch in either position. With the<br />
Operation switch in the up (Blackout) position,<br />
the switch automatically locks out all regular<br />
service lamps, electric horn, and backup lamps.<br />
Return the Operation switch to the down<br />
(NORMAL) position to turn off blackout<br />
lamps and restore regular service lamps.<br />
NOTE<br />
Pull the switch lever toward you to move it<br />
to either position. This prevents accidental<br />
engagement or disengagement of the service<br />
lamps.<br />
LOWER C<strong>ON</strong>TROL PANEL<br />
Figure 2-5. Lower Control Panel. TA 236646<br />
2-15
<strong>TM</strong> 9-<strong>2320</strong>-<strong>283</strong>-<strong>10</strong><br />
KEY TO LOWER C<strong>ON</strong>TROL PANEL<br />
1 HEAT C<strong>ON</strong>TROL KNOB<br />
Pull out to increase heater output temperature;<br />
push in to decrease output temperature.<br />
2 HEATER FAN SPEED SWITCH<br />
Rotate right (3 positions) for LOW, MED,<br />
and HIGH fan speeds. Turn full left to turn<br />
off.<br />
3 HEATER AIR C<strong>ON</strong>TROL (DRIVER)<br />
Pull out to divert heater air to the driver’s<br />
side of the cab. Push in to close vents.<br />
4 HEATER AIR C<strong>ON</strong>TROL (PASSENGER)<br />
Pull out to divert heater air to the passenger’s<br />
side of the cab. Push in to close vent.<br />
5 FRESH AIR VENT<br />
Pull out to receive fresh air in the passenger’s side<br />
of the cab; push in to close the fresh air vent.<br />
6 RECIRCULATI<strong>ON</strong> VENT<br />
Pull out to circulate cab air through the heater;<br />
push in to close the vent.<br />
7 AIR FILTER RESTRICTI<strong>ON</strong> INDICATOR<br />
When air cleaner air flow is adequate, the window<br />
on this indicator will show green. If the air flow is<br />
restricted, the window will show red. After air filter<br />
has been cleaned, push reset button to reset filter<br />
indicator.<br />
NOTE<br />
Air cleaner maintenance is required when red<br />
shows in the window. Notify Organizational<br />
Maintenance.<br />
TA 236647<br />
2-16
<strong>TM</strong> 9-<strong>2320</strong>-<strong>283</strong>-<strong>10</strong><br />
CIRCUIT BREAKER AND RELAY ACCESS PANEL<br />
Figure 2-6. Circuit Breaker and Relay Access Panel.<br />
KEY TO CIRCUIT BREAKER AND RELAY ACCESS PANEL<br />
1 ACCESS PANEL DOOR<br />
There are three quarter-turn slotted head screws which retain the door in the<br />
closed position. To open, as shown, use a flat tip screwdriver and turn the screws<br />
one quarter-turn to the left and swing door down. To close, raise door and turn<br />
screws one quarter-turn to the right.<br />
2 BLACKOUT LAMP SYSTEM AND TRAILER 24<br />
VOLT RELAYS<br />
When switches controlling Normal Mode tractor and<br />
trailer lamps, or Blackout Mode lamps are selected,<br />
the appropriate relays are energized to provide 12<br />
Volt or 24 Volt power as required. Also, prevents<br />
Normal lamps from being illuminated when operating<br />
in the Blackout lamps mode. If a problem is experienced<br />
in one of these lamp systems, notify Organizational<br />
Maintenance. There are nine relays in the<br />
panel.<br />
TA 236648<br />
2-17
<strong>TM</strong> 9-<strong>2320</strong>-<strong>283</strong>-<strong>10</strong><br />
KEY TO CIRCUIT BREAKER AND RELAY ACCESS PANEL (Continued)<br />
3<br />
STARTER RELAY<br />
With engine RUN switch on, transmission range<br />
selector in NEUTRAL, and engine START button<br />
depressed, the relay energizes and closes the starter<br />
solenoid circuit. If a problem is experienced in activating<br />
the starter motor in your truck, notify Organizational<br />
Maintenance for troubleshooting and<br />
replacement as required.<br />
4<br />
RELAY IDENTIFICATI<strong>ON</strong><br />
Below each relay is an identification decal which will assist Organizational<br />
Maintenance personnel in troubleshooting and correcting electrical system<br />
problems related to the relays. Each decal identifies the functions controlled<br />
by the relay which it is alined under.<br />
5<br />
PUSH BUTT<strong>ON</strong> RESET-TABLE CIRCUIT BREAKERS<br />
There are nine resettable circuit breakers in the panel. A tenth circuit breaker,<br />
which automatically recycles if there is an overload, protects the NORMAL<br />
service headlamps system. It is located elsewhere. If, during vehicle operation,<br />
an electrical component stops functioning (for example both windshield defroster<br />
fans stop) pull safely to the side of the road. Open the access panel door and<br />
check to see if one of the pushbuttons has popped out. If so, press the button<br />
in and check to see if the defroster fans operate. If the button remains in and the<br />
fans function, close the panel door and continue vehicle operation. If the pushbutton<br />
pops out a second time, there is an overload or short in the particular<br />
system being protected by that circuit breaker. If safe vehicle operation can<br />
continue without use of the affected electrical item, complete your mission and<br />
notify Organizational Maintenance for troubleshooting and correction. If the<br />
vehicle cannot be safely operated, secure vehicle and advise Organizational<br />
Maintenance. The nine resettable circuit breakers are each rated at 20 AMPS.<br />
6<br />
CIRCUIT BREAKER IDENTIFICATI<strong>ON</strong><br />
A decal placed below the nine resettable pushbutton circuit breakers identifies<br />
them by number. If a circuit breaker pops out and cannot be reset, Organizational<br />
Maintenance will use this decal to identify the affected electrical circuits<br />
so that correction can be made.<br />
TA 236649<br />
2-18
<strong>TM</strong> 9-<strong>2320</strong>-293-<strong>10</strong><br />
2-2. Cab Floor-mounted Controls.<br />
Figure 2-7. Cab Floor-mounted Foot Controls.<br />
KEY TO FLOOR-MOUNTED FOOT C<strong>ON</strong>TROLS<br />
1 HEADLAMP DIMMER SWITCH<br />
Push all the way down with your foot and release to switch headlamps to high<br />
beam. Push all the way down and release again to dim headlamps.<br />
NOTE<br />
High beam indicator will come on when the headlamps are<br />
working in the high beam position.<br />
2 ENGINE RETARDER FOOT SWITCH<br />
Depress foot pedal which activates the switch to engage engine retarder. Release<br />
foot pedal to disengage engine retarder. The accelerator pedal must be full up<br />
before the foot switch will operate. Select the desired retarding range using the<br />
engine retarder selection switch located on the control panel.<br />
3 SERVICE BRAKE PEDAL<br />
Push down with your foot to apply service brakes on your truck. If your truck<br />
is properly coupled to a trailer, the trailer service brakes will also be applied<br />
when you use your truck’s service brake pedal.<br />
4 ACCELERATOR PEDAL<br />
Push down gradually with your foot to start truck moving or to increase<br />
engine speed.<br />
TA 236650<br />
2-19
<strong>TM</strong> 9-<strong>2320</strong>-293-<strong>10</strong><br />
Figure 2-8. Transmission Range Selector Control and Sliding Fifth Wheel Control.<br />
KEY TO TRANSMISSI<strong>ON</strong> RANGE SELECTOR C<strong>ON</strong>TROL AND SLIDING<br />
FIFTH WHEEL C<strong>ON</strong>TROL<br />
1 TRANSMISSI<strong>ON</strong> RANGE SELECTOR C<strong>ON</strong>TROL<br />
CAUTI<strong>ON</strong><br />
Use the service brakes to hold truck while<br />
stopped on a grade. DO NOT USE <strong>THE</strong><br />
TRANSMISSI<strong>ON</strong> TO HOLD <strong>THE</strong> TRUCK as<br />
this will cause the transmission oil temperature<br />
to become excessively high and will result in<br />
severe overheat damage to the transmission.<br />
CAUTI<strong>ON</strong><br />
DO NOT ALLOW YOUR VEHICLE TO<br />
COAST IN NEUTRAL. This can result in<br />
severe transmission damage and loss of normal<br />
engine braking.<br />
2-20
<strong>TM</strong> 9-<strong>2320</strong>-<strong>283</strong>-<strong>10</strong><br />
KEY TO TRANSMISSI<strong>ON</strong> RANGE SELECTOR C<strong>ON</strong>TROL AND<br />
SLIDING FIFTH WHEEL C<strong>ON</strong>TROL (Continued)<br />
CAUTI<strong>ON</strong><br />
Failure to disconnect the transmission to<br />
forward-rear axle propeller shaft or lift the<br />
rear driving wheels before pushing or towing<br />
the vehicle can cause serious transmission<br />
damage. The engine cannot be started by<br />
pushing or towing.<br />
CAUTI<strong>ON</strong><br />
If transmission oil temperature gage indicates<br />
a temperature of 300°F or greater (red band),<br />
stop vehicle in a safe place, shift to NEUTRAL,<br />
and operate engine at 1,500 RPM to reduce<br />
transmission temperature to below 300°F<br />
(yellow or green band). If temperture cannot<br />
be lowered during 3-minutes of idle at 1,500<br />
RPM, stop engine and advise Organizational<br />
Maintenance.<br />
NOTE<br />
The button on top of the shift control knob must always<br />
be depressed to move the lever except when manually<br />
upshifting from position 1-2 to 1-3, 1-3 to 1-4,<br />
or 1-4 to 1-5. When the lever has fully engaged the<br />
desired position, the button will pop-up.<br />
With the park brake applied, depress Selector lever button and move selector<br />
lever to NEUTRAL (N) to start the engine. The engine will not start with the<br />
selector lever in another position. Apply service brakes, release Park Brake,<br />
depress button, and move selector lever to REVERSE (R) to back up. Depress<br />
button and move selector lever to aline with the desired gear range. For operation<br />
at night, the gear range dial and gear range indicator are illuminated.<br />
In all forward gear ranges, the vehicle will start in FIRST GEAR (1) and automatically<br />
upshift to the highest gear shown for the gear range selected. For<br />
example, in gear range 1-5, the vehicle will start in FIRST GEAR (1) and upshift<br />
automatically thru SEC<strong>ON</strong>D GEAR (2). THIRD GEAR (3), FOURTH<br />
GEAR (4), and FIFTH GEAR (5). If gear range 1-3 is selected, the transmission<br />
will automatically upshift from FIRST GEAR (1) thru SEC<strong>ON</strong>D GEAR (2)<br />
and into THIRD GEAR. It will not upshift beyond THIRD GEAR until the<br />
selector lever is manually moved to a higher gear range.<br />
2-21
<strong>TM</strong> 9-<strong>2320</strong>-<strong>283</strong>-<strong>10</strong><br />
KEY TO TRANSMISSI<strong>ON</strong> RANGE SELECTOR C<strong>ON</strong>TROL AND<br />
SLIDING FIFTH WHEEL C<strong>ON</strong>TROL (Continued)<br />
Automatic upshift and downshift points are influenced by the pressure of your<br />
foot on the accelerator pedal. For example, when the accelerator pedal is fully<br />
depressed, the transmission will automatically upshift near the governed speed<br />
of the engine (2,<strong>10</strong>0 rpm). A partially depressed accelerator pedal will cause<br />
upshifts to occur at a lower engine speed.<br />
Manual downshifts by depressing the button and moving the selector lever,<br />
should be avoided when the vehicle is above the maximum speed obtainable<br />
in the next lower gear. If a downshift or shift to REVERSE (R) is made at<br />
too high a speed, the transmission hydraulic system automatically prevents<br />
he shift from taking place until a safe lower speed is reached. Normally, service<br />
brakes and the engine retarder should be used, as needed, to slow the vehicle<br />
to an acceptable speed where the transmission may be downshifted, if needed.<br />
2<br />
SLlDING FIFTH WHEEL C<strong>ON</strong>TROL<br />
WARNING<br />
To prevent unintentional fifth wheel movement<br />
during vehicle operation, ALWAYS BE SURE<br />
CAB C<strong>ON</strong>TROLLED SLIDING FIFTH<br />
WHEEL LEVER IS IN <strong>THE</strong> LOCK POSITI<strong>ON</strong><br />
before vehicle is moved. To prove fifth wheel is<br />
locked in position when coupled to a trailer,<br />
place transmission selector lever in FIRST<br />
GEAR (1), release park brakes and service<br />
brakes, apply trailer brake hand control, and<br />
tap accelerator pedal. This will cause the<br />
tractor mounted fifth wheel to be pulled<br />
sharply against the trailer mounted king pin.<br />
Set park brakes, release trailer brake hand<br />
control, and shift selector lever back to<br />
NEUTRAL (N). Leave the cab and make a<br />
visual check of the fifth wheel sliding plate to<br />
verify it has not moved from the position<br />
selected. This will also verify the trailer king<br />
pin is securely locked into the fifth wheel<br />
jaws. The control should also be in the LOCK<br />
position any time the tractor is to be operation<br />
even when not towing a trailer. NEVER MOVE<br />
C<strong>ON</strong>TROL TO <strong>THE</strong> UNLOCK POSITI<strong>ON</strong><br />
DURING NORMAL VEHICLE OPERATI<strong>ON</strong><br />
AS LOSS OF C<strong>ON</strong>TROL CAN RESULT.<br />
2-22
<strong>TM</strong> 9-<strong>2320</strong>-<strong>283</strong>-<strong>10</strong><br />
KEY TO TRANSMISSI<strong>ON</strong> RANGE SELECTOR C<strong>ON</strong>TROL AND<br />
SLIDING FIFTH WHEEL C<strong>ON</strong>TROL (Continued)<br />
2 SLIDING FIFTH WHEEL C<strong>ON</strong>TROL (Continued)<br />
This control is located in cab on a bracket fastened to the rear of the transmission<br />
range selector. With the trailer king pin locked into the fifth wheel<br />
jaws, inter-vehicular connections made, and trailer landing gear UP, set the<br />
control lever to the UNLOCK position, apply the trailer brake hand control<br />
and drive vehicle forward to slide fifth wheel and trailer king pin toward the<br />
rear. A total 12-inches of travel fore and aft is available. Normal position of the<br />
fifth wheel is at a point on the centerline of the rear tandem axles (See<br />
CAUTI<strong>ON</strong> decal and NORMAL location arrows on both sides of the fifth<br />
wheel assembly). The sliding feature allows adjustment of trailer and cargo<br />
weight (when scales are available), within vehicle capacity, to prevent overloading<br />
of the tractor and trailer axles. Each time the fifth wheel position is<br />
adjusted and before normal operation, the control must be moved to the LOCK<br />
position to prevent unintentional fifth wheel and trailer movement fore and<br />
aft.<br />
2-3. STEERING WHEEL AND COLUMN-MOUNTED C<strong>ON</strong>TROLS.<br />
Figure 2-9. Steering Wheel and Column-mounted Controls. TA 236653<br />
2-23
<strong>TM</strong> 9-<strong>2320</strong>-<strong>283</strong>-<strong>10</strong><br />
KEY TO STEERING WHEEL AND COLUMN-MOUNTED C<strong>ON</strong>TROLS<br />
1<br />
HAZARD SWITCH<br />
Pull out to turn on emergency flashers. Push turn signal lever up or down and<br />
return it to center to turn off emergency flashers.<br />
2<br />
TURN SIGNAL LEVER<br />
Push up to turn on right turn signal. Pull down to turn on left turn signal.<br />
Return to center position when turn is completed.<br />
3<br />
HORN BUTT<strong>ON</strong><br />
Push button to sound electric horn.<br />
4<br />
TRAILER BRAKE HAND C<strong>ON</strong>TROL<br />
CAUTI<strong>ON</strong><br />
After use, always return this control to its OFF/UP<br />
position, or trailer brakes will burn up.<br />
Pull down to apply trailer brakes only. Use for stopping on slick surfaces and<br />
to help keep trailer from jackknifing. It can also be used on grades, when at<br />
a standstill. This way the vehicle will not roll backward when moving the right<br />
foot from the standard brake over to the accelerator pedal. Be sure to return<br />
control to its OFF position (all the way up).<br />
5<br />
STEERING WHEEL<br />
CAUTI<strong>ON</strong><br />
Do not hold the steering wheel in full steer position for<br />
more than <strong>10</strong> seconds as the pump fluid will overheat<br />
and could cause equipment damage.<br />
Rotate right to turn front wheels to the right. Rotate left to turn front wheels<br />
to the left.<br />
2-24
<strong>TM</strong> 9-<strong>2320</strong>-<strong>283</strong>-<strong>10</strong><br />
2-4. SEAT ADJUS<strong>TM</strong>ENT C<strong>ON</strong>TROLS.<br />
Figure 2-<strong>10</strong>. Seat Adjustment Controls.<br />
KEY TO SEAT ADJUS<strong>TM</strong>ENT C<strong>ON</strong>TROLS<br />
1. SEAT BELT ADJUS<strong>TM</strong>ENT - COMPANI<strong>ON</strong> AND OPERATOR'S SEAT<br />
WARNING<br />
Use of seat belts while operating or riding in the<br />
M915A1 truck tractor is mandatory as an aid in preventing<br />
personal injury in the event of an accident.<br />
Seat belts should be adjusted for a snug fit with the buckle securely fastened to<br />
prevent injury in the event of an accident. To adjust length of belt for fit, slip<br />
the belt through the buckle until it fits snugly with the other end of the seat<br />
belt snapped into the buckle. To release, press the center of the buckle on the<br />
driver's seat belt, or pull up on companion seat belt buckle.<br />
• The companion seat belt must be completely extended from<br />
the nonlocking retractor device. All excess webbing must then be<br />
adjusted at the buckle.<br />
TA 236654<br />
2-25
<strong>TM</strong> 9-<strong>2320</strong>-<strong>283</strong>-<strong>10</strong><br />
KEY TO SEAT ADJUS<strong>TM</strong>ENT C<strong>ON</strong>TROLS (Continued)<br />
2<br />
BACKREST ANGLE ADJUS<strong>TM</strong>ENT C<strong>ON</strong>TROL -<br />
COMPANI<strong>ON</strong> SEAT<br />
Backrest may, be adjusted to 3 different angle positions.<br />
Push lever down to raise backrest cushion to<br />
desired position and release lever to lock in position.<br />
Pull lever up to lower backrest cushion.<br />
3<br />
SEAT CUSHI<strong>ON</strong> TILT ADJUS<strong>TM</strong>ENT C<strong>ON</strong>TROL -<br />
COMPANI<strong>ON</strong> SEAT<br />
Forward edge of seat cushion may be tilted to 3<br />
different angle positions. Push lever down to raise<br />
forward edge of seat. Pull lever up to lower seat<br />
cushion.<br />
4<br />
FORWARD AND BACKWARD SEAT ADJUS<strong>TM</strong>ENT C<strong>ON</strong>TROL - COM-<br />
PANI<strong>ON</strong> AND OPERATOR’S SEAT<br />
Pull out on the lever to move either seat forward or backward to adjust for individual<br />
leg length. The companion seat can be moved a total of 4 inches, while<br />
the operator’s seat may be moved a total of 6 inches. Releasing the lever locks<br />
the seat in position chosen.<br />
5<br />
RIDE LEVEL ADJUS<strong>TM</strong>ENT - OPERATOR’S<br />
SEAT<br />
Use this control to adjust the torsion bar preload for<br />
your weight. To increase preload, while seated<br />
push ratchet trip lever up and operate the ratchet<br />
handle in the up and down direction until the indicator<br />
(item 7) is flush with the seat side frame as<br />
shown in the inset in Figure 2-<strong>10</strong>. To lower preload,<br />
while seated push ratchet trip lever down and operate<br />
ratchet handle in the up and down direction until<br />
the indicator is flush with the seat side frame.<br />
TA 236655<br />
2-26
<strong>TM</strong> 9-<strong>2320</strong>-<strong>283</strong>-<strong>10</strong><br />
KEY TO SEAT ADJUS<strong>TM</strong>ENT C<strong>ON</strong>TROLS (Continued)<br />
6 BACKREST ANGLE ADJUS<strong>TM</strong>ENT C<strong>ON</strong>TROL - OPERATOR’S SEAT<br />
(located inside left frame upright)<br />
The backrest may be adjusted to three different angles for personal comfort.<br />
Lift up on the backrest and tilt it in the position desired. When lowered, the<br />
backrest will lock in one of three positions.<br />
7<br />
RIDE LEVEL INDICATOR -OPERATOR’S SEAT<br />
(located inside left frame upright)<br />
This device indicates when the seat preload is adjusted properly for your weight<br />
using the ride level adjustment described in item 5. The tip of the indicator<br />
will be flush with the edge of the frame when the preload is correct as shown<br />
in the inset view in Figure 2-<strong>10</strong>.<br />
2-5. ADDITI<strong>ON</strong>AL CAB C<strong>ON</strong>TROLS.<br />
Figure 2-77. Additional Cab Controls. TA 236656<br />
2-27
<strong>TM</strong> 9-<strong>2320</strong>-<strong>283</strong>-<strong>10</strong><br />
KEY TO ADDITI<strong>ON</strong>AL CAB C<strong>ON</strong>TROLS<br />
1 AIR HORN CHAIN<br />
Pull downward to sound air horn; release to silence air horn.<br />
2 CAB DOOR WINDOW GLASS REGULATOR HANDLE (one on each door)<br />
Rotate left regulator clockwise to lower left window glass, counterclockwise<br />
to raise left window glass. Rotate right regulator counterclockwise to lower<br />
right window glass, clockwise to raise right window glass.<br />
3 ASH TRAY<br />
Top flips up.<br />
4 DRIVERS FRESH AIR VENT<br />
Push handle forward to scoop fresh outside air in. Pull back to exhaust inside<br />
air. Center position is closed.<br />
5 CAB DOOR INSIDE HANDLE (one on each door)<br />
Pull handle to open cab door from the inside.<br />
NOTE<br />
Door lock will release when door is opened from inside.<br />
6 CAB VENT WINDOW HANDLE (one on each vent window)<br />
Raise lever to unlock window. Then push outward on handle to open vent<br />
window. Pull inward to close vent window.<br />
7 DOOR LOCK KNOBS<br />
Push down to lock doors. Pull up to unlock doors. They will unlock automatically<br />
when door handle inside is pulled, or the door is unlocked with a<br />
key from outside.<br />
2-28
<strong>TM</strong> 9-<strong>2320</strong>-<strong>283</strong>-<strong>10</strong><br />
KEY TO ADDITI<strong>ON</strong>AL C<strong>ON</strong>TROLS (Continued)<br />
8<br />
DEFROSTER FANS (one for each windshield section)<br />
Turn knob at base to the right (clockwise) to operate fan at high speed. Turn<br />
further to the right to operate fan at slower speeds. Turn knob all the way to the<br />
left (counterclockwise) to turn fan OFF. Fan may be swiveled on its base to<br />
direct air flow as required by conditions.<br />
9<br />
MAP LAMPS (one for each cab crew member)<br />
Push rocker switch on lamp base to turn <strong>ON</strong>. Push other side of rocker switch<br />
to turn OFF. Lamp socket may be swiveled to direct light as needed.<br />
<strong>10</strong><br />
DOME LAMP<br />
Push button in on lamp base to turn light on. Push again to turn light off.<br />
Provides general overall illumination of the cab interior.<br />
11<br />
REAR SLIDING WINDOW WITH ST<strong>ON</strong>E SHIELD<br />
Squeeze at center of latch and slide window toward passenger side of cab to<br />
open and return to close.<br />
Section II. PREVENTIVE MAINTENANCE CHECKS AND SERVICES<br />
INDEX<br />
Page<br />
PREVENTIVE MAINTENANCE CHECKS AND SERVICES (PMCS) ....... 2-29<br />
Maintenance Forms and Records .................................. 2-31<br />
Preventive Maintenance Checks and Services ........................ 2-31<br />
General Maintenance Procedures . . . . . . . . . . . . . . . . . 2-32<br />
Leakage Definitions for Operator/Crew PMCS . . . . . . . . . . . . .2-33<br />
Opening Hood . . . . . . . . . . . . . . . . . . . . . . . . . . . . . . . . . . . . . . . . . . . . . . . . . . 2-41<br />
2-29
<strong>TM</strong> 9-<strong>2320</strong>-<strong>283</strong>-<strong>10</strong><br />
INDEX (Continued)<br />
Page<br />
Table 2-1. Operator PMCS-M915A1 Vehicle. ....................<br />
Tires .................................................<br />
Exterior ...............................................<br />
Batteries ..............................................<br />
2-34<br />
2-34<br />
2-35<br />
2-36<br />
Front Axle and Hub Sight Glass Assembly<br />
................... 2-37<br />
Air Hoses and Connectors ...............................<br />
Trailer Electrical Connectors ..............................<br />
Fifth Wheel and Ramps ................................<br />
2-38<br />
2-38<br />
2-38<br />
Frame . . . . . . . . . . . . . . . . . . . . . . . . . . . . . . . . . . . . . . . . . . . . . . . . . . . . 2-39<br />
Fuel Tank, Lines, and Fittings ................................ 2-39<br />
Exhaust System ............................................ 2-40<br />
Cooling System ............................................ 2-43<br />
Air Cleaner ................................................ 2-44<br />
Engine Oil Level ............................................ 2-44<br />
Fuel Filter ................................................. 2-45<br />
Fuel Heater ................................................ 2-46<br />
Turbocharger .............................................. 2-46<br />
Fan, Fan Pulley, and Belts ................................... 2-47<br />
Fan Clutch and Actuator .................................... 2-48<br />
Ether Quick-Start Assembly .................................. 2-48<br />
Power Steering Pump ....................................... 2-49<br />
Air Dryer .................................................. 2-50<br />
2-30
<strong>TM</strong> 9-<strong>2320</strong>-<strong>283</strong>-<strong>10</strong><br />
INDEX (Continued)<br />
Page<br />
Transmission .............................................. 2-51<br />
Engine Operation ........................................... 2-52<br />
Air System ................................................ 2-52<br />
Controls and Instruments .................................... 2-53<br />
Vehicle Interior ............................................. 2-53<br />
Section II. PREVENTIVE MAINTENANCE CHECKS AND SERVICES<br />
2-6. Maintenance Forms and Records.<br />
Every mission begins and ends with the paperwork. There isn’t much of it, but you<br />
have to keep it up. The forms and records you fill out have several uses. They are<br />
a permanent record of the services, repairs, and modifications made on your vehicle.<br />
They are reports to organizational maintenance and to your commander. And they<br />
are a checklist for you when you want to know what is wrong with the vehicle after<br />
its last use, and whether those faults have been fixed. For the information you need<br />
on forms and records, see <strong>TM</strong> 38-750.<br />
2-7. Preventive Maintenance Checks and Services (see Table 2-1).<br />
a. Before checks and services (B) of preventative maintenance must be performed prior to<br />
placing vehicle or its components in operation.<br />
b. During checks and services(D) of preventative maintenance will be performed while the<br />
vehicle or its components, systems are in operation.<br />
2-31
<strong>TM</strong> 9-<strong>2320</strong>-<strong>283</strong>-<strong>10</strong><br />
c. After checks and services (A) of preventative maintenance are performed upon<br />
completion of mission.<br />
d. Weekly checks and services(W) of preventative maintenance are performed once every<br />
seven days.<br />
e. Monthly checks and services (M) of preventative maintenance are performed every 30<br />
days.<br />
f. If something doesn’t work, troubleshoot it with the instructions in this manual<br />
or notify your supervisor.<br />
g. Always do your PREVENTIVE MAINTENANCE in the same order, so it gets to<br />
be a habit. Once you’ve had some practice, you’ll spot anything wrong in a hurry.<br />
h. If anything looks wrong and you can’t fix it, write it on your DA form 2404. If<br />
you find something seriously wrong, report it to organizational maintenance RIGHT<br />
NOW.<br />
i. When you do your PREVENTIVE MAINTENANCE, take along the tools you need<br />
to make all the checks. You always need a rag or two.<br />
2-32<br />
Keep it clean - Dirt, grease, oil, and debris only get in the way and may cover up<br />
a serious problem. Clean as you work and as needed. Use drycleaning solvent (SD-2)<br />
on all metal surfaces. Use soap and water when you clean rubber or plastic materials.<br />
Bolts, nuts and screws - Check them all for obvious looseness; missing, bent or broken<br />
condition. You can’t try them all with a tool, of course. But look for chipped paint,<br />
bare metal, or rust around bolt heads. If you find one you think is loose, tighten it,<br />
or report it to organizational maintenance.<br />
Welds - Look for loose or chipped paint, rust, or gaps where parts are welded together.<br />
If you find a bad weld, report it to organizational maintenance.<br />
Electric wires and connectors - Look for cracked or broken insulation, bare wires,<br />
and loose or broken connectors. Tighten loose connectors and make sure the wires<br />
are in good shape.<br />
Hoses and fluid lines - Look for wear, damage, and leaks, and make sure clamps<br />
and fittings are tight. Wet spots show leaks, of course. But a stain around a fitting<br />
or connector can mean a leak. If a leak comes from a loose fitting or connector tighten<br />
it. If something is broken or worn out, report it to organizational maintenance.<br />
Fluid leakage - It is necessary for you to know how fluid leakage affects the status<br />
of your vehicle. The following are definitions of the types/classes of leakage an operator<br />
or crew member needs to know to be able to determine the status of his/her vehicle.<br />
Learn, then be familiar with them and REMEMBER - WHEN IN DOUBT, NOTIFY<br />
YOUR SUPERVISOR!
<strong>TM</strong> 9-<strong>2320</strong>-<strong>283</strong>-<strong>10</strong><br />
DEFINITI<strong>ON</strong>S FOR OPERATOR/CREW PMCS<br />
EQUIPMENT OPERATI<strong>ON</strong> IS ALLOWABLE WITH MINOR<br />
LEAKAGES (CLASS I OR II). OF COURSE, C<strong>ON</strong>SIDERA-<br />
TI<strong>ON</strong> MUST BE GIVEN TO <strong>THE</strong> FLUID CAPACITY IN <strong>THE</strong><br />
ITEM/SYSTEM BEING CHECKED/INSPECTED. WHEN IN<br />
DOUBT, NOTIFY YOUR SUPERVISOR.<br />
WHEN OPERATING WITH CLASS I OR II LEAKS, C<strong>ON</strong>-<br />
TINUE TO CHECK FLUID LEVELS AS REQUIRED IN<br />
YOUR PMCS.<br />
CLASS III LEAKS SHOULD BE REPORTED TO YOUR<br />
SUPERVISOR OR TO ORGANIZATI<strong>ON</strong>AL<br />
MAINTENANCE.<br />
CLASS I.<br />
CLASS II.<br />
CLASS Ill.<br />
Seepage of fluid as indicated by wetness<br />
or discoloration not great enough to form<br />
drops.<br />
Leakage of fluid great enough to form drops<br />
but not enough to cause drops to drip from<br />
item being checked/inspected.<br />
Leakage of fluid great enough to form drops<br />
that fall from the item being checked/inspected.<br />
NOTE<br />
Item number column shall be used as a source of item<br />
numbers for the <strong>TM</strong> Number column on DA Form 2404,<br />
Equipment, Inspection and Maintenance Worksheet in<br />
recording results of PMCS.<br />
Within designated interval, these checks are to be performed<br />
in the order listed.<br />
2-33
<strong>TM</strong> 9-<strong>2320</strong>-<strong>283</strong>-<strong>10</strong><br />
Table 2-1. Preventive Maintenance Checks and Services for Model M915A1<br />
Item<br />
No.<br />
Interval<br />
Location<br />
Item to<br />
Check/<br />
Service<br />
Crewmember<br />
Procedure<br />
Not Fully Mission<br />
Capable If:<br />
Always Remember The CAU-<br />
TI<strong>ON</strong>S, WARNINGS AND<br />
NOTES Before Operating<br />
This Vehicle And Prior to<br />
PMCS.<br />
Perform all PMCS checks if:<br />
a. You are the assigned driver<br />
but have not operated the vehicle<br />
since the last weekly inspection.<br />
b. You are operating the vehicle<br />
for the first time.<br />
1<br />
Before<br />
Exterior<br />
Left<br />
Front<br />
DRIVER<br />
Tire is missing or un-<br />
serviceable.<br />
Visually check left front tires for<br />
under inflation.<br />
DRIVER<br />
2<br />
Before<br />
Fuel<br />
Heater<br />
Check fuel heater for leaks a<br />
damage.<br />
NOTE<br />
Fuel Heater is located below<br />
driver’s side door and above<br />
fuel tank.<br />
Class III leakage is<br />
evident.<br />
2-34 Change 2
<strong>TM</strong> 9-<strong>2320</strong>-<strong>283</strong>-<strong>10</strong><br />
Table 2-1. Preventive Maintenance Checks and Services for Model M915A1<br />
Location<br />
Itern Interval Crewmember Not Fully Mission<br />
No. Item to Procedure<br />
Capable If:<br />
Check/<br />
Service<br />
DRIVER<br />
3 Before Trailer Inspect inter-vehicle tractor to Hose(s) or couplers<br />
Coupling trailer air hoses for cracking or missing/leaking, cou-<br />
Air damaged connectors. Inspect pler(s) unserviceable;<br />
Hoses trailer electrical connectors. intervehicle cable<br />
missing or damaged.<br />
and<br />
Connectors<br />
I I I I<br />
Change 2 2-35
<strong>TM</strong> 9-<strong>2320</strong>-<strong>283</strong>-<strong>10</strong><br />
Table 2-1. Preventive Maintenance Checks and Services for Model M915A1<br />
Item<br />
No.<br />
Interval<br />
Location<br />
Item to<br />
Check/<br />
Service<br />
Crewmember<br />
Procedure<br />
Not Fully Mission<br />
Capable If:<br />
DRIVER<br />
4<br />
Before<br />
Fifth<br />
Wheel<br />
and<br />
Ramps<br />
a. Check that lockjaw pins do<br />
not protrude more than 1/16”<br />
above surface of top plate, or<br />
have any lateral or vertical<br />
movement.<br />
a. Lockjaw pin extends<br />
more than<br />
1/16” or has lateral or<br />
vertical movement.<br />
b. Check for bent, worn, broken<br />
or missing parts.<br />
b. Bent, worn, broken<br />
or missing parts.<br />
c. Check slide track for damage<br />
and free movement of fifth<br />
wheel assembly.<br />
2-36 Change 2
<strong>TM</strong> 9-<strong>2320</strong>-<strong>283</strong>-<strong>10</strong><br />
Table 2-1. Preventive Maintenance Checks and Services for Model M915A1<br />
Item Interval<br />
No.<br />
Location<br />
Item to<br />
Check/<br />
Service<br />
DRIVER<br />
Crewmember<br />
Procedure<br />
Not Fully Mission<br />
Capable If:<br />
4 Before Fifth d. Check the primary and sec- d. Primary or secon-<br />
Wheel ondary release handles for op- dary release handles<br />
and eration and damage. are damaged or do<br />
Ramps<br />
not function.<br />
Continued<br />
NOTE<br />
Air lines and cylinder are located<br />
under fifth wheel top<br />
plate.<br />
e. Check air lines and air cylin- e. Any air leak.<br />
der for damage.<br />
Change 2 2-37
<strong>TM</strong> 9-<strong>2320</strong>-<strong>283</strong>-<strong>10</strong><br />
Table 2-1. Preventive Maintenance Checks and Services for Model M915A1<br />
Item<br />
No.<br />
Interval<br />
Location<br />
Item to<br />
Check/<br />
Service<br />
Crewmember<br />
Procedure<br />
Not Fully Mission<br />
Capable If:<br />
DRIVER<br />
Before<br />
Left<br />
Side<br />
and<br />
Rear of<br />
Vehicle<br />
Under<br />
Vehicle<br />
a. Look under vehicle for obvious<br />
fluid leaks such as oil,<br />
water and fuel.<br />
NOTE<br />
If leakage is detected, further<br />
investigation is required to determine<br />
location and cause of<br />
leak.<br />
b. Visually check left side tires.<br />
c. Check that mud flaps are in<br />
place and intact.<br />
a. Class III leaks are<br />
evident.<br />
b. Any tire(s) missing<br />
or unserviceable.<br />
DRIVER<br />
Before<br />
Right<br />
Side<br />
and<br />
Front<br />
Tires<br />
Visually check tires for underinflation.<br />
Any tire is missing or<br />
unserviceable.<br />
DRIVER<br />
Before<br />
Front of<br />
Vehicle<br />
Look under vehicle for obvious<br />
fluid leaks such as oil, fuel and<br />
water.<br />
Any Class III leak evident.<br />
NOTE<br />
If leakage is detected, further<br />
investigation is needed to determine<br />
the location and cause<br />
of the leak.<br />
2-38 Change 2
<strong>TM</strong> 9-<strong>2320</strong>-<strong>283</strong>-<strong>10</strong><br />
Table 2-1. Preventive Maintenance Checks and Services for Model M915A1<br />
ltem<br />
No.<br />
lnterval<br />
Location<br />
Item to<br />
Check/<br />
Service<br />
Crewmember<br />
Procedure<br />
Not Fully Mission<br />
Capable If:<br />
DRIVER<br />
8<br />
Before<br />
Windshield<br />
Wipers/<br />
Blades<br />
Check windshield for any<br />
cracks that would impair vision.<br />
Check wiper arms and blades<br />
for presence and damage.<br />
NOTE<br />
Cracked or broken windshield<br />
may violate AR 385-55.<br />
Change 2 2-39
<strong>TM</strong> 9-<strong>2320</strong>-<strong>283</strong>-<strong>10</strong><br />
Table 2-1. Preventive Maintenance Checks and Services for Model M915A1<br />
ltem<br />
No.<br />
Interval<br />
Location<br />
Item to<br />
Check/<br />
Service<br />
Crewmember<br />
Procedure<br />
Not Fully Mission<br />
Capable If:<br />
DRIVER<br />
9<br />
Before<br />
Cooling<br />
System<br />
WARNING<br />
Raise the hood to the highest<br />
point, then slowly lower the<br />
hood until the prop locks up.<br />
Inspect condition of support<br />
and brackets. After raising<br />
the hood, insert the s-<br />
shaped hook through the<br />
two matching holes in the<br />
prop channel to prevent the<br />
hood from accidently falling.<br />
Reverse this procedure to<br />
lower the hood.<br />
If engine has been running,<br />
let radiator cool before removing<br />
cap. Remove cap in<br />
two steps. First, place a<br />
thick cloth over the cap and<br />
slowly rotate cap to its first<br />
stop, pause and let pressure<br />
escape from cooling system.<br />
Then rotate cap further until<br />
you can remove it. Failure to<br />
follow this procedure can result<br />
in serious burns.<br />
Check coolant level in radiator<br />
sight glass. If level is low, add a<br />
mixture of antifreeze and clean<br />
water to bring coolant to proper<br />
level (check with organizational<br />
maintenance for the<br />
proper mixture).<br />
Class III leaks evident.<br />
2-40 Change 2
<strong>TM</strong> 9-<strong>2320</strong>-<strong>283</strong>-<strong>10</strong><br />
Table 2-1. Preventive Maintenance Checks and Services for Model M915A1<br />
Item Interval<br />
No.<br />
Location<br />
Item to<br />
Check/<br />
Service<br />
DRIVER<br />
Crewmember<br />
Procedure<br />
Not Fully Mission<br />
Capable If:<br />
<strong>10</strong> Before Cab a. Check for missing or dam- a. Fire extinguisher<br />
Fire Ex- aged fire extinguisher under missing or damaged.<br />
tin- dashboard on driver’s side.<br />
guisher<br />
b. Pressure gage<br />
b. Checkgage for proper pres- needle in REsure<br />
of about 150 psi (<strong>10</strong>34 CHARGE area.<br />
kPa). Make sure mounting is<br />
secure.<br />
c. Check for damaged or miss- c. Seal damaged or<br />
ing seal.<br />
missing.<br />
Change 2 2-41
<strong>TM</strong> 9-2329-<strong>283</strong>-<strong>10</strong><br />
Table 2-1. Preventive Maintenance Checks and Services for Model M915A1<br />
ltem<br />
No<br />
Interval<br />
Location<br />
Item to<br />
Check/<br />
Service<br />
Crewmember<br />
Procedure<br />
Not Fully Mission<br />
Capable If:<br />
DRIVER<br />
11<br />
Before<br />
Interior<br />
of Vehicle<br />
Check seat and seat belt for<br />
proper adjustment and ability<br />
to lock, security of pins and<br />
bolts and tears.<br />
NOTE<br />
Missing, torn or inoperative<br />
seat belt may be in violation of<br />
AR 385-55.<br />
DRIVER<br />
12<br />
Before<br />
Controls<br />
and Instruments<br />
WARNING<br />
If NBC exposure is suspected,<br />
all air filter media<br />
should be handled by personnel<br />
wearing protective<br />
equipment. Consult your<br />
unit NBC officer or NBC NCO<br />
for appropriate handling or<br />
disposal instructions.<br />
NOTE<br />
The engine must be running to<br />
perform the following checks.<br />
a. Start engine.<br />
CAUTI<strong>ON</strong><br />
A sudden rise in temperature<br />
during engine warm up indicates<br />
defective cooling system.<br />
b. Check air cleaner indicator.<br />
If in red, clean filter and reset.<br />
a. Engine will not<br />
start.<br />
b. Air cleaner indicator<br />
stays in red.<br />
2-42 Change 2
<strong>TM</strong> 9-<strong>2320</strong>-<strong>283</strong>-<strong>10</strong><br />
Table 2-1. Preventive Maintenance Checks and Services for Model M915A1<br />
Location<br />
Item Interval Crewmember Not Fully Mission<br />
No.<br />
Item to<br />
Procedure<br />
Capable If:<br />
Check/<br />
Service<br />
DRIVER<br />
12 Before Controls c. Check voltmeter needle. c. Readings above<br />
and In- Should be in green area (nor- or below the green<br />
stru- mal operating range 12 to 15 area.<br />
ments volts).<br />
Continued d. Check transmission oil tem- d. Oil temperature<br />
perature gage (should read exceeds 250°F.<br />
120°F to 250°F for normal operating<br />
range; may not read at<br />
low temperature).<br />
e. Check air pressure gage e. Reads less than<br />
(front and rear). Normal range 60 psi. Warning light<br />
is 95 to 125 psi. Make sure and/or buzzer stays<br />
warning light and buzzer is op- on or not operational.<br />
erational.<br />
f. Check engine water tem- f. Temperature gage<br />
perature gage (normal range is reads less than 160°<br />
160° - 22°F) with engine or exceeds 220°F.<br />
warmed up.<br />
after engine warms<br />
up.<br />
g. Check engine oil pressure g. Reads less than<br />
gage 35 to 50 psi at high idle. <strong>10</strong> psi at idle.<br />
I I I 4<br />
Change 2 2-43
<strong>TM</strong> 9-<strong>2320</strong>-<strong>283</strong>-<strong>10</strong><br />
Table 2-1. Preventive Maintenance Checks and Services for Model M915A1<br />
Item<br />
No.<br />
Interval<br />
Location<br />
Item to<br />
Check/<br />
Service<br />
Crewmember<br />
Procedure<br />
Not Fully Mission<br />
Capable If:<br />
DRIVER<br />
12<br />
Before<br />
Controls<br />
and Instruments<br />
h. Check transmission and ratio<br />
selector. Shift in all ranges<br />
observing unusual stiffness,<br />
abnormal operation or binding.<br />
h. Transmission or<br />
ratio selector inoperative<br />
or binding.<br />
Continued<br />
i. Check engine retarder for<br />
braking ability.<br />
i. Engine retarder is<br />
inoperable.<br />
j. Check steering response.<br />
j. Steering binds or is<br />
unresponsive.<br />
k. Listen for leakage in exhaust<br />
system.<br />
k. Pipe, clamp or<br />
hardware damaged<br />
or missing.<br />
I. Check tachograph rpm needle<br />
for proper response to<br />
throttle. Check idle speed 580<br />
to 650 rpm.<br />
I. Tachograph indicates<br />
less than 580<br />
rpm or more than 650<br />
rpm at idle.<br />
m. Check parking brake; pull<br />
out to apply, push in to release.<br />
With parking brake applied,<br />
place transmission in gear. Vehicle<br />
should not move.<br />
m. Parking brake is<br />
inoperative.<br />
n. Check service brakes for<br />
pulling, grabbing or other abnormal<br />
operation by moving<br />
vehicle approximately <strong>10</strong> feet.<br />
n. Brakes do not<br />
stop vehicle.<br />
2-44 Change 2
<strong>TM</strong> 9-<strong>2320</strong>-<strong>283</strong>-<strong>10</strong><br />
Table 2-1. Preventive Maintenance Checks and Services for Model M915A1<br />
Item Interval<br />
No.<br />
Location<br />
Item to<br />
Check/<br />
Service<br />
DRIVER<br />
Crewmember<br />
Procedure<br />
Not Fully Mission<br />
Capable If:<br />
13 Before Air Check automatic drain valve Automatic drain valve<br />
Dryer operation. With engine running inoperative.<br />
and air pressure reaches 120<br />
psi, a sharp burst of air will be<br />
heard at the drain valve each<br />
time the compressor unloads.<br />
NOTE<br />
13.1 Before Trailer Perform this check with the<br />
Brakes trailer empty and the trailer<br />
loaded after the tractor/trailer<br />
are coupled.<br />
a. Check for air leaks at the Any air leaks are<br />
intervehicular connecting present.<br />
hoses, relay valve and air reservoirs.<br />
b. Apply trailer brakes only Brakes fail to hold<br />
and attempted to move the tractor/trailer combitractor<br />
/trailer combination. nation from moving.<br />
Change 3 2-45
<strong>TM</strong> 9-<strong>2320</strong>-<strong>283</strong>-<strong>10</strong><br />
Table 2-1. Preventive Maintenance Checks and Services for Model M915A1<br />
Item<br />
No.<br />
Interval<br />
Location<br />
Item to<br />
Check/<br />
Service<br />
Crewmember<br />
Procedure<br />
Not Fully Mission<br />
Capable If:<br />
DRIVER<br />
14<br />
During<br />
Steering/<br />
Swaying<br />
Observe any unusual sway,<br />
dip, or unstable handling.<br />
Handling is unstable.<br />
15<br />
During<br />
Gages<br />
Any gage not func-<br />
tioning properly.<br />
Monitor all gages and warning<br />
buzzers during operation.<br />
2-46 Change 2
<strong>TM</strong> 9-<strong>2320</strong>-<strong>283</strong>-<strong>10</strong><br />
Table 2-1. Preventive Maintenance Checks and Services for Model M915A1<br />
Location<br />
Item Interval Crewmember Not Fully Mission<br />
No. Item to Procedure Capable If:<br />
Check/<br />
Service<br />
Driver<br />
16 After Turbo- When you shut down the en- Unusual or rattling<br />
charger gine, listen to the turbocharger noises or a defective<br />
for rattling noises.<br />
turbocharger.<br />
17 After Exterior<br />
of Vehicle<br />
(Left<br />
Side)<br />
DRIVER<br />
Check left side view and spotter<br />
mirrors and arms.<br />
Change 2 2-47
<strong>TM</strong> 9-<strong>2320</strong>-<strong>283</strong>-<strong>10</strong><br />
Table 2-1. Preventive Maintenance Checks and Services for Model M915A1<br />
Item<br />
No.<br />
Interval<br />
Location<br />
Item to<br />
Check/<br />
Service<br />
Crewmember<br />
Procedure<br />
Not Fully Mission<br />
Capable If:<br />
18<br />
After<br />
Transmission<br />
DRIVER<br />
With transmission temperature<br />
gage between 120° and 250°F<br />
while idling in neutral with<br />
Drake applied, remove dipstick<br />
and check oil level. Should<br />
read between high and low<br />
mark on the hot run band. If beow<br />
the low mark on the hot run<br />
band, add oil to bring level to<br />
mid-point of band. About one<br />
quart will raise level from bottom<br />
line to middle of band.<br />
The above method is preferred<br />
but oil level may be checked<br />
with transmission temperature<br />
below 120°F by reading the<br />
cold run band on the dipstick.<br />
TRANSMISSI<strong>ON</strong> DIPSTICK<br />
2-48 Change 2
<strong>TM</strong> 9-<strong>2320</strong>-<strong>283</strong>-<strong>10</strong><br />
Table 2-1. Preventive Maintenance Checks and Services for Model M915A1<br />
Location<br />
Item Interval Crewmember Not Fully Mission<br />
No.<br />
Item to<br />
Procedure<br />
Capable If:<br />
Check/<br />
Service<br />
DRIVER<br />
19 After Fuel Fil- Check for leaks or damage. Class III leakage is<br />
ter<br />
evident.<br />
CAUTI<strong>ON</strong><br />
If one quart or more of fuel<br />
must be drained from fuel filter<br />
before fuel is clear, fuel<br />
tank and fuel system must be<br />
inspected carefully. Report<br />
fuel contamination to organizational<br />
maintenance.<br />
NOTE<br />
With engine running open drain<br />
on bottom of filter. Drain fuel<br />
into suitable container until fuel<br />
runs clear. Close drain securely.<br />
Dispose of fuel in accordance<br />
with local requirements,<br />
Change 2 2-49
<strong>TM</strong> 9-<strong>2320</strong>-<strong>283</strong>-<strong>10</strong><br />
Table 2-1. Preventive Maintenance Checks and Services for Model M915A1<br />
Item<br />
No.<br />
Interval<br />
Location<br />
Item to<br />
Check/<br />
Service<br />
Crewmember<br />
Procedure<br />
Not Fully Mission<br />
Capable If:<br />
DRIVER<br />
20<br />
After<br />
Left Front,<br />
Left Side,<br />
Rear and<br />
Right<br />
Side,<br />
Right<br />
Front<br />
a. Check for obvious damage<br />
to vehicle.<br />
b. Check under vehicle for<br />
signs of leaks.<br />
c. Visually check left side tires<br />
or under-inflation, cracks,<br />
gouges or bulges. Remove all<br />
penetrating objects.<br />
a. Any damage that<br />
would prevent operation.<br />
b. Class III leaks.<br />
c. Any tire is missing<br />
or unserviceable if<br />
there is evidence of<br />
cuts, gouges and<br />
bulges which would<br />
result in tire failure<br />
during operation.<br />
DRIVER<br />
21<br />
After<br />
Exterior<br />
of Vehicle<br />
(Right<br />
Side)<br />
a. Check right side view mirror<br />
and arm for damage.<br />
2-50 Change 2
<strong>TM</strong> 9-<strong>2320</strong>-<strong>283</strong>-<strong>10</strong><br />
Item<br />
No.<br />
Table 2-1. Preventive Maintenance Checks and Services for Model M915A1<br />
Interval<br />
Location<br />
Item to<br />
Check/<br />
Service<br />
DRIVER<br />
Crewmember<br />
Procedure<br />
Not Fully Mission<br />
Capable If:<br />
22 After Engine Check the level gage for proper Engine has used ex-<br />
Oil level. The gage should be be- cessive amount of oil<br />
Level tween the low and high marks. (more than one quart<br />
DO NOT OVERFILL.<br />
in <strong>10</strong>0 miles).<br />
Change 2 2-51
<strong>TM</strong> 9-2329-<strong>283</strong>-<strong>10</strong><br />
Table 2-1. Preventive Maintenance Checks and Services for Model M915A1<br />
Item<br />
No.<br />
Interval<br />
Location<br />
item to<br />
Check/<br />
Service<br />
Crewmember<br />
Procedure<br />
Not Fully Mission<br />
Capable If:<br />
DRIVER<br />
23<br />
After<br />
Power<br />
Train (Engine,<br />
Transmission<br />
and<br />
Transfer)<br />
a. Check for fluid leakage and<br />
damage.<br />
(Oil Filters)<br />
b. Check for obvious signs of<br />
leakage.<br />
a. Any Class III leak<br />
of oil, fuel, or coolant.<br />
b. Any Class III oil<br />
leaks.<br />
(Radiator)<br />
c. Visually check for obvious<br />
coolant leakage, damaged or<br />
leaking hoses or damaged<br />
mounting brackets.<br />
c. Any Class III leak<br />
or damaged mounting<br />
brackets are evident.<br />
2-52 Change 2
<strong>TM</strong> 9-<strong>2320</strong>-<strong>283</strong>-<strong>10</strong><br />
Item<br />
No.<br />
Table 2-1. Preventive Maintenance Checks and Services for Model M915A1<br />
Interval<br />
Location<br />
ltem to<br />
Check/<br />
Service<br />
DRIVER<br />
Crewmember<br />
Procedure<br />
Not Fully Mission<br />
Capable If:<br />
2 After Drive a. Check for frayed/cracked a. Any drive belt is<br />
Belts and belts.<br />
broken, cracked to<br />
the belt fiber, has<br />
Fan<br />
more than one crack<br />
(1/8 inch in depth or<br />
50% of belt thickness),<br />
has frays more<br />
than 2 inches longer<br />
or excessive play.<br />
b. Check belt adjustment. Deflection<br />
should not be more<br />
than about 1/2 inch. If belts are<br />
loose, notify organizational<br />
maintenance.<br />
\<br />
BELT<br />
I<br />
Change 2 2-53
<strong>TM</strong> 9-<strong>2320</strong>-<strong>283</strong>-<strong>10</strong><br />
Table 2-1. Preventive Maintenance Checks and Services for Model M915A1<br />
Item<br />
No.<br />
Interval<br />
Location<br />
Item to<br />
Check/<br />
Service<br />
Crewmember<br />
Procedure<br />
Not Fully Mission<br />
Capable If:<br />
DRIVER<br />
24<br />
After<br />
Drive<br />
Belts and<br />
Fan<br />
c. Check pulley for damage or<br />
cracks.<br />
c. Any pulley damaged<br />
or cracked.<br />
Continued<br />
(Water Pump)<br />
d. Check for any obvious coolant<br />
leakage or damage.<br />
(Air Compressor)<br />
e. Check for obvious signs of<br />
oil leakage or damage (oil in air<br />
tanks).<br />
d. Any Class Ill coolant<br />
leak or damage is<br />
evident.<br />
e. Any Class III oil<br />
leak or damage is<br />
evident.<br />
2-54 Change 2
<strong>TM</strong> 9-<strong>2320</strong>-<strong>283</strong>-<strong>10</strong><br />
Table 2-1. Preventive Maintenance Checks and Services for Model M915A1<br />
Item Interval<br />
No.<br />
Location<br />
Item to<br />
Check/<br />
Service<br />
Crewmember<br />
Procedure<br />
Not Fully Mission<br />
Capable If:<br />
DRIVER<br />
5 After Fan<br />
Clutch<br />
and Actuator<br />
Engine must be off to perform<br />
this check.<br />
a. Check the fan clutch for a. Damage or loose<br />
damage. Look for loose hardware.<br />
attaching bolts.<br />
b. Inspect hoses for looseness b. Air leaks are obat<br />
the fittings and inspect for air served.<br />
leaks, fraying, cracks and abrasions.<br />
c. Check fan clutch actuator for c. Air leakage from<br />
signs of leaks and loose hose the exhaust port<br />
connections.<br />
when engine temperature<br />
is below<br />
185°F.<br />
Change 2 2-54.1
<strong>TM</strong> 9-<strong>2320</strong>-<strong>283</strong>-<strong>10</strong><br />
Table 2-1. Preventive Maintenance Checks and Services for Model M915A1<br />
Item<br />
No.<br />
Interval<br />
Location<br />
Item to<br />
Check/<br />
Service<br />
Crewmember<br />
Procedure<br />
Not Fully Mission<br />
Capable If:<br />
DRIVER<br />
26<br />
After<br />
Horns<br />
Check operation of horns if tactical<br />
situation permits.<br />
NOTE<br />
Operation of vehicles with inoperative<br />
horn may violate AR<br />
385-55.<br />
DRlVER<br />
27<br />
After<br />
Lights<br />
Check operation of headlights,<br />
taillights, turn signals, brake<br />
lights, and blackout lights.<br />
NOTE<br />
Operation of vehicles with malfunctioning<br />
lights may violate<br />
AR 385-55.<br />
DRIVER<br />
28<br />
After<br />
Air Reservoir<br />
and<br />
System<br />
Drain air reservoirscompletely<br />
Check air lines and reservoirs<br />
for leaks and damage.<br />
NOTE<br />
Vehicles should not have an<br />
automatic drain valve. Check<br />
vehicle and manually drain<br />
tank.<br />
Any leaking or damaged<br />
air lines or reservoirs<br />
or oil coming<br />
from air tanks.<br />
2-54.2 Change 2
<strong>TM</strong> 9-<strong>2320</strong>-<strong>283</strong>-<strong>10</strong><br />
Table 2-1. Preventive Maintenance Checks and Services for Model M915A1<br />
Item Interval<br />
No.<br />
Location<br />
Item to<br />
Check/<br />
Service<br />
Crewmember<br />
Procedure<br />
CAUTI<strong>ON</strong><br />
Not Fully Mission<br />
Capable If:<br />
DO NOT OVERFILL<br />
29 Weekly Steering Check pump for leakage. In- Any damage to hoses<br />
Pump spect pump hoses for deterio- or mounting. Class III<br />
and ration and leaks. leak evident.<br />
Reservoir<br />
Inspect for loose mounting or<br />
damage.<br />
With fluid hot and engine off,<br />
check fluid level in the steering<br />
pump for proper level. If level is<br />
low, add fluid to bring level to<br />
full mark on dipstick.<br />
Change 2 2-54.3
<strong>TM</strong> 9-<strong>2320</strong>-<strong>283</strong>-<strong>10</strong><br />
Table 2-1. Preventive Maintenance Checks and Services for Model M915A1<br />
Item<br />
No.<br />
Interval<br />
Location<br />
Item to<br />
Check/<br />
Service<br />
Crewmember<br />
Procedure<br />
Not Fully Mission<br />
Capable If:<br />
30<br />
Weekly<br />
Ether<br />
Quick-<br />
Start<br />
Assembly<br />
Inspect mounting for loose<br />
hardware. Check lines, fittings<br />
and canister for damage.<br />
Any reservoir damaged<br />
or leaking.<br />
2-54.4 Change 2
<strong>TM</strong> 9-<strong>2320</strong>-<strong>283</strong>-<strong>10</strong><br />
Table 2-1. Preventive Maintenance Checks and Services for Model M915A1<br />
Item<br />
No.<br />
Interval<br />
Location<br />
Item to<br />
Check/<br />
Service<br />
Crewmember<br />
Procedure<br />
Not Fully Mission<br />
Capable If:<br />
31 Weekly Tires a. Check tire tread depth. Tire worn to or be-<br />
Tread should not be worn be- yond wear bar.<br />
yond the level of the wear bar.<br />
b. Check for correct air pressure:<br />
Front - <strong>10</strong>5 psi, Rear - 95<br />
psi.<br />
32 Weekly Wheels, Ensure all wheel stud nuts are Any wheel stud is<br />
Studs tight using wheel stud nut missing or stud nut is<br />
and wrench and handle. loose.<br />
Nuts<br />
33 Weekly Air Systern<br />
With air system charged and<br />
engine off check air lines and<br />
fittings for leaks and damage.<br />
Any reservoir or fine<br />
damaged or leaking.<br />
34 Weekly Frame Visually inspect frame side Loose or broken side<br />
rails, crossmembers, cab sup- rails, cab supports,<br />
ports and underbody supports crossmembers, missfor<br />
loose or missing bolts and ing bolts or broken<br />
cracked or broken welds. welds.<br />
35 Weekly Fuel Check fuel tank, lines and fit- Class III leakage evi-<br />
Tank tings for leakage. dent.<br />
Change 2 2-54.5
<strong>TM</strong> 9-<strong>2320</strong>-<strong>283</strong>-<strong>10</strong><br />
Table 2-1. Preventive Maintenance Checks and Services for Model M915A1<br />
Item<br />
No.<br />
Interval<br />
Location<br />
Item to<br />
Check/<br />
Service<br />
Crewmember<br />
Procedure<br />
Not Fully Mission<br />
Capable If:<br />
36<br />
Weekly<br />
Trailer<br />
Coupling:<br />
a. Check electrical connectors<br />
and cable for damage.<br />
a. Electrical cable<br />
missing or damaged.<br />
b. Check trailer air lines for<br />
damage (front and rear).<br />
b. Air lines leaking or<br />
damaged.<br />
2-54.6 Change 2
<strong>TM</strong> 9-<strong>2320</strong>-<strong>283</strong>-<strong>10</strong><br />
Table 2-1. Preventive Maintenance Checks and Services for Model M915A1<br />
Item<br />
No.<br />
Interval<br />
Location<br />
ltem to<br />
Check/<br />
Service<br />
Crewmember<br />
Procedure<br />
Not Fully Mission<br />
Capable If:<br />
37 Weekly Spare Check spare tire davit for<br />
Tire Davit proper operation.<br />
38 Weekly Exhaust<br />
System<br />
WARNING<br />
Do not touch hot exhaust<br />
pipes with bare hands. Severe<br />
burns will result.<br />
Inspect exhaust stack and muffler<br />
for obvious damage and/or<br />
leaks and rusted through con-<br />
ditions.<br />
Pipe, clamp or hose<br />
damaged or missing.<br />
Change 2 2-54.7
<strong>TM</strong> 9-<strong>2320</strong>-<strong>283</strong>-<strong>10</strong><br />
Table 2-1. Preventive Maintenance Checks and Services for Model M915A1<br />
Item<br />
No.<br />
Interval<br />
Location<br />
Item to<br />
Check/<br />
Service<br />
Crewmember<br />
Procedure<br />
Not Fully Mission<br />
Capable If:<br />
39<br />
Weekly<br />
Batteries<br />
WARNING<br />
Don’t smoke, have open<br />
flames, or make sparks<br />
around the batteries, especially<br />
if the caps are off. Batteries<br />
can explode and cause<br />
injury or death.<br />
Remove ail jewelry such as<br />
rings, dog tags, bracelets,<br />
etc. If jewelry or tools contact<br />
battery terminal, a direct<br />
short may occur resulting In<br />
instant heating, damage to<br />
equipment and injury to personnel.<br />
Check electrolyte level. Electrolyte<br />
should be filled to the<br />
level/split ring in the battery<br />
filler opening (vent). If fluid is<br />
low, fill with distilled water to<br />
the level ring. Run vehicle at<br />
least 15 minutes to charge battery.<br />
If fluid is gassing (boiling)<br />
notify organizational maintenance.<br />
Battery is unserviceable,<br />
missing, leaking;<br />
terminals or cables<br />
are loose, corroded<br />
or hold downs<br />
are not secure.<br />
2-54.8 Change 2
<strong>TM</strong> 9-2328-<strong>283</strong>-<strong>10</strong><br />
Table 2-1. Preventive Maintenance Checks and Services for Model M915A1<br />
Item Interval<br />
No.<br />
Location<br />
Item to<br />
Check/<br />
Service<br />
Crewmember<br />
Procedure<br />
Not Fully Mission<br />
Capable If:<br />
40 Weekly Air<br />
Cleaner<br />
If NBC exposure is suspected,<br />
ail air filter media<br />
should be handled by personnel<br />
wearing protective<br />
equipment. Consult your<br />
unit NBC Officer or NBC NCO<br />
for appropriate handling or<br />
disposal instructions.<br />
Dust unloader miss-<br />
ing/damaged.<br />
Empty automatic dust unloader.<br />
41 Weekly Body Check for any rusted through<br />
condition or damage that would<br />
affect operation of the vehicle.<br />
42 Weekly Cab a. Visually inspect the cab a. Cab mounts or<br />
mounts for cracks, breaks and welds cracked or broken.<br />
damage.<br />
UNDER HOOD CHECKS<br />
WARNING<br />
After raising the hood, insert<br />
the s-shaped hook through<br />
the two matching holes in<br />
the prop channel to prevent<br />
the hood from accidently<br />
failing.<br />
b. Check for doors, latches<br />
and auxillary equipment for<br />
proper operation.<br />
Change 2 2-54.9
<strong>TM</strong> 9-<strong>2320</strong>-<strong>283</strong>-<strong>10</strong><br />
Table 2-1. Preventive Maintenance Checks and Services for Model M915A1<br />
Item<br />
No.<br />
Interval<br />
Location<br />
Item to<br />
Check/<br />
Service<br />
Crewmember<br />
Procedure<br />
Not Fully Mission<br />
Capable If:<br />
43<br />
Weekly<br />
Cooling<br />
System<br />
Check for leaks, damaged fins,<br />
loose or damaged hoses, debris<br />
or dirt in radiator fins.<br />
Class III leakage evident.<br />
44<br />
Weekly<br />
Turbocharger<br />
Inspect oil lines and fittings for<br />
signs of leaks or damage.<br />
Check air intake and exhaust<br />
ducts for loose bolts and<br />
clamps. Look for signs of hose<br />
damage.<br />
Class III leaks evident.<br />
Damage to intake<br />
or exhaust<br />
ducts.<br />
TURBOCHARGER<br />
45 Weekly<br />
Oil Bypass<br />
Filter<br />
Class III leakage evi-<br />
dent.<br />
Check lines and fittings for<br />
leaks, looseness and damage.<br />
OIL BYPASS FILTER<br />
\<br />
2-54.<strong>10</strong> Change 2
<strong>TM</strong> 9-<strong>2320</strong>-<strong>283</strong>-<strong>10</strong><br />
Section Ill. OPERATI<strong>ON</strong> UNDER USUAL C<strong>ON</strong>DITI<strong>ON</strong>S<br />
2-8. General.<br />
This section covers the procedures you will normally be using in operating the M915A1<br />
truck tractor. Specific instructions are given for starting, driving the truck, operating<br />
its components, stopping, parking, and shutting down the vehicle. Throughout this<br />
section, guidelines are given for adjusting control settings and driving techniques as<br />
well as the specific operating procedures so that you will be able to readily respond<br />
to different situations when you are operating your truck.<br />
2-9. Assembly and Preparation for Use.<br />
KNOW HOW TO USE <strong>THE</strong> FEATURES OF YOUR TRUCK IN <strong>THE</strong> SAFEST AND MOST<br />
EFFICIENT WAYS TO ACCOMPLISH YOUR MISSI<strong>ON</strong>.<br />
KNOW YOUR OPERATOR’S C<strong>ON</strong>TROLS AND INDICATORS BEFORE STARTING<br />
AND DRIVING YOUR TRUCK.<br />
WARNING<br />
This vehicle has been designed to operate safely and efficiently<br />
within the limits specified in this <strong>TM</strong>. Operation beyond these limits<br />
is prohibited LAW AR 70-1 without written approval from the Commander,<br />
U.S. Army Tank-Automotive Command, ATTN: AMSTA-CM-S,<br />
Warren, MI 48397-5000.<br />
a. PERFORM (B) PMCS.<br />
b. While sitting in your seat, adjust it as necessary for comfort and to ensure that<br />
all controls are within easy reach.<br />
Change 1 2-55
<strong>TM</strong> 9-<strong>2320</strong>-<strong>283</strong>-<strong>10</strong><br />
1. Ride Level Adjustment. While seated, pull up on the ratchet trip lever and<br />
operate the ratchet up and down to increase preload. Push ratchet trip lever<br />
down and operate ratchet to decrease preload. The seat will adjust to weights<br />
from 130 to 275 pounds. When properly adjusted, the preload indicator will<br />
be as shown in the figure, with the tip of the indicator flush with the seat frame.<br />
2. Backrest Angle Adjustment. Lift up on backrest and tilt forward or backward.<br />
Lower the backrest so that it engages one of three notched positions.<br />
3. Forward and Backward Seat Adjustment. Pull out on lever (towards door) and<br />
move seat forward or backward to adjust for your leg length. Seat may be<br />
moved forward or back 6 inches.<br />
4. Fasten seat belt and adjust for proper fit. Make sure companion seat belt is used if sameone is<br />
sitting there.<br />
2-<strong>10</strong>. Starting and Warmup (at temperatures of +32°F and above).<br />
a. MAKE SURE YOU APPLY <strong>THE</strong> PARKING BRAKE. Pull out to set brake. Push<br />
in to release brake.<br />
NOTE<br />
This truck has a neutral safety switch which prevents the<br />
engine from being started if the transmission is in gear,<br />
b. PLACE <strong>THE</strong> TRANSMISSI<strong>ON</strong> RANGE SELECTOR IN <strong>THE</strong> NEUTRAL (N)<br />
POSITI<strong>ON</strong>.<br />
c. TURN <strong>THE</strong> ENGINE RUN SWITCH TO <strong>THE</strong> <strong>ON</strong> POSITI<strong>ON</strong>. The low air pressure<br />
buzzer should sound and the following warning lamps should illuminate:<br />
ENG OIL (low Oil Pressure)<br />
LOW AIR PRESSURE<br />
PARK BRAKE<br />
d. Make sure the cab controlled sliding fifth wheel valve lever is in the LOCK position<br />
and the differential lock/unlock control is set to UNLOCK. The DIFF LOCK<br />
OUT lamp will be lit if the differential control is in the LOCK position,<br />
e. Make sure that all accessories are turned off and that the engine retarder system<br />
is disengaged (foot off pedal).<br />
WARNING<br />
The companion seat belt has nonlocking retractors. For proper use webbing must first<br />
be completely extended from the nonlocking retractor device. All excess webbing must<br />
then be adjusted at the buckle.<br />
2-56
<strong>TM</strong> 9-<strong>2320</strong>-<strong>283</strong>-<strong>10</strong><br />
CAUTI<strong>ON</strong><br />
If the engine fails to start within 15 seconds, release the<br />
START button and allow the starting motor to cool for<br />
two minutes before you try again to start the engine. Never<br />
depress the START button while the starting motor is still<br />
running from the previous try. If the engine fails to start<br />
after four attempts, refer to Table 3-1, Troubleshooting<br />
Procedures. Failure to follow these precautions can result<br />
in serious damage to the starting motor.<br />
f. Press the START button while slightly depressing the accelerator pedal. The<br />
engine should start. The engine temperature warning lamp should illuminate when<br />
the starter button is depressed. Do not depress Engine Start button for more<br />
than 15 seconds with two minute intervals between crankings.<br />
CAUTI<strong>ON</strong><br />
During warmup do not operate the engine above <strong>10</strong>00 rpm<br />
until normal engine idle speed oil pressure is indicated on<br />
the Engine Oil Pressure gage. this allows time for oil cirulation<br />
to reach the turbocharger and for engine parts<br />
to warm up gradually. (Minimum oil pressure at idle is <strong>10</strong><br />
psi).<br />
g. After the engine starts, maintain an idle speed of 580 to 650 rpm.<br />
CAUTI<strong>ON</strong><br />
If there is no indication of oil pressure after <strong>10</strong> seconds<br />
at idle, shut down the engine immediately by turning the<br />
key switch to OFF and refer to Table 3-1 for<br />
troubleshooting and corrective action. DO NOT ATTEMPT<br />
TO RESTART <strong>THE</strong> ENGINE UNTIL <strong>THE</strong> PROBLEM HAS<br />
BEEN CORRECTED.<br />
h. While performing step g., observe the oil pressure gage. At low idle speed the gage should indicate<br />
at least <strong>10</strong> psi at normal operating temperature.<br />
i. Observe all instruments for proper indications. Also, observe warning lamps for<br />
the following:<br />
The ENG OIL (Low Oil Pressure) Warning lamp should go off.<br />
The Low Air Pressure warning lamp and buzzer should go off.<br />
2-57
<strong>TM</strong> 9-<strong>2320</strong>-<strong>283</strong>-<strong>10</strong><br />
The Park Brake warning lamp should remain on until the Park Brake is released.<br />
Don’t release the park brake until Low Air Pressure lamp and buzzer shut<br />
Off.<br />
2-11. Cold Weather Starting (at temperatures below + 32°F).<br />
a. PERFORM (B) PMCS and install winter front over radiator grille.<br />
b. While sitting in your seat, adjust it as necessary for comfort and to ensure that<br />
all controls are within easy reach (refer to paragraph 2-9).<br />
c. MAKE SURE YOU APPLY <strong>THE</strong> PARKING BRAKE.<br />
NOTE<br />
The engine cannot be started by pushing or towing the<br />
truck.<br />
NOTE<br />
The truck has a neutral safety switch which prevents the<br />
engine from being started if the transmission is in gear.<br />
d. PLACE <strong>THE</strong> TRANSMISSI<strong>ON</strong> RANGE SELECTOR IN <strong>THE</strong> NEUTRAL (N)<br />
POSITI<strong>ON</strong>.<br />
e. Make sure all accessories are turned off and the engine retarder system is<br />
disengaged (foot off pedal).<br />
f. TURN <strong>THE</strong> KEY SWITCH TO <strong>THE</strong> <strong>ON</strong> POSITI<strong>ON</strong>. The low air pressure buzzer<br />
should sound and the following warning lamps should illuminate:<br />
ENG OIL (Low Oil Pressure)<br />
LOW AIR PRESSURE<br />
PARK BRAKE<br />
CAUTI<strong>ON</strong><br />
Never press the E<strong>THE</strong>R QUICK-START button without<br />
cranking the engine. A build up of ether fumes in the intake<br />
manifold system can result in combustion in the<br />
manifold.<br />
g. Depress the accelerator slightly while pressing the START button.<br />
2-58
<strong>TM</strong> 9-<strong>2320</strong>-<strong>283</strong>-<strong>10</strong><br />
h. Press the E<strong>THE</strong>R QUICK-START button for 4 to 5 seconds and release to<br />
automatically inject a set amount of ether into the intake manifold while cranking<br />
the engine. At temperatures below O°F it may be necessary to repeat steps<br />
g and h.<br />
i. After the engine starts, maintain an idle speed of 560-650 rpm.<br />
j. While performing step i, observe the oil pressure gage. At low idle speed the gage should indicate<br />
at least <strong>10</strong> psi at normal operating temperature.<br />
k. Observe all instruments for proper indications. Also, observe warning lamps for<br />
the following:<br />
The ENG OIL (Low Oil Pressure) warning lamp should go off.<br />
The Low Air Pressure warning lamp and buzzer should go off.<br />
The Park Brake warning lamp should remain on until the Park Brake is released.<br />
Don’t release the park brake until the low air pressure lamp and buzzer<br />
shut off.<br />
2-59
<strong>TM</strong> 9-<strong>2320</strong>-<strong>283</strong>-<strong>10</strong><br />
2-12. Driving.<br />
PUTTING YOUR TRUCK IN MOTI<strong>ON</strong><br />
a. Check gages to ensure that the truck is ready for operation.<br />
Engine oil pressure is at least <strong>10</strong> psi at low idle speed; a cold engine will read<br />
higher.<br />
Water temperatures is 160°F (180°F if pulling a load).<br />
Air pressure is <strong>10</strong>5 - 140 psi. At pressures below 60 psi the brakes will not<br />
release.<br />
The low air pressure warning lamp and buzzer should go off.<br />
Voltmeter should indicate normal (mid-range on the dial).<br />
Fuel gage should indicate that there is sufficient fuel for the intended mission.<br />
b. Turn on lamps, as appropriate, for existing conditions.<br />
c. Depress transmission selector lever pushbutton and move selector lever until gear<br />
range indicator alines with the desired position on the gear range dial. The vehicle<br />
will always start in 1st Gear and automatically shift up to the highest gear<br />
shown for the range selected. Use the 1-5 gear range for all normal driving<br />
conditions. For further information on gear range choices, see USE OF<br />
TRANSMISSI<strong>ON</strong> GEAR RANGE SELECTOR POSITI<strong>ON</strong>S which follows.<br />
2-60
<strong>TM</strong> 9-<strong>2320</strong>-<strong>283</strong>-<strong>10</strong><br />
d. RELEASE PARKING BRAKE by pushing in on parking brake control.<br />
e. TO MOVE TRUCK FORWARD, GRADUALLY DEPRESS ACCELERATOR PEDAL.<br />
USE OF TRANSMISSI<strong>ON</strong> GEAR RANGE SELECTOR POSITI<strong>ON</strong>S<br />
(R)<br />
(N)<br />
(1-5)<br />
Use this position to back the vehicle.<br />
Completely stop the vehicle before<br />
shifting from a forward gear to reverse<br />
or from reverse to forward. Reverse<br />
operation provides the greatest tractive<br />
advantage. Reverse has only one<br />
gear.<br />
Use this position when you start the<br />
engine. If the engine starts in another<br />
position the neutral safety switch is<br />
malfunctioning. Use neutral when the<br />
vehicle will be left unattended while<br />
the engine is running-ALWAYS<br />
APPLY <strong>THE</strong> PARKING BRAKE.<br />
This position is used for all normal<br />
driving conditions. The vehicle will<br />
start in 1st gear and as the accelerator<br />
is depressed, the transmission will up<br />
shift to 2nd gear, 3rd gear, 4th gear,<br />
and 5th gear automatically. As the<br />
vehicle slows down, the transmission<br />
will downshift to the correct gear<br />
automatically.<br />
(1-4,1-3,1-2) Occasionally the road, load, or traffic<br />
conditions will make it desirable to<br />
limit the automatic shifting to a lower<br />
range. When conditions return to normal,<br />
move the range selector back to<br />
(1-5).<br />
(1)<br />
This is low gear - use this position<br />
when pulling through mud and snow<br />
or driving on steep grades. Maximum<br />
engine braking is accomplished in this<br />
position.<br />
TA 236674<br />
2-61
<strong>TM</strong> 9-<strong>2320</strong>-<strong>283</strong>-<strong>10</strong><br />
BASIC DRIVING GUIDELINES<br />
AVOID UNNECESSARY ENGINE IDLING<br />
During long engine idling periods, the engine coolant temperature will fall below<br />
the normal operating range. The incomplete combustion of fuel in a cold engine<br />
will cause crankcase dilution, formation of lacquer or gummy deposits on the valves,<br />
pistons, and rings, and rapid accumulation of sludge in the engine. When prolonged<br />
engine idling is absolutely necessary, maintain at least 800 rpm.<br />
FREQUENTLY CHECK GAGES AND INDICATORS<br />
During normal driving conditions, at engine rpm range from 1800-2<strong>10</strong>0 rpm, engine<br />
oil pressure should be in a range from 35-50 psi.<br />
ENGINE OIL PRESSURE<br />
Engine water temperature should be above 160°F at the low end and up to 212°F<br />
at the high end (normal water temperature should be from 180°F to 200°F). If<br />
temperature reaches 220°F, shut down the engine and investigate the cause. The<br />
air pressure gages should register at least 90 psi. (The low air pressure warning<br />
lamp and buzzer come on at about 70 psi and below.) Normal operating range is<br />
<strong>10</strong>5-140 psi.<br />
ENGINE WATER AIR PRESSURE AIR PRESSURE<br />
TEMPERATURE GAGE-FR<strong>ON</strong>T GAGE-REAR<br />
TA 236675<br />
2-62
<strong>TM</strong> 9-<strong>2320</strong>-<strong>283</strong>-<strong>10</strong><br />
The transmission oil temperature gage should register a normal operating<br />
temperature range of <strong>10</strong>0 o F to 250°F. Check the battery voltmeter (normal range<br />
is 12 to 15 volts) and the fuel gage frequently. Check the rpm readings on the<br />
tachograph for the appropriate ranges, as illustrated and described in further detail<br />
on following pages.<br />
If the gages or indicators show any abnormal conditions, bring the truck to a safe<br />
stop, shut down the engine, and investigate the cause of the trouble.<br />
2-63
<strong>TM</strong> 9-<strong>2320</strong>-<strong>283</strong>-<strong>10</strong><br />
OPTIMUM USE OF ENGINE RPM<br />
It is not necessary to operate the engine at maximum rpm in order to get good<br />
performance. The engine will perform efficiently at the low and middle speed ranges<br />
and offer a definite fuel advantage at these reduced speeds. Control rpm through<br />
proper accelerator usage and by allowing the automatic transmission to tailor gear<br />
selection and engine speed to the load requirements and road speed desired.<br />
The operator who insists on running in low gear at top rpm when restricted to 25<br />
or 30 miles per hour is wasting fuel and creating noise unnecessarily.<br />
For all normal driving situations, use gear range 1-5 and let the automatic transmission<br />
select the proper gear for any given condition.<br />
AVOID OVERSTEERING<br />
Become familiar with the steering characteristics of the truck before attempting<br />
maneuvers in limited space.<br />
DRIVE EFFICIENTLY AND EC<strong>ON</strong>OMICALLY<br />
2-64
<strong>TM</strong> 9-<strong>2320</strong>-<strong>283</strong>-<strong>10</strong><br />
a. Driving at Highway Speed:<br />
When driving conditions permit, maintain the legal highway speed in gear range<br />
1-5. This permits running the engine below governed speed (preferably <strong>10</strong> to<br />
20 percent below governed speed). This is the engine’s cruising range and it<br />
affords better fuel economy than higher engine speeds. Recommended normal<br />
highway cruising range is 1,800 to 1,900 rpm.<br />
Operate in the economy range at full throttle if you are satisfied with the way<br />
the vehicle performs, However, there are times when hilly terrain, high winds<br />
or other conditions make it impractical to operate without reserve power. Such<br />
conditions are better met if the truck is operated in a lower gear range such as<br />
1-4 where reserve power is available for changes in terrain, wind, and traffic<br />
conditions.<br />
b. Driving in the City:<br />
Operate the truck in gear range 1-5 or 1-4 for normal city driving. This will keep<br />
engine rpm’s to a minimum and give greatest fuel economy. If traffic, road, or<br />
load conditions are extreme, you may find it desirable to limit the automatic<br />
upshifting to a lower gear range. In such cases, you may use gear range 1-3,<br />
but upshift by moving the shift lever to 1-4 or 1-5 as soon as conditions allow,<br />
for best economy.<br />
The transmission can be downshifted or upshifted manually, even at full throttle.<br />
Although there is no speed limitation on upshifting, there is on downshifting<br />
and Reverse. Manual downshifting should be avoided when the vehicle is above<br />
the maximum speed attainable in the next lower gear. Protection against improper<br />
downshifts and reverse shifts is provided, however, in the design of the transmission<br />
hydraulic system. If a downshift or reverse shift is made manually at too<br />
high a speed, the hydraulic system automatically prevents the shift from taking<br />
place until a safe lower speed is reached.<br />
2-65
<strong>TM</strong> 9-<strong>2320</strong>-263-<strong>10</strong><br />
c. Hauling Uphill:<br />
The engine works hardest when moving a loaded truck up a grade. Proper use<br />
of gear ranges will shorten the time on hills.<br />
Unless the hill is extreme, begin in gear range 1-5, and depress the accelerator<br />
pedal all the way downward. Keep it there as the truck moves up the grade.<br />
If there is enough power to maintain a satisfactory road speed, remain in this<br />
gear range and allow the transmission to upshift automatically.<br />
If the hill causes a steady decrease in speed and engine rpm approaches 1,700,<br />
manually downshift the range selector lever to the next lower range (1-4). Continue<br />
to downshift in this manner (1-3, 1-2, 1) to match the power demands of<br />
the grade. Once the hill has been topped, return the gear range selector to the<br />
1-5 position.<br />
For starting on maximum grades with maximum load, start in gear range 1, depress<br />
accelerator pedal to floor, and manually upshift the lever one range at a time,<br />
shifting when engine speed approaches 2,000 rpm.<br />
d. Using the Engine as a Braking Force:<br />
Your truck is equipped with an engine retarder system which enables the engine<br />
to act as a brake. The engine retarder should be used for descending grades,<br />
in-city traffic or in any situation where slowing is required but excessive use of<br />
the service brakes is not desirable. An example of this is wet or icy pavement.<br />
The following procedures should be applied when appropriate:<br />
1. Preset the ENGINE RETARDER switch on the instrument panel for the amount<br />
of engine retarding you expect to need. Then all you have to do to obtain<br />
the degree of engine retarding you need is remove your foot completely from<br />
the accelerator pedal and press the engine retarder foot switch pedal.<br />
2. Keep the truck in a gear range that gives you the rated rpm. The engine retarder<br />
provides the most braking this way.<br />
2-66
<strong>TM</strong> 9-<strong>2320</strong>-<strong>283</strong>-<strong>10</strong><br />
3. When starting a downgrade, select the gear range you would most likely use<br />
if you were climbing that same grade. If too much braking occurs select a<br />
lower setting with the ENGINE RETARDER switch or shift to a higher gear<br />
range. If not enough braking, select a higher setting with the ENGINE<br />
RETARDER switch or shift to a lower gear range.<br />
4. The engine retarder is very effective on ice, snow or slick roads by selecting<br />
a higher than normal gear range for the road speed. This will reduce rpm and<br />
provide lower engine braking. But first try selecting a lower setting with the<br />
ENGINE RETARDER switch. Engagement of differential lockup may also be<br />
helpful on slick surfaces (refer to instructions on using the Interaxle Differential<br />
Lock-up system).<br />
REVIEW OF DRIVING GUIDELINES<br />
a. After prolonged engine idle, run the engine up to full rpm momentarily to clean<br />
engine.<br />
b. The most practical engine rpm cruising speed for the highway is one that permits<br />
the legal road speed and also fuel economy. The recommended cruising<br />
range for the highway is 1,800 to 1,900 rpm.<br />
c. In the city and other reduced speed zones, match engine speed to the lower<br />
load requirement to conserve fuel and lower vehicle noise level. Select a gear<br />
range that permits operating in the area of not less than 1,500 rpm.<br />
d. When manually downshifting for power on a grade, wait for your shift points<br />
before making the shift. You will save both time and fuel if you do. If you maintain<br />
a satisfactory engine speed on a grade in your cruising gear, it is not necessary<br />
to downshift at all.<br />
e. Avoid overspeeding the engine. Never allow the engine to be pushed above<br />
governed rpm when rolling down a grade.<br />
f. Progressive downshifting, when starting down grade from the top of a hill, will<br />
provide better control around curves and turns, and will save brakes.<br />
USING TRAILER BRAKE HAND C<strong>ON</strong>TROL<br />
2-67
<strong>TM</strong> 9-<strong>2320</strong>-<strong>283</strong>-<strong>10</strong><br />
Use the trailer brake hand control to help avoid jackknifing. This control will apply the<br />
trailer brakes only. To apply the trailer brakes, pull down on the control. Be sure to<br />
return the control to its off position (all the way up) when you have finished using it.<br />
USING <strong>THE</strong> INTERAXLE DIFFERENTIAL LOCKUP<br />
Interaxle differential lockup provides additional traction by applying full torque to both<br />
rear axles. This feature should be used any time tractive conditions are poor, e.g., rainy<br />
or icy pavement.<br />
The Differential Lock/Unlock control is located on the instrument panel to the right<br />
of the driver. Use the following instructions to engage and disengage the system.<br />
Engage:<br />
1. Pull to the side of the road and stop the truck, but leave engine running.<br />
2. Place the Differential Lock/Unlock control in the LOCK position.<br />
3. Observe that the Differential Lockout indicator lamp comes on. The truck is now<br />
ready for operation.<br />
Disengage:<br />
1. Remove your foot from the accelerator pedal.<br />
2. Place the Differential Lock/Unlock control in the UNLOCK position.<br />
3. Observe that the Differential Lockup indicator lamp goes off. The system is now<br />
disengaged.<br />
2-68
<strong>TM</strong> 9-<strong>2320</strong>-<strong>283</strong>-<strong>10</strong><br />
2-13. Stopping the Truck and Shutting Down the Engine.<br />
a. LIFT YOUR FOOT OFF ACCELERATOR PEDAL and let reduction in engine rpm<br />
and automatic downshifting of transmission help to slow truck.<br />
b. APPLY SERVICE BRAKES to bring truck to a normal, complete stop.<br />
c. When truck is completely stopped, SHIFT TRANSMISSI<strong>ON</strong> RANGE SELECTOR<br />
TO NEUTRAL AND APPLY PARKING BRAKES.<br />
d. Idle engine for at least 3 minutes as indicated in CAUTI<strong>ON</strong>.<br />
e. TURN OFF ENGINE RUN SWITCH.<br />
2-14. Parking.<br />
a. Stop truck.<br />
b. Pull PARKING BRAKE control knob.<br />
c. If truck is parked on normal surfaces, parking brakes will provide sufficient holding<br />
force.<br />
2-15. Fifth Wheel.<br />
The M915A1 truck tractor is equipped with a cab controlled sliding fifth wheel for use<br />
with trailers having a 2-inch diameter kingpin. The fifth wheel is 36 inches in diameter<br />
and can oscillate, or pitch, 15 degrees fore and aft. Rated vertical load capacity is 40,000<br />
Ibs. Drawbar pull capacity is 150,000 Ibs. There are two manual kingpin lock releases<br />
on the left side of the fifth wheel as shown. To uncouple the trailer kingpin from the<br />
fifth wheel, first pull the Primary Lock Release Pull Ring, then pull the Secondary Lock<br />
Release Handle.<br />
2-69
<strong>TM</strong> 9-<strong>2320</strong>-<strong>283</strong>-<strong>10</strong><br />
TA 236677<br />
2-70
<strong>TM</strong> 9-<strong>2320</strong>-<strong>283</strong>-<strong>10</strong><br />
Moving the fifth wheel control lever inside the cab to the UNLOCK position operates<br />
an air cylinder under the fifth wheel which allows it to travel on the slide track rack<br />
a total of 12 inches forward or backward. This feature allows for adjustment of amount<br />
of cargo load carried by the rear tandem axles, within rated capacity.<br />
With a trailer coupled to the fifth wheel and the control in the UNLOCK position, adjustment<br />
is made by driving forward or backward slowly with the trailer brake hand<br />
control applied. After sliding adjustment is made, move the fifth wheel control lever<br />
to the LOCK position and release the trailer brake hand control.<br />
Use of the sliding fifth wheel for axle weight distribution requires scales to determine<br />
the weight being placed on each axle of the tractor and trailer. The normal position<br />
of the sliding fifth wheel is mid-way between the two rear tandem axles of the tractor<br />
with an unloaded or loaded trailer. From this starting position, weight on the front axle<br />
of the tractor can be increased by moving the sliding fifth wheel forward, and<br />
decreased by moving the sliding fifth wheel backward. See NORMAL LOCATI<strong>ON</strong> decals<br />
on both sides of the fifth wheel assembly for correct positioning when towing the M-872<br />
trailer.<br />
2-16. Coupling and Uncoupling.<br />
2-71
<strong>TM</strong> 9-<strong>2320</strong>-<strong>283</strong>-<strong>10</strong><br />
USE OF CHOCK BLOCKS WHEN COUPLING<br />
Remove chock blocks from their brackets and place them firmly behind the wheels<br />
on both sides of the semitrailer. On level ground, wheels of one axle should be blocked;<br />
if one side is blocked at the tire’s front, the opposite side should be blocked at<br />
the tire’s rear.<br />
EQUIPMENT CHECKS<br />
Check out your equipment as follows before backing under the semitrailer.<br />
a. Visually check the fifth wheel for cracked, damaged or missing parts,<br />
b. Check mountings for good condition and mounting bolts for tightness.<br />
c. Check that all moving parts and top of fifth wheel are properly lubricated.<br />
d. Check the lock guard for proper operation. Have it replaced if it is damaged or<br />
missing. Make sure both Primary Lock Release Pull Ring and Secondary Lock<br />
Release Handle are pulled out and lock guard is open to accept the trailer kingpin.<br />
e. Be sure that the fifth wheel ramps are down level with, or slightly below the<br />
angle of the pickup ramps.<br />
f. Prepare the semitrailer for coupling. Adjust the trailer height so that the fifth wheel<br />
picks up the trailer on the fifth wheel ramps.<br />
g. Be sure fifth wheel air slide control is set to the LOCK position<br />
TA 236678<br />
2-72
<strong>TM</strong> 9-<strong>2320</strong>-<strong>283</strong>-<strong>10</strong><br />
BACKING TOWARD <strong>THE</strong> SEMITRAILER AND COUPLING<br />
a. Make sure your tractor is alined straight in front of the semitrailer.<br />
b. Slowly back your truck under the semitrailer gooseneck so that the gooseneck<br />
contacts the fifth wheel guide ramps with the semitrailer kingpin centered as<br />
closely as possible in the throat of the fifth wheel. Stop, shift to Neutral, and<br />
apply Park Brake. Verify correct alinement as shown.<br />
c. Make sure you have contact with the semitrailer and the fifth wheel ramps. If<br />
the kingpin comes in too high, it will not engage in the fifth wheel correctly.<br />
2-73
<strong>TM</strong> 9-<strong>2320</strong>-<strong>283</strong>-<strong>10</strong><br />
d. Connect air hoses then enter cab and push in on the trailer air supply control<br />
knob and set the trailer brake hand control. See MAKING SEMITRAILER C<strong>ON</strong>-<br />
NECTI<strong>ON</strong>S which follows.<br />
e. Release park brake control, shift to Reverse (R) and back up slowly until the fifth<br />
wheel locks firmly to the kingpin. Shift range selector to First Gear (1) and pull<br />
against the load with the trailer brake hand control set. This will apply pressure<br />
against the kingpin and provide a test to insure a secure coupling.<br />
f. Shift range selector to Neutral (N) and apply park brake control. Leave cab and<br />
verify that the primary and secondary release controls on the fifth wheel are IN.<br />
g. The kingpin must be in the locks. You should not be able to see daylight between<br />
the upper fifth wheel plate of the semitrailer and the fifth wheel.<br />
h. Be sure the kingpin is not hooked over the front of the fifth wheel.<br />
i. Lift and secure the semitrailer landing gear and stow the crank handle in its holder<br />
as shown.<br />
MAKING SEMITRAILER C<strong>ON</strong>NECTI<strong>ON</strong>S<br />
a. Connect the appropriate electrical cable (12v for NORMAL Service Lamps and/or<br />
24v for BLACKOUT Lamp operation).<br />
b. Check operation of semitrailer lights.<br />
c. Check operation of semitrailer brakes using the hand control in the cab.<br />
d. Check all tires.<br />
e. Make sure that the air supply is adequate before you start out.<br />
2-74
<strong>TM</strong> 9-<strong>2320</strong>-<strong>283</strong>-<strong>10</strong><br />
2-75
<strong>TM</strong> 9-<strong>2320</strong>-<strong>283</strong>-<strong>10</strong><br />
USE OF CHOCK BLOCKS WHEN UNCOUPLING)<br />
UNCOUPLING FROM <strong>THE</strong> SEMITRAILER<br />
a. Shift range selector to Neutral (N) and apply parking brake. Verify that parking<br />
brake indicator lamp comes on. This will keep your tractor from running out from<br />
under the semitrailer when you unlock the fifth wheel.<br />
b. Pull out the trailer air supply valve.<br />
c. Leave cab and block trailer wheels with chocks as previously explained.<br />
d. Lower the semitrailer landing gear until the bases or wheels touch the ground.<br />
Then, turn the crank two more revolutions so that when the trailer is uncoupled,<br />
it will not drop down sharply and will be nearly level.<br />
e. Disconnect and secure the trailer air hoses and lamp cable(s).<br />
TA 236681<br />
2-76
<strong>TM</strong> 9-<strong>2320</strong>-<strong>283</strong>-<strong>10</strong><br />
f. Unlock the fifth wheel by first pulling the primary lock release pull ring. Then,<br />
pull the secondary lock release handle out.<br />
g. Enter cab and slowly pull the truck forward until the trailer kingpin is free from<br />
the lock guard and the landing gear is supporting the trailer weight. Then,stop<br />
and pause for a moment. Do not pull all the way out from under the trailer yet<br />
to ensure the landing gear will support the trailer. If it collapses, the rear frame<br />
area of your truck will be able to catch the front of the trailer before equipment<br />
damage occurs.<br />
h. Have a crew member observe semitrailer kingpin to make sure it clears properly<br />
during separation of the vehicles. Make sure the kingpin will clear the rear frame<br />
crossmember when you pull the tractor out from under the trailer.<br />
i. Pull slowly forward allowing the semitrailer gooseneck and kingpin to totally clear<br />
the rear frame area of your tractor.<br />
TA 236682<br />
2-77
<strong>TM</strong> 9-<strong>2320</strong>-<strong>283</strong>-<strong>10</strong><br />
PINTLE TOWING<br />
Trailer Connections<br />
1. Attach trailer or tow bar to the pintle hook.<br />
2. Connect the intervehicular electric cable from receptacle on rear of truck to the<br />
trailer.<br />
3. Connect air hoses from quick disconnect couplings (“glad hands”) at rear of truck<br />
to trailer or vehicle being towed.<br />
2-78<br />
TA 236683
<strong>TM</strong> 9-<strong>2320</strong>-<strong>283</strong>-<strong>10</strong><br />
MUD FLAP STOWAGE<br />
If you are using an M915A1 to tow an M127 trailer, you must remove the rear mud<br />
flaps from their normal location and stow them in brackets provided.<br />
1. Remove the lock pin from each mud flap.<br />
2. Remove the mud flaps by pulling up. You may have to tap upward on the spring<br />
with a hammer or similar tool.<br />
3. Insert the mud flaps in the stowage bracket on the right hand frame rail.<br />
4. Insert lock pins.<br />
5. When towing operations are complete reinstall the mud flaps, with lock pins,<br />
in normal position.<br />
TA 236664<br />
2-79
<strong>TM</strong> 9-<strong>2320</strong>-<strong>283</strong>-<strong>10</strong><br />
2-17. Operation of Auxiliary Equipment.<br />
TOWING PINTLE<br />
a. To open pintle:<br />
Remove cotter pin.<br />
Engage latch and lock in open position.<br />
b. To close and secure pintle:<br />
Push lock down. Latch will engage in closed position.<br />
Insert cotter pin to secure lock.<br />
TIE DOWNS AND LIFTING SHACKLES<br />
2-80
<strong>TM</strong> 9-<strong>2320</strong>-<strong>283</strong>-<strong>10</strong><br />
a. To lift the truck by crane or other means, attach a lifting sling of suitable strength<br />
to designated lifting shackles. Lift the truck slowly and have observers watch<br />
for any signs of cable failure, unusual load shifts and obstructions.<br />
b. During air or sea transport, secure the truck by attaching cables to the designated<br />
tie down points.<br />
PORTABLE FIRE EXTINGUISHERS<br />
To operate:<br />
a. Remove from bracket located at the rear of tool box to the left of the passenger<br />
seat.<br />
b. Hold extinguisher upright. Point nozzle toward base of fire and pull safety pin.<br />
c. Press top lever, discharging chemical at base of fire. Use a side-to-side motion.<br />
d. After using fire extinguisher, notify Organizational Maintenance that you need<br />
a replacement for the used extinguisher.<br />
TA 236666<br />
2-81
<strong>TM</strong> 9-<strong>2320</strong>-<strong>283</strong>-<strong>10</strong><br />
NATO SLAVE RECEPTACLE<br />
The NATO slave receptacle is mounted on the side of the battery box toward the front<br />
of the truck. This receptacle is used primarily as a cable connection for jump starting<br />
your truck or another truck.<br />
TA 236687<br />
2-82
<strong>TM</strong> 9-<strong>2320</strong>-<strong>283</strong>-<strong>10</strong><br />
2-18. Decals, Data Plates and Instruction Plates.<br />
a. Cab Interior.<br />
2-83
<strong>TM</strong> 9-<strong>2320</strong>-<strong>283</strong>-<strong>10</strong><br />
a. Cab Interior (Continued).<br />
b. Transmission Range Selector and Operator’s Seat.<br />
TA 236689<br />
2-84
<strong>TM</strong> 9-<strong>2320</strong>-<strong>283</strong>-<strong>10</strong><br />
c. Engine Compartment.<br />
d. Fifth Wheel Assembly (both sides).<br />
Change 1 2-85
<strong>TM</strong> 9-<strong>2320</strong>-<strong>283</strong>-<strong>10</strong><br />
Section IV. OPERATI<strong>ON</strong> UNDER UNUSUAL C<strong>ON</strong>DITI<strong>ON</strong>S<br />
WARNING<br />
This vehicle has been designed to operate safely<br />
and efficiently within the limits specified in this<br />
<strong>TM</strong>. Operation beyond these limits is prohibited<br />
IAW AR 70-1 without written approval from the<br />
Commander, U.S. Army Tank-Automotive Command,<br />
ATTN: AMSTA-CM-S, Warren, MI 48397-<br />
5000.<br />
This section covers many of the unusual conditions you may have to deal with while operating the<br />
M915A1 truck tractor. YOU SHOULD BECOME FAMILIAR WITH THIS SECTI<strong>ON</strong> AND WITH <strong>THE</strong><br />
REFERENCED PUBLICATI<strong>ON</strong>S. FM 55-30 C<strong>ON</strong>TAINS IMPORTANT INFORMATI<strong>ON</strong> <strong>ON</strong> DRIVER<br />
SELECTI<strong>ON</strong> AND TRAINING. FM 21-305 PROVIDES BASIC INSTRUCTI<strong>ON</strong> FOR OPERATORS OF<br />
WHEELED VEHICLES. You should use the material in these manuals along with the guidelines in this<br />
section to help you operate the M915A1 property under unusual conditions.<br />
2-19. Extreme Cold Weather.<br />
The M915A1 truck tractor, like other vehicles, needs special attention and care during<br />
periods of extreme cold weather. Remember that in extreme cold:<br />
Lubricants thicken.<br />
Batteries may lose power or freeze.<br />
Electrical insulation can crack causing short circuits.<br />
Fuel may not combine properly with air to form the necessary mixture for starting<br />
the engine.<br />
Metals and other materials may become hard or brittle.<br />
The cooling system requires adequate protection from extreme cold.<br />
Fuels, lubricants, and antifreeze compounds require special storage, handling, and<br />
use.<br />
You should READ AND BECOME FAMILIAR WITH <strong>THE</strong> MATERIAL IN <strong>THE</strong> FOLLOW-<br />
ING PUBLICATI<strong>ON</strong>S. They cover information you will need to know for operating a<br />
vehicle in extreme cold.<br />
TB 750-651 FM 31-70<br />
FM 9-207 FM 31-71<br />
<strong>TM</strong> 750-254<br />
2-86 Change 1
<strong>TM</strong> 9-<strong>2320</strong>-<strong>283</strong>-<strong>10</strong><br />
When you operate the M915A1 truck tractor in extreme cold, keep in mind the problems<br />
characteristic of operation in cold weather, and make sure your truck is adequately<br />
prepared and protected for the existing weather conditions. Follow these<br />
guidelines when you operate the M915A1 truck in conditions of extreme cold.<br />
ARCTIC WINTERIZATI<strong>ON</strong> KIT<br />
See TB9-<strong>2320</strong>-<strong>283</strong>-14 for complete information.<br />
STARTING OUT<br />
Be careful when you first start your truck. USE YOUR COLD WEA<strong>THE</strong>R STARTING<br />
PROCEDURE (paragraph 2-11), AND GIVE <strong>THE</strong> ENGINE TIME TO REACH AN<br />
OPERATING TEMPERATURE RANGE OF AT LEAST 140°F to 160°F.<br />
Adjust the amount of winter front coverage over the radiator grille to maintain a<br />
normal coolant operating range of 180° to 200°F.<br />
START DRIVING VERY SLOWLY. Be alert for the possibilities that TIRES MAY<br />
BE FROZEN TO <strong>THE</strong> GROUND, frozen in the shape of flat spots, or that one or<br />
more BRAKE SHOES MAY BE FROZEN and require preheating (notify Organizational<br />
Maintenance, if necessary).<br />
DRIVE VERY SLOWLY FOR ABOUT <strong>10</strong>0 YARDS, being careful not to let the engine<br />
stall. By starting out slowly and carefully you will be able to detect any initial problems<br />
caused by the cold weather, and your truck’s fluids and components will<br />
have a little extra warmup time.<br />
PARKING<br />
If you shut down your truck for a short period, PARK IN A SHELTERED AREA OUT<br />
OF <strong>THE</strong> WIND. If there is no shelter available, park so that truck does not face<br />
into the wind. Install the winter front.<br />
IF YOU PARK YOUR TRUCK FOR A L<strong>ON</strong>G SHUTDOWN PERIOD, TRY TO PARK<br />
<strong>ON</strong> HIGH GROUND, AND USE PLANKS OR BRUSH TO MAKE A RAISED AND<br />
RELATIVELY DRY SURFACE FOR <strong>THE</strong> TRUCK’S TIRES IN CASE WEA<strong>THE</strong>R C<strong>ON</strong>-<br />
DITI<strong>ON</strong>S WORSEN. KEEP <strong>THE</strong> TIRES OUT OF SNOW, WATER, ICE, AND MUD,<br />
IF POSSIBLE.<br />
CLEAN YOUR TRUCK OF SNOW, ICE, AND MUD as soon as possible after<br />
shutdown.<br />
IF YOUR TRUCK WILL BE PARKED FOR A L<strong>ON</strong>G PERIOD OF TIME during cold<br />
weather, have Organizational Maintenance personnel REMOVE BATTERIES AND<br />
STORE <strong>THE</strong>M IN A WARM PLACE. Fill fuel tank to guard against condensation.<br />
Drain any accumulated water from air reservoirs and fuel filter. Install the winter front.<br />
2-87
<strong>TM</strong> 9-<strong>2320</strong>-<strong>283</strong>-<strong>10</strong><br />
MAKE SURE TIRES ARE PROPERLY INFLATED.<br />
Have Organizational Maintenance personnel CHECK AND SERVICE <strong>THE</strong> COOLING<br />
SYSTEM to make sure your truck is adequately protected against extreme cold.<br />
Make sure that transmission is in neutral and that the truck’s tires are blocked before<br />
you leave the area.<br />
POWER STEERING<br />
The power steering system incorporates a cooler designed to reduce power steering<br />
fluid temperatures during normal or unusually warm conditions. In extremely cold<br />
weather, the cooler becomes restrictive and must be by-passed to prevent over pressure<br />
and possible rupture of the cooler. NOTIFY ORGANIZATI<strong>ON</strong>AL MAINENANCE TO<br />
PERFORM THIS MAINTENANCE WHEN 0°F TEMPERATURE OR BELOW IS<br />
EXPECTED.<br />
2-20. Extreme Hot Weather.<br />
During very hot weather you must watch for and guard against your truck overheating.<br />
You may have to alter your driving procedures, remembering that the following types<br />
of operation can cause the truck to overheat:<br />
Continuous high speeds.<br />
Long, hard pulls.<br />
Continuous use of low gear ranges on steep grades or in soft terrain.<br />
WHEN YOU OPERATE <strong>THE</strong> TRUCK IN EXTREME HOT WEA<strong>THE</strong>R<br />
Check water and transmission temperature gages and STOP YOUR TRUCK IF YOU<br />
NOTE ANY UNUSUALLY HIGH TEMPERATURE READING. Let the truck cool down.<br />
CHECK <strong>THE</strong> COOLING SYSTEM, AIR CLEANER, ENGINE OIL LEVEL, AND<br />
RADIATOR FINS FREQUENTLY. PERFORM NECESSARY SERVICES AND NOTIFY<br />
ORGANIZATI<strong>ON</strong>AL MAINTENANCE OF ANY UNUSUAL GAGE READINGS OR<br />
O<strong>THE</strong>R PROBLEMS.<br />
SHORTEN DIFFERENTIAL OIL CHANGE INTERVAL, REFER TO LO 9-<strong>2320</strong>-<strong>283</strong>-12.<br />
PROTECTING YOUR TRUCK WHEN You PARK IT<br />
PARK YOUR TRUCK UNDER COVER, IF POSSIBLE. This will help protect it against<br />
the effects of sun, sand, and dust, IF NO SHELTER IS AVAILABLE, COVER TRUCK<br />
WITH TARPAULINS. If you don’t have enough tarps to cover the entire truck, AR-<br />
RANGE TARPS AROUND ENGINE COMPAR<strong>TM</strong>ENT AND OVER RADIATOR to<br />
keep out sand and dust. COVER WINDOW GLASS to protect against sandblasting.<br />
2-88
<strong>TM</strong> 9-<strong>2320</strong>-<strong>283</strong>-<strong>10</strong><br />
CHECK TIRES and make sure all tires are inflated to proper pressures,<br />
CHECK FREQUENTLY FOR RUST AND FUNGUS GROWTH, both of which are common<br />
problems in hot, humid weather. CLEAN AND LUBRICATE YOUR TRUCK to<br />
help prevent deterioration.<br />
2-21. Unusual Terrain.<br />
BECOME FAMILIAR WITH <strong>THE</strong> PROCEDURES IN FM 21-305 for driving on unusual<br />
terrain. The M915A1 is not designed or intended for off-road use. If, however, you<br />
should find the adverse conditions described in this paragraph unavoidable, the recommended<br />
procedures given should be applied.<br />
In areas WHERE <strong>THE</strong> GROUND SURFACE PROVIDES POOR TRACTI<strong>ON</strong>, MOVE<br />
<strong>THE</strong> DIFFERENTIAL LOCK/UNLOCK LEVER TO <strong>THE</strong> LOCK POSITI<strong>ON</strong> (See instructions<br />
in paragraph 2-12).<br />
When you engage the locking system, driving axles receive equal torque.<br />
Use the differential lock/unlock control as needed for better traction. Disengage differential<br />
lockup when conditions are back to normal. For instructions on operating<br />
the inter-axle differential lockup system refer to paragraph 2-12.<br />
WOODS AND ROCKY TERRAIN<br />
MAKE SURE YOUR TRUCK CAN CLEAR ANY GROUND OBSTRUCTI<strong>ON</strong>S LIKE<br />
STUMPS OR ROCKS BEFORE YOU DRIVE OVER <strong>THE</strong>M. Such objects can damage<br />
components underneath the truck. Try to avoid hanging limbs which might cause<br />
damage.<br />
If you must drive over very rocky terrain, BE SURE YOU HAVE A SPARE WHEEL<br />
AND TIRE, since there will be a greater chance of tire punctures.<br />
MUD OR O<strong>THE</strong>R SOFT SURFACES<br />
Before you enter mud or other soft surfaces, check the conditions, and SELECT<br />
<strong>THE</strong> TRANSMISSI<strong>ON</strong> GEAR RANGE THAT YOU JUDGE APPROPRIATE TO GET<br />
YOUR TRUCK THROUGH the area. Enter the soft area at a medium speed for the<br />
gear range you have selected.<br />
MAINTAIN A STEADY PRESSURE <strong>ON</strong> ACCELERATOR PEDAL to keep your truck<br />
rolling until you reach solid ground again. Do not accelerate to the point of spinning<br />
the wheels.<br />
IF YOUR TRUCK GETS STUCK, TRY TO PULL OUT SLOWLY IN A LOW GEAR<br />
RANGE. YOU MAY HAVE TO PLACE BOARDS, BRUSH OR SIMILAR MATERIAL<br />
UNDER TIRES TO PROVIDE TRACTI<strong>ON</strong>.<br />
2-89
<strong>TM</strong> 9-<strong>2320</strong>-<strong>283</strong>-<strong>10</strong><br />
SAND<br />
If you operate the M915A1 in sand:<br />
MAINTAIN STEADY, EVEN MOVEMENT WITH <strong>THE</strong> TRANSMISSI<strong>ON</strong> IN LOWER<br />
GEAR RANGES. Try to keep your truck rolling without straining the engine and<br />
power train.<br />
If you get stuck, ADJUST TIRE PRESSURE to gain additional traction. Reduce<br />
pressure in the front tires to 50 psi and reduce pressure in the rear tires to 45 psi.<br />
After you have the truck out, inflate all tires to normal pressure.<br />
IF <strong>THE</strong> TRUCK BOGS DOWN even though you have reduced tire pressure, PLACE<br />
BOARDS, BRUSH, CANVAS, OR SIMILAR MATERIALS UNDER AND IN FR<strong>ON</strong>T<br />
OF TIRES AFTER SHOVELING A CLEAR PATH AHEAD OF EACH TIRE. This should<br />
provide better traction.<br />
IF <strong>THE</strong>SE EFFORTS FAIL and it becomes evident that you cannot free the truck<br />
under its own power, HAVE ANO<strong>THE</strong>R VEHICLE TOW YOUR TRUCK OUT.<br />
WHENEVER YOU OPERATE <strong>THE</strong> M915A1 IN SANDY OR DUSTY AREAS, YOU<br />
SHOULD:<br />
1. MAKE SURE EACH TIRE HAS A VALVE CAP.<br />
2. CHECK ENGINE AND TRANSMISSI<strong>ON</strong> TEMPERATURE AND ENGINE OIL<br />
PRESSURE GAGES FREQUENTLY.<br />
3. IF YOUR TRUCK OVERHEATS, STOP AND FIND OUT WHY. Service or notify<br />
Organizational Maintenance, if necessary.<br />
4. Make sure engine oil level tuba and transmission fluid level/filler tube are cleared<br />
before you remove the dipsticks to check fluids. CLEAN ACCUMULATI<strong>ON</strong>S<br />
OF SAND AND DIRT FROM AROUND ANY FLUID FILLER LOCATI<strong>ON</strong>S<br />
BEFORE YOU CHECK OR ADD FLUIDS.<br />
5. CLEAN SPOUTS OF FUEL C<strong>ON</strong>TAINERS AND AREAS AROUND FILLER CAP<br />
<strong>ON</strong> FUEL TANK BEFORE YOU ADD FUEL. UNDER EXTREME SANDY OR<br />
DUSTY C<strong>ON</strong>DITI<strong>ON</strong>S, FILTER FUEL WHEN YOU FILL TANK.<br />
6. WHEN YOU PARK <strong>THE</strong> TRUCK OVERNIGHT OR FOR ANY EXTENDED<br />
PERIOD in cold temperature, PARK SO THAT REAR OF TRUCK FACES<br />
TOWARD <strong>THE</strong> WIND, IF POSSIBLE, OR COVER <strong>THE</strong> RADIATOR AND ALL<br />
WINDOW GLASS WITH CANVAS.<br />
2-90
<strong>TM</strong> 9-<strong>2320</strong>-<strong>283</strong>-<strong>10</strong><br />
SNOW AND ICE<br />
If you have to operate the M915A1 truck in snow or on icy surfaces, follow the guidelines<br />
below:<br />
DRIVING<br />
ACCELERATE SLOWLY to avoid spinning the tires.<br />
DRIVE AT SLOWER SPEEDS.<br />
GIVE SIGNALS SO<strong>ON</strong>ER.<br />
LIGHTLY APPLY BRAKES <strong>ON</strong>CE OR TWICE TO GIVE EARLY WARNING OF IN-<br />
TENTI<strong>ON</strong> TO STOP. This will also help to avoid skidding.<br />
MAINTAIN AT LEAST DOUBLE <strong>THE</strong> NORMAL DISTANCE FROM <strong>THE</strong> VEHICLE<br />
AHEAD.<br />
KEEP WINDSHIELDS, WINDOWS, MIRRORS, HEADLAMPS, STOPLAMPS, AND<br />
BODY LAMPS CLEAN AND FREE OF SNOW AND ICE. Use defrosters and fans<br />
to help keep glass free of snow and ice.<br />
DESCEND MODERATE GRADES IN <strong>THE</strong> GEAR RANGE YOU WOULD NORMAL-<br />
LY USE TO ASCEND <strong>THE</strong> SAME GRADE. <strong>ON</strong> STEEP OR VERY SLIPPERY GRADES,<br />
LOCK DIFFERENTIAL, USE AT LEAST <strong>ON</strong>E GEAR RANGE LOWER AND ACTIVATE<br />
ENGINE RETARDING SYSTEM.<br />
After driving through slush or water, drive slowly and test the brakes. Keep driving<br />
slowly, maintaining moderate pressure on the service brake pedal to create a slight<br />
drag. When you are sure that your brakes are dried out and operating properly,<br />
resume normal speed.<br />
If you come to a difficult stretch of road, stop and inspect it carefully before driving<br />
on it. SELECT <strong>THE</strong> TRANSMISSI<strong>ON</strong> GEAR RANGE THAT YOU FEEL IS MOST<br />
LIKELY TO GET YOU OVER THAT STRETCH OF ROAD AND LOCK DIFFERENTIAL.<br />
If tires start spinning, stop, back up, and try again. If necessary, try rocking out<br />
by locking the differential, shifting to gear range 1-5 and accelerating lightly. Shift<br />
into reverse when your truck’s forward motion stops. Repeat this alternate shifting<br />
and acceleration until your truck can use the momentum created by the rocking<br />
motion to rock out of the slippery area. Make every effort not to spin tires and do<br />
not exceed 800-900 engine rpm.<br />
2-91
<strong>TM</strong> 9-<strong>2320</strong>-<strong>283</strong>-<strong>10</strong><br />
2-92<br />
STOPPING<br />
EASE UP <strong>ON</strong> ACCELERATOR, leaving truck in gear range already selected.<br />
LIGHTLY APPLY BRAKES <strong>ON</strong>CE OR TWICE, using engine brake to full advantage<br />
for braking effect. If towing a trailer, lightly apply trailer brake hand control first<br />
before applying service brakes. This will help slow your vehicle and prevent trailer<br />
jackknifing.<br />
Always AVOID SUDDEN BRAKING on slick,roads; this can cause your truck to skid<br />
and trailer to jackknife.<br />
PARKING<br />
IF YOU HAVE TO PARK <strong>THE</strong> TRUCK <strong>ON</strong> AN ICY, SLUSHY, WET OR MUDDY<br />
SURFACE, PLACE BOARDS, BRUSH OR O<strong>THE</strong>R MATERIAL THAT WILL PROVIDE<br />
TRACTI<strong>ON</strong> UNDERNEATH TIRES. This will guard against tires freezing to the ground<br />
or becoming pocketed in ice, and will provide some traction when your truck is<br />
started and moving again.<br />
Instead of setting parking brake, BLOCK TIRES AND LEAVE TRANSMISSI<strong>ON</strong> IN<br />
NEUTRAL.<br />
2-22. Fording.<br />
BEFORE FORDING<br />
Before you attempt fording with the M915A1 truck tractor, check the bottom surface<br />
condition of the water body. Make sure the bottom surface is hard enough that you<br />
can ford without exceeding the maximum fording depth of 20 inches. If the bottom<br />
surface is too soft, do not attempt fording. Ford to the maximum depth for short periods<br />
or short distances only.<br />
MAKE SURE ENGINE IS OPERATING PROPERLY before entering water.<br />
LUBRICATE UNPAINTED SURFACES to guard against rust and deterioration.<br />
ENGAGE DRIVELINE LOCKING SYSTEM. Move differential lock/unlock control to<br />
the LOCK position.<br />
DURING FORDING<br />
PUT TRANSMISSI<strong>ON</strong> IN A LOW GEAR RANGE. ENTER WATER SLOWLY.<br />
FORD AT SPEEDS OF NO MORE THAN 3-4 MPH.<br />
WHEN YOUR TRUCK EMERGES FROM WATER, APPLY BRAKES A FEW TIMES<br />
TO HELP DRY OUT BRAKE LININGS. Make sure brakes are working properly before<br />
driving truck at normal speeds.
<strong>TM</strong> 9-<strong>2320</strong>-<strong>283</strong>-<strong>10</strong><br />
AFTER FORDING<br />
During fording, water may enter your truck or its components. This water may have<br />
contaminated the fluid systems. You must make sure that any accumulated water is<br />
removed from your truck before it has a chance to cause damage to any systems,<br />
surfaces or equipment of the truck. As soon as possible after fording, CHECK YOUR<br />
TRUCK USING <strong>THE</strong> FOLLOWING GUIDELINES:<br />
LET <strong>THE</strong> ENGINE RUN FOR AWHILE to drive out any accumulated water.<br />
DRAIN OR DRY ANY AREAS <strong>ON</strong> YOUR TRUCK WHERE WATER HAS<br />
ACCUMULATED.<br />
CHECK EACH FLUID SYSTEM IN YOUR TRUCK for evidence of water contamination.<br />
If you find water in one or more fluid systems, notify Organizational Maintenance<br />
to drain, flush, and refill the contaminated system.<br />
REFER TO LO 9-<strong>2320</strong>-<strong>283</strong>-12. Notify Organizational Maintenance that an after-fording<br />
lubrication is needed.<br />
If necessary, NOTIFY ORGANIZATI<strong>ON</strong>AL MAINTENANCE OF ANY SERVICE OR<br />
REPAIRS YOUR TRUCK NEEDS before you return it to normal use. (Refer to afterfording<br />
maintenance procedures in chapter 3).<br />
TA 236991<br />
2-93
<strong>TM</strong> 9-<strong>2320</strong>-<strong>283</strong>-<strong>10</strong><br />
2-23. Manually Compressing the Spring Brake Power Springs.<br />
In the event of an air system pressure loss, spring brake units on the forward-rear axle<br />
will apply the forward-rear axle brakes. If the truck must be moved and there is not<br />
enough air system pressure to compress the power spring in the spring brake chambers<br />
and release the brakes, you will have to do this manually. The truck has two spring<br />
brakes.<br />
To compress the power spring in each unit:<br />
1. Using the adjustable wrench (See appendix B), remove the nut, washer and release<br />
stud from the stowage pocket of the failed chamber.<br />
2. Remove cap (dust-cover) from spring chamber.<br />
3. Insert the cross-pin end of the release stud into the opening (under the cap) in<br />
the spring chamber.<br />
TA 236692<br />
2-94
<strong>TM</strong> 9-<strong>2320</strong>-<strong>283</strong>-<strong>10</strong><br />
4. After the release stud has been inserted far enough to engage the pressure plate,<br />
turn the release stud ¼ turn to lock the cross-pin into the pressure plate.<br />
5. Install the washer and nut (used in stowage) on the release stud.<br />
6. Tighten nut until 2½ to 2¾ inches of the release stud remains above the nut.<br />
Spring brake is then fully caged.<br />
2-24. Manually Releasing (Resetting) the Spring Brake Power Springs.<br />
If the power springs in the spring brake chambers have been compressed, they should<br />
be reset before the truck is returned to service.<br />
To reset the spring brakes:<br />
1. Remove the nut and washer from the release stud.<br />
2. Disengage the cross-pin from the pressure plate and remove the release stud<br />
from the spring chamber.<br />
3. Replace cap over the hole in the spring chamber.<br />
4. Insert release stud in the stowage pocket and install the washer and nut.<br />
2-25. Towing the M915A1 Truck Tractor.<br />
If the truck must be towed with the rear wheels on the ground, notify Organizational<br />
Maintenance to send a wrecker or tow vehicle and a <strong>TM</strong> 9-<strong>2320</strong>-<strong>283</strong>-20 maintenance<br />
manual and tools needed to disconnect the transmission-to-forward rear axle prop shaft<br />
or to pull the rear axle shafts. Refer to FM 21-305 for general guidelines on vehicle<br />
recovery and use of warning kits and signals. FM 21-305, FM 20-22 and the following<br />
procedures provide instructions for towing.<br />
2-95
<strong>TM</strong> 9-<strong>2320</strong>-<strong>283</strong>-<strong>10</strong><br />
Preparation for towing:<br />
1. If possible, tow with the rear wheels suspended. This will eliminate the need<br />
for removal of prop shaft or axle shafts.<br />
2. If the vehicle must be towed with the rear wheels on the ground, set the interaxle<br />
differential control to the UNLOCK position (see paragraph 2-12) and remove<br />
the transmission-t&forward rear axle prop shaft at the universal joints. After<br />
removal of the prop shaft, secure the prop shaft to the truck undercarriage.<br />
3. If for some reason the prop shaft cannot be removed as described in step 2,<br />
remove all four axle shafts from the two rear axle assemblies. Secure the axle<br />
shafts to the vehicle so as to prevent damage.<br />
Use of tow bar:<br />
1. INSTALL MEDIUM DUTY TOWBAR (NSN 2540-00-378-2012) at pintle of towing<br />
vehicle and at towing eyes of truck tractor. MAKE SURE TOWING DEVICE<br />
IS L<strong>ON</strong>G ENOUGH TO allow for complete turning radius.<br />
TA 239993<br />
2-96
<strong>TM</strong> 9-<strong>2320</strong>-<strong>283</strong>-<strong>10</strong><br />
2. To maintain a supply of air for brake operation, connect air pressure hoses between<br />
the truck and the towing vehicle. Quick disconnect couplings are provided<br />
in the bumper for this purpose.<br />
3. PLACE TRANSMISSI<strong>ON</strong> IN NEUTRAL, RELEASE PARKING BRAKES, and turn<br />
on appropriate lights.<br />
4. TOWING VEHICLE SPEED WITH PROP OR AXLE SHAFTS REMOVED<br />
(DISTANCES BEY<strong>ON</strong>D ½ MILE) SHOULD BE RESTRICTED TO A MAXIMUM<br />
OF 15 MPH <strong>ON</strong> PRIMARY ROADS AND 8 MPH <strong>ON</strong> SEC<strong>ON</strong>DARY ROADS.<br />
2-97/2-98(blank)
<strong>TM</strong> 9-<strong>2320</strong>-<strong>283</strong>-<strong>10</strong><br />
CHAPTER 3<br />
MAINTENANCE INSTRUCTI<strong>ON</strong>S<br />
INDEX<br />
Page<br />
LUBRICATI<strong>ON</strong> INSTRUCTI<strong>ON</strong>S . . . . . . . . . . . . . . . . . . . . . . . . . . . . . . . 3-1<br />
TROUBLESHOOTING PROCEDURES . . . . . . . . . . . . . . . . . . . . . . . . . . 3-2<br />
Symptom Index ............................................. 3-2<br />
MAINTENANCE PROCEDURES.............................. 3-15<br />
Cleaning Your Truck ........................................ 3-15<br />
Fuel Tank . . . . . . . . . . . . . . . . . . . . . . . . . . . . . . . . . . . . . . . . . . . . . . . . . 3-15<br />
Cooling System . . . . . . . . . . . . . . . . . . . . . . . . . . . . . . . . . . . . . . . 3-16<br />
Changing a Wheel and Tire . . . . . . . . . . . . . . . . . . . . . . 3-19<br />
Batteries .................................................. 3-26<br />
MAINTENANCE UNDER UNUSUAL C<strong>ON</strong>DITI<strong>ON</strong>S ............ 3-27<br />
Extreme Cold Weather<br />
Extreme Hot or Humid<br />
...................................... 3-27<br />
Weather .............................. 3-27<br />
After Fording .............................................. 3-28<br />
After Operating on Unusual Conditions ........................ 3-28<br />
Section I. LUBRICATI<strong>ON</strong> INSTRUCTI<strong>ON</strong>S<br />
For complete information on your responsibilities in lubricating the M915A1 truck<br />
tractor, REFER TO <strong>THE</strong> LUBRICATI<strong>ON</strong> INSTRUCTI<strong>ON</strong>S IN LO 9-<strong>2320</strong>-<strong>283</strong>-12.<br />
The lube order will show you the lubrication points, explain what lubrication to<br />
use, and tell you the proper interval for lubricating each point.<br />
3-1
<strong>TM</strong> 9-<strong>2320</strong>-<strong>283</strong>-<strong>10</strong><br />
Section II. TROUBLESHOOTING PROCEDURES<br />
SYMPTOM INDEX<br />
AIR SYSTEM AND BRAKES<br />
Troubleshooting<br />
Procedure<br />
Page<br />
Air pressure to low . . . . . . . . . . . . . . . . . . . . . . . . . . . . . . . . . . . . 3-4<br />
Low pressure warning lamp comes on . . . . . . . . . . . . . . . . . . . . . . 3-4<br />
Trailer brakes will not apply . . . . . . . . . . . . . . . . . . . . . . . . . . 3-5<br />
Trailer brakes will not release . . . . . . . . . . . . . . . . . . . 3-5<br />
DRIVELINE AIR C<strong>ON</strong>TROL SYSTEM<br />
Will not disengage . . . . . . . . . . . . . . . . . . . . . . . . . . . . . . . . . . . . . . . 3-5<br />
SLIDING FIFTH WHEEL AIR C<strong>ON</strong>TROL SYSTEM<br />
Cannot be locked . . . . . . . . . . . . . . . . . . . . . . . . . . . . . . . . . . . . . . . . . . 3-6<br />
Cannot be unlocked . . . . . . . . . . . . . . . . . . . . . . . . . . . . . . . . . . . . . . . . 3-6<br />
ELECTRICAL SYSTEM<br />
One or more electrical systems not working . . . . . . . . . . . . . . . . . . . 3-7<br />
ENGINE<br />
Fails to crank . . . . . . . . . . . . . . . . . . . . . . . . . . . . . . . . . . . . . . . . . . 3-8<br />
Fails to start ............................................... 3-8<br />
Misfires or runs roughly ..................................... 3-8<br />
Will not idle ............................................... 3-8<br />
Overheats ................................................. 3-9<br />
Will not develop full power . . . . . . . . . . . . . . . . . . . . . . . . . . . 3-<strong>10</strong><br />
Low or no engine oil pressure . . . . . . . . . . . . . . . . . . . . . . . . . . . . 3-<strong>10</strong><br />
3-2
<strong>TM</strong> 9-<strong>2320</strong>-<strong>283</strong>-<strong>10</strong><br />
SYMPTOM INDEX (Continued)<br />
Troubleshooting<br />
Procedure<br />
Page<br />
Excessive oil consumption . . . . . . . . . . . . . . . . . 3-<strong>10</strong><br />
Excessive exhaust smoke . . . . . . . . . . . . . . . . . . . . . . . . 3-<strong>10</strong><br />
Truck speed not reduced while using engine retarder . . . . . 3-<strong>10</strong><br />
EXHAUST SYSTEM<br />
Excessive exhaust noise or fumes . . . . . . . . . . . . . . . . . . . . . . . 3-11<br />
STEERING<br />
Hard steering, shimmy or wandering . . . . . . . . . . . . . . . . . . . 3-11<br />
Hard to steer . . . . . . . . . . . . . . . . . . . . . . . . . . . . . . . . . . 3-11<br />
Slow or intermittent . . . . . . . . . . . . . . . . . . . . . . . . . . . . 3-11<br />
TRANSMISSI<strong>ON</strong><br />
Foamy fluid on dipstick . . . . . . . . . . . . . . . . . . . . . . . . . . . 3-12<br />
Shifts slowly or erratically . . . . . . . . . . . . . . . . . . . . . . . . . . 3-12<br />
Overheats . . . . . . . . . . . . . . . . . . . . . . . . . . . . . . . . . . . . . . . . . . . . . . . . 3-12<br />
Leaks fluid at breather . . . . . . . . . . . . . . . . . . . . . . . . . . . . . . . . 3-13<br />
WHEELS, TIRES, AND HUBS<br />
Wheel wobbles . . . . . . . . . . . . . . . . . . . . . . . . . . . . . . . . . . . . . . . . . . . 3-13<br />
Truck wanders or pulls to one side . . . . . . . . . . . . . . . . . . . . . 3-13<br />
Tires worn unevenly or excessively . . . . . . . . . . . . . . . . . . . . . . . . . . . 3-14<br />
The table lists the common malfunctions which you may find during the operation<br />
or maintenance of the M915A1 truck tractor or its components. You should<br />
perform the tests/inspections, and corrective actions, in the order listed.<br />
L<br />
The manual cannot list all malfunctions that may occur, nor all tests or inspections<br />
and corrective actions. IF A MALFUNCTI<strong>ON</strong> IS NOT LISTED OR IS NOT<br />
CORRECTED BY LISTED CORRECTIVE ACTI<strong>ON</strong>S, NOTIFY YOUR SUPERVISOR.<br />
3-3
<strong>TM</strong> 9-<strong>2320</strong>-<strong>283</strong>-<strong>10</strong><br />
Table 3-1. Troubleshooting<br />
MALFUNCTI<strong>ON</strong><br />
TEST OR INSPECTI<strong>ON</strong><br />
CORRECTIVE ACTI<strong>ON</strong><br />
AIR SYSTEM AND BRAKES<br />
1. AIR RESERVOlR PRESSURE LOW (WARNING LAMP AND BUZZER ARE <strong>ON</strong>).<br />
Step 1.<br />
Step 2.<br />
Step 3.<br />
Step 4.<br />
Check that all reservoir draincocks are closed.<br />
Close all draincocks.<br />
If tractor is not coupled to a trailer, check that trailer air supply<br />
control is pulled out (OFF).<br />
Pull trailer air supply control out.<br />
Check for possible air leaks at air reservoirs, hoses, fittings, and at<br />
intervehicular air hose connections.<br />
Notify Organizational Maintenance of any leaks.<br />
If tractor is coupled to semitrailer, and your tests and inspections<br />
of truck do not reveal any trouble with truck air system, troubleshoot<br />
semitrailer.<br />
If your tests, inspections, and corrective actions for both<br />
tractor and semitrailer do not solve the low air pressure<br />
problem, notify Organizational Maintenance.<br />
2. AIR SYSTEM LOSES PRESSURE DURING TRUCK OPERATI<strong>ON</strong> OR LOW AIR<br />
PRESSURE WARNING LAMP AND BUZZER COME <strong>ON</strong> DURING TRUCK<br />
OPERATI<strong>ON</strong>.<br />
Step 1.<br />
Step 2.<br />
Make sure that trailer air supply control is pulled out, operate<br />
engine until warning lamp and buzzer go off, and release parking<br />
brake. Stop engine and note reservoir pressure. Fully depress and<br />
hold service brake pedal for 2 minutes. Have crew member check<br />
for leaks. Reservoir pressure loss during 2-minute period should not<br />
exceed 5 psi.<br />
Close any open reservoir drains; make sure that trailer air<br />
supply control is pulled out. If you find any other leaks,<br />
notify Organizational Maintenance.<br />
If pressure loss in test above does not exceed 5 psi in 2 minutes,<br />
push in trailer air supply control to charge semitrailer air reservoirs<br />
and repeat the test procedure. Have crew member check semitrailer<br />
for leaks. Pressure loss should not exceed 5 psi in 2 minutes.<br />
Note any semitrailer air leaks. If reservoir pressure loss<br />
exceeds 5 psi in 2 minutes, troubleshoot the semitrailer.<br />
3-4
<strong>TM</strong> 9-<strong>2320</strong>-<strong>283</strong>-<strong>10</strong><br />
Table 3-1. Troubleshooting - Continued<br />
MALFUNCTI<strong>ON</strong><br />
TEST OR INSPECTI<strong>ON</strong><br />
CORRECTIVE ACTI<strong>ON</strong><br />
3. TRAILER BRAKES WILL NOT APPLY WHEN BRAKE PEDAL IS USED OR<br />
HAND C<strong>ON</strong>TROL <strong>ON</strong> STEERING COLUMN IS USED.<br />
Check to make sure that both intervehicular air hoses are connected securely<br />
to semitrailer connections (refer to paragraph 2-16).<br />
Connect air hoses securely to semitrailer. Charge trailer<br />
air system by pushing in trailer air supply control. If<br />
trouble continues, notify Organizational Maintenance.<br />
4. TRAILER BRAKES WILL NOT RELEASE.<br />
Step 1.<br />
Step 2.<br />
Step 3.<br />
Step 4.<br />
Check to make sure that trailer brake hand control is in OFF position.<br />
Move control to OFF position (refer to paragraph 2-3).<br />
Check to make sure that trailer air supply control is pushed in<br />
(charging position).<br />
If necessary, push in trailer air supply control.<br />
Check to make sure that both intervehicular air hoses (service to<br />
service and emergency to emergency) are securely connected<br />
between tractor and semitrailer.<br />
If necessary, connect hoses securely (refer to paragraph<br />
2-16).<br />
Check for obvious leaks in tractor air system (reservoirs, lines,<br />
intervehicular hoses).<br />
If you find any leaks in tractor air system, notify Organizational<br />
Maintenance. If you find no evidence of leaks<br />
or damage in truck components, troubleshoot semitrailer.<br />
DRIVELINE AIR C<strong>ON</strong>TROL SYSTEM<br />
5. DRIVELINE WILL NOT DISENGAGE (INDICATOR LAMP STAYS <strong>ON</strong>) WHEN<br />
DIFFERENTIAL LOCK/UNLOCK IS MOVED TO <strong>THE</strong> UNLOCK POSITI<strong>ON</strong>.<br />
Step 1.<br />
Step 2.<br />
Make sure you have given system time to disengage.<br />
Leave LOCK/UNLOCK control in UNLOCK position and<br />
wait for lamp to go off (refer to paragraph 2-1).<br />
If LOCK indicator lamp stays on after you have given system time<br />
to disengage, excessive driveline windup may have occurred.<br />
Back up slowly, and check to see whether LOCK indicator<br />
lamp goes off. If indicator lamp remains on, notify Organizational<br />
Maintenance.<br />
3-5
<strong>TM</strong> 9-<strong>2320</strong>-<strong>283</strong>-<strong>10</strong><br />
Table 3-1. Troubleshooting - Continued<br />
MALFUNCTI<strong>ON</strong><br />
TEST OR INSPECTI<strong>ON</strong><br />
CORRECTIVE ACTI<strong>ON</strong><br />
SLIDING FIFTH WHEEL AIR C<strong>ON</strong>TROL SYSTEM<br />
6. FIFTH WHEEL CANNOT BE LOCKED IN DESIRED POSITI<strong>ON</strong> WHEN LOCK/<br />
UNLOCK C<strong>ON</strong>TROL IS MOVED TO <strong>THE</strong> LOCK POSITI<strong>ON</strong>. (TRACTOR<br />
COUPLED TO TRAILER).<br />
Step 1. Check for obstructions (dirt/grease buildup or debris) between<br />
fifth wheel plate and slide track rack.<br />
Clean or remove objects from area as necessary and again<br />
check,<br />
Step 2. Make sure you have given air cylinder time to react.<br />
Leave LOCK/UNLOCK control in LOCK position, wait for<br />
<strong>10</strong> seconds, and again check (refer to paragraph 2-2).<br />
Step 3. If fifth wheel still will not lock after you have given air cylinder<br />
time to react/lock, fifth wheel may be hung-up between segments<br />
of slide track rack.<br />
Move LOCK/UNLOCK control to UNLOCK position,<br />
apply trailer brake hand control and place gear range<br />
selector in (1) or (R). Move tractor slowly forward or<br />
backward, an inch or two, stop and shift range selector to<br />
NEUTRAL (N). Move fifth wheel control to the LOCK<br />
position and check to see if fifth wheel is now locked.<br />
Release trailer brake hand control.<br />
Step 4. If fifth wheel still will not lock in position after Test Steps 1.,<br />
2., and 3.. check air line connections at cab mounted control and<br />
at air cylinder under fifth wheel plate. Check for sound of escaping<br />
air and loose fitting connections.<br />
If you find any leaks in air system connections at control<br />
or air cylinder, notify Organizational Maintenance.<br />
7. FIFTH WHEEL CANNOT BE UNLOCKED FROM PREVIOUS POSITI<strong>ON</strong> WHEN<br />
C<strong>ON</strong>TROL IS MOVED TO <strong>THE</strong> UNLOCK POSITI<strong>ON</strong>. (TRACTOR COUPLED TO<br />
TRAILER).<br />
Step 1.<br />
Check for obstructions (dirt/grease buildup or debris) between<br />
fifth wheel plate and slide track rack.<br />
Clean or remove objects from area as necessary and again<br />
check to see if fifth wheel position can be adjusted.<br />
3-6
<strong>TM</strong> 9-<strong>2320</strong>-<strong>283</strong>-<strong>10</strong><br />
Table 3-1. Troubleshooting - Continued<br />
MALFUNCTI<strong>ON</strong><br />
TEST OR INSPECTI<strong>ON</strong><br />
CORRECTIVE ACTI<strong>ON</strong><br />
Step 2.<br />
Step 3.<br />
Step 4.<br />
Make sure you have given air cylinder time to react.<br />
Leave LOCK/UNLOCK control in UNLOCK position and<br />
wait for cylinder to unlock (refer to paragraph 2-2).<br />
If fifth wheel position still cannot be adjusted after you have<br />
completed Steps 1. and 2.. fifth wheel may be hung-up between<br />
segments of slide track rack.<br />
Move LOCK/UNLOCK control to UNLOCK position, apply<br />
trailer brake hand control, and shift range selector to (1)<br />
or (R). Tap accelerator pedal to jog fifth wheel-to-slide<br />
track rack connection. Shift to NEUTRAL (N) and check<br />
to see if fifth wheel is now unlocked. Release trailer brake<br />
hand control.<br />
If fifth wheel position still cannot be adjusted after you have<br />
completed previous steps, check air line connections at cab<br />
mounted control and at air cylinder under fifth wheel plate.<br />
Check for sound of escaping air and loose fittings.<br />
If you find any leaks in air system connection fittings at<br />
control or air cylinder, notify Organizational Maintenance.<br />
ELECTRICAL SYSTEM<br />
8. <strong>ON</strong>E OR MORE OF <strong>THE</strong> ELECTRICAL SYSTEMS NOT WORKING.<br />
Step 1. Check to make sure appropriate switch(es) are in the <strong>ON</strong> position<br />
and if a lamp system that the blackout switch is in NORMAL<br />
position. If tractor is coupled to semitrailer and problem is with<br />
semitrailer lamp system, check to make sure that intervehicular<br />
cable is connected securely between tractor and semitrailer.<br />
Put appropriate switch(es) in the <strong>ON</strong> position. If necessary,<br />
securely connect intervehicular cable.<br />
Step 2. Check to make sure that none of the resettable circuit breakers<br />
have popped out indicating a momentary overload or short circuit.<br />
Open access panel and reset any circuit breakers which have<br />
popped out, by pushing in. Then recheck electrical system which<br />
was not operating. If resetting fails to correct the problem or the<br />
breaker button again pops out, notify Organizational Maintenance.<br />
Step 3. Troubleshoot semitrailer.<br />
If your tests, inspections, and corrective actions fail to solve<br />
problem, notify Organizational Maintenance.<br />
3-7
<strong>TM</strong> 9-<strong>2320</strong>-<strong>283</strong>-<strong>10</strong><br />
Table 3-1. Troubleshooting - Continued<br />
MALFUNCTI<strong>ON</strong><br />
TEST OR INSPECTI<strong>ON</strong><br />
CORRECTIVE ACTI<strong>ON</strong><br />
ENGINE<br />
9. ENGINE FAILS TO CRANK WHEN STARTER BUTT<strong>ON</strong> IS DEPRESSED.<br />
Step 1.<br />
Step 2.<br />
Step 3.<br />
Step 4.<br />
Step 5.<br />
Check to make sure the engine run key switch is in the <strong>ON</strong> (right)<br />
position.<br />
Move switch to <strong>ON</strong> position.<br />
Check to make sure transmission range selector lever is in<br />
NEUTRAL (N) position.<br />
Move selector lever to N.<br />
Inspect for dirty, loose or broken battery cables.<br />
Clean dirty cables, Tighten loose connections at batteries,<br />
ground, and starter. If cables are broken, notify Organizational<br />
Maintenance for replacement.<br />
Engine still fails to crank.<br />
Notify Organizational Maintenance.<br />
Check battery indicators, they should be green.<br />
If they are dark or yellow, notify Organizational Maintenance.<br />
<strong>10</strong>. ENGINE CRANKS BUT FAILS TO START.<br />
Step 1.<br />
Step 2.<br />
Step 3.<br />
Check to make sure fuel tank has fuel.<br />
Fill fuel tank, if required.<br />
Check air filter restriction gage.<br />
If gage indicates restriction (registers red instead of green),<br />
notify Organizational Maintenance.<br />
Check to make sure you are using ether starting aid (quick start)<br />
correctly (if temperature is below 32°F).<br />
Follow the proper cold weather starting procedures using<br />
ether starting aid (refer to paragraph 2-11).<br />
11. ENGINE STARTS, BUT MISFIRES OR RUNS ROUGHLY AFTER PROPER<br />
WARMUP PERIOD.<br />
Refer to Step 2 under Malfunction <strong>10</strong>.<br />
12. ENGINE DOES NOT IDLE PROPERLY.<br />
If idle is uneven, or if engine dies after starting, refer to Steps 2 and 3 under<br />
Malfunction <strong>10</strong>.<br />
3-8
<strong>TM</strong> 9-<strong>2320</strong>-<strong>283</strong>-<strong>10</strong><br />
Table 3-1. Troubleshooting - Continued<br />
MALFUNCTI<strong>ON</strong><br />
TEST OR INSPECTI<strong>ON</strong><br />
CORRECTIVE ACTI<strong>ON</strong><br />
13. ENGINE COOLANT TEMPERATURE GAGE INDICATES ENGINE IS OVER-<br />
HEATING (TEMPERATURE EXCEEDS 2<strong>10</strong>°F).<br />
Step 1.<br />
Step 2.<br />
Step 3.<br />
Step 4.<br />
Check coolant level in radiator. Sight glass should be full.<br />
Add coolant to fill radiator to proper level (refer to Paragraph<br />
3-3).<br />
Check for leaks in system.<br />
If you find leaks, notify Organizational Maintenance.<br />
Check to make sure radiator cooling fins are free of mud, ice, snow<br />
or debris.<br />
Remove any material clogging radiator. Shine flashlight<br />
through engine side and note light at radiator. Make sure<br />
cooling fins are not clogged.<br />
Check cooling fan drive belts for looseness.<br />
1/2 INCH OR LESS<br />
If belts are loose,<br />
notify Organizational Maintenance.<br />
Step 5.<br />
Step 6.<br />
Check to make sure engine oil is at proper level on dipstick.<br />
Add oil, if necessary (refer to paragraph 2-7).<br />
Check to make sure transmission fluid is at proper level on dipstick.<br />
Check transmission oil temperature gage (refer to paragraph 2-7).<br />
Add fluid, if necessary.<br />
TA 23669<br />
3-9
<strong>TM</strong> 9-<strong>2320</strong>-<strong>283</strong>-<strong>10</strong><br />
Table 3-1. Troubleshooting - Continued<br />
MALFUNCTI<strong>ON</strong><br />
TEST OR INSPECTI<strong>ON</strong><br />
CORRECTIVE ACTI<strong>ON</strong><br />
14. ENGINE DOES NOT DEVELOP FULL POWER,<br />
Step 1. Refer to Step 2 in Malfunction <strong>10</strong>.<br />
Step 2. Notify Organizational Maintenance for further engine troubleshooting<br />
and service interval maintenance.<br />
15. LOW OR NO ENGINE OIL PRESSURE (ENGINE OIL PRESSURE GAGE<br />
SHOULD REGISTER OIL PRESSURE WITHIN <strong>10</strong> TO 15 SEC<strong>ON</strong>DS AFTER<br />
ENGINE STARTS).<br />
Check engine oil level.<br />
Add oil to maintain proper level. If this does not solve oil<br />
pressure problems, notify Organizational Maintenance.<br />
16. EXCESSIVE ENGINE OIL C<strong>ON</strong>SUMPTI<strong>ON</strong>.<br />
Inspect engine for loose oil lines or leaks.<br />
Notify Organizational Maintenance of any leaks.<br />
17. EXCESSIVE EXHAUST SMOKE (AT NORMAL OPERATING RANGE OF<br />
180°F - 200°F).<br />
Step 1.<br />
Step 2.<br />
Check air cleaner restriction indicator.<br />
If indicator shows red, notify Organizational Maintenance.<br />
Open fuel tank filler cap and check for obvious fuel contamination.<br />
If fuel is so contaminated that you can see dirt or other foreign<br />
matter, notify Organizational Maintenance. If you smell unburned<br />
fuel in or around the engine/cab area, notify Organizational Maintenance.<br />
18. ENGINE RETARDER DOES NOT REDUCE TRUCK SPEED.<br />
Step 1.<br />
Step 2.<br />
Check to make sure the engine retarder system is engaged.<br />
Press down on the engine retarder foot pedal and take<br />
your foot completely off the accelerator pedal.<br />
Notify Organizational Maintenance if you are operating retarder<br />
control properly, but retarder system is not slowing your vehicle.<br />
3-<strong>10</strong>
<strong>TM</strong> 9-<strong>2320</strong>-<strong>283</strong>-<strong>10</strong><br />
Table 3-1. Troubleshooting - Continued<br />
MALFUNCTI<strong>ON</strong><br />
TEST OR INSPECTI<strong>ON</strong><br />
CORRECTIVE ACTI<strong>ON</strong><br />
19. EXCESSIVE EXHAUST NOISE OR FUMES NOTED IN OR NEAR CAB.<br />
Step 1.<br />
Step 2.<br />
Check exhaust manifold, pipes, flex tubes, muffler and stack for<br />
leaks and rusted-through areas with engine running.<br />
If any leaks are found, notify Organizational Maintenance<br />
for replacement of rusted leaking parts.<br />
Check exhaust system clamps for leakage with engine running.<br />
If leaks are noted, have Organizational Maintenance retorque<br />
clamp hardware or replace with new clamps.<br />
20. HARD STEERING, SHIMMY OR WANDERING.<br />
NOTE<br />
Check tire pressure when tires are cold.<br />
Step 1.<br />
Step 2.<br />
Step 3.<br />
Step 4.<br />
Step 5.<br />
Check to make sure tires are properly inflated.<br />
Front <strong>10</strong>5 psi<br />
Rear 95 psi<br />
Check for worn, loose or damaged parts of front axle or suspension.<br />
Check steering linkage, wheels, and truck frame.<br />
If you find any problems, notify Organizational Maintenance.<br />
Check for loose lug nuts.<br />
Tighten lug nuts and notify Organizational Maintenance<br />
to have lug nuts torqued.<br />
Check for loose or damaged shock absorbers.<br />
Notify Organizational Maintenance for loose or damaged<br />
shock absorbers.<br />
Check power steering fluid reservoir for proper fluid level.<br />
Add fluid if necessary (refer to LO 9-<strong>2320</strong>-<strong>283</strong>-12).<br />
21. TRUCK STEERING SLOW TO RESP<strong>ON</strong>D OR INTERMITTENT.<br />
Step 1.<br />
Check power steering fluid reservoir for proper fluid level.<br />
Add fluid if necessary (refer to LO 9-<strong>2320</strong>-<strong>283</strong>-12).<br />
3-11
<strong>TM</strong> 9-<strong>2320</strong>-<strong>283</strong>-<strong>10</strong><br />
Table 3-1. Troubleshooting - Continued<br />
MALFUNCTI<strong>ON</strong><br />
TEST OR INSPECTI<strong>ON</strong><br />
CORRECTIVE ACTI<strong>ON</strong><br />
Step 2.<br />
Check for proper operation of power steering.<br />
With truck standing still, turn wheels from stop to stop<br />
and hold against each stop for 5 seconds. Repeat this several<br />
times. If steering problem continues, notify Organizational<br />
Maintenance.<br />
22. FOAMY FLUID <strong>ON</strong> TRANSMISSI<strong>ON</strong> DIPSTICK.<br />
Check level on dipstick with engine at idle and truck on level ground.<br />
If transmission temperature is <strong>10</strong>0-250°F and fluid level is<br />
about the HOT RUN band or if temperature is below <strong>10</strong>0°F and<br />
fluid level is above COLD RUN band, notify Organizational<br />
Maintenance.<br />
23. SLOW OR ERRATIC TRANSMISSI<strong>ON</strong> ENGAGEMENT.<br />
Check dipstick to make sure fluid is at proper level (refer to LO 9-<strong>2320</strong>-<strong>283</strong>-<br />
12).<br />
If fluid is sufficient, notify Organizational Maintenance.<br />
24. TRANSMISSI<strong>ON</strong> FLUID TEMPERATURE GAGE INDICATES FLUID IS OVER-<br />
HEATING DURING NORMAL OPERATI<strong>ON</strong>. NORMAL OPERATING TEMPER-<br />
ATURE RANGE IS <strong>10</strong>0°F TO 250°F.<br />
Step 1.<br />
Step 2.<br />
Step 3.<br />
Check transmission fluid level on dipstick.<br />
Notify Organizational Maintenance if additional fluid is required.<br />
Check dipstick for evidence of foamy fluid.<br />
Refer to Malfunction 22.<br />
Check dipstick for evidence of discoloration that could indicate<br />
water/antifreeze in fluid.<br />
If there is discoloration of fluid, notify Organizational<br />
Maintenance.<br />
3-12
<strong>TM</strong> 9-<strong>2320</strong>-<strong>283</strong>-<strong>10</strong><br />
Table 3-1. Troubleshooting - Continued<br />
MALFUNCTI<strong>ON</strong><br />
TEST OR INSPECTI<strong>ON</strong><br />
CORRECTIVE ACTI<strong>ON</strong><br />
25. FLUID LEAKING FROM TRANSMISSI<strong>ON</strong> BREA<strong>THE</strong>R.<br />
Check for evidence of foamy fluid on transmission dipstick.<br />
Refer to Malfunction 22.<br />
26. WHEEL WOBBLES.<br />
Step 1.<br />
Step 2.<br />
Step 3.<br />
Check wheel for loose or missing lug nuts.<br />
Tighten loose nuts; notify Organizational Maintenance to<br />
torque nuts properly. If any lug is broken or missing,<br />
notify Organizational Maintenance.<br />
Check to see if wheel is bent.<br />
If wheel is bent, change wheel and tire assembly. Notify<br />
Organizational Maintenance that a replacement tire is<br />
needed.<br />
Check for loose, worn or damaged components.<br />
Notify Organizational Maintenance of any suspension<br />
problems.<br />
27. TRUCK WANDERS OR PULLS TO <strong>ON</strong>E SIDE <strong>ON</strong> LEVEL PAVEMENT.<br />
NOTE<br />
Check tire pressure when tires are cold.<br />
Step 1.<br />
Step 2.<br />
Check tire pressure.<br />
Front <strong>10</strong>5 psi<br />
Rear 95 psi<br />
Check to make sure that all tires are of the proper size and type.<br />
If tires are not properly matched, and if more than one<br />
tire is involved, notify Organizational Maintenance. If<br />
only one tire is improper and the spare tire is of the correct<br />
size and type, replace improper wheel and tire assembly<br />
with the spare and notify Organizational Maintenance that<br />
a replacement is needed.<br />
Step 3.<br />
Check for loose or damaged steering gear/linkage.<br />
If you find evidence of any problems, notify Organizational<br />
Maintenance.<br />
3-13
<strong>TM</strong> 9-<strong>2320</strong>-<strong>283</strong>-<strong>10</strong><br />
Table 3-1. Troubleshooting - Continued<br />
MALFUNCTI<strong>ON</strong><br />
TEST OR INSPECTI<strong>ON</strong><br />
CORRECTIVE ACTI<strong>ON</strong><br />
28. TIRES WORN UNEVENLY OR EXCESSIVELY.<br />
Step 1.<br />
Step 2.<br />
Step 3.<br />
Check cold tire pressure.<br />
Inflate or deflate tires to proper pressure.<br />
Inspect for bent wheel rims.<br />
If a rim is bent, replace that wheel and tire assembly (refer<br />
to paragraph 3-4).<br />
Check for loose wheel; worn, loose or damaged suspension components.<br />
Tighten nuts on loose wheel; notify Organizational Maintenance<br />
to properly torque wheel. Also, notify Organizational<br />
Maintenance for any suspension damage (refer to<br />
paragraph 3-4).<br />
3-14
<strong>TM</strong> 9-<strong>2320</strong>-<strong>283</strong>-<strong>10</strong><br />
Section III. MAINTENANCE PROCEDURES<br />
3-1. Cleaning Your Truck.<br />
• Never wipe off dirt when truck is dry.<br />
• Never wash truck in direct sunlight or if the truck exterior is hot to touch.<br />
• Wash your truck often using cold or warm water (never use hot water or any strong<br />
detergent). Do not use abrasives to remove mud and dirt from your truck.<br />
• While cleaning truck, look closely for evidence of rust or corrosion, bare metal or<br />
other exterior damage. If you find any problems, notify Organizational Maintenance<br />
to treat affected areas.<br />
• Remove loose dust and dirt from cab interior components.<br />
• Clean upholstery and seatbelts using a mild solution of warm water and soap (never<br />
use solvents or abrasives). Wipe dry all areas that you have washed.<br />
3-2. Fuel Tank.<br />
WARNING<br />
When filling the fuel tank with diesel fuel be sure the hose<br />
or nozzle or container contacts the filter tube on the fuel<br />
tank to carry off static electricity, Do not smoke or permit<br />
any open flame in the area of the truck while you are servicing<br />
the diesel fuel system. Failure to follow this warning<br />
can result in equipment damage or injury to personnel.<br />
a. SHUT DOWN ENGINE<br />
b. WIPE OFF DIRT AROUND FILLER CAP AND OPENING.<br />
c. REMOVE CAP.<br />
d. FILL TANK<br />
e. INSTALL FILLER CAP.<br />
3-15
<strong>TM</strong> 9-<strong>2320</strong>-<strong>283</strong>-<strong>10</strong><br />
3-3. Cooling System.<br />
• Engine has three drains as shown. Two of these also serve as vents to allow trapped<br />
air to escape when refilling the cooling system.<br />
3-16
<strong>TM</strong> 9-<strong>2320</strong>-<strong>283</strong>-<strong>10</strong><br />
• Radiator has one drain location at lower left hand side (right side if facing the<br />
truck). The draincock faces toward the engine on the back side of the radiator<br />
bottom tank.<br />
WARNING<br />
Let radiator cool before removing cap. Remove radiator<br />
cap in two steps. First, place a thick cloth over the cap<br />
and slowly rotate cap left to its first stop; pause, and let<br />
pressure escape from cooling system. Then push cap down<br />
and rotate cap farther left until you can remove it. Failure<br />
to follow this procedure can result in serious burns.<br />
a. TURN RADIATOR CAP TO <strong>THE</strong> LEFT AND REMOVE.<br />
b. TURN DRAINCOCKS AT <strong>THE</strong>RMOSTAT HOUSING, OIL<br />
COOLER, AND RADIATOR TO <strong>THE</strong> LEFT TO OPEN.<br />
c. WORKING FROM BEHIND <strong>THE</strong> RIGHT FR<strong>ON</strong>T WHEEL (left<br />
as seen by facing the truck), UNDERNEATH <strong>THE</strong> VEHICLE,<br />
REACH UP AND PULL <strong>THE</strong> WIRE C<strong>ON</strong>NECTOR FROM <strong>THE</strong><br />
E<strong>THE</strong>R SENDER UNIT.<br />
d. USING ADJUSTABLE WRENCH (SEE APPENDIX B), TURN<br />
E<strong>THE</strong>R SENDER TO <strong>THE</strong> LEFT TO REMOVE FROM ENGINE<br />
BLOCK DRAIN PORT.<br />
e. ALLOW ALL OLD COOLANT TO DRAIN.<br />
3-17
<strong>TM</strong> 9-<strong>2320</strong>-<strong>283</strong>-<strong>10</strong><br />
Fill the system with a mixture of clean water and ethylene glycol base permanent type<br />
antifreeze (Check with Organizational Maintenance for the proper mixture of water and<br />
antifreeze plus thread sealer for the ether sender unit).<br />
a. APPLY THREAD SEALER (SEE APPENDIX D) TO E<strong>THE</strong>R SENDER UNIT AND<br />
INSTALL E<strong>THE</strong>R SENDER UNIT IN ENGINE BLOCK DRAIN PORT BY TURN-<br />
ING TO <strong>THE</strong> RIGHT, TIGHTEN USING ADJUSTABLE WRENCH (SEE APPEN-<br />
DIX B), AND INSTALL WIRE C<strong>ON</strong>NECTOR. CLOSE RADIATOR DRAINCOCK,<br />
AND OPEN DRAINCOCK VENTS AT <strong>THE</strong>RMOSTAT HOUSING AND OIL<br />
COOLER.<br />
b. POUR COOLANT INTO RADIATOR FILLER NECK UNTIL SIGHT GLASS IS<br />
FULL AND COOLANT FLOWS FROM <strong>THE</strong> TWO DRAINCOCK VENTS. CLOSE<br />
TWO DRAINCOCK VENTS.<br />
c. START ENGINE AND ALLOW IT TO REACH NORMAL OPERATING TEM-<br />
PERATURE (180°F TO 200°F).<br />
d. RECHECK COOLANT LEVEL.<br />
e. PUT <strong>ON</strong> RADIATOR CAP.<br />
f. CHECK FOR LEAKS.<br />
3-18<br />
WARNING<br />
Let radiator cool before removing cap. Remove radiator<br />
cap in two steps. First, place a thick cloth over the cap and<br />
slowly rotate cap left to its first stop; pause, and let pressure<br />
escape from cooling system. Then rotate cap farther<br />
left until you can remove it. Failure to follow this procedure<br />
can result in serious burns.<br />
a. REMOVE RADIATOR CAP.<br />
b. OPEN <strong>THE</strong> DRAINCOCK VENT AT <strong>THE</strong> <strong>THE</strong>RMOSTAT HOUS-<br />
ING.<br />
c. ADD COOLANT UNTIL RADIATOR SIGHT GLASS IS FULL<br />
AND COOLANT FLOWS FROM DRAINCOCK VENT AT <strong>THE</strong><br />
<strong>THE</strong>RMOSTAT HOUSING. CLOSE DRAINCOCK VENT.<br />
d. PUT <strong>ON</strong> RADIATOR CAP.<br />
e. CHECK FOR LEAKS
<strong>TM</strong> 9-<strong>2320</strong>-<strong>283</strong>-<strong>10</strong><br />
3-4. Changing a Wheel and Tire Assembly.<br />
WARNING<br />
Use caution when lifting or handling a wheel and tire assembly.<br />
It is very heavy and could cause injury if improperly<br />
lifted or if it should fall on you.<br />
a. In case of a flat, stop the truck where there will be no hazard to other traffic or<br />
to the crew members changing the tire. Notify Organizational Maintenance as<br />
soon as possible so the spare wheel lug nuts can be torqued and the flat tire can<br />
be repaired and returned to service.<br />
b. A spare wheel and tire assembly is provided on the M915A1 truck tractor. A tire<br />
hoist is provided to raise and lower the spare wheel and tire assembly from the<br />
stowed position.<br />
c. When changing tires, do not substitute type or size tire unless all tires on the truck<br />
can be converted. Keep all tires the same.<br />
d. Tire changing requires two people: one to operate the winch and a second to handle<br />
the tire being winched up or down.<br />
WARNING<br />
When lowering the spare, the brake disk will get hot. Do<br />
NOT TOUCH IT. You can get burned.<br />
WARNING<br />
When paying out cable from the hoist, LEAVE FOUR<br />
FULL TURNS OF CABLE <strong>ON</strong> <strong>THE</strong> HOIST DRUM.<br />
Otherwise, a load on the cable could pull it loose from the<br />
drum and cause injury to personnel.<br />
CAUTI<strong>ON</strong><br />
If the brake starts smoking or shows other signs of<br />
overheating, stop operation and allow 15 minutes for<br />
brake to cool.<br />
a. Remove the Spare Wheel and Tire.<br />
3-19
<strong>TM</strong> 9-<strong>2320</strong>-<strong>283</strong>-<strong>10</strong><br />
1. With the spare still mounted in the tire carrier, run the end of the cable through<br />
a wheel opening, wrap it around the tire and secure the snap back to the cable.<br />
WARNING<br />
The winch automatically brakes when pressure is taken off<br />
the handle regardless of which direction it is being turned.<br />
If slack is needed to secure the cable around the wheel<br />
and tire, you must pull on the cable and turn the handle<br />
in the counterclockwise (lower) direction at the same time.<br />
Do not pay out more cable than is needed.<br />
2. Remove tractor to trailer electrical cable at tractor.<br />
3. Remove spare from the tire carrier by removing the wing nut and lowering the<br />
carrier side panel. Then remove the bolt. The spare can then be lifted on the<br />
side panel and moved out far enough to clear the truck for lowering.<br />
4. Take up slack in the cable by turning the handle in the clockwise (raise) direction.<br />
3-20
<strong>TM</strong> 9-<strong>2320</strong>-<strong>283</strong>-<strong>10</strong><br />
WARNING<br />
When paying out cable from the hoist, LEAVE FOUR<br />
FULL TURNS OF CABLE <strong>ON</strong> <strong>THE</strong> HOIST DRUM.<br />
Otherwise, a load on the cable could pull it loose from the<br />
drum and cause injury to personnel.<br />
5. Turn the handle counterclockwise to lower the spare. To stop the winch at any<br />
point, turn the handle in the clockwise (raise) direction until you hear two<br />
clicks from the internal ratchet then release the handle. The brake will automatically<br />
engage.<br />
NOTE<br />
Do not continue turning handle counterclockwise (lower)<br />
if cable is not paying out, otherwise handle will unscrew<br />
and the winch will become inoperative.<br />
6. As cable unwinds, guide the tire so it doesn’t suddenly drop from the truck,<br />
otherwise the cable may snap. As the tire lowers, guide it between the fuel tank<br />
and the fender. Lower the tire to the ground.<br />
NOTE<br />
If your hand should slip off the handle while lowering<br />
then spare, the brake will automatically engage.<br />
3-21
<strong>TM</strong> 9-<strong>2320</strong>-<strong>283</strong>-<strong>10</strong><br />
7. When the wheel and tire assembly is on the ground, detach the cable and leave<br />
it paved out in readiness for lifting the flat.<br />
b. Secure the flat tire and wheel in the stowed position.<br />
1. Secure the hoist cable to the wheel and tire assembly by inserting the hook<br />
through the opening in the wheel opposite the valve stem, wrapping the cable<br />
around the tire, and attaching the hook to the cable.<br />
2. To raise the wheel and tire assembly, turn the hoist crank clockwise (raise).<br />
You will hear a clicking sound made by the internal ratchet. If you stop turning<br />
the handle or if your hand should slip off the handle, the brake will apply automatically<br />
and hold the load.<br />
3. With one person operating the winch and the other guiding the tire, raise the<br />
tire and wheel assembly high enough to clear the lowered carrier side panel.<br />
Keep the tire away from the truck while raising it. Push it toward the center of<br />
the carrier, raise the side panel and secure with the bolt and wing nut. Connect<br />
electrical cable at tractor.<br />
3-22<br />
4. After the tire and wheel has been secured, the cable may be slightly loose but<br />
should remain attached to the wheel.<br />
5. Crank handle must be in the 12 o’clock or 6 o’clock position when not in use<br />
to avoid possible interference with trailer.
<strong>TM</strong> 9-<strong>2320</strong>-<strong>283</strong>-<strong>10</strong><br />
WARNING<br />
The hydraulic jack is intended only for lifting the truck,<br />
not for supporting the vehicle for performing maintenance.<br />
Do not get under the truck after it is raised unless it is<br />
properly supported with blocks or jack stands. Failure to<br />
observe this warning can result in serious injury.<br />
WARNING<br />
To prevent vehicle movement during jacking operations,<br />
apply parking brake and block opposite end wheels. If<br />
changing a front tire, block at back of rear-rear axle<br />
tires. If changing any rear tire, block at front of front<br />
tires.<br />
Instructions for Operating the Jack:<br />
1. TO RAISE JACK RAM, use slotted end of two piece handle to rotate RELEASE<br />
VALVE in jack base FIRMLY TO <strong>THE</strong> RIGHT.<br />
2. INSERT TWO PIECE HANDLE IN JACK SOCKET AND PUMP <strong>THE</strong> HANDLE<br />
TO RAISE JACK RAM.<br />
3. TO LOWER JACK RAM, ROTATE RELEASE VALVE SLOWLY TO <strong>THE</strong><br />
LEFT.<br />
Jack Placement:<br />
Front Axle -<br />
1. Place the jack so the jack ram is under the first small spring leaf just forward of<br />
the axle. Unscrew the jack ram (counterclockwise) all the way out (about<br />
3-1/2 inches).<br />
2. Raise the jack ram by pumping the handle until the tire clears the ground.<br />
3-23
<strong>TM</strong> 9-<strong>2320</strong>-<strong>283</strong>-<strong>10</strong><br />
Rear and Rear-Rear Axles -<br />
1. Pace the jack under the walking beam inboard of the walking beam trunnion<br />
support at either the forward-rear or rear-rear axle based on wheel to be removed.<br />
Turn the jack ram at the top approximately 2-1/2 inches out (counterclockwise)<br />
to contact walking beam.<br />
2. Raise the jack ram by pumping the handle until both duals clear the ground.<br />
1. CHECK TO MAKE SURE THAT TIRE TO BE INSTALLED HAS PROPER<br />
COLD AIR PRESSURE.<br />
Front - <strong>10</strong>5 psi<br />
Rear - 95 psi<br />
If necessary, put air in tires using the pneumatic hose which is stowed in the tool box.<br />
A quick-disconnect fitting is provided at the rear of the supply air reservoir for this purpose.<br />
Use your tire pressure gage, also stowed in the tool box, to verify correct tire<br />
pressure.<br />
2. HAVE SPARE WHEEL AND TIRE ASSEMBLY READY FOR QUICK IN-<br />
STALLATI<strong>ON</strong>.<br />
3. CHECK TO MAKE SURE THAT TRUCK WILL NOT ROLL WHEN AXLE IS<br />
RAISED. Block tires and set parking brake to prevent truck from rolling.<br />
3-24
<strong>TM</strong> 9-<strong>2320</strong>-<strong>283</strong>-<strong>10</strong><br />
NOTE<br />
All wheel nuts on hubs on the left side of the truck have<br />
left-hand threads (rotate nuts to the right to loosen, to the<br />
left to tighten). All wheel nuts on hubs on the right side of<br />
the truck have right-hand threads (rotate nuts left to<br />
loosen, right to tighten).<br />
4. BREAK LOOSE ALL NUTS OF WHEEL TO BE REMOVED.<br />
5. POSITI<strong>ON</strong> <strong>THE</strong> JACK AS INSTRUCTED IN <strong>THE</strong> JACKING PROCEDURE,<br />
<strong>THE</strong>N RAISE <strong>THE</strong> AXLE UNTIL <strong>THE</strong> TIRE CLEARS <strong>THE</strong> GROUND.<br />
6. REMOVE NUTS FROM WHEEL AND REMOVE OUTER WHEEL AND TIRE<br />
ASSEMBLY FROM HUB. INNER DUAL WHEEL AND TIRE ASSEMBLY <strong>ON</strong><br />
A REAR AXLE CAN NOW BE REMOVED IF REQUIRED.<br />
7. MOUNT SPARE WHEEL AND TIRE ASSEMBLY <strong>ON</strong> HUB AND INSTALL<br />
NUTS. (IF INSTALLING INNER DUAL WHEEL AND TIRE ASSEMBLY,<br />
MOUNT IT <strong>ON</strong> HUB FIRST, <strong>THE</strong>N MOUNT OUTER WHEEL AND TIRE<br />
ASSEMBLY <strong>ON</strong> HUB SO INNER VALVE STEMS ARE VISIBLE; AND IN-<br />
STALL NUTS.) RUN NUTS UP SNUGLY BUT DO NOT COMPLETE TIGHT-<br />
ENING AT THIS TIME.<br />
8. LOWER TRUCK. ALTERNATELY TIGHTEN NUTS AS SHOWN. You will<br />
not be able to overtighten the nuts due to the size wheel studs and length of<br />
the wrench handle. Notify Organizational Maintenance to properly torque the<br />
nuts.<br />
9. STOW HYDRAULIC JACK IN TOOL COMPAR<strong>TM</strong>ENT UNDER PASSENGER<br />
SEAT.<br />
3-25
<strong>TM</strong> 9-<strong>2320</strong>-<strong>283</strong>-<strong>10</strong><br />
3-5. Batteries<br />
Four 12-volt batteries connected in series-parallel supply the 12-volt electrical system<br />
of the M915A1 truck tractor and provide 24 volts for the starter motor and blackout<br />
lamp system. Check the batteries as described below.<br />
WARNING<br />
Never wear jewelry while working on batteries or any<br />
electrical systems. Metal jewelry could cause a short circuit.<br />
CAUTI<strong>ON</strong><br />
Always checks to make sure that the batteries are connected<br />
as shown in the illustration (series-parallel). Incorrectly<br />
connected batteries can cause severe damage to the truck's<br />
electrical system. Notify Organizational Maintenance if<br />
batteries are not connected correctly.<br />
• LATCHES<br />
Unfasten to remove battery box cover, then pull straight toward you to<br />
clear location pins.<br />
3-26
<strong>TM</strong> 9-<strong>2320</strong>-<strong>283</strong>-<strong>10</strong><br />
• CABLES AND C<strong>ON</strong>NECTI<strong>ON</strong>S<br />
Check all cables. Make sure they are in good condition. Check connections at terminals.<br />
Make sure they are secure. Also make sure cable clamps, terminals and battery tops are<br />
clean.<br />
• CASES<br />
Check battery cases. Make sure none is leaking. If you find leakage, notify Organizational<br />
Maintenance. Clean all affected areas.<br />
• TEST INDICATORS<br />
Check test indicators for green color. If any is completely dark or shows a yellow color,<br />
notify Organizational Maintenance.<br />
Section IV. MAINTENANCE UNDER UNUSUAL C<strong>ON</strong>DITI<strong>ON</strong>S<br />
3-6. Extreme Cold Weather.<br />
• In extreme cold weather, it is essential that your truck be in top condition, or it<br />
will be very difficult to get the truck started (if it is in poor condition, it may not<br />
start at all). Always make sure that you have carefully performed your PMCS, and<br />
be sure to report any problems to Organizational Maintenance.<br />
• Always give the engine extra time to reach its operating temperature range of<br />
180°F to 200°F.<br />
• For detailed guidance on antifreeze protection, lubrication, electrical system<br />
service, and other maintenance requirements for extreme cold weather operations,<br />
refer to FM9-207.<br />
3-7. Extreme Hot or Humid Weather.<br />
• Check the engine coolant level frequently; make sure that you maintain coolant at<br />
proper level. Check cooling system (radiator, hoses, lines) for possible leaks, and<br />
notify Organizational Maintenance of any problems.<br />
• Check tires frequently to make sure that each tire is inflated to the proper pressure<br />
(but be very careful not to overinflate tires). Wait until tires are cool before you<br />
adjust their pressures.<br />
3-27
<strong>TM</strong> 9-<strong>2320</strong>-<strong>283</strong>-<strong>10</strong><br />
• Hot, damp weather can cause your truck‘s materials to deteriorate. Watch for evidence<br />
of corrosion and rust on metals, and for mildew, mold or fungus growth on<br />
fabrics. Clean affected areas carefully and, if necessary, notify Organizational Maintenance<br />
of any needed parts.<br />
3-8. After Fording.<br />
• Always check for sand and mud after you have forded water with the M915A1<br />
truck tractor. Thoroughly clean the truck. If the fording depth was 21 inches or<br />
more, notify Organizational Maintenance and request after-fording maintenance<br />
on your truck.<br />
• If your truck has been operated in salt water, let the exterior dry, then check it for<br />
evidence of salt accumulation. Use a clean, damp cloth to immediately remove all<br />
salt accumulation.<br />
• If the salt water fording depth was 21 inches or more, notify Organizational Maintenance<br />
that your truck needs after-fording maintenance and that you were operating<br />
your truck in salt water.<br />
3-9. After Operating on Unusual Terrain.<br />
• After operating your truck in mud, clean all accumulated mud from your truck.<br />
Check and clean radiator if mud is stuck in cooling fins.<br />
• If you have been operating in sandy or dusty areas, frequently check the air cleaner<br />
restriction indicator and the air cleaner element, radiator cooling fins, and all<br />
fluids in your truck’s systems. If you find sand or dirt in any fluid, notify Organizational<br />
Maintenance. Any time you have operated your truck in sandy or dusty<br />
areas, notify Organizational Maintenance that your truck needs special servicing<br />
because of operation in sand or dust.<br />
3-28
APPENDIX A<br />
<strong>TM</strong> 9-<strong>2320</strong>-<strong>283</strong>-<strong>10</strong><br />
REFERENCES<br />
A-1. Publication Indexes.<br />
Consolidated index of Army Publications and Blank Forms DA Pam 3<strong>10</strong>-1<br />
U.S. Army Equipment index of Modification Work Orders DA Pam 750-<strong>10</strong><br />
A-2. Forms.<br />
The following forms pertain to this material. (Refer to DA Pamphlet 3<strong>10</strong>-1 for index of blank forms).<br />
Standard Form 46, US Government Motor Vehicle Operator's Identification Card.<br />
Standard Form 91, Operator Report of Motor Vehicle Accidents.<br />
Recommended Changes to DA Publications and Blank Forms (DA Form 2028).<br />
Refer to <strong>TM</strong> 38-750, The Army Maintenance Managmenet Systems (TAMMS), for instructions on the use of<br />
maintenance forms pertaining to this material.<br />
A-3. Other Publications.<br />
The following publications contain information pertinent to the major item of material<br />
and associated equipment.<br />
a. Operating Vehicle.<br />
Army Motor Transport Units and Operations . . . . .<br />
Manual for the Wheeled Vehicle Driver . . . . . .<br />
b. Maintenance and Repair.<br />
Lubrication Order for M915A1 Truck Tractor . .<br />
Organizational Maintenance for M915A1 Truck Tractor .<br />
Organizational Maintenance Repair Parts and Special Tools<br />
List for M915A1 Truck Tractor . . . . . . . . . . . . . .<br />
Direct Support and General Support Maintenance<br />
Manual for M915A1 Truck Tractor. . . . . . . . . .<br />
Direct and General Support Repair Parts and Special Tools<br />
List for M915A1 Truck Tractor. . . . . . . . . . .<br />
. . . FM 55-30<br />
. . . FM 21-305<br />
. . LO 9-<strong>2320</strong>-<strong>283</strong>-12<br />
. . <strong>TM</strong> 9-<strong>2320</strong>-<strong>283</strong>-20<br />
. . <strong>TM</strong> 9-<strong>2320</strong>-<strong>283</strong>-20P<br />
. <strong>TM</strong> 9-<strong>2320</strong>-<strong>283</strong>-34<br />
. . <strong>TM</strong> 9-<strong>2320</strong>-<strong>283</strong>-34P<br />
A-1
<strong>TM</strong> 9-<strong>2320</strong>-<strong>283</strong>-<strong>10</strong><br />
APPENDIX A (Continued)<br />
Direct and General Support Maintenance Manual and<br />
Repair Parts and Special Tools List for Diesel Engine<br />
in M915A1 Truck Tractor<br />
Organizational Care, Maintenance and Repair of Pneumatic<br />
Tires, Inner Tubes, and Radial Tires. . . . . . .<br />
Description, Use, Bonding Techniques, and Properties<br />
of Adhesives. . . . . . . .<br />
Materials Used for Cleaning, Preserving, Abrading, and<br />
Cementing Ordnance Materiel and Related Materiels<br />
Including Chemicals. . . . . .<br />
Metal Body Repair and Related Operations . .<br />
Welding Theory and Application . . . . . . . . . .<br />
Painting Instructions for Field Use . . .<br />
Inspection, Care, and Maintenance of Antifriction<br />
Bearings. . . . . . . . . . . . .<br />
Use of Antifreeze Solutions and Cleaning Compounds in<br />
Engine Cooling Systems . . . . . . . . .<br />
Cooling Systems: Tactical Vehicles. . . . .<br />
. . . <strong>TM</strong> 9-2815-225-34&P<br />
. . . <strong>TM</strong> 9-26<strong>10</strong>-200-20<br />
. . . TB ORD <strong>10</strong>32<br />
. . . <strong>TM</strong> 9-247<br />
. . . FM 43-2<br />
. . . <strong>TM</strong> 9-237<br />
. . . <strong>TM</strong> 43-0139<br />
. . . <strong>TM</strong> 9-214<br />
. . . TB 750-651<br />
. . . <strong>TM</strong> 750-254<br />
c. Cold Weather Operation and Maintenance.<br />
Basic Cold Weather Manual . . . . . . . . . FM 31-70<br />
Northern Operations . . . . . . . . . . . . . . FM 31-71<br />
Operation and Maintenance of Ordnance Materiel in<br />
Extreme Cold Weather (0° to -65°F) . . . . . . . . . FM 9-207.<br />
M915A1 Winterization Kit . . . . . . . . TB 9-<strong>2320</strong>-<strong>283</strong>-14<br />
d. Decontamination.<br />
Chemical, Biological, and Radiological (CBR)<br />
Decontamination. . . . . . . . . . . . <strong>TM</strong> 3-220<br />
NBC(Nuclear, Biological, and ChemicaI) Defense FM 21-40<br />
e. General.<br />
Principles of Automotive Vehicles ..................... <strong>TM</strong> 9-8000<br />
Camouflage .................................... FM 5-20<br />
Procedures for Destruction of Tank-Automotive Equipment<br />
to Prevent Enemy Use ........................... <strong>TM</strong> 750-244-6<br />
Administrative Storage of Equipment ................... <strong>TM</strong> 740-90-1<br />
Vehicle Recovery Operations .......................................... FM 20-22<br />
f. Warranty, M915A1 TB 9-2300-295-15/20<br />
A-2
<strong>TM</strong> 9-<strong>2320</strong>-<strong>283</strong>-<strong>10</strong><br />
APPENDIX B<br />
COMP<strong>ON</strong>ENTS OF END ITEM AND BASIC ISSUE ITEMS LIST<br />
SECTI<strong>ON</strong> I. INTRODUCTI<strong>ON</strong><br />
B-1. Scope.<br />
This appendix lists integral components of and basic issue items for the M915A1<br />
Truck Tractor to help you inventory items required for safe and efficient operation.<br />
B-2. General.<br />
The Components of End Item and Basic Issue Items Lists are divided into the following<br />
sections:<br />
a. Section II, Components of End Item (None Authorized for M915A1).<br />
b. Section III, Basic Issue Items. These are the minimum essential items required<br />
to place the M915A1 truck tractor in operation, to operate it, and to perform emergency<br />
repairs. Although shipped separately packed, BII must accompany the M915A1<br />
truck tractor during operation and whenever it is transferred between accountable officers.<br />
The illustrations will assist you with hard-to-identify items. This manual is your<br />
authority to request/requisition replacement BII, based on TOE/MTOE authorization of<br />
the end item. The Bll items listed in this appendix are located on the vehicle for you in<br />
Appendix E.<br />
B-3. Explanation of Columns.<br />
The following provides an explanation of columns found in the tabular listings.<br />
a. Column (1) - Illustration Number (Illus Number). This column indicates the number<br />
of the illustration in which the item is shown.<br />
b. Column (2) - National Stock Number. Indicates the National Stock Number<br />
assigned to the item and will be used for requisitioning purposes.<br />
B-1
<strong>TM</strong> 9-<strong>2320</strong>-<strong>283</strong>-<strong>10</strong><br />
c. Column (3) - Description. Indicates the Federal item name and, if required, a<br />
minimum description to identify and locate the item. The last line for each item indicates<br />
the FSCM (in parentheses) followed by the part number.<br />
d. Column (4) - Unit of Measure (U/M). Indicates the measure used in performing<br />
the actual operational/maintenance function. This measure is expressed by a two-character<br />
alphabetical abbreviation (e.g., ea., in., pr).<br />
e. Column (5) - Quantity required (Qty rqr). Indicates the quantity of the item<br />
authorized to be used with/on the equipment.<br />
SECTI<strong>ON</strong> II. COMP<strong>ON</strong>ENTS OF END ITEM<br />
None authorized for M915A1 Truck Tractor.<br />
B-2
<strong>TM</strong> 9-<strong>2320</strong>-<strong>283</strong>-<strong>10</strong><br />
SECTI<strong>ON</strong> Ill. BASIC ISSUE ITEMS<br />
(1) (2)<br />
lllus National Stock<br />
Number Number<br />
(3)<br />
Description<br />
FSCM and Part Number<br />
(4) (5)<br />
U/M Qty<br />
rqr<br />
1 2540-00-670-2459 Bag, Pamphlet Ea 1<br />
(19207) 7961712<br />
2 5140-00-473-6256 Bag, Tool Ea 1<br />
(34623) 11655979<br />
3 2920-01-082-6214 Cable, 12 Volt, 12 Foot, 7-pin Ea 1<br />
(34623) MA73-20001<br />
4 2590-01-082-3172 Cable, 24 Volt, 12 foot Ea 1<br />
(34623) MA 365-2000<br />
5 6150-01-022-6004 Cable, Slave Ea 1<br />
(19207) 11682336-1<br />
6 42<strong>10</strong>-00-270-4512 Extinguisher, Fire Ea 1<br />
(19207) 7714780<br />
7 75<strong>10</strong>-00-889-3494 Folder, Equipment Record Ea 1<br />
(19207) 11677003<br />
8 49<strong>10</strong>-00-204-2644 Gage, Tire Pressure <strong>10</strong>-120 psi Ea 1<br />
(26759) 7007624<br />
B-3
<strong>TM</strong> 9-<strong>2320</strong>-<strong>283</strong>-<strong>10</strong><br />
SECTI<strong>ON</strong> Ill. BASIC ISSUE ITEMS (Continued)<br />
(1) (2) (3)<br />
lllus National Stock Description<br />
Number Number FSCM and Part Number<br />
(4) (5)<br />
U/M Qty<br />
rqr<br />
9 5120-01-084-3298 Handle, Wrench Ea 1<br />
(34623) 967556<br />
<strong>10</strong> 4720-01-119-5206 Hose, Tire Inflation Ea 1<br />
(34623) MB 145-20065<br />
11 5120-00-224-7330 Jack, Hydraulic 12-Ton Ea 1<br />
(04720) 0120<br />
12<br />
13<br />
6545-00-922-1200 Kit, First Aid Ea 1<br />
(19207) 11677011<br />
5120-00-494-1911 Pliers, Slip Joint, 8-inch Ea 1<br />
(19207) 11655775-3<br />
14 9905-01-090-9819 Reflectors, Vehicle Ea 1<br />
(34623) 950<br />
B-4
<strong>TM</strong> 9-<strong>2320</strong>-<strong>283</strong>-<strong>10</strong><br />
SECTI<strong>ON</strong> III. BASIC ISSUE ITEMS (Continued)<br />
(1) (2) (3) (4) (5)<br />
lllus National Stock Description U/M Qty<br />
Number Number FSCM and Part Number rqr<br />
15 5120-00-234-8913 Screwdriver, Cross Tip, 4-inch Ea 1<br />
(96906) MS 15224-5<br />
16 5120-00-224-7375 Screwdriver, Cross-Tip 8-inch Ea 1<br />
(55719) RGP84<br />
17 5120-00-222-8852 Screwdriver, Flat-Tip, 4-inch Ea 1<br />
(77948) 225498<br />
18 5120-00-278-1280 Screwdriver, Flat-Tip, 8-inch Ea 1<br />
(96906) MS 15219-2<br />
19 5120-00-240-5328 Wrench, Adjustable, 8-inch Ea 1<br />
(96906) MS 15461-3<br />
20 5120-00-264-3796 Wrench, Adjustable, 12-inch Ea 1<br />
(96906) MS 15461-5<br />
21 5120-01-088-2471 Wrench, Lug Ea 1<br />
(19207) 41-W-3838-40<br />
B-5/B-6(blank)
<strong>TM</strong> 9-<strong>2320</strong>-<strong>283</strong>-<strong>10</strong><br />
APPENDIX C<br />
ADDITI<strong>ON</strong>AL AUTHORIZATI<strong>ON</strong> LIST<br />
SECTI<strong>ON</strong> I. INTRODUCTI<strong>ON</strong><br />
C-1. Scope.<br />
This appendix lists additional items you are authorized for the support of the M915A1<br />
Truck Tractor.<br />
C-2. General.<br />
This list identifies items that do not have to accompany the M915A1 Truck Tractor<br />
and that do not have to be turned in with it. These items are all authorized to you by<br />
MTOE.<br />
C-3. Explanation of Listing.<br />
National stock numbers, descriptions, and quantities are provided to help you identify<br />
and request the additional items you require to support this equipment. The items are<br />
listed in alphabetical sequence by item name.<br />
C-1
<strong>TM</strong> 9-<strong>2320</strong>-<strong>283</strong>-<strong>10</strong><br />
SECTI<strong>ON</strong> II. ADDITI<strong>ON</strong>AL AUTHORIZATI<strong>ON</strong> LIST<br />
(1)<br />
NATI<strong>ON</strong>AL<br />
STOCK<br />
NUMBER<br />
(2)<br />
DESCRIPTI<strong>ON</strong><br />
FSCM & PART NO. NOMENCLATURE<br />
(3) (4)<br />
QTY<br />
U/M AUTH<br />
51<strong>10</strong>-00-293-2336 (19207) 6150925 Ax: SG L-BIT 4-16-40-Wt<br />
35.5 In. to 36.5 In. Long<br />
Ea<br />
2540-00-933-6935 (96906) MS 500055-23 Chains, Tire: 11:00-24 Tire<br />
4730-00-126-8443 (3<strong>10</strong>09) 295460-C91 Coupling, Hose<br />
5120-00-288-6574 (19207) 11677021 Handle: Mattock-Pick<br />
35.5 In. to 36.5 In. Long<br />
4720-00-740-9662 (19207) 7409662 Hose : Air Connection<br />
5120-00-243-2395 (19207) 11677022 Mattock: Pick Typ 5 Lb<br />
W/O Handle<br />
Pr<br />
Ea<br />
Ea<br />
Ea<br />
Ea<br />
2<br />
1<br />
1<br />
2<br />
1<br />
5120-00-293-3336 (81348) GGG-5-326 Shovel: Hand RD-PT<br />
D-HDL, Short Size 2<br />
Ea<br />
1<br />
2540-00-378-2012 (19207) 8383002 Towbar: Medium Duty<br />
Composed of:<br />
Ea<br />
1<br />
5340-00-545-2337 (19207) 8724449 Clevis<br />
5315-00-539-9174 (19207) <strong>10</strong>929861 Pin<br />
5315-00-350-4326 (19207) 5213744 Pin, Locking<br />
55<strong>10</strong>-00-491-0307 (19207) CPR-<strong>10</strong>3023-2 Block: Hydraulic Jack<br />
Support, Wood,<br />
4 x 8 x 9 In.<br />
Ea<br />
Ea<br />
Ea<br />
Ea<br />
2<br />
2<br />
2<br />
1<br />
C-2
<strong>TM</strong> 9-<strong>2320</strong>-<strong>283</strong>-<strong>10</strong><br />
APPENDIX D<br />
EXPENDABLE SUPPLIES AND MATERIALS LIST<br />
SECTI<strong>ON</strong> I. INTRODUCTI<strong>ON</strong><br />
D-1. Scope.<br />
This appendix lists expendable supplies and materials you will need to operate and<br />
maintain the M915A1 Truck Tractor. These items are authorized to you by CTA 50-970.<br />
Expendable Items (Except Medical, Class V, Repair Parts, and Heraldic Items).<br />
D-2. Explanation of Columns.<br />
a. Column (1) - Item number. This number is assigned to the entry in the listing and<br />
is referenced in the narrative instructions to identify the material (e.g., “Use cleaning<br />
compound, Item 5, Appendix D”).<br />
b. Column (2) - Level. This column identifies the lowest level of maintenance that<br />
requires the listed item.<br />
C - Operator/Crew<br />
O - Organizational Maintenance<br />
F - Direct Support Maintenance<br />
H - General Support Maintenance<br />
c. Column (3) - National Stock Number. This is the National stock number assigned<br />
to the item; use it to request or requisition the item.<br />
d. Column (4) - Description. Indicates the federal item name and, if required, a description<br />
to identify the item. The last line for each item indicates the Federal Supply<br />
Code for Manufacturer (FSCM) in parenthesis followed by the part number.<br />
e. Column (5) - Unit of Measure (U/M). Indicates the measure used in performing<br />
the actual maintenance function. This measure is expressed by a two-character alphabetical<br />
abbreviation (e.g., ea, in, pr). If the unit of measure differs from the unit of issue,<br />
requisition the lowest unit of issue that will satisfy your requirements.<br />
D-1
<strong>TM</strong> 9-<strong>2320</strong>-<strong>283</strong>-<strong>10</strong><br />
SECTI<strong>ON</strong> II. EXPENDABLE SUPPLIES AND MATERIALS LIST<br />
(1) (2) (3) (4) (5)<br />
NATI<strong>ON</strong>AL<br />
ITEM<br />
STOCK<br />
NUMBER LEVEL NUMBER DESCRIPTI<strong>ON</strong> U/M<br />
1 C Grease, Automotive<br />
and Artillery, GAA<br />
MIL-G-<strong>10</strong>924C<br />
9150-00-065-0029 2-1/2 oz.tube oz.<br />
9150-00-935-<strong>10</strong>17 14-oz.cartridge oz.<br />
9150-00-190-0904 1-lb can lb<br />
9150-00-190-0905 5-lb can lb<br />
9150-00-190-0907 35-lb can lb<br />
9150-00-190-7369 120-lb drum lb<br />
2<br />
C<br />
Oil, Fuel: Diesel,<br />
Arctic A DFA<br />
9150-00-286-5<strong>283</strong> Bulk gal.<br />
9150-00-286-5282 5-gal.drum gal.<br />
9150-00-286-5284 55-gal.drum, 16-gage gal.<br />
3<br />
C<br />
9150-00-286-5285 55-gal.drum, 18-gage gal.<br />
Oil, Fuel: Diesel,<br />
Regular DF-2,<br />
VV-F-800<br />
9140-00-286-5294 Bulk<br />
9140-00-286-5295 5-gal.can<br />
9140-00-286-5296 55-gal.drum, 16-gage<br />
9140-00-286-5297 55-gal.drum, 18-gage<br />
gal.<br />
gal.<br />
gal.<br />
gal.<br />
D-2
<strong>TM</strong> 9-<strong>2320</strong>-<strong>283</strong>-<strong>10</strong><br />
SECTI<strong>ON</strong> II. EXPENDABLE SUPPLIES AND MATERIALS LIST<br />
(Continued)<br />
(1) (2) (3) (4) (5)<br />
NATI<strong>ON</strong>AL<br />
ITEM<br />
STOCK<br />
NUMBER LEVEL NUMBER DESCRIPTI<strong>ON</strong> U/M<br />
4 C Oil, Fuel: Diesel, Winter<br />
DF-1, VV-F-800<br />
9140-00-286-5286 Bulk gal.<br />
9140-00-286-5287 5-gal.can gal.<br />
9140-00-286-5288 55-gal.drum, 16-gage gal.<br />
9140-00-286-5289 55-gal.drum, 18-gage gal.<br />
5<br />
C<br />
Oil, Lubricating:<br />
OE/HDO-<strong>10</strong><br />
MIL-L-2<strong>10</strong>4C<br />
9150-00-189-6727 1-qt can qt<br />
9150-00-186-6618 5-gal.drum gal.<br />
9150-00-265-9429 55-gal.drum, 16-gage gal.<br />
9150-00-191-2772 55-gal.drum, 18-gage gal.<br />
9150-00-183-7807 Bulk gal.<br />
6<br />
C<br />
Oil, Lubricating:<br />
OE/HDO-30<br />
MIL-L-2<strong>10</strong>4C<br />
9150-00-186-6681 1-qt can<br />
9150-00-188-9858 5-gal.drum<br />
9150-00-265-9436 55-gal.drum, 16-gage<br />
9150-00-189-6729 55-gal.drum, 18-gage<br />
9150-00-183-7808 Bulk<br />
qt<br />
gal.<br />
gal.<br />
gal.<br />
gal.<br />
D-3
<strong>TM</strong> 9-<strong>2320</strong>-<strong>283</strong>-<strong>10</strong><br />
SECTI<strong>ON</strong> II. EXPENDABLE SUPPLIES AND MATERIALS LIST<br />
(Continued)<br />
(1)<br />
ITEM<br />
NUMBER<br />
(2)<br />
LEVEL<br />
(3)<br />
NATI<strong>ON</strong>AL<br />
STOCK<br />
NUMBER<br />
(4)<br />
DESCRIPTI<strong>ON</strong><br />
(5)<br />
U/M<br />
7 C Oil, Lubricating:<br />
OE/HDO-50<br />
MIL-L-2<strong>10</strong>4C<br />
9150-00-265-9440 1-qt can<br />
9150-00-265-9442 5-gal.drum<br />
9150-00-265-9441 55-gal.drum<br />
qt<br />
gal.<br />
gal.<br />
8 C Oil, Lubricating:<br />
Ice Subzero OEA,<br />
MIL-L-46167<br />
9150-004024478 1-qt can<br />
9150-00-402-2372 5-gal.drum<br />
9150-00491-7197 55-gal.drum<br />
qt<br />
gal.<br />
gal.<br />
9 C<br />
Oil, Lubricating,<br />
Multi-viscosity:<br />
<strong>10</strong>W/30, MlL-L-46152<br />
9150-00-186-6699<br />
9150-99-256-6411<br />
9150-00-186-6703<br />
1-qt can<br />
5-gal.drum<br />
55-gal.drum<br />
qt<br />
gal.<br />
gal.<br />
<strong>10</strong><br />
C<br />
Dexron ®<br />
ATF<br />
9150-00-698-2382 1-qt can<br />
9150-00-057-4959 5-gal.drum<br />
qt<br />
gal.<br />
11 C N/A Solution, Soap N/A<br />
12<br />
C<br />
Windshield, Cleaning<br />
Compound for<br />
6850-00-926-2275 1-pt can<br />
pt<br />
D-4
<strong>TM</strong> 9-<strong>2320</strong>-<strong>283</strong>-<strong>10</strong><br />
APPENDIX E<br />
STOWAGE AND SIGN GUIDE<br />
E-1. Scope.<br />
This appendix shows the locations for stowage of equipment and material required to be<br />
carried on the M915A1 Truck Tractor.<br />
E-2. General.<br />
The pictures which follow show the location of Basic Issue Items, listed in Appendix B.<br />
Decals and plates locations are shown in Chapter 2 of this manual, in paragraph 2-18.<br />
The item numbers on the pictures which follow indicate the five areas inside your truck<br />
where Basic Issue Items, listed in Appendix B, are stowed. The tabular listing below the<br />
pictures gives you the stowage area name, Bll illustration number, and BII description.<br />
E-1
<strong>TM</strong> 9-<strong>2320</strong>-<strong>283</strong>-<strong>10</strong><br />
STOWAGE STOWAGE BIIL<br />
LOCATI<strong>ON</strong> LOCATI<strong>ON</strong> ILLUS<br />
NUMBER DESCRIPTI<strong>ON</strong> NUMBER<br />
Bll<br />
DESCRIPTI<strong>ON</strong><br />
1 Glove Box - Inside<br />
1<br />
7<br />
Pamphlet Bag<br />
Equipment Record Folder<br />
2 Tool Box - Outside Back 6<br />
Fire Extinguisher<br />
3 Tool Box - Inside Center<br />
11<br />
Hydraulic Jack<br />
4 Tool Box - Outside Front 12<br />
First Aid Kit<br />
5<br />
Tool Box - Inside Under<br />
Companion Seat<br />
2<br />
3<br />
4<br />
5<br />
8<br />
9<br />
<strong>10</strong><br />
13<br />
14<br />
15<br />
16<br />
17<br />
18<br />
19<br />
20<br />
21<br />
Tool Bag<br />
12-Volt Cable<br />
24-Volt Cable<br />
Slave Cable<br />
Tire Pressure Gage<br />
Wrench Handle<br />
Tire Inflation Hose<br />
Slip Joint Pliers<br />
Vehicle Reflector<br />
Cross Tip Screwdriver, 4-inch<br />
Cross Tip Screwdriver, 8-inch<br />
Flat Tip Screwdriver, 4-inch<br />
Flat Tip Screwdriver, 8-inch<br />
Adjustable Wrench, 8-inch<br />
Adjustable Wrench, 12-inch<br />
Lug Wrench<br />
E-2
<strong>TM</strong> 9-<strong>2320</strong>-<strong>283</strong>-<strong>10</strong><br />
Subject<br />
ALPHABETICAL INDEX<br />
A<br />
Page,<br />
Figure, Table.<br />
Number<br />
Abbreviations<br />
Explanation of . . . . . . . . . . . . . . . . . . . . . . . . . . . . . . . . . . . . . . . 1-6<br />
Accessories (See T 1-1) . . . . . . . . . . . . . . . . . . . . . . . . . . . . . . . . . 1-13<br />
Adjustment<br />
Backrest . . . . . . . . . . . . . . . . . . . . . . . . . . . . . . . . . . . . . . . . . . . 2-26, 2-27<br />
Fore and Aft Seat . . . . . . . . . . . . . . . . . . . . . . . . . . . . . . . . . . . . 2-26<br />
Air Pressure Gage (See Gages)<br />
Air System<br />
Maintenance . . . . . . . . . . . . . . . . . . . . . . . . . . . . . . . . . . . . . . . . 2-52, T 2-1<br />
Troubleshooting . . . . . . . . . . . . . . . . . . . . . . . . . . . . . . . . . . . . . 3-4, T 3-1<br />
Batteries<br />
Description . . . . . . . . . . . . . . . . . . . . . . . . . . . . . . . . . . . . . . . . . 3-26<br />
Maintenance . . . . . . . . . . . . . . . . , . . . . . . . . . . . . . . . . . . . . . . . 2-36, T 2-1<br />
Tests & Inspection . . . . . . . . . . . . . . . . . . . . . . . . . . . . . . . . . . . 3-26<br />
Body (See Truck Chassis)<br />
Brakes<br />
Troubleshooting . . . . . . . . . . . . . . . . . . . . . . . . . . . . . . . . . . . . . 3-5, T 3-1<br />
Cab Floor - Mounted Controls . . . . . . . . . . . . . . . . . . . . . . . . . . . . 2-19<br />
Cab Controls, Miscellaneous or Additional . . . . . . . . . . . . . . . . . . 2-27<br />
Carriage<br />
Maintenance . . . . . . . . . . . . . . . . . . . . . . . . . . . . . . . . . . . . . . . . 2-46, T 2-1<br />
Cigar Lighter . . . . . . . . . . . . . . . . . . . . . . . . . . . . . . . . . . . . . . . . . . 2-8<br />
Cleaning<br />
Exterior . . . . . . . . . . . . . . . . . . . . . . . . . . . . . . . . . . . . . . . . . . . . 3-15<br />
Interior . . . . . . . . . . . . . . . . . . . . . . . . . . . . . . . . . . . . . . . . . . . . 3-15<br />
Conditions, Unusual<br />
Cold . . . . . . . . . . . . . . . . . . . . . . . . . . . . . . . . . . . . . . . . . . . . . . . 2-86<br />
Hot . . . . . . . . . . . . . . . . . . . . . . . . . . . . . . . . . . . . . . . . . . . . . . . . 2-88<br />
Terrain . . . . . . . . . . . . . . . . . . . . . . . . . . . . . . . . . . . . . . . . . . . . . 2-89<br />
Control Panel (See Control Panel Section in Manual)<br />
Maintenance . . . . . . . . . . . . . . . . . . . . . . . . . . . . . . . . . . . . . . . . 2-53, T 2-1<br />
Control Panels, Lower<br />
(See Lower Control Panels Section in Manual)<br />
Controls (See Control Panel)<br />
B<br />
C<br />
Index-1
<strong>TM</strong> 9-<strong>2320</strong>-<strong>283</strong>-<strong>10</strong><br />
Subject<br />
C (Continued)<br />
Page,<br />
Figure, Table,<br />
Number<br />
Cooling System<br />
Adding Coolant to Partly Filled System .................. 3-18<br />
Data ............................................... 1-11, T 1-1<br />
Draincock Locations .................................. 3-16<br />
Filling Empty System ................................. 3-18<br />
Coupling and Uncoupling of Tractor or Semitrailer ........... 2-71 thru 2-77<br />
Data<br />
Plates . . . . . . . . . . . . . . . . . . . . . . . . . . . . . . . . . . . . . . . . . . . . . . 2-83<br />
Decals . . . . . . . . . . . . . . . . . . . . . . . . . . . . . . . . . . . . . . . . . . . . . . . 2-83<br />
Dimensions (See T 1-1) . . . . . . . . . . . . . . . . . . . . . . . . . . . 1-9<br />
Driving<br />
Guidelines . . . . . . . . . . . . . . . . . . . . . . . . . . . . . . . . . . . . . . . . . . 2-62<br />
Procedure . . . . . . . . . . . . . . . . . . . . . . . . . . . . . . . . . . . . . . . . . . 2-60<br />
Driveline Locking System<br />
Troubleshooting . . . . . . . . . . . . . . . . . . . . . . . . . . . . . . . . . 3-5, T 3-1<br />
Electrical System<br />
Data . . . . . . . . . . . . . . . . . . . . . . . . . . . . . . . . . . . . . . . . . . . . . 1-11, T 1-1<br />
Troubleshooting . . . . . . . . . . . . . . . . . . . . . . . . . . . . . . . . . . . . 3-7, T 3-1<br />
Engine<br />
Compartment Checks . . . . . . . . . . . . . . . . . . . . . . . . . . . . . . . . . 2-41, T 2-1<br />
Oil Level Maintenance . . . . . . . . . . . . . . . . . . . . . . . . . . . . . . 2-44, T 2-1<br />
Oil Pressure Gage (See Gages)<br />
Performance . . . . . . . . . . . . . . . . . . . . . . . . . . . . . . . . . . . . . . 1-<strong>10</strong>, T 1-1<br />
Run Switch (See Control Panel Section in Manual) . . . . . . . . 2-8<br />
Start Button (See Control Panel Section in Manual) . . . . . . . . 2-8<br />
Troubleshooting . . . . . . . . . . . . . . . . . . . . . . . . . . . . . . . . . . . . 3-8, T 3-1<br />
Water Temperature Gage (See Gages)<br />
Ether Quick-Start Assembly<br />
Button (See Tachograph Section in Manual) . . . . . . . . . . . . . 2-<strong>10</strong><br />
Maintenance . . . . . . . . . . . . . . . . . . . . . . . . . . . . . . . . . . . . . . . . 2-48<br />
Exhaust System<br />
Troubleshooting . . . . . . . . . . . . . . . . . . . . . . . . . . . . . . . . . . . . 3-11, T 3-1<br />
D<br />
E<br />
Index-2
<strong>TM</strong> 9-<strong>2320</strong>-<strong>283</strong>-<strong>10</strong><br />
Subject<br />
F<br />
Page,<br />
Figure, Table,<br />
Number<br />
Fan<br />
Belts Maintenance ................................... 2-47, T 2-1<br />
Clutch Actuator Maintenance .......................... 2-48, T 2-1<br />
Clutch Maintenance .................................. 2-47, T 2-1<br />
Pulley Maintenance .................................. 2-47, T 2-1<br />
Fifth Wheel<br />
Description . . . . . . . . . . . . . . . . . . . . . . . . . . . . . . . . . . . . . . . . . 2-69<br />
Troubleshooting . . . . . . . . . . . . . . . . . . . . . . . . . . . . . . . . . . . . 3-6<br />
Unlocking/Locking . . . . . . . . . . . . . . . . . . . . . . . . . . . . . . 2-70<br />
Fire Extinguisher, Portable<br />
Operating . . . . . . . . . . . . . . . . . . . . . . . . . . . . . . . . . . . . . . . . . 2-81<br />
Fording<br />
Procedure . . . . . . . . . . . . . . . . . . . . . . . . . . . . . . . . . . . . . . . . . 2-92<br />
Fuel Filter<br />
Maintenance . . . . . . . . . . . . . . . . . . . . . . . . . . . . . . . . . . . . 2-45, T 2-1<br />
Fuel Heater . . . . . . . . . . . . . . . . . . . . . . . . . . . . . . . . . . . . . . . . . 2-46<br />
Fuel Filter . . . . . . . . . . . . . . . . . . . . . . . . . . . . . . . . . . . . . . . . . . 2-45<br />
Fuel Supply Gage (See Gages)<br />
Fuel System<br />
Data . . . . . . . . . . . . . . . . . . . . . . . . . . . . . . . . . . . . . . 1-11, T 1-1<br />
Fuel Tank (See Fuel System)<br />
Filling . . . . . . . . . . . . . . . . . . . . . . . . . . . . . . . . . . . . . . . . . . . . 3-15<br />
Maintenance . . . . . . . . . . . . . . . . . . . . . . . . . . . . . . . . . . . . . . . . 2-39, T 2-1<br />
Gages (in Control Panel Section)<br />
Air Pressure, Front ................................... 2-7<br />
Air Pressure, Rear .................................... 2-7<br />
Engine Oil Pressure .................................. 2-6<br />
Engine Water Temperature Gage ....................... 2-9<br />
Fuel Supply ......................................... 2-4<br />
Transmission Oil Temperature .......................... 2-5<br />
Hood<br />
Opening (Maintenance Section, 2-II) . . . . . . . . . . . . . . . . . . . 2-41<br />
Hubs<br />
Troubleshooting . . . . . . . . . . . . . . . . . . . . . . . . . . . . . . . . . . 3-13, T 3-1<br />
G<br />
H<br />
Index-3
<strong>TM</strong> 9-<strong>2320</strong>-<strong>283</strong>-<strong>10</strong><br />
Subject<br />
I<br />
Page,<br />
Figure, Table,<br />
Number<br />
Instruction<br />
Plates . . . . . . . . . . . . . . . . . . . . . . . . .<br />
Instrument Panel<br />
Controls and Indicators . . . . . . . . . . .<br />
Interaxle Differential Lockup<br />
Use of . . . . . . . . . . . . . . . . . . . . . . . . . .<br />
J<br />
K<br />
...... 2-83<br />
...... 2-3<br />
...... 2-68<br />
Low Air Pressure Warning Light . . . . . . . . . . . . . . . . . . . . . . . . . 2-7<br />
Maintenance<br />
Cold Weather ....................................... 3-27<br />
General ............................................ 2-32<br />
Hot Weather ........................................ 3-27<br />
Humid Weather ..................................... 3-28<br />
Preventive Maintenance Checks & Services .............. 2-29, T 2-1<br />
Nomenclature . . . . . . . . . . . . . . . . . . . . . . . . . . . . . . . . . 1-6<br />
Operation<br />
Data . . . . . . . . . . . . . . . . . . . . . . . . . . . . . . . . . . . . . . . . . . . 1-<strong>10</strong>, T 1-1<br />
Pintle<br />
Data . . . . . . . . . . . . . . . . . . . . . . . . . . . . . . . . . . . . . . . . . . . . . . . 1-12, T1-1<br />
Towing . . . . . . . . . . . . . . . . . . . . . . . . . . . . . . . . . . . . . . . . . . . . 2-80<br />
Radiator<br />
Maintenance . . . . . . . . . . . . . . . . . . . . . . . . . . . . . . . . . . . . . . . 2-43, T 2-1<br />
L<br />
M<br />
N<br />
O<br />
P<br />
Q<br />
R<br />
Index-4
Subject<br />
R (continued)<br />
<strong>TM</strong> 9-<strong>2320</strong>-<strong>283</strong>-<strong>10</strong><br />
Page,<br />
Figure, Table,<br />
Number<br />
Ramps<br />
Maintenance . . . . . . . . . . . . . . . . . . . . . . . . . . . . . . . . . .<br />
2-38, T 2-1<br />
S<br />
Seat Adjustment Controls . . . . . . . . . . . . . . . .<br />
Side Panels, Engine Compartment<br />
Removing (Maintenance Section) . . . . . . . .<br />
Spring Brake Power Springs<br />
Compressing (Caging) Manually . . . . . . . . .<br />
Releasing (Uncaging) Manually . . . . . . . . .<br />
Starting<br />
Procedure . . . . . . . . . . . . . . . . . . . . . . . . . . . . . . . . . . . . . . . . . .<br />
Steering<br />
Troubleshooting . . . . . . . . . . . . . . . . . . . . . .<br />
Steering Pump & Reservoir<br />
Maintenance . . . . . . . . . . . . . . . . . . . . . . . . .<br />
Steering Wheel Controls . . . . . . . . . . . . . . . .<br />
Stopping<br />
Procedure . . . . . . . . . . . . . . . . . . . . . . . . .<br />
2-25<br />
2-41<br />
2-94<br />
2-95<br />
2-56<br />
3-11, T 3-1<br />
2-49, T 2-1<br />
2-23<br />
2-69<br />
Tires<br />
Maintenance . . . . . . . . . . . . . . . . . . . . . . . . . . . . . . . . . . . . . . . . 2-34, T 2-1<br />
Troubleshooting . . . . . . . . . . . . . . . . . . . . . . . . . . . . . . . . . . . . . 3-13, T 3-1<br />
Towing<br />
Procedure . . . . . . . . . . . . . . . . . . . . . . . . . . . . . . . . . . . . . . . . . .<br />
Trailer<br />
Couplings Maintenance . . . . . . . . . . . . . . . . . . . . . . . . .<br />
Transmission<br />
Data . . . . . . . . . . . . . . . . . . . . . . . . . . . . . . . . . . . . . . . . . . .<br />
Maintenance . . . . . . . . . . . . . . . . . . . . . . . . . . . . . . . . . . . .<br />
Troubleshooting . . . . . . . . . . . . . . . . . . . . . . . . . . . . . . . . .<br />
Transmission Oil Temperature Gage (See Gages)<br />
Transmission Range Selector<br />
Starting . . . . . . . . . . . . . . . . . . . . . . . . . . . . . . . . . . . . . . . .<br />
Troubleshooting Tables . . . . . . . . . . . . . . . . . . . . . . . . . . . .<br />
Truck Chassis<br />
Capabilities & Features . . . . . . . . . . . . . . . . . . . . . . . . . . .<br />
Components . . . . . . . . . . . . . . . . . . . . . . . . . . . . . . . . . . . .<br />
T<br />
2-95<br />
2-9, 2-46, T 2-1<br />
1-11, T 1-1<br />
2-51, T 2-1<br />
3-12, T 3-1<br />
2-20<br />
3-4<br />
1-8<br />
1-2, F1-1 thru<br />
F1 -2<br />
Index-5
<strong>TM</strong> 9-<strong>2320</strong>-<strong>283</strong>-<strong>10</strong><br />
Subject<br />
T (Continued)<br />
Page.<br />
Figure, Table,<br />
Number<br />
Description and Purpose .............................. 1-7<br />
Exterior Maintenance ................................. 2-35, T 2-1<br />
Performance Data .................................... 1-9, T 1-1<br />
Turbocharger<br />
Maintenance ........................................ 2-46, T 2-1<br />
Voltmeter<br />
Indicators . . . . . . . . . . . . . . . . . . . . . . . . . . . . . . . . . . . . . . . . . . . 2-5<br />
Weights (See T 1-1) .................................... 1-9, T 1-1<br />
Wheel, Fifth<br />
Maintenance ........................................ 2-38, T 2-1<br />
Wheels<br />
Changing ........................................... 3-19<br />
Troubleshooting ..................................... 3-13, T 3-1<br />
Winterization Kit ....................................... 2-87, A-3<br />
U<br />
V<br />
W<br />
X<br />
Y<br />
Z<br />
Index-6
<strong>TM</strong> 9-<strong>2320</strong>-<strong>283</strong>-<strong>10</strong><br />
By Order of the Secretary of the Army :<br />
E.C. MEYERS<br />
General, United States Army<br />
Chief of Staff<br />
Official:<br />
ROBERT M. JOYCE<br />
Brigadier General, United States Army<br />
The Adjutant General<br />
Distribution<br />
To be distributed in accordance with DA Form 12-38, (qty rqr block No 330). Operator<br />
maintenance requirements for Truck, Tractor, Line Haul, 6 x 4, 14-ton, M915A1.<br />
*U.S. GOVERNMENT PRINTING OFFICE: 1994 0 - 388-421 (003267)
PIN: 053355-000


