Panasonic' - Tecnicosaurios
Panasonic' - Tecnicosaurios
Panasonic' - Tecnicosaurios

Create successful ePaper yourself
Turn your PDF publications into a flip-book with our unique Google optimized e-Paper software.
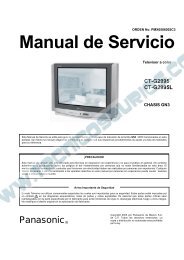
SA.AKl5<br />
: WARNING<br />
This servlce information is designed for experiense repair technicians only and is not designed for use by the general public. lt does not contain<br />
warnings or cautions to advise non-technical individuals of potential dangers in attempting to service a product. Products powered by electr¡city<br />
should be serviced or repaired only by experienced professional technicians. Any attempto service or repair the product or products dealt with<br />
in th¡s service information by anyone else could result in serious iniury or death.<br />
I Gontents<br />
Page<br />
BEFORE REPAIR AND ADJUSTMENT ..........<br />
2 MEASUREMENTS AND ADJUSTMENTS<br />
19-20<br />
HANDLING PRECAUTIONS FOR TRAVERSE DECK ..... 2 TERMINAL FUNCTION OF lC's<br />
21 -23<br />
SAFETY PRECAUTIONS ..<br />
2 WIRING CONNECTION DIAGRAM<br />
24<br />
PROTECTION CIRCUITRY<br />
3 BLOCK DIAGRAM<br />
25- 31<br />
PRECAUTION OF LASER DIODE<br />
3 TERMINAL GUIDE OF lC's. TRANSISTORS AND DIODES.. 32<br />
ACCESSORIES<br />
3 SCHEMATIC DIAGRAM<br />
32-45<br />
CONNECTIONS<br />
4 PRINTED CIRCUIT BOARD<br />
qO - J I<br />
FRONT PANEL CONTROLS .....<br />
4 TROUBLESHOOTINGUIDE<br />
52<br />
SETTING THE TIME<br />
5 MECHANISM PARTS LOCATION (RAA34O7)<br />
53-54<br />
LISTENING TO COMPACT DISCS (PROGRAM PLAY)<br />
5 MECHANISM PARTS 1IST............<br />
55<br />
LjSTENTNG TO COMPACT DTSCS (CD MANAGER FUNCTTON) .... 6 LOADING MECHANISM PARTS LIST ,...........<br />
55<br />
BEFORE RECORDTNG (DECK 2 ONLY) .............<br />
7 CD LOADING UNIT PARTS LOCATION<br />
56<br />
RECORDING FROM COMPACT DISCS<br />
7-8 CABINET PARTS LOCATION<br />
57,58<br />
REMOTE CONTROL BUTTONS & FUNCTIONS<br />
9 REPLACEMENT PARTS LIST ............<br />
59 - 6.t<br />
OPERATION CHECKS & MAIN COMPONENT REPLACEMENT..... 10 - 15 RESTSTORS & CApACTTORS ...........<br />
62-65<br />
SELF.DIAGNOSTIC DISPLAY FUNCTION<br />
16 - 17 PACKING MATERIALS & ACCESSORIES .,,........,,......... 66<br />
CD TEST MODE FUNCTION<br />
18 PACKAGING,,,<br />
I Before Repair and Adjustment<br />
Disconnect AC power, discharge both Power Supply Capacitors C504 and C505 through a 10O , 5W resistor to ground.<br />
DO NOT SHORT-CIRCUIT DIRECTLY (with a screwdriver blade, for instance), as this may destroy solid state devices.<br />
After repairs are completed, restore power gradually using a variac, to avoid overcurrent.<br />
Current consumption at AC 120V, 60 Hz, in NO SIGNAL mode should be -450 mA.<br />
Page<br />
ol<br />
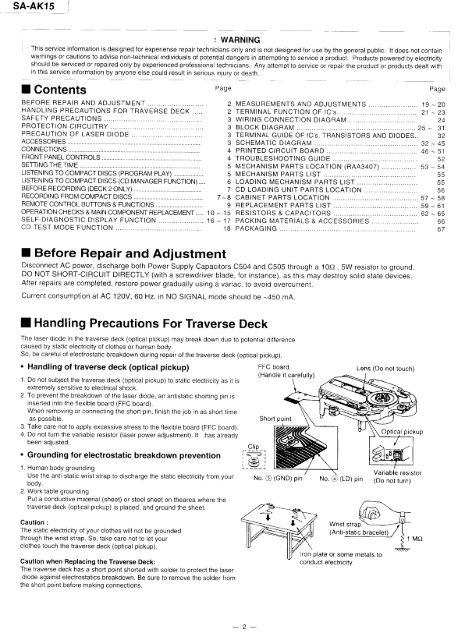
I Handling Precaut¡ons For Traverse Deck<br />
The laser diode in the traverse deck (optical pickup) may break down due to potential difference<br />
caused by static electricity of clothes or human body.<br />
So, be careful of electrostatic breakdown during repair of the traverse deck (optical pickup).<br />
. Handling of traverse deck (optical pickup)<br />
f:FC board<br />
1. Do not subjecthe traverse deck (optical pickup) to static electricity as it is<br />
extremely sensitive to electrical shock.<br />
2. To preventhe breakdown of the laser diode, an antistatic shorling pin is<br />
insefied into the flexible board (FFC board).<br />
When removing or connecting the short pin, finish the job in as short time<br />
as possible.<br />
3. Take care not to apply excessive stress to the flexible board (FFC board).<br />
4. Do not turn the variable resistor (laser power adjustment). lt has already<br />
been adjusted.<br />
. Grounding for electrostat¡c breakdown prevention<br />
Short poinl<br />
Lens (Do noi touch)<br />
Optical pickup<br />
1. Human body grounding<br />
Use the anti-static wrist strap to discharge the static electricity from your<br />
Dooy.<br />
2. Work table grounding<br />
Put a conductive material (sheet) or steel sheet on thearea where the<br />
traverse deck (optical pickup) is placed, and ground the sheet.<br />
Caution :<br />
The static electricity of your clothes will not be grounded<br />
through the wrist strap. So, take care not to let your<br />
clothes touch the traverse deck (optical pickup).<br />
Caution when Replacing the Traverse Deck:<br />
The traverse deck has a short po¡nt shorted with solder to protecthe laser<br />
diode against electrostatics breakdown. Be sure to remove the solder f rom<br />
the short point before making connections.<br />
No. @ (GND) pin<br />
No. €) (LD) pin<br />
Wrist strap<br />
-\--7<br />
(Anti-:19!9 ilegqglll<br />
lron plate or some metals to<br />
conducl electr¡city<br />
Variable resislor<br />
(Do not turn)<br />
- 2 -