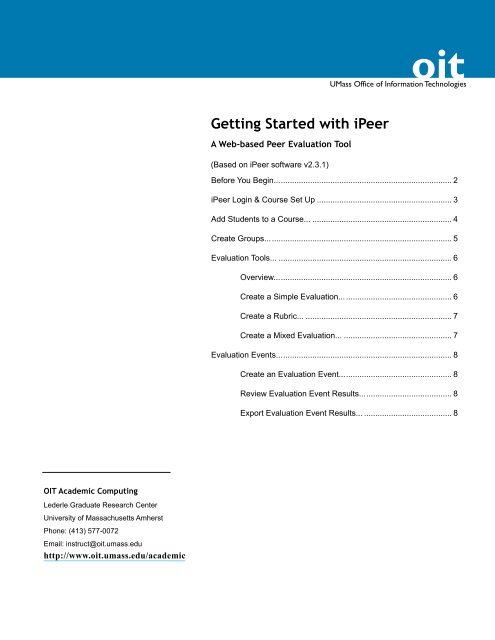
Getting Started with iPeer - Office of Information Technologies ...
Getting Started with iPeer - Office of Information Technologies ...
Getting Started with iPeer - Office of Information Technologies ...

Create successful ePaper yourself
Turn your PDF publications into a flip-book with our unique Google optimized e-Paper software.
oit<br />
UMass <strong>Office</strong> <strong>of</strong> <strong>Information</strong> <strong>Technologies</strong><br />
<strong>Getting</strong> <strong>Started</strong> <strong>with</strong> <strong>iPeer</strong><br />
A Web-based Peer Evaluation Tool<br />
(Based on <strong>iPeer</strong> s<strong>of</strong>tware v2.3.1)<br />
Before You Begin................................................................................ 2<br />
<strong>iPeer</strong> Login & Course Set Up............................................................. 3<br />
Add Students to a Course.................................................................. 4<br />
Create Groups.................................................................................... 5<br />
Evaluation Tools................................................................................. 6<br />
Overview................................................................................ 6<br />
Create a Simple Evaluation................................................... 6<br />
Create a Rubric..................................................................... 7<br />
Create a Mixed Evaluation.................................................... 7<br />
Evaluation Events............................................................................... 8<br />
Create an Evaluation Event................................................... 8<br />
Review Evaluation Event Results.......................................... 8<br />
Export Evaluation Event Results........................................... 8<br />
OIT Academic Computing<br />
Lederle Graduate Research Center<br />
University <strong>of</strong> Massachusetts Amherst<br />
Phone: (413) 577-0072<br />
Email: instruct@oit.umass.edu<br />
http://www.oit.umass.edu/academic
Gettting <strong>Started</strong> <strong>with</strong> <strong>iPeer</strong> - a Web-based Peer Evaluation Tool 2<br />
Introduction<br />
The <strong>iPeer</strong> web-based s<strong>of</strong>tware provides a set <strong>of</strong> evaluation tools for<br />
students to complete evaluations <strong>of</strong> their peers. This is particularly useful<br />
in courses where teams or groups are utilized for collaborative work.<br />
Instructional Media Lab<br />
OIT Academic Computing<br />
A 205 LGRC (Lederle Lowrise)<br />
Directions & Map: http://www.bit.ly/iml-map<br />
Hours: Open Mondays through Fridays<br />
10am to 4pm<br />
Phone: 413-545-2823<br />
Google Talk and Email:<br />
instruct@oit.umass.edu<br />
AIM / Skype / Yahoo: instructoit<br />
Before You Begin<br />
Prior to using <strong>iPeer</strong> in a course, please do the following:<br />
• Contact the Instructional Media Lab to have a staff member<br />
create an account for you in <strong>iPeer</strong>.<br />
• Schedule a one-on-one consultation <strong>with</strong> a consultant in the<br />
Instructional Media Lab to finalize your login credentials and<br />
assist you in settting up a course and importing your class roster<br />
to <strong>iPeer</strong>.<br />
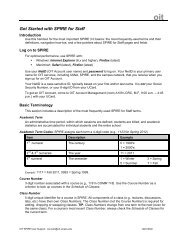
<strong>iPeer</strong> Terminolgy<br />
Course: The unique UMass course that you create <strong>with</strong>in <strong>iPeer</strong> to contain<br />
peer evaluations. (<strong>iPeer</strong> is not yet automatically populated by SPIRE to<br />
reflect your courses.)<br />
Users: Students that are enrolled in your course. (Currently you must<br />
manually enroll/upload your class roster.)<br />
Groups: Teams/Groups <strong>of</strong> students that you determine and create in your<br />
course. These can be changed at any point and students may exist in more<br />
than one group simultaneously.<br />
Evaluation Tools: Methods by which students in a group evaluate their<br />
peers. You have the option to create customized Simple Evaluations,<br />
Rubrics, Mixed Evaluations, and/or Team Maker Surveys<br />
Evaluation Events: Specific timeframes during which students are asked<br />
to use a particular Evaluation Tool to evaluate their group members.<br />
OIT Academic Computing, University <strong>of</strong> Massachusetts http://www.oit.umass.edu/academic 120802jc
Gettting <strong>Started</strong> <strong>with</strong> <strong>iPeer</strong> - a Web-based Peer Evaluation Tool 3<br />
<strong>iPeer</strong> Login & Course Set Up<br />
Login to <strong>iPeer</strong><br />
1. Go to the <strong>iPeer</strong> login page: http://ipeer.oit.umass.edu.<br />
2. Enter your NetID (OIT Account user name) and assigned<br />
password and click Login. The <strong>iPeer</strong> Home screen will open.<br />
The Home screen provides an overview list, accompanied by<br />
course basic details, <strong>of</strong> all your current courses that you have<br />
in <strong>iPeer</strong>.<br />
Courses window<br />
Add Course button<br />
Add a Course<br />
1. Select the Courses tab.<br />
2. Click the Add Course button (top, right). The Add Course<br />
window will open.<br />
3. Enter a course name (eg. Crypto 101 002) in the Course field.<br />
4. Enter a course title (eg. Intro to Cryptozoology) in the Title<br />
field.<br />
5. Select an instructor name from the Instructor drop-down<br />
menu.<br />
6. Click Add Course.<br />
Delete a Course<br />
1. Select the Courses tab.<br />
2. Right-click (or control-click) on the course you would like to<br />
delete.<br />
3. Select Delete Course from the contextual menu, and then click<br />
OK.<br />
Contextual menu<br />
Edit a Course’s Basic Info<br />
1. Select the Courses tab.<br />
2. Right-click (or control-click) on the course you would like to<br />
edit the basic info <strong>of</strong> (name, title, instructor).<br />
3. Select Edit Course from the contextual menu.<br />
4. Make your edits and then click the Update Course button.<br />
OIT Academic Computing, University <strong>of</strong> Massachusetts http://www.oit.umass.edu/academic 120802jc
Gettting <strong>Started</strong> <strong>with</strong> <strong>iPeer</strong> - a Web-based Peer Evaluation Tool 4<br />
Add Student button<br />
Course homepage<br />
click here to start button<br />
Students window<br />
Import Students window<br />
Add Students to a Course<br />
Manual Entry<br />
1. Log in to <strong>iPeer</strong>, click on the Courses tab, and select the name<br />
<strong>of</strong> the course that you would like to add students to. The<br />
course’s homepage will open.<br />
2. In the Students section (left side), click the Add Student<br />
button. The Students window will open.<br />
3. In the Student Number field, enter the 8-digit UMass Student<br />
ID <strong>of</strong> the student you would like to enroll.<br />
4. Fill in the First Name, Last Name, and Email fields.<br />
5. Click the Save button. The User(s) created successfully screen<br />
will appear.<br />
6. A password will be automatically generated and appear in red<br />
(right side).<br />
IMPORTANT: You must record and provide this password to<br />
your newly created student. They will login using their 8-digit<br />
UMass ID as the username and this password that you just<br />
created.<br />
Import Roster from CSV<br />
1. Log in to <strong>iPeer</strong>, click on the Courses tab, and select the name<br />
<strong>of</strong> the course that you would like to add students to. The<br />
course’s homepage will open.<br />
2. In the Students section (left side), click the Add Student<br />
button. The Students window will open.<br />
3. Click the click here to start button (bottom right). The Import<br />
Students From Text (.txt) or CSV File (.scv) window will<br />
expand open.<br />
4. Follow the Formatting and Import instructions provided onscreen.<br />
NOTE: You will need to export your course roster as a CSV<br />
file from Moodle and re-format it according to the on-screen<br />
instructions. We have found it best for you to include/add a<br />
password column to this CSV file and make the password the<br />
same for all students. Students may then login to <strong>iPeer</strong> and<br />
change their password via their Edit Pr<strong>of</strong>ile (top right) button.<br />
Please contact the Instructional Media Lab for assistance <strong>with</strong><br />
importing your course roster to <strong>iPeer</strong>.<br />
OIT Academic Computing, University <strong>of</strong> Massachusetts http://www.oit.umass.edu/academic 120802jc
Gettting <strong>Started</strong> <strong>with</strong> <strong>iPeer</strong> - a Web-based Peer Evaluation Tool 5<br />
Create Groups<br />
Groups window<br />
Plus Sign button<br />
to expand Import<br />
Groups section<br />
Manual Entry<br />
1. Log in to <strong>iPeer</strong>, click on the Courses tab, and select the name<br />
<strong>of</strong> the course that you would like to create groups in. The<br />
course’s homepage will open.<br />
2. In the Groups section (left side), click the Create Group<br />
button. The Groups window will open.<br />
3. Enter a number in the Group Number field, and enter a name<br />
in the Group Name field.<br />
4. From the Filtered Students column select the student(s) that<br />
you would like to be in the group and click Assign>>.<br />
5. Once you have populated the group, click the Add Group<br />
button.<br />
Import Groups from CSV<br />
1. Log in to <strong>iPeer</strong>, click on the Courses tab, and select the name<br />
<strong>of</strong> the course that you would like to add students to. The<br />
course’s homepage will open.<br />
2. In the Groups section (left side), click the Create Group<br />
button. The Groups window will open.<br />
3. Click the plus sign button (bottom right) to expand the Import<br />
Groups from Text (.txt) or CSV File (.csv) section.<br />
4. Follow the Formatting and Import instructions provided onscreen.<br />
Please contact the Instructional Media Lab for assistance <strong>with</strong><br />
importing your course roster to <strong>iPeer</strong>.<br />
OIT Academic Computing, University <strong>of</strong> Massachusetts http://www.oit.umass.edu/academic 120802jc
Gettting <strong>Started</strong> <strong>with</strong> <strong>iPeer</strong> - a Web-based Peer Evaluation Tool 6<br />
Evaluation Tools<br />
Overview<br />
<strong>iPeer</strong> provides four different Evaluation Tools:<br />
Evaluation Tools window<br />
• Simple: students evaluate each other <strong>with</strong> a single numeric<br />
rating and an optional comment. Students are presented <strong>with</strong> a<br />
table <strong>with</strong> one row per group member and a slider to rate each<br />
member relative the others, as well as a mark field to directly<br />
enter a numeric rating.<br />
• Rubric: students evaluate each other using an instructordefined<br />
rubric that has multiple criteria and mastery levels.<br />
• Mixed: students fill ot a multi-part evaluation for each other;<br />
part one is a rubric, and part two is a series <strong>of</strong> short-answer<br />
essay questions.<br />
• TeamMaker Survey: All students provide answers to a class<br />
survey.<br />
The first three Evaluation Tools are group-based—you have to group<br />
students into teams prior to assigning an Evaluation Tool to them.<br />
The TeamMaker Survey is for all students to respond to, unrelated to<br />
their assigned groups. This tool is buggy and we do not recommend its<br />
use at this time.<br />
Simple Evaluation - Student View<br />
Create a Simple Evaluation<br />
1. Log in to <strong>iPeer</strong> and click on the Evaluation Tools tab. The All<br />
My Tools area will display a list <strong>of</strong> any Evaluation Tools that<br />
you have created.<br />
2. In the Simple Evaluations section, click the Add Simple<br />
Evaluation button (right side).<br />
3. Enter a descriptive name for the evaluation in the Evaluation<br />
Name field, and enter a relative score value that each group<br />
member is worth in the Base Point Per Member field. (For<br />
example: if you set the Base Point Per Member value to 10,<br />
enable self-evaluation, and there are 3 students in the group, a<br />
total <strong>of</strong> 30 points will need to be distributed amongst the team<br />
members.)<br />
4. Click Save.<br />
OIT Academic Computing, University <strong>of</strong> Massachusetts http://www.oit.umass.edu/academic 120802jc
Gettting <strong>Started</strong> <strong>with</strong> <strong>iPeer</strong> - a Web-based Peer Evaluation Tool 7<br />
Rubric - Student View<br />
Mixed Evaluation - Student View<br />
Create a Rubric<br />
1. Log in to <strong>iPeer</strong> and click on the Evaluation Tools tab. The All<br />
My Tools area will display a list <strong>of</strong> any Evaluation Tools that<br />
you have created.<br />
2. In the Rubrics section, click the Add Rubric button (right<br />
side).<br />
3. Enter a descriptive name for the evaluation in the Rubric<br />
Name field.<br />
4. Select a number <strong>of</strong> Level <strong>of</strong> Mastery columns from the dropdown<br />
menu.<br />
5. Select a number <strong>of</strong> Criteria rows from the drop-down menu.<br />
6. Select public or private from the Rubric Availability dropdown<br />
menu to make your rubric available to other <strong>iPeer</strong><br />
instructors or only yourself.<br />
7. Click Next. A Rubric Preview window will appear.<br />
8. Click Add Rubric to save it.<br />
Create a Mixed Evaluation<br />
1. Log in to <strong>iPeer</strong> and click on the Evaluation Tools tab. The All<br />
My Tools area will display a list <strong>of</strong> any Evaluation Tools that<br />
you have created.<br />
2. In the Mixed Evaluations section, click the Add Mix<br />
Evaluation button (right side).<br />
3. Enter a descriptive name for the evaluation in the Mix<br />
Evaluation Name field.<br />
4. Select a number <strong>of</strong> Likert Question rows from the drop-down<br />
menu.<br />
5. Select a number <strong>of</strong> Level <strong>of</strong> Scale columns from the dropdown<br />
menu.<br />
6. Select a number <strong>of</strong> Pre-fill Text Question from the drop-down<br />
menu.<br />
7. Select public or private from the Rubric Availability dropdown<br />
menu to make your rubric available to other <strong>iPeer</strong><br />
instructors or only yourself.<br />
8. Click Next. A Mix Evaluation Preview window will appear.<br />
9. Enter your Evaluation content and then click Add Mix<br />
Evaluation to save it.<br />
Edit an Evaluation<br />
1. Click on the Evaluation Tools tab.<br />
2. In the top menu click Simple Evaluations, Rubrics, or Mixed<br />
Evaluations.<br />
3. Righ-click (Control-click) on the name <strong>of</strong> the Evaluation<br />
that you wish to edit and select Edit Evaluation from the<br />
contextual menu.<br />
4. Make your edits and then click Edit (and Update Format) or<br />
Edit Mixed Evaluation.<br />
OIT Academic Computing, University <strong>of</strong> Massachusetts http://www.oit.umass.edu/academic 120802jc
Gettting <strong>Started</strong> <strong>with</strong> <strong>iPeer</strong> - a Web-based Peer Evaluation Tool 8<br />
Evaluation Events<br />
Create an Evaluation Event<br />
1. Log in to <strong>iPeer</strong>, click on the Home tab, and select the name <strong>of</strong><br />
the course that you would like to create an Evaluation Event<br />
in. The course’s homepage will open.<br />
2. In the Evaluation Events section (right side), click the Add<br />
Event button. The Events window will open.<br />
3. Enter a title for the event in the Event Title field.<br />
4. Select an Evaluation format from the Evaluation Format dropdown<br />
menu (Simple, Rubric, or Mix Evaluation), and then<br />
select a specific Evaluation name from list drop-down menu.<br />
5. Select a Due Date as well as Release Dates from the calendar<br />
tools.<br />
6. From the Available Groups list, select the name <strong>of</strong> the<br />
group(s) that you would like to participate in the Evaluation<br />
Event and click Assign.<br />
7. Click Add Event.<br />
Review Evalution Event Results<br />
1. Log in to <strong>iPeer</strong>, click on the Home tab, and select the name<br />
<strong>of</strong> the Event that you would like to view. The Evaluations<br />
window will open <strong>with</strong> a summary <strong>of</strong> the specific Evaluation<br />
Event results.<br />
From this page you can see how many students have<br />
completed the evaluation and/or how many were late in<br />
completion.<br />
2. Click Results to view evaluation results from each group’s<br />
submissions.<br />
From this page you can mark peer evaluations as having been<br />
Reviewed or Not Reviewed by you; as well as Release Grades<br />
and/or Release Comments, depending on the evaluatio format.<br />
When using the Rubric format you will need to click the Detail<br />
button to access these advanced directives.<br />
Export Evaluation Event Results<br />
1. Log in to <strong>iPeer</strong>, click on the Home tab, and select the name<br />
<strong>of</strong> the Event that you would like to view. The Evaluations<br />
window will open <strong>with</strong> a summary <strong>of</strong> the specific Evaluation<br />
Event results.<br />
2. Click Export Evaluations (top left). The export Evaluation<br />
Results window will open.<br />
3. Check all items that you would like to be included in the<br />
exported CSV file.<br />
4. Click Export. A CSV file will be downloaded that includes all<br />
Evaluation Events to date.<br />
OIT Academic Computing, University <strong>of</strong> Massachusetts http://www.oit.umass.edu/academic 120802jc