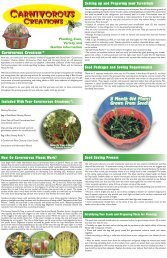
Instruction Manual (.pdf) - DuneCraft
Instruction Manual (.pdf) - DuneCraft
Instruction Manual (.pdf) - DuneCraft

You also want an ePaper? Increase the reach of your titles
YUMPU automatically turns print PDFs into web optimized ePapers that Google loves.
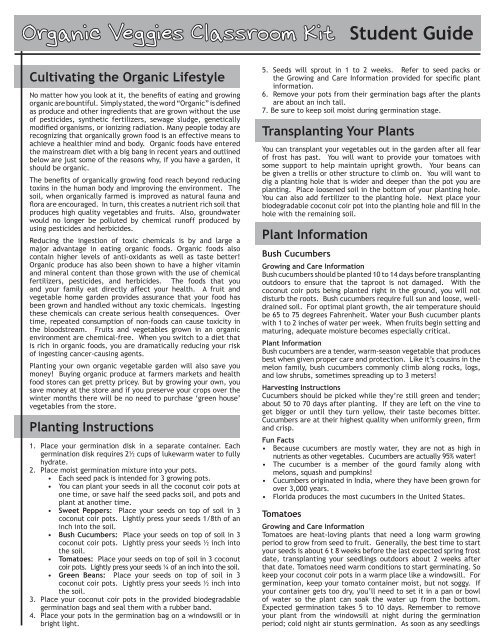
Organic Veggies Classroom Kit Student Guide<br />
Cultivating the Organic Lifestyle<br />
No matter how you look at it, the benefits of eating and growing<br />
organic are bountiful. Simply stated, the word “Organic” is defined<br />
as produce and other ingredients that are grown without the use<br />
of pesticides, synthetic fertilizers, sewage sludge, genetically<br />
modified organisms, or ionizing radiation. Many people today are<br />
recognizing that organically grown food is an effective means to<br />
achieve a healthier mind and body. Organic foods have entered<br />
the mainstream diet with a big bang in recent years and outlined<br />
below are just some of the reasons why, if you have a garden, it<br />
should be organic.<br />
The benefits of organically growing food reach beyond reducing<br />
toxins in the human body and improving the environment. The<br />
soil, when organically farmed is improved as natural fauna and<br />
flora are encouraged. In turn, this creates a nutrient rich soil that<br />
produces high quality vegetables and fruits. Also, groundwater<br />
would no longer be polluted by chemical runoff produced by<br />
using pesticides and herbicides.<br />
Reducing the ingestion of toxic chemicals is by and large a<br />
major advantage in eating organic foods. Organic foods also<br />
contain higher levels of anti-oxidants as well as taste better!<br />
Organic produce has also been shown to have a higher vitamin<br />
and mineral content than those grown with the use of chemical<br />
fertilizers, pesticides, and herbicides. The foods that you<br />
and your family eat directly affect your health. A fruit and<br />
vegetable home garden provides assurance that your food has<br />
been grown and handled without any toxic chemicals. Ingesting<br />
these chemicals can create serious health consequences. Over<br />
time, repeated consumption of non-foods can cause toxicity in<br />
the bloodstream. Fruits and vegetables grown in an organic<br />
environment are chemical-free. When you switch to a diet that<br />
is rich in organic foods, you are dramatically reducing your risk<br />
of ingesting cancer-causing agents.<br />
Planting your own organic vegetable garden will also save you<br />
money! Buying organic produce at farmers markets and health<br />
food stores can get pretty pricey. But by growing your own, you<br />
save money at the store and if you preserve your crops over the<br />
winter months there will be no need to purchase ‘green house’<br />
vegetables from the store.<br />
Planting <strong>Instruction</strong>s<br />
1. Place your germination disk in a separate container. Each<br />
germination disk requires 2½ cups of lukewarm water to fully<br />
hydrate.<br />
2. Place moist germination mixture into your pots.<br />
• Each seed pack is intended for 3 growing pots.<br />
• You can plant your seeds in all the coconut coir pots at<br />
one time, or save half the seed packs soil, and pots and<br />
plant at another time.<br />
• Sweet Peppers: Place your seeds on top of soil in 3<br />
coconut coir pots. Lightly press your seeds 1/8th of an<br />
inch into the soil.<br />
• Bush Cucumbers: Place your seeds on top of soil in 3<br />
coconut coir pots. Lightly press your seeds ½ inch into<br />
the soil.<br />
• Tomatoes: Place your seeds on top of soil in 3 coconut<br />
coir pots. Lightly press your seeds ¼ of an inch into the soil.<br />
• Green Beans: Place your seeds on top of soil in 3<br />
coconut coir pots. Lightly press your seeds ½ inch into<br />
the soil.<br />
3. Place your coconut coir pots in the provided biodegradable<br />
germination bags and seal them with a rubber band.<br />
4. Place your pots in the germination bag on a windowsill or in<br />
bright light.<br />
5. Seeds will sprout in 1 to 2 weeks. Refer to seed packs or<br />
the Growing and Care Information provided for specific plant<br />
information.<br />
6. Remove your pots from their germination bags after the plants<br />
are about an inch tall.<br />
7. Be sure to keep soil moist during germination stage.<br />
Transplanting Your Plants<br />
You can transplant your vegetables out in the garden after all fear<br />
of frost has past. You will want to provide your tomatoes with<br />
some support to help maintain upright growth. Your beans can<br />
be given a trellis or other structure to climb on. You will want to<br />
dig a planting hole that is wider and deeper than the pot you are<br />
planting. Place loosened soil in the bottom of your planting hole.<br />
You can also add fertilizer to the planting hole. Next place your<br />
biodegradable coconut coir pot into the planting hole and fill in the<br />
hole with the remaining soil.<br />
Plant Information<br />
Bush Cucumbers<br />
Growing and Care Information<br />
Bush cucumbers should be planted 10 to 14 days before transplanting<br />
outdoors to ensure that the taproot is not damaged. With the<br />
coconut coir pots being planted right in the ground, you will not<br />
disturb the roots. Bush cucumbers require full sun and loose, welldrained<br />
soil. For optimal plant growth, the air temperature should<br />
be 65 to 75 degrees Fahrenheit. Water your Bush cucumber plants<br />
with 1 to 2 inches of water per week. When fruits begin setting and<br />
maturing, adequate moisture becomes especially critical.<br />
Plant Information<br />
Bush cucumbers are a tender, warm-season vegetable that produces<br />
best when given proper care and protection. Like it’s cousins in the<br />
melon family, bush cucumbers commonly climb along rocks, logs,<br />
and low shrubs, sometimes spreading up to 3 meters!<br />
Harvesting <strong>Instruction</strong>s<br />
Cucumbers should be picked while they’re still green and tender;<br />
about 50 to 70 days after planting. If they are left on the vine to<br />
get bigger or until they turn yellow, their taste becomes bitter.<br />
Cucumbers are at their highest quality when uniformly green, firm<br />
and crisp.<br />
Fun Facts<br />
• Because cucumbers are mostly water, they are not as high in<br />
nutrients as other vegetables. Cucumbers are actually 95% water!<br />
• The cucumber is a member of the gourd family along with<br />
melons, squash and pumpkins!<br />
• Cucumbers originated in India, where they have been grown for<br />
over 3,000 years.<br />
• Florida produces the most cucumbers in the United States.<br />
Tomatoes<br />
Growing and Care Information<br />
Tomatoes are heat-loving plants that need a long warm growing<br />
period to grow from seed to fruit. Generally, the best time to start<br />
your seeds is about 6 t 8 weeks before the last expected spring frost<br />
date, transplanting your seedlings outdoors about 2 weeks after<br />
that date. Tomatoes need warm conditions to start germinating. So<br />
keep your coconut coir pots in a warm place like a windowsill. For<br />
germination, keep your tomato container moist, but not soggy. If<br />
your container gets too dry, you’ll need to set it in a pan or bowl<br />
of water so the plant can soak the water up from the bottom.<br />
Expected germination takes 5 to 10 days. Remember to remove<br />
your plant from the windowsill at night during the germination<br />
period; cold night air stunts germination. As soon as any seedlings
Organic Veggies Classroom Kit Student Guide<br />
Plant Information (continued)<br />
begin to emerge above the soil level, remove from germination<br />
bag and place plant in direct light right away. In 3 or 4 weeks,<br />
or when the weather outdoors has warmed up into the 50 degree<br />
range at night, it’s time to acclimate your seedlings to outdoor<br />
conditions. Start by setting your plants outside in a shady spot<br />
for a half day at first, then 2 or 3 full days. Then gradually move<br />
them into full sun, starting with mornings and then full days.<br />
After your plant has acclimated to outdoor weather conditions,<br />
it’s time to transplant your tomatoes outside!<br />
Plant Information<br />
Native to western South America and Central America, the tomato<br />
was first discovered in 1519, by Cortez growing in Montezuma’s<br />
gardens. Cortez brought the tomato seeds to Europe where they<br />
were planted as an ornamental plant, but never eaten. Because<br />
of the tomatoes close resemblance to the deadly nightshade,<br />
tomatoes were thought to be poisonous by Europeans who were<br />
suspicious of this bright, shiny fruit. There are over 7,500<br />
varieties of tomatoes grown currently, with various ways to<br />
prepare and eat them. Tomatoes are rich in lycopene and grow<br />
3 to 10 feet tall. Consumed throughout the world, the tomato<br />
is believed to benefit the heart and when cooked and has been<br />
found to help prevent prostate cancer.<br />
Harvesting <strong>Instruction</strong>s<br />
Tomatoes fully ripened have a much fuller flavor than tomatoes<br />
that are picked early and then allowed to ripen. Tomatoes also<br />
have a tendency to crack if they stay on the vine too long, so pick<br />
your tomatoes at the peak of redness, or even a tad before. Wash<br />
and dry your tomatoes before storing, unless you’re planning<br />
on storing your tomatoes for over a week, then a windowsill or<br />
bowl will work fine. If you end up with too many tomatoes to<br />
eat at one time, canning, freezing or drying are good methods<br />
for storage. When the end of the season arrives and you still<br />
have green tomatoes on the vine, you can actually cut the vines<br />
off and hang them intact, upside down, in a dark place. Your<br />
tomatoes will ripen this way!<br />
Fun Facts<br />
• The tomato is the world’s most popular fruit.<br />
• Tomatoes are used in many food products. They can be eaten<br />
raw, cooked, steamed, or dried.<br />
• You will need to supply your plants with a trellis or “cage” to<br />
help support the plant as it grows.<br />
Sweet Peppers<br />
Growing and Care Information<br />
In order to grow healthy sweet peppers it’s best to plant your<br />
seeds in late winter and then transplant them outdoors after the<br />
soil and air have warmed up in the spring. Pepper seeds are slow<br />
to germinate so be sure to start them at least 6 to 8 weeks before<br />
the weather starts warming up. Sweet pepper plants cannot<br />
tolerate frost and will not grow well in cold, wet soil. They thrive<br />
in well-drained, fertile soil that is watered properly. Use a starter<br />
fertilizer when transplanted and provide 1 inch of water per week<br />
throughout the growing season. Uniform moisture is essential.<br />
Plant Information<br />
The green pepper is a tender, warm-season vegetable and one of<br />
the most popular garden varieties. Green peppers are crisp and<br />
refreshing consumed raw and a good source of vitamin A and C.<br />
Low in calories and high in very important mineral— potassium.<br />
Green peppers are used as a main ingredient in Louisiana Creole<br />
and Cajun cuisine as well as Italian and Mediterranean cooking.<br />
Harvesting <strong>Instruction</strong>s<br />
Green peppers can be harvested from July to October. These<br />
peppers are usually picked when they are fully grown and mature<br />
— about 3 to 4 inches long, firm and green. Remember, sweet<br />
peppers become sweeter as they mature. When harvesting, do<br />
not pull or tear a pepper from the plant. Try using a sharp knife or<br />
scissors to cut the stem from the plant. Harvesting regularly will<br />
encourage the plant to keep blossoming and setting fruit, especially<br />
early in the growing season.<br />
Fun Facts<br />
• All peppers are rich in vitamin C, but red peppers contain more<br />
than twice as much vitamin C as green peppers.<br />
• Green and red peppers come from the same plant. As the green<br />
pepper matures, their color changes from green to red as they<br />
ripen and become sweeter. That’s why red peppers are sweeter<br />
than green peppers!<br />
• You might think that peppers are vegetables, but they are<br />
actually fruits!<br />
• Peppers come in many colors, including green, yellow, red, even<br />
brown and purple!<br />
Green Beans<br />
Growing and Care Information<br />
Start your green beans seeds 4 to 6 weeks before the last frost.<br />
After placing green bean seeds in your soil, be sure they get plenty<br />
of warmth for germination. Adequate moisture is especially<br />
important for flower bud formation and pod set. Too much or too<br />
little water or excessive heat could cause blossom and pod drop.<br />
Green beans prefer warm soil and full sun. Once your green beans<br />
reach 3 to 4 inches tall you can transplant them outdoors. Placing<br />
a stake or trellis in the ground will help support the green bean<br />
vines as they grow.<br />
Plant Information<br />
Green beans are a very popular warm season crop, bred especially<br />
for the sweetness of their pods. With over 130 varieties, green<br />
beans can be a variety of colors including red, green, and even<br />
purple. There are two major groups of green beans, bush beans<br />
and pole beans. The bush bean variety is about 2 feet tall and<br />
produces all of its fruit in a short period of time, and then ceases<br />
to produce.<br />
Harvesting <strong>Instruction</strong>s<br />
Your green beans will be ready for harvest in two months. Harvest<br />
your green beans once they have reached a mature length and<br />
before bulges start appearing in the pod. The pod should be crisp<br />
and snap when you break them in half. Store your green beans<br />
unwashed and in plastic bags in the refrigerator for up to 3 days.<br />
Do not wash them before refrigerating this will cause your green<br />
beans to spoil.<br />
Fun Facts<br />
• The green bean is a tender, warm season vegetable that ranks<br />
second in popularity in home gardens.<br />
• Bush green beans produce an upright sturdy plant with little or<br />
no runners.<br />
• The first “stringless” bean was bred by Calvin Keeney in 1894.<br />
Company Information<br />
©<strong>DuneCraft</strong>, Inc. 2012<br />
Chagrin Falls, Ohio 44022<br />
All Rights Reserved<br />
Made in the USA<br />
Visit www.dunecraft.com for more information.