Thank you for purchasing the MFJ-208 VHF SWR ... - Thiecom
Thank you for purchasing the MFJ-208 VHF SWR ... - Thiecom
Thank you for purchasing the MFJ-208 VHF SWR ... - Thiecom

You also want an ePaper? Increase the reach of your titles
YUMPU automatically turns print PDFs into web optimized ePapers that Google loves.
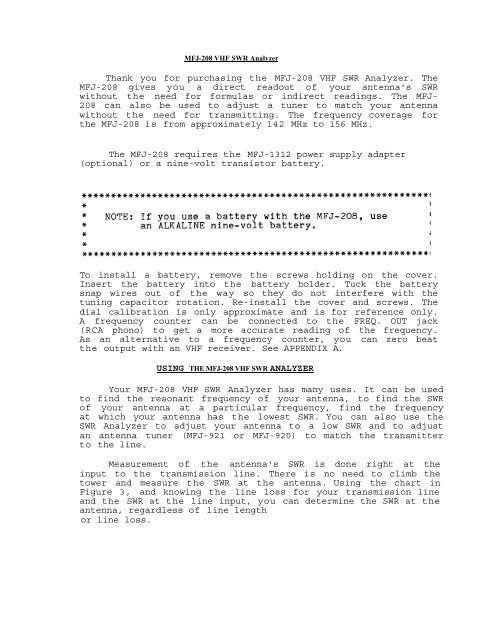
<strong>MFJ</strong>-<strong>208</strong> <strong>VHF</strong> <strong>SWR</strong> Analyzer<br />
<strong>Thank</strong> <strong>you</strong> <strong>for</strong> <strong>purchasing</strong> <strong>the</strong> <strong>MFJ</strong>-<strong>208</strong> <strong>VHF</strong> <strong>SWR</strong> Analyzer. The<br />
<strong>MFJ</strong>-<strong>208</strong> gives <strong>you</strong> a direct readout of <strong>you</strong>r antenna's <strong>SWR</strong><br />
without <strong>the</strong> need <strong>for</strong> <strong>for</strong>mulas or indirect readings. The <strong>MFJ</strong>-<br />
<strong>208</strong> can also be used to adjust a tuner to match <strong>you</strong>r antenna<br />
without <strong>the</strong> need <strong>for</strong> transmitting. The frequency coverage <strong>for</strong><br />
<strong>the</strong> <strong>MFJ</strong>-<strong>208</strong> is from approximately 142 MHz to 156 MHz.<br />
The <strong>MFJ</strong>-<strong>208</strong> requires <strong>the</strong> <strong>MFJ</strong>-1312 power supply adapter<br />
(optional) or a nine-volt transistor battery.<br />
To install a battery, remove <strong>the</strong> screws holding on <strong>the</strong> cover.<br />
Insert <strong>the</strong> battery into <strong>the</strong> battery holder. Tuck <strong>the</strong> battery<br />
snap wires out of <strong>the</strong> way so <strong>the</strong>y do not interfere with <strong>the</strong><br />
tuning capacitor rotation. Re-install <strong>the</strong> cover and screws. The<br />
dial calibration is only approximate and is <strong>for</strong> reference only.<br />
A frequency counter can be connected to <strong>the</strong> FREQ. OUT jack<br />
(RCA phono) to get a more accurate reading of <strong>the</strong> frequency.<br />
As an alternative to a frequency counter, <strong>you</strong> can zero beat<br />
<strong>the</strong> output with an <strong>VHF</strong> receiver. See APPENDIX A.<br />
USING THE <strong>MFJ</strong>-<strong>208</strong> <strong>VHF</strong> <strong>SWR</strong> ANALYZER<br />
Your <strong>MFJ</strong>-<strong>208</strong> <strong>VHF</strong> <strong>SWR</strong> Analyzer has many uses. It can be used<br />
to find <strong>the</strong> resonant frequency of <strong>you</strong>r antenna, to find <strong>the</strong> <strong>SWR</strong><br />
of <strong>you</strong>r antenna at a particular frequency, find <strong>the</strong> frequency<br />
at which <strong>you</strong>r antenna has <strong>the</strong> lowest <strong>SWR</strong>. You can also use <strong>the</strong><br />
<strong>SWR</strong> Analyzer to adjust <strong>you</strong>r antenna to a low <strong>SWR</strong> and to adjust<br />
an antenna tuner (<strong>MFJ</strong>-921 or <strong>MFJ</strong>-920) to match <strong>the</strong> transmitter<br />
to <strong>the</strong> line.<br />
Measurement of <strong>the</strong> antenna's <strong>SWR</strong> is done right at <strong>the</strong><br />
input to <strong>the</strong> transmission line. There is no need to climb <strong>the</strong><br />
tower and measure <strong>the</strong> <strong>SWR</strong> at <strong>the</strong> antenna. Using <strong>the</strong> chart in<br />
Figure 3, and knowing <strong>the</strong> line loss <strong>for</strong> <strong>you</strong>r transmission line<br />
and <strong>the</strong> <strong>SWR</strong> at <strong>the</strong> line input, <strong>you</strong> can determine <strong>the</strong> <strong>SWR</strong> at <strong>the</strong><br />
antenna, regardless of line length<br />
or line loss.
I. Measure <strong>the</strong> antenna's <strong>SWR</strong> at a particular frequency.<br />
1. To check <strong>the</strong> <strong>SWR</strong> of <strong>you</strong>r antenna, connect <strong>the</strong><br />
antenna with a PL-259 connector to <strong>the</strong> ANTENNA<br />
connector on <strong>the</strong> <strong>MFJ</strong>-<strong>208</strong>.<br />
NOTE: If <strong>you</strong> are using coax as <strong>you</strong>r feedline, connect<br />
<strong>the</strong> coax directly to <strong>the</strong> UHF connector marked ANTENNA.<br />
If <strong>you</strong> are using an open-wire feedline, wire <strong>the</strong><br />
feedline to a PL-259 connector, <strong>the</strong>n attach it to<br />
<strong>the</strong> ANTENNA connector of <strong>the</strong> <strong>MFJ</strong>-<strong>208</strong>.<br />
2. Push <strong>the</strong> power button to ON. The LED should light. 3.<br />
Adjust <strong>the</strong> frequency dial of <strong>the</strong> <strong>SWR</strong> ANALYZER to<br />
read <strong>the</strong> frequency at which <strong>you</strong> want to check <strong>the</strong><br />
<strong>SWR</strong>.<br />
4. Read <strong>the</strong> <strong>SWR</strong> from <strong>the</strong> meter.<br />
This is <strong>the</strong> <strong>SWR</strong> at <strong>the</strong> INPUT TO THE TRANSMISSION<br />
line looking toward <strong>the</strong> load (antenna). To<br />
determine <strong>the</strong> <strong>SWR</strong> at <strong>the</strong> antenna, use Figure 3 in<br />
APPENDIX D.<br />
5. Using steps 1 through 5, <strong>you</strong> can make a plot of<br />
<strong>SWR</strong> versus FREQUENCY <strong>for</strong> <strong>you</strong>r antenna. Just plot<br />
<strong>the</strong> <strong>SWR</strong> at many different frequencies. APPENDIX B<br />
has an <strong>SWR</strong> vs. FREQUENCY chart. We suggest <strong>you</strong><br />
make photocopies of this chart so <strong>you</strong> can use it<br />
<strong>for</strong> several antennas.<br />
II. Find <strong>the</strong> frequency at which <strong>the</strong> antenna has <strong>the</strong><br />
lowest <strong>SWR</strong>.<br />
1. Connect <strong>the</strong> antenna to <strong>the</strong> <strong>MFJ</strong>-<strong>208</strong> as in step I.<br />
2. Push <strong>the</strong> power button to ON.<br />
3. Adjust <strong>the</strong> TUNE control throughout its range until<br />
<strong>the</strong> <strong>SWR</strong> meter reads its lowest value. Read <strong>the</strong><br />
frequency on <strong>the</strong> tuning dial. Read <strong>the</strong> <strong>SWR</strong> on <strong>the</strong><br />
meter.<br />
III. Adjust <strong>the</strong> antenna <strong>for</strong> 1:1 <strong>SWR</strong>.<br />
1. Turn <strong>the</strong> frequency TUNE knob until <strong>the</strong> pointer is<br />
on <strong>the</strong> freq at which <strong>you</strong> want to tune <strong>the</strong> antenna.<br />
NOTE: For accuracy, use a frequency counter attached to <strong>the</strong><br />
COUNTER output on <strong>the</strong> <strong>SWR</strong> ANALYZER or zero-beat<br />
against <strong>the</strong> receiver.<br />
2. Read <strong>the</strong> <strong>SWR</strong> on <strong>the</strong> meter. If <strong>the</strong> meter reads<br />
o<strong>the</strong>r than 1:1 <strong>SWR</strong>, adjust <strong>the</strong> antenna until <strong>the</strong><br />
antenna reads 1:1 <strong>SWR</strong> (or lowest value obtainable).
NOTE: The <strong>MFJ</strong>-<strong>208</strong> can tell <strong>you</strong> whe<strong>the</strong>r <strong>the</strong> antenna elements<br />
are too short or too long. If <strong>you</strong> find <strong>the</strong><br />
antenna's resonant frequency is too low, <strong>the</strong>n <strong>the</strong><br />
elements are too long. If <strong>the</strong> resonant frequency is<br />
higher than <strong>you</strong> want, <strong>the</strong>n <strong>the</strong> elements are too<br />
short.<br />
If <strong>you</strong> are adjusting an antenna <strong>for</strong> <strong>the</strong> first time, it is<br />
recommended <strong>you</strong> start with elements a little too long, <strong>the</strong>n<br />
shorten to resonance. Again, <strong>the</strong> <strong>SWR</strong> <strong>for</strong> <strong>you</strong>r particular<br />
antenna may never get as low as 1:1. Adjust <strong>for</strong> <strong>the</strong> lowest<br />
reading.<br />
IV. Using <strong>the</strong> <strong>MFJ</strong>-<strong>208</strong> to adjust an antenna tuner.<br />
1. Connect <strong>the</strong> antenna to <strong>the</strong> antenna tuner connector<br />
marked ANTENNA, <strong>the</strong>n connect <strong>the</strong> tuner connector<br />
marked TRANSMITTER to <strong>the</strong> <strong>MFJ</strong>-<strong>208</strong> connector marked<br />
ANTENNA.<br />
2. Push <strong>the</strong> power to <strong>the</strong> ON position.<br />
3. Set <strong>the</strong> frequency dial to <strong>the</strong> desired operating<br />
frequency. Adjust <strong>the</strong> tuner's controls until <strong>the</strong><br />
meter on <strong>the</strong> <strong>MFJ</strong>-<strong>208</strong> indicates 1:1 <strong>SWR</strong> (nulls).<br />
4. Disconnect <strong>the</strong> <strong>MFJ</strong>-<strong>208</strong> completely and connect <strong>the</strong><br />
tuner to <strong>the</strong> transmitter.<br />
5. Push <strong>the</strong> power switch to <strong>the</strong> OFF position when<br />
<strong>you</strong> are finished checking <strong>the</strong> <strong>SWR</strong>.
We recommend using <strong>the</strong> <strong>MFJ</strong>-1702 coax switch as in <strong>the</strong> diagram below:<br />
WARNING: NEVER TRANSMIT WHILE THE <strong>MFJ</strong>-1702 COAX SWITCH IS SWITCHED<br />
TO A if <strong>the</strong> XMTR is connected to B.<br />
Damage to <strong>you</strong>r radio can occur.<br />
TRANSMIT ONLY WHEN THE COAX SWITCH IS SWITCHED TO THE<br />
CONNECTOR TO WHICH THE XMTR IS CONNECTED.<br />
If <strong>the</strong> XMTR input is on B, <strong>the</strong>n transmit only<br />
when <strong>the</strong> coax switch is in position B.<br />
If <strong>the</strong> XMTR input is on A input, transmit only<br />
when <strong>the</strong> coax switch is in position A.<br />
The center conductor of <strong>the</strong> UNSELECTED position is grounded, so<br />
transmitting into B while <strong>the</strong> switch is thrown to A will cause <strong>you</strong><br />
to be transmitting into a dead short to ground.<br />
NOTE: <strong>MFJ</strong> ENTERPRISES,INC. will NOT be liable <strong>for</strong> any damage<br />
to <strong>you</strong>r radio or o<strong>the</strong>r equipment due to improper<br />
connection or use of <strong>the</strong> <strong>MFJ</strong>-1702 coax switch.
APPENDIX A<br />
HOW TO ZERO-BEAT THE <strong>MFJ</strong>-<strong>208</strong> AGAINST THE RECEIVER<br />
The FREQ. OUT port on <strong>the</strong> <strong>MFJ</strong>-<strong>208</strong> has a sine wave output which<br />
can be used to accurately check <strong>the</strong> frequency at which <strong>the</strong><br />
<strong>MFJ</strong>-<strong>208</strong> is working.<br />
To zero-beat <strong>the</strong> <strong>208</strong> against <strong>the</strong> receiver, loosely couple a<br />
wire from <strong>the</strong> RCA jack (Free. Out) to <strong>the</strong> antenna connector<br />
on <strong>you</strong>r radio.<br />
First, try a small length of wire from <strong>the</strong> FREQ. OUT connector<br />
of <strong>the</strong> <strong>SWR</strong> ANALYZER. Just leave it dangling free, not<br />
touching <strong>the</strong> ANTENNA input of <strong>the</strong> receiver. Place <strong>the</strong> far<br />
end of <strong>the</strong> wire near <strong>the</strong> receiver input but do not<br />
connect to <strong>the</strong> input unless <strong>you</strong> simply cannot hear <strong>the</strong><br />
signal at all in <strong>the</strong> receiver. The output of <strong>the</strong> <strong>SWR</strong> ANALYZER<br />
is high (typically 0 dB). Damage to some radios may occur with<br />
a direct connection, so <strong>you</strong> assume all risk involved in<br />
making a direct connection to <strong>you</strong>r radio.<br />
Turn <strong>the</strong> radio on and tune to <strong>the</strong> frequency in question. For<br />
example, if <strong>you</strong> want to check <strong>you</strong>r 2 meter Yagi on 146 MHz,<br />
set <strong>the</strong> radio <strong>for</strong> 146.000 MHz. Turn <strong>the</strong> audio down because<br />
<strong>the</strong> signal coming out of <strong>the</strong> <strong>MFJ</strong>-<strong>208</strong> is pretty strong.<br />
Adjust <strong>the</strong> TUNE dial on <strong>the</strong> <strong>MFJ</strong>-<strong>208</strong> until <strong>you</strong> start hearing a<br />
tone in <strong>the</strong> radio's speaker. As <strong>you</strong> turn <strong>the</strong> TUNE dial, <strong>the</strong><br />
frequency will start at a very high pitch, <strong>the</strong>n decrease to<br />
zero pitch. Where <strong>the</strong> tone cannot be heard is <strong>the</strong> "zero<br />
beat". That means <strong>the</strong> radio frequency is set to <strong>the</strong> exact<br />
frequency of <strong>the</strong> <strong>MFJ</strong>-<strong>208</strong>.<br />
Now make a note of where <strong>the</strong> dial is set to on <strong>the</strong> <strong>MFJ</strong>-<strong>208</strong><br />
so <strong>you</strong> can re-set <strong>the</strong> frequency if <strong>you</strong> accidentally bump <strong>the</strong> TUNE<br />
control.<br />
You can now disconnect <strong>the</strong> radio and connect <strong>the</strong> antenna to<br />
<strong>the</strong> <strong>MFJ</strong>-<strong>208</strong>.
APPENDIX C<br />
Facts About Transmission Lines and Line Loss.<br />
It is not necessary to connect <strong>the</strong> <strong>MFJ</strong>-<strong>208</strong> to <strong>the</strong> antenna<br />
directly to determine its <strong>SWR</strong>. The <strong>MFJ</strong>-<strong>208</strong> should be<br />
connected to <strong>the</strong> input to <strong>the</strong> transmission line. You do NOT<br />
have to know <strong>the</strong> length in wavelength of <strong>you</strong>r transmission<br />
line, but <strong>you</strong> do need to know <strong>the</strong> number of feet (or meters) and<br />
<strong>the</strong> loss (in dB) <strong>for</strong> <strong>the</strong> length of <strong>the</strong> transmission line <strong>you</strong> are<br />
using. Using <strong>the</strong> <strong>SWR</strong>/Line loss chart below <strong>you</strong> can readily<br />
determine <strong>the</strong> <strong>SWR</strong> at <strong>the</strong> antenna. As <strong>you</strong> will see, <strong>the</strong> most<br />
important consideration <strong>for</strong> any antenna system is probably<br />
<strong>the</strong> loss in <strong>the</strong> transmission line. The less loss, <strong>the</strong><br />
better. Two important points about transmission lines need<br />
to be understood:<br />
1. On a LOSSLESS transmission line, <strong>the</strong> <strong>SWR</strong> read at <strong>the</strong><br />
transmitter is <strong>the</strong> same as <strong>the</strong> <strong>SWR</strong> at <strong>the</strong> antenna. For<br />
any line with loss <strong>the</strong> <strong>SWR</strong> is greatest at <strong>the</strong> antenna<br />
and minimum at <strong>the</strong> transmitter.<br />
2. Regardless of <strong>the</strong> losses in <strong>the</strong> transmission line, if<br />
<strong>the</strong> <strong>SWR</strong> at <strong>the</strong> transmitter is 1:1 (due to matching),<br />
<strong>the</strong>n <strong>the</strong> <strong>SWR</strong> at <strong>the</strong> antenna is 1:1, but if <strong>the</strong>re is ANY<br />
<strong>SWR</strong> at <strong>the</strong> input to <strong>the</strong> transmission line, <strong>the</strong>re is a<br />
higher <strong>SWR</strong> at <strong>the</strong> antenna (assuming anything but a<br />
lossless line).<br />
Let's go through a practical example:<br />
Let's say <strong>you</strong> are using RG-8/U which has a loss of 2.3<br />
dB at 146 MHz per 100 feet. You are using only 50 feet<br />
of cable, so <strong>you</strong>r loss when matched at <strong>the</strong> transmitter<br />
is 1.15 dB at 146 MHz.<br />
Go to Figure 3 and find <strong>the</strong> 1 dB loss line which curves<br />
up and to <strong>the</strong> right.<br />
Now assume <strong>you</strong> are using <strong>the</strong> <strong>MFJ</strong>-<strong>208</strong> and find that <strong>the</strong><br />
lowest <strong>SWR</strong> <strong>you</strong> can get on <strong>you</strong>r antenna is 1.5:1.<br />
Follow <strong>the</strong> 1 dB (1.15 dB is <strong>for</strong> all practical purposes<br />
<strong>the</strong> same as 1.0 dB) curve down to <strong>the</strong> point it reads<br />
1.5:1 on <strong>the</strong> horizontal axis (<strong>SWR</strong> at transmitter).<br />
Looking at <strong>the</strong> vertical axis we can see that <strong>the</strong> point<br />
corresponds to an <strong>SWR</strong> of 1.8:1 on <strong>the</strong> vertical axis.<br />
Reading this chart correctly tells us that with 50 feet of<br />
RG-8/U that has a loss of 2.3 dB per 100 feet at 146 Mhz and a<br />
line input <strong>SWR</strong> of 1.5:1, <strong>the</strong> <strong>SWR</strong> at <strong>the</strong> antenna is<br />
1.8:1.<br />
By <strong>the</strong> way, <strong>the</strong> 1.8:1 <strong>SWR</strong> at <strong>the</strong> load only adds about<br />
.2 dB of loss to <strong>the</strong> already matched 1.15 dB of loss<br />
<strong>for</strong> a total loss of 1.35 dB. (See ARRL Antenna Book.)