

Bissell Pet Hair Eraser Vacuum Cleaner (87B4 ... - Air & Water
Bissell Pet Hair Eraser Vacuum Cleaner (87B4 ... - Air & Water
Bissell Pet Hair Eraser Vacuum Cleaner (87B4 ... - Air & Water

You also want an ePaper? Increase the reach of your titles
YUMPU automatically turns print PDFs into web optimized ePapers that Google loves.
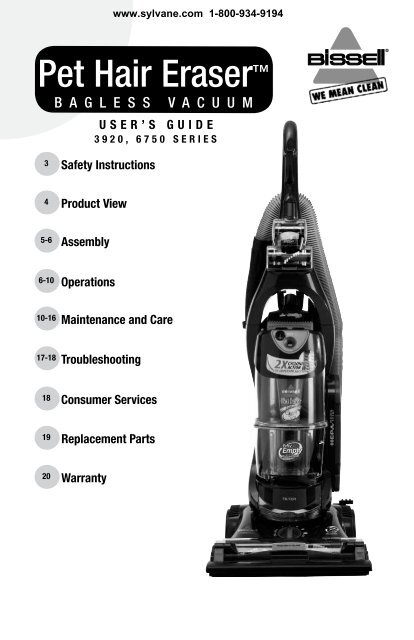
<strong>Pet</strong> <strong>Hair</strong> <strong>Eraser</strong> <br />
B A G L E S S V A C U U M<br />
U S E R ’ S G U I D E<br />
3 9 2 0 , 6 7 5 0 S E R I E S<br />
3 Safety Instructions<br />
4<br />
5-6<br />
6-10<br />
10-16<br />
17-18<br />
18<br />
19<br />
20<br />
Product View<br />
Assembly<br />
Operations<br />
Maintenance and Care<br />
Troubleshooting<br />
Consumer Services<br />
Replacement Parts<br />
Warranty<br />
www.sylvane.com 1-800-934-9194
www.sylvane.com 1-800-934-9194<br />
Thanks for buying a BISSELL <strong>Vacuum</strong><br />
We’re glad you purchased a BISSELL vacuum. Everything we know about<br />
floor care went into the design and construction of this complete,<br />
high-tech home cleaning system.<br />
Your BISSELL vacuum is well made, and we back it with a limited three<br />
year warranty. We also stand behind it with a knowledgeable, dedicated<br />
Consumer Services department, so, should you ever have a problem, you’ll<br />
receive fast, considerate assistance.<br />
My great-grandfather invented the floor sweeper in 1876. Today, BISSELL is<br />
a global leader in the design, manufacture, and service of high quality<br />
homecare products like your BISSELL vacuum .<br />
Thanks again, from all of us at BISSELL.<br />
Mark J. <strong>Bissell</strong><br />
President and Chief Executive Officer<br />
2 w w w . b i s s e l l . c o m 8 0 0 . 2 3 7 . 7 6 9 1
www.sylvane.com 1-800-934-9194<br />
IMPORTANT SAFETY INSTRUCTIONS<br />
When using an electrical appliance, basic<br />
precautions should be observed, including<br />
the following:<br />
READ ALL INSTRUCTIONS<br />
BEFORE USING YOUR<br />
UPRIGhT VACUUM.<br />
Always connect to a polarized outlet (left slot is wider<br />
than right). Unplug from outlet when not in use and<br />
before conducting maintenance.<br />
WARNING: To reduce<br />
the risk of fire, electric shock,<br />
or injury:<br />
■ Do not modify the polarized plug to fit a<br />
non-polarized outlet or extension cord.<br />
■ Do not leave vacuum cleaner unattended when it<br />
is plugged in.<br />
■ Unplug from outlet when not in use and<br />
before servicing.<br />
■ Unplug before attaching the TurboBrush.<br />
■ Do not use outdoors or on wet surfaces.<br />
■ Do not allow children to operate vacuum<br />
cleaner or use as a toy.<br />
■ Close attention is necessary when used by or<br />
near children.<br />
■ Do not use for any purpose other than described in<br />
this user’s guide.<br />
■ Use only manufacturer’s recommended<br />
attachments.<br />
■ Do not use with damaged cord or plug.<br />
■ If appliance is not working as it should, has been<br />
dropped, damaged, left outdoors, or dropped<br />
into water, have it repaired at an authorized<br />
service center.<br />
■ Do not pull or carry by cord, use cord as a handle,<br />
close a door on cord, or pull cord around sharp<br />
edges or corners. Do not run appliance over cord.<br />
Keep cord away from heated surfaces.<br />
■ Do not unplug by pulling on cord. To unplug, grasp<br />
the plug, not the cord.<br />
■ Do not handle vacuum cleaner or plug with<br />
wet hands.<br />
■ Do not put any object into openings. Do not use with<br />
any opening blocked; keep openings free of dust,<br />
lint, hair, and anything that may reduce air flow.<br />
■ Keep hair, loose clothing, fingers, and all parts of<br />
body away from openings and moving parts.<br />
■ Turn off all controls before plugging or unplugging<br />
vacuum cleaner.<br />
■ Use extra care when cleaning stairs.<br />
■ Do not pick up flammable materials (lighter fluid,<br />
gasoline, kerosene, etc.) or use in the presence of<br />
explosive liquids or vapors.<br />
■ Do not pick up toxic material (chlorine bleach,<br />
ammonia, drain cleaner, etc.).<br />
■ Do not use vacuum cleaner in an enclosed space<br />
filled with vapors given off by oil base paint, paint<br />
thinner, some moth proofing substances, flammable<br />
dust, or other explosive or toxic vapors.<br />
■ Do not pick up hard or sharp objects such as<br />
glass, nails, screws, coins, etc.<br />
■ Do not pick up anything that is burning or smoking,<br />
such as cigarettes, matches, or hot ashes.<br />
■ Do not use without filters in place.<br />
■ Use only on dry, indoor surfaces.<br />
■ Keep appliance on a level surface.<br />
■ Do not carry the vacuum cleaner while it<br />
is running.<br />
SAVE ThESE<br />
INSTRUCTIONS FOR<br />
FUTURE USE<br />
ThIS APPLIANCE<br />
hAS A POLARIZED<br />
PLUG.<br />
To reduce the risk of electric shock, this appliance has a<br />
polarized plug (one blade is wider than the other). This plug<br />
will fit in a polarized outlet only one way. If the plug does<br />
not fit fully in the outlet, reverse the plug. If it still does not<br />
fit, contact a qualified electrician to install a proper outlet.<br />
Do not change the plug in any way.<br />
This model is for household use only.<br />
w w w . b i s s e l l . c o m 8 0 0 . 2 3 7 . 7 6 9 1<br />
3
Handle<br />
<strong>Pet</strong> Contour<br />
Tool <br />
Power Switch Clean Filter Indicator<br />
Easy Empty Dirt Container<br />
Washable<br />
Pre-Motor Filter<br />
Headlight<br />
Foot<br />
Window<br />
Product view<br />
<strong>Pet</strong><br />
TurboBrush ®<br />
Upper Tank<br />
<strong>Pet</strong> <strong>Hair</strong> Lifter<br />
www.sylvane.com 1-800-934-9194<br />
Wide Cleaning Foot<br />
Carry Handle<br />
Hose and Cord Clip<br />
Dusting Brush/<br />
Upholstery Tool<br />
Crevice Tool<br />
Twist ‘n<br />
Snap<br />
Hose<br />
HEPA Media<br />
Post Motor Filter<br />
Lock ‘n Seal ® Lever<br />
Handle Release<br />
Pedal<br />
Height Adjustment<br />
Knob<br />
Power Cord<br />
Stretch Hose<br />
Extension Wand<br />
Scuff Resistant Bumper<br />
Quick Release <br />
Cord Wraps<br />
Curved<br />
Hose<br />
Wand<br />
Lower<br />
Hose Clip<br />
Hose<br />
Wand<br />
Base<br />
4 w w w . b i s s e l l . c o m 8 0 0 . 2 3 7 . 7 6 9 1
Assembly CAUTION:<br />
Do not plug in your<br />
The only tool you’ll need to assemble your<br />
vacuum cleaner is a Phillips screwdriver.<br />
Attach handle to vacuum<br />
1. Locate the handle and cord wrap. Remove<br />
the screw packet taped to the handle.<br />
2. Stand the vacuum upright and from the<br />
rear of the unit, slide the base of the handle<br />
firmly into the grooves at the top of the<br />
vacuum body.<br />
3. IMPORTANT – before inserting the screws<br />
into the handle, slide the cord wrap into the<br />
handle.<br />
4. Ensure that the handle and cord wrap fit<br />
firmly to the vacuum body. If there are<br />
any gaps, continue to push firmly until the<br />
handle and cord wrap are flush.<br />
5. Insert 2 of the screws provided (3 total)<br />
into the existing holes, attaching the cord<br />
wrap and handle to the body of the vacuum.<br />
Tighten securely with a screwdriver.<br />
6. Attach the hose and cord clip by snapping<br />
it into the handle of the unit. Secure it by<br />
inserting the screw provided.<br />
7. Attach the lower hose clip by snapping it<br />
into place and twisting to the right.<br />
7.<br />
www.sylvane.com 1-800-934-9194<br />
Hose Clip<br />
vacuum cleaner until<br />
you are familiar with<br />
all instructions and<br />
operating procedures.<br />
WARNING:<br />
Plastic film can be<br />
dangerous. To avoid<br />
danger of suffocation,<br />
keep away from babies<br />
and children.<br />
w w w . b i s s e l l . c o m 8 0 0 . 2 3 7 . 7 6 9 1<br />
2.<br />
6.<br />
3.<br />
5
Assembly<br />
Attach vacuum hose and tools<br />
1. Line up the tabs on the base of the Twist ‘n<br />
Snap hose with the corresponding notches<br />
on the hose collar as shown.<br />
2. Turn the Twist ‘n Snap hose to the left<br />
to lock the hose into place.<br />
3. Connect the curved hose wand to the hose.<br />
Grasping the curved hose wand, slide the<br />
end of the curved hose wand onto the hose<br />
wand base. Snap the hose into the hose clip.<br />
NOTE: The vacuum will not operate effectively<br />
unless the curved hose wand is firmly attached.<br />
4. Slide the extension wand and crevice tool<br />
together into the storage clip.<br />
5. Slide the dusting brush/upholstery tool into<br />
the storage clip.<br />
6. Attach the <strong>Pet</strong> Contour Tool by aligning the<br />
slots at the bottom with the tabs on the<br />
upper tank cap, then snap back into the two<br />
posts to secure.<br />
7. Store <strong>Pet</strong> TurboBrush on the front of the<br />
handle by lining up the TurboBrush base<br />
with the base of the holder then push back<br />
to snap into place.<br />
8. Flip the pet hair lifter down until it clicks into<br />
place on the front of the foot.<br />
NOTE: Flip the <strong>Pet</strong> hair Lifter down for carpeted<br />
surfaces and up for non-carpeted surfaces (see<br />
page 7 for more information).<br />
Operations<br />
Power switch<br />
www.sylvane.com 1-800-934-9194<br />
The Power Switch is located just below the<br />
handle on the front of the vacuum. Push the<br />
rocker switch “ON” (I) to vacuum, and “OFF” (O)<br />
when cleaning is complete.<br />
CAUTION:<br />
Before using your vacuum,<br />
make sure that the dirt<br />
container is in the locked<br />
position and that all filters<br />
(pre-motor and hEPA postmotor)<br />
are in place. Do not<br />
operate your vacuum<br />
without these filters.<br />
NOTICE:<br />
For above floor cleaning, the floor<br />
brush will continue to rotate but<br />
is raised above floor. To prevent<br />
carpet damage, do not lean on<br />
the vacuum or let the powerfoot<br />
tilt forward.<br />
CAUTION:<br />
To avoid personal injury<br />
and to prevent the cleaner<br />
from falling when cleaning<br />
stairs, always place it at<br />
the bottom of the stairs.<br />
6 w w w . b i s s e l l . c o m 8 0 0 . 2 3 7 . 7 6 9 1<br />
7.<br />
1.<br />
8.<br />
Twist 'n<br />
Snap Hose<br />
6.<br />
<strong>Pet</strong> <strong>Hair</strong> Lifter
Operations<br />
handle positions<br />
Press the handle release pedal, located on the lower<br />
left side of the vacuum, with your foot to place your<br />
vacuum into one of three cleaning positions.<br />
1. Upright – For storage and above floor<br />
cleaning with tools.<br />
2. Normal Cleaning – Press handle release<br />
pedal once. Position used for most<br />
household floor cleaning tasks.<br />
3. Low Cleaning – With the vacuum in normal<br />
cleaning position, press handle release pedal<br />
again. Use for reaching under low furniture<br />
such as tables, chairs or beds.<br />
height adjustment<br />
www.sylvane.com 1-800-934-9194<br />
There are seven height settings available for<br />
various floor surfaces. Turn the dial on the foot of<br />
the cleaner to the desired setting.<br />
Lowest setting – For low pile carpet or bare<br />
floors. To pick up debris it may be necessary to<br />
move up one setting.<br />
Medium settings – For medium pile carpet.<br />
high setting – For high pile and most shag carpet.<br />
Note: For optimal carpet cleaning<br />
performance, adjust to the lowest practical<br />
setting. If your cleaner is difficult to push,<br />
adjust to the next higher setting.<br />
If the dial is difficult to turn, tilt the cleaner<br />
back slightly to take the weight off the foot while<br />
turning.<br />
<strong>Pet</strong> hair Lifter<br />
Use to pick up pet hair from carpeted surfaces. Just<br />
vacuum like you normally would. The vacuum will<br />
grab pet hair when you pull back and it will release<br />
hair and suction it up when you push forward.<br />
NOTE: Turn vacuum off before you flip up or<br />
flip down the <strong>Pet</strong> hair Lifter.<br />
1. To vacuum carpeting, while vacuum is in<br />
upright position flip down until it clicks into<br />
place on the front of the foot. Turn height<br />
adjustment knob to pet hair setting.<br />
2. To vacuum non-carpet surfaces flip up. Push the<br />
yellow release button just above the feature, and<br />
it will flip up and out of the way.<br />
1. 2.<br />
Tip:<br />
Before cleaning under low furniture, check<br />
area first for objects that might harm the unit<br />
or block the vacuum hose.<br />
w w w . b i s s e l l . c o m 8 0 0 . 2 3 7 . 7 6 9 1<br />
1.<br />
2.<br />
3.<br />
7
Operations<br />
Transporting cleaner<br />
1. To move your cleaner from room to room,<br />
put the handle in the upright position, tilt<br />
the cleaner back on its rear wheels and<br />
push forward.<br />
2. The cleaner can also be moved by using<br />
the carry handle.<br />
Clean filter indicator<br />
www.sylvane.com 1-800-934-9194<br />
The clean filter Indicator tells you when the air flow<br />
in your vacuum is reduced due to dirty filters or a<br />
clog in the hose. The clean filter indicator will remain<br />
green while the unit is running until the airflow is<br />
reduced by a clog or dirty filter. At that time, it begins<br />
to change to red or black. When it is fully red, the<br />
airflow is significantly reduced or clogged by a dirty<br />
filter. Follow the steps on page 11 to clean your<br />
filters. All filters in the vacuum should be cleaned or<br />
replaced when the clean filter indicator turns red.<br />
If the indicator turns black, it means you have a clog<br />
in your hose.To check and remove the clog, remove<br />
the hose from the unit by turning the Twist ‘n Snap<br />
hose to the right.Try to visually locate the clog. Once<br />
you have done this, use a blunt long object such as a<br />
broom handle to loosen and remove the debris. Once<br />
this is completed, reassemble the hose to the unit.<br />
If the indicator remains red or black with the<br />
vacuum running, follow the steps on page 15 to<br />
check for and clear clogs.<br />
NOTE: When your vacuum is turned off,<br />
the clean filter indicator will go to the red<br />
color setting. The clean filter indicator<br />
only detects reductions in airflow when<br />
the vacuum power is on.<br />
2a.<br />
2b.<br />
right way to carry wrong way to carry<br />
Clean<br />
Filter<br />
Indicator<br />
NOTICE:<br />
While vacuuming, certain carpets<br />
and low humidity conditions may<br />
generate small static discharges.<br />
The discharges are entirely<br />
harmless and are not associated<br />
in any way with the main<br />
power supply.<br />
8 w w w . b i s s e l l . c o m 8 0 0 . 2 3 7 . 7 6 9 1<br />
1.
Operations<br />
Special on-board tools<br />
www.sylvane.com 1-800-934-9194<br />
Your vacuum is not only a powerful carpet and<br />
rug cleaner, it’s also a versatile above floor<br />
vacuum cleaner when you select one of the<br />
special tools.<br />
1. Raise the handle to the upright position.<br />
2. Grasp the curved hose wand handle to separate<br />
from hose wand base.<br />
3. Attach tools by firmly pushing onto vacuum<br />
hose, curved hose wand or extension wand.<br />
They are a friction fit, so be sure the hose<br />
and tool fit snuggly together.<br />
Dusting Brush/Upholstery Tool: Two types of<br />
cleaning tools in one attachment.<br />
• Use the dusting brush to dust<br />
furniture, blinds, books, lamps, shelves<br />
and baseboards.<br />
• Slide the brush off to use the<br />
upholstery tool on cushions,<br />
draperies and fabrics.<br />
Crevice Tool: Use in tight narrow spaces.<br />
Extension Wand: Use with desired attachment for<br />
a longer reach.<br />
Curved hose Wand: Use with desired attachment<br />
for a longer reach or for cleaning hard to<br />
reach places.<br />
<strong>Pet</strong> Contour Tool: Use to reach into corners<br />
and edges on stairs as well as armrests<br />
and other curved surfaces. The tool can be<br />
flipped to use in any direction.<br />
<strong>Pet</strong> TurboBrush: Use rotating brush action for<br />
small flat areas such as cushions and beds.<br />
NOTE: Press gently down and pull towards<br />
you in a raking motion. Too much pressure<br />
will cause the brush to stop rotating.<br />
Dusting Brush/<br />
Upholstery Tool<br />
Crevice Tool<br />
Extension Wand<br />
Curved Hose<br />
Wand<br />
Hose Wand<br />
Base<br />
NOTICE:<br />
These tools are designed to<br />
remove pet hair from upholstered<br />
or carpeted surfaces. They<br />
should not be used on pets.<br />
Tip:<br />
<strong>Hair</strong>, string and small objects can block<br />
the vacuum hose or tools. Check them<br />
occasionally for obstructions.<br />
CAUTION:<br />
The rotating floor brush continues to rotate while tools are in use. To reduce<br />
the risk of injury from moving parts, always move the cleaner with the carrying<br />
handle. Always place vacuum cleaner on the floor with handle in upright position<br />
when using tools. Never place your fingers under the cleaner when it is running.<br />
Never place powerfoot on furniture or uneven surfaces. Do not place vacuum<br />
cleaner close enough to objects to pull them into rotating brush.<br />
w w w . b i s s e l l . c o m 8 0 0 . 2 3 7 . 7 6 9 1<br />
9
Operations<br />
Power cord usage<br />
1. To use your vacuum, remove the cord and<br />
plug it into an electrical outlet. For your<br />
convenience, there are two quick release<br />
cord wraps for easy cord removal. There is<br />
also a cord clip that is part of the upper cord<br />
wrap where you can attach the cord when<br />
vacuuming.<br />
2. When you are finished cleaning, turn<br />
vacuum cleaner off.<br />
3. Unplug power cord by grasping the polarized<br />
plug (NOT the cord) and disconnect from outlet.<br />
4. Loop power cord around cord wraps on rear<br />
of vacuum cleaner. Be sure to first return the<br />
quick release cord wraps back to their<br />
original position before wrapping the cord.<br />
5. Clip molded plug to power cord to secure.<br />
Maintenance and care<br />
www.sylvane.com 1-800-934-9194<br />
To maximize your cleaning performance and<br />
extend the life of your vacuum, it is very<br />
important that you empty your dirt container<br />
and check and clean your filters frequently.<br />
Perform the following maintenance steps:<br />
1. Empty the dirt container when the dirt reaches<br />
the “Full” line on the container, or more frequently<br />
to prevent overfills. For best performance, empty<br />
after each use.<br />
2. Check the pre-motor filter and post-motor HEPA<br />
media filter at least once a month, clean or<br />
replace as needed.<br />
NOTE: Be sure to clean or replace your<br />
filters anytime the clean filter indicator<br />
begins to turn red.<br />
NOTE: More frequent filter cleaning may<br />
be necessary if you are vacuuming new<br />
carpet, fine dust, or have allergy concerns.<br />
Follow the instructions on the following<br />
pages to perform these simple maintenance<br />
steps.<br />
Quick Release<br />
Cord Wraps<br />
WARNING:<br />
To reduce the risk of electric<br />
shock, turn power switch OFF<br />
and disconnect polarized plug<br />
from electrical outlet before<br />
performing maintenance or<br />
troubleshooting checks.<br />
Tip:<br />
To maximize cleaning performance, check<br />
and clean or replace all filters as suggested.<br />
10 w w w . b i s s e l l . c o m 8 0 0 . 2 3 7 . 7 6 9 1
Maintenance and care<br />
Empty dirt container<br />
www.sylvane.com 1-800-934-9194<br />
The dirt container needs to be emptied when the<br />
dirt reaches the “Full” line on the container.<br />
1. Unplug the vacuum from electrical outlet<br />
2. Slide the Lock ‘n Seal Lever to the “Unlock”<br />
position.<br />
3. Grasp handle and pull the dirt container<br />
straight out to remove from the vacuum.<br />
4. Empty dirt into garbage container.<br />
NOTE: Emptying the dirt container after<br />
every use will help prevent over filling and<br />
ensure that the vacuum is ready to go the<br />
next time you clean.<br />
Cleaning the pre-motor and post-motor hEPA media filter Post-Motor<br />
1. Unplug the vacuum from electrical outlet.<br />
HEPA<br />
Media<br />
2. The pre-motor filter protects the motor<br />
from dirt particles. It is located in the<br />
slide out tray underneath the dirt<br />
container. If the filter becomes dirty, pull<br />
out the tray, lift out the foam filter pad<br />
and clean it.<br />
NOTE: The pre-motor filter may be<br />
hand washed in cold water with mild<br />
Washable<br />
detergent. Rinse well and air dry Pre-Motor<br />
thoroughly before replacing. Filter<br />
Filter<br />
3. The post-motor HEPA media filter<br />
assists in the filtration process to<br />
return clean air to the room. It is<br />
located behind the door on the side<br />
of the vacuum. If the filter becomes<br />
dirty, open the door, remove the filter<br />
and replace.<br />
NOTE: The post-motor filter is a<br />
white, pleated hEPA media filter. This<br />
filter is not washable and must be<br />
replaced when it becomes dirty.<br />
WARNING:<br />
Do not operate cleaner<br />
with damp or wet filters or<br />
without all filters in place.<br />
w w w . b i s s e l l . c o m 8 0 0 . 2 3 7 . 7 6 9 1<br />
2.<br />
Unlock<br />
4.<br />
11
Maintenance and care<br />
www.sylvane.com 1-800-934-9194<br />
Check rotating floor brush and drive belt<br />
You should check your vacuum cleaner’s<br />
rotating floor brush and drive belt regularly<br />
for wear or damage. You should also clean<br />
the brush and brush ends of strings, hair<br />
and carpet fibers. This type of debris can<br />
wrap around the brush and hamper its<br />
ability to effectively clean your carpet. Also<br />
remove any debris that has accumulated<br />
under the brush cover.<br />
1. Unplug the vacuum from electrical outlet.<br />
2. Place handle in low position and turn<br />
vacuum cleaner over so bottom side is<br />
facing up.<br />
3. Lift tab 1 and release the three latches<br />
in order 2-4 marked. Lift off the brush<br />
cover.<br />
4. Grasp rotating floor brush at both ends<br />
and lift.<br />
5. Clean strings, hair and other debris from<br />
rotating floor brush, paying particular<br />
attention to brush ends.<br />
6. Clean strings, hair and other debris from<br />
motor pulley and drive belt areas.<br />
7. Check drive belt carefully for wear, cuts or<br />
stressed areas.<br />
8. Check air passageway for obstructions.<br />
Remove debris from this area.<br />
12 w w w . b i s s e l l . c o m 8 0 0 . 2 3 7 . 7 6 9 1<br />
3.<br />
Motor Pulley<br />
WARNING:<br />
To reduce the risk of injury<br />
from moving parts, turn<br />
vacuum cleaner off and<br />
disconnect power plug<br />
from electrical outlet.<br />
<strong>Air</strong> Passageway
Maintenance and care<br />
www.sylvane.com 1-800-934-9194<br />
Replace drive belt<br />
1. Unplug the vacuum from electrical outlet.<br />
2. With rotating floor brush removed from<br />
vacuum cleaner (Steps 1-4 of check<br />
rotating floor brush and drive belt),<br />
grasp old drive belt and remove from<br />
motor pulley. Discard the old drive belt.<br />
3. Place new drive belt over motor pulley<br />
and loop other end over rotating floor<br />
brush in the space between the bristles.<br />
NOTE: It is important that you use only<br />
genuine BISSELL replacement belts.<br />
Generic belts may not meet the exacting<br />
specifications required to keep your<br />
vacuum operating at its peak performance.<br />
The use of unbranded belts could lead to<br />
early failure of the vacuum and could void<br />
your warranty.<br />
3.<br />
Motor Pulley<br />
4. Pull the rotating floor brush firmly<br />
into position, stretching the drive belt,<br />
and place ends of rotating floor brush<br />
down into the slots on sides as shown.<br />
Alignment of brush ends in slots may be<br />
necessary to fully insert the brush.<br />
5. Turn rotating floor brush by hand several<br />
times in the direction of motor pulley. If<br />
properly installed, drive belt will center<br />
itself on rotating brush crown.<br />
6. Insert front edge of brush cover, rotate<br />
into place, and snap 3 latches.<br />
w w w . b i s s e l l . c o m 8 0 0 . 2 3 7 . 7 6 9 1<br />
13
Maintenance and care<br />
www.sylvane.com 1-800-934-9194<br />
Replace lightbulb<br />
1. Unplug the vacuum from electrical outlet.<br />
2. Using a flat bladed screwdriver, pry the tab<br />
on the left and right side out and pull out to<br />
remove the lens.<br />
3. Remove the bulb from the socket by<br />
grasping the bulb and pulling gently. Install<br />
the new bulb by pushing it gently into the<br />
socket until the bulb snaps into place.<br />
4. Reposition the lens and snap it back<br />
into place.<br />
Maintaining <strong>Pet</strong> TurboBrush ®<br />
The <strong>Pet</strong> TurboBrush should be checked regularly<br />
for clogs or debris wrapping around the brush.<br />
1. Unplug the vacuum from electrical outlet.<br />
2. If a clog is present or debris is visible, unscrew<br />
the two screws on the back of the TurboBrush to<br />
remove the faceplate and clear any obstructions.<br />
3. To clean debris from the brush, remove the<br />
brush from the drive belt and clean debris.<br />
4. Reposition the drive belt on the brush.<br />
Place ends of brush in slots on sides.<br />
Reposition faceplate and secure with<br />
two screws.<br />
NOTE: This tool is designed to remove pet<br />
hair from upholstered or carpeted surfaces.<br />
It should not be used on pets.<br />
14 w w w . b i s s e l l . c o m 8 0 0 . 2 3 7 . 7 6 9 1<br />
4.<br />
2.<br />
3.
Maintenance and care<br />
Clearing clogs<br />
Low suction or poor pickup may be due to a clog<br />
in the vacuum cleaner. If you notice a change in<br />
the sound of the motor, check for clogs.<br />
1. Unplug the vacuum from electrical outlet.<br />
2. Empty dirt container.<br />
www.sylvane.com 1-800-934-9194<br />
3. Check upper tank for build up or clogs.<br />
4. If you notice a clog in the upper tank,<br />
remove the separator plate (see section<br />
"Cleaning the Upper Tank" on page 16).<br />
5. Grasp the curved wand and separate it from<br />
the hose wand base. Check for a clog in the<br />
base, the wand or in the hose.<br />
NOTE: On select units that have the clean<br />
filter indicator, when the indicator reads<br />
black, there is a clog in the hose which is<br />
diminishing suction power. Remove the clog<br />
in the hose to restore full suction power.<br />
6. Remove the Twist ‘n Snap hose from the vacuum<br />
by turning to the right. Straighten the hose and<br />
unclog with a long, narrow object such as a<br />
broom handle.<br />
7. If you notice debris or dirt clogged in the<br />
connecting tube, remove it by pulling it out at the<br />
top and lifting the tube out. Clean the tube of any<br />
debris and clear any possible clog from the port<br />
to the pre-motor filter. Reattach tube by first<br />
installing the base and than push in the top of<br />
the tube.<br />
8. If the clog persists, follow the instructions for<br />
checking the rotating floor brush and drive<br />
belt on page 12 and inspect the air<br />
passageway for obstructions.<br />
w w w . b i s s e l l . c o m 8 0 0 . 2 3 7 . 7 6 9 1<br />
4.<br />
2.<br />
5.<br />
Connecting<br />
Tube<br />
Hose Wand Base<br />
Bottom<br />
Port<br />
15
Maintenance and care<br />
www.sylvane.com 1-800-934-9194<br />
Cleaning the upper tank<br />
1. Grasp the inner cyclone and twist to the left<br />
or to the unlocked marking, until the locking<br />
tabs stop the rotation. Pull down from the<br />
upper tank to remove it.<br />
2. Wipe out the inside of the upper tank and the<br />
inner cyclone with a damp cloth moistened<br />
with water or a mild cleaning solution.<br />
3. If you desire to thoroughly clean the louvers<br />
located in the upper portion of the inner<br />
cyclone, hold the bottom of the cyclone and<br />
gently pull straight up on the louvers.<br />
4. The inner cyclone and louvers may be<br />
washed using a mild detergent. Be sure it<br />
is completely dry before reassembling or<br />
damage to your unit may result.<br />
5. Once cleaning is completed, reassemble the<br />
louvers over the inner cyclone by<br />
sliding it straight down on the top of the<br />
inner cyclone. Be sure to line up the tabs<br />
when reassembling for proper installation.<br />
6. To replace the inner cyclone, slide it into<br />
the upper housing. Be sure to line up the<br />
inner cyclone by having the marking (Front)<br />
positioned toward the front of the unit. Push<br />
the inner cyclone in and rotate it to the right<br />
or locked marking until the locking tabs stop<br />
the rotation.<br />
16 w w w . b i s s e l l . c o m 8 0 0 . 2 3 7 . 7 6 9 1<br />
1.<br />
3.<br />
5.<br />
6.
www.sylvane.com 1-800-934-9194<br />
Troubleshooting<br />
<strong>Vacuum</strong> cleaner won’t run<br />
WARNING:<br />
To reduce the risk of electric shock,<br />
turn power OFF and disconnect<br />
polarized plug from electrical outlet<br />
before performing maintenance or<br />
troubleshooting.<br />
Possible causes Remedies<br />
1. Power cord not plugged in 1. Check electrical plug<br />
2. Blown fuse/tripped breaker in home 2. Check/replace fuse or reset breaker<br />
3. Damaged power cord 3. Unplug, check for damage, replace<br />
as necessary<br />
<strong>Vacuum</strong> cleaner and tools won’t pick up dirt<br />
Possible causes Remedies<br />
1. Incorrect height adjustment 1. Adjust powerfoot to correct height<br />
2. Hose not attached to suction opening 2. Firmly push curved hose wand into hose<br />
wand base<br />
3. Twist 'n Snap hose not securely attached 3. Make sure Twist 'n Snap hose is snapped<br />
into locked position<br />
4. Crack or hole in hose 4. Check hose and replace if needed<br />
5. Broken or worn drive belt 5. Replace drive belt, see pages 12-13<br />
6. Rotating floor brush bristles worn 6. Replace brush<br />
7. Rotating floor brush jammed 7. Remove brush and clean debris from<br />
brush ends<br />
8. Clog in vacuum 8. Clear clogs, see page 15<br />
9. Dirt container full 9. Empty dirt container<br />
10. Dirt container not installed properly 10. Position correctly and lock in place<br />
11. Filters are dirty 11. Check pre-motor and post-motor filters<br />
12. TurboBrush is clogged or debris is wrapped 12. Maintaining TurboBrush, see page 14<br />
around the brush roll<br />
<strong>Vacuum</strong> cleaner is difficult to push<br />
Possible causes Remedies<br />
1. Incorrect height setting 1. Adjust powerfoot to correct height setting<br />
Visible dirt escaping from cleaner<br />
Possible causes Remedies<br />
1. Dirt container full 1. Empty dirt container<br />
2. Filters missing or installed incorrectly 2. Check pre-motor and post-motor filters for<br />
correct installation<br />
3. Dirt container installed incorrectly 3. Pull out and re-insert dirt container correctly<br />
w w w . b i s s e l l . c o m 8 0 0 . 2 3 7 . 7 6 9 1<br />
17
Troubleshooting<br />
www.sylvane.com 1-800-934-9194<br />
Other maintenance or service not included in the manual should be performed by an<br />
authorized service representative.<br />
Thank you for selecting a BISSELL product.<br />
Please do not return this product to the store.<br />
For any questions or concerns, BISSELL is happy to be of service.<br />
Contact us directly at 1-800-237-7691.<br />
BISSELL Consumer Services<br />
For information about repairs or replacement parts, or questions about your warranty, call:<br />
BISSELL Consumer Services<br />
1-800-237-7691<br />
Monday - Friday 8 a.m. — 10 p.m. ET<br />
Saturday 9 a.m. — 8 p.m. ET<br />
Or write:<br />
BISSELL Homecare, Inc.<br />
PO Box 3606<br />
Grand Rapids MI 49501<br />
ATTN: Consumer Services<br />
Or visit the BISSELL website - www.bissell.com<br />
When contacting BISSELL, have model number of cleaner available.<br />
Please record your Model Number: ___________________<br />
Please record your Purchase Date: ___________________<br />
NOTE: Please keep your original sales receipt. It provides proof of purchase date in the event of<br />
a warranty claim. See Warranty on page 20 for details.<br />
Please register your new BISSELL product at<br />
www.bissell.com/productregistration<br />
16 18 w w w . b i s s e l l . c o m 8 0 0 . 2 3 7 . 7 6 9 1
www.sylvane.com 1-800-934-9194<br />
Replacement parts - BISSELL vacuum<br />
You may purchase parts from your retailer, by calling BISSELL Consumer Services or by<br />
visiting our website. Below is a list of common replacement parts. While not all of these<br />
parts may have come with your specific model, they are available for purchase if desired.<br />
Please note, all attachments may not store on board your vacuum.<br />
Item Part No. Part Name<br />
1 32074 Style 7/9/10/12/14 Drive Belt (2-Pack)<br />
2 203-1297 Headlight Bulb<br />
3 203-1063 Crevice Tool<br />
4 203-1228 Dusting Brush/Upholstery Tool<br />
5 203-1399 <strong>Pet</strong> TurboBrush<br />
6 203-1368 <strong>Pet</strong> Contour Tool<br />
7 203-1022 Extension Wand<br />
8 203-2303 Curved Hose Wand<br />
9 203-2304 Twist 'n Snap <strong>Vacuum</strong> Hose (clear)<br />
10 203-2305 Wide Window Foot Brush Roll (gray)<br />
11 3290 Style 7/8/14 Pre-Motor Foam Filter<br />
12 3091 Style 8/14 HEPA Media POST-Motor Filter<br />
13 203-2306 Hose & Cord Wrap<br />
14 203-2307 Cord Clip<br />
15 203-2308 Hose Clip<br />
16 203-7130 <strong>Pet</strong> <strong>Hair</strong> Lifter<br />
1 2 3 4 5 6<br />
7 8 9 10 11 12<br />
13 14 15 16<br />
w w w . b i s s e l l . c o m 8 0 0 . 2 3 7 . 7 6 9 1 16 19
www.sylvane.com 1-800-934-9194<br />
Warranty - BISSELL <strong>Pet</strong> hair <strong>Eraser</strong> <strong>Vacuum</strong><br />
This warranty gives you specific legal rights, and you may also have other rights which may vary from state<br />
to state. If you need additional instruction regarding this warranty or have questions regarding what it may<br />
cover, please contact BISSELL Consumer Services by E-mail, telephone, or regular mail as described below.<br />
Limited Three Year Warranty<br />
Subject to the *EXCEPTIONS AND EXCLUSIONS identified below, upon receipt of the product BISSELL<br />
Homecare, Inc. will repair or replace (with new or remanufactured components or products), at BISSELL’s<br />
option, free of charge from the date of purchase by the original purchaser, for three years any defective or<br />
malfunctioning part.<br />
See information below on "If your BISSELL product should require service".<br />
This warranty applies to product used for personal, and not commercial or rental service. This warranty does not<br />
apply to fans or routine maintenance components such as filters, belts, or brushes. Damage or malfunction caused<br />
by negligence, abuse, neglect, unauthorized repair, or any other use not in accordance with the User's Guide is<br />
not covered.<br />
If your BISSELL product should require service:<br />
Contact BISSELL Consumer Services to locate a BISSELL Authorized Service Center in your area.<br />
If you need information about repairs or replacement parts, or if you have questions about your warranty,<br />
contact BISSELL Consumer Services.<br />
Website or E-mail:<br />
www.bissell.com<br />
Use the “Customer Services” tab.<br />
Or Call:<br />
BISSELL Consumer Services<br />
1-800-237-7691<br />
Monday - Friday 8 a.m. - 10 p.m. ET<br />
Saturday 9 a.m. - 8 p.m. ET<br />
Or Write:<br />
BISSELL Homecare, Inc.<br />
PO Box 3606<br />
Grand Rapids, MI 49501<br />
ATTN: Consumer Services<br />
BISSELL HOMECARE, INC. IS NOT LIABLE FOR INCIDENTAL OR<br />
CONSEQUENTIAL DAMAGES OF ANY NATURE ASSOCIATED WITH THE<br />
USE OF THIS PRODUCT. BISSELL’S LIABILITY WILL NOT EXCEED THE<br />
PURCHASE PRICE OF THE PRODUCT.<br />
Some states do not allow the exclusion or limitation of incidental or consequential damages, so the above<br />
limitation or exclusion may not apply to you.<br />
*EXCEPTIONS AND EXCLUSIONS FROM ThE TERMS OF ThE LIMITED WARRANTY<br />
THIS WARRANTY IS EXCLUSIVE AND IN LIEU OF ANY OTHER WARRANTIES EITHER<br />
ORAL OR WRITTEN. ANY IMPLIED WARRANTIES WHICH MAY ARISE BY OPERATION<br />
OF LAW, INCLUDING THE IMPLIED WARRANTIES OF MERCHANTABILITY AND<br />
FITNESS FOR A PARTICULAR PURPOSE, ARE LIMITED TO THE THREE YEAR DURATION<br />
FROM THE DATE OF PURCHASE AS DESCRIBED ABOVE.<br />
Some states do not allow limitations on how long an implied warranty last so the<br />
above limitation may not apply to you.<br />
©2009 BISSELL Homecare, Inc<br />
Grand Rapids, Michigan<br />
All rights reserved. Printed in Korea<br />
Part Number 110-4173<br />
Rev 10/09<br />
Visit our website at:<br />
www.bissell.com<br />
16 20 w w w . b i s s e l l . c o m 8 0 0 . 2 3 7 . 7 6 9 1


