Download Project PDF - Joann.com
Download Project PDF - Joann.com
Download Project PDF - Joann.com

Create successful ePaper yourself
Turn your PDF publications into a flip-book with our unique Google optimized e-Paper software.
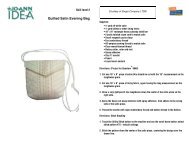
SMALL TOTE BAG<br />
Courtesy of Fabric Traditions<br />
Designed by Theresa Romeo<br />
All Measurements are given length x width<br />
Supplies:<br />
1 yd. Fabric Traditions Lemongrass Series - Floral<br />
1 yd. Fabric Traditions Lemongrass Series – Stripe<br />
1 yd. fusible interfacing<br />
Basic sewing supplies<br />
Cut:<br />
Floral:<br />
One - 22''x 14'' - outer bag front and back<br />
Two - 24''x 3-3/4'' - handles<br />
Stripe:<br />
Four - 10''x 4'' - bag outer sides and lining sides<br />
One - 22''x 14'' - bag lining<br />
Interfacing:<br />
Two - 24'' x 3-3/4'' - handles<br />
One - 22'' x 14'' - front and back<br />
Two - 10'' x 4'' - sides<br />
Directions:<br />
1. Iron the interfacing to the wrong sides of the outer bag pieces and<br />
handles.<br />
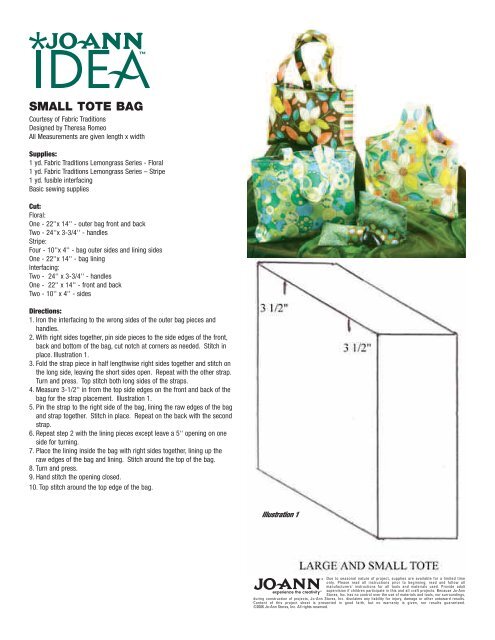
2. With right sides together, pin side pieces to the side edges of the front,<br />
back and bottom of the bag, cut notch at corners as needed. Stitch in<br />
place. Illustration 1.<br />
3. Fold the strap piece in half lengthwise right sides together and stitch on<br />
the long side, leaving the short sides open. Repeat with the other strap.<br />
Turn and press. Top stitch both long sides of the straps.<br />
4. Measure 3-1/2'' in from the top side edges on the front and back of the<br />
bag for the strap placement. Illustration 1.<br />
5. Pin the strap to the right side of the bag, lining the raw edges of the bag<br />
and strap together. Stitch in place. Repeat on the back with the second<br />
strap.<br />
6. Repeat step 2 with the lining pieces except leave a 5'' opening on one<br />
side for turning.<br />
7. Place the lining inside the bag with right sides together, lining up the<br />
raw edges of the bag and lining. Stitch around the top of the bag.<br />
8. Turn and press.<br />
9. Hand stitch the opening closed.<br />
10. Top stitch around the top edge of the bag.<br />
Illustration 1<br />
Due to seasonal nature of project, supplies are available for a limited time<br />
only. Please read all instructions prior to beginning; read and follow all<br />
manufacturers’ instructions for all tools and materials used. Provide adult<br />
supervision if children participate in this and all craft projects. Because Jo-Ann<br />
Stores, Inc. has no control over the use of materials and tools, nor surroundings,<br />
during construction of projects, Jo-Ann Stores, Inc. disclaims any liability for injury, damage or other untoward results.<br />
Content of this project sheet is presented in good faith, but no warranty is given, nor results guaranteed.<br />
©2006 Jo-Ann Stores, Inc. All rights reserved.