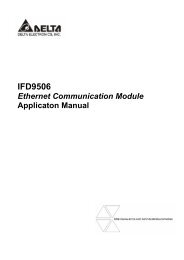
Ethernet Communication Module IFD9507
Ethernet Communication Module IFD9507
Ethernet Communication Module IFD9507

Create successful ePaper yourself
Turn your PDF publications into a flip-book with our unique Google optimized e-Paper software.
<strong>IFD9507</strong><br />
<strong>Ethernet</strong> <strong>Communication</strong> <strong>Module</strong><br />
Application Manual
<strong>Ethernet</strong> <strong>Communication</strong> <strong>Module</strong> <strong>IFD9507</strong><br />
Warning<br />
Please read this instruction carefully before use and follow this instruction to operate the device in order to prevent<br />
damages on the device or injuries to staff.<br />
Switch off the power before wiring.<br />
<strong>IFD9507</strong> is an OPEN TYPE device and therefore should be installed in an enclosure free of airborne dust, humidity,<br />
electric shock and vibration. The enclosure should prevent non-maintenance staff from operating the device (e.g.<br />
key or specific tools are required for operating the enclosure) in case danger and damage on the device may occur.<br />
<strong>IFD9507</strong> is to be used for controlling the operating machine and equipment. In order not to damage it, only<br />
qualified professional staff familiar with the structure and operation of <strong>IFD9507</strong> can install, operate, wire and<br />
maintain it.<br />
DO NOT connect input AC power supply to any of the I/O terminals; otherwise serious damage may occur. Check<br />
all the wirings again before switching on the power and DO NOT touch any terminal when the power is switched<br />
on. Make sure the ground terminal is correctly grounded in order to prevent electromagnetic interference.<br />
Table of Contents<br />
1 INTRODUCTION...................................................................................................................................4<br />
1.1 Features ......................................................................................................................................4<br />
1.2 Specifications ..............................................................................................................................4<br />
2 PRODUCT PROFILE & OUTLINE .......................................................................................................6<br />
2.1 Dimension ...................................................................................................................................6<br />
2.2 Product Profiles...........................................................................................................................6<br />
2.3 LED Indicators.............................................................................................................................6<br />
2.4 RJ-11 PIN Definition....................................................................................................................7<br />
2.5 RJ-45 PIN Definition....................................................................................................................7<br />
2.6 RS-232 PIN Definition .................................................................................................................7<br />
2.7 Address Switch ...........................................................................................................................7<br />
2.8 Data Format ................................................................................................................................8<br />
2.9 Baud Rate for Modbus <strong>Communication</strong> ......................................................................................8<br />
2.10 Feed-through Terminal PIN Definition .........................................................................................8<br />
3 INSTALLATION & WIRING ..................................................................................................................9<br />
3.1 How to Install...............................................................................................................................9<br />
3.2 How to Connect <strong>IFD9507</strong> to Network..........................................................................................9<br />
4 REGISTERS IN <strong>IFD9507</strong>....................................................................................................................10<br />
4.1 Basic Registers (BR).................................................................................................................10<br />
4.2 Explanations on BR...................................................................................................................10<br />
4.3 Alarm Registers (AL) in <strong>IFD9507</strong> ..............................................................................................13<br />
DVP-PLC Application Manual 1
<strong>Ethernet</strong> <strong>Communication</strong> <strong>Module</strong> <strong>IFD9507</strong><br />
4.4 In buffer registers (IN) in <strong>IFD9507</strong> ............................................................................................ 14<br />
4.5 Out buffer registers (OUT) in <strong>IFD9507</strong> ..................................................................................... 15<br />
5 MONITORING FUNCTIONS .............................................................................................................. 15<br />
5.1 Monitor Bit Registers (MB) ....................................................................................................... 15<br />
5.2 Monitor Word Registerss (MW) ................................................................................................ 16<br />
6 SETTING UP DEVICE ADDRESS AND RELAY ADDRESS IN SLAVE MODE (FOR MODBUS TCP<br />
PROTOCOL ONLY) ........................................................................................................................... 17<br />
7 SETTING UP DEVICE ADDRESS AND OTHER NETWORK SETTINGS IN SLAVE MODE ........... 17<br />
8 MODBUS COMMUNICATION ........................................................................................................... 18<br />
8.1 Function Codes Supported....................................................................................................... 18<br />
8.2 Exception Codes Supported..................................................................................................... 18<br />
8.3 Device Type & Device Address................................................................................................. 18<br />
9 ETHERNET/IP COMMUNICATION.................................................................................................... 19<br />
9.1 Service code supported............................................................................................................ 19<br />
9.2 Object supported ...................................................................................................................... 19<br />
9.3 CIP General Status Code (Reference Volume 1:CIP Common Specification Appendix B) ...... 20<br />
9.4 Connection Manager Service Request Error Codes (Reference Volume 1:CIP Common<br />
Specification Table3-5.29) .................................................................................................................. 20<br />
10 SETTING UP THE SOFTWARE - DCISOFT ..................................................................................... 21<br />
10.1 Setting up <strong>Communication</strong> & Searching for <strong>Module</strong>s in DCISoft.............................................. 21<br />
10.2 Basic Settings........................................................................................................................... 23<br />
10.3 Network Settings ...................................................................................................................... 24<br />
10.4 Setting up E-Mails .................................................................................................................... 26<br />
10.5 Monitoring Settings................................................................................................................... 27<br />
10.6 IP Filter ..................................................................................................................................... 28<br />
10.7 <strong>Ethernet</strong>/IP settings .................................................................................................................. 29<br />
10.8 User Defined Settings............................................................................................................... 31<br />
10.9 Virtual COM .............................................................................................................................. 33<br />
10.10 Security Settings....................................................................................................................... 36<br />
10.11 Returning to Default Settings.................................................................................................... 37<br />
11 SETTING UP CONFIGURATION BY HOMEPAGE ........................................................................... 38<br />
11.1 Webpage connection ................................................................................................................ 38<br />
11.2 Basic settings ........................................................................................................................... 39<br />
11.3 Setting up E-Mails .................................................................................................................... 40<br />
11.4 IP filter....................................................................................................................................... 41<br />
11.5 Security Settings....................................................................................................................... 42<br />
11.6 Returning to default setting....................................................................................................... 43<br />
11.7 Monitoring settings ................................................................................................................... 43<br />
11.8 <strong>Ethernet</strong>/IP................................................................................................................................ 45<br />
11.9 User Define............................................................................................................................... 47<br />
2<br />
DVP-PLC Application Manual
<strong>Ethernet</strong> <strong>Communication</strong> <strong>Module</strong> <strong>IFD9507</strong><br />
12 APPLICATION EXAMPLES – DCISOFT ...........................................................................................49<br />
12.1 Setting up & Unlocking Password .............................................................................................49<br />
12.2 Password Loss (Returning to Default Settings by RS-232).......................................................51<br />
12.3 IP Filter Protection.....................................................................................................................51<br />
12.4 Application of E-Mail .................................................................................................................53<br />
12.5 Monitoring Mode .......................................................................................................................54<br />
12.6 Application of Virtual COM Port.................................................................................................56<br />
13 APPLICATION EXAMPLES – AB SOFTWARE (REVISION:2.10.118.0) ..........................................61<br />
13.1 Serial Slave ...............................................................................................................................61<br />
13.2 Serial Master .............................................................................................................................64<br />
DVP-PLC Application Manual 3
<strong>Ethernet</strong> <strong>Communication</strong> <strong>Module</strong> <strong>IFD9507</strong><br />
1 Introduction<br />
Thank you for choosing Delta’s <strong>IFD9507</strong> module. To correctly install and operate <strong>IFD9507</strong>, please read the<br />
manual carefully before using the module.<br />
<strong>IFD9507</strong> is an <strong>Ethernet</strong> communication module for remote setting and communication through Delta’s DCISoft<br />
1.01.<br />
<strong>IFD9507</strong> has 3 digital input contacts which will send messages to designated E-Mail addresses after being<br />
triggered. <strong>IFD9507</strong> supports Modbus TCP communication protocol and can conduct remote monitoring by using<br />
graphic software or human machine interface. <strong>IFD9507</strong> can be the master of Modbus TCP, sending out Modbus<br />
TCP instructions and controlling the peripheral equipment. <strong>IFD9507</strong> supports <strong>Ethernet</strong>/IP communication protocol<br />
and can control device between <strong>Ethernet</strong>/IP protocols with Modbus protocol. <strong>IFD9507</strong> can be a slave as well,<br />
receiving Modbus instructions sent from other masters and transferring them to another Modbus communication<br />
network or <strong>Ethernet</strong>/IP communication network through <strong>Ethernet</strong>. In addition, under MDI/MDI-X auto-detection, it<br />
does not need to jump wire in selecting the network cable. See the contents below for more detailed instructions<br />
on <strong>IFD9507</strong> module.<br />
1.1 Features<br />
• Auto-detects 10/100 Mbps transmission speed; MDI/MDI-X auto-detection<br />
• The monitor table temporarily stores the monitored data for the user to fast save or acquire the data.<br />
• Supports Modbus TCP protocol (supports Master and Slave mode)<br />
• Supports <strong>Ethernet</strong>/IP protocol (supports Master and Slave mode)<br />
• Able to send out emails after being triggered.<br />
• The station address, RS-485 communication format and baud rate can be set up externally<br />
1.2 Specifications<br />
• Network interface<br />
Item<br />
Specification<br />
Interface<br />
Number of ports<br />
Transmission method<br />
Transmission cable<br />
Transmission speed<br />
<strong>Communication</strong><br />
protocol<br />
RJ-45 with Auto MDI/MDIX<br />
1 Port<br />
IEEE802.3, IEEE802.3u<br />
Category 5e<br />
10/100 Mbps Auto-Detection<br />
• Serial communication interface (COM1)<br />
ICMP, IP, TCP, UDP, DHCP, SMTP, Modbus TCP, <strong>Ethernet</strong>/IP<br />
Item<br />
Specification<br />
Interface<br />
Number of ports<br />
Transmission method<br />
Transmission cable<br />
Mini Dim<br />
1 Port<br />
RS-232<br />
DVPACAB215 / DVPACAB230 / DVPACAB2A30<br />
Transmission speed 110, 150, 300, 600, 1200, 2400, 4800, 9600, 19200, 38400, 57600, 115200<br />
<strong>Communication</strong><br />
protocol<br />
Modbus, Delta Configuration, User Define<br />
4<br />
DVP-PLC Application Manual
<strong>Ethernet</strong> <strong>Communication</strong> <strong>Module</strong> <strong>IFD9507</strong><br />
• Serial communication interface (COM2)<br />
Item<br />
Specification<br />
Interface<br />
Number of ports<br />
Transmission method<br />
RJ-11<br />
1 Port<br />
RS-485<br />
Transmission speed 110, 150, 300, 600, 1200, 2400, 4800, 9600, 19200, 38400, 57600, 115200<br />
<strong>Communication</strong><br />
protocol<br />
Modbus, User Define<br />
• Terminal block<br />
Item<br />
Specification<br />
Interface<br />
Transmission method<br />
Feed-through terminal 10PIN<br />
RS-485<br />
Transmission distance 1,200m<br />
Transmission speed 110, 150, 300, 600, 1200, 2400, 4800, 9600, 19200, 38400, 57600, 115200<br />
<strong>Communication</strong><br />
protocol<br />
Max. number of<br />
stations<br />
Modbus, User Define<br />
32<br />
• Environment<br />
Item<br />
Noise immunity<br />
Specification<br />
ESD (IEC 61131-2, IEC 61000-4-2): 8KV Air Discharge<br />
EFT (IEC 61131-2, IEC 61000-4-4): Power Line: ±2KV, Digital Input: ±2KV,<br />
<strong>Communication</strong> I/O: ±2KV<br />
RS (IEC 61131-2, IEC 61000-4-3): 80MHz ~ 1GHz, 10V/m. 1.4GHz ~ 2.0GHz,<br />
10V/m<br />
Conducted Susceptibility Test (EN61000-4-6, IEC61131-2 9.10): 150KHz ~<br />
80MHz, 3V/m<br />
Surge Test (Biwave IEC61132-2, IEC61000-4-5):<br />
Power line 0.5KV DM, <strong>Ethernet</strong> 0.5KV CM, RS-485 0.5KV CM<br />
Operation temperature 0°C ~ 55 o C (temperature), 50 ~ 95% (humidity), pollution degree 2<br />
Storage temperature<br />
Vibration/shock<br />
immunity\<br />
Certificates<br />
-25°C ~ 70 o C (temperature), 5 ~ 95% (humidity)<br />
International standards: IEC61131-2, IEC 68-2-6 (TEST Fc)/IEC61131-2 &<br />
IEC 68-2-27 (TEST Ea)<br />
IEC 61131-2, UL508<br />
• Electrical specifications<br />
Item<br />
Power voltage<br />
Power consumption<br />
Insulation voltage<br />
Weight (g)<br />
Specification<br />
24VDC (-15% ~ 20%) supplied by feed-through terminal<br />
3W<br />
500V<br />
140g<br />
DVP-PLC Application Manual 5
<strong>Ethernet</strong> <strong>Communication</strong> <strong>Module</strong> <strong>IFD9507</strong><br />
2 Product Profile & Outline<br />
2.1 Dimension<br />
2.2 Product Profiles<br />
Unit: mm<br />
9<br />
1 <strong>Communication</strong> ports: RS-485, <strong>Ethernet</strong>, RS-232 6 RS-485 indicator, Reset button, <strong>Ethernet</strong> indicator<br />
2 Power indicator 7 <strong>Module</strong> name<br />
3 Address setup rotary switch。<br />
8 RS-485 connector, digital input points, power input<br />
point, earth point<br />
4 <strong>Communication</strong> format/baud rate setup switch 9 DIN rail connector<br />
5 Message display<br />
2.3 LED Indicators<br />
Name Color Function<br />
POWER Green Power status<br />
RS-485 Green Status of series communication port<br />
LINK/ACT Green Status of network communication<br />
6<br />
DVP-PLC Application Manual
<strong>Ethernet</strong> <strong>Communication</strong> <strong>Module</strong> <strong>IFD9507</strong><br />
2.4 RJ-11 PIN Definition<br />
RJ-11 sketch PIN. Signal Definition<br />
1 -- N/C<br />
2 -- N/C<br />
3 D+ Positive pole for data<br />
4 D- Negative pole for data<br />
5 GND Reference<br />
6 -- N/C<br />
2.5 RJ-45 PIN Definition<br />
RJ-45 sketch PIN Signal Definition<br />
1 Tx+ Positive pole for data transmission<br />
2 Tx- Negative pole for data transmission<br />
3 Rx+ Positive pole for data receiving<br />
4 -- N/C<br />
5 -- N/C<br />
6 Rx- Negative pole for data receiving<br />
7 -- N/C<br />
8 -- N/C<br />
2.6 RS-232 PIN Definition<br />
PIN Signal Content<br />
1 -- N/C<br />
2 -- N/C<br />
3 -- N/C<br />
4 Rx Reception data<br />
5 Tx Transmission data<br />
6 -- N/C<br />
7 -- N/C<br />
8 GND Ground<br />
2.7 Address Switch<br />
Switch setting<br />
Content<br />
01…F7<br />
Valid node address setting<br />
DVP-PLC Application Manual 7
<strong>Ethernet</strong> <strong>Communication</strong> <strong>Module</strong> <strong>IFD9507</strong><br />
2.8 Data Format<br />
Switch setting Format Switch setting Format<br />
0 7-N-1 8 7-N-2<br />
1 8-N-1 9 8-N-2<br />
2 7-O-1 A 7-O-2<br />
3 8-O-1 B 8-O-2<br />
6 7-E-1 E 7-E-2<br />
7 8-E-1 F 8-E-2<br />
2.9 Baud Rate for Modbus <strong>Communication</strong><br />
Switch setting Baud rate Switch setting Baud rate<br />
1 110 7 4,000<br />
2 150 8 9,600<br />
3 300 9 19,200<br />
4 600 A 38,400<br />
5 1,200 B 57,600<br />
6 2,400 C 115,200<br />
2.10 Feed-through Terminal PIN Definition<br />
PIN Signal Content<br />
1 SG Reference ground of signal<br />
2 D- Data-<br />
3 D+ Data-<br />
4 X2 Digital input 2<br />
5 X1 Digital input 1<br />
6 X0 Digital input 0<br />
7 S/S Reference ground of digital input<br />
8 24V +24V input<br />
9 0V 0V input<br />
10 Earth ground<br />
8<br />
DVP-PLC Application Manual
<strong>Ethernet</strong> <strong>Communication</strong> <strong>Module</strong> <strong>IFD9507</strong><br />
3 Installation & Wiring<br />
This section gives instructions on how to connect <strong>IFD9507</strong> with other devices and how to connect <strong>IFD9507</strong> to<br />
the network.<br />
3.1 How to Install<br />
3.2 How to Connect <strong>IFD9507</strong> to Network<br />
Connect <strong>IFD9507</strong> to the <strong>Ethernet</strong> hub by twisted pair cable CAT-5e. <strong>IFD9507</strong> has auto MDI/MDIX function;<br />
therefore, <strong>IFD9507</strong> does not need to jump wire if selecting CAT-5e.The network connection between the PC and<br />
<strong>IFD9507</strong>:<br />
PC Master<br />
<strong>Ethernet</strong><br />
AC motor<br />
driver<br />
RS-485 (Master Mode)<br />
RS-485 (Master Mode)<br />
Temperature<br />
controller<br />
RS-485 (Slave Mode)<br />
Human<br />
machine<br />
interface<br />
DVP-PLC Application Manual 9
<strong>Ethernet</strong> <strong>Communication</strong> <strong>Module</strong> <strong>IFD9507</strong><br />
4 Registers in <strong>IFD9507</strong><br />
4.1 Basic Registers (BR)<br />
BR# Attribute Content Explanation Default Latched<br />
0 R Model name<br />
1 R Firmware version<br />
2 R<br />
Release date of<br />
the version<br />
3 Reserved<br />
4 R/W<br />
<strong>Communication</strong><br />
format<br />
Set up by the system; read only. The model code of<br />
<strong>IFD9507</strong>= H’0201<br />
Displaying the current firmware version in hex, e.g. V1.2 is<br />
indicated as high byte = 0x01 and low byte = 0x20.<br />
Displaying the date in decimal form. 10,000s digit and<br />
1,000s digit are for “month”; 100s digit and 10s digit are for<br />
“day”. For 1s digit: 0 = morning; 1 = afternoon.<br />
Example: 12191 indicates the version released in the<br />
afternoon of December 19.<br />
See the table of communication format setting<br />
5 R/W Baud rate See the table of baud rate setting No<br />
6 R/W Address For setting up the station address No<br />
Yes<br />
Yes<br />
Yes<br />
No<br />
7 R<br />
Number of<br />
DI/DO points<br />
8 Reserved<br />
DI: high byte; DO: low byte 0x300 Yes<br />
9 R Error code Displaying the errors. See the table of error codes. 0 No<br />
10 Reserved<br />
11 R/W<br />
12 R/W<br />
<strong>Communication</strong><br />
time-out<br />
<strong>Communication</strong><br />
delay time<br />
13 R/W Keep alive time<br />
14 R/W I/O Enable Flag<br />
For setting up the communication time-out (unit: ms) in<br />
Modbus<br />
For setting up the minimum interval time between every<br />
communication datum<br />
For setting up the communication time-out (unit: second) in<br />
TCP connections<br />
High byte is input buffer enable flag. Low byte is output<br />
buffer enable flag. The flag will be cleared when data was<br />
sent.<br />
5,000 Yes<br />
0 Yes<br />
30 Yes<br />
0 No<br />
15 R/W IP Index Destination IP index 1 Yes<br />
16~32 Reserved<br />
33 R/W<br />
Returning to<br />
default setting<br />
Symbol “R” refers to read only; “R/W” refers to read and write.<br />
0 No<br />
4.2 Explanations on BR<br />
BR#0: Model Name<br />
Explanations:<br />
1. Model code of <strong>IFD9507</strong> = H'0201.<br />
2. You can read the model code in the program to see if the extension module exists<br />
BR#1: Firmware Version<br />
Explanations:<br />
The firmware version of <strong>IFD9507</strong> is displayed in hex, e.g. H’0100 indicates version V1.00.<br />
10<br />
DVP-PLC Application Manual
<strong>Ethernet</strong> <strong>Communication</strong> <strong>Module</strong> <strong>IFD9507</strong><br />
BR#2: Release Date of the Version<br />
Explanations:<br />
Displaying the date in decimal form. 10,000s digit and 1,000s digit are for “month"; 100s digit and 10s digit<br />
are for “day". For 1s digit: 0 = morning; 1 = afternoon.<br />
Example: 12191 indicates the version released in the afternoon of December 19.<br />
BR#4: <strong>Communication</strong> Format<br />
Explanations:<br />
Explanation<br />
Content<br />
Explanation<br />
BR4 low byte<br />
b7 ~ b4 b3 b2 ~ b1 b0<br />
Reserved<br />
Stop bit<br />
0: 1 stop bit<br />
1: 2 stop bits<br />
Parity bit<br />
00: none parity bit<br />
01: odd parity bit<br />
11: even parity bit<br />
Data bit<br />
0: 7 data bits<br />
1: 8 data bits<br />
0000 (0) 7-N-1 0011 (3) 8-O-1 1000 (8) 7-N-2 1011 (B) 8-O-2<br />
0001 (1) 8-N-1 0110 (6) 7-E-1 1001 (9) 8-N-2 1110 (E) 7-E-2<br />
0010 (2) 7-O-1 0111 (7) 8-E-1 1010 (A) 7-O-2 1111 (F) 8-E-2<br />
BR4 high byte<br />
b7 B6 ~ b4 B3 b2 b1 b0<br />
RS-485<br />
User<br />
Define<br />
0: Disable<br />
1: Enable<br />
Reserved<br />
RS-232<br />
User<br />
Define<br />
0: Disable<br />
1: Enable<br />
COM2 RS-485<br />
setting<br />
0: Serial Master<br />
<strong>Ethernet</strong> Server<br />
1: Serial Slave<br />
<strong>Ethernet</strong> Client<br />
COM1 RS-232 setting<br />
0: Delta Configuration<br />
1: Modbus<br />
Mode<br />
0: ASCII<br />
1: RTU<br />
00000000 (0) Disable Disable Serial Master Delta configuration ASCII<br />
00000001 (1) Disable Disable Serial Master Delta configuration RTU<br />
00000010 (2) Disable Disable Serial Master Modbus ASCII<br />
00000011 (3) Disable Disable Serial Master Modbus RTU<br />
00000100 (4) Disable Disable Serial Slave Delta configuration ASCII<br />
00000101 (5) Disable Disable Serial Slave Delta configuration RTU<br />
00000110 (6) Disable Disable Serial Slave Modbus ASCII<br />
Content<br />
00000111 (7) Disable Disable Serial Slave Modbus RTU<br />
00001000 (8) Disable Enable Serial Master Delta configuration ASCII<br />
: : : : : :<br />
10000111 (135) Enable Disable Serial Slave Modbus RTU<br />
10001000 (136) Enable Enable Serial Master Delta configuration ASCII<br />
10001001 (137) Enable Enable Serial Master Delta configuration RTU<br />
10001010 (138) Enable Enable Serial Master Modbus ASCII<br />
10001011 (139) Enable Enable Serial Master Modbus RTU<br />
10001100 (140) Enable Enable Serial Slave Delta configuration ASCII<br />
10001101 (141) Enable Enable Serial Slave Delta configuration RTU<br />
10001110 (142) Enable Enable Serial Slave Modbus ASCII<br />
10001111 (143) Enable Enable Serial Slave Modbus RTU<br />
DVP-PLC Application Manual 11
<strong>Ethernet</strong> <strong>Communication</strong> <strong>Module</strong> <strong>IFD9507</strong><br />
BR#5: Baud Rate<br />
Explanations:<br />
BR#5 low byte for baud rate of COM1<br />
<strong>Communication</strong><br />
interface<br />
Explanation<br />
Data<br />
Baud rate<br />
(bps)<br />
Data<br />
Baud rate<br />
(bps)<br />
Data<br />
Baud rate<br />
(bps)<br />
Content<br />
RS-232<br />
0x01 110 0x06 2,400 0x0B 57,600<br />
0x02 150 0x07 4,800 0x0C 115,200<br />
0x03 300 0x08 9,600<br />
0x04 600 0x09 19,200<br />
0x05 1,200 0x0A 38,400<br />
BR#5 high byte for baud rate of COM2<br />
Content<br />
RS-485 same as low byte<br />
BR#6: Address<br />
Explanations:<br />
For filling in or reading the Modbus address. The address will be displayed in the message display after being<br />
set up.<br />
BR#7: Number of DI/DO Points<br />
Explanations:<br />
Read the number of DI/DO points from BR#7.<br />
BR#9: Error Code<br />
Explanations:<br />
Error code = 0 refers to no error occurring.<br />
Code Indication How to correct<br />
01 ~ F7<br />
Node address of the scan module<br />
(when operating normally)<br />
--<br />
F0 Returning to default setting --<br />
F1 <strong>IFD9507</strong> being powered --<br />
F2 Power supply in low voltage Check if the power supply of the module works normally.<br />
F3 Internal memory detection error<br />
1. Re-power <strong>IFD9507</strong>. If the error still exists, try step 2.<br />
2. Reset <strong>IFD9507</strong>. If the error still exists, send the<br />
module back to the factory for repair.<br />
F4 Internal error. Manufacturing error.<br />
1. Re-power <strong>IFD9507</strong>. If the error still exists, try step 2.<br />
2. Reset <strong>IFD9507</strong>. If the error still exists, send the<br />
module back to the factory for repair.<br />
F5 Network connection error Check if <strong>IFD9507</strong> is connected normally to the network.<br />
F6<br />
Full number of devices connected<br />
in the network.<br />
Check if the number is too much.<br />
F7 UART setting error.<br />
Check if the RS-485, RS-232 communication format is<br />
correct.<br />
E1 Alarm 1 triggered Check alarm input point 1.<br />
12<br />
DVP-PLC Application Manual
<strong>Ethernet</strong> <strong>Communication</strong> <strong>Module</strong> <strong>IFD9507</strong><br />
Code Indication How to correct<br />
E2 Alarm 2 triggered Check alarm input point 2.<br />
E3 Alarm 3 triggered Check alarm input point 3.<br />
04 CRC error<br />
0B<br />
No response from the station<br />
1. Check if <strong>IFD9507</strong> is normally connected to RS-485.<br />
2. Make sure the transmission speed of <strong>IFD9507</strong> is<br />
consistent with that of other nodes on the network.<br />
1. Check if <strong>IFD9507</strong> is normally connected to RS-485.<br />
2. Make sure the transmission speed of <strong>IFD9507</strong> is<br />
consistent with that of other nodes on the network.<br />
BR#11: <strong>Communication</strong> Time-out (ms)<br />
Explanations:<br />
or setting up the communication time-out in Modbus. Default = 5,000ms. For example, if you wish to set up<br />
the communication time-out as 7 seconds manually, write 7,000 into BR11.<br />
BR#12: <strong>Communication</strong> Delay Time (ms)<br />
Explanations:<br />
For setting up the minimum interval time between every Modbus communication datum. Default = 0ms. For<br />
example, if you wish to set up the communication delay time as 100ms manually, write 100 into BR12.<br />
BR#13: Keep Alive Time (s)<br />
Explanations:<br />
For setting up the communication time-out in TCP connections. Default = 30s. For example, if you wish to set<br />
up the communication time-out as 7 seconds manually, write 7 into BR13.<br />
BR14: I/O Enable Flag<br />
Explanations:<br />
Setting up input buffer and output buffer enable or not. Default = 0. Setting high byte to 1 can enable input<br />
buffer and setting low byte to 1 can enable output buffer.<br />
BR15: IP index<br />
Explanations:<br />
Destination IP index is used in a TCP connection. Default = 1. In delta DCISoft, there are 4 items can be set<br />
therefore the index is 1 to 4. User can select one of items to connect with others <strong>Ethernet</strong>/IP device.<br />
BR#33: Returning to Default Setting<br />
Explanations:<br />
<strong>IFD9507</strong> will return to default setting when "1” is written into BR#33. BR#33 will be cleared to “0” automatically<br />
after the returning.<br />
4.3 Alarm Registers (AL) in <strong>IFD9507</strong><br />
AL# Attribute Content Explanation Default Latched<br />
0 R/W Alarm point 1 0 Yes<br />
DVP-PLC Application Manual 13
<strong>Ethernet</strong> <strong>Communication</strong> <strong>Module</strong> <strong>IFD9507</strong><br />
AL# Attribute Content Explanation Default Latched<br />
1 R/W Alarm point 2 0 Yes<br />
2 R/W Alarm point 3 0 Yes<br />
Symbol “R” refer to read only; “R/W” refers to read and write.<br />
AL#0: Alarm Point 1<br />
Explanations:<br />
You can designate one RX extension point as the alarm point by setting up the AL register in <strong>IFD9507</strong>. When<br />
the alarm point is triggered, <strong>IFD9507</strong> will execute its corresponding function. When b15 of AL0 is set as “1”,<br />
the Gateway will execute the event immediately. When RX point is triggered, the Gateway will only execute<br />
the triggered event once.<br />
Device Function Setting Attribute Default Latched<br />
b15<br />
Enabling the<br />
function<br />
b15 = 1: Enabling<br />
b15 = 0: Disabling<br />
R/W 0 Yes<br />
b4 ~ b14 Reserved R/W 0 No<br />
AL#0<br />
b2 ~ b3<br />
Type of event<br />
enabled when<br />
RX alarm point<br />
is triggered<br />
b1 Reserved Reserved<br />
b0<br />
Condition for<br />
triggering RX<br />
b3 b2<br />
Reserved 0 0<br />
Trigger E-Mail 0 1<br />
Reserved 1 0<br />
Reserved 1 1<br />
The setting will be invalid when<br />
thealarm function is being executed.<br />
b0 = 0: Triggered when RX input<br />
point is low<br />
b0 = 1: Triggered when RX input<br />
point is high<br />
R/W 0 Yes<br />
R/W 0 Yes<br />
AL#1: Alarm Output 2<br />
Explanations:<br />
The settings for AL#1 are the same as those in AL#0.<br />
AL#2: Alarm Output 3<br />
Explanations:<br />
The settings for AL#2 are the same as those in AL#0.<br />
4.4 In buffer registers (IN) in <strong>IFD9507</strong><br />
IN# Attribute Content Explanation Default Latched<br />
0~255 R/W Data input buffer <strong>Ethernet</strong>/IP input data 0 No<br />
Symbol “R” refers to read only; “R/W” refers to read and write.<br />
Explanations:<br />
The input data was sent to <strong>Ethernet</strong>.<br />
14<br />
DVP-PLC Application Manual
<strong>Ethernet</strong> <strong>Communication</strong> <strong>Module</strong> <strong>IFD9507</strong><br />
4.5 Out buffer registers (OUT) in <strong>IFD9507</strong><br />
OUT# Attribute Content Explanation Default Latched<br />
0~255 R Data output buffer 0 No<br />
Symbol “R” refers to read only; “R/W” refers to read and write.<br />
Explanations:<br />
The output data was sent to RS-485.<br />
5 Monitoring Functions<br />
5.1 Monitor Bit Registers (MB)<br />
MB# Attribute Content Explanation Default Latched<br />
0 R/W<br />
1 R/W<br />
2 R/W<br />
3 ~ 32 R/W<br />
Number of devicees<br />
monitored<br />
No. of station<br />
monitored<br />
Address of the<br />
device monitored<br />
No. of station<br />
monitored, address<br />
of the device<br />
monitored<br />
33 ~ 200 R/W Reserved<br />
201 R Monitored value<br />
202 ~ 213 R Reserved<br />
214 R Monitored status<br />
Symbol “R” refer to read only; “R/W” refers to read and write.<br />
Cache mode normally enabled (b15=1),<br />
monitoring data in max. 16 slaves.<br />
0 Yes<br />
No. of the station to be monitored 0 Yes<br />
Recording the address of the device<br />
monitored.<br />
No. of the station to be monitored;<br />
recording the address of the device<br />
monitored.<br />
Every MB records the value in the 16-bit<br />
device.<br />
Every MB records the status in the 16-bit<br />
device. 1 = normal; 0 = abnormal<br />
0 Yes<br />
0 Yes<br />
0 No<br />
0 No<br />
MB#0: Number of Devices Monitored<br />
Explanations:<br />
For setting up the number of devices to be monitored. Max. data in 16 slaves can be monitored.<br />
b15 is read only (Default =1: normally enabled cache mode)<br />
MB# (Odd Number): No. of Station Monitored<br />
Explanations:<br />
MB#1, MB#3, MB#5…MB#33 are for setting up the station No. (0 ~ 255) to be monitored.<br />
MB# (Even Number): Address of Device Monitored<br />
Explanations:<br />
MB#2, MB#4, MB#6…MB#34 are for setting up the address of the device to be monitored.<br />
MB#201: Monitored Value<br />
Explanations:<br />
Every MB records the values in the 16-bit device.<br />
DVP-PLC Application Manual 15
<strong>Ethernet</strong> <strong>Communication</strong> <strong>Module</strong> <strong>IFD9507</strong><br />
b15 b14 b13 b12 b11 b10 b9 b8 b7 b6 b5 b4 b3 b2 b1 b0<br />
Device<br />
16<br />
Device<br />
15<br />
Device<br />
14<br />
Device<br />
13<br />
Device<br />
12<br />
Device<br />
11<br />
Device<br />
10<br />
Device<br />
9<br />
Device<br />
8<br />
Device<br />
7<br />
Device<br />
6<br />
Device<br />
5<br />
Device<br />
4<br />
Device<br />
3<br />
Device<br />
2<br />
Device<br />
1<br />
MB#214: Monitored Status<br />
Explanations:<br />
Every MB records the status in the 16-bit device. 1 = normal; 0 = abnormal.<br />
b15 b14 b13 b12 b11 b10 b9 b8 b7 b6 b5 b4 b3 b2 b1 b0<br />
Device<br />
16<br />
Device<br />
15<br />
Device<br />
14<br />
Device<br />
13<br />
Device<br />
12<br />
5.2 Monitor Word Registerss (MW)<br />
Device<br />
11<br />
Device<br />
10<br />
Device<br />
9<br />
Device<br />
8<br />
Device<br />
7<br />
Device<br />
6<br />
Device<br />
5<br />
Device<br />
4<br />
Device<br />
3<br />
Device<br />
2<br />
MW# Attribute Content Explanation Default Latched<br />
0 R/W<br />
1 R/W<br />
2 R/W<br />
3 ~ 32 R/W<br />
Number of devices<br />
monitored<br />
No. of station<br />
monitored<br />
Address of the<br />
device monitored<br />
No. of station<br />
monitored, address<br />
of the device<br />
monitored<br />
33 ~ 200 R/W Reserved<br />
201 ~ 216 R Monitored value<br />
216 ~ 300 R Reserved<br />
301 R Monitored status<br />
Cache mode normally enabled (b15=1),<br />
monitoring data in max. 16 slaves.<br />
0 YES<br />
No. of the station to be monitored 0 YES<br />
Recording the address of the device<br />
monitored<br />
Symbol “R” refers to read only; “R/W” refers to read and write.<br />
No. of the station to be monitore; recording<br />
the address of the device monitored.<br />
Every MW records the monitored value in 1<br />
register<br />
Every MW records the status in a 16-bit<br />
register. 1 = normal; 0 = abnormal<br />
0 YES<br />
0 YES<br />
0 NO<br />
0 NO<br />
Device<br />
1<br />
MW#0: Number of Devices Monitored<br />
Explanations:<br />
For setting up the number of devices to be monitored. Max. data in 16 slaves can be monitored.<br />
b15 is read only (Default =1: normally enabled cache mode)<br />
MW# (Odd Number): No. of Station Monitored<br />
Explanations:<br />
MW#1, MW#3, MW#5…MW#33 are for setting up the station No. (0 ~ 255) to be monitored.<br />
MW# (Even Number): Address of Device Monitored<br />
Explanations:<br />
MW32, MW34, MW#36…MW#34 are for setting up the address of the device to be monitored.<br />
MW#201~#216: Monitored Value<br />
16<br />
DVP-PLC Application Manual
<strong>Ethernet</strong> <strong>Communication</strong> <strong>Module</strong> <strong>IFD9507</strong><br />
Explanations:<br />
Every MW records the values in 1 register.<br />
MW#201 MW#202 MW#203 MW#204 MW#205 MW#206 MW#207 MW#208 MW#209 MW#210<br />
Device 1 Device 2 Device 3 Device 4 Device 5 Device 6 Device 7 Device 8 Device 9 Device 10<br />
MW#211 MW#212 MW#213 MW#214 MW#215 MW#216<br />
Device<br />
11<br />
Device<br />
12<br />
Device<br />
13<br />
Device<br />
14<br />
Device<br />
15<br />
Device<br />
16<br />
MW#301: Monitored Status<br />
Explanations:<br />
Every MW records the status in a 16-bit register. 1 = normal; 0 = abnormal.<br />
b15 b14 b13 b12 b11 b10 b9 b8 b7 b6 b5 b4 b3 b2 b1 b0<br />
Device<br />
16<br />
Device<br />
15<br />
Device<br />
14<br />
Device<br />
13<br />
Device<br />
12<br />
Device<br />
11<br />
Device<br />
10<br />
Device<br />
9<br />
Device<br />
8<br />
Device<br />
7<br />
Device<br />
6<br />
Device<br />
5<br />
Device<br />
4<br />
Device<br />
3<br />
Device<br />
2<br />
Device<br />
1<br />
6 Setting up Device Address and Relay Address in Slave Mode (For Modbus TCP protocol<br />
only)<br />
MIP# Attribute Content Explanation Default Latched<br />
0 ~ 50 R/W<br />
Corresponding<br />
address<br />
50 ~ 249 R/W Relay IP address<br />
Symbol “R” refers to read only; “R/W” refers to read and write.<br />
Max. 100 addresses are allowed. High<br />
byte for 1 address and low byte for 1<br />
address.<br />
Total 100 IPs. Every address (1 byte)<br />
corresponds to 1 IP address (4 bytes).<br />
0 Yes<br />
0 Yes<br />
MIP#0: Corresponding Address<br />
Explanations:<br />
The low bytes of MIP#0 are for the first address, and the high byte are for the second address, and so on.<br />
MIP#51 ~ #52: Corresponding IP for the 1 st Device Address<br />
Explanations:<br />
Example 1: If you wish to convert “192.168.0.1” into C0A80001 (hex), write A8C0 into MIP50 and H0100 into<br />
MIP51.<br />
Example 2: Data in address 1 have to correspond to 192.168.0.8. Data in address 2 have to correspond to<br />
192.168.0.6. To complete such settings, write H0102 into MIP0, H0800 into MIP50, HA8C0 into MIP51, H0600<br />
into MIP52, and HA8C0 into MIP53.<br />
7 Setting up Device Address and Other Network Settings in Slave Mode<br />
Parameter<br />
Device address<br />
Relay IP address<br />
Priority/Time Tick<br />
Timeout Tick<br />
Timeout<br />
Explanation<br />
Address of Modbus device<br />
Corresponding IP address for a device<br />
Scale of time. Unit: ms<br />
Scale of timeout<br />
Timeout = Time Tick × Timeout Tick (Unit: ms)<br />
DVP-PLC Application Manual 17
<strong>Ethernet</strong> <strong>Communication</strong> <strong>Module</strong> <strong>IFD9507</strong><br />
Parameter<br />
Multiple<br />
Trigger<br />
OT packet interval<br />
TO packet interval<br />
Explanation<br />
Max. timeout times<br />
Cyclic, changing status, application object<br />
Packet interval between originator and target<br />
Packet interval between originator and target<br />
8 Modbus <strong>Communication</strong><br />
8.1 Function Codes Supported<br />
Function code Explanation Devices supported<br />
0x02 Read discrete input RX<br />
0x03 Read holding register BR, AL, MB, MW, MIP<br />
0x06 Write single holding register BR, AL, MB, MW, MIP<br />
0x10 Write multiple holding register BR, AL, MB, MW, MIP<br />
0x17 Read/write multiple holding register BR, AL, MB, MW, MIP<br />
8.2 Exception Codes Supported<br />
Exception code<br />
0x01<br />
0x02<br />
0x03<br />
0x04<br />
0x0A<br />
0x0B<br />
Explanation<br />
Illegal function<br />
Illegal data addresss<br />
Illegal data value<br />
Slave device failure<br />
Gateway path unavailable<br />
Gateway target device failed to respond<br />
8.3 Device Type & Device Address<br />
Device<br />
type<br />
Modbus address<br />
(Hex)<br />
Discrete input<br />
5-digit Modbus address (Dec)<br />
6-digit Modbus address<br />
(Dec)<br />
RX 0x0400 ~ 0x0402 11025 ~ 11027 101025 ~ 101027 3<br />
Device<br />
type<br />
Modbus address<br />
(Hex)<br />
Holding register<br />
5-digit Modbus address (Dec)<br />
6-digit Modbus address<br />
(Dec)<br />
Number<br />
Number<br />
BR 0x0000 ~ 0x00FF 40001 ~ 40256 400001 ~ 400256 64<br />
AL 0x0200 ~ 0x0202 40513 ~ 40515 400513 ~ 400515 3<br />
X 0x0400 ~ 0x0402 41025 ~ 41027 401025 ~ 401027 3<br />
IN 0x0500 ~ 0x05FF 41281 ~ 41536 401281 ~ 401536 256<br />
OUT 0x0600 ~ 0x06FF 41537 ~ 41791 401537 ~ 401791 256<br />
MB 0x2000 ~ 0x20FF 48193 ~ 48448 408193 ~ 408448 256<br />
MW 0x2200 ~ 0x23FF 48705 ~ 49216 408705 ~ 409216 512<br />
MIP 0x2400 ~ 0x24FF 49217 ~ 49471 409217 ~ 409471 256<br />
18<br />
DVP-PLC Application Manual
<strong>Ethernet</strong> <strong>Communication</strong> <strong>Module</strong> <strong>IFD9507</strong><br />
9 <strong>Ethernet</strong>/IP <strong>Communication</strong><br />
9.1 Service code supported<br />
Service<br />
Code<br />
0x01<br />
Object Service Description<br />
ID<br />
Message Router Object<br />
Assembly Object<br />
Connection Manager<br />
Object<br />
BR<br />
AL<br />
MB<br />
MW<br />
TCP Interface<br />
TCP Link<br />
Get_Attribute_All<br />
Returns a predefined listing of this objects<br />
attributes<br />
0x05 ID Reset Invokes the Reset service for the device.<br />
ID<br />
Message Router Object<br />
Get_Attribute_Single Return the contents of the specified<br />
attribute.<br />
0x0E<br />
Assembly Object<br />
Connection Manager<br />
Object<br />
BR<br />
AL<br />
MB<br />
MW<br />
TCP Interface<br />
TCP Link<br />
Assembly Object Set_Attribute_Single Used to modify an attribute.<br />
0x10<br />
BR<br />
AL<br />
MB<br />
MW<br />
TCP Interface<br />
0x4E<br />
Connection Manager Forward_Close Closes a connection.<br />
Object<br />
0x54<br />
9.2 Object supported<br />
Connection Manager<br />
Object<br />
Forward_Open<br />
Opens a connection, maximum data size<br />
is 511 bytes.<br />
Object Name Class ID Code Instance Code<br />
Function<br />
Description<br />
Object Type Attribute<br />
ID 0x01 0x01 Identity Attribute Get<br />
Message Router Object 0x02 0x01 Router Command<br />
Assembly Object<br />
0x04 0x64 Assembly GO Set<br />
0x04 0x65 Input device object GI Get<br />
Connection Manager Object 0x06 0x01 Connection<br />
monitor object<br />
RX Digital input Discrete input Get<br />
BR 0x64 0x01 Basic registers Attribute Get/Set<br />
AL 0x64 0x02 Alarm function Attribute Get/Set<br />
MB 0x64 0x03 Bit monitor Attribute Get/Set<br />
MW 0x64 0x04 Register monitor Attribute Get/Set<br />
TCP Interface 0xF5 0x01 TCP/IP Interface<br />
Object<br />
Attribute Get/Set<br />
DVP-PLC Application Manual 19
<strong>Ethernet</strong> <strong>Communication</strong> <strong>Module</strong> <strong>IFD9507</strong><br />
Object Name Class ID Code Instance Code<br />
Function<br />
Description<br />
TCP Link 0xF6 0x01 TCP/IP Link<br />
Object<br />
Object Type<br />
Object<br />
Attribute<br />
Get<br />
9.3 CIP General Status Code (Reference Volume 1:CIP Common Specification Appendix B)<br />
General<br />
Status Code Status Name<br />
Description of Status<br />
(in hex)<br />
00 Success Service was successfully performed by the object specified.<br />
01 Connection failure A connection related service failed along the connection path.<br />
02 Resource unavailable Resources needed for the object to perform the requested<br />
service were unavailable<br />
04 Path segment error The path segment identifier or the segment syntax was not<br />
understood by the processing node. Path processing shall stop<br />
when a path segment error is encountered.<br />
05 Path destination<br />
unknown<br />
The path is referencing an object class, instance or structure<br />
element that is not known or is not contained in the processing<br />
node. Path processing shall stop when a path destination<br />
unknown error is encountered.<br />
08 Service not supported The requested service was not implemented or was not<br />
defined for this Object Class/Instance.<br />
09 Invalid attribute value Invalid attribute data detected<br />
0E Attribute not settable A request to modify a non-modifiable attribute was received.<br />
13 Not enough data The service did not supply enough data to perform the<br />
specified operation.<br />
14 Attribute not supported The attribute specified in the request is not supported<br />
15 Too much data The service supplied more data than was expected<br />
16 Object does not exist The object specified does not exist in the device.<br />
20 Invalid parameter A parameter associated with the request was invalid. This code<br />
is used when a parameter does not meet the requirements of<br />
this specification and/or the requirements defined in an<br />
Application Object Specification.<br />
26 Path Size Invalid The size of the path which was sent with the Service Request<br />
is either not large enough to allow the Request to be routed to<br />
an object or too much routing data was included.<br />
9.4 Connection Manager Service Request Error Codes (Reference Volume 1:CIP Common Specification<br />
Table3-5.29)<br />
General<br />
Status<br />
Extended Status<br />
Explanation and Description<br />
0x00<br />
Service completed successfully<br />
0x01 0x0100 CONNECTION IN USE OR DUPLICATE FORWARD OPEN<br />
This extended status code shall be returned when an originator is<br />
trying to make a connection to a target with which the originator may<br />
have already established a connection<br />
0x01 0x0103 TRANSPORT CLASS AND TRIGGER COMBINATION NOT<br />
SUPPORTED<br />
A transport class and trigger combination has been specified which<br />
is not supported by the target. Routers shall not fail the connection<br />
based on the transport class and trigger combination. Only targets<br />
shall return this extended status code.<br />
0x01 0x0108 INVALID NETWORK CONNECTION PARAMETER<br />
This extended status code shall be returned as the result of<br />
specifying a connection type, connection priority, redundant owner<br />
or fixed / variable that is not supported by the target application.<br />
Only a target node shall return this extended status code.<br />
20<br />
DVP-PLC Application Manual
<strong>Ethernet</strong> <strong>Communication</strong> <strong>Module</strong> <strong>IFD9507</strong><br />
General<br />
Status<br />
Extended Status<br />
Explanation and Description<br />
0x01 0x0114 VENDOR ID OR PRODUCT CODE MISMATCH<br />
The Product Code or Vendor Id specified in the electronic key<br />
logical segment does not match the Product Code or Vendor Id of in<br />
the target device.<br />
0x01 0x0115 PRODUCT TYPE MISMATCH<br />
The Product Type specified in the electronic key logical segment<br />
does not match the Product Type of in the target device.<br />
0x01 0x0116 REVISION MISMATCH<br />
The major and minor revision specified in the electronic key logical<br />
segment does not correspond to a valid revision of the target<br />
device.<br />
0x01 0x0315 INVALID SEGMENT IN CONNECTION PATH<br />
Invalid Segment Type or Segment Value in Connection Path This<br />
extended status code is the result of a device being unable to<br />
decode the connection path. This could be caused by an<br />
unrecognized path type, a segment type occurring unexpectedly, or<br />
a myriad of other problems in the connection path.<br />
10 Setting up the Software - DCISoft<br />
This section gives instructions on how to set up <strong>IFD9507</strong> by DCISoft and explanations on each setup page.<br />
<strong>IFD9507</strong> is set up by UDP port 20006; therefore, you have to be aware of the relevant settings of the firewall.<br />
See the explanations below on the software.<br />
10.1 Setting up <strong>Communication</strong> & Searching for <strong>Module</strong>s in DCISoft<br />
• Broadcast search<br />
1. Open DCISoft on the PC and click on the “IP Search” icon.<br />
2. You will see the network modules found.<br />
DVP-PLC Application Manual 21
<strong>Ethernet</strong> <strong>Communication</strong> <strong>Module</strong> <strong>IFD9507</strong><br />
3. Double-click on the module to be set up to enter the setup page. The first page overviews the basic<br />
status of the module.<br />
4. The next page is for basic network setup. Consult your ISP for relevant network settings. For other<br />
settings, see BR4~BR6 and BR11~BR13.<br />
22<br />
DVP-PLC Application Manual
<strong>Ethernet</strong> <strong>Communication</strong> <strong>Module</strong> <strong>IFD9507</strong><br />
10.2 Basic Settings<br />
The basic settings include parameters such as module name, network settings and serial communication.<br />
• The basics<br />
1. <strong>Module</strong> name:<br />
There can be many <strong>IFD9507</strong>s on the network. Thus, you can set up a module name for each module to<br />
DVP-PLC Application Manual 23
<strong>Ethernet</strong> <strong>Communication</strong> <strong>Module</strong> <strong>IFD9507</strong><br />
identify the module when you need to use them.<br />
2. Master configuration:<br />
Open “Serial Master” mode or “Serial Slave” mode.<br />
3. Network settings:<br />
Enable DHCP or static IP. Consult your ISP for other relevant settings.<br />
A. IP configuration:<br />
There are 2 types of IP, static IP and DHCP.<br />
Static IP: Preset or manually modified by the user.<br />
DHCP: Automatically updated by the server. There has to be a server in the LAN.<br />
IP<br />
Static<br />
DHCP<br />
Explanation<br />
The user enters the IP address, subnet mask and gateway.<br />
DHCP server offers the IP address, subnet mask and gateway.<br />
B. IP address:<br />
IP address is the location of the equipment on the network. All equipment connected to the network<br />
has to have an IP address. Incorrect IP address will result in connection failure on the equipment or<br />
even other equipment. Ask your ISP for questions about IP address setup. The default IP for<br />
<strong>IFD9507</strong> is 192.168.1.5.<br />
C. Subnet mask:<br />
Subnet mask is an important parameter for setting up the subnet, used for seeing if the destination<br />
IP and the local equipment are in the same subnet. If not, the equipment will send the packet to the<br />
gateway, and the gateway will send the packet to another subnet. Incorrect setting may cause the<br />
destination equipment unable to communication to <strong>IFD9507</strong>. To see of your setting is correct,<br />
conduct bitwise AND operations between your IP and subnet mask and destination IP and subnet<br />
mask. If the two values obtained are the same, the two IPs are in the same subnet. The default<br />
subnet mask of <strong>IFD9507</strong> is 255.255.255.0.<br />
D. Gateway:<br />
Gateway is the window for two different subnets, allowing the two ends in different subnets to<br />
communicate. For example, if the LAN has to be connected to WAN, it will need a gateway to<br />
bridge the communication. The IP of the gateway has to be in the same subnet as <strong>IFD9507</strong>. The<br />
default gateway of <strong>IFD9507</strong> is 192.168.1.254.<br />
4. <strong>Communication</strong> parameter setting:<br />
See how to set up BR4, BR5, and BR6.<br />
Applicable protocol: Modbus/TCP or <strong>Ethernet</strong>/IP.<br />
5. Timer setting:<br />
For setting up TCP communication idle time, communication timeout and minimum delay time for<br />
every communication datum. Please refer to the settings of BR11, BR12 and BR13.<br />
10.3 Network Settings<br />
The first step for all the network equipment to connect to the network is to have its own IP address (Internet<br />
Protocol). The IP address is like a number for all network equipment to be identified in the network.<br />
• Setting up static IP of the PC<br />
24<br />
DVP-PLC Application Manual
<strong>Ethernet</strong> <strong>Communication</strong> <strong>Module</strong> <strong>IFD9507</strong><br />
1. Enter Control Panel → Network Connection → click on “Local Area Connection”.<br />
2. You will see the “Local Area Connection Status” window. Click on “Properties”.<br />
3. Click on “Internet Protocol (TCP/IP)".<br />
4. Enter “192.168.0.1” into IP address. Click on “OK” to complete the IP address setting of the PC.<br />
DVP-PLC Application Manual 25
<strong>Ethernet</strong> <strong>Communication</strong> <strong>Module</strong> <strong>IFD9507</strong><br />
10.4 Setting up E-Mails<br />
E-Mail is the abbreviation of electronic mail which transmits mails through the network. <strong>IFD9507</strong> has E-Mail<br />
functions for the user to pre-save a segment of text message, which can be a descriptive message or error<br />
message, into the subject of the E-Mail. When the E-Mail is triggered, <strong>IFD9507</strong> will send the messages to the<br />
user by E-Mail.<br />
• Mail settings<br />
1. Mail alarm setup:<br />
There are 3 mail alarms to be set up. Check the boxes to enable the alarms. The alarm can be<br />
triggered by “low" and “high”.<br />
2. SMTP server:<br />
When alarm 1 is triggered, the E-Mail will first be sent to SMTP server, and the SMTP server will send<br />
it to the designated address. For example, assume there is an E-Mail to be sent to<br />
26<br />
DVP-PLC Application Manual
<strong>Ethernet</strong> <strong>Communication</strong> <strong>Module</strong> <strong>IFD9507</strong><br />
Test@delta.com.tw, and the SMTP server is 192.168.0.1. The E-Mail will be sent to the SMTP server<br />
first, and the server will further send it to the recipient Test@delta.com.tw.<br />
3. E-Mail of sender:<br />
Maximum 63 Engligh characters are allowed.<br />
4. Subject of E-Mail:<br />
You can enter the text message in the column, and the message will be placed in the subject of the<br />
E-Mail and sent to the recipient. <strong>IFD9507</strong> is able to contain 1 ~ 3 E-Mail subjects (max. 63 English<br />
characters are allowed).<br />
5. E-Mail of recipient:<br />
One mail can be sent to 10 addresses according to the alarm settings. Every address allows max.63<br />
English characters. For example, (see the figure above) when Alarm 1 is triggered, the E-Mail will be<br />
sent to Test1@delta.com.tw and Test2@delta.com.tw . When Alarm 2 is triggered, the E-Mail will be<br />
sent to Test2@delta.com.tw<br />
Note:<br />
To correctly send out E-Mails, there has to be a SMTP server in the network. When we send out an<br />
E-Mail, the mail will be sent to SMTP server first, and the server will further send the mail to the<br />
designated address.<br />
10.5 Monitoring Settings<br />
You can read data in designated addresses in different equipment in the network by setting up <strong>IFD9507</strong>.The<br />
data can be temporarily stored in <strong>IFD9507</strong> for fast storing and acquisition.<br />
• Setting up monitoring functions<br />
1. Monitor bit:<br />
Device addresses for setting up the bit status of serial slave; able to read the content in the<br />
DVP-PLC Application Manual 27
<strong>Ethernet</strong> <strong>Communication</strong> <strong>Module</strong> <strong>IFD9507</strong><br />
corresponding address of the designated slave.<br />
2. Monitor word:<br />
Device addresses for setting up the word status of serial slave; able to read the content in the<br />
corresponding address of the designated slave.<br />
Note:<br />
Cache mode normally enabled, and Max. data in 16 slaves can be monitored. When the cache mode<br />
is enabled, the data you would like to read will be sent back directly from the register in <strong>IFD9507</strong>.<br />
3. Serial slave mode (used when in Modbus TCP protocol):<br />
The instruction sent from the master is received and transferred to the network. Please designate the<br />
station address and relay IP address.<br />
Station address: slave PLC address (Gateway and PLC address cannot be the same)<br />
Relay IP address: serial master IP<br />
10.6 IP Filter<br />
The IP filter is used for restricting the connection of the network in case some uncertain IP will cause errors.<br />
Only the IP set within a certain range can establish a connection. Other IPs will be rejected.<br />
• Setting up IP filter<br />
28<br />
DVP-PLC Application Manual
<strong>Ethernet</strong> <strong>Communication</strong> <strong>Module</strong> <strong>IFD9507</strong><br />
1. Enable IP filter function:<br />
Check the box to enable IP filter.<br />
2. IP address:<br />
IP addresses that are allowed to establish connections. Maximum 8 IPs are allowed.<br />
3. Netmask:<br />
Subnet mask of the IP that is allowed to establish a connection. To see whether the subnet mask is<br />
allowed, conduct bitwise AND operation between the allowed IP and subnet mask and destination IP<br />
and subnet mask. If the two values obtained are the same, the subnet mask is allowed by the network.<br />
For example, assume the IP is 192.168.0.1 and subnet mask 255.255.255.255, the only IP allowed to<br />
establish a connection will be 192.168.0.1. If the subnet mask is 255.255.255.0, the IPs allowed to<br />
establish connections will become 192.168.0.0 ~ 192.168.0.255.<br />
10.7 <strong>Ethernet</strong>/IP settings<br />
<strong>Ethernet</strong>/IP parameters are used for a connection.<br />
• Setting <strong>Ethernet</strong>/IP parameters<br />
DVP-PLC Application Manual 29
<strong>Ethernet</strong> <strong>Communication</strong> <strong>Module</strong> <strong>IFD9507</strong><br />
1. Dest IP<br />
This is Destination IP address.<br />
2. Timeout (ms)<br />
Timetick * Timeout tick = Timeout<br />
※ Available time tick: 20 ~ 215<br />
30<br />
DVP-PLC Application Manual
<strong>Ethernet</strong> <strong>Communication</strong> <strong>Module</strong> <strong>IFD9507</strong><br />
※ Max. Timeout tick: 255<br />
3. Trigger<br />
There are three trigger types. The cyclic used to describe event that repeat in regular. Production<br />
occurs when a change of state is detected by application object. The Application object used to<br />
provide the run time exchange of messages across network.<br />
4. OT RPI<br />
Originator to target requested packet interval.<br />
When the trigger occurs, the packet is sent to the target within the set interval time.<br />
5. TO RPI<br />
Target to originator requested packet interval.<br />
When the trigger occurs, the packet is sent to the source within the set interval time.<br />
6. In Instance<br />
Target input buffer Instance. Range: 1 ~ 65,535.<br />
7. In Size<br />
Target input buffer size. Range: 0 ~ 256.<br />
8. Out Instance<br />
Target output buffer instance. Range: 1 ~ 65,535.<br />
9. Out Size<br />
Target output buffer size. Range: 0 ~ 256.<br />
10. Width<br />
Data width<br />
11. Config Instance<br />
Configuration instance. Range: 1 ~ 65,535.<br />
10.8 User Defined Settings<br />
When you set up user-defined communication protocol for <strong>IFD9507</strong>, please set up the following parameters.<br />
• Setting up communication parameter between RS-232/RS-485 serial master and serial slave<br />
DVP-PLC Application Manual 31
<strong>Ethernet</strong> <strong>Communication</strong> <strong>Module</strong> <strong>IFD9507</strong><br />
1. Listen Port/Destination IP:<br />
Range: 1,024 ~ 65,535<br />
2. Fix Length:<br />
Length of the packet to be transmitted. Unit: byte<br />
3. Start Item:<br />
32<br />
DVP-PLC Application Manual
<strong>Ethernet</strong> <strong>Communication</strong> <strong>Module</strong> <strong>IFD9507</strong><br />
1 ~ 3 bytes of characters as the start of a packet.<br />
4. Stop Item:<br />
1 ~ 3 bytes of characters as the stop of a packet.<br />
10.9 Virtual COM<br />
Virtual COM converts the data transmitted to RS-232 to <strong>Ethernet</strong>.<br />
• Select "User Define COM”.<br />
• Switch to “User Define” page and select “Listen Port”.<br />
DVP-PLC Application Manual 33
<strong>Ethernet</strong> <strong>Communication</strong> <strong>Module</strong> <strong>IFD9507</strong><br />
• Open Virtual COM setup page.<br />
34<br />
DVP-PLC Application Manual
<strong>Ethernet</strong> <strong>Communication</strong> <strong>Module</strong> <strong>IFD9507</strong><br />
• Press “OK”, and you will see all the devices connected on the network.<br />
• Select the module you need and press “OK”. Relevant information of the device will be imported<br />
automatically. Press “OK” to complete the setup.<br />
• Once the setup is successful, you can see the virtual COM you set in the Device Manager.<br />
DVP-PLC Application Manual 35
<strong>Ethernet</strong> <strong>Communication</strong> <strong>Module</strong> <strong>IFD9507</strong><br />
10.10 Security Settings<br />
To prevent the set values in <strong>IFD9507</strong> from being modified, you can set up passwords to lock the settings in<br />
<strong>IFD9507</strong>.<br />
• Setting up password<br />
1. Password setup:<br />
Check the "Modify” box to set up the password.<br />
2. Confirm password:<br />
Enter the new password again.<br />
3. See “12.1 Application Examples” for more details.<br />
36<br />
DVP-PLC Application Manual
<strong>Ethernet</strong> <strong>Communication</strong> <strong>Module</strong> <strong>IFD9507</strong><br />
Note:<br />
Once the password is locked, all the pages cannot be set up unless you unlock the password.<br />
However, if you set up <strong>IFD9507</strong> by RS-232, you can return the setting to default one whether the<br />
password is locked or not. For example, if you have locked <strong>IFD9507</strong> but forget the password, you<br />
have to return <strong>IFD9507</strong> to default setting by RS-232, and all the settings will return to default ones.<br />
• Login password<br />
Password:<br />
Enter the password to unlock the editing function for other pages.<br />
10.11 Returning to Default Settings<br />
If you need to clear all the settings after many modifications on the settings and return the settings to default<br />
ones, check the “Factory Setting” box.<br />
• Returning to default settings<br />
DVP-PLC Application Manual 37
<strong>Ethernet</strong> <strong>Communication</strong> <strong>Module</strong> <strong>IFD9507</strong><br />
Returning to default setting:<br />
Check “Factory Setting” box and click on “Yes”.<br />
Note:<br />
If you set up <strong>IFD9507</strong> by RS-232, you can return to settings to default ones whether the password is<br />
locked or not. It will take approximately 10 seconds to return to default settings, so DO NOT switch off<br />
the power within the 10 seconds. Besides, you can also press “Reset” button for 2 seconds to return<br />
to default settings.<br />
11 Setting up Configuration by Homepage<br />
This section gives instructions on how to set up <strong>IFD9507</strong> by homepage and explanations on each configuration<br />
page. <strong>IFD9507</strong> is set up by UDP port 20006; therefore, you have to be aware of the relevant settings of the<br />
firewall. See the explanations below on the homepage.<br />
11.1 Webpage connection<br />
• Enabling webpage function<br />
1. Open IE, and enter the IP address of <strong>IFD9507</strong> into the address column.<br />
2. See below for the setup page offered by the webpage. Preview all the information in the column on the<br />
left hand side.<br />
38<br />
DVP-PLC Application Manual
<strong>Ethernet</strong> <strong>Communication</strong> <strong>Module</strong> <strong>IFD9507</strong><br />
11.2 Basic settings<br />
The basic settings include parameters as module name, network settings and series communication. Please<br />
consult your Internet service provider for relevant network settings. For other settings, please refer to BR4 ~<br />
BR6 and BR11 ~ BR13.<br />
• The basics<br />
DVP-PLC Application Manual 39
<strong>Ethernet</strong> <strong>Communication</strong> <strong>Module</strong> <strong>IFD9507</strong><br />
See 10.2 for how to set up.<br />
11.3 Setting up E-Mails<br />
Email is the abbreviation of electronic mail which transmits mails through the network. <strong>IFD9507</strong> has E-Mail<br />
functions for the user to pre-save a segment of text messages, which can be a descriptive message or error<br />
message, into the subject of the E-Mail. When the E-Mail is triggered, <strong>IFD9507</strong> will send the messages to the<br />
user by E-Mail.<br />
• Mail settings<br />
40<br />
DVP-PLC Application Manual
<strong>Ethernet</strong> <strong>Communication</strong> <strong>Module</strong> <strong>IFD9507</strong><br />
1. Mail alarm setup:<br />
There are 3 mail alarms to be setup. Check the boxes to enable the alarms. The alarms can be<br />
triggered by “falling" or “rising".<br />
2. See 10.4 for how to set up SMTP server/Mail From/E-mail Subject of Event/Recipient E-Mail Address<br />
columns.<br />
11.4 IP filter<br />
The IP filter is used for restricting the connection of the network in case some uncertain IP will cause errors.<br />
Only the IP set within a certain range can establish a connection. Other IPs will be rejected.<br />
• Setting up IP filter<br />
DVP-PLC Application Manual 41
<strong>Ethernet</strong> <strong>Communication</strong> <strong>Module</strong> <strong>IFD9507</strong><br />
See 10.6 for how to set up.<br />
11.5 Security Settings<br />
To prevent the set values in <strong>IFD9507</strong> being modified, you can set up passwords to lock the settings in<br />
<strong>IFD9507</strong>.<br />
• Setting up <strong>IFD9507</strong> password<br />
1. Password setup:<br />
Maximum 4 characters are allowed. Leave the column “blank” to disable the password protection<br />
function.<br />
2. Confirming password:<br />
Enter the new password again.<br />
Note:<br />
Once the password is locked, all the pages cannot be set up unless you unlock the password.<br />
However, if you set up <strong>IFD9507</strong> by RS-232, you can return the setting to default one whether the<br />
password is locked or not. For example, if you have locked <strong>IFD9507</strong> but forget the password, you<br />
have to return <strong>IFD9507</strong> to default setting by RS-232, and all the settings will return to default ones.<br />
• Login password<br />
42<br />
DVP-PLC Application Manual
<strong>Ethernet</strong> <strong>Communication</strong> <strong>Module</strong> <strong>IFD9507</strong><br />
1. Refresing webpage:<br />
Once IFD9506 is locked by a password, please click on “Refresh” on the webpage toolbar to<br />
display the password login page.<br />
2. Setting up password:<br />
Enter the password to enable the editing function on other pages.<br />
11.6 Returning to default setting<br />
If you need to clear all the settings after many modifications on the settings and return the settings to default<br />
ones, check the “Factory Setting” box.<br />
• Returning to default setting<br />
Returning to default setting:<br />
Check “Factory Setting” box and click on “Yes”.<br />
Note:<br />
If you set up <strong>IFD9507</strong> by RS-232, you can return to settings to default ones whether the password is<br />
locked or not. It will take approximately 10 seconds to return to default settings, so DO NOT switch off<br />
the power within the 10 seconds. Besides, you can also press “Reset” button for 2 seconds to return<br />
to default settings.<br />
11.7 Monitoring settings<br />
You can read data in designated addresses in different equipment in the network by setting up <strong>IFD9507</strong>.The<br />
data can be temporarily stored in <strong>IFD9507</strong> for fast storing and acquisition.<br />
• Setting up Master Mode monitoring functions<br />
DVP-PLC Application Manual 43
<strong>Ethernet</strong> <strong>Communication</strong> <strong>Module</strong> <strong>IFD9507</strong><br />
1. Monitor bit:<br />
Device addresses for setting up the bit status of serial slave; able to read the content in the<br />
corresponding address of the designated slave.<br />
2. Content:<br />
The corresponding monitored value of the device address.<br />
3. Digit Selection:<br />
The monitored value can be displayed in hex or decimal form.<br />
4. Monitor word:<br />
Device addresses for setting up the word status of serial slave; able to read the content in the<br />
corresponding address of the designated slave.<br />
Note:<br />
Cache mode normally enabled, and Max. data in 16 slaves can be monitored. When the cache mode<br />
is enabled, the data you would like to read will be sent back directly from the register in <strong>IFD9507</strong>.<br />
• Setting up Slave Mode monitoring functions<br />
44<br />
DVP-PLC Application Manual
<strong>Ethernet</strong> <strong>Communication</strong> <strong>Module</strong> <strong>IFD9507</strong><br />
1. Serial slave mode: (used when in Modbus TCP protocol)<br />
The instruction sent from the master is received and transferred to the network. Please designate the<br />
station address and relay IP address.<br />
Station address: slave PLC address (Gateway and PLC address cannot be the same)<br />
Relay IP address: serial master IP<br />
11.8 <strong>Ethernet</strong>/IP<br />
You can read data in designated addresses in different equipment in the network by setting up <strong>IFD9507</strong>.The<br />
data can be temporarily stored in <strong>IFD9507</strong> for fast storing and acquisition.<br />
• Setting up Slave Mode connection parameters<br />
DVP-PLC Application Manual 45
<strong>Ethernet</strong> <strong>Communication</strong> <strong>Module</strong> <strong>IFD9507</strong><br />
1. Dest IP<br />
This is Destination IP address.<br />
2. Timeout (ms)<br />
Timetick * Timeout tick = Timeout<br />
※ Available time tick: 2 0 ~ 2 15<br />
※ Max. Timeout tick: 255.<br />
3. Trigger<br />
There are three trigger types. The cyclic used to describe event that repeat in regular. Production<br />
occurs when a change of state is detected by application object. The Application object used to<br />
provide the run time exchange of messages across network.<br />
4. OT RPI<br />
Originator to target requested packet interval.<br />
When the trigger occurs, the packet is sent to the target within the set interval time.<br />
5. TO RPI<br />
Target to originator requested packet interval.<br />
When the trigger occurs, the packet is sent to the originator within the set interval time.<br />
6. In Instance<br />
Target input buffer Instance. Range: 1 ~ 65,535.<br />
7. In Size<br />
Target input buffer size. Range: 0 ~ 256.<br />
8. Out Instance<br />
Target output buffer instance. Range: 1 ~ 65,535.<br />
9. Out Size<br />
Target output buffer size. Range: 0 ~ 256.<br />
10. Width<br />
Data width<br />
11. Config Instance<br />
Configuration instance. Range: 1 ~ 65,535.<br />
46<br />
DVP-PLC Application Manual
<strong>Ethernet</strong> <strong>Communication</strong> <strong>Module</strong> <strong>IFD9507</strong><br />
11.9 User Define<br />
You can define your own format for data to be transmitted. The items to be defined include the fixed length,<br />
start item and stop item.<br />
• Select RS-232 or RS-485 to connect the device.<br />
• Switch to “User Define” page to set up the “Fix Length”, “Start Item” and “Stop Item”.<br />
1 ~ 256<br />
1. Listen Port/Destination Port:<br />
DVP-PLC Application Manual 47
<strong>Ethernet</strong> <strong>Communication</strong> <strong>Module</strong> <strong>IFD9507</strong><br />
Range: 1024 ~ 65535.<br />
1. Fix Length:<br />
When this is sest, <strong>IFD9507</strong> will transmit data following the fixed length.<br />
2. Start Item:<br />
The start item of data. Range: 1 ~ 3<br />
3. Stop Item:<br />
The stop item of data. Range: 1 ~ 3<br />
When the start item and stop item are set, <strong>IFD9507</strong> will transmit data following the start item and<br />
stop item. If the transmission time exceeds the Modbus time-out, <strong>IFD9507</strong> will dispose of<br />
incomplete data.<br />
Note:<br />
When using two <strong>IFD9507</strong> modules as Mater and Slave and its user define functions, the settings<br />
of the fixed length, start item and stop item have to be consistent. If not, the data will be filtered<br />
automatically.<br />
48<br />
DVP-PLC Application Manual
<strong>Ethernet</strong> <strong>Communication</strong> <strong>Module</strong> <strong>IFD9507</strong><br />
12 Application Examples – DCISoft<br />
12.1 Setting up & Unlocking Password<br />
Application<br />
Steps<br />
Setting up password by <strong>IFD9507</strong> configuration<br />
(1) Set up password in <strong>IFD9507</strong>.<br />
(2) Unlock <strong>IFD9507</strong>.<br />
1. See 10.1 for the connection and how to set up the communication.<br />
2. Open the setup page and switch to “Security” page.<br />
3. Check “Modify” and enter “aabb” in “Password” and “Confirm Password” columns. Click on “Apply” to save<br />
the password.<br />
DVP-PLC Application Manual 49
<strong>Ethernet</strong> <strong>Communication</strong> <strong>Module</strong> <strong>IFD9507</strong><br />
4. Open the setup page again, and <strong>IFD9507</strong> is now locked by the password. You cannot open any of the<br />
settings now. Enter the password and press “Confirm”, and you will be able to unlock the editing function<br />
on other pages.<br />
50<br />
DVP-PLC Application Manual
<strong>Ethernet</strong> <strong>Communication</strong> <strong>Module</strong> <strong>IFD9507</strong><br />
12.2 Password Loss (Returning to Default Settings by RS-232)<br />
Application<br />
Steps<br />
Returning to default settings by RS-232.<br />
(1) Set up password in <strong>IFD9507</strong>.<br />
(2) Supposed the password is forgotten, return to default settings through RS-232.<br />
1. Use DVPACAB2A30 cable to connect the PC and <strong>IFD9507</strong>. Open the setup page.<br />
2. Check “Factory Setting” box and the warning dialog box will appear. Click on “Yes” to return to default<br />
settings (in approx. 5 ~ 10 seconds), and the password will be cleared as well.<br />
12.3 IP Filter Protection<br />
Application<br />
Steps<br />
Setting up IP filter protection. Only connections to 192.168.0.7 and 172.16.0.1 ~<br />
172.16.0.255 are allowed.<br />
(1) Check "Enable IP Filter” box.<br />
(2) Set up IP address to “192.168.0.7” and netmask to “255.255.255.255”.<br />
(3) Set up the IP address to “172.16.0.1” and Netmask to “255.255.255.0”.<br />
1. See 10.1 for the connection and how to set up the communication.<br />
2. Open the setup page and switch to “IP Filter” page.<br />
3. Check “Enable IP Filter” box. Enter “192.168.0.7” into No. 1 IP and “255.255.255.255” in all “Netmask”<br />
columns.<br />
DVP-PLC Application Manual 51
<strong>Ethernet</strong> <strong>Communication</strong> <strong>Module</strong> <strong>IFD9507</strong><br />
4. Enter “172.16.0.1” in No. 2 IP and “255.255.255.0” in No. 2 Netmask column. Click on “OK” to complete<br />
the setting. Only the equipment within the UP range can be connected.<br />
52<br />
DVP-PLC Application Manual
<strong>Ethernet</strong> <strong>Communication</strong> <strong>Module</strong> <strong>IFD9507</strong><br />
12.4 Application of E-Mail<br />
Application<br />
Steps<br />
Sending E-Mail to notify the administrator when Alarm 1 is triggered.<br />
(1) Check “Alarm 1” to enable it.<br />
(2) Set the IP of SMTP server to ” 192.168.1.99” and "Mail From” to “Message@Delta”<br />
(3) Set the E-mail Subject of Event to “MAIL ALARM”.<br />
(4) Set the E-mail address of administrator to test@Delta.com.tw<br />
1. See 10.1 for the connection and how to set up the communication.<br />
2. Open the setup page and switch to “Mail” page.<br />
3. Setting up “Mail” page and check “Mail Alarm Setup”.<br />
Enter SMTP server address, “Mail From” column, “Subject of Event” and “Recipient E-mail Address”. For<br />
example, when Alarm 1 is triggered, the mail will be sent to test@sample.com. Trigger Alarm 1 by “low”.<br />
Enter 172.16.144.121 into “SMTP Server” column and Mail From Message@ENA01. Enter “MAIL EVENT”<br />
as the subject and recipient e-mail address as test@delta.com.tw. Check “Alarm 1” and press “OK” to<br />
complete the settings.<br />
DVP-PLC Application Manual 53
<strong>Ethernet</strong> <strong>Communication</strong> <strong>Module</strong> <strong>IFD9507</strong><br />
12.5 Monitoring Mode<br />
Application<br />
Steps<br />
Writing the address of the device to be monitored into the monitor table.<br />
(1) Use monitor bit and monitor word functions.<br />
(2) Monitor bit data in station address 1, H100 and H300, and word data in station address<br />
1 H150.<br />
(3) Monitor bit data in station address 2, H200.<br />
(4) Monitor word data in station address 3, H200.<br />
(5) Monitor word data in station address 4, H100.<br />
(6) Monitor bit quantity: 3; monitor word quantity: 3<br />
1. See 10.1 for how to set up communication.<br />
2. Open <strong>IFD9507</strong> Configuration page and switch to “Monitor” page.<br />
54<br />
DVP-PLC Application Manual
<strong>Ethernet</strong> <strong>Communication</strong> <strong>Module</strong> <strong>IFD9507</strong><br />
3. The settings:<br />
Note:<br />
When the cache mode is enabled, you do not need to modify the station address and device address.<br />
You will read data from <strong>IFD9507</strong>, in which way you will be able to speed up the reading.<br />
DVP-PLC Application Manual 55
<strong>Ethernet</strong> <strong>Communication</strong> <strong>Module</strong> <strong>IFD9507</strong><br />
12.6 Application of Virtual COM Port<br />
Application<br />
Steps<br />
Through the virtual COM port, <strong>IFD9507</strong> is able to transmit the data sent to RS-232 to the<br />
<strong>Ethernet</strong> by connencting to the software supporing serial ports, e.g. Delta’s WPLSoft,<br />
VFDSoft and ASDA-Soft. See the example below for how to connect <strong>IFD9507</strong> to VFD-E AC<br />
motor drive through the virtual COM port by VFDSoft.<br />
(1) Select “User Define” protocol and set the parameters in the serial master and serial slave<br />
to the ones consistent with those in VFD-E.<br />
(2) Set up virtual COM port.<br />
(3) Open Delta VFDSoft, set up the communication format (COM Setup) and establish the<br />
connection.<br />
1. Setting up Virtual COM Port<br />
• For the COM setting, select “User Define” and set the communication parameters to the ones<br />
consistent with those in VFD-E.<br />
• Switch to “User Define” page and select “Listen Port”.<br />
56<br />
DVP-PLC Application Manual
<strong>Ethernet</strong> <strong>Communication</strong> <strong>Module</strong> <strong>IFD9507</strong><br />
• Open Virtual COM setup page.<br />
DVP-PLC Application Manual 57
<strong>Ethernet</strong> <strong>Communication</strong> <strong>Module</strong> <strong>IFD9507</strong><br />
• Press “OK”, and you will see all the devices connected on the network.<br />
• Select the module you need and press “OK”. Relevant information of the device will be imported<br />
automatically. Press “OK” to complete the setup.<br />
58<br />
DVP-PLC Application Manual
<strong>Ethernet</strong> <strong>Communication</strong> <strong>Module</strong> <strong>IFD9507</strong><br />
• Once the setup is successful, you can see the virtual COM you set in the Device Manger.<br />
2. Using Virtual COM in Delta VFDSoft<br />
• Open Delta VFDSoft.<br />
• Setting up communication format (COM Setup)<br />
Enter the virtual COM (COM2) set in the previous steps to “Com Port” column. Next, enter the<br />
communication format of VFD-E (38400, 7, E, 1) and press “Test" button. Once the “Success” light is<br />
ON, the communication test is regarded successful.<br />
DVP-PLC Application Manual 59
<strong>Ethernet</strong> <strong>Communication</strong> <strong>Module</strong> <strong>IFD9507</strong><br />
• Press “OK”, and <strong>IFD9507</strong> will be able to communicate with VFD-E by VFDSoft.<br />
60<br />
DVP-PLC Application Manual
<strong>Ethernet</strong> <strong>Communication</strong> <strong>Module</strong> <strong>IFD9507</strong><br />
13 Application Examples – AB Software (Revision:2.10.118.0)<br />
13.1 Serial Slave<br />
Using Delta PLC DVP28SV11T to control AB PowerFlex 40P via <strong>IFD9507</strong>.<br />
• Configure 22-COMM-E IP<br />
Use AB software “Driver Explorer Application” to Set the PowerFlex40P+22CommE IP.<br />
1. Open Driver Explorer Application.<br />
2. Select “Configure <strong>Communication</strong>” in Explore.<br />
3. Select “Serial”<br />
Select your RS232 com port, Baud = “38400”, Checksum Type=”CRC-16” and click “OK”<br />
DVP-PLC Application Manual 61
<strong>Ethernet</strong> <strong>Communication</strong> <strong>Module</strong> <strong>IFD9507</strong><br />
4. Select “Connect Serial Point-to-Point” in Explore.<br />
5. Select “Parameter List” in 22-COMM-E <strong>Ethernet</strong>/IP and enter “IP” in IP Addr Cfg1~Cfg4 and<br />
“Netmask” in Subnet Cfg1~Cfg4.<br />
• DCISoft configuration<br />
1. Open DCISoft “Basic” configuration screen.<br />
2. Select “Serial Slave” in Master Configuration.<br />
62<br />
DVP-PLC Application Manual
<strong>Ethernet</strong> <strong>Communication</strong> <strong>Module</strong> <strong>IFD9507</strong><br />
3. Select “Static” in IP Configuration.<br />
4. Enter “192.168.1.99” in IP Address field.<br />
5. Enter “255.255.255.0” in Netmask field.<br />
6. Select “<strong>Ethernet</strong>/IP” in Application Protocol.<br />
7. Enter “231” in Station Address.<br />
8. Press “OK”.<br />
9. Open DCISoft “<strong>Ethernet</strong>/IP” configuration screen.<br />
10. Enter AB PowerFlex 40P IP Address“192.168.1.72” in Dest IP Field.<br />
11. Select “Cyclic” in Trigger.<br />
12. Enter PowerFlex 40P parameter “1”,”4”,”2”,”2”,”2 byte”,”6” in In Instance, In Size, Out Instance, Out<br />
Size, Width, Config Instance in turn.<br />
13. Press “OK”.<br />
• WPL program<br />
1. Write control data to DVP <strong>IFD9507</strong> IN register (H0500)<br />
2. Use WPL MODWR instruction to write the control data to EIP (H0500).<br />
3. Ex. RUN:111000000011010H701A<br />
STOP:111000000011001H7019<br />
Reverse RUN:111000000101010H702A<br />
4. Select which communication index you want. Write 1~4 to DVP<strong>IFD9507</strong> BR15 (H000F).<br />
Use WPL MODWR instruction to select the DVP <strong>IFD9507</strong> BR (H0500) index.<br />
5. Set the I/O Enable Flag (BR14).<br />
DVP-PLC Application Manual 63
<strong>Ethernet</strong> <strong>Communication</strong> <strong>Module</strong> <strong>IFD9507</strong><br />
Use WPL MODWR instruction to write “0101” set I/O enable Flag.<br />
13.2 Serial Master<br />
Using AB PLC 1769-L32E to write Delta PLC DVP28SV11T bit and register via <strong>IFD9507</strong>.<br />
• Configure RSLinx 1769-L32E<br />
1. Open RSLinx and configure drivers<br />
2. Select RS232 device and click “Add New”<br />
64<br />
DVP-PLC Application Manual
<strong>Ethernet</strong> <strong>Communication</strong> <strong>Module</strong> <strong>IFD9507</strong><br />
3. Select Com port and click “Auto-Configure”. When it is successful, it will show successful messages.<br />
• Configure <strong>IFD9507</strong><br />
1. Open DCISoft “Basic” configuration screen.<br />
2. Select “Serial Master” in Master Configuration.<br />
3. Select “Static” in IP Configuration.<br />
4. Enter “192.168.1.99” in IP Address field.<br />
5. Enter “255.255.255.0” in Netmask field.<br />
6. Enter “231” in Station Address<br />
7. Press “OK”.<br />
DVP-PLC Application Manual 65
<strong>Ethernet</strong> <strong>Communication</strong> <strong>Module</strong> <strong>IFD9507</strong><br />
• Configure RSLogix 5000<br />
1. Select “New”.<br />
2. Select controller type “1769-L32E” and type Nameclick “OK”.<br />
3. Add new <strong>Ethernet</strong> module.<br />
66<br />
DVP-PLC Application Manual
<strong>Ethernet</strong> <strong>Communication</strong> <strong>Module</strong> <strong>IFD9507</strong><br />
4. Select “communications” module.<br />
5. Select “ETHERNET-MODULE” and click “OK”.<br />
DVP-PLC Application Manual 67
<strong>Ethernet</strong> <strong>Communication</strong> <strong>Module</strong> <strong>IFD9507</strong><br />
6. Enter module name. Select Comm Format “Data-INT”. Enter instance “101”, Size “100”, Out Instance<br />
“100”, Output Size “100”, Configuration Instance “6” and, Configuration Size “0” and<br />
IP: ”192.168.1.99”.<br />
7. Enter Requested Packet Interval ”500.0 ms” and click “OK”<br />
68<br />
DVP-PLC Application Manual
<strong>Ethernet</strong> <strong>Communication</strong> <strong>Module</strong> <strong>IFD9507</strong><br />
8. Open MainRoutine screen<br />
9. Create New Tag “SW1” (Use SW1 to control instruction ON/OFF)<br />
10. Using Move instruction move data to “ENA01EIP: O.Data” register.<br />
Ex:Set Delta PLC Y0 (H0500) ON<br />
Send instruction MODBUS TCP:06 01 05 05 00 FF 00<br />
(1) H0006: Mov “06” to ENA01EIP: O.Data[0]<br />
(2) H0105: Mov “261” to ENA01EIP: O.Data[1]<br />
(3) H0500: Mov “1280” to ENA01EIP: O.Data[2]<br />
(4) HFF00: Mov “65280” to ENA01EIP: O.Data[3]<br />
DVP-PLC Application Manual 69
<strong>Ethernet</strong> <strong>Communication</strong> <strong>Module</strong> <strong>IFD9507</strong><br />
11. Download this program and make the PLC 1769-L32E go online.<br />
12. Toggle Bit ”SW1”.<br />
70<br />
DVP-PLC Application Manual