Silver Cross Classic Chassis Pram.pdf
Silver Cross Classic Chassis Pram.pdf
Silver Cross Classic Chassis Pram.pdf

You also want an ePaper? Increase the reach of your titles
YUMPU automatically turns print PDFs into web optimized ePapers that Google loves.
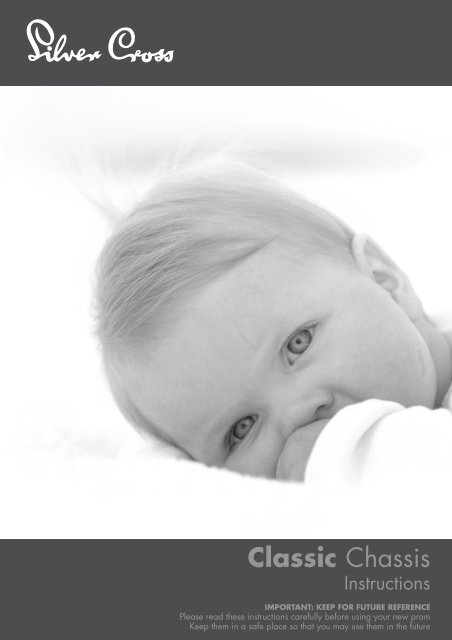
<strong>Classic</strong> <strong>Chassis</strong><br />
Instructions<br />
Important: Keep for future reference<br />
Please read these instructions carefully before using your new pram<br />
Keep them in a safe place so that you may use them in the future
These instructions are important.<br />
Please read carefully and retain for future reference.<br />
Your <strong>Classic</strong> chassis is a high quality <strong>Silver</strong> <strong>Cross</strong> product. It meets current safety<br />
standards and regular light maintenance will ensure long service.<br />
If somebody unfamiliar is using your <strong>Classic</strong> chassis always ensure that they read<br />
these instructions carefully so that understand how the chassis works best.<br />
Although these instructions clearly outline the correct use of the <strong>Classic</strong> chassis they<br />
do not relate to the seat unit. To operate the seat unit you must refer to the separate<br />
instructions packed with your chosen seat unit. Remember, the safety of your child is<br />
your responsibility.<br />
The <strong>Classic</strong> chassis (SX104) is designed and tested to work with the following<br />
<strong>Silver</strong> <strong>Cross</strong> seat units<br />
Sleepover (SX301)<br />
Freeway (SX302)<br />
<strong>Classic</strong> <strong>Chassis</strong> - Instructions<br />
Contents<br />
Description<br />
page No.<br />
Preparation for use. . . . . . . . . . . . . . . . . . . . . . . . . . . . . . . . . . . . . . . . . . . .4<br />
Using the brake . . . . . . . . . . . . . . . . . . . . . . . . . . . . . . . . . . . . . . . . . . . . . .7<br />
Height adjustable handle . . . . . . . . . . . . . . . . . . . . . . . . . . . . . . . . . . . . . . .8<br />
Folding the chassis . . . . . . . . . . . . . . . . . . . . . . . . . . . . . . . . . . . . . . . . . . . .9<br />
Opening the chassis . . . . . . . . . . . . . . . . . . . . . . . . . . . . . . . . . . . . . . . . . .11<br />
Using your <strong>Classic</strong> chassis with the Ventura car seat. . . . . . . . . . . . . . . . . . . .12<br />
Safety notes. . . . . . . . . . . . . . . . . . . . . . . . . . . . . . . . . . . . . . . . . . . . . . . .13
1. Preparation for use<br />
A<br />
B<br />
First check that all your parts have been<br />
supplied. Your complete chassis includes:<br />
1<br />
C<br />
a. <strong>Chassis</strong> C. Wheels x 4<br />
B. Basket x 1<br />
Providing everything is present you are<br />
ready to continue.<br />
E<br />
Open the chassis by sliding the<br />
folding catches (E) towards you.<br />
This disengages the automatic chassis lock<br />
and allows the handle to rise into the upright<br />
position<br />
2<br />
Gently press down on the handle ensuring<br />
both sides click and lock into place.<br />
3
1. Preparation for use Header (cont.)<br />
Your <strong>Classic</strong> chassis has a multi-position<br />
adjustable handle. Press both adjuster buttons<br />
and rotate the handle to the<br />
mid-position.Release buttons to lock<br />
4<br />
Now attach your wheels by first removing any<br />
axle packing protection. Present the wheels to<br />
the axle and slide into position. Release the<br />
wheel locking clip (F) by pulling gently and<br />
slide the wheel to the stop position. Release<br />
the clip and check that the wheel has firmly<br />
attached. Repeat on all four wheels.<br />
F<br />
5<br />
Carefully position the basket within the<br />
chassis frame with the lower end towards the<br />
brake. Push down on each locking clip to<br />
firmly secure in place.<br />
6
1. preparation for use (COnt.)<br />
Your <strong>Classic</strong> chassis is fitted with hard<br />
wearing EVA tyres for convenience and a<br />
puncture free ride.<br />
7<br />
Your <strong>Classic</strong> chassis is now ready for use.<br />
We will now proceed to the<br />
features and folding of your <strong>Classic</strong> chassis<br />
8
2. Using the Header brake<br />
To engage the brake simply press down on the brake pedal<br />
where ON is marked.<br />
9<br />
Always check your brake is fully engaged by<br />
gently rocking your chassis.<br />
10<br />
To disengage the brake simply press on the pedal<br />
in the OFF position.<br />
11
Header 3. Height adjustable handle<br />
The handle is fully adjustable to accommodate<br />
users of varying heights<br />
giving added comfort and allowing for<br />
compact storage<br />
12<br />
To adjust the handle simply press both the<br />
adjuster buttons and rotate to the desired<br />
height. Release buttons to lock.<br />
13<br />
Your handle has various different positions<br />
and should always lock firmly into place.<br />
14
4. Folding the Header chassis<br />
Slide the folding catches (E) towards you until<br />
the locking catches disengage on both sides.<br />
Note: The secondary safety catch will lock at<br />
this stage.<br />
E<br />
15<br />
To disengage the secondary safety lock (G),<br />
slightly press down on the handle allowing<br />
the secondary lock (G) to swing freely.<br />
Lift upwards allowing the handle to move<br />
forward, freely.<br />
G<br />
G<br />
16<br />
‘click’<br />
Rotate the handle until it is parallel to the<br />
wheels and press down on both sides until<br />
you hear a click on both sides.<br />
17
4. folding the chassis (cont.)<br />
Your <strong>Classic</strong> chassis has an automatic<br />
locking catch which secures your chassis<br />
for easy transportation and storage<br />
18<br />
For the most compact fold, adjust the handle<br />
and rotate it towards the floor, then lock.<br />
19<br />
The wheels are removable by lifting the<br />
wheel<br />
catch (F - see point 5) towards you and<br />
pulling the wheel away from the axle.<br />
20<br />
10
5. Opening the Header chassis<br />
E<br />
Slide the folding catches (E) towards you to<br />
release the automatic chassis lock<br />
21<br />
Lift the handle and rotate into the locked<br />
position. Press firmly to ensure both locks<br />
engage<br />
22<br />
Adjust your handle to the desired height<br />
position.<br />
Your chassis is now ready for use.<br />
23<br />
11
6. using your classic with the ventura car seat<br />
To attach your Ventura car seat to the <strong>Classic</strong> chassis,<br />
hold the car seat centrally over the chassis mounting bars.<br />
24<br />
On the underneath of the Ventura are four locking points,<br />
lower the car seat onto the <strong>Classic</strong> mounting bars so that<br />
these locate and ‘click’.<br />
Gently lift the car seat to ensure it is full locked on the<br />
chassis.<br />
25<br />
To disengage the Ventura, there is a release handle on the<br />
rear of the shell, pull this upwards whilst holding the car seat<br />
by the handle.<br />
You can now lift the Ventura off the chassis.<br />
26<br />
12
Header Notes<br />
Safety Notes<br />
Your <strong>Classic</strong> chassis is a high quality <strong>Silver</strong> <strong>Cross</strong> product. It complies with British Standard 7409:1996 and<br />
with correct use and maintenance should give good service. If, however, you should have any problems with<br />
your pushchair, please contact your <strong>Silver</strong> <strong>Cross</strong> retailer who will take appropriate action.<br />
Do not leave your child unattended in this pushchair.<br />
Do not carry more than one child in this pushchair.<br />
The child should always wear a safety harness complying with BS6684. “D” rings are provided for the<br />
attachment of an additional harness. These are located on the existing harness close to where it is attached<br />
to the seat frame.<br />
Do not hang shopping bags or other objects from the handle. This may cause the pushchair to tip up.<br />
Extra shopping or luggage should only be carried in the basket and should not exceed 5kg in weight<br />
evenly distributed.<br />
Always hold the seat when making adjustments. Be sure that the parking device is on.<br />
Never try to fold the pushchair when the child is seated as this may trap the child.<br />
If you have any difficulty in folding or unfolding the pushchair do not force. This will cause damage.<br />
Read the “ To fold or unfold” instructions carefully.<br />
It may be unsafe to fit accessories or spare parts other than those supplied or recommended by <strong>Silver</strong> <strong>Cross</strong>.<br />
If anyone other than the owner is going to use the pushchair (e.g. grandparent, child minder), please show<br />
them how to use it correctly.<br />
Caution: The child should be clear of moving parts while making adjustments.<br />
Warning: A baby’s safety is your responsibility.<br />
Care and Maintenance<br />
Always check your pushchair for signs of wear. Lubricate moving parts regularly, especially the wheel, axles,<br />
suspension springs and lower parts of the chassis that tend to collect dirt.<br />
Check for freedom of movement of all locking devices.<br />
Polish metalwork with a clean, dry cloth.<br />
Guarantee<br />
All <strong>Silver</strong> <strong>Cross</strong> products are guaranteed for a period of twelve months against faulty workmanship.<br />
Please read these instructions carefully before using your new <strong>Classic</strong> chassis<br />
and keep for future reference.<br />
13
Filling material(s) and<br />
covering fabric(s) meet the<br />
requirements for resistance to<br />
cigarette and match ignition in<br />
the 1988 safety regulations.<br />
CARELESSNESS<br />
CAUSES FIRE<br />
<strong>Silver</strong> <strong>Cross</strong> (UK) Ltd<br />
Micklethorn<br />
Broughton<br />
Skipton<br />
North Yorkshire<br />
BD23 3JA<br />
Telephone: 01756 702412<br />
Website: www.silvercross.co.uk