Instruction Book HM790 English - Kenwood Limited
Instruction Book HM790 English - Kenwood Limited
Instruction Book HM790 English - Kenwood Limited

Create successful ePaper yourself
Turn your PDF publications into a flip-book with our unique Google optimized e-Paper software.
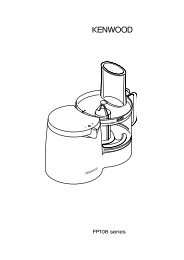
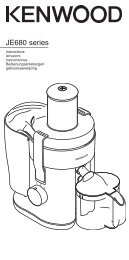
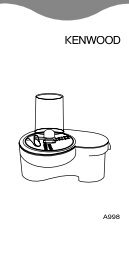
<strong>HM790</strong> series
<strong>HM790</strong> series
efore using your <strong>Kenwood</strong> appliance<br />
● Read these instructions carefully and retain for future<br />
reference.<br />
● Remove all packaging and any labels.<br />
safety<br />
● Ensure the cord is fully unwound from the cord wrap<br />
before using the handmixer.<br />
● Never put the handmixer body in water or let the cord<br />
or plug get wet.<br />
● Keep fingers, hair, clothing and utensils away from<br />
moving parts.<br />
● Never let the cord touch hot surfaces or hang down<br />
where a child could grab it.<br />
● Never use a damaged handmixer. Get it checked or<br />
repaired: see 'service and customer care'.<br />
● Never use an unauthorised attachment.<br />
● Always unplug the appliance when not in use, before<br />
fitting or removing parts or before cleaning.<br />
● This appliance is not intended for use by persons<br />
(including children) with reduced physical, sensory or<br />
mental capabilities, or lack of experience and<br />
knowledge, unless they have been given supervision or<br />
instruction concerning use of the appliance by a person<br />
responsible for their safety.<br />
● Children should be supervised to ensure that they do<br />
not play with the appliance.<br />
● Only use the appliance for its intended domestic use.<br />
<strong>Kenwood</strong> will not accept any liability if the appliance is<br />
subject to improper use, or failure to comply with these<br />
instructions.<br />
before plugging in<br />
● Make sure your electricity supply is the same as the<br />
one shown on the underside of your handmixer.<br />
Important – UK only<br />
● The wires in the cord are coloured as follows:<br />
Blue = Neutral, Brown = Live.<br />
● The appliance must be protected by a 3A approved<br />
(BS1362) fuse.<br />
Note:<br />
● For non-rewireable plugs the fuse cover MUST be<br />
refitted when replacing the fuse. If the fuse cover is lost<br />
then the plug must not be used until a replacement can<br />
be obtained. The correct fuse cover is identified by<br />
colour and a replacement may be obtained from your<br />
<strong>Kenwood</strong> Authorised Repairer (see Service).<br />
2<br />
● If a non-rewireable plug is cut off it must be<br />
DESTROYED IMMEDIATELY. An electric shock hazard<br />
may arise if an unwanted non-rewireable plug is<br />
inadvertently inserted into a 13A socket outlet.<br />
● This appliance conforms to EC directive 2004/108/EC<br />
on Electromagnetic Compatibility and EC regulation no.<br />
1935/2004 of 27/10/2004 on materials intended for<br />
contact with food.<br />
before using your handmixer for the first time<br />
● Wash the parts (see 'cleaning').<br />
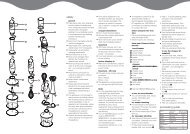
key<br />
<br />
<br />
<br />
<br />
<br />
<br />
<br />
<br />
<br />
<br />
speed switch<br />
tool release button<br />
beaters<br />
cord wrap<br />
kneader with additional collar<br />
kneader without additional collar<br />
beater storage pillars<br />
kneader storage pillars<br />
worktop storage unit<br />
cord clip<br />
to use your handmixer<br />
1 Unwrap the cord from the cord wrap and make sure<br />
the speed switch is in the off position by lining up the O<br />
symbol on the handmixer body with the dot on the side<br />
of the speed switch. Insert the beaters or kneaders –<br />
turn and push until a positive click is felt. The tabs on<br />
the tool shafts need to line up with the outlet holes.<br />
Important: The kneader with the additional collar will<br />
only fit into the larger outlet hole.<br />
2 Plug in.<br />
3 With the ingredients in a suitably sized bowl, place the<br />
beaters/kneaders into the bowl.<br />
4 Pull the speed switch backwards to reach the desired<br />
speed (the first dot on the handmixer body is slow and<br />
speed 5 is fast). Line up the dot on the side of the<br />
speed switch with the corresponding speed.<br />
● As the mixture thickens, increase the speed.<br />
● If the machine labours increase the speed.<br />
● Move the speed switch forwards to the pulse position<br />
(P) to operate the motor as required. The motor will<br />
operate for as long as the pulse is held in position.<br />
5 When the mixture has reached the desired<br />
consistency, return the speed switch to the off position<br />
and then lift the beaters/kneaders out of the bowl.
6 To remove the tools, make sure the speed switch is in<br />
the off position and unplug the handmixer. Press the<br />
tool release button. Hold onto the tool shafts when<br />
ejecting the tools.<br />
Important:<br />
● When making bread dough we recommend that the<br />
dough load does not exceed 400g flour.<br />
● With heavy mixtures, such as dough, don’t use your<br />
handmixer for longer than 3 minutes in any 5 minute<br />
period as the protection device might operate. Switch<br />
it off as soon as you’ve got the right consistency.<br />
● To protect your handmixer it is fitted with a protection<br />
device which will stop the handmixer operating if<br />
overloaded. If this happens, switch off, unplug, wait a<br />
couple of minutes and then plug back into the power<br />
supply.<br />
Recommended speeds for beaters<br />
Please note that these are recommendations<br />
only and the speed you select may depend upon<br />
the bowl size, quantities, the ingredients you<br />
are mixing and personal preference.<br />
Food type<br />
Recommended<br />
speeds<br />
Egg whites<br />
Gradually increase the<br />
speed to 5<br />
Cream 1 - 2<br />
Whisked sponge<br />
Gradually increase the<br />
speed to 3<br />
1 stage sponge cake 1 – 3<br />
Batter 1<br />
Rubbing fat into flour 1<br />
Adding water to combine 1<br />
pastry ingredients<br />
cleaning<br />
● Always switch off, unplug and remove the beaters or<br />
kneaders before cleaning.<br />
● Never put the handmixer body in water or let the cord<br />
or plug get wet.<br />
● Never use abrasives to clean parts.<br />
beaters, kneaders<br />
● Wash by hand or in your dishwasher, then dry.<br />
handmixer body and worktop storage unit<br />
● Wipe with a dry to slightly damp cloth then dry.<br />
storage<br />
1 Wrap the cord around the base of the handmixer <br />
and clip the cord together using the cord clip.<br />
2 Place the handmixer on its end into the worktop<br />
storage unit, ensuring the plug and handle are facing<br />
away from the storage pillars .<br />
3 Store the beaters in the two outside beater storage<br />
pillars.<br />
4 Store the kneader without additional collar in the taller<br />
of the kneader storage pillars.<br />
5 Store the kneader with additional collar in the shorter of<br />
the kneader storage pillars.<br />
service and customer care<br />
●<br />
If the cord is damaged it must, for safety reasons, be<br />
replaced by KENWOOD or an authorised KENWOOD<br />
repairer.<br />
UK<br />
If you need help with:<br />
● using your handmixer or<br />
● servicing or repairs (in or out of guarantee)<br />
call <strong>Kenwood</strong> customer care on 023 9239 2333.<br />
Have your model number ready - it's on the<br />
underside of your handmixer.<br />
● spares and attachments<br />
call 0870 2413653.<br />
other countries<br />
● Contact the shop where you bought your handmixer.<br />
● Designed and engineered by <strong>Kenwood</strong> in the UK.<br />
● Made in China.<br />
3
Recipe<br />
IMPORTANT INFORMATION FOR CORRECT<br />
DISPOSAL OF THE PRODUCT IN ACCORDANCE<br />
WITH EC DIRECTIVE 2002/96/EC.<br />
At the end of its working life, the product must not be<br />
disposed of as urban waste.<br />
It must be taken to a special local authority differentiated<br />
waste collection centre or to a dealer providing this service.<br />
Disposing of a household appliance separately avoids<br />
possible negative consequences for the environment and<br />
health deriving from inappropriate disposal and enables<br />
the constituent materials to be recovered to obtain<br />
significant savings in energy and resources. As a reminder<br />
of the need to dispose of household appliances<br />
separately, the product is marked with a crossed-out<br />
wheeled dustbin.<br />
guarantee (UK only)<br />
If your handmixer goes wrong within one year from the<br />
date you bought it, we will repair or replace it free of<br />
charge provided:<br />
● you have not misused, neglected or damaged it;<br />
● it has not been modified (unless by <strong>Kenwood</strong>);<br />
● it is not second-hand;<br />
● it has not been used commercially;<br />
● you have not fitted a plug incorrectly; and<br />
● you supply your receipt to show when you<br />
bought it.<br />
This guarantee does not affect your statutory rights.<br />
white bread dough<br />
400g/14 oz strong plain flour<br />
10ml/2 tsp dried yeast (the type that requires<br />
reconstituting)<br />
5ml/1 tsp sugar<br />
5ml/1 tsp salt<br />
13g/ 1 ⁄2 oz lard<br />
230ml/8 fl.oz. warm water<br />
The correct water temperature should be 43°C and can<br />
be achieved by mixing one third boiling water with two<br />
thirds cold.<br />
Place the dried yeast with the sugar and water in a<br />
suitably sized mixing bowl (you may find a smaller bowl<br />
makes the operation easier) and leave to froth. Add the<br />
remaining ingredients. Fit the kneaders to the handmixer<br />
then combine the ingredients together on a low speed<br />
until the flour is incorporated, then increase the speed and<br />
knead until the dough is smooth and elastic for<br />
approximately 1 minute 30 seconds. Leave the dough to<br />
rise in a warm place for 45-60 minutes.<br />
Re-knead the dough on speed 5 for 30 seconds keeping<br />
the kneaders in the mix.<br />
Shape the dough into a loaf or rolls and place on greased<br />
baking trays. Then leave somewhere warm until it has<br />
doubled in size.<br />
Bake at 230°C/450°F/Gas mark 8 for 20-25 minutes (for<br />
a loaf) or 10-15 minutes (for rolls). When ready the bread<br />
should sound hollow when tapped on the base.<br />
Head Office Address:<br />
<strong>Kenwood</strong> <strong>Limited</strong>, New Lane, Havant, Hampshire PO9 2NH, UK<br />
www.kenwoodworld.com<br />
Designed and engineered by <strong>Kenwood</strong> in the UK<br />
Made in China 18275/3