
You also want an ePaper? Increase the reach of your titles
YUMPU automatically turns print PDFs into web optimized ePapers that Google loves.
<strong>IMPORTANT</strong>!<br />
Read these instructions carefully before use and keep them for further reference.<br />
Your child’s safety may be affected if you do not follow these instructions.<br />
Please read this User Guide carefully BEFORE trying to use your stroller<br />
WARNING – A CHILD’S SAFETY IS YOUR RESPONSIBILITY<br />
Looking after your stroller<br />
The stroller and its cover have been carefully<br />
designed, manufactured and tested to high<br />
safety standards.<br />
Regularly inspect and maintain your stroller to<br />
ensure freedom of movement of the locking<br />
devices and security of components. To<br />
prolong the life of your stroller, keep it clean<br />
and do not leave it in direct sunlight<br />
for extended periods of time.<br />
Helpful hints<br />
Regularly clean and inspect your stroller.<br />
To ensure trouble free operation lubricate<br />
moving parts and joints with a silicon based<br />
spray. If the wheels squeak use a silicon<br />
based spray or light lubricating oil ensuring it<br />
penetrates the wheel and axle assembly.<br />
Regularly clean and lubricate the front swivel<br />
and wheel units as dirty or dry units can have<br />
an adverse effect on manoeuvrability<br />
and steering.<br />
When using the stroller on the beach, clean it<br />
completely afterwards to remove all the sand<br />
and salt from the mechanisms and wheel<br />
assemblies.<br />
This stroller is not waterproof and is supplied<br />
with a rain cover. Under certain climate<br />
conditions the covers and trims may be<br />
affected by mould and mildew. To help<br />
prevent this occurring, do not fold or store this<br />
stroller if it is wet or damp and always use the<br />
rain cover when necessary. Always store in a<br />
well ventilated area.<br />
Cleaning the cover<br />
The hood, seat covers and trims may be<br />
cleaned using warm water with household<br />
soap or mild detergent. Allow it to dry fully,<br />
away from direct sunlight.<br />
DO NOT dry clean or use bleach or any other<br />
aggressive cleaning agents.<br />
To maintain the safety of your stroller, seek<br />
prompt repairs for bent, torn or broken<br />
parts. Use only those parts and accessories<br />
approved by Britax. Replacement parts and<br />
accessories are available from your Britax<br />
stockist or contact Britax Customer Service<br />
Department on 01264 386034. This product<br />
is not intended for commercial use.<br />
Guarantee<br />
Please be aware that faults caused by failing<br />
to follow the maintenance advice above are<br />
not covered by the product’s warranty.<br />
All Britax products are carefully designed,<br />
manufactured and tested. However, should<br />
this product prove faulty within six months of<br />
purchase due to a materials or manufacturing<br />
fault please return it to the original place of<br />
purchase. We will then, at our discretion,<br />
repair it free of charge.<br />
For guarantee purposes proof of purchase<br />
will be required. We recommend that you<br />
retain your receipt and attach it to this user<br />
guide. They should be kept in a safe place.<br />
Britax does not accept liability for damage<br />
arising from abuse, misuse or negligence.<br />
This guarantee is not transferable and<br />
therefore does not apply to second-hand<br />
products.<br />
Your statutory rights are not affected by<br />
this guarantee.<br />
Register your stroller on-line now<br />
It’s quick and easy, and we can update you<br />
with news, advice and safety information.<br />
Visit www.britax.eu/registration<br />
Carry Cot + (V Type) also available.<br />
WARNING – Ensure that all locking devices<br />
are engaged before use.<br />
WARNING – Check that the seat unit<br />
attachment devices are correctly engaged<br />
before use.<br />
WARNING – Children must be harnessed at all<br />
times.<br />
WARNING – Overloading, incorrect folding<br />
and the use of non-approved accessories<br />
may damage or break this stroller and make it<br />
unstable for use.<br />
WARNING – Regularly inspect the stroller to<br />
ensure all parts are in full working order.<br />
WARNING – Any load attached to the handle<br />
affects the stability of the pushchair.<br />
WARNING – This seat unit is not suitable for<br />
children under 6 months.<br />
WARNING – Always use the crotch strap in<br />
combination with the waist belt.<br />
WARNING – This product is not suitable for<br />
running or skating.<br />
WARNING – It may be dangerous to leave your<br />
child unattended.<br />
DO NOT leave or place your child in a position<br />
where they are exposed to the sun. The canopy<br />
or hood on this product will not give your child<br />
total protection from the harmful rays of the sun.<br />
DO NOT allow the stroller to remain wet for<br />
prolonged periods of time. If it does get wet,<br />
allow to dry unfolded at room temperature.<br />
DO NOT place more that 4kg in the basket, or<br />
1kg in the canopy pocket (if supplied).<br />
DO NOT allow children to play with or adjust<br />
the stroller.<br />
DO NOT carry more than one child on this<br />
stroller.<br />
DO NOT lift the stroller by the bumper bar –<br />
it may disengage.<br />
DO NOT use accessories that are not approved<br />
by Britax Excelsior Limited.<br />
DO NOT use a PVC rain cover indoors, in a hot<br />
atmosphere or near a direct heat source - your<br />
child might overheat.<br />
DO support the back of the stroller seat when<br />
reclining it.<br />
DO if using an alternative harness, please<br />
ensure it conforms to an appropriate safety<br />
standard i.e. BS6684. ‘D’ ring attachments are<br />
found on each side of the stroller.<br />
DO read the cleaning instructions for the cover.<br />
DO ensure children are clear of moving parts<br />
and locking devices while making adjustments.<br />
DO periodically check that any screws, nuts,<br />
bolts and other fastenings are fully tightened.<br />
DO store the stroller in a safe place when not<br />
in use. Avoid placing heavy objects on top of it<br />
and do not store near direct heat sources, e.g.<br />
radiators, open bar fires or in direct sun light as<br />
the cover may fade.<br />
ALWAYS remove the child from the stroller<br />
before going up or down stairs or escalators.<br />
This stroller is designed and manufactured to<br />
comply to EN1888: 2005.<br />
Britax Excelsior Limited<br />
1 Churchill Way West<br />
Andover<br />
Hampshire SP10 3UW<br />
United Kingdom<br />
A Britax Childcare company<br />
Customer Service Helpline: 01264 386034<br />
Email: helpline@uk.britaxeurope.com<br />
Switchboard: +44 (0) 1264 333343<br />
Fax: +44 (0) 1264 334146<br />
www.britax.eu<br />
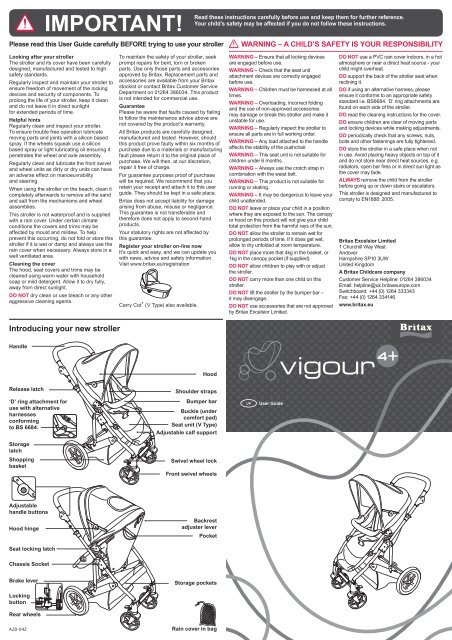
Introducing your new stroller<br />
Handle<br />
Hood<br />
Release latch<br />
Shoulder straps<br />
‘D’ ring attachment for<br />
use with alternative<br />
harnesses<br />
conforming<br />
to BS 6684.<br />
Bumper bar<br />
Buckle (under<br />
comfort pad)<br />
Seat unit (V Type)<br />
Adjustable calf support<br />
UK<br />
User Guide<br />
Storage<br />
latch<br />
Shopping<br />
basket<br />
Swivel wheel lock<br />
Front swivel wheels<br />
Adjustable<br />
handle buttons<br />
Hood hinge<br />
Backrest<br />
adjuster lever<br />
Pocket<br />
Seat locking latch<br />
Chassis Socket<br />
Brake lever<br />
Storage pockets<br />
Locking<br />
button<br />
Rear wheels<br />
AZ0-042<br />
Rain cover in bag<br />
1408.001 - Vigour 4 (UK).indd 1 5/6/07 10:59:42
1 Assembling your chassis<br />
1a 1b 1c 1d<br />
1e<br />
Release the storage latch (dia 1a).<br />
Hold the handle and lift upwards until<br />
the chassis is fully extended and clicks<br />
into position (dia 1b).<br />
Push the front swivel wheel assembly<br />
fully into the front leg (dia 1c). Check<br />
the wheel is correctly fitted by trying to<br />
pull it out. Repeat this process for both<br />
swivel wheels.<br />
Push the rear wheel assembly into the<br />
rear wheel axle (dia 1d). Check the<br />
wheel is correctly fitted by trying to<br />
pull it out. Repeat this process for both<br />
wheels.<br />
Adjust the handle to a comfortable<br />
height by simultaneously pressing the<br />
buttons on the inside of the handle –<br />
on both sides (dia 1e).<br />
Check the chassis is ready for use by<br />
pressing down on the handle – the<br />
chassis should not collapse.<br />
WARNING – Ensure that all locking<br />
devices are engaged before use.<br />
2 Attaching your seat unit and using your stroller<br />
(this vehicle is intended for children from 6 months and up to 15kgs) <strong>IMPORTANT</strong> - A V-Type seat unit must be used with this V-Type chassis<br />
2a<br />
2b<br />
2c<br />
2d<br />
B<br />
2e<br />
B<br />
A<br />
A<br />
HANDY HINT - You may find it helpful<br />
to apply the brake when fitting the seat<br />
unit.<br />
Push down on the brake lever to lock<br />
the brakes A . To release the brake lift<br />
brake lever B (dia 2a).<br />
<strong>IMPORTANT</strong> – Always apply the<br />
brakes when you park the stroller.<br />
2f<br />
<strong>IMPORTANT</strong> – Always remove<br />
your child from the seat unit prior to<br />
installation, removal or change of seat<br />
direction. The seat unit can be installed<br />
forward or rearward facing.<br />
To install the seat unit, insert the<br />
seat locking latches into both chassis<br />
sockets (dia 2b).<br />
2g<br />
Push down on the seat until you hear an<br />
audible ‘click’ (dia 2c).<br />
WARNING – Check that the seat<br />
unit attachment devices are correctly<br />
engaged before use by lifting the seat.<br />
2h<br />
To unlock the swivel wheels, push the<br />
lock up on each front wheel B . To lock<br />
align wheels to rear of front leg and<br />
push lock down A (dia 2d).<br />
2i<br />
To attach the bumper bar (dia 2e),<br />
remove the hood (if fitted). Align the<br />
bumper bar mouldings with the fixings<br />
then slide both bumper bar mouldings<br />
onto the seat unit until fully engaged.<br />
To remove the bumper bar, remove the<br />
hood (if fitted) then slide both bumper<br />
bar mouldings off the seat unit fixings.<br />
WARNING! DO NOT lift the stroller<br />
by the bumper bar or hood. It may<br />
disengage or damage your product.<br />
C<br />
D<br />
D A B<br />
D<br />
To fit the hood align with the fixings on<br />
the bumper bar and slide down (dia 2f)<br />
until fully engaged.<br />
The hood can be fitted without the<br />
bumper bar by aligning with the fixings<br />
on the seat unit and sliding down until<br />
fully engaged.<br />
To open the hood, pull the front of<br />
the hood forward then push the hood<br />
hinges down on both sides (dia 2g).<br />
To remove the hood, slide the hood off<br />
the fixings on the seat unit, or off the<br />
fixings on the bumper bar (if fitted).<br />
To adjust the backrest, squeeze the<br />
backrest adjuster lever at the top of the<br />
seat unit, then raise or lower the seat<br />
unit to the desired position<br />
(dia 2h).<br />
<strong>IMPORTANT</strong> – Use the harness at<br />
all times.<br />
<strong>IMPORTANT</strong> – Do not lift the stroller by<br />
the seat unit.<br />
<strong>IMPORTANT</strong> – Support the back of the<br />
pushchair seat unit when adjusting the<br />
angle.<br />
Unfasten the comfort pad to reveal the<br />
five-point harness. A five-point harness<br />
is provided to restrain your child (dia 2i).<br />
To secure the child in the harness, push<br />
buckle A and B<br />
into buckle housing<br />
C until the buckle prongs snap into<br />
position. Carefully adjust the harness by<br />
pulling the slider D<br />
until the desired fit is<br />
achieved in the waist belt, shoulder and<br />
crotch straps.<br />
Always adjust the harness when<br />
changing the seating position of the child.<br />
To release the buckle, squeeze the top<br />
and bottom prongs A .<br />
WARNING – Always use the crotch strap<br />
in combination with the waist belt.<br />
WARNING – Fasten the harness when<br />
not in use to prevent it becoming trapped<br />
when folding the stroller.<br />
3 Folding your stroller<br />
3a<br />
3b<br />
3c<br />
3d<br />
3e<br />
<strong>IMPORTANT</strong> – Always remove<br />
your child from the seat unit prior to<br />
installation, removal, change of seat<br />
direction or folding.<br />
HANDY HINT - For a more compact<br />
storage, fold the handle down. Refer<br />
to (dia 1e) for instruction on operating<br />
handle adjustment.<br />
Stand at the rear of the chassis, pull<br />
both release latches and twist the right<br />
hand one in the direction of the arrow<br />
marked on the release latch (dia 3b).<br />
Push the handle down allowing the<br />
chassis to fold until it moves into the<br />
fully folded position. Ensure that the<br />
storage latch is closed (dia 3c).<br />
HANDY HINT – The chassis may also<br />
be folded with the seat unit attached.<br />
For a more compact storage remove<br />
the swivel wheels by sliding the swivel<br />
wheel lock lever towards the middle of<br />
the stroller then pull the corresponding<br />
swivel wheel out (dia 3d).<br />
To remove the rear wheels, push<br />
the locking button and pull the<br />
corresponding rear wheel out (dia 3e).<br />
1408.001 - Vigour 4 (UK).indd 2 5/6/07 10:59:45