Untitled - korinth
Untitled - korinth
Untitled - korinth

Create successful ePaper yourself
Turn your PDF publications into a flip-book with our unique Google optimized e-Paper software.
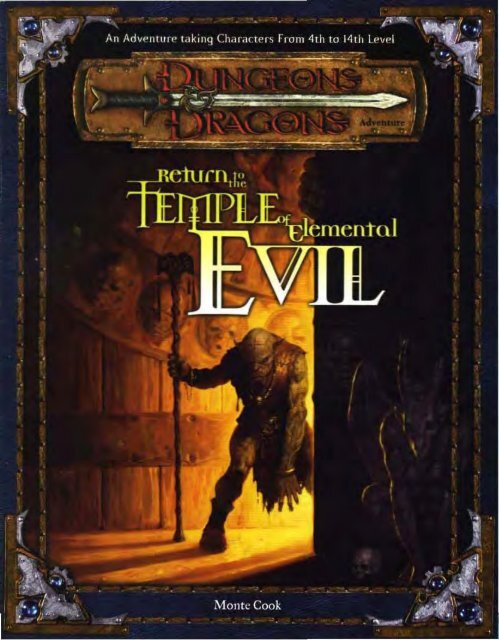
Return tO the<br />
Temple Of<br />
Elemental Evil<br />
Monte Cook<br />
Credits<br />
Additional Stat Block Design: Jennifer Clarke Wilkes, Andy Collins, Dale Donovan,<br />
David Eckelberry, Duane Maxwell, Erik Mona, David Noonan<br />
Editors: Jennifer Clarke Wilkes, Andy Collins, Duane Maxwell<br />
Creative Director: Ed Stark<br />
Art Director: Dawn Murin<br />
Graphic Design: Sean Glenn and Robert Campbell<br />
Cover Illustration: Brom<br />
Interior Illustrations: David Roach<br />
Cartography: Todd Gamble<br />
Typography: Erin Dorries<br />
Business Manager: Anthony Valterra<br />
Project Manager: Justin Ziran<br />
Production Manager: Chas DeLong<br />
Special thanks to Gary Gygax and Frank Mentzer for their work on the original Temple of Elemental Evil.<br />
Playtesters: Bob Baxter, Rich Bue, Andy Collins, Sue Cook, Bruce R. Cordell, Bret Holien, Erik Mona,<br />
David Noonan, Jeff Quick, John D. Rateliff, Sean K Reynolds, Ed Stark, Jonathan Tweet<br />
Based on the original DUNGEONS & DRAGONS® rules created by E. Gary Gygax and Dave Arneson<br />
and the new DUNGEONS & DRAGONS game designed by Jonathan Tweet, Monte Cook,<br />
Skip Williams, Richard Baker, and Peter Adkison.<br />
U.S., CANADA, ASIA<br />
EUROPEAN HEADQUARTERS<br />
PACIFIC, & LATIN AMERICA<br />
Wizards of the Coast, Belgium<br />
Wizards of the Coast, Inc. P.B. 2031<br />
P.O. Box 707<br />
2600 Berchem<br />
Renton WA 98057-0707<br />
Belgium<br />
(Questions?) 1-800-324-6496<br />
®<br />
+32-70-23-32-77<br />
620-T11843<br />
DUNGEONS & DRAGONS and the Wizards of the Coast logo are registered trademarks owned by Wizards of the Coast, Inc.<br />
All Wizards characters, character names, and the distinctive likenesses thereof are trademarks owned by Wizards of the Coast, Inc.<br />
Distributed to the hobby, toy, and comic trade in the United States and Canada by regional distributors.<br />
Distributed in the United States to the book trade by St. Martin’s Press. Distributed in Canada to the book trade by Fenn Ltd.<br />
Distributed worldwide by Wizards of the Coast, Inc. and regional distributors.<br />
This material is protected under the copyright laws of the United States of America.<br />
Any reproduction or unauthorized use of the material or artwork contained herein is prohibited without the express written permission of Wizards of the Coast, Inc.<br />
This product is a work of fiction. Any similarity to actual people, organizations, places, or events is purely coincidental.<br />
©2001 Wizards of the Coast, Inc. Made in the U.S.A.<br />
Visit our website at www.wizards.com/dnd<br />
1
2<br />
TABLE OF CONTENTS<br />
Table Of<br />
COntents<br />
Introduction ..............................................3<br />
Preparation ......................................................................3<br />
Running the Adventure...................................................3<br />
Previous Play in the Temple............................................3<br />
Size and Scope................................................................4<br />
Tharizdun/The Dark God/<br />
The Elder Elemental Eye ...............................................4<br />
History .............................................................................5<br />
The Course of the Adventure..........................................6<br />
Character Hooks .............................................................6<br />
Part 1: Hommlet and Environs.................8<br />
History .............................................................................8<br />
Where to Go and What to Do.........................................9<br />
Chapter 1: The Town of Hommlet..................................9<br />
Using Hommlet ..........................................................9<br />
The Hidden Cult..........................................................9<br />
The Town in Danger..................................................10<br />
NPCs about Town .....................................................10<br />
Key to Hommlet........................................................12<br />
Chapter 2: The Moathouse ...........................................18<br />
Moathouse History ...................................................18<br />
On the Way to the Moathouse .................................19<br />
Events Development .................................................19<br />
Moathouse Key..........................................................20<br />
Chapter 3: Ghost Town and Ruined Temple ..................30<br />
Nulb ...........................................................................30<br />
Nulb Key ....................................................................31<br />
The Ruined Temple ...................................................32<br />
Temple Key ................................................................33<br />
Part 2: The Temple of<br />
All-Consumption................................38<br />
Organization of the Temple......................................38<br />
Outdoor Random Encounters ..................................40<br />
Chapter 4: The Hamlet of Rastor .................................41<br />
The Temple’s Influence in Town...............................41<br />
Nearby Orc Camp .....................................................41<br />
Chapter 5: The Crater Ridge Mines ..............................42<br />
History and Geology .................................................42<br />
The Temples ..............................................................42<br />
Dungeon in a Circle ..................................................42<br />
Underdark Entrances ................................................42<br />
Random Encounters .................................................42<br />
Key to the Mines .......................................................43<br />
Chapter 6: The Inner and Outer Fanes ......................106<br />
Outside the Outer Fane ..........................................106<br />
The Outer Fane........................................................107<br />
The Inner Fane ........................................................127<br />
The Black Spike .......................................................128<br />
Part 3: The Rebirth of Elemental Evil .....137<br />
The Triad’s Plan...........................................................137<br />
Allies from Hommlet ..................................................137<br />
Enemies from Nulb.....................................................137<br />
Chapter 7: The Recovered Temple..............................138<br />
Security/Organization.............................................138<br />
Outer Entrance........................................................138<br />
The Dungeons.........................................................138<br />
Chapter 8: The Fire Node ...........................................151<br />
Conditions within the Node ...................................151<br />
Travel to and from the Node ..................................151<br />
Security/Organization.............................................151<br />
Fire Node Key..........................................................151<br />
Further Encounters .................................................154<br />
Appendix 1: New Magic Items<br />
and Monsters....................................154<br />
New Magic Items....................................................154<br />
New Minor Artifacts................................................155<br />
New Major Artifacts................................................156<br />
New Monsters.........................................................157<br />
New Template: Half-Elemental...............................160<br />
Appendix 2: The Worship of Tharizdun ....161<br />
Tharizdun and the Elder Elemental Eye .................161<br />
Clerics of the Dark God ..........................................161<br />
The Insanity Score...................................................161<br />
The Madness Domain ............................................161<br />
The Force Domain...................................................162<br />
New Prestige Class: Doomdreamer .......................162<br />
Appendix 3: NPC Statistics...................164<br />
The Town of Hommlet............................................164<br />
The Moathouse .......................................................167<br />
Ghost Town and Ruined Temple ............................168<br />
The Crater Ridge Mines ..........................................169<br />
The Inner and Outer Fanes.....................................178<br />
The Recovered Temple............................................184<br />
The Fire Node..........................................................188<br />
Appendix 4: Player Handouts ..............188<br />
Excerpts from the Journal of Geynor Ton...............189<br />
Excerpts from the Journal of Hedrack....................190<br />
GUIDE TO SIDEBARS<br />
Sidebar<br />
Page<br />
Town of Hommlet ...........................................................9<br />
A Side Adventure...........................................................10<br />
The Dynamic Dungeon.................................................37<br />
The Keys ........................................................................38<br />
Hamlet of Rastor...........................................................40<br />
Designing Side Treks.....................................................41<br />
Operating an Ore Cart ..................................................49<br />
Foreshadowing ..............................................................52<br />
Alternate Climaxes ......................................................101<br />
Drawbacks to Demonic Additions .............................115<br />
Using Varachan ...........................................................125<br />
Difficulty of the Inner Fane .........................................127<br />
Sleeping in the Inner Fane..........................................129<br />
The Triad......................................................................132<br />
The Origin of the Grand Altar ....................................134<br />
Lareth...........................................................................149<br />
The Elemental Plane of Fire........................................151
IntrOductiOn<br />
The night grows whole again . . . The shadows rest,<br />
Gathered beneath a greater shadow’s wings.<br />
—Clark Ashton Smith, “The Eldritch Dark”<br />
One of the best, most fondly remembered DUNGEONS &<br />
DRAGONS® adventures is The Temple of Elemental Evil. In<br />
1979, The Village of Hommlet was published and was wildly<br />
popular: Tens of thousands of playing groups got to know<br />
the people of Hommlet and explored the ruined moathouse<br />
that lay nearby. They were soon hungry for more, for<br />
the moathouse was merely a foreshadowing of a much<br />
greater challenge: the Temple of Elemental Evil. Finally, in<br />
1985, to gamers’ delight, the adventure module T1–4 The<br />
Temple of Elemental Evil was released, incorporating the<br />
original Village of Hommlet adventure and detailing the<br />
entire, massive temple that everyone had clamored for.<br />
Now evil stirs once again, and a new band of adventurers<br />
must rise to the challenge. They must discover the secret<br />
power behind the original temple and overcome it before its<br />
plans come to fruition and unleash evil and destruction<br />
unlike anything seen before.<br />
Return to the Temple of Elemental Evil builds upon the adventures<br />
in the original Village of Hommlet and Temple of Elemental<br />
Evil, as well as G3 Hall of the Fire Giant King, and WG4 The<br />
Forgotten Temple of Tharizdun. Enjoy.<br />
PREPARATION<br />
You, the Dungeon Master (DM), need a copy of the Player’s<br />
Handbook, the DUNGEON MASTER’s Guide, and the Monster<br />
Manual to use this adventure.<br />
Text that appears in shaded boxes is player information,<br />
which you may read aloud or paraphrase when appropriate.<br />
Sidebars contain important information for you, including<br />
special rules or instructions. Monster and nonplayer character<br />
(NPC) statistics are provided with each encounter in<br />
abbreviated form, but common monsters list the Monster<br />
Manual page reference (or the DUNGEON MASTER’s Guide page<br />
reference for common NPCs). Full statistics for special<br />
monsters and significant NPCs appear in Appendix 3 (see<br />
below for more information).<br />
Encounter Levels<br />
Return to the Temple of Elemental Evil is an adventure suitable<br />
for a party of 4th-level player characters (PCs), although characters<br />
as low as 3rd level should be able to handle the early<br />
encounters. (They will need to rest more often, though, and<br />
face a serious risk of death.) By the time they finish the<br />
adventure, the characters are likely to be 14th level.<br />
Individual encounters possess an overall rating called<br />
the Encounter Level (EL), if appropriate, which sums up the<br />
Challenge Ratings (CR) of the individual encounter elements.<br />
The EL helps you gauge how difficult or easy any<br />
given encounter will be for your players.<br />
RUNNING THE<br />
ADVENTURE<br />
An adventure this size is challenging to run. To do it properly,<br />
you have to master the material. That means not only being<br />
familiar with the encounter area that the PCs are currently<br />
in, but in those around it as well. In organized complexes<br />
INTRODUCTION<br />
such as those detailed here, very often creatures and NPCs<br />
move around. Play the foes as intelligently as possible—<br />
grand challenges are always more memorable than adventures<br />
that are pushovers.<br />
NPCs and Monsters<br />
Three types of NPCs and monsters are included in this adventure.<br />
The first are noncombatants. These are people with no<br />
game statistics or references other than to a class and level. In<br />
dangerous areas, noncombatants are marked as such.<br />
The second type is the typical sort of NPCs or monsters.<br />
Their statistics include page references for the Monster<br />
Manual or the DUNGEON MASTER’s Guide, and they conform<br />
exactly to those books. You can equip NPCs with the standard<br />
gear assigned them in Chapter 2: Characters in the<br />
DUNGEON MASTER’s Guide (pages 47–58), or customize them as<br />
desired, but do not introduce treasure other than what is<br />
already presented in the adventure.<br />
Sometimes, typical opponents are altered slightly, either<br />
because they have equipment not mentioned in the Monster<br />
Manual or because they have been advanced. In this case, all<br />
the work has been done for you. If a creature’s Strength has<br />
been improved, for example, you don’t have to worry about<br />
figuring out new attack and damage bonuses—the creature’s<br />
statistics already includes those modifications.<br />
The third type is specific NPCs and monsters. Complete<br />
statistics for these individuals are presented in Appendix 3,<br />
and the text refers you to that appendix.<br />
Difficulty<br />
Encounter Levels reflect what level four average PCs<br />
should be to handle the encounter without undue difficulty.<br />
You’ll have to decide how this ranking stacks<br />
against your specific party, but encounters of the same EL<br />
should always be the same challenge. For example, if your<br />
group of PCs usually handles encounters of one EL above<br />
their level without a problem, then that should be true of<br />
most other such encounters as well. Of course, you can<br />
always tinker with an encounter, adding more creatures<br />
or taking some away, changing levels of NPCs, or adding<br />
equipment as you see fit.<br />
Experience Points<br />
Of course, no one can predict the order in which a party<br />
encounters the challenges. If a group of 13th-level characters<br />
faces eight ogres each having four levels of warrior<br />
(making them each CR 5), no experience point award is<br />
listed in Table 7–1 in the DUNGEON MASTER’s Guide. In this<br />
case, extrapolate the results downward—take the lowest CR<br />
that gives an award and divide by 1.5 to get the appropriate<br />
award for the next lower award.<br />
As a variant rule, you are encouraged to award experience<br />
points for prisoners freed and returned safely home. The XP<br />
award should be equal to that for defeating the prisoner in an<br />
encounter (with a minimum of 100 XP). Never use this to<br />
award an unduly high amount: Freeing an 18th-level NPC<br />
held prisoner by a group of orcs, for example, is not a situation<br />
worthy of such a reward.<br />
PREVIOUS PLAY<br />
IN THE TEMPLE<br />
This adventure assumes that the adventurers who assaulted<br />
the Temple fifteen years ago undertook certain actions,<br />
3
INTRODUCTION<br />
4<br />
among them the destruction of the original Temple of Elemental<br />
Evil. If events went differently in your campaign<br />
from what is described here, you can do one of two things.<br />
1. Alter the adventure to fit your campaign history.<br />
2. Assume that after your PCs did what they did at the original<br />
temple, and NPC adventurers came and wrought the<br />
changes described here. For example, if the party did not<br />
collapse the temple by destroying the Orb of Golden Death,<br />
assume that NPCs did so between then and now. Likewise,<br />
if NPCs from the original adventure died in the course of<br />
your campaign but are portrayed as still alive in this<br />
adventure, assume that raise dead or resurrection spells<br />
brought them back.<br />
Players Familiar with<br />
the Original Adventure<br />
Players knowing about the original Temple of Elemental Evil is<br />
not a problem. Perhaps the characters are privy to information<br />
about the place through a family member or friend, or<br />
simply studied it in recent books on the subject. Knowledge<br />
of the previous adventure is nice, but it is neither necessary<br />
nor unduly advantageous to play this adventure.<br />
NPCs from the Original Adventure<br />
Fifteen years have passed in the campaign world since the<br />
defeat of the Temple of Elemental Evil, but some of the villains<br />
(and heroes) from the first adventure are still active. Although<br />
each is found in a different portion of this adventure,<br />
some of the returning NPCs include: Canoness Y’dey, Elmo,<br />
Falrinth, Hedrack, Lareth the Beautiful, Prince Thrommel,<br />
Senshock, Smigmal Redhand, Spugnoir, and Zert<br />
If these names are unfamiliar to you, don’t worry—they<br />
will not long remain so. If you recognize them, you’ll soon<br />
find that even though this adventure is brand-new, you’ll<br />
feel right at home.<br />
SIZE AND SCOPE<br />
To call Return to the Temple of Elemental Evil an adventure is an<br />
understatement. It’s really a campaign unto itself. Characters<br />
beginning with little experience should reach quite<br />
advanced levels by the end. Expect it to take many sessions—most<br />
likely months and months of play—to complete,<br />
and even then only if your group plays every week.<br />
Buying Equipment<br />
Although the adventure details two different communities,<br />
at some point the characters likely will want to purchase<br />
equipment, particularly magic items, that they cannot find in<br />
either Hommlet or Rastor. The city of Verbobonc lies about<br />
thirty miles northwest of Hommlet (see map 2). Treat this as<br />
a large city with a gold piece limit of 40,000 (see page 137 in<br />
the DUNGEON MASTER’s Guide). Verbobonc can offer the characters<br />
virtually anything that they want to buy or have made<br />
with the treasure that they gain in the adventure.<br />
Since Verbobonc is not detailed here, it may be a good idea<br />
to handle trips to the city quickly and without much wasted<br />
adventure time. That is up to you and the players.<br />
Side Adventures<br />
During the course of play, the PCs are likely to want to do something<br />
not covered in the adventure. Plenty of opportunities<br />
exist for side adventures, either spun off from events that<br />
occur in the scenario or based on something entirely different,<br />
placed by you for a change of pace. Monitor the party level<br />
when doing this. If, through side adventures, the party gains<br />
significant experience or even an entire level, some of the<br />
encounters may be too easy when they come back to the main<br />
plot. Don’t worry too much about this—the system is selfcorrecting<br />
(since they gain less XP for encounters below their<br />
level, they advance a little more slowly and soon end up at the<br />
appropriate level).<br />
THARIZDUN/<br />
THE DARK GOD/<br />
THE ELDER<br />
ELEMENTAL EYE<br />
The deity Tharizdun is a being of pure destructive force, of<br />
cold, conclusive obliteration and utterly evil nihilism. So<br />
terrible is he that in eons past, all the other deities banded<br />
together against him. But even their combined might was<br />
insufficient to destroy him, and they were forced merely to<br />
banish him to a special prison plane.<br />
Even so, separated from the Material Plane and stricken<br />
from all official histories of existence, Tharizdun still influences<br />
the life of the occasional mortal. His cult is small but<br />
fanatically devoted. Coming to them in mysterious and<br />
mind-wrenching dreams, the deity imparts his dark will to<br />
his followers. The goal of Tharizdun’s clerics is to channel<br />
enough power to their dread master so that he can free<br />
himself from his prison. This, of course, will spell the utter<br />
end of the world, and so this faith appeals only to the completely<br />
insane.<br />
Two schemes to accomplish this grand task have dominated<br />
the activities of the cult. First, they seek to recover<br />
lost shines and artifacts devoted to their deity. In reestablishing<br />
his places of worship and wielding the dark devices<br />
consecrated in his name, they increase Tharizdun’s power.<br />
Second, following advice gained in soul-bending divinations<br />
and dream communications, they have established<br />
another church. This new religion, simply called Elemental<br />
Evil (but often referring to a deity called the Elder Elemental<br />
Eye), channels the reverence and power of unknowing<br />
worshipers directly to the Dark God.<br />
The Elder Elemental Eye is actually an aspect of dread<br />
Tharizdun. Clerics of the Elder Elemental Eye are his clerics,<br />
although sometimes they do not realize it. For example,<br />
drow clerics introduced to the religion of Elemental Evil<br />
(see below) did not know that they truly served Tharizdun.<br />
Even the clerics of the original Temple of Elemental Evil<br />
did not refer to the Elder Elemental Eye. They believed that<br />
they revered only the evil aspect of the elements themselves<br />
(or the demon Zuggtmoy; see below).<br />
The symbol of the Elder Elemental Eye is a downwardpointing<br />
black triangle with an inverted yellow Y within it<br />
so that the tips of the figure meet the middle of each side<br />
of the triangle.<br />
The cult also uses the much more overt symbol of a golden<br />
flaming eye. For years, people have wrongly assumed that<br />
this was the symbol of Zuggtmoy, but with good reason.<br />
While Tharizdun was imprisoned far away, he used powerful<br />
demon lords such as Zuggtmoy, Lolth, and Demogorgon as<br />
conduits to transfer power to his clerics. In some instances,<br />
the demon did not even know what was happening, while in
INTRODUCTION<br />
others it believed itself to be the object of reverence by the<br />
worshiper in question. In days past, when Lareth the Beautiful<br />
commanded the moathouse (the outpost for the Temple<br />
of Elemental Evil), both Zuggtmoy and Lolth believed him to<br />
be their priest—when really he served none other than the<br />
Elder Elemental Eye (and Tharizdun).<br />
Clerics of the Elder Elemental Eye often choose one element<br />
to revere (see Appendix 2: The Worship of Tharizdun). Separating<br />
into four factions results in much competition among the<br />
cult’s ranks. Yet they see this rivalry—which sometimes<br />
results in open conflict—as good, since it promotes strength.<br />
The Elder Elemental Eye is obscure. A successful Knowledge<br />
(religion) check (DC 17) is needed to identify the<br />
symbol, with another such check (DC 20) to ascertain any<br />
details. Tharizdun or the Dark God are names that are fairly<br />
well known, but they are so feared that details are always<br />
mysterious. With a successful Knowledge (religion) check<br />
(DC 18) someone can recognize his symbol, the obex—an<br />
upside-down, two-step pyramid—or other trappings, such as<br />
the purple and black colors, squirming tentacles theme, great<br />
and abiding cold, and force-related effects. Another successful<br />
check (DC 23) is needed to ascertain any details.<br />
For information on the game mechanics of the religion<br />
(new domains, new spells, and a new prestige class), see<br />
Appendix 2.<br />
Evil Elementals<br />
Many of the elementals and elemental creatures in this<br />
adventure are described as being evil, despite their “always<br />
neutral” alignment listings in the Monster Manual. A small,<br />
isolated number of the inhabitants of the Elemental Planes<br />
are indeed evil and ruled over by the Elemental Princes of<br />
Evil, monstrously powerful beings in their own right. These<br />
evil elementals are just like normal versions of their type,<br />
except for alignment and their subservience to the Princes<br />
and their sire, the Elder Elemental Eye (Tharizdun).<br />
If an elemental or elemental being (any creature with<br />
the Elemental type) is summoned or called by a cleric of the<br />
Elder Elemental Eye, that creature is always of the evil sort.<br />
If such a being is summoned or called by anyone else in<br />
areas controlled by the cult, a chance exists that it is an evil<br />
creature. While this is not significant in the case of summoning<br />
(because the spell does not allow for the summoned<br />
creature to act independently), it makes calling elemental<br />
creatures dangerous. Evil elementals called by spells such as<br />
planar ally never work against the forces of the Elder Elemental<br />
Eye (or Tharizdun), and may even attempt to trick<br />
the caster and lure her into a trap or work with her enemies<br />
in some way.<br />
The chance for a summoned or called elemental or elemental<br />
being to be evil depends on its location as follows.<br />
Normal 0%<br />
Moathouse 10%<br />
Crater Ridge Mines 20%<br />
Outer Fane 50%<br />
Inner Fane 70%<br />
Temple of Elemental Evil 90%<br />
Elemental Node 100%<br />
Even if a nonevil elemental or elemental creature is summoned<br />
and them brought into these areas, a chance exists<br />
(equal to one-half the chances listed above) that the being<br />
will be immediately converted to evil.<br />
HISTORY<br />
The history of this area is important—the inhabitants can’t<br />
help but dwell on the past even though the present is happy<br />
and prosperous. The events surrounding the erstwhile<br />
Temple of Elemental Evil are too dire to forget.<br />
History as the Locals Know It<br />
Twenty-five years ago, the forces of evil and darkness gathered<br />
north and east of Hommlet and constructed a huge temple.<br />
This was a bastion for their armies of gnolls, bugbears, ogres,<br />
trolls, and giants—not to mention the evil human masters of<br />
the place and the demons and other foul creatures that served<br />
them. From this awful place, the malevolent denizens<br />
unleashed earthquakes, storms, fires, and floods upon the<br />
countryside. Monsters were drawn to the area like steel to a<br />
lodestone. The Temple of Elemental Evil took three years to<br />
complete, but even in that short time, the forces of good knew<br />
that they could not abide such a place. The lands of Furyondy<br />
and Veluna rallied their forces and sacked the temple twentytwo<br />
years ago in a battle called Emridy Meadows (named for<br />
the site of the largest confrontation). Most of the evil forces<br />
were destroyed or driven off. The temple itself was greatly<br />
damaged, but the underground levels were extensive and dangerous<br />
even for those heroic folk. So the Temple of Elemental<br />
Evil was sealed with great magic, imprisoning a powerful<br />
demon within its confines.<br />
Nine years later, bandits began troubling the area around<br />
Hommlet. Evil humanoids and strangely garbed priests were<br />
seen on the road. Within the following year, it became clear<br />
that the Temple of Elemental Evil was rising again. This time,<br />
the folk of Hommlet and the surrounding area coordinated<br />
and fostered attacks by bands of adventurers against the<br />
ruined but still-occupied temple. Eventually, the evil was<br />
once again overthrown, and this time the temple’s dangerous<br />
lower levels were destroyed. Since then, the territory has<br />
prospered in the peace that has settled in, apparently for a<br />
long stay. Common wisdom has it that no more adventures<br />
can be had in Hommlet.<br />
True History<br />
Many years ago, the worshipers of Tharizdun conceived a<br />
bizarre plan to promote and reinvigorate the power of their<br />
religion. Their agents, as insidious as they were insane, infiltrated<br />
the ranks of other evil religions. They even managed to<br />
worm their way into the ranks of the Lolth-worshiping drow.<br />
Once their agents were in place, they began a campaign of<br />
lies, misdirection, and manipulation. Among the drow, they<br />
formed a new religion, turning a small but powerful contingent<br />
of dark elves against their spider goddess and toward the<br />
Elder Elemental Eye. These renegade drow attempted to<br />
expand their area of influence to the surface by controlling<br />
many tribes of giants and inciting them to attack the communities<br />
around them, but this plan was ultimately foiled.<br />
Zuggtmoy<br />
Meanwhile, the clerics of Tharizdun were having much<br />
more success among the ranks of those serving Zuggtmoy<br />
(ironically, an enemy and competitor of Lolth). Not surprisingly,<br />
being the patron of fungi and mold, this demon<br />
had few worshipers among the surface-dwelling peoples.<br />
Tharizdun’s infiltrators among her clerical servants convinced<br />
her that a religion based on Elemental Evil would<br />
have more appeal than one dealing with her own mushrooms<br />
and slime. Zuggtmoy appreciated the wisdom of this<br />
5
INTRODUCTION<br />
6<br />
advice—each of the four elements would draw a different<br />
group of worshipers, and the elements’ competitive nature<br />
would hone the skills and power of the cult quickly.<br />
So successful were these efforts that the infiltrators<br />
decided the Zuggtmoy-backed religion of Elemental Evil<br />
could also help recover some of the ancient shrines to Tharizdun,<br />
created by time-lost followers of the Dark God when it<br />
was still possible for them to operate in the open. The greatest<br />
of these places of power was located in the Kron Hills,<br />
buried deep under the earth for centuries. A few whispered<br />
suggestions later, the forces of Elemental Evil began erecting<br />
a grand temple directly over this ancient location of dark<br />
power. Zuggtmoy could sense the power in the area, but<br />
instead of being suspicious, she believed she could tap into<br />
and exploit it. She did not realize its real nature, nor that she<br />
in fact would be the conduit through which that power<br />
would once again be unleashed upon the world.<br />
Enter Iuz<br />
Much to the surprise of the forces of Tharizdun, the evil<br />
demigod Iuz became involved in creating the Temple of Elemental<br />
Evil. Attracted by its growing power, the Old One<br />
sought it as a way to defeat or weaken his enemies in Veluna<br />
and Furyondy. Iuz was even more easily manipulated than<br />
Zuggtmoy, it turned out, and soon he was devoting a great<br />
deal of his own power and influence to the project.<br />
Iuz and Zuggtmoy gathered their power and created the Orb<br />
of Golden Death (an artifact also known as Yellowskull, Goldenskull,<br />
or the Death Orb) to open up powerful elemental nodes.<br />
Each node was a partial plane containing a moonlike body<br />
stranded in a cold, isolated region of magically created space.<br />
These nodes hovered right at the edge of the Elemental Planes,<br />
drawing forth power from them and taking on their aspects<br />
(so there was one each of fire, water, earth, and air). Iuz and<br />
Zuggtmoy knew only that control of the nodes would give<br />
them and their temple great power. What they did not know<br />
was that creating the nodes also served the goals of the Cult of<br />
Tharizdun (see The Course of the Adventure, below).<br />
The Fall of the Temple<br />
Zuggtmoy became arrogant. With the nodes developing<br />
nicely, and her armies growing steadily, she made it clear<br />
through raids north and west that the Temple of Elemental<br />
Evil now controlled the territory. Not surprisingly, those<br />
nearby kingdoms that were suddenly threatened—the lands<br />
of Furyondy and Veluna chief among them—banded<br />
together and attacked the temple, laying siege to it. In less<br />
than two weeks, the temple was laid waste and its servants<br />
scattered. Even the moathouse to the west was sacked.<br />
After the temple fell, a number of drow were seen in the<br />
area, searching the ruins. There were actually two factions<br />
present: Some were followers of Lolth, looking for objects of<br />
power and servants of the temple who could be co-opted by<br />
the demon queen. Lolth felt a strong connection to the entire<br />
operation, since she believed that at least some of the servants<br />
of Tharizdun were actually worshipers of hers. Her<br />
drow servants were also there to find out what had become of<br />
her rival, Zuggtmoy. The other drow were followers of the<br />
Elder Elemental Eye, all of whom searched the ruins with<br />
similar goals—salvage and information gathering.<br />
The Temple Rises Again<br />
Years passed, and the cult of Tharizdun knew that the Temple<br />
of Elemental Evil was too powerful and too valuable to their<br />
plans to let it lie fallow for long. Zuggtmoy was imprisoned,<br />
but perhaps that was for the best—in fact, the cultists did not<br />
intend to free her.<br />
Using their connections in the still-thriving cult of Lolth<br />
(unlike that of Zuggtmoy), the clerics of the Elder Elemental<br />
Eye influenced powerful individuals to return to the ruined<br />
temple. Lareth the Beautiful, the wizard Falrinth, Barkinar<br />
the commander, and others, not all of whom were friendly to<br />
one another, found their way into the hierarchy of the new<br />
temple. This time, its backers believed, the temple would<br />
grow quietly until it was ready to strike.<br />
Iuz’s attention was gained once again, and he once again<br />
lent his support. He sent a powerful cleric named Hedrack,<br />
who was quickly subverted into following the Elder Elemental<br />
Eye (and eventually became privy to all the secrets of the<br />
cult of Tharizdun). Converting Hedrack was important, for<br />
Iuz had commissioned his emissary to discover a way to free<br />
Zuggtmoy so that she would be in Iuz’s debt thereafter—but<br />
that was not in the plans of the temple’s true backers.<br />
The Temple Falls Again<br />
Unfortunately for them, the Temple of Elemental Evil was<br />
discovered before its forces could fully prepare. Instead of<br />
armies, parties of adventurers made quick but painful<br />
strikes against key personnel and winnowed down the<br />
number of guards. The heroic bands were given succor by<br />
the locals, who at times even lent a sword arm or a spell to<br />
bring down the evil temple.<br />
Finally, adventurers broke the sealed doors and destroyed<br />
the wards placed upon them ten years previous, freeing Zuggtmoy.<br />
The demon immediately suspected something was<br />
going on, and for the first time, she began to understand that<br />
in the shadows were those who manipulated events and<br />
directed the forces of what she had thought of as her temple.<br />
Zuggtmoy’s liberation was short lived: The Orb of Golden<br />
Death was destroyed, hurtling the demon into the Abyss<br />
(actually, much of her essence was trapped by Tharizdun’s<br />
clerics—see Chapter 6). The subterranean levels of the<br />
Temple of Elemental Evil collapsed, as did its access to the<br />
elemental nodes.<br />
Today<br />
Surely, after such utter defeat, the temple would pose no further<br />
threat to the lands of good.<br />
Not so. In fact, in the years that have passed the insane and<br />
corrupt followers of the Dark God have moved closer to victory<br />
than ever before. A number of clerics and powerful servants<br />
in the Temple of Elemental Evil were spirited away by<br />
agents from the cult of Tharizdun to a new, hidden temple in<br />
the Lortmil Mountains.<br />
In order to accomplish their insane goal, the Dark God’s minions<br />
must recover the place of power beneath the original<br />
temple’s moathouse and then reestablish the connection with<br />
the elemental nodes. No one knows about their insidious plan,<br />
or that they even exist. The success of their plan seems assured.<br />
THE COURSE OF THE<br />
ADVENTURE<br />
This far-reaching adventure has three distinct phases.<br />
Part 1: Hommlet and Environs<br />
The adventure begins in Hommlet, a small town prospering<br />
in a time of peace. The adventurers soon learn that
INTRODUCTION<br />
something strange is going on in the nearby moathouse,<br />
where they discover clerics of the Elder Elemental Eye<br />
excavating a secret, hidden shrine. There, the clerics (and<br />
possibly the PCs) learn some clue toward achieving the<br />
cult’s ultimate goal.<br />
The adventurers realize that the clerics have allies in<br />
Hommlet. In excising that cancer from the town, they learn<br />
that these cultists come from a hidden base in the Lortmil<br />
Mountains called the Temple of All-Consumption.<br />
Adventurers may proceed on to the ghost town of Nulb<br />
and the ruined Temple of Elemental Evil. Nulb is dangerous,<br />
filled with powerful, unquiet spirits, but the temple itself<br />
seems to be nothing more than the base of a band of hobgoblin<br />
raiders. Only later can the PCs understand that there’s<br />
more going on there than they think, but experience from<br />
taking on the hobgoblins can help them grow powerful<br />
enough to face the clerics of Tharizdun.<br />
Part 2: The Temple<br />
of All-Consumption<br />
The adventurers travel to the hamlet of Rastor, in the Lortmil<br />
Mountains. There they learn a few important details<br />
regarding the location, layout, and defenses of the Temple<br />
of All-Consumption.<br />
This temple, located in an old volcano crater, has three<br />
distinct parts. The outermost and largest, the Crater<br />
Ridge Mines, is a set of catacombs within the crater rim<br />
itself. In their long campaign in this area, the PCs learn<br />
that four temples exist (one to each element) that compete<br />
against one another, and discover the secret to penetrating<br />
the next portion of the temple, called the Outer Fane.<br />
They may also find clues that lead them to Nulb (see<br />
above), where they can learn more from a crazed cleric<br />
who lives there.<br />
The Outer Fane is located within a smaller crater inside<br />
the large one. This houses most of the clerics of Tharizdun<br />
and the Elder Elemental Eye, as well as access to the innermost<br />
portion of the temple.<br />
The Inner Fane is the heart of the Temple of All-<br />
Consumption. Here, in a tower called the Black Spike, dwell<br />
the Inner Circle of doomdreamers (Tharizdun’s mad worshipers)<br />
and the Triad of three ancient and powerful beings.<br />
These two “ruling” groups of the cult plot a horrible, destructive<br />
scheme to reopen the elemental nodes created long ago<br />
and summon forth the Princes of Elemental Evil to wreak<br />
havoc, weakening the bonds that bind Tharizdun himself. To<br />
do this, the cult must excavate the entrances to the nodes,<br />
which of course lie buried in the deepest part of the original<br />
Temple of Elemental Evil.<br />
Part 3: The Rebirth<br />
of Elemental Evil<br />
In the third and final part of the adventure, the adventurers<br />
must travel back to the ruined Temple of Elemental Evil and<br />
eventually into the recently uncovered Fire Node, where<br />
they may face a Prince of Elemental Evil named Imix. If successful,<br />
the characters stop the cult of Tharizdun and rid the<br />
world of its evil—but can such insidious and devoted malevolence<br />
stay down for long?<br />
The Changing Seasons<br />
Return to the Temple of Elemental Evil is a campaign of epic proportions,<br />
providing many months of playing time. You, the<br />
DM, need to consider the length of time needed within the<br />
campaign world to undertake the downfall of the evil clerics<br />
and their plans. Conceivably, this too could take months or<br />
even longer. It may be best to assume that the adventure<br />
begins in early summer and then keep track of the passage of<br />
days from that point.<br />
The onset of winter can really change the situation; see<br />
below for ideas. (For more information, see The Environment<br />
on page 85 of the DUNGEON MASTER’s Guide.)<br />
• Movement is slower and more hazardous.<br />
• A storm could trap people in one location for days.<br />
• Food is harder to come by.<br />
• Unlike other times, being underground in winter may<br />
actually be warmer than being above ground.<br />
• The Stalagos, the Imeryds Run, and other bodies of water<br />
in the adventure freeze over in winter. Even the moat of<br />
the moathouse (but not the underground pool beneath<br />
it) freezes.<br />
Concluding the Adventure<br />
The adventure is completed when the PCs stop the cult of<br />
Tharizdun’s plan. This requires defeating Imix, destroying<br />
or secreting away both the Orb of Oblivion and the Orb of<br />
Silvery Death, and wiping out, or nearly so, the cult of<br />
doomdreamers (especially the Triad). If the party clears<br />
out more than half of the Crater Ridge Mines, the place is<br />
abandoned, and the few remaining clerics and followers<br />
of Tharizdun scatter.<br />
If any of the Triad survives at the end of the adventure,<br />
they continue to lead the cult toward some new scheme<br />
to bring back their deity. If a majority of those inhabiting<br />
the mines and the Inner and Outer Fanes remain, they<br />
continue to operate there and work their evil rites. If<br />
Imix survives, the threat of Tharizdun’s return may be far<br />
from over.<br />
CHARACTER HOOKS<br />
To begin the adventure, all that is really needed is that the<br />
PCs be in Hommlet with time on their hands. Adventurers<br />
worthy of the name should have great trouble resisting<br />
the temptation of exploring the infamous moathouse<br />
and perhaps even the ruins of the feared Temple of Elemental<br />
Evil.<br />
Because you want the PCs to explore and learn about<br />
the area on their own, it is probably best if none of them<br />
are actually from Hommlet or the surrounding region.<br />
Here are some ideas for getting them to Hommlet and<br />
involved in the action:<br />
• One or more characters are descendants of someone who<br />
fought in the Battle of Emridy Meadows and who seek to<br />
learn more about the area and its history.<br />
• The party learns that adventurers rarely go to Hommlet<br />
anymore, which means there’s no competition for the challenges<br />
that remain for brave souls such as they.<br />
• The area has such a reputation and exciting history that,<br />
despite reports of peace and prosperity, it might be worth<br />
checking out anyway.<br />
• A friend or relative of one of the PCs lives in Hommlet and<br />
sends the character a letter suggesting that trouble is brewing<br />
in town. This person has no real information but is just<br />
going on intuition—which proves to be accurate.<br />
• The PCs are hired to transport some precious cargo or a<br />
message to someone in Hommlet.<br />
7
PART 1: HOMMLET AND ENVIRONS<br />
Part 1:<br />
HOmmlet and<br />
EnvirOns<br />
Ten leagues south of the large and well-established city of<br />
Verbobonc, within the Kron Hills that lie east of the Lortmil<br />
Mountains and just west of the Gnarley Forest, nestles a<br />
small settlement with a long and dark history. This unremarkable<br />
village, called Hommlet, witnessed the growth of<br />
one of the greatest centers of corruption the world would<br />
ever know: the Temple of Elemental Evil.<br />
Hommlet is a small town with a population of just under<br />
one thousand. Only twelve years ago, it was a hamlet of<br />
around one hundred people, although even then most folk<br />
referred to it as a village. Since that time, the town has<br />
enjoyed unprecedented peace and prosperity.<br />
The town is not ruled by a mayor or a town council as<br />
many others are. Instead, two ex-adventurers called Rufus<br />
and Burne have been granted control of Hommlet and its<br />
lands by the viscount of Verbobonc. Not many people in<br />
the town look at it that way, however. Most folks simply<br />
see the two men as the town “elders,” giving them the<br />
respect that they have earned. Few grumble when it comes<br />
time to pay their taxes to the two lords. Most everyone<br />
appreciates the protection Rufus and Burne’s soldiers provide,<br />
as well as the role the two played in the downfall of<br />
the original Temple of Elemental Evil (and the threats they<br />
have overcome to protect the town since then).<br />
In such a small town, nothing that costs more than 800 gp<br />
commonly can be found for purchase. Exceptions exist, of<br />
course—the Church of St. Cuthbert might have an extra suit<br />
of full plate to sell brave heroes who obviously fight against<br />
evil, for example. Such exceptions should be rare.<br />
Above all, Hommlet is a peaceful, contented place. Its<br />
people are well fed, safe, and happy with their lot. However,<br />
they are wary, for their happiness has been threatened<br />
more than once in the past. The people, particularly those<br />
who have lived in town a long time, watch with interest<br />
the comings and goings of suspicious strangers, and<br />
they keep an eye on the old moathouse and temple<br />
that were sites of not one but two malevolent<br />
insurgencies over the years.<br />
HISTORY<br />
Once this area was simply a gentle wilderness. Growing<br />
out of a small collection of farmhouses and a roadside<br />
shelter, Hommlet expanded quickly. Prosperity came naturally<br />
to the fertile land, as herders, farmers, hunters, trappers,<br />
and woodcutters made the growing hamlet their<br />
home. The town was built on a crossroads between Verbobonc<br />
and the Wild Coast, so visitors were frequent.<br />
Eventually, these visitors brought trouble.<br />
Brigands and other evil humanoids have been a bane to<br />
Hommlet for years. Eventually, thieves, cutthroats, orcs,<br />
and even more sinister forces created a settlement of their<br />
own—Nulb. That hamlet was frequented not only by the<br />
most evil of people, but also by monsters and beasts as<br />
well. A chapel dedicated to vice and damnation grew<br />
nearby, with increasingly vile creatures coming to worship<br />
foul deities there. In time, this chapel became the<br />
Temple of Elemental Evil, filled with dark priests and<br />
their wicked servants.<br />
While that first temple reigned, the lands around Hommlet<br />
grew dark with violence and pestilence. As their power<br />
increased, the temple clerics built a small keep, known as the<br />
moathouse, not far from Hommlet. From this base, they<br />
planned to launch raids and secure their fortunes in the west.<br />
Fortunately for Hommlet, those who commanded the temple<br />
were not overly concerned with the village but with more<br />
powerful strongholds to the north. When their corruption<br />
spread, it drew the attention of armies the temple was not yet<br />
prepared to deal with.<br />
Forces from the north attacked the temple, some using<br />
Hommlet as a base and a point for resupply and rest. When<br />
the temple fell, folk in Hommlet saw ochre-robed priests<br />
fleeing westward and rejoiced that the evil was gone.<br />
Two men involved with the fall of the original temple,<br />
Rufus and Burne, settled in<br />
Hommlet and built a tower.<br />
Their connections<br />
with the lord of<br />
Verbobonc to the<br />
north were well<br />
known, as were<br />
their plans<br />
8
CHAPTER 1: THE TOWN OF HOMMLET<br />
to expand their tower into a large keep. The town prospered<br />
once again.<br />
But evil was not done with the Temple of Elemental Evil.<br />
Slowly, over years, its creatures and servants returned to the<br />
place and brought with them the taint of evil that hung like a<br />
shadow over Hommlet a second time. This time, however, the<br />
inhabitants of Hommlet chose to get involved. A young man<br />
named Elmo and his brother Otis worked with Canoness<br />
Y’dey of the Church of St. Cuthbert to spy on the temple’s<br />
activities. They helped small bands of adventurers overcome<br />
the evil cleric in the moathouse and the more powerful foes<br />
in the temple—not the least of which was a demon lord who<br />
was eventually banished back to the Abyss. This time, the<br />
dungeons beneath the temple were collapsed, and it appeared<br />
that the place was finally overcome.<br />
In the years that followed, the town prospered as never<br />
before. With the temple and Hommlet on the lips of many<br />
throughout the countryside, the former hamlet grew into<br />
a village and eventually a small town. Burne and Rufus<br />
finished their keep and were granted the town and the<br />
lands around it to protect and nurture. More churches<br />
sprang up to serve the needs of the growing population,<br />
and some are even talking now of building a wall around<br />
the town.<br />
WHERE TO GO<br />
AND WHAT TO DO<br />
The PCs can poke around Hommlet for a while before they<br />
get bored. Eventually, however, they will seek adventure.<br />
The most obvious thing to do is to go to the moathouse.<br />
Just about anyone in town can tell the PCs about it and where<br />
it lies, about twelve miles away. Most people believe it to be<br />
deserted, but some of the NPCs encountered in town, particularly<br />
at the Inn of the Welcome Wench, have their own<br />
opinions and agendas. Use these NPCs one way or another to<br />
encourage the party to go to the moathouse.<br />
There’s also Nulb, but the encounters most certainly are<br />
too difficult for the PCs at the start. Most people believe<br />
Nulb to be haunted—correctly, as it turns out. A few vivid<br />
descriptions of incorporeal undead should tell smart players<br />
to stay far away, at least for now. NPCs may drop hints about<br />
Nulb, but do what you can to discourage the adventurers<br />
from going there just yet.<br />
The ruined temple itself is also ripe for exploration. Elmo<br />
and a few of the other experienced people in town (Y’dey or<br />
Spugnoir, for example) know that it is occupied by hobgoblins.<br />
Although these hobgoblins don’t bother Hommlet, they<br />
are a problem that most people would be glad to see dealt<br />
with. Feel free to let the PCs wander off to the temple. What<br />
the PCs discover there can effectively foreshadow their<br />
return at the adventure’s climax.<br />
Consider running this first part of the adventure a little<br />
backward—that is, have the PCs begin investigating the<br />
cult in Hommlet and learn of the clerics in the moathouse<br />
from there. You do risk them wanting to skip the<br />
moathouse altogether and go straight to the Temple of All-<br />
Consumption. Even if the party does go to the moathouse,<br />
you may need to adjust the timetable for the clerics’<br />
departure, as well as how they react if the cult in town<br />
is discovered and defeated while they are still working<br />
under the moathouse.<br />
Chapter 1:<br />
The TOwn Of<br />
HOmmlet<br />
A more pleasant, pastoral community you’ve never seen. A largish<br />
keep stands on a hill overlooking the town, its stones still<br />
quite new and its walls clearly never assailed. Although the town<br />
comprises hundreds of buildings and homes, the area is still<br />
verdant with trees and shrubbery throughout.<br />
USING HOMMLET<br />
Hommlet is a fleshed-out town for you to use<br />
as need be. Although you may need to create<br />
and add NPCs as the PCs wander about and<br />
interact with folks, a great deal of that work<br />
has been done for you. You may even find<br />
that because it is so well detailed, you want to<br />
set further adventures in the area after this<br />
campaign is over.<br />
In the following listing of locations<br />
throughout the town, NPCs who are usually<br />
encountered in a given area are described<br />
there. Otherwise, a reference is given to the<br />
area where that NPC is discussed (for<br />
example, any mention of Joman Dart refers<br />
the reader to the Old Trading Post, of which<br />
he is the proprietor). Some NPCs, though,<br />
move around and potentially can be encountered<br />
in other places. They are described at<br />
the end of this chapter in a section entitled<br />
NPCs About Town. Many of these NPCs<br />
tend to deal with the PCs frequently, and<br />
some may join their adventuring band.<br />
Keep in mind that there’s too much going<br />
on in Hommlet for the PCs to experience<br />
everything and meet everyone right away. It’s<br />
possible you’ll never use some areas and<br />
NPCs. The typical party might come to town,<br />
hang about in the Inn of the Welcome<br />
Wench, go off to the moathouse (possibly<br />
resting at the inn between trips), visit an<br />
establishment or two, and confront the cultists<br />
in the mill before heading off to the mountains.<br />
However, events occur at the Temple of<br />
All-Consumption (see Part 2) that may very<br />
well bring the PCs back to Hommlet for a<br />
time. Further, the climax of the adventure<br />
takes place in the reopened lower levels of the Temple of Elemental<br />
Evil, and Hommlet is a convenient location from<br />
which to conduct forays into that site as well.<br />
THE HIDDEN CULT<br />
Clerics of Tharizdun have slipped into town. Their leader,<br />
Master Dunrat, used a charm person spell to befriend Karlun<br />
Fies, a local miller. Even though the spell has long since<br />
worn off, Dunrat continued to treat Karlun kindly, and in<br />
fact gave him a great deal of gold. In return, Karlun allows<br />
the clerics to use his flour mill and the cellar below as their<br />
secret headquarters (see area 28).<br />
Town of Hommlet<br />
cHommlet (small town):<br />
Nonstandard; AL NG; 800 gp<br />
limit; Assets 38,000 gp; Population<br />
950; Mixed (human 79,<br />
halfling 7, elf 5, gnome 4,<br />
dwarf 3, half-elf 1, half-orc 1).<br />
Authority Figure(s): Rufus,<br />
male human Ftr8; Burne, male<br />
human Wiz10.<br />
Important Characters: Yether<br />
the Keen, male human Clr5<br />
(head, temple to Pelor);<br />
Canoness Y’dey, female<br />
human Clr10 (head, church of<br />
St. Cuthbert); Jaroo Ashstaff,<br />
doppelganger (disguised as<br />
aged druid); Master Dunrat,<br />
male human Clr5/Sor1 (disguised<br />
cultist of Tharizdun);<br />
Elmo, male human Rgr6<br />
(militia captain).<br />
Others: Burne’s Badgers,<br />
War1 (18), War4 (1), War5 (1).<br />
Notes: Agents of the cult of<br />
Tharizdun, who are here both<br />
to gather information and to<br />
discourage adventurers from<br />
exploring the ruins of the fallen<br />
temple and the moathouse,<br />
have infiltrated the town.<br />
Hommlet probably has<br />
more than its share of classed<br />
characters (some of fairly high<br />
level). This is primarily due to<br />
its history—one fraught with<br />
danger and adventure.<br />
9
CHAPTER 1: THE TOWN OF HOMMLET<br />
A Side Adventure<br />
Cultists are active in Hommlet<br />
and the moathouse, but with<br />
the exception of Master Dunrat<br />
(see area 28), they do not actually<br />
come from the Temple of<br />
All-Consumption. (Dunrat lived<br />
in the Outer Fane.) They are<br />
based in a secret Elder Elemental<br />
Eye stronghold nearby in the<br />
Kron Hills. Among the leaders<br />
of this cult were Festrath and<br />
Thaque (See Chapter 2: The<br />
Moathouse), who were both<br />
wooed by the Water Temple to<br />
come and join them in the<br />
Crater Ridge Mines.<br />
Finding and rooting out the<br />
remnants of this cult outpost<br />
could prove an interesting side<br />
adventure. You’d need to add<br />
some clues to its existence and<br />
location among the cultists’<br />
belongings. Be warned, however,<br />
that this might throw the<br />
PCs off the track of the main<br />
adventure unless the side<br />
quest contains plenty of<br />
pointers back to the Temple<br />
of All-Consumption.<br />
10<br />
Karlun himself believed that Dunrat and his associates<br />
were smugglers or brigands, but he didn’t care; he was only<br />
interested in his cut. If he had known they were evil clerics,<br />
or worse, worshipers of Tharizdun, he would probably have<br />
changed his mind. Unfortunately, he never got the chance—<br />
Karlun was murdered just days ago by his erstwhile friend.<br />
The cult has only a handful of people hiding in the mill;<br />
the rest are currently at the moathouse. Master Dunrat is a<br />
tall, imposing fellow, with a dark beard tapered to a point and<br />
thick, bushy eyebrows. Chenashi is a cleric of the Elder Elemental<br />
Eye and Master Dunrat’s main assistant. She keeps<br />
her red hair cut very short and is quite stout. Toridan is a halforc<br />
fighter with a greenish-gray pallor and a head shaved<br />
except for a topknot. Grune, a human swordsman with long,<br />
dark hair, is Dunrat’s bodyguard and never leaves his side. A<br />
tiefling wizard named Vacra is in charge of security. Vacra has<br />
adopted the identity of Sart, a part-time mill worker, using<br />
her wand of change self; this also hides her small horns and<br />
cloven feet. This allows her to hang around the mill during<br />
the day and keep an eye on happenings.<br />
Vacra is always at the mill, but only a 50% chance exists for<br />
each of the other cultists to be present at any given time<br />
(although Grune always accompanies Dunrat).<br />
If the PCs or the militia raid the mill, those not<br />
present at the time hide in the grove with the<br />
doppelganger Jaroo, silencing Yundi permanently<br />
if they have to (see area 26).<br />
In addition to this group, two more evil<br />
servitors of the cult live in town: Maridosen,<br />
the barkeep at the Inn of the Welcome Wench<br />
(see area 4), and Chatrilon Unosh, one of the<br />
guests at the same inn.<br />
THE TOWN<br />
IN DANGER<br />
The town militia consists of thirty to forty<br />
regular members who work with Elmo (see<br />
below) to deal with bandits, monsters, or<br />
trouble in town. Many of these are warriors<br />
(except where noted elsewhere), but most<br />
would be only 1st level.<br />
Dangerous activity has been infrequent in the<br />
last few years. Occasionally a drunken brawl<br />
breaks out in Terrigan’s, but that’s a normal sort<br />
of “growing pain” that a town such as Hommlet<br />
would experience, particularly located on a<br />
crossroads as it is. If real trouble (such as war)<br />
broke out and the town needed to defend itself,<br />
Elmo could probably raise a hundred ablebodied<br />
commoners and perhaps ten to twenty<br />
additional warriors to add to the regulars.<br />
If trouble brews in town—extensive thievery,<br />
wanton behavior, large-scale violence—Elmo<br />
is the first to get involved. Assume that if<br />
there’s trouble, he is on the spot within 5 minutes, armed<br />
and armored. Elmo calls upon a few militia personnel for<br />
help if need be.<br />
Rufus and Burne, although powerful, never get directly<br />
involved unless the situation demands it, and the only way<br />
that can happen is if the entire town is literally threatened<br />
with extinction. They know that Elmo and the townsfolk are<br />
capable of dealing with smaller problems. At most, they may<br />
dispatch some of their troops to help keep the peace.<br />
Should extensive property damage ever occur in town (say,<br />
to the mill or one of the inns), those responsible for the<br />
destruction must pay reparations to the victim(s). Elmo<br />
enforces this rule, which is supported by Rufus and Burne.<br />
NPCS ABOUT TOWN<br />
A few NPCs important to Hommlet are not tied directly to a<br />
location and can be encountered in various places.<br />
Elmo<br />
Elmo is captain of the militia, living off treasure earned when<br />
he and his brother helped Canoness Y’dey and others fight<br />
against the Temple of Elemental Evil.<br />
Elmo is willing to undertake dangerous tasks if doing so is<br />
for the good of the town. He’s not interested in gaining further<br />
treasure or exploring. He isn’t concerned with anything<br />
very far out of town (such as the hobgoblins in the old<br />
temple), but he’s very grateful to anyone who deals with such<br />
problems. Getting on Elmo’s good side is a smart idea,<br />
because he has a lot of influence in the town. If he is at the<br />
Inn of the Welcome Wench, Burne and Rufus are likely to<br />
show up eventually to share a drink.<br />
Elmo is a good friend of Jaroo and unfortunately does<br />
not realize that the druid is dead, replaced by a doppelganger<br />
(see area 26). So fiendish is the creature’s ruse that it<br />
was able to convince him that Yundi, the grove’s assistant<br />
druid, has been acting strange lately and bears watching. If<br />
Elmo is convinced to help with or take part in some operation,<br />
such as confronting the cultists in the mill, he insists<br />
on bringing Jaroo along.<br />
He has not yet made up his mind whether to worry about<br />
the moathouse. He knows all too well from past experience<br />
that signs of activity there might mean danger from the<br />
temple itself; he lost his brother when the evil rose up a<br />
second time. He is also aware of hobgoblin bandits that operate<br />
in and around the old temple grounds. In fact, he and<br />
others of the militia have fought them many times before,<br />
eventually convincing the evil humanoids to stay away from<br />
Hommlet: it’s too well defended.<br />
Elmo gets along very well with Yether at the church of<br />
Pelor (see area 2). He does not interact with Canoness Y’dey<br />
or anyone associated with the Church of St. Cuthbert,<br />
though. He still blames Y’dey for the death of his brother Otis<br />
twelve years ago, when she and he fought together against<br />
the second rise of the Temple of Elemental Evil. (Y’dey was<br />
not able to get to Otis’s body quickly enough to raise him.)<br />
dElmo: Male human Rgr6; hp 50; see Appendix 3.<br />
Nierethi Poscurian<br />
Nierethi Poscurian is an evil illusionist interested in the area’s<br />
history, specifically the ultimate fate of the moathouse’s old<br />
master, a human named Lareth the Beautiful. This man was<br />
said to be favored by the forces of evil—including the demon<br />
goddess Lolth. If the PCs go to the moathouse, they may see<br />
Nierethi poking around there as well. He has no connection<br />
to the cult, but he would quickly take their side if he thought<br />
it might gain him some power or powerful allies.<br />
dNierethi Poscurian: Male gnome Ill4; hp 10; see<br />
Appendix 3.<br />
Chatrilon Unosh<br />
Chatrilon Unosh stays at the Inn of the Welcome Wench,<br />
working for the secret cult. He is in frequent contact with
CHAPTER 1: THE TOWN OF HOMMLET<br />
Maridosen, the barkeep (see area 4). Chatrilon is gruff and<br />
(try as he might) comes off as a little sinister.<br />
It’s Chatrilon’s job to discourage people from going to the<br />
moathouse, and he hangs around the inn listening to the conversations<br />
of others. If he overhears anyone speaking about the<br />
moathouse, he poses as a greedy, treasure-seeking adventurer<br />
and joins the conversation. Chatrilon insists that he has been<br />
there within the last week and that it was disappointingly<br />
empty. He has been there, with other cult members two weeks<br />
ago, and knows that it’s not lifeless. He does not know about<br />
the dragon (see Chapter 2: The Moathouse), nor that the<br />
cultists currently in the moathouse dungeons are trapped.<br />
If his assurances are ignored, Chatrilon tries to convince<br />
adventurers to deal with the hobgoblins in the old temple<br />
instead. Once he realizes that a party plans to go to the moathouse<br />
anyway, he changes his tactics and attempts to worm<br />
his way into the group. All he asks, he says, is an equal share<br />
of the treasure. At the first chance that the PCs might discover<br />
the cultists, he attacks, hoping to assassinate one<br />
member of the party and then take out the rest in combat. If<br />
given the opportunity, he helps the PCs fight the dragon; he<br />
does so only to free his associates, though, having ascertained<br />
that it must have them trapped.<br />
dChatrilon Unosh: Male human Rog5/Asn1; hp 27; see<br />
Appendix 3.<br />
Xaod the Slayer<br />
Xaod is an interesting character. Although devoted to Heironeous,<br />
he has spent most of his career just barely retaining his<br />
paladinhood. No one in Hommlet knows that there’s anything<br />
holy about Xaod. He is crude, loud, and often boorish, with a<br />
reputation as a dangerous fighter and a bit of a drunkard. He<br />
does spend a lot of time in the taverns, but he is actually here<br />
because he had a vision that a great evil was festering in the<br />
territory around the old Temple of Elemental Evil.<br />
About a month ago, Xaod went to the temple, but he found<br />
only hobgoblins. He slew a number of them and returned.<br />
His vision involved great fire and magic, not those motley<br />
bandits, so he is confused as to what Heironeous wants him<br />
to do next. Xaod is not one for self motivation, so he sits in<br />
town until some new vision or sign tells him where to go. He<br />
does not read the occasional evil aura as anything more than<br />
might be expected in a given town, and once he’s deep in his<br />
cups, his awareness of evil auras is considerably dimmed.<br />
Maridosen does make him uneasy, though, so he’s not likely<br />
to chat up the barkeep (see area 4).<br />
dXaod the Slayer: Male human Pal4; hp 28; see<br />
Appendix 3.<br />
Questin Himmble<br />
Questin came here from a small halfling band in the hills.<br />
Extremely ugly due to some birth defect, he was often mistaken<br />
for a goblin and was abandoned early on by his parents.<br />
He was raised in the wild and rescued years later, but his barbaric<br />
tendencies never left him.<br />
Questin is in town looking for his parents, who he (correctly)<br />
believes now live in this town. He cannot find them<br />
since he doesn’t know their names—just a memory of their<br />
faces. He means to exact some sort of revenge when he finds<br />
them, but he does not yet know what that will be. In the<br />
meantime, he’s down on his luck and low on funds. He might<br />
be willing to join up with adventurers if loot is involved.<br />
Questin lives out in the wilds just outside town, coming into<br />
Hommlet each morning.<br />
11
CHAPTER 1: THE TOWN OF HOMMLET<br />
12<br />
dQuestin Himmble: Male halfling Bbn2/Rog2; hp 32;<br />
see Appendix 3.<br />
Ingrith<br />
Ingrith passes through Hommlet occasionally, usually to pay<br />
her respects at the temple to Ehlonna (see area 1). She has<br />
earned the respect of important people in town (including<br />
Elmo, Jaroo, and the clerics of the temples) by ridding the<br />
surrounding lands of beasts and monsters: trolls, a manticore,<br />
and a pack of dire wolves. She does this without reward or<br />
even being asked. Rumor has it that she has a paramour in<br />
town somewhere for whom she cares deeply. If this is true,<br />
no one knows who the person might be.<br />
Ingrith is not immediately interested in the moathouse or<br />
even the old Temple of Elemental Evil. Later on, however<br />
(see Part 3: Rebirth of Elemental Evil), she might very well<br />
help those who seek to defeat the evil clerics of Tharizdun.<br />
dIngrith: Female half-elf Mnk4/Rgr3; hp 42; see<br />
Appendix 3.<br />
KEY TO HOMMLET<br />
Use the following key when referring to the town of Hommlet<br />
(map 1).<br />
1. Temple to Ehlonna<br />
Jennithar Rhengold, a golden-haired, half-elven servant of<br />
Ehlonna, maintains a small temple dedicated to this woodland<br />
deity. Jennithar is the only cleric found here, and she is<br />
very reserved, reluctant to speak much with anyone not of her<br />
faith. The people of Hommlet do not pay much attention to<br />
her or the temple. Although a respectable-size body of followers<br />
worships here (many of the elves and halflings), most visit<br />
the temple infrequently. About one-third of the attendees at<br />
any given service are actually visitors passing through town.<br />
dJennithar Rhengold: Female half-elf Clr4; hp 29; see<br />
DUNGEON MASTER’s Guide page 51.<br />
Other Possible NPCs: Ingrith, Joman Dart (see area 6),<br />
Redithidoor Halfmoon (see area 4), Thaenai Sevensong (see<br />
area 10).<br />
Scrolls/Services: Jennithar does not make scrolls. She<br />
casts spells for those of her faith, assuming that they make a<br />
donation (40 gp for 1st-level spells, 80 gp for 2nd-level spells).<br />
2. Temple to Pelor<br />
This temple is tended by two clerics. Yether the Keen was<br />
assigned here two years ago by the church hierarchy in Verbobonc.<br />
He is in his late fifties, ruddy-faced and sporting a<br />
short gray-white beard and full head of hair. Nerris, Yether’s<br />
assistant (male human Clr1), serves as an acolyte even<br />
though his aptitude and training suggests that he is ready to<br />
move on to more advanced duties. Nerris is tall, thin, pale,<br />
and prematurely balding.<br />
The congregation of the church is growing steadily. Eventually,<br />
the building will need to be expanded, along with the<br />
clerical staff. People generally hold Yether and the temple in<br />
high regard, for adherents of this faith sponsor a number of<br />
charitable activities throughout the year. Yether’s even been<br />
known to take in those who cannot afford lodging.<br />
Last week, a traveler who worships Pelor stopped in for<br />
services and mentioned that he saw some strangely garbed<br />
people on the road east of town. He described them as wearing<br />
ochre-colored robes and having a disturbing presence.<br />
Such news has of course alarmed Yether somewhat, for he<br />
knows the history of the area and the location of the moathouse.<br />
If he learns that anyone aligned with or faithful to<br />
Pelor is going to explore the moathouse or even head in that<br />
direction, he asks them to report anything odd that they’ve<br />
seen to him (and to Captain Elmo as well).<br />
dYether the Keen: Male human Clr5; hp 36; see DUNGEON<br />
MASTER’s Guide page 51.<br />
Other Possible NPCs: Otho Gyver (see area 17), Todariche<br />
Nem (see area 14).<br />
Scrolls/Services: Yether creates scrolls and gives them to<br />
those who donate to the church. He has the following scrolls<br />
already prepared:<br />
Bless<br />
Cure light wounds<br />
Aid<br />
Neutralize poison<br />
Remove disease<br />
25 gp<br />
25 gp<br />
150 gp<br />
375 gp<br />
375 gp<br />
Yether also casts spells for any willing to make a donation (50<br />
gp for 1st-level spells, 100 gp for 2nd-level spells, and 150 gp<br />
for 3rd-level spells). He is willing to donate spells or even<br />
scrolls to a cleric of his faith who is undertaking some task for<br />
the town (such as defeating evil foes in the moathouse).<br />
Information: Yether can identify the symbols of the Elder<br />
Elemental Eye. He also recognizes the description of the<br />
four-sided statues (see area 32A in The Moathouse and area<br />
18 in The Outer Fane), references to the Dark God, and the<br />
obex as the symbol of Tharizdun. He is reluctant to tell overmuch<br />
or even speak the dread deity’s name.<br />
3. Church of St. Cuthbert<br />
Canoness Y’dey maintains this, the largest temple in town.<br />
The aged cleric was instrumental in the fall of the Temple of<br />
Elemental Evil and its complete defeat a few years later. Y’dey<br />
suspects that there was more to that temple than was seen by<br />
her and her allies. She is aware that a great demon lived<br />
within and is gone now, but she spends waking nights now<br />
and again wondering what “elemental evil” truly represented,<br />
and what was the truth behind the forces and funding of the<br />
temple. (She was told then, and it is thought by others now,<br />
that a demonic tyrant of the nearby lands of Iuz controlled<br />
the temple, but she personally finds that hard to believe.) No<br />
one can get in to see Y’dey without first speaking to Calmer,<br />
who casts detect evil on any wishing an audience.<br />
Calmer is Y’dey’s assistant and trusted friend. He is tall and<br />
well built, but he most likely will never advance beyond his<br />
current position. He is aware of this and has long since<br />
accepted it. Calmer is a friend of Spugnoir (see area 25).<br />
Terjon, the second-in-command, is an adventurer at heart.<br />
He prefers that Y’dey manage the temple’s affairs so that he<br />
can go on expeditions. About one-quarter of the time, he is<br />
off on a quest for something or other. He’s eager to join up<br />
with good-aligned adventurers for a short-term mission but<br />
won’t join a group that is obviously far less skilled than he.<br />
He questions any potential companions to make sure that<br />
they are at least 5th level. Terjon is gruff, with dark brown<br />
hair and eyes. Most townsfolk do not care for him, preferring<br />
the softer touch of Y’dey or Calmer.<br />
New to the temple, the acolyte Derim keeps quiet and<br />
observes, learning the hierarchy of the church and indeed<br />
the town. His motives are not sinister; he simply looks before<br />
he leaps. One day, Derim hopes to be the canon of this<br />
church and an influential leader in Hommlet.
CHAPTER 1: THE TOWN OF HOMMLET<br />
dCanoness Y’dey: Female human Clr10; hp 70; see<br />
Appendix 3.<br />
dCalmer: Male human Clr3; hp 23; see DUNGEON MASTER’s<br />
Guide page 51.<br />
dTerjon: Male human Clr6; hp 49; see Appendix 3.<br />
DDerim: Male human Clr1; hp 10; see DUNGEON MASTER’s<br />
Guide page 51.<br />
Other Possible NPCs: Jinnerth (see area 8), Moneir and<br />
Sunom (see area 7), Naresh (see area 11).<br />
Scrolls/Services: Calmer and occasionally Y’dey create<br />
scrolls and give them to those who donate to the church.<br />
They have the following scrolls already prepared:<br />
Cure light wounds<br />
Detect evil<br />
Augury<br />
Bull’s strength<br />
Cure moderate wounds<br />
Remove paralysis<br />
Neutralize poison<br />
Prayer<br />
Protection from elements<br />
Remove curse<br />
Restoration<br />
25 gp<br />
25 gp<br />
150 gp<br />
150 gp<br />
150 gp<br />
150 gp<br />
375 gp<br />
375 gp<br />
375 gp<br />
375 gp<br />
800 gp<br />
Y’dey also casts spells for any willing to make a donation<br />
(100 gp for 1st-level spells, 200 gp for 2nd-level spells, 300<br />
gp for 3rd-level spells, 400 gp for 4th-level spells, 500 gp<br />
for 5th-level spells). She is not willing to cast spells or<br />
donate scrolls to anyone, even those undertaking some<br />
altruistic task. She believes in earning one’s own way<br />
rather than getting gifts.<br />
Information: Y’dey can identify the symbols of the<br />
Elder Elemental Eye. She also recognizes the description<br />
of the four-sided statues (see area 32A in the moathouse<br />
and area 18 in the Outer Fane), references to the Dark<br />
God, and the obex as the symbol of Tharizdun. She speculates<br />
that the cult of the Elder Elemental Eye may have<br />
been secretly involved in creating the original Temple of<br />
Elemental Evil.<br />
4. Inn of the Welcome Wench<br />
Ostler Gundigoot (male human, Com6) opened the Inn of<br />
the Welcome Wench shortly after the Battle of Emridy Meadows<br />
more than twenty years ago. In the old days, he was an<br />
important figure both in the militia and in general town<br />
administration. The Inn of the Welcome Wench quickly<br />
grew in reputation as a place of great comfort and quality, but<br />
one whose patrons should expect to pay well for the excellent<br />
service and fine food and lodging.<br />
Nowadays, Ostler takes it easy. His heart is weak, and his<br />
daughter and wife attempt to shelter him from any great<br />
excitement or surprises. Ostler’s daughter, Vesta (female<br />
human Com1, noncombatant), runs the day-to-day activities<br />
of the inn, maintaining the same quality and fair-minded<br />
practices that her father established when it first opened. She<br />
is exceedingly friendly and warm, making the inn a welcome<br />
and homey place for all.<br />
Maridosen, the barkeep, is actually an agent for the secret<br />
cult. This black-haired, pale-skinned woman has worked at<br />
the inn for two months and knows the town fairly well. She<br />
is short-tempered, with little patience for small talk or<br />
humor. It is likely that Vesta will fire her within the next<br />
month, as she is too coarse for the inn’s standards.<br />
Redithidoor Halfmoon entertains the clientele, but he’s<br />
more interested in adventuring. He’s been out to the moathouse<br />
(about a week-and-a-half ago) and believes that some<br />
undead, at the very least, are still active in the dungeons. He<br />
didn’t actually go in, but he heard noises that suggested something<br />
was moving around down there.<br />
Redithidoor is incompetent, both as a musician and as an<br />
adventurer. Most people don’t think much of him. (Vesta<br />
allows him to perform in exchange for a meal and a room, but<br />
this is really charity.) Even Chatrilon Unosh (see NPCs about<br />
Town, below) balks at the idea of joining any group of which<br />
Redithidoor is a part.<br />
dMaridosen: Female half-elf Ftr3; hp 27; see Appendix 3.<br />
dRedithidoor Halfmoon: Male elf Brd1; hp 5; see<br />
Appendix 3.<br />
Other Possible NPCs: Burne and Rufus (see area 27),<br />
Chatrilon Unosh, Elmo, Nierethi Poscurian, Questin Himmble,<br />
Telna (see area 19), Tragge Liftsilver (see area 18).<br />
Areas of Note<br />
No map of the building exists, although you may wish to<br />
detail it further.<br />
Yard<br />
This open area is very well kept, with nicely trimmed shrubbery<br />
and a soft lawn.<br />
Stables<br />
Ten horses can be stabled here.<br />
Dining Hall<br />
Well-appointed if a little old, this place is clean and quiet. The<br />
clientele of the Welcome Wench are well-mannered folk who<br />
enjoy fine food and drink. Drunkards and louts are not welcome.<br />
They are dealt with by Maridosen, or if need be, the<br />
active town militia.<br />
Two private dining rooms exist for meetings or distinguished<br />
guests. The kitchen beyond is spacious, with steps<br />
leading down into the cellar and up into the Gundigoots’ private<br />
apartment.<br />
The menu at the Inn of the Welcome Wench is varied and<br />
filled with delights. Below are some representative offerings.<br />
Full Meals<br />
Price<br />
Beef stew<br />
4 sp<br />
Boiled crawfish with drawn butter 4 sp<br />
Poached salmon<br />
5 sp<br />
Spiced sausages<br />
5 sp<br />
Stuffed pork chops<br />
5 sp<br />
Stuffed trout<br />
5 sp<br />
Steak and kidney pie<br />
5 sp<br />
Marinated mutton chops<br />
6 sp<br />
Roast goose<br />
7 sp<br />
Venison steak<br />
7 sp<br />
Squab-stuffed pheasant<br />
8 sp<br />
(All full meals served with bread and honey, potatoes,<br />
and string beans, yams, rum-boiled artichokes, cabbage, carrots,<br />
or spinach.)<br />
Light Meals<br />
Peppered bread<br />
Oatmeal<br />
Boiled eggs<br />
Fruit and cheese<br />
Price<br />
8 cp<br />
1 sp<br />
2 sp<br />
2 sp<br />
13
CHAPTER 1: THE TOWN OF HOMMLET<br />
14<br />
Beverages<br />
Beer<br />
Beer, heavy<br />
Ale<br />
Ale, spiced<br />
Mead<br />
Mead, special brew<br />
Wine, table<br />
Wine, Keoish golden<br />
Wine, Sundish lilac<br />
Wine, Urnst white<br />
Wine, Celene ruby<br />
Wine, Furyondian emerald pale<br />
Wine, Velunan fireamber<br />
Brandy, local<br />
Brandy, Keoish<br />
Brandy, Urnst, aged<br />
Liqueur, Ulek Elixir<br />
Price<br />
2 cp<br />
3 cp<br />
4 cp<br />
7 cp<br />
1 sp<br />
14 cp<br />
8 cp<br />
15 cp<br />
4 sp<br />
5 sp<br />
8 sp<br />
1 gp<br />
3 gp<br />
5 sp<br />
1 gp<br />
3 gp<br />
5 gp<br />
Meals are served on pottery, pewter, or copper services.<br />
Drinks come in wooden tankards or pottery mugs, and silver<br />
or crystal goblets for fine wines.<br />
Rooms<br />
Rooms at the inn are comfortable and simple. Each has a soft<br />
bed with a quilted blanket, a desk with a chair, and a pitcher<br />
of water and a bowl for washing up. A single two-room suite<br />
is available for 3 gp per night. Room doors have locks (Open<br />
Lock DC 18), and a client can rent the key by paying Maridosen<br />
an additional 1 gp per night.<br />
A common room, for those unable or unwilling to pay for<br />
a private room, is available for 5 sp per night, although the<br />
inn does not guarantee the safety of one’s belongings there. A<br />
dozen bunks are located here.<br />
On any given night, 1d4+1 of the private rooms are rented,<br />
and 1d4 of the beds in the common room are occupied.<br />
Cellar<br />
This lower area has an extra kitchen, but most of its space is<br />
used for storage of the following.<br />
• Foodstuffs.<br />
• Perishable foodstuffs (kept cool by a well and thick<br />
stone walls).<br />
• Wine.<br />
• Ashes (fed into a pit from the fireplace above by a chute).<br />
• Old furniture, empty crates, tools, and a wheelbarrow.<br />
Three large casks sit against the far wall, one of which<br />
is empty. A portion of the empty cask swings up<br />
(Search DC 20), allowing a person to enter and pass<br />
through another secret door (Search DC 20) to reach a<br />
secret room beyond.<br />
• Weapons. When the forces of evil held sway over the<br />
territory in the past, those who sought to oppose it met<br />
in a secret, soundproof room below the inn. The walls<br />
of this space are lined with bunks, and a cache of weapons<br />
also exists: 1 greatsword, 1 halberd, 2 greataxes, 2<br />
morningstars, 3 handaxes, 3 heavy maces, 4 shortspears,<br />
7 battleaxes, 7 light crossbows, 8 longspears, 12<br />
daggers, 12 longswords, 20 javelins, and 130 crossbow<br />
bolts. Ten small shields and 17 large shields (all wooden)<br />
hang on the walls. Ten suits of leather armor are<br />
kept in a large chest, as well as a large table, benches,<br />
and a few chairs.<br />
5. Terrigan’s<br />
As a counterpoint to the Inn of the Welcome Wench, Terrigan’s<br />
is a low-price, low-class tavern. Consisting of only a taproom, it<br />
offers no food or lodging. Instead, it serves cheap ale in generous<br />
portions. Terrigan’s has a well-deserved reputation for<br />
being rough. Late nights particularly can be dangerous—<br />
drunken customers tend to get into fights, often requiring<br />
Elmo or other militia members to break them up.<br />
Some of the more “upstanding” members of the community<br />
do not care for Terrigan’s, feeling its presence is a bad<br />
influence. Terrigan himself is a member of the militia and<br />
well thought of by Elmo, Burne, and Rufus.<br />
dTerrigan: Male human Ftr3; hp 27; see DUNGEON<br />
MASTER’s Guide page 53.<br />
Other Possible NPCs: Ingrith, Nierethi Poscurian,<br />
Rudoulf (see area 9), Questin Himmble, Telna (see area 19),<br />
Tragge Liftsilver (see area 18), Xaod the Slayer.<br />
6. Old Trading Post<br />
Joman Dart (male halfling Com2; Appraise +6) runs this<br />
business, in a large structure rebuilt after a fire a few years<br />
ago. It still bears the original name in honor of its long service<br />
providing the community with supplies of all sorts.<br />
Although other shops and merchants now operate in the<br />
town, the Old Trading Post remains a favorite of adventurers<br />
and travelers due to its proximity to the Inn of the Welcome<br />
Wench. Most people have forgotten that during the rise of<br />
the Temple of Elemental Evil, the men who ran the old shop<br />
served the temple as spies.<br />
Joman sells all manner of goods, except perishable food.<br />
Anything commonly available and costing up to 800 gp can<br />
be found here. He also purchases used equipment and weapons<br />
(such as might be brought back by adventurers from the<br />
moathouse) at the standard rate of half price, with no questions<br />
asked. Joman can appraise and purchase valuable<br />
objects such as gems, jewelry and art objects, and he always<br />
gives fair value. At any given time, he keeps about 800 gp in<br />
assorted coins in a secret cache in the back of the shop, and<br />
another 30 gp, 50 sp, and 100 cp in the till up front.<br />
Other Possible NPCs: Potentially, anyone in town.<br />
7. Weavers<br />
Moneir and Sunom (male and female human Com1), a married<br />
couple, work out of their home as weavers. Sunom’s parents<br />
once lived in this house, but they have since passed<br />
away. Moneir and Ganna (see area 12) are secretly in love.<br />
8. Tailor<br />
Jinnerth (male human Com1) is an elderly man, bald and<br />
lanky, who works and lives here. He plies his trade as a tailor<br />
as he has for years.<br />
9. Stables<br />
Rudoulf (male dwarf Com2), a stout, black-bearded fellow,<br />
runs this establishment. He buys and sells horses as well as<br />
quartering them for a fee (1 sp per day). Two stable hands<br />
assist him, Wes and Initha (male and female human Com1).<br />
10. Brewery<br />
Thaenai Sevensong (female elf Com2) manages the brewery,<br />
which has expanded and relocated since the old days.<br />
She keeps her long black hair bound high on her head<br />
while she works, and she is impressively muscled for an elf.<br />
The brewery employs ten people (all Com1, various races).
CHAPTER 1: THE TOWN OF HOMMLET<br />
11. Teamster<br />
Naresh (male human Com3) lives with his wife, three almost<br />
full-grown sons (all human War1), and two younger daughters.<br />
A barn attached to the house holds two wagons and two carts,<br />
and two drivers (male human War1, male human Com2) live<br />
in the loft. Another small barn houses a dozen mules.<br />
Naresh and his sons are bigots who particularly dislike elves.<br />
The teamster warns any human he speaks with that a given elf<br />
in town is evil and probably means ill. Tupper, a smith who<br />
works for Alphon (see area 13), has recently begun spending<br />
time with Naresh’s eldest son, learning about the “superiority”<br />
of humans.<br />
12. Woodcutter<br />
Tarim (male human War1) cuts and collects wood from the<br />
surrounding area. He is a good friend of the druid Jaroo (see<br />
area 26). He is in his late forties and lives in this house with<br />
his wife, Ganna (human Com1), and his two children.<br />
13. Smithy<br />
Six different blacksmiths work here. Alphon (male halfling<br />
Exp3), who sports freckles and long red hair, specializes in<br />
weaponsmithing. Tupper (male human Exp1), stout with<br />
brown hair, works the forge to make common metal items<br />
such as horseshoes, nails, simple tools, and the like. Tobbinrae<br />
(female human Exp1), who works with Tupper, is pale with<br />
short blond hair and a distinctive limp. Harris Karl (male<br />
human Com1) works as an armorer. He is bald with dark skin.<br />
Psolik Ebran (male human Com2), and Arthin Basthincar<br />
(female human Com1) are also apprentices here.<br />
14. Sage<br />
Todariche Nem (male human Exp5) is the most learned scholar<br />
in Hommlet, an expert in most common topics: history, nature,<br />
geography, and arcana (consider him to have a +10 in those<br />
Knowledge skills). He has a fairly extensive library of books<br />
and scrolls in his house. Todariche is in love with Jennithar<br />
Rhengold (see area 1), but she does not return his affections.<br />
15. Scrollmaker<br />
Zerosh Nubric makes scrolls of arcane spells for sale. His<br />
business is not brisk, since few wizards or sorcerers live in<br />
the area. Still, he need only sell one or two scrolls every few<br />
months to make a good living. He has the following scrolls<br />
already in stock:<br />
Color spray<br />
Magic weapon<br />
Shield<br />
Sleep<br />
Identify<br />
Invisibility<br />
Levitate<br />
Mirror image<br />
Fireball<br />
Water breathing<br />
25 gp<br />
25 gp<br />
25 gp<br />
25 gp<br />
125 gp<br />
150 gp<br />
150 gp<br />
150 gp<br />
375 gp<br />
375 gp<br />
Zerosh also makes scrolls on demand, if he knows the<br />
spell. Zerosh’s spellbook contains the following spells: color<br />
spray, detect thoughts, dispel magic, displacement, enlarge, expeditious<br />
retreat, fireball, identify, invisibility, knock, levitate, mage<br />
armor, magic missile, magic weapon, minor image, mirror image,<br />
reduce, resist elements, shield, sleep, tongues, unseen servant,<br />
water breathing, web, and all cantrips.<br />
He’s not willing to work with others; he is a bit of a recluse<br />
and enjoys his privacy. Naddy Tomanloft (see area 21) has convinced<br />
Zerosh that Joman Dart, who runs the Old Trading<br />
Post, is evil. Now the wizard won’t go near the trading post<br />
and intends to use spells to investigate the halfling owner<br />
more closely—when he gets around to it.<br />
dZerosh Nubric: Male elf Wiz5; hp 22; see DUNGEON<br />
MASTER’s Guide page 57.<br />
16. Old Town Hall<br />
This building, once the village hall, was used much more<br />
often before Rufus and Burne finished the keep. Now it is<br />
cleared for special occasions but otherwise used for storage.<br />
It is mice ridden, and a pair of owls has taken up residence<br />
as well.<br />
17. Papa’s Bakery<br />
This establishment bears a hand-painted sign with its name<br />
and a picture of a loaf of bread. “Papa” is Otho Gyver (male<br />
human Com2), a middle-aged baker who’s worked in town<br />
for over six years. The wonderful smells coming from his<br />
shop every morning spread throughout the neighborhood,<br />
ensuring good business.<br />
18. Stonemason<br />
Gister Noshim (male human Com4) makes his living as a<br />
mason. He grew wealthy building the keep over the last<br />
few years and now lives in a luxurious house with his large<br />
extended family.<br />
Gister has a secret room built under his house with an<br />
underground passage. This passage, constructed with the help<br />
of a dwarf named Tragge Liftsilver (male dwarf Com2), leads<br />
all the way under the town to the keep. Gister had the passage<br />
made so that if trouble ever came to Hommlet, he and his<br />
family could retreat within the safety of the keep’s walls. It<br />
opens under and into the westernmost tower, but Burne and<br />
Rufus don’t know about it. Tragge, however, has been known<br />
to blab about this secret passage when he gets drunk.<br />
19. Telna’s Kitchen<br />
Telna is a spy sent by Iuz to keep an eye on Hommlet, once<br />
at the center of events very important to him. She’s watched<br />
the place for years but has become a little lax in her<br />
duties—not much happens here nowadays. Still, she frequents<br />
the Inn of the Welcome Wench and Terrigan’s, and<br />
she asks enough questions that she’s considered one of the<br />
town’s more prominent busybodies.<br />
Telna’s cover in town is working as a cook. She prepares<br />
meals for special occasions (held at her house), bakes cakes<br />
and pastries for sale, prepares food suitable for travel rations,<br />
and delivers meals for a small price.<br />
dTelna: Female human Sor4; hp 18; see DUNGEON MASTER’s<br />
Guide page 56.<br />
20. Wheel and Wainwright<br />
Winta Goldwing (female human Com1) took over this<br />
business from her uncle a few years ago. She is very successful<br />
and earns enough to support her small family,<br />
including her husband Rerrid (male human Brd1), who is<br />
studying to become a minstrel.<br />
21. Leatherworker<br />
Naddy Tomanloft (female gnome Com1) runs the leatherworking<br />
shop. None of her three employees (male human,<br />
15
CHAPTER 1: THE TOWN OF HOMMLET<br />
16<br />
female elf, female gnome, all Com1) live here. Naddy has it<br />
in her head that Joman Dart (see area 6) is up to no good,<br />
perhaps because the previous merchants in that spot were,<br />
years ago, servants of the Temple of Elemental Evil. She<br />
tells anyone who will listen that Joman can’t be trusted and<br />
should be watched very closely.<br />
22. Potter<br />
Sumone Hann (female human Com1, noncombatant), with<br />
the help of two young workers (both male human Com1),<br />
makes all manner of pots, flagons, bowls, dishes, and the<br />
like. Sumone has fallen on hard times lately, because<br />
another, more skilled potter has started working in town<br />
(see area 23).<br />
23. Asherm’s Earthenware<br />
Asherm (male gnome Exp2) is a skilled potter and sculptor.<br />
New in town (he came from a gnome village in the west),<br />
he employs three other gnomes (all gnome Exp1) to keep<br />
the kilns operating almost continually. He lives in a small,<br />
attached apartment.<br />
24. Milk Market<br />
Chonas Divor has given up his studies of mysticism and meditation<br />
to live a simple life. He is still known for his spirituality<br />
and even-tempered treatment of all his customers, but<br />
those coming to his market seeking dairy products do not<br />
suspect that he is actually a trained martial artist.<br />
Chonas buys milk from local farmers and keeps three<br />
employees (two humans and a halfling, all Com1) to make<br />
butter and cheese. These products are stored underground,<br />
beneath the market.<br />
dChonas Divor: Male human Mnk2; hp 14; bracers of armor<br />
+1 but no other magic; see DUNGEON MASTER’s Guide page 53.<br />
25. Potions and Elixirs<br />
A ten-year-old girl named Renne (female human Com1)<br />
runs this shop. Renne is extraordinarily intelligent and<br />
mature for her age. She sells potions that her father creates<br />
or buys from the Church of St. Cuthbert (he made a deal<br />
with his friend Calmer; see area 3). Renne’s father Spugnoir<br />
(spoon-wahr) was an adventurer who settled in the town<br />
years ago, during the rise of Elemental Evil. He married a<br />
local girl, but she died young. Spugnoir has since spent his<br />
time taking care of his daughter, making potions, and<br />
exploring the area alone looking for magic.<br />
Now Spugnoir is missing, having disappeared a few days<br />
ago. Renne is very worried about her father, for she knows<br />
that his inquisitive nature tends to get him into trouble.<br />
Unknown to most people, Spugnoir has spent the last twelve<br />
years exploring the moathouse and the areas surrounding it<br />
(even old Nulb). He knows the moathouse better than<br />
anyone, and he has seen that outside forces have begun<br />
exploring it. He also knows they have uncovered something<br />
under the moathouse that he was unaware of. Unfortunately,<br />
he’s now trapped inside the moathouse dungeon (see Chapter<br />
2: The Moathouse).<br />
Spugnoir pays Haunor (male dwarf War4) handsomely to<br />
watch over the place while he’s away. The dwarf protects the<br />
business from those who might seek to take advantage of<br />
the vast amounts of money it draws.<br />
At any given time, ten finished potions are here. At the<br />
start of the adventure, the following are in stock:<br />
Spider climb<br />
Cure light wounds (2)<br />
Hiding<br />
Swimming<br />
Blur<br />
Bull’s strength<br />
Darkvision<br />
Levitate<br />
Cure moderate wounds<br />
Water breathing<br />
50 gp<br />
55 gp<br />
150 gp<br />
150 gp<br />
300 gp<br />
300 gp<br />
300 gp<br />
300 gp<br />
330 gp<br />
750 gp<br />
If Spugnoir is available to work, assume that he replaces purchased<br />
potions. Roll on the minor potions column of Table<br />
8–18: Potions in the DUNGEON MASTER’s Guide to determine<br />
replacements. Use the listed prices for arcane potions. Divine<br />
potions are marked up 10%, and only 1st- or 2nd-level spells are<br />
available (if one of higher level is rolled randomly, assume<br />
Spugnoir got it in a trade). If Spugnoir is available, he can brew<br />
potions of any arcane spell up to 3rd level to order. Spugnoir<br />
also casts spells of up to 3rd level, charging 70 gp per spell level.<br />
dSpugnoir: Male human Wiz7; hp 30; see Appendix 3.<br />
DSebbekai: Cat familiar of Spugnoir; hp 15; see Appendix 3.<br />
26. Grove<br />
Jaroo Ashstaff, an aged and powerful druid, long maintained<br />
this grove as a place devoted to nature. Jaroo worked and<br />
fought hard in the past for the betterment of the community.<br />
Once, many people looked to Jaroo and his faith for spiritual<br />
guidance, before there were proper temples in town.<br />
Sadly, Jaroo is now dead. He was killed very recently and<br />
replaced by a doppelganger working for Master Dunrat of<br />
the hidden cult (see area 28). Jaroo’s body is buried in the<br />
dirt floor of the small wooden house that the druid lived in<br />
behind the grove, and his gear has long-since been distributed<br />
among the cultists.<br />
The faux Jaroo is a deep-cover spy for the cult of the Elder<br />
Elemental Eye. It is the cult’s last line of defense in Hommlet—<br />
if their hidden base in the mill (see area 28) is compromised,<br />
the remaining cultists come here and lie low. Since Jaroo was a<br />
good friend of Elmo, the doppelganger is able to monitor what<br />
the town militia knows and is currently up to. The doppelganger<br />
uses its position (and has for a week now) to suggest to<br />
Elmo that there’s nothing going on at the moathouse and that<br />
the ruins of the temple are too far away to worry about. The<br />
creature’s ability to detect thoughts allows it to manipulate people<br />
very effectively—it knows when they believe what it says, or<br />
when it has gone too far.<br />
Yundi, Jaroo’s youthful assistant, used to work at the Inn of<br />
the Welcome Wench as a potboy. He is blond and bearded,<br />
with a lean frame. Yundi lives in a house near the grove and<br />
helps Jaroo tend the trees while learning druidic lore from<br />
him. He has noticed that Jaroo has not been quite himself<br />
lately, and he’s beginning to wonder if the elderly druid is<br />
losing his mind or perhaps has fallen under some spell. As<br />
well, Jaroo’s animal companion, Tanak the brown bear, has<br />
gone missing (the animal fled after Jaroo was killed). Yundi<br />
keeps his own companion, a wolf named Wyst, with him when<br />
he’s in the grove. Otherwise, Wyst patrols the grove alone.<br />
dDoppelganger Jaroo: hp 22; see Monster Manual page 60.<br />
dYundi: Male human Drd2; hp 14; see DUNGEON MASTER’s<br />
Guide page 52.<br />
Other Possible NPCs: Elmo, Tarim (see area 12); Chatrilon<br />
Unosh, Maridosen (see area 4)—these last two are here only<br />
when Yundi is not.
CHAPTER 1: THE TOWN OF HOMMLET<br />
27. Keep<br />
This fortress is the home of Burne, a wizard, and Rufus, a<br />
fighter. Both are well respected and powerful adventurers<br />
who settled down in this area about fifteen years ago and<br />
decided to make it their home. Burne and Rufus don’t get<br />
involved in adventures anymore. PCs who come to their door<br />
asking for help—or worse, demanding it—are sent to Elmo<br />
and the town militia (forcibly, if necessary).<br />
In general, Rufus is forthright but a little crass at times.<br />
Burne is a careful thinker and a long-term planner who is<br />
sometimes quick to anger. Neither suffers fools.<br />
These two essentially run the town. When the old village<br />
elder passed away, leadership unofficially passed to them by<br />
default. They rule very casually—without asking about the<br />
keep, a visitor could stay for days in town without knowing<br />
that they exist.<br />
Burne’s Badgers<br />
This is a small group of mercenaries whom Burne put on permanent<br />
retainer years ago. Although their ranks have<br />
changed over the years, the mercenary company remains the<br />
closest thing to a formal military in Hommlet. Their main<br />
role is to defend the keep (a duty that they’ve never actually<br />
had to perform), but they also undertake whatever tasks<br />
Burne or Rufus assigns them. Twenty mercenaries (all<br />
human War1), including a captain (male human War5) and<br />
his lieutenant (female human War4) comprise this group. In<br />
times of real trouble, the townsfolk would help defend the<br />
keep, as they would certainly all take shelter within.<br />
In addition to the mercenaries, Burne and Rufus employ<br />
eight servants (cooks, housekeepers, and the like), who live<br />
in the keep.<br />
dBurne: Male human Wiz10; hp 28; see Appendix 3.<br />
dRufus: Male human Ftr8; hp 69; see Appendix 3.<br />
Areas of Note<br />
This is a well-built and well-supplied fortress.<br />
Wall and Towers<br />
The curtain walls are 15 feet high and 5 feet thick (hardness<br />
8, 900 hp, Climb DC 25). The tower walls are 3 feet thick<br />
(hardness 8, 540 hp, Climb DC 25).<br />
The towers have two levels and are 20 feet high. They are<br />
fitted with arrow slits that provide nine-tenths cover. The westernmost<br />
tower has a secret door in the floor (Search DC 20)<br />
that leads to a hidden passage to the stonemason’s house (see<br />
area 18).<br />
Gatehouse<br />
This barbican is built like a tower but is much larger. The<br />
gates themselves are made of strong wood; one set sits at<br />
either end of a passage through the barbican, filled with<br />
arrow slits and murder holes that give the defenders ninetenths<br />
cover. In the middle of this passage, the defenders can<br />
drop a wooden portcullis.<br />
sMain Gate: 4 in. thick; hardness 5; hp 40; AC 4; break<br />
DC 27.<br />
sPortcullis: 3 in. thick; hardness 5; hp 30; AC 4; lift DC 25.<br />
Main Tower<br />
This is the oldest structure in the keep, built long before<br />
the rest. Once the home of Rufus and Burne, this now<br />
houses Burne’s Badgers. It has three main levels, a parapet<br />
with two light catapults, and a top turret with two ballistae.<br />
These engines of war are well placed, being situated atop<br />
the highest point in the keep—and for miles around, for<br />
that matter. A cellar beneath the tower contains a secret<br />
cave with a natural spring, which provides the entire keep<br />
with water.<br />
Inner Keep<br />
An inner wall identical to the curtain wall surrounds this<br />
main structure. It has towers with a single gate (same as those<br />
in the barbican), creating an inner bailey surrounding a keep,<br />
called the donjon. The donjon has four levels with a grand<br />
hall, a feast hall, a huge kitchen, many storerooms, an apartment<br />
for Rufus and Burne, a vast library, and guest chambers.<br />
28. Mill<br />
The river powers a large waterwheel that in turn rotates<br />
the mighty grinding stone in the mill’s main room. A<br />
loft overhead is full of grain that flows down a chute<br />
into the grinder. The waterwheel also drives a conveyer<br />
belt with scoops to transfer grain up into the loft. Bags<br />
of flour fill a backroom.<br />
The entire place is covered with a fine dusting of raw<br />
flour, and the air is thick with it.<br />
On a tree just outside the mill, Dunrat keeps a stalwart eye, a<br />
metallic construct in the shape of a bird (see Appendix 1).<br />
When he wants to, he can see through its eyes as with a<br />
familiar. Thus, Dunrat maintains a watch. The construct has<br />
AC 18, 5 hp, and cannot move on its own.<br />
Two others also work at the mill: Themock and Nhygen,<br />
both burly men (human Com1). They know only that some<br />
of “Karlun’s friends” are staying in the cellar: Those guests<br />
don’t say much and are almost never seen during the day<br />
when the workers are there. At the first sign of danger, the<br />
mill workers run.<br />
Fire!<br />
If a fire of significant size (more than a torch flame) starts in<br />
the mill, a cumulative 20% chance exists per round the fire<br />
burns (01–20 on d% the first round, then 01–40 the second,<br />
and so on) that the flour dust in the air ignites. This results in<br />
a huge explosion that deals 2d4 damage to everyone in the<br />
mill (no saving throw allowed). Damage to the building itself<br />
in such an event is significant—it burns to the ground eventually<br />
unless action is taken. Extinguishing the fire requires<br />
at least three people working with buckets for 10 minutes<br />
(luckily, the buckets are close to the river).<br />
Cellar (EL Variable)<br />
Lit by a small oil lamp, this dingy, dirt-floor cellar has six<br />
bedrolls laid out; it is obvious they have all been used<br />
recently. An average-size trunk is against the wall farthest<br />
from the stairs, and a few satchels and other bags are scattered<br />
among the bedrolls.<br />
The bags contain nothing but clothing and personal gear,<br />
with the exception of Vacra’s (see below).<br />
Creatures: One or more of the cultists (see The Hidden<br />
Cult, page 9) is here.<br />
dMaster Dunrat: Male human Clr5/Sor1; hp 36; see<br />
Appendix 3.<br />
dChenashi: Female human Clr2; hp 11; see Appendix 3.<br />
17
CHAPTER 2: THE MOATHOUSE<br />
18<br />
dGrune: Male human War1; hp 8; see Appendix 3.<br />
dToridan: Male half-orc Ftr2; hp 19; see Appendix 3.<br />
dVacra: Female tiefling Wiz3; hp 10; see Appendix 3.<br />
Treasure: One bag contains Vacra’s spellbook; see Appendix<br />
3. A locked trunk holds gold and equipment (see below).<br />
Trap (EL 2): The trunk is locked (Open Lock DC 23), and<br />
Dunrat keeps the key with him. It is trapped with a glyph of<br />
warding that goes off unless the opener speaks the phrase<br />
“Praise the Elder Elemental Eye.”<br />
aGlyph of Warding: CR 2; 5-ft. acid spray (3d8); Reflex save<br />
DC 14 half; Search (DC 28); Disable Device (DC 28).<br />
This trunk holds 480 gp (used for bribes and buying<br />
equipment), an ochre-colored robe, a disguise kit, and a<br />
message to Master Dunrat from someone named Naquent<br />
(see area 6 of the Outer Fane in Chapter 6). This message<br />
details Dunrat’s mission to set up a secret base in Hommlet<br />
and uncover the ancient shrine in the moathouse. His<br />
orders are to uncover whatever treasures of the Dark God<br />
he can, seal the shrine again, and bring the objects to the<br />
Temple of All-Consumption. The message ends with an<br />
important clue: “A wagon can be obtained from Tal Chammish<br />
in the nearby village of Rastor to haul whatever you<br />
find back to the crater.” Most of the major NPCs in town<br />
know where Rastor lies, as does any character who makes a<br />
successful Knowledge (geography) check (DC 14).<br />
29. Miller’s House<br />
This small, three-room building is where the miller,<br />
Karlun Fies, and his wife live—or rather lived, since both<br />
were murdered by the evil clerics just a few days ago. Their<br />
bodies lie at the bottom of the river, and they have not<br />
been missing long enough for anyone to have noticed<br />
their absence.<br />
Chapter 2:<br />
The<br />
MOathOuse<br />
Now a ruined keep of small size, the moathouse has an<br />
exciting history of battles and monsters. It lies approximately<br />
ten miles east of Hommlet, on the road toward the<br />
deserted town of Nulb (see map 2). An overgrown and<br />
rugged path two miles long leads off the main road to the<br />
moathouse itself.<br />
MOATHOUSE HISTORY<br />
When the Temple of Elemental Evil was built, this keep arose<br />
at the point where their evil influence reached farthest west.<br />
Building it was a great deal of work, because the area was wet<br />
and unstable. The builders had to drain the surrounding<br />
lands and dig down to the limestone to build a foundation<br />
(once they did, they allowed the water to return, channeling<br />
it into a moat around the fortress). The construction crews<br />
complained and whined, “Why here?”<br />
The reason is that this fortress is over the site of an<br />
ancient shrine to Tharizdun. In time-lost days, clerics of<br />
the Dark God erected a great obelisk within a natural cave<br />
in an attempt to commune with their deity (see area 32).<br />
When Tharizdun was imprisoned, they sealed the cave and<br />
diverted a minor underground stream so that even if the<br />
top of the shaft leading down to the cave were discovered,<br />
it would appear to be a pool.
CHAPTER 2: THE MOATHOUSE<br />
The original master of the place was a cultist of the Dark<br />
God named Noustan. Posing as a cleric of Zuggtmoy, he<br />
compelled the forces of Elemental Evil to build here. The<br />
moathouse served its purpose, but each time the forces of<br />
good struggled against Elemental Evil, this outpost was the<br />
first to fall. The first time, when the moathouse was still<br />
new, a pitched battle between two sizable forces tore<br />
gaping holes in the walls, destroying the mostly wooden<br />
second story of the main structure, and the place was<br />
looted. The second time, as the temple was rebuilding<br />
itself, a particularly devious and vile cleric named Lareth<br />
the Beautiful took control of the moathouse. Lareth commanded<br />
a small number of troops, mostly humans and bugbears,<br />
who occupied only the dungeon of the moathouse.<br />
Shrewd and opportunistic, Lareth professed to serve both<br />
Lolth and Zuggtmoy at various times but was actually a<br />
cleric of Tharizdun. He and his servants were slain by the<br />
small band of heroes who helped defeat the temple, with<br />
the aid of locals such as Y’dey and Elmo (see Chapter 1: The<br />
Town of Hommlet).<br />
Since then, the moathouse has fallen into even worse condition,<br />
and the dungeon has been relatively quiet—except<br />
for the ghouls and ghasts. These horrors seem to always be<br />
present, no matter how many are destroyed (this is due to the<br />
influence of Tharizdun’s shrine, but no one knows that).<br />
Occasionally Elmo comes out to the place, just to make sure<br />
all is quiet, and Spugnoir (see area 25 in Chapter 1) explores a<br />
few rooms in the dungeon from time to time, looking for<br />
magical treasure rumored to belong to Lareth. Over the years,<br />
even a few groups of adventurers have stopped by, but they<br />
always report what everyone else does—nothing new stirs in<br />
the moathouse.<br />
Until now.<br />
ON THE WAY TO<br />
THE MOATHOUSE<br />
Should the PCs decide to leave the road and explore on their<br />
own, they find a mixture of farmland (nearest the town) and<br />
hilly, rocky scrub, with the occasional moor in the damp lowlands<br />
between hills. A chance for hostile encounters exists in<br />
this dangerous area. Use the table below, checking once<br />
every 6 hours. The encounter level (EL) listed is the average<br />
for the possible range of creatures encountered.<br />
d% Encounter Average EL<br />
01–60 None n/a<br />
61–70 1d3 dire badgers 4<br />
71–80 Ankheg 3<br />
81–85 1d3+1 hobgoblins (scouts or spies from<br />
the tribe in the temple) 1.5<br />
86–90 1d3+1 brigands (War1) 1.5<br />
91–95 1d4+1 wild dogs 1<br />
96–100 Yeth hound 3<br />
Aside from such dangerous encounters, the PCs can see deer,<br />
badgers, snakes, quail, thrushes, blue jays, hawks, field mice,<br />
ground squirrels, and a variety of insects. When they get<br />
close to the moathouse, they encounter few animals of any<br />
size—a dragon has chased them away.<br />
A Chance Encounter<br />
Whether on the road or in the wilds, the PCs eventually run<br />
into Delian Thornbush (male half-elf Com2, noncombatant).<br />
Delian, or “ol’ Del” as he refers to himself, wanders the<br />
wilderness on his own, trapping small animals for food and<br />
occasionally going to Hommlet to sell the pelts. The PCs<br />
encounter him on his way to town if on the road, or checking<br />
his traps in the wilderness. He’s a friendly old guy, grizzled<br />
and dirty, usually with a bag full of pelts or dead animals<br />
on his shoulder. He doesn’t get to talk to people much,<br />
so he’s quite willing to chat.<br />
If the PCs say anything about the moathouse, Del<br />
responds with: “There’s a dragon in there! Don’t wanna be<br />
going there.”<br />
Del saw Utreshimon, a blue dragon, about three days ago<br />
(the dragon took up residence in the moathouse the previous<br />
week). He has no idea if the dragon has anything to do with<br />
the clerics he saw (see below)—and in fact, it doesn’t.<br />
If pressed for more information about the moathouse<br />
other than the dragon, he says: “Some folks been pokin’ in<br />
and outta that old place. Look like holy men to me, ’cept they<br />
keep strange company.”<br />
What Del saw was the clerics of Tharizdun who have been<br />
exploring and excavating the site for the past three months.<br />
The “strange company” are gnolls, which Del can identify<br />
because enough live in the area for him to be familiar with<br />
such creatures. Careful questioning reveals that the gnolls<br />
with the clerics were “more like people” than most. (Their<br />
armor, weapons, and clothing are in good shape and fairly<br />
uniform, having been supplied by the clerics.)<br />
Pressed even further, Del says: “Even before, when that<br />
place was more quiet, I wouldn’t go in there. It’s haunted.”<br />
What Del saw were the ghouls that infest the moathouse.<br />
He doesn’t know a ghoul from a zombie from a<br />
wight, but he can describe them as “like dead people still<br />
walkin’ around.”<br />
The Dragon<br />
Utreshimon, a young blue dragon, found the moathouse<br />
about a week ago and moved in. Although a young blue is a<br />
tough challenge for a low-level party, a few factors make the<br />
encounter a little less deadly. For one, the dragon’s actions are<br />
limited because of the clerics and others in the dungeon<br />
below. It seems Utreshimon has them trapped, and he finds<br />
that funny. He’s also not terribly hungry, having already<br />
devoured a cleric or two.<br />
The Clerics<br />
It’s been two months or more now since clerics of the Elder<br />
Elemental Eye, the doomdreamer cult’s more presentable<br />
delegates, moved secretly into the area around Hommlet.<br />
Although the cult’s plans require using the Temple of Elemental<br />
Evil eventually, they are currently concentrating<br />
their efforts in uncovering what their records show to be an<br />
important old temple to Tharizdun under the moathouse.<br />
Their operation here is almost finished. They’ve explored<br />
the obelisk chamber thoroughly (see area 32) and gathered<br />
relics they believe to be important.<br />
When the dragon arrived, the clerics attempted to destroy<br />
him. That mistake cost them dearly. Their leader is dead now,<br />
killed by Utreshimon. The other clerics are panicking—they’ve<br />
been trapped in the moathouse dungeon for three days.<br />
EVENTS DEVELOPMENT<br />
If the PCs defeat or drive off the dragon and then leave, the<br />
clerics are able to move about as they wish. However, they<br />
19
CHAPTER 2: THE MOATHOUSE<br />
20<br />
are without capable leadership. They assume that they have<br />
been discovered but fear punishment from their superiors<br />
if they do not wait for the wagon that has been sent to carry<br />
off whatever they’ve found. They become more watchful<br />
and move the gnolls from areas 28 and 29 (see below) into<br />
the upper moathouse, where they attempt to defend area 6,<br />
using the windows to fire arrows into the courtyard. Gren<br />
(see area 24) is sent to Master Dunrat in Hommlet to ask<br />
for aid.<br />
If the PCs attack the clerics in the dungeon but eventually<br />
fall back, the clerics attempt to follow the above plan with<br />
whatever remains of their forces, with Geynor Ton (see area<br />
32A) going to Hommlet if Gren is dead. In the worst-case<br />
scenario, the remaining defenders hole up in the obelisk cave<br />
(area 32C) and fight to the death there.<br />
About 24 hours after the clerics send for help, Chenashi<br />
and Chatrilon Unosh (see Chapter 1: The Town of Hommlet)<br />
arrive to help. Chenashi carries Master Dunrat’s scroll<br />
of animate dead, and she uses it to animate the skeletons in<br />
area 25 if they were destroyed, or to turn any dead gnolls<br />
into zombies.<br />
In any event, a wagon from the Temple of All-<br />
Consumption arrives 72 hours after the PCs first come to<br />
the moathouse. The clerics, if alive, seal up the shaft to the<br />
obelisk (area 32B) once again. Then they and the gnolls<br />
travel back to the Temple of All-Consumption, stopping<br />
just outside Hommlet to collect most of the clerics there;<br />
Chenashi stays behind as a permanent agent, as does the<br />
doppelganger in the grove (area 26 of the town). They<br />
leave behind any remaining undead, as well as a grick<br />
sent with the wagon to guard the place against further<br />
intrusion. Further, the insane Festrath (see area 32E)<br />
refuses to leave and is sealed in the cave with the obelisk<br />
and the grell.<br />
If Master Dunrat in Hommlet does not hear from the<br />
clerics at the moathouse after another 24 hours have<br />
passed, he sends Chatrilon or Chenashi to find out if everything<br />
is all right.<br />
MOATHOUSE KEY<br />
This small ruined fortress is little more than a stone<br />
manor and a walled courtyard with a tower, now collapsed.<br />
The upper story of the manor has fallen in<br />
entirely. It was apparently made mostly of wood, and<br />
only smashed and charred timbers remain. The condition<br />
of the manor’s interior is questionable. All is quiet<br />
other than the buzzing of mosquitoes (which are<br />
thick), since little life makes its presence known<br />
around the moathouse.<br />
Tracks are visible on the path to anyone making a successful<br />
Search check (DC 15). Anyone with the Track feat can<br />
attempt a Wilderness Lore check (DC 10) to determine the<br />
tracks were made within the last few days.<br />
All rooms and hallways in the aboveground level of the<br />
moathouse have 10-foot ceilings unless otherwise noted. The<br />
walls are masonry stone, and the doors are wooden.<br />
sWall: 1-ft. thick; hardness 8; hp 90; AC 4; break DC 35.<br />
sDoors: 1 1/2-in. thick; hardness 5; hp 15; AC 5; break<br />
DC 18 (locked).<br />
1. Frog (EL 3)<br />
Something stirs in the reeds. A large green shape lurches,<br />
glistening, from the water.<br />
The reeds are thick and treacherous; it’s easy to slip and fall in<br />
the water. There’s no real reason for the PCs to poke around,<br />
but if they do, they get a terrible surprise.<br />
Creatures: A giant frog dwells here as it has for years. It<br />
attacks with its long tongue, attempting to grab and pull a<br />
victim toward its gaping mouth. It attacks if anyone gets<br />
within 10 feet; otherwise, it remains hidden.<br />
dGiant Frog: hp 28 (see Appendix 1).<br />
2. Drawbridge<br />
The path leads to a rotten, slightly bowed drawbridge that<br />
crosses the water. Four new planks lie atop the rotted wood.<br />
Ever since the clerics put the new planks down, the drawbridge<br />
is completely safe.<br />
3. Gates<br />
On the other side of the drawbridge are two gates leading<br />
into the moathouse. One stands open, and the other lies<br />
on the ground.<br />
4. Tower<br />
The interior of this old tower appears to have once<br />
sported a wooden staircase, an upper floor, and a roof.<br />
Now, each of these is mostly gone, leaving a hollow cylinder,<br />
blackened on the inside by a fire from long ago. The<br />
ground is covered in wooden, stone, and twisted iron<br />
debris, most of it at least a little charred.<br />
The tower is empty.<br />
5. Courtyard<br />
The wide courtyard is paved in cobblestones, although<br />
over the years grass and weeds have grown throughout<br />
the area. Rubble from the collapsed wall and destroyed<br />
upper story still litter the open space. A brown smear<br />
spreads across the middle of the courtyard, up the stairs,<br />
and into the open doorway at their top. A curved dagger<br />
lies near where the smear begins.<br />
The smear is sun-dried blood, spilled when the dragon (see<br />
area 6) first arrived and attacked the clerics here, chasing the<br />
survivors into the dungeon.<br />
6. Great Hall (Dragon’s Lair) (EL 5)<br />
The stench of death is strong here. Shafts of daylight peek<br />
through the rotten and partially ruined ceiling timbers.<br />
In the center of the room lies the corpse of a man; it<br />
appears to be partially eaten. This man wore ochrecolored<br />
robes now shredded and smeared in dried blood.<br />
A heavy mace has been set atop the body. In the northwest<br />
corner lies the corpse of a woman wearing black,<br />
studded leather armor, with a sword and a bow.
CHAPTER 2: THE MOATHOUSE<br />
The body in the northwest corner was a rogue. The other<br />
was once the excavation’s leader, a 6th-level cleric named<br />
Master Thaque.<br />
Creatures: This is the lair of Utreshimon, a young blue<br />
dragon. He has not yet accumulated much treasure, but he<br />
does have what remains on his two most recent victims.<br />
Utreshimon is cruel and mischievous. He loves that he has<br />
all the inhabitants in the dungeon below trapped, and<br />
laughs about it to himself frequently. He knows about the<br />
secret entrance to the black chamber (see area 7), and so he<br />
made his lair here, successfully blocking both entrances<br />
into the dungeon.<br />
dUtreshimon: Young blue dragon; hp 102; see<br />
Appendix 3.<br />
Tactics: At first, Utreshimon is overconfident and fights<br />
intruders with straightforward ferocity. He attacks immediately,<br />
preferably while his enemies are still in the courtyard. If<br />
possible, Utreshimon hovers near a cluster of them, filling the<br />
debris-filled courtyard with dust that blinds the whole party<br />
and makes spellcasting difficult. Because the blinding effect<br />
lasts for 1 round after the hovering ends, Utreshimon has<br />
enough time to move around from opponent to opponent<br />
while keeping the party sightless. If hurt, he flies up to the<br />
top of the tower and uses his breath weapon against enemies<br />
in the courtyard.<br />
Utreshimon is very protective of his lair and won’t allow<br />
anyone inside. He particularly wants to continue blocking<br />
off the entrance to the dungeon. If the attackers retreat, the<br />
dragon does not follow. He is not hungry, and he does not<br />
wish to let the trapped clerics escape.<br />
Treasure: The corpse of the rogue wears masterwork<br />
studded leather armor (dyed black) and bears a longsword,<br />
a +1 shortbow, 12 arrows, 13 gp, and 3 100-gp gems (jade).<br />
Around her neck dangles a black iron triangle with an<br />
upside-down yellow Y inscribed within (the symbol of the<br />
Elder Elemental Eye).<br />
The dead cleric in the middle of the room wears chainmail,<br />
and bears a +1 heavy mace, a scroll of cure light wounds,<br />
24 gp, and a lilac-colored stone mask worth 200 gp (from<br />
the excavation in area 32). He also wears a symbol of the<br />
Elder Elemental Eye.<br />
7. Black Chamber<br />
The door leading into this room is battered and broken,<br />
and was obviously once barred. Tattered and torn eboncolored<br />
hangings cover the walls, while the floor is littered<br />
with the debris of smashed furniture. A broken<br />
shield, a weapon haft, and a skull or two lie amid the<br />
wreckage. The southeast corner of the room has collapsed,<br />
but heavy stone pieces from the collapse have<br />
been repositioned to block easy egress.<br />
This was the site of a battle long ago.<br />
The secret door leads to the hidden passageway leading<br />
from the large room in the dungeon (see area 24). It’s hard to<br />
locate (Search DC 25).<br />
Treasure: Amid the wreckage, searchers can find a useable<br />
longsword, a gold chain worth 200 gp, 34 gp, and 3 pp<br />
(Search DC 22).<br />
8. Stairway Up<br />
Halfway up, these stairs are completely choked with<br />
rubble from the collapse of the upper story.<br />
21
CHAPTER 2: THE MOATHOUSE<br />
22<br />
9. Littered Room<br />
Rat droppings, half a shattered wooden table, and an<br />
empty wooden wall case are all that can be seen in this<br />
relatively bare chamber.<br />
10. Empty Bed Chamber<br />
The bed has been hacked to pieces, and a large dead rat<br />
festers amid the wreckage. A ripped portion of ochre-colored<br />
cloth hangs from a nail in the doorway.<br />
11. Salon<br />
A few bats flutter about the room. It is filled with wreckage,<br />
but the bits of furniture and tapestry that remain<br />
appear to have once been very fine indeed.<br />
12. Gray Ooze (EL 4)<br />
The southeast corner of the room has collapsed entirely. It<br />
is now nothing more than a pile of rubble within an<br />
opening to the outside—directly out into the moat, judging<br />
by the sound of running water. The room is damp and<br />
otherwise completely empty.<br />
Creatures: A gray ooze has wandered into this room, seeping<br />
up from the riverbed. It hides among the damp rocks<br />
(Spot DC 17) and attacks anything that comes close, but<br />
otherwise remains unseen.<br />
dGray Ooze: hp 26; see Monster Manual page 145.<br />
13. Stairway to Dungeon<br />
A few shelves still cling to the walls here, but they are<br />
empty. This odd, narrow room lies at the top of a set of<br />
stone steps descending to an area beneath the moathouse.<br />
14. Empty Trophy Room<br />
Amid the wrecked and splintered wooden furniture here<br />
lie a few mangy pelts, the stuffed heads of a boar and a<br />
bear, and some broken antlers.<br />
15. Empty Room<br />
This room contains only blackened, charred bits of wood<br />
and stone, suggesting a fire long ago.<br />
16. Deserted Kitchen<br />
A wooden worktable still stands in this room, and a few<br />
wooden cupboards hang on the walls. A shattered cask<br />
lies near the blackened stones of a fireplace. A rusted<br />
cleaver lies on the floor.<br />
17. Collapsed Chamber<br />
The ceiling in this chamber has completely collapsed. If<br />
there was anything underneath, it is now smashed and<br />
well buried.<br />
Rooting through the rubble here (Search DC 20) can uncover<br />
the grand reward of 33 cp, a suit of scale mail, a light crossbow,<br />
and 24 crossbow bolts.<br />
MOATHOUSE DUNGEON<br />
All rooms and hallways have 12-foot ceilings unless otherwise<br />
noted. The walls are masonry stone and the doors are<br />
wooden, both identical to those above ground. Unless<br />
otherwise noted, the dungeon is dark, for the clerics carry<br />
their light with them.<br />
18. Gnoll Guards (EL 2)<br />
The narrow stairs drop to a landing, then turn and continue<br />
down. They end after about twenty steps, having<br />
descended into a dank and cool area with masonry walls.<br />
Black, wet slime collects between the stones, making<br />
most surfaces slightly slick.<br />
Creatures: Unless the PCs successfully move silently<br />
down the stairs, two gnolls (Listen +3) lunge out from<br />
around either side of the stair and attack with surprise. If<br />
the gnolls did not hear the party, they loiter in the western<br />
portion of the room.<br />
The gnolls wear black scale armor and black capes. Each<br />
also has a small medallion bearing the symbol of the Elder<br />
Elemental Eye and a pouch with 2d10 gp.<br />
dGnolls (2): hp 10, 11; see Monster Manual page 105.<br />
19. Old Storeroom<br />
This room is filled with clutter, having been thoroughly<br />
ransacked. Broken barrels, splintered wood, and scraps of<br />
leather lie everywhere.<br />
Three large wooden shields in moderate condition, as well as<br />
a single suit of leather armor, are scattered among the debris.<br />
20. Old Armory<br />
The remains of broken and splintered wood and a few<br />
torn black rags litter this small room. Water drips from<br />
the ceiling and collects in puddles among the uneven<br />
stones of the floor.<br />
The room has lots of trash and debris, much of it burned, but<br />
amid the clutter lie seven spears, nine glaives, and a single<br />
black cape with a yellow eye of fire sewn into it.<br />
Creatures: Spugnoir the potion seller hides here (see<br />
Chapter 1: The Town of Hommlet). He is currently out of<br />
prepared spells except for a single magic missile, having<br />
attempted to take on the dragon alone two days previous<br />
and lost. He is down to only 16 hp out of 30, but he’s quick<br />
to try to defend himself. He knows that clerics of some<br />
strange cult are around here, and that they have uncovered<br />
a hidden chamber underneath the dungeon. He can tell<br />
the PCs about the secret door in area 24. He also knows of the<br />
secret entrance outside that leads to area 36. However, he<br />
never explored the connecting rooms much because some<br />
dreadful creatures lair there.<br />
If the PCs are kind to him (Diplomacy DC 13, automatic<br />
success if they provide any healing), Spugnoir accompanies<br />
them for a while in the dungeon and takes them to
CHAPTER 2: THE MOATHOUSE<br />
the entrance to the new chamber (see area 32). He also<br />
offers a 30% discount on arcane potions back at his shop in<br />
Hommlet. If they are not particularly kind to him, he<br />
returns to Hommlet alone (assuming the dragon is dead or<br />
gone), with no wish to return.<br />
21. Prison (EL 3)<br />
Littered with bones, broken stonework, and bits of rusty<br />
metal, this area appears to have at one time been the real<br />
crux of the dungeon. Cell doors—some hanging open,<br />
some closed—line the west wall. Wide pillars stretch<br />
from floor to ceiling, with manacles dangling from<br />
them. You see a small wooden door in the north portion<br />
of the room and an archway in the eastern wall. A foul<br />
smell hangs in the air here.<br />
Creatures: A ghast hides behind one of the pillars (Hide<br />
+10) waiting to leap out and attack as soon as possible. The<br />
stench of the undead horror might tip off wary adventurers,<br />
but most likely they’ll think its just the dungeon’s smell.<br />
Spawned by the utter corruption inherent in the obelisk’s<br />
power (see area 32C), this creature obeys all commands from<br />
clerics of the Elder Elemental Eye, recognizing Tharizdun’s<br />
authority within them. It in turn commands any ghouls<br />
found in the dungeon.<br />
dGhast: hp 25; see Monster Manual page 97.<br />
Treasure: The cells hold nothing, and the debris and<br />
bones on the floor are quite old.<br />
22. Torture Chamber (EL 3)<br />
You see ruined devices of torture—a rack, an iron<br />
maiden, a brazier surrounded by discarded irons. The<br />
whole place is covered in cobwebs and dust.<br />
Inside a pillar is a well-hidden secret shaft (Search DC<br />
25). The passage drops some 30 feet and has iron rungs set<br />
into the stonework for easy descent (Climb DC 0). From<br />
there, a narrow tunnel leads to a hidden entrance into<br />
area 33.<br />
Creatures: Three ghouls wait here, waiting for the ghast’s<br />
orders. They move to attack if they hear sounds of combat or<br />
the horrid shriek of the ghast from area 21. Otherwise, they<br />
attack any living creature that comes into the room, other<br />
than a cleric of the Elder Elemental Eye.<br />
dGhouls (3): hp 10, 13, 14; see Monster Manual page 97.<br />
Treasure: One of the ghouls wears a gold ring worth 25 gp.<br />
23. Empty Room<br />
Debris and trash cover this room as well. There’s not<br />
much else here other than a wooden door on the east<br />
wall.<br />
A successful Search (DC 18) reveals a path through the debris<br />
made by recent traffic.<br />
24. Excavated Relics (EL 4)<br />
This large room is mostly empty. In fact, it appears to have<br />
been swept clean. Some strange items lie on a white blanket<br />
spread out on the floor. Not far away, a lantern rests on<br />
the floor, lighting the room. A single door is in the south<br />
wall near where you came in.<br />
Creatures: Gren, a cleric of the Elder Elemental Eye, waits<br />
here with two black-caped gnoll bodyguards. Her job is to<br />
watch over this collection of relics uncovered in the cavern<br />
below (see area 32). The importance of these objects has been<br />
impressed upon her, and she has sworn to defend them with<br />
her life if need be.<br />
dGren: Female human Clr2; hp 18; see Appendix 3.<br />
dGnolls (2): hp 10, 12; 2d10 gp; see Monster Manual<br />
page 105.<br />
Tactics: Gren’s most likely first move is to open the door<br />
into area 25 and command the skeletons there to attack.<br />
Although she fights to the death, the gnolls are not beyond<br />
trying to use the secret door to escape if events turn bad<br />
for them.<br />
Treasure: Laid out carefully on the white blanket are the<br />
following items:<br />
• An iron torch and three black cones.<br />
• A black scepter with violet gems.<br />
• A small black sphere.<br />
• A black metal tube.<br />
The torch is a torch of revealing, and the cones are its fuel (see<br />
Appendix 1). The scepter is nonmagical but is worth 1,000 gp.<br />
The sphere is a bead of force. The tube holds a worm-ridden<br />
scroll covered with unfamiliar writing, and only a comprehend<br />
languages spell can decipher it. The scroll provides information<br />
for accessing an extraplanar node of utter darkness<br />
called the Black Cyst. This ritual requires multiple wish spells,<br />
living sacrifices, and all manner of other grisly components,<br />
as well as years of work.<br />
This is a foreshadowing of what the PCs find in Chapter 6:<br />
The Inner and Outer Fanes.<br />
25. Skeletons! (EL 3)<br />
Beyond the heavy oak door lies a smaller chamber containing<br />
little other than dust and cobwebs. The north<br />
wall bears a scrawled carving in Common: “Death to<br />
all ogres.”<br />
Creatures: The skeletons of six humans and a single massive<br />
ogre here await the commands of the clerics who animated<br />
them. They attack anyone not wearing the triangle<br />
symbol of the Elder Elemental Eye. The human skeletons are<br />
still wearing tattered leather armor—one also wears an old<br />
black cloak with a flaming eye symbol.<br />
dMedium-Size Skeletons (6): hp 4, 5, 6, 6, 9, 10; see<br />
Monster Manual page 165.<br />
dLarge Skeleton: hp 22; see Monster Manual page 165.<br />
26. Portcullis<br />
An iron portcullis sits flush with the ceiling in the middle of<br />
this northwest–southeast hallway. Anyone making a successful<br />
Search (DC 20) finds it. A character standing under the<br />
portcullis when it drops (see area 27) must succeed at a<br />
Reflex save (DC 15) or take 4d6 points of piercing damage.<br />
The character is pinned and must make a successful Escape<br />
Artist or Strength check (DC 27) to get free.<br />
sPortcullis: 2 in. thick; hardness 10; hp 60; AC 4; lift<br />
DC 27.<br />
23
CHAPTER 2: THE MOATHOUSE<br />
24<br />
26A. Secret Winch<br />
A winch behind the secret door raises the portcullis once<br />
dropped (see area 27).<br />
27. Trap (EL 1)<br />
The middle of the three doors here is false and causes the<br />
portcullis in area 26 to fall if opened. All the current<br />
inhabitants know about this trap as well as the winch in<br />
area 26A that raises the portcullis. In fact, if they know<br />
powerful intruders are on their way, they trigger the trap<br />
intentionally.<br />
aPortcullis Trap: CR 1; no attack roll required (drops<br />
portcullis in area 26); Search (DC 20); Disable Device<br />
(DC 20).<br />
8. Gnoll Lair (EL 5)<br />
This strangely shaped room has six very old-looking beds<br />
made of wood and padded with mattresses of straw.<br />
Clothes, armor pieces, and weapons lie about the floor<br />
mixed with bones, fruit rinds, and other waste. It has the<br />
smell of wet fur.<br />
Creatures: Six gnolls rest here. Whether asleep or relaxing,<br />
they are not particularly attentive. Assume that the<br />
gnolls suffer a –10 penalty on Listen checks for their inattention.<br />
For example, if the PCs talk and make a lot of noise<br />
in the middle of area 27, just to the south, the DC for the<br />
Listen check would be 5 (0 base, +5 for distance). Since<br />
gnolls have Listen +3, they would get a result of 3 (average<br />
roll of 10–10+3), which would not be enough to detect the<br />
party’s approach.<br />
If surprised in this lair, three of the gnolls are asleep and<br />
not wearing armor (and are AC 11). They are not ready to<br />
fight on the first round of combat. The other three are<br />
armored and attempt to fight off intruders while their companions<br />
awaken.<br />
dGnolls (6): hp 9, 10, 11, 11, 12, 14; 2d10 gp; see Monster<br />
Manual page 105.<br />
Development: If the dragon in area 6 is slain, and they get<br />
the chance, four of the gnolls here occupy the great hall in<br />
the upper moathouse. The two that remain here remain ready<br />
for battle and alert.<br />
If the clerics are able to leave, the gnolls go with them.<br />
29. Gnoll Leader (EL 3)<br />
Odd in shape, this chamber’s walls are stained and scored<br />
with signs of fire long ago. A wooden bed with a mattress<br />
of straw is against the western wall, and a small iron box<br />
sits next to it. On top of the box is a pipe and some<br />
tobacco, a whetstone, and a stoneware cup full of some<br />
dark liquid.<br />
The liquid in the cup is very old, cold coffee. Inside the box,<br />
which is not locked, are a few bits of clothing and some personal<br />
gear (nothing of value). Tucked in the northernmost<br />
portion of the room is a black cloak with a flaming eye<br />
symbol, fairly dirty but otherwise in good shape.<br />
Creatures: The leader of the gnolls dwells here, a ranger<br />
whose favored enemy is humans. This gnoll is practically<br />
without fear. He’s willing to take on an entire group of foes,<br />
although he gladly accepts the aid of his troops (see area 28)<br />
or the clerics, should it come.<br />
dGarrik: Gnoll Rgr2; hp 28; see Appendix 3.<br />
Development: If the gnoll leader learns that intruders are<br />
in the moathouse, he joins the gnolls in area 28 and moves to<br />
defend the clerics. If the clerics leave, he and the remaining<br />
gnolls go with them.<br />
30. Clerics’ Quarters (EL 2)<br />
Six old wooden beds with straw mattresses are arranged<br />
haphazardly in this room. Each has a bag or satchel of a<br />
different sort next to it, and a small iron box rests upon<br />
one bed. A stand with a brazier, currently unlit, and<br />
another with a lantern, also unlit, are against the middle<br />
portions of the east and west walls.<br />
This is the room where the clerics have been staying during<br />
their excavation.<br />
Trap: The box is locked (Open Lock DC 20) and trapped<br />
with a glyph of warding activated when it is opened without<br />
saying “Praise the Elder Elemental Eye.” The cleric Geynor<br />
Ton (see area 32A) has the key.<br />
aGlyph of Warding: CR2; 5-ft. acid spray (3d8); Reflex save<br />
DC 15 half; Disable Device (DC 28).<br />
Treasure: The box contains potions of cure light wounds<br />
and water breathing, scrolls of animal messenger and stone<br />
shape, six tindertwigs, and a curved ceremonial dagger<br />
with gold inlay (worth 50 gp). In addition, a sheaf of<br />
papers lies within that serves as Geynor Ton’s personal<br />
journal. When the PCs discover this, show them Handout<br />
1: Journal of Geynor Ton. Feel free to photocopy this sheet<br />
ahead of time.<br />
Development: If the clerics leave, they take everything<br />
with them but the beds—and those they push into area 29.<br />
31. Ambush (EL 3)<br />
The stairs here go down into darkness, from which a foul<br />
stench arises.<br />
Creatures: A ghast waits in ambush on the stairs.<br />
Spawned by the utter corruption inherent in the obelisk’s<br />
power (see area 32C), this creature obeys all clerics of the<br />
Elder Elemental Eye.<br />
dGhast: hp 30; see Monster Manual page 97.<br />
Development: The clerics in area 32C hear the sounds of<br />
combat here (unless a silence spell covers the battle or the<br />
PCs otherwise deal with the ghast quietly) and arrive to help<br />
in 2 rounds.<br />
32. Excavation Site<br />
This complex area requires the side view diagram (Map 5)<br />
to understand.<br />
32A. Old Well Room (EL 4)<br />
This place is very cold, and even the most insensitive can<br />
tell that the unnatural chill is a corruption in the air. A<br />
wide pit in the center dominates the room, its sides slick<br />
with moisture. A pulley has been affixed to the ceiling,<br />
and a rope descends from it, connected to four more<br />
ropes. These in turn are tied to the edge of a 10-foot-wide<br />
wooden platform, circular in shape, in four different<br />
places to provide stability. A lantern sitting atop a stool in
CHAPTER 2: THE MOATHOUSE<br />
the southwestern corner illuminates the chamber. Scattered<br />
about the pit edge are picks and shovels, and a<br />
strange statue rests in the corner farthest from the<br />
entrance. Against the north wall stands a large, round, flat<br />
stone about the diameter of the pit.<br />
The platform, rope, and pulley all look new.<br />
Creatures: Two clerics work in this room studying the<br />
statue, which was brought up recently from below. One is a<br />
human, Geynor Ton. The other is a troglodyte named<br />
Ysslansh.<br />
Ysslansh is the leader of the clerics stationed at the<br />
moathouse now that Festrath (see area 32E) has become<br />
irretrievably insane. The troglodyte is ruthless and utterly<br />
evil, with no concern for the welfare of the humans or<br />
gnolls in his command. All the human clerics hate him<br />
and resent his power.<br />
dGeynor Ton: Male human Clr2; hp 16; see Appendix 3.<br />
dYsslansh: Male troglodyte Clr2; hp 28; see Appendix 3.<br />
Tactics: If the clerics hear a fight with the ghast in area 31,<br />
they move to investigate, arriving in 2 rounds.<br />
Statue: This is actually a rectangular block 3 feet high and<br />
2 feet on a side. Each side has a distinct figure carved into it.<br />
The first is jet black and depicts a tall, muscular man in full<br />
plate with unfamiliar flanges and fluting. He wears a cape<br />
and holds a wavy-bladed sword.<br />
The second side is dark green, carved into a man swathed in<br />
a flowing robe with long sleeves and a high collar. Covering<br />
the face is a mask resembling the one that the dead Master<br />
Thaque possessed (see area 6).<br />
The third side is deep blood red and depicts a man in high<br />
boots, a doublet, and gauntlets of twisting design. A hood<br />
drawn tight around the face covers his head.<br />
The fourth side is a statue of a man colored deep indigo. The<br />
figure is clothed in a many-pleated robe with a sash covered in<br />
strange sigils (impossible to decipher). His head is cowled and<br />
he cradles a scepter in his folded arms.<br />
Platform: The platform can be easily raised or lowered by<br />
someone either beside the shaft or on the platform itself. At<br />
any point, as a full-round action, the operator can tie off the<br />
rope to the platform so that it no longer moves down. Using<br />
the pulley, a character can lift or lower twice the amount he<br />
or she could normally drag. Six Medium-size characters<br />
easily fit on the platform; ten can crowd aboard if necessary.<br />
The rope-and-platform assembly breaks if more than 2,000<br />
pounds are placed on it.<br />
If the rope is released, the platform falls along with everything<br />
on it. Characters aboard the platform can attempt<br />
Reflex saves (DC 20) to grab the rope. If successful, the character<br />
must succeed at a Strength check (DC 15, +1/100<br />
pounds of load) to stop the platform. Failure, in addition to<br />
the normal damage from falling, inflicts severe rope burn<br />
that deals 1 point of subdual damage.<br />
Characters taking violent or reckless actions on the platform<br />
must succeed at a Balance check (DC 13) to stay on.<br />
Those who fall can attempt to grab hold of the edge by<br />
making Reflex saves (DC 20).<br />
Development: If the clerics are able to leave, they reseal<br />
the shaft. They insert the round, flat stone about 15 feet down<br />
and then use the potion of water breathing and the scroll of<br />
stone shape (both in the iron box in area 30) to seal it. The shaft<br />
fills up with water again, forming a pool, and the room<br />
returns to “normal.”<br />
The clerics take the statue with them when they leave and<br />
abandon the wooden platform (but not the rope), which they<br />
stand on end against the north wall.<br />
32B. Shaft<br />
Roughly 15 feet from the top of the shaft, indications<br />
exist that a stone plug was once placed here, then carefully<br />
mortared and sealed. Just above that point, a 4-<br />
foot-wide tunnel carrying an underground stream empties<br />
into the shaft, the water spilling down into the<br />
darkness below. A 2-foot-wide opening is visible just<br />
below the top of the shaft.<br />
Once, when the seal was intact, the water filled the shaft up<br />
to the top and formed a pool. Excess water drained out<br />
through the opening just below the top of the shaft and into a<br />
pipe that returned it to the underground stream.<br />
32C. Ancient Obelisk (EL 5)<br />
Use this description as the PCs descend the shaft.<br />
The water pouring down beside the descending platform<br />
creates a mist below, deepening the chill that you feel as<br />
you go deeper. Through that mist, you can see that the<br />
floor below is just over 60 feet from the top of the shaft. It<br />
appears very smooth and black, with veins of deep violet.<br />
The shaft walls spread out into the darkness, opening<br />
onto a vast cavern.<br />
The whole area below the shaft is unholy, as the result of<br />
an unhallow spell. The site has a permanent protection from<br />
good effect, and the unholy aura confers a –4 profane<br />
penalty on turn undead attempts (+4 to rebuke undead).<br />
The ancient unhallow spell no longer has any other effects<br />
attached to it.<br />
The unnatural cold intensifies as depth increases: By<br />
the time characters descend to the “floor” (which in fact is<br />
the top of the obelisk), it is so cold that they risk hypothermia.<br />
They must make Fortitude saves (DC 15, +1 for<br />
every previous check) every 10 minutes or suffer 1d6<br />
points of subdual damage. Characters wearing warm,<br />
winter clothing need only make checks once per hour. A<br />
character rendered unconscious then takes normal damage<br />
from the cold. Those who take any subdual damage from<br />
the cold become fatigued, suffering a –2 penalty to<br />
Strength and Dexterity, and cannot run or charge. Subdual<br />
damage and fatigue penalties go away when the character<br />
is removed from the cold.<br />
Once the characters reach the top of the obelisk, use the<br />
following descriptive text:<br />
The floor resembles black marble but has no luster,<br />
while the veins of purple are thick and jagged. The<br />
entire surface appears to be slightly convex, with sides<br />
lower than the center. Stranger still, the floor does not<br />
extend to the cave walls around it, as though it were<br />
merely a large platform itself. It is about 30 feet<br />
across—the cave is much larger than that in every<br />
direction. Beyond the floor edge, the cave walls plummet<br />
farther down into darkness. At the western rim of<br />
25
CHAPTER 2: THE MOATHOUSE<br />
the black floor, another circular wooden platform hangs<br />
suspended over the darkness, with another rope and<br />
pulley system pounded into the rock above it.<br />
Obelisk (EL 3): The obelisk is dangerous to touch. It feels<br />
exceedingly cold, and as soon as a living being comes into<br />
contact with it, even while wearing boots or gloves, the veins<br />
begin to writhe like tentacles and move toward that figure.<br />
After 1 round, the veins reach the character, who must succeed<br />
at a Fortitude save (DC 22) or suffer 1d6 points of temporary<br />
Strength damage. The character must make a save<br />
every round he continues to touch the obelisk. Victims who<br />
lose all their Strength are pulled down into the obelisk by the<br />
veins, their soul forever destroyed. As the clerics discovered,<br />
it is possible to lower oneself down by the first platform,<br />
scurry quickly across the top of the obelisk, and get to the<br />
other platform without incurring any adverse effects.<br />
Creature (EL 4): Hiding in the dark roof of the cave is a<br />
grell, a horrible creature resembling a floating brain with<br />
tentacles. It was summoned earlier by the cleric Festrath<br />
using the extraplanar archway (area 32G). The grell quietly<br />
lowers itself over a party descending to the bottom of the<br />
cave and attacks a single, random foe. It can attack with<br />
only one tentacle on the first round because it cannot both<br />
move and make a full attack. If it can paralyze and grab hold<br />
of the victim with two tentacles, it flies away with its prey<br />
the next round.<br />
dGrell: hp 23 of 32; wounded (see Appendix 1).<br />
Ad Hoc XP Adjustment: Due to the difficult situation<br />
provided (a hidden and ready opponent versus unprepared<br />
PCs), this encounter should award 120% of the normal XP.<br />
32D. Obex<br />
On what appears to be the true bottom of the colossal<br />
cavern, the stone is worked and smooth. Two symbols are<br />
carved into the floor on the western side of the cave: a twotiered,<br />
inverted ziggurat, black in color, and a flaming sun,<br />
also jet black. Rising from the middle of the cave, a pillar<br />
supports the black-and-violet mass of the enormous<br />
obelisk on whose surface you recently stood. On the<br />
other side of the cave, water spilling from above collects<br />
into a pool.<br />
The upside-down pyramid is a symbol of Tharizdun, called<br />
an obex. Standing on the obex is safe (although it creates an<br />
unsettling feeling in any creature that does not worship<br />
the Dark God), unless the character speaks the name of<br />
Tharizdun. If this happens, he is instantly reduced to –1 hp<br />
(no save) and rendered unconscious and dying (Heal DC<br />
22 to stabilize).<br />
While unconscious, the character has an evil vision: a<br />
man formed of darkness that is hazy and insubstantial.<br />
Each round in which the character is not stabilized, he<br />
loses 1 additional hit point while seeing and experiencing<br />
something new:<br />
–2 hp: The dark form moves close.<br />
–3 hp: The dark form says, “Your soul is now at the very edge<br />
of my prison.”<br />
–4 hp: The dark form says, “Do you seek to free me?”<br />
–5 hp: If the character says “Yes,” he is restored to full hit<br />
points and consciousness, and finds a curved +1 dagger at<br />
his feet, engraved with his name. If he says anything else,<br />
or nothing at all, he continues to lose hit points.<br />
–6 hp: The dark form says, “Do you seek to free me?”<br />
–7 hp: If the character says “Yes,” he is restored to full hit<br />
points and consciousness. If he says anything else, or nothing<br />
at all, he continues to lose hit points.<br />
–8 hp: The dark form says, “It does not matter what you seek.<br />
I am all. You are nothing.”<br />
–9 hp: The dark form says, “You serve me now, whether you<br />
wish it or not.” The character is restored to full hit points<br />
and consciousness but is cursed by the Dark God. He<br />
now suffers a –2 penalty on saving throws to resist spells<br />
cast by clerics of Tharizdun or the Elder Elemental Eye.<br />
This curse cannot be removed with anything less than a<br />
wish or miracle.<br />
32E. Black Sun (EL 5)<br />
This symbol seems an evil perversion of some otherwise<br />
good sign of light and life.<br />
The strange symbol radiates insanity and mental disharmony.<br />
Even those nearby or looking at it from afar are disturbed and<br />
on edge. Anyone standing within its circle for more than 1<br />
round must succeed at a Will saving throw (DC 15) or suffer<br />
1d6 points of temporary Wisdom damage. The character must<br />
make a save every round she continues to touch the symbol.<br />
Creatures: Festrath, a cleric of Tharizdun who is now<br />
completely insane, is hidden among the rocks at the cavern’s<br />
edge near the black sun. When Master Thaque was killed by<br />
the dragon (see area 6), Festrath was next in the chain of command.<br />
However, he was already close to madness from<br />
spending time in the chamber and foolishly experimenting<br />
with the black sun. He has since lost what remained of his<br />
mind, although being wrapped in a winter cloak, he has managed<br />
to stave off the effects of the cold for the most part. (His<br />
statistics have already been modified to reflect subdual<br />
damage and fatigue penalties.)<br />
From his vantage point, the mad Festrath watches what the<br />
party does, waiting for an opportune time to attack. He is<br />
afraid of the grell, and avoids letting the creature know<br />
where he is. (Festrath was attacked by the grell when he summoned<br />
it, wounding it and driving it off temporarily so that<br />
he could hide.) Once he has committed to the attack, he does<br />
not hesitate to use his potion of fly to get at enemies on a platform<br />
or the pillar, or just to attack from above. He laughs and<br />
howls maniacally all the while.<br />
Festrath carries a piece of paper that bears this message:<br />
“The Water Temple will soon make its move against the<br />
forces of Fire. Return quickly, Festrath, for we need your aid.<br />
Together, we shall win the favor of the doomdreamers and<br />
the Triad itself.”<br />
dFestrath: Male human Clr5; hp 24 of 32; wounded; see<br />
Appendix 3.<br />
32F. Pillar<br />
Impossible though it seems, the huge obelisk comes to a<br />
very narrow point that is balanced atop this 30-foot-high<br />
pillar. The pillar has been carved from the rock itself and<br />
appears to be quite solid. Iron rungs, mostly free of corrosion,<br />
have been hammered into it, allowing anyone to<br />
climb to the point where pillar meets obelisk.<br />
27
CHAPTER 2: THE MOATHOUSE<br />
28<br />
The pinpoint tip of the obelisk, if viewed in the light of a<br />
torch of revealing (see Appendix 1), is actually a purple-colored<br />
gem of unknown make. Touching the gem teleports a character<br />
(and all her gear, but not the torch) into a perfectly<br />
spherical room of black walls with purple veins. No light is<br />
present, but even characters without darkvision find that<br />
they can “see” within the darkness here. Immediately upon<br />
arrival, the character hears a voice boom in a low, hollow<br />
voice: “Seek the heart of each of the four moons. Together,<br />
they can sunder the walls of my prison. For now, eat of my<br />
fruit and be blessed.”<br />
The mysterious voice is a message from Tharizdun to his<br />
faithful. It refers to the elemental nodes that can be used to<br />
fulfill the doomdreamers’ plans (see the Introduction as well<br />
as Chapter 8: The Fire Node).<br />
After the voice speaks, a lustrous black fruit suddenly<br />
appears in the character’s hands. Each character who enters<br />
the chamber and eats the fruit gains a permanent +1 inherent<br />
bonus to a random ability score. Three rounds after the fruit<br />
appears, the character is transported to area 32B.<br />
Anyone who attempts to go through this process more<br />
than once, or who eats a fruit given to another, suffers 2<br />
points of permanent drain from a random ability score. A<br />
character who attempts to eat a third fruit in this manner<br />
must make a successful Fortitude save (DC 18) or be obliterated,<br />
leaving nothing but gray mist (only true resurrection can<br />
bring the character back). Even on a success, another 2 points<br />
of a random ability score are permanently drained. Attempting<br />
to eat a fourth fruit results in obliteration with no saving<br />
throw allowed.<br />
32G. Horrific Summons (EL variable)<br />
An archway is carved out of the stone in such a way that it<br />
seems to be nothing but a curved mass of writhing tentacles<br />
and serpents. Beyond the opening is a smooth,<br />
black wall.<br />
Creatures: Touching the wall beyond this apparent dead<br />
end is a huge mistake. As soon as it is touched, tentacles push<br />
through the blackness as if it were a curtain (although nothing<br />
from this side can reach through to the other). They<br />
belong to a grell—and one tentacle immediately attacks the<br />
character touching the wall.<br />
dGrell: hp 32; see Appendix 1.<br />
Tactics: Regardless of whether the initial attack is successful,<br />
the grell comes through the archway on the following<br />
round and attacks until it has paralyzed and<br />
grasped one character. Then, it flies upward to devour its<br />
victim in peace.<br />
Development: Grells come from some distant, horrible<br />
plane, to which the archway is a one-way gate. A new grell<br />
is summoned every time the blackness beyond the archway<br />
is touched.<br />
32H. Corrupted Pool (EL 5)<br />
The water that pours down from above, spattering across<br />
the top of the obelisk, finally collects in a pool at the<br />
bottom of the cavern. About 10 feet across and perhaps 2<br />
inches deep, it fills an imperfection in the floor’s otherwise<br />
smooth surface. The water runs in a rivulet across<br />
the floor through a large crack in the cave wall, disappearing<br />
into the earth.<br />
Merely touching this water, befouled by its contact with<br />
the obelisk, is deadly. The character must succeed at a<br />
Fortitude save (DC 15) or suffer initial and secondary<br />
damage of 2d6 temporary Constitution. Those drinking the<br />
corrupted water get no saving throw. Anyone slain by<br />
interaction with the water is immediately transformed into<br />
a ghast.<br />
33. Crypt (EL 4)<br />
Dismal and cold, this dusty, cobweb-filled chamber has all<br />
the trappings of a crypt. Sarcophagi are stored in dark,<br />
shadow-filled alcoves along the walls.<br />
This area is also unholy, as the result of an unhallow spell. The<br />
site has a permanent protection from good effect, and the<br />
unholy aura confers a –4 profane penalty on turn undead<br />
attempts (+4 to rebuke undead). The ancient spell no longer<br />
has any other effects attached to it.<br />
A secret door slides to one side within the tiny alcove to<br />
the north and opens into a cramped tunnel, only about 3 feet<br />
high and wide, that leads to the hollow column in area 22.<br />
The back of one crypt to the south is broken out and leads<br />
through a cramped earthen tunnel, thick with the reek of<br />
decay. The tunnel ceiling is barely 5 feet high.<br />
Creatures: Four ghouls dwell here, lurking among the<br />
crypts. Their hiding places are marked with dots on the map.<br />
They stagger out of the crypts one at a time, one per round.<br />
dGhouls (4): hp 10, 12, 13, 14; see Monster Manual page 97.<br />
Ad Hoc XP Adjustment: Because of the unholy aura in<br />
this place, and that they are hiding, these undead are more<br />
difficult to deal with than usual. This encounter should<br />
award 110% of the normal XP.<br />
34. Ghoul Caves<br />
The passage is rough, as if burrowed from the earth. The<br />
walls seem to close in, making the narrow tunnel seem<br />
even narrower. Bits of earth fall from the ceiling and walls<br />
as you pass by them. The place stinks of death.<br />
This warren of tunnels was clawed out over the ages by the<br />
ever-present ghouls and is filled with their leavings.<br />
34A. Undisturbed Secret Shrine (EL 5)<br />
This cave seems cut at strange angles, creating disturbing<br />
shadows and weird, seemingly impossible bends<br />
and curves. The stone is a cloudy purple color. Rising<br />
from floor to ceiling is a tall, four-sided column, natural<br />
but extensively carved so that each side sports a different<br />
graven image. Before the column is an altar made of<br />
dull, porous, slightly corroded black rock, sitting atop a<br />
1-foot-high platform of black stone speckled and<br />
streaked with violet. The room is cold—a soul-numbing<br />
chill that grips one’s very heart, as well as one’s sanity.<br />
It is a fact, rather than a mere judgment, that this is an<br />
evil place.
CHAPTER 2: THE MOATHOUSE<br />
The clerics of the Elder Elemental Eye never found this<br />
ancient shrine, a companion to the room with the obelisk.<br />
The ghouls know of it, but they are too stupid and singleminded<br />
to tell their masters.<br />
Four-Sided Column: This is similar to the statue<br />
found in area 32A but is three times the size. Each<br />
side has a small secret compartment that hides<br />
some important treasure.<br />
The first is jet black and depicts a<br />
tall, muscular man in full plate<br />
armor with unfamiliar flanges<br />
and fluting. He wears a cape<br />
and holds a wavy-bladed<br />
sword. The secret compartment<br />
contains a bead of force.<br />
The second side is dark<br />
green, carved into a man<br />
swathed in a flowing robe<br />
with long sleeves and a high<br />
collar. Covering the face is a<br />
mask resembling the one that<br />
the dead Master Thaque possessed<br />
(see area 6). The secret<br />
compartment holds a skincovered<br />
black drum.<br />
The third side is deep<br />
blood red and depicts a man<br />
in high boots, a doublet, and<br />
gauntlets of twisting design.<br />
A hood drawn tight around<br />
the face covers his head. The<br />
secret compartment has a<br />
set of silver chimes (worth<br />
200 gp).<br />
The fourth side is a statue<br />
of a man colored deep<br />
indigo. The figure is clothed<br />
in a many-pleated robe with<br />
a sash covered in strange sigils<br />
(impossible to decipher). His head is<br />
cowled and he cradles a scepter in his folded<br />
arms. In the compartment is a bronze brazier and<br />
three chunks of incense.<br />
Altar (EL 5): If the altar is touched by living flesh or struck<br />
with force, it begins to fade. In 3 rounds, its color transforms<br />
into translucent amethyst with a black, amorphous center.<br />
Anyone touching the altar further must succeed at a Fortitude<br />
save (DC 18) or be paralyzed for 1d4 hours.<br />
If the PCs search the four-sided column and discover the<br />
objects inside, they risk producing a different—and much<br />
more dangerous—effect. On beating the drum, ringing the<br />
chimes, and lighting the brazier, a glowing golden eye swims<br />
into view from the stone’s writhing center. All creatures<br />
viewing the eye must make Will saves (DC 20). Failure<br />
results in a random effect as described below.<br />
d% Result<br />
01–05 Death<br />
06–20 1d2 negative levels<br />
21–40 Insanity (as if permanently affected by confusion)<br />
41–60 1d3 permanent Wisdom drain<br />
61–80 2d6 temporary Strength damage<br />
81–100 1d6 temporary Constitution damage<br />
The altar’s greatest effect requires the presence of a tentacle<br />
rod (found in area 120 of the Crater Ridge Mines,<br />
area 19 of the Outer Fane, and Level 8 of the Inner Fane)<br />
when the eye appears. In this case, the altar becomes<br />
transparent heliotrope in color, the black mass at the<br />
center grows larger and shows swollen veins of purple,<br />
and the eye is a fiery red-orange. A tentacle comes<br />
out of the altar and grabs the nearest living creature,<br />
pulling it into the stone (+15 attack,<br />
+10 Strength bonus, treat as Large). A<br />
creature drawn into the altar is<br />
destroyed, while the stone returns to<br />
its black, opaque state. Atop the altar<br />
appears a single magic item wished<br />
for by those in the shrine, worth up<br />
to 50,000 gp (if multiple items are<br />
wished for, determine which one<br />
appears randomly).<br />
In the Fire Temple complex of the<br />
Crater Ridge Mines (see area 122 in<br />
Chapter 5) there resides the Book of<br />
the Dark Eye. This tome, which deals<br />
with worship of the Elder Elemental<br />
Eye, describes in detail the process of<br />
activating the altar.<br />
35. Wall of Stone<br />
Use this description only if a character<br />
examines the end of this dead-end<br />
passage very carefully.<br />
A wall of solid stone, clearly different<br />
from the masonry around it,<br />
forms the end of the passage. It<br />
seems somehow fused with the<br />
stone of the walls, as well as the<br />
floor and ceiling.<br />
This is the result of a wall of stone spell<br />
cast long ago. The clerics of the Elder Elemental<br />
Eye have no idea what’s on the other side, nor do they<br />
care, having discovered the black obelisk that they were<br />
sent to find.<br />
36. Secret Passage<br />
The stone passage heads east for some 40 feet before narrowing<br />
to a rough-hewn tunnel a mere 5 feet wide. It<br />
gradually slopes up as it continues eastward another 400<br />
yards, then opens into a small, natural cave. Hidden<br />
among boulders, the cave mouth lies by the riverbank<br />
about a quarter-mile east of the moathouse.<br />
The clerics of the Elder Elemental Eye do not know about<br />
this passage, but a few others do, including Spugnoir and<br />
Elmo (see Chapter 1: The Town of Hommlet).<br />
37. Cockatrice Lair (EL 5)<br />
This sour-smelling room contains three nests made of<br />
black cloth, river reeds, and bits of wood. Each nest is<br />
about 3 feet across. A stone just inside the southern<br />
29
CHAPTER 3: GHOST TOWN AND RUINED TEMPLE<br />
30<br />
entrance looks very much like half a gigantic rat, the<br />
other half smashed to bits around it.<br />
The stone is what remains of a dire rat, petrified by the<br />
cockatrices here.<br />
Creatures: Three cockatrices nest here, but only two are<br />
present. Vicious and foul-tempered, they immediately attack<br />
anyone they see, hissing and snarling.<br />
dCockatrices (2): hp 25, 30; see Monster Manual page 38.<br />
Treasure: Within each nest, a searcher can find a mostly<br />
intact black cloak with a gold eye of fire embroidered on the<br />
back, along with numerous scraps of others.<br />
38. Old Barracks (EL 3)<br />
Smashed wooden beds—at least a dozen—lie haphazardly<br />
about in this ruined chamber. A handaxe and the<br />
aged remains of the figure who wielded it, still clad in<br />
rusted half-plate armor, lie in the middle of the floor.<br />
The area to the south is likewise filled with debris, mostly<br />
from broken crates and casks. It was once a storage area.<br />
Creature: Another cockatrice wanders about this room<br />
poking about the ruins. It attacks immediately. It is so stupid<br />
that it does not come to the aid of its kin in area 37, even if it<br />
hears fighting.<br />
dCockatrice: hp 27; see Monster Manual page 38.<br />
Treasure: Searchers can locate twelve 100-gp gems, fallen<br />
between two loose stones on the floor along the west wall.<br />
39. Old Bedchamber<br />
This room obviously once was lavish in its appointment.<br />
Now, its once-fine wall hangings, soft chairs,<br />
thick rugs, and plush couch are all in tatters. A wooden<br />
table, a single chair, and a bed make up the rest of the<br />
room’s furnishings. Dust-covered, moth-eaten bedclothes<br />
lie in a heap next to the bed, whose mattress<br />
has been cut open and the stuffing scattered about. A<br />
skeleton clothed in tattered dark robes lies on the floor<br />
near the table.<br />
Most people who have been in this chamber believe that<br />
the skeleton is that of Lareth the Beautiful. That is exactly<br />
what they are meant to think. That dark cleric, who called<br />
himself the “New Master,” began fortifying the moathouse a<br />
few years ago when the Temple of Elemental Evil attempted<br />
to rise again. While Lareth was indeed slain by adventurers<br />
in this room, an even more powerful cleric of the Elder Elemental<br />
Eye, named Hedrack, raised him from the dead soon<br />
afterward and spirited him away. Now Lareth lives as a<br />
recluse in the nearby village of Nulb (see Chapter 3: Ghost<br />
Town and Ruined Temple).<br />
Characters with the Heal skill who examine the body and<br />
make a successful skill check (DC 15) notice that the remains<br />
bear marks of disease and no signs of violence (a plague<br />
victim’s body was substituted for Lareth’s). This is the only<br />
clue at this point that Lareth is alive.<br />
Treasure: A successful Search check (DC 15) uncovers a<br />
small spider medallion on the skeleton, as well as a wand of<br />
doom with 1 charge remaining. A successful Knowledge (religion)<br />
check (DC 15) identifies the spider symbol as one of<br />
Lolth, the demon goddess of drow and spiders.<br />
Chapter 3:<br />
GhOst TOwn<br />
and Ruined<br />
Temple<br />
Farther from Hommlet than the moathouse are the ruins of<br />
the Temple of Elemental Evil itself, and those of the hamlet<br />
nearby; these serve as interesting places to explore, although<br />
not integral to the adventure. The temple ruins become<br />
much more important later on.<br />
NULB<br />
Dark and disgusting, the deserted hamlet next to the<br />
Imeryds Run seems a direct counterpoint to lovely<br />
Hommlet. The structures are made of sod, mud bricks,<br />
crude logs, or used timber—probably taken from boats or<br />
other buildings. Many of them are collapsed. All are overgrown<br />
with vegetation, the woods swallowing up the<br />
filthy, foul place as if it never existed.<br />
Nulb was a disreputable settlement that grew along with<br />
the Temple of Elemental Evil. While not every villager was<br />
thoroughly evil, Nulb’s livelihood was. The village thrived<br />
on traffic to and from the temple, supplying needed goods<br />
and services. It was a nasty, unseemly business.<br />
With the second fall of the Temple of Elemental Evil,<br />
Nulb’s trade quickly dried up. Almost overnight, the populace<br />
left behind this ghost town of ramshackle buildings.<br />
No matter the time of year, it is always windy and overcast<br />
(01–50 on d%) or raining/sleeting (51–100) in the ruins of<br />
Nulb. The sun never seems to shine here.<br />
Nulb Random Encounters<br />
Wandering around Nulb can be very dangerous, as the evil of<br />
the community still hangs over the place like a shroud.<br />
Undead and other fearsome creatures are on the loose. Use<br />
the table below, checking once per hour spent in town. The<br />
Encounter Level (EL) listed is the average for the possible<br />
range of creatures encountered.<br />
d% Encounter Average EL<br />
01–60 None n/a<br />
61–70 1d4 shadows 5<br />
71–72 1d4+1 Large monstrous spiders 5<br />
73–77 3d6 dogs (feral packs) 4<br />
78–80 1d2 dire wolverines 5<br />
81–85 1d4+1 vargouilles 5<br />
86–90 1d2 wights 4<br />
91–95 Rast 5<br />
96–97 Wraith 5<br />
98–100 Scrag 5<br />
On the way to Nulb, use the random encounter table found<br />
at the beginning of Chapter 2: The Moathouse. For the area<br />
immediately around Nulb and the ruins, use the random<br />
encounter table given in The Ruined Temple, below.
CHAPTER 3: GHOST TOWN AND RUINED TEMPLE<br />
NULB KEY<br />
There’s not much left, but a few places are worth noting in<br />
the old hamlet.<br />
1. Waterside Hostel (EL 8)<br />
This is one of the more substantial buildings in Nulb.<br />
It has a foundation of fieldstone and walls of sawn<br />
timber.<br />
No signs mark this building, but the inside quickly reveals<br />
that it was a tavern and inn years ago. Dust-covered tables,<br />
some overturned, occupy the main room along with a<br />
number of wooden chairs and a bar. Shattered glass and<br />
splintered wood cover the ancient sawdust and straw on<br />
the floor.<br />
Those who examine the bar note that the temperature<br />
there is cooler than in the rest of the room. They seem to see<br />
things moving out of the corner of an eye but never get a<br />
glimpse of what it was. These conditions are side effects of<br />
the presence of a ghost in the tavern.<br />
Creatures: The ghost of Wat, an assassin who once<br />
worked as the barman here, lingers in the former inn. The<br />
only way to permanently destroy Wat is to burn down this<br />
accursed hostel, which was the site of many attacks, murders,<br />
and malevolent schemes. The evil of the place keeps<br />
him tied to the world of the living. Fortunately for any<br />
intruders, it is also the reason Wat cannot follow them out<br />
of the tavern.<br />
dWat: Ghost Rog5/Asn1; hp 39; see Appendix 3.<br />
Tactics: The assassin waits unseen and incorporeal while<br />
he studies a victim who enters the bar, then manifests behind<br />
that character to make a death attack using his ghost touch<br />
longsword. If he successfully slays his victim, he attacks other<br />
party members with his horrific appearance. Otherwise, he<br />
becomes ethereal once more, picks another target, and<br />
begins the process again.<br />
1A. Upstairs in the Hostel (EL 5)<br />
Six small rooms comprise the upstairs, one of which is still<br />
haunted by another evil presence. Five rooms are thoroughly<br />
ransacked and stripped, but the door to the sixth is locked<br />
(Open Lock DC 20).<br />
Dala cannot leave this room. If the door is closed, it locks<br />
automatically.<br />
dDala, Allip: hp 40; see Monster Manual page 16.<br />
Advanced as follows: +2 HD, +1 attack bonus, +1 all saves,<br />
+2 Listen, +2 Spot.<br />
Ad Hoc XP Adjustment: Dala was an experienced<br />
rogue in life, and in her tormented unlife she is even more<br />
formidable (reflected in her advanced statistics). This<br />
encounter should award 150% normal XP to reflect the<br />
increased difficulty.<br />
Treasure: Under a loose floorboard, Dala kept a potion of<br />
love and a pair of jeweled earrings (worth 700 gp). Hidden in<br />
the mattress are 87 gp.<br />
2. Old Herb Shop (EL 7)<br />
This dilapidated frame building appears to have been<br />
visited often when the community was still thriving. A<br />
sign still barely clings to the outside, the lettering all but<br />
faded, reading “Herbs.”<br />
This building consists of a front room, a storeroom behind it,<br />
and two small bedchambers behind that. One of the bedchambers<br />
is clearly in use, the other just as clearly is not. The<br />
whole place is an untidy mess, with much of the old herb<br />
shop accoutrements still lying about.<br />
Creatures: Lareth the Beautiful was once the self-styled<br />
New Master of the evil moathouse near Hommlet. He lives<br />
here alone and does not appreciate visitors.<br />
Years ago, Hedrack, then high priest of the Temple of Elemental<br />
Evil, raised Lareth and brought him to Nulb (see area<br />
39 in Chapter 2: The Moathouse). While Lareth recuperated<br />
in secret, the temple fell and the survivors fled; many were<br />
Inside this small room, a terrible gibbering sound<br />
accompanied by horrific, mind-wrenching howls can<br />
be heard. A small bed quakes and a chair, a nightstand,<br />
some pillows and various other objects spin wildly<br />
around the room of their own volition.<br />
Entering this room, filled as it is with flying objects, can be<br />
dangerous. Any creature within the room must make a<br />
Reflex save every round or be struck by an object for 1d4–1<br />
points of damage.<br />
Creatures: Inhabiting this room is an allip, which appears<br />
as a young woman gripped in the throes of utter madness.<br />
She gibbers and shrieks, flailing fruitlessly at anyone who<br />
comes near (she cannot physically harm material creatures).<br />
This tormented spirit is all that remains of Dala, who served<br />
in the tavern and operated as a thief. She was the lover of<br />
Dick Rentsch, the hostler, who died long ago—betrayed by<br />
Wat. Now the assassin’s ghost torments her by whispering<br />
terrible things and then fleeing.<br />
31
CHAPTER 3: GHOST TOWN AND RUINED TEMPLE<br />
32<br />
taken to the Temple of All-Consumption. Nulb died. Before<br />
he knew it, Lareth was alone and mostly forgotten by his<br />
former allies.<br />
Lareth is practically insane with anger and resentment.<br />
When he was killed, he suffered a terrible wound to his face<br />
(from the mace of a good-aligned cleric). Hedrack’s raise dead<br />
spell brought him back to life but did not repair the cosmetic<br />
damage. Now Lareth the Beautiful is anything but. Horribly<br />
disfigured, he has become a recluse, although his powers are<br />
greater than ever.<br />
Hedrack’s journal in the Temple of All-Consumption<br />
(see area 19 in the Outer Fane) refers to these facts and<br />
hints that Lareth is a risk, for he may know too much.<br />
Lareth does in fact know a great deal about the cult of<br />
Tharizdun, garnered from bits of information overheard in<br />
the temple and called forth in divinations that he has performed.<br />
Back in the day—like almost all the other clerics<br />
involved with the Temple of Elemental Evil—Lareth had<br />
no idea that he was actually working for the cult of Tharizdun.<br />
Now he does, and for a price, he is willing to give out<br />
this information.<br />
dLareth: Male human Clr7; hp 60; see Appendix 3.<br />
Development: What no one really knows or understands<br />
at this point (although they will by Part 3) is that Lareth is the<br />
prophesied Champion of Elemental Evil. He is still crucial to<br />
the Triad’s plans, and the cult of Tharizdun is coming to get<br />
him (resurrecting him again if necessary).<br />
3. Pirate Boat (EL 8)<br />
An old riverboat, run aground years ago, rests by the<br />
riverside. Although it’s mostly intact, the wooden<br />
planks that make up its hull are rotten—particularly<br />
the stern, which remains partially in the water. In<br />
fact, it appears that some damage has been done to<br />
that part of the hull, perhaps in the winter when the<br />
river freezes.<br />
The boat is sizeable, about 40 feet long and 10 feet wide.<br />
Because it is beached, the whole craft sits at an angle, pitching<br />
to the stern and starboard.<br />
The upper deck is unremarkable, with numerous “storage<br />
lockers” for supplies along the sides. These are mostly empty,<br />
though a few hold rotten or ruined food and equipment. The<br />
stern has a cabin 12 feet long and 10 feet wide. The rear 4 feet<br />
of this cabin is filled with water.<br />
Creatures: An ochre jelly and two wraiths inhabit the<br />
partially submerged cabin. The jelly lives in the water. The<br />
wraiths hide among broken crates and wrecked wooden<br />
furniture (Hide +11) until the jelly attacks. Through the<br />
judicious use of pain, the wraiths have been able to “train”<br />
the otherwise mindless jelly to attack anyone brandishing<br />
holy symbols (who can likely try to turn them) about 50% of<br />
the time.<br />
The wraiths appear as dark silhouettes of river pirates,<br />
hefting spectral weapons and wearing loose-fitting shirts<br />
and bandanas on their heads.<br />
dOchre Jelly: hp 63; see Monster Manual page 145.<br />
dWraiths (2): hp 30, 32; see Monster Manual page 185.<br />
Treasure: Under the water at the rear of the cabin is an<br />
iron lockbox (Search DC 15). It’s rusted shut, requiring a successful<br />
Strength check (DC 25) to pry it open. Inside is a<br />
pirate’s trove: 430 gp, 125 sp, and a black opal ring (worth<br />
6,000 gp).<br />
THE RUINED TEMPLE<br />
Even with its forces twice defeated, the remnants of the<br />
Temple of Elemental Evil remain a sinister and disturbing<br />
pockmark on the territory. The ruins are mostly quiet,<br />
although folk still tell stories of strange lights or creatures<br />
moving about the old place. A few people know that a<br />
band of marauding hobgoblins moved into the ruins<br />
about two years ago. The evil creatures have been driven<br />
out at least once before, but they enjoy using the terrible<br />
reputation of the place to their advantage, so they keep<br />
coming back.<br />
On the Way to the Temple<br />
Player characters might explore the temple at different<br />
points in this adventure.<br />
Stage 1: Early On<br />
If the PCs explore this area before moving on to the Temple<br />
of All-Consumption, it appears as little more than a ruined<br />
structure serving as a base for hobgoblins. There might be<br />
activity going on under the temple as the forces of Tharizdun<br />
hope to excavate the place, but there’s probably no way for<br />
the PCs to discover this yet.<br />
Stage 2: Finale<br />
Once the PCs have learned the truth behind the Triad’s plan<br />
through exploration of the Temple of All-Consumption, the<br />
heroes must return here to stop the dreadful ritual. If they<br />
haven’t previously killed the hobgoblins, those forces still<br />
occupy the temple, but the rest of what’s going on is detailed<br />
in Part 3: The Rebirth of Elemental Evil.<br />
Encounters Around the Temple<br />
The area around the old Temple of Elemental Evil is weedchoked<br />
scrub, full of gnarled trees and twisted vegetation. It<br />
is not uncommon to stumble on a skull or a skeleton of a<br />
humanoid creature amid this dark growth, for this is a place<br />
well accustomed to violence.<br />
A chance exists for hostile encounters in this dangerous<br />
area. Use the table below, checking once every 6 hours.<br />
d% Encounter Average EL<br />
01–60 None n/a<br />
61–63 2d6 Medium-size monstrous centipedes 4<br />
64–78 1d4+1 hobgoblins 2<br />
79–80 1d2+1 ogres 4<br />
81–83 Kella (see below) 9<br />
84–85 Dire boar 4<br />
86–90 Spies from Iuz (see below) 5<br />
91–100 Cleric of the Elder Elemental Eye 4<br />
Encounter Table Notes<br />
Kella is a good-aligned druid who watches over and protects<br />
the woodlands in the area and is an enemy of the hobgoblins.<br />
She does not know anything about cult activity in<br />
the area, but she can provide a fair amount of detailed<br />
information about the hobgoblins. Kella is not interested<br />
in joining an adventuring group at the moment—she has<br />
other concerns. She does give assistance to those in need<br />
of healing or information, provided that they seem to be<br />
good people.<br />
dKella: Female human Drd9; hp 51; see Appendix 3.<br />
Three spies employed by Iuz are watching the temple. Iuz<br />
is not dim—he knows that something is going on at the
CHAPTER 3: GHOST TOWN AND RUINED TEMPLE<br />
temple and that this time it does not involve him. He has<br />
sent these spies to find out what, but they have so far discovered<br />
nothing other than hobgoblins.<br />
Fisturn and Baugh are fighters, and their companion,<br />
Uvren, is a bugbear who moves about draped in a large black,<br />
hooded cloak. They secretly watch any adventurers in hopes<br />
of gaining information, sneak up to overhear conversations,<br />
and may even confront the party to trick or coerce secrets<br />
from them.<br />
About the only interesting bit of information that they<br />
know is the identity of their local contact, Telna in Hommlet.<br />
dFisturn: Male human Ftr3; hp 32; see DUNGEON MASTER’s<br />
Guide page 53.<br />
dBaugh: Male human Ftr3; hp 25; see DUNGEON MASTER’s<br />
Guide page 53.<br />
dUvren: Bugbear; hp 16; see Monster Manual page 27.<br />
Undra is a cleric/rogue reconnoitering for the cult. She<br />
avoids the hobgoblins and seeks only to know the status of<br />
the area. She carries a map showing Hommlet, Nulb, and the<br />
temple ruins, with an arrow pointing to the west labeled<br />
“Temple of All-Consumption.” The map also shows a spot<br />
north of the temple marked “secret door in well” and a crude<br />
line that leads to the ruined tower (area 2C below).<br />
Undra does not reveal any information about the excavation<br />
of the temple’s lower levels, but if successfully intimidated,<br />
she may give away the existence of the Temple of All-<br />
Consumption and the continuing cult of the Dark God.<br />
dUndra: Female human Clr2/Rog2; hp 20; see<br />
Appendix 3.<br />
TEMPLE KEY<br />
The Temple of Elemental Evil: Its name befits its hideous<br />
appearance. The huge, charcoal-gray building, with its<br />
arched buttresses and obscene designs, stands a mute testament<br />
to the darker side of history. Every surface of the<br />
structure teems with leering faces and twisted forms of<br />
demons and monstrosities unlike anything previously<br />
imagined. The massive main doors are crowned with<br />
winged beasts and disgusting figures that chill a viewer<br />
to the very soul.<br />
The surrounding compound is equally terrifying. Vermiculated<br />
growth, covered in dark thorns, twists amid<br />
rubble from what was once a high curtain wall. Shadows<br />
dance along the blackened trees whose branches claw at<br />
the air around them like desperate, dying men.<br />
It need not be said aloud, being obvious immediately:<br />
This is an evil place.<br />
The interior of the temple is dimly lit by narrow, barred,<br />
stained-glass windows (not a practical means of entrance).<br />
The ceiling is vaulted, 30 feet high in most places, 15 feet<br />
higher than that in the center. All interior doors are simple<br />
wooden ones, and none of them have locks.<br />
sWooden Doors: 1 in. thick; hardness 5; 10 hp; AC 5;<br />
break DC 15.<br />
The old temple itself now houses a band of hobgoblin<br />
raiders. Unlucky, unwise, or slow adventurers could find<br />
themselves facing a large number of opponents at once.<br />
These creatures are well organized and aware of their surroundings.<br />
Hobgoblins in and around the temple move to aid<br />
threatened areas. With a few exceptions, they don’t just wait<br />
for trouble to come to them.<br />
All of the old entrances to the temple dungeons are now<br />
inaccessible, since virtually all the lower levels have collapsed.<br />
The task of clearing out the rubble is nearly insurmountable, as<br />
anyone who knows anything about such work can see. It would<br />
take huge teams of workers months to complete. Don’t let the<br />
PCs waste a lot of time trying to dig down into the dungeons.<br />
1. Outside Guards (EL 2)<br />
Amid the thorny growth, what was once a gatehouse lies<br />
in utter ruin. Mossy, overgrown stones lie scattered in<br />
small heaps.<br />
Creatures: Hiding among these ruins are four hobgoblins<br />
(Hide +1). They attack anyone not a hobgoblin by throwing<br />
javelins from behind the rubble, which grants them onehalf<br />
cover.<br />
dHobgoblins (4): hp 4, 5, 6, 7; 1d10 gp each; see Monster<br />
Manual page 119.<br />
Development: Three of the four guards watching the<br />
entrance (area 5), if they see a battle occurring in this area,<br />
join the fight as soon as they can. (It takes them 3 rounds to<br />
cross the distance.) The last stays by the door and shouts a<br />
warning to those inside if his comrades are unsuccessful.<br />
Likewise, if these guards see a fight in area 5, they join the<br />
other hobgoblins as quickly as they can (3 rounds).<br />
2. Tower (EL 4)<br />
The remnant of a black tower still stands by the ruined<br />
wall. The tower stands about 25 feet tall, probably much<br />
shorter than it was at one point, but appears intact. A<br />
heavy wooden door blocks entry.<br />
The door is locked from the inside by a knob (Open Lock DC<br />
20). To either side is an arrow slit that affords nine-tenths<br />
cover to those behind it. Two more of these are accessible<br />
from the inside spiral stair as it circles around the northeastern<br />
portion of the tower.<br />
sWooden Door: 2 in. thick; hardness 5; 20 hp; AC 5;<br />
break DC 25.<br />
Creatures: Six hobgoblins live in the tower with four<br />
goblin slaves. These creatures dislike the other hobgoblins in<br />
the temple and make no move to aid them. In fact, a successful<br />
Diplomacy check (DC 15) changes their attitude from<br />
indifferent to friendly (see page 149 of the DUNGEON MASTER’s<br />
Guide), and they readily provide information on request<br />
about the other temple inhabitants. They do not help the PCs<br />
fight, however.<br />
dHobgoblins (6): hp 4, 4, 5, 6, 7, 8; 1d10 gp each; see<br />
Monster Manual page 119.<br />
dGoblins (4): hp 2, 3, 4, 5; AC 12, no armor; see Monster<br />
Manual page 107.<br />
Tactics: If intruders attempt to batter down the door, the<br />
hobgoblins send the goblins up to the top of the tower on<br />
the remnants of the spiral stair. The goblins squeeze through<br />
a small hole and perch 25 feet above the door. From there<br />
they throw alchemist’s fire down onto the enemy (each has a<br />
single flask). If the attackers break in, the hobgoblins hurl<br />
javelins from behind an overturned table, giving them onehalf<br />
cover.<br />
Ad Hoc XP Adjustment: This is a well-organized force<br />
holding a defensible position. The encounter should award<br />
110% of the normal XP for increased difficulty.<br />
33
CHAPTER 3: GHOST TOWN AND RUINED TEMPLE<br />
34<br />
2A. Main Room<br />
The largest area in the tower remnant contains a long<br />
wooden table and two benches, covered with food, kegs<br />
of ale, and crude implements. Six sleeping mats made of<br />
woven straw are on the floor near the western portion of<br />
the tower. A spiral stair winds up to the left of the<br />
entrance. Underneath it are what appear to be ancient<br />
crates and barrels.<br />
The containers under the stairs contain very old foodstuffs<br />
and supplies from years ago when this was the hideout of<br />
human bandits.<br />
2B. Backroom (EL 1)<br />
This room appears unused and empty, except for a pair of<br />
tables pushed against the south wall and some stools<br />
stacked atop them.<br />
Creatures: Four rats and two dire rats occupy this room<br />
and attack any who enter. The hobgoblins occasionally throw<br />
food scraps here to foster the rats, and then antagonize and<br />
annoy (and sometimes kill) the rats as they come out. Needless<br />
to say, these are bad-tempered rodents.<br />
Rats (4): hp 1 each; see Monster Manual page 201.<br />
Dire Rats (2): hp 5, 6; see Monster Manual page 56.<br />
2C. Slave Room<br />
This sparse backroom holds little more than piles of feces<br />
and a few nests of rags.<br />
This is where the goblin slaves sleep. A well-concealed trap<br />
door (Search DC 25) lies under a flagstone in the northern<br />
end of the room. Beneath it lies a 3-foot-square shaft with<br />
bronze rungs on one side, which descends 30 feet to a small<br />
hidden chamber (see area 2D). The goblins and the hobgoblins<br />
do not know about this secret room.<br />
2D. Secret Underground Room<br />
and Escape Tunnel<br />
In this 10-foot-by-15-foot room sits a small wooden table<br />
with a bronze coffer and an iron box on it. A single exit in<br />
the east wall, 5 feet tall, is the only way out. A wooden peg<br />
is pounded into the wall near the exit.<br />
The passage curves and twists to the northeast; it appears to<br />
be partially worked and partially natural. About 540 feet<br />
along, it opens into the western part of a small natural cave.<br />
A 3-foot-wide opening marks the north wall of this 40-foot<br />
oval chamber.<br />
A secret entrance to the temple excavations (see area 1 in<br />
Chapter 7: The Recovered Temple) is concealed in the eastern<br />
portion of the south wall by a balanced, pivoting stone slab<br />
(Search DC 22). The passage concealed is 3 feet wide and<br />
leads 600 feet generally south, slanting downward steeply. At<br />
its end is a 10-foot-wide stone passage east, turning south in<br />
30 feet. If the characters arrive early in the adventure, the<br />
southward passage is completely blocked by rubble halfway<br />
down its length.<br />
The narrow north passage ascends slowly as it gradually<br />
veers to the east, continuing about 200 feet. It then turns due<br />
north for another 100 feet, where the limestone gives way to<br />
clay walls shored up by timbers for 50 feet. The escape tunnel<br />
ends in a heavy wooden door opening into the shaft of an<br />
abandoned, dry well 20 feet deep. A ladder in the tunnel can<br />
be set up in the well to provide a way out. An abandoned barn<br />
and cottage lie in ruins near the well mouth. This area is<br />
being watched (see Chapter 7: The Recovered Temple).<br />
Treasure: Both the coffer and the box are locked (Open<br />
Lock DC 20 to open the coffer, DC 15 to open the box). The<br />
coffer holds a potion of water breathing and a potion of cure serious<br />
wounds. The box contains 800 gp and 200 sp. The bandits left<br />
these boxes as they escaped from the tower years ago.<br />
3. Ruin (EL 3)<br />
Little remains of this ruined building—broken stone,<br />
bricks, and burned timbers. A narrow staircase on the<br />
western side of the building leads down to a small opening<br />
about 2 1/2 feet high and 2 feet wide.<br />
The opening leads into a cellar that is mostly collapsed, so<br />
that the ceiling is only 2 to 3 feet high. Rubble and rat droppings<br />
are all that can be seen, although a successful Search<br />
check (DC 20) reveals a hidden trapdoor. Below the trapdoor<br />
is a 20-foot-square wine cellar, long since plundered.<br />
Creatures: A hobgoblin adept and two companions live in<br />
the wine cellar. These three were cast out of the main band<br />
for attempting to turn the others against the reigning adept,<br />
Krebbich (see area 12). Because they have holed up here only<br />
recently, they do not have much in the way of food or even<br />
beds to sleep on.<br />
dAlubya: Female hobgoblin Adp3; hp 18; see Appendix 3.<br />
dHobgoblins (2): hp 4, 8; 1d10 gp each; see Monster<br />
Manual page 119.<br />
Tactics: If she hears movement above them (Listen +4) the<br />
adept peeks up through the trapdoor and casts burning hands<br />
at any visible intruders (Reflex saves have a –2 circumstance<br />
penalty due to the cramped quarters). She then retreats back<br />
down and casts bull’s strength from her scroll on one of her<br />
comrades, who prepare to fight in their lair.<br />
4. Dogs (EL 2)<br />
This is an empty, worn portion of the compound. It<br />
smells of damp fur.<br />
Creatures: Six dogs, trained by the hobgoblins for hunting<br />
and guarding, spend most of their time here but could conceivably<br />
be encountered anywhere. If the hobgoblins suspect<br />
or are under attack, they move the dogs to wherever additional<br />
defenders are needed. The dogs attack nonhobgoblin<br />
intruders on sight, barking and growling loudly as they do.<br />
dDogs (6): hp 4, 5, 6, 6, 7, 9; see Monster Manual page 195.<br />
Development: The hobgoblins know that the sound of<br />
barking dogs means intruders and respond quickly with<br />
reinforcements.<br />
5. Entrance (EL 2)<br />
The bronze doors here are each 23 feet high and 20 feet<br />
wide. Massive iron chains hang limply to either side, long<br />
since broken. Faded and worn runes cover each door but<br />
are no longer readable.
CHAPTER 3: GHOST TOWN AND RUINED TEMPLE<br />
The doors are not locked or barred in any way (the means to<br />
do so has long ago been destroyed). Heavy wooden side doors<br />
exist that have been sealed with lead.<br />
sWooden Door: 3 in. thick; hardness 5; 30 hp; AC 5;<br />
break DC 28.<br />
Creatures: Four hobgoblin guards watch the entrance at<br />
all times. They attack intruders while crying out, if possible,<br />
to warn the others.<br />
dHobgoblins (4): hp 4, 5, 6, 9; 1d10 gp each; see Monster<br />
Manual page 119.<br />
Development: If they see a battle occurring in area 1,<br />
three of the guards join the fight as soon as they can (it takes<br />
them 3 rounds to cross the distance). The last stays by the<br />
door and shouts a warning to those inside if his comrades<br />
are unsuccessful.<br />
6. Vestibule<br />
The floor of this area is made of reddish-brown stone<br />
squares. Dim light filters through the stained-glass windows,<br />
casting revolting colors upon the floor. The walls<br />
are plastered and painted with scenes befitting the<br />
nature of this despicable place—torture, murder,<br />
enslavement, robbery, and far more unspeakable acts.<br />
The creed of the worshipers is evident from these depiction:<br />
Evil is supreme.<br />
Ahead, the floor stones are green, and the nave of the<br />
temple is filled with pillars of a pinkish material, shot<br />
through with worm-colored veins. Their arches lead to<br />
an unremarkable pair of lesser side aisles. The columns<br />
supporting the archways, as well as the archways themselves,<br />
are worked in relief scenes of vile activities conducted<br />
mostly by human men and women.<br />
This hall is empty.<br />
Development: If they hear noise from here, the hobgoblins<br />
in area 8 start getting ready for trouble.<br />
7. Central Altar<br />
The pillars here are white marble, veined with ugly<br />
red. The altar block of pinkish white marble is roughly<br />
oval, a bit over 7 feet long by 5 feet wide. Its top has a<br />
hollowed-out portion resembling a humanoid form,<br />
with legs apart and arms away from the body. This<br />
depression is stained a darker color than the rest. Just<br />
north of the altar is a circular, marble-lined pit—a well<br />
of sorts—20 feet in diameter. Shards of broken crystal<br />
vessels and piles of feces and trash lie scattered about<br />
its bottom.<br />
The hobgoblins use the well as a latrine. It contains nothing<br />
of value.<br />
Development: If they hear noise from here, the hobgoblins<br />
in area 8 start getting ready for trouble.<br />
8. Camp (EL 5)<br />
The supporting pillars in this wing are sandstone, resting<br />
on a red slate floor. A stump of a granite monolith is<br />
all that remains of whatever sort of altar might have<br />
stood here.<br />
Dozens of beds composed of cloth scraps, hay, and<br />
leaves fill this area. Many are covered with tattered blankets.<br />
Scattered among the beds are cooking pots, small<br />
barrels, bags, tools, weapons, and other gear.<br />
This is the main sleeping and living area of the hobgoblins.<br />
Aside from personal gear and food, little of value exists here.<br />
Creatures: A mixed group of ten adult hobgoblins are<br />
resting here at any given time, although three times that<br />
number of beds are here. None of the hobgoblins are ready<br />
for battle. If surprised, they fight unarmored (AC 11) with<br />
their longswords. If they have warning (from the barking<br />
of dogs, shouts from the entrance, or other sounds), they<br />
have some time to prepare: Four of them are ready in 1d6<br />
rounds, three more in 1d6+1 rounds, and three more in<br />
1d6+3 rounds.<br />
Eight young hobgoblins also live here who do not fight.<br />
dHobgoblins (10): hp 3, 4, 5, 5, 6, 6, 7, 7, 8, 9; 1d10 gp<br />
each; see Monster Manual page 119.<br />
9. Storehouse<br />
The thick stone columns here are deep green, with<br />
blood-red striations. The paving blocks are mossy green,<br />
and in the center of the wing is a circular dais about 20<br />
feet in diameter. On or around the dais are piled barrels,<br />
crates, and bags, as well as sundry other items: large<br />
coils of rope, bolts of cloth, pots, large slabs of meat,<br />
tools, and more.<br />
The dais is two-tiered; each rises about 18 inches, the<br />
inner being 14 feet in diameter, forming a 3-foot-wide<br />
step along the rim of the lower tier. The lower disc is<br />
greenish black, the upper slightly greener. The center of<br />
this altar is a depression about 8 feet across, filled with<br />
scum-covered black liquid.<br />
This area now serves as the hobgoblins’ storage space. In the<br />
eastern corner are some tools and various cuts of leather<br />
stacked on a crate next to a large whetstone. These mark where<br />
the hobgoblins maintain their armor and weapons.<br />
The liquid in the altar is ordinary, although filthy, water.<br />
10. Elite Warriors (EL 4)<br />
Seven woven pallets lie on the floor. An unlit brazier<br />
stands in the middle of the room. Across from the door,<br />
a collapsed wall reveals a descending staircase filled<br />
with rubble and debris. A large haunch of meat hangs<br />
from a hook to the left of the door, with large strips<br />
ripped out of it.<br />
Creatures: Six hobgoblin warriors use this small room as<br />
their home. Only four of them are here now. They attack any<br />
intruders immediately and fight to the death.<br />
Another hobgoblin youth, who is almost fully grown,<br />
is also here. She fights as a regular hobgoblin but wears<br />
no armor.<br />
dHobgoblin War1 (6): hp 6, 7, 8, 9, 9, 10; see Appendix 3.<br />
dHobgoblin: hp 4; AC 11, no armor; see Monster Manual<br />
page 119.<br />
Development: If they hear sounds of combat from area 8,<br />
these warriors join the fray in 1d3 rounds. The youth does<br />
not leave the room.<br />
35
CHAPTER 3: GHOST TOWN AND RUINED TEMPLE<br />
36<br />
11. Slave Quarters (EL 2)<br />
This place reeks of filth and excrement. The rear portion<br />
of the room is partially collapsed, a staircase leading down<br />
below the temple now filled with rubble.<br />
Creatures: Six goblins and a human commoner, slaves of<br />
the hobgoblins, live here. The goblins are hostile and fight<br />
immediately, but the human, whose name is Tiadden, is a<br />
young carpenter who ended up in the wrong place at the<br />
wrong time. He was nabbed by the hobgoblins on the road.<br />
They are cruel to him, and the goblins are worse. He has no<br />
desire to defend his captors.<br />
dGoblins (6): hp 1, 2, 3, 3, 4, 4; AC 12, no armor, no weapons;<br />
see Monster Manual page 107.<br />
dTiadden: Male human Com1; hp 2 (noncombatant).<br />
Development: The slaves are at the command of any hobgoblin<br />
who wishes to give them a duty, including helping the<br />
defense of the temple.<br />
If freed, Tiadden attempts to go to Hommlet, even though<br />
he is from farther east.<br />
12. Adept’s Quarters (EL 5)<br />
The thick smell of incense and blood permeates this<br />
room. The walls and floor are painted with strange runes<br />
and glyphs in what appears to be blood. Bundles of herbs<br />
and dead animals hang from the ceiling on wire. A<br />
wooden bed is pushed against the wall opposite the door,<br />
while a table sits in the middle of the room, covered in<br />
leaves, roots, bones, feathers, animal parts, pots, stick<br />
bundles, and a lit oil lamp. A small wooden chest is next<br />
to the bed, with an incense burner atop it. The ceiling is<br />
black with soot.<br />
Creatures: Krebbich, a powerful adept, lives here. He did<br />
not live this long by running headlong into battle with his<br />
fellows. Krebbich is much craftier than that.<br />
dKrebbich: Male hobgoblin Adp6; hp 38; see Appendix 3.<br />
DKubo: Toad familiar of Krebbich; hp 16; see Appendix 3.<br />
Tactics: If he hears sounds of trouble, he immediately<br />
casts invisibility. Then he slips out of his room and casts<br />
protection from good and bull’s strength on a hobgoblin heading<br />
to fight the intruders, preferably Commander Rarkus<br />
(see area 16), who’s most likely to live long enough to put<br />
his spells to good use. Krebbich spends the rest of his time<br />
curing wounded hobgoblins so that they can continue the<br />
fight, always favoring Rarkus over all others and the elite<br />
warriors over the rest.<br />
Treasure: In addition to his gear, Krebbich keeps a potion<br />
of cure light wounds hidden under his pillow for emergencies.<br />
The chest is locked (Open Lock DC 15) and holds clothing,<br />
personal gear, and a small bag containing 110 gp. Krebbich<br />
carries the key with him at all times.<br />
13. Grand Staircase (EL 3)<br />
A flight of steps 20 feet wide, each step broad and tall,<br />
delves down to the north. The stone is a dull gray, but<br />
flecks of color—black, blue, green, red, and white—dot<br />
its surface.<br />
To the north of the staircase is a stone railing, with<br />
supports of alternating brown, green, and white stone.
CHAPTER 3: GHOST TOWN AND RUINED TEMPLE<br />
The upper portion is cinnabar. The floor beyond the railing<br />
is paved with 3-foot squares of highly polished red<br />
granite. Square columns of some type of yellow stone<br />
are carved with painted reliefs showing scenes of fire<br />
and suffering with demonic creatures looking on.<br />
The stairs descend 30 feet to a pair of smashed and fallen<br />
bronze doors, obviously battered down. Like those in area 1,<br />
they are covered in mostly faded markings, with bits of<br />
broken iron chain lying all around them. The area immediately<br />
beyond the doors is collapsed except for a small space,<br />
10 feet wide and 20 feet long, cleared out with great effort<br />
long ago. The ceiling is low, for the cleared area is really just a<br />
tunnel through the rubble. The floor is bare, brown earth<br />
covered in feces and food scraps.<br />
Creatures: A dire ape, the pet of the hobgoblins, lairs<br />
here. It comes at the call of an elite warrior who stands at the<br />
top of the stairs and summons it. Otherwise, it lunges out of<br />
the rubble to attack anyone coming down the stairs.<br />
dDire Ape: hp 36; see Monster Manual page 57.<br />
14. High Altar<br />
A huge bronze-and-copper altar, shaped like a huge<br />
basin and blackened from fire, rests on six legs 1 foot<br />
above the floor. It is 8 feet in diameter, filled with<br />
charcoal and bits of blackened bone. This vessel is<br />
dented and cut. A single chain dangles over the altar<br />
from the ceiling.<br />
The hobgoblins now use this altar to worship their own deity,<br />
Maglubiyet, and burn fires here dedicated to him.<br />
15. Commander’s Quarters<br />
A large room in its own right, this old vestry is filled with<br />
numerous couches, tables, and padded chairs, although<br />
most of the furniture has seen better days. In the middle<br />
of the room, two couches have been pushed together to<br />
make a sort of grand bed. Beyond the bed is a pile of bags,<br />
boxes, and other items.<br />
Rarkus, a formidable fighter, leads this band of raiders.<br />
Although the 30-foot-by-60-foot chamber is far too large for<br />
him, he has appropriated it for his own personal quarters.<br />
Hidden amid the blankets and pillow on the bed is a large<br />
iron key.<br />
Treasure: The pile of loot behind the bed is the band’s<br />
valuable plunder. It consists of the following items.<br />
• Three bags, one containing 845 cp, one with 698 sp, and<br />
one with 572 gp.<br />
• A bronze statue of a mounted elf warrior (worth 300 gp<br />
but weighing 200 pounds).<br />
• A small iron box containing ten 50-gp gems (all bloodstone)<br />
in silk padding.<br />
• A bolt of cloth with gold embroidery (worth 100 gp).<br />
• A suit of full plate armor.<br />
• A large box wrapped in an iron chain and padlocked<br />
(Open Lock DC 25), which holds a golden flagon with<br />
obsidian inlays (worth 200 gp), a silver platter (worth 75<br />
gp), six smokesticks wrapped in cloth, a flask of holy<br />
water, and a painting of a green dragon (worth 120 gp).<br />
The iron key in the bedclothes opens the padlock.<br />
16. Throne (EL 5)<br />
Extending out of a half-circle alcove, a<br />
dais completes a circle 30 feet across. The<br />
floor, steps, and walls are black basalt,<br />
highly polished and gleaming. Four<br />
steps lead to the upper platform, and<br />
upon it is a great throne of purplish<br />
basalt, covered in leering demon faces<br />
and carved skulls with evil grins. Above<br />
the throne, the following words are chiseled<br />
into the curved wall:<br />
The power of elemental death<br />
Brings mortals low<br />
But raises the Nameless One High<br />
The flagstones upon which the throne<br />
sets are 10-foot squares of granite, set in<br />
a mosaic pattern of brown, green, red,<br />
and white.<br />
Once, when pressed in a particular order, the<br />
stones activated a mechanism to raise and<br />
lower the throne, sending it down into the<br />
dungeons. This no longer functions. The<br />
throne is immune to all spells other than disintegrate,<br />
wish, or miracle.<br />
Creatures: Commander Rarkus sits here<br />
with two more elite hobgoblin warriors (see<br />
area 10), ready but relaxed. He also keeps a<br />
trio of goblin slaves with him, even allowing<br />
them to wear armor and carry weapons.<br />
dRarkus: Male hobgoblin Ftr4/Rog1; hp<br />
40; see Appendix 3.<br />
dHobgoblin War1 (2): hp 9, 10; see<br />
Appendix 3.<br />
dGoblins (3): hp 4, 4, 5; see Monster<br />
Manual page 107.<br />
Tactics: The warriors fight to the death for<br />
Rarkus. The goblins defend him, but if Rarkus is slain, they<br />
stop and run away if possible. Rarkus himself fights fiercely,<br />
using his goblin slaves to get flanking bonuses and make<br />
sneak attacks. If seriously threatened, he attempts to retreat<br />
and leave the temple.<br />
Development: If possible, when alerted to a battle going<br />
on elsewhere, this group goes to area 12 to alert Krebbich<br />
before rushing toward the trouble.<br />
Conclusion<br />
If the hobgoblin band loses members due to attacks, they<br />
replace them with new hobgoblins recruited from the<br />
surrounding area at a rate of 1d3 average individuals or 1<br />
elite warrior per week. If the hobgoblins are wiped out or<br />
driven away, a new band of 3d6 hobgoblins (with some of<br />
the original members if they escaped) takes up residence<br />
in 2d6+1 weeks. See Part 3: The Rebirth of Elemental Evil<br />
for more information about the temple and further<br />
developments.<br />
The Dynamic Dungeon<br />
Imagine that what you are<br />
about to read is a snapshot of<br />
the Temple of All-Consumption<br />
at one given moment in<br />
time. Once the PCs arrive, the<br />
place comes to life. The<br />
actions of the PCs may affect<br />
the placement of NPCs, monsters,<br />
and objects in the<br />
Temple. The troglodyte priest<br />
in area 11 might, for example,<br />
come to investigate a distant<br />
commotion caused by the<br />
PCs elsewhere.<br />
In short, many of the NPCs<br />
and monsters in the temple<br />
might move around. If there’s<br />
a more logical place for them<br />
to go, put them there. Use<br />
what’s given here only when<br />
there’s no other better place<br />
for the inhabitant to be. Be<br />
creative. Perhaps the guards<br />
in areas 205 to 216 are all—<br />
for a short time—in area 211<br />
receiving a morale-bolstering<br />
speech from Oamarthis. The<br />
more dynamic the place<br />
seems, the more real it is to<br />
the players.<br />
At the same time, don’t<br />
avoid consistency. If the PCs<br />
destroy a door, that door<br />
should remain destroyed when<br />
they come back to that area or<br />
the door replacing it should be<br />
obviously new.<br />
37
PART 2: THE TEMPLE OF ALL-CONSUMPTION<br />
The Keys<br />
Key hierarchy: Two linked<br />
lesser keys = a greater key. Two<br />
greater keys = a master key.<br />
Lesser key of fire (red lozenge/<br />
diamond)<br />
Key phrase: “Fire burns away<br />
my enemies.”<br />
Lesser key of earth (brown triangle)<br />
Key phrase: “Stone crushes<br />
the weak.”<br />
Lesser key of air (silver circle)<br />
Key phrase: “Wind scatters<br />
those who oppose us.”<br />
Lesser key of water (blue-green<br />
square)<br />
Key phrase: “Waves pound<br />
relentlessly.”<br />
Lesser keys open locked areas<br />
within their corresponding<br />
temples. Greater keys open<br />
corresponding doors to the<br />
Outer Fane. A master key is<br />
necessary to open the door to<br />
the Inner Fane.<br />
38<br />
Part 2: The<br />
Temple Of<br />
All-<br />
COnsumptiOn<br />
The Inner Circle of the Temple of All-Consumption, which<br />
serves as the main focus of Tharizdun’s cult in the world, is a<br />
group known as the doomdreamers (the leaders of the<br />
doomdreamers are known as the Triad). These evil clerics<br />
were all (or so they claim) called by the Dark God in their<br />
dreams to band together to free him from his imprisonment.<br />
To that end, they built the Temple of All-Consumption, sent<br />
agents and cultists to find the ancient shrines and temples<br />
of Tharizdun scattered about in all the world’s remote<br />
locales, and created and fostered the Temple of<br />
Elemental Evil fifty leagues to the east.<br />
ORGANIZATION<br />
OF THE TEMPLE<br />
Three distinct portions of the Temple of All-<br />
Consumption exist: the Crater Ridge mines,<br />
the Outer Fane, and the Inner Fane. The<br />
mines are the largest part, and serve as the<br />
main defense of the overall temple. The mines<br />
also house a vast number of monsters and<br />
troops that the doomdreamers can call upon.<br />
This area is unorganized for the most part—<br />
the exceptions being the main entrances and<br />
the areas offering access to the bridges that<br />
lead to the Outer Fane.<br />
The Outer Fane is much better organized<br />
than the mines. The doors into this area are<br />
magically sealed and can only be entered with<br />
special keys. No uncontrolled monsters are<br />
allowed to wander freely. Inhabitants communicate<br />
with one another and respond when<br />
needed. No attack on the mines draws help<br />
from the Outer Fane, however. The inhabitants<br />
of the Outer Fane look on the creatures of the<br />
mines as nothing more than a buffer.<br />
The Inner Fane is a tower of sorts that serves<br />
both as a centralized command post for the<br />
doomdreamers and as a main sanctuary for<br />
dread Tharizdun. When speaking from the<br />
Inner Fane, the doomdreamers are the voice of<br />
the Dark God himself from the viewpoint of<br />
their followers.<br />
Reinforcements and Reactions<br />
The Temple replaces losses of humanoids with like humanoids<br />
at a rate of 20% per week. If six gnolls and fourteen human<br />
guards are killed in the Main Gate area, a gnoll and three<br />
humans show up to replace them within a week (or two gnolls<br />
and two humans—the DM can choose). Nonhumanoids, such<br />
as giants, magical beasts, and so on, have only a 10% replacement<br />
rate per week.<br />
However, after the first few reinforcements, all fallen<br />
humanoids are replaced with orcs. These orcs, conscripted<br />
from the nearby orc camp, are forced into service once the<br />
PCs begin to really tear at the resources of the Temple. This<br />
occurs at the DM’s discretion.<br />
These replacement reinforcements are in addition to any<br />
reinforcements from elsewhere in the Temple, of course.<br />
Commanders in the Temple replace fallen guards in organized<br />
areas starting with outermost areas first, unless they<br />
have lost so many guards that the whole force must withdraw<br />
and abandon an outer area to protect an inner one. For<br />
example, in the Earth Temple, if intruders are attacking from<br />
the southwest, the clerics may decide to abandon areas 226 to<br />
234 and attempt instead to guard area 224 closely, utilizing<br />
whatever reinforcements they can muster.<br />
Lastly, a different sort of “reinforcing” of an area can take<br />
place. As the PCs clear out whole sections of the Crater Ridge<br />
mines, forces from other areas move in to take advantage of<br />
the vacuum created. If the Fire Temple is wiped out, that area<br />
is soon filled with forces of the Water Temple, including any<br />
normal replacements for the Fire Temple, who are now working<br />
for the Water Temple.<br />
The Stalagos<br />
The dwarves named the water that has accumulated within<br />
the mountain’s crater over the years the Stalagos, a name that<br />
suggests “stagnant and dark.” The name is appropriate, for<br />
that is exactly what the Stalagos is. The briny water rarely so<br />
much as ripples, appearing to be more a perfectly smooth,<br />
opaque, gray landscape.<br />
The Stalagos is deceptively deep. Because it fills a bowllike<br />
crater, the depth is around one hundred feet in most places.<br />
Holes exist, though, that are much deeper.<br />
During the winter, the Stalagos freezes over (the ice is 1d4<br />
feet thick). That makes it easier to get across, since the bridges<br />
are no longer needed, but the doors are still inaccessible<br />
without the proper key. The kuo-toas and other creatures<br />
that use the lake are accustomed to swimming under the<br />
surface of the ice, breaking holes through thin spots when<br />
the need arises. Because the dwarves craft stone so well, the<br />
bridges that they built across the lake do not risk destruction<br />
by shifting ice.<br />
Inside the mines or the Inner and Outer Fanes, the inhabitants<br />
keep water sources clear of ice in winter.<br />
Getting from the Mines to the Fanes<br />
Four specific ways exist to get from the mines to the Outer<br />
Fane—a door tied to each of the elements. Three are connected<br />
to mines via a bridge across the Stalagos. The other is<br />
located on a boat landing. Only someone holding a greater<br />
key attuned to that door or someone blessed by that key in a<br />
ceremony in the corresponding elemental temple can open<br />
these doors. For example, only someone holding the greater<br />
key of fire can open the Fire Door.<br />
Of those in the mines, only clerics and those who are quite<br />
knowledgeable (for example, Heunar and Tippish in area 40<br />
or Eeridik in area 139) know exactly how the keys and the<br />
doors work. Others are rarely brought to the Outer Fane, and<br />
if they are, they are always in the company of a cleric who<br />
knows how to open the proper door.<br />
Keys each weigh about a pound, are about 5 inches across,<br />
and are made of iron. Four different kinds of keys exist (one<br />
for each element—shaped like the symbols of those elements).<br />
Three different degrees of keys exist as well. An individual<br />
usually holds a lesser key, which radiates faint transmutation<br />
magic. Pressing two identical lesser keys together<br />
forms a greater key, which link or “fuse” for 15 minutes (after
PART 2: THE TEMPLE OF ALL-CONSUMPTION<br />
which time they come apart and do not link again for 15 minutes).<br />
Fusing two greater keys creates a master key. When a<br />
master key is created, the fusing is permanent. Both a greater<br />
and master key radiate moderate transmutation magic. The<br />
keys do not radiate evil.<br />
As mentioned previously, greater keys can be used to<br />
“bless” an individual. This is accomplished by touching the<br />
key to the creature and reciting the proper key phrase<br />
within the proper elemental temple. Such a “blessing” lasts<br />
until it is used once, whereupon the blessing may be<br />
repeated. Very few clerics in the mines have any reason to<br />
enter the Outer Fane, so only a few high-ranking ones are<br />
considered “blessed” in this way. All clerics know the key<br />
phrase for their element.<br />
Everyone within the Outer and Inner Fanes knows how<br />
the keys work and knows all the key phrases. Nevertheless,<br />
many of the powerful inhabitants teleport in and out on<br />
their own or use the Tourbillion (see Sublevel 3 of the<br />
Inner Fane).<br />
Dealing with the Temple<br />
This is a long-term undertaking. The mines are vast, and PCs<br />
probably need to explore a fair bit of them in order to get<br />
inside the Outer, and eventually, the Inner Fane. The Outer<br />
and Inner Fanes are very well defended and offer a great<br />
challenge to any group of adventurers.<br />
Unlike a typical dungeon adventure where practically<br />
the entire upper level must be cleared before proceeding<br />
to the next, lower level (and so on), it is possible that the<br />
PCs can use multiple fly spells and attempt to proceed<br />
directly to the Inner Fane. To be sure, many PCs will want<br />
to try this as soon as possible. That plan, however, is likely<br />
to spell an early end for the PCs. It is fairly important they<br />
learn that going to the heart of the matter is not only particularly<br />
dangerous (they can learn this from Tymerian in<br />
Rastor), but also inefficient. The characters need to explore<br />
the mines before tackling the greater challenge of the<br />
Outer and Inner Fanes. Such a tactic not only allows them<br />
to gain experience and treasure enough to take on the<br />
Temple’s masters, but to learn about how the place works,<br />
discover the Temple’s plans, and acquire the special keys<br />
and other items necessary to take the fight to the doomdreamers.<br />
If the characters insist on making an early foray<br />
into the Outer and Inner Fane, a DM can dissuade them by<br />
using the defense network of lightning towers (see The<br />
Outer and Inner Fanes). If the PCs are simply exploring<br />
the aerial route to the Fanes, these towers should deal just<br />
enough damage to drive them off, providing ample warning<br />
that this route is not their best option. Once they are of<br />
sufficient level to take the full damage from the towers and<br />
deal with the inhabitants of the Fanes, they likely will have<br />
sufficient magic to protect them, making this route more<br />
of an option.<br />
The doomdreamers of the Inner Fane themselves are<br />
not likely to respond directly against the PCs initially.<br />
They are primarily mystics, lost in communion with their<br />
dark deity. They won’t deign to notice the progress of the<br />
PCs until they strike against the Outer Fane. Even then,<br />
they will leave the powerful priests and other guardians<br />
there to deal with the irritant. Only when the PCs breach the<br />
sanctity of the Inner Fane will the doomdreamers become<br />
directly involved.<br />
The priests of the Outer Fane also do not immediately<br />
respond to any intrusions in the mines. Figuring either that<br />
the PCs will find defeat at the hands of the mines’ creatures<br />
or that the PCs represent outside forces seduced by one of<br />
the elemental temples to aid in its struggles against the<br />
others, the leaders in the Outer Fane will pay them little<br />
regard. Once the PCs have defeated the forces of two of the<br />
elemental temples and recovered the necessary components<br />
to construct a master key, the Outer Fane likely<br />
responds in force.<br />
Hedrack, the Master of the Outer Fane, likely sends one of<br />
the two assassins in area 16 (Outer Fane) to deal with the<br />
intruders. The other he keeps in reserve. If this response fails,<br />
he sends the troglodyte priest and the four dire lions in area<br />
39 (Outer Fane). If the PCs defeat these creatures in turn, he<br />
sends one other force: one or both of the invisible stalkers<br />
from area 36 (Outer Fane). After this, he sends no others,<br />
waiting instead for the PCs to enter the Outer Fane, where<br />
they are on his territory.<br />
If the characters are having a particularly rough time of it,<br />
the DM has the option of sending some aid their way. In area<br />
41 of the Outer Fane resides a priest named Varachan. He is<br />
the second-in-command of the Greater Temple in the Outer<br />
Fane, and was once as evil as any of the priests. Something<br />
happened, however, and he has reconsidered. Now he is of<br />
good alignment and seeking to atone for his many past sins.<br />
He sees the arrival of the adventurers as one way to do so. See<br />
the Using Varachan sidebar, page 125, for more information<br />
of Varachan and the sort of aid he might provide characters<br />
who seem intent on bringing the Temple low.<br />
At least four not necessarily exclusionary choices exist for<br />
PC tactics.<br />
1. Hit-and-Run. The most obvious choice is to attack the<br />
Temple at some obvious entry point, penetrate as deep as possible,<br />
and then get out to rest and recuperate. The problem<br />
that PCs quickly encounter using this tactic is that they may<br />
very well have to fight the same battles over and over to get<br />
in (until their explorations allow them to find a new and possibly<br />
better way in). While the characters get more powerful,<br />
most likely the inhabitants are going to fortify the entrances<br />
increasingly each time.<br />
One possible way to accomplish this well is for the PCs to<br />
establish some means of secret entry. Teleportation into an<br />
already explored area is of course the best way, but careful use<br />
of gaseous form, dimension door, or passwall can accomplish the<br />
same goal.<br />
2. Long-Term Delve. This choice consists of the PCs<br />
going in and not (or rarely) coming back out until they have<br />
thwarted the plans of the Temple priests. In a complex this<br />
size, this tactic is actually quite viable. If the PCs bring plenty<br />
of food, water, and light sources (or magical ways to produce<br />
such), occasionally raid Temple storehouses for supplies, and<br />
are smart about where to “hole up” when they need to rest,<br />
they can continue this indefinitely. This tactic allows them to<br />
avoid having to fight their way in (and once they are deep<br />
within the mines, fight their way out) every time they need<br />
to rest.<br />
3. Sneak in Disguised. PCs tired of fighting their way in<br />
using hit-and-run tactics or possibly just afraid of a big confrontation<br />
may take this option using Disguise and Bluff skills<br />
or spells such as change self, alter self, or the polymorph spells to<br />
sneak in. This option works better once the PCs have been<br />
inside for a while and they learn of the various groups at work<br />
within the Temple and their hierarchy of power.<br />
Most of the inhabitants of the mines know nothing of<br />
the real plans of the cult; mentioning events in Hommlet<br />
39
PART 2: THE TEMPLE OF ALL-CONSUMPTION<br />
Hamlet of Rastor<br />
cRastor (hamlet): Nonstandard;<br />
AL N; 100 gp limit; Assets<br />
600 gp; Population 118; Mixed<br />
(human 35, dwarf 30, halfling<br />
8, orc 8, half-orc 8, gnome 8,<br />
elf 3).<br />
Authority Figures: Rerrid<br />
Hammersong, dwarf Clr5/Ftr3.<br />
Rerrid is the town elder and its<br />
leader by default. He is a cleric<br />
of Moradin, using his magic<br />
for the good of the town.<br />
Important Characters: Thandain<br />
Deeperdark, dwarf Ftr5.<br />
Thandain has no actual title,<br />
but most people in Rastor<br />
respect her enough that her<br />
words carry a great deal of<br />
weight.<br />
Tymerian, human Wiz4. Tymerian<br />
uses her spells to aid<br />
others and earn a profit in<br />
doing so. If need be, the town<br />
calls upon her to aid in defense.<br />
Tymerian was once a powerful<br />
adventurer. She and her party<br />
tried to fly over the volcano<br />
rim to break into the Temple of<br />
All-Consumption, were devastated<br />
by the lightning towers,<br />
and were eventually captured<br />
by wights. She managed to<br />
escape and has lived in Rastor<br />
ever since.<br />
Jardeth, half-orc War2. Although<br />
the position is fairly<br />
unofficial, Jardeth serves as a<br />
sort of constable in the town.<br />
He is very loyal to Rerrid.<br />
Tunraug Urkart, dwarf Exp3.<br />
He is the local blacksmith.<br />
Yarew, human Com2. The<br />
Gray Lodge is the single tavern<br />
in town, and the only place<br />
where outsiders can find<br />
boarding. Yarew owns the<br />
lodge and tends bar. He<br />
employs two women to help<br />
with meals and upkeep.<br />
Verg and Unaret, orcs War2.<br />
Hunters and trappers by trade,<br />
these two orcs serve as the<br />
main go-betweens for Rastor<br />
and the orc camp.<br />
or the Moathouse does nothing to impress the<br />
guards in the mines.<br />
Really sneaky, well-informed PCs may be able<br />
to get very far into the Temple using this<br />
method—quite possibly into a place where they<br />
are in way over their heads. For example, using a<br />
good deal of the skills mentioned above may get<br />
the PCs all the way to a bridge and across, but<br />
then they find themselves without a key and in<br />
a lot of trouble (those approaching the doors<br />
without a key are slain). The smartest players of<br />
all learn quickly that the mines are not just a<br />
barrier to get past but contain useful items and<br />
information.<br />
Most of the encounters presented here indicate<br />
how creatures react to those attempting<br />
to bluff or move about in disguise. Always use<br />
common sense. If it says that a certain group<br />
of guards does not attack anyone in ochre<br />
robes, but the PCs attack their commander<br />
while wearing ochre robes, then obviously the<br />
guards no longer treat the PCs as people in<br />
ochre robes.<br />
4. Warn Others. If the PCs spread the word<br />
that there’s a “new” Temple of Elemental Evil in<br />
the Lortmil Mountains, adventurers from all<br />
over begin to descend upon the area, just like<br />
they did with the original temple twelve years<br />
ago. Rather than coordinating an offensive<br />
strike, most of these adventurers are going to<br />
want to go in on their own.<br />
NPC adventurers come in small bands and<br />
fairly infrequently. They might stay in Rastor for<br />
a time and encounter the PCs there. They might<br />
go to the Temple and get killed, so that the PCs<br />
find the occasional corpse. They might go to the<br />
Temple and experience some successes, in<br />
which case the PCs may find an area partially<br />
clear of foes (and treasure) or they might<br />
encounter the rival NPC adventurers as they<br />
explore. In any event, Temple forces become<br />
even more alert and paranoid if more than one<br />
group of adventurers attacks (see the Dynamic<br />
Dungeon sidebar, page 37).<br />
No government in the area is going to devote<br />
resources to dealing with a threat of which they<br />
have never heard. The truth is, the Temple of<br />
All-Consumption isn’t hurting anyone or drawing<br />
enough attention to itself to warrant intervention.<br />
The PCs might convince people that an<br />
evil temple exists in the mountains, but evil<br />
temples are all over. The mention of the “Elder<br />
Elemental Eye” or even “Tharizdun” raises a few<br />
eyebrows, but that’s about it. (In fact, it might<br />
make the PCs seem more like crackpots to<br />
many.) The best that the PCs can do is gain<br />
assurances that if they deal with this threat, they<br />
will be rewarded.<br />
OUTDOOR RANDOM<br />
ENCOUNTERS<br />
While in this general area, use the following encounter<br />
table when an encounter is needed. A 30% chance exists for<br />
an encounter in any given 4-hour period. The Encounter<br />
Level (EL) listed is the average for the possible range of<br />
creatures encountered.<br />
Lortmil Encounter Table<br />
Night Day Encounter Average EL<br />
01–02 1d6 human commoners (level 1d3) 3<br />
03–04 1d6 human barbarians (level 1d3) 5<br />
05 Human druid (level 1d4+1) 3<br />
06 Elven druid (level 1d4+1) 3<br />
01 07 Human ranger (level 1d4+1) 3<br />
02 08 Elven ranger (level 1d4+1) 3<br />
09–10 1d6 halfling commoners (Level 1d3) 3<br />
11–12 1d6 gnome commoners (Level 1d3) 3<br />
13–14 1d6 dwarven commoners (Level 1d3) 3<br />
03 15–16 1d6 dwarven warriors (Level 1d3) 3<br />
04–10 17–20 1d4+4 orcs 4<br />
11–15 21–24 Temple raiders looking for sacrifice<br />
victims (1d4+4 War1) 4<br />
16–25 25–30 Temple guards on patrol (1d4+4 War1) 4<br />
26–27 31 Fire mephit 3<br />
28–29 32 Air mephit 3<br />
30–31 33 Earth mephit 3<br />
32–33 34 Water mephit 3<br />
34–35 35–36 2d4+3 wolves 7<br />
36–38 37 1d4 owlbears 6<br />
39 Giant owl 3<br />
40 38–40 Giant eagle 3<br />
41–44 41–44 1d6+3 gnolls 6<br />
45–47 45–47 1d4+2 bugbears 6<br />
48–50 48–50 1d4+1 ogres 5<br />
51–52 51–52 1d3+1 Large monstrous spiders 5<br />
53–54 53–55 1d3+1 lions 6<br />
55–56 56–57 1d4 assassin vines 5<br />
57–58 58–59 1d2 Huge monstrous spiders 5<br />
59–61 60–61 1d4+2 dire wolves 7<br />
62–64 62–67 2d4 hippogriffs 7<br />
65–66 68 1d2 gargoyles 5<br />
67–68 69–73 1d3 griffons 6<br />
69–74 2d4 dire bats 7<br />
75–77 74–75 1d3 dire wolverines 6<br />
78–79 76–77 1d3 displacer beasts 6<br />
80–81 78–79 1d2 dire lions 6<br />
82–83 80–81 1d2 spider eaters 6<br />
84–86 82 1d2 trolls 6<br />
87–89 83 Wyvern 6<br />
90 84–86 Bulette 7<br />
91–92 87 Young adult white dragon 7<br />
93 88–89 Dire bear 7<br />
94 90–91 Dragonne 7<br />
95–96 92–93 Hill giant 7<br />
97–98 94–95 Stone giant 8<br />
96–98 Treant 8<br />
99–100 99–100 Gray render 8<br />
40
CHAPTER 4: THE HAMLET OF RASTOR<br />
Chapter 4:<br />
THe Hamlet<br />
Of RastOr<br />
Built at the end of a road (and the beginning of two mountain<br />
trails), Rastor is a rough, little, mud–soaked place low on<br />
charm and laden with coarse and dangerous inhabitants.<br />
Although primarily the home of humans and dwarves, newcomers<br />
quickly notice that orcs live among the populace,<br />
along with a fair number of half–orcs. The orcs are from a tribe<br />
that lives in an encampment only a few miles deeper into the<br />
mountains. The people of Rastor have long since made their<br />
peace with this orc tribe, and now a fair amount of interaction<br />
exists between the two. Since merchants sometimes come to<br />
Rastor with supplies for sale, the orcs consider the people of<br />
the hamlet important allies. The merchants never notice that<br />
folks in Rastor buy more than they can ever really use. What<br />
they don’t know is that the humans and others in the village<br />
sell goods to the orcs. This situation makes Rastor rougher<br />
than most traditional communities, and it makes the nearby<br />
orcs more sophisticated than a typical tribe.<br />
Just about everyone in Rastor knows that some sort of<br />
secret temple or complex lies in the nearby mountains. They<br />
see the clerics and their servants coming out of nearby passes<br />
in wagons or on foot. About half know exactly where it lies<br />
and have even traded or interacted with the ochre–robed<br />
clerics or their black-clad servants.<br />
THE TEMPLE’S<br />
INFLUENCE IN TOWN<br />
Tal Chammish is a spy for the Temple of All-Consumption<br />
who lives in Rastor. He can get help from the Temple in the<br />
form of gnolls (1d4+3), an ogre, a cleric (level 1d2+3) or all<br />
the above. Such aid arrives within 1d4 days.<br />
Tal is a dealer of a substance called Tanbrosh, a flowering<br />
growth in the area that, when properly prepared, becomes<br />
a powerful narcotic. Currently, Tunraug Urkart, Thandain<br />
Deeperdark and Verg, as well as four unnamed 1st-level<br />
warriors, one other orc, and sixteen commoners are all<br />
addicted to Tanbrosh. Characters using Tanbrosh gain a +2<br />
bonus to Strength and Constitution, but a –2 penalty to<br />
Wisdom. So powerful is this drug that an addicted character<br />
denied his a daily dose suffers a –4 penalty to all ability<br />
scores after one day, is catatonic the next, and dies on the<br />
third. Tal charges a mere 5 cp for a dose, for he is less interested<br />
in money than in the power that he holds over those<br />
who he manages to addict.<br />
If the forces of the Temple of All-Consumption learn that<br />
characters making successful attacks against them use Rastor<br />
as a base, or even frequent the town, they tell Tal to do something<br />
about it. At first, all Tal does is use his addicted customers<br />
(upon threat of not getting anymore Tanbrosh) to<br />
steal from the group, sabotage their equipment, or otherwise<br />
harass them. These attempts are simply to get the characters<br />
to leave. Eventually, this escalates into actual attacks on lone<br />
characters or when the characters are at their weakest or<br />
most vulnerable.<br />
All of the Tanbrosh addicts are too ashamed to expose Tal<br />
or tell anyone about their addiction.<br />
dTal Chammish: Male human Rog2; hp 11; see DUNGEON<br />
MASTER’s Guide page 55.<br />
Removing Tanbrosh Addiction<br />
Tanbrosh is a potentially deadly addiction. Composed both<br />
of a psychological element and a powerful physical need,<br />
Tanbrosh addiction is difficult to cure. If the PCs stumble<br />
upon Tal’s plot, they may wish to aid the addicted villagers.<br />
To do so requires either a neutralize poison spell, which<br />
completely eliminates the addiction, or a series of skill<br />
checks. The first is a Heal check (DC 19) to determine<br />
what the problem is. The second is an<br />
Alchemy check (DC 26) to develop an antitoxin<br />
that allows the addict to free himself<br />
slowly of the need for the addictive substance.<br />
This process takes 1d4+1 weeks for<br />
each person treated. The healer can administer<br />
such long-term care for up to six<br />
people at a time. Other characters with the<br />
required skills may assist, each adding six<br />
additional patients to the number treated<br />
and possibly allowing a cooperation bonus<br />
(see page 62 of the Player’s Handbook). Five<br />
or more ranks in Profession (herbalist)<br />
grants a +2 synergy bonus on both of these<br />
checks.<br />
Meanwhile, the addicts still need their<br />
daily doses or suffer the consequences outlined<br />
above. To make the substance requires<br />
a Profession (herbalist) or Alchemy check<br />
(DC 18).<br />
If the PCs have captured Tal or otherwise<br />
garnered his cooperation, the DCs for these<br />
checks decrease by 5. If Tal is dead or has<br />
escaped, consider the PCs to be working<br />
under unfavorable conditions (they’re racing<br />
against the clock), adding 2 to the DC numbers<br />
listed above.<br />
NEARBY ORC CAMP<br />
The orcs of the nearby tribe have a relatively<br />
peaceful and cooperative coexistence<br />
with the people of Rastor. The camp is<br />
located three miles to the south and west of the village, in<br />
the steep hills at the edge of the mountain they call the<br />
Foot of Gruumsh.<br />
Eighty-four orcs live in the camp, mostly by hunting, fishing,<br />
and occasionally waylaying travelers—although such<br />
attacks are rare (the orcs never attack merchants coming into<br />
Rastor because they do not want such trade to end).<br />
Most of the orcs (77 of them) are standard orcs. Kreugna is<br />
a 6th-level barbarian and serves as the leader of the orcs. She<br />
rules by force, but is generally respected. Marukiu is a 5thlevel<br />
adept who aids Kreugna. The camp also boasts two 3rdlevel<br />
and three 1st-level barbarians.<br />
The orcs of the camp keep four dire boars. These are used<br />
as guards as well as mounts. A gargoyle that lives in a nearby<br />
mountain cave is allied with the orcs and performs specialized<br />
tasks for them (such as aerial reconnaissance).<br />
Adventurers encountering these orcs won’t find them<br />
automatically hostile, particularly if the heroes have made<br />
friends in Rastor. If the outsiders are unfriendly, these orcs<br />
fight mercilessly.<br />
Designing Side Treks<br />
Maybe drow, dwarves, or<br />
illithids living below the mines<br />
like or don’t like the inhabitants<br />
of the Temple. They begin<br />
coming up, or somehow draw<br />
the adventurers down.<br />
The dwarves, in an attempt<br />
to get at better ore, would have<br />
eventually tunneled downward.<br />
Perhaps they did. Deeper mines<br />
down the kimberlite pipe could<br />
be filled with all sorts of subterranean<br />
monsters.<br />
A colony of aboleths, living<br />
deep below Mount Stalagos<br />
in a huge lake, hate the kuotoas<br />
in the Temple and want<br />
to find slaves to strike against<br />
them. The PCs could be the<br />
perfect candidates for such a<br />
mission.<br />
Perhaps some Underdark<br />
denizens know of a way<br />
straight into the Outer Fane<br />
from the mines. The adventurers<br />
must find these creatures<br />
and learn the secret from them<br />
rather than attempt to cross<br />
the bridges.<br />
41
42<br />
CHAPTER 5: THE CRATER RIDGE MINES<br />
Chapter 5:<br />
The Crater<br />
Ridge Mines<br />
This is the largest portion of the Temple of All-Consumption,<br />
and—fortunately for anyone attempting to infiltrate—the<br />
least organized.<br />
HISTORY AND GEOLOGY<br />
Mount Stalagos last erupted over ten thousand years ago, and<br />
is considered dormant, if not dead, by all concerned. No<br />
mention of volcanic activity in the region has been noted<br />
since the area was first settled.<br />
The main crater was created when Mount Stalagos<br />
exploded and the top of the mountain collapsed. The resultant<br />
crater filled with water from rainfall, but then the central,<br />
smaller cone (now known as the Inner and Outer Fanes) was<br />
formed by a second eruption bursting up through the center<br />
of the crater. Now that vent, too, is dormant, but cracks and<br />
fissures into an underground bed of magma prevent its small<br />
crater from filling with water.<br />
Over 100 years ago, diamonds brought up by the ancient<br />
lava flows were discovered in the surrounding fields by<br />
dwarves. These were traced to the crater and an extensive<br />
mining operation began. The plan was to mine the rim of<br />
the crater and then plunge down into the heart of the<br />
dead volcano—a kimberlite pipe in this case—afterward.<br />
The dwarves were never able to carry out this plan. In fact,<br />
they were only just able to begin their exploratory mining<br />
operation. Newcomers to the area with no concern for diamonds<br />
arrived and slaughtered the dwarves with spells<br />
and summoned creatures. These were the first doomdreamers,<br />
and they desired the crater for their own use.<br />
Since the doomdreamers’ arrival, the locals have thought<br />
of Mount Stalagos as cursed, haunted, or at least inhabited<br />
by terrible monsters—that is, if they thought of it at all.<br />
The doomdreamers sought to hide their presence from<br />
the world and did a very good job of it. Left alone, they<br />
could proceed to their insane task of freeing the imprisoned<br />
Tharizdun.<br />
One method the doomdreamers used to conceal their<br />
existence and to keep people away from their temple was<br />
to foster a growing community of evil humanoids and<br />
monsters within the mines. The mines are home to<br />
numerous tribes of orcs, ogres, troglodytes, gnolls, and<br />
trolls, as well as some kuo-toas. Some of these are supported<br />
directly by the Temple, others exist independently (but<br />
their existence still wards away potential trespassers, so<br />
they are tolerated).<br />
THE TEMPLES<br />
Four elemental temples exist within the mines, placed there<br />
to help control the various troops and creatures that the<br />
Temple employs as guardians and soldiers. These temples<br />
were intentionally created to compete, as that competition—<br />
the doomdreamers’ theory goes—encourages tight-knit team<br />
loyalty and promotes the most powerful and capable to the<br />
forefront. Thus, the forces directly tied to each temple are<br />
bitter rivals. This rivalry goes so far as to erupt occasionally<br />
into widespread violence, but is usually limited to spying,<br />
assassination, betrayals and sabotage.<br />
Currently, the Fire Temple is the most powerful and influential<br />
temple, although the Water Temple is poised to tip the<br />
balance in their favor. All the clerics in these temples are all<br />
technically clerics of the Elder Elemental Eye, and all the<br />
temples are dedicated to that deity, not to separate ones. The<br />
distinction between the different elements has much more<br />
to do with politics than with religion.<br />
In order to keep the power of any one temple in check,<br />
and to keep all-out war from breaking out, the doomdreamers<br />
magically associated each entrance into the<br />
Outer Fane with an element, and then placed that<br />
entrance far away from the corresponding temple. Since<br />
each temple holds the key to enter its corresponding door,<br />
that temple must occasionally work with the forces of one<br />
or more other temples to use that key should they need<br />
entrance into the Outer Fane.<br />
DUNGEON IN A CIRCLE<br />
Basically, the Crater Ridge mines are a dungeon complex<br />
organized as a big ring. As it gets farther east, it gets more difficult.<br />
As DM, you can use this to your advantage. If the<br />
adventure gets too difficult, the adventurers can pull back<br />
and go around the other way to deal with encounters more<br />
aptly suited to them.<br />
UNDERDARK ENTRANCES<br />
A number of encounters assume that passages exist that connect<br />
the mines to a deeper set of natural caves that plunge<br />
deep into the earth and extend throughout the area for miles.<br />
These are not marked on the map, and in fact, if the DM<br />
wishes, they do not exist for the PCs to find. Various creatures<br />
are assumed to come up into the mines from these<br />
entrances, but they are unmarked because the DM may not<br />
wish to have the PCs explore such an entrance and end up in<br />
areas not detailed in this product and having nothing to do<br />
with the adventure.<br />
Should you want to place them, they should be in isolated<br />
in lower areas such as 29 or 167. One obvious place would be<br />
the secret passage in area 193. Tunnels branching off from<br />
this natural passage might delve deep into the earth below<br />
the mountains.<br />
If you are looking to expand the adventure, developing<br />
more caverns below the ones found here is a great way of<br />
doing it. Expanding the adventure area downward can make<br />
this subterranean scenario even larger. Perhaps, although it is<br />
unlikely, you might need to design some side adventures in<br />
order to keep the adventurers at the proper level to deal with<br />
the challenges ahead. You can send them on a side adventure<br />
deep below the mines.<br />
RANDOM ENCOUNTERS<br />
This adventure really does not need random events: The<br />
mines are teeming with encounters already. However, this is<br />
a dynamic place. One cannot stay too long in one area, even if<br />
it is cleared of foes, and expect to be safe. Use the following<br />
random encounters whenever intruders stop for more than<br />
an hour, but never check more than once every 6 hours. The<br />
Encounter Level (EL) listed is the average for the possible<br />
range of creatures encountered.
CHAPTER 5: THE CRATER RIDGE MINES<br />
d% Encounter Average EL<br />
01–60 None n/a<br />
61–70 1d6+2 guards (War1)* 4<br />
71–73 1d4 Huge monstrous centipedes 4<br />
74–76 1d4+1 darkmantles 3<br />
77–80 1d4+3 orcs (reinforcements)* 4<br />
81–85 1d4+2 gnolls* 4<br />
86–87 Gelatinous cube 3<br />
88–89 Gray ooze 4<br />
90–92 Cleric (4th level) and 1d4+1 guards (War1)* 5<br />
93 1d3 rust monsters 5<br />
94 1d3 gricks 5<br />
95 1d2 carrion crawlers 5<br />
96 Average salamander* 5<br />
97 Adult tojanida* 5<br />
98 Adult arrowhawk* 5<br />
99 Average xorn* 6<br />
100 1d2 wraiths 6<br />
*These creatures are affiliated with the organization of the Temple.<br />
KEY TO THE MINES<br />
Unless otherwise noted, the ceiling heights of the rough<br />
caves and passages tunneled out by the dwarves are half the<br />
width of the cavern or tunnel (to a minimum of ten feet).<br />
These passages are quite rough, and the floors frequently<br />
uneven, covered with loose stones.<br />
More regular-shaped chambers, unless otherwise noted,<br />
have a ceiling height of 15 feet and are made of worked<br />
stone. They were also made by the dwarves and originally<br />
were intended to be used as living spaces, craft halls, temples,<br />
and so on. These areas are usually inhabited by organized<br />
Temple forces and are often lit.<br />
Main Gate General Notes<br />
Although it is the main entrance, this gate—much higher up<br />
than the South Gate—is much less frequently used. The<br />
guards here do not expect to see visitors, and the commander<br />
of the area, the half-elf ranger Mereclar, believes that he has a<br />
prestigious duty but is in fact one of the weakest of the various<br />
leaders in the mines.<br />
The complex of areas 1–11 has three stages of security. When<br />
the PCs first arrive, it is at A. For one week after an attack (either<br />
here or at the South Gate), the area moves to stage B. If, during<br />
that week, another attack comes here, they move to stage C for<br />
one week, then downgrade to B for a month afterward.<br />
A. Lax. The main doors in area 1 are closed but not barred.<br />
The gnolls in areas 4 and 5 do not watch out of the slits<br />
unless the alarm is raised. All guards take 10 on Listen and<br />
Spot checks but suffer a –5 penalty for inattention.<br />
B. Wary. The main doors in area 1 are barred. The gnolls in<br />
areas 4 and 5 do not watch out of the slits unless the alarm is<br />
raised or if attackers spend 3 or more rounds attempting to<br />
get through the main doors. All guards take 10 on Listen and<br />
Spot checks with no penalty.<br />
C. Alert. The main doors in area 1 are barred. The gnolls in<br />
areas 4 and 5 watch out of the slits and attack anyone in sight<br />
not obviously allied with the Temple (not wearing Temple<br />
colors or accompanied by someone who is). All guards take<br />
10 on Listen and Spot checks with no penalty.<br />
All guards and other personnel wear the black iron triangle<br />
of the Elder Elemental Eye. Their clothing is predominantly<br />
black as well.<br />
Areas 1–10 are all lit by torches in iron sconces. All ceilings<br />
are 15 feet high unless otherwise noted, and doors are<br />
wooden (hardness 5, 15 hp, break DC 18 if locked; Open<br />
Lock DCs are listed in each encounter area).<br />
The inhabitants of areas 1–11 know the general layout of<br />
areas 1–17 and the general layout of the whole Temple complex.<br />
They know that there’s a lake in the middle of the crater<br />
and three bridges that go out to an island where the masters<br />
of the place reside. The troglodytes know about areas 204 and<br />
218 to 234.<br />
1. Entry<br />
After the long, winding path takes you 300 feet up the<br />
slope above the valley floor, it ends in a large cave set into<br />
the side of a cliff. Forty feet across, with a entrance 30 feet<br />
across, this cave has a smooth, level floor that leads to a<br />
pair of iron-bound wooden doors each 15 feet high and 8<br />
feet across. The left door has a massive iron doorknocker.<br />
A humanoid skull is spiked to the right door.<br />
Standard procedure is for a visitor to bang the doorknocker,<br />
drawing the attention of the archers in areas 4 and 5 and for one<br />
of the guards from areas 2 or 3 to come to the doors. Visitors,<br />
however, are rare. Temple forces using these gates expect them<br />
to be unlocked and just walk right in. If closed and barred,<br />
these gates have hardness 5, 30 hp and a break DC of 26.<br />
The arrow slits can be seen with a Spot check (DC 18). The<br />
characters on the other side have nine-tenths cover. See areas<br />
4 and 5 for the occupants.<br />
Use the following descriptive text for the hall beyond<br />
the doors.<br />
The hall is wide and long, the walls plastered taupe and<br />
painted with murals of demons, human sacrifice, devilish<br />
revelry, monsters destroying and devouring<br />
humans, and people being ravaged by the power of<br />
wind, whirlpools, blazing flames, and landslides. These<br />
disturbing scenes continue down the entire length of<br />
this subterranean avenue.<br />
Immediately in front of the doors to the west, four<br />
symbols are placed in mosaic in the floor: a silvery white<br />
circle, a brown triangle, an amber-red diamond, and a<br />
blue-green square.<br />
2. Guard Post (EL 4)<br />
This room has a small round table with a half-eaten<br />
haunch of meat and four flagons on it. Four stools surround<br />
the table. A rack of six spears hangs on the north<br />
wall, and a chain dangles above the table.<br />
Creatures: Four gnolls stand guard here. These creatures<br />
watch the area from the south as much as from the main<br />
doors. Temple-allied forces do not go beyond the door here<br />
much—the areas to the south are abandoned.<br />
Gnolls (4): hp 9, 10, 14, 11; 2d10 gp; see Monster Manual<br />
page 105.<br />
Tactics: These guards have a large bell hung from the ceiling<br />
with a pull chain. As its first action in a combat, one gnoll<br />
rings this bell, alerting everyone in areas 1–17.<br />
They do not question anyone dressed in Temple garb<br />
(ochre robes, black cloaks, and so on) and bearing either<br />
Elder Elemental Eye or Tharizdun symbols.<br />
43
CHAPTER 5: THE CRATER RIDGE MINES<br />
44<br />
Development: If they hear fighting elsewhere, an alarm<br />
bell, or cries for help, they move to help.<br />
3. Guard Post (EL 2)<br />
A rectangular table covered in coins, dice, a small keg, and<br />
mugs rests in the center of the room. Two benches are<br />
pushed against the walls, and the floor has paper, old food,<br />
and other trash scattered about in small piles. A chain<br />
dangles above the table. The room smells of stale ale.<br />
Scattered on the table where the guards were gambling are 35<br />
cp and 2 sp.<br />
Creatures: Four human warriors watch from this post.<br />
They usually keep the door open so that they can monitor<br />
the hall beyond. They are friendly with the gnolls in area 4<br />
but not the troglodytes in area 13. They do obey the commands<br />
of the troglodyte priest in area 11.<br />
dHuman War1 (4): hp 7, 5, 6, 6; see Appendix 3.<br />
Tactics: These guards have a large bell hung from the ceiling<br />
with a pull chain. As his first action in a combat, one warrior<br />
rings this bell, alerting everyone in areas 1 to 17.<br />
They do not even question anyone dressed in Temple garb<br />
(ochre robes, black cloaks, and so on) and bearing either<br />
Elder Elemental Eye or Tharizdun symbols.<br />
Development: If they hear fighting elsewhere, an alarm<br />
bell, or cries for help, they move to help.<br />
4. Archers (EL 4)<br />
This room is barren, the stones stained with age and less<br />
pleasant things. Two arrow slits look out at the entrance<br />
cave and another faces the path up the cliffs.<br />
Characters at the arrow slits have nine-tenths cover from<br />
attackers on the other side.<br />
Creatures: Four gnolls are stationed here at all times.<br />
dGnolls (4): hp 9, 11, 10, 12; 2d10 gp; see Monster Manual<br />
page 105.<br />
Tactics: If two gnolls are ready at the arrow slits facing<br />
the entrance cave, the other two delay their actions. The two<br />
at the slits fire their arrows and move away, and then the<br />
other two move in and fire. In this way, all four can fire out<br />
of the two slits each round.<br />
They do not even question anyone dressed in Temple garb<br />
(ochre robes, black cloaks, and so on) and bearing either Elder<br />
Elemental Eye or Tharizdun symbols.<br />
Development: If they hear fighting elsewhere, an alarm<br />
bell, or cries for help, they move to help.<br />
5. Archers (EL 2)<br />
The secret door south of this room is only secret from the east<br />
side. It pivots open. A 10-foot-wide corridor leads to a second<br />
crossbow slit that overlooks the trail that comes up the slope.<br />
Other than the arrow slit in the north wall and the barrel<br />
of crossbow bolts next to it, this room is empty.<br />
Characters at the arrow slits have nine-tenths cover from<br />
attackers on the other side.<br />
Creatures: Four humans with heavy crossbows are stationed<br />
here.<br />
dHuman War1 (4): hp 8, 5, 7, 6; see Appendix 3.<br />
Tactics: If attacked, these warriors retreat through the<br />
secret passage south of this area so that they can reach reinforcements.<br />
The secret door at the bend in the hallway requires<br />
a Search check (DC 20) to find.
CHAPTER 5: THE CRATER RIDGE MINES<br />
If ready at the arrow slits, all the guards have their weapons<br />
loaded and delay their actions so that the first fires and moves<br />
away and the next moves in and fires. On the second round,<br />
and every round after, the warrior currently in front of the slit<br />
moves away and another moves in to fire while any who need<br />
to reload can do so.<br />
They do not even question anyone dressed in Temple garb<br />
(ochre robes, black cloaks, and so on) and bearing either Elder<br />
Elemental Eye or Tharizdun symbols.<br />
Development: If they hear fighting elsewhere, an alarm<br />
bell, or cries for help, they move to help.<br />
6. Barracks (EL 5)<br />
This large chamber has three long tables flanked by<br />
benches. The remnants of a meal (plates, cups, knives,<br />
and food scraps) are scattered across the surfaces of<br />
these tables. A terrible quadrupedal beast with long,<br />
sharp quills protruding from its neck growls from where<br />
it is chained at the south wall. Two ballistae lie near the<br />
east wall.<br />
Creatures: A particularly massive howler is chained to the<br />
south wall near the door into area 8. This is the commander’s<br />
mount. Its chain is 20 feet long and the creature has been<br />
trained not to howl except in battle or when in danger (to alert<br />
others). This helpful feature allows those around it to keep<br />
their sanity.<br />
dHuge Howler (12 HD): hp 80, CR 5, size Huge, AC 16,<br />
Add +5 to attacks, +3 to saves, +6 to skills, Power Attack; see<br />
Monster Manual page 121.<br />
Development: Three potential developments exist concerning<br />
this area.<br />
Reinforcements: The sound of battle, a cry of alarm, or the<br />
howling of the howler in this room is going to bring the occupants<br />
of areas 7–10 running into this room (those from 7 and<br />
8 come in 1d2 rounds, those in 9–10 come in 1d4+2 rounds).<br />
Door: The doors can be barred against intruders. If hard<br />
pressed, the guards from the entire area retreat to this room<br />
and bar the doors. (This is a poor tactic concerning the<br />
defense of the Temple, but these are fairly inexperienced and<br />
underpaid guards.)<br />
Ballistae: Against the east wall, the defenders keep a pair of<br />
ballistae. These have never been used, but if assaulted by<br />
powerful forces they could be manned (by the human warriors)<br />
and fired from their current position all the way into<br />
area 1, assuming the doors were open.<br />
7. Sergeant (EL 3)<br />
This small room has a large wooden bed, a poorly treated<br />
wooden table, and a large, padded chair. Clothing, armor,<br />
and other equipment litter the floor, as well as some food<br />
scraps. A knife target hangs on the wall with three knives<br />
stuck in it.<br />
The clutter on the floor includes ogre-size clothing, an ogresize<br />
chain shirt (badly damaged and worthless), a backpack,<br />
40 feet of rope, a climbing kit, an empty waterskin, and three<br />
large belts, as well as cloth scraps, bones, bits of paper, and<br />
general refuse.<br />
Creatures: Wormspike is an ogre with two levels of warrior.<br />
He has completely shaved his body and wears a pair of goggles<br />
over his eyes all the time.<br />
The terror of the guards stationed here, he backs up<br />
Mereclar’s authority. (Mereclar once saved Wormspike’s<br />
life, and now the ogre does whatever he can to help, protect,<br />
or advance the half-elf.) Any guard in this section of<br />
the dungeon obeys commands from Wormspike unless<br />
countermanded by Mereclar.<br />
dWormspike: Male ogre War2; hp 39; see Appendix 3.<br />
Tactics: Wormspike doesn’t trust anyone. If encountered,<br />
he stops whomever he does not immediately recognize and<br />
takes them to Mereclar for questioning. If they resist, he<br />
attacks, bellowing for help from any guards in earshot.<br />
Treasure: Also scattered amid the clutter is a bag containing<br />
143 gp, 243 sp, and a jeweled brooch (worth 75 gp).<br />
Locating the bag requires a successful Search check (DC<br />
15). Well-hidden amid the mess is a beautiful golden dagger<br />
(worth 100 gp: Search DC 20).<br />
Development: If he hears fighting elsewhere, an alarm<br />
bell, or cries for help, he moves to investigate, usually in the<br />
company of Mereclar.<br />
8. Commander (EL 5)<br />
The door to this room is always locked (DC 25 to open),<br />
whether occupied or unoccupied.<br />
Well-kept and tidy, this bedchamber is obviously lived in.<br />
A bed is pushed against the far wall, a round rug is on the<br />
floor, and a table, two chairs, and a chest fill the rest of the<br />
room (the chest is actually under the table). A green<br />
quiver hangs from a peg, filled with arrows. Next to it<br />
hangs a gray cloak.<br />
Mereclar has the key to this room, as well as to the locked<br />
chest, on his person at all times. The arrows, quiver, and cloak<br />
are all normal.<br />
Creatures: Mereclar is a 5th-level half-elf ranger. He commands<br />
all the troops in areas 1–10. He is technically (and<br />
begrudgingly) subservient to Terrenygit, the troglodyte<br />
priest in area 11.<br />
Mereclar dresses in very dark green clothing and wears a<br />
long red plume on his helmet. He is very tall for a half-elf.<br />
dMereclar: Male half-elf Rgr5; hp 36; see Appendix 3.<br />
Tactics: Mereclar questions anyone he encounters<br />
(“Where are you going?” “Who do you work for?”). If he gets<br />
answers that sound plausible (either because they’re accurate<br />
or because the speaker beats him in an opposed Bluff<br />
against Sense Motive check), he lets them pass. Otherwise,<br />
he orders his soldiers to attack. He knows nothing about<br />
Hommlet or the Moathouse, and becomes all the more suspicious<br />
of anyone who tries to use it as a justification for<br />
their presence.<br />
Treasure: The chest, which is locked (DC 25 to open), contains<br />
clothing, a suit of leather armor, a quiver with 20<br />
arrows, two flasks of alchemist fire, and a coin pouch containing<br />
37 gp and five 20-gp gems.<br />
It also contains a letter discussing recruiting some of the<br />
local orcs as guards and mentions that the clerics in the<br />
Outer Fane are busy searching for the “Champion of Elemental<br />
Evil.” It is signed by someone named Naquent (see Outer<br />
Fane area 6).<br />
Development: If he hears fighting elsewhere, an alarm<br />
bell, or cries for help, he moves to investigate, usually in the<br />
company of Wormspike and on the back of the howler in<br />
area 6.<br />
45
CHAPTER 5: THE CRATER RIDGE MINES<br />
46<br />
9. Bunkhouse (EL 4, EL 5 if all are<br />
ready at once)<br />
This room is crowded with beds, enough for twenty<br />
people to live here. Next to each bed is a small trunk. The<br />
room is cluttered and ill used, with graffiti on the walls,<br />
clothes on the floor, and weapons here and there.<br />
Eighteen of the bunks here are used, eight of the occupants<br />
currently stationed at guard posts. Two spears, a halberd, a<br />
light crossbow, two daggers, a longsword, and six arrows lie<br />
among the general clutter. Each of the small trunks by an<br />
occupied bunk contains clothing, eating utensils, and various<br />
bits of worthless personal gear. The graffiti says things such<br />
as “Old Three-Fingers was here,” “Marvick is an idiot,” or<br />
even less intelligent, cruder messages.<br />
Creatures: Ten human warriors usually occupy this room<br />
at any given time, sleeping, resting, or relaxing. If attacked<br />
without warning, only three are ready to act in the first<br />
round, three more can act in the next round, and the other<br />
four are ready in 1d4 rounds as they wake up, grab their gear,<br />
and so on.<br />
dHuman War1 (10): hp 6, 5, 10, 9, 5, 11, 4, 7, 8, 6; see<br />
Appendix 3.<br />
Development: If an alarm bell sounds in areas 2 or 3, the<br />
warriors get organized in 1d6 rounds and move to the sound<br />
of the alarm.<br />
10. Bunkhouse (EL 5, EL 6 if all are<br />
ready at once)<br />
Twenty bunk beds are crammed into this room, although<br />
not all of them appear to be used. The chamber is<br />
unkempt and chaotic, covered with clothing, food scraps,<br />
and trash.<br />
Only sixteen of the bunks are used currently, with eight of<br />
the occupants currently stationed at guard posts.<br />
Creatures: Eight gnolls usually occupy this room at any<br />
given time, sleeping, resting, or relaxing. If attacked without<br />
warning, only three are ready to act in the first round, three<br />
more can act in the next round, and the other two are ready in<br />
1d4 rounds as they wake up, grab their gear, and so on.<br />
dGnolls (8): hp 14, 12, 11, 13, 12, 14, 10, 9; 2d10 gp; see<br />
Monster Manual page 105.<br />
Development: If an alarm bell sounds in areas 2 or 3, the<br />
warriors get organized in 1d6 rounds and move to the sound<br />
of the alarm.<br />
11. Priest’s Quarters (EL 6)<br />
The far wall of this room bears a large symbol made of<br />
wood painted black. The symbol resembles an upsidedown,<br />
two-step pyramid. In the room are a bed, a chest of<br />
drawers, a table, and two chairs. The table is covered in<br />
sheets of thick vellum and sports a lamp that glows with a<br />
violet light. In one corner, a set of manacles is bolted into<br />
the wall.<br />
The symbol is that of Tharizdun. The lamp has a continual<br />
flame cast upon it, the spell having been modified slightly<br />
for color.<br />
Creatures: This is the bedchamber of Terrenygit, a 5th-level<br />
troglodyte cleric. Terrenygit is allied with the troglodytes to<br />
the northeast, but mostly he serves the Inner Fane directly.<br />
He has no allegiance to any of the four elemental temples. If he<br />
survives, anything that he sees or discovers eventually finds<br />
its way to the ears of the doomdreamers.<br />
Terrenygit wears black robes and an obex around his neck,<br />
as well as a necklace of bones and teeth. He is missing an eye.<br />
dTerrenygit: Male troglodyte Clr5; hp 55; see Appendix 3.<br />
Tactics: To back up his power, Terrenygit often commands<br />
six of the zombies in area 12 to accompany him<br />
wherever he goes. He enjoys casting hold person on powerful<br />
foes, subduing them, and presenting them as live sacrifices<br />
to the Dark God. Should this happen to the PCs, they<br />
are taken to the Earth Temple (area 220) and placed in the<br />
nearby prison.<br />
Terrenygit does not have much trust for humans. If he<br />
does not immediately recognize them, he attacks.<br />
Development: In theory, Terrenygit may be encountered<br />
here, in area 12, or almost anywhere in areas 1–10 if an alarm<br />
sounds or the noise of trouble draws his attention.<br />
Treasure: On the table are two divine scrolls: one has<br />
silence and neutralize poison, and the other has cure moderate<br />
wounds and cure light wounds (2). In the chest of drawers are<br />
clothes as well as a bag with 30 pp, a gold necklace with large<br />
agates (worth 200 gp), and a rolled-up piece of paper with a<br />
message written in Draconic. It says:<br />
Master Terrenygit,<br />
We wish to extend to you our admiration for the way in which<br />
you have administered the forces defending the main gate. Under<br />
your care, it is secure against the intrusion of outsiders who do not<br />
understand our need for seclusion. We have concerns, however, that<br />
you may wish to ally yourself with others of your people in the Earth<br />
Temple. We must request that you do not. Maintain your vigilance.<br />
Great reward shall come to the priest who helps secure us against<br />
outsiders who would violate our retreat.<br />
Things will go much better for all of us if you comply.<br />
High Priest of the Outer Fane<br />
12. Undead Reinforcements (EL 5)<br />
The door to this room is always locked (DC 28 to open).<br />
Terrenygit has the only key.<br />
This chamber is bare but for scraps of torn cloth and dark<br />
stains on the floor and walls.<br />
Creatures: Twelve Medium-size zombies stand motionless<br />
in this room until intruders enter the room or until they<br />
are commanded by Terrenygit. However, Terrenygit can command<br />
no more than ten of these creatures at once. Each of<br />
these zombies has had their eyes removed and replaced by<br />
the black triangle symbols of the Elder Elemental Eye.<br />
dZombies (12): hp 16, 12, 15, 14, 11, 18, 20, 16, 13, 14, 21,<br />
10; see Monster Manual page 191.<br />
13. Mine Entrance (EL 2)<br />
The north wall of this 40-foot wide, 20-foot deep chamber<br />
is rough, as are the two passages that extend to the north.<br />
It appears that this might be the start of a mine, with<br />
roughly worked walls scraped and chipped by tools. The<br />
easternmost passage descends with crudely carved stairs,<br />
while the other seems relatively level.
CHAPTER 5: THE CRATER RIDGE MINES<br />
Creatures: Two troglodyte guards watch this area. They<br />
obey any commands that come from Terrenygit in area 11.<br />
Each wears studded leather armor and carries a scimitar and<br />
large wooden shield. Each also has two javelins to throw.<br />
dTroglodytes (2): hp 13, 15; AC 20; see Monster Manual<br />
page 179.<br />
Tactics: These guards do not move to help guards in<br />
other areas. They do not leave their post except to retreat<br />
and warn their brethren when faced with overwhelming<br />
numbers.<br />
14. Storage<br />
Large bins fill this area, made of iron with open tops. Considering<br />
the amount of dirt and grime in the area, they<br />
most likely once held ore of some kind.<br />
The dwarves used this area to keep ore ready for shipment.<br />
The guards of the main gate currently do not use this chamber<br />
at all. The bins are all empty.<br />
15. Mineral Separation Area<br />
Two rows of long wooden troughs, collapsing from rot<br />
in places, extend the length of this long chamber. At the<br />
far eastern end, a dark shaft plunges downward. A thick,<br />
flexible tube made of hides is connected to a large set of<br />
bellows and then drops down into the shaft. The other<br />
end of the tube rests limply on the ground near the eastern<br />
edge of the troughs.<br />
The 10-foot-by-10-foot shaft goes down 50 feet to a pool fed<br />
from the stagnant waters of the Stalagos. The water is<br />
brought up the shaft by means of a gigantic bellows—once<br />
powered by an earth elemental that the dwarves would daily<br />
summon for the job. The water poured down the length of<br />
the large troughs and allowed the valuable ore and minerals<br />
to be separated from the baser rock.<br />
Treasure: A book, torn and worm eaten, lies near the<br />
south wall next to a broken battleaxe and an empty cloth<br />
sack. The book, written in Dwarven, tells the brief history<br />
of this place up until the dwarves left—that it was a mine<br />
rich in various ores and minerals until evil priests called<br />
the doomdreamers arrived and sent monsters in to kill all<br />
the dwarves.<br />
16. Ore Crusher Area (EL 1)<br />
Iron bins of ore, covered with dust and rust, line the<br />
walls of this long chamber. A huge machine of some<br />
type occupies the middle of the room, with a chute<br />
leading into a pair massive stone cylinders and a<br />
wooden trough underneath. The cylinders appear to be<br />
connected by gears to a single, huge crank, sized for a<br />
giant to turn. Small bits of stone lie scattered around<br />
the machine.<br />
The machine is an ore crusher, originally driven by the labor<br />
of an earth elemental summoned by a powerful dwarven<br />
cleric. Dwarven workers shoveled ore into the chute,<br />
which dumped into the turning cylinders. The machine<br />
reduced large chunks of ore into smaller bits, often smashing<br />
away the unwanted rock and leaving the denser ore in<br />
discreet chunks.<br />
Creatures: A single, Medium-size monstrous spider<br />
lurks around the ore crusher, preying upon rats. It attacks<br />
single creatures but attempts to hide or scuttle away from<br />
groups.<br />
dMedium-Size Monstrous Spider: hp 12; see Monster<br />
Manual page 210.<br />
17. Mine Entrance<br />
This chamber is large and mostly empty. Three fourwheeled<br />
iron carts are here, with high sides and a strange<br />
sort of handle on one end. One of the carts lies on its<br />
side. To the south, two rough-hewn passages lead out of<br />
the room, a pair of iron rails running down the middle<br />
of both, with lengths of timber supporting the rails at<br />
set intervals.<br />
The three carts are ore carts. The cart on its side is badly<br />
mangled and its wheels no longer turn. Even a rudimentary<br />
examination of the carts reveals that the wheels are<br />
spaced so that they fit on the iron rails in the two passageways.<br />
These are tracks for the ore carts. A short period<br />
of experimentation reveals that pumping the handle<br />
makes the cart move and that another smaller lever works<br />
as a brake.<br />
Although they can of course simply walk down the passages<br />
with the tracks, the PCs could also use the ore carts to<br />
transport themselves, treasure, prisoners, gear, and so on.<br />
18. Statues? Here? (EL 5)<br />
A basilisk dwells in the northern portion of the cave marked<br />
18. Two gnolls recently wandered into the area and fell victim<br />
to its gaze. They can be found at points A and B on the map,<br />
looking like statues (and probably alerting wise characters<br />
that something’s amiss).<br />
18A. First Statue<br />
In the winding passage stands a statue of a gnoll, a howl<br />
upon its stone lips.<br />
18B. Second Statue<br />
Another gnoll statue lies toppled here. It is broken, and<br />
one of its legs is missing.<br />
Characters examining either statue note exquisite workmanship.<br />
Creatures: The basilisk wandered into the area a few<br />
weeks ago. It has eaten a portion of the petrified gnoll<br />
marked B, but it is fairly hungry and grumpy. It attacks<br />
intruders immediately.<br />
dBasilisk: hp 46; see Monster Manual page 23.<br />
Treasure: Although it has begun making a nest for itself<br />
in the northern portion of the cave amid a patch of harmless<br />
fungus, it has no treasure of any kind. Conceivably, if the<br />
gnolls and their equipment were returned to their natural<br />
state via a stone to flesh spell, they would carry the meager<br />
treasure and equipment that the gnolls in area 10 possess. If<br />
this happened, the gnoll marked B would die immediately,<br />
but the gnoll marked A would be so grateful that it would<br />
swear a blood-debt allegiance to the spellcaster and serve<br />
faithfully as a cohort.<br />
47
CHAPTER 5: THE CRATER RIDGE MINES<br />
48<br />
19. Hot Surprise (EL 4)<br />
South of this point, the main passage angles upward.<br />
The tunnel widens into a large cave, the west wall extending<br />
away from the track by 30 feet or more. Rubble and<br />
mining refuse litters the open area.<br />
Mining expeditions once found enough valuable nondiamond<br />
materials here to pull away a fair amount of the rock.<br />
The rubble in this room is mostly from the rough, preliminary<br />
mining of the dwarves.<br />
Creatures: Two thoqquas have just burned their way up<br />
through the diamond plug and into this cave. They hide<br />
under the rubble in the western portion of the room (their<br />
location is noted at the location marked with an X) and<br />
attack anyone who comes within 30 feet, just out of belligerence.<br />
On their first action, they charge (see page 124 of the<br />
Player’s Handbook).<br />
dThoqquas (2): hp 17, 15; see Monster Manual page 175.<br />
20. Steps (EL 4)<br />
These rough-hewn steps do not appear to be well used.<br />
Trap: The area above these steps is coated in green slime. A<br />
character sees the green discoloration on the ceiling with<br />
a successful Search check (DC 16). If living creatures pass<br />
beneath it, the green slime drops down on them. All characters<br />
on the stairs must make a Reflex saving throw (DC<br />
15) to avoid direct contact. Green slime deals 1d6 points of<br />
temporary Constitution damage per round while it<br />
devours flesh. On the first round of contact, the slime can<br />
be scraped off a creature (most likely destroying the scraping<br />
device), but after that it must be frozen, burned, or cut<br />
away (doing damage to the victim as well). Extreme cold or<br />
heat, sunlight, or a remove disease spell destroys a patch of<br />
green slime. Against wood or metal, green slime deals 2d6<br />
points of damage per round, ignoring metal’s hardness but<br />
not that of wood. It does not harm stone.<br />
aGreen Slime Trap: CR 4; no attack roll necessary (1d6<br />
Con damage per round until scraped off or otherwise neutralized);<br />
Reflex save (DC 15) avoids; Search (DC 16); Disable<br />
Device (n/a) (no mechanism to disable).<br />
21. Crossover Point<br />
This area is a vast cavern, the walls scraped of their ore.<br />
The southern portion of the cave is a pit 25 feet deep. The<br />
ore-cart track crosses over it on a wooden bridge. Another<br />
track passes through the lower area, leading off approximately<br />
north and south. Wooden ladders connect the<br />
upper and lower portions of the chamber.<br />
The ladders are bolted to the stone. The easternmost ladder<br />
is still quite sturdy. The other breaks if more than 100<br />
pounds is placed upon it, dropping a character about 20 feet<br />
(2d6 damage).<br />
Development: This is an excellent place for an ambush<br />
if intruders encounter Marlgran or Vranthis and then<br />
retreat. The ettin or the dragon (or both) attempt to ambush<br />
the PCs when they return here. The creatures listen for the<br />
heroes to approach and hide in whatever portion (upper or<br />
lower) their foes are not going to enter first. A tactic either<br />
uses is to push their opponents off the upper ledge, dealing<br />
with them after finishing off whoever remains.<br />
22. Raised Track<br />
The cart track curves through this chamber. To the south,<br />
a wooden ramp slowly elevates the track at about a 15-<br />
degree angle. The wooden incline carries the track higher<br />
and higher above the floor of the high-ceilinged stone<br />
passage it runs through.<br />
The ceiling in this chamber and the passage to the south is 50<br />
feet high.<br />
23. Ettin Ambush (EL 6)<br />
The ore cart track curves through this large cave. The ceiling<br />
is high and domed, and a well-rusted ore cart lies on<br />
its side in the eastern portion of the room.<br />
Marlgran the ettin has done what he could to keep his pet<br />
rust monster well fed, but it has “nibbled” on the track here<br />
enough so that there’s a flat 20% chance (01–20 on d%) that a<br />
car derails passing through here.<br />
Area 23A has a large bed of old, damp straw in the middle<br />
of it, with rusted bits of equipment, armor, and weapons<br />
lying all around it. The cave stinks of feces and rust.<br />
Creatures: Marlgran the ettin and his pet rust monster<br />
come into this cave if Marlgran hears a car coming (Listen +9).<br />
Otherwise, they hide in the cave marked 23A. Marlgran always<br />
carries a thunderstone with him to use against groups of enemies<br />
before charging into battle with his two greatclubs.<br />
The servants of the Temple frequently bribe Marlgran with<br />
food or a little gold in order to pass by him safely. They’ve<br />
never really done him harm, so he has a generally positive<br />
outlook toward them.<br />
dMarlgran: Ettin; hp 70; see Monster Manual page 89.<br />
dRust Monster: hp 29; see Monster Manual page 157.<br />
Treasure: Buried within the bed of straw is a large burlap<br />
sack containing 243 gp, a 50-gp gem, and three thunderstones.<br />
24. Pool Cave<br />
The passage widens into a natural cave, the central portion<br />
of which is filled with water. A dripping sound<br />
echoes across the stone walls. Beyond the pool, which is<br />
40 feet across, the floor of the cave is about 12 feet higher<br />
than the entryway. The entire cave is filled with strange,<br />
glistening rock formations.<br />
The roof of this cave ranges from 15–17 feet high. The pool is<br />
formed from rainwater that works its way through down<br />
cracks in the rock into this cave. The water is fresh and is<br />
responsible as well for the creation, over the centuries, of the<br />
rock formations that are beneath the surface of the pool.<br />
The pool is surprisingly deep, almost 20 feet in the southern<br />
half of the pool (varying from 8–10 feet in the northern<br />
half ). In the northern half, two encrusted corpses lie where<br />
they fell decades earlier (Search DC 25 from the surface, DC<br />
18 from beneath the water’s surface). These corpses are both<br />
human Temple servants who died and were dumped here.<br />
One bears the Elder Elemental Eye symbol, the other the<br />
upside-down step pyramid of Tharizdun (known as the obex)<br />
and a black thurible (see Appendix 1).
CHAPTER 5: THE CRATER RIDGE MINES<br />
In the deepest portion of the pool lies another corpse.<br />
This much older corpse (Search DC 35 from the surface,<br />
DC 22 from beneath water’surface at the shallow end of<br />
the pool to DC 18 under in the pool’s deepest part) is that<br />
of a dwarf still wearing a +1 breastplate, a silver holy<br />
symbol of Moradin (worth 10 gp), and a platinum ring<br />
(worth 60 gp).<br />
Beyond the pool, the high floor hides a deep ledge. The<br />
floor of the ledge is particularly uneven and is only 5 feet<br />
from the ceiling. Still, hidden in this area is the rest of the<br />
treasure of the dwarf in the deep end of the pool. Characters<br />
who make a Search check against DC 20 find a +1 battleaxe, a<br />
masterwork shield, a rusted dagger, a rusted grappling<br />
hook, a vial of holy water, and a rotten leather pouch containing<br />
92 gp, 42 sp, and a 30 gp gem. The rusted items are<br />
no longer usable.<br />
25. Inlet (EL 3)<br />
Fairly dark, stagnant water runs along the eastern side of<br />
this rough passage. The stone here is wet, slick, and shiny.<br />
The water varies from 3–6 feet deep and comes from the<br />
Stalagos, although the portion of the passage that actually<br />
connects with the water outside is completely submerged.<br />
Creatures: An ochre jelly lingers about this area at the<br />
edge of the water. It attacks anything alive that comes near.<br />
dOchre Jelly: hp 59; see Monster Manual page 145.<br />
26. Vranthis the Dragon (EL 6)<br />
This cave has the look of an inhabited place: The floor is<br />
somewhat smooth and free of dust. The north wall is covered<br />
in a dried plasterlike mud, with numerous, sparkling<br />
greenish-blue crystals set into it. The west wall’s niche in<br />
the southern portion of the room has an 8-foot diameter<br />
bed of fungi, grass, and straw—almost like a large nest. A<br />
few metallic items gleam within the bed. Something<br />
appears to be stashed in the niche in the east wall, across<br />
from the bed.<br />
The crystal is essentially worthless, placed by the cavern’s<br />
inhabitant as decoration. The bed has a total of 33 copper<br />
pieces strewn about it, placed only for the sparkle.<br />
Creatures: Vranthis, a wily juvenile green dragon, haunts<br />
this entire area of the mines. He likes to attack foes on the<br />
platform in area 27. He flies or swims through the wide passage<br />
between areas 25 to 28 and out through the water to<br />
hunt in the surrounding countryside.<br />
Vranthis is not in any way allied with the Temple—this is<br />
simply his lair.<br />
dVranthis: Juvenile green dragon; hp 133; see Appendix 3.<br />
Tactics: If encountered elsewhere and hard-pressed<br />
(knocked below half hit points and presented with a formidable<br />
force), Vranthis retreats here. If seriously threatened in his lair,<br />
Vranthis slaps the floating pyramid (see the Trap below) with<br />
his tail to summon the girallon and then flees.<br />
Development: If attacked but left alive, Vranthis is<br />
likely to enlist Marlgran’s aid in helping him prepare for<br />
another attack.<br />
Trap: Vranthis has stolen two minor magic items to guard<br />
his treasure, which is located in the niche in the southeastern<br />
portion of his cave. The first was an oil that would allow a<br />
small object to levitate indefinitely until disturbed. The<br />
second was a ceramic pyramid that, when shattered, would<br />
immediately activate a summon monster V spell to summon a<br />
fiendish girallon.<br />
The pyramid now floats precariously in<br />
front of the stashed horde. Deviously, Vranthis<br />
has coated it with oil, so that if anyone<br />
should try to grab it, they must make a Dexterity<br />
(DC 18) to keep from dropping it. Any<br />
attempt to search the treasure or remove an<br />
item with the pyramid floating in front of it<br />
requires a Dexterity check (DC 15). If failed,<br />
the pyramid is jostled, falls to the floor, and<br />
shatters. (Anyone within 5 feet who wishes to<br />
can make a Reflex saving throw (DC of 25)<br />
to catch it before it hits the floor.)<br />
dFiendish Girallon: hp 52; cold and<br />
fire resistance (10), damage reduction 5/+1,<br />
SR 14, smite good 1/day (+7 damage to<br />
good-aligned creatures); see Monster Manual<br />
page 104.<br />
Treasure: Vranthis has accumulated a<br />
small hoard, but has also managed to guard it<br />
with a trap (see above). The hoard consists of<br />
an iron cauldron with 980 gp and 21 100-gp<br />
gems (amethysts, red garnets, and white<br />
pearls) in it, a golden statue of a coiled serpent<br />
(worth 200 gp) weighing 200 pounds, a masterwork<br />
large steel shield painted with a green<br />
dragon rampant, and a scroll of see invisibility<br />
and alter self.<br />
27. Platform<br />
A wooden platform lies at the end of the<br />
track. It stands 40 feet high. A crankdriven<br />
conveyer belt is on the eastern<br />
side of the platform, with small scooplike<br />
attachments suggesting that it was used<br />
to convey materials from the floor of the<br />
cave to the top of the platform.<br />
Characters on the platform can see that the<br />
ceiling here has been extensively mined<br />
for ore.<br />
Development: If Vranthis the dragon<br />
learns that intruders are on the platform,<br />
he flies out and attacks them while they<br />
are up there, or preferably, while they are<br />
on the even narrower ramp leading up to<br />
the platform.<br />
28. Kuo-Toa Spy (EL 6)<br />
The eastern half of this long cave is lower<br />
than the western half and filled with<br />
dark, murky water. The southern end is<br />
wide, with the water welling into a pool<br />
nearly 60 feet across. The rocky walls and<br />
floor are damp, and the cave wells with<br />
cool, almost oily air. Other than distant<br />
dripping sounds, the area is silent.<br />
The water is 5–6 feet deep in most places, although in the<br />
center of the pool in the southern section it is closer to 10<br />
Operating an Ore Cart<br />
It is a move-equivalent action<br />
to get in or out of the cart. The<br />
cart provides one-half cover to<br />
anyone riding inside.<br />
Working the pump handle is<br />
a move-equivalent action that<br />
moves the cart over level terrain<br />
at a speed of 20. Up an incline,<br />
the rate slows to 10. Rolling<br />
down an incline, the cart can<br />
move as fast as 40. Using the<br />
brake is a move-equivalent<br />
action that slows the cart’s<br />
speed by 10 feet. Left alone, the<br />
cart slows by 10 feet per round<br />
until it comes to a stop.<br />
Four Medium-size characters<br />
can fit into a cart fairly<br />
comfortably. Two Small characters<br />
can take the place of one<br />
Medium-size (while a Large<br />
character would take the place<br />
of two Medium-size). A cart<br />
can carry 1,500 pounds of<br />
weight. The sides are thick<br />
steel: 60 hp, hardness 10. Each<br />
cart also has a lever that<br />
dumps its contents to one side<br />
or the other.<br />
When a cart comes to a<br />
curve, if it moves at a speed of<br />
greater than 10, a 20% chance<br />
(01–20 on d%) exists that it<br />
derails. A cart moving at a<br />
speed greater than 10 that is<br />
derailed spills its contents out<br />
half the time (01–50 on d%).<br />
Characters dumped out of a<br />
moving cart must make a<br />
Reflex saving throw (DC 15) or<br />
suffer 1d6 hp points of subdual<br />
damage for every 10 feet of<br />
its speed.<br />
A Strength check (DC 26)<br />
is needed to push an ore cart<br />
off a track (automatically<br />
derailing it). Obstructions<br />
can derail a cart as well—<br />
usually with a flat 20% to<br />
30% chance of this occurring<br />
(01–20 or 01–30 on d%).<br />
49
CHAPTER 5: THE CRATER RIDGE MINES<br />
50<br />
feet. A passage connects the pool to the outside and the lake,<br />
but it is below the surface of the water.<br />
Creatures: Hiding in the pool is Moolowik, a kuo-toa<br />
rogue. This creature is a servant of the Water Temple (see area<br />
195), and is here checking out this portion of the mines to<br />
see if the Water Temple can recruit allies or establish a<br />
foothold here. The kuo-toa wears a symbol of the Water<br />
Temple (black triangle with a blue/green square dangling<br />
from the bottom point) around his neck.<br />
dMoolowik: Kuo-toa Rog4; hp 29; see Appendix 3.<br />
Tactics: The kuo-toa remains hidden in the pool because<br />
it is afraid of the digester in area 30 that was hunting in this<br />
area not long before. If spotted (Hide +4, +6 for the water<br />
for a total of +10), it attempts to flee out into the Stalagos. If<br />
it observes intruders without being spotted itself, it follows<br />
them (Move Silently +5) to collect what information it can<br />
about them. Only if they confront it where it has nowhere<br />
to flee does it attack.<br />
29. Unstable Cave (EL 4)<br />
A small cave, this appears empty except for rocks strewn<br />
about the floor.<br />
Trap: 1 round after characters enter this cave, it begins to<br />
collapse. Characters in the cave must make Reflex saving<br />
throws (DC 15) each round. Failure deals 3d6 points of<br />
damage, while success reduces damage by half. After 6<br />
rounds, the cave collapses completely. Anyone still in the<br />
cave then suffers 10d6 points of damage, no save.<br />
aCollapsing Ceiling Trap: CR 4; no attack roll necessary<br />
(3d6 or 10d6); Reflex save (DC 15) for half damage; Search<br />
(DC 15); Disable Device (n/a; no mechanism to disable).<br />
Development: As noted to the introduction to this part of<br />
the adventure, this cave opening might serve as a possible<br />
entrance to the Underdark (for those DMs who wish to<br />
create side adventures).<br />
30. Side Caves (EL 6)<br />
Cold, hard droppings of massive size are scattered about<br />
the floor, and a foul odor fills the air.<br />
The ceiling of both of these caves is 20 feet above the floor,<br />
and the walls here are particularly uneven with many<br />
ledges and handholds, making climbing them only a DC<br />
10 task.<br />
Creatures: A digester hides on a ledge 15 feet up in the<br />
first cave. If creatures enter and appear to be headed toward<br />
the second cave, it waits to attack from above until they<br />
return (or if it is discovered before that). Otherwise, it attacks<br />
as quickly as possible, spraying foes with acid from above. It<br />
can climb down slowly, but it does not unless all foes are dead<br />
or gone.<br />
dDigester: hp 71; see Monster Manual page 54.<br />
31. Fungi Forest<br />
This long, high-ceilinged cave appears to be at least in part a<br />
natural one; perhaps a bubble in the magma formed during<br />
one of the volcano’s ancient eruptions. The dark basalt<br />
walls, ceiling, and floor are covered in black, violet, and<br />
white fungus. In places it grows in clumps 3–4 feet high<br />
and twice (or more) as long, punctuated by the occasional<br />
toadstool—some the size of small trees—giving the
CHAPTER 5: THE CRATER RIDGE MINES<br />
impression of a weird, underground forest. The room is<br />
damp and smells sour.<br />
The ceiling height varies from 25–30 feet. Rats, mice, bats,<br />
and even badgers can be found in and around this large<br />
cave, feeding on the fungus that grows here, an unknown<br />
and particularly nutritious sort. The growth extends down<br />
the passages toward areas 32 and 33, but not on the stairs up<br />
to 35.<br />
Development: If characters spend more than a minute in<br />
this cavern making a fair bit of noise, the umber hulk from<br />
area 33 arrives and attacks.<br />
32. Fungi Cave (EL 3)<br />
More fungus coats the walls and floor of this area. A large<br />
mound of puffballs grows in the center of the cave alongside<br />
a 4-foot-tall mushroom.<br />
Creatures: The mushroom is a violet fungus, ready to<br />
attack any living thing that nears it.<br />
dViolet Fungus: hp 18; see Monster Manual page 93.<br />
Treasure: Buried under the puffballs (Search DC 20) is a<br />
pair of ancient dwarven skeletons. These fungus-covered<br />
corpses bear little resemblance to what they once were, but<br />
one still wears a masterwork breastplate and the other a pair<br />
of jeweled rings (worth 50 gp each).<br />
33. Young Umber Hulk (EL 7)<br />
Yet another irregularly shaped cave lies at the end of this<br />
passage. Patches of dark fungi grow over rocky walls. A<br />
dark humanoid shape of great size looms out of the darkness,<br />
claws glistening.<br />
The umber hulks here and in area 34 tunneled out this room,<br />
as well as the caves and tunnels connecting areas 33–36, with<br />
their powerful claws.<br />
Creatures: An umber hulk lairs in this cave, feeding off<br />
the small animals drawn to area. It hungrily attacks anything<br />
that comes into its cave, except the umber hulk that<br />
lives in area 34, a much older specimen that has dwelled<br />
here longer.<br />
dUmber Hulk: hp 74; see Monster Manual page 180.<br />
Treasure: This creature hasn’t accumulated much yet. In<br />
the northern niche in its cave it has stashed 180 gp, 435 sp,<br />
and a masterwork scimitar.<br />
Development: This creature won’t attack the older<br />
umber hulk (its parent) in area 34. If battle rages in this cave<br />
for more than 3 rounds, 5 later the older creature enters the<br />
fray in an attempt to grab a single bit of food (one character)<br />
with a confusion gaze and a grapple and then run back to its<br />
own home.<br />
34. Old Umber Hulk (EL 7)<br />
Bones lie scattered among the fungi in this cave, some so<br />
old that the fungus grows over them as much or more<br />
than on the stones.<br />
The umber hulks tunneled out this room, as well as the<br />
caves and tunnels connecting areas 33–36, with their powerful<br />
claws.<br />
Trap: The umber hulk here has dug a pit 30 feet deep and<br />
then covered it with a blanket of fungus and bones. The pit is<br />
10 feet wide and 5 feet across—the umber hulk can easily<br />
hop over it, but the unwary might fall into it.<br />
aPit Trap (30 feet deep): CR 1; no attack roll necessary<br />
(3d6); Reflex save (DC 15) avoids; Search (DC 17); Disable<br />
Device (n/a) (no mechanism to disable).<br />
Creatures: The old umber hulk that dwells here waits<br />
until someone falls in the trap (or a creature is trying to get<br />
around it) before it attacks. It gains an additional +6 bonus to<br />
hide in this cave (for a total of +7) because it is covered in the<br />
same moss and fungus that grows on the walls and floor. Its<br />
mate was slain a few weeks ago by the trolls in area 36 aided<br />
by the troll in area 37.<br />
dUmber Hulk: hp 56; see Monster Manual page 180.<br />
Treasure: This older umber hulk has accumulated a fair bit<br />
of treasure over the years from the dwarves and the more<br />
recent residents that it has preyed upon. It is contemplating<br />
the not-so-distant day when it has to buy the help of the<br />
umber hulk in area 33 to get food. Buried in the fungus in the<br />
rearmost portion of the cave is its treasure: 1,223 gp; 1,546 sp;<br />
a 50-gp gem; a 100-gp gem; a copper statue of a dwarf warrior<br />
(worth 100 gp); a jeweled brooch (worth 150 gp); a pair of<br />
golden candlesticks (worth 100 gp each); and a ring of climbing.<br />
35. Dead Umber Hulk<br />
A large corpse lies in this cave, desiccated and maggot<br />
ridden. Its black, armor-plated skin and long claws are all<br />
that remains of its humanoid form—its head has been<br />
removed. The cave is otherwise bare. A sour smell lingers<br />
in the air and a few insects buzz around the room. The<br />
corpse lies nearest the east exit.<br />
This umber hulk, the mate of the creature in area 34, was<br />
slain by the trolls in area 36 and 37 working together. Its head<br />
is now in area 37.<br />
The umber hulks tunneled out this room, as well as the caves<br />
and tunnels connecting areas 33–36, with their powerful claws.<br />
36. Troll Watchmen (EL 7)<br />
The central portion of this cave is a pit about 10 feet<br />
across and 6 feet deep full of animal bones and dung. The<br />
western end of the room has two patches of uprooted,<br />
dead fungus mashed into what appear to be large beds or<br />
nests. Two tall, muscular humanoid creatures stand near<br />
the pit, their scaly greenish hides scarred and pocked<br />
from many battles.<br />
The umber hulks tunneled out this room, as well as the<br />
caves and tunnels connecting areas 33–36, with their powerful<br />
claws.<br />
Creatures: Two trolls, still fairly wild, have been paid off<br />
by the forces of the Temple to watch for intruders coming<br />
from the north. Their attitude toward the members of the<br />
Temple is fairly positive because the troll in area 37 helped<br />
them defeat one of the hated umber hulks. They attack all<br />
intruders, howling for help if seriously threatened, hoping<br />
for assistance from area 37.<br />
dTrolls (2): hp 70, 61; see Monster Manual page 180.<br />
Treasure: One of the trolls wears a necklace of bones that<br />
incorporates a jeweled ring (worth 100 gp) and a carved coral<br />
pendant with no chain (worth 150 gp).<br />
51
CHAPTER 5: THE CRATER RIDGE MINES<br />
Foreshadowing<br />
If the PCs talk with the NPCs<br />
they find here or root through<br />
their belongings, they might<br />
learn about some plot elements<br />
that come later. This<br />
gives the adventure a lot<br />
more impact.<br />
1. The Champion of Elemental<br />
Evil. The doomdreamers of<br />
the Inner Circle have a<br />
prophecy that says that a single<br />
individual shall come who shall<br />
enable them to achieve their<br />
goal. They call this person the<br />
Champion of Elemental Evil<br />
and are fervently looking for<br />
him or her.<br />
2. Doomdreamer powers.<br />
When others speak of the<br />
doomdreamers, it’s in hushed<br />
tones. They are extremely mysterious<br />
and terrifying, able to<br />
know your darkest secrets<br />
instantly and use them against<br />
you, chill your soul and warp<br />
your mind with a maddening<br />
scream. They deal with demons<br />
as equals and have communed<br />
with Tharizdun himself in<br />
dreams.<br />
3. Half-elementals. Spoken<br />
of in reverence and awe,<br />
these beings are seen as<br />
nearly divine by the followers<br />
of the Elder Elemental Eye.<br />
Half-elementals wield great<br />
powers within their idiom and<br />
their minds are unlike those<br />
of mere mortals—you can<br />
never even guess at their<br />
true, lofty thoughts.<br />
52<br />
Western Bridge Complex<br />
General Notes<br />
This area, protecting one of the three bridges across the<br />
Stalagos (specifically, the Fire Bridge), is ruled by the insidiously<br />
evil and powerful half-demon half-ogre<br />
mage named D’Gran. D’Gran’s forces are favorably<br />
disposed toward the Fire and Air Temples<br />
but not the other two (although officially they<br />
are neutral in this regard).<br />
The complex of areas 37–51 has three stages<br />
of security. When the PCs first arrive, it is<br />
always at A. If any of these areas is attacked,<br />
they move to B as quickly as possible and<br />
remain wary for the rest of that day. If an attack<br />
comes while in stage B, they move to stage C as<br />
quickly as possible and remain so for the rest of<br />
that day.<br />
A. Lax. As presented. All guards take 10 on<br />
Listen and Spot checks but suffer a –5 penalty<br />
for inattention.<br />
B. Wary. The troll from area 44 joins the troll<br />
in area 37. Likewise, the giant in area 49 joins<br />
the other in area 46. The gnolls in area 50 join the<br />
gnolls in area 51. All guards take 10 on Listen<br />
and Spot checks with no penalty.<br />
C. Alert. The wizards in area 40 cast appropriate<br />
spells on the giants, trolls, or the other<br />
guards (in that order). The wizards, their<br />
dinosaurs, and D’Gran stand in the intersection<br />
between areas 44 and 46. All guards take 10 on<br />
Listen and Spot checks with no penalty.<br />
All guards and other personnel wear the<br />
black iron triangle of the Elder Elemental Eye.<br />
Their clothing is predominantly black as well.<br />
Areas 37–51 are all lit by torches in iron<br />
sconces. All ceilings are 15 feet high unless<br />
otherwise noted, and doors are wooden (hardness<br />
5, 15 hp, break DC 18 if locked; Open Lock<br />
DC are listed in each encounter area).<br />
The inhabitants of areas 37–51 know the general<br />
layout of areas 35–53 and could find their<br />
way to area 1 and the way out if they had to.<br />
They know about the ettin, and rumors exist of<br />
the dragon to the north; they know about and<br />
hate the orcs to the south. They also know the<br />
general layout of the whole temple complex.<br />
They know that there’s a lake in the middle of<br />
the crater and that three bridges go out to an<br />
island where the masters of the place reside, and<br />
that the door at the other end of the bridge can be opened<br />
only by a special key that “mostly just priests have.”<br />
37. Troll Warrior (EL 7)<br />
A simple black iron chandelier holds ten lit candles<br />
over a crude but sturdy wooden table in the middle of<br />
the room. A longspear has been wedged, point upward,<br />
into a crack between two floor stones near the table. A<br />
large ebony head, with compound eyes and massive<br />
mandibles, is thrust atop the point of the spear, its<br />
blood long since dried on the shaft and the floor. A<br />
large longbow and a quiver of arrows lean against the<br />
southeast wall.<br />
Creatures: A 2nd-level troll fighter named Krall stands<br />
guard here. He wears half-plate and uses a Huge two-bladed<br />
sword (damage d10/d10). Krall serves the Temple faithfully<br />
and wears a black triangle symbol. He is slowly attempting to<br />
convince the trolls in area 36 to convert and work officially<br />
for the cause.<br />
DKrall: Male troll Ftr2; hp 88; see Appendix 3.<br />
Tactics: Krall questions all intruders, even those wearing<br />
Temple colors or symbols. A successful Bluff or Disguise<br />
(against Sense Motive or Spot respectively) opposed check<br />
gets intruders by.<br />
Treasure: The bow is a composite longbow (Strength 20)<br />
for which no string can be found here. The twenty arrows in<br />
the quiver are all of masterwork quality.<br />
38. Empty Lair (EL 2)<br />
This foul-smelling chamber has a green curtain with<br />
dark stains that runs along the southeast wall. Two large<br />
beds, a wooden table, three large chairs, and a heavy<br />
trunk furnish the room. Along the northeast and northwest<br />
walls, about 6 feet off the floor, a long wooden<br />
shelf holds skulls—mostly human, but some appear<br />
elven, dwarven, halfling, gnome, and more bestial creatures<br />
as well.<br />
This is the lair of the two trolls, one found in area 37 and the<br />
other in 44. Shoved under one of the beds are several of<br />
sheets of paper, a bottle of ink, and a pen that one of the trolls<br />
is using to learn to write.<br />
Trap: The trunk is locked (DC 20 to open) and has a crude<br />
trap built by the trolls that causes an arrow to discharge out<br />
of the open trunk.<br />
aPoisoned Arrow Trap: CR 2; +10 ranged (1d6/×3) +<br />
poison, Fortitude save (DC 14) resists, 1d6 Dex/1d6 Dex);<br />
Search (DC 18); Disable Device (DC 20).<br />
Treasure: The chest contains 1,208 sp, three smokesticks,<br />
Medium-size masterwork chainmail, a bag of broken human<br />
bones, and a rolled-up map. The map depicts a route leading<br />
from the Temple to a troll lair in a cave about ten miles away<br />
(twelve trolls dwell there, including a 2nd-level adept and a<br />
3rd-level warrior).<br />
39. Dinosaurs (EL 5)<br />
A closed portcullis bars entry to this room, which smells<br />
of blood and urine. Strange sounds can be heard coming<br />
from within. A lever on the north wall of the hall leading<br />
up to the room rests in the down position 5 feet<br />
from the entrance.<br />
The portcullis is raised and lowered using the lever. It takes a<br />
full round for the mechanism to lift or lower the gate. The<br />
room beyond the portcullis has a few gnawed and broken<br />
bones, as well as some dried blood splatters.<br />
Creatures: Two deinonychuses lair here, the crafty pets of<br />
Heunar and Tippesh (area 40). These beasts are always<br />
hungry, and they attack anything other than their wizard<br />
masters if given the chance, but they won’t stupidly throw<br />
away their lives doing so.<br />
dDeinonychuses (2): hp 33, 40; see Monster Manual<br />
page 55.<br />
Development: If threatened, Heunar may come here to<br />
set the deinonychuses free to attack his foes. If not found in
CHAPTER 5: THE CRATER RIDGE MINES<br />
his quarters, Heunar is likely to be here, probably feeding<br />
the creatures.<br />
40. Wizards’ Quarters (EL 7)<br />
The thick smell of incense fills this room. A single, large<br />
bed, a long table covered in alchemical equipment, a<br />
wardrobe, and two chests of drawers are in this room. A<br />
large hourglass sits atop one of the chests. Near the center<br />
of the room a circle filled with glyphs and sigils has been<br />
drawn on the floor in red chalk. More sigils and symbols<br />
decorate the walls and ceiling.<br />
The table has all the equipment to make potions, as well as an<br />
incense brazier and a stuffed small monstrous scorpion.<br />
Creatures: Heunar is a 4th-level half-orc wizard, and his<br />
partner Tippesh is a human 6th-level human wizard who<br />
specializes in evocation spells. They serve D’Gran with no<br />
great loyalty, but no great hatred either. They are both committed<br />
to moving up the chain of command so that one day<br />
they can work within the Outer Fane. Both are also allied<br />
with the Fire Temple—a political choice, for the Fire<br />
Temple is the most powerful and prominent of the four<br />
right now.<br />
Heunar is not as ugly as most half-orcs. He has a shock of<br />
bright red hair and wears a tunic and a long coat covered in<br />
pockets, straps, and hooks where he keeps his components<br />
handy. In a pocket, he carries a piece of paper with the words<br />
“Fire burns away my enemies.” (This is a useful phrase to<br />
know in the Fire Temple.)<br />
Tippesh is a large, stocky woman with short, black hair<br />
and a large tattoo of a bat on her face. She wears garish, tightfitting,<br />
yellow and orange clothing.<br />
dHeunar: Male half-orc Wiz4; hp 13; see Appendix 3.<br />
dTippesh: Female human Evo6: hp 21; see Appendix 3.<br />
Tactics: These wizards know just about everyone, making<br />
it a point to recognize people as they climb the ladder of<br />
power in the Temple. They attack anyone they don’t recognize<br />
(a successful Disguise opposed check would help here,<br />
but using Bluff to convince them that you are a member of<br />
the organization won’t).<br />
If in battle, both enjoy the advantage of mobility. Tippesh<br />
uses her slippers of spider climb and Heunar drinks his potion of<br />
levitate to get away from those who seek to melee with them.<br />
If alerted, Heunar runs to area 39 to loose the deinonychuses.<br />
They then use their spells to attack foes while the dinosaurs<br />
attack directly.<br />
In battle, Heunar casts invisibility, summon monster II,<br />
shield, and magic missile, in that order. Tippesh spends most<br />
of the day in mage armor as a general rule, and unleashes<br />
fireballs and lightning bolts first—better safe than sorry is<br />
her outlook.<br />
Traps: Each of the spellbooks detailed below is trapped<br />
with explosive runes.<br />
aExplosive Runes: CR 3; 10-ft. explosion (6d6); Reader gets<br />
no save, others get Reflex saves (DC 17) for half damage;<br />
Search (DC 28); Disable Device (DC 28).<br />
Treasure: Amid the clutter on the table is a potion of spider<br />
climb. Altogether, the lab is worth 500 gp, but it weighs 40<br />
pounds and is quite cumbersome. The wardrobe and chests of<br />
drawers hold clothing and personal gear mostly, although a<br />
small box of costume jewelry (5 pieces worth 1 gp each) and<br />
three books are also present. Two are silver-bound spellbooks<br />
(see Heunar and Tippesh’s statistics in Appendix 3).<br />
The third book is an old set of records of the Temple of<br />
Elemental Evil. Only about the first quarter of the book’s<br />
pages are used. The basics of the history are covered, and it<br />
specifically mentions the fate of Lareth the Beautiful (see<br />
Chapter 3: Ghost Town and Ruined Temple). It further makes<br />
clear that the raised cleric knows much about the Cult of<br />
Tharizdun and remains at large—probably in the vicinity<br />
of Hommlet or Nulb—and could end up being a dangerous<br />
loose end for the cult to deal with.<br />
41. Armory<br />
Racks of weapons and shields hang on the wall, and other<br />
weapons lie on two tables in the room’s center.<br />
Longswords, shortspears, morningstars, heavy flails, and<br />
halberds are on the wall, and short swords, daggers,<br />
javelins, nunchaku, warhammers, and throwing axes are<br />
on the tables. An unlit lantern sits on a small table in the<br />
middle of the room.<br />
Ten of each weapon are in the room.<br />
42. Storeroom<br />
Boxes, barrels, sacks, and bundles fill this dusty storeroom.<br />
The goods found here are fairly fresh and range from foodstuffs<br />
(flour, fruit, vegetables, cheese, dried meat, and so on)<br />
to dry goods (200 feet of rope, 30 feet of chain, blankets,<br />
paper, torches, tools, and so on).<br />
43. D’Gran’s Quarters (EL 10)<br />
This gruesome room has a large pile of bones, many of<br />
them crushed, with an indentation suggesting that<br />
something large frequently reclines on them. Blood<br />
spatters the walls and floor, though most of the stains<br />
appear old.<br />
Creatures: D’Gran is a half-demon/half-ogre mage who<br />
commands this complex. He is a sadistic and cruel creature,<br />
as befits his abyssal nature. He is a devout believer that that<br />
the world will be a better place when Tharizdun is freed and<br />
gladly works for the doomdreamers in whatever capacity<br />
they desire. Beyond that, his intensely chaotic nature makes<br />
him difficult to deal with, so the clerics of the cult have<br />
placed him in the mines to keep from having to deal with<br />
him much.<br />
D’Gran has long, curved horns, blue-black scales that cover<br />
about two-thirds of his body, and piercing yellow eyes. He<br />
wears a green kilt and a wide belt covered with copper plates.<br />
D’Gran also wears the symbol of the Fire Temple (a<br />
diamond-shaped red pendant dangling from the standard<br />
upside-down black triangle), but only because that temple<br />
pays him and is currently on top in the struggle for power,<br />
not because he owes any philosophical support to them. He<br />
does take special care in escorting Fire Temple personnel<br />
through the area he controls, but (unbeknownst to the Fire<br />
Temple) he would not actually support them in a real fight<br />
against the members of other temples. Should such an<br />
event occur, he would be more likely to follow his chaotic<br />
and evil whims.<br />
dD’Gran: Half-demon/half-ogre mage; hp 43; see<br />
Appendix 3.<br />
53
CHAPTER 5: THE CRATER RIDGE MINES<br />
Tactics: D’Gran is extremely suspicious but vain. Any<br />
Bluff or Disguise opposed check made against him by<br />
intruders pretending to be Temple personnel suffers a –2<br />
penalty unless it appeals to his own ego (flattery gets you<br />
everywhere). D’Gran knows that the giant at the bridge<br />
attacks anyone not accompanied by him or one of the other<br />
bridge complex personnel, and so he accompanies those<br />
who successfully fool him (unfortunately for the characters,<br />
this means he asks more questions, prompting more<br />
skill checks).<br />
Treasure: Buried in the bones (Search DC 17) is a small<br />
bag of holding (250-pound limit). This bag contains a potion of<br />
cure moderate wounds, three 100-gp pieces of jet, three vials of<br />
antitoxin, a set of masterwork thieves’ tools, a masterwork<br />
scimitar, a Small chain shirt and an arcane scroll of arcane<br />
lock. (These items are all Descritad’s—see area 44.)<br />
Development: If desired, D’Gran can be encountered anywhere<br />
in his little demesne (areas 37–51), since he frequently<br />
wanders around to verbally abuse those under him.<br />
44. Great Hall (EL 7)<br />
This large chamber appears to be a feasting hall. Four<br />
long tables with benches on either side fill most of the<br />
central part of the room. The southwest 15 feet of the<br />
room is raised 1 foot above the rest of the hall. A thronelike<br />
wooden chair is pushed against the southwest wall,<br />
carved with images of fire and torment. A long iron<br />
chain is connected to the wall, the rest coiled near the<br />
large chair.<br />
A small humanoid hangs from manacles on the<br />
southeast wall, her feet 3 feet above the floor. The wall<br />
around and behind her is stained maroon and filled<br />
with cracks and chips. Near the entrance in the northwest<br />
wall is a stack of black iron spheres, each about 4<br />
inches across.<br />
54<br />
The throne is D’Gran’s, and the chain was for his pet abyssal<br />
wolf, which is dead now. It was slain by Descritad, the<br />
halfling chained to the wall.<br />
Creatures: Slaazh, a 2nd-level troll fighter in spiked halfplate<br />
carrying a Huge greatsword (2d8 damage), stands<br />
guard over Descritad. Slaazh occasionally threatens the<br />
halfling, but usually just guards her and the room in general.<br />
Its lair is area 38.<br />
DSlaazh: Male troll Ftr2; hp 86; see Appendix 3.<br />
Descritad is a multiclass halfling rogue/barbarian who<br />
stole from D’Gran and others one too many times and was<br />
caught (but not before she killed D’Gran’s pet). Now she<br />
hangs from manacles on the southwest wall, awaiting the<br />
next gathering in which D’Gran shall have his sport—<br />
throwing the shot-putlike iron spheres at her from across<br />
the room. The idea here is that the impact is painful, but<br />
(unless he accidentally hits her in the head), probably not<br />
lethal until she has been hit many times. If adventurers<br />
enter the room and fight the troll, she cheers for them. She<br />
knows what everyone in this area knows about the layout<br />
of the place (she was a cohort of D’Gran’s until recently)<br />
and promises any potential rescuers help and information<br />
for her freedom. She’s not lying—she tells them anything<br />
she knows about the place that they want to know and<br />
helps them in battle against whatever enemies come. However,<br />
Descritad is savage and greedy, and she does not make<br />
the best ally. She complains, has no tact, is rude and crass,
CHAPTER 5: THE CRATER RIDGE MINES<br />
and is likely to say just the wrong thing if her friends are<br />
negotiating with an important NPC. She also attempts to<br />
steal treasure whenever possible.<br />
dDescritad: Female halfling Rog3/Bbn3; hp 41; see<br />
Appendix 3.<br />
Tactics: The troll questions all intruders, even those wearing<br />
Temple colors or symbols. A successful Bluff opposed<br />
check gets intruders by Slaazh.<br />
45. Guards (EL 4)<br />
The door to this room is usually ajar so the guards can hear<br />
people coming.<br />
This simple guard post has two round tables surrounded<br />
by chairs. The tables are stained and covered in cups,<br />
bread crusts, playing cards, dice, and graffiti carved by<br />
sharp knives wielded by bored hands.<br />
Creatures: Eight 1st-level human warriors are stationed<br />
here at all times. They are positioned in this chamber so that<br />
they can attack intruders in 46 or those coming from the<br />
north or south in the large passage. They keep the door open<br />
to be aware of who is coming down that hall, although,<br />
unless they are on alert, they do not have anyone actually<br />
positioned there to keep watch out of the door. They rely<br />
instead on their hearing (Listen +2).<br />
dHuman War1 (8): 6, 8, 9, 4, 5, 6, 5, 10; see Appendix 3.<br />
Development: If they hear intruders or sounds of trouble,<br />
they take a round to get ready and then move as quickly as<br />
possible toward the sound. For example, if they hear sounds<br />
of combat in 46, they reach that area 3 rounds later.<br />
Tactics: The guards do not question anyone appearing to<br />
belong there (wearing Temple symbols and winning an<br />
opposed Disguise check).<br />
46. The Bridge (EL 7)<br />
The hall here widens into a chamber. A pile of fairly<br />
rounded stones is stacked in the southeast corner. To<br />
the north, the passage leads out of the crater wall and<br />
onto a 20-foot-wide stone bridge spanning the gray,<br />
stagnant water that fills most of the caldera. To either<br />
side of this exit, huge, stone, birdlike humanoids,<br />
carved from the natural rock, stand a perpetually vigilant<br />
watch.<br />
The dwarves built these bridges so that they could safely and<br />
easily traverse the dark waters of Stalagos, the lake in the<br />
caldera, and reach the inner cone (the Outer Fane). This<br />
bridge is known as the Fire Bridge, because it leads to the<br />
Fire Door. At both ends, carved into where the rock floor<br />
ends and the bridge begins, is a lozenge-shaped symbol 3 feet<br />
long. This is the symbol of fire.<br />
Creatures: Either Rau or Vech, both hill giants, stand<br />
guard here while the other relaxes in their shared lair in area<br />
49. Whichever giant is present uses the stones to attack any<br />
intruders in sight.<br />
dHill Giant: hp 102; see Monster Manual page 98.<br />
Tactics: The giant attacks all intruders, even those wearing<br />
Temple colors or symbols, unless accompanied by D’Gran or<br />
someone else he recognizes.<br />
Development: If the guards in 45 are alive, they arrive 3<br />
rounds after the sounds of combat begin in this area.<br />
47. Guard Barracks (EL 4)<br />
This room is crowded with wooden bunks. The north wall<br />
is covered with a mural showing warriors magically<br />
appearing out of a black triangle with an upside-down Y<br />
inscribed within it. The human warriors charge out in a<br />
great battle frenzy. Each bed has a bag or small wooden<br />
lockbox on or under it.<br />
The bags and boxes contain clothing and personal gear<br />
(comb, mirror, razor, knife, box of food seasoning, and so on).<br />
Creatures: Sixteen human guards live here, although, at<br />
any given time eight of them stand guard in area 45. The rest<br />
relax here. If attacked without warning, only three are ready<br />
on the first round to act, three more can act in the next<br />
round, but the other two aren’t ready for 1d4 rounds as they<br />
wake up, grab their gear, and so on.<br />
dHuman War1 (8): 8, 5, 6, 4, 7, 7, 6, 5; see Appendix 3.<br />
Although they are loyal to D’Gran, they are quick to obey<br />
the orders of the nearby hill giants out of fear. They hate the<br />
trolls and work with them only if D’Gran is around.<br />
Development: Although they are not listening for trouble<br />
(giving them a –10 penalty on Listen checks), if they hear an<br />
alarm or are otherwise alerted, they all can be ready for<br />
combat in 1d4 rounds and move to the sound of trouble with<br />
the greatest possible speed.<br />
Treasure: Under one of the pillows on a bunk (Search<br />
DC 20), a guard keeps a token from the Water Temple.<br />
This is a flat blue-green stone, square in shape, with the<br />
following verse carved into it in Common: “Waves pound<br />
relentlessly.” This is useful in the Water Temple (Area 195)<br />
and elsewhere.<br />
48. Food Storage<br />
Boxes, barrels, sacks, and bundles fill this room. Hunks of<br />
meat tied with twine hang from the ceiling.<br />
This room contains barrels of water, casks of wine, crates and<br />
bags of foodstuffs (flour, corn meal, sugar, salt, eggs, potatoes,<br />
onions, carrots, and so on), and hanging hunks of heavily<br />
salted meat.<br />
49. Giant Lair (EL 8)<br />
Two massive beds, 10 feet long and 5 feet wide, are<br />
pushed against the far wall. In the middle of the floor, the<br />
occupants of the room have stacked an incredible pile of<br />
melon rinds. Many of these rinds are quite old, rotten,<br />
and give the room a sickly sweet odor of decay. The room<br />
also contains a large chest, a large furry pelt that’s obviously<br />
used as a bed, and an open barrel.<br />
The barrel is full of fresh water. The pelt is the bed of Farkis,<br />
the dire wolverine.<br />
Creatures: Rau and Vech, the two hill giants who live here,<br />
love melons. D’Gran provides them with melons to keep them<br />
happy. A new shipment comes in about once a week, but only<br />
during the late summer months. They love melons almost as<br />
much as they love their pet dire wolverine, Farkis.<br />
One of the giants is here, the other on duty at the bridge<br />
(area 46).<br />
dHill Giant: hp 102; see Monster Manual page 98.<br />
dDire Wolverine: hp 45; see Monster Manual page 57.<br />
55
CHAPTER 5: THE CRATER RIDGE MINES<br />
56<br />
Treasure: The chest is locked with two different locks (DC<br />
25 and 28 to open), and contains 4,150 gp; a collection of used<br />
weapons (two longswords, three daggers, a heavy mace, a<br />
morningstar, a battleaxe, two light crossbows, and a masterwork<br />
short sword); a masterwork large steel shield; and the<br />
head from a long-since destroyed life-size bronze statue of a<br />
human male (worth about 20 gp).<br />
Development: Unless it is summer and they have a fresh<br />
supply of melons, or autumn and they have just had their fill,<br />
the giants are not particularly loyal to D’Gran or the Temple.<br />
Here in their lair, a bribe of 50 gp (or its equivalent) gets the<br />
giant present to ignore the PCs. A bribe of 250 gp gets the giant<br />
to help the PCs with information. A bribe of 500 gp gets the<br />
giant to help the briber in a combat encounter. (Bluff is ineffective<br />
on them because they just don’t care.)<br />
50. Gnoll Barracks (EL 5)<br />
A great many cots and beds are jumbled in this room.<br />
The walls are covered in crude paintings of dogs and<br />
doglike humanoids. Equipment, clothing and trash are<br />
scattered everywhere.<br />
Twelve beds are here. Most of the stuff on the floor is food<br />
waste and broken equipment, although some general gear (2<br />
backpacks, a flask of oil, 20 feet of rope, and so on) and personal<br />
items (a hair-filled brush, a bracelet made of teeth, a<br />
whetstone, and so on) lay about as well. A character who<br />
makes a Search check (DC 15) discovers a battleaxe, a longsword,<br />
and ten arrows, all in good shape.<br />
Creatures: Twelve gnolls live here, although, at any given<br />
time six of them stand guard in area 51. The rest relax here. If<br />
attacked without warning, three are ready on the first round<br />
to act, another can act in the next round, but the other two<br />
aren’t ready for 1d4 rounds as they wake up, grab their gear,<br />
and so on.<br />
dGnolls (6): hp 11, 14, 12, 13, 9, 11; 2d10 gp; see Monster<br />
Manual page 105.<br />
Although they are loyal to D’Gran, they are quick to obey<br />
the orders of the nearby hill giants out of fear.<br />
Tactics: The gnolls question all intruders, even those wearing<br />
Temple colors or symbols. A successful Bluff opposed<br />
check gets intruders by.<br />
Development: Although they are not listening for trouble<br />
(giving them a –10 penalty on Listen checks), if they hear an<br />
alarm or are otherwise alerted, they all can be ready for<br />
combat in 1d4 rounds and move to the sound of trouble with<br />
the greatest possible speed.<br />
51. Gnoll Guards (EL 5)<br />
The doors to the southeast are both barred (DC 25 to open).<br />
This large area has two doors spaced far apart leading<br />
southeast. The northwest wall has a number of mining<br />
tools such as picks, hammers, and shovels on hooks, but<br />
they look dusty and infrequently used.<br />
Creatures: The six gnolls that stand watch here attack<br />
anyone who they do not recognize. One of them bangs his<br />
weapon on the gong for the first round if possible, to sound<br />
an alarm.<br />
They know about the hostile orcs who live to the south<br />
and hate them for their frequent raids. D’Gran has promised<br />
to send one of the giants down into those caves to wipe out<br />
the orcs, but so far it has not happened.<br />
dGnolls (6): hp 11, 12, 15, 13, 9, 8; 2d10 gp; see Monster<br />
Manual page 105.<br />
Tactics: The gnolls question all intruders, even those wearing<br />
Temple colors or symbols. A successful Bluff opposed<br />
check gets intruders by.<br />
Development: The cries and clashes of battle bring the<br />
humans from area 47 in 1d4+1 rounds.<br />
Orc Caves General Notes<br />
A band of orcs that the Temple attempted to incorporate into<br />
their organization months ago rebelled and escaped into this<br />
area and the caves to the south. They hate the gnolls and<br />
humans to the north and have come into conflict with them<br />
on multiple occasions. They are deathly afraid of the secret<br />
dwarven temple complex to the south.<br />
The orcs do not use light, relying on their darkvision.<br />
They are fairly well organized, and attempt to fight against a<br />
foe en masse as much as possible. They are spread out, however,<br />
which makes doing so difficult. They are wary and<br />
always on alert.<br />
If Murant, the orc leader in area 58, hears sounds of battle<br />
anywhere in the orcs’ lair, he charges toward the battle, bellowing<br />
for the other orcs to aid their brethren.<br />
52. Orc Watchers (EL 1)<br />
This tunnel appears to have once been a natural tube created<br />
as the lava cooled many centuries ago. It slopes<br />
steadily upward toward the southeast.<br />
The stairs in the south leading upward were cut into the rock,<br />
but other than that, this area and the passage to the south are<br />
entirely natural.<br />
Creatures: Two orcs are positioned here at all times,<br />
halfway up the stairs. They listen (Listen +2) or watch for<br />
the door opening (their darkvision allows them to see<br />
about halfway across the tunnel/cave). If they see any<br />
sign of intruders, they fall back to area 57 and alert the<br />
guards there.<br />
dOrcs (2): hp 4, 6; 2d10 gp each; see Monster Manual<br />
page 146.<br />
53A. Alarm<br />
The orcs in 53B set up a thin thread tripwire halfway across<br />
the floor of this cave, about 5 inches above the floor. PCs<br />
must make a successful Spot check (DC 22) to see it. Otherwise,<br />
a character walking across this cave steps on the taut<br />
string on a roll of 01–80 on d%. If this happens, bells on<br />
both ends of the string are jangled, alerting the orcs in 53B.<br />
The orcs might still hear noisy characters even if they<br />
avoid the string.<br />
53B. Attack Chariot (EL 4)<br />
A metal-plated wagon, with a high wall complete with<br />
arrow slits, sits in the middle of this cave. Tools and bits of<br />
scrap iron are scattered about the floor.<br />
The wagon is a new invention of the orcs as they prepare a<br />
serious raid against the gnolls to the north. It is 7 feet wide,<br />
and 10 feet long counting the back, which consists of two<br />
poles for orcs to hang onto as they push behind extensions
CHAPTER 5: THE CRATER RIDGE MINES<br />
of the walls. Four orcs can push at half normal speed, and<br />
they have nine-tenths cover (except from directly behind)<br />
as only their feet are exposed while they push. Room exists<br />
inside for two humanoids, both of whom have nine-tenths<br />
cover. Two repeating crossbows are inside the wagon,<br />
swivel-mounted and sturdy, giving anyone using them a +1<br />
attack bonus.<br />
Creatures: Six orcs are stationed here, preparing and<br />
guarding the attack chariot. If they hear noise (particularly<br />
the bells) in area 53A, they get ready to use the chariot in<br />
battle. They move it to the mouth of the cave, effectively<br />
blocking the passage. They only pull back when the enemy<br />
gets dangerously close. The two orcs inside are the only<br />
ones that can see, so they yell directions to those who<br />
push. Once it is in a desired position, the orcs pushing are<br />
free to melee.<br />
dOrc Archers (2): hp 8, 4; 2d10 gp each Repeating crossbows<br />
(+1 ranged); see Monster Manual page 146.<br />
dOrc Skirmishers (4): hp 6, 7, 4, 5; 2d10 gp each; see<br />
Monster Manual page 146.<br />
Ad Hoc XP Adjustment: The presence of the orc attack<br />
chariot increases the EL of this encounter by one. Award an<br />
addition 50% XP for defeating these orcs.<br />
54. More Watchers (EL 2)<br />
This huge cave slopes upward toward the south. Fungus<br />
grows all along the east wall and floor.<br />
The fungus is harmless.<br />
Creatures: Watching the passage to the north, four orcs<br />
with repeating crossbows wait in the darkness (Hide +0) and<br />
fire at oncoming foes. Unless noise alerts them that foes are<br />
coming from one of the other passages, the orcs won’t be prepared<br />
to fight them until such enemies actually enter the<br />
large cave they occupy.<br />
dOrc Archers (4): hp 4, 5, 3, 6; 2d10 gp each; repeating<br />
crossbows (+1 ranged); see Monster Manual page 146.<br />
55. Storehouse<br />
The passage ends in another large cave. The central portion<br />
of the chamber is higher than the outer edges, a<br />
sloped “pedestal” about 5 feet high.<br />
In the lower portion of the cave’s south end, the orcs<br />
have hidden supplies that they have stolen from the forces<br />
of the Temple. A few crates, barrels of water, and bags of<br />
foodstuffs—some a little old—are here along with 50 feet<br />
of rope, some wooden planks, a large animal harness,<br />
some chalk, a bale of thick black cloth, and a small barrel<br />
full of nails.<br />
56. The Forbidden Cave<br />
This place seems empty. A large orc skull and a hammer<br />
have been scrawled in the stone in the middle of the<br />
cave’s floor, with an arrow pointing to the southeast.<br />
Weeks ago, the orcs explored the areas to the southeast of this<br />
chamber. Traps and a powerful golem (see below) chased<br />
them out. The tale grew in the telling, and now the orcs here<br />
believe that the deity of the dwarves haunts the areas beyond<br />
this chamber.<br />
57. Orc Guards (EL 6)<br />
Skins and straw make six beds here, scattered throughout<br />
the cave. The eastern alcove is actually a dark pit.<br />
The pit is about 18 feet deep and serves as a latrine and a<br />
place to dump garbage. It holds nothing of value, but a giant<br />
bombardier beetle lives in the waste (see below). Each bed<br />
has a bag or bundle secreted amid the straw or skins that<br />
contains simple gear and personal belongings (a whetstone,<br />
some tools, a candle, and so on). A portable ram rests near<br />
one bed.<br />
Creatures: This cave is home to two different types of<br />
creatures.<br />
Giant Bombardier Beetle. The pit is the lair of a giant bombardier<br />
beetle that does not bother the orcs—the source of<br />
its food and nesting materials. Likewise, the orcs are afraid of<br />
it and don’t bother the beetle. It attacks anything that comes<br />
down into the pit.<br />
dGiant Bombardier Beetle: hp 13; see Monster Manual<br />
page 206.<br />
Orcs. Six well-armed and armored orcs lair here. Each has<br />
one level of warrior. If the orcs fight here, they attempt to<br />
push at least one attacker into the pit with bull rush attacks.<br />
They are very loyal to their leader, Murant, and fight to the<br />
death for him.<br />
dOrc War1 (6): hp 10, 8, 9, 7, 15, 9; see Appendix 3.<br />
Development: The orcs here would prefer to confront<br />
intruders in the empty cave to the north or from the top<br />
of the stairs going south if possible, whichever is more<br />
appropriate.<br />
58. Orc Leader (EL 5)<br />
This cave has an odd smell, but appears dark and empty.<br />
The ceiling is 18 feet high. A wooden platform hangs<br />
from the southwest wall, but it looks unsafe to stand upon<br />
and you see no easy way up to it.<br />
Hidden in the southernmost portion of the room is a pile of<br />
furs and skins that Murant uses as a bed.<br />
The platform, built by the dwarves long ago to reach a<br />
vein of ore high above, is indeed unsafe. More than 100<br />
pounds sends the platform, which is 10 feet above the<br />
floor, crashing down.<br />
Creatures: Murant, the leader of the orcs (it is premature<br />
to call this a “tribe” or Murant a “chief ”), dwells here. Murant<br />
is a 5th-level barbarian fond of using poison on his blade. He<br />
goes into battle with his axe poisoned with large scorpion<br />
venom (DC 18 1d6 Str/1d6 Str).<br />
Murant wears the skull of a large reptile as a helmet and<br />
his hide armor is covered in small fetishes—feathers, bones,<br />
animal skulls, coins, and so on.<br />
dMurant: Male orc Bbn5; hp 47; see Appendix 3.<br />
Development: Murant goes where his troops are. If he<br />
hears sounds of trouble, he goes to area 57 first to gather the<br />
orcs there. Like the orcs in 57, he would prefer not to fight<br />
enemies in his lair, and moves to the intruders rather than<br />
letting them come to him.<br />
Treasure: Hidden in a small niche by his bed (Search DC<br />
18), Murant has secreted a bag. In the bag are three more<br />
doses of large scorpion venom, a potion of cure light wounds, 89<br />
gp, three 50-gp gems, a good lock (DC 30 to open) and its key,<br />
and an everful mug (see Appendix 1).<br />
57
CHAPTER 5: THE CRATER RIDGE MINES<br />
58<br />
59. Lair (EL 3)<br />
The floor of this cave is flat and smooth. A crude spiral<br />
staircase of timbers goes up to the ceiling and up<br />
through a hole 20 feet above the floor. A few bones, a<br />
broken knife blade, and a shattered clay pot lie scattered<br />
about the room.<br />
The staircase was built by the dwarves to access a rich bit of<br />
ore above this cave, in effect creating another cave, about the<br />
same size as this one, directly above it. The old rickety staircase<br />
is sturdy enough to carry a normal amount of weight (in<br />
other words, it’s not dangerous), but it squeaks terribly as it is<br />
climbed. Move Silently checks are modified by –20 when<br />
going up these stairs.<br />
The room at the top of the stairs is more or less the same<br />
size and shape as the room below, except that the only<br />
exit is the stairs. A large communal bed of blankets and<br />
scraps of cloth, occupied by small, frail, and obviously<br />
abused orcs is in the southern portion of the room. A<br />
small shrine with a stone idol sets on the floor in the<br />
western portion of the room, and a pile of miscellaneous<br />
gear is in the east.<br />
Creatures: The creatures in this room consist of six<br />
male orcs, twelve female orcs, six orc children, and one<br />
kobold slave.<br />
Only the male orcs fight, and they fight to the death. Even<br />
the kobold slave is too ill treated to struggle.<br />
dOrcs (6): hp 4, 5, 4, 3, 2, 6; 2d10 gp each; see Monster<br />
Manual page 146.<br />
Treasure: A stone statue of Gruumsh the orc deity is<br />
within the shrine, with a single bloodstone eye (worth 50 gp).<br />
The pile of gear consists of 50 feet of silk rope, a grappling<br />
hook, a portable battering ram, a pair of daggers, three large<br />
rocks, a silver platter (tarnished and dented, but still worth<br />
50 gp), a chain shirt, a lantern, a small steel mirror, and 10<br />
feet of chain.<br />
60. Orc Lair (EL 5)<br />
The orc archers fire as soon as characters are in sight, which<br />
may be well before the characters see what is described<br />
below, particularly if the PCs carry light sources with them.<br />
The passage ends in a wall of metal—six tower shields,<br />
some bearing the black triangle symbol, have been lashed<br />
together (four upright and two sideways along the top)<br />
with rope and chain making a steel wall, 12 feet across<br />
and 7 feet high. This blocks off the passage. Small holes in<br />
the shield wall provide just enough room to fire an arrow<br />
through it.<br />
The cave itself is bare of much of interest—dozens of sleeping<br />
pallets and beds made from piles of rags and clothes, a<br />
large wooden chest, a barrel of 42 arrows near the entrance,<br />
and a horrible red eye symbol painted on the floor.<br />
Creatures: The creatures in this room consist of seven<br />
male orcs with bows, twenty female orcs, ten orc children,<br />
and three goblin slaves.<br />
Only the male orcs and the goblins fight, and the goblins<br />
fight only as long as the male orcs present make them.<br />
dOrcs (7): hp 3, 5, 5, 4, 6, 3, 4; 2d10 gp each; longbows (+1<br />
ranged); see Monster Manual page 146.<br />
dGoblins (3): hp 3, 5, 4; unarmed (–1 melee); see Monster<br />
Manual page 107.<br />
Tactics: Two of the males are on watch at all times—<br />
they keep the wall of shields up all the time. Up to four<br />
archers can fire from here at once. Once attacked, they try<br />
to keep the wall up as long as they can—opposed Strength<br />
checks should be made by the orcs and anyone trying to<br />
push it over.<br />
Treasure: The chest is not locked. In fact, the lock has<br />
been obviously forced open already. Inside, the orcs keep<br />
some dwarven items that they have found in the area:<br />
• A magnifying glass.<br />
• A pair of pewter flagons with a dwarf embossed on each<br />
(worth 100 gp each).<br />
• A ceramic pot with images of dwarves on ponies (worth<br />
50 gp).<br />
• A jug of dwarven ale, still stoppered and sealed.<br />
• A silver holy symbol of Moradin (worth 25 gp).<br />
• A dwarven silk robe (worth 35 gp).<br />
Dwarven Temple General Notes<br />
Areas 61–68 comprise a dwarven temple devoted to Moradin,<br />
built when the mines were dug and generally left undisturbed<br />
by the inhabitants of the mines since then.<br />
All ceilings are 20 feet high unless otherwise noted, and<br />
doors are stone (hardness 8, 60 hp, break DC 28 if locked;<br />
Open Locks DCs are listed in each encounter area).<br />
No one in the mines knows about the secret door between<br />
areas 69 and 70.<br />
61. Sealed Door (EL 3)<br />
This stone door bears two mirror-image stylized carvings<br />
of dragon heads extending out of hammer heads.<br />
Trap: The door (hardness 8, 60 hp, break DC 28) is locked,<br />
locking automatically each time it closes. The key to this<br />
door was lost long ago, so the lock must be bypassed. The<br />
lock has a DC of 25 to open. However, if the character<br />
attempting to pick the lock does not successfully search the<br />
lock first (Search DC 30), a mechanism triggers that activates<br />
a pit trap just beyond the door. A knock spell or the use<br />
of a chime of opening unlocks the door but does not deactivate<br />
the pit trap. The pit is 10 feet wide and long, and 40 feet deep<br />
with jagged spikes that “attack” with a +10 bonus (1d4 spikes<br />
for 1d4+5 points of damage per successful hit). The trapdoor<br />
is rigged so that 100 pounds must be placed on the southeastern<br />
side for it to open. This means that potentially more<br />
than one person falls victim to the trap if they enter walking<br />
close together. This trap has a high DC to find because of its<br />
ingenious construction. The trap door closes after 5 minutes<br />
(and the trap deactivates until activated by the mechanism<br />
in the lock).<br />
aTrapdoor Pit (40 feet deep): CR 3; no attack roll necessary<br />
(4d6), +10 melee (1d4 spikes for 1d4+5 points of damage<br />
per successful hit); Reflex save (DC 20) avoids; Search (DC<br />
30); Disable Device (DC 30).<br />
Treasure: Two dead orcs lie at the bottom of the pit. One has<br />
a masterwork set of thieves’ tools, a longsword, a short sword, a<br />
light crossbow, 12 masterwork crossbow bolts, studded leather<br />
armor, and 24 gp. The other wears a breastplate, carries an<br />
urgrosh, a dagger, 50 feet of rope, 43 sp, and 10 gp.
CHAPTER 5: THE CRATER RIDGE MINES<br />
62. Font Chamber<br />
A 5-foot-wide basin raised 2 feet from the floor on four<br />
marble legs dominates this small chamber. The basin,<br />
currently empty, sparkles with a lustrous sheen. Impossibly,<br />
it appears that the large font is made from a single<br />
gemstone, possibly emerald, cut with large facets into a<br />
bowllike shape. The walls bear the images of strong,<br />
comely dwarves carved into the rock with angular lines<br />
and broad strokes—they’re more idealized than realistic.<br />
In each corner, a huge stone idol bears the likeness of a<br />
hammer and anvil.<br />
The font is actually made of marble. The image of it being a<br />
gem or crystal is a glamer produced by a now-lost 7th-level<br />
divine spell. If water (up to eight pints per day) is placed<br />
within the font by a dwarf cleric of Moradin, the water<br />
instantly becomes holy as if affected by a bless water spell.<br />
If a liquid other than water is placed in the font, or if the<br />
individual placing the water is other than a dwarf cleric of<br />
Moradin, the liquid boils immediately and explodes into a<br />
cloud of steam that inflicts 1 point of damage per pint to all<br />
within the room (Reflex save DC 20 half ). The cloud dissipates<br />
immediately.<br />
63. Reliquary (EL 6)<br />
The door to this room is locked (DC 30 to open).<br />
Two orcs, long dead, lie in front of this door in the hallway.<br />
They have been thoroughly looted. Their remaining<br />
clothing is blackened and burned.<br />
Once the door is opened, use the following description.<br />
Sixty feet long and 40 feet wide, this cross-shaped<br />
room is quiet. The walls are covered in silver and dark<br />
blue draperies. In the center of the room is a long<br />
stone pedestal, 10 feet long, 4 feet wide, and 2 1/2 feet<br />
tall. The top of this pedestal is padded, dark blue<br />
velvet. Resting atop this padded surface are six jeweled,<br />
silver spheres.<br />
Traps: Two traps are in this room.<br />
Entry Trap: A glyph of warding had been cast on the door,<br />
but the orcs activated it. However, another trap awaits<br />
those moving through the door into the room beyond.<br />
The floor immediately beyond the door is trapped with<br />
another glyph.<br />
aGlyph of Warding: CR 3; 5-ft. cold blast (5d8); Reflex save<br />
DC 15 half; Search (DC 28); Disable Device (DC 28).<br />
Pedestal Trap: Touching any of the spheres without first<br />
saying “Moradin is mighty” activates a magic trap. The interloper<br />
must make a Fortitude saving throw (DC 19) or be polymorphed<br />
into a dwarf. Further, he must make an immediate<br />
Will saving throw (DC 20) or be dominated into defending<br />
the spheres from anyone who attempts to take, damage, or<br />
otherwise disturb them. The effects of this spell should be<br />
treated as if cast by a 10th-level caster.<br />
aPedestal Trap: CR 5; victim polymorphed and dominated,<br />
Fortitude save (DC 19) and Will save (DC 20), respectively,<br />
negate; Search (DC 31); Disable Device (DC 31).<br />
Treasure: The six spheres (hammerspheres) are magic<br />
objects related to the worship of Moradin. See Appendix 1<br />
for more information on these objects.<br />
64. Temple to Moradin (EL 11)<br />
A large altar, shaped like an anvil, dominates this chamber.<br />
Fifteen feet wide and 10 feet tall, a set of stone steps<br />
rises up on one side to access the top of the altar where<br />
two large gems glisten as if on fire. The walls are elaborately<br />
carved with images of dwarves with hammers, and<br />
the floor is covered with a mosaic of tiny, interlocking<br />
gray and white hammers. The southeast wall bears large<br />
Dwarven runes.<br />
Stairs in the eastern corner rise to a platform with a<br />
stone door elaborately carved with more runes.<br />
This is a temple to Moradin, deity of the dwarves, abandoned<br />
here years ago by the miners. The Dwarven runes<br />
read: “Moradin destroys transgressors but rewards the<br />
faithful.”<br />
A consecrate spell is in effect in this chamber at all times. If<br />
a good-aligned cleric calls upon positive energy (makes a<br />
turn undead check against DC 20) while standing atop the<br />
steps connected to the altar, a +2 warhammer appears atop it.<br />
After 24 hours, the warhammer loses its magic and becomes<br />
a standard masterwork warhammer. This works only once<br />
per week.<br />
Creatures: A stone golem that appears to be an 8-foot-tall<br />
(proportional) dwarf literally rises up through the stone floor<br />
at the point marked “G” on the map when anyone enters the<br />
chamber. It takes 1 round for the golem to rise, so it catches<br />
no one by surprise. It attacks any nondwarf in the room<br />
unless commanded to cease by a dwarven cleric of Moradin<br />
59
CHAPTER 5: THE CRATER RIDGE MINES<br />
60<br />
(in which case it sinks back into the floor). The golem does<br />
not leave the room and sinks down into the floor if the room<br />
is empty.<br />
dStone Golem: hp 80; see Monster Manual page 108.<br />
65. Chamber of the Mysteries<br />
Twenty feet square, this room has a fine marble floor.<br />
The domed ceiling has supports of obsidian running<br />
up the walls. A dim light, a faint chanting sound, and<br />
the smell of loamy earth pervade this chamber.<br />
Hanging from the apex of the ceiling by a silver<br />
chain is a single emerald as big as an egg. It glistens in<br />
the unnatural light, hanging approximately 5 feet from<br />
the floor.<br />
The emerald is a magic relic of Moradin, containing the<br />
essence of dwarvenkind. Dwarves touching the stone are<br />
filled with the knowledge of their own lineage and various<br />
random facts about their ancestors. Any nondwarf touching<br />
the stone is affected as if by a confusion spell (Will DC 16) lasting<br />
for 10 rounds. The touch must be willing—a person<br />
touched by the stone against their will feels no effect. (This<br />
cannot be used as a weapon, in other words.)<br />
Treasure: The silver chain is worth 100 gp. The emerald is<br />
worth 1,000 gp; however, due to its magical power a dwarf<br />
pays up to 5,000 gp for it.<br />
66. Priests’ Apartment<br />
The door to this room is locked (DC 30 to open).<br />
Six short but well-made beds, a few stone bookcases, a<br />
long, low table made of glass, and two large chests occupy<br />
this room. The bookcases are mostly empty, but a few<br />
tomes still grace the shelves. A bronze ewer sits atop the<br />
glass table.<br />
A secret compartment (Search DC 26) in one of the stones on<br />
the wall opposite the door hides a large gold key. This key is<br />
worth 25 gp and opens the doors (and deactivates the trap) in<br />
area 67.<br />
The books are all in Dwarven and discuss various religious<br />
topics centering on the worship of Moradin.<br />
Treasure: The bronze ewer is worth about 20 gp. The<br />
chests are both well locked (DC 30 to open) and sturdy<br />
(hardness 5, 30 hp, break DC 25). Inside the first chest<br />
are six green and gray clerical vestments, sized for a<br />
dwarf, as well as a golden incense burner (worth 175 gp).<br />
The second has six heavy maces, six sets of clothing sized<br />
for a dwarf, and a small pouch with three thunderstones<br />
inside it.<br />
67. Temple Treasury (EL 5)<br />
The double doors leading into this room are locked (DC 32<br />
to open) and trapped. The doors are made of iron and are 5<br />
inches thick (hardness 10, 150 hp). In the center of each<br />
door is a large keyhole shaped like a dwarf ’s face with an<br />
open mouth. A hidden keyhole can be found under a plate<br />
in the floor (Search DC 30) in front of the doors. If that<br />
device is not disabled or triggered (a Disable Device DC 32<br />
works) when the doors are opened, a 20-foot-by-20-foot<br />
block of stone, 3 feet thick, falls on the area immediately<br />
in front of the door. Make attack rolls against all characters<br />
under the block (who are, unless somehow aware of the<br />
trap, flat-footed) with a +20 bonus. Those struck suffer<br />
10d6 damage.<br />
aFalling Block Trap: CR 5; +20 crushing attack (10d6);<br />
Search (DC 30); Disable Device (DC 32).<br />
A square dais waits in the center of the room, carved in<br />
stone and bearing the symbol of Moradin on all sides.<br />
Various objects, most sparkling with gold, sit atop the<br />
dais. Three heavy, ironbound trunks line the back wall.<br />
Treasure: The three locked (DC 26) chests each contain<br />
3,000 gp. The dais holds the following: a box with inlaid gold<br />
bearing images of dwarves at the forge (worth 250 gp) that<br />
contains 10 200-gp amethysts; a golden urn (worth 300 gp); a<br />
small gold statue of Moradin (worth 1,000 gp); and a nonmagical<br />
holy book bound in silver with inlaid gemstones<br />
(worth 400 gp).<br />
68. Feasthall of Moradin<br />
A vaulted ceiling with stone supports covered in dwarven<br />
relief crowns this vast hall. Long stone tables run the<br />
length of this chamber, each with an iron chandelier<br />
hanging over it by a heavy chain.<br />
A silver platter and service sit atop one table and a<br />
bronze harp sits atop the other.<br />
Six doors lead from the room.<br />
The platter and service are worth 200 gp, and the harp is<br />
worth 75 gp.<br />
The doors lead to small rooms. The two closest to the<br />
entrance are small private dining rooms each with a round<br />
table, six chairs, and tattered tapestries devoted to<br />
Moradin and the forge. The second pair leads to kitchens,<br />
with ovens, food storage, and wash basins. The third pair<br />
leads to latrines.<br />
69. Hydra (EL 7)<br />
The floor of this mammoth cave is uneven, with the<br />
lowest portion in the middle. Loose rocks and boulders<br />
fill the area, covered with moisture.<br />
A hidden tunnel here leads to the Stalagos. It lies about<br />
halfway along the north wall, concealed behind some<br />
boulders.<br />
Creatures: A seven-headed hydra makes its lair here. It is<br />
an ally of the orcs in areas 52–60, since they occasionally feed<br />
it. More often than not, the hydra slips out of the caves<br />
through the tunnel to root around in the Stalagos for food<br />
(which is not plentiful).<br />
dHydra, Seven-Headed: hp 82; see Monster Manual<br />
page 121.<br />
Trap: The southernmost portion of the cave is dangerous.<br />
If a character pokes around (searches) or otherwise spends<br />
much time in that area, a minor cave-in occurs. All within 20<br />
feet of the wall suffer 3d6 points of damage; a Reflex saving<br />
throw (DC 15) reduces that amount by half. The hydra knows<br />
not to go back there.<br />
Treasure: Amid the rocks in the eastern portion of the<br />
room (Search DC 15) are a few broken bones, a masterwork<br />
longsword, and a masterwork large steel shield.
CHAPTER 5: THE CRATER RIDGE MINES<br />
70. Large Cave<br />
The secret door to the west of this area is well concealed (DC<br />
22 to find with a Search check). It pivots in the center when a<br />
rock knob is pushed (a knob is on either side).<br />
South Entrance/Air Temple<br />
General Notes<br />
This area is not only the most often-used entrance into the<br />
Crater Ridge mines; it also houses the Air Temple, one of<br />
the four elemental temples within the mines. Thus, the<br />
forces of the Air Temple control the main entrance—the one<br />
fact that keeps them a viable power in the competition<br />
among the four temples. (They are comparatively weak in<br />
most other ways.)<br />
When it was originally created, this section (actually all<br />
areas from 73–95) was once a living area for the dwarves of<br />
the mines.<br />
The complex of areas 71–82 has three stages of security.<br />
When the PCs first arrive, it is always at A. For one week after<br />
an attack (either here or at the main gate), the area moves to<br />
stage B. If, during that week, another attack comes here, they<br />
move to stage C for one week, then downgrade to B for a<br />
month afterward.<br />
A. Lax. The main doors in area 80 are closed but not barred.<br />
No one occupies the area behind the arrow slits (80A and<br />
80B). The gnolls in 79 do so only if the alarm is raised. All<br />
guards take 10 on Listen and Spot checks but suffer a –5<br />
penalty for inattention.<br />
B. Wary. The main doors in area 80 are barred. The<br />
gnolls in areas 79 occupy areas 80A and B, but do not<br />
watch out of the slits unless the alarm is raised or if attackers<br />
spend 3 or more rounds attempting to get through the<br />
main doors. All guards take 10 on Listen and Spot checks<br />
with no penalty.<br />
C. Alert. The main doors in area 80 are barred. The gnolls<br />
from area 79 occupy areas 80A and B and watch out of the<br />
slits, attacking anyone not obviously allied with the Temple<br />
(not wearing Temple colors or accompanied by someone<br />
who is). All guards take 10 on Listen and Spot checks with<br />
no penalty.<br />
All guards and personnel here wear the black triangles of<br />
the Elder Elemental Eye, but with a small silver and white<br />
circle attached to the bottom by two light chain links. Their<br />
clothing is predominantly black as well.<br />
Areas 71–82 are all lit by torches in iron sconces. All ceilings<br />
are 20 feet high unless otherwise noted, and doors are<br />
wooden (hardness 5, 15 hp, break DC 18 if locked; Open<br />
Lock DCs are listed in each encounter area).<br />
The inhabitants of areas 71–82 know the layout of areas<br />
71–96 and the general layout of the whole temple complex.<br />
They know that there’s a lake in the middle of the crater and<br />
three bridges that go out to an island where the masters of<br />
the place reside, for example.<br />
Fachish and Choranth each bear a lesser key of air.<br />
71. Temple Guards (EL 4)<br />
This cave has a very high ceiling. In the center, a rock<br />
pedestal, 10 feet high and 15 feet in diameter, seems to make<br />
a sort of crude tower, with sides raised like battlements<br />
providing protection to anyone standing atop it. A<br />
strong breeze blows from the southeast.<br />
The dwarves intentionally made this tower into a defensible<br />
location. Those on top of the tower get half cover when<br />
standing and nine-tenths cover when crouching.<br />
The eastern side of the tower has a wooden ladder so that<br />
the guards can reach the top—if attacked, they pull it up.<br />
Creatures: Six 1st-level human warriors with longbows<br />
stand guard here.<br />
dHuman War1 (6): hp 9, 4, 6, 5, 5, 7; see Appendix 3.<br />
Tactics: The guards question all intruders, even those<br />
wearing Temple colors or symbols. A successful Bluff<br />
opposed check gets intruders by.<br />
In battle, they use the tower to its fullest extent, and<br />
defend the temple to the south with fierce loyalty. While<br />
they fight, they shout warnings to those to the northeast<br />
and southeast.<br />
Development: If possible, the guards in 72 assist those<br />
here, arriving in just 2 rounds after a warning is shouted.<br />
If these guards hear a warning from 72 or 73, they race as<br />
quickly as they can to give aid.<br />
72. Temple Guards (EL 6)<br />
A strong breeze blows from the east. The large cave<br />
appears empty except for a pair of rusted iron buckets<br />
that lie in the western portion of the cave.<br />
Creatures: Four gnolls and their half-orc leader (Graud,<br />
a 4th-level barbarian) hide in the eastern portion of the<br />
cave, waiting to ambush anyone coming from the west.<br />
While they fight, they shout warnings to those to the east<br />
and south.<br />
Graud, their leader, has wild, very long hair and scars<br />
over most of his body. He wears a chain shirt, breeches, and<br />
little else.<br />
dGnolls (4): hp 14, 11, 10, 10; 2d10 gp each; see Monster<br />
Manual page 105.<br />
dGraud: Male half-orc Bbn4; hp 42; see Appendix 3.<br />
Tactics: The gnolls are so used to orc attacks that anyone<br />
coming from the west is automatically attacked. Those who<br />
present themselves as Temple personnel after that are questioned,<br />
even those wearing Temple colors or symbols. A successful<br />
Bluff opposed check gets intruders by.<br />
Development: If possible, the guards in 71 assist those<br />
here, arriving in just 2 rounds after a warning is shouted.<br />
If these guards hear a warning from 71 or 73, they race as<br />
quickly as they can to give aid.<br />
73. The Air Temple (EL 8)<br />
This large chamber is quiet except for a distant whispering,<br />
as if the air plays about the ears of anyone in strange,<br />
almost sinister ways. A 15-foot-high square dais, with a<br />
set of steps on either side, commands the room. The dais<br />
and steps are made of a gleaming white marble, with<br />
silver inlay.<br />
The south wall bears a life-size relief of a whirlwind<br />
engulfing humans, elves, dwarves, halflings, and<br />
gnomes, tossing them about like dolls. The north wall<br />
has a procession of eight white and silver tapestries,<br />
each depicting a demonic creature more terrible and horrifying<br />
than the last.<br />
This entire area is unholy, as described in the spell unhallow.<br />
In addition to the protection from good effect and the –4<br />
61
CHAPTER 5: THE CRATER RIDGE MINES<br />
62<br />
profane penalty on turn undead attempts (+4 to rebuke<br />
undead attempts), the unhallow grants all evil beings the<br />
freedom of movement ability, as the spell, as long as they are<br />
in this room.<br />
Atop the dais is a circular platform of alabaster ringed with<br />
silver, with concentric silver circles inlaid within it. This altar<br />
is 20 inches high and 10 feet across. Upon the altar is a silver<br />
trumpet and a censer painted white and sitting in a tripod<br />
stand. The censer has one piece of incense in it.<br />
Creatures: Fachish, a 7th-level cleric, is usually found<br />
here when not asleep in his chambers (area 75). Fachish is<br />
the high priest of the Air Temple, and his assistant is<br />
Choranth (see area 74).<br />
Fachish is bald, short, and overweight with a dark goatee<br />
beard. He wears ochre robes and a long silver sash in addition<br />
to his Air Temple symbol.<br />
dFachish: Male human Clr7; hp 50; see Appendix 3.<br />
Tactics: If threatened, Fachish uses the censer to<br />
summon a large air elemental to attack intruders and then<br />
casts confusion and hold person at enemies. He is distrustful of<br />
everyone—Temple symbols and garb don’t help. In fact, he’s<br />
more likely to expect an attack or treachery from an agent<br />
of another elemental temple than from some outside<br />
intruder (since outside intruders are more rare). Unless<br />
they clearly have a reason to be here, he reacts with hostility<br />
to any intruders.<br />
Treasure: The sword of air (see Appendix 1) is hidden<br />
under the altar, which slides to one side (Search DC 20 to<br />
notice, Strength DC 22 to accomplish). Fachish plans on<br />
rewarding Kellial (see below) with the sword soon. The trumpet<br />
is worth 100 gp, and the censer is worth 250 gp.<br />
Developments: Several possible developments can<br />
occur here.<br />
Tapestries: Nonevil creatures who touch any of the tapestries<br />
must make a Will saving throw (DC 20) or go temporarily<br />
insane, as if affected by a confusion spell cast by a<br />
12th-level caster.<br />
Censer and Trumpet: If anyone burns incense within the<br />
censer and blows the trumpet, a large air elemental appears<br />
as if the censer were a censer of controlling air elementals. These<br />
items function only atop the dais here and they work only<br />
once per day. The summoned elemental is of evil alignment.<br />
A nonevil being touching either the censer or the trumpet<br />
finds them disturbing. If a nonworshiper of the Elder Elemental<br />
Eye (or Tharizdun) blows the trumpet, he must make<br />
a Will save (DC 20) or go insane for 2d6 hours, during which<br />
time he rants and raves and can take no actions at all. Even<br />
after that bout is over, the character suffers 1d4 points of permanent<br />
Wisdom drain.<br />
Reinforcements: If Choranth hears a fight here (DC at least<br />
3 due to distance and closed door), she comes with her<br />
skeletons. She arrives after 3 rounds.<br />
Betrayal: If Choranth sees that Fachish is likely to die,<br />
she tries to make a deal with his slayers, swearing her assistance<br />
if they agree to kill Fachish and then leave the Air<br />
Temple area.<br />
Altar and Key: If a character stands atop the altar, touching<br />
a greater key of air, and says, “Wind scatters those who oppose<br />
us,” she is “blessed” by the key and can now open the Wind<br />
Door (Area 36) freely, whether she has a key or not.<br />
Destroying the Altar: If the circular platform is destroyed<br />
(hardness 8, 90 hp, break DC 35), the unhallow effect is
CHAPTER 5: THE CRATER RIDGE MINES<br />
dispelled, the censer permanently loses all power (any elementals<br />
summoned by the censer are automatically dispelled),<br />
as does the sword of air. Two rounds later, the air in<br />
this room begins to churn, and ceiling stones begin to fall.<br />
Anyone in the room must make a Reflex saving throw (DC<br />
20) or be struck for 3d6 points of damage. This continues for<br />
1d4+1 rounds. The dais becomes damaged as a result of this.<br />
Fachish, if present, goes insane and remains in the room<br />
despite the falling stones.<br />
Ad Hoc XP Adjustment: Because of the unhallow spell,<br />
award an additional 10% experience points for all creatures<br />
defeated in this area.<br />
73A. Empty Barracks<br />
This room has ten bunks and a long table covered with<br />
clothing, gear, and food. A dozen stools are scattered<br />
around the room and the walls each bear a silver circle<br />
painted upon them.<br />
The Air Temple’s most immediate guardians have been stationed<br />
in area 71, 81, and 78.<br />
74. Choranth’s Chamber (EL 7)<br />
This large bedchamber has a skeleton of a gigantic bear<br />
in each corner, positioned in a threatening pose. A circular<br />
bed occupies the center of the room. A 2 1/2-foot<br />
ball of floating, reddish-orange light almost entirely<br />
covered by swirling bone fragments that move about its<br />
surface floats 8 feet above the bed. The sides of the<br />
room have a chest of drawers, a wardrobe, and iron<br />
shelves covered with books.<br />
The object in the center of the room is a spirit sphere. This<br />
device allows Choranth to control twice as many undead than<br />
she normally would, as long as she and the undead remain<br />
within 250 feet of the sphere. A successful turning check<br />
destroys the sphere, made as if the sphere had 10 HD. If the<br />
sphere is destroyed, all the undead Choranth controls<br />
become inert until she can reestablish control (limited by<br />
her normal amount). The spirit sphere cannot be moved or<br />
damaged physically.<br />
The books on the shelves are treatises on elemental air and<br />
the worship of evil deities.<br />
Creatures: Choranth, a 4th-level human cleric and four<br />
huge skeletons (cave bears) are in this area. (Graud, her lover,<br />
shares the chamber with her but is currently in 72.)<br />
Choranth commands the undead (bolstering them first) to<br />
attack while she casts spells. If need be, she tries to counteract<br />
any turning attempts made by intruders.<br />
Choranth has long blonde hair, and usually wears it with<br />
feathers and small animal bones woven into her braids. She<br />
wears ochre-colored robes with a silver sash, as well as a<br />
black cape.<br />
DChoranth: Female human Clr4; hp 26; see Appendix 3.<br />
Tactics: Choranth is distrustful of everyone—Temple symbols<br />
and garb don’t help. In fact, she’s more likely to expect an<br />
attack or treachery from an agent of another elemental temple<br />
than from some outside intruder (since outside intruders are<br />
more rare). Unless they clearly have a reason to be here, she<br />
reacts with hostility to any intruders.<br />
Treasure: The chest of drawers and wardrobe contain<br />
mostly clothes and personal gear, but the wardrobe also has a<br />
locked box in a secret back (Search DC 25). The padded box is<br />
DC 21 to open and made of iron inlaid with ivory and silver<br />
(worth 85 gp). Inside is a silver and pearl necklace (worth 350<br />
gp), a bracelet of the same (worth 200 gp), and pearl earrings<br />
(worth 150 gp each).<br />
Developments: Two different developments could possibly<br />
occur involving Choranth.<br />
Helping in the Temple: If Choranth hears a fight in the Air<br />
Temple (DC at least 3 due to distance and closed door), she<br />
comes with her skeletons to help defend it. She arrives after 3<br />
rounds. If she hears fighting anywhere else, she prepares to<br />
defend herself (casting shield of faith and endurance), but does<br />
not move to help.<br />
Betrayal: If Choranth sees that Fachish is likely to die,<br />
she tries to make a deal with his slayers, swearing her assistance<br />
if they agree to kill Fachish and then leave the Air<br />
Temple area.<br />
75. Fachish’s Chamber<br />
This is a lavish bedchamber suite, with a wooden<br />
poster bed covered in blankets and pillows, two<br />
wooden wardrobes, a chest of drawers, a circular rug<br />
intricately woven in silver and sky blue, a desk and<br />
chair, a round table with two padded chairs, and a pair<br />
of wooden shelf sets. An open brazier on the table<br />
lights the room, but only dimly. Paintings in elegant<br />
frames decorate the walls.<br />
This is the bedchamber of Fachish, high priest of the Air<br />
Temple. The wardrobes and the chest of drawers contain<br />
only clothing and personal gear. The books are vile, evil<br />
texts discussing demons, elemental air, and some very<br />
unsavory practices and topics—some, unfortunately,<br />
with illustrations.<br />
The desk holds papers and ledgers that show supplies<br />
coming into the Air Temple/entrance complex from the<br />
Outer Fane, guard schedules, and so on. Anyone examining<br />
these papers closely can determine the following.<br />
• The name of the Air Temple’s high priest—the man who<br />
lives in this room—is Fachish. His assistant is Choranth<br />
and she has a half-orc lover named Graud.<br />
• Fachish plans on rewarding someone named Kellial with<br />
the sword of air soon.<br />
• Fachish reveres the Elder Elemental Eye, but also an<br />
entity named Yan-C-Bin.<br />
• The Outer Fane can only be entered by someone with the<br />
blessing of the greater key, and that a different key exists<br />
for each door.<br />
• Four temples exist in the mines—one for each element.<br />
The leader of the Fire Temple’s name is Tessimon.<br />
• The temples in the mines compete and even sometimes<br />
war against one another. The Air Temple fares very poorly<br />
in comparison to the other temples.<br />
• The area that the Air Temple is in, as well as many of<br />
the chambers that lie east of it, were once a dwarven<br />
living area. Fachish found an old dwarven scroll that<br />
indicated that the dwarves secreted a fabulous diamond<br />
called Tulian’s Eye in the area somewhere, and he<br />
would like to find it to help finance hiring some help<br />
for his temple.<br />
Treasure: Each of the eight paintings in the room is worth<br />
80 gp. The rug is worth 200 gp but weighs 50 lb.<br />
63
CHAPTER 5: THE CRATER RIDGE MINES<br />
64<br />
76. Balcony<br />
A natural ledge beyond the door has been transformed<br />
by some work flattening the floor, widening the sides,<br />
and adding an iron railing to become a balcony. While<br />
standing atop the balcony, you see the dark, still<br />
waters of the lake within the crater, the volcanic<br />
island in the center, and the bridges that cross the lake<br />
to the island.<br />
Next to the door leading out onto the balcony is an<br />
open window about 18 inches wide and 2 feet high. A<br />
table rests beneath the window, and a pair of brass scroll<br />
tubes sets upon the table.<br />
Fachish uses this area to watch over the Stalagos in contemplation,<br />
as well as appreciate the open air.<br />
The first scroll tube contains a dwarven treatise on volcanoes<br />
and the minerals and metals found in them (diamonds,<br />
gold, iron, and a few others). The second mentions the<br />
dwarven queen Tulian Saltheart and the fabulous diamond<br />
that her craftsmen created from a raw diamond found here<br />
in the mines. They named the jewel after her: Tulian’s Eye.<br />
When the mines were evacuated by the dwarves, according<br />
to the scroll, Tulian’s Eye was hidden away somewhere.<br />
(Actually, it’s in area 87.)<br />
Both of the scrolls belong to Fachish, who is studying<br />
them in the hopes of finding Tulian’s Eye.<br />
77. Storage<br />
A few boxes and barrels lie in this room. Marks on the<br />
floor in the dust indicate that there used to be more.<br />
The Air Temple is poorly supplied right now because of its<br />
low status. The boxes and barrels contain foodstuffs and<br />
water, as well as some simple gear. A small box also contains<br />
six pieces of incense for use in the temple.<br />
78. Barbican<br />
The three sets of doors leading into this room are all<br />
bronze and barred (hardness 9, 50 hp break DC 27) with<br />
engravings depicting monstrous, demonic heads. Each has<br />
a pair of secret sliding panels that open to allow those<br />
within to fire crossbows or bows. The doors are always<br />
locked (DC 25 to open).<br />
This chamber is empty except for a central dais 7 feet<br />
above the floor, connected on two sides by six steps. The<br />
dais is of black stone, as are the steps.<br />
The presence of this barbican, situated where it is, shows that<br />
the forces of the Air Temple are more concerned with invasion<br />
from within (from the east) than without.<br />
Creatures: Two ogres and three 1st-level human warriors<br />
are stationed here. Their commander is Kellial Unm, a 7thlevel<br />
human fighter.<br />
dOgres (2): hp 25, 30; see Monster Manual page 144.<br />
dHuman War1 (3): hp 5, 6, 8; see Appendix 3.<br />
Kellial is a somewhat foppish, particularly cunning<br />
man, with short brown hair, black half-plate, a long black<br />
cloak, and a shield with a red dragon’s face emblazoned<br />
upon it.<br />
dKellial: Male human Ftr7; hp 57; see Appendix 3.<br />
Tactics: The inhabitants of this room unbar the door<br />
only for those wearing a symbol of the Air Temple or<br />
accompanied by someone wearing such a symbol. If someone<br />
is insistent after being denied access, Kellial attempts<br />
to communicate with Fachish, so that the high priest can<br />
make the decision as to whether to grant the petitioner<br />
access. (Fachish sometimes makes deals with others to let<br />
them pass—it is one of the few avenues of power he has<br />
within the Temple organization.)<br />
Should the doors be breached, the defenders here fight<br />
from atop the dais (+1 attack rolls from higher ground),<br />
defending the stairs.<br />
Development: If someone knocks on the doors in area<br />
80, one of the ogres is sent to see who it is. The ogre can be<br />
easily bluffed by those wearing Temple garb or symbols, if<br />
desired (normal Bluff opposed check).<br />
Kellial, however, is not so easily fooled. He reacts to<br />
intruders such as Fachish does (see Tactics, in area 73),<br />
although if it sounds like the intruders possess information<br />
that he does not have (mentioning Hommlet or the Moathouse,<br />
for example), he attempts to ply them for secrets.<br />
79. Gnoll Barracks (EL 6)<br />
Twelve bunk beds are crammed into this room. The<br />
chamber is unkempt and chaotic, covered with clothing,<br />
food scraps, and trash.<br />
Creatures: Twelve gnolls live here, although four are currently<br />
in area 72. Those who are here attempt to be ready at<br />
any given time and are ready in only 1d3 rounds.<br />
dGnolls (7): hp 14, 11, 13, 10, 12, 10, 16, 11; 2d10 gp each;<br />
see Monster Manual page 105.<br />
Development: Once ready, these gnolls respond to<br />
sounds of conflict anywhere they hear it. They accept commands<br />
from either of the Air Temple’s clerics, Graud, Kellial,<br />
or either of the ogres in area 78.<br />
79A. Latrine<br />
80. South Entrance<br />
This wide, natural cave has had its floor smoothed by precision<br />
stoneworking. Two large wooden doors are opposite<br />
the cave mouth. The arch above the doors bears a leering<br />
devil face.<br />
This entrance is lower than the Main Entrance (area 1).<br />
The hall beyond and through to area 78 and to the stairs to<br />
the west is 35 feet high.<br />
This hall is high and wide, with iron sconces holding<br />
lit torches all along its length. The walls are made of<br />
dark basalt stones stacked carefully, but the floor is<br />
polished and smooth, with a long black and red rug<br />
that is embroidered with scenes of despicable<br />
debauchery and foul activities conducted by mortals<br />
and demons alike.
CHAPTER 5: THE CRATER RIDGE MINES<br />
80A and B. Arrow Slits<br />
Other than the arrow slit in the wall, the barrel of crossbow<br />
bolts next to it, and the four heavy crossbows on the<br />
floor, this room is empty.<br />
Characters at the arrow slits have nine-tenths cover from<br />
attackers on the other side.<br />
Development: In times of alert, the gnolls from area 79<br />
man these positions with crossbows, four at A, four at B.<br />
In 1 round, two gnolls can fire from each side (for a total<br />
of four crossbow bolts fired each round) while the other<br />
two reload.<br />
81. Sniper<br />
A 20-foot-by-20-foot platform has been suspended 5 feet<br />
below the ceiling (which is 35 feet high). From this platform,<br />
a sniper with a heavy crossbow, hunkered down with<br />
nine-tenths cover, can fire at anyone coming from area 80,<br />
78, or the stairs to the west with surprise (catching them<br />
flat-footed) unless they make a Spot check (DC 20). A<br />
ladder of iron rungs leading to the platform is built into<br />
the east wall.<br />
Creatures: A 1st-level human warrior occupies this room<br />
at all times. He attacks anyone not wearing an Air Temple<br />
symbol or accompanied by someone with such a symbol. He<br />
also attacks anyone fighting the other guards.<br />
dHuman War1: hp 6; see Appendix 3.<br />
82. Guards<br />
This small complex of rooms houses Temple/entrance guards.<br />
82A. Kellial’s Chamber<br />
This door is locked (DC 25 to open). Kellial has the key in<br />
a pocket.<br />
This simple, tidy bedchamber has a bed, a chest, a<br />
wardrobe, and a single black rug. The walls are bare.<br />
The wardrobe holds nothing but nicely pressed clothing<br />
and regular gear. The chest is locked (DC 25 to open—the<br />
door key also opens the chest) and contains more gear<br />
including a small pouch with eight smokesticks and a flask<br />
of alchemist’s fire.<br />
82B. Latrine<br />
82C. Guards (EL 3)<br />
This room is crowded with beds, enough for ten people to<br />
live here. Next to each bed is a small trunk. The room is<br />
cluttered and ill used, with graffiti on the walls, clothes<br />
on the floor, and here and there a weapon.<br />
Three spears, a longsword, a shortbow, a dagger, a battleaxe,<br />
and a quiver of ten arrows lie amid the general clutter. Each<br />
of the small trunks by an occupied bunk contains clothing,<br />
eating utensils, and various bits of worthless personal gear.<br />
The graffiti says things such as, “Herthis is good,” “Graud<br />
knows who to make nice with,” or even less intelligent,<br />
cruder sayings.<br />
Creatures: Seven 1st-level human warriors are here,<br />
although enough beds exist for ten. Particularly undisciplined,<br />
these guards take 1d6+3 rounds to get ready to act. If confronted<br />
before they are ready, they surrender immediately.<br />
dHuman War1 (7): hp 6, 5, 7, 4, 9, 5, 6; see Appendix 3.<br />
83. Lookout<br />
Dusty steps lead to a chamber with a single open window<br />
looking down over the slope below. The place appears<br />
rarely used.<br />
In the southernmost chamber, a bench lies below the<br />
window (which is 2 feet wide and 3 feet high, difficult to spot<br />
from below—DC 22—because of the angle).<br />
Creatures: This area is no longer used, so that no one is<br />
even aware that a spectre now dwells here, haunting the<br />
place where it was murdered (it was once a priest who was<br />
killed by Fachish to get where he is now). It attacks anyone<br />
who comes near it.<br />
dSpectre: hp 45; see Monster Manual page 169.<br />
Treasure: Poked in between two boards on the underside<br />
of the bench (Search DC 25) is a wand of magic missile with<br />
14 charges, once used to defend the entrance from this<br />
hidden spot.<br />
84. The Arena Pit<br />
Sixty feet to a side and 30 feet high, this room is very<br />
large. In the middle of the room, surrounded by a 10-<br />
foot walkway all the way around, is a square pit 40 feet<br />
across. The edge of the pit is rimmed with iron spikes<br />
pointed down to prevent anything from crawling out of<br />
the 15-foot-deep area. The pit itself is littered with<br />
bones, broken bits of weapons and armor, and three<br />
long lengths of chain.<br />
Climbing out of the pit has a DC of 20. A result lower than 15<br />
indicates that the climber scrapes against one of the spikes,<br />
suffering 1d4 points of damage and requiring a DC 15 Climb<br />
check to avoid falling back into the pit.<br />
85. Master of the Pit (EL 8)<br />
This chamber is filled with garbage: Cloth, wood, metal,<br />
bone scraps, feces, uneaten food, and other, unidentifiable<br />
items completely cover the floor to about a 1-foot<br />
depth (deeper in the southeast corner). The walls are<br />
smeared with black and brown matter.<br />
A chest lies obscured under the trash in the southeast corner.<br />
Creatures: Claagingred is a very large gargoyle with a<br />
broken horn. He is the Master of the Pit. He has two normal<br />
gargoyles as servants.<br />
dClaagingred: Large gargoyle; hp 84; CR 6; Size L; HD 8,<br />
AC 15; Add +3 to attacks, +2 to Fort and Ref saves, +1 to Will<br />
saves, +1 to all skills; Dodge; see Monster Manual page 94.<br />
dGargoyles (2): hp 35, 43; see Monster Manual page 94.<br />
Together, the three of them lower prisoners into the pit<br />
and then lift out the winner. They charge other inhabitants of<br />
the mines 1 sp each to watch the fights. Often, clerics or<br />
others in the mines bring them prisoners to fight in the pit,<br />
for which the Master of the Pit pays them a small fee. Otherwise,<br />
the gargoyles grab prisoners from the surrounding<br />
countryside (the guards around the south entrance allow<br />
them to come and go as they please).<br />
65
CHAPTER 5: THE CRATER RIDGE MINES<br />
66<br />
Tactics: These gargoyles attack whomever comes along,<br />
unless it is a powerful character they recognize (such as<br />
Fachish or Kellial) or a powerful creature (such as a giant),<br />
hoping to make them new prisoners in their arena. They<br />
make grab attacks and throw foes into the pit in area 84.<br />
Once the characters are in the pit, the gargoyles attack those<br />
who try to get out, inflicting subdual damage (suffering a –4<br />
penalty on their attack rolls) once the characters are seriously<br />
wounded so that they just knock them unconscious. Completely<br />
subdued characters are taken to area 86 and chained<br />
to the wall (the gargoyles take their equipment and store it<br />
here, in the trash-strewn room).<br />
Treasure: Claagingred wears a pair of gold bracelets<br />
(worth 50 gp each).<br />
The chest is locked (DC 25 to open) and trapped so that<br />
poison gas sprays out if it is not disabled first (DC 25 to find,<br />
DC 20 to disable). The poison gas has a save DC of 18 and<br />
inflicts 1d6 temporary Dexterity damage and then 1d6 temporary<br />
Dexterity damage a minute later. Inside the chest are<br />
1,581 sp and 135 gp.<br />
86. Prison (EL 1)<br />
The smell of excrement, urine, and sweat is overpowering<br />
here. The room is long and bare, with iron manacles hanging<br />
from the walls and terrible stains on the floor.<br />
Creatures: Chained to the west wall is a rabid, wild dog,<br />
It attacks anything that comes near it, and its chain is 5<br />
feet long.<br />
dDog, Riding: hp 15; see Monster Manual page 196.<br />
A dwarf is chained to the east wall. His name is Harchol<br />
and he is a 1st-level commoner grabbed by the gargoyles<br />
about a week ago in the surrounding area. He knows little of<br />
the place other than that he and the dog were scheduled to<br />
fight very soon. If the characters return him to his clan, he<br />
rewards them with a bag of 10 50-gp gems (smoky quartz).<br />
dHarchol: Male dwarf Com1; hp 5 (noncombatant).<br />
87. Tulian’s Eye (EL 6)<br />
The secret door that leads to this room is very hard to find<br />
(Search DC 30) and sealed with an arcane lock. It slides down<br />
into the floor when the proper stone on the wall is pressed.<br />
Trap: The floor immediately beyond the secret door is a<br />
10-foot-wide, 30-foot-long trapdoor that dumps anyone<br />
weighing 150 pounds or more (including gear) down into a<br />
50-foot-deep pit.<br />
If 150 pounds of pressure is placed upon the floor of this<br />
pit, an iron plate, 3 inches thick, slides to close off the pit<br />
halfway up (twenty-five feet). This locks into place for three<br />
days and then reopens.<br />
Meanwhile, on the same round as the trap door opens, the<br />
room south of the secret door fills with poison gas (Insanity<br />
mist: save DC 15, 1d4 Wisdom/2d6 Wisdom).<br />
aTrapdoor Pit (50 feet deep) with Gas: CR 4; no<br />
attack roll necessary (5d6) plus possibly gas (see above);<br />
Reflex save (DC 20) avoids; Search (DC 21); Disable Device<br />
(DC 20).<br />
Each wall of this hidden room is done in careful relief,<br />
depicting a dwarven woman with a strong stance, a long,<br />
elegant gown, and a beautiful crown upon her head. In<br />
the middle of the room is a wide stone pedestal. Resting<br />
atop the pedestal is a huge diamond shaped like an eye.
CHAPTER 5: THE CRATER RIDGE MINES<br />
Creatures: The pedestal is a mimic, charmed long ago to<br />
remain as the final guardian of Tulian’s Eye. It attacks anything<br />
within reach that does not say the pass phrase: “The<br />
Eye of Tulian is the brightest in the world.”<br />
dMimic: hp 60; see Monster Manual page 135.<br />
Treasure: Tulian’s Eye is a diamond (worth 10,000 gp) cut<br />
into the shape of an eye (see area 76). However, it also bears a<br />
curse. Any nondwarf who keeps the Eye in their possession<br />
(within 1 foot of them) for 24 hours takes 1 point of temporary<br />
Constitution damage per day. This manifests itself physically<br />
by welts that appear on the victim’s body that look like<br />
hammers and anvils.<br />
88. Statues<br />
Three statues stand upon pedestals in this room, forming<br />
a triangle with two in the east and one in the west.<br />
Each is a life-size representation of a dwarf done in a<br />
peculiar dark blue stone. The first, nearest the door, is a<br />
warrior: a male dwarf in plate armor, with a very large<br />
shield and a dwarven urgrosh. The second, near the<br />
northwest corner, is a dwarven woman in regal robes<br />
with a crown upon her head. The third, in the east part<br />
of the room, is another male dwarf, carrying a pick and<br />
dressed like a miner.<br />
These statues are here from when the dwarves dug out<br />
these mines (this area, from 73 to 95, was once a living area<br />
for the dwarves).<br />
89. Old Storage (EL 6)<br />
Moldy sacks, wooden crates and barrels that have burst or<br />
rotted enough to spill their contents, and a few baskets<br />
holding black lumps that might have once been some<br />
sort of fruit fill this chamber.<br />
Yellow Mold: If the sacks, crates, or barrels are disturbed,<br />
a patch of this mold bursts forth in a cloud of poisonous<br />
spores. All within 10 feet of the mold must make a<br />
Fortitude save (DC 15) or immediately take 1d6 points of<br />
temporary Constitution damage and another 2d6 points of temporary<br />
Constitution damage 1 minute later if they fail a<br />
second DC 15 Fortitude save. Fire destroys yellow mold and<br />
sunlight renders it dormant.<br />
90. Whip (EL 7)<br />
A large blue-green square has been somewhat crudely<br />
painted on the wall above the archway leading into this<br />
room. A netlike hammock is stretched across the southwest<br />
corner and a round chest, made of wood and metal<br />
but fashioned into the shape of a large clamshell, is in the<br />
northwest corner.<br />
Forces from the Water Temple (area 195) control this area and<br />
the two to the east. Those who wish to get to the Water Door<br />
can use the boats found in area 91.<br />
Creatures: Poolidib, a 5th-level kuo-toa cleric (called a<br />
whip), lives in this chamber to watch over the boat landing.<br />
He wears a Water Temple symbol: the black triangle of the<br />
Elder Elemental Eye with a blue-green stone square dangling<br />
from the bottom of it.<br />
dPoolidib: Male kuo-toa Clr5; hp 41; see Appendix 3.<br />
The whip, and only the whip, can communicate with the<br />
chuul in the water in area 91. Only he can tell it not to attack.<br />
Tactics: Calling out in the gurgly kuo-toan language,<br />
Poolidib attempts to summon the guards from area 92 if<br />
attacked by intruders. However, he is not immediately hostile.<br />
If attacked, Poolidib uses hold person and command to<br />
attempt to eliminate or occupy some foes, and then attacks<br />
with his pincer staff.<br />
Treasure: The clamshell chest holds 765 gp, a leather bag<br />
with ten 50-gp pink pearls, a potion of cure moderate wounds,<br />
and a scroll of bless, hold person, and dispel magic.<br />
Development: He is used to people coming to him<br />
looking to use a boat, and expects a bribe (usually around<br />
5–10 gp). If given the bribe and shown a greater key of water<br />
(he doesn’t bother to deal with people who can’t get in the<br />
Water Door) he takes them to area 91 and out to the boats,<br />
commanding the chuul not to attack. Then he personally<br />
guides the boat to the Outer Fane, to area 11, the Water<br />
Door. He does not wait for them to come back before<br />
returning his boat.<br />
91. Boat Landing (EL 7)<br />
A ledge has been carved into the side of the cliff to<br />
make a small, stony shore area along the side of the<br />
lake. Two large wooden rowboats, each about 15 feet<br />
long, are moored here, tied to iron spikes drilled deep<br />
into the stone.<br />
The boats are sturdy and well made. They can hold up to ten<br />
people and move at 1 1/2 mph when rowed (2 mph when<br />
guided by the kuo-toan whip—see area 90).<br />
Creatures: A chuul waits in the water by the two boats. It<br />
attacks anything living not accompanied by the whip from<br />
area 90.<br />
dChuul: hp 90; see Monster Manual page 36.<br />
Tactics: The chuul attempts to surprise foes on the ledge.<br />
If attacked by more than two opponents, it drops paralyzed<br />
foes into the water so that they drown (see drowning rules in<br />
the DUNGEON MASTER’s Guide, page 85.<br />
92. Kuo-Toa Guards (EL 6)<br />
This damp chamber is bare. The north wall appears to have<br />
once been painted, but the mural is now obliterated.<br />
Creatures: Six kuo-toas stand guard here. They dutifully<br />
serve the whip in area 90. They all wear Water Temple<br />
symbols: the black triangle of the Elder Elemental Eye<br />
with a blue-green stone square dangling from the bottom<br />
of it.<br />
They hate and fear the cloakers in area 93, avoiding that<br />
room whenever possible. They know about the chuul in area<br />
91 and don’t venture there without the whip.<br />
dKuo-Toas (6): hp 10, 14, 11, 12, 10, 11; see Monster<br />
Manual page 125.<br />
Tactics: They automatically attack anyone wearing Air<br />
Temple symbols or those with no Temple garb or symbols.<br />
Otherwise, they attempt to make intruders stay here while<br />
they call for the whip.<br />
When not on duty they leave via area 91 and are replaced<br />
by other kuo-toas from the Water Temple.<br />
67
CHAPTER 5: THE CRATER RIDGE MINES<br />
68<br />
93. Dragon Mouth (EL 7)<br />
The archway leading into this room from the west is a huge<br />
stone dragon mouth.<br />
Forty feet square, this large room bears stonework<br />
reliefs on both the north and south walls. These depict<br />
dwarves in battle against dragons, trolls, and orcs, with<br />
the dwarves victorious. However, in various places the<br />
images have been defaced with obvious intention—the<br />
faces of dwarves are missing, spikes are hammered into<br />
dwarf warrior’s bodies, and so on.<br />
The current inhabitants of the mines defaced these older<br />
dwarven works of art.<br />
Creatures: Two cloakers live in this room. They are loyal<br />
to the Air Temple and are allies of the gargoyles in areas<br />
84–86. They do not like the kuo-toas and Fachish of the Air<br />
Temple pays them off to keep an eye on their mutual enemies<br />
and harass them as best they can.<br />
dCloakers (2): hp 50, 43; see Monster Manual page 37.<br />
Tactics: The cloakers keep a close eye out for anyone<br />
coming their way from any of the three entrances. They<br />
remain hidden until they attack. One moves in for an<br />
enveloping ambush while the other uses its moan to scare<br />
off any of the victim’s allies. The moaning cloaker tries to<br />
put any remaining foes into a stupor before it attacks<br />
physically.<br />
They attack anyone not wearing an Air Temple symbol.<br />
Treasure: Hidden beneath a moveable flagstone in the<br />
floor is a small hole. The cloakers keep their valuables in this<br />
hidden hole: 567 gp, 490 sp, a 200-gp bracelet set with pieces<br />
of obsidian, and a +1 heavy mace that they hope to trade to a<br />
cleric for something they can use.<br />
94. Empty Room<br />
A high stone ledge runs around the south and west walls.<br />
The ledge, 8 feet from the floor, serves as a shelf for old<br />
dusty bottles, jugs, and pots. A few shards of glass and pottery<br />
lay near the walls, covered in dust.<br />
This was once an apothecary for the dwarves, but it has<br />
since been cleaned out. All the containers on the shelf are<br />
empty.<br />
95. Old Armory<br />
Empty, dust-covered weapon racks and stone pegs<br />
cover the walls. The stone of the floor has a large<br />
image of a hammer and anvil carved into it, now filled<br />
with mold. A dead gnoll, shredded with multiple cuts<br />
and gouges, lies on the floor. The double doors leading<br />
northeast are iron and bear the hammer and anvil<br />
symbol as well.<br />
This gnoll fought with the blade spirit in the next room. It<br />
still has its equipment and treasure: battleaxe, shortbow, scale<br />
mail, large steel shield, quiver with 10 arrows, Air Temple<br />
symbol, and 13 gp.<br />
If the blade spirit in area 96 hears anything in this room, it<br />
comes to attack whoever it is.<br />
96. The Forge (EL 9)<br />
This large chamber was obviously once a vast forge. A<br />
number of firepits, barrels, tables covered in dusty tools,<br />
weapon racks, form molds, troughs, and other metalworking<br />
implements are scattered throughout the chamber. A<br />
skeletal form lays splayed about the exit to the northwest.<br />
This room is relatively undisturbed because it is haunted. The<br />
skeletal form is a long-dead destrachan.<br />
Creatures: A blade spirit (see Appendix 1) inhabits this<br />
room. It attacks anything that comes into this chamber or<br />
that it hears moving around in area 95.<br />
dBlade Spirit: hp 60; see Appendix 1.<br />
Treasure: The dwarven smiths here were excellent craftsmen<br />
and made many masterwork items. The following items<br />
are here, all of masterwork quality:<br />
Three battleaxes;<br />
Two greataxes;<br />
One urgrosh;<br />
One longsword;<br />
One heavy mace;<br />
One dagger;<br />
Three large shields;<br />
One small shield;<br />
One buckler;<br />
Three Medium-size breastplates;<br />
Two Medium-size suits of half-plate;<br />
One Medium-size suit of full plate;<br />
One Medium-size suit of chainmail;<br />
One Medium-size suit of banded mail.<br />
97. Empty Cave<br />
The door here appears to have been chained, locked, and<br />
sealed with iron, but now stands broken open.<br />
The walls of this cave are made of dark andesite, glistening<br />
with traces of iron ore. The walls are rounded,<br />
with a faint ripple pattern and do not appear to have<br />
been worked by any tool, yet clearly are not natural<br />
caves either. The tunnel to the north slopes upward at a<br />
steep incline.<br />
A small niche in the northwestern portion of the room,<br />
hidden behind a few rocks, contains a small scroll tube made<br />
of battered brass. A character finds it on a successful Search<br />
check (DC 27).<br />
The scroll inside is a Dwarven text and describes the<br />
dwarves’ conflict with the horrible sound beasts (destrachan).<br />
It states that the dwarves encountered the creatures<br />
while first digging the mines, finding that the terrible things<br />
created their own tunnels. The creatures killed the miners<br />
wantonly and destroyed equipment and even the very minerals<br />
that they were mining. The dwarves drove them off<br />
repeatedly, always with terrible losses.<br />
98. Destrachan Victim<br />
The walls of the tunnel and cave are rounded and fairly<br />
smooth except for a ribbed pattern like ripples on water,<br />
clearly untouched by a pick or shovel. A dead human,<br />
dressed in black and wearing a Temple symbol, lies dead
CHAPTER 5: THE CRATER RIDGE MINES<br />
in this cave, his body twisted and his guts splayed as<br />
though he exploded from within.<br />
This guard wandered into a bad place and paid the price. The<br />
destrachan in area 99 killed him. Close examination of the<br />
body shows that even his equipment has been torn, burst,<br />
shattered, or shredded.<br />
99. Destrachan Pit (El 12)<br />
This irregularly shaped, dark cave has a slight, curving<br />
bend in the middle. The walls are smooth and rounded<br />
with a ripple effect along their surface. In the middle of<br />
the room is a pit, also with rounded, ribbed sides.<br />
Once the scourge of the dwarves that lived in the mines,<br />
these creatures still present a threat to anyone here. They tunneled<br />
out the areas from 97 to 106 long ago, and when the<br />
dwarves drove them away, they used the tunnels for themselves.<br />
Now the destrachans are back.<br />
The pit is 30 feet deep, filled 10 feet deep with sand pulverized<br />
to the point of being as fine as flour by the sonics of the<br />
destrachan. This sand absorbs the impact of characters falling<br />
into the pit (so that they take only 1d6 damage); however,<br />
they fall into the sand in over their head (assuming they are<br />
less than 10 feet tall). This sand is like quicksand in a way, in<br />
that creatures that weigh more than 100 pounds sink down<br />
into it almost as if it were water. At the same time, creatures<br />
over 100 pounds find the sand very difficult to “swim” in, suffering<br />
a –5 penalty on any Swim checks. Characters failing a<br />
Swim check (DC 15) risk drowning (see DUNGEON MASTER’s<br />
Guide page 85).<br />
A pile of four corpses—an elf, an orc and two humans—<br />
lies in the northernmost corner of the chamber. These poor<br />
souls were obviously tortured and mutilated while still alive.<br />
Creatures: Two destrachans live in this cave.<br />
dDestrachans (2): hp 58 and 66; see Monster Manual page 47.<br />
Tactics: The destrachans first blast multiple intruders with<br />
a 6d6 subdual sonic attack. They continue this barrage until<br />
most of the foes are unconscious, and then concentrate sonic<br />
attacks against the equipment, weapons, and armor of their<br />
remaining foes, and then finally finish them off. Unconscious<br />
foes are stripped of equipment and tortured to death.<br />
If a foe gets close to the side of the pit, a sonic attack aimed<br />
at the ground beneath his feet knocks him into the pit<br />
(Reflex save DC 20 to avoid).<br />
Development: If the destrachans hear activity in areas 97<br />
or 98, one moves up quietly to investigate. If battle ensues,<br />
the other comes as quickly as it can. Otherwise, the first<br />
learns what it can about the intruders and returns to this area<br />
so that both can be ready for an attack.<br />
Ad Hoc XP Adjustment: Award 10% additional experience<br />
points for this encounter if it happens around the pit.<br />
100. Exit<br />
A strong breeze blows from the northwest. A rock formation<br />
stands near the middle of the cave that looks a little<br />
like a rearing serpent. A few old pots lie amid some rocks<br />
in the north portion of the room.<br />
69
CHAPTER 5: THE CRATER RIDGE MINES<br />
70<br />
The passage to the northwest leads to a ledge looking over<br />
the Stalagos, about 30 feet above the level of the water.<br />
Climbing down to the water has a DC of 15.<br />
The kuo-toas sometimes use this entrance, climbing up<br />
and in, but this is rare, particularly because of the destrachan,<br />
whom they fear.<br />
Treasure: A dwarf used this ledge to hide her treasure<br />
long ago. Three feet below the level of the ledge, a movable<br />
rock can be located (Search DC 25). Behind this rock is a<br />
small niche in which one can find an iron box with dwarven<br />
carvings. The box is locked (DC 26 to open) and contains a<br />
ring of counterspells with hold person within it, a small leather<br />
pouch with ten 400-gp golden yellow topazes, and a single<br />
800-gp white opal.<br />
101. Destrachan Sphere (EL 8)<br />
The passage widens into a cave, the floor sloping down<br />
sharply about 20 feet toward the center and then back up<br />
the other side to another passage continuing east. The<br />
ceiling is domed, and from the lowest portion of the floor<br />
to the highest point in the ceiling, the distance is about 50<br />
feet. The effect is that the cave resembles a hollow sphere.<br />
In the southern portion of the cave, there is a ledge at<br />
about the same level as either exit.<br />
Climbing the sides of this sphere down to the floor or back<br />
up again requires a Climb check (DC 10).<br />
Creatures: A single destrachan makes its home on the<br />
ledge in the south part of the room.<br />
dDestrachan: hp 60; see Monster Manual page 47.<br />
Tactics: Using its ranged attacks, the destrachan blasts<br />
foes across the room from the ledge.<br />
102. Fungi Grove (EL 8)<br />
Fungi, lichen, mushrooms, puffballs, and patches of other<br />
subterranean growth nearly fill this tunnel. The place is<br />
damp and smells pungent.<br />
This out-of-the-way cave is a secret lair of a Tarren, an evil<br />
druid. His bedroll and camp lie hidden within the fungi, and<br />
he and his bear companion attempt to hide to ambush<br />
anyone who approaches.<br />
Creatures: Tarren, an 8th-level human druid, has a dire<br />
bear companion named Kiibo.<br />
Tarren wears hide armor with a human skull mounted on<br />
either shoulder. His skin and hair are dark, and his eyebrows<br />
are very thick. Kiibo has a shaved spot on his forehead where<br />
he bears a tattoo of a skull.<br />
dTarren: Male human Drd8; hp 35; see Appendix 3.<br />
dKiibo: Dire bear; hp 110; see Monster Manual page 58.<br />
The Temple once courted Tarren, but they betrayed him.<br />
Now he hides here and strikes against the forces of the<br />
Temple out of spite. He attacks immediately anyone in<br />
Temple garb or with Temple symbols.<br />
Tactics: In combat, Tarren lets the bear enter melee and<br />
casts rusting grasp, dispel magic, spike growth, and summon<br />
nature’s ally III (in that order).<br />
Development: If dealt with peacefully, Tarren offers to<br />
sell special fungal concoctions and information to the PCs.<br />
Concoctions. He has three doses of each, and sells each for<br />
150 gp. He is not forthcoming about the drawbacks, only<br />
the benefits.<br />
Mushroom Elixir: Heals 2d8+3 hp. After 10 minutes, the<br />
drinker suffers a –1 penalty on attacks, saves, and checks<br />
for 1 hour due to dizziness.<br />
Puffball Wafer: Grants 1d4+1 additional points of Strength<br />
for 1 hour. Inflicts 1d4+1 temporary points of Intelligence.<br />
Gray Moss Brew: Allows drinker to see in the dark with darkvision<br />
with a 60-ft. range for 12 hours, but during that time<br />
she acts with a –2 penalty on Spot and Search checks<br />
because her vision gets slightly blurry.<br />
Information. Tarren knows a great deal about the Temple.<br />
For a bribe (30–50 gp per question he can answer). He could<br />
pass on the following information:<br />
• The leaders of the Temple are called the doomdreamers.<br />
The leaders of the doomdreamers are the Triad.<br />
• The leaders dwell in the black tower on the island in the<br />
center of the lake.<br />
• Four temples exist in the mines, one devoted to each element.<br />
They struggle against one another for dominance.<br />
Fire is currently dominant.<br />
• A place called the Greater Temple lies in the Outer Fane’s<br />
center. This is the “master temple” not devoted to an element,<br />
but rather something far worse. (He does not know<br />
about the connection with Tharizdun.)<br />
• To get into the center island/crater, you need a “greater<br />
key,” which is made of two “lesser keys,” owned by various<br />
individuals in the mines. This forces them to cooperate<br />
somewhat. Each greater key opens only one door. The<br />
nearest bridge, to the northwest, leads to the Earth Door.<br />
• Beyond this area to the east is the Fire Temple. To the west<br />
is the Air Temple.<br />
Treasure: Without Tarren’s help, his fungal concoctions<br />
appear to be useless unless a character makes a Knowledge<br />
(nature) check against DC 24 (or has the druid ability<br />
nature sense).<br />
103. Tiered Cave<br />
As the characters enter this cave, they hear an occasional<br />
creaking and rumbling sound coming from the<br />
floor. It sounds like stone on stone. The floor in this<br />
cave slopes up toward the east. Three distinct tiers, each<br />
about 2 feet high, rise toward the east as well. Each of<br />
these is like a high step, positioned one third of the way<br />
through the cave from the next. The walls and ceiling<br />
here are smooth except for a light ripple pattern running<br />
down their lengths. The floor is also smooth,<br />
except for the tiers, which seem to be the result of fairly<br />
recent settling.<br />
The sound is the result of a small fault in the rock, created<br />
long ago when the destrachan created these tunnels (they<br />
were not as careful in their construction as were the<br />
dwarves). No real danger exists here.<br />
104. Giant Ants (EL 5)<br />
The striated pattern in the rock continues through this<br />
long cave.<br />
Creatures: Six giant ant workers are exploring this cave.<br />
They crawl about the far eastern corner.<br />
dGiant Ant Workers (6): hp 10, 9, 10, 7, 13, 11; see<br />
Monster Manual page 205.<br />
Tactics: If one ant dies, the others flee to area 105.
CHAPTER 5: THE CRATER RIDGE MINES<br />
Development: If the characters attack the giant ants here<br />
and the ants in area 105 can hear the sound of battle, they<br />
come to their aid (they can cross the distance in 1 full round).<br />
These ants do not move to help those in 105.<br />
105. Ant Warriors (EL 7)<br />
The dark, almost black rock around this cave is smooth,<br />
showing no chips or marks from tools.<br />
A very small circular tunnel, 2 feet across, leads out of this<br />
cave to the south 40 feet and then straight down for 200 feet<br />
and then south 600 feet into a giant ant nest.<br />
Creatures: Four giant ant soldiers and four workers are<br />
here. They attack anything that threatens them.<br />
dGiant Ant Workers (4): hp 10, 8, 12, 9; see Monster<br />
Manual page 205.<br />
dGiant Ant Soldiers (4): hp 11, 11, 14, 9; see Monster<br />
Manual page 205.<br />
Development: If anything attacks the giant ants in area 104<br />
and the ants here can hear the sound of the fight, they come to<br />
their aid (they can cross the distance in one full round).<br />
Fire Temple General Notes<br />
Tessimon, the high priestess of fire, presides over the most<br />
powerful temple in the Crater Ridge mines. Although arrogant<br />
and overconfident, the members of the Fire Temple are<br />
not content—they want to expand their influence even<br />
more. Tessimon hopes to move into the ranks of the doomdreamers<br />
one day.<br />
The complex of areas 106–123 (and 130) has three stages of<br />
security. When the PCs first arrive, it is always at A. If any of<br />
these areas is attacked, they move to B as quickly as possible<br />
and remain wary for the rest of that day. If an attack comes<br />
while at stage B, they move to stage C as quickly as possible<br />
and remain so for the rest of that day.<br />
A. Lax. As presented. All guards take 10 on Listen and Spot<br />
checks but suffer a –5 penalty for inattention.<br />
B. Wary. The guards in 107 and the salamanders in 123<br />
take 10 on their Listen checks. Zert and Skassik individually<br />
patrol areas 110 to 123. Tessimon goes to the Fire Temple<br />
(area 121).<br />
C. Alert. The fire mephits in 108 split into two groups of<br />
two and hide at the two eastern exits of area 106 for an<br />
ambush. Those in 109 move to the top of the shaft down into<br />
110 for the same reason. Zert commands all the guards in<br />
area 113 to move to area 111 if it appears the threat comes<br />
from the southwest and to 121 if it appears to come from the<br />
northeast. He stays with them, as does Firre. Skassik positions<br />
himself in the Fire Temple (121) either way. All guards<br />
take 10 on Listen and Spot checks with no penalty.<br />
All guards and other personnel wear the black iron triangle<br />
of the Elder Elemental Eye with a red lozenge dangling<br />
beneath it (symbol of the Fire Temple). Their clothing is predominantly<br />
black as well.<br />
Areas 106–123 are all lit by torches in iron sconces.<br />
The inhabitants of areas 106–123 know the layout of<br />
areas 104–134 and could find their way to area 80 and the<br />
way out if they had to. They know about the destrachan to<br />
the east and crypts and bridge complex to the north. They<br />
also know the general layout of the whole temple complex.<br />
They know that there’s a lake in the middle of the crater<br />
and three bridges that go out to an island where the masters<br />
of the place reside, and that the door at the other end<br />
of the bridge can only be opened by a special key that<br />
“mostly just priests have.”<br />
Tessimon, Firre Orenac, and Zert each bear a lesser key of fire.<br />
106. A Gathering of Fire (EL 7)<br />
The floor of this cave has a huge red marble plate, 40 feet<br />
across, in the shape of a diamond, set into its center. This<br />
plate is flush with the floor.<br />
Floating over the center of this symbol, 7 feet off the<br />
floor, is a glowing orb, intensely red, swirling with<br />
flickering fire.<br />
Four obelisks, black with red flecks and streaks, surround<br />
the diamond shape along its edges.<br />
The symbol and the sphere represent the edge of the Fire<br />
Temple’s current influence.<br />
The orb is cool to the touch and is clearly made of iron<br />
(hardness 10, 120 hp, break DC 45). However, when it is<br />
touched, a Medium-size fire elemental appears at one of<br />
the four corners of the diamond-shaped symbol and attacks<br />
anyone not bearing the symbol of the Fire Temple or not a<br />
creature with the “Fire” subtype. The elemental acts immediately<br />
and stays 10 rounds or until slain. This functions<br />
four times each day.<br />
Creatures: Up to four Medium-size fire elementals are in<br />
this room.<br />
dMedium-Size Fire Elementals (up to 4): hp 24, 26, 27,<br />
30; see Monster Manual page 83.<br />
Tactics: Since the inhabitants know about the power of<br />
the sphere, they use it to their advantage. If they know that<br />
enemies are coming, they summon a few elementals into the<br />
room to help deal with them.<br />
107. Guards (EL 5)<br />
A round table with seven chairs placed around it sits in<br />
the middle of this cave. The table has a small keg, some<br />
mugs, and some playing cards scattered about its surface.<br />
Poked into a crack in the wood underneath the table (Search<br />
DC 22) is a small scrap of paper with the words “Tessimon<br />
dephnami ignamuis” written on it. This is the pass phrase to<br />
get past the arcane lock on the doors into 121.<br />
Creatures: Three human warriors, three elf warriors<br />
and their commander, a 4th-level elf warrior (Virith), stand<br />
guard here.<br />
dHuman War1 (3): hp 5, 6, 8; see Appendix 3.<br />
dElf War1 (3): hp 4, 5, 5; see Appendix 3.<br />
dVirith: Male elf War4; hp 20; see Appendix 3.<br />
Tactics: These guards ignore anyone with the Fire Temple<br />
symbol and question anyone bearing other temple garb or symbols.<br />
They attack immediately anyone without such symbols.<br />
107A. Ledge<br />
This ledge is about 50 feet above the level of the water.<br />
108. Fire Mephit Guards (EL 7)<br />
The floor is uneven and broken. The smell of sulfur hangs<br />
in the air. This cave’s walls have crude paintings in red<br />
and black. The paintings seem to be of a type of demon<br />
or devil. A 20-foot-wide pit occupies the northernmost<br />
71
CHAPTER 5: THE CRATER RIDGE MINES<br />
72<br />
portion of the room, with sulfurous smoke rising up<br />
and out of it.<br />
Creatures: Four fire mephits stand guard in this room,<br />
although mostly they serve as reinforcements in case of<br />
trouble in either 106 or 110. All wear the Fire Temple symbol.<br />
dFire Mephits (4): hp 11, 12, 13, 15; see Monster Manual<br />
page 132.<br />
Tactics: The mephits fly back over the pit to make it difficult<br />
for foes to get at them with melee attacks, while they<br />
use their breath weapon, magic missile, or heat metal attacks<br />
against opponents. They attack anyone not wearing Fire<br />
Temple symbols or not accompanied by someone who<br />
wears one.<br />
They use the torches on the walls, hovering by them, to<br />
facilitate their fast healing ability.<br />
Development: If the mephits in area 109 hear (Listen +6)<br />
fighting here, they come to aid these mephits in 1d4 rounds.<br />
If these mephits hear (Listen +6) movement in either 106<br />
or 110, they move to investigate. They are on guard and are<br />
always alert, so assume that they take 10 (for a total of 16).<br />
109. Fire Mephit Lair (EL 5)<br />
This room is blackened and scored. The stone floor in the<br />
western portion of the room is hot and soft, nearly melted<br />
into magma. Depressions in the stone make it look like<br />
some creatures use it for a bed.<br />
The fire mephits do use the hot, soft rock as a bed—in fact, it<br />
is their presence that has softened it.<br />
Creatures: Two fire mephits are here resting. They are not<br />
alert, but attack any intruder not wearing Fire Temple symbols<br />
or not accompanied by someone who wears one.<br />
dFire Mephits (2): hp 13, 15; see Monster Manual page 132.<br />
Tactics: They use the torches on the walls, hovering by<br />
them, to facilitate their fast healing ability.<br />
Development: If they hear (Listen +6) fighting in area<br />
108, they come to aid their brethren in 1d4 rounds.<br />
Treasure: Hidden behind a pair of stones in the eastern<br />
portion of the room are a black iron box and a scorched<br />
leather sack. The sack contains 231 gp and 148 sp. The box is<br />
locked (DC 30 to open).<br />
110. Smoky Cave (EL 5)<br />
This room is filled with heavy, sulfurous smoke. You<br />
cannot see more than 5 feet.<br />
If the characters reach the center, use the following text.<br />
This choking cloud seems to issue forth from a stone and<br />
iron structure in the center, but details are difficult to<br />
make out.<br />
The structure in the center of the room is a 4-foot block of<br />
stone topped with a slightly rusted iron devil head with a<br />
wide mouth, open eyes, and tall horns. The smoke magically<br />
issues forth from the mouth of the devil, filling the room<br />
before eventually dispersing.<br />
The smoke reduces visibility to 5 feet and provides onehalf<br />
concealment (20% miss chance). Every round a character<br />
is within the cave, unless they are fire creatures (such as the<br />
mephits), they must make a DC 15 Fortitude save (DC +1 per<br />
previous check) or spend a round choking and coughing<br />
instead of taking other actions. A character who chokes for 2<br />
consecutive rounds suffers 1d6 points of subdual damage.<br />
The smoke production can be suppressed by dispel magic<br />
(assume the smoke effect is that of a 9th-level caster) for 1d4<br />
rounds or temporarily blocked with an item such as a blanket<br />
(the smoke discharges any obstructions in 1d4 rounds). In<br />
either case, visibility becomes 10 feet, the concealment is<br />
reduced to one-quarter, and no saving throws are needed for<br />
that time. The devil head can also be destroyed, but it is quite<br />
solid (hardness 10, 270 hp, break DC 45)<br />
Nonfire dwelling natives (such as Zert or the guards in<br />
107) hold their breath and run through the room, since they<br />
know where they are going.<br />
Trap: A pit trap lies hidden in the north end of the room,<br />
deactivated by a hidden lever in the tunnel leading to 111<br />
(DC 25 to find) or another just before the steps up into 107<br />
(on the wall near the X spots on the map). The pit is 80 feet<br />
deep and triggers when more than 75 pounds is placed<br />
upon it. In the smoke, the DC to find the trap is 25, to disable<br />
is 22 and the Reflex save to avoid falling is 22. If the<br />
smoke is cleared, use the numbers in the following statistic<br />
block instead.<br />
aTrapdoor Pit (80 feet deep): CR 4; no attack roll necessary<br />
(8d6); Reflex save (DC 20 or 22 in the smoke) avoids;<br />
Search (DC 21 or 25 in the smoke); Disable Device (DC 20 or<br />
22 in the smoke).<br />
Development: If the mephits in 108 hear (Listen +6)<br />
activity here, they move to investigate. They are on guard and<br />
are always alert, so assume that they take 10 (for a total of 16).<br />
They attempt to use the smoke to their advantage, attacking<br />
and then retreating into the smoke, attacking and then<br />
retreating again.<br />
Ad Hoc XP Adjustment: Increase experience point<br />
awards in this room by 50%.<br />
111. Guard Post (EL 1)<br />
A large stone column stands in the center of this cavern,<br />
covered in stone carvings of dogs vomiting flame, surrounded<br />
by writhing serpents. A large bronze gong stands<br />
by the column.<br />
Creatures: Two elven guards are here.<br />
dElf Guards, War1 (2): hp 4, 5; see Appendix 3.<br />
Tactics: These guards are merely a watch post. If they see<br />
or encounter hostile intruders, they ring the gong and then<br />
flee, shouting, toward area 115 to alert Skassik and possibly<br />
Zert (in 116).<br />
112. Hell Hound (EL 3)<br />
This smoky cave’s walls are covered in soot.<br />
Creatures: Watching this room like a watchdog is a large<br />
hell hound. It watches for trouble mostly from the southwest.<br />
Well trained, it bays when attacked and never leaves<br />
the room.<br />
DHell Hound: hp 31; see Monster Manual page 118.<br />
Tactics: The hell hound is just smart enough to recognize<br />
symbols of the Fire Temple and so does not attack anyone<br />
bearing one.
CHAPTER 5: THE CRATER RIDGE MINES<br />
113. Barracks (EL 7)<br />
This cave has a dozen beds lining the walls, each with a<br />
small trunk next to it. A brazier hangs from the ceiling on<br />
an iron chain. In the rear of the cave, a ladder leads up to a<br />
ledge about 12 feet off the floor. A huge wooden keg sits<br />
atop a table next to the ladder, with a few crates underneath.<br />
Two swords, a spear, and a shield lay in a pile near<br />
the entrance.<br />
The crates hold foodstuffs, and the keg is full of ale. The small<br />
trunks are not locked and each contains clothes, personal<br />
gear, and 1d10 gp.<br />
On the ledge rests another bed and a locked trunk.<br />
Creatures: Four 1st-level human warriors are here.<br />
dHuman War1 (4): hp 5, 7, 6, 8; see Appendix 3.<br />
Arlainth, a 6th-level half-elven sorcerer is also here, on the<br />
ledge. He is very jealous of Eeridik (see area 139), and hopes<br />
to murder him to take his position. Arlainth wears gray robes<br />
and a black sash covered in gold embroidered runes. He has<br />
long blond hair tied back with a simple cord.<br />
dArlainth: Male half-elf Sor6; hp 20; see Appendix 3.<br />
Tactics: These guards (and the sorcerer) are unprepared<br />
for battle. The guards need 1d4 rounds to equip themselves.<br />
They ignore anyone with the Fire Temple symbol and question<br />
anyone bearing other temple garb or symbols. They<br />
attack immediately anyone without such symbols.<br />
Treasure: The locked trunk on the ledge (DC 25 to open)<br />
contains some clothing (Arlainth’s), two books on magic<br />
(worth 10 gp each), two flasks of alchemist’s fire, and an<br />
arcane scroll with the following spells: detect invisibility, knock,<br />
and glitterdust.<br />
Development: If these guards hear the sound of fighting<br />
or the gong in 111, they take 1d4 rounds to prepare and then<br />
move to reinforce troubled areas.<br />
114. Common Room<br />
Three long tables with benches flanking them occupy this<br />
cave. The eastern portion of the room is a kitchen, with<br />
sacks of foodstuffs, a wooden cupboard, a table with a chopping<br />
block and knife, a large tub of water, and a fire pit with<br />
a chimney above it that disappears into the ceiling.<br />
The chimney is 2 feet wide and leads up and out to the east.<br />
115. Salamander Blackguard (EL 9)<br />
This area is warm, with black smoke stains on the rock.<br />
The roof of this cave is 15 feet above the floor; within it is a 4-<br />
foot-wide niche that leads into a low (6 feet high) cave, about<br />
15 feet across. This cave serves as the lair of a powerful salamander.<br />
It takes a Spot check (DC 28) to notice the niche.<br />
The cave is just big enough for him to coil within and contains<br />
little more than burned, smashed bone fragments of his<br />
past victims. A chain is secured to a stone in the wall that can<br />
be dropped down into the cavern below to allow someone to<br />
climb up into the niche and the upper cave.<br />
Creatures: Skassik is a salamander blackguard. He hates<br />
and resents Zert (area 116), who has the position that he feels<br />
he rightfully deserves.<br />
Skassik wears bright red plate armor covered in flaming<br />
skull imagery and wields a barbed, all-iron greatsword.<br />
dSkassik: Salamander Ftr1/Blk3; hp 69; see Appendix 3.<br />
Tactics: If present, Skassik drops down out of the niche<br />
(his ring of feather falling keeps him safe) to surprise intruders.<br />
When he does, he takes the end of the chain with him so he<br />
can get back up.<br />
Before entering into battle, Skassik is sure to poison his<br />
weapon with his giant wasp poison (DC 18, 1d6 Dex/1d6 Dex<br />
damage) and casts bull’s strength on himself.<br />
Treasure: Hidden behind a rock in the upper cave, Skassik<br />
keeps a small leather bag with a permanent protection from<br />
elements (fire) spell cast upon it by a 10th-level caster. It contains<br />
134 pp, 966 gp, and potions of cure serious wounds, oil of<br />
slipperiness, and sneaking.<br />
Development: If Skassik hears noise or the alert from<br />
room 111, he waits here, preparing his ambush. If he hears<br />
combat in 116, he does not move to help Zert.<br />
116. Zert’s Quarters (EL 8)<br />
A red curtain with an amber triangle on it serves as the “door.”<br />
This spartan cave is furnished as a bedchamber. A wooden<br />
bed is up against the east wall, and a small trunk sits opposite<br />
it. Some pegs pounded into the wall hold up cloaks,<br />
shirts, and a hat.<br />
The small trunk is locked (DC 20 to open) but contains only<br />
clothing and personal gear. Zert carries the key.<br />
Creatures: Zert, an 8th-level human fighter who wields<br />
the sword of fire, lives here.<br />
Zert has been involved with the Temple for years. Originally<br />
a secret spy in Hommlet serving the Temple of Elemental<br />
Evil, Zert was spirited away and brought here when that<br />
temple fell. Now he serves the Fire Temple as master of its<br />
guards and creatures, second only to Tessimon. He is a nononsense,<br />
practical man who does not actually share in the<br />
faith of the cult. He just enjoys the job.<br />
Zert is dark skinned and dark haired (although his hair<br />
shows streaks of gray). His plate armor is dark green, with a<br />
scaly pattern over it (so that it looks reptilian). He has a large<br />
scar on his left cheek.<br />
dZert: Male human Ftr8; hp 52; see Appendix 3.<br />
Tactics: Zert is paranoid and attacks anyone he does not<br />
immediately recognize. He commands his troops to do likewise.<br />
He drinks his potion of endurance before battle.<br />
Development: Although presented here, Zert could be<br />
anywhere in the Fire Temple area. He doesn’t like to stay<br />
put, nervously patrolling the whole area: He knows that<br />
one or more of the other temples’ forces could strike at<br />
any moment.<br />
117. Rasts (EL 9)<br />
The dark stone walls of this cave are scarred and broken,<br />
as is the floor. The markings give the appearance that<br />
something has been clawing, and perhaps chewing, on<br />
the stone. The floor in front of the almost 30-foot-wide<br />
tunnel to the north has been worked smooth, with<br />
images of cracking flames carved into its surface and<br />
filled with a reddish metal.<br />
Creatures: Four rasts live in this chamber, waiting eagerly<br />
for prey to enter. They are savage and nearly insane, and do<br />
indeed claw and chew on the walls and floor.<br />
73
CHAPTER 5: THE CRATER RIDGE MINES<br />
74<br />
dRasts (4): hp 18, 22, 20, 35; see Monster Manual page 154.<br />
Tactics: Although they do not attack other fire creatures<br />
or people with the Fire Temple symbol, they do not help<br />
them either. They do not even work well together, and<br />
simply attack.<br />
118. Firre’s Quarters<br />
A red curtain with an amber diamond on it serves as the<br />
“door” on either end of this cave. The smell of rotting flesh is<br />
discernible from the other side of the curtain.<br />
Hidden by red curtains, this cave is horrible to behold.<br />
Skulls, still half covered with flesh and some with eyes<br />
dangling from their sockets, hang from the ceiling on<br />
hooked chains. Beside them, stirred by the soft currents<br />
in these caves, are hands and bloody organs, also on<br />
chains. The walls and floor are covered in gore.<br />
A small bed with an iron chest next to it suggests that<br />
this place is no grisly meat locker but instead a bedchamber.<br />
The chest has been carved to resemble a human<br />
bound in the fetal position by barbed wire. It is locked<br />
with a large padlock.<br />
Firre is a gnome that serves as the second-rank cleric of the<br />
Fire Temple. He is so bloodthirsty that even the others in<br />
the Fire Temple avoid him.<br />
Treasure: The chest is locked (DC 32 to open) and holds<br />
clothing and gear, including small torture tools, scalpels, and<br />
hooks. It has a false bottom (Search DC 26 to find) that is also<br />
locked (DC 28 to open). Firre has the keys to both locks<br />
around his neck.<br />
The secret compartment holds a demonstone (see Appendix<br />
1).<br />
Development: The demonstone created the monster that<br />
is Firre. Before he came upon this stone, he was a gnome<br />
fighter that lived in the nearby Kron Hills. If this stone<br />
should be destroyed, Firre is freed from the demonic influence<br />
but immediately becomes suicidal because of the evil<br />
he has wrought.<br />
119. The Playroom (EL 7)<br />
All manner of torture devices and implements fill this<br />
room. A rack, an iron maiden, an oven with hot coals<br />
and irons, and a table covered with knives, scalpels,<br />
thumbscrews, and other terrible implements are<br />
arranged about the room. Manacles on the walls suggest<br />
that this is where the Fire Temple keeps its prisoners<br />
as well.<br />
Creatures: Firre Oranac, a 3rd-level gnome fighter/4thlevel<br />
cleric spends most of his time here. Firre is a terrible,<br />
despicable creature who delights in pain and suffering even<br />
more than does his superior, Tessimon.<br />
Firre has darting, dark eyes and only a little hair, but he<br />
wears a red skullcap anyway. He does not wear the traditional<br />
ochre robes, but his Fire Temple symbol is twice as<br />
large as normal.<br />
dFirre Oranac: Male gnome Ftr3/Clr4; hp 58; see<br />
Appendix 3.<br />
Also in the cave is Jurrikath Musseloto, a 5th-level human<br />
bard. He is within the iron maiden, and is currently stable<br />
but unconscious at –3 hp. Jurrikath has been a prisoner in<br />
the Temple of All-Consumption for so long that he no longer<br />
remembers anything other than his confinement. Traded to<br />
Firre by a cleric in the Outer Fane for a minor magic item,<br />
Jurrikath is prized by the villains here for the exquisite<br />
beauty of his screams of agony. Only a greater restoration spell<br />
can return his memory and his sanity, enabling him to<br />
remember that he was once a highly successful and capable<br />
adventurer and a companion of Tymerian (see the Hamlet of<br />
Rastor). He can give some sketchy details about the Outer<br />
Fane—such as that a dragon guards the Fire Door, and that<br />
the Inner Fane is even more difficult to enter than the Outer<br />
Fane. Without the spell, he is unable to take actions other<br />
than walk, eat, drink, and so on—and then only when forced<br />
to by another.<br />
dJurrikath Musseloto: Male human Brd5; hp 32; see<br />
Appendix 3.<br />
Tactics: Firre hates nothing more than a fair fight. Unless<br />
it is obvious that he can win, Firre flees. If he is in the company<br />
of allies, Firre fights with spells first, and then weapons.<br />
If possible, he poisons his weapon first with a dose of deathblade<br />
(DC 20 1d6 Constitution/2d6 Constitution temporary<br />
damage) before engaging in melee.<br />
Development: Fighting here may draw Tessimon from<br />
area 120. Likewise, Firre moves to Tessimon’s aid if she is<br />
attacked in her chamber, although he takes no large risk to<br />
save her.<br />
120. Tessimon’s Quarters (EL 9)<br />
A red curtain with an amber diamond on it serves as the<br />
“door” on either end of this cave.<br />
This cave is a lavishly furnished bedchamber. A sumptuous<br />
bed is in the middle of the room, disheveled with red<br />
satin blankets and pillows. A large ebony wardrobe rests<br />
against the east wall next to a vanity with a large mirror<br />
atop it and a wooden coat rack. A large wooden chest,<br />
bound in iron straps and sealed with a massive padlock,<br />
sits against the west wall. Next to the chest are a small<br />
black marble-top table and a pair of padded chairs. The<br />
table holds a silver service set, dirty with food and drink.<br />
The cave walls have been painted with red streaks to give<br />
the impression of flames.<br />
The wardrobe is jammed with women’s clothing. The vanity<br />
has perfumes and cosmetics of all sorts (together, worth<br />
about 120 gp) and a pair of small gold earrings (worth 25 gp)<br />
mixed in haphazardly with them.<br />
The key to the chest is hidden, tucked behind the mirror<br />
on the vanity (Search DC 25 to find).<br />
Creatures: Tessimon, a 9th-level cleric, is the high priest<br />
of the Fire Temple. She is cruel and delights in the suffering<br />
of others. Her manner is crude, and her actions crass. Tessimon<br />
has an extremely irritating laugh that she most often<br />
gives at the misfortune and pain of others.<br />
Tessimon has long black hair with red ends (she dyed it<br />
long ago). She wears ochre robes with a hood, and her neck is<br />
covered with red tattoos of flames. She is of medium build.<br />
dTessimon: Female human Clr9; hp 61; see Appendix 3.<br />
Tactics: If encountered here, she immediately flees to the<br />
Fire Temple (area 121), where she fights from atop the altar<br />
platform. In melee, Tessimon uses her lesser tentacle rod, a gift<br />
from the doomdreamers. She delights in the agony her lesser<br />
tentacle rod inflicts, but she is not a fool. Thus, if she has time,
CHAPTER 5: THE CRATER RIDGE MINES<br />
she first casts defensive spells on herself (shield of faith, divine<br />
power, endurance, and magic vestment) and drinks her potion of<br />
heroism before engaging foes.<br />
In the temple (area 121) she stands atop the platform<br />
(raised up 20 or 30 feet) and cast flame strike and slay living<br />
until her foes can reach her for melee. She laughs as she casts<br />
dispel magic on foes levitating or flying up to get at her.<br />
Treasure: The chest is locked (DC 30 to open) and sturdier<br />
than normal (hardness 5, hp 50, break DC 29). It contains:<br />
• A masterwork heavy mace.<br />
• A copper scroll tube containing three divine scrolls: cure<br />
moderate wounds, contagion, and greater magic weapon.<br />
• A bag containing 230 gp.<br />
• A jewelry box—ivory with intricate carvings of nude<br />
men and women (worth 100 gp) containing three gold<br />
bracelets with various gems (worth 100 gp, 200 gp, and<br />
400 gp), two gold necklaces with various gems (worth 200<br />
gp and 800 gp), one gold ring (worth 50 gp), and two gold<br />
rings with various gems (worth 100 gp and 250 gp) and<br />
three pairs of gold earrings with various gems (worth 75<br />
gp, 180 gp, and 300 gp).<br />
• A black urn with gold inlay (worth 100 gp).<br />
• A complete map of the Fire Temple (areas 106 to 123).<br />
• A letter from Hedrack in the Outer Fane that discusses<br />
guard pay (3 sp per day) and mentions “Things move<br />
apace. Soon the doomdreamers’ plan shall come to<br />
fruition and the Dark Master will be freed. First, however,<br />
we must find the Champion to fulfill the prophecy.<br />
Watch for potential candidates. Perhaps you, yourself,<br />
could be the one.”<br />
The Water Temple Attacks<br />
The Water Temple is in the process of making their move to<br />
deal a great blow to the Fire Temple. If they succeed, they<br />
become the most powerful of the four elemental temples.<br />
The goal of their plan is to destroy the altar platform with a<br />
scroll of disintegrate that Kelashein has procured for Nilbool<br />
to use.<br />
Nilbool, accompanied by four of the kuo-toan fighters from<br />
area 197, Urlurg the monitor, and the water mephit from area<br />
181, plan to sneak into area 134 through the door onto the<br />
bridge. From there, they bribe the guards in that area as<br />
well as 135 and 133 with 50 pp per area. Then, they must<br />
overcome the guards in area 123 (who of course would<br />
accept no bribe from Water Temple followers), and make<br />
for area 121 before too many Fire Temple guardians are<br />
alerted. Through divination and espionage, they discovered<br />
the pass phrase needed to get through the large doors.<br />
Once inside, they use the disintegrate scroll on the platform.<br />
This disrupts the Fire Temple in serious ways (see area 121<br />
for more information).<br />
The intruders hope to make their escape in the resulting<br />
confusion. If worse comes to worse, however, Nilbool uses a<br />
word of recall scroll, also procured by Kelashein, to teleport<br />
himself and Urlurg back to the Water Temple.<br />
If the PCs encounter Nilbool’s party, use the stats provided<br />
but also add the scrolls of disintegrate and word of recall to Nilbool’s<br />
gear, as well as 200 pp and a sketchy map of areas 121 to<br />
123 and 130 to 136.<br />
The DM can incorporate this plot in many ways:<br />
1. Have the attack occur while the PCs are in the Fire<br />
Temple (or nearby).<br />
2. Have the PCs encounter Nilbool’s group on the way to<br />
the Fire Temple.<br />
3. If the PCs go to the Water Temple before the Fire Temple,<br />
make it possible to learn of this plan and act upon it (either<br />
helping or hindering).<br />
4. Have this happen after the PCs have encountered either<br />
the Fire Temple, the Water Temple, or both, to give the<br />
whole place a dynamic feel.<br />
121. The Fire Temple<br />
The red bronze doors (hardness 9, 50 hp, break DC 37) on<br />
either end of the temple are locked with a 3rd-level variant<br />
of arcane lock that allows a pass phrase to bypass it. Each is<br />
engraved with the image of a red dragon coiled, snarling,<br />
and ready for a fight. The pass phrase to open the lock is<br />
“Tessimon is queen of fire,” spoken in Ignan: “Tessimon<br />
dephnami ignamuis.”<br />
This huge, sweltering hot cave stretches close to 150 feet<br />
across. An 80-foot-wide pit, filled with hungry, clawing<br />
flames, is in the center, and a 30-foot-wide, 6-inch-thick<br />
steel platform floats in the middle of the pit, right at the<br />
level of the tops of the flames. Atop the platform is an<br />
altar of obsidian, glistening in the firelight but rough<br />
edged. The altar is flanked by two tall brass candelabra<br />
each holding five candles. A large kettledrum also sits by<br />
the altar.<br />
The walls are carved with elaborate images of fiery<br />
demons torturing people and thrusting them into flames.<br />
This room looks and feels like a vision of hell itself.<br />
The ceiling is 70 feet high.<br />
This entire area is unholy, as described in the spell unhallow. In<br />
addition to the protection from good effect and the –4 profane<br />
penalty on turn undead attempts (+4 to rebuke undead<br />
attempts), the unhallow grants all evil beings protection from<br />
fire, as a protection from elements (fire) cast by an 11th-level caster,<br />
continually while they are in this room. (This effect automatically<br />
recharges itself every 24 hours, so if an occupant loses<br />
some of his fire protection, it returns in full within a day.) The<br />
fire in the pit is entirely magical; it consumes no fuel and is<br />
otherwise an ordinary 10-foot-deep pit. Anyone in the pit suffers<br />
2d6 points of fire damage per round—no saving throw.<br />
If anyone approaches the pit with a tentacle rod, the platform<br />
moves to the side of the pit that they stand nearest until<br />
that person steps onto the platform, at which time it returns<br />
to its normal position in the center.<br />
Created by use of the wishes from an efreeti, the platform<br />
raises and lowers magically at a rate of up to 20 feet per round<br />
when commanded to do so. It accepts verbal commands from<br />
the highest-level cleric of Tharizdun/the Elder Elemental<br />
Eye standing atop it. If no such cleric is there, it accepts commands<br />
from the highest-level character or creature atop it.<br />
Making these commands takes a free action. It can descend<br />
all the way to the bottom of the pit, inflicting 2d6 point of<br />
fire damage on everyone standing on it. It can also rise all the<br />
way to the ceiling, where it passes through an illusory image<br />
of the ceiling and into a cavern just large enough to accommodate<br />
the 30-foot-by-30-foot platform (this cavern has a 15-<br />
foot ceiling).<br />
The walls of this hidden area sport images of fire elementals,<br />
efreet, and salamanders. On the northeast wall, a<br />
secret door behind the image of an efreeti (Search DC 23 to<br />
find) reveals a niche with shelves built into it. Upon these<br />
shelves are:<br />
75
CHAPTER 5: THE CRATER RIDGE MINES<br />
• A potion of cure light wounds.<br />
• A potion of cure serious wounds.<br />
• A scroll of bull’s strength.<br />
• A necklace of fireballs (Type IV), but with only two fireballs<br />
left: one 6d6 and one 4d6.<br />
Development: Several possible developments can<br />
occur here.<br />
Altar, Candles, and Drum:. As the most powerful of the<br />
elemental temples, the Fire Temple possesses an altar of<br />
ancient power dedicated to the Elder Elemental Eye. If<br />
touched, the black altar becomes translucent over the<br />
course of 3 rounds. It takes on an amethyst color with a<br />
black, amorphous center. Anyone touching the altar while<br />
it is transformed is paralyzed (Fortitude save DC 18 to<br />
resist) for 1d4 hours.<br />
If the candles in the candelabra are lit and the drum is beat,<br />
a glowing golden eye swims into view from the stone’s<br />
writhing center. All creatures viewing the eye must make Will<br />
saving throws (DC 20). Failure results in one of these effects:<br />
d% Effect<br />
01–05 Death<br />
06–20 1d2 negative levels<br />
21–40 Insanity (as if permanently affected by confusion)<br />
41–60 1d3 permanent Wisdom drain<br />
61–80 2d6 temporary Strength damage<br />
81–100 1d6 temporary Constitution damage<br />
The eye floats out of the altar after 3 rounds and becomes a<br />
yellow egg. The egg immediately begins to swell (during this<br />
time, the egg has hardness 5, 60 hp, and a break DC of 26).<br />
Three rounds after that, if the egg survives, and it has reached<br />
a size of 10 feet long and 6 feet across, it hatches into 1d3+1<br />
salamanders that attack anyone not wearing a Fire Temple<br />
symbol. These salamanders become permanent residents and<br />
servants of the Fire Temple.<br />
If a tentacle rod (Tessimon in area 120, Hedrack in area 19<br />
of the Outer Fane, and The First on Level 8 of the Inner<br />
Fane each have one) is present when the eye appears, the<br />
altar becomes a transparent heliotrope in color, the black<br />
mass at the center grows larger and shows swollen veins of<br />
purple, and the eye becomes a fiery red-orange. A tentacle<br />
comes out of the altar and grabs the nearest living creature<br />
(+15 attack, +10 Strength bonus, treat as Large), pulling it<br />
into the stone. That creature is completely destroyed. After<br />
this happens, the altar returns to its black, opaque state and<br />
atop it sits a single magic item wished for by those in the<br />
temple (if multiple items are wished for, determine which<br />
one appears randomly), worth up to 50,000 gp in value.<br />
The book found in the reliquary describes this process<br />
(area 122).<br />
The egg still appears if the tentacle rod is present, but the<br />
rod wielder can destroy it with a touch (Tessimon usually<br />
does exactly this, for she finds the salamanders difficult<br />
to control).<br />
Altar and Key: If someone stands atop the platform, holds<br />
the greater key of fire and says, “Fire burns away my enemies,”<br />
she is “blessed” by the key and can now enter the<br />
Fire Door (Outer Fane area 1) freely, whether she has a key<br />
or not.<br />
Destroying the Altar: If the platform is destroyed (hardness<br />
10, 60 hp, break DC 28), the unhallow effect is dispelled, the<br />
sword of fire loses all power, as does the symbol in area 106.<br />
Two rounds later, the air in this room begins to grow very<br />
hot, and ceiling stones begin to fall. Anyone in the room<br />
must make a Reflex saving throw (DC 20) or be struck for<br />
3d6 points of damage. This continues for 1d4+1 rounds, the<br />
room partially collapsing.<br />
Treasure: The candelabra and the drum are all enchanted<br />
so that they are immune to heat (and worth 100 gp each). The<br />
candles are magical, in that they light but never burn down<br />
or melt (ten candles, worth 20 gp each).<br />
Ad Hoc XP Adjustment: Because of the unhallow spell,<br />
award an additional 10% experience points for all creatures<br />
defeated in this area.<br />
121A. Temple Guardians (EL 8)<br />
This side alcove is empty, other than the guardians it holds.<br />
Creatures: Six burning skeletons serve as the guardians of<br />
the Fire Temple.<br />
dBurning Skeletons (6): hp 34, 29, 24, 32, 35, 40; see<br />
Appendix 1.<br />
122. Reliquary of Fire (EL 4)<br />
Opposite the entrance, a huge idol made of black stone,<br />
fashioned in the shape of a stern but serene dragon with<br />
folded wings, guards a large stone box. The wings of the<br />
dragon have been covered in shiny red enamel. The eyes<br />
of the dragon glisten like emeralds.<br />
Trap: The mouth of this cave has two traps. One is a glyph<br />
of warding that activates if anyone crosses into the cave without<br />
saying “fire dragon.”<br />
aGlyph of Warding: CR 3; 5-ft. fire blast (5d8); Reflex save<br />
DC 15 half; Search (DC 28); Disable Device (DC 28).<br />
Scythe Trap: The other is a scythe blade built into the wall<br />
just beyond the radius of the glyph inside the room that falls<br />
upon anyone entering.<br />
aScythe Trap: CR 1; +10 melee (2d4/×4); Search (DC<br />
21); Disable Device (DC 20).<br />
Treasure: The dragon’s eyes are indeed emeralds (worth<br />
500 gp each). The stone box under the dragon sculpture contains<br />
two treasures important to the Fire Temple. The first is<br />
an golden orb set with multiple pieces of amber (worth 1,000<br />
gp); this is not magical, but instead an “unholy relic.” The<br />
second is the Book of the Dark Eye, a tome detailing the worship<br />
of the Elder Elemental Eye in great detail. This includes<br />
exactly how to operate one of the black stone altars (as found<br />
in area 121 or in area 34A of the Moathouse) in conjunction<br />
with the tentacle rods.<br />
123. Salamander Guards<br />
Smoke makes it difficult to see in this cave. An iron brazier,<br />
3 feet across, swings ever so slightly on a chain hung<br />
from the ceiling, 8 feet from the floor. Under it, in the<br />
center of the cave, lies a 10-foot-diameter iron plate,<br />
cupped a little like a huge bowl.<br />
The smoke comes from the brazier and gives 20% concealment<br />
to anything in the cave. The big metal dish is where the<br />
salamanders recline and it is heated to the point that anyone<br />
touching it suffers 1d6 points of damage.<br />
Creatures: Two salamanders and a hell hound guard this<br />
end of the Fire Temple. The hell hound obeys any commands<br />
of the salamanders.<br />
77
CHAPTER 5: THE CRATER RIDGE MINES<br />
78<br />
dAverage Salamanders (2): hp 37, 39; see Monster<br />
Manual page 159.<br />
dHell Hound: hp 31; see Monster Manual page 118.<br />
Tactics: These guards ignore anyone with the Fire<br />
Temple symbol and question anyone bearing other temple<br />
garb or symbols. They attack anyone without such symbols.<br />
Development: If these guards hear fighting in the Fire<br />
Temple (Listen DC 6 for combat just inside the door to area<br />
121, +1 per 10 feet deeper into the area thereafter; they<br />
have a +14 to Listen checks) they go to investigate and aid<br />
their comrades, arriving in 1d4 rounds. Otherwise, they<br />
remain here.<br />
Treasure: Within the hanging brazier, in a secret compartment<br />
in the bottom (Search DC 24 to find), is a red<br />
ceramic dish with an amber triangle containing five large<br />
deep blue spinels (worth 600 gp each). Touching the brazier<br />
to access this compartment inflicts 1 point of damage<br />
from the heat.<br />
124. Crypt Entrance<br />
Two tall statues of black-clad warriors, their plate armor<br />
covered in strange embellishments and angular flanges,<br />
seem to stand guard in this room, facing south. Each<br />
imposing figure stands 10 feet tall and grasps a sword<br />
with strange, baroque ornamentation.<br />
The floor is worked smooth, in contrast to the roughhewn<br />
walls. On the floor, ancient, twisted, and somehow<br />
disturbing letters spell out words in a foreign language.<br />
Although currently under the control of the Fire Temple, the<br />
areas beyond are used for the burial of all important clerics of<br />
the entire Temple of All-Consumption.<br />
The message on the floor spells out in Abyssal, “Here lies<br />
those who served best the dark master in all his forms. Disturb<br />
not their slumber.”<br />
The statues represent the warrior aspect of dread Tharizdun,<br />
and together they form a magical bond. While they<br />
stand, anyone defiling any of the crypts beyond them must<br />
make a Fortitude saving throw (DC 15) or begin to lose 1 hp<br />
per round through the onset of a flesh-consuming disease.<br />
The victim’s body writhes in agony (and is treated as<br />
exhausted: half normal speed, effective penalty of –6 to<br />
Strength and Dexterity). Only a remove curse spell or destruction<br />
of one of these statues (each has hardness 8, 90 hp, and a<br />
break DC of 25) stops this horrible curse from consuming<br />
the defiler. A new saving throw must be made every time a<br />
new crypt area is defiled, with potentially cumulative effects<br />
wracking the victim.<br />
125. Side Crypt<br />
Three stone sarcophagi are arranged in a row in this<br />
cave. At the foot of each stands a bronze candelabrum.<br />
The sarcophagi have carvings on their lids depicting a<br />
man or woman lying in state, clothed in dark, concealing<br />
robes. Each bears a black symbol of an inverted step<br />
pyramid. One stone image clutches a large mace with<br />
wicked barbs, one a smooth black scepter, and the third<br />
a scroll.<br />
Prying off the lid of any sarcophagus requires a Strength<br />
check (DC 23).<br />
Trap: Two of the sarcophagi are trapped.<br />
The sarcophagus with the scepter-holding figure is<br />
trapped so that when it is opened, a hail of spikes fires from<br />
hidden holes. Anyone in the chamber suffers 3d6 points of<br />
damage from numerous strikes (a Reflex saving throw<br />
against DC 14 reduces this damage by half ).<br />
aSpikes Trap: CR 2; no attack roll necessary (3d6);<br />
Reflex save DC 14 half; Search (DC 23); Disable Device<br />
(DC 23).<br />
The sarcophagus with the scroll-holding figure is fire trapped.<br />
aFire Trap: CR 4; 5-ft. fire blast (1d4+10); Reflex save DC<br />
16 half; Search (DC 29); Disable Device (DC 29).<br />
Treasure: The sarcophagus with the mace-holding figure<br />
holds an ancient, withered corpse wearing +1 half-plate and<br />
clutching a +1 heavy mace that resembles the one carved into<br />
the image.<br />
The sarcophagus with the scepter-holding figure holds a<br />
disturbingly well-preserved (but still very old) corpse wearing<br />
a gold necklace with pieces of jade (worth 500 gp).<br />
Hidden under the corpse is a black wand of Melf ’s acid arrow<br />
(with 17 charges remaining).<br />
The sarcophagus with the scroll-holding figure holds<br />
nothing but dust and tiny bits of bone.<br />
Development: If the crypt is disturbed or anything is<br />
taken, refer to area 124 for the curse that might fall upon<br />
those involved.<br />
126. Major Crypt (EL 6)<br />
Ten sarcophagi are placed in two rows of five each in this<br />
cave. Each either has a triangle, a lozenge, a square, or a<br />
circle carved into its lid.<br />
One of the ten symbols is from the Fire Temple (lozenge),<br />
two are from the Water Temple (square), three are from<br />
the Earth Temple (triangle), and four are from the Air<br />
Temple (circle).<br />
A natural shaft in the western portion of the ceiling<br />
leads up and eventually (via an extremely circuitous route)<br />
out of the mines. Its width ranges from 3–5 feet. Characters<br />
must make a successful Search check (DC 18) to notice<br />
this shaft.<br />
Creatures: Four dire bats hang from the ceiling in the<br />
eastern portion of the cave. They are new residents that<br />
found their way into a nice quiet cave and do not have anything<br />
to do with the Temple. They swoop down to attack<br />
anyone who enters.<br />
dDire Bats (4): hp 29, 38, 27, 31; see Monster Manual<br />
page 57.<br />
Development: If the crypt is disturbed or anything is<br />
taken, refer to area 124 for the curse that might fall upon<br />
those involved.<br />
127. Small Crypt<br />
Hanging suspended from the ceiling of the cave by a<br />
chain is a eighteen-inch-wide upside-down step pyramid.<br />
It appears to be made of iron painted black, and is<br />
about 8 feet off the floor. Two stone sarcophagi are in<br />
the room, each bearing the same symbol, and each<br />
painted entirely black, although the paint is now somewhat<br />
chipped.<br />
Prying off the lid of any sarcophagus requires a Strength<br />
check (DC 23).
CHAPTER 5: THE CRATER RIDGE MINES<br />
Treasure: Each of the corpses within the sarcophagi are<br />
mummies (but not undead). Each wears a silver chain with<br />
bits of ebony and small images of bat-winged demons and<br />
curved knives (each worth 250 gp).<br />
Development: If the crypt is disturbed or anything is<br />
taken, refer to area 124 for the curse that might fall upon<br />
those involved.<br />
128. Temple Crypt (EL 12)<br />
This cavern is filled with sarcophagi, all decorated<br />
with Temple symbols, skulls, and macabre decorations.<br />
The walls are also covered in stone carvings of<br />
leering, batwinged demons, looming skeletons, and<br />
spectral warriors.<br />
This room contains eight sarcophagi. Prying off the lid of any<br />
sarcophagus requires a Strength check (DC 23).<br />
Creatures: Four spectres and six shadows haunt this area,<br />
hiding amid the tombs, and attacking en masse when intruders<br />
enter, possibly with surprise and flanking. Clearly, this is<br />
a very dangerous encounter.<br />
dSpectres (4): hp 46, 40, 38, 50; see Monster Manual<br />
page 169.<br />
dShadows (6): hp 19, 19, 24, 17, 20, 19; see Monster<br />
Manual page 161.<br />
Treasure: All the sarcophagi contain only dead bodies,<br />
except one. It contains a nearly perfectly preserved (but<br />
dead) corpse of a half-elven woman. Clutched in her hands is<br />
a +1 shock rapier.<br />
Development: If the crypt is disturbed or anything is<br />
taken, refer to area 124 for the curse that might fall upon<br />
those involved.<br />
129. Grand Crypt (EL varies)<br />
The walls of the cavern glisten as though wet. Although<br />
large, this crypt cave holds only one sarcophagus, and it<br />
rests atop an obsidian dais with three steps. The sarcophagus<br />
itself is made of a reddish stone, and a squat,<br />
bloated demon statue—a part of the stone of the lid<br />
itself—almost seems to hiss at any who come near<br />
through twisted teeth and curled lips.<br />
Next to the dais to the west, a statue of a male human<br />
warrior made of dark gray stone, fitted with bronze armor<br />
plates (covered with the verdigris of age) and holding a<br />
bronze spear, seems to stand guard. A shallow pool, 10<br />
feet across and long since emptied, is in front of the<br />
statue, to the south.<br />
This is the “tomb” of Unariq, a cleric of Tharizdun who<br />
attempted to cast a powerful ritual that would free the Dark<br />
God. Instead, he joined the deity in his prison dimension.<br />
Now Unariq’s body serves as a conduit of negative energy<br />
and a gate to the Ethereal Plane.<br />
Pool (EL 2): As soon as anyone comes within 20 feet of<br />
the pool (which is 25 feet from the entrance), it magically<br />
fills with fresh water to a depth of 6 inches. When the<br />
water fills the pool, the statue animates (see below).<br />
A character looking into the pool sees her reflection. Any<br />
character doing so must make a Will save (DC 17) or become<br />
fascinated with her own image, transfixed as though with a<br />
hypnotism spell. This lasts until dispelled or the effect is somehow<br />
ruined (see spell description). The net effect is that the<br />
character is probably held motionless only long enough to be<br />
blasted by the statue or held for a short time while others are<br />
being blasted.<br />
Statue (EL 3): Once water fills the pool (see above), the<br />
statue animates, pointing its spear at the character who<br />
caused the pool to fill. If that character does anything other<br />
than move forward and touch the water in the pool, the<br />
statue fires five magic missiles at the character (cast as a 10thlevel<br />
caster). It continues to fire magic missiles (five per<br />
round) at the character if she takes actions other than touching<br />
the water.<br />
If another character moves forward, the statue changes<br />
its target to the new character. It never points at characters<br />
beyond 25 feet away from the pool, and never at characters<br />
who have touched the water. Otherwise, it might<br />
continually change targets based on character actions. It<br />
releases its magic missiles once per round at those within 25<br />
feet of the pool who do not touch the water.<br />
Sarcophagus (EL 4): Upon the lid of the sarcophagus is<br />
written in Common: “The greatest of us, gone but not<br />
slain.” If anyone touches the sarcophagus, the demon<br />
speaks with a magic mouth spell in Common: “This is the<br />
resting place of Unariq VoTalsimol, who has joined with<br />
the Master.”<br />
The sarcophagus is sealed with a special arcane lock that<br />
can be overcome only by someone who has touched the<br />
water in the pool, who may ignore its presence. Even so,<br />
prying off the lid requires a Strength check (DC 26) due to<br />
its weight. If the lid is removed, only a swirling black<br />
vortex is seen within.<br />
If the swirling vortex within the sarcophagus is disturbed<br />
(even touched), it alerts four special guardian ethereal<br />
marauders that appear and attack all within the room<br />
instantly. Once all foes are killed or chased off, they return<br />
to the Ethereal Plane, but attack any further intruders<br />
immediately for the next 24 hours (after which, the room<br />
resets, with even the lid of the sarcophagus returning to its<br />
rightful spot magically).<br />
dEthereal Marauders (4): hp 14, 11, 8, 10; see Monster<br />
Manual page 88.<br />
Further, the character touching the swirling blackness<br />
must make a Will saving throw (DC 19). If failed, the character<br />
is drawn into the Ethereal Plane and attacked by four<br />
more ethereal marauders near a huge black door (see development<br />
below).<br />
dEthereal Marauders (4): hp 11, 10, 13, 12; see Monster<br />
Manual page 88.<br />
If the saving throw was successful, the character remains<br />
on this plane and hears the following in his head:<br />
“The Dark Master of Oblivion cannot yet be freed, but<br />
once the secret of the four moon-nodes is discovered, all dark<br />
desires will come to fruition.”<br />
Development: Characters passing into the black vortex<br />
are taken to the Ethereal Plane where four ethereal marauders<br />
guard a black door (as mentioned above).<br />
The void around you swirls with color, sparkling lights,<br />
and curtains of energy. All is quiet as you float with no<br />
discernible up, down, north, or south. Before you towers a<br />
gate 50 feet across—its utter darkness is the color of the<br />
absolute absence of matter and energy, a blackness unlike<br />
any seen elsewhere.<br />
79
CHAPTER 5: THE CRATER RIDGE MINES<br />
80<br />
The black gate is a perfect circle, bound in golden<br />
chains and surrounded with symbols and glyphs of<br />
white fire. These glyphs blot out and obscure dark<br />
green sigils and runes that are only barely noticeable<br />
under them.<br />
It is currently impossible to affect this portal sealing the way<br />
into Tharizdun’s prison, as Unariq learned to his dismay. The<br />
ritual he thought would free his deity consumed him instead.<br />
Characters attempting to break the chains or open the doorway<br />
force the immediate appearance of a celestial being (a solar)<br />
that instructs them that doing so again will result in their<br />
deaths. The solar answers no questions—he is only a guardian<br />
forced into an eternity of keeping vigil over an indestructible<br />
gate. He interacts with characters only as a warning and then a<br />
foe—his threat was not an empty one. If those so warned do<br />
not cease what they are doing and leave the gate’s vicinity<br />
immediately, the solar attacks them without mercy.<br />
Getting back to the Prime Material Plane is a matter of<br />
concentrating on the Grand Crypt, at which time the character<br />
appears back in the cave, standing in the pool.<br />
130. Fire Temple Entrance (EL 3)<br />
This cave is unremarkable except that the dark stone of<br />
the floor is worked smooth and a large diamond shape is<br />
worked into its surface, the carved outline filled with reddish<br />
iron. A bit of broken chain lies in the western side of<br />
the room.<br />
The chain is normal and about 2 feet long.<br />
Trap: The floor of the passage going north has a glyph of<br />
warding. The pass phrase of “Fire is strong” bypasses it. Tessimon<br />
makes sure that this glyph is renewed if it is set off.<br />
aGlyph of Warding: CR 3; 5-ft. fire burst (5d8); Reflex save<br />
DC 15 half; Search (DC 28); Disable Device (DC 28).<br />
131. Water Cave<br />
The sounds of dripping, running water fill the air.<br />
Water runs down the walls of this cave, collecting in a<br />
pool that fills it.<br />
The water is about 12 feet deep. The water is rainwater that<br />
slowly works its way down into this cave via tiny cracks.<br />
132. Smashed Juggernaut<br />
A strange stone statue mounted on stone wheels stands<br />
near the middle of this room. The statue once portrayed a<br />
large horsehead mounted on a solid square block, the<br />
whole thing being 10 feet high and 6 feet wide. Now, it is<br />
smashed and marred, its features only barely discernible.<br />
Its pieces lie in rubble all around it, as if it were long ago<br />
smashed by weapons.<br />
Mixed with the stones are numerous bones, broken<br />
weapons, and rusted armor pieces.<br />
About a year ago, the Fire Temple and the Earth Temple had<br />
a major clash in this area. All that remains to mark the<br />
battle is the charred remains of the Earth Temple’s magically<br />
animated juggernaut and a few corpses stripped of<br />
anything worthwhile.<br />
Eastern Bridge Complex<br />
General Notes<br />
Eeridik, a wererat sorcerer, commands the guards and personnel<br />
in this complex. Eeridik has worked for the cult of<br />
Tharizdun for a long time and seeks to become more powerful<br />
and influential (and to live in the Outer Fane). Currently,<br />
the forces here are favorable to the Earth Temple in particular<br />
and distrust the powerful Fire Temple. Officially, they have<br />
no allegiance.<br />
The complex of areas 133–148 has three stages of security.<br />
When the PCs first arrive, it is always at A. If any of these<br />
areas is attacked, they move to B as quickly as possible and<br />
remain wary for the rest of that day. If an attack comes while<br />
in stage B, they move to stage C as quickly as possible and<br />
remain so for the rest of that day.<br />
A. Lax. As presented. All guards take 10 on Listen and Spot<br />
checks but suffer a –5 penalty for inattention.<br />
B. Wary. All guards take 10 on Listen and Spot checks with<br />
no penalty. Tac hides near the area that was attacked, hoping<br />
for an ambush. Eeridik stays in or around area 138.<br />
C. Alert. The trolls from area 135 join the guards in 133.<br />
Eeridik uses his spells to help as many of the powerful guards<br />
(trolls, Tac, and so on) as he can. Reokallitan and Eeridik<br />
move to 138, accompanied by the guards in 137. If his forces<br />
are greatly depleted, Eeridik bribes the gray render in 149 to<br />
come with him to 138. All guards take 10 on Listen and Spot<br />
checks with no penalty.<br />
All guards and other personnel wear the black iron triangle<br />
of the Elder Elemental Eye. Their clothing is predominantly<br />
black as well.<br />
Areas 133–148 are all lit by torches in iron sconces. All<br />
ceilings are 15 feet high unless otherwise noted, and doors<br />
are wooden (hardness 5, 15 hp, break DC 18 if locked).<br />
Almost every wall has light gray plaster on it, although much<br />
of it is peeling and cracking.<br />
The inhabitants of areas 133–148 know the layout of<br />
areas 130–154. They know about and to some degree rely<br />
upon the Fire Temple, but fear the caves to the north, for<br />
the dangerous predators such as the fiendish displacer<br />
beasts. They also know the general layout of the whole<br />
temple complex (they know that there’s a lake in the middle<br />
of the crater and three bridges that go out to an island<br />
where the masters of the place reside), and that the door at<br />
the other end of the bridge can only be opened by a special<br />
key that “mostly just priests have.”<br />
133. Guards (EL 7)<br />
A cloth-covered wooden practice dummy stands in the<br />
middle of the room, a symbol of Pelor around its neck.<br />
A rope hangs down from the ceiling on the north end<br />
of the room. Some disturbing stains mar the stones on<br />
the walls.<br />
The door to the north, leading into area 134, is sealed with an<br />
arcane lock as well as being barred on the north side. It is an<br />
iron door (hardness 10, 60 hp, break DC 28), and only Eeridik<br />
can pass it; all guards and other personnel use the other door<br />
and pass through area 135.<br />
Creatures: Two ogres and four gnolls live here and serve as<br />
guards against anyone headed north into the Bridge Complex.<br />
dOgres (2): hp 30, 26; see Monster Manual page 144.<br />
dGnolls (4): hp 9, 10, 14, 11; 2d10 gp; see Monster Manual<br />
page 105.
CHAPTER 5: THE CRATER RIDGE MINES<br />
Trap: The guards here have rigged a trap on the southern<br />
end of the room. A successful Search check (DC 18) allows a<br />
character to notice it before the guards can trigger it. A large<br />
weighted net, reinforced with steel wire, hangs above the<br />
entrance. If they hear someone coming (ogres Listen +2,<br />
gnolls Listen +3), one gnoll stands by a rope in the north end<br />
connected across the ceiling to the net. Pulling the rope<br />
drops the net.<br />
Because of the nature and size of this large, weighted<br />
net, no attack roll is necessary. Those under the net (in the<br />
first 10 feet of the south end of the room) must make<br />
Reflex saving throws (DC 20) to avoid it. Entangled creatures<br />
suffer –2 on attack rolls and a –4 penalty to effective<br />
Dexterity. Creatures in the net move at half speed and<br />
cannot charge or run. If multiple creatures are in the net,<br />
they must coordinate their movement (moving at the same<br />
time in the same direction) and move at the speed of the<br />
slowest creature in the net. In any event, the net is<br />
anchored to the floor on either side by ropes and so creatures<br />
within the net cannot move it more than 15 feet without<br />
first making a DC 23 Strength check to break a rope<br />
(DC 25 to break both at the same time).<br />
Entangled victims can escape with an Escape Artist check<br />
(DC 20) that requires a full-round action. The net has hardness<br />
10, 15 hp, and can be burst with a Strength check (DC<br />
27), also a full-round action.<br />
aLarge Net Trap: CR 1; no attack roll necessary (entangle—see<br />
above); Reflex save (DC 20) avoids; Search (DC 18);<br />
Disable Device (18).<br />
Tactics: Once the net is dropped, the gnolls fire their bows<br />
and the ogres charge into melee, putting themselves in a<br />
position so that they threaten both trapped and untrapped<br />
opponents (if possible).<br />
They do not attack or even question those dressed in<br />
Temple garb (ochre robes, black cloaks, and so on) and bearing<br />
either Elder Elemental Eye or Tharizdun symbols.<br />
Development. These guards do not leave their post.<br />
Ad Hoc XP Adjustment. Award 10% additional experience<br />
points for this encounter.<br />
134. Bridge Access (EL 5)<br />
This large chamber has light gray plaster covering the walls,<br />
peeling and chipped in places. A fresco on the southwest<br />
wall shows hooded figures with torches riding galloping<br />
horses. Another on the northeast wall depicts a grisly<br />
scene of human sacrifice, and creatures—possibly bugbears—dancing<br />
around a fire. In the western portion of<br />
the room, two heavy wooden gates, bound in iron, stand<br />
closed and barred.<br />
The gates leading out onto the bridge are kept barred (hardness<br />
5, 30 hp, break DC 26).<br />
The bridge is the Earth Bridge, connecting to the Earth<br />
Door. The door can be opened only by someone with or<br />
blessed by a greater key of earth.<br />
Creatures. Eight human 1st-level warriors, armed with<br />
heavy crossbows, stand near the gates. Each is equipped with<br />
a potion of heroism made by Eeridik, the sorcerer in area 139.<br />
They obey the commands of Eeridik or Tac.<br />
dHuman War1 (8): hp 9, 8, 4, 8, 7, 6, 3, 10; see Appendix 3.<br />
Tactics: These guards drink their potions at the first sound<br />
of trouble, and then act foolishly brave, because Eeridik told<br />
them it would make them invincible.<br />
They do not attack or even question those dressed in<br />
Temple garb (ochre robes, black cloaks, and so on) and bearing<br />
either Elder Elemental Eye or Tharizdun symbols.<br />
Development. These guards do not leave their post.<br />
Ad Hoc XP Adjustment. Award double normal experience<br />
points for this encounter. The EL has been raised by +2<br />
to account for the increased difficulty.<br />
135. Trolls (EL 8)<br />
This chamber is dank and fetid. Three straw mats are near<br />
the west wall, and the rest of the floor is covered in<br />
broken, gnawed bones. The plaster on the walls has been<br />
clawed off.<br />
Creatures: Three trolls live here, each with hide armor<br />
and javelins (for ranged combat). Although not very bright,<br />
these trolls serve Eeridik faithfully, for in his service they are<br />
well fed and rarely in real danger.<br />
These trolls are all covered in crude tattoos, the result of<br />
“artistic” acid burns that show leering faces and weapons.<br />
dTrolls (3): hp 65, 67, 70; 3d10+30 gp; AC 22; javelins<br />
(+4 ranged); see Monster Manual page 180.<br />
Tactics: In a fight, the trolls throw spears, utilizing the<br />
wall separating the room from the south passage for cover if<br />
possible. Then, they close for melee attacks.<br />
They do not attack or even question those dressed in<br />
Temple garb (ochre robes, black cloaks, and so on) and bearing<br />
either Elder Elemental Eye or Tharizdun symbols.<br />
Ad Hoc XP Adjustment: Award 10% additional experience<br />
points for this encounter.<br />
136. Supplies<br />
Bags, boxes, and piles of equipment fill this storeroom.<br />
Food, drink, clothing, tools, rope, and other things are on<br />
the floor, hang on hooks, or sit on wooden shelves built<br />
into the walls.<br />
All this material is fresh and new.<br />
137. Barracks (EL 3)<br />
Thirty feet square, this room has plaster-covered walls<br />
filled with cracks. The torches on the walls have permanently<br />
stained areas of the walls black. Twenty beds, some<br />
of them bunked, some not, surround a large, circular table<br />
flanked by numerous stools. The table is covered in<br />
stoneware. Most of the beds have a small trunk or a sack<br />
near them.<br />
The trunks and bags contain personal gear, although one<br />
trunk has a false bottom that contains a bag of stolen loot<br />
with 342 sp and 290 gp.<br />
Creatures: Six 1st-level human warriors are here, off duty<br />
and unready for battle. None of them are ready for combat<br />
until 2d4 rounds after the first sound of trouble.<br />
They obey the commands of Eeridik or Tac.<br />
dHuman War1 (6): hp 5, 4, 4, 9, 6, 7; see Appendix 3.<br />
Tactics: Morale among these particular guards is quite low.<br />
They surrender at the first sign of a real threat.<br />
They do not attack or even question those dressed in<br />
Temple garb (ochre robes, black cloaks, and so on) and bearing<br />
either Elder Elemental Eye or Tharizdun symbols.<br />
81
CHAPTER 5: THE CRATER RIDGE MINES<br />
139. Eeridik’s Chamber (EL 10)<br />
The door is sealed with an arcane lock cast by Eeridik.<br />
Resembling a nest more than a bedchamber, the creature<br />
that lives in this room obviously thrives on refuse and<br />
garbage. Rotting food, scraps of cloth and wood, bits of<br />
jagged metal, and feces cover the floor. Something has<br />
created a mound, not unlike a burrow, in the center of<br />
this junk.<br />
82<br />
Development: If they hear sounds of trouble, these<br />
guards get ready for battle but do not actually leave the barracks<br />
unless commanded to do so by Eeridik or Tac.<br />
138. Hall of Elemental Evil<br />
This room holds four statues, arranged near the center of<br />
the room, each about 10 feet distant from the others.<br />
Each statue is about 8 feet tall and stands on a round<br />
base. The first is a humanoid form, sheathed in flame.<br />
This statue appears to be made of copper and is covered<br />
in verdigris. The next statue is made of brown and gray<br />
marble and depicts a vaguely humanoid form with a<br />
rocky appearance. The third statue appears to be a rearing<br />
wave with a human face peering out from the crest. The<br />
wave statue is made of sandstone painted blue and white.<br />
The last statue is that of a spinning whirlwind of pearly<br />
white marble. Humanlike arms extend from either side<br />
of the whirlwind.<br />
Obviously, each statue represents an element. If anyone<br />
wearing one of the elemental symbols touches the appropriate<br />
statue, that character is affected by a bless effect for 6<br />
rounds. For example, if a person wearing a symbol of the<br />
Earth Temple touches the stony humanoid statue, they are<br />
blessed. This ability can be used once per day per person. If<br />
anyone wearing one of the elemental symbols touches the<br />
statue of the opposing element (fire opposes water, air<br />
opposes earth), that character is affected by a bane for 6<br />
rounds.<br />
138A. Latrine<br />
Within the mound in the center lies a small wooden box<br />
bound in bronze and locked with a padlock (DC 25 to open).<br />
Creatures: Eeridik is an 8th-level wererat sorcerer. He<br />
commands the bridge access area, ruling by bribing others<br />
with potions and spells. Sneaky and conniving, Eeridik has<br />
had his current position a long time and is known by most<br />
important people in the Temple.<br />
Eeridik is a wiry, hairy creature. He prefers not to wear<br />
clothing, but does wear a necklace with rat skulls.<br />
dEeridik: Wererat Sor8; hp 44; see Appendix 3.<br />
In addition, six dire rats lie amid the trash, all of which<br />
obey Eeridik’s commands.<br />
dDire Rats (6): hp 4, 5, 5, 4, 6, 3; see Monster Manual<br />
page 56.<br />
Tactics: Eeridik casts bull’s strength, endurance, and cat’s grace<br />
on himself and whoever else might be with him. He uses<br />
stoneskin and improved invisibility on himself as well. Once<br />
powered up with spells, he fights off opponents with lightning<br />
bolts and magic missiles if necessary, but prefers to escape<br />
rather than fight.<br />
Eeridik spends almost all his time in his hybrid form.<br />
Give Eeridik a +4 bonus on his Sense Motive or Spot<br />
check (respectively) to sense a bluff or a disguise used to<br />
get by him, since he has a lot of experience in monitoring<br />
people passing through his area of control. Even if he suspects<br />
or knows someone is lying, he does not act on that<br />
information until he believes that he can confront the trespassers<br />
with the upper hand (such as in the company of his<br />
guards or Tac).<br />
Trap: The box has a magic trap that possibly petrifies the<br />
person opening it.<br />
aPetrification Trap: CR 6; petrification; Fortitude save<br />
(DC 19) negates; Search (DC 31); Disable Device (DC 31).<br />
Treasure: Inside the box is a necklace of gold and rubies<br />
(worth 1,000 gp), a potion of lesser restoration, a lesser key of earth,<br />
and a book in Eeridik’s scrawl detailing his great work, the<br />
summoning circle in area 141.<br />
140. Tac’s Quarters (EL 9)<br />
If Tac is here, the door is locked (via a latch on the inside of<br />
the door; DC 20 to open).<br />
This bedchamber is spartan in its decor. The walls are<br />
painted white, the floor is mostly covered by a brown<br />
and black spiral-patterned rug, and a simple bed sets<br />
next to a small dresser with an incense burner and a<br />
pair of candles atop it.<br />
The bed is covered by a blanket, but it is simple to discover<br />
that it is actually a bed of nails (Tac is a masochist). Under the<br />
bed, Tac keeps a pair of short barbed whips to flagellate himself.<br />
The dresser holds clothing and personal gear.
CHAPTER 5: THE CRATER RIDGE MINES<br />
Creatures: Tac is a 9th-level human monk. He is not<br />
found here often. Usually, he sneaks around the area and<br />
tries to observe in secret. If the area is under alert, he<br />
attempts to sneak out of his room to find the intruders,<br />
attacking them when they are in the middle of fighting<br />
someone else.<br />
Tac wears simple black and brown tunics and iron bands<br />
on his ankles and wrists.<br />
dTac: Male human Mnk9; hp 78; see Appendix 3.<br />
Tactics: Tac uses his movement and tumbling to attack<br />
spellcasters first, even if fighters defend them.<br />
Tac does not attack anyone in Temple garb (ochre robes,<br />
black cloaks, and so on) and bearing either Elder Elemental<br />
Eye or Tharizdun symbols, but he does follow them to see<br />
what they are doing, where they are going, and who they are.<br />
141. Great Hall (EL 9)<br />
Wooden tables and benches lie tumbled in the corners of<br />
the room, the floor obviously cleared to make room for the<br />
huge magic circle, traced in glowing red lines and surrounded<br />
by sparkling green and silver runes. The circle<br />
touches the east and west walls, and reaches to about 10<br />
feet from the north door or the south stairs.<br />
Tapestries that once hung on the walls have since<br />
been torn down and lie in heaps, but three remain in<br />
their rightful places, depicting an army of charging<br />
undead skeletons over a hillside, a burning city, and a<br />
dragon smashing its way up through the earth.<br />
This is Eeridik’s great experiment, a magic circle that serves<br />
as a call for a powerful demon. The spell also automatically<br />
places a dimensional anchor spell upon the demon so that it<br />
cannot leave. He commanded his people to move the old furnishings<br />
out of the way so that he could construct it.<br />
Creatures: A bebilith appears if living or nonliving matter<br />
crosses the red line. Because it is called rather than summoned,<br />
it is physically (and permanently) brought to the<br />
Prime Material Plane. Once called, it attacks every creature<br />
or person that it encounters.<br />
A dispel magic does not send the bebilith home (it is not<br />
summoned), but it might dispel the dimensional anchor spell,<br />
allowing it to leave if it so chose.<br />
dBebilith: hp 101; see Monster Manual page 41.<br />
Development: If called but left alive, the demon wanders<br />
around the mines killing everything it finds until it is<br />
slain. Potentially, this could be a major setback for the<br />
forces of the Temple, and eventually draws the attention of<br />
the doomdreamers who send invisible stalkers to deal<br />
with the creature.<br />
142. Empty Room<br />
Unlike the areas around it, this room is dark. The oddshaped<br />
room appears empty except for a pair of round rugs<br />
laid out near the center of the room, each about 12 feet in<br />
diameter, embroidered in a black and white pattern.<br />
143. Bear Pit (EL 7)<br />
This chamber is empty except for some brownish red<br />
splatters on the walls and floor. A chain extends out of a<br />
small hole in the east wall, attached to a thick collar<br />
around the neck of a towering bear frothing at the mouth<br />
with death in its eyes. Its claws and teeth seem even<br />
larger than they should be, and its bulk is massive and<br />
apparently, all muscle.<br />
The chain is 40 feet long and the hole is in the east wall<br />
where the X is on the map. A secret button near the top of the<br />
stairs to the north and one on the other side of the door to<br />
the south causes a powerful gear mechanism to retract the<br />
chain so that the bear is pulled tight against the east wall.<br />
This allows area inhabitants to get through this chamber<br />
safely. Pushing it again releases the mechanism so that the<br />
bear can stretch the chain back to its 40-foot length again.<br />
The locals torment and tease the bear to no end, which has<br />
driven it mad with rage and the desire to kill. Should Eeridik<br />
or his people ever acquire a prisoner, they most likely throw<br />
him in with the bear just to see what happens.<br />
Creatures: An insane dire bear is chained to the wall. It<br />
attacks anyone it can reach. Judging by the matted, bloodstain<br />
fur and scars, this bear has been severely mistreated.<br />
Currently, it is not wounded.<br />
dDire Bear: hp 110; see Monster Manual page 58.<br />
144. Common Room (EL 5)<br />
Three tables, a number of chairs and stools, and a pair of<br />
divans fill much of this room. One of the tables has playing<br />
cards and dice on it, while another has a small keg and<br />
at least a dozen mugs. The walls have small niches 3 feet<br />
above the floor and just large enough to place small idols<br />
(twelve total).<br />
The southeast corner has a small fireplace for cooking,<br />
its chimney rising up into the stone. Next to the<br />
fireplace is a short, rough wooden cabinet with a chopping<br />
block on top of it. On the other side of the fireplace<br />
is a tall cabinet.<br />
The room is dirty, and the furniture is ill treated and<br />
stained.<br />
The idols all resemble the statues found in 138, three of each.<br />
These idols are about 1 foot high and each is worth about 50<br />
gp due to their fine workmanship. The cabinets contain a<br />
small amount of foodstuffs. Life for the guards here was<br />
much better when they could cook and eat in area 141.<br />
Creatures: Because they have nowhere else to sleep, a<br />
couple of the trolls (including the troll in 148) sleep here.<br />
Currently, a troll sleeps in the northeast corner hanging over<br />
a divan. If he awakens, he attacks anything he sees in a<br />
drowsy fit.<br />
dTroll: hp 63; see Monster Manual page 180.<br />
Development: If the troglodyte in 147 hears a fight in this<br />
room, he comes to investigate.<br />
145. Secret Room (EL 4)<br />
The secret door (DC 22 to find) slides into the wall to the<br />
right, but is locked (DC 26 to open).<br />
A dragon made of stone, about the size of a horse, stands<br />
with wings unfurled in this room, facing the door. One<br />
claw is raised menacingly, and its mouth is slightly open.<br />
The craftsmanship is very good.<br />
83
CHAPTER 5: THE CRATER RIDGE MINES<br />
84<br />
The walls are bare stone but have been carved in<br />
such a way that they look like rows of scalloped<br />
columns about 4 feet apart. The floor is smooth, but covered<br />
in dust.<br />
A Search check on the dragon statue (DC 20) reveals that the<br />
upraised claw can move down on a hinge. If a character gets a<br />
DC 25 or better result on the Search check, she notices that<br />
the upraised claw can also move up.<br />
Eeridik and Tac know about this chamber (though neither<br />
has a key), but no one else does.<br />
Development: The claw can be moved up or down.<br />
Up: If the claw is moved up, the secret door closes, the<br />
ceiling slides into the wall with a heavy stone grating<br />
sound, and the floor begins moving upward into the dark<br />
shaft revealed above the ceiling. The shaft is 100 feet high,<br />
and the floor stops 15 feet below the top. This takes 8<br />
rounds. There, in the same position as the secret door, a<br />
stone door stands closed.<br />
The stone door slides to the left, and beyond is an unlit 20-<br />
foot-by-20-foot room, positioned directly above the eastern<br />
portion of area 144. The walls are ornately carved in intaglio,<br />
with images of dwarven armies fighting orcs, trolls, and monsters<br />
such as minotaurs and dragonnes.<br />
The dwarves used this room as a bolt hole, and as such it<br />
contains an iron rack of six masterwork urgroshes, three<br />
masterwork greataxes, and a masterwork battleaxe. Ten<br />
sleeping mats are on the floor, the four corners have brass<br />
oil lamps, and a sturdy wooden table upon which two minor<br />
magic items sit occupy this area.<br />
• Everful Keg: A keg of water that produces a limitless supply<br />
of water, but no more than ten gallons a day. It functions<br />
only in this room.<br />
• Box of Endless Biscuits: Each time the lid of this small wooden<br />
box is opened, six hearty biscuits appear inside it. It can be<br />
used ten times each day. It functions only in this room.<br />
Down. If the dragon’s claw is pushed down, the secret<br />
door closes and the floor slowly lowers, leaving the ceiling<br />
far behind. It moves 100 feet down, taking 8 rounds to do<br />
so. Once it stops, characters notice a stone door in the same<br />
position as the secret door. It slides to the left, and once it<br />
starts, it moves of its own accord until completely open.<br />
This is a trap.<br />
Beyond the door is a conduit to the Stalagos. Water immediately<br />
begins to rush into the shaft. Characters all suffer 2d6<br />
points of damage from the onrush of water. A Swim check<br />
(DC 17) are needed to keep one’s head above water and essentially<br />
“ride” the rising water up as it fills the shaft to a depth of<br />
60 feet (still 40 feet below the level of the secret door to get<br />
back to area 144). The water rises at a rate of 5 feet per round.<br />
Those failing the Swim check need to make DC 10 Constitution<br />
checks to keep from drowning (see DUNGEON MASTER’s<br />
Guide page 85). Swim checks to reach the ever-rising surface<br />
have a DC 15 on rounds after the initial one. After the water<br />
has stopped rising, the Swim DC is 10.<br />
aWater Trap: CR 4; no attack roll necessary (2d6), must<br />
succeed at Swim checks to avoid drowning; Search (DC 20);<br />
Disable Device (DC 22).<br />
146. Private Lounge<br />
The door to this room is locked (DC 26 to open) if someone<br />
is in this room or 147. A latch on the inside locks it, so no<br />
key is needed.<br />
This room is sumptuously furnished and decorated.<br />
Velvet-lined overstuffed chairs and pillow-covered<br />
couches sit atop cranberry-colored, gold-embroidered<br />
rugs. The walls are covered in black and white draperies<br />
with golden hems except for a spot in the east wall that<br />
has a fireplace. A ebony table near the northwest corner is<br />
covered in a silver service. A wooden cabinet, painted<br />
white, sits on the floor next to the table.<br />
This place is for entertaining guests—particularly those from<br />
the Outer or Inner Fanes. The service (worth 250 gp total) has<br />
pots of spiced tea and cider, all of which is cold. The cabinet<br />
contains jugs and bottles of alcohol, wine, and other beverages.<br />
The fireplace is used for cooking better meals than those<br />
served in 144, and small shelves surround it with jars of<br />
expensive spices (10 jars worth 20 gp each).<br />
147. Guest Room (EL 8)<br />
A large bed covered in red blankets, a finely carved table<br />
and four chairs, a bureau topped with a large black triangle<br />
plaque propped upon a stand, a wardrobe, and a chest<br />
furnish this room. The walls are covered in abstract tapestries<br />
of red, black, and gold. The floor is polished<br />
smooth and covered by a circular rug of black and gold.<br />
A brass chandelier hangs from the ceiling, filled with<br />
ten lit candles.<br />
Strangely, this fine room is filled with an eye-watering<br />
stench that makes you want to retch.<br />
Currently, the guest room is occupied. The wardrobe is<br />
empty, but the guest has placed a pair of black robes and a<br />
copper censer in the chest, which is not locked. A book<br />
(written in Undercommon) about the Elder Elemental Eye<br />
lies open on the bed.<br />
Creatures: Reokallitan is a troglodyte 3rd-level rogue/4thlevel<br />
cleric that represents the Earth Temple, hoping to<br />
insure the safety of Earth Temple devotees that need to use<br />
the bridge. He is afraid (and rightly so) that the Tessimon<br />
of the Fire Temple may convince Eeridik to join her and<br />
not allow anyone to access the bridge, effectively cutting<br />
off the Earth Temple from the Outer and Inner Fane.<br />
Reokallitan has a lesser key of earth.<br />
dReokallitan: Male troglodyte Rog3/Clr4; hp 49; see<br />
Appendix 3.<br />
Tactics: Reokallitan is in a strange position. He cannot<br />
afford to get involved in a fight, but it is in his best interest to<br />
help the forces here so that they think of him as an ally. In<br />
any event, he fights to defend himself.<br />
In battle, he casts his summon monster spells so allies appear<br />
to help him flank opponents.<br />
148. North Guard Post (EL 6)<br />
This wide chamber has smooth masonry walls on the south<br />
side, but rough-hewn walls on the north. Three passage<br />
lead off to the north, appearing to be mine tunnels.<br />
Creatures: A troll and six human warriors stand guard here.<br />
dTroll: hp 65; 54 gp; see Monster Manual page 180.<br />
dHuman War1 (6): hp 4, 9, 6, 8, 5, 6; see Appendix 3.<br />
Tactics: These guards have a large, extremely loud bell<br />
with a pull chain hanging from the ceiling. As his first action
CHAPTER 5: THE CRATER RIDGE MINES<br />
in a combat, one warrior rings this bell, alerting everyone in<br />
areas 137 to 144. The humans use their crossbows while the<br />
troll engages in melee.<br />
They do not attack or even question those dressed in<br />
Temple garb (ochre robes, black cloaks, and so on) and bearing<br />
either Elder Elemental Eye or Tharizdun symbols.<br />
These guards do not leave their post unless faced with<br />
overwhelming force, in which case they fight a tactical<br />
withdrawal into area 144, hoping for reinforcements.<br />
149. Gray Render (EL 8)<br />
The rotting, mostly eaten carcass of what looks to have<br />
been a cow lies near the entrance. A few bones, some of<br />
them quite large, lay scattered about the lose stones of<br />
this cave. The walls are clearly worked, having once been<br />
a part of the mine.<br />
The cow was a recent gift from the clerics of the Temple to<br />
keep the cave’s inhabitant happy.<br />
Creatures: A gray render with a huge black triangle<br />
symbol tattooed onto its chest lives here. Surrounding<br />
the symbol are six special glyphs. These glyphs have the<br />
following powers, activated when the render touches them<br />
(a standard action). Each is usable once and can only affect<br />
the gray render.<br />
1. Bull’s strength for 1 hour.<br />
2. Cat’s grace for 1 hour.<br />
3. Cure serious wounds.<br />
4. Haste for 10 rounds.<br />
5. Cure critical wounds.<br />
6. Endurance for 1 hour.<br />
dGray Render: hp 125; see Monster Manual page 112.<br />
This creature is a servant of the Temple, given the glyphs by<br />
the doomdreamers and then let loose into the mines.<br />
Tactics: The gray render is not hesitant to use the glyphs,<br />
and is likely to use the haste glyph first so that it can take<br />
extra actions (including activating more glyphs). Of course, if<br />
it hears foes coming, it uses any preparation time to activate<br />
glyphs before wasting rounds of haste.<br />
It does not attack those dressed in Temple garb (ochre<br />
robes, black cloaks, and so on) and bearing either Elder Elemental<br />
Eye or Tharizdun symbols.<br />
Ad Hoc XP Adjustment: Award 10% additional experience<br />
points for this encounter.<br />
150. Low Cave<br />
The tunnel leading into this cave slopes down sharply,<br />
and many of the stones are loose, making it difficult to<br />
descend safely. This area appears to be a natural vesicle in<br />
the crater wall; no signs of tools having dug this out can<br />
be found.<br />
Those coming down into this cave must make Balance<br />
checks (DC 15) or slip and fall for 1d6 points of damage, sliding<br />
3d4 feet.<br />
151. Pit (EL 5)<br />
The tunnel continues to slope down sharply to the<br />
east, covered in scree, ending in a shaft leading down<br />
into darkness.<br />
85
CHAPTER 5: THE CRATER RIDGE MINES<br />
86<br />
The floor of the cave marked 151 is 80 feet lower than the<br />
level of the tunnel leading into it; it is in effect, a deep pit.<br />
As in area 150, characters must succeed at a Balance check<br />
(DC 15) to keep from slipping. Failure means that the<br />
character suffers 1d6 more points of damage and slides<br />
into the pit, although a successful Reflex saving throw<br />
(DC 20) allows a character to catch himself on the side<br />
before he falls.<br />
Characters that fall drop a little more than 80 feet,<br />
although the bottom 10 feet or so is filled with thick slurry, a<br />
combination of befouled, acidic water and insoluble mud.<br />
This is not enough to break the fall, so the character suffers<br />
the full 8d6 points of damage. Further, the muck at the<br />
bottom burns eyes, nose, and mouth as well as flesh, so that<br />
the character suffers an additional 1d6 points of damage<br />
each round that they are in the slurry. The slurry is hard to<br />
maneuver in and is slippery, so while it is not hard to keep<br />
one’s head above water, Climb checks out of the muck have a<br />
DC of 20.<br />
152. Dangerous Cave (EL 4)<br />
The southeastern portion of this cave is unstable. Searching<br />
the rubble prompts a cave-in that inflicts 8d6 damage<br />
to all within the cave unless a Reflex save (DC 15) is made,<br />
in which case a character suffers only half of that amount<br />
of damage.<br />
Development: Should a cave-in occur here, Eeridik eventually<br />
sends the trolls in his command to clear it. At such a<br />
time, he may try to deal with the fiendish displacer beasts in<br />
area 153 as well.<br />
153. Displacer Beasts (EL 7)<br />
The floor of this simple cave is littered with bones and<br />
foul-smelling feces. The ceiling is low—only about 10<br />
feet—and a path is well worn through the center of<br />
the chamber.<br />
Creatures: Two fiendish displacer beasts make their lair<br />
here, hunting throughout the whole area.<br />
The forces of the Temple magically called these creatures,<br />
but they escaped and now prey upon anything in the mines.<br />
They have a healthy respect for the gray render in area 149<br />
and are aware that as one proceeds south, the danger<br />
increases. Thus, they are more likely to hunt in the caves to<br />
the north.<br />
dFiendish Displacer Beasts (2): hp 55, 61; fire and cold<br />
resistance 10; damage reduction 5/+1; SR 12; 1/day can<br />
inflict additional +6 to good creatures; see Monster Manual<br />
page 59.<br />
Tactics: One of the creatures stands in the center of the<br />
cavern, drawing out foes, while the other hides in the shadows<br />
(Hide +12) ready to ambush unknowing opponents.<br />
154. Split-Level Cave<br />
The dark andesite walls rise high up to the sound of<br />
something flitting about the ceiling, although judging by<br />
the occasional high pitched shriek, it is probably just bats.<br />
A ledge near the middle bisects this long cave. The western<br />
portion is over 70 feet lower than the eastern.<br />
If characters explore the upper portion of the cave, use the<br />
following text:<br />
The mine’s ore cart track ends here. An ore cart sits atop<br />
the end of the track, about a third full of kimberlite ore.<br />
A rusty iron bin is next to the track, also about a third<br />
full of ore. A pick lies discarded to the side of the bin, as<br />
does an old lantern.<br />
See the sidebar Operating an Ore Cart on page 49 for information<br />
on how to use the ore carts.<br />
If characters explore the lower portion of the cave, use the<br />
following text:<br />
The ore cart track is melted, as if acid was poured upon it,<br />
destroying both wood and metal. Here and there, small<br />
patches of a substance like dried mucus, dark but glistening,<br />
can be seen around where the track once was.<br />
Around the track, in the cave, piles of slagged metal, perhaps<br />
once ore carts or metal bins themselves, lay mostly<br />
dissolved and destroyed.<br />
The black pudding from area 156 has been here.<br />
A 50-foot coil of rope attached to a grappling hook lays<br />
splayed about below the ledge.<br />
155. Clean Cave<br />
The tunnel to the east and this entire cave is clear of<br />
debris and dust, although a fine layer of moist slime coats<br />
the floor and the lower portions of the wall.<br />
The slime is the sign of the recent passing of the black pudding<br />
in area 156.<br />
156. Pudding Lair (EL 7)<br />
An inky black mass, 20 feet across, pulsing and undulating,<br />
occupies a large portion of this cave, the walls and<br />
floor slick with an organic goo.<br />
Creatures: This is a black pudding. It is starving to death,<br />
having unsuccessfully tried to eat the gray render and the<br />
fiendish displacer beasts. It attacks and fights to the death.<br />
dBlack Pudding: hp 120; see Monster Manual page 145.<br />
157. Darkmantle Swarm (EL 5)<br />
The tunnel widens slightly here, the track continuing<br />
through.<br />
Creatures: Six darkmantles lurk near the cavern roof. Positioned<br />
in a line (above the track), they attack as soon as anyone<br />
passes underneath by creating as much darkness as they<br />
can in the cave and the tunnels on either side.<br />
dDarkmantles (6): hp 5, 6, 4, 3, 8, 9; see Monster Manual<br />
page 39.<br />
Tactics: If sorely pressed, these creatures attempt to flee<br />
into area 158.<br />
158. Side Cave<br />
This cave is large and empty. The ceiling is very high, and<br />
veins of what might be iron ore are visible in the andesite.
CHAPTER 5: THE CRATER RIDGE MINES<br />
Hidden (unintentionally) among the rocks is the very old<br />
skeleton of a dwarf wearing a golden ring (worth 35 gp),<br />
rusted and damaged chainmail, and rags. He clutches in his<br />
hand a copper tube that has a map of areas 133–154. Areas<br />
150 and 151 are marked (in Dwarven) “Danger” and area 152<br />
is marked “Possible danger.”<br />
159. Dead Bodies<br />
Four humans lie dead, recently hacked apart by heavy<br />
blows. They wear nothing but breeches, and have no<br />
equipment.<br />
These were guards from the Water Temple attempting to<br />
make it to the Eastern Bridge Complex carrying a message<br />
and a large bribe for Eeridik. They were killed by the<br />
bugbears in this area and their equipment was taken to<br />
area 164.<br />
160. Spiral Descent<br />
This cave is a massive cone-shaped shaft dropping down<br />
about 75 feet, the track spiraling down a path to the<br />
bottom. Loose stones litter the path.<br />
Ore cart rules modifications for this area:<br />
• The slope is so steep here that stopping an ore cart, once<br />
on the spiral, is impossible (using the brake to slow it and<br />
finally come to a stop at the bottom is fine).<br />
• If no attempt to brake is made, a 20% chance (01–20 on<br />
d%) exists that the cart tips over, spilling anything and<br />
anyone inside down 1d6×10 feet (a successful Reflex<br />
save against DC 20 indicates that the character has<br />
caught herself ).<br />
• If the cart does not tip over and the riders make no<br />
attempt to brake, the cart moves at double speed all the<br />
way to the broken and dissolved track to the south (see<br />
area 154).<br />
• If the cart has not stopped by the time it reaches the point<br />
where the track stops, it crashes, inflicting 4d6 damage on<br />
all within (Reflex save DC 20 half ).<br />
Bugbear Caves General Notes<br />
Recently up from the subterranean underworld, these<br />
bugbears have moved into the mines because of the great<br />
deal of traffic here for them to prey upon. They owe no<br />
allegiance to the Temple, and in fact look upon its servants<br />
as enemies.<br />
161. Bugbear Wonderworkers (EL 9)<br />
The passages leading into the cave (see below) are trapped.<br />
Drawn in blood, strange and crude-seeming symbols and<br />
images cover the walls. The floor is covered in loose,<br />
sparkling stones. The rear of the cave has a 10-foot-wide<br />
ledge about 12 feet above the floor.<br />
Within a shallow pit covered with stones near the east<br />
wall, the corpse of a recently slain elf lies hidden from<br />
view. Horrible operations are being performed on the<br />
corpse, involving sewing strange fetishes into the flesh<br />
and carving symbols on the skin. Its mouth is stuffed full<br />
of herbs and fungus. Removing the fungus lets out a<br />
number of small cave bugs that are trapped within. This<br />
corpse is being prepared as a corpsebomb (see 161A), but<br />
is not yet dangerous.<br />
Creatures: Steeran is a 5th-level bugbear wizard, and<br />
Fesad is a 5th-level bugbear cleric. They live in this cave,<br />
Steeran sleeping on the ledge and Fesad amid the<br />
sparkling stones.<br />
Steeran is covered in ritual scarification, and Fesad<br />
wears banded mail covered with fetishes, bones, and<br />
scrawled symbols.<br />
dSteeran: Female bugbear Wiz5; hp 34; see Appendix 3.<br />
dFesad: Female bugbear Clr5; hp 46; see Appendix 3.<br />
Tactics: Steeran and Fesad stand atop the ledge and cast<br />
spells down upon intruders. As soon as they detect signs of<br />
intruders, Fesad uses an animal messenger spell on a small bat<br />
and sends it to warn Chief Urolax in 164. Then she casts<br />
shield of faith and endurance on herself. Steeran casts invisibility<br />
and shield upon himself and waits for trouble, eager to blast<br />
with his lightning bolt.<br />
If given the time, Fesad always heals herself and Steeran,<br />
not hesitating to use the scroll in the pot as well (see below).<br />
Traps: Fesad has made good use of the glyph of warding<br />
spell. Both Fesad and Steeran know the word that bypasses<br />
the glyphs (“Sarlgim”).<br />
Entrances: A glyph of warding exists on the floor in both<br />
entrances. The northernmost triggers a hold person spell,<br />
while the southernmost explodes with acid.<br />
aGlyph of Warding: CR 2; hold person; Will save DC 14<br />
negates; Search (DC 28); Disable Device (DC 28);<br />
aGlyph of Warding: CR 2; 5-ft. acid spray (5d8); Reflex save<br />
DC 14 half; Search (DC 28); Disable Device (DC 28).<br />
Pot: On the ledge these two bugbears keep a large pot, covered<br />
with a lid and then wrapped in twine. This pot also has a<br />
glyph of warding on it that triggers when the pot is opened so<br />
that it explodes with sonic energy inflicting 5d8 points of<br />
damage (DC 15 to reduce damage by half ).<br />
aGlyph of Warding: CR 2; 5-ft. sonic burst (4d8); Reflex<br />
save DC 14 half; Search (DC 28); Disable Device (DC 28).<br />
Treasure: The pot holds 344 gp, a silver bracelet with<br />
pieces of jade (worth 300 gp), a vial of antitoxin, and a scroll<br />
with the following spells: cure light wounds, cure moderate<br />
wounds, and remove disease.<br />
161A. Corpsebomb (EL 2)<br />
The body of some poor human, fetishes stitched into his<br />
flesh and symbols carved into his skin, hangs in an<br />
upright spread-eagle position by wire, blocking the central<br />
portion of the tunnel. His mouth is stuffed with what<br />
looks like plants and his eyes have been removed,<br />
replaced by sparkling stones.<br />
Trap: This hideous display is a trap. Disturbing the body in<br />
any way—even touching the wires—causes it to explode in a<br />
grisly mass of flesh, bone, and insects (which are crammed<br />
within the corpse).<br />
Getting past the corpse and the wires without touching<br />
anything requires a Dexterity check (armor check penalties<br />
and size modifiers for AC should be figured into this check<br />
and a DC 10 is needed to succeed).<br />
The bugbears in 161 know the pass phrase (“Ilarkarm”) to<br />
get past safely.<br />
aCorpsebomb: CR 2; 10-ft. explosion (3d6); Reflex save DC<br />
15 half; Search (DC 0); Disable Device (DC 35).<br />
87
CHAPTER 5: THE CRATER RIDGE MINES<br />
to the sound, but wait here in ambush. They do not leave<br />
this cave.<br />
The scouts attempt to flank opponents in battle, while the<br />
other two charge into combat and slug it out.<br />
Traps: The bugbears have rigged traps in the passage<br />
between 162 and the north–south tunnel to the east. Rigged<br />
with tripwires, these three traps send a heavy axe blade crashing<br />
down upon whomever touches the wire.<br />
aAxe Trap: CR 1; +10 melee (1d12/×3); Search (DC 21);<br />
Disable Device (DC 20).<br />
163. Bugbear Common Cave<br />
Eight piles of straw are arranged around the perimeter<br />
of this chamber. Two large drums and a large pile of<br />
bones and skulls sit in the center. The place smells of<br />
rotten meat.<br />
Amid the pile of bones is a wand of bless (8 charges) made of<br />
bone and mistakenly thought to be a bone. A Search check<br />
(DC 30) can find it, but a detect magic would be easier.<br />
164. Bugbear Chief (EL 6)<br />
When this cave is occupied, the chief usually rolls a large<br />
boulder to seal herself in. This requires a Strength check (DC<br />
18) to move, although a Medium-size creature could also get<br />
in by climbing over the boulder (DC 18) since it does not<br />
reach as high as the ceiling.<br />
88<br />
Because of the position of the northernmost corpsebomb<br />
and the tunnel’s slope downward, if an ore cart is<br />
coming from the north down this passage, whomever is in<br />
control of it must make a Spot check (DC 20) to see it<br />
quickly enough to stop in time—otherwise, the cart<br />
crashes right into it.<br />
162. Bugbear Guards (EL 7)<br />
The passage into this cave from the east is trapped (see below).<br />
This roughly worked cave smells of fur and dung. Near<br />
the north wall is a pit, surrounded by black stones. Strings<br />
covered with teeth, bones, herbs, and colored cloth hang<br />
like drapery along the south wall.<br />
Beyond this chamber, to the west, a passage leads about 25<br />
feet to a ledge overlooking the Stalagos, about 30 feet above<br />
the water line. On this ledge the bugbears have secured a<br />
rope to allow them to climb down if need be (for the most<br />
part, they are rightfully afraid of the water).<br />
The pit in the north part of the cave is a fire pit that they<br />
fill with coals. The stones surrounding it are actually coal<br />
used for fuel.<br />
Creatures: Two bugbears and two bugbear scouts (1stlevel<br />
rogues) dwell here.<br />
dBugbears (2): hp 15, 19; 3d10 gp each; see Monster<br />
Manual page 27.<br />
dBugbear Rog1 (2): hp 23, 20; see Appendix 3.<br />
Tactics: The bugbears do not draw attention to themselves—that<br />
is, if they hear (Listen +3, +5 for the scouts)<br />
noise in the tunnel with the track in it, they do not move<br />
This cave is dominated by a single monolithic boulder, 9<br />
feet high and 8 feet across. Just behind it, the edge of a<br />
bed of cloth and straw is visible from the entrance. Atop<br />
the boulder, a number of candles drip wax down the side<br />
of the stone while they illuminate the chamber. Graffiti is<br />
scrawled across the stone in crude letters.<br />
The graffiti is in goblin and says “Urolax is powerful,” and<br />
“Chief Urolax knows all.”<br />
Creatures: Urolax is a particularly large and strong bugbear<br />
fighter. She has numerous earrings and a nose ring (all<br />
worthless), and she wields a +2 bastard sword with a dragon’s<br />
head-shaped pommel.<br />
dUrolax: Female bugbear Ftr4; hp 50; see Appendix 3.<br />
Development: If Urolax hears (Listen +4) fighting in 162<br />
or 163, she rushes to aid her people. If she believes that<br />
intruders are wandering about the area, she leads the bugbears<br />
in 166 to a good place for an ambush, such as area 160<br />
or 171 (depending on where the intruders are).<br />
165. Ambush (EL 7)<br />
Creatures: Four bugbears and a dire boar wait here, ready<br />
to ambush anyone who comes by. The bugbears use ranged<br />
attacks (their spears) and then charge into battle alongside<br />
the boar.<br />
dBugbears (4): hp 14, 20, 19, 16; 3d10 gp each; see Monster<br />
Manual page 27.<br />
dDire Boar: hp 52; see Monster Manual page 57.<br />
Tactics: With enough warning, these bugbears can move<br />
to area 169 to set up their ambush, eager to push opponents<br />
(or an ore cart full of opponents) off the ledge.<br />
Treasure: One of the bugbears is actually a spy for the<br />
Fire Temple. She has a Fire Temple symbol under her armor<br />
and a rolled-up piece of paper that says “Offer bribe to chief
CHAPTER 5: THE CRATER RIDGE MINES<br />
to join the Fire Temple—Tessimon” tucked into a bag with<br />
100 gp in it.<br />
166. Bugbear Reserves (EL 8)<br />
This cave has a number of straw mats laid out for sleeping,<br />
a large cooking pot over a pit, and crude bits of<br />
graffiti splayed about the walls. The place smells of fur<br />
and cooked meat.<br />
Creatures: Seven bugbears rest here.<br />
dBugbears (7): hp 16, 14, 13, 24, 19, 16, 22; 3d10 gp each;<br />
see Monster Manual page 27.<br />
Development: These bugbears do not leave unless commanded<br />
to do so by the chief. If they hear the sounds of<br />
fighting, they only get ready (which takes them 2d6<br />
rounds) and remain here.<br />
Urolax uses these bugbears to replace her fallen guards in<br />
162 if needed or positions them in defensible places (such as<br />
160, 169, or 171).<br />
167. Small Cave<br />
Not quite 20 feet across, this cave is small and empty<br />
except for a small pool of water only a few feet across.<br />
Volcanic action has brought the water in the pool up to<br />
this point. The pool is only 3 feet wide but is actually a<br />
water-filled shaft that delves down hundreds of feet<br />
below. It is fresh water, having never come into contact<br />
with the Stalagos.<br />
168. Battle Scene<br />
Three dead humanoids covered in dark, reddish-brown<br />
hair and leathery hides lie in this cave. Their bodies are<br />
bloated, suggesting that they were slain within the last<br />
few days. The corpses of two ink-black creatures, with<br />
wide, thin bodies that resemble strange squids or octopi<br />
also lie hacked apart with blades.<br />
When the bugbears first arrived, they encountered a pair of<br />
darkmantles. The bugbears won, but only after taking heavy<br />
losses in the magical darkness created by the monsters. Their<br />
comrades looted the bodies.<br />
169. Two-Level Tracks<br />
The eastern portion of this tunnel is about 30 feet higher<br />
than the eastern half. Both levels have tracks running<br />
through them.<br />
170. Crossover Point<br />
Two tracks cross in this intersection. It appears that<br />
switching tracks is possible here.<br />
Switching tracks requires stopping the cart and manipulating<br />
levers near the crossing that allow the wheels to<br />
switch tracks.<br />
171. Bridge<br />
Two tracks exist in this room. One, running northeast–southwest,<br />
is on a wooden platform with creaky<br />
wooden supports, about 25 feet above the floor, running<br />
over the top of the other track, which runs from southeast–northwest.<br />
This wooden platform/bridge connects<br />
two exits also 25 feet higher than the floor. The ceiling<br />
here is at least 40 feet high.<br />
The bridge is rickety but stable. The supports have hardness<br />
5, 60 hp, and a break DC of 28.<br />
Creatures: An exploratory team from the Water Temple,<br />
consisting of Kadiss the elf wizard, and five elf warriors,<br />
are here, with the goal of moving northward to parley with<br />
the bugbears.<br />
Kadiss and two of the other elves are in an ore cart on the<br />
bridge, with one of the warriors controlling the speed and<br />
brake. This allows Kadiss to move without needing to pay<br />
attention, and gives the possibility of a quick escape.<br />
Kadiss is an albino with long white hair. He wears all black<br />
clothing and the Water Temple symbol (as do all the warriors).<br />
He is new to the cult and the Water Temple, but he is<br />
interested in getting more power for his chosen faction by<br />
gaining more allies.<br />
dKadiss: Male elf Wiz6; hp 29 (normally 17); see<br />
Appendix 3.<br />
dElf War1 (5): hp 3, 5, 6, 4, 5; see Appendix 3.<br />
Tactics: Here, in this dangerous area, Kadiss already has<br />
mage armor, shield, blur, and endurance (extra hp included<br />
above) cast. He and his group are looking for friends, not enemies.<br />
If they encounter creatures other than the bugbears<br />
(such as the PCs), they attempt to recruit them as well.<br />
Development: If the NPCs encountered here survive,<br />
they are not encountered here again. Instead, they move back<br />
to the safety of area 178.<br />
172. Ore Storage<br />
Just off to the west of the track, another ore cart, half full<br />
of kimberlite ore, sits next to the wall. The cave beyond<br />
has six large wooden and iron bins filled with<br />
unprocessed ore in large chunks. Near the entrance to the<br />
cave is a wooden barrel full of shovels. On the ground<br />
next to the barrel are three picks, a pile of iron spikes, and<br />
three hammers.<br />
Water Temple General Notes<br />
Long ago, the clerics of the Elder Elemental Eye allied themselves<br />
with a large tribe of kuo-toas that dwelled deep underground.<br />
The kuo-toas are masters of ancient secrets, and<br />
remember—as a race—when the dread deity named Tharizdun<br />
was free, and have swum amid the ruins of the nowsunken<br />
temple-cities dedicated to his evil. Foul and despicable,<br />
the kuo-toas were the perfect accomplices to the cult.<br />
Trained in the priesthood of the Eye, these kuo-toas<br />
slipped into other tribes to spread the worship and influence<br />
of their deity (who really is, of course, Tharizdun). While this<br />
never really caught on, the kuo-toas that relocated to the<br />
Temple of All-Consumption became a powerful and influential<br />
force, allying themselves strongly with the Water Temple.<br />
To this day, the fish-men make up the majority of the Water<br />
Temple’s forces.<br />
89
CHAPTER 5: THE CRATER RIDGE MINES<br />
90<br />
The complex of areas 177–197 has three stages of security.<br />
When the PCs first arrive, it is always at A. If any of these<br />
areas is attacked, they move to B as quickly as possible and<br />
remain wary for the rest of that day. If an attack comes while<br />
in stage B, they move to stage C as quickly as possible and<br />
remain so for the rest of that day.<br />
A. Lax. As presented. All guards take 10 on Listen and Spot<br />
checks but suffer a –5 penalty for inattention.<br />
B. Wary. The guards in 177, 179 and 189 take 10 on their<br />
Listen checks. Urlurg (if he is available) patrols areas 189 to<br />
197. Kelashein goes to the Water Temple (area 195).<br />
C. Alert. Kelashein and Nilbool go to the Water Temple<br />
(area 195). All guards take 10 on Listen and Spot checks with<br />
no penalty.<br />
All guards and other personnel wear the black iron triangle<br />
of the Elder Elemental Eye with a blue green square dangling<br />
from under it (symbol of the Water Temple). Their clothing is<br />
predominantly black as well.<br />
Areas 177–192 are all lit by torches in iron sconces. Other<br />
areas are lit by other means. All ceilings in areas 173–183 are<br />
15 feet high unless otherwise noted, and doors are wooden<br />
(hardness 5, 15 hp, break DC 18 if locked).<br />
The inhabitants of areas 177–197 know the layout of<br />
areas 104–134 and know about the secret entrance/exit in<br />
area 193. They know about the bugbears to the south and<br />
the bridge complex to the northwest. They also know the<br />
general layout of the whole temple complex. They know<br />
that there’s a lake in the middle of the crater and three<br />
bridges that go out to an island where the masters of the<br />
place reside, and that the door at the other end of the bridge<br />
can only be opened by a special key that “mostly just<br />
priests have.”<br />
Kelashein and Oomkaan each bear a lesser key of water.<br />
173. Ore Carts<br />
Three mine passages, each with an iron ore cart track<br />
running down its center, head generally southeast<br />
from this chamber. Six ore carts, one horribly damaged,<br />
lie about the room, near the beginning of the<br />
tracks. One of them appears to still have some raw ore<br />
in it, but the others are dirty, rusted, and empty. A few<br />
tools lay around or in the carts, such as shovels, picks,<br />
and hammers.<br />
See the sidebar Operating an Ore Cart on page 49 for information<br />
on how to use the ore carts.<br />
174. Mineral Processing<br />
Iron bins of ore, covered with dust and rust, line the<br />
walls of this chamber. A huge machine of some type<br />
occupies the middle of the room, with a chute leading<br />
into a pair of massive stone cylinders with a wooden<br />
trough underneath. The cylinders appear to be connected<br />
by gears to a single, huge crank sized for a<br />
giant to turn. Small bits of stone lie scattered around<br />
the machine.<br />
The machine is an ore crusher, originally driven by the labor<br />
of an earth elemental, a greater planar ally of a powerful<br />
dwarven cleric. Dwarven workers shoveled ore into the<br />
chute, which dumped into the turning cylinders. The<br />
machine reduced large chunks of ore into smaller bits, often<br />
smashing away the unwanted rock and leaving the denser<br />
ore in discrete chunks.<br />
175. Mineral Storage (EL 5)<br />
The door to this room is damaged, so that the lower half<br />
appears to be clawed or chewed away. The room holds<br />
more huge iron bins, 8 feet high, filled with chunks of<br />
rock—crushed ore.<br />
Each of the four bins here is nearly full, and each 12 feet long<br />
and 8 feet wide.<br />
Creatures: Five Medium-size monstrous scorpions have<br />
adopted this place as their lair. They clawed through the door<br />
to get in and hide amid and on the bins, dropping down on<br />
anything comes in and explores the room.<br />
dMedium-Size Monstrous Scorpions (5): hp 10, 13, 15,<br />
11, 20; see Monster Manual page 209.<br />
Tactics: These creatures hide (Hide +8) here and drop down<br />
on foes from the top of the ore bins (+1 to attack from above).<br />
176. Storage<br />
An ore cart sits upside-down, with one of its wheels<br />
removed. The walls are lined with picks and shovels hanging<br />
on hooks, as well as a few wooden cabinets. Everything<br />
is covered in dust and grime.<br />
The cabinets hold spikes, hammers, 100 feet of rope, a pair of<br />
grapnels, and numerous other tools.<br />
177. Guards (EL 4)<br />
Three large banners hang upon the northwest wall,<br />
each bearing a square in a different shade between blue<br />
and green. A table is pushed against the southeast wall,<br />
covered in food: biscuits, dried meats, fruits, cheese,<br />
and wine. Five chairs are pushed against the table.<br />
Creatures: Four human guards and a kuo-toa are positioned<br />
here at all times.<br />
dHuman War1 (4): hp 6, 7, 5, 9; see Appendix 3.<br />
dKuo-Toa: hp 12; 2d10 gp each; see Monster Manual<br />
page 125.<br />
Tactics: Their job is to guard from incursions from the<br />
southeast. The Water Temple does not have sufficient forces<br />
to extend into area 173 or 174, so they watch down the wide<br />
hall in that direction, demanding that intruders state their<br />
names and business from 100 feet away, and firing on them if<br />
they do not comply.<br />
Development: If Kadiss and his elves are present in 178,<br />
they come immediately to the sound of trouble here (they<br />
can get here in 1 round).<br />
177A. Latrine<br />
178. Kadiss’s Chamber<br />
Four shields hang on the walls, each bearing a different<br />
coat of arms. Six generous wooden beds; three wardrobes;<br />
a long table covered in dishes, books, and other<br />
miscellaneous clutter; a long bench; and four chairs furnish<br />
the room.
CHAPTER 5: THE CRATER RIDGE MINES<br />
The wardrobes contain clothing and inexpensive gear, as well<br />
as a pair of mostly burned boots of elvenkind (they are ruined).<br />
The room to the northwest is an unlit and mostly bare<br />
storeroom that contains a little food, water, tools, and even a<br />
few weapons: a heavy crossbow, two longbows, 40 arrows, 40<br />
bolts, a longsword, a net, and a trio of daggers.<br />
Creatures: See area 171.<br />
Tactics: Kadiss, if here, is interesting in acquiring allies for<br />
the Water Temple, so he is more likely to talk first rather than<br />
blast away with his fireball.<br />
Treasure: The books on the table include texts on history,<br />
science, and magic as well as Kadiss’s spellbook.<br />
A flask of alchemist’s fire is also on the table, as are three<br />
tindertwigs and a potion of jump (labeled as such in Elven).<br />
Development: If Kadiss and his elves are here, they<br />
respond to sounds of combat in area 177 immediately.<br />
179. Mephit Guards (EL 5)<br />
A circular pool located in the center of the room is built<br />
up off the floor about 2 feet with crude but serviceable<br />
masonry work—clearly not done by the same masons<br />
who crafted the rest of the room. The water in the 15-footdiameter<br />
pool is still.<br />
The pool is 2 feet deep and was built by the personnel of the<br />
Water Temple to accommodate the mephits.<br />
Creatures: Two water mephits stand guard here, waiting<br />
in ambush in the pool.<br />
dWater Mephits (2): hp 14, 20; see Monster Manual<br />
page 133.<br />
Tactics: These creatures wait in the pool until foes are in<br />
position for both of them to use their breath weapons at the<br />
same time.<br />
180. Human Barracks<br />
Close to two dozen beds, most of them bunks, are neatly<br />
arranged in this barracks. Various wooden trunks, about<br />
one for every two beds, are also here, along with a rack of<br />
longspears by the door.<br />
Twenty beds are here. The trunks contain clothing and personal<br />
gear of little value. No one is currently here.<br />
181. Mephit Quarters (EL 3)<br />
The door sticks (because of the dampness), requiring a<br />
Strength check (DC 22) to open it.<br />
A large wooden tub, 6 feet across, is in the corner farthest<br />
from the door. The tub is filled with water. The room is<br />
damp and air smells of brine.<br />
The tub is filled with extremely salty (briny) water.<br />
Creatures: A water mephit currently rests here, in the tub.<br />
dWater Mephit: hp 16; see Monster Manual page 133.<br />
Development: If this mephit was killed while attacking<br />
the Fire Temple (see The Water Temple Attacks, page<br />
75), the characters find instead just the water tub, empty<br />
of any creatures.<br />
182. Common Room (EL 7)<br />
A large pool, about 20 feet to a side, is in the eastern<br />
corner of the room. It has a stone rim around the edge<br />
about 1 foot high, but the pool seems deeper than that.<br />
Surrounding the pool are wicker chairs and wooden<br />
benches, a few tables covered with dishes and mugs, and<br />
some woven straw mats. The floor is very damp.<br />
The pool is 6 feet deep, dug by the current residents.<br />
Creatures: Six skum with longspears soak in the pool.<br />
Each of these creatures bears a yellow symbol on their chest,<br />
seemingly grown there as if it was a part of their foul creation<br />
(it was). This symbol vaguely resembles a human skull<br />
entwined by something ropy, like a tentacle. This is the<br />
symbol of The Second, an aboleth doomdreamer that created<br />
these skum (and those in area 194) and gave them as a present<br />
to the Water Temple.<br />
dSkum (6): hp 12, 8, 16, 11, 10, 11; see Monster Manual<br />
page 166.<br />
Tactics: If attacked from the southeast (or even if they<br />
believe that they will be attacked from that direction), the<br />
skum fall back immediately to area 183, hoping to keep foes<br />
at bay with their reach. If attacked from the north, they<br />
simply do the best that they can, fighting foes from within<br />
the pool.<br />
183. Unfinished Room (EL 4)<br />
The ceiling to this chamber is well over 20 feet high.<br />
This room is still partially rough, although the southwest<br />
wall, a part of the northeast wall, and most of the<br />
floor is finished with masonry stone. A partially finished<br />
balcony, about 8 feet wide and 30 feet long, is 15 feet<br />
high up on the southwest wall. A ladder leads up to the<br />
balcony, propped against its northwestern end.<br />
On the balcony sit two small barrels full of arrows (each<br />
has thirty).<br />
Creatures: Seven human warriors watch this area. Two are<br />
always on the balcony, but if they hear intruders approaching,<br />
they all climb up to that spot, pull up the ladder, and fire<br />
arrows down on foes. The balcony has enough of a railing to<br />
provide 1/4 cover (+2 to AC).<br />
dHuman War1 (7): hp 8, 5, 4, 5, 10, 5, 6; see Appendix 3.<br />
Development: The skum from area 182, if attacked, may<br />
come to this room. If they are here, they fight on the<br />
ground with longspears while the humans fire down from<br />
the balcony.<br />
184. Kitchen/Hall<br />
The western portion of the cave has been turned into<br />
a kitchen, with a fire pit and numerous crates, bags,<br />
barrels, and foodstuffs piled upon tables and cabinets. A<br />
pot boils atop the fire pit, and the smell of a fishy stew<br />
is in the air.<br />
The rest of the room is filled with long wooden<br />
tables and benches, enough to seat at least thirty comfortably.<br />
A clear area in the north corner is roped off<br />
and apparently serves as a fighting or wrestling ring<br />
about 15 feet on a side.<br />
91
CHAPTER 5: THE CRATER RIDGE MINES<br />
92<br />
185. Throne Room<br />
A massive throne made of white and pink shells, coral,<br />
and bones sits atop a platform of green marble with<br />
blue streaks in the southern end of this cavern. Two<br />
silver platters, covered in cooked fish, crustaceans and<br />
vegetables, sit on small stands in front of the monumental<br />
chair. Flanking the throne on either side stands<br />
a 4-foot gray marble statue of a fish-headed humanoid<br />
with a spear.<br />
Kelashein uses this room to see guests, address her servants,<br />
or to simply gloat and revel in her mania.<br />
186. The Pit (EL 6)<br />
Trap: The floor of this cave is entirely an illusion (an illusory<br />
wall, cast as if by a 10th-level caster), except for a narrow<br />
path around the eastern edge (known to the inhabitants of<br />
187 and 188). Anyone entering the room immediately falls<br />
into the 50-foot-deep pit below the illusion. No mechanism<br />
exists that disables the trap, so a character may not attempt a<br />
Disable Device check to bypass it.<br />
aPit Trap (50 feet deep): CR 4; no attack roll necessary<br />
(5d6); Reflex save (DC 20); Search (DC 29); Disable Device<br />
n/a (no mechanism to disable).<br />
Creatures: Trapped in the pit is a ravenous carrion<br />
crawler. Magically compelled to remain in the pit, the inhabitants<br />
of the surrounding area only occasionally remember to<br />
throw it down food, so it is very hungry and angry, attacking<br />
anything that falls into the pit.<br />
dCarrion Crawler: hp 20; see Monster Manual page 29.<br />
187. Kelashein’s Quarters<br />
This dead-end cave has a net-hammock strung up in the<br />
western corner. Next to it is a wooden table covered in<br />
dishes made of large seashells, a lantern, and a censer.<br />
Against the south wall rests a wooden chest of drawers,<br />
a wardrobe, a marble font filled with water, and a long<br />
harpoon. A square blue-green rug covers the floor, and a<br />
huge tapestry depicting an underwater scene covers the<br />
north wall.<br />
The chest and wardrobe hold clothing and personal equipment,<br />
such as a mirror, a brush, some utensils and tools, some<br />
chalk, and so on, as well as some treasure (see below).<br />
Creatures: Kelashein is a 7th-level human cleric, the<br />
high priest of the Water Temple. She is also mad with<br />
power. She has devised a plan to attack and surpass the Fire<br />
Temple (see The Water Temple Attacks, page 75), but if it<br />
fails, the Water Temple most likely will suffer greatly from<br />
the reprisals.<br />
Kelashein is a stern-faced woman with dyed-green hair<br />
and a crown of coral on her head. Her robes are ochre, and<br />
she wears a blue-green sash as well as the symbol of the<br />
Water Temple. She wields her mace like a scepter and truly<br />
believes that she shall one day be in charge of the entire<br />
Temple of All-Consumption. She enjoys the company of<br />
the kuo-toas and is too arrogant to be paranoid that<br />
together, the kuo-toas are much more powerful than the<br />
humans in the Water Temple are.<br />
dKelashein: Female human Clr7; hp 45; see Appendix 3.<br />
Development: If in state of alert B, she is in area 185. If in<br />
C, she moves to the temple, area 195. If sounds of battle come<br />
from this room, Nilbool comes from area 188 (if possible)<br />
to help.<br />
Trap: The chest is trapped with a glyph of warding.<br />
aGlyph of Warding: CR 3; 5-ft. electrical discharge (5d8);<br />
Reflex save DC 17 half; Search (DC 28); Disable Device<br />
(DC 28).<br />
Treasure: Amid the dishes and other clutter on the table is<br />
a small idol of an angry octopus made of solid silver (worth<br />
600 gp).<br />
In the chest, Kelashein keeps a small bag of 55 gp as well<br />
as four carefully wrapped potions of water breathing to give<br />
out as needed.<br />
188. Nilbool’s Quarters<br />
Three wooden chairs, a table with a large seashell censer,<br />
and a square blue-green rug furnish this room. A small<br />
stone bookcase and a wooden chest are also here, against<br />
the north wall.<br />
The eastern corner of the room is cut off by a<br />
wooden and rice paper screen, painted with the image<br />
of a tidal wave crashing down upon a human city,<br />
destroying it.<br />
The place stinks of rotting fish.<br />
Behind the screen, Nilbool keeps his straw sleeping mat and<br />
silvery, fish-skin-covered pillows. The bookcase is filled with<br />
books on magic.<br />
Creatures: Nilbool, a kuo-toa, is a 2nd-level cleric and a<br />
5th-level wizard. Nilbool would hate and plot against<br />
Kelashein, striving for an all kuo-toan Water Temple, if he<br />
didn’t already spend so much time worrying about and<br />
plotting against Oomkaan, the powerful half-demon halfkuo-toa<br />
that serves as Kelashein’s second-in-command. In<br />
order to do this, his first goal is to find the sword of water,<br />
which has been lost (see area 203).<br />
Nilbool wears a shell-and-fish decorated vest and a long,<br />
blue-green robe. A number of coral and gold rings pierce his<br />
ears, nose, mouth and scales.<br />
dNilbool: Male kuo-toa Clr2/Wiz5; hp 43; see Appendix<br />
3.<br />
Treasure: Nilbool keeps what’s left of the Water Temple<br />
treasury in a locked box (DC 27 to open) hidden under the<br />
wooden chest in a hole in the floor. It consists of 877 gp, 350<br />
sp, and 23 pp.<br />
Nilbool’s spellbook is under the box.<br />
189. Guards (EL 4)<br />
This cave is large. The northern part of the room has a<br />
pair of round tables and some chairs. The tables have<br />
mugs, weapons, and a couple of large books on them. The<br />
central portion has a pair of wooden practice dummies<br />
with considerable wear. The southern end has a pair of<br />
archery targets mounted on the wall.<br />
In the northern half of the room are the following weapons:<br />
a longsword, three daggers, a longbow, and two quivers<br />
(12 arrows each). The books on the table are combat<br />
training manuals.<br />
Creatures: Nine human guards are currently here practicing<br />
and keeping watch. In particular, one guard stays<br />
positioned at the easternmost exit (well away from the<br />
archery targets if they are in use) to keep an eye on area 190.
CHAPTER 5: THE CRATER RIDGE MINES<br />
These guards are particularly new, hired by Kelashein to<br />
supplement her forces as she expands the temple.<br />
dHuman War1 (9): hp 8, 4, 5, 4, 7, 5, 6, 10, 5; see<br />
Appendix 3.<br />
Tactics: These guards overturn the tables and use them as<br />
cover for as long as possible if attacked, or if they think they<br />
might be attacked.<br />
Development: If the guards hear the sounds of combat<br />
in 190, they do not go there, and in fact do not even look in<br />
there, for the sight of the sea hag is as dangerous to them as<br />
it is to intruders. Instead, they simply ready themselves as a<br />
second line of defense.<br />
190. Pool/Prison (EL 7)<br />
A huge cave sprawls ahead, the majority of it occupied by<br />
a vast underground pool of still water. A wooden rowboat<br />
sits on the rock at the edge of the pool. A column of dark<br />
gray rock rises up out of the water in about the middle of<br />
the pool. The stone walls and floor around the pool are<br />
very damp and glisten with slick wetness.<br />
The pool is 6 feet deep at the edges and three times that<br />
deep in the middle. The water is dark, but not so stagnant<br />
and briny as the water of the Stalagos. A small ledge on the<br />
southern side of the column, 1 foot above the water level,<br />
also exists.<br />
On the south side of the cave, under the water level, an<br />
underwater passage leads to 190A, a cave tall enough so<br />
that it rises 10 feet above the water level. A ledge on the<br />
western end is dry, and six pairs of manacles bolted into<br />
the wall.<br />
The rowboats (one floats at either end of the cave) hold<br />
four Medium-size people, and are about 8 feet long.<br />
Creatures: A sea hag named Gouquog dwells within this<br />
pool. She is allied with the Water Temple and with Daagra the<br />
annis (Outer Fane area 32) as well. Gouquog knows much<br />
about the Outer Fane (including how the keys work and the<br />
key phrase for the Water Temple).<br />
dGouquog: Sea hag Ftr3; hp 34; see Appendix 3.<br />
The prison cave has two human commoners, one of who<br />
is currently at 0 Strength from the hag’s horrifying appearance,<br />
and the other is in a whimpering catatonia for<br />
another full day due to her evil eye. They are on the ledge,<br />
and are manacled.<br />
dHuman Com1 (2): hp 2, 4 (noncombatants).<br />
Tactics: Gouquog waits in the pool, by the column, for<br />
intruders to come by in one of the boats (Hide +3). Her<br />
first action is to try to surprise her foes by swimming<br />
beside their boat and surfacing enough for them to see her,<br />
and then capsizing the boat with her great strength.<br />
Assume that a rowboat with four characters in it requires a<br />
DC 20 Strength check to capsize (–1 DC for each character<br />
under four in the boat). If successful, she then falls back to<br />
use her bow to attack characters in the water (which she<br />
does at no penalty), firing upon those who seem like the<br />
strongest swimmers first.<br />
191. Temple Entrance<br />
A 10-foot, blue-green square made of smoothed, painted<br />
rock rests in the center of this cave. On either side of the<br />
cave, a golden brazier hangs from the ceiling on a chain.<br />
The smoke that come from the braziers smells strongly of<br />
fish and salt.<br />
The 3-inch-thick square is not affixed to the floor.<br />
192. The Deeps (EL 8)<br />
The walls here are still somewhat rough, but they have<br />
been carved to resemble waves (and the occasional<br />
fish) and painted a dark green-blue color. Flickering<br />
torchlight, under blue-green glass hoods, gives the<br />
waves motion.<br />
The center of the cave sports a huge green marble<br />
statue depicting three fish-headed humanoids clutching<br />
squirming, terrified human prisoners as they ride atop a<br />
long, eellike serpent. The massive statue is 25 feet long<br />
and, coupled with the walls, seems to be swimming deep<br />
underwater.<br />
A strange, heady smell hangs in the chamber, like old<br />
incense or heavy perfume.<br />
A veil of actual seaweed hanging from the ceiling hides the<br />
southern alcove. Behind it, its resident has placed a bed of<br />
seaweed and straw and has decorated the walls with<br />
painted images of octopi, fish, eels, and sea demons. Next<br />
to the bed is a crystal hookah filled with powerful mindaltering<br />
drugs.<br />
Creatures: Oomkaan, a 4th-level half-demon half-kuo-toa<br />
cleric lives in the alcove. He is technically second-incommand<br />
of the Water Temple, but Nilbool actually has<br />
more influence. Oomkaan spends most of his time lost in<br />
strange dreams and visions that result from the powerful<br />
narcotics that he continually abuses.<br />
Oomkaan has glowing red eyes, a horny ridge that starts<br />
at the bridge of his nose and goes up over his head and<br />
down his spine, and large, functional greenish-black<br />
demon wings.<br />
dOomkaan: Half-fiend/half-kuo-toa Clr4; hp 40; see<br />
Appendix 3.<br />
Tactics: Oomkaan is a straightforward combatant. He casts<br />
bull’s strength on himself and attacks, pausing to heal himself<br />
when he must.<br />
Oomkaan attacks anyone foolish enough to disturb him<br />
here, no matter who they claim to be.<br />
Trap: Under a rock in the alcove, Oomkaan keeps some<br />
valuables in a small hole (Search DC 25 to find). Moving the<br />
rock triggers a glyph of warding that bestows a curse upon<br />
anyone triggering it as the spell bestow curse: Will save (DC<br />
14) or suffer a –6 effective decrease in Dexterity until it is<br />
removed. Oomkaan uses his own name as a password.<br />
aGlyph of Warding: CR 5; bestow curse (–6 to Dexterity);<br />
Will save (DC 14) negates; Search (DC 28); Disable Device<br />
(DC 28).<br />
Treasure: In the hole, Oomkaan has placed a leather bag<br />
with 35 gp and 80 pp, an oil of timelessness, an immovable rod,<br />
and a tanglefoot bag.<br />
193. Secret Entrance (EL 7)<br />
This is a natural cave with a tunnel out of it heading north.<br />
In the center, a 3-foot-wide pool of unknown depth seems<br />
to have pushed its way up into the cave long ago.<br />
93
CHAPTER 5: THE CRATER RIDGE MINES<br />
94<br />
The pool is actually the top of a 15-foot shaft filled with<br />
water that leads down into a water-filled cave about 25 feet<br />
in diameter. This water was trapped here ages ago when the<br />
crater was forming, and geological pressure has forced it up<br />
into area 193.<br />
Creatures: Zeityan, a water naga serving the Water<br />
Temple, lives in this cave, guarding the secret entrance/exit<br />
here. To be exact, she actually lives in the water-filled cave<br />
under area 193.<br />
Zeityan is a very old naga, older than most of the other<br />
creatures in the entire Temple of All-Consumption. Over the<br />
years, she has developed her own agenda—she does not truly<br />
believe that Tharizdun can be freed. She knows of and hates<br />
Mhunaath and Yklah, the dark nagas in area 10 of the Outer<br />
Fane. Because of this, Zeityan is not immediately hostile to<br />
intruders that appear to be outsiders to the Temple. Instead, if<br />
they do not immediately attack her, she attempts to speak<br />
with them.<br />
If intruders parley with her, she tells them that they<br />
should go to the Outer Fane (to defeat the temple/get<br />
treasure/learn the truth—whatever she thinks might<br />
entice them). The best way to get into the Outer Fane, she<br />
tells them, is first to take the lesser keys of water from<br />
Kelashein and Oomkaan (in areas 187 and 192—she even<br />
tells them about the trap in 186). Then cross to the Water<br />
Door on a rowboat located at the landing south of here<br />
(area 91).<br />
She also tells them the following information:<br />
• The two main threats in the Outer Fane are the sorceresses<br />
Mhunaath and Yklah, who take on naga form occasionally<br />
(this is a lie).<br />
• No one really believes that Tharizdun can actually be<br />
freed (lie).<br />
• The doomdreamers are more concerned with the goings<br />
on someplace far away than right here in their own temple,<br />
so it is possible to move about safely (true—she doesn’t<br />
know it, but she refers to the Temple of Elemental Evil<br />
where the doomdreamers hope to uncover the access to<br />
the elemental nodes).<br />
Tactics: If it’s a fight the PCs want, they’ll get it. Using the<br />
water and the edge of the pool for nine-tenths cover, she<br />
peeks up into the cave and casts spells, but only after she has<br />
cast mage armor and displacement on herself.<br />
Treasure: In the lower cave, at the bottom, amid some<br />
strangely shaped rock formations lies a human skeleton<br />
wearing masterwork full plate and two platinum rings with<br />
lion insignias (worth 40 gp each). Near him is a +1 battleaxe<br />
and eleven +1 crossbow bolts. Any other equipment he had has<br />
long since rotted and become useless.<br />
194. Temple Guardians (EL 8)<br />
In the corridor to the northwest, starting at the bottom of<br />
the stairs, the cave is filled with water to a depth of 3 feet. The<br />
water is stagnant and briny, like that of the Stalagos.<br />
The water-filled tunnel widens into a cave. An eerie, flickering<br />
blue glow comes from the southeast, bright enough<br />
to dimly illuminate this cave as well.<br />
The water in the cave is 10 feet deep, remaining so as the<br />
tunnel progresses toward the southeast.<br />
Creatures: Three particularly large, tough skum<br />
reside in this pool. Each of these creatures bears a yellow<br />
symbol on their chest, seemingly grown there as if it were a<br />
part of their foul creation (it was). This symbol vaguely<br />
resembles a human skull entwined by something ropy, like a<br />
tentacle. This is the symbol of the Second, an aboleth doomdreamer<br />
that created these skum (and those in area 194) and<br />
gave them as a present to the Water Temple.<br />
dLarge Skum (3): hp 44, 45, 50; CR 5, 6 HD, AC 15.<br />
Add the following:<br />
+3 to initiative, +5 to Strength, +5 to Dexterity;<br />
+5 to attacks, +3 to bite damage, +1 to claw and rake damage;<br />
+2 to saves, +4 to Climb, +7 to Hide, +3 to Move Silently, +1<br />
to all other skills;<br />
Weapon focus (underwater crossbow);<br />
New attack: underwater crossbow, +9 ranged (1d8 damage).<br />
Each of the skum is armed with a strange, clockwork masterwork<br />
heavy crossbow designed to fire underwater, but with<br />
half the range (the characters can resell these for 200 gp<br />
each). Each is also under the effect of the special bull’s strength<br />
and cat’s grace spell described in area 195.<br />
Tactics: The skum fire their crossbows before closing in<br />
for melee with their claw and rake attacks.<br />
Development: These creatures do not retreat, nor do they<br />
advance to 192 even if they hear sounds of intruders. However,<br />
if anyone attacks the Water Temple, and the skum are<br />
still present, they intervene and defend it in all due haste<br />
(swimming, they can get there in 1 round).<br />
195. The Water Temple (EL 8)<br />
This huge cave has a ceiling that rises 20 feet above<br />
the water level. A 50-foot-square platform, crafted<br />
from dark green stone, rises above the water about 10<br />
inches. It appears to have a number of pools within<br />
it, different from the water around it. The entire<br />
room shimmers with a blue radiance, flickering along<br />
the slick walls and ceiling. The place reeks of brine<br />
and fish.<br />
This entire area is unholy, as described in the spell unhallow.<br />
In addition to the protection from good effect and the –4 profane<br />
penalty on turn undead attempts (+4 to rebuke<br />
undead attempts), the unhallow continually grants all evil<br />
beings an aid spell, as cast by a 10th-level caster, while they<br />
are in this room.<br />
The water is 10 feet deep, and the platform in the center<br />
goes all the way down to the floor (making it almost 11<br />
feet thick).<br />
Once on the platform, a character can see the following:<br />
Three pools are within the platform. One is clear and<br />
appears to be about 6 feet deep. The second is green and<br />
slimy. The last is black.<br />
The pools surround a translucent blue cube. Atop the<br />
cube are a curved knife and a pair of brass horns shaped<br />
like fish.<br />
All three pools are very dangerous, showcasing evil aspects of<br />
water and liquid.<br />
The clear pool is actually highly acidic. Anyone touching<br />
the water in this pool suffers 1d6 points of acid damage.<br />
Anyone submerged in the water suffers 3d6 points of acid<br />
damage per round.
CHAPTER 5: THE CRATER RIDGE MINES<br />
The green pool is full of algae and moss. A patch of<br />
green slime hides within this pool. All characters touching<br />
the water automatically touch the slime. Green slime<br />
deals 1d6 points of temporary Constitution damage per<br />
round while it devours flesh. On the first round of contact,<br />
the slime can be scraped off a creature (most likely<br />
destroying the scraping device), but after that it must be<br />
frozen, burned, or cut away (applying damage to the<br />
victim as well). Extreme cold or heat, sunlight, or a cure<br />
disease spell destroys a patch of green slime. Against wood<br />
or metal, green slime deals 2d6 points of damage per<br />
round, ignoring metal’s hardness but not that of wood. It<br />
does not harm stone.<br />
The black pool is cursed. The brackish, foul water contaminates<br />
anyone who touches it and that also fails a Fortitude<br />
save (DC 18) so that their skin dries and turns dark<br />
purple. They lose 1d4 temporary Constitution points and<br />
1d3 temporary Strength points and continue to lose these<br />
amounts each day (victims are allowed to make new saving<br />
throws each day to avoid that day’s damage). These effects<br />
last until someone casts a remove curse spell on the victim or<br />
the victim dies.<br />
Development: Several possible developments can<br />
occur here.<br />
The Pools: If an evil being touches all three pools (and<br />
survives), that creature is granted a special maximized<br />
bull’s strength and cat’s grace spell that lasts for one week as<br />
well as the ability to breath water for that week (if the<br />
creature cannot already). If a nonevil being touches all<br />
three pools, she must make a Will saving throw (DC 20) or<br />
do her best to drown herself immediately. This urge passes<br />
after 1d3 minutes.<br />
Horns and knife: The curved knife is masterwork, but it is<br />
only used for human sacrifices. If the horns are both<br />
blown at the same time, a huge water elemental of evil<br />
alignment appears and serves the trumpeters, if they can<br />
speak Aquan (otherwise it simply attacks anyone not wearing<br />
a Water Temple symbol). This effect works only in this<br />
room, and only once per day. Any nonevil creature that<br />
touches either horn feels its terrible evil. If the creature<br />
blows the horn, it must make a Will saving throw or go<br />
insane for 2d6 hours, attacking any living creature around<br />
it. Even after that time, the creature suffers 1d4 points of<br />
permanent Wisdom drain.<br />
dHuge Water Elemental: hp 152; see Monster Manual<br />
page 84.<br />
Altar and Key: If someone stands atop the platform, holds<br />
the greater key of water and says “Waves pound relentlessly,” he<br />
is “blessed” by the key and can now enter the Water Door<br />
(Area 11) freely, whether he has a key or not.<br />
Destroying the Altar: If the top portion of the platform is<br />
destroyed (hardness 8, 120 hp, break DC 35), the unhallow<br />
effect is dispelled, and the sword of water loses all power. Two<br />
rounds later, the water in this room begins to swirl, and ceiling<br />
stones begin to fall. Anyone in the room must make a<br />
Reflex saving throw (DC 20) or be struck for 3d6 points of<br />
damage. Those in the water must make Swim checks (DC 20)<br />
or begin to drown. This continues for 1d4+1 rounds, the<br />
room partially collapsing.<br />
Treasure: The horns function only in this room. They are<br />
worth 50 gp each for their decorative value.<br />
Ad Hoc XP Adjustment: Because of the unhallow spell,<br />
award an additional 10% experience points for all creatures<br />
defeated in this area.<br />
95
CHAPTER 5: THE CRATER RIDGE MINES<br />
196. Cave of the Monitor (EL 8)<br />
The blue glow from the west illuminates this cave. A<br />
sword made of coral and shells and adorned with pearls<br />
hangs on the wall. Another peg holds a heavy black<br />
leather cloak out of the water. A silver censer burns<br />
with an oily, salty incense and hangs from the ceiling<br />
on a chain.<br />
Below the surface (the water is 10 feet deep here), Urlurg<br />
the kuo-toa has a small niche just large enough for him to<br />
sleep within.<br />
The cloak is not magical, but it is well oiled to keep it<br />
waterproof. Urlurg keeps it for extended surface excursions.<br />
Creatures: This is the home of Urlurg, a 6th-level kuotoa<br />
monk. He holds a rank known as a monitor among<br />
kuo-toan society.<br />
dUrlurg: Male kuo-toa Mnk6; hp 44; see Appendix 3.<br />
Treasure: The sword mounted on the wall, although<br />
worthless as a weapon, is worth 750 gp as a decorative piece.<br />
The censer is worth 50 gp.<br />
Development: If Urlurg was killed while attacking<br />
the Fire Temple (see The Water Temple Attacks, page 75), the<br />
characters find the chamber empty of any creatures.<br />
If Urlurg hears (Listen +12) fighting in area 194 or 195, he<br />
calls out the kuo-toas in 197 and then moves to help.<br />
197. Kuo-Toa Lair (EL 8)<br />
A long, curving cave, filled with water, this chamber<br />
has numerous ledges along its length. The bluish glow<br />
filters into here from the west, illuminating most of<br />
this cave as well.<br />
The ledges have nestlike beds of weeds and woven<br />
cloth upon them, as well as the occasional bag, box, or<br />
piece of equipment that lay among them.<br />
This is the lair for all the kuo-toas (other than those who<br />
have individual quarters elsewhere) in<br />
the Crater Ridge mines—it looks as if it could provide a<br />
home to dozens.<br />
Creatures: Two kuo-toas and six 1st-level kuo-toa fighters<br />
are here currently.<br />
dKuo-Toas (2): hp 12, 13; 2d10 gp each; see Monster<br />
Manual page 125.<br />
dKuo-Toa Ftr1 (6): hp 20, 18, 24, 23, 19, 26; see<br />
Appendix 3.<br />
Treasure: If characters search the ledges, they find<br />
mostly personal equipment and belongings of the kuo-toas<br />
who reside here: clothing (mostly leather harnesses and<br />
straps), nets, a little rope, some food, some oily ale, and a decorative<br />
shell dagger or two (which are worthless). One ledge<br />
has a vial with a potion of cure light wounds in a bag with gear,<br />
while another contains three pieces of decorative coral (each<br />
worth 50 gp).<br />
Development: If the four kuo-toa fighters who participated<br />
in the attack on the Fire Temple were killed (see The<br />
Water Temple Attacks, page 75), then the characters<br />
encounter only the two that remained here.<br />
The kuo-toas here know about the magical properties of<br />
the horns in area 195. If they hear intruders or are called by<br />
Urlurg, they move into that area and blow the horns (unless<br />
of course one of the priests is present, in which case they do<br />
whatever they are told).<br />
198. Owlbears (EL 6)<br />
This small cave has bloodstains leading into it, with three<br />
recently slain humans, dressed in armor and black clothing,<br />
lying on the floor.<br />
Creatures: Having just come up<br />
from deep in the Underdark, two owlbears<br />
lurk about this area, lairless. They<br />
feast upon three guards that they killed<br />
in area 199 and dragged<br />
here. Each is slightly<br />
wounded.<br />
96
CHAPTER 5: THE CRATER RIDGE MINES<br />
dOwlbears (2): hp 45, 63; see Monster Manual page 148.<br />
Tactics: They want to be left alone to feed. They do not<br />
give pursuit if opponents run, nor do they investigate if they<br />
hear noises outside their cave.<br />
Treasure: Each dead guard has 2d10 gp and wears<br />
banded mail.<br />
199. Slaughter<br />
Three humans, dressed in the black clothing and armor<br />
typical of the Temple with the black triangle symbols<br />
around their neck, lie dead in the eastern portion of this<br />
cavern, their bodies torn and rent. Swords and bows lie<br />
near the bodies—twice as many as would seem necessary<br />
for three guards. Smeared, bloody trails lead from this<br />
area east out of the cave.<br />
The western end of the cave has a wooden bench, a<br />
keg on the floor with a ceramic mug atop it, and a small<br />
table with some bread and cheese on it, along with a lit<br />
lantern. A whetstone sits atop the bench.<br />
These guards, from the Northern Bridge Complex, ran afoul<br />
of the owlbears in area 198.<br />
The keg contains water.<br />
Treasure: Each dead guard has 2d10 gp, banded mail, a<br />
longsword, a longbow, and 1d12 arrows. Additionally, three<br />
other longswords and two other bows are on the ground<br />
(from the fallen now in 198).<br />
200. Wide Cave (EL 3)<br />
Near the north wall of this cavern lies a pile of dusty,<br />
rusted tools—picks, shovels, hammers, spikes, and 10<br />
feet of chain.<br />
None of this is usable anymore.<br />
Trap: The passage headed west is trapped. At the mouth of<br />
this passage in this cave is a pit covered with a gray tarp and<br />
then covered with dust and rocks to appear natural. The pit is<br />
12 feet wide (the width of the tunnel’s mouth), 10 feet long,<br />
40 feet deep, and fitted with wooden spikes. Because no<br />
mechanism exists, this trap cannot be disabled. It was placed<br />
here to defend against the creatures in area 202 and 203 (but<br />
it doesn’t work, since they just climb around it now that they<br />
know it is here).<br />
At the bottom of the pit is a dead dire ape, its rotting carcass<br />
covered in maggots.<br />
aSpiked Pit Trap (40 feet deep): CR 3; no attack roll necessary<br />
(4d6), +10 melee (1d4 spikes for 1d4+4 points of<br />
damage per successful hit); Reflex save (DC 20) avoids; Search<br />
(DC 18); Disable Device n/a (no mechanism to disable).<br />
201. Tiny Cave<br />
The south wall of this cave is of mortared stone with a<br />
wooden door set into it. Otherwise, the cave is empty, the<br />
other walls obviously worked with picks and tools, and<br />
the floor covered in loose stones.<br />
The door to the south is locked (DC 25 to open).<br />
202. Dire Apes (EL 5)<br />
This cave is littered with bones, broken crates and barrels,<br />
torn sacks, and dung, as well as clumps of black and gray<br />
hair. It smells of waste and animals.<br />
The broken crates and other materials come from containers<br />
of food and drink that the apes have stolen from<br />
Temple forces.<br />
Creatures: Four dire apes live in this cave. Not long ago,<br />
these creatures were under the command of the Earth<br />
Temple, but about a month ago, they escaped and came here,<br />
menacing the guards of the bridge complex (areas 205–216).<br />
Exceedingly crafty (particularly their leader in area 203),<br />
these apes raid, steal, and kill to survive. Sometimes they<br />
even sneak up to the area controlled by the Water Temple,<br />
climbing (quietly) around the pool in area 190 to get at the<br />
supplies and easy victims in 189.<br />
Two of the apes have manacles around their legs, each<br />
dangling a few links of a broken chain.<br />
Dire apes (4): 34, 29, 32, 40; see Monster Manual page 57.<br />
203. Master Ape (EL 7)<br />
Garbage and filth, as well as bones and skulls, cover the<br />
floor of this cave. The northernmost area holds a 7-footwide<br />
pool of water that appears fairly shallow. A tiny<br />
rivulet of water seeps down the worked stone wall, collecting<br />
in the pool.<br />
The pool is fed by rainwater that seeps down through cracks<br />
in the rock. The water is only 3 feet deep, but a number of<br />
nooks and crannies exist in the side and bottom of the pool.<br />
Creatures: A particularly large and intelligent dire ape<br />
with a shock of white hair atop its head lives here. He leads<br />
the apes in area 202 on daring raids.<br />
dDire Ape: hp 100; 15 HD; +8 to attacks; see Monster<br />
Manual page 57.<br />
Treasure: Amid the garbage and bones here, a Search<br />
check (DC 20) reveals a pair of masterwork daggers in<br />
sheaths still connected to a broken belt, a normal longsword,<br />
and a Water Temple symbol. The sword of water (see<br />
Appendix 1) lies in the pool (Search DC 24 to find), having<br />
been stolen from the Water Temple by a thief, who was then<br />
killed by the apes.<br />
204. Long Cave<br />
A dead ape, which probably stood about 8 feet tall with<br />
long gray hair, massive claws, and huge yellow teeth, festers<br />
in the western side of the cave. The body appears to<br />
have been partially eaten.<br />
Troglodytes defending the temple to the west killed this ape,<br />
once a part of the band in 202 and 203.<br />
Northern Bridge Complex<br />
General Notes<br />
Oamarthis, a duergar fighter, commands the smallest and<br />
weakest of the three bridge complexes. Its proximity to both<br />
the Water and Earth Temples makes it seem relatively secure<br />
in the eyes of the cult’s masters. Oamarthis has the reputation<br />
of treating his people better than do most of the other leaders<br />
in the mines. They are more loyal and attentive.<br />
97
CHAPTER 5: THE CRATER RIDGE MINES<br />
98<br />
The complex of areas 205–216 has three stages of security.<br />
When the PCs first arrive, it is always at A. If any of these<br />
areas is attacked, they move to B as quickly as possible and<br />
remain wary for the rest of that day. If an attack comes while<br />
in stage B, they move to stage C as quickly as possible and<br />
remain so for the rest of that day.<br />
A. Lax. As presented. All guards take 10 on Listen and Spot<br />
checks but suffer a –5 penalty for inattention.<br />
B. Wary. The guards in 205 and 206 take 10 on Listen<br />
checks with no penalty. The dogs in 210 patrol the area<br />
between their kennel and the hall to the door of 201.<br />
C. Alert. The dogs move to area 205 to supplement the<br />
guards there. The guards in 211 move to 206 along with<br />
Oamarthis and Rui Lotaas. All guards take 10 on Listen and<br />
Spot checks with no penalty.<br />
All guards and other personnel wear the black iron triangle<br />
of the Elder Elemental Eye. Their clothing is predominantly<br />
black as well.<br />
Areas 205–216 are all lit by torches in iron sconces. All<br />
ceilings are 15 feet high unless otherwise noted, and doors<br />
are wooden (hardness 5, 15 hp, break DC 18 if locked).<br />
Almost every wall has light gray plaster on it, although much<br />
of it is peeling and cracking.<br />
The inhabitants of areas 205–216 know the layout of<br />
areas 198–217. They know all too well that they are sandwiched<br />
between the Water Temple and the Fire Temple, and<br />
know general details about both—and in fact react with<br />
hostility to anyone wearing symbols of these temples. They<br />
also know the general layout of the whole temple complex.<br />
They know that there’s a lake in the middle of the crater and<br />
three bridges that go out to an island where the masters of<br />
the place reside, and that the door at the other end of the<br />
bridge can only be opened by a special key that “mostly just<br />
priests have.”<br />
205. Guards (EL 3)<br />
This room has two round tables surrounded by chairs.<br />
One table is covered in small game tiles with images of<br />
trees, people, and monsters. The other holds a bounty of<br />
food and drink—a tin platter of breads, meats, and<br />
cheeses, and two bottles of wine.<br />
A large gong stands in the southeast corner, a mallet<br />
hanging from a hook on the wall next to it.<br />
The game tiles are from an elven game called Wayward Wind.<br />
Creatures: Six guards (three humans and three elves) sit<br />
in this room relaxing (and, in theory, keeping an eye out<br />
for trouble).<br />
dHuman War1 (3): hp 6, 5, 7; see Appendix 3.<br />
dElf War1 (3): hp 3, 5, 4; see Appendix 3.<br />
Tactics: If attacked or if they detect trouble, one of the<br />
guards rings the gong loudly, alerting areas 206–208, 211, and<br />
214–216.<br />
These guards do not even question those dressed in<br />
Temple garb (ochre robes, black cloaks, and so on) and bearing<br />
either Elder Elemental Eye or Tharizdun symbols, unless<br />
they also bear symbols denoting association with the Water<br />
or Earth Temple.<br />
Development: If these guards hear fighting anywhere<br />
else, they move to help their fellows: that’s their job. If they<br />
hear movement in the north–south hallway to the north,<br />
they move to investigate.<br />
206. Guards (EL 3)<br />
A long table, flanked by wooden benches, is in the western<br />
part of this room. A dagger is stuck into the wood of<br />
the table, and some breadcrumbs cover a pair of plates<br />
near it. The walls of this area are covered in plaster and<br />
frescoes of huge armies destroying cities and sacking and<br />
pillaging homes. A iron lever juts from the south wall<br />
with a keyhole next to it.<br />
Close examination of the frescoes shows that the soldiers<br />
are carrying banners with the symbol of the Elder Elemental<br />
Eye.<br />
Creatures: Six more guards are on duty here.<br />
dHuman War1 (3): hp 6, 5, 6; see Appendix 3.<br />
dElf War1 (3): hp 4, 5, 5; see Appendix 3.<br />
Tactics: If attacked from the west, they fall back immediately,<br />
hoping to draw the intruders into a combat with the<br />
chimera. Otherwise, they fight off intruders as best as they can.<br />
These guards do not even question those dressed in<br />
Temple garb (ochre robes, black cloaks, and so on) and bearing<br />
either Elder Elemental Eye or Tharizdun symbols, unless<br />
they also bear symbols denoting association with the Water<br />
or Earth Temple.<br />
Development: Two different developments can occur here.<br />
Guard Actions: If the guards hear fighting (Listen +1) in area<br />
205, they move to aid their fellows. If they hear fighting in<br />
area 207, they move to fire arrows at intruders fighting the<br />
chimera. Otherwise, they stay at their post here.<br />
Lever: A lever exists in the south wall. If pulled down, the<br />
chimera’s chain in area 207 retracts into the wall ten feet,<br />
making it safe to enter into the hallway to area 211 (even its<br />
breath weapon can’t get that far). The lever resets in 3 rounds<br />
(releasing the chain back to its 20-foot length) unless someone<br />
holds it down. If someone coming from area 211 needs<br />
to get out of the hall safely, they call “Chain the beast!” to the<br />
guards in this room.<br />
A large keyhole can be seen next to the lever. If the proper<br />
key is inserted, the chain in area 207 retracts into the wall all<br />
the way and an iron door (hardness 10, 60 hp, break DC 28)<br />
slams down cutting off the alcove. Oamarthis and Rui Lotaas<br />
have the only keys, and use it when someone they approve of<br />
want to use the bridge safely.<br />
Turning the key the wrong way loosens the chain entirely,<br />
freeing the chimera. Thus, to activate the mechanism requires<br />
an Open Lock check (DC 20) but to do so without loosing the<br />
chimera requires a DC 30 Open Lock check (or a DC 25 Disable<br />
Device check made before the Open Lock check).<br />
207. Bridge (EL 7)<br />
A small 10-foot-deep, 10-foot-wide area extends to the east<br />
off the wide passage, which smells of dung and musk.<br />
Straight south, the hall leads to a stonework bridge that<br />
crosses over the surface of the gray and stagnant waters in<br />
the crater.<br />
Creatures: The pride and joy of Oamarthis, commander of<br />
this bridge complex, is the chimera he has subdued and<br />
brought here to guard the bridge 24 hours a day. A heavy<br />
masterwork chain (hardness 10, 45 hp, break DC 28), 20 feet<br />
long tethers it to the back of the alcove in the east wall. The<br />
chimera is insane and hates its captivity, although it no<br />
longer struggles against its chain.
CHAPTER 5: THE CRATER RIDGE MINES<br />
dChimera, White Dragon Head: hp 80; see Monster<br />
Manual page 35.<br />
Tactics: If attacked by foes with ranged weapons, it withdraws<br />
into its alcove. From there, it can use its breath weapon<br />
against any character who it can see.<br />
Development: A mechanism activated in area 206 can<br />
free the chain from the wall, or it can retract the chain into<br />
the wall as it closes an iron door in front of the alcove (see<br />
area 206 for more information).<br />
If they hear the chimera fighting, the guards from area<br />
206 come here and fire arrows at its foes (but they keep<br />
their distance otherwise).<br />
208. Barracks (EL 1 if guards are<br />
awake)<br />
Twenty wooden bunk beds with stuffed mattresses, a long<br />
table and a number of chairs, and at least ten small chests<br />
of drawers fill this somewhat crowded room.<br />
On the table, a lute, a harp, and a stack of books sit<br />
next to a statuette of a wolf. A large open barrel of water is<br />
under the table.<br />
The walls have racks of swords, spears, and bows. Six<br />
arrow quivers hang on pegs.<br />
The statue is worth about 30 gp. The books are on various<br />
and miscellaneous topics (each of the eight books is worth<br />
1d6 gp). The chests of drawers hold clothing, mirrors,<br />
brushes, combs, towels, hair wax, and other miscellaneous<br />
personal gear.<br />
Nine longswords, twenty shortspears, ten longspears, and<br />
seven longbows hang on the walls. Each of the quivers holds<br />
a dozen arrows.<br />
Creatures: Two guards sleep in this room. If awakened, it<br />
takes them 10 rounds to get ready.<br />
dHuman War1: hp 6, 5; see Appendix 3.<br />
Development: Only shouts or sounds of combat in<br />
206 or the ringing of the gong in 205 awakens these<br />
guards—unless of course someone goes in specifically to<br />
wake them.<br />
209. Storage<br />
Boxes, barrels, sacks, and bundles fill this storeroom.<br />
The materials found here are fairly fresh, and range from<br />
foodstuffs (flour, fruit, vegetables, cheese, dried meat, and so<br />
on) to dry goods (200 feet of rope, 30 feet of chain, blankets,<br />
paper, torches, tools, and so on).<br />
210. Kennel (EL 5)<br />
The smell of urine and fur is strong here. This room is<br />
mostly empty except for a low water trough, an empty<br />
trough next to it, and six padded straw pallets.<br />
The small room to the south has food and extra water for the<br />
dogs, but is mostly empty. The guards are supposed to clean out<br />
the kennels regularly and dump the waste into the Stalagos.<br />
Creatures: Six rottweilers, trained for combat, live in this<br />
area. They have free run of the complex, but are terrified of<br />
the chimera and do not go near it.<br />
dDog, Riding (6): hp 15, 20, 16, 13, 11, 10; see Monster<br />
Manual page 196.<br />
Development: If the dogs hear sounds of fighting (Listen<br />
+5), they run to the scene, attacking anyone who they do not<br />
99
CHAPTER 5: THE CRATER RIDGE MINES<br />
100<br />
recognize (they know all the guards and personnel of the<br />
complex). If they are on patrol, they growl and snap at<br />
anyone they do not recognize but do not attack unless commanded<br />
to do so by a guard.<br />
211. Great Hall (EL 10)<br />
The large, irregularly shaped room holds six long<br />
wooden tables each flanked by benches. At the head of<br />
two tables sit ornate, padded chairs. Tapestries of red and<br />
gold hang on the plaster-covered walls, and red and gold<br />
carpets run along the sides of the room as well as in<br />
between the tables.<br />
The door into the hall leading to 213 is locked (DC 25 to<br />
open).<br />
Creatures: Currently, Oamarthis, the duergar commander<br />
of the place, Riu Lotaas, his barghest henchman, and six<br />
human warriors sit around one of the tables, involved in a<br />
deep discussion.<br />
This meeting has been called because Oamarthis plans<br />
to lead this group out of the complex to hunt and kill the<br />
dire apes (areas 203 and 204) that have been attacking<br />
their area.<br />
dOamarthis: Male duergar Ftr7; hp 62; see Appendix 3.<br />
dRiu Lotaas: Greater barghest; hp 66; has key to lever in<br />
area 206; see Monster Manual page 22.<br />
dHuman War1 (6): hp 5, 6, 5, 5, 9, 7; see Appendix 3.<br />
Tactics: If attacked here, the warriors turn over the table<br />
for cover and use their bows. Riu uses project image, charm<br />
person, and charm monster from behind the table for as long as<br />
he can, and then tries to move around the tables, hidden, to<br />
make a surprise attack with his greatsword. Oamarthis<br />
becomes invisible, and then enlarges himself, moving in for a<br />
surprise attack as well.<br />
If confronted but not attacked, Oamarthis demands to<br />
know the identity and purpose of any intruder, even one<br />
wearing Temple colors or symbols.<br />
Development: If they hear any sounds of fighting, they<br />
move to that location and aid their comrades. Their inattention<br />
to their environment gives them a –10 penalty on<br />
Listen or Spot checks.<br />
Treasure: Oamarthis has a map of areas 198 to 217 laying<br />
on the table.<br />
211A. Latrine<br />
212. Kitchen<br />
The smell of spices, baked bread, and cooking meat waft<br />
from this room. A large fireplace with both a roast on a<br />
spit and a simmering pot over the flames is built into the<br />
east wall. Two tables, covered in fresh bread, chopped vegetables,<br />
and bowls full of various half-made mixtures,<br />
stand in the middle of the room.<br />
Creatures: Unlike anywhere else in the mines, this complex<br />
has a full-time cook. This aged man is very particular<br />
about his work and has no desire to fight.<br />
dCook: Com2; hp 5 (noncombatant).<br />
213. Commander’s Quarters (EL 3)<br />
Both doors on either side of the hall leading into this room<br />
are locked (DC 24 to open). The hall is trapped (see below)<br />
This room has a lavish bed covered in blue blankets<br />
and white pillows. The other contents of this bedchamber<br />
include a chest, a bureau, a wardrobe, a bookcase,<br />
two tables (one small and one large), and a large<br />
padded chair. Etched into the plaster of the walls are<br />
frescoes of skeletal figures dancing in long robes<br />
around bonfires.<br />
The small table next to the bed has an oil lamp on it.<br />
The large table appears to have a piece of paper and some<br />
writing utensils.<br />
The wardrobe and bureau (which has two drawers) contain<br />
dwarf-size clothing, in mostly gray colors. The bureau also<br />
holds some personal gear.<br />
The books on the bookcase cover a variety of topics (each<br />
of the twenty worth 1d10 gp), including the worship of the<br />
Elder Elemental Eye, the history of evil cults, and a small<br />
handwritten tome on the secret history of the Temple of Elemental<br />
Evil. The latter discusses the secret backing of this<br />
temple (although not in great detail), the rescue of important<br />
individuals (including the head of the Temple, a cleric named<br />
Hedrack), and the fate of Lareth the Beautiful (see Chapter 3:<br />
Ghost Town and Ruined Temple).<br />
On the large table, next to an inkwell and pen, intruders<br />
can find a letter very recently written in a fluid script<br />
(in Common):<br />
Masters—<br />
It has been a month since anyone has wanted to use our bridge,<br />
but that is probably for the best. We are under siege. Not only do<br />
the forces in the nearby Earth and Water Temples occasionally<br />
extort and bully my people, but now a pack of particularly crafty<br />
Raagen (what my people call cave apes) have taken to stealing<br />
from and sometimes attacking my forces. I cannot send a party of<br />
armed warriors from among my troops without risking the security<br />
of this access to the Outer Fane, so I request assistance in this<br />
matter from you.<br />
Your faithful servant,<br />
Oamarthis, Commander of the Northern Bridge Complex<br />
Trap: The hallway between area 211 and 213 is trapped.<br />
Unless a button near the door in area 211 is pressed (Search<br />
DC 25 to find), a volley of five arrows fires from the north<br />
wall of this hallway.<br />
aArrow Trap: CR 3; Five +8 ranged (1d6/×3); Search<br />
(DC 25); Disable Device (DC 20).<br />
Treasure: The chest is locked (DC 25 to open) and contains<br />
the following:<br />
• A tanglefoot bag.<br />
• A masterwork large steel shield (an extra).<br />
• A potion of neutralize poison.<br />
• A bag of twelve 50 gp jaspers.<br />
• A bag of 230 gp.<br />
214. Lounge<br />
Three divans with end tables, five padded chairs, and a<br />
round rug with a checkerboard pattern decorate this<br />
room. The frescoes on the walls depict armored men<br />
riding dragons.<br />
The three end tables each have a small tobacco box for filling<br />
pipes.
CHAPTER 5: THE CRATER RIDGE MINES<br />
215. Riu Lotaas’s Quarters<br />
Chains ending in hooks dangle from the ceiling, rattling<br />
in some unfelt breeze. Bones are scattered haphazardly<br />
on the floor, which is stained with disturbing splatters of<br />
reddish brown. Some of the chains and places on the<br />
plaster-covered walls are also stained.<br />
This horrible place is the lair of Rui Lotaas, the greater barghest<br />
that serves as second-in-command in the complex, although<br />
no bed or other accoutrements are present.<br />
216. Athach Guardian (EL 7)<br />
An open chest, small but filled with sparkling gemstones,<br />
sits in the middle of the room. Against the north wall rests a<br />
bed almost 20 feet long and 8 feet wide with a huge straw<br />
mattress. A large, fairly fresh haunch of meat, probably a<br />
whole side of beef, hangs from a hook on the west wall.<br />
Creatures: Axred the athach lives here. As long as<br />
Oamarthis keeps him well supplied in gemstones, he guards<br />
this end of the complex.<br />
dAthach: hp 140; see Monster Manual page 21.<br />
Tactics: Axred wastes the first round closing the chest and<br />
hefting his clubs. Then, he beats his enemies until they die.<br />
He particularly hates the troglodytes to the west and concentrates<br />
his attacks on them if he encounters any.<br />
Treasure: The chest (locked, open DC 25, although Axred<br />
has the key on him) holds twenty 10-gp eye agates, thirteen<br />
50-gp citrines, nine 100-gp deep green spinels, and four 200-<br />
gp deep blue spinels.<br />
217. Empty Cave<br />
Two javelins lay on the floor of this cave. The walls are<br />
covered in black symbols and images painted crudely and<br />
without care.<br />
This used to be a guard cave for the forces of the Earth<br />
Temple until they decided that it was unlikely that the guards<br />
of the Northern Bridge Complex were going to attack them.<br />
Earth Temple General Notes<br />
The Earth Temple suffered a crippling defeat at the hands<br />
of the Fire Temple months ago. It was so terrible that all<br />
clerics and followers of the temple that survived fled the<br />
mines altogether. To replace them, the doomdreamers contacted<br />
their allies among the troglodytes. The cult of<br />
Tharizdun is much more common among the hidden ranks<br />
of troglodytes than among surface peoples. It was simple to<br />
get recruits to serve the Earth Temple from their ranks.<br />
Now no humans serve that temple at all.<br />
The complex of areas 218–236 has three stages of security.<br />
When the PCs first arrive, it is always at A. If any of these<br />
areas is attacked, they move to B as quickly as possible and<br />
remain wary for the rest of that day. If an attack comes while<br />
in stage B, they move to stage C as quickly as possible and<br />
remain so for the rest of that day.<br />
A. Lax. As presented. All guards take 10 on Listen and Spot<br />
checks but suffer a –5 penalty for inattention.<br />
B. Wary. The Swordmaster (area 226) and the rogue (area<br />
233) patrol areas 224 to 234 together. The guards in 218 and<br />
231 take 10 on Listen checks with no penalty.<br />
C. Alert. As B, plus the troglodytes in 234 and Uskathoth<br />
join Miikolak in area 226.<br />
All guards and other personnel wear the black iron triangle<br />
of the Elder Elemental Eye with a brown triangle dangling<br />
from under it (symbol of the Earth Temple).<br />
Their clothing is predominantly black as well.<br />
Remember to make Listen checks for<br />
guards—to make this easy, assume that they<br />
roll a 0. The guards in 218, for example, hear<br />
any fight in area 220 since the guards have<br />
Listen check bonuses of +3, and the DC to<br />
hear a pitched battle is –10 modified by +1<br />
per 10 feet of distance (for a final DC of 4).<br />
Unlike the other temples, these areas are<br />
kept dark unless otherwise noted.<br />
The inhabitants of areas 218–236 know the<br />
layout of areas 13, 200–204, 217–236 and know<br />
how to get to area 1 to get out if needed. They<br />
also know the general layout of the whole<br />
temple complex. They know that there’s a lake<br />
in the middle of the crater and three bridges<br />
that go out to an island where the masters of<br />
the place reside, and that the door at the<br />
other end of the bridge can only be opened<br />
by a special key that “mostly just priests have.”<br />
Uskathoth and Snearak each bear a lesser key of earth.<br />
218. Troglodyte Guards (EL 6)<br />
This cave is pervaded by a horrible stench. The walls, dug<br />
by picks and hammers, are covered in crude black sigils<br />
and images in paint. Aside from a few rocks that might<br />
serve as stools and another that probably works as a table,<br />
the cave is empty.<br />
The sigils are words in Terran that mean “crush,” “death,”<br />
“destruction,” and “devour.” On the rock table are three<br />
stoneware mugs and a hunk of raw meat.<br />
Creatures: Four troglodyte warriors stand watch here.<br />
Troglodyte War1 (4): 18, 15, 21, 17; see Appendix 3.<br />
Tactics: If they encounter people in Temple garb, they do<br />
not attack but do question their business. They escort anyone<br />
they deem worthy to pass into their area (if for no other<br />
reason than to protect them from attack by the mephits in<br />
area 221).<br />
219. Prison<br />
This small cave stinks of urine and sweat. Chains are<br />
bolted into the walls, and a few metal food dishes lay on<br />
the floor. Near the back of the cave, a coal-filled brazier<br />
glows, a pair of hot irons stuck into the heat.<br />
This is where the troglodytes keep those they intend to<br />
sacrifice.<br />
Creatures: Two humans and an elf are bound in the chains<br />
here. The humans are commoners grabbed from the local<br />
area. The elf is Tenaris Glimmerdawn, a 3rd-level fighter,<br />
captured a week ago when she was crossing the mountains.<br />
Her companions have already been taken for sacrifice, and<br />
she and the humans know their hideous fate.<br />
Tenaris gladly joins her rescuers in combating the forces of<br />
the evil temple, but she has no gear. The humans would<br />
rather be shown the way out.<br />
Alternate Climaxes<br />
It is very possible that adventurers<br />
exploring the Outer<br />
Fane learn enough of the<br />
doomdreamers’ plans so that<br />
they know to go to the Temple<br />
of Elemental Evil. In this case,<br />
they might go to that temple,<br />
only to return to carry the fight<br />
to the Triad in the Inner Fane<br />
later. That is a very viable strategy,<br />
and the DM should be<br />
prepared for that to occur. The<br />
fight against the doomdreamers<br />
in the Inner Fane is<br />
just as good a climax to this<br />
epic adventure as the battle<br />
against Imix.<br />
101
CHAPTER 5: THE CRATER RIDGE MINES<br />
102<br />
dHuman Com1 (2): hp 2, 4 (noncombatants).<br />
dTenaris Glimmerdawn: Female elf Ftr3; hp 19; see<br />
Appendix 3.<br />
220. The Earth Temple (EL 9)<br />
Chanting in words that a human mouth would be hard<br />
pressed to produce greets your ears. This cave smells of<br />
loam and blood. A three-tiered ziggurat rises 15 feet<br />
above the floor, which is of soft earth. Black-cloaked figures<br />
surround this edifice, at the top of which is a triangular<br />
platform the color of watery mud. Another cloaked<br />
figure stands atop the altar clutching a bloody knife in<br />
one hand and what appears to be a heart in the other. A<br />
blood-soaked body lies limp at that figure’s feet. Behind<br />
the figure with the knife, another black-cloaked<br />
humanoid beats on a drum, and as it does, something<br />
rises up through the floor, passing through the soft earth<br />
as if it did not exist.<br />
The walls are covered with tapestries of dark brown<br />
and black images of demons and other hideous creatures.<br />
This entire area is unholy, as described in the spell unhallow.<br />
In addition to the protection from good effect and the –4<br />
profane penalty on turn undead attempts (+4 to rebuke<br />
undead attempts), the unhallow forces all good beings to<br />
make a Will save every round as if affected by a cause fear<br />
spell cast by an 9th-level caster (DC 17), while they are in<br />
this room.<br />
Creatures: Six troglodytes and Snearak, a lesser priest, are<br />
here performing a ritual that involves killing a victim and<br />
offering the heart to a xorn.<br />
dSnearak: Male troglodyte Clr5; hp 46; see Appendix 3.<br />
dAverage Xorn: hp 45; see Monster Manual page 187.<br />
dTroglodytes (6): hp 9, 14, 11, 13, 13, 18; 2d10 gp each;<br />
see Monster Manual page 179.<br />
Tactics: If attacked, or an unwelcome intruder enters the<br />
room (or if anyone—no matter what symbol they wear)<br />
attempts to interrupt the ceremony, the troglodytes and<br />
xorn attack. The troglodytes fall back to throw javelins<br />
while the xorn moves into melee. Snearak stays atop the<br />
altar and casts spells.<br />
If Snearak encounters characters wearing Temple garb or<br />
symbols, he insists on bringing them to Uskathoth. If they<br />
wear Earth Temple symbols, he attacks, knowing them to be<br />
impostors (unless they look like troglodytes, in which case<br />
he ignores them or maybe even gives them a command).<br />
Development: Several possible developments can occur<br />
here. In no case, however, do these troglodytes leave while<br />
the ceremony progresses.<br />
Reinforcements: If possible, the earth mephits in all the<br />
rooms marked 221 come to the defense of the Earth Temple,<br />
as do the guards in 218.<br />
Tapestries: A nonevil creature touching the tapestries in this<br />
room must make a Will saving throw (DC 20) or see a<br />
momentary vision of his own death by crushing suffocation<br />
deep under the earth (and in the process, suffer 1d4 points of<br />
temporary Wisdom damage).<br />
Blood and Drum: If blood is on the altar and someone<br />
beats the drum, an average xorn of evil alignment appears.<br />
If given a sacrifice (the heart of a victim slain on the altar),<br />
it accepts commands in Terran from the priests involved in<br />
the ceremony, or it attacks any enemies present. The drums<br />
function magically only once per day and only in this<br />
room. If the drum is handled by anyone of a nonevil alignment,<br />
the character feels disturbed and afraid. Any nonevil
CHAPTER 5: THE CRATER RIDGE MINES<br />
character who plays the drum must make a Will save (DC<br />
20) or become catatonic for 2d6 hours. After that period,<br />
the character suffers 1d4 Wisdom points of permanent<br />
Wisdom drain.<br />
Altar and Key: If someone stands atop the platform,<br />
holds the greater key of earth and says, “Stone crushes the<br />
weak,” she is “blessed” by the key and can now enter the<br />
Earth Door (Outer Fane Area 14) freely, whether she has a<br />
key or not.<br />
Destroying the Altar: If the altar is destroyed (hardness 10,<br />
60 hp, break DC 28), the unhallow effect is dispelled, and<br />
the sword of earth loses all power. Two rounds later, the air<br />
in this room begins to churn with dust, and ceiling stones<br />
begin to fall. Anyone in the room must make a Reflex<br />
saving throw (DC 20) or be struck for 3d6 points of<br />
damage. This continues for 1d4+1 rounds, the room partially<br />
collapsing.<br />
Ad Hoc XP Adjustment: Because of the unhallow spell,<br />
award an additional 10% experience points for all creatures<br />
defeated in this area.<br />
221. Earth Mephit Guard (EL 3)<br />
Three of these areas exist, each with one mephit.<br />
This small cave’s worked stone walls show clear signs of<br />
iron ore in great quantities. The floor is uneven and covered<br />
with scree.<br />
Creatures: An earth mephit stands guard in each of<br />
these areas.<br />
dEarth Mephit: hp 16; see Monster Manual page 132.<br />
Tactics: If these mephits encounter any intruders, they<br />
yell out a warning and then retreat toward their fellows,<br />
hoping for aid.<br />
They do not shout an alarm if they encounter someone<br />
wearing the Earth Temple symbol. They react with hostility<br />
toward anyone else unless commanded otherwise by someone<br />
with the symbol.<br />
222. Uskathoth’s Pets (EL 5)<br />
This cave swarms with insects covering the walls, floor,<br />
and ceiling creating a barely audible hissing sound that<br />
fills the air. The smell of something rotting mixes with<br />
something acrid to create a thoroughly unpleasant odor.<br />
Hundreds of centipedes and millipedes are here, drawn<br />
by the corruption of Uskathoth’s magic. Only a few<br />
pose a threat.<br />
Since no one can pass safely through this cave, other<br />
troglodytes commonly stand at the edge and call out to him<br />
when they need him.<br />
Creatures: Sixteen dangerous bugs are here—eight Small<br />
and eight Medium-size centipedes that attack all intruders<br />
except Uskathoth.<br />
dSmall Monstrous Centipedes (8): hp 2 each; see Monster<br />
Manual page 207.<br />
dMedium-Size Monstrous Centipedes (8): hp 4 each;<br />
see Monster Manual page 207.<br />
Development: If Uskathoth hears voices in this room<br />
(DC 2), he looks to see who’s here. If he hears fighting (DC<br />
–8), he casts his preparatory spells (see area 223) and then<br />
comes here. Uskathoth has a Listen modifier of +7.<br />
223. Uskathoth’s Chamber (EL 7)<br />
The dark stone walls of this cave are mostly covered<br />
with tapestries that show creatures made entirely of<br />
rock and earth toppling buildings and killing people.<br />
On the ceiling, about 12 feet above, a dead human, skin<br />
shriveled and blackened, hangs by chains horizontally<br />
in a spread eagle position. The rear of the cave has a<br />
wooden bed, a small table, a padded chair, and a chest.<br />
The small table has a bronze coffer atop it. The cave<br />
stinks of death.<br />
The chest is unlocked and holds clothing, a masterwork<br />
heavy mace, and some other personal gear.<br />
Creatures: Uskathoth is a 6th-level cleric and the high<br />
priest of the Earth Temple. He is the absolute master of<br />
the place, feared by all the other troglodytes. He has a<br />
black triangle symbol permanently imbedded in his forehead,<br />
and the brown triangle of earth tattooed all over his<br />
scaly flesh.<br />
dUskathoth: Male troglodyte Clr6; hp 53; see Appendix 3.<br />
Tactics: As a general rule, Uskathoth casts endurance on<br />
himself every day (adding +2 to his Con, adding 7 to his hp<br />
total). Before going into battle, he casts bull’s strength, protection<br />
from good, and aid.<br />
Development: If he hears noise in the outer room (area<br />
222), he moves to investigate, casting preparatory spells if it<br />
sounds dangerous.<br />
Trap (CR 3): The coffer on the table is locked (DC 28 to<br />
open) and Uskathoth has the key. It is trapped as well, with a<br />
glyph of warding.<br />
aGlyph of Warding: 5-ft. cold blast (5d8); Reflex save DC<br />
15 half; Search (DC 28); Disable Device (DC 28).<br />
Treasure: Inside the coffer, Uskathoth keeps ten 100-gp<br />
amethysts, and an amulet of inescapable location the value of<br />
and use for which he is unsure.<br />
Under the coffer is a message written on a piece of<br />
parchment in Draconic. It is from someone named<br />
Hedrack, and it discusses the recent takeover of the Earth<br />
Temple by the troglodytes (after the Earth Temple’s crushing<br />
defeat a year or so ago at the hands of the Fire Temple).<br />
Hedrack supports the troglodytes and feels that they will<br />
serve the Elder Elemental Eye well, as will a being called<br />
Ogremoch.<br />
224. Rough Cavern (EL 5)<br />
This large cavern has a well-worn path running through<br />
its center, where the ground is most level, running<br />
east–west. The rest of the floor is jagged and uneven,<br />
filled with loose boulders and rocks.<br />
Moving anywhere in the cave other than from the stairs to<br />
the west exit requires a DC 15 Balance check.<br />
Creatures: Lairing in the eastern portion of the cave is a<br />
manticore, an ally of the troglodytes, particularly Snearak. It<br />
attacks any nontroglodyte it sees, unless a troglodyte accompanies<br />
the offender.<br />
dManticore: hp 60; see Monster Manual page 130.<br />
Treasure: Hidden amid the rocks in the easternmost part<br />
of the cave (near the tunnel to 225) is a very old severed<br />
human hand. On that hand are two rings. One is nonmagical<br />
but bears a ruby making it worth 750 gp. The other is a ring<br />
of sustenance.<br />
103
CHAPTER 5: THE CRATER RIDGE MINES<br />
104<br />
225. Snearak’s Chamber<br />
A vent in the center of the cave produces gusts of warm<br />
air. A hammock made from a net hangs in the eastern part<br />
of the cave, while a mat of woven leather strips is at the<br />
entrance. Humanoid skulls and bones hang from (or have<br />
been spiked to) the walls.<br />
The “welcome mat” on the floor is made from human and<br />
dwarf skin.<br />
Treasure: Behind a rock (Search DC 25) is a small space in<br />
which Snearak has stored three 10-gp moss agates, 45 gp, and<br />
one piece of incense of meditation.<br />
226. Cleric and Elemental (EL 7)<br />
This cave looks as though its roof once was quite unstable,<br />
and is now propped up by wooden beams. The floor is<br />
covered with loose rock but appears fairly flat.<br />
Despite appearances, this area is now stable. However,<br />
should one of the beams be destroyed (hardness 5, 40 hp,<br />
break DC 28), the roof partially collapses, inflicting 8d6<br />
points of damage (Reflex save for half with DC 15) to all<br />
within the cave.<br />
Creatures: Miikolak, a 5th-level troglodyte cleric, has a<br />
Medium-size earth elemental that follows her wherever she<br />
goes, a gift of the doomdreamers (for which Uskathoth is<br />
extremely jealous). Miikolak shares the position of assistant<br />
priest with Snearak. She wears chitin armor (see Appendix 1)<br />
and carries a staff covered in totems and fetishes such as<br />
bones, skulls, claws, teeth, and so on.<br />
dMiikolak: Female troglodyte Clr5; hp 46; see Appendix 3.<br />
dMedium-Size Earth Elemental: hp 30; see Monster<br />
Manual page 82.<br />
Tactics: Using the elemental to engage foes, Miikolak uses<br />
spells to defend herself in battle—including summon monster<br />
to bring forth more earth elementals (Small). She does not<br />
cause the cave to collapse.<br />
If she encounters characters wearing Temple garb or<br />
symbols, she insists on bringing them to Uskathoth. If they<br />
wear Earth Temple symbols, she attacks, knowing them to<br />
be impostors (even if they look like troglodytes, she knows<br />
all the troglodytes here by appearance and assumes others<br />
are impostors).<br />
Development: If she hears fighting, she and the elemental<br />
go to the source of the sound and help defend the temple.<br />
It is likely that the Swordmaster in area 230 would hear fighting<br />
here and help Miikolak.<br />
227. Trap<br />
This cave is trapped to guard the cave to the east. On either<br />
side of the cave, six holes fire poisoned darts with great accuracy<br />
when the proper floor plates are trigged. Crossing the<br />
room normally activates all six of them (each causing two<br />
darts to shoot out at different heights). To find a plate, the<br />
Search DC is 22.<br />
aPoisoned Dart Trap: CR 6; +12 ranged (1d4 plus Small<br />
centipede poison, Fort save (DC 11) resists, 1d2 Dex/1d2 Dex);<br />
Search (DC 22); Disable Device (DC 20).<br />
The trap can fire three darts out of each hole before the<br />
ammunition is exhausted.<br />
228. Miikolak’s Chamber<br />
This room smells of incense. Black drapery hangs from<br />
the ceiling along each wall. A bed of black pillows is in<br />
the eastern portion of the room, behind a pair of black<br />
iron poles thrust into the stony floor, each dangling three<br />
to five humanoid skulls from the top of it and painted<br />
with mysterious red sigils.<br />
The sigils spell out words in Draconic that all mean death,<br />
destruction, and decay.<br />
Treasure: Behind the drapery along the south wall is a<br />
small chest (Search DC 10 to find). The chest is locked (DC<br />
25 to open), the key hidden under it (Search DC 15 to find).<br />
Three potions of cure light wounds, 133 gp, and a small statue of<br />
a troglodyte done in ebony (worth 275 gp) are in the chest,<br />
along with some clothing, a curved dagger, six sticks of<br />
incense, and an extra Earth Temple symbol.<br />
229. Storeroom<br />
Boxes, bags, and barrels sit on the floor here. Tools, weapons,<br />
and clothing hang on the walls.<br />
Weapons include thirty javelins, six longspears, two battleaxes,<br />
and a greataxe. The rest is food (mostly dried or salted<br />
meat) or regular gear.<br />
230. Swordmaster (EL 5)<br />
A woven-fiber sleeping mat lies on the floor in the south<br />
part of the cave. Hanging over it are two greatswords,<br />
mounted on the wall.<br />
The greatswords are normal.<br />
Creatures: The troglodyte that lives here is a 4th-level<br />
fighter with the sword of earth (see Appendix 1). He is known<br />
only as the Swordmaster and has permanently dyed his scaly<br />
skin jet black. A number of iron rings pierce his flesh, from<br />
which he dangles small bones, skulls, or tiny totems (a<br />
number of which are the brown triangles of earth).<br />
dSwordmaster: Male troglodyte Ftr4; hp 60; see<br />
Appendix 3.<br />
Tactics: The Swordmaster attacks the strongest-looking<br />
foe first and keeps attacking until that foe goes down.<br />
If he encounters characters wearing Temple garb or symbols,<br />
he insists on bringing them to Uskathoth. If they wear Earth<br />
Temple symbols, he attacks, knowing them to be impostors<br />
(even if they look like troglodytes, he knows all the troglodytes<br />
here by appearance and assumes others are impostors).<br />
Development: If the Swordmaster hears any fighting<br />
going on anywhere (Listen +4) he moves to the sound and<br />
joins in, for he loves combat.<br />
It is likely that Miikolak hears any sounds of combat here<br />
and arrives with her elemental in 1 round to help.<br />
231. Troglodyte Guards (EL 5)<br />
Various tiny niches have been dug into the walls, just large<br />
enough to fit the humanoid skull each holds. A 1-foot-deep<br />
pit, about 8 feet across, lies in the middle of the cave. It is<br />
filled with a smattering of bones, wood shavings, and a large<br />
mass of fungi that appears to be used as a pillow.
CHAPTER 5: THE CRATER RIDGE MINES<br />
Creatures: Three troglodyte warriors stand watch here.<br />
One is shaving a wooden javelin to make it straighter.<br />
dTroglodyte War1 (3): hp 20, 19, 24; see Appendix 3.<br />
Tactics: If they encounter people in Temple garb, they do<br />
not attack, but they do question their business. They escort<br />
anyone who they deem worthy to pass into their area (if for<br />
no other reason than to protect them from attack by the<br />
mephits in area 221).<br />
232. Earth Temple Entry<br />
This cavern has a smooth floor. Laid into it, in new, brownish<br />
stone, is a triangle mosaic 15 feet across. The walls have<br />
disturbing black sigils crudely smeared upon them.<br />
The sigils are words in Terran that mean “crush,” “death,”<br />
“destruction,” and “devour.”<br />
233. Troglodyte Common Area (EL 4)<br />
Stones have been arranged in this cavern to function as<br />
chairs, couches, and tables. A brazier full of hot coals,<br />
surrounded by long metal forks and a pot full of small<br />
chunks of meat, glows atop one of the tables. The walls<br />
are covered with the skins of various creatures: bears,<br />
large lizards, and even humans. The cave carries an<br />
acrid odor.<br />
Creatures: Greshta, a 3rd-level troglodyte rogue sits here<br />
munching on cooked meat chunks held over the hot coals.<br />
She wears chitin armor (see Appendix 1) and carries a tanglefoot<br />
bag at her side, always at the ready.<br />
dGreshta: Female troglodyte Rog3; hp 19; see Appendix 3.<br />
Tactics: She always leads with the tanglefoot bag and then<br />
attempts to run away, hoping to hide and then attack with<br />
surprise (and sneak attacks).<br />
Development: If alerted or attacked, she falls back into<br />
area 234 to wake up the sleeping troglodytes there.<br />
234. Main Troglodyte Living Quarters<br />
(EL 2 if they are awake)<br />
This large, stench-filled cave is filled with sleeping<br />
pallets and piles of hay, as well as a few bags and<br />
sacks. A lingering, caustic stench hangs in the air. The<br />
walls are smeared with pitch, making it seem particularly<br />
dark. Enough room exists here to house at least<br />
twenty individuals.<br />
The sacks and bags contain clothing and gear. One holds an<br />
iron obex symbol on a chain (this is the symbol of Tharizdun,<br />
a black, upside-down stepped pyramid), another has a book<br />
written in dark Draconic lettering regarding the worship of<br />
the Elder Elemental Eye and even a fair bit of history regarding<br />
the Temple of Elemental Evil.<br />
Creatures: Two troglodytes sleep in this room. They do<br />
not awaken unless someone wakes them or if battle erupts in<br />
233. Since they have no armor to don and are quick to anger,<br />
the troglodytes, once awake, need just a single round to grab<br />
their weapons.<br />
dTroglodytes (2): hp 15, 12; 2d10 gp each; see Monster<br />
Manual page 179.<br />
Development: If alerted or attacked, the troglodyte in 233<br />
falls back here to wake up the sleeping troglodytes.<br />
Ad Hoc XP Adjustment: Award one-half of the normal<br />
experience for this encounter.<br />
105
106<br />
CHAPTER 6: THE INNER AND OUTER FANES<br />
Chapter 6:<br />
The Inner<br />
and Outer<br />
Fanes<br />
The true headquarters of the cult of Tharizdun and its leaders,<br />
the doomdreamers, lies within the secondary cinder<br />
cone of ancient Mount Stalagos, now an island in the<br />
middle of the crater lake. Like the larger crater around it, it<br />
is a ring with a hollow middle, but unlike the larger, it is<br />
not filled with water.<br />
The Outer Fane is the area inside the crater walls. It<br />
serves as a home to the cult’s most powerful servitors, a<br />
prison, an area for greeting and housing guests, and a<br />
temple to Tharizdun.<br />
The Inner Fane is the area within the heart of the volcano<br />
itself—surrounded by the crater walls that comprise the<br />
Outer Fane. Primarily, the Inner Fane is the monolithic<br />
tower that rises up from a magma-filled rift and eventually<br />
above the top of the crater. This tower, called the Black<br />
Spike, is the home of the doomdreamers and their leaders,<br />
the Triad. It holds the Dreaming Stone, the main conduit for<br />
communion with the Dark God, and the secrets of the<br />
doomdreamers’ blackhearted scheme.<br />
OUTSIDE THE<br />
OUTER FANE<br />
Built atop the outer ridges of the crater, which rise over 100<br />
feet above the surface of the lake, eight tall towers rise from<br />
their perches. From that outer edge, the black, volcanic rock<br />
continues to slope upward, so that the inner edge of the<br />
crater is about another 100 feet taller.<br />
Nevertheless, the Black Spike, the tower within the Inner<br />
Fane, rises over 60 feet higher even than the level of the<br />
ridge. Should any flyer get past the lightning towers and the<br />
mounted guards within, the roof of the Black Spike provides<br />
for its own defense.<br />
Lightning Towers<br />
Each of these metallic blue towers is 70 feet high, with a<br />
very narrow, needlelike top half. A single lookout (War2)<br />
stands at the top of each tower and watches for airborne<br />
threats to the Outer and Inner Fanes (Tower granted powers:<br />
+10 enhancement bonus on Spot checks, see invisible and<br />
darkvision to 120 feet). If guards spot intruders, they signal<br />
those inside the tower. Each tower has a complement of<br />
nine more 2nd-level warriors, a 6th-level sorcerer, and 10<br />
spider eaters trained as mounts. Their first action is to contact<br />
one of the other towers (who, in turn, contacts the next<br />
tower, and so on, until the last tower contacts Hedrack in the<br />
Outer Fane). Communication is through contact medallions<br />
(see Appendix 1) worn by the sorcerers, who serve as the<br />
tower commanders.<br />
After contacting the other towers, the defenders take to<br />
their flying mounts and move to attack, supported by the<br />
lightning bolt power of the tower. Anyone larger than<br />
Diminutive coming within 150 feet of a lightning tower,<br />
even if invisible or in gaseous form (but not if ethereal),<br />
not blessed by a greater key (all inhabitants of the towers are<br />
so blessed), is struck by a 10d6 blue lightning bolt from the<br />
tower every round (DC 20 Reflex save for half ). The lightning<br />
bolt attack occurs even if the intruders are otherwise<br />
undetected. A given tower cannot discharge more than ten<br />
bolts per round.<br />
The mere fact that a tower discharges a bolt usually alerts<br />
all the tower’s personnel, although the towers end up killing<br />
a lot of birds, so false alarms are not uncommon.<br />
The towers are extremely magical. Shockers trapped in a<br />
special prison on the towers’ second level power the energy<br />
running through them. The walls (but not the floors) themselves<br />
are transparent from the inside. The 3-inch-thick walls<br />
and floors have hardness 10 and 90 hp.<br />
1. Base (EL 12)<br />
The lowest level of this strange tower smells of something<br />
sickly sweet. On the far side from the door, ten<br />
beds are arranged close together with a few stools and a<br />
table. The rest of the room provides a home for things<br />
much larger.<br />
Creatures: This is the quarters for ten warriors as well as<br />
ten spider eaters. Unless they are on patrol, they are here<br />
(one warrior is always in the lookout post). The central pit is<br />
filled with an organic secretion produced by the spider eaters<br />
with one or two creatures in it, completely paralyzed and<br />
stuck in the goo (roll 1d10):<br />
1–3 Monstrous spider<br />
4–5 Monstrous scorpion<br />
6 Giant eagle<br />
7 Giant owl<br />
8 Hippogriff<br />
9 Orc<br />
10 Human (Com1)<br />
The warriors are particularly depraved individuals, and do<br />
not mind at all being quartered with the spider eaters, their<br />
loyal mounts.<br />
dSpider Eater Riders (10): Human War2; hp 14, 11, 11,<br />
15, 10, 11, 14, 12, 9, 16; see Appendix 3.<br />
Spider Eaters (10): hp 38, 44, 37, 37, 41, 39, 46, 40, 42, 40;<br />
see Monster Manual page 171.<br />
Treasure: Within each trapped and paralyzed creature,<br />
1d4 spider eater eggs incubate.<br />
2. Shocker Prison (El 9)<br />
This room seems to comprise the majority of the<br />
tower, its height reaching 40 feet. A column of energy,<br />
about 15 feet wide and cascading and wavering from<br />
floor to ceiling, dominates most of the chamber.<br />
Within the blue-violet energy, five or six humanoid<br />
shapes, apparently made of energy, writhe and contort<br />
as if in great pain.<br />
To one side of the column, a large, round pillow with<br />
many smaller pillows scattered about it sits next to a<br />
hookah, a set of crystal goblets and a carafe on a short<br />
table, and a small, ornate trunk.<br />
Anyone touching the energy column suffers 10d6 points of<br />
electricity damage, no saving throw, and finds it very hard. It<br />
is, in fact, impenetrable, although it can be dispelled. The<br />
creatures inside (shockers) cannot escape on their own,
CHAPTER 6: THE INNER AND OUTER FANES<br />
although they move menacingly toward characters that<br />
approach the column.<br />
If the column is dispelled (treat as caster level 15th), the<br />
shockers trapped within are immediately freed, the tower<br />
loses all powers (it becomes opaque, normal stone with<br />
normal stone hardness and hit points, cannot discharge lightning<br />
bolts, and its lookout post loses all its properties). It collapses<br />
in 1d4 minutes due to its unsound structure.<br />
Creatures: The pillar of energy holds six shockers. Their<br />
energy and life force are used to power the tower, although<br />
since their prison can be dispelled, the balance between power<br />
and destruction is a delicate one. If the shockers are freed, they<br />
are not grateful. They are so enraged that they attack any living<br />
creature that they encounter until they are slain.<br />
Further, the sorcerer commander of each tower lives here.<br />
Half of these sorcerers are male, and half are female. The sorcerer<br />
attacks any intruders, although he or she flees rather<br />
than fighting to the death. The sorcerer attempts to counter<br />
any effort to dispel the shocker’s energy prison. Vary the sorcerer’s<br />
magic items as desired to ensure that they aren’t identical<br />
to one another. (For instance, instead of a wand of Melf ’s<br />
acid arrow, one could have a wand of flaming sphere.)<br />
dSorcerer: Human Sor6; hp 25; each wears a contact<br />
medallion; see DUNGEON MASTER’s Guide page 56.<br />
Treasure: The crystal set is worth 200 gp. The locked<br />
trunk (DC 20 to open) contains clothing, personal gear, and<br />
d% gp in a coin purse. Each sorcerer carries the key to the<br />
trunk in his or her area.<br />
3. Lookout Post (EL 1)<br />
This is a small platform at the top of a staircase going down<br />
into the tower. From here, one can see the entire crater.<br />
As mentioned above, anyone standing on the lookout post<br />
is granted a +10 enhancement bonus on Spot checks, has<br />
darkvision (120 foot range) and can see invisible objects<br />
(120-foot range).<br />
Creatures: A single spider eater rider (see area 1) is stationed<br />
here.<br />
THE OUTER FANE<br />
The Outer Fane is more organized than the mines. No areas<br />
here are beyond the cult’s control—all creatures within are<br />
members or servants of the Temple of All-Consumption.<br />
Security in the Outer Fane is tight, with many guard posts<br />
and a few traps. Because it is so difficult to get into the Outer<br />
Fane, the inhabitants rarely question those who appear to<br />
belong once they are inside.<br />
The exception to this is if the doomdreamers have been<br />
alerted to the general presence of intruders. Assume that if<br />
the PCs have killed or routed a significant number of servants<br />
in the mines over a short period (a couple of weeks),<br />
the creatures in the Outer Fane know that they might<br />
encounter enemies. If this is the case, then Outer Fane residents<br />
question very closely anyone they don’t immediately<br />
know, and the more intelligent do anything they can to<br />
determine if those claiming to belong actually do.<br />
Unless otherwise noted, the interiors of all rooms and corridors<br />
in the Outer Fane are made from solid pieces of a<br />
strange black rock with violet veinlike streaks running<br />
through it. The only visible seams are where the walls meet<br />
the floors and ceilings. These slabs are each 1 foot thick, covering<br />
worked basalt, the natural rock in the crater walls here.<br />
If separating two rooms, the walls are of the mysterious black<br />
107
CHAPTER 6: THE INNER AND OUTER FANES<br />
108<br />
rock 2 feet thick with no basalt involved. The black rock has<br />
hardness 10 and 20 hp per inch. Standard room height is<br />
twenty feet, with 15-foot-high hallways.<br />
The violet veins seem to writhe and move occasionally,<br />
particularly as seen out of the corner of one’s eye—never<br />
when one looks directly at the stone. Because of this disturbing<br />
property, all Spot checks are made with a –2 penalty<br />
(those who live here are unaffected due to their long exposure<br />
to it).<br />
Doors are made of the blackest of basalt (hardness 8, 150 hp,<br />
break DC 35) with a round purple stone in the center (on both<br />
sides, unless otherwise noted). The doors do not open unless<br />
the stone is touched, at which point the door slides into the<br />
ground slowly (this takes a full round). It slides up into place<br />
3 rounds later.<br />
All areas are lit by everburning torches in wall sconces unless<br />
otherwise noted.<br />
1. Fire Door (EL 14)<br />
Use this description when the PCs reach the outside the<br />
door. Remember that only someone with a greater key of fire or<br />
blessed in the Fire Temple can open this door.<br />
The bridge ends at a tall black door bound in a reddish<br />
metal. A large red lozenge, its edges gilded, is carved<br />
into the door in relief. The door is 15 feet high and wide.<br />
No handle, hinges, or other conventional door trappings<br />
are visible.<br />
If a greater key of fire or someone blessed in the Fire Temple<br />
(area 121) touches the door, it slides into the floor beneath<br />
it. This takes 1 round, and it stays down for 3 rounds or for<br />
as long as the opener is within 5 feet of the door—<br />
whichever is longer.<br />
A flickering, reddish glow lights this vast room. A circular<br />
pit, 3 feet deep and 50 feet across, fills the central portion<br />
of the room. In the center of the pit is a large pile of coins<br />
with a concave depression in the middle, as though it<br />
were a nest.<br />
The floor, walls, and ceiling are made of a reddish<br />
marble with black flecks and streaks. Along the north<br />
and east walls are altars, diamond-shaped if seen from<br />
above, with holes in the center of their top face from<br />
which a tall gout of flame roars continually. Flanking<br />
these altars are statues of nude human women done in<br />
black stone, their heads replaced by black triangles with<br />
inverted yellow Ys inside them.<br />
Beneath the coins in the pit is a hatch (Search DC 28 to<br />
find) that requires 30 minutes for one person to uncover<br />
enough to open (or two people 15 minutes each, and so on).<br />
This hatch gives access to a shaft 10 feet across that goes<br />
down 50 feet. Widely spaced rungs made of brass are bolted<br />
into the black stone walls (Climb DC 10 for creatures of less<br />
than Large size; these are meant for the dragon to climb<br />
down, not a human). At the bottom of the shaft lies a 50-<br />
foot-diameter round chamber of black stone (with purple<br />
veins). In the walls are set four alcoves, each with a treasure<br />
and a trap.<br />
Creatures: A young adult red dragon lives here, having<br />
been recruited long ago by the doomdreamers. She serves<br />
them faithfully as a guardian. Chymon wears an armband of<br />
reduction, allowing her to move easily through any passage in<br />
the Outer Fane as well as down into her secret chamber<br />
below this one.<br />
dChymon, Young Adult Red Dragon: hp 218; see<br />
Appendix 3.<br />
Tactics: Chymon casts invisibility first (she does this as the<br />
door slides down if anyone comes through the Fire Door). Her<br />
first attack against trespassers, she hopes, is one with surprise.<br />
This dragon is large enough to snatch Small opponents<br />
with its mouth before it breathes, a tactic Chymon enjoys<br />
(the snatched creature gets no saving throw). If the victim is<br />
still alive after this devastating attack, she throws the creature<br />
against the wall.<br />
If hard pressed but given the opportunity, the dragon<br />
ducks down into the secret room below and uses one or more<br />
of its precious scrolls.<br />
Traps: Each of the four alcoves in the round chamber<br />
below the coin pit has a trap. Each trap can be disarmed by<br />
the use of a password (respectively, they are the words “fall,”<br />
“phase,” “toxic,” and “frost,” spoken in Draconic). Chymon<br />
knows these passwords, as did the creators of the traps (who<br />
are now long dead).<br />
Alcove #1: If anything breaks the plane of the outer edge of<br />
this alcove, a trapdoor opens in front of the alcove, 10 feet<br />
across, dumping anyone standing above it down a 30-foot pit,<br />
the bottom of which is the top of a steep, slippery chute<br />
(Climb DC 5 to ascend) that carries victims another 20 feet<br />
(for no additional damage) to one side. Then, a thick metal<br />
wall (hardness 10, 60 hp, break DC 28) slams shut over the<br />
point where pit and chute meet. Meanwhile, at the bottom of<br />
the pit, a programmed image makes it appear as if the bottom<br />
of the pit is flat and covered with the dead body (or bodies) of<br />
character(s) that slid down the chute. If anyone investigates<br />
the bodies at the bottom of the pit, they quickly discover they<br />
are an illusion, but doing so causes the trapdoor at the top of<br />
the pit, made of iron (hardness 10, 60 hp, break DC 28) to<br />
close and seal itself.<br />
aTrapdoor Pit (30 feet deep): CR 6; no attack roll necessary<br />
(3d6 and see above); Reflex save (DC 20) avoids; Search<br />
(DC 21); Disable Device (DC 20).<br />
Alcove #2. If anything breaks the plane of the outer edge<br />
of this alcove, the floor in front of the alcove (a 10-foot-by-<br />
10-foot area) becomes mostly insubstantial for a moment,<br />
dropping whoever stands above it down 5 feet. Then, it<br />
turns to normal, trapping fallen characters within solid<br />
rock. The experience inflicts 10d6 points of damage and<br />
traps the character (Medium-size characters cannot take<br />
actions other than speaking, and characters shorter than 5<br />
feet begin to suffocate). The only way to escape is to use<br />
spells such as gaseous form, reduce, etherealness, transmute rock<br />
to mud, and so on—cast by someone other than the character<br />
trapped—or wait for 24 hours when the trap resets, and<br />
activate it, causing the floor to become immaterial again,<br />
allowing for a quick escape.<br />
aPhase Trap: CR 7; no attack roll necessary (10d6 and<br />
see above); Reflex save (DC 20) avoids; Search (DC 25); Disable<br />
Device (DC 25).<br />
Alcove #3. If anything breaks the plane of the outer edge of<br />
this alcove, poisonous gas sprays out of the alcove and into a<br />
cloud that fills the entire room. All must make a Fortitude<br />
saving throw (DC 17) or lose 2d6 Strength; a minute later,<br />
they must repeat the saving throw or suffer an additional<br />
1d6 Strength.
CHAPTER 6: THE INNER AND OUTER FANES<br />
aPoison Gas Trap: CR 8; Fortitude save (DC 19) resists,<br />
(2d6 Str/1d6 Str); Search (DC 25); Disable Device (DC 25).<br />
Alcove #4. If anything breaks the plane of the outer edge of<br />
this alcove, a cone of cold, 40 feet long, blasts out of the alcove<br />
inflicting 10d6 damage (Reflex save DC 16 for half ).<br />
aCold Trap: CR 6; 40-ft. cone (10d6 damage); Reflex save<br />
(DC 16) avoids; Search (DC 25); Disable Device (DC 25).<br />
Treasure: The coins in the pit are of mixed denominations:<br />
100,000 cp, 50,000 sp, and 2,000 gp. The real treasure is<br />
in the alcoves in the lower room:<br />
Alcove #: A locked (DC 25 to open) iron coffer with bone<br />
inlay (worth 100 gp) containing six arcane scrolls:<br />
1. Disintegrate and eyebite;<br />
2. Cloudkill and summon monster V;<br />
3. Ice storm and polymorph self;<br />
4. Spell turning;<br />
5. Domination and hold monster;<br />
6. Teleport without error.<br />
Alcove #2. Two candles of truth in finely wrought golden<br />
candlesticks designed to look like knights (worth 150 gp each).<br />
Alcove #3. A small, unlocked box, padded with velvet, that<br />
holds six emeralds (each worth 1,000 gp).<br />
Alcove #4. A statue of solid gold, 4 feet high, of a wyvern<br />
standing, wing unfurled, atop an egg covered in jewels. The<br />
statue is worth 2,000 gp. (The gems alone are worth 1,000 gp.)<br />
Development: The ogres in area 3 hear the dragon’s roar<br />
and the sounds of fighting in this room. They investigate, but<br />
do not interfere unless the dragon looks like she needs<br />
help—they know that she would not hesitate to breathe fire<br />
on them if they got in the way.<br />
2. Storeroom<br />
Wooden crates are stacked high in the back of this<br />
room. A pile of sacks, most likely full of flour, sugar, or<br />
other foodstuffs, lay piled against the east wall. Nearer<br />
the front of the room is a table with a number of glass<br />
bottles and ceramic jugs on it, with some open crates of<br />
more bottles and a few wooden kegs underneath. A<br />
strange red bottle, its neck made to look like a dragon’s<br />
neck and the corked mouth its head, is at the front of<br />
the table.<br />
The crates hold packed cheese, vegetables, and dried meat. The<br />
bottles, jugs, and kegs contain various types of alcohol.<br />
The liquid in the red bottle is known as dragon spirits. Enough<br />
remains in the bottle for three more draughts. A draught,<br />
imbibed by a spellcaster, allows them to cast an additional 1stlevel<br />
spell that day. If the caster must prepare spells ahead of<br />
time, that extra spell must be one that she prepared for that day,<br />
even if she has already cast it. Dragon spirits are magical.<br />
3. Guard Post (EL 7)<br />
The walls of this room are covered in tapestries of<br />
white and purple showing winged demons tearing the<br />
hearts out of people and carrying them away, toward a<br />
large mountain in the background. Although each tapestry<br />
is artistically different, each shows the same<br />
basic scene.<br />
In the middle of the room is a crude wooden table covered<br />
in wooden mugs and dice. Next to the table are a<br />
large keg and a basket of dried meats and cheeses.<br />
Six tapestries hang in this room. Each bears a small written<br />
clue that might aid those who attempt to get through<br />
the violet walls in area 22. These phrases are hidden in<br />
tiny places within the differences of the tapestries, written<br />
(or rather stitched) in Common. To find these hidden<br />
clues, a character must succeed at a Search check (DC 30)<br />
on each tapestry.<br />
Starting from the northwest tapestry and moving around<br />
counterclockwise, the six tapestries have these messages<br />
woven into them:<br />
1. Who are you?<br />
2. What do you bring before me?<br />
3. Where are you now?<br />
4. Why have you come here?<br />
5. When shall I be free?<br />
6. Who am I?<br />
Creatures: Six ogres sit around the large table rolling<br />
knucklebones. They each wear black full plate armor with<br />
the Elder Elemental Eye symbol prominently displayed.<br />
Each also carries a Huge masterwork greatsword sized for a<br />
Large creature.<br />
dOgres (6): hp 28, 26, 26, 28, 30, 27; AC 21 (full plate);<br />
Huge greatsword +9 melee (2d8+7); Weapon focus<br />
(greatsword instead of greatclub); 3d10 gp each; see Monster<br />
Manual page 144.<br />
Tactics: These ogres are not smart enough to effectively<br />
question newcomers and are easily bluffed. They attack<br />
anyone who is obviously an enemy or anyone they are told to<br />
attack by an authority figure that they recognize, such as<br />
Hedrack or Satau.<br />
In a fight, they move up and melee as quickly and as<br />
straightforwardly as possible.<br />
Development: If a fight breaks out in area 1 or 5, these<br />
ogres hear it and move to investigate.<br />
4. The Oracle (EL 10)<br />
The door to this room does not open as others do. A demon’s<br />
face glowers over the lintel, with glowing eyes. To open the<br />
door, a character must look into the demon’s eyes and overcome<br />
the door’s Will. The character must make a Will saving<br />
throw against a DC of 18. Failure results in fatigue (cannot<br />
run or charge, a –2 penalty to Strength and Dexterity until<br />
character gets 8 hours rest). Success means that the door<br />
opens to the character’s touch from that point on.<br />
This chamber has a trio of dim glowing balls that float<br />
near the ceiling, offering illumination. A semicircular<br />
table, the curved side facing west, sits in the middle of the<br />
western portion of the room, made of some lavender-colored<br />
stone. On it are a number of oddly shaped bits of<br />
bone, wood and stone.<br />
In the eastern end of the chamber is a pit, about 40<br />
feet wide, that drops down into darkness.<br />
The pit is 40 feet deep. At the bottom, a large chamber<br />
spreads out to the east, completely unlit. This larger area is<br />
well appointed, with a sumptuous round bed, a pair of<br />
padded couches, and a grand wooden chair pushed up to a<br />
table covered in a plethora of odds and ends: skulls, bottles,<br />
tools, books (regarding magic and divination), parchment,<br />
quills and ink, bones, a dagger, a magnifying glass, and an<br />
empty birdcage.<br />
109
CHAPTER 6: THE INNER AND OUTER FANES<br />
110<br />
Still, these furnishings take up only a small portion of<br />
the room—they are all situated near the center of the<br />
chamber. Ringing the outside the chamber is something<br />
mind flayers call psychic statuary. In the portions of the<br />
room marked with Xs, these “statues” are not visible until a<br />
person enters the area occupied by them. At that point, an<br />
image forms in the character’s mind of whatever Satau<br />
wished it to be. These statues, then, depict mental images of<br />
mind flayers devouring the brains of humanoids, of fabulous<br />
illithid subterranean cities, and disgusting illithid religious<br />
rites. Since these statues are mental, they include moving<br />
pictures and touch all the senses, but are always the same for<br />
whomever enters that particular area.<br />
In the east wall of the lower chamber, a secret door in<br />
the wall pivots open silently when pushed, but it requires a<br />
Strength check (DC 22) to do so. Beyond the secret door is<br />
a room, much longer than it is wide. Crossing through the<br />
middle of the room, a character encounters the most sophisticated<br />
type of psychic statuary. This piece incorporates and is<br />
changed by the mind of the viewer. The image mentally perceived<br />
in this case, of a mind flayer eating the brain of a<br />
humanoid being while other mind flayers clap in pleasure,<br />
incorporates the character in question, who becomes the<br />
victim in the statue. A character must make a Will saving<br />
throw (DC 15). If successful, the character changes the psychic<br />
statue so that she escapes before harm comes to her. If<br />
failed, the psychic image is of her being eaten and she suffers<br />
1d4 points of temporary Wisdom damage.<br />
At the eastern end of the secret room, a small ebony<br />
table holds a silver ewer. The ewer is filled with three doses<br />
of a magic dust that, when ingested, restores all lost hit<br />
points to anyone.<br />
Creatures: Satau the Illithid serves the Outer Fane as an<br />
oracle. He lives in the lower portion of the room, at the<br />
bottom of the pit. He has two levels of sorcerer and wields a<br />
wand of invisibility with 16 charges.<br />
Satau, in addition to his normal illithid and sorcerer abilities,<br />
has the ability to predict the future with 75% accuracy<br />
(more or less) by tossing and examining the various trinkets<br />
found on the table. This ability is considered very valuable by<br />
the cult. Because of it, Satau knows a great deal about the<br />
doomdreamers and their plans. If it could somehow be<br />
extracted from him, he knows:<br />
• They are currently excavating the bottom level of the<br />
Temple of Elemental Evil.<br />
• Half of the doomdreamers are currently lost within something<br />
called the Dreaming Stone (he has never seen it).<br />
• The doomdreamers believe that they are very close to<br />
finding the means to free Tharizdun.<br />
dSatau: Mind flayer Sor2; hp 41; see Appendix 3.<br />
Tactics: If he hears anyone coming into the upper portion of<br />
the chamber, Satau levitates up from the pit, invisible. He<br />
attempts to use detect thoughts to learn what he can about the<br />
intruders, and then attacks with mind blast—still above the pit.<br />
Attempting to charm or use suggestion upon those not stunned<br />
(and after he is finished, those who are stunned) is next, so<br />
that he can send them all away, not to return. He is not interested<br />
in feeding, for he is well fed here.<br />
If hard pressed, he becomes invisible and retreats to the<br />
secret room, using the dust there to heal himself if need be.<br />
Development: Since no one can get easily into the chamber,<br />
no one comes to help Satau when he is in trouble. Since<br />
Satau is selfish and ultimately self serving, he does not help<br />
others in the Outer Fane.
CHAPTER 6: THE INNER AND OUTER FANES<br />
5. Library<br />
Books line the shelves that cover every wall of this<br />
chamber. Shelves even run up and down throughout<br />
the room creating aisles. Thin, violet-colored rugs run<br />
down these aisles.<br />
The books cover virtually every subject, but most deal with<br />
darker aspects of magic, religion, and science. This library<br />
holds 687 books, each worth 1d10 gp (though carrying them<br />
all out would be an immense chore).<br />
6. Study (EL 10)<br />
Three velvet-covered couches, six similarly luxurious<br />
chairs, a few small tables, and two desks furnish this room.<br />
Each table and desk has a glowing lamp burning upon it.<br />
The desks have a few drawers each, but they hold only blank<br />
parchment, quills and ink.<br />
Creatures: Naquent, Hedrack’s assistant, is here studying<br />
a book on giants she found in the library below. Naquent is<br />
tall and thin, with long brown hair. She wears ochre robes<br />
and an obex.<br />
dNaquent: Female half-elf Clr10; hp 54; see Appendix 3.<br />
Tactics: If forced into a fight, she casts ethereal jaunt first<br />
and attempts to escape. Naquent likes to fight on her terms.<br />
She returns to attack her foes later, preferably with a number<br />
of guards with her.<br />
Development: If she hears fighting, she does not intervene.<br />
Instead, she goes to the nearest guards not involved in the<br />
fight (probably the ogres in area 3 or the bugbears in area 9),<br />
sends them to deal with it, and goes to find and alert Hedrack.<br />
7. The Shrine of Dark Communion<br />
Six low kneeling benches are arranged in two rows of<br />
three, facing west. Between two archways of purple stone<br />
that lead off to the southwest and the northwest is a door<br />
made of glass with a lavender stone in its center. Beyond<br />
that door, a ball of swirling black fire, with a blood-red<br />
corona, floats within a 20-foot-wide chamber.<br />
The glass door operates like all the other doors in the<br />
Outer Fane.<br />
Cultists use this chamber to contemplate the nature of<br />
Tharizdun and reach out to him. In order to facilitate this<br />
process, a ball of pure negative, destructive energy floats behind<br />
the transparent door. It is called the Black Sun. This is, in effect,<br />
a sphere of annihilation. Just like the minor artifact, the Black Sun<br />
can be moved by the will of a character, but in this case, if that<br />
character is of a nonevil alignment, the Black Sun moves immediately<br />
toward the character and continues to do so for 1d4<br />
rounds. If no force is acting upon it, it automatically returns to<br />
the room it was originally found in with a speed of 40.<br />
A strange property of the black stone with the violet veins<br />
is that it is immune to the effects of the Black Sun, blocking<br />
its movement.<br />
8. Vestry<br />
Hanging from hooks along the north and south walls of<br />
this room are robes of two different colors: ochre and<br />
deep purple. An ornate box, 2 feet to a side, with hinged<br />
doors on two sides, rests on a stand in the center of the<br />
room. Images of processions of people, all garbed in robes<br />
and cowls, are etched into the sides of the box.<br />
Six ochre robes are here, as well as four purple robes of Tharizdun<br />
(see Appendix 1). The purple robes are magical, their power<br />
useful in areas 21 and 23, for they protect the wearer from the<br />
savage cold and the long sleeves allow characters to touch<br />
things through them without suffering damage. The robes<br />
have no power anywhere else.<br />
The box is locked (DC 30 to open either side) and contains<br />
a torch of revealing and a black thurible on one side, and 10<br />
pieces of incense of revealing (six black cones and four spheres;<br />
see Appendix 1 for more information) on the other.<br />
9. Guard Post (EL 8)<br />
The door is locked (DC 28 to open) and locks automatically<br />
when closed. The key hangs on the wall on the north side of<br />
the door, with the last bugbear out always taking the key<br />
with him.<br />
The north wall of this area is made of iron, as is the door<br />
in that wall. The iron is painted dark purple, with images<br />
of ochre-robed priests chanting a song of evil and death<br />
painted over that.<br />
Four arrow slits are in the north wall are positioned so that<br />
arrows fired from them come from the open mouths of the<br />
painted priests. The bugbears here have nine-tenths cover.<br />
Behind the metal wall, in the northern room, holds seven<br />
large beds, two tables, four benches, and a few sacks containing<br />
clothes and gear.<br />
Creatures: Seven bugbears stand guard here. Four of them<br />
are located behind the iron wall with mighty composite<br />
bows. The other three wait behind the door, ready to rush out<br />
and attack intruders with their longswords.<br />
dBugbears (7): hp 16, 20, 13, 18, 16, 15, 20; AC 22; Longsword<br />
+4 melee (1d8+2); Mighty composite longbow +3<br />
ranged (1d8+2); 3d10 gp each; see Monster Manual page 27.<br />
Tactics: Unlike many bugbears, these creatures are not<br />
interested in stealth, perfecting instead their combat skills.<br />
Thus, they wear banded mail, carry large shields, and wield<br />
longswords. As soon as intruders appear either to be<br />
advancing dangerously on the archers behind the arrow<br />
slits or fleeing through the area entirely, the bugbears<br />
behind the door charge out for melee.<br />
Development: If these bugbears hear (Listen +3) a fight in<br />
the naga’s lair, specifically the crashing of the portcullises,<br />
they come to assist the nagas. Otherwise, they remain here.<br />
10. Dark Naga Lair (EL 10)<br />
Two round beds, covered in black silk sheets and violet<br />
pillows, occupy this room. Incense burns in a brazier<br />
hanging from the ceiling in the northeast corner. Three<br />
statues stand against the west wall, each depicting a lifesize<br />
human male entwined in the coils of a snake with the<br />
face of a beautiful woman.<br />
On the south wall, 20 feet from the west wall, four<br />
iron levers can be seen.<br />
111
CHAPTER 6: THE INNER AND OUTER FANES<br />
112<br />
The four levers control four portcullises, one at each end of<br />
the two hallways that lead into this room. The portcullises are<br />
iron and have hardness 10, 60 hp, and a lift DC of 25.<br />
The beds, if examined closely, are strange, in that they are<br />
padded around the edges more than they are on top. This is<br />
because the nagas here coil around them, resting only their<br />
head on top (on the pillows).<br />
Creatures: Mhunaath and Yklah, both dark nagas, dwell<br />
here. They coil around the “beds” when here most of the<br />
time. These two serve the cult as enforcers and advisors. They<br />
are eager to command large groups into battle.<br />
dMhunaath and Yklah, Dark Nagas: hp 58 and 64; see<br />
Monster Manual page 138.<br />
Spells Known (6/7/7/5): 0—dancing lights, daze, detect magic,<br />
flare, ghost sound, mage hand, prestidigitation; 1st—burning<br />
hands, charm person, mage armor, magic missile, shield; 2nd—<br />
blur, cat’s grace, invisibility; 3rd—fly, fireball.<br />
Tactics: Both nagas spend most of the day in mage armor.<br />
When intruders advance down either or both hallways into this<br />
room, the nagas attempt to trap them with the portcullises.<br />
Using a tail, one naga can pull down all four levers at once, or<br />
she can lower them one at a time. The nagas do this whenever<br />
any intruder comes along. They feel it’s better to identify their<br />
allies with detect thoughts and simply raise the portcullises again.<br />
While their foes are trapped, they enjoy using fireballs,<br />
charm person, and magic missile. Otherwise, they use invisibility<br />
to protect themselves (and they might do that anyway).<br />
The nagas do not hesitate to use the potions hidden in<br />
their beds, dexterously finding them and yanking them out<br />
with their tails.<br />
Treasure: Under one bed, a small sack contains three 500-gp<br />
gems, a flask of alchemist’s fire, and a potion of cure light wounds.<br />
Hidden amid the pillows of the other bed (Search DC 18 to<br />
find) are a potion of haste and a potion of cure moderate wounds.<br />
Development: If the bugbears in area 9 hear a battle or one<br />
of the portcullises drop here, they come and fire arrows at those<br />
trapped in the hallway if they see them fighting the nagas.<br />
11. Water Door (EL 9)<br />
Use this description when the PCs reach the outside the door.<br />
Remember that only someone with a greater key of water or<br />
blessed by such a key in the Water Temple can open this door.<br />
On the landing sits a tall black door bound in a greenish<br />
metal. A large blue-green square, its edges gilded, is<br />
carved into the door in relief. The door is 15 feet high and<br />
wide. No handle, hinges or other conventional door trappings<br />
are visible.<br />
If a greater key of water or someone blessed by that key in the<br />
Water Temple (area 195) touches the door, it slides into the<br />
floor beneath it. This takes 1 round, and it stays down for 3<br />
rounds or for as long as the opener is within 5 feet of the<br />
door—whichever is longer.<br />
This hall is long, lit by an eerie blue-green luminescence<br />
coming up from the pool that runs down its middle.<br />
Halfway down this hall, the sides rise up 20 feet on steep<br />
stairs. The walls, floor, and ceiling of the place are made of a<br />
blue marble with green streaks and flecks, and are carved<br />
with the images of aquatic animals and beasts seemingly<br />
swimming up and out of the pool and into the room. Turtles<br />
and fish, lobsters and crabs, octopi and squid, jellyfish and<br />
rays, sea monsters, fish-men with tridents, sea lions, and<br />
much more are everywhere one looks.<br />
The pool is 20 feet deep. The secret door opens only when a<br />
carved turtle’s head is turned (Search DC 25 to find).<br />
Creatures: An evil, elder tojanida with +2 bracers of armor<br />
worn on two of its limbs dwells within the pool. It attacks<br />
anything not wearing a Temple symbol that comes into the<br />
pool or within 5 feet of its edge. If it must, the tojanida<br />
climbs out of the pool to attack.<br />
In addition to the bracers, the tojanida has the Elder Elemental<br />
Eye symbol scrawled onto its shell in numerous places.<br />
dElder Tojanida: hp 130; see Monster Manual page 177.<br />
Development: If the guards in area 12 hear any activity in<br />
this room, they come to investigate.<br />
12. Guard Post (EL 10)<br />
This room has three large beds, a wooden table, and three<br />
large chairs. Faded, gray curtains hang on the walls, sporting<br />
some nasty brown stains. An odd little hammocklike<br />
net hangs from the ceiling above the table. The table is<br />
covered with bones and food stains.<br />
A quasit uses the hammock as a bed.<br />
Creatures: Three 2nd-level minotaur barbarians wearing<br />
masterwork studded leather stand guard here with Huge<br />
masterwork greataxes. A quasit named Insentorix lives here<br />
as well. The minotaurs hate the quasit but tolerate it because<br />
Hedrack assigned it here.<br />
dMinotaur Bbn2 (3): hp 65, 57, 60; see Appendix 3.<br />
dInsentorix: Quasit; hp 30; 6 HD; Add +3 to attacks, +2<br />
to saving throws, +4 to all skills; see Monster Manual page 41.<br />
Tactics: If confronting intruders claiming to be Temple<br />
personnel, the invisible quasit uses detect good or commune to<br />
determine if they are telling the truth.<br />
In a fight, the minotaurs attack enraged while the quasit<br />
flies about invisibly attacking and then becoming invisible<br />
again. If the tojanida in area 11 is already dead, or if the characters<br />
slay two of the three minotaurs, the quasit flies away<br />
invisibly straight to Hedrack in area 19.<br />
Development: These guards’ job is to come out when<br />
someone opens the Water Door (area 11) and question those<br />
coming through it, attacking enemies (first off, by concentrating<br />
their efforts to throw at least one victim into the<br />
water to the tojanida). If they hear any activity in that room<br />
(minotaur Listen +10, quasit Listen +6) they investigate.<br />
13. The Grinder (EL 6)<br />
Trap: As soon as 100 pounds or more is placed on the floor<br />
of this area, the trap activates. The west wall pushes inward 10<br />
feet very quickly, trapping anyone in the room in the eastern<br />
half, where horrible bladed devices spin and grind everything<br />
there for 3 rounds. Characters can make Reflex saving<br />
throws (DC 20) to try to get out of the trap as the wall moves.<br />
Otherwise, they suffer 6d6 points of damage per round.<br />
While in the grinder trap, a spellcaster must make a Concentration<br />
check (DC 10 + 1/2 the last damage inflicted by the<br />
grinder) to successfully cast a spell.<br />
aGrinder Trap: CR 6; 6d6 damage per round; Reflex save<br />
(DC 20) avoids; Search (DC 25); Disable Device (DC 26).
CHAPTER 6: THE INNER AND OUTER FANES<br />
14. The Earth Door (EL 11)<br />
Use this description when the PCs reach the outside the door.<br />
Remember that only someone with a greater key of earth or<br />
blessed by such a key in the Earth Temple can open this door.<br />
The bridge ends at a tall black door bound in a brownish<br />
metal. A large brown triangle, its edges gilded, is carved<br />
into the door in relief. The door is 15 feet high and wide.<br />
No handle, hinges, or other conventional door trappings<br />
are visible.<br />
If a greater key of earth or someone blessed by that key in the<br />
Earth Temple (area 220) touches the door, it slides into the<br />
floor beneath it. This takes 1 round, and it stays down for 3<br />
rounds or for as long as the opener is within 5 feet of the<br />
door—whichever is longer.<br />
The chamber smells of loam. The walls are of a brown and<br />
gray stone, covered with images in relief. These depict<br />
huge dragons and other monstrous beasts erupting from<br />
the earth like primordial creations that exist only to<br />
destroy. The floor and ceiling are made of the same stone,<br />
the ceiling reaching 40 feet above the floor. In the western<br />
end of the room, a massive pile of soil and stones lays<br />
on the floor, 10 feet high and 30 feet long.<br />
The secret door in the hall between areas 14 and 15 pivots<br />
when pushed, but this requires a Strength check (DC 20).<br />
Creatures: The mound of earth is, in fact, an elder earth elemental,<br />
tainted irrevocably to evil and now a servant of the cult.<br />
dElder Earth Elemental: hp 225; see Monster Manual<br />
page 82.<br />
Tactics: This earth elemental knows only that it should<br />
attack those not wearing either Elder Elemental Eye or<br />
Tharizdun symbols. It attacks any creature that does not. It<br />
also obeys any command given to it by Hedrack.<br />
Development: Hedrack might give this elemental a<br />
verbal description of intruders and command it to wait for or<br />
even hunt for them.<br />
15. Guard Post (EL 9)<br />
Eight beds hang from the ceiling by chains, suspended<br />
about 6 feet from the floor along the east and west walls.<br />
The north and south walls each display weapon racks<br />
holding greatswords and longswords, respectively. Also in<br />
the room are four trunks, four short wardrobes, and a<br />
short barrel full of arrows.<br />
Each bed has a rope-loop step that can be pulled down to<br />
better climb into it. The area has been cleared in this way to<br />
make more room for the constant sparring that the inhabitants<br />
here undertake.<br />
Ten greatswords, 10 longswords, and 100 arrows are here.<br />
The trunks and wardrobes have only clothes and normal gear<br />
in them.<br />
Creatures: Eight 4th-level human warriors, the elite<br />
culled from the warriors stationed in the mines, live here.<br />
They are always sparring with one another (and are all<br />
scarred and quite grizzled).<br />
dElite Guards, Human War4 (8): hp 23, 26, 30, 24, 31,<br />
28, 25, 30; see Appendix 3.<br />
Tactics: These warriors question anyone who they do<br />
not recognize.<br />
16. Weeping Statue (EL 11)<br />
In the center of this chamber, a dark gray, life-size statue<br />
of a man in a cowled robe stands, enough of his face<br />
visible to show that he is weeping.<br />
Two curved stone benches flank the statue.<br />
Creatures: Two assassins, one half-elf and the other<br />
human, are here. They live in area 17, but when they are<br />
not sleeping, they relax here instead, reading or talking.<br />
Both wear black cloaks and lilac stone facemasks identical<br />
to the one found in area 6 of the Moathouse (worth 200<br />
gp each).<br />
dVictor: Male half-elf Rog5/Asn4; hp 40; see Appendix 3.<br />
dBethe: Female human Rog5/Asn4; hp 40; see Appendix 3.<br />
Tactics: If they hear anyone coming, they retreat to area 17<br />
to hide behind the door, hoping for an ambush and possibly a<br />
death attack while intruders examine the statue.<br />
Development: If Hedrack knows intruders are in the<br />
Outer Fane, he often contacts these two and sends one of<br />
them skulking about to slay the culprits.<br />
17. Assassins’ Quarters<br />
The door here is rigged so that it moves very slowly (taking 2<br />
rounds to lower) unless one taps the purple stone twice<br />
quickly in succession. It also has a pair of hidden peepholes<br />
(Search DC 30 to find) looking out into area 16.<br />
This room is a spartan bedchamber, with two iron-framed<br />
beds, a pair of black wooden chairs, and a round purple<br />
rug on the floor. Next to the south wall stands a black<br />
wooden chest of drawers with a pair of curved daggers<br />
mounted to the wall over it. A small black table with a<br />
ceramic water basin sits between the beds.<br />
The chest of drawers holds clothes (mostly black garments)<br />
and miscellaneous possessions such as combs, brushes, soap,<br />
and so on.<br />
One of the drawers in the chest is locked (DC 30 to open).<br />
It contains 6 doses of id moss and 3 doses of dark reaver<br />
powder (see page 80 of the DUNGEON MASTER’s Guide). A secret<br />
drawer exists in the back of the chest (Search DC 20 to find)<br />
coated with nitharit contact poison (DC 13, no initial<br />
damage/3d6 Constitution secondary damage if second DC 13<br />
Fortitude save failed one minute after contact). The secret<br />
drawer holds a pouch with 242 gp, two gold rings bearing<br />
golden raven’s head emblems (worth 150 gp each), four<br />
tindertwigs, and a scroll of nondetection.<br />
18. The Four-Sided Pillar<br />
This room is empty except for a large pillar that stretches<br />
from floor to ceiling. Each of the four sides of the pillar<br />
has an alcove in which the stone has been sculpted into a<br />
different statue form.<br />
Each side of the pillar has a distinct statue carved into it.<br />
The first is jet black and depicts a tall, muscular man in<br />
plate armor that has unfamiliar flanges and fluting. He wears<br />
a cape and holds a wavy-bladed sword.<br />
113
CHAPTER 6: THE INNER AND OUTER FANES<br />
114<br />
The second side is dark green, appearing<br />
like a man swathed in a flowing robe<br />
with long sleeves and a high collar.<br />
Covering his face is a mask (that<br />
resembles the masks that the assassins<br />
in area 16 wear).<br />
The third side is a deep blood<br />
red and depicts a man in high<br />
boots, a doublet, and gauntlets<br />
of twisting design. A hood<br />
drawn tight around the face<br />
covers his head.<br />
The fourth side is a deep<br />
indigo-colored statue of a<br />
man clothed in a manypleated<br />
robe with a girdle<br />
covered in strange, indecipherable<br />
sigils. (They<br />
actually don’t mean anything—they’re<br />
just an<br />
example of artistic license.)<br />
His head is covered in a cowl<br />
and he cradles a scepter in<br />
his folded arms.<br />
19. Master<br />
Hedrack’s Suite<br />
(EL variable)<br />
This area has forbiddance cast<br />
upon it by Hedrack, so that creatures<br />
that are not chaotic evil cannot enter<br />
the room unless they make a Will<br />
saving throw (DC 24). Those who fail the save also suffer 3d6<br />
damage (6d6 damage if lawful good).<br />
This large bedchamber is richly appointed, but dire in<br />
its decor. A wide bed with black linens and a black<br />
canopy over it, the ebony wood carved into hideous<br />
faces, stands near the north wall. Other dark wood furnishings<br />
include an ornate trunk, a nightstand with a<br />
lamp, a bookshelf, a desk, and a folding screen that cuts<br />
off the southeastern section of the room. In the two<br />
corners farthest from the door stand a pair of gray<br />
stone statues, 6 feet tall, of creatures made of writhing<br />
snakes, tendrils, or tentacles. Next to one is a black<br />
marble bathing tub, with a dark wooden towel rack<br />
next to it.<br />
The walls are covered in tapestries depicting normal<br />
scenes of daily life in human situations—dinner in a<br />
castle, an auction in a village, a party, and so on. A<br />
purple robe hangs on a peg near the door.<br />
Anyone looking more closely at the tapestries finds that each<br />
of them is actually more disturbing than they first appear. In<br />
each, a shadow lurks menacingly, a character has an out-ofplace<br />
evil grin, or something even more understated gives it a<br />
feeling of wrongness.<br />
The wooden screen sets apart a small dining area with a<br />
dark wooden table and four chairs, a service table, and an elegant<br />
silver service.<br />
Creatures: (EL 14) Hedrack was the high priest of the<br />
Temple of Elemental Evil long ago. Now he serves the doomdreamers<br />
as the high priest of the Greater Temple in the<br />
Outer Fane, wielding a lesser tentacle<br />
rod as his symbol of<br />
office. He is an older man<br />
with gray hair and a thin<br />
face and build.<br />
dHedrack: Male human<br />
Clr14; hp 102; see Appendix 3.<br />
Hedrack keeps two skeletons<br />
in the room to perform<br />
menial tasks. If<br />
he is alerted, he tells<br />
them to attack anyone<br />
who comes into<br />
the room, but he does<br />
not waste time in battle<br />
to give them commands.<br />
DMedium-Size Skeletons<br />
(2): hp 5, 6; see Monster<br />
Manual page 165.<br />
Tactics: Hedrack never fights<br />
to the death, and never puts himself<br />
in a situation where he is at serious risk. He<br />
would rather investigate a situation and<br />
send servants (particularly the assassins in<br />
area 16) to deal with it.<br />
He can be assumed to have always cast bull’s<br />
strength and endurance. Before going into<br />
combat, he also casts spell resistance and magic<br />
vestment if possible.<br />
In battle, he does not hesitate to cast destruction<br />
on the character most likely to fall victim to it (a<br />
rogue, bard, wizard, or sorcerer, for example),<br />
although if the foes are numerous he may use<br />
blasphemy first. To escape, he relies on word of recall<br />
to bring him into area 23.<br />
Traps: (EL 8) The chest is locked (DC 30 to<br />
open) and has a greater glyph of warding upon it that casts slay<br />
living (Fortitude save DC 24) on anyone attempting to open it<br />
that does not first speak the name “Tharizdun” first.<br />
The bookcase is likewise trapped with the exact same<br />
greater glyph with the same password.<br />
aGreater Glyphs of Warding (2): CR 6; slay living, Fortitude<br />
save (DC 24) partial; Search (DC 30); Disable Device<br />
(DC 30)<br />
Treasure: The robe on the peg is a purple robe of Tharizdun.<br />
The silver service is worth 450 gp. Inside the trunk are three<br />
platinum ewers full of sacred oils (worth 150 gp each), a<br />
large pouch with 234 pp and six 100-gp silver pearls, a jar of<br />
sovereign glue (one ounce), a lens of detection wrapped in silk,<br />
and a hand of glory that must be soaked in unholy water once<br />
per week to function.<br />
In addition to books on magic, dark lore, and dark<br />
deities, Hedrack keeps a tome of understanding +1 and a vacuous<br />
grimoire on his bookshelf. He also keeps his journal<br />
there (see Handout 2: The Journal of Hedrack). The journal<br />
has a small piece of paper placed in it with the following<br />
sentence written upon it: “Dread Tharizdun, power of<br />
the Elder Elemental Eye and master of all destructive<br />
forces, I am the Champion of Elemental Evil and am ready<br />
to carry out your wishes.” (This is the phrase said by candidates<br />
of the test for the Champion of Elemental Evil—see<br />
area 23).<br />
Development: Hedrack does not prepare his defenses<br />
here. If he is alerted to foes coming his way, he moves to area
CHAPTER 6: THE INNER AND OUTER FANES<br />
16, 30, or 33 to get help in fending off enemies. If in dire<br />
need, he tries to get to area 23, where he can use the tentacle<br />
rod to transport him to the Inner Fane.<br />
Ad Hoc XP Adjustment: Do not award experience points<br />
for the skeletons.<br />
20. Golems (EL 9)<br />
A chill settles on your skin here. Down the length of this<br />
hallway, about every 10 feet, a purplish stone panel has<br />
been set into the walls on both sides. The panels are<br />
carved with intricate images of robed and hooded people<br />
in procession, each carrying a special torch.<br />
Furthermore, three alcoves exist in the north wall.<br />
These are almost entirely filled with thick, mucouslike<br />
green goo. These alcoves, 8 feet high and 4 feet wide are<br />
probably about 4 feet deep, but it is difficult to know for<br />
sure due to their opacity. A black, oblong rug covers much<br />
of the floor in front of them.<br />
The room is cold enough that unprotected characters (those<br />
not wearing winter weather gear or protected by an endure<br />
elements or similar spell) must make a Fortitude saving<br />
throw (DC 15, +1 per previous check) or suffer 1d6 points of<br />
subdual damage and become fatigued (–2 to effective<br />
Strength and Dexterity scores, cannot run or charge). This<br />
check must be made every hour spent in this environment<br />
(here or area 24: areas 21–23 are even colder). The purple<br />
robes found in areas 8 or 19 protect the wearer from this<br />
cold completely.<br />
The alcoves are indeed 4 feet deep. The gelatinous substance<br />
is an organic preservative ensuring that the golems<br />
inside keep eternally fresh.<br />
Creatures: Two flesh golems, built by the doomdreamers<br />
themselves, attack anything that passes through this hallway<br />
not anointed in area 24. Each hides within one of the strange,<br />
green goo-filled alcoves.<br />
There used to be three golems, but one was destroyed in<br />
combat long ago.<br />
dFlesh Golems (2): hp 49, 53; see Monster Manual page 108.<br />
The flesh golems attack fearlessly, but do not leave this<br />
hallway.<br />
21. The Vestibule<br />
The area marked with a D on the map is an area of permanent<br />
deeper darkness. The central area is unlit, and light<br />
sources of any kind are dimmed, so that their effective<br />
radius is halved.<br />
It is very cold in this room, with only the center lit. In the<br />
middle of the lit area, a wide, ebony table with silver inlay,<br />
each of the four legs carved to look like a serpent, holds a<br />
huge iron horn, etched with images of fire, flood, windstorm,<br />
and earthquake. The north wall is partially covered<br />
by a folding screen of ebony, fashioned entirely from<br />
interlocking, three-inch triangles with an upside-down Y<br />
engraved within them.<br />
The ceiling here is vaulted, about 30 feet high in the center<br />
and 20 feet high at the east and west edges. The room is<br />
cold enough that unprotected characters (those not wearing<br />
winter weather gear or protected by an endure elements or<br />
similar spell) must make a Fortitude saving throw (DC 15,<br />
+1 per previous check) or suffer 1d6 points of subdual<br />
damage and become fatigued (–2 to effective Strength and<br />
Dexterity scores, cannot run or charge). This check must<br />
be made every 10 minutes spent in this environment (here<br />
or area 22: areas 20 and 24 are also cold, 23 is far colder).<br />
The purple robes found in areas 8 or 19 protect the wearer<br />
from this cold completely.<br />
This entire area is unholy, as described in the spell unhallow.<br />
In addition to the protection from good effect and the –4<br />
profane penalty on turn undead attempts (+4 to rebuke<br />
undead attempts), the unhallow forces all nonevil creatures<br />
entering the area to make a Will save (DC 23) or flee in<br />
cause fear, as the spell cause fear. This is a separate unhallow<br />
effect from the one in area 23. The cause fear spell affects<br />
only creatures with six or less hit dice. This probably<br />
means that it does not have any effect on the characters.<br />
DMs should keep in mind, however, the possible effect on<br />
animal companions, followers, familiars, and lower-level<br />
NPCs who may be with the party (people they have rescued,<br />
for example).<br />
The screen hides a set of three silver sliding switches,<br />
although they can only be perceived in the light of a torch of<br />
revealing. Each switch is about 3 inches long and 1 inch wide<br />
set into the black, purple-veined stone wall. All are currently<br />
in the “up” position.<br />
The horn is known as the Horn of the Eye, a religious<br />
relic of the cult of Tharizdun/Elder Elemental Eye. It is<br />
magical, but its powers are really only of note within a<br />
temple dedicated to the Dark God. To sound it takes great<br />
strength (Strength score minimum 14), and is taxing—the<br />
character blowing the horn suffers 1 point of temporary<br />
Constitution damage.<br />
Development: The “proper” thing to do in<br />
this room is to flip the first switch (the leftmost<br />
switch) down and then blow on the<br />
horn, after touching it with a master key (it<br />
makes no sound without first being activated<br />
in this way). Done properly, with the sounding<br />
of the horn, a black column about 6<br />
inches in diameter rises up to a height of 8<br />
feet, about 1 foot north of the edge of the<br />
darkness to the south, and about 3 feet west<br />
of the area to the east. The second switch<br />
should then be flipped, and the horn<br />
sounded again. This causes a similar column<br />
to rise about 1 foot north of the edge of the<br />
darkness to the south, and about 3 feet east of<br />
the area to the west.<br />
The third switch/sounding causes the area<br />
between the columns, about 32 feet across, to<br />
shimmer with a purple radiance, creating a<br />
veil of energy. Characters or objects passing<br />
through the veil appear in a circular chamber<br />
about 40 feet across. This is a one-way trip, as<br />
no purple veil exists on the other side. Characters<br />
attempting to stick a part of an object<br />
through to “test” or trying to stick their head<br />
through just to “peek” are automatically transported through<br />
the veil.<br />
If the horn is blown without the proper switch being<br />
flipped, the horn’s bellow turns into a terrible attack. All characters<br />
within 20 feet of the horn suffer 3d6 points of sonic<br />
damage (Reflex save DC 20 half ). This damage is caused each<br />
time, so experimentation can be dangerous.<br />
Drawbacks to Demonic<br />
Additions<br />
Characters of a good alignment<br />
with a demonic addition<br />
must make a Will save (DC 15)<br />
every day or suffer 1d3 points<br />
of temporary Wisdom damage<br />
as the experience drives them<br />
slowly mad.<br />
Characters of a nonevil<br />
alignment must make a Will<br />
save (DC 15) each day or they<br />
succumb to temptation to perform<br />
an evil act chosen by the<br />
DM. This may result (DM’s<br />
discretion) in an ultimate<br />
alignment change.<br />
When characters with<br />
demonic additions deal with<br />
nonevil NPCs, a –6 circumstance<br />
penalty is applied on all<br />
Charisma-based checks (Diplomacy,<br />
Bluff, and so on).<br />
115
CHAPTER 6: THE INNER AND OUTER FANES<br />
116<br />
Anyone in areas 18–29 can hear a sounding of the horn.<br />
This alerts Hedrack, Thrommel, and others, but none come<br />
here to fight. They believe that their deity can properly<br />
deal with any interlopers (although they might still prepare<br />
an ambush in area 20 in case the intruders come back<br />
that way).<br />
Treasure: While the huge horn weighs 150 pounds and<br />
only functions properly within this area, it is still worth<br />
about 500 gp due to workmanship.<br />
Ad Hoc XP Adjustment: Because of the unhallow spell,<br />
award an additional 10% experience points for all creatures<br />
defeated in this area.<br />
21A. The Black Cyst (not on the map)<br />
Beyond the purple veil, the rounded black walls of an<br />
entirely different room stretch out around you. It is completely<br />
black here, yet you can see the size and features of<br />
the room—as if here you can see shades of darkness. A<br />
dark, oblong orb, like an egg, rests atop a long black<br />
block. The orb is shrouded in swirling mist.<br />
Suddenly, a rumbling bass voice erupts from the darkness<br />
around you:<br />
“Once more mortals trespass within the Black Cyst.<br />
Kneel before the essence of Tharizdun and accept his<br />
gifts. Mock the Dark God and face annihilation.”<br />
The room is cold enough that unprotected characters (those<br />
not wearing winter weather gear or protected by an endure<br />
elements or similar spell) must make a Fortitude saving throw<br />
(DC 15, +1 per previous check) or suffer 1d6 points of subdual<br />
damage and become fatigued (–2 to effective Strength<br />
and Dexterity scores, cannot run or charge). This check must<br />
be made every 10 minutes spent in this environment (here or<br />
area 22: areas 20 and 24 are also cold, 23 is far colder). The<br />
purple robes found in areas 8 or 19 protect the wearer from<br />
this cold completely.<br />
After the voice speaks, a torch of revealing sheds light in<br />
the cyst as if it were a normal torch. No other source of illumination<br />
functions, although characters can see the size<br />
and shape of the room regardless. In this light, the name<br />
“Tharizdun” can be seen carved in the Common tongue on<br />
the block.<br />
Development: Anyone who kneels before the block and<br />
speaks the name Tharizdun can freely touch (or take) the egg<br />
and the block. Those who touch the egg or block without<br />
doing so must make a Fortitude saving throw (DC 20) or be<br />
annihilated as if struck by a sphere of annihilation. Even those<br />
who make their save suffer 1d6 points of temporary Strength<br />
and Constitution damage.<br />
Egg: The egg is the Orb of Silver Death, an artifact (see<br />
Appendix 1). If touched, a deep, booming voice says:<br />
“The Orb of Oblivion has already been taken to prepare for<br />
my second coming. Take this instead and serve me.”<br />
The Orb of Oblivion is another artifact, now found in the Fire<br />
Node (see area 9 in the Recovered temple section).<br />
Block: The block is solid stone, but a secret compartment is<br />
hidden on the left side (Search DC 25, only possible in the<br />
light of a torch of revealing). Within this secret cache is a rod of<br />
force and rings of force armor (see Appendix 1). The cult has designated<br />
that the Champion of Elemental Evil use these items,<br />
sacred to Tharizdun, when he or she is found. Anyone within<br />
the Outer or Inner Fane immediately attacks a character seen<br />
with them (since the character is obviously a thief, for all<br />
know that the Champion has not yet been found).<br />
Black Thurible: Twirling an incense-laden black thurible in<br />
this area causes everyone present to be teleported to area 23,<br />
within the black circle.<br />
22. Exit (EL 8)<br />
A long hallway, 20 feet wide, is blocked by a series of six<br />
translucent, lilac-colored walls. In front of each wall is a<br />
black pedestal topped with a small gray statue of a squat,<br />
obese, grinning demon.<br />
The hallway is cold enough that unprotected characters<br />
(those not wearing winter weather gear or protected by an<br />
endure elements or similar spell) must make a Fortitude saving<br />
throw (DC 15, +1 per previous check) or suffer 1d6 points of<br />
subdual damage and become fatigued (–2 to effective<br />
Strength and Dexterity scores, cannot run or charge). This<br />
check must be made every 10 minutes spent in this environment<br />
(here or area 21: areas 20 and 24 are also cold, 23 is far<br />
colder). The purple robes found in areas 8 or 19 protect the<br />
wearer from this cold completely.<br />
This hallway gives access to the door leading to the Inner<br />
Fane. Moving down the hallway is difficult because of the lilaccolored<br />
walls. These are essentially walls of force. Similarly colored<br />
walls of force lie behind the purple-veined black walls that<br />
make up the walls, floors, and ceilings of the hallway as well.<br />
When a character approaches—that is, gets within 5 feet<br />
of—a wall (and therefore a statue), the statue asks a question<br />
in Common. Although these walls of force can be disintegrated<br />
normally, a character giving the correct answer to the question<br />
can also step through the wall as though it does not<br />
exist. The questions are, in order:<br />
1. Who?<br />
2. What?<br />
3. Where?<br />
4. Why?<br />
5. When?<br />
6. Who?<br />
If a character within 5 feet of the statue does not give a correct<br />
answer within 2 rounds, she is immediately teleported<br />
into area 23, inside the black circle.<br />
The demons’ questions are shortened versions of longer,<br />
more specific questions. Those questions and the proper<br />
answers are, in order:<br />
1. Q: Who are you?<br />
A: The character’s name.<br />
2. Q: What do you bring before me?<br />
A: Whatever the character is holding in his or her hand(s).<br />
“Nothing” may be an appropriate answer.<br />
3. Q: Where are you now?<br />
A: “The Outer Fane” or “The Temple to Tharizdun.”<br />
4. Q: Why have you come here?<br />
A: This is open to interpretation, but should be truthful<br />
and specific to that character. “To destroy the cult,” or “To get<br />
treasure,” could be appropriate answers.<br />
5. Q: When shall I be free?<br />
A: This is up to the character, but should be truthful and<br />
specific to that character. A cult member would say “Soon,”<br />
while an enemy might say “Never!”<br />
6. Q: Who am I?<br />
A: “Tharizdun.”
CHAPTER 6: THE INNER AND OUTER FANES<br />
While the answers to 1, 2, 3, and 6 are specific, the answers to<br />
4 and 5 should be correct from the viewpoint of the character.<br />
If a character answers 5 with “tomorrow,” for example,<br />
this is incorrect unless he honestly believes it.<br />
The door is unlocked.<br />
Ad Hoc XP Adjustment: Award XP for getting past this<br />
barrier as if it were CR 8.<br />
23. The Greater Temple<br />
(EL variable)<br />
Characters must make two saving throws (one for the unhallow<br />
effect, and one for the development involving the statues)<br />
just for being in this room, and possibly more if they<br />
touch anything. Another immediate save might be necessary<br />
due to the cold.<br />
The cold in this room is incredible—but you realize it is<br />
no normal drop in temperature, but rather a chill that<br />
reaches into the soul.<br />
A 40-foot-wide hallway extends north toward<br />
darkness, its sides flanked by a deep purple stone<br />
railing that appears to be made of writhing serpents,<br />
worms or tentacles. The railings both extend 40 feet<br />
into the hexagonal portion of the room, the ends each<br />
bearing black iron cressets that could hold small coneshaped<br />
inserts.<br />
In the southern portion of the room, six cantilevers on<br />
the east and west walls support small statues of scowling<br />
demons, each subtly different from the others. A square<br />
plate of violet stone, 20 feet across, is set into the floor at<br />
the point where the railings stop. A black circle is circumscribed<br />
within the plate.<br />
A short flight of steps leads up to a raised platform in<br />
the southernmost end of the room. The platform and<br />
steps are made of gray stone with black and purple flecks.<br />
Atop the platform is a black altar, a lavender altar cloth<br />
draped over it, and two black tallow candles set in fixtures<br />
at either end.<br />
It is extremely cold in this room. No normal gear or even<br />
spells can protect anyone from this magical, soul-numbing<br />
chill. Anyone not wearing a purple robe found in area 8 or<br />
19 suffers 1d4 points of damage per minute spent in this<br />
chamber. Touching a metal object (unless protected by the<br />
long sleeves of the purple robes) inflicts an additional 2d4<br />
points of damage. Wearing metal armor inflicts 1d4 points of<br />
damage on the first round and 2d4 points of damage per<br />
round thereafter. The purple robes protect a wearer completely<br />
from this cold.<br />
This entire area is unholy, as described in the spell unhallow.<br />
In addition to the protection from good effect and the –4<br />
profane penalty on turn undead attempts (+4 to rebuke<br />
undead attempts), the unhallow forces all nonevil creatures<br />
entering the area to make a Will save (DC 23) or flee in fear,<br />
as the spell cause fear. This is a separate unhallow effect from<br />
the one in area 21. The cause fear spell affects only creatures<br />
with six or less hit dice. This probably means that it does not<br />
have any effect on the characters. DMs should keep in mind,<br />
however, the possible effect on animal companions, followers,<br />
familiars, and lower-level NPCs who may be with the<br />
party (people they have rescued, for example).<br />
117
CHAPTER 6: THE INNER AND OUTER FANES<br />
118<br />
Creatures (EL 7): After 3 rounds in the temple, characters<br />
should make Spot checks (DC 15); success means that they<br />
notice a stirring in the darkness between areas 21 and 23.<br />
Two hounds of darkness come out and attack any goodaligned<br />
characters (assume that they can use detect good at<br />
will). If no good-aligned characters are present, they simply<br />
sit, dark eyes glaring at those in the temple.<br />
dHounds of Darkness (treat as shadow mastiffs) (2):<br />
hp 28, 35; see Monster Manual page 162.<br />
Developments: Several developments are possible here.<br />
Railing (CR 4): Touching the Railing of Temptation is dangerous.<br />
Those not already devoted to Tharizdun who do so<br />
must make a Will saving throw (DC 15). If they succeed, they<br />
merely feel an odd sensation, both pleasurable and disturbing<br />
at the same time. If they fail, they feel compelled to touch<br />
it again and experience the dark pleasure. Later, these same<br />
characters experience the following:<br />
• The character prefers darkness to light, suffering a –1<br />
penalty on all attacks, saves, and checks in sunlight.<br />
• Strange, evil desires begin to flood the character’s mind.<br />
The DM should tell the player privately when his character<br />
is tempted to do something evil—usually in times of<br />
quiet. A successful Will save (DC 15) each time this occurs<br />
allows the character to resist the temptation that time.<br />
• In times of great stress, the character calls upon<br />
Tharizdun for aid, the name rising unbidden to his or<br />
her lips. This accomplishes nothing, but it may surprise<br />
the character’s comrades.<br />
Statues (CR 5): While in the octagon-shaped portion of the<br />
temple, characters not wearing an obex symbol (embroidered<br />
obexes are on the purple robes of Tharizdun—but that is not<br />
enough) must make a Will saving throw (DC 17) or they see<br />
the demonic statues laughing and mocking them. Inflicting<br />
any harm upon these statues (whether the first save attempt<br />
failed or not) forces the transgressor to make a Fortitude save<br />
(DC 20) to avoid a horrible weakening effect that deals 2d6<br />
temporary Strength damage. Worse, the character who<br />
missed the Will save continues to feel that inanimate objects<br />
are mocking him even after he leaves this place. He suffers<br />
1d3 points of temporary Wisdom damage every day until a<br />
greater restoration or heal spell is cast upon him.<br />
Black Circle: Stepping into the black circle with a tentacle<br />
rod (see Appendix 1) grants a character the ability to immediately<br />
transport himself to Level 1 of the Inner Fane. The<br />
Black Circle is also where a character appears after leaving<br />
the Black Cyst (area 21A) or failing a question in area 22.<br />
Remember that each new entry requires new saving throws<br />
versus the cause fear and the madness of the mocking statues.<br />
The Black Circle is also where Hedrack tests aspirants for<br />
the Champion of Elemental Evil. The test consists of a candidate<br />
standing in the circle and saying, “Dread Tharizdun,<br />
power of the Elder Elemental Eye and master of all destructive<br />
forces, I am the Champion of Elemental Evil and am<br />
ready to carry out your wishes.” If the candidate is false, black<br />
fire erupts around him inflicting 6d6 points of cold damage<br />
and striking him blind (no save).<br />
Altar: CR 10. In the light of a torch of revealing, a receptacle<br />
atop the altar is visible—an indentation just the right size for<br />
the Orb of Silver Death (or the Orb of Oblivion). If the characters<br />
place the Orb here, a booming voice resonates throughout<br />
the temple:<br />
“Find my champion, and send him into the heart of the<br />
moons—the nodes there, he can loose my children upon<br />
the world, and they in turn can free me.”<br />
At this point, three black tentacles with auras of violet energy<br />
around them come out of both sides of the altar. These tentacles<br />
react in one of three ways:<br />
If the Orb is removed and a sacrifice (an intelligent, living<br />
creature or a magic item worth at least 1,000 gp) is placed<br />
upon the altar, the tentacles grab it, tear it to shreds, and<br />
recede back into the altar. The character holding the Orb is<br />
granted a limited wish. This can be done only once in a given<br />
week. The Orb, if left on the altar, can be destroyed in this<br />
way, but no limited wish is granted.<br />
If no sacrifice is offered, but someone in the temple says,<br />
“Tharizdun is all powerful,” the tentacles lie upon the altar<br />
and disintegrate, leaving a magic item worth 1,000 gp or less<br />
in their place. This can be done only once in a given week.<br />
If no sacrifice is offered, the tentacles attack immediately<br />
(+5 bonus on initiative), making +20 grappling attacks up to<br />
10 feet away, inflicting 1d6 points of damage and 1d3 points<br />
of temporary Wisdom damage per round (a Fortitude save<br />
DC 20 negates the ability score damage). The tentacles are<br />
immune to spells (except disintegrate), have 20 hp each, AC<br />
20, and a Strength score of 20 (+5 bonus).<br />
Incense from a black thurible drives the tentacles away, back<br />
into the altar.<br />
Treasure: Hidden under the altar (which slides to the<br />
east—a fact discovered by making a Search check against<br />
DC 25) is a treasure trove: 333 gems sacred to Tharizdun<br />
arranged carefully in a pattern resembling an obex. Three<br />
hundred of these gems are worth 10 gp. Thirty of them are<br />
worth 100 gp and three of them are worth 1,000 gp each.<br />
They are of a variety of types, but all are black or some<br />
shade of purple.<br />
Ad Hoc XP Adjustment: Because of the unhallow spell,<br />
award an additional 10% experience points for all creatures<br />
defeated in this area.<br />
24. Unholy Font<br />
The only object in this room is a black stone font, filled<br />
with clear water. Strange runes ring the rounded edge of<br />
the font. Each wall has a single purple tapestry with a<br />
black symbol upon it: an inverted, two-step pyramid.<br />
As in other areas of the unholy temple, characters in<br />
this area feel a soul-numbing cold.<br />
The room is cold enough that unprotected characters<br />
(those not wearing winter weather gear or protected by an<br />
endure elements or similar spell) must make a Fortitude<br />
saving throw (DC 15, +1 per previous check) or suffer 1d6<br />
points of subdual damage and become fatigued (–2 to effective<br />
Strength and Dexterity scores, cannot run or charge).<br />
This check must be made every hour spent in this environment<br />
(here or area 20: areas 21–23 are even colder). The<br />
purple robes found in areas 8 or 19 protect the wearer from<br />
this cold completely.<br />
The runes on the font say in Infernal, “The Black Tears of<br />
Tharizdun. Be Anointed and Walk Unhindered.” The first<br />
time anyone touches this water, they suffer the effect of a<br />
bane spell for 2d6 minutes. If they actually drink or even taste<br />
the water, the effect lasts for 2d6 hours.<br />
The second time, and all times after that anyone touches<br />
the water, assuming the bane spell is no longer in effect, they<br />
are granted the effects of a bless spell for 2d6 minutes. A<br />
person can gain this benefit only once per day.
CHAPTER 6: THE INNER AND OUTER FANES<br />
Development: Anointed characters (those who have at<br />
least touched the water) are not attacked by the golems in<br />
area 20.<br />
25. The Dire Hall<br />
The walls of this hallway are made of a dark gray stone and<br />
display images in relief showing horrible scenes of human<br />
sacrifice, carnage, rape, bestiality, and necrophilia. The<br />
door to the west is incorporated into the terrible visages,<br />
with a relief of a window in the door overlooking a scene<br />
of mass slaughter beyond. The spiral staircase to the<br />
north goes down. It is made of black iron arms linked<br />
together, one holding the next, in an intricate yet disturbing<br />
pattern.<br />
26. The Infernal Device<br />
The wrought-iron staircase leads 100 feet down into a<br />
dismal room. The place is filled with a wheezing/screeching<br />
sound that sets one’s teeth on edge. The air smells of burning<br />
sulfur and leaves a greasy feel on gear and skin.<br />
In the northernmost end of the room, a huge mass of<br />
metal tubes, gears, arms, and wheels turn and move. At<br />
the front of this machine, a wide iron plate fashioned<br />
into the form of a hideous face grins with a wide, open<br />
mouth. The innards of the huge device are visible.<br />
This is a strange experiment conducted by the doomdreamers.<br />
The device is part machine, part demon, infused<br />
with fiendish essence, and powered by evil magic. It is used<br />
to graft demonic additions onto the bodies of willing or<br />
unwilling victims. It has proven to be a success.<br />
Development: If anyone comes within 5 feet of the<br />
open mouth, they must make a Reflex saving throw (DC 15)<br />
or be grabbed by a tonguelike appendage and dragged into<br />
the machine.<br />
Within the bowels of the machine, the character’s body is<br />
sliced, burned, punctured, and torn. These operations inflict<br />
6d6 points of damage on the victim in 1 round. In the second<br />
round (if the character is still alive), demonic flesh and<br />
essence is added to the victim’s body, restoring 5d6 points of<br />
damage. On the third round, the character is spit out, with a<br />
new demonic addition (roll below).<br />
01–25 Left arm<br />
26–55 Right arm<br />
56–70 Left leg<br />
71–85 Right leg<br />
86–100 Familiar<br />
Left Arm: A demonic left arm is long and flexible like a tendril,<br />
with a crude, three-fingered claw at the end. If empty, it<br />
can make unarmed attacks against the character’s enemies<br />
with the character’s best attack bonus, inflicting 1d4 points of<br />
damage plus the character’s Strength bonus. Weapons used in<br />
the hand suffer a –2 attack penalty. Once per day, it can cast<br />
magic missile as a 5th-level wizard.<br />
Right Arm: A demonic right arm is muscular and sinewy,<br />
with a large, clawed hand. When using the arm, the character’s<br />
Strength is treated as four points higher. It can make<br />
unarmed attacks against the character’s enemies with the<br />
character’s best attack bonus (including the new Strength<br />
119
CHAPTER 6: THE INNER AND OUTER FANES<br />
120<br />
bonus), inflicting 1d6 points of damage plus the character’s<br />
(adjusted) Strength bonus. Wielding a weapon in this hand is<br />
at normal attack bonuses, plus the character’s adjusted<br />
Strength modifier.<br />
Left Leg: The demonic left leg is thick and muscular. A character<br />
gains a +2 bonus to his Constitution score with this leg.<br />
Right Leg: Long and agile, the demonic right leg increases<br />
the character’s speed by +10 when not wearing heavy armor<br />
or carrying a heavy load. Further, the character gains a +5<br />
competence bonus on Climb and Jump checks.<br />
Familiar: Grafted onto the shoulder, back, stomach, or<br />
hand of a character, the demonic familiar is a small face with<br />
an evil expression. This face has Intelligence 12, Wisdom 9,<br />
and Charisma 6. If the character is a wizard, the face can<br />
teach him one new spell for every spell level he knows. If the<br />
character is a spellcaster of any kind, the familiar increases<br />
his effective spell-related ability score by 2 (for bonus spells<br />
purposes only).<br />
The machine does not take a character more than once.<br />
Removing a demonic addition requires severing the limb<br />
(inflicting 6d6 points of damage). To regrow the original<br />
limb requires a regeneration spell.<br />
The machine has hardness 10, 200 hp, and a break DC of<br />
35. A victim inside the machine can attack with a light<br />
weapon, or can cast spells if he makes a Concentration check<br />
based on the damage suffered. It can take two victims, and<br />
only victims of size Large or smaller.<br />
27. The Vampire (EL 14)<br />
A long-dead corpse in the northeast corner hangs from<br />
chains, old plate armor bits clinging to dried flesh and<br />
brittle bone, with a symbol of Pelor hanging around its<br />
neck. Other than that, the room appears empty.<br />
This room is unholy, as described in the unhallow spell. In<br />
addition to the protection from good effect and the –4 profane<br />
penalty on turn undead attempts (+4 to rebuke undead<br />
attempts), the unhallow has placed a silence spell in effect for<br />
the whole room.<br />
Near the corpse, on the east wall, a secret button exists in<br />
the stone (Search DC 23 to find). When the secret button is<br />
pushed, the entire center 20-foot-by-20-foot portion of the<br />
floor recesses about 1 foot and then slides south, revealing a<br />
pit 13 feet deep with Thrommel’s coffin in it.<br />
Creatures: Thrommel, a 9th-level blackguard vampire,<br />
resides here. Once he was Prince Thrommel, Grand Marshall<br />
of Furyondy and Provost of Veluna. (These are countries to<br />
the north of Hommlet.) The forces of the Temple of Elemental<br />
Evil captured him when he fought against them in the<br />
Battle of Emridy Meadows. Kept as a prisoner in the Temple<br />
of Elemental Evil for a long time, he was eventually brought<br />
here where he was infected with vampirism and turned to<br />
evil. He lost his paladin standing and became a blackguard.<br />
Thrommel has a fiendish bat servant.<br />
Now, Thrommel is one of the more powerful servants in<br />
the entire cult of Tharizdun. The doomdreamers are still not<br />
sure how much they can rely on him, and would prefer to<br />
keep him under observation.<br />
A Knowledge (nobility and royalty) check (DC 20) allows a<br />
character to recognize Thrommel.<br />
dThrommel: Vampiric human Pal (fallen)3/Blk9; hp 83;<br />
see Appendix 3.<br />
dJolana, Fiendish Bat Servant: hp 10; see Appendix 3.<br />
Tactics: Thrommel can travel up from his coffin in<br />
gaseous form; he does not need to open the sliding floor. If<br />
he hears movement above (Listen +13), he casts silenced bull’s<br />
strength and protection from elements (fire) and then moves to<br />
attack. He attacks anyone he does not recognize, or who does<br />
not accompany someone he recognizes.<br />
If it appears that intruders are about to move into area 28,<br />
he waits to attack them there, while the trap occupies them<br />
(of course, that takes him out of the unholy area). If he hears<br />
that intruders have already fallen victim to that trap without<br />
yet entering this room, he investigates in gaseous form and<br />
then attacks.<br />
Treasure: Thrommel’s coffin contains the following: a<br />
gold belt (worth 500 gp) with a +2 dagger in a scabbard, a<br />
necklace and amulet (worth 2,000 gp) with a matching ring<br />
(worth 250 gp). The amulet and ring mark him as the Prince<br />
of Furyondy. A successful Knowledge (nobility and royalty)<br />
check (DC 15) recognizes them as such.<br />
Development: Unless presented with an artifact of his old<br />
life or some such, Thrommel cannot be turned back to the<br />
path of good. If Thrommel is destroyed and then resurrected,<br />
he is free from vampirism and can regain his paladinhood,<br />
likely after years of atonement.<br />
Bringing his remains back to Furyondy or Veluna earns<br />
the eternal gratitude (and probably about 10,000 gp worth<br />
of rewards, as well as knighthood) from the nobility<br />
there, particularly the woman he was pledged to marry<br />
long ago, Jolene.<br />
Ad Hoc XP Adjustment: Because of the unhallow spell,<br />
award an additional 10% experience points for all creatures<br />
defeated in this area.<br />
28. Tentacle Trap (EL 6)<br />
A circular plate of glass has been set into the center of<br />
the floor. It is 5 feet across. A red pentagram is painted<br />
onto the glass, and all that can be seen through the glass<br />
is darkness.<br />
Trap: If this room is entered from any of the three doors<br />
(without saying the password, “The Dark God is Watching”),<br />
a greater glyph of warding summons ten tentacles of<br />
black energy up from beneath the glass. Attacking with<br />
surprise and a +5 bonus on initiative, the tentacles each<br />
make grappling attacks with a reach of 15 feet and a +10<br />
attack bonus, inflicting 1d6 points of real damage. The tentacles<br />
are immune to spells (except disintegrate), have 10 hp<br />
each, AC 16, and a Strength score of 19 (+4 bonus).<br />
The tentacles attack anything in the room.<br />
Incense from a black thurible drives the tentacles back into<br />
the floor.<br />
aTentacle Glyph: CR 6; ten +10 grapples, 15-ft. reach<br />
(1d6); Search (DC 31); Disable Device (DC 31)<br />
29. Storage<br />
This room is full of crates and a few barrels. A wooden<br />
table is covered with tools of all sorts and even a few<br />
weapons. A large coil of silk rope sits next to the<br />
table, and tools and implements hang from hooks on<br />
the wall.<br />
The rope is 200 feet long. The weapons include three daggers<br />
and a mace, as well as 200 arrows and 100 crossbow bolts.
CHAPTER 6: THE INNER AND OUTER FANES<br />
30. Mistress Naquent’s Chamber<br />
(EL 9)<br />
This room has a sunken area 10 feet across in the middle,<br />
filled with pillows and blankets. Three chests and a<br />
wardrobe are pushed against the south wall, while the<br />
other walls are covered in dark violet curtains with black<br />
obexes embroidered upon them.<br />
In order to bolster her servant, Naquent has cast unhallow in<br />
her room. In addition to the protection from good effect and the<br />
–4 profane penalty on turn undead attempts (+4 to rebuke<br />
undead attempts), the unhallow forces all nonevil creatures<br />
entering the area to make a Will save (DC 22) or fall victim to<br />
a bane spell.<br />
Creatures: Naquent once took a slave as a “lover” and then<br />
mistreated him terribly. When he died, he came back as a spectre<br />
to exact revenge, but then Naquent used her dark powers to<br />
master him a second time. Now she uses him as a guardian. He<br />
attacks anyone other than Naquent that comes into this room.<br />
dSpectre(1): hp 45; see Monster Manual page 169.<br />
Traps: The chests and the wardrobe are each trapped with<br />
a glyph of warding that inflicts 5d8 points of cold damage. In<br />
addition, all the chests are locked (DC 30 to open).<br />
aGlyphs of Warding (3): CR 3; 5-ft. burst of cold (5d8); Reflex<br />
save DC 19 half; Search (DC 28); Disable Device (DC 28).<br />
Treasure: The wardrobe and two of the chests contain<br />
only clothes, gear, and personal effects. The third chest<br />
contains a pair of boots of dancing, two potions of protection<br />
from elements (fire and acid), a flask of acid, a flask of<br />
alchemist’s fire, a sunrod, a masterwork Large shield, and a<br />
decorative box with two 10-gp gold-plated rings, a 50-gp<br />
silver ring with a small jewel, two 50-gp gold bracelets, a<br />
pair of pearl earrings (worth 200 gp for the pair), a necklace<br />
of gold and obsidian (worth 500 gp), and a necklace of gold<br />
and amethysts (worth 800 gp).<br />
Ad Hoc XP Adjustment: Because of the unhallow spell,<br />
award an additional 10% experience points for all creatures<br />
defeated in this area.<br />
31. Sitting Room<br />
A large reddish-purple carpet covers the floor. Couches,<br />
chairs, and small tables furnish this hall, with two iron<br />
chandeliers holding candles above the whole room, illuminating<br />
it.<br />
A book lies on one of the chairs entitled “Dark Juices of<br />
the Mind” and details distilling drugs and elixirs from the<br />
human brain.<br />
32. Prison Complex (EL 11)<br />
This stark chamber has only a large black iron lever set<br />
into the middle of the floor, standing about 4 feet high.<br />
Around the base of the lever, a 1-foot-diameter dial can be<br />
adjusted to point to any of twelve numbers. Just behind<br />
and to the right and the left of the lever, two 10-foot<br />
circles are inscribed into the floor and filled with silver.<br />
The lever and dial control a teleporter that brings prisoners<br />
up from the room below (marked 32A on the map, about 100<br />
feet below). Twelve forcecage cells are in area 32A, one 10-foot<br />
cube in every 20-foot square. When something is placed in<br />
the right-hand square and the lever is pulled, it is teleported<br />
into the cage corresponding to the number currently on the<br />
dial. If nothing is placed in the circle, and the lever is pulled,<br />
121
CHAPTER 6: THE INNER AND OUTER FANES<br />
122<br />
the contents of the cell that corresponds to the number currently<br />
on the dial appear in the circle.<br />
A Search (DC 15) check on the dial indicates a blank space<br />
that it can point to. If the dial is set to that space and the lever<br />
is pulled, anything in the left circle is teleported into area<br />
32A, but not into one of the cells.<br />
Area 32A has an iron lever on the east wall. When pulled,<br />
the creature pulling the lever appears in the left circle of area<br />
32 next to the lever.<br />
The cells contain the following:<br />
1. Empty<br />
2. An azer<br />
3. Empty<br />
4. Vister, an elf paladin<br />
5. Empty<br />
6. Empty<br />
7. A troll<br />
8. Empty<br />
9. A lammasu<br />
10. Empty<br />
11. Empty<br />
12. Athemal, a halfling commoner<br />
Creatures: An annis hag with five levels of ranger named<br />
Daagra is in charge of the Outer Fane’s prison. It is her job to<br />
feed them and keep them alive. She attacks anyone who<br />
might free her prisoners without direct orders from Hedrack<br />
or one of the doomdreamers.<br />
dDaagra, Annis Rgr5: hp 83; see Appendix 3.<br />
A number of prisoners are trapped in the forcecages in<br />
the room below. Since these cages are transparent, all the<br />
prisoners know that the others are there—if Vister is freed,<br />
for example (see below), she encourages her rescuers to<br />
free the halfling and the lammasu as well (she’s unsure of<br />
the others).<br />
An azer named Reunoux is a prisoner, captured when it<br />
came to this plane to investigate the corruption of fire elementals.<br />
If freed, he helps his rescuers as best he can, but it would<br />
probably be for the best if he were escorted out of the Temple<br />
eventually, so that he can find a way back to his plane in safety.<br />
He can tell his rescuers this: The forces of evil elementals are<br />
stirring. The Cult of the Elder Elemental Eye is drawing power<br />
into the Fire Elemental Node once again (and he can even<br />
explain what that is—see the Introduction as well as Part 3 and<br />
the Fire Node). Lastly, he tells them that dread Imix, the Elemental<br />
Prince of Evil Fire, is involved.<br />
dReunoux: Azer; hp 11; see Monster Manual page 22.<br />
Vister is an elf paladin. She was investigating reports of an<br />
evil cult and eventually wound up here. She knows the basics<br />
of the Temple organization (both physically and its hierarchy)<br />
and shares this information. In fact, assuming her saviors<br />
are not evil and are interested in fighting against the<br />
forces of the Temple further, she would like to join them.<br />
dVister: Female elf Pal7; hp 50; see Appendix 3.<br />
An insane troll is held in one of the cells. It attacks anything<br />
within reach if released.<br />
dTroll: hp 70; see Monster Manual page 180.<br />
A lammasu named Maluccus is also a prisoner, captured<br />
when it was found spying on the Temple. Maluccus has been<br />
kept drugged so that he cannot use his spells or abilities, but<br />
if freed, he is released from that stupor. He uses his spells and<br />
abilities to aid his rescuers the best he can, and then uses<br />
dimension door to escape the Temple area and report his findings<br />
to greater members of the celestial hierarchy.<br />
dMaluccus: Lammasu; hp 60; see Monster Manual page 127.<br />
He has these spells prepared (6/6/5/4/2):<br />
0—create water, detect magic, light, mending, purify food and<br />
drink, resistance; 1st—bless, comprehend languages, cure light<br />
wounds, doom, endure elements, invisibility to undead; 2nd—aid,<br />
bull’s strength, consecrate, endurance, hold person; 3rd—cure serious<br />
wounds, dispel magic, invisibility purge, searing light; 4th—holy<br />
smite, neutralize poison.<br />
Athemal, a halfling commoner, was kidnapped by the gargoyles<br />
in area 85 of the mines, but transferred here when a<br />
new sacrifice for the temple was needed. In the meantime, he<br />
was fed through the infernal device in area 26, which gave<br />
him a demonic left arm. He’s only had it for two days, but he’s<br />
already lost 3 points of Wisdom (and must make another<br />
Will saving throw (DC 15) each day to avoid another 1d3<br />
temporary Wisdom damage). Athemal knows what his fate<br />
was to be, and is grateful to anyone who rescues him. A baker<br />
by trade, he does what he can to defend himself, but really<br />
does not stand a chance and should be helped back to his<br />
home—a nearby caravan of traveling halflings.<br />
dAthemal: Male halfling Com2; hp 8; see Appendix 3.<br />
Tactics: Daagra calls up the troll in cell 7 (this takes a full<br />
round) and then keeps her distance from it while it attacks<br />
her foes.<br />
If she needs to flee, Daagra uses the teleportation system<br />
here to go to area 32A, and then alters her form to look like a<br />
human prisoner dressed in rags (and possibly healing herself<br />
). Then she teleports back up to area 32, hoping to fool<br />
her foes into thinking that she is an escaped prisoner, freed<br />
by their actions. Once able, she attacks with surprise.<br />
Development: The annis goes to area 33 to summon elementals<br />
for her to command if she is in need of help and<br />
knows that they have not been summoned today.<br />
33. The Chamber of Dark<br />
Elementalism (EL 9)<br />
Arranged on the floor, in tile mosaic, someone has placed<br />
a brown triangle symbol, a white circle, a blue-green<br />
square, and a red lozenge.<br />
Entering this room invokes a powerful summoning spell<br />
(four actually) that calls forth elementals. This effect works<br />
only once per day.<br />
Creatures: Four Large neutral evil elementals—one of<br />
each type—appear in this room over their respective symbols.<br />
They are all evil elementals and, while in this chamber,<br />
can use detect evil. If an intruder is not evil, they attack. They<br />
accept the commands of any evil character, although a<br />
higher-level evil character’s commands always supercede<br />
orders from lower-level evil creatures.<br />
dLarge Fire Elemental: hp 60; see Monster Manual<br />
page 83.<br />
dLarge Earth Elemental: hp 68; see Monster Manual<br />
page 82.<br />
dLarge Water Elemental: hp 68; see Monster Manual<br />
page 84.<br />
dLarge Air Elemental: hp 60; see Monster Manual page 81.<br />
34. Guardians (EL 9)<br />
This octagonal chamber rises up high into the ridge, the<br />
ceiling out of sight.
CHAPTER 6: THE INNER AND OUTER FANES<br />
The ceiling is 80 feet above, with an iron perch built into the<br />
diagonal walls.<br />
Creatures: Four adult arrowhawks nest in the upper portion<br />
of this room. They swoop down to attack anyone not<br />
wearing Temple symbols or garb.<br />
dAdult Arrowhawks (4): hp 48, 32, 40, 38; see Monster<br />
Manual page 19.<br />
35. Slave Pen<br />
The door to this room does not open normally. Only by<br />
touching a Temple symbol to the door can it be opened.<br />
This stark, dark chamber stinks of waste and toil. A few<br />
bones are on the floor, two buckets are in one corner, and<br />
a broom and mop are in another.<br />
Creatures: Four humans, two dwarves, and an orc live<br />
here. They are all slaves and have been for years. They are<br />
forced to clean, serve in the kitchen, and do other basic<br />
duties. They are mistreated and ill fed. Their tongues have<br />
been cut out so that they cannot speak.<br />
dHuman Com1 (4): hp 3 each (noncombatants).<br />
dDwarf Com1 (2): hp 4 each (noncombatants).<br />
dOrc: hp 3; AC 10 (no armor or weapons); see Monster<br />
Manual page 146.<br />
36. Air Door (EL 9)<br />
Use this description when the PCs reach the outside the<br />
door. Remember that only someone with a greater key of air or<br />
blessed by such a key in the Air Temple can open this door.<br />
The bridge ends at a tall black door bound in a silvery metal.<br />
A large white circle is carved into the door in relief, edged<br />
with silver. The door is 15 feet high and wide. No handle,<br />
hinges or other conventional door trappings are visible.<br />
If a greater key of air or someone blessed by that key in the Air<br />
Temple (area 73) touches the door, it slides into the floor<br />
beneath it. This takes 1 round, and it stays down for 3 rounds<br />
or for as long as the opener is within 5 feet of the door—<br />
whichever is longer.<br />
The corridor runs north and south from the large black<br />
door to a staircase headed up. The entire hall is of stone<br />
painted white and blue, with dark blue and almost black<br />
in spots, giving the impression of a stormy sky.<br />
Two small rooms, one to the east and one to the west, lie off<br />
this hallway. The room to the west is completely empty. The<br />
room to the east appears completely empty but is actually<br />
occupied by an pair of invisible stalkers.<br />
Creatures: The two invisible stalkers in the eastern side<br />
room have been commanded to follow any creatures coming<br />
through the door and observe them. If they overhear or see<br />
anything that suggests that the intruder might be a threat,<br />
they fly to Hedrack to alert him.<br />
dInvisible Stalkers (2): hp 60, 49; see Monster Manual<br />
page 123.<br />
Development: Hedrack might command the stalkers to<br />
find the current location of intruders and slay them (possibly<br />
with the assassins in area 16).<br />
37. Guard Room (EL 7)<br />
In the middle of the room is a crude wooden table covered<br />
in wooden mugs and dice. Next to the table are a<br />
large keg and a basket of dried meats and cheeses.<br />
Creatures: Six ogres lounge around the room. They each<br />
wear black full plate armor with the Elder Elemental Eye<br />
symbol prominently displayed. Each also carries a Huge<br />
masterwork greatsword.<br />
dOgres (6): hp 28, 25, 26, 30, 28, 27; AC 21 (full plate); Huge<br />
greatsword +9 melee (2d8+7); Weapon focus (greatsword instead<br />
of greatclub); 3d10 gp each; see Monster Manual page 144.<br />
Tactics: These ogres are not smart enough to effectively<br />
question newcomers and are easily bluffed. They attack<br />
anyone who is obviously an enemy or anyone they are told to<br />
attack by an authority figure that they recognize, such as<br />
Hedrack, Ukemil, or Verachan.<br />
In a fight, they move up and melee as quickly and as<br />
straightforwardly as possible.<br />
Development: If a fight breaks out in area 34, these ogres<br />
hear it and move to investigate. If hard pressed, they try to<br />
fall back to the kennel, area 39.<br />
38. The Chamber of Hate<br />
Stairs descend from the only door into this strange room.<br />
Each wall is covered with two rows of vertically suspended<br />
men, encased in metallic cocoons so that only<br />
their faces and hands are visible. The height of the room,<br />
floor to ceiling, is about 20 feet, and four of these men are<br />
encased in metal, two above two, every 10 feet.<br />
It takes a moment to register that all these men are<br />
exactly identical.<br />
This strange room has been created as an experiment. Before<br />
he “died,” the powerful priest named Unariq (see area 129 in<br />
the mines) was cloned. The power of Unariq’s evil and hatred<br />
was so inherent within him that even these lifeless clones<br />
ooze power. The gem in the center of the room is a device<br />
designed to absorb and channel the power of this hatred.<br />
If an evil divine spellcaster touches the gem, she can draw<br />
dark energy out of it to power her spells. Once per day, she can<br />
use the gem to restore 2d4 levels of cast spells, allowing her to<br />
recast the spells that she had prepared as if she had not cast them<br />
yet. This only functions in this room, while the clones exist.<br />
The gem also serves as the key to the secret door in area 42.<br />
If touched to that area of the wall, the door opens and the key<br />
teleports back to this room.<br />
Creatures: A succubus lingers here, hidden at all times. It<br />
is her job to monitor the “experiment” as well as the use of<br />
the gem’s power.<br />
dSuccubus: hp 30; see Monster Manual page 41.<br />
Tactics: Assuming the form of one of the clones, the<br />
succubus waits and watches any intruders from within<br />
one of the cocoons, using detect good and detect thoughts to<br />
determine their nature and intentions. Then, she attempts<br />
to charm the most likely victim, blasting the others with<br />
unholy blight if detect good revealed the characters as good<br />
aligned, and moving ethereally into combat to drain<br />
energy otherwise.<br />
At first, characters require successful Spot checks (DC 31)<br />
to discover that the succubus is not one of the clones. Once<br />
she starts using abilities such as charm monster and unholy<br />
123
CHAPTER 6: THE INNER AND OUTER FANES<br />
blight, the DC becomes 21 to tell where these effects are<br />
coming from.<br />
If in real trouble, she teleports away, probably to area 41 to<br />
get help from Verachan.<br />
39. Kennel (EL 12)<br />
Smelling of urine and filth, this stark chamber must be<br />
the home of some sort of animal.<br />
Creatures: Ukemil, a troglodyte priest, tends the creatures<br />
here. The kennel houses four creatures that resemble<br />
reptilian lions, with scales rather than fur and no manes.<br />
Ukemil loves these creatures and pampers them with food<br />
and fine treatment.<br />
Ukemil’s right leg was replaced by the infernal machine<br />
(area 26); he’s quite proud of the “improvement.”<br />
dUkemil: Male troglodyte Clr5/Rog4; hp 69; see<br />
Appendix 3.<br />
dFiendish Dire Lions (4): hp 71, 58, 60, 50; Cold and Fire<br />
resistance (15); Damage reduction 5/+2; Int 3; see Monster<br />
Manual page 57.<br />
Tactics: Ukemil sends the lions into melee, while he casts<br />
bull’s strength on himself and drinks his potion of cat’s grace. Eventually,<br />
he enters the fray, attacking those opponents occupied<br />
by the lions so that he can get sneak attacks. He takes time to<br />
heal himself and, if given the opportunity, the lions.<br />
Development: The ogres in area 37 retreat here if they<br />
need help. If sounds of fighting come from anywhere in<br />
areas 37 to 42 (Ukemil Listen +9, lions +4), Ukemil leads his<br />
lions into battle after preparing himself with spells.<br />
Eventually, Ukemil returns to his quarters (area 40), but he<br />
does like to spend most of his spare time with the creatures<br />
that he fawns over.<br />
40. Master Ukemil’s Chamber (EL 5)<br />
Black drapes cover the walls of this chamber. A metal<br />
pallet suggests that it might be used as a very uncomfortable<br />
bed. A black iron chest with a 2-foot-tall carved<br />
obsidian demon rearing above it, wings unfurled, is<br />
against the west wall, a huge lock sealing the chest shut. A<br />
pile of human skulls sits in one corner.<br />
124<br />
The chest is locked (DC 28 to open). Ukemil carries the key.<br />
Trap: A well-crafted poison needle in the lock of the chest<br />
pricks anyone attempting to pick it. It is coated in purple<br />
worm poison.<br />
aPoisoned Needle Trap: CR 5; Fortitude save (DC 24)<br />
resists, 1d6 Str/1d6 Str; Search (DC 25); Disable Device (DC 25).<br />
Treasure: The chest contains clothing and gear as well<br />
as 123 gp, a potion of oil of timelessness, and a scroll with the<br />
following divine spells: detect good, augury, and protection<br />
from elements.<br />
The obsidian demon statue weighs 50 pounds but is worth<br />
300 gp.<br />
41. Master Varachan’s Chamber<br />
(EL 10)<br />
Two dressers, a huge mirror, a large bed, a table, four<br />
chairs, a ceramic bathing tub (with a wooden towel rack<br />
next to it), a couch, a wardrobe, and a large chest furnish
CHAPTER 6: THE INNER AND OUTER FANES<br />
this elaborate bedchamber. All the wood of the furniture<br />
is carved with gothic imagery. Two short purple<br />
rugs are on the floor—one near the door and the other<br />
near the bed.<br />
The wardrobe holds only clothes and gear. The chest is<br />
locked (DC 30 to open; Varachan carries the key).<br />
Creatures: Varachan is second only to Hedrack, and was<br />
well on his way to surpassing the older cleric and moving<br />
into the ranks of the doomdreamers when suddenly, his formerly<br />
nonexistent conscience spoke up and he realized that<br />
what he was doing was wrong. He repented his evil deeds,<br />
but now finds himself unsure whether he should flee or stay<br />
and work for good from within the ranks of evil.<br />
Varachan has brown hair and a scarred face. He is normally<br />
found in black, loose-fitting clothing rather than<br />
ochre robes.<br />
If encountered by good-aligned characters, Varachan helps<br />
them by giving them information, advice, and magical aid, even<br />
going as far as giving them the magical contents of the chest<br />
(see below) if they seek to fight against the doomdreamers.<br />
The information that he can provide includes:<br />
• Details on both ways into the Inner Fane.<br />
• The location of anything in the Outer Fane and the general<br />
location of major items in the mines.<br />
• Information regarding any of the inhabitants of the<br />
Outer Fane.<br />
• The general plan of the doomdreamers: to excavate<br />
part of the Temple of Elemental Evil and gain access to<br />
the Nodes.<br />
• Details on what the Orb of Silvery Death can do, and how to<br />
get it (area 21A).<br />
• The location of the talisman of pure good (Sublevel 4) and<br />
the basics of how to get there.<br />
• The history of this place and of the cult.<br />
• That the doomdreamers are led by three beings called the<br />
Triad: a human, an aboleth, and a half-elemental.<br />
See the sidebar for more information on what Varachan will<br />
and will not do.<br />
dVarachan: Male elf Clr12 (no spells); hp 80; see<br />
Appendix 3.<br />
Trap: The chest has a greater glyph of warding on it that<br />
inflicts 6d8 points of sonic damage to anyone who opens it<br />
that does not say “Tharizdun shall never be free.”<br />
aGreater Glyph of Warding: CR 6; 5-ft. burst of sonic<br />
energy (6d8); Reflex save DC 20 half; Search (DC 31); Disable<br />
Device (DC 31).<br />
Treasure: The chest contains a bag with 240 gp; four refuge<br />
sticks (when broken and the command word “darkness” is<br />
spoken, they bring the user to this room); three greater slaying<br />
arrows (keyed to humans); potions of haste, bull’s strength, and<br />
heroism; a divine scroll with these spells: cure serious wounds<br />
(3), neutralize poison, remove curse, and remove disease; and<br />
another divine scroll with these spells: raise dead, greater dispelling,<br />
heal, and restoration.<br />
42. Hall of Priests<br />
Spreading out both vertically and horizontally, this<br />
large chamber is dimly torchlit, so that the full 60-foot<br />
vaulted ceiling is visible. The walls and ceiling have<br />
been elaborately painted with images of<br />
men and women—mostly human, but<br />
some not—dressed in ochre robes. In the<br />
middle of the room is a dais with bronze<br />
statues depicting six more similarly<br />
dressed individuals.<br />
This room is used to honor past priests of<br />
Tharizdun, mostly of the rank of doomdreamer,<br />
who have served the imprisoned<br />
deity over the centuries.<br />
The two chambers to the west are storage<br />
for various supplies—from paint to tools to<br />
leather goods to cleaning materials.<br />
The secret door to the east only opens to<br />
the touch of the gem in area 38. It slides<br />
down into the floor. Beyond that door is a<br />
narrow chamber with a rough, black basalt<br />
wall to the east, right at the inner edge of the<br />
crater. That wall has another secret door, this<br />
one pivoting open when pushed. It leads to a<br />
ledge 40 feet above the floor of the blasted<br />
yard (see the Inner Fane). Still another pivoting<br />
secret door on the ledge leads to a cave<br />
with carved steps down to the last secret door<br />
that gives access to the blasted yard itself, and<br />
the Inner Fane. All these secret doors have a<br />
DC of 25 to find.<br />
The secret door to the west (also DC 25 to<br />
find) hinges at the bottom and pushes outward,<br />
toward area 42.<br />
43. Secret Room (EL 10)<br />
The west wall of this otherwise empty<br />
secret room is marked with a number of<br />
intricate, arcane runes, painted with a delicate<br />
hand. Judging by the sparkle, it<br />
appears that some gems are incorporated<br />
into the rune patterns.<br />
The clerics use this room to commune with<br />
the insanity that is so much a part of their<br />
deity. No amount of observation or knowledge<br />
can determine what the runes mean or<br />
do—they are runes of madness.<br />
Rune Circle: A successful Search check<br />
(DC 15) allows a character to notice that the<br />
floor of this room also has a set of runes, written<br />
in a circle in the middle of it. If the character<br />
fails the Search, a 75% chance exists<br />
(01–75 on d%) that anyone entering the room<br />
and looking around steps into this circle—<br />
check for each character, starting with the<br />
first who enters the room, and then the next,<br />
and so on. If this happens (or if it is done willingly),<br />
that character must make a Fortitude<br />
saving throw (DC 25) or be transported into a<br />
nightmarish nether realm and replaced with a grell. Unless<br />
other characters make Spot checks (DC 25), it appears as if<br />
the victim has been transformed into a grell.<br />
Meanwhile, in the nether realm, the victim’s senses are<br />
assaulted by mind-bending experiences beyond any mortal’s<br />
Using Varachan<br />
Varachan, the evil cleric who<br />
underwent a change of heart,<br />
can no longer cast spells, but he<br />
has so far hidden that from his<br />
peers. He has managed to hang<br />
onto his position, but was<br />
unsure of what to do next until<br />
he heard through channels that<br />
adventurers were causing the<br />
cult some trouble. He sees<br />
helping them as a way to begin<br />
atoning for his sins.<br />
Secretly, Varachan has been<br />
manipulating events so that<br />
they have been easier for the<br />
intruders. This means that at<br />
any time during the adventure,<br />
when events are going particularly<br />
badly for the PCs, the forces<br />
of the Temple might be ordered<br />
to back off, or reinforcements<br />
might be sent to the wrong<br />
place, or guards might be redirected<br />
to someplace other than<br />
where the adventurers are. They<br />
might even find some healing<br />
potions or other helpful treasure<br />
right in their path, or information<br />
important to them left on a<br />
piece of paper for them to find.<br />
To follow the characters’ progress,<br />
he uses a crystal ball that<br />
also has the detect thoughts ability.<br />
With this, he can not only<br />
keep track not only of where the<br />
characters are, but also where<br />
they might be going.<br />
Varachan is cautious, and<br />
won’t risk himself by doing this<br />
very often—maybe only once or<br />
twice. He is neither omnipotent<br />
nor omniscient, and cannot<br />
accomplish tasks such as stopping<br />
a fight in progress.<br />
It may be best if events were<br />
manipulated in such a way so<br />
that the characters suspect<br />
that someone might be helping<br />
them, so that when they<br />
meet Varachan—if they do—it<br />
is all the more meaningful.<br />
In no way should Varachan<br />
actually fight alongside the PCs.<br />
Even after they encounter him,<br />
he wants to keep his position<br />
here to try to accomplish more.<br />
125
CHAPTER 6: THE INNER AND OUTER FANES<br />
126<br />
ken, in a weightless place filled with grell, swirling colors never<br />
seen before, impossible shapes and temperatures beyond heat<br />
and cold. Each round, the victim must make a Will saving<br />
throw (DC 20). If he fails, he remains in this horrible place for<br />
another round and suffers 1d3 points of temporary Wisdom<br />
damage. Each round the character remains, another grell<br />
appears in the room, up to a maximum of ten grell.<br />
Characters who are reduced to 0 Wisdom in the nether<br />
realm never come back.<br />
Creatures: Up to ten grell can appear in this strange<br />
room. They attack any creature that they encounter but<br />
attempt to escape the room if seriously threatened (knocked<br />
down to less than half hit points).<br />
dGrell (10): hp 32 each; see Appendix 1.<br />
Treasure: Incorporated into the runes on the wall are thirty<br />
violet agates (each worth 10 gp), and three black opals (worth<br />
1,000 gp each). It takes 33 rounds to remove the gems (more<br />
people make this faster—3 people can do it in 11 rounds).<br />
44. Great Hall<br />
A vast hall with a vaulted ceiling 30 feet high is furnished<br />
with a number of long wooden tables flanked by<br />
benches. A raised area along the east wall holds another<br />
table with four chairs on one side, so that those seated<br />
in them would face the rest of the room. Behind the<br />
table are six long purple banners with alternating black<br />
triangles with inverted Ys and black, upside down twostep<br />
pyramids.<br />
The west wall has a shelf about 10 feet up, upon which<br />
rest gargoyles of gray stone. An archway of carved skulls<br />
girds each of the main entrances.<br />
This room is used as a meeting hall and a dining room for<br />
the entire Outer Fane (although many of the residents eat<br />
in their private chambers unless some formal gathering<br />
takes place). The four clerics sit at the head table on the<br />
raised platform.<br />
The room to the west is a kitchen with two fireplaces,<br />
numerous tables, cutting boards, cupboards, pots, pans,<br />
dishes, trays, serving carts, and various types of food and<br />
spices. A single human slave works here beginning preparations<br />
for the next meal.<br />
dHuman Com1: hp 2 (noncombatant).<br />
45. Magmin (EL 8)<br />
This room is very hot. The stone of the walls and floor is<br />
misshapen in places, as if it were softened, perhaps by<br />
tremendous heat. Ash, cinders, and a few bits of metal,<br />
completely slagged, lay scattered on the ground.<br />
Anyone moving about in this room must make a Reflex save<br />
(DC 13) to avoid touching an area of the walls or floor that is<br />
superheated by the denizens here. If the saving throw fails,<br />
the character suffers 1d6 points of fire damage.<br />
Creatures: The doomdreamers are determined to keep a<br />
force of magmins under their control, for they want to keep<br />
control of the volcano here, should it threaten to erupt once<br />
again. They believe that the magmins can control that (and to a<br />
degree, they could). The clerics here have strict orders to keep<br />
these creatures well fed and happy so that they stay.<br />
dMagmins (6): hp 9, 10, 8, 13, 14, 7; see Monster Manual<br />
page 130.<br />
Tactics: If someone comes into this room, the magmins do<br />
not immediately attack, waiting to be fed or given something<br />
to melt or burn. If they are not given what they want within 2<br />
rounds, these spoiled creatures attack, even following characters<br />
out into the hall or wherever else they go.<br />
46. Empty Chamber<br />
This bedchamber has two metal-frame beds, a pair of<br />
wooden dressers of dark wood, and a round, black,<br />
marble-top table with four chairs. It does not appear that<br />
anyone lives here.<br />
This would be used for more guests if there were any.<br />
47. Cornugon Guest (EL 10)<br />
This room is dark.<br />
Heat and the stench of sulfur are thick in the air here. A<br />
large bed, the linens torn to shreds, stands in the middle<br />
of the room. A long wooden table bears the weight of a<br />
sizable, bloody carcass. A few other bits of furniture, such<br />
as chairs and a divan, lie in splinters on the floor. A large<br />
chest is pushed into the far corner.<br />
Creatures: A cornugon devil resides here, a guest of the<br />
cult. He did not intentionally wreck the bedchamber that<br />
they gave him, but he could not help it. A room furnished for<br />
humans is no place for a devil.<br />
Ultimately more interested in tyranny than destruction<br />
(like all devils), this cornugon was not sent here to actually<br />
make an alliance, but to spy.<br />
dCornugon: hp 85; see Monster Manual page 49.<br />
Tactics: The cornugon can be assumed to have a magic<br />
circle against good cast on him at any given time. If he knows<br />
foes are near, he creates a wall of fire in the hallway between<br />
this room and the main hallway to the south. He also creates<br />
a major image of a pit fiend within that fire. If attacked, he<br />
gleefully detonates fireballs while he is in the radius, using his<br />
cause fear to drive foes back into the fiery wall. If foes appear<br />
to be resistant to fire, he switches to lightning bolts.<br />
If in trouble, he teleports to area 44 and summons barbazu<br />
to hold off his foes while he regenerates.<br />
Treasure: The chest is locked (DC 25 to open) but not<br />
trapped. Within this, the devil keeps 650 sp, 130 gp, two<br />
flasks of alchemist’s fire (which it drinks), and a bag of ten<br />
120-gp silver pearls.<br />
48. Drow Ambassadors (13)<br />
This room is dark.<br />
The scent of perfume and dark, spiced incense wafts<br />
through this chamber. Two iron-frame beds with black<br />
linens, two chests of drawers, two chairs, a couch, and a<br />
table, all made of black wood, fill this room. The north<br />
wall bears a large Elder Elemental Eye symbol. Two black<br />
cloaks hang on pegs by the door.<br />
Creatures: Two representatives from the drow forces that<br />
once supported an uprising among giant tribes, under the auspices<br />
of a drow noble house named Eilservs, are currently quartered<br />
here, guests of the Outer Fane and the doomdreamers.
CHAPTER 6: THE INNER AND OUTER FANES<br />
These dark elves do not serve Lolth, but instead the Elder<br />
Elemental Eye. They only recently learned that the deity was<br />
indeed the same deity as dark Tharizdun, but they have<br />
adjusted fairly well.<br />
They are doing their best to insinuate themselves into<br />
the politics of the Outer Fane. They know that something<br />
big is going on and that it involves the Temple of Elemental<br />
Evil.<br />
dMaracla: Female drow Clr9; hp 44; see Appendix 3.<br />
dDirass: Male drow Wiz10; hp 27; see Appendix 3.<br />
Tactics: Despite their chaotic nature, these two work<br />
very well together. Maracla always has bull’s strength cast on<br />
herself and endurance cast on Dirass. Dirass always has mage<br />
armor and cat’s grace cast on himself.<br />
Preparing for battle, Maracla casts divine favor, magic vestment,<br />
and freedom of movement, in that order, while Dirass casts<br />
shield, improved invisibility, levitate, and nondetection.<br />
In battle, Maracla attacks with contagion, inflict critical<br />
wounds, and slay living. If either she or Dirass becomes seriously<br />
hurt, she falls back to heal (levitating up to heal Dirass,<br />
if necessary). Dirass casts lightning bolt, cone of cold, and ice<br />
storm. If foes see through his invisibility somehow, he casts<br />
stoneskin on himself and goes into battle using vampiric touch.<br />
These drow are a little afraid of the cornugon in area 47.<br />
Development: If alerted that dangerous intruders are<br />
about, these two do not sit in their chamber and wait.<br />
Instead, they move to a more defensible spot with others, like<br />
Hedrack or Naquent.<br />
49. Slaves<br />
Creatures: Two human slaves toil here, mopping the<br />
floor. They have mops and buckets. Like the slaves in area<br />
35, they have been slaves for a long time and are mistreated<br />
and underfed.<br />
dHuman Com1 (2): hp 1, 3 (noncombatant).<br />
50. Master Dunrat’s Quarters<br />
Black curtains line the walls of this chamber, with three<br />
large Elder Elemental Eye triangles suspended from the<br />
ceiling on heavy iron chains. A bed, a side table, a<br />
dresser, a wardrobe, a chest, and several bookcases furnish<br />
the room.<br />
The bookcases hold books on geography, peoples, magic, and<br />
science. The wardrobe is conspicuously empty (or mostly so),<br />
as is the chest. On the dresser is a letter addressed to Dunrat<br />
from Naquent, still sealed. It says that once he returns with<br />
the relics from the Moathouse, he should present to Master<br />
Hedrack a full report.<br />
Creatures: If Dunrat survived and returned from Hommlet,<br />
he comes here (and opens the letter). See Chapter 1.<br />
THE INNER FANE<br />
All areas of the Inner Fane, from the Blasted Yard to the interior<br />
of the Black Spike, are all unholy, saturated with multiple<br />
unhallow spells cast as if by a 15th-level caster. In addition to the<br />
protection from good effect and the –4 profane penalty on turn<br />
undead attempts (+4 to rebuke undead attempts), the unhallow<br />
grants all evil creatures in the area the effects of an aid spell.<br />
Ad Hoc XP Adjustment: Because of the unhallow spells,<br />
award an additional 10% experience points for all creatures<br />
defeated in the Inner Fane.<br />
The Blasted Yard<br />
Like a scene from Hell itself, the interior of the crater is a<br />
dry, cracked yard of uneven volcanic rock concealed by<br />
fingers of sulfurous mist. A hot, dry stench fills the air,<br />
burning the inside of your nose and mouth. At the center<br />
of this area, pounded down into a wound in the earth like<br />
a spike pounded into flesh, stands a black tower glistening<br />
with the dull sheen of iron. The earth seems to recoil<br />
from the touch of this strange structure, so it is surrounded<br />
by the gaping trench of this wound, its black<br />
walls plunging downward out of sight. Cracks, exposing<br />
red, hellish light from below, start at the wound and cross<br />
the yard. No windows exist on the tower, and the single<br />
door is accessible only via a narrow span bridge crossing<br />
over the wound.<br />
The level of the Blasted Yard is about 10–15 feet above the<br />
level of the Stalagos. The inner walls of the crater rise up<br />
about 200 feet above it.<br />
A secret door exists in the western portion of the crater<br />
wall surrounding the blasted yard; it pivots in the middle. A<br />
Search check (DC 25) locates it. It leads into area 42 of the<br />
Outer Fane.<br />
Creatures (Three encounters, each EL<br />
11): Three separate groups of eight particularly<br />
powerful (8 HD) wights prowl about the<br />
Blasted Yard. They use the uneven terrain to<br />
skulk about and prepare ambushes.<br />
These creatures are known as dark wights<br />
and have obexes seared into the flesh on<br />
their foreheads. They wear tattered black<br />
clothing and black breastplates and have<br />
milky white skin.<br />
dDark Wights (8 HD) (8): hp 54, 50, 65,<br />
51, 56, 64, 48, 70 (+4 from aid from unhallow<br />
already included); Add +6 to AC (+5 from<br />
armor), +2 Dex, +2 to attack, +1 to Fortitude<br />
saves, +2 to Reflex and Will saves, –3 to<br />
Climb; see Monster Manual page 183.<br />
Tactics: These wights keep to their groups,<br />
using their Move Silently skill to creep up<br />
and attack. If one group engages foes, the<br />
sound of combat draws one of the other<br />
groups to the scene of the fight in 1d4+2<br />
rounds, so they end up assaulting invaders in waves, most<br />
likely forcing clerics to use multiple turning attempts to deal<br />
with them all.<br />
Ad Hoc XP Adjustment: Treat each wight as a CR 5<br />
monster.<br />
The Wound and the Cracks<br />
The Black Spike tower does not actually touch the stone it<br />
has been “pounded into” until about 60 feet below the surface<br />
of the Blasted Yard. Thus, the wound and the cracks range<br />
from 30–60 feet deep. Sulfuric smoke is thick around these<br />
areas, and the glow of magma filters up through them.<br />
Falling into a crack simply results in normal falling<br />
damage (roll d%: 01–40, 30 feet for 3d6 points of damage,<br />
41–60, 40 feet for 4d6 points of damage, 61–80, 50 feet for<br />
5d6 points of damage, 81–100, 60 feet for 6d6 points of<br />
damage). Falling into the wound itself is more like an uncontrolled<br />
slide because of the slope (see Black Spike side view<br />
in the map book), but still results in falling damage (60 feet<br />
Difficulty of the Inner Fane<br />
The encounters within the<br />
tower are particularly difficult.<br />
If the PCs are proceeding<br />
directly from the Outer Fane<br />
and have not received aid from<br />
Varachan, they probably cannot<br />
overcome them without<br />
some wild luck or extremely<br />
careful play. Even with his help,<br />
or the experience gained from<br />
taking on the Temple of Elemental<br />
Evil first, the Triad may<br />
be more powerful than they<br />
can deal with, meaning that<br />
they almost certainly escape to<br />
plague the PCs later in the<br />
campaign with a new plot to<br />
free their deity.<br />
127
CHAPTER 6: THE INNER AND OUTER FANES<br />
128<br />
for 6d6 points of damage) into lava. The lava inflicts 20d6<br />
points of damage per round.<br />
THE BLACK SPIKE<br />
This tower is made of black iron reinforced with adamantine<br />
so that it can support the weight of the Dreaming Stone within<br />
it. The walls and floors of the tower have hardness 15, 420 hp,<br />
and SR 30. The SR counts for attempts to bypass the walls<br />
using teleport, scrying, and so on, as well as directly affecting<br />
the walls with spells such as disintegrate, passwall, or other such<br />
magic. The Black Spike is impervious to heat or fire. The<br />
details of its construction and placement involved incredibly<br />
powerful magic, which rent the center of the crater down to<br />
its volcanic core.<br />
The Black Spike has fourteen levels, five of which are<br />
underground.<br />
The Roof and Upper Portion<br />
of the Tower<br />
Any creature of a nonevil alignment coming within 150 feet<br />
of the top level of the Black Spike must make a Will saving<br />
throw (DC 20) to avoid the evil of the place overcoming<br />
them. Those overcome by evil fall unconscious for 1d6 minutes<br />
and suffer 1d6 points of temporary Wisdom damage.<br />
This saving throw must be made every hour spent in the area<br />
of its effect.<br />
The Bridge and the Door (EL 12)<br />
The bridge is 10 feet wide and is made of 6-inch-thick iron. It<br />
has hardness 10, 180 hp, and a break DC of 45.<br />
The door, made of 3-inch-thick adamantine, is intelligent<br />
and speaks using telepathy. It has hardness 20, 120 hp, and a<br />
break DC of 50. Like the rest of the tower, it has a SR of 30. It<br />
also uses the following spell-like abilities like a 10th-level sorcerer,<br />
three times each per day:<br />
Detect good<br />
Detect evil<br />
Detect thoughts<br />
Lightning bolt<br />
Wall of fire<br />
Fear<br />
Summon monster V<br />
Dismissal<br />
Feeblemind<br />
No way to “open” the door exists. It opens itself. The door<br />
questions any person approaching that it does not recognize<br />
(that is, a doomdreamer or one of the guardians that<br />
lives in the tower), immediately alerting the guardians of<br />
Level 1. It uses detect thoughts to attempt to determine<br />
whether people are lying. If unsatisfied with answers it gets<br />
from questions, it refuses to open. It does not use its offensive<br />
powers until attacked.<br />
Ad Hoc XP Adjustment: Award XP for this encounter as<br />
if the door were a CR 12 monster.<br />
Level 1: Guardians (EL 12)<br />
This round chamber is lit by an ambient light, the source<br />
of which is not obvious. This light plays off a multicolored<br />
stone set into the ceiling, 10 feet across and extending<br />
5 feet down into the room—the ceiling is at least 30<br />
feet above the floor. The stone above is a weird mineral—<br />
unlike any from this world. Long, metal supports radiate
CHAPTER 6: THE INNER AND OUTER FANES<br />
like the spokes of a wheel across the ceiling, with the<br />
rock as the hub. The supports connect to even thicker<br />
supports on the walls. These supports appear to be made<br />
from adamantine.<br />
A wrought-iron staircase climbs up the eastern portion<br />
of the tower, up to the level above. The floor of the<br />
room has some old, reddish-brown splatter stains upon<br />
the iron, and here and there a bit of a bone.<br />
A secret panel is hidden in the wall directly opposite the door<br />
(Search DC 28 to find). Behind the panel is a black stone<br />
stud. Anyone touching this stud is teleported to the middle<br />
of Sublevel 1).<br />
Creatures: Two semi-intelligent half-dragon<br />
half-tyrannosauruses live in this level of the<br />
tower, one the spawn of a black dragon, the other a<br />
blue. Each has scaly flesh the color of its dragon sire,<br />
large muscular forearms with draconic claws, and batlike<br />
wings that have been surgically covered in iron<br />
plates. These altered wings no longer allow these<br />
creatures to fly, but can be used defensively,<br />
adding +4 to their AC.<br />
dHalf-Dragon Half-Tyrannosauruses (2):<br />
hp 194, 199 (+4 from aid from unhallow already<br />
figured in); see Appendix 3.<br />
Tactics: These powerful creatures do not<br />
attack anything that the door lets in willingly.<br />
They are really servants of the much more intelligent<br />
door. The half-dragons are intelligent enough<br />
to speak a few words, but they are difficult to<br />
understand. If the door telepathically warns them<br />
of hostile intruders, they begin to roar to alert<br />
those in the level above them.<br />
In a fight, they simultaneously use their<br />
breath weapons in the first round. Then they<br />
move in for their devastating bite and claw<br />
attacks.<br />
Development: If Tychon is alerted to<br />
hostile intruders by the roaring of<br />
the tyrannosauruses, he comes<br />
down and casts these spells on the<br />
guardians, in this order: spell resistance,<br />
empowered bull’s strength, and shield<br />
of faith on both (always on the black first).<br />
Ad Hoc XP Adjustment: Award an additional 20%<br />
XP adjustment for this encounter.<br />
Level 2: Doomdreamers (EL 11)<br />
A multicolored stone rises up from the floor to the ceiling,<br />
widening as it does, so that it is about 12 feet across<br />
at the floor, but almost 30 at the ceiling. Light from an<br />
unknown source, perhaps the rock itself, plays about its<br />
facets. It seems that the stone is translucent enough that<br />
the other side of this tower level is just barely visible, in<br />
the form of dark shapes, through it.<br />
The iron staircase rises up from the floor below and<br />
then twists back on itself as it continues up to the next<br />
level. Six doorways of ochre light stand around the<br />
strange stone pillar. An ebony cabinet is in the eastern<br />
portion of the room, near the wall. A single, unlit candle<br />
sits atop it.<br />
This chamber is used as communal quarters for doomdreamers<br />
who have not completely succumbed to the lure<br />
of the Dreaming Stone, although most of them are currently<br />
in the Temple of Elemental Evil (see Part 3: The<br />
Rebirth of Elemental Evil).<br />
Each of the doorways leads to an extradimensional space<br />
not unlike Mordenkainen’s magnificent mansion. This space is a<br />
20-foot cube that appears to have dark wood paneling and<br />
contains a wooden frame bed, a wardrobe, a chest, a marble<br />
bath, two tables (a smaller one by the bed and a larger one<br />
opposite the sleeping area), three chairs, a couch, and a<br />
hanging chandelier filled with candles.<br />
Five of these areas are empty, as if the resident is gone<br />
(which is true). One is lived in, the wardrobe filled<br />
with clothing and personal gear and the chest<br />
locked (DC 30 to open).<br />
Creatures: Tychon is a human<br />
9th-level cleric/2nd-level doomdreamer,<br />
one of the few who has not succumbed<br />
to the reverie of the<br />
Dreaming Stone (see Levels 4 and<br />
5). He is a small man, but like all<br />
doomdreamers, wears long, loose<br />
violet robes that conceal all features<br />
and a black helmet that<br />
reveals only his eyes and has long<br />
spikes on either side.<br />
dTychon: Male human<br />
Clr9/Doomdreamer2; hp 56 (+4<br />
from aid from unhallow already figured<br />
in); see Appendix 3.<br />
Tactics: If Tychon is alerted to<br />
intruders by the roaring of the<br />
tyrannosauruses, he goes down<br />
and casts these spells on the<br />
guardians, in this order: spell resistance,<br />
empowered bull’s strength,<br />
and shield of faith on both<br />
(always on the black first).<br />
Assume that he has an<br />
empowered bull’s strength and<br />
endurance spell on himself at any<br />
given time. In battle, he drinks<br />
his potion of haste and casts greater<br />
command, hold person, and summon monster<br />
spells, resorting to melee eventually,<br />
casting spells such as inflict critical wounds<br />
and poison (casting defensively if needed)<br />
and attacking with them in the same<br />
round.<br />
Trap (EL 6). A scroll tube in the chest<br />
(see below) has a greater glyph of warding cast<br />
upon it.<br />
aGreater Glyph of Warding: CR 6; 5-ft.<br />
burst of fire energy (5d8 points of fire<br />
damage); Reflex save DC 22 half; Search<br />
(DC 31); Disable Device (DC 31).<br />
Treasure: The cabinet holds 10 draughts<br />
of dreamstep, a special potion that allows the drinker to<br />
move through the Dreaming Stone (an otherwise solid<br />
object). The potion lasts until the Dreaming Stone is<br />
exited.<br />
The chest that is locked in one of the extra-dimensional<br />
spaces holds Tychon’s valuables: 450 gp, a bracelet (worth<br />
Sleeping in the Inner Fane<br />
Nonevil creatures sleeping in<br />
the Inner Fane face strange<br />
dangers. One of the night<br />
hags found on levels 4 and 5<br />
visits the characters while<br />
they are dreaming. Unless the<br />
character can fend off (that is,<br />
kill) the hag all by himself<br />
(assume that a dreaming PC<br />
is fully rested, equipped and<br />
prepared, although no resources<br />
such as spells or<br />
charges used during the<br />
dream are actually expended),<br />
the character has a fitful night<br />
of terrible dreams and suffers<br />
1 point of permanent Constitution<br />
loss.<br />
Normally, night hags can<br />
only haunt the dreams of a<br />
chaotic or evil character, but<br />
that is not the case here (normally,<br />
one has to be ethereal<br />
to defeat the hag, which is<br />
not the case here either). Further,<br />
defeating a dream hag<br />
does not mean that the night<br />
hags in the Black Spike are<br />
actually harmed in any way—<br />
although if someone has<br />
battled a night hag in their<br />
dreams, they’re sure to recognize<br />
one when they encounter<br />
her in the flesh.<br />
Lastly, even though only<br />
two night hags are here, they<br />
can attack multiple sleepers in<br />
their dreams during the<br />
course of a night.<br />
129
CHAPTER 6: THE INNER AND OUTER FANES<br />
130<br />
240 gp) made of intricately etched gold and silver, a potion<br />
of darkvision, and a scroll in a copper tube trapped with a<br />
greater glyph of warding (see above). Inside the tube is a<br />
scroll with these spells: raise dead, heroes’ feast, commune, and<br />
healing circle.<br />
In a secret compartment at the bottom of the chest<br />
(Search DC 25 to find) a 3-pound lump of dream matter can<br />
be found. This is a small piece of the larger Dreaming Stone.<br />
This bit of reality stolen from the realm of dreams can be<br />
changed into any nonmagical object of its mass just by<br />
touching it and concentrating (which requires a standard<br />
action and a Concentration check of DC 15). It retains that<br />
shape for 24 hours (reverting to its default multicolored<br />
rock form) or until a new shape is selected. Thus, it can be<br />
changed into a wooden spear, an adamantine lock, or a long<br />
parchment scroll. In its new shape it can be broken, torn, or<br />
shattered as normal, immediately forcing it back into its<br />
(whole) rock form.<br />
Level 3: Demon Servant (EL 13)<br />
This tower level, 30 feet high, is about half filled with<br />
a multicolored stone column rising from floor to ceiling,<br />
widening as it does. A few large gray feathers lie<br />
scattered about the room, and the place stinks of<br />
rotten meat.<br />
Creatures: A vrock lairs in this room, permanently called<br />
here to do the bidding of the doomdreamers. It is a guardian,<br />
a messenger, and a general lackey, although one of great<br />
power—often underrated by the clerics here.<br />
dVrock: hp 73 (+4 from aid from unhallow already<br />
included); see Monster Manual page 51.<br />
Tactics: The vrock attacks anyone who does not say to it,<br />
“Tharizdun commands,” or who holds a master key, when it first<br />
sees them. (Most inhabitants of the tower say it immediately<br />
upon coming up the stairs out of habit.) It also attacks anyone<br />
who one of the Triad orders it to attack.<br />
In battle, it starts out using mirror image for defense and<br />
then wades into melee. If knocked below half its hit<br />
points, it teleports to the other side of the room (behind<br />
the stone) and attempts to use its summon ability to call<br />
another vrock.<br />
Levels 4 and 5:<br />
The Dreaming Stone (EL 11)<br />
This level is taken up almost entirely by the huge stone in<br />
the center, rising from floor to ceiling. Dark shapes seemingly<br />
float through it very slowly, as if adrift.<br />
Nothing is on these levels other than the Dreaming Stone.<br />
While it can be entered anywhere using dreamstep, it is most<br />
commonly accessed on one of these levels.<br />
The Dreaming Stone was brought here years ago. It acts as<br />
a conduit between the imprisoned Tharizdun and his most<br />
powerful clerics. Using a powerful elixir known as dreamstep<br />
(found on Level 3), an individual can enter the Dreaming<br />
Stone, floating through it as if weightless while in its bounds.<br />
Characters within the Dreaming Stone can move as though<br />
swimming unencumbered.<br />
While in the Dreaming Stone, characters hear strange,<br />
dark whispers, most of which makes no sense, as if listening<br />
to someone softly mutter sinister things in their sleep.<br />
All within the Dreaming Stone must make a Will saving<br />
throw (DC 10 + number of previous checks) per hour or<br />
enter a sleeplike trance from which only a few ever awaken<br />
(only the interaction of a deity, or a wish or miracle spell,<br />
revives such a character). Those in this trance are in constant<br />
communion with the Dark God, a mind-shattering<br />
experience to say the least.<br />
Spells cast by those under the effect of dreamstep operate<br />
normally within the Dreaming Stone, and can even be cast at<br />
those outside the stone from within (but never the other way<br />
around). Spells cast from the outside onto the stone itself,<br />
such as disintegrate, transmute stone to mud, passwall, and so on<br />
act normally, but draw the wrath of not only the night hags<br />
within but Tharizdun. Anyone harming the Dreaming Stone<br />
must make a Will saving throw (DC 20) or be struck insane<br />
as if afflicted with the insanity spell.<br />
A number of the doomdreamers have become “lost”<br />
within the stone, unable and unwilling to ever leave the<br />
dark reverie that communion with their imprisoned deity<br />
brings. Currently, seven of these evil clerics are adrift here.<br />
Within the stone, they are completely helpless and do not<br />
react to any stimuli. One of the doomdreamers here is a<br />
troglodyte, one is a kuo-toa, one is an elf, one is a half-orc,<br />
and the rest are human.<br />
Creatures: Two night hags watch over the doomdreamers<br />
here. They attack anyone who threatens their charges.<br />
dNight Hags (2): hp 40, 56 (+4 from aid from unhallow<br />
already figured in); see Monster Manual page 140.<br />
Tactics: The night hags do not hesitate to cast magic missile<br />
or ray of enfeeblement at those outside the stone that might be<br />
threats. They do not leave the Dreaming Stone.<br />
Trap: Any creature of a nonevil alignment coming<br />
within 150 feet of the top level of the Black Spike (including<br />
levels 4 through 8) must make a Will saving throw<br />
(DC 20) to avoid the evil of the place overcoming them.<br />
Those overcome by evil fall unconscious for 1d6 minutes<br />
and suffer 1d6 points of temporary Wisdom damage. This<br />
saving throw must be made every hour spent in the area of<br />
its effect.<br />
Level 6 Augury of Change (EL 11)<br />
At the top of the stairs leading up into this room (and at<br />
the bottom of the stairs going up farther still), these<br />
words are carved into the floor in a block script:<br />
“The Dark God’s favor smiles upon those willing to<br />
risk much to gain much.”<br />
A voice calls out from around the other side of the multicolored<br />
stone in a tone that sounds like gravestones rubbing<br />
together. “Come around here and see if the fortune<br />
of the deities smiles upon you.”<br />
On the other side of the stone, marked on the map with an X,<br />
is a skeletal figure wrapped in a black robe seated behind a<br />
violet stone table (an altar, really). Spread out before it are<br />
several large, ornate playing cards on vellum. In a semicircle<br />
behind it are dozens of burning candles set into tall, black<br />
iron candlesticks that sit on the floor.<br />
Creatures: The creature is a simple skeleton, enchanted to<br />
have a +10 turn resistance (in addition to the effects of the<br />
pervasive unhallow) and granted an intelligence beyond its<br />
normal automaton state (Intelligence score of 8). The cards<br />
are a deck of many things.
CHAPTER 6: THE INNER AND OUTER FANES<br />
1. Entry<br />
This area curves around the multicolored stone, with 1-footsquare<br />
plates made of gray stone set here and there into the<br />
black iron floor. Each of these plates bears the symbol of the<br />
Dark God. The wall by the iron door bears four tapestries,<br />
each depicting a scene of elemental destruction: a flood, an<br />
earthquake, a tornado, and a burning building.<br />
The door has a huge skull etched into the iron and<br />
filled with some reddish material.<br />
dMedium-Size Skeleton: hp 16 (+4 from aid from<br />
unhallow already included); +10 turn resistance; Int 8; see<br />
Monster Manual page 165.<br />
The skeleton and the deck merely represent the force<br />
of chaos inherent within the worship of Tharizdun. Drawing<br />
a card from the deck is the means to perform the<br />
Ritual of Chance to honor the Dark God. This ritual consists<br />
of any willing person stating how many cards they<br />
will draw and then drawing them, suffering the penalties<br />
or reaping the rewards. The skeleton is merely the dealer.<br />
Whenever a card that is bad for a character is drawn, the<br />
skeleton cackles.<br />
If attacked, it does not defend itself. If it is destroyed,<br />
all the candles immediately go out. Anyone involved in<br />
its destruction must make a Will saving throw (DC 25) or<br />
have a curse directly from Tharizdun upon them. Victims<br />
suffer a –2 morale penalty on all attack and damage rolls<br />
and all skill checks permanently. Only a creature of<br />
divine or near-divine status, or a wish or miracle, can remove<br />
the curse.<br />
Treasure: In the skeleton’s lap it holds an ivory box (worth<br />
100 gp) for storing the cards.<br />
Trap: Any creature of a nonevil alignment coming<br />
within 150 feet of the top level of the Black Spike (including<br />
levels 4 through 8) must make a Will saving throw<br />
(DC 20) to avoid the evil of the place overcoming them.<br />
Those overcome by evil fall unconscious for 1d6 minutes<br />
and suffer 1d6 points of temporary Wisdom damage. This<br />
saving throw must be made every hour spent in the area of<br />
its effect.<br />
Level 7: Shrine of the Lost<br />
This level is divided into two areas.<br />
The door leading into area 2 is made of iron (hardness 10, 60<br />
hp, break DC 28).<br />
Trap: Any creature of a nonevil alignment coming within<br />
150 feet of the top level of the Black Spike (including levels 4<br />
through 8) must make a Will saving throw (DC 20) to avoid<br />
the evil of the place overcoming them. Those overcome by<br />
evil fall unconscious for 1d6 minutes and suffer 1d6 points of<br />
temporary Wisdom damage. This saving throw must be made<br />
every hour spent in the area of its effect.<br />
2. Shrine<br />
Curving around the multicolored stone, the iron outer wall<br />
of this area is covered in tapestries 12 feet high and 3 feet<br />
wide. Each shows a single figure—either a male or a female,<br />
and usually, but not always, a human—wandering alone in<br />
some terrible location. One shows an underground maze,<br />
another a blasted, lifeless plain, still another a dark and<br />
twisted forest, and a fourth a sinister city street. In each, an<br />
impression of danger looms, as shadows take menacing<br />
shapes and dark corners hide some lurking threat.<br />
At the far end of the room as one circles around, a small<br />
shrine can be seen, consisting of a black stone slab upon<br />
which rests a small wooden box that looks like a tiny coffin<br />
and a simple tallow candle. Upon the slab are written the<br />
following words in large, commanding letters: “The enemies<br />
of the Dark God shall die lost, alone, and unmourned.<br />
Their powerless souls shall feed him, extinguished like the<br />
meaningless flame of an unneeded candle.”<br />
Nothing happens here unless the candle is lit and then<br />
snuffed. If this happens, a small piece of black fruit, somewhat<br />
like a cherry, appears inside the little coffin. If a character<br />
eats the fruit, they gain a +1 inherent bonus to one ability<br />
score, determined randomly. A voice speaks in their head, in<br />
a low, thundering tone: “Blesses slave, like you, I feed upon<br />
the energy of others.”<br />
Then one character within the shrine other than the one<br />
who ate the fruit, chosen at random, loses 1 point of a<br />
random ability score, drained away permanently. (The safest<br />
way to use this shrine is alone.)<br />
If a character eats more than one piece of fruit, he hears<br />
the following telepathic message, in the same low, booming<br />
voice from before: “I am not a generous or giving deity. Suffer<br />
the consequences of assuming too much.”<br />
The character disappears as if affected by a maze spell. The<br />
maze that they are thrown into is a place of horrible menace<br />
and maddening terror. The character must make two Will<br />
saving throws, both against DC 20. If she fails the first, she<br />
loses two points permanently from the ability score that<br />
gained the bonus from the first fruit. If she fails the second,<br />
she is rendered permanently insane as if affected by an insanity<br />
spell once she returns from the maze.<br />
131
CHAPTER 6: THE INNER AND OUTER FANES<br />
The Triad<br />
The Triad is made up of three<br />
doomdreamers that have<br />
ascended through the reverie<br />
of the Dreaming Stone, forever<br />
altered to become the<br />
leaders of the cult of Tharizdun.<br />
They are the most powerful<br />
servants of the Dark God<br />
currently alive. They are so<br />
terrible, in fact, that even<br />
other doomdreamers cannot<br />
suffer their presence. The Triad<br />
occupies this level and are the<br />
only beings with access to the<br />
Tabernacle above.<br />
The First is a human 10thlevel<br />
cleric/5th-level doomdreamer.<br />
He has been a part of<br />
the cult longer than any other<br />
current member, and claims to<br />
remember the days when the<br />
Dark God was free (this is a<br />
lie, however). He maintains<br />
his unnaturally long existence<br />
through feeding off the lifeforce<br />
of others, dark magic,<br />
and drugs.<br />
The Second is an aboleth<br />
7th-level cleric/1st-level doomdreamer.<br />
The Second is currently<br />
in the Temple of Elemental<br />
Evil (see the Recovered<br />
Temple area 30). The newest<br />
of the Triad, the Second is<br />
actually the oldest being, and<br />
can, in fact, remember the<br />
days before Tharizdun was<br />
imprisoned, but only through<br />
the assimilated racial memory<br />
of all aboleths.<br />
The Third is a half-air elemental<br />
8th-level cleric/5thlevel<br />
doomdreamer. The Third<br />
was born on the Elemental<br />
Plane of Air and raised in the<br />
court of Yan-C-Bin, the princess<br />
of evil air elementals.<br />
She was presented as a gift to<br />
the cult of the Elder Elemental<br />
Eye and worked her way up<br />
as a cleric.<br />
132<br />
Level 8: The Triad<br />
Any creature of a nonevil alignment coming within 150 feet<br />
of the top level of the Black Spike (including levels 4 through<br />
8) must make a Will saving throw (DC 20) to<br />
avoid the evil of the place overcoming them.<br />
Those overcome by evil fall unconscious for 1d6<br />
minutes and suffer 1d6 points of temporary<br />
Wisdom damage. This saving throw must be<br />
made every hour spent in the area of its effect.<br />
All doors on this level are made of iron (hardness<br />
10, 60 hp, break DC 28) and do not open<br />
except by the touch of a master key.<br />
1. Outer Chamber (EL 8)<br />
Each wall bears a large inverted black ziggurat.<br />
The only furnishings are a triangular<br />
table with two chairs. A platter sits on the<br />
table made of steel, with a carved demon<br />
on one side looking greedily down at it, as<br />
if at its contents—except that the platter<br />
currently holds nothing.<br />
An iron door is in each wall.<br />
The Triad occasionally meets here and eats<br />
together. Only two chairs are present because<br />
The Second cannot use a chair.<br />
Trap: A symbol of insanity is engraved on the<br />
floor. It is triggered when anyone (except the<br />
Triad themselves) looks at the rune.<br />
aSymbol of Insanity: CR 8; 60-ft. radius affects<br />
up to 150 hp worth of creatures; Will save (DC 27)<br />
negates; Search (DC 33); Disable Device (DC 33).<br />
Treasure: The platter with the demon acts as<br />
a wand of create food and water with 35 charges.<br />
2. Quarters of The Second (EL 4)<br />
The door into this room from area 1 has a<br />
symbol engraved in it that resembles a skull<br />
entwined in the coils of a tentacle. It also has a<br />
glyph of warding on it that sprays acid on anyone<br />
other than the Triad who opens the door.<br />
aGlyph of Warding: CR 4; 5-ft. burst of acid<br />
(5d8 damage); Reflex save DC 20 half; Search<br />
(DC 28); Disable Device (DC 28).<br />
A wall of water stands directly behind the<br />
open door, as if held back by a magical force.<br />
Within, it appears that the room beyond is<br />
filled with water, with a grotto of coral<br />
arranged in the center.<br />
The Second is within the Temple of Elemental<br />
Evil.<br />
The room is filled with water, but special<br />
spells prevent the water from leaving the<br />
room, meaning that characters entering and<br />
then exiting are not even wet when they leave. Characters<br />
must hold their breaths and swim as in any other underwater<br />
situation here. The water is murky, so all Search and<br />
Spot checks incur a –2 penalty.<br />
Treasure: The grotto of coral is shaped a little like a bed or<br />
a roost for a massive creature. Within it are 31 pearls (ten are<br />
pink and worth 80 gp each, ten are white and worth 100 gp<br />
each, six are silver and worth 120 gp each, and five are black<br />
and worth 500 gp each). Each successful Search check (DC<br />
20) allows a character to find 1d6 of the pearls.<br />
3. Quarters of The First (EL 16)<br />
Whips of all kinds hang from pegs. In two different<br />
places, manacles hang empty from the walls. An elaborate<br />
iron-maidenlike structure of needles and barbs stands<br />
open, fresh blood dripping from the points. A steeltopped<br />
desk with a bloodstained, padded chain next to it<br />
is pushed up against one wall, covered with papers and a<br />
few books. Near another wall sits a steel chest covered in<br />
a red and gold cloth.<br />
The iron maidenlike device is The First’s “bed.”<br />
Creatures: The First dwells here, consumed in drugenhanced<br />
meditation unless alerted (he can shake this off<br />
in 1 round). He abuses himself with needles, spikes, and<br />
narcotics, a terrible practice that has nonetheless made<br />
him particularly hardy. Without his long robes and concealing<br />
helmet, he is clearly a very old, but very fit man,<br />
covered with scars (particularly from the self-flagellation<br />
on his back) and with spikes and needles poking through<br />
his flesh.<br />
dThe First: Male human Clr10/Doomdreamer5; hp<br />
132 (+4 from aid from unhallow already figured in); see<br />
Appendix 3.<br />
Tactics: The First looks upon his greater tentacle rod as a<br />
gift directly from Tharizdun, and loves to use it. First, he<br />
immediately activates his bead of karma, giving him +4 effective<br />
levels on his spells regarding range, duration, damage,<br />
and so on. Then, he drinks his potion of haste with the plan to<br />
attack with the rod and cast a spell such as destruction or disintegrate<br />
each round. Ahead of time, he casts maximized<br />
endurance, giving him 30 more hp and +2 to Fortitude saves,<br />
if he has enough time. If he has still more preparation time,<br />
he casts the following spells (before drinking the potion of<br />
haste), in order: spell resistance (SR 17), death ward, dispel good,<br />
true seeing, bull’s strength, protection from elements (fire), magic<br />
vestment, spell immunity (magic missile, lightning bolt, holy smite;<br />
also ice storm if he’s used his bead of karma), shield of faith, and<br />
protection from good.<br />
If he casts all the above spells, his AC becomes 34: he gains<br />
an additional +2 deflection bonus (from both dispel evil and<br />
shield of faith—both of which give +4, but does not stack with<br />
his existing +2 bonus) and an additional +3 enhancement<br />
bonus to his AC (from magic vestment).<br />
Traps: A symbol of death is engraved on the floor. It is triggered<br />
when anyone (except The First) looks at the rune.<br />
aSymbol of Death: CR 8; 60-ft. radius kills up to 150-hp<br />
worth of creatures; Fortitude save (DC 27) negates; Search<br />
(DC 33); Disable Device (DC 33).<br />
A special greater glyph of warding on the chest strikes<br />
anyone within 15 feet of the chest blind when it is opened<br />
(DC 25).<br />
aGreater Glyph of Warding: CR 6; 15-ft. burst of blindness<br />
(as spell); Fortitude save (DC 25) negates; Search (DC 31);<br />
Disable Device (DC 31).<br />
Treasure: The chest holds a torch of revealing and six cones<br />
as well as six incense balls for a black thurible. It also contains<br />
a bag holding 940 pp. Further, in a secret, false bottom (DC<br />
25 to find), it contains a tome of understanding +2.
CHAPTER 6: THE INNER AND OUTER FANES<br />
On the desk are papers that detail the Triad’s plans. They<br />
describe that the Dark God has communicated through the<br />
Dreaming Stone and other means that the Elemental Nodes<br />
created years back must be recovered. Within each of the<br />
nodes, the corresponding Prince of Evil Elementals can be<br />
made manifest and come to the Prime Material Plane with<br />
the power to free Tharizdun.<br />
The Princes of Evil Elementals are:<br />
Air: Yan-C-Bin<br />
Water: Olhydra<br />
Earth: Ogremoch<br />
Fire: Imix<br />
The papers mention another being, Cryonax, as the Prince of<br />
Evil Ice, but that he is not needed for this duty. They mention<br />
that few know that the Elder Elemental Eye spawned these<br />
beings and fewer still know that the Elder Elemental Eye is<br />
truly the Dark God Tharizdun.<br />
To recover the nodes (which are fully described: see Chapter<br />
8: The Fire Node), the elemental power gems (each lost within<br />
its own node) must be found and placed within the Orb of<br />
Oblivion, which is now within an area known as the Greater<br />
Temple of the Temple of Elemental Evil.<br />
Once Tharizdun is free, the doomdreamers will command<br />
the magmin to cause the volcano to erupt to show their devotion<br />
to the destructive power of their deity, who then lays<br />
waste to all existence.<br />
Development: If aware that intruders are in the Inner<br />
Fane, The First goes to Level 9 to defend himself there.<br />
4. Quarters of the Third (EL 15)<br />
A forbiddance spell has been cast in this area so that creatures<br />
who are not chaotic evil cannot enter the room unless they<br />
make a Will saving throw (DC 24). Those who fail the save<br />
also suffer 3d6 damage (6d6 damage if lawful good).<br />
The middle of this room is taken up with an abnormally<br />
large bed, about 15 feet square. The black sheets are<br />
stained with fresh blood, and two dead bodies lie tangled<br />
within them. Two silver circular plates, about 2 feet<br />
across, hang on the curved south wall, flanking a large<br />
upside-down two-step pyramid symbol made of ebony.<br />
Clothes lie scattered about the floor, as do various bloody<br />
tools and knives.<br />
Creatures: The Third calls this room home. She is sadistic<br />
and despicable, and when not elsewhere, tortures slaves and<br />
prisoners to death here.<br />
The Third, Half-Air Elemental Clr8/Doomdreamer5:<br />
hp 111 (+4 from aid from unhallow already figured in); see<br />
Appendix 3.<br />
Tactics: The Third has no qualms about defending herself<br />
here, particularly with her forbiddance spell helping her. She<br />
always has bull’s strength and endurance cast, and given warning<br />
also casts divine power, magic vestment, true seeing, and protection<br />
from good.<br />
In battle, The Third casts silence on spellcasters and then<br />
batters her foes with blasts of force, greater command, blasphemy,<br />
destruction, and forcecage. Another tactic that she utilizes<br />
is to seal herself off with a wall of force (perhaps coupled<br />
with repulsion), to heal her wounds and cast more<br />
defensive spells on herself such as protection from elements<br />
or spell resistance.<br />
Treasure: Each of the symbols on the wall is worth 100 gp.<br />
Hidden within the bed is a portable hole containing the following:<br />
a necklace of platinum and black opals (worth 5,000<br />
gp), two potions of cure critical wounds, and a scroll of divination,<br />
scrying, and etherealness.<br />
Level 9: Tabernacle of Utter<br />
Darkness (EL variable)<br />
Anyone entering this room must have a master key or be<br />
within 5 feet of someone who has one.<br />
At the very top of the tower lies a room of complete darkness.<br />
Nevertheless, you can see the rounded black walls<br />
and features of the room—as if here you can see shades of<br />
darkness. Two tall pillars support the high, pinnacled ceiling,<br />
and three altars rest atop a rise of a single step,<br />
rounded so that it takes up about a third of the room.<br />
The pillars seem intricately carved with tentacles,<br />
skulls, contorted faces, serpents, swirling suns, inverted<br />
step pyramids, triangle symbols, smiling demons, and<br />
other disturbing imagery. The two side altars are perfectly<br />
regular black rectangular slabs, while the main, grand altar<br />
is strangely misshapen, lumpy, and organic in appearance.<br />
Behind this strange altar is a huge upside-down twostep<br />
pyramid that seems to glow brightly with darkness, if<br />
such is possible. Its absolute blackness threatens to draw<br />
you into it.<br />
This dark chamber is extremely cold, numbing you<br />
from within. This room seems to be the very heart of the<br />
darkness that pervades this entire tower, the Fanes, and<br />
even the caldera itself.<br />
It is extremely cold in this room. No normal gear or even<br />
spells can protect anyone from this magical, soul-numbing<br />
chill. Anyone not wearing a purple robe of Tharizdun suffers<br />
1d4 points of damage per minute spent in the temple. Touching<br />
a metal object (unless protected by the long sleeves of the<br />
purple robes) inflicts an additional 2d4 points of damage.<br />
Wearing metal armor inflicts 1d4 points of damage on the<br />
first round and 2d4 points of damage per round afterward<br />
unless the purple robe is worn.<br />
A torch of revealing sheds light here as if it were a normal<br />
torch. No other source of illumination functions, although<br />
characters can see the size and shape of the room.<br />
Traps: Characters must make three saving throws (one for<br />
the unhallow effect, one for the special illusion, and one for the<br />
looking at the obex) just for being in this room, more if they<br />
touch anything. Another immediate save might be required<br />
due to the cold.<br />
aPhantasmal Compulsion (CR 4): As soon as characters<br />
enter the room, they must make a Will saving throw (DC<br />
20). Those who fail fall victim to a powerful phantasm in<br />
which they see the person they cherish most in their life<br />
(mother, spouse, child, sibling, friend, and so on) hauled up<br />
to the Grand Altar by burly, black-masked muscular men and<br />
held down for sacrifice. The character is convinced that this<br />
is really happening, and must then make another Will save<br />
(DC 20) or be compelled to race up to the Grand Altar<br />
attempting to save them (having them fall prey to the Grand<br />
Altar’s attacks, see below).<br />
One of the Triad, if present, can later use this phantasm<br />
to convince victims who failed the first saving throw that<br />
he or she (the individual member of the Triad) is actually<br />
133
CHAPTER 6: THE INNER AND OUTER FANES<br />
The Origin of the<br />
Grand Altar<br />
The demon Zuggtmoy helped<br />
create the original Temple of<br />
Elemental Evil and was eager<br />
to see it restored after it was<br />
first cast down. As she manipulated<br />
events to rebuild the<br />
Temple’s evil, she learned of<br />
its true masters. When the<br />
heroes who defeated the<br />
second rise of the Temple dispatched<br />
the demon, the Triad<br />
intercepted her spirit’s path<br />
back to the Abyss. They<br />
brought her here in hopes that<br />
she could be of some use to<br />
them. When she would not<br />
cooperate with them willingly,<br />
they made her into the altar of<br />
this tabernacle.<br />
134<br />
their loved one. These victims must then make a second<br />
Will save (DC 20) or be convinced that this is true and be<br />
unable to attack the Triad member. This effect<br />
is a free action for the evil cleric and lasts for<br />
1d6+1 rounds.<br />
aThe Obex (CR 6): The symbol behind<br />
the grand altar is the first threat faced by any<br />
exploring the room. Characters looking upon<br />
it must make a Will saving throw (DC 20) or<br />
be transfixed by it for 1d4 rounds, after which<br />
they must make a second Will save (DC 18).<br />
Failure means that the character’s soul is<br />
absorbed into the symbol. If the character’s<br />
soul remains within the obex for more than 10<br />
rounds, it is utterly and completely destroyed<br />
(no resurrection possible other than through<br />
divine intervention). Once the saving throws<br />
are made (successful or not), they need never<br />
be made again.<br />
If a soul is absorbed by the obex, one of the<br />
spirits within the pillars attempts to take control<br />
of the body.<br />
aThe Pillars of the Unfettered (CR 10):<br />
The pillars, as described in the read aloud text,<br />
are illusions covering their real form—<br />
columns of violet energy running from floor<br />
to ceiling. If the illusion is dispelled or seen through, a<br />
character can make a Spot check (DC 15) to notice that<br />
faces, and even wispy humanoid creatures, seem to swirl<br />
amid the energy. These are trapped spirits known as the<br />
Unfettered—those left bodiless but alive by the evil effects<br />
of the Lesser Altars. They are not undead, for they never<br />
died—they’re simply trapped, bodiless.<br />
Body Available: If an available, soulless body exists nearby<br />
(probably thanks to the Obex) one of the Unfettered attempts<br />
to possess it. The body must fail a Fortitude saving throw (DC<br />
20) for this to happen. An Unfettered soul attempts this every<br />
round. If one succeeds, the character’s body is now under the<br />
control of a new spirit. This does not work like a malevolent<br />
ghost or a wizard using magic jar. The Unfettered work differently.<br />
It adopts all mental and physical attributes of the body it<br />
inhabits. After 1d4 rounds, the Unfettered now knows how to<br />
use all the body’s skills, feats, spells, and equipment. It has all<br />
the character’s memories. The only aspect that changes is the<br />
being’s alignment, which becomes chaotic evil.<br />
Half of the time (01–50 on d%), an Unfettered attempts to<br />
hide its new nature and impersonate the character it possesses,<br />
as if it has a Bluff skill modifier of +15. The other half<br />
of the time (51–100 on d%), it simply revels in its new body,<br />
attacking all those nearby for 1d4 rounds and then fleeing.<br />
Character Touches Pillar: If no bodies are available, but a<br />
character touches one of the pillars, an Unfettered is loosed.<br />
Now, it attempts to enter and cohabit any body around by<br />
forcing someone to make a Will save (DC 20). Determine the<br />
target randomly, and make a new check each round until<br />
the Unfettered succeeds (that is, a character fails his save)<br />
or until no bodies are present to assault within 50 feet of the<br />
pillar from which the Unfettered came.<br />
Characters so possessed suffer a –2 circumstance<br />
penalty on all attack and damage rolls and skill checks<br />
because of disorientation and nausea. Nothing more happens<br />
until the character goes to sleep, falls unconscious, or<br />
goes into a meditative reverie. Now, the Unfettered takes<br />
control of the body and attempts to run off. It controls the<br />
character for 8 hours or until put to sleep or knocked unconscious<br />
(if a character is unconscious due to negative hit points,
CHAPTER 6: THE INNER AND OUTER FANES<br />
this happens 1 round after the Unfettered first takes control<br />
due to further damage to the body). When the Unfettered<br />
loses consciousness, the regular character awakens and takes<br />
control of the body, with no memory of any actions taken<br />
while not in control. Any spell that banishes or dismisses<br />
extraplanar creatures rids a body of an Unfettered spirit.<br />
aThe Lesser Altars (CR 6 each): Each altar’s top is covered<br />
with 9 rows of 37 pieces (333 total) of violet quartz (worth<br />
10 gp each). These altars are for minor sacrifices made to<br />
Tharizdun. If any object(s) worth at least 100 gp (gems, gold<br />
coins, a magic item, and so on) is placed upon the altar, it vanishes.<br />
If the altar is touched without making such a sacrifice, a<br />
blood sacrifice is required. Any living creature touching the<br />
altar must make a Fortitude saving throw (DC 20) or be consumed.<br />
The character’s body (but not equipment) disappears<br />
forever and the character’s spirit goes into one of the pillars to<br />
become one of the Unfettered. There, they live out eternity<br />
neither truly dead (so they cannot be resurrected) nor alive.<br />
Only a wish or a miracle restores the body, but another such<br />
spell is required to get the proper spirit (and not one of the<br />
other Unfettered, for hundreds are within each pillar) to go<br />
into it. Further, the character has 1 point of Wisdom permanently<br />
drained each full day spent in the pillar. Once the character<br />
reaches 0 Wisdom, she becomes permanently chaotic<br />
evil, indistinguishable from any other Unfettered (the character<br />
is permanently lost barring any action from a divine being).<br />
A proper sacrifice satiates the altar for 10 minutes, allowing<br />
it to be touched, searched, or pried upon safely.<br />
aThe Grand Altar (CR 15): This strange altar is mottled<br />
purple and black with blotches of green. Although it feels like<br />
stone, it is lumpy and has an organic, fungal appearance. It is,<br />
in fact, alive—the essence of a powerful demon trapped here.<br />
This altar is for blood sacrifices only. Any living thing that<br />
touches it must make a Fortitude save (DC 20) or be struck<br />
paralyzed for 3d6 rounds. During this time, tendrils, not<br />
unlike those of a violet fungus, extend forth from the altar<br />
and grasp at anything within 5 feet. These tendrils strike<br />
with a +15 attack bonus, inflicting 1d6+4 points of damage<br />
and injecting poison. This poison (DC 18 to resist) inflicts<br />
1d6 points of temporary Strength and temporary Constitution<br />
damage (as both initial and secondary damage). Slain<br />
characters or those rendered below 0 Strength are instantly<br />
liquefied and absorbed into the altar.<br />
The altar cannot be affected by physical attacks, nor can<br />
it be affected by any spells other than dispel magic, greater<br />
dispelling, or similar effects. Dispelling the magic of the<br />
altar (cast as if by a 15th-level caster) frees the demon<br />
within, who is banished back to its home plane for 100<br />
years, leaving in its place two items: a huge, 20-HD violet<br />
fungus and a cube of force, the focus of the magic that held<br />
the demon in the altar.<br />
Further, if the character who heard the voice in area 31 of<br />
the Recovered Temple is present when this happens, that<br />
character gets three wishes granted immediately.<br />
dHuge 20-HD Violet Fungus: hp 160; Add +4 Strength,<br />
+16 attacks, poison (Fortitude save DC 18), +9 Fortitude save,<br />
+6 Will and Reflex saves.<br />
Sublevel 1: The Cathedral of Pain<br />
(EL 13)<br />
Certainly there must be no greater collection of torture<br />
device in world. Every type of device meant to inflict pain<br />
is in this room, from the straightforward rack and iron<br />
maiden to more complex and esoteric things. Each major<br />
torture device has a strange tube connecting it to the wall.<br />
These tubes seem almost alive, like veins. Screams,<br />
moans, and sobs echo throughout the room.<br />
The pain generated in this room travels through the organiclooking<br />
tubes and into the walls, powering the evil of this place<br />
(particularly the Tabernacle of Utter Darkness). If these twentythree<br />
tubes are destroyed (hardness 0, 2 hp, break DC 15), they<br />
leak a bluish-black substance: liquid pain. If touched, it inflicts<br />
6d6 points of damage and the victim must make a Fortitude<br />
save (DC 16) or become exhausted from the pain (move at half<br />
normal speed, suffer an effective penalty of –6 to Strength and<br />
Dexterity) for 1d6 minutes. The character must make a second<br />
save (Will, DC 16) or become shaken (–2 morale penalty onattack<br />
rolls, weapon damage rolls, and saving throws). It is a setback<br />
for the Temple to have all the tubes destroyed, but it does<br />
not affect anything currently (enough pain and evil power is<br />
stored within the Tabernacle to function for weeks).<br />
In the south portion of the wall exists a secret panel that<br />
opens to reveal a small niche with two black stone studs.<br />
Anyone touching the rightmost stud appears in the middle<br />
of Level 1. Anyone touching the left stud is teleported to the<br />
middle of Sublevel 2.<br />
Creatures: The master of torture and four prisoners currently<br />
occupy this area.<br />
Yrthuk Innar is a 10th-level half-earth elemental fighter.<br />
He lives and works here, torturing prisoners with skill and<br />
an odd detachment. Yrthuk is better equipped than would be<br />
expected because he currently uses much of the equipment<br />
formerly owned by his victims (who want it back).<br />
dYrthuk Innar: Half-earth elemental Ftr10; hp 101 (+4<br />
from aid from unhallow already figured in); see Appendix 3.<br />
Festalon Girrot is an elven cleric of Ehlonna who has only<br />
recently been brought here. He is grateful to any rescuers<br />
and offers to help them in any way that he can, including<br />
fighting against the doomdreamers.<br />
dFestalon Girrot: Male elf Clr7; hp 32 (currently 1); see<br />
Appendix 3.<br />
Erdso is a human monk who has been here for months,<br />
enduring unimaginable agonies. Unfortunately, those agonies<br />
have driven him completely insane. Although he seems<br />
normal and pledges to help his rescuers fight against the evil<br />
here, at the first moment of real stress, he flies into a gibbering<br />
rage, randomly attacking allies and foes alike.<br />
dErdso: Male human Mnk8; hp 50 (currently 2); see<br />
Appendix 3.<br />
Tamme and Jear are simple townsfolk from Rastor who<br />
disappeared long ago. Tamme is human, while Jear is an orc.<br />
They are friends, and pledge to help their rescuers but really<br />
have little power to do so.<br />
dTamme: Female human Com2; hp 7 (currently 1) (noncombatant).<br />
dJear: Female orc; hp 5 (currently 1); AL N; see Monster<br />
Manual page 146.<br />
Tactics: Yrthuk does whatever it takes to defend himself<br />
and his workplace. This includes breaking off a tube and<br />
spraying the liquid pain inside at a target within 15 feet. This<br />
can be accomplished anywhere in the room (the tubes run<br />
throughout) but Yrthuk only does it once or twice.<br />
Treasure: A sack in a corner of the room is actually a bag of<br />
holding (Type I) that holds some of the gear of Yrthuk’s captives,<br />
135
CHAPTER 6: THE INNER AND OUTER FANES<br />
136<br />
including a wand of cure light wounds (25 charges), a wand of<br />
summon monster I (20 charges), a pouch with a single pinch of<br />
dust of tracelessness, a masterwork morningstar, a masterwork<br />
mighty longbow (Str 12), a quiver with 7 arrows, 3 100-gp<br />
gems, and 75 gp.<br />
Sublevel 2: The Tourbillion (EL 11)<br />
A huge map is on the ground, carved and painted onto<br />
the floor. It seems to depict most of this portion of the<br />
continent, marking each natural feature as well as each<br />
city and town, labeled in Common. Above the map are<br />
two iron poles that sit on round bases on the floor and<br />
end, at the top, with what looks to be a claw. Behind each<br />
of these claw-poles is an even taller pole topped with an<br />
iron loop about 2 inches across.<br />
On the opposite side of the room from the poles<br />
stands a strange statue of black and purple stone. Relatively<br />
formless, it appears to be a 9-foot-tall mass of<br />
writhing serpents, tentacles, or thick ropes.<br />
Investigation shows that the height of any of the poles can be<br />
adjusted quite easily. If torches of revealing are placed in the<br />
iron loops atop the taller poles, the claw poles cast shadows<br />
upon the map. If the two shadows meet on the map, the room<br />
is filled with a swirling vortex of energy and an image of that<br />
exact spot appears above the map, in three dimensions. Stepping<br />
into the image transports you to that spot.<br />
Thus, this is a teleportation device that leads to anywhere.<br />
The doomdreamers use it to get around to wherever they<br />
need to go (usually using word of recall to get back if possible).<br />
They do not give other lesser clerics or servants access to it.<br />
Currently, if the torches are lit but none of the poles are<br />
moved or adjusted in any way, the tourbillion vortex shows<br />
the Temple of Elemental Evil.<br />
In the south portion of the wall exists a secret panel that<br />
opens to reveal a small niche with two black stone studs.<br />
Anyone touching the rightmost stud appears in the middle<br />
of Sublevel 1. Anyone touching the left stud is teleported to<br />
the middle of Sublevel 3.<br />
Creatures: The statue is a stone golem. If anyone touches<br />
the poles in the room, it animates, taking on a vaguely<br />
humanoid form amid the tentacles (or whatever), attacking<br />
anyone in the room. Only one of the Triad can command it to<br />
stop attacking, although if people in the room leave and then<br />
come back, they find it has returned to its inert state.<br />
dStone Golem: hp 110; see Monster Manual page 108.<br />
Sublevel 3: Dire Library<br />
The center of the floor of this round room bears a large<br />
black sigil in the form of a blazing sun of darkness. The<br />
walls are covered in bookshelves filled with all manner of<br />
scrolls, tomes, and stacks of old papers, yellow with age.<br />
The black sun represents forbidden knowledge, and it<br />
marks the library of the doomdreamers. As libraries go, it is<br />
fairly small, but every book in it is very rare and extremely<br />
evil. Topics include: necromancy, demons, devils, torture,<br />
murder, assassination, theft, conquest, monsters, undead,<br />
creatures that live in darkness, and more. Each of these<br />
works is worth 5d6 gp and two hundred of them are here.<br />
Among them is one book of obvious import due to its size<br />
and construction. Not obvious until examined, this artifact<br />
is the book of vile darkness.<br />
In the south portion of the wall exists a secret panel that<br />
opens to reveal a small niche with two black stone studs.<br />
Anyone touching the rightmost stud appears in the middle<br />
of Sublevel 2. Anyone touching the left stud is teleported to<br />
the middle of Sublevel 4.<br />
Sublevel 4: Reliquary of Evil<br />
This small round room holds only one item: a pedestal of<br />
black basalt, covered with carved demons performing acts<br />
upon humans far worse than even anything seen earlier<br />
in the Temple. Atop this pedestal is a clear glass bowl<br />
filled with the blackest of liquids.<br />
The black liquid is concentrated evil: negative energy. Touching<br />
it bestows two negative levels and stuns a nonevil creature<br />
for 1d6 rounds. No saving throw is allowed to resist these<br />
effects; the Fortitude DC to remove the negative level is 20.<br />
Soaking at the bottom of this terrible stuff is a talisman of<br />
pure good—an artifact recovered by the doomdreamers a long<br />
time ago from an enemy. They are trying to change it into a<br />
talisman of ultimate evil, but so far have been unsuccessful.<br />
The talisman has only two charges left.<br />
In the south portion of the wall exists a secret panel that<br />
opens to reveal a small niche with two black stone studs.<br />
Anyone touching the rightmost stud appears in the middle<br />
of Sublevel 3. Anyone touching the left stud is teleported to<br />
the middle of Sublevel 5, hanging with one arm grasping a<br />
hook on the ceiling.<br />
Sublevel 5: Quasit Lair (EL 8)<br />
This odd room is an upside-down cone. Worse, the walls<br />
are clear rather than black, so you can see the slowly<br />
churning magma around the base of this strange tower.<br />
Iron hooks hang from the ceiling. A dead body hangs<br />
from one of them, probably there for at least a day.<br />
Characters can move about by climbing across the ceiling on<br />
the hooks. This requires a Climb check (DC 10).<br />
A character who falls is stuck in the point of the cone and<br />
suffers a –4 effective penalty to Dexterity and Strength, with<br />
an additional –2 modifier for every other fallen character<br />
also stuck.<br />
In the southern portion of the wall (near the ceiling) exists<br />
a secret panel that opens to reveal a small niche with a black<br />
stone stud. Anyone touching the stud appears in the middle<br />
of Sublevel 4.<br />
Creatures: Four quasits hang in this room in the form of<br />
bats, but immediately transform and attack as soon as any<br />
nondoomdreamer appears in the room.<br />
dQuasits (4): hp 17, 16, 14, 18 (+4 from aid from unhallow<br />
already figured in); see Monster Manual page 41.<br />
Tactics: The quasits take full advantage that characters<br />
here must use one hand to hang onto a hook. They attack and<br />
then fly out of reach.<br />
Ad Hoc XP Adjustment: Give an additional 10% experience<br />
award for this encounter, due to the difficult circumstances<br />
in which the characters must fight.
PART 3: THE REBIRTH OF ELEMENTAL EVIL<br />
Part 3: The<br />
Rebirth Of<br />
Elemental<br />
Evil<br />
By now, the climax of the adventure, the characters should<br />
know exactly what they are up against.<br />
THE TRIAD’S PLAN<br />
There are six steps to the complex plan of the cult of Tharizdun<br />
to free their Dark God. Not all the following steps need<br />
to be completed in order.<br />
1. Uncover the bottom level of the Temple of Elemental<br />
Evil. The excavation crew includes a beholder (using its disintegrate<br />
ray), a small cadre of stone giants, and a number of<br />
slaves gathered from the area (mostly hobgoblins).<br />
2. Rededicate the Greater Temple (see Chapter 7: The<br />
Recovered Temple) to the Elder Elemental Eye, eradicating<br />
any trace of Iuz and Zuggtmoy.<br />
3. Uncover the gates to the four elemental nodes.<br />
4. Find the elemental power gems and put them in the Orb<br />
of Oblivion, so that the gates are once again fully functional.<br />
5. Have the Champion of Elemental Evil call the Princes of<br />
Elemental Evil into their respective nodes.<br />
6. Bring the princes to the inner chamber of the Greater<br />
Temple, where they will use the Orb of Oblivion to infuse<br />
Tharizdun with enough power to escape his extradimensional<br />
prison.<br />
Progress to Date<br />
Most of step 1 is finished, and step 2 is all but complete.<br />
Only one of the elemental nodes—the Fire Node—is fully<br />
accessible; the fire power gem is now within the Orb of Oblivion,<br />
and Imix, Prince of Evil Fire, now resides within the node.<br />
Victory for evil is already within reach. With just one<br />
Elemental Prince and the Orb of Oblivion, a chance of freeing<br />
Tharizdun exists.<br />
Victory for Good<br />
Imix is extremely powerful. The adventurers might not be<br />
able to defeat him in battle. However, they can still “win” by<br />
making it impossible for Imix to summon Tharizdun, and<br />
perhaps even trap him in the Fire Node. To do so, they must<br />
find the Orb of Oblivion and hide or destroy it, as well as do<br />
substantial damage to the cult in the recovered temple and<br />
the Temple of All-Consumption. It would then be unlikely<br />
for the remaining doomdreamers to gather enough power to<br />
fashion another one.<br />
ALLIES FROM HOMMLET<br />
The inhabitants of Hommlet have seen evil rise in the temple<br />
twice before, so they are on guard against it happening again.<br />
When the doomdreamers and their servants began excavating<br />
the Temple of Elemental Evil, powerful and influential<br />
people of Hommlet did not take long to learn about it.<br />
Canoness Y’dey summoned a hound archon to investigate<br />
and learn the motivation and strengths of this new, mysterious<br />
force of evil. The archon never came back. Now Y’dey is<br />
gathering the powerful folk of the town and convincing<br />
them that they must act. These people include the following<br />
(see Chapter 1: The Town of Hommlet for details): Elmo,<br />
Terjon, Rufus, Burne, “Jaroo” (not present if the doppelganger<br />
has been discovered), Spugnoir, Ingrith, and Kella<br />
(see The Ruined Temple in Chapter 3).<br />
If the adventurers return from the Temple of All-<br />
Consumption, planning to explore the Temple of Elemental<br />
Evil, and go to Hommlet first, they are contacted by Elmo. He<br />
takes them to the keep, where Y’dey has gathered a number of<br />
these influential and powerful people. She grills the PCs and<br />
then includes them in the planning session. The more information<br />
they share, the more weight their opinions carry.<br />
Both Elmo and Ingrith are eager to accompany anyone<br />
planning to fight the clerics and their servants. Kella uses her<br />
phylactery of change (see Appendix 1) to take the form of an<br />
ogre and joins those currently in area 8 of the recovered<br />
temple. She has already gone in before the PCs arrive but will<br />
help them if encountered. The others help with spellcasting,<br />
mundane equipment, and advice.<br />
If the adventurers do not go to Hommlet, they may still<br />
encounter some of these interested parties in the woods<br />
around the temple, seeking to discover more information. At<br />
the very least, these individuals can tell the PCs how to get<br />
into the dungeons via the outer entrance that the cultists use.<br />
ENEMIES FROM NULB<br />
Taking Hedrack’s advice, the Triad has collected Lareth the<br />
Beautiful from Nulb (resurrecting him if necessary) and<br />
brought him to the recovered temple. They proclaimed him<br />
the Champion of Elemental Evil and bade him perform the<br />
ritual to call Imix. Lareth succeeded in this test and now is<br />
one of the cult’s most valuable commodities. They watch over<br />
him very closely. Place him in area 29, 30 or 31 of the recovered<br />
temple, or perhaps even in the Fire Node with a few<br />
scrolls of protection from elements.<br />
The Other Nodes and Princes<br />
Depending on the power level of the party, you might wish to<br />
alter the adventure so that the cult is much closer to gathering<br />
all the princes and freeing Tharizdun. Now the PCs must<br />
make their way through all the elemental nodes to find the<br />
Orb of Oblivion and stop the Triad’s mad plan.<br />
This requires some work, as you’ll need to create the other<br />
elemental nodes and fill them with appropriate creatures; see<br />
Monsters by Type (and Subtype), page 4 of the Monster<br />
Manual. This also requires creating statistics for one or more<br />
of the other Princes of Elemental Evil, using Imix as a starting<br />
point. The remaining princes are Yan-C-Bin (Air), a formless,<br />
sentient cloud; Olhydra (Water), a living wave of water;<br />
and Ogremoch (Earth), a huge, amorphous colossus of stone.<br />
137
CHAPTER 7: THE RECOVERED TEMPLE<br />
138<br />
Chapter 7:<br />
The<br />
RecOvered<br />
Temple<br />
The Triad members are working as fast as they can to excavate<br />
the lower dungeon levels beneath the Temple of Elemental<br />
Evil.<br />
SECURITY/ORGANIZATION<br />
Security in this area is very tight. The cultists know that the<br />
temple was once a hive of all manner of creatures, and they<br />
do not want anything simply wandering in. Further, they are<br />
aware that someone knows of their presence, because they<br />
captured the hound archon that was sent to investigate (see<br />
area 25).<br />
Guards are hostile to anyone who does not appear to be<br />
a doomdreamer or one of the monsters that dwell here.<br />
However, they recognize Smigmal the assassin and Falrinth<br />
the wizard (see areas 15 and 16, respectively) and let<br />
them pass.<br />
OUTER ENTRANCE<br />
An abandoned barn and cottage lie in ruins near a well,<br />
some distance to the north and east of the temple.<br />
Although the Triad members have done what they can to<br />
hide the coming and going of their servants, the evidence<br />
is not hard to find by someone actively looking. With a successful<br />
Spot check (DC 15), a character notices that the<br />
nearby vegetation is matted down, and that a few out-ofplace,<br />
cairnlike piles of stones are within sight of the old cottage.<br />
Exploration of the area (Search DC 20) reveals traces of<br />
considerable activity near the well, and tracking (Wilderness<br />
Lore DC 15) can ascertain that many creatures—some<br />
of them very large—have recently traveled through, right<br />
up to the well.<br />
Watcher (EL 9)<br />
Creatures: A succubus keeps an eye on the ruins. It hides<br />
in the form of a halfling in the nearby woods (Hide +11),<br />
watching over the well with clairaudience/clairvoyance.<br />
dSuccubus: hp 33; see Monster Manual page 41.<br />
Tactics: If it sees ordinary-looking people poking around,<br />
the succubus takes the form of an ogre and charges forth,<br />
hoping to scare them off. However, it might attempt to charm<br />
and then use its energy drain on a solitary person.<br />
If it sees a well-armed group of adventurers, the demon<br />
teleports to the guards in areas 2 and 3 to alert them. It<br />
then travels to the lower level and warns the doomdreamers<br />
there.<br />
The succubus does not stick around to fight, not even for<br />
one round.<br />
Secret Tunnel<br />
The abandoned, dry well is about 20 feet deep. At its bottom<br />
is a heavy wooden door in the shaft wall, opening into a<br />
secret tunnel. Just inside the entrance is a ladder that can be<br />
set up in the well to provide a way out.<br />
For 50 feet, the passage has clay walls shored up by timbers.<br />
It then narrows to only about 3 feet wide, the walls<br />
now limestone, and heads due south for 100 feet. It<br />
descends slowly as it now gradually veers to the west, continuing<br />
about 200 feet to an opening in the north wall of a<br />
40-foot oval chamber.<br />
From the cave, the passage curves and twists to the<br />
southwest, the walls partially worked and partially natural.<br />
After 540 feet, it opens into the eastern wall of a 10-foot-by-<br />
15-foot underground room (area 2D in The Ruined Temple,<br />
Chapter 3).<br />
The oval cavern contains a secret entrance to the temple<br />
excavations. This is concealed in the eastern portion of the<br />
south wall by a balanced, pivoting stone slab (Search DC 22).<br />
The passage is 3 feet wide and leads 600 feet generally south,<br />
slanting downward steeply. At its end is a 10-foot-wide stone<br />
passage east, turning south in 30 feet. (This is shown in the<br />
upper-left corner on map 24.)<br />
THE DUNGEONS<br />
It is obvious that this is an excavation in process. Everywhere<br />
you look, debris and rubble lie about the floor.<br />
Wooden support beams prop up unstable ceilings. The<br />
place is damp and grimy, and smells of earth and mold.<br />
The corridors here are 10 feet wide, with arched ceilings<br />
about 17 feet high. Unless otherwise noted, all other areas<br />
have arched ceilings about 30 feet high.<br />
Torches in iron sconces illuminate all areas unless otherwise<br />
stated.<br />
The cultists have uncovered only enough of the third<br />
dungeon level to gain access to the Greater Temple area<br />
beneath it.<br />
1. Entry<br />
This room once must have been completely collapsed—<br />
the ceiling is rough and jagged, its mason-wrought<br />
arches destroyed. The area is now relatively clear of<br />
rubble and debris, but the stonework of the walls and<br />
floors is badly damaged and uneven, and everything is<br />
covered in small stones and dust. Two wooden doors and<br />
two passages lead out of the room. The doors are slightly<br />
damaged and do not hang entirely right, but they do not<br />
appear knocked out of place.<br />
The passage to the south is low, about 12 feet high, and ends<br />
in a set of very steep stairs going up to a trapdoor (and into<br />
area 5).<br />
Both doors are slightly ajar.<br />
2. Guards (EL 10)<br />
Although freshly cleared of rubble, this room is still very<br />
dusty, and the masonry of its walls and floor is damaged<br />
and covered in scratch marks. Five sleeping mats of<br />
woven reeds are rolled up together near the west wall,<br />
and a single boulder serves as a table of sorts, holding an<br />
empty platter and three stoneware mugs.<br />
The secret door in this room is particularly hard to find<br />
(Search DC 25) and in fact has not been discovered by the
CHAPTER 7: THE RECOVERED TEMPLE<br />
excavators. Falrinth knows about it, but he has no reason to<br />
reveal its existence.<br />
Creatures: Four ogre warriors in full plate armor and an<br />
ogre barbarian stand guard in this room. The barbarian commands<br />
the ogres here and in area 3.<br />
dOgre War4 (4): hp 50, 52, 58, 59; see Appendix 3.<br />
dTrond: Male ogre Bbn6; hp 84; see Appendix 3.<br />
Tactics: These ogres use their advantageous reach to<br />
flank and tie up as many foes as they can. They prefer to<br />
fight in area 1 if possible, alongside their fellow guards in<br />
area 3.<br />
3. Guards (EL 9)<br />
Still partially filled with rubble, this room stinks of urine<br />
and stale ale. A wooden door lies atop two large stones to<br />
make a crude table, with knucklebones, a knife, and a<br />
large animal horn atop it. Other stones have been pulled<br />
around the table for use as chairs.<br />
This was once the quarters of the wizard Falrinth. If the PCs<br />
look carefully (Search DC 20), they can find an old, faded<br />
magic symbol painted on the floor by the door, a few candles<br />
lying amid the rubble, and a stuffed dire rat, musty and torn,<br />
under a stone.<br />
Creatures: Four ogre warriors in full plate armor stand<br />
watch here.<br />
dOgre War4 (4): hp 52, 55, 60, 69; see Appendix 3.<br />
Tactics: If attacked, or if they note the approach of intruders,<br />
one ogre uses its first action to sound the horn, alerting<br />
all in areas 1 to 8. The ogres prefer to fight in area 1 if possible,<br />
alongside their fellow guards in area 2.<br />
4. Secret Room<br />
It appears that this area has not been cleared, but the<br />
destruction was far less severe here. Only scattered stones<br />
lie fallen about the floor. A wooden workbench runs<br />
along the north wall near the door. That wall is also lined<br />
with shelves, some smashed, but a few still holding small<br />
bins or containers. A small fireplace is full of rubble.<br />
Along the south wall is a partially destroyed writing desk<br />
covered with dust, and a pair of bookstands, both lying<br />
toppled on the floor. One has a book lying face down and<br />
open next to it.<br />
In the eastern end of the room are a rubble-covered<br />
table, a toppled high-backed chair, and an open cabinet.<br />
An iron box can be seen amid the debris on the table.<br />
This was Falrinth’s secret workshop, back in the old days.<br />
Treasure: The box, the containers on the shelves, and the<br />
desk are empty. A successful Search check (DC 15) of the<br />
table reveals nine gems scattered in the rubble (two worth 10<br />
gp, eight worth 100 gp, and one worth 500 gp).<br />
The book on the floor is a vacuous grimoire. A general<br />
search of the room reveals another fallen book nearby: a tome<br />
of leadership and influence (+1).<br />
The cabinet holds three iron coffers, each locked (Open<br />
Lock DC 30). The first contains 107 pp, the second 310 gp,<br />
and the third 228 sp. Falrinth (see area 16) still carries the<br />
keys, although he has not used this room lately. In the back<br />
of the cabinet is what appears to be a smashed mirror.<br />
5. Guard Post (EL 11)<br />
This circular area seems to be the bottom of a shaft,<br />
although now clogged with debris so that it extends up<br />
only about 15 feet. A trapdoor, perhaps once well hidden<br />
under a flagstone, is now in plain view, opened via a<br />
heavy pull-ring.<br />
Very steep stairs lie below the trapdoor, leading down about<br />
15 feet to a passage that connects with area 1.<br />
Creatures: With the excavations nearly complete, the<br />
doomdreamers have assigned a greater earth elemental to<br />
reinforce the usual guard, a stone giant. Since it’s too tall to<br />
fit completely within the area, the elemental fights partially<br />
submerged in the floor (remember it can pass through earth<br />
and stone as easily as a person through water).<br />
dGreater Earth Elemental: hp 200; see Monster Manual<br />
page 82.<br />
dStone Giant: hp 118; see Monster Manual page 98.<br />
Tactics: While the earth elemental batters foes with its<br />
slam attack, the stone giant backs 30 feet down the hall to the<br />
east and throws stones into the melee.<br />
6. Common Area<br />
Although the plaster on the walls of this room is<br />
cracked and peeled, what remains shows numerous<br />
black triangles with inverted Ys, surrounded by painted<br />
eyes of all types—human, elf, gnome, and those far<br />
more monstrous.<br />
The openings to the north clearly once were doorways,<br />
but the doors must have been destroyed and not<br />
replaced.<br />
The hobgoblin slaves in both rooms marked 7 can see easily<br />
into this room, but they do not react to intruders.<br />
7. Hobgoblin Slaves<br />
Mostly cleared out, this room already stinks of filth and<br />
sweat. Beds fashioned from rags, leaves, and straw cover<br />
the floor, surrounded by various tools or other implements.<br />
Once, the walls and floors were covered in<br />
mosaics, but it is difficult to make them out now.<br />
Characters who examine the mosaics find enough remnants<br />
to suggest that they were of depraved and horrible scenes.<br />
Creatures: Each of these two areas houses twenty hobgoblin<br />
slaves. Ten are currently present in either room and do not<br />
fight unless attacked.<br />
dHobgoblins (10): hp 4 each; AC 11, no armor or weapons;<br />
see Monster Manual page 119.<br />
Ad Hoc XP Adjustment: These hobgoblins are unarmed<br />
and unwilling to fight. They present no challenge to adventurers,<br />
so this encounter should award no XP.<br />
Hobgoblin Attitudes<br />
If the characters explored the upper areas of the temple<br />
before (see Chapter 3) and interacted on a friendly basis<br />
with any of the hobgoblins, they notice a few familiar faces<br />
among the slaves. These hobgoblins, and any with them,<br />
start out already friendly (see page 149 in the DUNGEON<br />
MASTER’s Guide). Otherwise, the hobgoblins’ attitude is<br />
indifferent.<br />
139
CHAPTER 7: THE RECOVERED TEMPLE<br />
140<br />
8. Ogre Workers (EL 7)<br />
Large sleeping mats lie spread out on the floor. A few<br />
tools and weapons are around them. The room has been<br />
almost entirely cleared of rubble.<br />
The stone of the walls and floor in these rooms is oddly colored:<br />
ochre in the east, moss-green in the west.<br />
Creatures. Each of these two areas houses eight ogres.<br />
Only six are present in either room. These brutes are<br />
employed mostly for heavy lifting, but they defend the<br />
area if they see intruders or are alerted by the horn (see<br />
area 2).<br />
dOgres (6): hp 24, 25, 26, 26, 27, 28; see Monster Manual<br />
page 144.<br />
Kella<br />
One of these ogres is a shapechanged druid, Kella, acting as a<br />
spy (see Part 3: The Rebirth of Elemental Evil). If encountered,<br />
she helps the adventurers by turning on the other<br />
ogres in the room. (If you prefer, she encounters the party in<br />
the corridor approaching area 6 and identifies herself to<br />
them with a token from Y’dey.)<br />
Assuming she survives the battle, Kella gives the PCs a<br />
good idea of the layout of the place and its servants (a<br />
beholder, giants, ropers, some golems, and a lot of ogres).<br />
She tells them that the head of the whole operation is,<br />
strangely enough, an aboleth that floats about in a cocoon<br />
of water. She also has learned that the cultists have<br />
opened the way into the Fire Node. Lastly, she mentions<br />
that she saw Lareth the Beautiful here, and that he was<br />
very closely guarded.<br />
Once she has passed along this information, Kella suggests<br />
one of three possibilities. She can:<br />
1. Continue spying on the cultists;<br />
2. Leave to inform Y’dey and the others; or<br />
3. Go with the adventurers and help them fight.<br />
9. Stone Giants (EL 8 or 10)<br />
About half cleared of rubble, this room appears to be<br />
unused.<br />
To the untrained eye, the rocks here appear tumbled and<br />
random. However, they are actually arranged to form beds,<br />
chairs, and table surfaces for the stone giants that live here.<br />
(A character with stonecunning or whose favored enemy is<br />
giants recognizes this.)<br />
Creatures (EL 8 or 10). Two stone giants lair in each of<br />
these four rooms. The southeast room contains only a single<br />
giant currently, for the other was assigned to the guard post<br />
(area 5). The stone giants were useful earlier in the excavation<br />
process, but now have less to do, since most activity is<br />
cleanup. When the doomdreamers begin uncovering the<br />
access points to the other elemental nodes, the giants will<br />
once again be put to work.<br />
dStone Giants (1 or 2): hp 119 each; see Monster Manual<br />
page 98.<br />
Tactics: These giants prefer to fight together in the central<br />
room occupied by their leader, Dein (see area 10). They do<br />
whatever Dein says, and when they fight by his side, his presence<br />
taints them all with evil (so they are affected by spells<br />
and magic items that target evil creatures). In this case, the<br />
EL becomes 14.<br />
Treasure: Well hidden among the stones (Search DC
CHAPTER 7: THE RECOVERED TEMPLE<br />
25), each giant keeps a small cache of 2d6 gems worth 50<br />
gp each.<br />
10. Master Giant (EL 10)<br />
This hexagonal room has a 30-foot-high domed ceiling. A<br />
cleared area in the middle appears to be a large bed, albeit<br />
an uncomfortable one, made of stones. An iron box rests<br />
top a large, flat stone nearby.<br />
Creatures: Dein, a half-demon stone giant in charge of the<br />
stone giant workers, makes his lair in this central room. He<br />
has been promised great rewards by the doomdreamers<br />
regarding the Earth Node, and he does whatever he must to<br />
survive until it is uncovered.<br />
dDein: Half-fiend stone giant; hp 160; see Appendix 3.<br />
Tactics: Dein uses the other giants as best he can, calling<br />
them to fight by his side and sacrificing them to save himself<br />
if need be. Using his +1 Huge greatsword, he wades into<br />
combat after using unholy aura to protect himself and any<br />
other giants with him.<br />
If he needs to make a retreat, he uses darkness and moves<br />
into the northwest room, weakening any who follow with<br />
unholy blight if they appear to be good aligned.<br />
Treasure: The box is locked (Open Lock DC 25), but Dein<br />
has the key. It contains thirty 100-gp gems of all sorts.<br />
11. Smashed Statues (EL 4)<br />
Apparently, when this area collapsed, it smashed a number<br />
of statues that were here. Although most of the rubble has<br />
been cleared away, at least some of the statues remain. A<br />
large stone dragon, its wings and tail broken, stands<br />
upright staring at the ground. A stone ball with a large eye<br />
in the middle of it lies on the floor, a number of pieces<br />
broken from the top. A monstrous-looking humanoid head<br />
with sharp teeth and a piece of what appears to be the<br />
hindquarters of a large cat are near the south curved wall,<br />
and the statue of a 9-foot-tall bestial humanoid, missing<br />
one leg, lies on the floor in the middle of the room.<br />
A successful Search check (DC 18) among the broken statuary<br />
allows a character to find a scroll tube containing a scroll of<br />
antimagic field. The scroll tube is protected by a fire trap spell.<br />
aFire Trap: CR 4; fire explosion in 5-ft. radius (1d4+16<br />
damage); Reflex save DC 16 half; Search (DC 29); Disable<br />
Device (DC 29).<br />
12. Evil Fountain<br />
Horrid faces, carved from the same rock as the passage,<br />
snarl and vomit forth thin streams of water that are<br />
caught in a multi-tiered basin. The water smells of sulfur,<br />
and the basin is filled with a greenish growth.<br />
Although the water is vile-tasting, it causes no ill effect.<br />
13. Beholder (EL 13)<br />
Ahead, the floor drops suddenly into a pit about 15 feet<br />
deep, with 1-foot-wide ledges around the north and south<br />
sides. Here and there in the pit, the wall is covered with a<br />
sheet of corroded and dented bronze. The floor is not<br />
entirely clear of rubble, but clearly some effort has been<br />
made. Ahead to the east, the pit widens into what appears<br />
to be an octagon-shaped chamber, with the ledge continuing<br />
around it.<br />
The pit is marked on the map with lines around it. In the<br />
lower octagonal room, archways lead into smaller rooms to<br />
the north and south.<br />
Creatures: Kex, a beholder and chief excavator, makes its lair<br />
here and is resting in the southern small room. Its disintegrate<br />
ray has destroyed most of the rubble and cleared paths through<br />
it. Kex wears a ring of protection (+2) on one of its eyestalks.<br />
dKex, Beholder: hp 70; AC 22; see Monster Manual page 24.<br />
Tactics: Kex chose this pit because of the difference in<br />
level. It hopes that intruders stick to the ledges, so that it can<br />
silently float into the pit and blast unsuspecting characters<br />
with all eyes. Likewise, it tries to get under flying, climbing,<br />
or levitating opponents.<br />
Otherwise, it attacks with its deadliest eyes first: disintegrate,<br />
flesh to stone, and finger of death. Only then does it try to<br />
charm the most obvious fighter to attack its opponents.<br />
Another tactic is to move a spellcaster with telekinesis to<br />
someplace isolated from the rest (knocking her off the ledge,<br />
for example); it focuses its antimagic cone on her while directing<br />
its other eyes at the remaining opponents.<br />
Treasure: In the north room, Kex keeps a large bag filled<br />
with loot gathered in the excavation: a pair of boots of<br />
elvenkind, a wand of lightning bolt (10 charges), 121 gp, 45 pp,<br />
six 50-gp gems, and a silver bracelet worth 220 gp. Much of<br />
this is still grimy and dirty.<br />
14. Empty Room<br />
A gray light illuminates this round room. The ceiling was<br />
once domed, but now much of it has caved in. The walls<br />
and floor at first appear damaged, but it becomes apparent<br />
that they were cleverly carved to resemble natural formations,<br />
with carved grass and scrub poking up from between<br />
the faux rocks. The southern portion of the room is far<br />
from cleared. A few bones lie about the scattered rubble,<br />
and a breeze blows in from cracks high in the ceiling.<br />
15. Secret Room (EL 15)<br />
Both secret doors in the passage leading into this room pivot<br />
on the western side, and need a successful Search check (DC<br />
22) to find. Both are magically trapped (see below).<br />
This cleared room has a cot, a rough wooden table, a chair,<br />
and a chest. Hanging on the wall are two scimitars, a<br />
punching dagger, two maces, a wavy-bladed knife, and a<br />
pair of nunchaku. All the weapons are ornately decorated.<br />
The door to the north hangs half open.<br />
Creatures: Smigmal Redhand is a half-orc assassin who<br />
wears a half-elf disguise most of the time. She is the associate<br />
of Falrinth the wizard (see area 16 below), and they have<br />
worked together since the days of the old Temple of Elemental<br />
Evil. In fact, it was their guidance that allowed such efficient<br />
and quick clearing of so much of the temple. They were<br />
not then, nor are they now, on the side of the clerics—they<br />
are in this for personal gain only.<br />
141
CHAPTER 7: THE RECOVERED TEMPLE<br />
Going over a map of the cleared dungeons (showing all<br />
areas except 4, 15, 16, 26, 30 and 31) with Smigmal is a doomdreamer<br />
named Dugart, also a half-orc. Dugart fancies<br />
Smigmal and would rather deal with her than Falrinth, even<br />
though the wizard knows quite a bit more.<br />
dSmigmal Redhand: Female half-orc Ftr5/Rog2/Asn7;<br />
hp 87; see Appendix 3.<br />
dDugart: Male half-orc Clr10/Doomdreamer2; hp 101;<br />
see Appendix 3.<br />
Tactics: If she is aware of approaching intruders, Smigmal<br />
waits invisibly (using her ring of invisibility), with poison on her<br />
blade, to study a target and make her death attack. While studying,<br />
she quietly drinks all her nonhealing potions. She then<br />
takes a full round to back into the hallway to the north, uses her<br />
scroll of improved invisibility (remember to make a caster check<br />
of DC 8) so that she can remain invisible after the attack, and<br />
moves back in for the kill (adjusting as needed if her target is<br />
on the move). If seriously hurt or spotted, she runs or uses her<br />
scroll of dimension door to get to wherever Falrinth is.<br />
Smigmal uses Dugart to distract opponents during the<br />
fight, gladly sacrificing him to save herself.<br />
Dugart always has bull’s strength and endurance cast on himself.<br />
If he has time to prepare, he casts freedom of movement,<br />
greater magic weapon, protection from elements (fire), magic vestment,<br />
protection from good, and even bull’s strength on Smigmal.<br />
Unable to see Smigmal once the battle is joined, he uses his<br />
healing spells on himself and casts unholy blight, summon<br />
monster V, flame strike, and bolts of bedevilment (see Appendix 2)<br />
against enemies, relying on ethereal jaunt to get away if really<br />
hurt. He loves casting heal on himself just when his enemies<br />
think he’s beaten.<br />
Traps: The secret doors have been trapped by Falrinth<br />
with fire trap (cast at 14th level).<br />
aFire Trap: CR 3; fire explosion in 5-ft. radius (1d4+14<br />
damage); Reflex save DC 17 half; Search (DC 29); Disable<br />
Device (DC 29).<br />
The lock on the chest (Open Lock DC 25) has Smigmal’s<br />
custom contact poison (which she calls “crimson jelly”)<br />
smeared all over it.<br />
aPoisoned Lock: CR 1; contact, 1d6 Str/1d6 Str; Fortitude<br />
save (DC 16) resists; Search (DC 21); Disable Device (DC 20).<br />
Treasure: The chest is locked (Open Lock DC 25), and<br />
Smigmal has the key. It holds a jeweled dagger (worth 300<br />
gp), a scroll of change self, and a pouch containing 98 pp and<br />
435 gp, as well as all sorts of clothes for disguises.<br />
Smigmal is a weapons collector. All the displayed weapons<br />
are worth double normal value due to their elaborate decoration.<br />
all the furniture has been salvaged from wreckage<br />
throughout the dungeon and has no value.<br />
Development: If he gets a lot of warning, Dugart does not<br />
stay here but instead goes to the Greater Temple (area 29) to<br />
join the last line of defense.<br />
16. Falrinth’s Room (EL 14)<br />
The door is locked (Open Lock DC 25) and trapped (see below).<br />
142<br />
A simple cot, a pair of chairs, a rickety table, and a tall candelabra<br />
furnish this room. A book lies on the cot. Incense<br />
fills the air from a small burner on the table, next to a<br />
leather satchel.<br />
Creatures: Falrinth is a selfish, evil wizard. He has a<br />
long working relationship with Smigmal, but he would
CHAPTER 7: THE RECOVERED TEMPLE<br />
betray her in a moment if it would save his life. He is in the<br />
employ of the cult of Tharizdun now, as an expert on the<br />
old temple’s layout. They pay him well, so life is good. He<br />
has no interest in defending the place, and if attacked he<br />
might just teleport away.<br />
dFalrinth: Male human Wiz14; hp 62; see Appendix 3.<br />
Tactics: Falrinth has set up a phase door leading from the<br />
south wall into area 14 that he can use to escape or to get a<br />
tactical advantage. He always has endurance and cat’s grace<br />
cast on himself. Like Smigmal, he enjoys fighting while<br />
under the effect of improved invisibility, and he prepares himself<br />
with true seeing, stoneskin, and haste as soon as he knows<br />
danger is afoot.<br />
In battle, Falrinth doesn’t mess around. He leads off<br />
with finger of death (preferably against an obvious wizard or<br />
sorcerer, or maybe a rogue), followed by a maximized lightning<br />
bolt (60 points of damage) or chain lightning, depending<br />
on whether his foes are lined up. If Smigmal is a<br />
potential target of the latter, he might switch to another<br />
spell—or not.<br />
Traps: The door into the room has a fire trap spell cast on it.<br />
aFire Trap: CR 3; fire explosion in 5-ft. radius (1d4+14<br />
damage); Reflex save DC 17 half; Search (DC 29); Disable<br />
Device (DC 29).<br />
The book on the bed is Falrinth’s fake spellbook. It is<br />
trapped with sepia snake sigil on the cover and maximized<br />
explosive runes inside (destroying the book when discharged).<br />
aMaximized Explosive Runes: CR 5; fire explosion in 10-<br />
ft. radius (36 points of fire damage); no save to reader, all<br />
others Reflex save DC 17 half; Search (DC 28); Disable<br />
Device (DC 28).<br />
aSepia Snake Sigil: CR 3; reader immobilized for 1d4+14<br />
days; Reflex save (DC 17) negates; Search n/a; Disable<br />
Device n/a.<br />
Treasure: The leather satchel contains 290 gp and nine 75-<br />
gp gems, as well as a potion of cure serious wounds and a wand of<br />
knock (32 charges). Falrinth carries the keys to the three iron<br />
coffers in area 4.<br />
The furniture is salvaged from the dungeons and repaired<br />
with mend spells. It has no value.<br />
Under the bed lie Falrinth’s two massive real spellbooks,<br />
each hidden by a sequester spell. Each is locked (Open Lock<br />
DC 30) and trapped with a sepia snake sigil (as above). One<br />
holds his cantrips and 1st- through 3rd-level spells; the other<br />
holds his 4th- through 7th-level spells.<br />
17. Workers (EL 2)<br />
The floor of this partially cleared room is bare earth. A<br />
large pile of rubble sits in the middle of the chamber, and<br />
the southwest corner appears to be a plugged passageway.<br />
A few mushrooms and puffballs grow up from the bare<br />
earth.<br />
The blocked passage to the southwest was once a staircase<br />
going up to the level above.<br />
Creatures: Ten hobgoblin slaves toil here under the<br />
supervision of an ogre, moving stones onto wheelbarrows.<br />
dHobgoblins (10): hp 4 each; AC 11, no armor or weapons;<br />
see Monster Manual page 119.<br />
dOgre: hp 26; see Monster Manual page 144.<br />
Tactics: If they get the chance, the hobgoblins turn on the<br />
ogre immediately. Their initial attitude to the PCs is at worst<br />
indifferent (see area 7 above), and they would rather talk than<br />
fight. Attacking them or treating them badly dissuades the<br />
hobgoblins from any attempt at negotiation, though, and<br />
they fight as best they can with their tools.<br />
Development: The hobgoblins readily share what they<br />
know of the excavation, including general layout and creatures.<br />
They do not know about secret areas and cannot tell the<br />
difference between the various clerics. Once they have told<br />
what they know, they try to make their way out of the temple.<br />
Treasure: With a successful Search check (DC 20) in the<br />
central rubble pile, a character finds the bones of some<br />
strange inhuman creature (one of the lamias that once inhabited<br />
this chamber) and a +1 short sword.<br />
Ad Hoc XP Adjustment: Do not award any XP for defeating<br />
the hobgoblins in combat.<br />
18. Entry into Lower Level (EL 12)<br />
The stairs descend onto a wide landing only partially<br />
cleared of rubble. The walls of the landing are covered<br />
with mosaic murals depicting a nauseating scene of frolicking<br />
demons, vile slimes and fungi, and giant<br />
humanoids, all dancing amid a field of their fallen, torn,<br />
and tortured victims.<br />
Creatures: Two particularly well-fed ropers, already living<br />
in the underground ruins, have been charmed by Falrinth. (As<br />
a backup, the Second used its psionic ability to enslave them<br />
as well.) They now guard this area and attack all those not<br />
identified by the wizard as inhabitants here.<br />
dRopers (2): hp 109, 123; see Monster Manual page 156.<br />
Tactics: The ropers lurk among the rocks (Hide +18) in<br />
the eastern portion of the room. If they hear a group<br />
coming, they wait until at least two targets are in the room<br />
(otherwise they both attack the same foe immediately).<br />
Their strands reach across the room easily, pulling victims<br />
10 feet closer each round until they can make a bite attack.<br />
Thus, for example, a victim at the bottom of the stairs is<br />
dragged to the roper’s maw in 3 rounds.<br />
Development. If there’s time, the Second (see area 30) further<br />
prepares the ropers against intruders by casting protection<br />
from elements (fire) to cope with their vulnerability.<br />
19. Iron Golem (EL 13 or 15)<br />
A large, relatively untarnished iron statue is the only<br />
thing that stands in this roughly triangular room. The<br />
place is relatively clear of rubble, and the ceilings are<br />
quite high. Old wall paintings have been completely<br />
obscured, and a few scraps of what might have been tapestries<br />
lie about.<br />
Two of these rooms, each with a statue (actually an iron golem)<br />
are at the point marked X on the map. It is quite possible that<br />
intruders encounter both at once.<br />
Creatures. These metal behemoths are the pride and joy<br />
of the cult’s defenses. They move to attack on the command<br />
of any doomdreamer, or when the room they stand within is<br />
entered by someone who does not utter the phrase, “The<br />
Dark God’s return is imminent.”<br />
dIron Golem: hp 99; see Monster Manual page 109.<br />
Tactics: The doomdreamers, if alerted and prepared,<br />
command the golems to attack anyone coming down the<br />
stairs other than themselves (and then instruct the cult’s<br />
other servants to steer clear).<br />
143
CHAPTER 7: THE RECOVERED TEMPLE<br />
144<br />
Development: Even though two iron golems should be<br />
able to deal with any intruder, the cultists take additional<br />
defensive measures if they have forewarning. They position<br />
the elite ogres stationed in area 23 to defend the northern<br />
part of the passage to the Greater Temple (area 29), with<br />
orders to attack when the iron golems do.<br />
20. Doomdreamer Quarters<br />
(EL variable)<br />
The two fireplaces in the south wall are clear of rubble<br />
and in use, with fresh soot around both and dying embers<br />
present. Five cots are arranged here around an old<br />
wooden table and some chairs. The table has a brass candelabrum<br />
upon it, as well as a number of papers and a<br />
large book.<br />
Near each cot is a small trunk. Two traveling bags sit<br />
against the wall near the south exit.<br />
This is where the doomdreamers on this mission (other than<br />
the Second) rest and keep their belongings.<br />
Trunks (EL 3 or 6): Each of the five trunks is locked<br />
(Open Lock DC 30) and trapped with a glyph of warding.<br />
aGlyph of Warding: CR 3; As specified; Reflex save DC 15<br />
half; Search (DC 28); Disable Device (DC 28).<br />
aGreater Glyph of Warding: CR 6; Energy, 6d8 damage;<br />
Reflex save DC 22 half; Search (DC 31); Disable Device<br />
(DC 31).<br />
Each contains clothing and personal gear as well as the<br />
following:<br />
Trunk 1: (Fire glyph, 3d8 fire damage, Reflex half DC 15)<br />
Bag with four 40-gp gems and four 150-gp gems; a silver<br />
trumpet (worth 100 gp). Estalion (see area 28) has the key.<br />
Trunk 2: (Cold greater glyph, 6d8 cold damage, Reflex half<br />
DC 18) Hat of disguise, two flasks of acid, pouch with 240 pp.<br />
Thuchos Nalred (see area 28) has the key.<br />
Trunk 3: (Blindness glyph, Fortitude negates DC 15) Candle<br />
of truth, a small, jeweled box (worth 200 gp) containing a gold<br />
bracelet (worth 75 gp), a coral necklace (worth 250 gp), and<br />
an obsidian brooch (worth 375 gp). Dugart (see area 15) has<br />
the key.<br />
Trunk 4: (Sonic greater glyph, 6d8 sonic damage) Bag with<br />
548 gp, box containing 34 tindertwigs, potions of vision,<br />
charisma, and remove disease; jars of universal solvent, stone salve,<br />
and Keoghtom’s ointment. Susain Carun (see area 29) has the<br />
key to this trunk.<br />
Trunk 5: (Acid greater glyph, 6d8 acid damage) Robe of<br />
powerlessness, crystal sphere (worth 600 gp); a jeweled<br />
comb (worth 200 gp), three gold-bound books about religion<br />
(worth 100 gp each), and potions of darkvision and ghoul<br />
touch. Maliskra (see area 9 in the Fire Node) has the key to<br />
this trunk.<br />
Traveling Bags: One of these contains two tanglefoot bags<br />
and two flasks of alchemist’s fire, along with a pair of masterwork<br />
daggers and a smokestick.<br />
The other bag holds a letter from Hedrack (see area 19 of<br />
the Outer Fane), discussing Lareth the Beautiful and proclaiming<br />
him as the prophesied Champion of Elemental Evil.<br />
It also contains three scrolls of protection from elements (fire),<br />
272 gp, and 59 pp.<br />
Papers: The papers on the table detail the Triad’s plans, the<br />
elemental nodes, and the cult’s accomplishments to date.<br />
The latter list includes: recruiting Falrinth; clearing out<br />
the dungeons (using the beholder as well as stone giants and<br />
slaves); finding Lareth; uncovering the Fire Node; and calling<br />
Imix. The papers make it clear that, while they plan on<br />
uncovering all the node access points, a chance exists to free<br />
Tharizdun even with just Imix.<br />
Book: The large book on the table is a copy of the Book of<br />
the Dark Eye, a tome detailing the worship of the Elder Elemental<br />
Eye. (Another copy is in area 122 of the Crater<br />
Ridge Mines.) It describes exactly how to operate one of<br />
the black stone altars (found in area 121 of the Crater<br />
Ridge Mines or in area 34A of the moathouse) in conjunction<br />
with the tentacle rods.<br />
Candelabrum: The candelabrum on the table is magical<br />
and lights upon command (worth 200 gp).<br />
Development (EL 9): The succubus watching the<br />
entrance through the old well (see The Watcher above)<br />
comes here after warning the doomdreamers of intruders. If<br />
the PCs encounter the demon here, it is wearing the form of<br />
an elven woman and attempts to seduce and charm its way<br />
into their ranks. If that doesn’t work (and it probably won’t),<br />
it might fight long enough to try draining a few levels, then<br />
teleports away for good.<br />
20A. Quarters of The Second (EL 6)<br />
The hallway connecting this room and area 20 has a persistent<br />
image of a storage closet (crates, barrels, box-filled shelves),<br />
behind which is an illusory wall. The door behind that illusion<br />
is trapped.<br />
Trap: The door to this room has a glyph of warding on it.<br />
aGlyph of Warding: CR 3; 5-ft. burst of acid (3d8 acid<br />
damage); Reflex save DC 18 half; Search (DC 28); Disable<br />
Device (DC 28).<br />
This room smells of brine. A large tank, half filled with<br />
water, made of glass plates clamped together fills most of<br />
its area. The sides of the tank are 8 feet high and have<br />
symbols etched into them that resemble skulls entwined<br />
with tentacles. Next to the tank is a small wooden table<br />
with three rolled-up scrolls atop it.<br />
The Second, an aboleth, is most comfortable in water (see<br />
area 30). It had the plates for the tank brought in, and the<br />
water was created magically by the clerics.<br />
Creatures: The tank has two skum within it, handservants<br />
of the Second. They attack anyone who enters the room other<br />
than their master, although it takes them a full round to<br />
climb out of the tank.<br />
dSkum (2): hp 10, 14; see Monster Manual page 166.<br />
Treasure: The scrolls on the table are all divine spells: cure<br />
critical wounds, commune, and divination. These belong to the<br />
Second, kept here to stay dry.<br />
Within a wall of the tank, a small niche can be seen. It<br />
holds a set of bracers decorated with pearl and coral (worth<br />
250 gp each), a pair of crystal vials (each worth 50 gp) that<br />
hold potions of truth and poison, and a watertight bag with 83<br />
gp and a flask of acid.<br />
21. Open Area<br />
This large room is clear of rubble, although a number of<br />
wooden splinters cover the ground of the western side,<br />
where perhaps some furniture was crushed during a<br />
cave-in.
CHAPTER 7: THE RECOVERED TEMPLE<br />
An old, rubble-choked fireplace is in the south wall.<br />
Near it is a stack of crates, barrels, and other containers.<br />
The containers hold various supplies for the clerics and their<br />
servants, brought from the Temple of All-Consumption or<br />
from a nearby area. These contain tools, food, water, blankets,<br />
and other necessities.<br />
22. Workers (EL 4)<br />
This large room is only about half cleared. Baskets of<br />
small stones, as well as digging tools of all types, are scattered<br />
about the chamber.<br />
Creatures: Ten hobgoblins, under the supervision of two<br />
ogres, are piling up stones to be disintegrated or toted up to<br />
the surface.<br />
dHobgoblins (10): hp 4 each; AC 11, no armor or weapons;<br />
see Monster Manual page 119.<br />
dOgres (2): hp 26, 28; see Monster Manual page 144.<br />
Tactics: If they get the chance, the hobgoblins turn on the<br />
ogres immediately. Their initial attitude to the PCs is at worst<br />
indifferent (see area 7 above), and they would rather talk than<br />
fight. Attacking them or treating them badly dissuades the<br />
hobgoblins from any attempt at negotiation, though, and<br />
they fight as best they can with their tools.<br />
Development: The hobgoblins readily share what they<br />
know of the excavation, including general layout and<br />
creatures. They do not know about secret areas and cannot<br />
tell the difference between the various clerics. Once<br />
they’ve told what they know, they try to make their way<br />
out of the temple.<br />
Ad Hoc XP Adjustment: Do not award any XP for defeating<br />
the hobgoblins in combat.<br />
23. Elite Ogre Barracks (EL 14)<br />
Seven large cots are spread out in this very large room.<br />
Each has a large backpack on, under, or near it.<br />
Near the western end of the room, against the south<br />
wall, is a shallow pit.<br />
Two patches of green slime are in the 6-foot-deep pit.<br />
Creatures: Seven ogres, all experienced fighters, live here.<br />
These are the elite among the ogres trained by the cult.<br />
dOgre Ftr6 (7): hp 40, 55, 48, 40, 53, 32, 42; see<br />
Appendix 3.<br />
Tactics: Two of the ogres have been nurturing patches of<br />
green slime, which they uncovered in the excavation. When<br />
first attacked, they each dip their great club into the muck<br />
and fling a glob of it at their foes. (The green slime inflicts<br />
damage to the weapons normally, but the magic weapons’<br />
hardness negates virtually all damage inflicted.) This is a<br />
ranged touch attack that they can make up to 40 feet away. In<br />
the next round, attack normally.<br />
Development: If the doomdreamers have been forewarned<br />
of trouble, they order these ogres to defend the hallway<br />
between areas 18 and 29. In this case, the ogres try to<br />
spread out a little (so that not all are caught in the same spell<br />
radius) and charge into battle from the north when the<br />
golems from area 19 attack.<br />
Treasure: Each backpack holds some mundane gear and<br />
1d12+50 gp.<br />
Ad Hoc XP Adjustment: The green slimes are an unusual<br />
hazard. If the ogres get the chance to use them, this<br />
encounter should award 110% normal XP.<br />
24. Rakshasa Lair (EL 9 or 11)<br />
The walls here are draped in red and gold. This room contains<br />
a small table covered in a black cloth, a large wooden<br />
bed, and a chair (also covered in black cloth). The table<br />
has a pair of humanoid skulls atop it, as well as a bottle of<br />
very fine wine and a delicate crystal goblet.<br />
Two of these rooms exist, with the area between empty.<br />
The secret doors require a successful Search check (DC 22)<br />
to find.<br />
Creatures: Each room is home to a rakshasa allied with<br />
the cult of Tharizdun. Since their arrival in the area, these<br />
evil beings have repeatedly slipped into Hommlet, preying<br />
upon the populace, learning who’s who, and stealing the richest<br />
furnishings for their rooms here.<br />
dRakshasa: hp 52; see Monster Manual page 153.<br />
Spells Known (6/7/7/5): 0—dancing lights, daze, detect magic,<br />
flare, ghost sound, mage hand, prestidigitation; 1st—animate rope,<br />
cure light wounds, mage armor, magic missile, shield of faith;<br />
2nd—cat’s grace, invisibility, mirror image; 3rd—fireball, fly.<br />
Tactics: Provided they have warning, the rakshasas lower<br />
their own spell immunity and cast these spells on themselves<br />
in the following order: mage armor, shield of faith, cat’s<br />
grace, and fly. Then they take on the form of recognizable<br />
figures from Hommlet, such as Vesta Gundigoot, Canoness<br />
Y’dey, Joman Dart, or even Elmo. Using animate rope, they<br />
tie themselves up together in the northern room and pretend<br />
to be prisoners (they can get out of the animated ropes<br />
immediately if need be). They use their natural detect<br />
thoughts abilities to react as would the persons they are pretending<br />
to be (calling the PCs who knew the people the<br />
creatures are impersonating by name). Remember that<br />
since rakshasas are immune to spells and spell-like abilities<br />
of 8th level or less, detect magic, detect evil, and discern lies<br />
have no chance to reveal their deception.<br />
Once “rescued,” the rakshasas attempt to find out what the<br />
PCs know (using questions and detect thoughts) and accompany<br />
them until the party gets into a fight with some worthy<br />
adversary. At that point, they turn on their rescuers.<br />
Since it is immune to such effects, a rakshasa has no<br />
qualms about detonating a fireball with itself in the middle of<br />
the blast.<br />
Treasure: Each bottle of wine is worth 25 gp, and each<br />
goblet, 20 gp. The rakshasa in the north room has hidden a<br />
gold necklace with amethysts (worth 950 gp) inside one of<br />
the skulls (Search DC 18).<br />
25. Hidden Prisoner<br />
A large brick fireplace with a marble mantle dominates<br />
this otherwise empty room. On the mantle are a few<br />
carved figurines and a pair of strange, dark lumps that<br />
look like shrunken human heads.<br />
The figurines and the heads on the mantle were recovered<br />
during the excavation. Each is worth about 25 gp.<br />
Creatures: In the northwest corner is a hound archon in<br />
dimensional shackles (which adjust to fit its shape and prevent<br />
its escaping in canine form) and under the effects of a<br />
145
CHAPTER 7: THE RECOVERED TEMPLE<br />
146<br />
sequester spell. Summoned by Canoness Y’dey to determine<br />
what was happening in the temple, this archon was overcome<br />
and captured. The cultists haven’t yet decided what to<br />
do with it, but they definitely know that someone is suspicious<br />
of them, so they are on their guard.<br />
dHound Archon: hp 38; see Monster Manual page 29.<br />
Development: The archon, if freed, allies itself with its<br />
rescuers unless they plan on leaving—it is eager to avenge<br />
itself and bring the evildoers here to their knees.<br />
26. Ghost of Senshock (EL 11)<br />
For a moment, this chamber appears to be a wellappointed<br />
apartment, suitable for a wizard: elegant furniture<br />
of ebony and rosewood, a worktable covered with<br />
bubbling beakers and brewing potions, tapestry-covered<br />
walls, and a bookcase.<br />
Then it is gone. The room is full of rubble and collapsed<br />
ceiling bits. Splinters that were once probably<br />
ornate pieces of furniture lie crushed under stones.<br />
Rotted tapestries are piled in torn and filthy heaps.<br />
The lingering vision of this room’s erstwhile appearance is a<br />
result of the haunting of the place by its former occupant. (If<br />
Zuggtmoy has already been returned to her rightful plane—<br />
see Level 9 of the Inner Fane—no illusion of a well-kept<br />
room appears.)<br />
Creatures: Senshock was a powerful figure in the Temple<br />
of Elemental Evil, killed here when it fell. Once he was Lord<br />
Wizard of the Greater Temple. Now he lingers as a ghost.<br />
dSenshock: Ghost Wiz9; hp 58; see Appendix 3.<br />
Tactics: Senshock attacks anyone who comes near, first<br />
casting displacement and haste upon himself while ethereal. If<br />
creatures come at him on the Ethereal Plane, he casts dismissal<br />
against them. If his foes are on the Material Plane, he<br />
manifests and uses phantasmal killer and ice storm, followed<br />
with summoned monsters and magic missiles. (As a ghost, he<br />
no longer needs to study his spells in a spellbook, but neither<br />
can he ever change his spell selection.)<br />
Destroying the Ghost: Senshock was a devoted follower<br />
and servant of Zuggtmoy, and like her had no idea that the<br />
cult of Tharizdun was behind the Temple of Elemental Evil.<br />
If Zuggtmoy is sent back to her rightful plane (see Level 9 of<br />
the Inner Fane), then Senshock is permanently laid to rest. If<br />
not, he comes back in 24 hours to haunt the temple further.<br />
Development: Senshock now looks upon the purple<br />
worm in area 27 as his friend and protects it, going immediately<br />
to its aid if it is bothered.<br />
27. Purple Worm (EL 12)<br />
This large room is filled with debris. A tunnel, seemingly<br />
of recent creation, opens from the eastern side of the<br />
room, while a much older, more finished (but damaged)<br />
passage heads southwest.<br />
The tunnel to the east is where a purple worm hibernated<br />
until recently, and where it lairs now.<br />
Creatures: Senshock once held the purple worm captive<br />
in a mirror of life trapping. (The mirror was smashed in the<br />
dungeons’ collapse.) The worm, disoriented and deranged by<br />
its long captivity, went into hibernation until very recently,<br />
when it was awoken by the excavation. Now, if anyone comes<br />
near, it attacks.<br />
dPurple Worm: hp 220; see Monster Manual page 152.<br />
Development: If not destroyed, Senshock comes from<br />
area 26 to attack anyone who bothers the purple worm. The<br />
worm has enough experience with Senshock’s presence to<br />
know that it cannot eat the ghost (at the very least, its<br />
tremorsense tells it that he’s not corporeal), but it doesn’t<br />
realize that the ghost considers it his ally. Thus, it does not<br />
work in conjunction with Senshock. Even if the two are<br />
encountered together, the purple worm acts alone and Senshock<br />
reacts.<br />
28. Large Chamber (EL 15)<br />
This is a very large chamber, with a pile of rubble 7 feet<br />
high in the center. Doors, some open, some barely on<br />
their hinges, and some just leaned against their doorframes,<br />
lead into small, uncleared rooms.<br />
Creatures: Two doomdreamers, Thuchos Nalred and<br />
Estalion, get ready to deal with the ghost and purple worm<br />
(or just the purple worm if Zuggtmoy has been returned to<br />
her rightful plane).<br />
Thuchos is a towering figure with a demonic right arm<br />
(see area 26 of the Outer Fane on page 119). Estalion is thin,<br />
with extremely dark eyes and long, black hair. Each wears a<br />
long, loose violet robe that conceals all features and a black<br />
helmet that reveals only the eyes, with long spikes on either<br />
side. Both are incredibly evil—Thuchos domineering and<br />
destructive, and Estalion treacherous and conniving.<br />
Estalion has already cast displacement and endurance on<br />
both of them and aid on himself, while Thuchos has cast<br />
aid, divine favor, divine power, greater magic weapon, magic vestment,<br />
rage (see Appendix 2), righteous might, shield of faith,<br />
spell immunity (ice storm, lightning bolt, and magic missile),<br />
and spell resistance (SR 24) on himself. Assume he has cast<br />
the spells of shortest duration last, giving him 8 rounds to<br />
act with full enhancement.<br />
dEstalion: Male elf Sor6/Clr6/Doomdreamer1; hp 44;<br />
see Appendix 3.<br />
dThuchos Nalred: Male human Clr9/Doomdreamer3;<br />
hp 93; see Appendix 3.<br />
With these spells cast upon him, Thuchos’s statistics<br />
change to the new totals below.<br />
Strength: 26 (+3 from divine power, +4 from righteous might,<br />
+4 from rage).<br />
Constitution: 22 (+4 from endurance, +4 from rage).<br />
Hit Points: 153 (+48 from Con increase, +12 from divine<br />
power, no temporary hp from aid because it does not stack).<br />
AC: 32 (+4 from shield of faith, +4 from magic vestment, –1<br />
for Large size from righteous might).<br />
Attacks: +28/+23/+18 (12th-level fighter progression from<br />
divine power, +1 from aid, +4 from divine favor, +6 from Str<br />
increase, +4 from greater magic weapon, –1 for Large size from<br />
righteous might).<br />
Damage: 2d6+15 (increased weapon size from righteous<br />
might, +4 from divine favor, +6 from Str increase, +3 from<br />
greater magic weapon).<br />
Tactics: Thuchos engages in physical combat, while Estalion<br />
backs him up with spells such as hold person, web, and<br />
magic missile.<br />
Development: If powerful attackers are obviously on<br />
their way, these two move to area 29. There, Thuchos first<br />
casts blade barrier to keep out foes and then casts the spells<br />
listed above on himself.
CHAPTER 7: THE RECOVERED TEMPLE<br />
29. Greater Temple (EL variable)<br />
This wide area appears mostly cleared and swept. The<br />
walls are lined with a black stone, and the ceiling is at<br />
least 60 feet high. A number of completely collapsed,<br />
clogged hallways lead away from this chamber; only one,<br />
its walls painted red, is clear.<br />
Two tall pillars, covered with golden flecks, flank a<br />
wide set of steps leading to an altar, transparent<br />
heliotrope in color with a dark center. Immediately<br />
behind the altar are a pair of lit brass candelabra, and next<br />
to it is a large kettle drum. Farther behind the altar is a<br />
wide purple curtain.<br />
It appears that some sort of ceremony is going on. A<br />
hulking ogre bangs on the drum with a pair of mallets,<br />
his eyes sewn shut and his mouth filled with froth. A<br />
man lies atop the altar, motionless. A humanoid in<br />
purple robes with a tall, pointed hood and very long<br />
sleeves chants before the altar, in whose center something<br />
seems to be stirring. The temperature is dropping<br />
rapidly.<br />
This whole area is unholy, the result of an unhallow spell.<br />
The site has a permanent protection from good effect, and the<br />
unholy aura confers a –4 profane penalty on turn undead<br />
attempts (+4 to rebuke undead). The unhallow spell also continually<br />
grants all evil beings protection from fire, as protection<br />
from elements cast by an 13th-level caster, while they are<br />
in this room.<br />
Altar, Candelabra, and Drum (EL 8): The altar is new,<br />
brought here through the Tourbillion (see Sublevel 2 of the<br />
Inner Fane). It is a necessary part of the ritual to free Tharizdun,<br />
once all the nodes are breached and the Princes of Elemental<br />
Evil are all present.<br />
If the altar is touched by living flesh or struck with force, it<br />
begins to fade. In 3 rounds its color transforms into translucent<br />
amethyst with a black, amorphous center. Anyone<br />
touching the altar further must succeed at a Fortitude save<br />
(DC 18) or be paralyzed for 1d4 hours.<br />
On lighting the candelabra and beating the drum, a<br />
glowing golden eye swims into view from the stone’s<br />
writhing center. All creatures viewing the eye must make<br />
Will saves (DC 20). Failure results in a random effect as<br />
described below.<br />
d% Result<br />
01–05 Death<br />
06–20 1d2 negative levels<br />
21–40 Insanity (as if permanently affected by confusion)<br />
41–60 1d3 permanent Wisdom drain<br />
61–80 2d6 temporary Strength damage<br />
81–100 1d6 temporary Constitution damage<br />
The eye floats out of the altar after 3 rounds and becomes a<br />
yellow egg, which immediately begins to swell (during this<br />
time, the egg has hardness 5 and 60 hp, with a break DC of<br />
26). After another 3 rounds, if the egg survives, it reaches a<br />
size of 10 feet long and 6 feet across, and hatches into 1d3+1<br />
salamanders that attack everyone not wearing a symbol of<br />
the Elder Elemental Eye.<br />
The altar’s greatest effect requires the presence of a tentacle<br />
rod (the cleric here has one, and others are in area 120 of the<br />
Crater Ridge Mines, area 19 of the Outer Fane, and Level 8<br />
of the Inner Fane) when the eye appears. In this case, the<br />
altar becomes transparent heliotrope in color, the black mass<br />
at the center grows larger and shows swollen veins of<br />
purple, and the eye is a fiery red-orange. (The altar is currently<br />
approaching this state.) A tentacle comes out of the<br />
altar and grabs the nearest living creature, pulling it into<br />
the stone (+15 attack, +10 Strength bonus, treat as Large). A<br />
creature drawn into the altar is destroyed, while the stone<br />
returns to a black, opaque state. Atop the altar appears a<br />
single magic item wished for by those in the shrine, worth<br />
up to 50,000 gp (if multiple items are wished for, determine<br />
which one appears randomly).<br />
The Book of the Dark Eye (area 122 of the Crater Ridge<br />
Mines; a copy exists in area 20 above) describes in detail<br />
the process of activating the altar. The egg still appears if a<br />
tentacle rod is present, but the rod wielder can destroy it<br />
with a touch.<br />
sAltar: hardness 12; hp 100; AC 5; break DC 30. If the<br />
altar is destroyed, the unhallow effect ends.<br />
Curtain (EL 10): The purple curtain is new. If anyone<br />
approaches it who is not within the nimbus of light created<br />
by a torch of revealing, it sprouts twelve tentacles and attacks<br />
all such interlopers. The tentacles have a reach of 10 feet<br />
and strike with a +15 attack bonus. A tentacle that hits<br />
attempts to start a grapple (treat as a Large creature) and<br />
also deals 6 points of damage. Anyone struck by three tentacles<br />
in a single round must succeed at a Fortitude save<br />
(DC 17) or be affected as by a slow spell for 10 rounds.<br />
Anyone struck by six tentacles in a round must make a successful<br />
Fortitude save (DC 17) or suffer 1 point of permanent<br />
Dexterity drain. Grappling tentacles count as striking<br />
for this purpose, so someone who is grappled by a tentacle<br />
in 1 round and struck by two more the next, while still<br />
grappled, has been “struck” by three and must make a Fortitude<br />
save.<br />
The curtain makes one or more opportunity attacks anyone<br />
who attempts to pass through (it can make up to twelve per<br />
round, depending on the number of free tentacles).<br />
sCurtain: hp 200; AC 20.<br />
The curtain is calmed and does not attack for 1d4+1<br />
rounds in the presence of incense burning in a black thurible<br />
(see Appendix 1).<br />
Creatures (EL 13): Susain Carun, a doomdreamer, is<br />
here attempting to rededicate the temple to the Elder Elemental<br />
Eye. She has a lesser tentacle rod and a demonic right<br />
leg (see area 26 of the Outer Fane). Susain currently has<br />
dispel good and spell resistance (SR 23) cast on herself. She<br />
offers the man on the altar to the Elder Elemental Eye,<br />
hoping that the tentacle takes him in exchange for an<br />
amulet of natural armor (+5).<br />
While all the clerics of Tharizdun are insane to some<br />
degree, Susain is the archetypical mad cultist. She cackles<br />
and shrieks, particularly at inappropriate times, and talks to<br />
herself incessantly, referring to herself in the second person.<br />
She is bald and well muscled.<br />
The ogre beating the drum has had its eyes sewn shut so as<br />
not to accidentally view the eye in the altar.<br />
The man on the altar is a paralyzed townsperson from<br />
Hommlet named Agman Stope. He is terrified beyond the<br />
capacity for rational thought.<br />
dSusain Carun: Female human Rog2/Clr8/Doomdreamer3;<br />
hp 70; see Appendix 3.<br />
dOgre: hp 26; 50% miss chance in combat due to blindness;<br />
see Monster Manual page 144.<br />
dAgman Stope: Male human Com1; hp 2 (noncombatant).<br />
147
CHAPTER 7: THE RECOVERED TEMPLE<br />
Tactics: Susain casts divine power on herself and slay<br />
living and blast of force (see Appendix 2) on her foes. If she<br />
has to, she falls back behind the purple curtain, but this<br />
requires that she spend a standard action lighting her torch<br />
of revealing.<br />
Development: If the ogres from area 23 are in the hallway<br />
to the south and enemies are approaching from that direction,<br />
Susain moves behind them, supporting them with empowered<br />
unholy blight. She then falls back to cast wall of force (from<br />
her scroll), sealing off the temple from the corridor.<br />
Ad Hoc XP Adjustment: Because of the unhallow spell,<br />
award an additional 10% experience points for all creatures<br />
defeated in this area. Award XP for destroying the curtain as<br />
if it were a CR 10 monster.<br />
30. Inner Chamber (EL 17)<br />
This area is exceedingly cold, numbing your spirit and<br />
slowing your thoughts. It contains three long ovoid altars<br />
of black stone, arranged in the middle of the floor in a Y<br />
pattern. To the east and west, black curtains conceal passages<br />
or side chambers.<br />
One of the altars has a large silver horn upon it,<br />
engraved with images of writhing tentacles.<br />
This area is sealed with a forbiddance spell, so that none other<br />
than chaotic evil creatures can enter the room unless they<br />
succeed at a Will save (DC 19). Those who fail the save also<br />
suffer 3d6 damage (6d6 damage if lawful good).<br />
The cold in this room is intense. No normal cold-weather<br />
gear or even spells can protect anyone from this magical,<br />
soul-numbing chill. Anyone not wearing a purple robe of<br />
Tharizdun suffers 1d4 points of cold damage per minute<br />
spent in the temple. Touching a metal object (unless protected<br />
by the long sleeves of a purple robe) inflicts an additional<br />
2d4 points of damage. Anyone wearing metal armor<br />
takes 1d4 points of damage on the first round and 2d4<br />
points of damage per round afterward unless protected by a<br />
purple robe.<br />
This whole area is unholy, as the result of an unhallow<br />
spell. The site has a permanent protection from good effect, and<br />
the unholy aura confers a –4 profane penalty on turn undead<br />
attempts (+4 to rebuke undead). The unhallow spell also continually<br />
grants all evil beings the benefits of aid while they<br />
are in this room.<br />
Horn of Darkness: The silver horn is a magic “key.” If it is<br />
blown, the terrible thundering sound creates a pulsing<br />
nimbus of darkness between the altars. If one of the Princes<br />
of Elemental Evil then places the Orb of Oblivion into this<br />
dark area, Tharizdun is filled with a torrent of evil energy<br />
and has a 25% chance to break free of his otherworldly<br />
prison. If two Princes of Elemental Evil are present, the<br />
energy is greater and the chance is 50%. Three makes it 75%,<br />
and all four princes give the deity so much power that he is<br />
automatically freed.<br />
In any event, the process destroys the artifact. The Orb of<br />
Silvery Death can still be used to access the Elemental Nodes,<br />
but a new Orb of Oblivion must be created to free the Dark<br />
God if the attempt fails.<br />
Altars: All the altars in this chamber act as soul-binding<br />
devices as described in the spell soul bind. If any character<br />
dies in this inner chamber, his soul is trapped in the nearest<br />
altar and cannot be brought back to life until that altar<br />
is destroyed.<br />
sAltar: hardness 10; hp 60; AC 5; break DC 28. If the altar<br />
is destroyed, the unhallow effect ends.<br />
Creatures: The Second of the Triad, an aboleth, spends<br />
much of its time here. It floats in an 8-foot-wide, 20-footlong<br />
levitating mass of water, held within a skinlike sheath<br />
of force. The Second can reach its tentacles through this<br />
sheath without spilling any water, and it moves at a speed of<br />
30 feet by pulling itself along the floor or walls. The sheath<br />
does not inhibit spellcasting through it, but it does provide a<br />
+4 armor bonus to AC and protects the Second from the cold<br />
of the room.<br />
dThe Second: Aboleth Clr7/Doomdreamer1; hp 161; see<br />
Appendix 3.<br />
Within the water in its sheath, the Second has a lesser<br />
planar ally, a Large water elemental. When commanded, the<br />
elemental leaps out of the floating mass, covered in the aboleth’s<br />
slime. Thus, its slam attack carries with it the effect of<br />
the aboleth’s mucus cloud. (Outside the force sheath, the<br />
water elemental takes damage from the cold in the room.)<br />
dLarge Water Elemental: hp 67; see Monster Manual<br />
page 84.<br />
Tactics: The Second hides behind the illusory wall it created<br />
between this area and area 31. It has already used its<br />
psionic abilities to create a programmed image of a huge,<br />
bloated mushroom-creature with four elephantine legs,<br />
two arms, and a hideous face under the cap.<br />
The image appears to come through the<br />
western curtain as anyone enters the room<br />
from the south. It says, “I am Zuggtmoy, the<br />
Demon Queen of Fungi and the ruler of this<br />
place. Now you shall fall before the power<br />
of a goddess.”<br />
The image then backs up to the north (illusory)<br />
wall. With this as cover, the Second<br />
peeks through and casts unholy blight or hold<br />
person from its wand. Characters in the room<br />
can make Spot checks (DC 25) to see some<br />
strange tentacle or inhuman face slip from<br />
behind the illusory wall.<br />
In battle, the aboleth looses its water elemental<br />
and attempts to psionically enslave<br />
its enemies. Only after it has exhausted<br />
these efforts does it make tentacle attacks,<br />
accompanied by touch spells such as inflict<br />
serious wounds.<br />
If about to lose, the Second uses its scroll of<br />
ethereal jaunt to escape (it keeps the scroll in a<br />
waterproof case, opening the container outside<br />
the sheath). It attempts to find any<br />
remaining doomdreamers or cult servants to<br />
mount a counterattack against its foes. Only<br />
as a last resort does it go to the Fire Node, where the water in<br />
its sheath eventually evaporates. (The heat does not bother it,<br />
because of its ring of minor elemental resistance, and it can still<br />
breathe, being amphibious).<br />
Treasure: In the small room to the east, behind the curtain,<br />
is a small, unlocked trunk on a table. In that trunk<br />
are seven scrolls of protection from elements (fire) and two of<br />
fire shield.<br />
Ad Hoc XP Award Adjustment: The Second is at home<br />
in this area and has prepared well for the possibility of attack.<br />
This encounter should award 150% normal XP (this includes<br />
the bonus XP for the unhallow effect). The EL for this room<br />
has been increased by +1 for that reason.<br />
Lareth<br />
Lareth the Beautiful, the<br />
anointed Champion of Elemental<br />
Evil (see Chapter 3), is<br />
the cult’s most precious property.<br />
Only he can summon the<br />
Princes of Elemental Evil to<br />
release the dread Tharizdun.<br />
The cultists do not want their<br />
champion harmed and keep<br />
Lareth very close. Place him in<br />
area 29, 30, or 31, or if events<br />
are going badly for the cult,<br />
secreted in the Fire Node<br />
(most likely near Imix) for<br />
extra security, packing a few<br />
scrolls of protection from elements<br />
(fire). Lareth possesses<br />
the items in the Black Cyst<br />
(area 21A of the Outer Fane)<br />
intended for the Champion, if<br />
they have not been stolen by<br />
the PCs.<br />
149
CHAPTER 7: THE RECOVERED TEMPLE<br />
31. Old Nexus<br />
This round chamber has walls 20 feet high and a domed<br />
ceiling that reaches 10 feet higher. The walls and ceiling are<br />
decorated with a mosaic mural, much of it crumbled away.<br />
That which remains seems to be made of precious stones.<br />
What’s left of the scene depicts glory and conquest, showing<br />
the surrounding lands as seen from high above the<br />
Temple of Elemental Evil. The countryside is filled with all<br />
manner of beings paying homage to the temple.<br />
In the center of the chamber, a round dais 2 feet tall<br />
holds an ornate silver throne, covered in more gemstones<br />
set to form leering demon faces, skulls and fungi. Some of<br />
the gems have been pried away.<br />
Once a place of great power, this room has lost most of its<br />
magic with the banishment of Zuggtmoy.<br />
The throne used to be a means of mental communication<br />
with Zuggtmoy herself. Anyone who sits on it can<br />
still hear her voice, feeble and distant. The voice does not<br />
identify itself but promises to grant three wishes to the<br />
one who dispels the magic on the grand altar in the Tabernacle<br />
of Utter Darkness at the top of the Black Spike (see<br />
Level 9 of the Inner Fane). Only one character hears this<br />
voice. (If Zuggtmoy has been freed from the altar, nothing<br />
happens.)<br />
Treasure: Characters can find and take fifty-two gems<br />
from the walls. Thirty are worth 10 gp each, eleven worth 50<br />
gp, six worth 100 gp, three worth 500 gp, and two worth<br />
1,000 gp.<br />
The throne contains 333 gems, but they have been somehow<br />
disfigured and corroded, making them worth only 1<br />
gp each.<br />
32. Gate to the Fire Node<br />
The red hallway leading out of the black-walled temple<br />
brightens from blood-colored to orange-red as one proceeds<br />
down its length. Soon, the paint (chipped and<br />
scratched as it is) resembles flames, and creatures of fire<br />
leap and cavort about them.<br />
Finally, the hall ends in an eight-pointed, diamondshaped<br />
room. On the floor here is the symbol of the Fire<br />
Temple set in blazing red stones on the floor, inscribed<br />
within a magic circle 20 feet across.<br />
By standing within the circle, up to ten Medium-size creatures<br />
at once are sent to the Fire Node (see Chapter 8).<br />
150
CHAPTER 8: THE FIRE NODE<br />
Chapter 8:<br />
The Fire<br />
NOde<br />
If characters pass through the gate in area 32 of the recovered<br />
temple (see Chapter 7), they end up in the Fire Node.<br />
This is the hollowed-out core of a small moon, floating<br />
within a partial plane, created by the power of a nowdestroyed<br />
artifact known as the Orb of Golden Death. Situated<br />
very close (metaphysically speaking) to the Elemental<br />
Plane of Fire, the node is a place of stifling heat, roaring<br />
flames, ash, and cinders.<br />
CONDITIONS<br />
WITHIN THE NODE<br />
The partial plane containing the Fire Node is near the smoldering<br />
heat of the Elemental Plane of Fire. Thus, the temperature<br />
within the node, while not a life-threatening<br />
inferno, is still sweltering hot. Only creatures of fire are<br />
comfortable there.<br />
Environmental Damage<br />
The Fire Node is quite hostile to creatures not of the Fire subtype.<br />
All such beings within the node suffer 1 point of fire<br />
damage every minute. Creatures of the Water subtype are<br />
extremely uncomfortable, and those who are made of water<br />
(such as elementals) take 2 points of damage each round.<br />
Spellcasting<br />
Spells inappropriate to such a hot, fire-oriented environment<br />
are more difficult to cast here. The plane impedes spells of<br />
the Water and Cold types, as well as those summoning elementals<br />
of those types.<br />
To cast an impeded spell, the caster must make successful a<br />
Spellcraft check (DC 15 + spell level). If the check fails, the<br />
spell does not take effect, but it is still lost from the caster’s<br />
memory. If the check succeeds, the spell works normally.<br />
Physical Layout<br />
The interior of this place is carved out of dark, volcanic rock.<br />
Surfaces are often covered in ash and soot, and black scorch<br />
marks are common as well.<br />
All doors in the Fire Node are stone with brass bindings.<br />
Corridors have 15-foot ceilings, and rooms 25-foot ceilings,<br />
unless stated otherwise.<br />
sStone Door: 4 in. thick; hardness 8; hp 60; AC 5; break<br />
DC 28.<br />
TRAVEL TO AND<br />
FROM THE NODE<br />
Anyone possessing either the Orb of Oblivion or the Orb of<br />
Silvery Death with the fire gem set into it can automatically<br />
teleport from anywhere within the node to the Fire Gate<br />
(area 32 of the recovered temple).<br />
Despite its similarity and “proximity,” the Fire Node has no<br />
specific connection to the Elemental Plane of Fire. Thus,<br />
creatures in the node, except for the efreet, cannot travel to<br />
that Elemental Plane (the home plane of many of them)<br />
without some sort of outside assistance.<br />
SECURITY/ORGANIZATION<br />
Unless someone from the recovered temple has come to<br />
the Fire Node and alerted its residents of an attack<br />
(unlikely, unless they’ve retreated here for safety), the creatures<br />
of the node have no idea whether newcomers are<br />
allies or enemies. Characters posing as cult members can<br />
get past most of the residents, who do not know the hierarchy<br />
of the organization well enough to recognize who is or<br />
isn’t a cleric.<br />
This is not true for Maliskra and Imix, however (see area<br />
9). Maliskra recognizes all the doomdreamers by face (+4<br />
bonus on Spot checks to see through a disguise) and is difficult<br />
to bluff (Sense Motive +6). Imix knows on sight<br />
whether someone is a worshiper of the Elder Elemental<br />
Eye/Tharizdun.<br />
All creatures within the node obey the<br />
commands of Imix out of fear, and they<br />
defend him when he is threatened.<br />
FIRE NODE KEY<br />
Many of the areas are currently empty,<br />
although there may be more inhabitants if<br />
that is appropriate to your campaign.<br />
1. Arrival (EL 9)<br />
This is a diamond-shaped room, with<br />
walls of black, volcanic rock and eight<br />
doors made of charcoal-gray stone bound<br />
in brass. In one point of the diamond sits<br />
a strange sort of brass chair with no back,<br />
built for a large creature.<br />
Creatures transporting in from area 32 of<br />
the recovered temple appear in the center<br />
of this room.<br />
Creatures: A salamander noble commands<br />
the entry to the Fire Node. In addition<br />
to wielding a +3 Huge longspear, it wears a ring<br />
of haste (identical in effect to boots of speed).<br />
dSalamander Noble: hp 115; see Monster<br />
Manual page 159.<br />
Tactics: The salamander noble does not<br />
attack those posing as cultists but does question<br />
why they have come.<br />
In the event of combat, it summons a Huge<br />
fire elemental and then casts dispel magic,<br />
attempting to cancel whatever fire protection<br />
its enemies possess. Following that, it uses its<br />
extra partial action from haste to make a full<br />
attack plus cast fireball or wall of fire each round.<br />
2. Bodaks (EL 10)<br />
A large, demonic idol stands in the room, its gargoylelike<br />
form rearing up with wings outstretched as if about to<br />
attack. The walls have carvings of erupting volcanoes<br />
and torrents of lava.<br />
Creatures: A pair of bodaks lurk about the base of the<br />
statue. Each wields a +2 greatsword.<br />
dBodaks (2): hp 56, 59; +2 greatsword, +8 melee, damage<br />
2d6+3; see Monster Manual page 27.<br />
The Elemental Plane of Fire<br />
This plane is composed<br />
almost entirely of everburning<br />
flames, which never consume<br />
their fuel. The environment is<br />
extremely hostile to creatures<br />
of the Material Plane—those<br />
without fire resistance or<br />
immunity are soon immolated.<br />
Unprotected wood, paper,<br />
cloth, and other flammable<br />
materials ignite almost immediately,<br />
and those wearing<br />
unprotected flammable clothing<br />
catch fire (see page 86 in<br />
the DUNGEON MASTER’s Guide).<br />
Creatures and objects suffer<br />
3d10 points of fire damage<br />
every round they are present<br />
on the plane. Creatures of the<br />
Water subtype are extremely<br />
uncomfortable, and those who<br />
are made of water (such as elementals)<br />
take double damage<br />
each round.<br />
While these conditions are<br />
typical for the Elemental Plane<br />
of Fire, locations exist on the<br />
plane (lava pools, magma<br />
rivers, volcano springs) where<br />
the circumstances are much<br />
worse. Gravity conditions are<br />
normal throughout.<br />
151
CHAPTER 8: THE FIRE NODE<br />
152<br />
Tactics: Intruders may accidentally fall victim to the lurking<br />
bodaks’ gaze, but the creatures attack only if threatened<br />
or commanded to do so by Imix.<br />
3. Giants (El 12)<br />
The walls here have iron spikes hammered into strange<br />
patterns to make images of skulls, Elder Elemental Eye<br />
symbols, and other, stranger designs. A massive iron<br />
table and two stools are in the middle of the room, while<br />
two very large beds are along the walls.<br />
Four of these rooms exist.<br />
Creatures: Two fire giants live together in each room,<br />
bored and eager for something to happen.<br />
dFire Giants (2): hp 130, 159; see Monster Manual page 98.<br />
Tactics: The giants are unfriendly but do not attack unless<br />
alerted to danger. For example, if they hear fighting in<br />
another area, they prepare for battle and assume that the next<br />
unknown they encounter is hostile.<br />
If threatened, one giant closes immediately, weapon brandished,<br />
while the other flips over the table and hurls rocks<br />
from behind it (gaining one-half cover).<br />
4. Elementals (EL 12)<br />
Wall carvings show burning plants and buildings, and<br />
people running about on fire. It seems as though this<br />
room itself is ablaze, but then you notice faces leering out<br />
from the fire, which animates and moves toward you.<br />
Three of these rooms are present.<br />
Creatures: Three greater fire elementals inhabit each<br />
of these rooms and attack any nonFire creature that<br />
comes near. They consider it the responsibility of those<br />
whom they shouldn’t attack (clerics of the Elder Elemental<br />
Eye, for instance) to defend themselves and prove<br />
their identity.<br />
dGreater Fire Elementals (Evil) (3): hp 171, 178, 190;<br />
see Monster Manual page 83.<br />
5. Salamander Forge (EL 10)<br />
The sound of hammering metal greets you as you come<br />
near.<br />
This room has a number of flaming pits, and<br />
around them are anvils, tongs, hammers, and all sorts<br />
of other tools. Molten metal gathers in puddles on the<br />
floor, eventually cooling enough to harden into castoff<br />
pieces.<br />
Two of these rooms exist. The pits are 10 feet deep and filled<br />
with burning coals.<br />
Creatures: Six salamanders toil here, but half are within<br />
the fire pits themselves and may not be initially visible.<br />
dAverage Salamanders (6): hp 33, 34, 38, 39, 40, 44; see<br />
Monster Manual page 159.<br />
Tactics: These creatures are intent on crafting weapons for<br />
the temple. They ignore newcomers unless attacked or otherwise<br />
alerted.<br />
Treasure: The salamanders have completed 2d4 each<br />
masterwork longspears, tridents, and greatswords.<br />
6. Burning Skeletons (EL 9)<br />
Blackened bones lie scattered throughout this chamber.<br />
Suddenly, the bones begin to assemble themselves into<br />
skeletons that burst into flames and advance menacingly.<br />
Two of these rooms exist (twenty-four skeletons total).<br />
Creatures: The bones form twelve burning skeletons<br />
that attack any nonFire creature that cannot rebuke or<br />
control them.<br />
Burning Skeletons (12): hp 25, 30, 31, 31, 32, 32, 33, 34,<br />
37, 39, 40, 40; see Appendix 1.<br />
7. Efreet (EL Variable)<br />
This chamber’s walls are covered in brass plates etched<br />
with an intricate, abstract design that is somehow menacing.<br />
The room’s only furnishings are an intricately carved<br />
huge brass chest and a large brass bowl filled with cooked<br />
meats on a stand.<br />
Areas marked P on map 26 are enchanted with a permanent<br />
image of an enormous red dragon head peering around the<br />
corner, looking at the doors. This are intended to frighten<br />
off interlopers.<br />
Traps (EL 10 each): Each area marked with a T on the map<br />
is a pit trap, 60 feet deep, the last 10 feet filled with magma.<br />
aTrapdoor Pit: CR 10; 60 feet deep (6d6), bottom filled<br />
with magma (20d6 per round); Reflex save avoids (DC 20);<br />
Search (DC 21); Disable Device (DC 20).<br />
Creatures (EL 10): Two efreet dwell in this chamber.<br />
dEfreet (2): hp 60, 62; see Monster Manual page 94.<br />
Tactics: These efreet like to use gaseous form and trick<br />
opponents into chasing them across the traps, or become<br />
invisible to surprise opponents in melee.<br />
Treasure: The chest is locked (Open Lock DC 30), and<br />
contains 981 pp, 3,549 gp, 4,320 sp, and 8,346 cp. One of the<br />
efreet carries the key.<br />
8. Demon (EL 15)<br />
This long chamber stinks of death and decay. Its length is<br />
covered with corpses spiked to the black stone walls, their<br />
flesh cooking in the heat of the place. At the end of this<br />
long corridor of gore sits an oval chamber filled with<br />
bones and broken weapons. The far wall has a symbol of<br />
the Elder Elemental Eye painted in blood.<br />
Creatures: A glabrezu inhabits this area. It is a servant of the<br />
Elder Elemental Eye but actually resents the presence of Imix.<br />
The demon comes to the prince’s aid only if commanded to do<br />
so. For now, it bides its time, knowing that the Triad has to<br />
eventually come to it—for unknown to everyone else, the<br />
demon possesses all three remaining elemental power gems.<br />
Glabrezu: hp 80 hp; see Monster Manual page 42.<br />
Tactics: This demon is the most evil creature in the node,<br />
but it is also the most likely to speak to adventurers, particularly<br />
if they are posing as cultists. It can tell them where<br />
Imix is, and that the “Champion of Elemental Evil” summoned<br />
the prince not long ago. The demon also informs<br />
them that the other nodes cannot be accessed until their<br />
gates in the Temple of Elemental Evil are uncovered, and the<br />
corresponding elemental power gems found (it smiles evilly at<br />
that last bit).
CHAPTER 8: THE FIRE NODE<br />
Treasure: Hidden in each of three hanging corpses’<br />
mouths is one of the other three elemental power gems. These<br />
are needed to complete the Orb of Oblivion or the Orb of<br />
Silvery Death.<br />
9. Throne of Imix (EL 17)<br />
This long hall of circular, flaming pits has a white-andsilver<br />
circle, 8 feet across, set into the stone at one end.<br />
Around it, images of gray smoke are painted on the walls.<br />
At the other, narrower end rests a massive throne,<br />
filling the alcove there. It is constructed of glass filled<br />
with roaring flames, giving the impression that it is<br />
made only of fire. Two huge rubies glisten from the top<br />
of the throne.<br />
The ceiling is at least 50 feet high. Above the throne,<br />
fiery runes blaze with a message.<br />
The runes are in Ignan. They say: “Here is Imix, Prince of Elemental<br />
Evil, Lord of Fire.”<br />
If the Air Node were accessible, standing in the circle<br />
would transport up to eight characters at a time into that<br />
node. Now, however, doing this accomplishes nothing.<br />
Creatures: Two beings are in this chamber. The first is<br />
Maliskra, the Triad’s representative in the node, in charge<br />
of keeping the creatures here safe and content until the<br />
time comes to free the Dark God. A half-medusa/half-fire<br />
elemental, Maliskra has long been groomed by the cult<br />
for this position. Her scales are bright red and her eyes<br />
smolder with a yellow, sulfurous glow. She possesses the<br />
Orb of Oblivion.<br />
The second is, of course, Imix. This 50-foot-tall creature<br />
is a red, flaming mass, humanoid-shaped but almost featureless<br />
except for eyes that burn white-hot. He wields<br />
a Colossal +2 flaming greatsword studded with rubies<br />
(increasing its value by 10,000 gp). Imix is extraordinarily<br />
haughty and confident that he will soon cause the destruction<br />
of everything by releasing Tharizdun—an idea that<br />
he relishes.<br />
dMaliskra: Half-medusa/half-fire elemental Clr5/Doomdreamer1;<br />
hp 71; see Appendix 3.<br />
dImix, Prince of Evil Fire: hp 342; see Appendix 3.<br />
Tactics: Maliskra knows how important Imix is to her<br />
cause and does not leave his side. She casts endurance and<br />
bull’s strength on herself early in the day, and shield of faith<br />
right before battle.<br />
In a fight, Maliskra keeps her distance, using spells (hold<br />
person, blindness/deafness, command, and her scroll of unholy<br />
blight) and her gaze attack as long as possible before entering<br />
melee. Imix relishes combat and sets to hacking apart foes<br />
with his sword as quickly as possible, virtually ignoring his<br />
spell-like abilities.<br />
Treasure: In addition to the other items here, the two<br />
rubies in the throne are each worth 5,000 gp.<br />
10. Gate to the Water Node<br />
A long, wide corridor, the walls carved to look like clouds<br />
of steam, leads to a chamber with a large blue-green<br />
square set into the floor.<br />
If the Water Node were accessible, standing in the square<br />
would transport up to eight characters at a time into that<br />
node. Now, however, doing this accomplishes nothing.<br />
153
APPENDIX 1: NEW MAGIC ITEMS AND MONSTERS<br />
154<br />
11. Gate to the Earth Node<br />
A brown triangle is set into the floor within this triangular<br />
chamber, The wall farthest from the symbol shows a<br />
huge but crude mural of burning stones falling from the<br />
night sky, destroying a city.<br />
If the Earth Node were accessible, standing in the triangle<br />
would transport up to eight characters at a time into that<br />
node. Now, however, doing this accomplishes nothing.<br />
FURTHER ENCOUNTERS<br />
The Fire Node is only sparsely populated. If more encounters<br />
are desired, add one or more of the following as random<br />
encounters or as inhabitants of some of the empty rooms.<br />
• Six fire mephits (EL 8); see Monster Manual page 132.<br />
• Seven steam mephits (EL 8); see Monster Manual page 132.<br />
• Six magma mephits (EL 8); see Monster Manual page 132.<br />
• Eight rasts (EL 11); see Monster Manual page 154.<br />
• Pyrohydra with eleven heads (EL 12); see Monster Manual<br />
page 122.<br />
• Red dragon, young adult (EL 12); see Monster Manual page<br />
68 (or use statistics for Chymon, the dragon in area 1 of<br />
the Outer Fane—see Appendix 3).<br />
Appendix 1:<br />
New Magic<br />
Items and<br />
MOnsters<br />
The many new magic items and creatures in this adventure are<br />
detailed here.<br />
NEW MAGIC ITEMS<br />
Armband of Reduction: This metal armband allows its<br />
wearer to reduce his height to one-half normal, as if a reduce<br />
spell had been cast upon him. This effect functions once per<br />
day and lasts for 2 hours (and may be dismissed at will by<br />
the wearer).<br />
Caster Level: 5th; Prerequisites: Craft Wondrous Item, reduce;<br />
Market Price: 2,000 gp; Weight: 1 lb.<br />
Black Thurible: This is a censer for burning incense, a black<br />
iron egg (hinged so it can be opened and incense placed within)<br />
hung on a chain so that can be easily carried. The egglike censer<br />
has holes to let out the incense odor. This device has various<br />
functions within the temples dedicated to Tharizdun, most of<br />
them protective in nature. (These functions are described in the<br />
adventure in the rooms where the black thurible has an effect.) It<br />
functions only when ball-shaped incense of dreaming (see below)<br />
is burned within.<br />
Caster Level: 10th; Prerequisites: Cannot be made (the secrets<br />
of making this item are now lost); Market Price: n/a; Weight:<br />
1 lb.<br />
Chitin Armor: This special nonmagical armor is made from<br />
the organic hides of monstrous beasts like giant beetles.<br />
Because it is organic, it is easy to move within it. It has all the<br />
properties of masterwork breastplate, half-plate or full plate<br />
armor (as appropriate), plus it raises the maximum Dex bonus<br />
of the armor type by +1. The secrets to making this armor are<br />
known only to troglodyte craftspeople.<br />
Caster Level: n/a; Prerequisites: None; Market Price: 500 gp<br />
(breastplate), 900 gp (half-plate), 1,800 gp (full plate). Weight: As<br />
normal armor.<br />
Contact Medallion: Once per day, the wearer can speak a<br />
command word and forge a telepathic bond (as Rary’s telepathic<br />
bond) with one person lasting for 1 minute. Range is one mile.<br />
Caster Level: 9th; Prerequisites: Craft Wondrous Item, Rary’s<br />
telepathic bond; Market Price: 5,000 gp; Weight: —.<br />
Everful Mug: With a command word, this common-looking<br />
mug fills with 12 ounces of water, cheap ale, or watery wine<br />
(user’s choice). It functions three times per day.<br />
Caster Level: 1st; Prerequisites: Craft Wondrous Item, create<br />
water; Market Price: 800 gp; Weight: —.<br />
Hammersphere: This magic sphere is 4 inches in diameter,<br />
made of silver and covered in small rubies. Etched into it in<br />
four places is the hammer-and-anvil symbol of the deity<br />
Moradin. When held aloft and activated with a command word,<br />
the sphere conjures forth a giant hammer. This hammer functions<br />
as a spiritual weapon, except that it inflicts 3d6 damage per<br />
hit. (You don’t have to concentrate on the hammer or keep the<br />
sphere aloft while it functions.) The hammersphere is usable<br />
once per day.<br />
Caster Level: 7th; Prerequisites: Craft Wondrous Item, spiritual<br />
weapon, greater magic weapon; Market Price: 2,500 gp; Weight: —.<br />
Incense of Dreaming: This dark-colored incense is created by<br />
worshipers of Tharizdun for use in black thuribles (see above)<br />
and torches of revealing (see below). Incense made for the black<br />
thurible is ball-shaped, while incense designed for the torch of<br />
revealing is cone-shaped. The incense has no effect when not<br />
burned in one of the items noted here.<br />
Caster Level: 3rd; Prerequisites: Craft Wondrous Item, darkness;<br />
Market Price: n/a; Cost to Create: 25 gp; Weight: —.<br />
Phylactery of Change: The wearer of this item can invoke a<br />
polymorph self effect with an indefinite duration (or until the<br />
phylactery is removed, destroyed, or dispelled). A new form<br />
can be adopted only once per day. The wearer can assume his<br />
natural form without limitation, however.<br />
Caster Level: 7th; Prerequisites: Craft Wondrous Item, polymorph<br />
self; Market Price: 11,200 gp.<br />
Purple Robe of Tharizdun: These robes have pointed hoods<br />
and sleeves so long that they cover the wearer’s hands by at least<br />
6 inches. They protect against the cold peculiar to temples to<br />
the Dark God. They do nothing else, and do not give magical<br />
protection against normal cold (beyond what a normal robe<br />
might provide).<br />
Caster Level: 10th; Prerequisites: Cannot be made (the secrets<br />
of making this item are now lost); Market Price: n/a; Weight:<br />
1 lb.<br />
Rings of Force Armor: This pair of black iron rings must be<br />
worn as a set, one on either hand with no other magic ring, to<br />
function. They sheath their wearer in a field of energy, granting<br />
a +4 armor bonus (the wearer is treated as having mage armor).<br />
This sheath is harmful to the touch, so any creature touching<br />
the wearer with bare flesh suffers 1d4 points of damage.
APPENDIX 1: NEW MAGIC ITEMS AND MONSTERS<br />
Further, because of the sheath, the wearer’s unarmed attacks<br />
gain a +1 enhancement bonus and add an additional 1d4 points<br />
of damage.<br />
Caster Level: 9th; Prerequisites: Forge Ring, magic weapon, mage<br />
armor, wall of force; Market Price: 45,000 gp; Weight: —<br />
Rod of Force: This rod is made of black iron, 18 inches long<br />
and a half-inch wide. The rod has three functions, any of which<br />
can be used, in any combination, five times per day:<br />
Blast of Force: A blast of force projects from the rod with a<br />
range of 100 feet. This blast strikes as a ranged touch attack. It<br />
inflicts 10d6 points of force damage.<br />
Wall of Force: As the spell.<br />
Blade of Force: A 30-foot-long glowing blade of force springs<br />
forth from the rod that lasts for 10 rounds. This can be used as<br />
a +1 brilliant energy longsword.<br />
Caster Level: 13th; Prerequisites: Craft Rod, magic missile, wall<br />
of force, Mordenkainen’s sword; Market Price: 125,000 gp; Weight:<br />
3 lb.<br />
Stalwart Eye: This Tiny birdlike item allows its owner to speak<br />
a command word and see through its eyes. The stalwart eye has<br />
AC 18, hardness 8, 5 hp, and cannot move on its own except to<br />
turn its head as the owner desires. No range limitation exists<br />
on the power except that the owner must be on the same<br />
plane as the stalwart eye.<br />
Caster Level: 5th; Prerequisites: Craft Wondrous Item, alarm,<br />
animal messenger; Market Price: 10,000 gp; Weight: 2 lb.<br />
Sword of Air: This +2 longsword has a silver circle set into the<br />
pommel, indicating its elemental alliance. When the sword is<br />
drawn, the wielder gains the effect of endure elements (electricity).<br />
Once per day, the wielder can project a blast of wind from the<br />
blade that inflicts 2d6 points of impact damage as a ranged<br />
touch attack with a range of 100 feet.<br />
Caster Level: 5th; Prerequisites: Craft Magic Arms and Armor,<br />
gust of wind, protection from elements; Market Price: 12,315 gp; Cost<br />
to Create: 6,315 gp + 480 XP; Weight: 4 lb.<br />
Sword of Earth: This +2 greatsword has a brown triangle shape<br />
set into the pommel, indicating its elemental alliance. When the<br />
sword is drawn, the wielder gains the effect of endure elements<br />
(acid). Once per day, the wielder can project a blast of solid rock<br />
from the blade that inflicts 3d6 points of impact damage as a<br />
ranged touch attack with a range of 60 feet.<br />
Caster Level: 5th; Prerequisites: Craft Magic Arms and Armor,<br />
magic stone, protection from elements; Market Price: 12,850 gp; Cost<br />
to Create: 6,565 gp + 500 XP; Weight: 15 lb.<br />
Sword of Fire: This +2 short sword has a red lozenge shape set<br />
into the pommel, indicating its elemental alliance. When the<br />
sword is drawn, the wielder gains the effect of endure elements<br />
(fire). Once per day, the wielder can project a blast of flame from<br />
the blade that inflicts 4d6 points of fire damage as a ranged<br />
touch attack with a range of 40 feet.<br />
Caster Level: 5th; Prerequisites: Craft Magic Arms and Armor,<br />
fireball, protection from elements; Market Price: 13,310 gp; Cost to<br />
Create: 6,810 gp + 520 XP; Weight: 3 lb.<br />
Sword of Water: This +2 longsword has a blue-green square<br />
shape set into the pommel, indicating its elemental alliance.<br />
When the sword is drawn, the wielder gains the effect of<br />
endure elements (cold). Once per day, the wielder can project<br />
a blast of normal water from the blade that inflicts 3d6 points<br />
of impact damage as a ranged touch attack with a range of<br />
50 feet.<br />
Caster Level: 5th; Prerequisites: Craft Magic Arms and Armor,<br />
sleet storm, protection from elements; Market Price: 12,850 gp; Cost to<br />
Create: 6,565 gp + 500 XP; Weight: 4 lb.<br />
Tentacle Rod: This rod comes in two varieties: the greater<br />
tentacle rod and the lesser tentacle rod. Each appears to be a<br />
long, sinuous rod of unknown (but presumably organic)<br />
composition. The lesser rod ends in three “branches.” while<br />
the greater has six.<br />
Upon command, these branches animate and grapple like<br />
tentacles, using their own attack bonus (including the rod’s +3<br />
enhancement bonus) rather than the wielder’s bonus. The rod’s<br />
attacks count as a standard action for the wielder.<br />
The tentacle attacks follow all the normal rules for grapple<br />
attacks, with two exceptions: These attacks don’t incur attacks of<br />
opportunity and the wielder need not move into the target’s<br />
space to maintain the grapple. The tentacle, and not the wielder,<br />
is considered to be the grappler (and the wielder doesn’t suffer<br />
any of the drawbacks of being a grappler). Treat the rod as a<br />
Medium-size creature for purposes of the special size modifier<br />
to the grapple check.<br />
Each rod also has one or more special powers that affect any<br />
target touched by three (or six) of its tentacles in the same<br />
round (regardless of whether the tentacles actually grapple<br />
the target).<br />
If all three of the lesser rod’s tentacles touch a target, it must<br />
make a Fortitude save (DC 14) or be affected by a slow spell for 12<br />
rounds. If any three of the greater rod’s tentacles touch a single<br />
target, it must make a Will save (DC 14) or be affected by a bestow<br />
curse spell (a permanent –4 enhancement penalty to attacks, saves,<br />
and checks). If all six of the greater rod’s tentacles touch a single<br />
target in the same round, the victim must make a Fortitude save<br />
(DC 17) or suffer 1 point of permanent Dexterity drain.<br />
Each tentacle has hardness 10, 20 hp, and a break DC of 30.<br />
Number of Attack Bonus/<br />
Rod Attacks Grapple Check* Damage* Str<br />
Lesser 3 +9 6 points 16<br />
Greater 6 +15 9 points 22<br />
*These numbers include the rod’s Strength bonus.<br />
Caster Level: 12th; Prerequisites: Craft Rod, animate objects,<br />
bestow curse (greater rod only), Evard’s black tentacles, slow (lesser<br />
rod only); Market Price: 21,000 gp (lesser rod) or 57,000 gp (greater<br />
rod); Weight: 3 lb.<br />
Torch of Revealing: This black iron torch has a cupped head<br />
that is fitted so that the cone-shaped incense of dreaming (see<br />
above) can be easily set into it. When incense of dreaming is<br />
placed within the torch and lit, it creates a 10-foot radius of<br />
violet light and chill air. These torches have a very specific<br />
purpose: the revelation of specific, magically hidden objects<br />
within temples and shrines devoted to Tharizdun.<br />
Caster Level: 10th; Prerequisites: Cannot be made (the secrets of<br />
making this item are now lost); Market Price: n/a.<br />
NEW MINOR ARTIFACTS<br />
Demonstone: This dark rock seems naturally in the shape of a<br />
small demonic creature with batwings folded around its body.<br />
It is semitranslucent with a dark center that sometimes seems<br />
to move. It occasionally seems to whisper, and if one listens<br />
closely, the whisper can be understood—but it is a foul and evil<br />
entreaty to do some horrible act. In the meantime, however, the<br />
possessor gains a +1 luck bonus to attacks, weapon damage,<br />
skill checks, and saving throws.<br />
155
APPENDIX 1: NEW MAGIC ITEMS AND MONSTERS<br />
156<br />
After one day of close proximity (within 5 feet) to the<br />
stone, a character must make a Will saving throw (DC 15) or<br />
do as the stone compels and become chaotic evil in alignment.<br />
If the saving throw is successful, further saves must be made<br />
each day, with the DC increasing by 1 each time.<br />
Characters turned evil by the demonstone are particularly<br />
despicable in their sadistic and horrible actions.<br />
Once the character becomes fully evil (or was evil in the<br />
first place), the stone need not remain in his possession for<br />
him to gain the luck bonus. It lasts until the brittle stone is<br />
destroyed (hardness 4, 10 hp, break DC 24) or until someone<br />
else succumbs to its temptation (fails his Will save while in<br />
close proximity).<br />
When a character who was turned evil by the stone loses<br />
their connection with it (if it is destroyed or gains a new victim)<br />
the awareness of their evil deeds comes back to them, and they<br />
are usually thrown into deep despair.<br />
Elemental Power Gems: Four of these gems exist, each<br />
intended on being set into one of three magic orbs: the Orb of<br />
Oblivion, the Orb of Golden Death (now destroyed), or the Orb<br />
of Silvery Death.<br />
Each gem, when touched, transports that character and all<br />
creatures within 50 feet to the corresponding elemental node.<br />
This function only works if the gate in the Temple of Elemental<br />
Evil corresponding to that node is cleared and operational.<br />
These gems can be placed within one of the Orbs (Oblivion or<br />
Silvery Death), which enable their full powers to be utilized.<br />
These gems are not destroyed when the Orb they are set into<br />
is destroyed. Instead, they are flung back into one or more of<br />
the elemental nodes.<br />
NEW MAJOR ARTIFACTS<br />
Orb of Oblivion: This artifact resembles a rounded, clear<br />
crystal skull with four small niches placed equidistant around<br />
the “crown.” This is the “master orb” from which the Orb of<br />
Golden Death (now destroyed) and the Orb of Silvery Death were<br />
patterned as lesser copies.<br />
By itself, the Orb has these powers, accessible at will: detect<br />
good, detect evil, discern lies, cause fear, and once per day, insanity.<br />
The Orb’s powers and how to use them are communicated by the<br />
Orb mentally to the possessor.<br />
The following abilities and drawbacks are not mentally<br />
described by the Orb.<br />
• No divine spell cast by a cleric of Tharizdun or the Elder<br />
Elemental Eye can affect the possessor when the Orb is<br />
held (treat as if the cleric always failed a spell resistance<br />
check against the possessor).<br />
• The possessor knows the location of the Orb of Silvery<br />
Death (and the Orb of Golden Death if it still existed) as if a<br />
discern location spell were used.<br />
• The user can command evil beings as if using a mass suggestion<br />
(DC 20). Each time this ability is used, however, the<br />
possessor suffers 1 point of permanent Charisma drain.<br />
• If the possessor is a good-aligned divine spellcaster, he<br />
gains a negative level while in contact with the Orb.<br />
The Orb with the Elemental Power Gems: The Orb of Oblivion<br />
gains the following powers when one of the elemental power<br />
gems is set into it:<br />
• A spell-like ability usable once per day:<br />
Fire: Flame strike.<br />
Water: Wall of ice.<br />
Air: Fly.<br />
Earth: Wall of stone.<br />
• Plane shift to and from the corresponding elemental plane<br />
at will as a spell-like ability.<br />
• Immunity to environmental damage incurred on the<br />
corresponding elemental plane as well as the following<br />
immunities/abilities:<br />
Fire: Immunity to fire.<br />
Water: Water breathing at will (possessor only).<br />
Air: Feather fall at will, immune to any gas.<br />
Earth: Immunity to petrification and poison.<br />
• Summon monster VIII (elemental of the corresponding<br />
type only) as a spell-like ability once per week.<br />
• Summon monster VII (evil outsider only) as a spell-like<br />
ability once per week.<br />
Destroying the Orb: The Orb of Oblivion cannot be destroyed<br />
while the Orb of Silvery Death exists. When the lesser orb is<br />
gone, the owner can will the Orb of Oblivion to consume itself,<br />
becoming a sphere of annihilation, if all four elemental power<br />
gems are inset.<br />
Orb of Silvery Death: This artifact resembles a rounded, silver<br />
skull with four small niches placed equidistant around the<br />
“crown.” Like the Orb of Golden Death (now destroyed), this is a<br />
slightly inferior copy of the Orb of Oblivion.<br />
By itself, the Orb has these powers, accessible at will: detect<br />
good, detect evil, discern lies, cause fear, and poison. The Orb’s powers<br />
and how to use them are communicated by the Orb mentally to<br />
the possessor.<br />
The following abilities and drawbacks are not mentally<br />
described by the Orb.<br />
• No divine spell cast by a cleric of Tharizdun or the Elder<br />
Elemental Eye can affect the possessor when the Orb is held<br />
(treat as if the cleric always failed a spell resistance check<br />
against the possessor).<br />
• The user can command evil beings as if using a mass suggestion<br />
spell (DC 20). Each time this ability is used, however,<br />
the possessor suffers 1 point of permanent Charisma drain.<br />
• The possessor of the Orb of Oblivion knows the location of<br />
the Orb of Silvery Death as if a discern location spell were used.<br />
• If the possessor is a good-aligned divine spellcaster, he<br />
gains a negative level while in contact with the Orb.<br />
The Orb with the Elemental Power Gems. The Orb of Silvery Death<br />
gains the following powers when one of the elemental power<br />
gems is set into it:<br />
• A spell-like ability usable once per day:<br />
Fire: Flame strike.<br />
Water: Wall of ice.<br />
Air: Fly.<br />
Earth: Wall of stone.<br />
• Plane shift to and from the corresponding elemental plane<br />
at will as a spell-like ability.<br />
• Immunity to environmental damage incurred on the corresponding<br />
elemental plane as well as the following<br />
immunities/abilities:<br />
Fire: Immunity to fire.<br />
Water: Water breathing at will (possessor only).<br />
Air: Feather fall at will, immune to any gas.<br />
Earth: Immunity to petrification and poison.<br />
• Summon monster VII (elemental of the corresponding type<br />
only) as a spell-like ability once per week.<br />
• Summon monster VI (evil outsider only) as a spell-like ability<br />
once per week.
APPENDIX 1: NEW MAGIC ITEMS AND MONSTERS<br />
Destroying the Orb: The Orb of Silvery Death can only be destroyed<br />
if all the gems are properly inset. It must then be subjected to<br />
the following effects, in succession and in the proper order,<br />
which causes the Orb to shatter:<br />
• A wind of 50 mph or more.<br />
• A strike from a maul<br />
made from a solid piece<br />
of granite.<br />
• A very hot flame (1,000<br />
degrees).<br />
• Very cold water (32<br />
degrees).<br />
NEW<br />
MONSTERS<br />
Blade Spirit<br />
Medium-Size Undead<br />
(Incorporeal)<br />
Hit Dice: 9d12 (58 hp)<br />
Initiative: +8<br />
Speed: 40 ft., fly 80 ft.<br />
(good)<br />
AC: 16 (+4 Dex, +2<br />
deflection)<br />
Attacks: Incorporeal<br />
touch +8 melee<br />
Damage: Incorporeal<br />
touch 1d4<br />
Face/Reach: 5 ft. by 5 ft./5 ft.<br />
Special Attacks: Animate<br />
weapons<br />
Special Qualities:<br />
Undead, incorporeal,<br />
+2 turn resistance<br />
Saves: Fort +3, Ref +7, Will +8<br />
Abilities: Str —, Dex 18, Con —, Int 14, Wis 14,<br />
Cha 15<br />
Skills: Hide +16, Intimidate +12, Intuit Direction +10, Listen<br />
+14, Search +10, Spot +14<br />
Feats: Alertness, Blind-Fight, Combat Reflexes, Dodge,<br />
Improved Initiative<br />
Climate/Terrain: Any land or underground<br />
Organization: Solitary<br />
Challenge Rating: 9<br />
Treasure: 1d6+1 masterwork bladed weapons (see below)<br />
Alignment: Always lawful evil<br />
Advancement: 10–18 HD (Medium-size)<br />
Blade spirits are the undead remnants of a powerful smith,<br />
almost always tied to a forge. Blade spirits are often, but not<br />
always, the spirits of dwarves that linger in the world, striking<br />
out with malice and contempt for any who come to the<br />
place they haunt.<br />
A blade spirit resembles a number of metal weapons hovering<br />
around a semitransparent face with glowing red eyes, like<br />
coals in a forge. It is associated with ghostly sounds of striking<br />
metal and gusts of unexplained heat.<br />
Combat<br />
Although a blade spirit has an incorporeal touch that disrupts<br />
the bodies of the living, it prefers to use animated weapons to<br />
attack while it remains farther away in its incorporeal form.<br />
Animate Weapons (Sp): A blade spirit can animate up to six<br />
slashing weapons, and it is always encountered with 1d6+1<br />
such weapons of masterwork quality. These fully corporeal<br />
weapons can move up to 15 feet away from the<br />
spirit, attacking with a +11 bonus.<br />
Weapon Domination (Sp): As a standard<br />
action, a blade spirit can dominate<br />
nearby slashing weapons. Any character<br />
holding a slashing weapon<br />
within 20 feet of the blade spirit<br />
must make a Will save (DC 16)<br />
or make an attack upon himself<br />
or herself with that weapon<br />
(this doesn’t count against<br />
the character’s normal<br />
number of attacks).<br />
Weapon Immunity: A<br />
blade spirit is immune to all<br />
damage inflicted by slashing<br />
weapons, no matter how<br />
magical, although associated<br />
damage is inflicted normally<br />
(for example, the 1d6 points<br />
of fire damage from a flaming<br />
sword).<br />
Undead: Immune to<br />
mind-influencing effects,<br />
poison, sleep, paralysis, stunning,<br />
and disease. Not subject to critical<br />
hits, subdual damage, ability<br />
damage, energy drain, or death<br />
from massive damage.<br />
Incorporeal: Can be harmed<br />
only by other incorporeal creatures,<br />
+1 or better magic weapons,<br />
or magic, with a 50% chance to<br />
ignore any damage from a corporeal<br />
source. Can pass through solid<br />
objects at will, and own attacks pass<br />
through armor. A blade spirit always moves silently.<br />
Burning Skeleton<br />
Medium-Size Undead<br />
Hit Dice: 5d12 (32 hp)<br />
Initiative: +2<br />
Speed: 30 ft.<br />
AC: 16 (+2 Dex, +4 natural)<br />
Attacks: Slam +4 melee<br />
Damage: Slam 1d6+1 and 1d6 fire<br />
Face/Reach: 5 ft. by 5 ft./5 ft.<br />
Special Attacks: Fire<br />
Special Qualities: Undead, immune to fire<br />
Saves: Fort +1, Ref +3, Will +5<br />
Abilities: Str 12, Dex 14, Con —, Int 10, Wis 13, Cha 10<br />
Skills: Climb +5, Hide +9, Listen +9, Move Silently +10,<br />
Search +7, Spot +9<br />
Feats: Alertness, Weapon Finesse (slam attack)<br />
Climate/Terrain: Any land or underground<br />
Organization: Solitary, gang (2–5), or pack (6–11)<br />
Challenge Rating: 3<br />
Treasure: None<br />
Alignment: Always chaotic evil<br />
Advancement: 6–10 HD (Medium-size)<br />
157
APPENDIX 1: NEW MAGIC ITEMS AND MONSTERS<br />
158<br />
Burning skeletons are undead that<br />
lurk around areas of fire—volcanoes,<br />
forges, fire pits, and so on.<br />
They are usually animated spirits<br />
of those who died in flames who<br />
have returned to wreak havoc. Left<br />
to their own devices, they seek to<br />
destroy all life and burn anything<br />
they come across.<br />
These undead resemble<br />
standard skeletons, although<br />
the bones are usually charred.<br />
An aura of flickering flames,<br />
particularly about their<br />
hands and skulls, is always<br />
evident, and their eyes<br />
glow like the ends of<br />
hot pokers.<br />
Combat<br />
These undead approach combat in<br />
a straightforward way.<br />
Undead: Immune to mind-influencing<br />
effects, poison, sleep, paralysis, stunning,<br />
and disease. Not subject to critical hits,<br />
subdual damage, ability damage, energy<br />
drain, or death from massive damage.<br />
Immunities (Ex): Burning skeletons are<br />
immune to cold and fire. Because they lack<br />
flesh or internal organs, they take only half<br />
damage from piercing or slashing weapons.<br />
Giant Frog<br />
Medium-Size Magical Beast<br />
Hit Dice: 3d10+12 (28 hp)<br />
Initiative: +0<br />
Speed: 20 ft.<br />
AC: 14 (+4 natural)<br />
Attacks: Tongue +2 ranged, bite +2<br />
melee, or bite +6 melee<br />
Damage: Tongue grapple, bite 2d6+2, or bite 2d6+6<br />
Face/Reach: 5 ft. by 5 ft./5 ft. (10 ft. with tongue)<br />
Special Attacks: Improved grab, swallow whole<br />
Special Qualities: Darkvision 60 ft.<br />
Saves: Fort +7, Ref +3, Will +0<br />
Abilities: Str 18, Dex 11, Con 18, Int 2, Wis 9, Cha 6<br />
Skills: Hide +4, Spot +1<br />
Climate/Terrain: Temperate or warm land, aquatic or underground<br />
Organization: Solitary, or pack (2–5)<br />
Challenge Rating: 3<br />
Treasure: None<br />
Alignment: Always neutral<br />
Advancement: 4–6 HD (Medium-size); 7–9 HD (Large)<br />
Giant frogs are massive amphibious predators that feed on<br />
whatever they can get their tongues on. Unlike smaller frogs,<br />
they have large, sharp teeth in their mouths.<br />
They are no more intelligent than their smaller cousins, and<br />
they live in the same sorts of environments.<br />
Combat<br />
Improved Grab (Ex): To use this ability, the giant frog<br />
must hit with its tongue. Grabbed victims of Medium-size<br />
or smaller are pulled into its mouth on the same round for a<br />
bite attack.<br />
Swallow Whole (Ex): The giant frog can swallow creatures<br />
of Small size or smaller the round after a victim is<br />
grabbed. A swallowed creature can climb out of the frog with<br />
a successful grapple check,<br />
returning it to the frog’s<br />
mouth where another successful<br />
grapple check is<br />
needed to get free. A swallowed<br />
creature can also<br />
cut its way out by using<br />
claws or a Small or Tiny<br />
slashing weapon to deal<br />
10 points of damage to<br />
the frog’s interior (AC<br />
14). The frog can swallow<br />
only one Small creature,<br />
four Tiny creatures,<br />
sixteen Diminutive creatures, or thirty-two<br />
Fine creatures at a time.<br />
Grell<br />
Medium-Size Aberration<br />
Hit Dice: 5d8+10 (32 hp)<br />
Initiative: +2<br />
Speed: 5 ft., fly 30 ft. (perfect)<br />
AC: 16 (+2 Dex, +4 natural)<br />
Attacks: 10 tentacles +4 melee, bite –1 melee<br />
Damage: Tentacles 1d4+1 and paralyzation,<br />
bite 2d4<br />
Face/Reach: 5 ft. by 5 ft./10 ft.<br />
Special Attacks: Improved grab, paralyzation<br />
Special Qualities: Blindsight, electricity<br />
immunity, paralysis immunity, tentacle<br />
regeneration, fly<br />
Saves: Fort +3, Ref +3, Will +4<br />
Abilities: Str 12, Dex 15, Con 14, Int 10, Wis<br />
10, Cha 8<br />
Skills: Hide +12, Listen +4, Move Silently +12, Spot +8<br />
Feats: Flyby Attack<br />
Climate/Terrain: Any land or underground<br />
Organization: Solitary or pack (2–7)<br />
Challenge Rating: 3<br />
Treasure: None<br />
Alignment: Usually neutral evil<br />
Advancement: 4–6 HD (Medium-size); 7–9 HD (Large)<br />
Grells are horrible, misshapen creatures that remind most<br />
others of giant, floating brains with tentacles. The vicious<br />
predators have a large, bulbous body of wrinkled light gray<br />
flesh, with a sharp beak but no other visible features. Ten long,<br />
spiny tentacles hang down from the bottom of the body. The<br />
grell floats in the air of its own volition.<br />
Combat<br />
A grell prefers to wait in ambush, using its tentacles to paralyze<br />
a foe, then escape with that victim to its lair to eat. The<br />
creatures are cunning and avoid direct confrontation with<br />
large groups. It can attack with all its tentacles, at any number<br />
of foes, each round. It will only bite paralyzed prey or as<br />
a last resort.<br />
Blindsight (Ex): A grell can ascertain prey by scent and<br />
vibration within 60 feet.
APPENDIX 1: NEW MAGIC ITEMS AND MONSTERS<br />
Face/Reach: 5 ft. by 5 ft./5 ft.<br />
Special Attacks: Electricity<br />
Special Qualities: Shocking discharge, damage reduction<br />
20/+2, immunities, fire resistance 10, cold resistance 10<br />
Saves: Fort +4, Ref +7, Will +2<br />
Abilities: Str 10, Dex 18, Con 13, Int 10, Wis 8, Cha 8<br />
Skills: Hide +10, Listen +5, Move Silently +10, Spot +5<br />
Feats: Weapon finesse (touch)<br />
Climate/Terrain: Any land or underground<br />
Organization: Solitary or swarm (2–11)<br />
Challenge Rating: 3<br />
Treasure: None<br />
Alignment: Usually neutral<br />
Advancement: 4–6 HD (Medium-size); 7–9 HD (Large)<br />
Shockers come from some strange, otherworldly place of lightning<br />
and electricity. Their motivations seem very mysterious,<br />
but they exhibit a very weak sense of self preservation from a<br />
human’s point of view.<br />
They appear to be sparkling blue humanoids made entirely<br />
of electrical energy.<br />
Combat<br />
A shocker’s whole existence seems to be based around discharging<br />
its energy. The amount of charge that a shocker has<br />
is measured by its hit points. Both damage that it suffers and<br />
that it deals is subtracted from its hit point total. When it<br />
reaches 0 hit points or lower, it disappears.<br />
Electricity (Ex): The touch attack of a shocker inflicts<br />
1d8 points of electrical damage. This damage is dealt to the<br />
shocker as well.<br />
Grab (Ex): When a grell hits with a tentacle attack, it<br />
attempts a grapple as a free action. This does not provoke an<br />
attack of opportunity. If it gets a hold, it automatically inflicts<br />
1d4+1 points of damage each round until the opponent<br />
breaks free. If the grell succeeds with grapples of two tentacles<br />
on one opponent and succeeds with its paralyzation<br />
attack (see below), the grell attempts to carry the victim away<br />
and eat it.<br />
Paralysis (Ex): A grell’s tentacles have small barbs much like<br />
a squid (though this is clearly a classic case of convergent evolution).<br />
When a grell succeeds with a grab, the opponent must<br />
make a Fortitude save (DC 14) or be paralyzed for 4 rounds.<br />
Tentacle Regeneration (Ex): A grell can regenerate lost<br />
tentacles in a day.<br />
Flight (Ex): A grell’s body is magically buoyant. This buoyancy<br />
allows it to fly as the spell at a speed of 30 feet. This<br />
buoyancy also grants it a permanent feather fall effect with<br />
personal range.<br />
Skills: A grell gains a +2 racial bonus on Hide and Move<br />
Silently checks.<br />
Shocker<br />
Medium-Size Outsider<br />
Hit Dice: 3d8+3 (16 hp)<br />
Initiative: +4<br />
Speed: 5 ft., fly 30 ft. (perfect)<br />
AC: 14 (+4 Dex)<br />
Attacks: Touch +7 melee<br />
Damage: Touch 1d8 electricity<br />
159
APPENDIX 1: NEW MAGIC ITEMS AND MONSTERS<br />
Shocking Discharge (Ex): If touched with bare flesh<br />
(including being struck in combat with a fist or claw) or a<br />
metallic weapon, the shocker delivers 1d8 points of damage to<br />
the attacker. This is true whether or not the attack is capable of<br />
affecting the shocker. The damage it inflicts is subtracted from<br />
the shocker’s hit-point total as well.<br />
Immunities (Ex): Shockers are immune to mind-influencing<br />
effects, poison, paralysis, stunning and disease. They’re not<br />
subject to critical hits, subdual damage, ability damage, or<br />
energy drain.<br />
NEW TEMPLATE:<br />
HALF-ELEMENTAL<br />
Much rarer than half-celestials or fiends, half-elementals are<br />
the result of unions between elementals and mortal creatures or<br />
are created by some magical infusion of elemental power into a<br />
mortal at birth (usually through strange and often distasteful<br />
rites). Such creatures are normally left among their mortal kin,<br />
never again thought of by their otherworldly sires.<br />
Half-elementals always have some aspect of their elemental<br />
nature displayed in both their appearance and their<br />
temperament.<br />
Half-air elementals often have their hair blown about in<br />
mysterious breezes and a breathy voice. Sometimes people<br />
describe them as flighty, for it’s hard for them to concentrate<br />
too long on any one topic.<br />
Half-earth elementals have a rocky sheen to their flesh. They<br />
are often slow to act, but stubborn once committed.<br />
Half-fire elementals have a reddish tint to their hair, eyes, or<br />
skin. They are temperamental and quick to jump to conclusions.<br />
Half-water elementals have a blue-green hue about them—<br />
either in their hair or their skin. They are usually nurturing and<br />
giving, but terrible when angered.<br />
Creating a Half-Elemental<br />
“Half-elemental” is a template that can be added to any corporeal<br />
creature with an Intelligence score of 4 or more (referred<br />
to hereafter as the “base creature”). Because the half-elemental<br />
is still mostly flesh, it cannot be of the elemental type. Instead,<br />
the creature’s type changes to “outsider.” It uses all the base creature’s<br />
statistics and special abilities except as noted here.<br />
AC: Natural armor improves by +1, except in the case of<br />
a half-earth elemental, for which natural armor improves<br />
by +3.<br />
Special Attacks: A half-elemental retains all the special<br />
attacks of the base creature. Half-elementals with an<br />
Intelligence or Wisdom score of 8 or higher possess the following<br />
spell-like abilities, using their level as the caster<br />
level, as specified in the table below. Each ability is usable<br />
once per day.<br />
Special Qualities: A half-elemental has all the special qualities<br />
of the base creature. Half-elementals are immune to disease<br />
and effects from their own elements (use cold for air) and<br />
gain a +4 racial bonus on Fortitude saves against poison.<br />
Saves: Same as the base creature.<br />
Abilities: Increase from the base creature as follows:<br />
Air: Str +0, Dex +2, Con +2, Int +2, Wis +2, Cha +2.<br />
Earth: Str +4, Dex –2, Con +4, Int +0, Wis +0, Cha +0.<br />
Fire: Str +0, Dex +4, Con +0, Int +2, Wis +0, Cha +2.<br />
Water: Str +2, Dex +0, Con +2, Int +2, Wis +2, Cha +2.<br />
Air<br />
Level Ability<br />
1–2 Obscuring mist<br />
3–4 Wind wall<br />
5–6 Gaseous form<br />
7–8 Air walk<br />
9–10 Control winds<br />
*Cast as an air spell only.<br />
Earth<br />
Level Ability<br />
1–2 Magic stone<br />
3–4 Soften earth and stone<br />
5–6 Stone shape<br />
7–8 Spike stones<br />
9–10 Wall of stone<br />
*Cast as an earth spell only.<br />
Fire<br />
Level Ability<br />
1–2 Burning hands<br />
3–4 Produce flame<br />
5–6 Flaming sphere<br />
7–8 Wall of fire<br />
9–10 Fire shield<br />
*Cast as a fire spell only.<br />
Water<br />
Level Ability<br />
1–2 Obscuring mist<br />
3–4 Fog cloud<br />
5–6 Water breathing<br />
7–8 Control water<br />
9–10 Ice storm<br />
*Cast as a water spell only.<br />
Level Ability<br />
11–12 Chain lightning<br />
13–14 Control weather<br />
15–16 Whirlwind<br />
17–18 Elemental swarm*<br />
19+ Plane shift<br />
Level Ability<br />
11–12 Stoneskin<br />
15–16 Iron body<br />
13–14 Earthquake<br />
17–18 Elemental swarm*<br />
19+ Plane shift<br />
Level Ability<br />
11–12 Fire seeds<br />
13–14 Firestorm<br />
15–16 Incendiary cloud<br />
17–18 Elemental swarm*<br />
19+ Plane shift<br />
Level Ability<br />
11–12 Cone of cold<br />
13–14 Acid fog<br />
15–16 Horrid wilting<br />
17–18 Elemental swarm*<br />
19+ Plane shift<br />
Skills: A half-elemental has 8 skill points, plus its<br />
Intelligence bonus, per Hit Die. Treat skills from the base<br />
creature’s list as class skills and other skills as cross-class. If<br />
the creature has a class, it gains skills for class levels normally.<br />
Any racial bonuses that apply to the base creature apply to<br />
the half-elemental as well.<br />
Feats: Half-elementals have one feat for every four levels or<br />
the base creature’s total of feats, whichever is greater.<br />
Climate/Terrain: Same as either the base creature or the<br />
elemental.<br />
Organization: Same as the base creature.<br />
Challenge Rating: Same as the base creature +2.<br />
Alignment: Same as the base creature.<br />
Treasure: Same as the base creature.<br />
Advancement: Same as the base creature.<br />
Half-Elemental Characters<br />
Half-elemental humanoids often have a character class. Half-air<br />
elementals favor bards and rogues, half-earth elementals favor<br />
fighters, half-fire elementals favor wizards and sorcerers, and<br />
half-water elementals favor clerics and druids. Half-elemental<br />
clerics serve deities appropriate for their elements.<br />
160
Appendix 2:<br />
The WOrship<br />
Of Tharizdun<br />
The religion of the cult of Tharizdun is one of madness,<br />
nihilism, human sacrifice, and evil acts too hideous to describe.<br />
It revels in suffering and all things unpleasant and hates goodness,<br />
light, and mercy. In fact, the cultists of Tharizdun hate<br />
existence itself and seek to further the will of their destructive,<br />
evil deity to bring it all to an end.<br />
No greater threat exists in the world than these deranged,<br />
dark-hearted fanatics. Unfortunately (or perhaps fortunately),<br />
few people today even know that the ancient deity the cultists<br />
devote themselves to exists. In ages long past he was banished<br />
to some otherworldly prison by all the other deities working in<br />
concert. The goal of the cultists of Tharizdun is to free their captive<br />
deity so that he may consume all there is to devour and<br />
bring an end to all things.<br />
They are mad.<br />
THARIZDUN AND THE<br />
ELDER ELEMENTAL EYE<br />
Tharizdun is a deity involved with the manipulation of cosmic<br />
forces to bring about vast destruction. He is a deity of chaos,<br />
evil, and madness.<br />
The Elder Elemental Eye is an “aspect” of Tharizdun, the<br />
Dark God, created originally to mask the cult from the eyes of<br />
the world and draw potential worshipers interested in dark<br />
power but afraid of the reputation of the Tharizdun.<br />
So, despite the fact that many of the worshipers of the Elder<br />
Elemental Eye do not know it, and despite the fact that the two<br />
deities have different granted domains, Tharizdun and the<br />
Elder Elemental Eye are the same deity.<br />
The favored weapon of Tharizdun is a curved dagger (used<br />
primarily as part of sacrificial rites).<br />
CLERICS OF<br />
THE DARK GOD<br />
Clerics of the Elder Elemental Eye wear ochre-colored robes<br />
and bear a triangle symbol (a black triangle with an inverted Y<br />
inscribed within it). Occasionally, their robes or the symbol are<br />
altered so that they reflect what element (fire, air, earth or<br />
water) they revere over the others, if any.<br />
Clerics of Tharizdun wear black or violet robes and bear an<br />
obex—a symbol that resembles a black, angular, inverted twostep<br />
pyramid.<br />
The leaders of the cult are called doomdreamers. They dress<br />
in violet robes and wear spiked helmets that conceal their faces.<br />
Elder Elemental Eye Domains: Chaos, Evil, Madness (see<br />
below), and one of the following: Fire, Earth, Air, or Water.<br />
Tharizdun Domains: Chaos, Evil, Madness, Force, and<br />
Destruction.<br />
THE INSANITY SCORE<br />
Regardless of whether they select the Madness domain, all<br />
clerics of Tharizdun and the Elder Elemental Eye share one<br />
common aspect: They are insane. To reach beyond the veil<br />
APPENDIX 2: THE WORSHIP OF THARIZDUN<br />
and draw upon the power of Tharizdun is to touch madness<br />
itself, and no one can do so and come back unchanged.<br />
As a special rule, every cleric of Tharizdun or the Elder<br />
Elemental Eye gains an Insanity score equal to half his cleric<br />
level (count any doomdreamer levels as cleric levels for the<br />
purpose of calculating this score). For spellcasting (determining<br />
bonus spells and DCs), add this score to the cleric’s<br />
Wisdom score and use the result in place of Wisdom alone.<br />
For all other purposes, such as skill checks and saving throws,<br />
subtract this score from the cleric’s Wisdom score and use the<br />
result in place of Wisdom alone. This means that the spells of<br />
the servants of the Dark God are very difficult to resist, but<br />
those servants are in general unaware of their surroundings<br />
and act imprudently—often erratically.<br />
THE MADNESS DOMAIN<br />
Deity: Tharizdun.<br />
Granted Power: Once per day, you can see and act with the<br />
clarity of true madness. Use your Insanity score as a bonus<br />
on a single roll involving Wisdom, such as a Listen check or<br />
Will saving throw. Choose to use this power before the roll<br />
is made.<br />
Madness Domain Spells<br />
1 Random action<br />
2 Tharizdun’s touch (see below)<br />
3 Rage (see below)<br />
4 Confusion<br />
5 Bolts of bedevilment (see below)<br />
6 Phantasmal killer<br />
7 Insanity<br />
8 Tharizdun’s maddening scream (see below)<br />
9 Weird<br />
Bolts of Bedevilment<br />
Enchantment [Mind-Affecting]<br />
Level: Madness 5<br />
Components: V, S<br />
Casting Time: 1 action<br />
Range: Medium (100 ft. + 10 ft./level)<br />
Effect: Ray<br />
Duration: 1 round/level<br />
Saving Throw: Will negates<br />
Spell Resistance: Yes<br />
This spell grants you the ability to make one ray attack per<br />
round. The ray dazes one living creature, clouding its mind so<br />
that it takes no action for 1d3 rounds. The creature is not<br />
stunned (so attackers get no special advantage against it), but it<br />
can’t move, cast spells, use mental abilities, and so on.<br />
Rage<br />
Enchantment (Compulsion) [Mind-Affecting]<br />
Level: Madness 3<br />
Components: V, S<br />
Casting Time: 1 action<br />
Range: Touch<br />
Target: Creature touched<br />
Duration: 1 round/level<br />
Saving Throw: Will negates (harmless)<br />
Spell Resistance: Yes (harmless)<br />
You put a creature into a screaming blood frenzy. In this rage,<br />
the target gains +4 to Strength, +4 to Constitution, and a +2<br />
161
APPENDIX 2: THE WORSHIP OF THARIZDUN<br />
162<br />
morale bonus on Will saves. Unlike a barbarian rage, no penalty<br />
to AC is suffered, and no fatigue period comes after the rage<br />
is over.<br />
Tharizdun’s Maddening Scream<br />
Enchantment (Compulsion) [Mind-Affecting]<br />
Level: Madness 8, Sor/Wiz 8<br />
Components: V<br />
Casting Time: 1 action<br />
Range: Touch<br />
Target: Living creature touched<br />
Duration: 1d4+1 rounds<br />
Saving Throw: None<br />
Spell Resistance: Yes<br />
The target cannot keep himself from screaming, gibbering, and<br />
leaping about as though completely mad. This spell worsens<br />
the Armor Class of the creature by a –4 penalty, makes Reflex<br />
saving throws impossible except on a natural roll of 20, and<br />
makes it impossible to use a shield.<br />
Tharizdun’s Touch<br />
Enchantment [Mind-Affecting]<br />
Level: Madness 2<br />
Components: V, S<br />
Casting Time: 1 action<br />
Range: Touch<br />
Target: Creature touched<br />
Duration: 1 round/level<br />
Saving Throw: Will negates<br />
Spell Resistance: Yes<br />
You may daze one living creature by making a successful touch<br />
attack. If the target creature does not make a successful Will<br />
save, its mind is clouded and it takes no action for 1 round per<br />
caster level. The dazed creature is not stunned (so attackers get<br />
no special advantage against it), but can’t move, cast spells, use<br />
mental abilities, and so on.<br />
THE FORCE DOMAIN<br />
Deity: Tharizdun.<br />
Granted Power: By manipulating cosmic forces of destruction,<br />
once per day the cleric can reroll any damage roll (for a weapon,<br />
a spell, or an ability) and take the better of the two rolls.<br />
Force Domain Spells<br />
1 Mage armor<br />
2 Magic missile<br />
3 Blast of force (see below)<br />
4 Otiluke’s resilient sphere<br />
5 Wall of force<br />
6 Repulsion<br />
7 Forcecage<br />
8 Otiluke’s telekinetic sphere<br />
9 Annihilation (see below)<br />
Annihilation<br />
Evocation [Force]<br />
Level: Force 9<br />
Components: V, S<br />
Casting Time: 1 action<br />
Range: Medium (100 ft. + 10 ft./level)<br />
Effect: 2-foot globe of nothingness<br />
Duration: 1 round/level<br />
Saving Throw: None<br />
Spell Resistance: Yes<br />
Using a blast of incredible force, you tear a temporary hole in<br />
the fabric of reality. This hole takes on the form of a sphere of<br />
annihilation. You control the sphere as if you possessed a talisman<br />
of the sphere. At the end of the duration, the hole seals<br />
itself and the sphere disappears, leaving a path of destruction<br />
in its wake.<br />
Blast of Force<br />
Evocation [Force]<br />
Level: Force 3<br />
Components: V, S<br />
Casting Time: 1 action<br />
Range: Medium (100 ft. + 10 ft./level)<br />
Effect: Ray<br />
Duration: Instantaneous<br />
Saving Throw: Fortitude (see text)<br />
Spell Resistance: Yes<br />
You direct single, invisible blast of force at a chosen target. This<br />
is a ranged touch attack that inflicts 1d6 points of damage for<br />
every two levels, to a maximum of 5d6. In addition, a successful<br />
hit forces the target to make a Fortitude save or be knocked<br />
down (size and stability modifiers apply to the saving throw as<br />
if this were a bull rush).<br />
NEW PRESTIGE CLASS:<br />
DOOMDREAMER<br />
Doomdreamers are the elite among the ranks of the cult of<br />
Tharizdun. The name comes from that they all claim to have<br />
been contacted by the Dark God in their dreams. They are all<br />
extremely evil, raving lunatics or sadistic, brooding and cruel<br />
individuals of singular corruption. All doomdreamers are<br />
masters of ancient, forbidden knowledge and madness, and<br />
devotees of nihilism.<br />
Most doomdreamers are clerics, but it is possible for an evil<br />
wizard or sorcerer to become one.<br />
The doomdreamers all live in the Inner Fane of the Temple<br />
of All-Consumption. They travel far and wide, however,<br />
working out the steps of their mysterious, convoluted plans<br />
to bring their deity out of imprisonment. They know that<br />
such an act would bring an end to the world—but they do<br />
not care. In fact, they are so mad that they revel in the thought<br />
of it.<br />
Hit Die: d8.<br />
Requirements<br />
To qualify to become a doomdreamer, a character must fulfill all<br />
the following criteria.<br />
Spellcasting: Ability to cast any three of the following<br />
spells: random action, Tharizdun’s touch, rage, confusion, bolts of<br />
bedevilment, phantasmal killer, insanity, Tharizdun’s maddening<br />
scream, weird, mage armor, magic missile, blast of force, Otiluke’s<br />
resilient sphere, wall of force, repulsion, forcecage, Otiluke’s telekinetic<br />
sphere, or annihilation.<br />
Knowledge (Religion): 9 ranks.<br />
Knowledge (Arcana): 9 ranks.<br />
Feats: Spell Focus (Necromancy).<br />
Special: Must have had a dream involving communication<br />
with Tharizdun, the Dark God.
APPENDIX 2: THE WORSHIP OF THARIZDUN<br />
Class Skills<br />
The doomdreamer’s class skills (and<br />
the key ability for each skill) are<br />
Alchemy (Int), Concentration (Con),<br />
Intimidate (Cha), Knowledge (religion) (Int),<br />
Profession (Wis), Scry (Int), Spellcraft<br />
(Int). See Chapter 4: Skills in the Player’s<br />
Handbook for skill descriptions.<br />
Skill Points at Each Level: 2 + Int<br />
modifier.<br />
Class Features<br />
All of the following are class features<br />
of the doomdreamer prestige class.<br />
Weapon and Armor Proficiency:<br />
Doomdreamers gain no proficiency in<br />
any weapon or armor.<br />
Spells per Day: A doomdreamer<br />
continues training in magic as well as<br />
her field of research. Thus, when a<br />
new doomdreamer level is gained,<br />
the character gains new spells per<br />
day as if she had also gained a level<br />
in cleric. She does not, however,<br />
gain any other benefit<br />
a cleric would have<br />
gained (improved chance<br />
of controlling or rebuking<br />
undead, for example). This essentially<br />
means that she adds the level of<br />
doomdreamer to the level of cleric, then determines spells per<br />
day and caster level accordingly.<br />
Secret: In their studies of forbidden lore, doomdreamers<br />
stumble upon all sorts of foul but useful knowledge and secrets.<br />
Some of these come from experimenting with dangerous<br />
drugs, speaking with demons, or mad visions. At 1st level and<br />
every second level afterward (3rd and 5th), the doomdreamer<br />
chooses one secret from the following list. Her level plus<br />
Intelligence modifier determines which secrets she can<br />
choose. A doomdreamer can voluntarily choose a weaker secret<br />
than her maximum (that is, a 1st-level doomdreamer with an<br />
Int modifier of +2 could select unnatural vitality). She can’t<br />
choose the same secret twice.<br />
Dark Lore (Su): Once per day, the doomdreamer can, as a<br />
standard action, look at one intelligent creature and learn some<br />
dark secret (involving a past transgression or mistake, a horrible<br />
experience, etc.). Speaking of that secret, the target creature<br />
must make a Will save (DC 15 + doomdreamer levels) or react<br />
as stunned for 1d3 rounds. (If need be, this dark secret can be<br />
enhanced with untruths that the victim who fails his save<br />
believes are true for the duration.)<br />
Chill Soul (Su): At 3rd level, a doomdreamer can make a<br />
touch attack against a living creature and inflict 3d8 points of<br />
damage by chilling their soul. This can be used in conjunction<br />
with an inflict wounds spell, but is negated if the victim is<br />
wearing the purple robes of Tharizdun. This can be used once<br />
per day.<br />
Maddening Howl (Sp): At 4th level, the doomdreamer can<br />
give a howl that affects all living creatures within 50 feet. Those<br />
in the area must make Will saves (DC 15 + doomdreamer levels).<br />
Failure means that the victim stands still (treat as dazed)<br />
for 1 round, his mind reeling with insane thoughts. This is<br />
usable once per day.<br />
Dark Communion (Sp): At 5th level, once per week, the<br />
doomdreamer can perform a ritual (this takes a full night and<br />
must be performed in a temple with a human sacrifice) that<br />
allows her to gain knowledge from her deity. This is effectively<br />
a commune spell, although the answers are more generous than<br />
simply yes or no, and the Dark God may choose to give an<br />
entirely different bit of information than the one asked for, if<br />
it suits his dread purposes.<br />
Doomdreamer Secrets<br />
Level +<br />
Int Mod. Secret Effect<br />
1 Demon’s name (Ex) May call a demon of up to<br />
10 HD when casting lesser<br />
planar ally<br />
2 Unnatural vitality (Ex) +3 hit points<br />
3 Deeper madness (Ex) +2 bonus to Insanity score<br />
4 Curse of power (Su) +1 caster level when casting<br />
evil spells<br />
5 Paying fealty to +1 to DC of spells causing<br />
death (Su)<br />
death effects<br />
6 Kiss of undeath (Su) Double character’s effective<br />
turning level when rebuking<br />
or commanding undead<br />
(including maximum number<br />
of undead commanded)<br />
7 Unholy pact (Ex) Once per week, no payment<br />
is needed when using any of<br />
the planar ally spells<br />
The Doomdreamer<br />
Class Base Fort Ref Will<br />
Level Attack Bonus Save Save Save Special Spells per Day<br />
1st +0 +0 +0 +2 Secret +1 level of cleric<br />
2nd +1 +0 +0 +3 Dark lore +1 level of cleric<br />
3rd +2 +1 +1 +3 Secret, chill soul +1 level of cleric<br />
4th +3 +1 +1 +4 Maddening howl +1 level of cleric<br />
5th +3 +1 +1 +4 Secret, dark communion +1 level of cleric<br />
163
164<br />
APPENDIX 3: NPC STATISTICS<br />
Appendix 3:<br />
NPC Statistics<br />
Following are the full statistics of all the notable NPCs who<br />
appear in this adventure, along with several templated creatures.<br />
The characters are organized by the section of the<br />
adventure in which they first appear. Each section leads off<br />
with statistics for warriors or other unnamed (or nonunique)<br />
NPCs (listed alphabetically by race) and follows with an<br />
alphabetical listing of unique NPCs by name. Familiars are<br />
listed immediately following their masters.<br />
The statistics block for any character in this appendix<br />
takes into account items the character is wearing or carrying<br />
that are operating at all times. For example, the wizard Burne<br />
(see below) has among his possessions a ring of protection +1, a<br />
cloak of resistance +2, bracers of armor +2, an amulet of natural<br />
armor +1, and a headband of intellect +2. The benefits of those<br />
items are already incorporated into his AC, saving throws,<br />
and Intelligence score. Items that must be manipulated to be<br />
used (such as potions, wands, rods, and scrolls) are not taken<br />
into account.<br />
THE TOWN OF HOMMLET<br />
dBurne: Male human Wiz10; CR 10; Medium-size humanoid<br />
(human); HD 10d4+20; hp 28; Init +4; Spd. 30 ft.; AC 14 (touch<br />
11, flat-footed 14); Atk +7 melee (1d4+2/19–20, dagger) or +7<br />
melee (1d6+3, quarterstaff ) or +5 ranged (1d8/19–20, light<br />
crossbow); AL N; SV Fort +7, Ref +7, Will +9; Str 15, Dex 10,<br />
Con 15, Int 21, Wis 11, Cha 12.<br />
Skills and Feats: Concentration +15, Knowledge (history) +10,<br />
Knowledge (local) +11, Knowledge (planes) +11, Knowledge<br />
(religion) +11, Listen +3, Move Silently +3, Scry +12, Search +8,<br />
Sense Motive +2, Spellcraft +18, Spot +3; Brew Potion, Combat<br />
Casting, Improved Initiative, Lightning Reflexes, Maximize<br />
Spell, Scribe Scroll, Spell Mastery (bull’s strength, dispel magic, fly,<br />
lightning bolt, sleep), Spell Penetration.<br />
Spells Prepared (4/6/5/4/4/3; base DC = 15 + spell level): 0—<br />
detect magic (2), mage hand, read magic; 1st—charm person,<br />
magic missile (3), shield, sleep; 2nd—bull’s strength, cat’s grace,<br />
Melf ’s acid arrow (2), protection from arrows; 3rd—displacement,<br />
fireball, fly, lightning bolt; 4th—improved invisibility,<br />
polymorph other, polymorph self, wall of ice; 5th—cloudkill,<br />
dismissal, dominate person.<br />
Spellbook: 0—arcane mark, dancing lights, daze, detect<br />
magic, detect poison, disrupt undead, flare, ghost sound, light,<br />
mage hand, mending, open/close, prestidigitation, ray of frost,<br />
read magic, resistance; 1st—alarm, burning hands, charm person,<br />
enlarge, erase, expeditious retreat, feather fall, mage armor,<br />
magic missile, reduce, shatter, shield, sleep; 2nd—arcane lock,<br />
bull’s strength, cat’s grace, darkness, darkvision, detect<br />
thoughts, endurance, Melf ’s acid arrow, misdirection, protection<br />
from arrows, pyrotechnics, see invisibility; 3rd—displacement,<br />
fireball, fly, haste, Leomund’s tiny hut, lightning bolt,<br />
magic circle against chaos, magic circle against evil, nondetection,<br />
suggestion; 4th—ice storm, illusory wall, improved invisibility,<br />
minor globe of invulnerability, polymorph other, polymorph<br />
self, scrying, summon monster IV, wall of fire, wall of<br />
ice; 5th—cloudkill, cone of cold, contact other plane, dismissal,<br />
dominate person.<br />
Possessions: Ring of protection +1, cloak of resistance +2,<br />
bracers of armor +2, amulet of natural armor +1, headband of<br />
intellect +2, wand of magic missile (7th, 38 charges), chime of<br />
opening (42 charges), potion of haste, arcane scroll of teleport.<br />
dCanoness Y’dey: Female human Clr10; CR 10; Medium-size<br />
humanoid (human); HD 10d8+30; hp 70; Init +2, Spd 20 ft.; AC<br />
25 (touch 13, flat-footed 24); Atk +10/+5 melee (1d8+2, +1<br />
heavy mace) or +9/ ranged (1d8/19–20, light crossbow); AL LG;<br />
SA Turn undead 4/day; SV Fort +10, Ref +5, Will +10; Str 13,<br />
Dex 15, Con 16, Int 12, Wis 17, Cha 13.<br />
Skills and Feats: Concentration +12, Diplomacy +10, Heal +12,<br />
Knowledge (arcana) +9, Knowledge (religion) +9, Spellcraft<br />
+10; Brew Potion, Combat Casting, Dodge, Scribe Scroll,<br />
Weapon Focus (heavy mace).<br />
Spells Prepared (6/6/6/5/4/3; base DC = 13 + spell level): 0—<br />
create water, detect magic, detect poison, light, mending, purify food<br />
and drink; 1st—bless, comprehend languages, magic weapon, protection<br />
from chaos*, remove cause fear, sanctuary; 2nd—augury, calm<br />
emotions*, endurance, lesser restoration (2), zone of truth; 3rd—dispel<br />
magic, locate object, magic circle against chaos*, remove curse, remove<br />
disease; 4th—discern lies, divination, order’s wrath*, restoration;<br />
5th—commune, dispel chaos*, raise dead.<br />
*Domain spell. Deity: St. Cuthbert. Domains: Law (cast law<br />
spells at 11th level); Protection (1/day grant one target a +7<br />
resistance bonus on one save).<br />
Possessions: +1 heavy mace, +1 full plate, +1 large steel shield, ring<br />
of protection +2, potion of fire breath, potion of heroism, light crossbow,<br />
20 crossbow bolts, 31 gp.<br />
dChatrilon Unosh: Male human Rog5/Asn1; CR 6; Mediumsize<br />
humanoid (human); HD 5d6+5 plus 1d6+1; hp 27; Init +6;<br />
Spd 30 ft.; AC 17 (touch 12, flat-footed 17); Atk +7 melee<br />
(1d6+1/18–20, rapier) or +6 ranged (1d6/×3, masterwork composite<br />
shortbow); SA Sneak attack +4d6, death attack; SQ<br />
Evasion, locate traps, uncanny dodge (Dex bonus to AC when<br />
flat-footed, can’t be flanked); AL NE; SV Fort +2, Ref +8, Will +0;<br />
Str 11, Dex 14, Con 12, Int 16, Wis 9, Cha 12.<br />
Skills and Feats: Balance +4, Bluff +10, Diplomacy +5, Disable<br />
Device +11, Disguise +10, Escape Artist +11, Forgery +11, Hide<br />
+11, Innuendo +9, Intimidate +3, Jump +2, Move Silently +11,<br />
Open Lock +10, Sense Motive +7, Spellcraft +4, Spot +7, Tumble<br />
+11; Improved Initiative, Point Blank Shot, Weapon Focus<br />
(rapier), Weapon Finesse (rapier).<br />
Death Attack (Ex): If the assassin studies a target for 3<br />
rounds and then makes a sneak attack with a melee weapon<br />
that successfully deals damage, the sneak attack can also paralyze<br />
(for 1d6+1 rounds) or kill the victim. Fort save DC 14<br />
to resist.<br />
Spells Prepared (1; base DC = 13 + spell level): 1st—obscuring mist.<br />
Spellbook: 1st—change self, detect poison, ghost sound, obscuring<br />
mist, spider climb.<br />
Possessions: +1 rapier, masterwork studded leather, +1 buckler,<br />
potion of cure moderate wounds, arcane scroll of undetectable alignment,<br />
wand of invisibility (15 charges), masterwork composite<br />
shortbow, 20 arrows.<br />
dChenashi: Female human Clr2; CR 2; Medium-size<br />
humanoid (human); HD 2d8; hp 11; Init –1; Spd 20 ft.; AC 18<br />
(touch 9, flat-footed 18); Atk +3 melee (1d8+1, morningstar) or<br />
+0 ranged (1d8/19–20, light crossbow); SA Rebuke undead<br />
5/day; SQ Insanity; AL CE; SV Fort +3, Ref –1, Will +5; Str 13,<br />
Dex 8, Con 10, Int 12, Wis 15, Cha 14.<br />
Skills and Feats: Concentration +5, Knowledge (arcana) +6,<br />
Knowledge (religion) +6, Spellcraft +6; Combat Casting,<br />
Scribe Scroll.<br />
Insanity (Ex): Insanity score 1. Wis 16 for bonus spells and<br />
DCs; Wis 14 for all other Wis-based checks.<br />
Spells Prepared (4/4; base DC = 13 + spell level): 0—detect<br />
magic, light, resistance (2); 1st—bane, cause fear, inflict light<br />
wounds*, shield of faith.
APPENDIX 3: NPC STATISTICS<br />
*Domain spell. Deity: Elder Elemental Eye. Domains:<br />
Destruction (1/day smite, +4 attack, +2 damage); Force (1/day<br />
reroll any damage roll for a weapon, a spell, or an ability).<br />
Possessions: Half-plate, large wooden shield, light crossbow<br />
with 20 bolts, masterwork morningstar, divine scroll of protection<br />
from elements (fire); 3 divine scrolls of cure light wounds,<br />
necklace of prayer beads (2 blessing).<br />
dElmo: Male human Rgr6; CR 6; Medium-size humanoid<br />
(human); HD 6d10+18; hp 50; Init +3; Spd 30 ft.; AC 21<br />
(touch 12, flat-footed 19); Atk +12/+7 melee (1d8+5/×3, +1<br />
battleaxe) or +11/+6 ranged (1d8+4/×3, masterwork mighty<br />
composite longbow [+4 Str bonus]); SA Favored enemy (goblinoids<br />
+2, undead +1), fight with two weapons; AL NG; SV<br />
Fort +8, Ref +5, Will +5; Str 19, Dex 16, Con 17, Int 15, Wis 16,<br />
Cha 11.<br />
Skills and Feats: Animal Empathy +6, Concentration +6,<br />
Handle Animal +6, Hide +4, Intuit Direction +6, Knowledge<br />
(nature) +7, Listen +8, Move Silently +3, Ride (horse) +10,<br />
Search +5, Swim +10, Use Rope +8, Wilderness Lore +8; Point<br />
Blank Shot, Power Attack, Track, Weapon Focus (battleaxe),<br />
Weapon Focus (composite longbow).<br />
Fight with Two Weapons: Ambidexterity and Two-Weapon<br />
Fighting when wearing light or no armor. (Not currently available<br />
because of +1 chainmail.)<br />
Spells Prepared (2; base DC = 13 + spell level): 1st—delay poison,<br />
speak with animals.<br />
Possessions: +1 chainmail, +1 large wooden shield, +1 battleaxe,<br />
masterwork mighty composite longbow (+4 Str bonus), 40<br />
arrows, 31 gp.<br />
dGrune: Male human War1; CR 1; Medium-size humanoid<br />
(human); HD 1d8+1; hp 8; Init +2; Spd 20 ft.; AC 19 (touch 12,<br />
flat-footed 17); Atk +5 melee (1d10+2/19–20, masterwork bastard<br />
sword) or +3 ranged (1d8/×3, composite longbow); AL LE;<br />
SV Fort +3, Ref +2, Will –1; Str 15, Dex 14, Con 13, Int 10, Wis<br />
8, Cha 12.<br />
Skills and Feats: Climb +0, Intimidate +5, Jump +0; Exotic<br />
Weapon Proficiency (bastard sword), Weapon Focus (bastard<br />
sword).<br />
Possessions: Breastplate, masterwork bastard sword, large<br />
wooden shield, composite longbow and 20 arrows, 3 potions of<br />
cure light wounds.<br />
dIngrith: Female half-elf Mnk4/Rgr3; CR 7; Medium-size<br />
humanoid (half-elf ); HD 4d8+4 plus 3d10+3; hp 42; Init +1;<br />
Spd 40 ft.; AC 17 (touch 17, flat-footed 16); Atk +8/+3 melee<br />
(1d8+2, unarmed strike) or +6/+6/+1 melee (1d8+2, flurry of<br />
blows) or +7 ranged (1d10/19–20, heavy crossbow); SA<br />
Favored enemy (goblinoids +1), fight with two weapons,<br />
stunning attack; SQ Immune to sleep, low-light vision, monk<br />
abilities, +2 bonus on saves against enchantment effects; AL<br />
LG; SV Fort +8, Ref +6, Will +9; Str 14, Dex 13, Con 13, Int 12,<br />
Wis 18, Cha 11.<br />
Skills and Feats: Balance +8, Climb +7, Escape Artist +6, Heal<br />
+9, Intuit Direction +9, Jump +5, Listen +10, Move Silently +6,<br />
Search +2, Spot +7, Tumble +6, Wilderness Lore +9; Blind-Fight,<br />
Deflect Arrows, Dodge, Power Attack, Track.<br />
Fight with Two Weapons: Ambidexterity and Two-Weapon<br />
Fighting when wearing light or no armor.<br />
Stunning Attack (Ex): 4/day; DC 16.<br />
Monk Abilities: Evasion, still mind, slow fall 20 ft.<br />
Possessions: dust of disappearance (one use), ring of protection +2,<br />
heavy crossbow, traveling gear.<br />
dMaridosen: Female half-elf Ftr3; CR 3; Medium-size<br />
humanoid (half-elf ); HD 3d10+6; hp 27; Init +3; Spd 30 ft.;<br />
AC 16 (touch 13, flat-footed 13); Atk +8 melee (1d6+1/18–20,<br />
masterwork rapier) or +8 ranged (1d6/×3, masterwork composite<br />
shortbow); SQ Immune to sleep, low-light vision, +2<br />
bonus on saves against enchantment effects; AL CE; SV Fort<br />
+5, Ref +4, Will +2; Str 13, Dex 16, Con 14, Int 10, Wis 12,<br />
Cha 8.<br />
Skills and Feats: Climb +7, Jump +7, Listen +2, Search +1,<br />
Spot +1; Dodge, Mobility, Weapon Finesse (rapier), Weapon<br />
Focus (rapier).<br />
Possessions: Masterwork studded leather armor (black),<br />
masterwork rapier, masterwork composite shortbow, 20<br />
masterwork arrows, 2 Quaal’s feather tokens (bird), potion of bull’s<br />
strength, 2 potions of cure moderate wounds (3rd).<br />
dMaster Dunrat: Male human Clr5/Sor1; CR 6; Medium-size<br />
humanoid (human); HD 5d8+10 plus 1d4+2; hp 36; Init +0; Spd<br />
20 ft.; AC 15 (touch 10, flat-footed 15); Atk +3 melee<br />
(1d4/19–20, dagger) or +3 ranged (1d10/19–20, heavy crossbow);<br />
SQ Insanity, rebuke undead 3/day; AL CE; SV Fort +6,<br />
Ref +1, Will +6; Str 10, Dex 10, Con 14, Int 11, Wis 13, Cha 11.<br />
Skills and Feats: Concentration +11, Diplomacy +6, Heal +4,<br />
Knowledge (religion) +4, Scry +4; Combat Casting, Leadership,<br />
Silent Spell, Still Spell.<br />
Insanity (Ex): Insanity score 2. Wis 15 for bonus spells and<br />
DCs; Wis 11 for all other Wis-based checks.<br />
Cleric Spells Prepared (5/5/4/2; base DC = 12 + spell level):<br />
0—detect magic, inflict minor wounds, light, read magic, resistance;<br />
1st—bane, cause fear, command, curse water, protection from<br />
good*; 2nd—death knell, hold person, Tharizdun’s touch* (2);<br />
3rd—animate dead, rage*.<br />
*Domain spell. Deity: Tharizdun. Domains: Evil (cast evil<br />
spells at 6th level); Madness (1/day add Insanity score to Wisbased<br />
roll).<br />
Sorcerer Spells Known (5/3; base DC = 10 + spell level; 25%<br />
arcane spell failure chance): 0—detect magic, light, mage hand,<br />
read magic; 1st—charm person, shield.<br />
Possessions: Bead of force, brooch of shielding, holy symbol<br />
(obex), dagger, heavy crossbow, masterwork breastplate, ring<br />
of mind shielding.<br />
dNierethi Poscurian: Male gnome Ill4; CR 4; Small<br />
humanoid (gnome); HD 4d4+3; hp 13; Init +1; Spd 20 ft.; AC<br />
14 (touch 12, flat-footed 13); Atk +3 melee (1d4/19–20, dagger)<br />
or +4 ranged (1d4/19–20, dagger); SQ Cantrips, lowlight<br />
vision, speak with burrowing animals, +2 bonus on<br />
saves against illusions, +1 bonus on attacks against kobolds<br />
and goblinoids, +4 dodge bonus against giants; AL NE; SV<br />
Fort +1, Ref +2, Will +5; Str 10, Dex 13, Con 11, Int 14, Wis<br />
12, Cha 10.<br />
Skills and Feats: Concentration +7, Hide +5, Knowledge<br />
(arcana) +9, Knowledge (temple history) +9, Listen +3,<br />
Spellcraft +9; Combat Casting, Scribe Scroll.<br />
Cantrips: 1/day—dancing lights, ghost sound, prestidigitation<br />
(all as Sor1). DC 12.<br />
Spells Prepared (5/5/4; base DC = 12 + spell level; 10%<br />
arcane spell failure chance): 0—detect magic, ghost sound*,<br />
light, ray of frost, read magic; 1st—change self*, color spray*, mage<br />
armor, silent image*, ventriloquism*; 2nd—blur*, invisibility*,<br />
knock, mirror image*.<br />
*These spells belong to the school of Illusion, which is this<br />
character’s specialty. Prohibited school: Enchantment.<br />
Possessions: Leather armor, dagger, wand of magic missile (5thlevel<br />
caster, 37 charges), 46 gp.<br />
165
APPENDIX 3: NPC STATISTICS<br />
166<br />
dQuestin Himmble: Male halfling Rog2/Bbn2; CR 4; Small<br />
humanoid (halfling); HD 2d6+4 plus 2d12+4; hp 32; Init +4;<br />
Spd 30 ft.; AC 17 (touch 15, flat-footed 17); Atk +8 melee<br />
(1d4/19–20, dagger) or +9 ranged (1d4/19–20, dagger); SA<br />
Sneak attack +1d6; SQ Evasion, halfling traits, locate traps, rage,<br />
uncanny dodge (Dex bonus to AC when flat-footed), +1 bonus<br />
on attacks with thrown weapons, +2 morale bonus on saves<br />
against fear; AL CN; SV Fort +6, Ref +8, Will +1; Str 11, Dex 19,<br />
Con 15, Int 11, Wis 10, Cha 6.<br />
Skills and Feats: Balance +9, Climb +3, Hide +11, Intuit<br />
Direction +4, Jump +3, Listen +7, Move Silently +8, Open Lock<br />
+8, Pick Pocket +5, Search +15, Spot +5, Tumble +8, Use Rope<br />
+6, Wilderness Lore +6; Dodge, Weapon Finesse (dagger).<br />
Rage (Ex): 1/day—hp 40; AC 15 (touch 13, flat-footed<br />
15); Atk +8 melee (1d4+2/19–20, dagger) or +9 ranged<br />
(1d4+2/19–20, dagger); SV Fort +8, Will +3; Str 15, Con 19.<br />
Climb +5, Jump +5. Lasts 7 rounds, then fatigued.<br />
Possessions: 6 daggers, leather armor, lens of detection, 39 gp.<br />
dRedithidoor Halfmoon: Male human Brd1; CR 1;<br />
Medium-size humanoid (human); HD 1d6; hp 5; Init +3; Spd 30<br />
ft.; AC 16 (touch 13, flat-footed 13); Atk +0 melee (1d6/19–20,<br />
short sword) or +3 ranged (1d8/×3, longbow); SQ Bardic<br />
knowledge +1, bardic music (countersong, fascinate, inspire<br />
courage); AL NG; SV Fort +0, Ref +5, Will +2; Str 10, Dex 17,<br />
Con 11, Int 11, Wis 10, Cha 10.<br />
Skills and Feats: Escape Artist +6, Gather Information +4,<br />
Hide +6, Perform (recorder) +4, Spot +2; Dodge, Run.<br />
Spells Known (2; base DC = 10 + spell level; 15% arcane spell failure<br />
chance): 0—ghost sound, mage hand, prestidigitation, read magic.<br />
Possessions: Finely carved recorder (20 gp value), traveling and<br />
performing outfits, leather armor, small wooden shield, short<br />
sword, longbow and arrows, 23 gp.<br />
dRufus: Male human Ftr8; CR 8; Medium-size humanoid<br />
(human); HD 8d10+8; hp 69; Init +1; Spd. 30 ft.; AC 22 (touch<br />
12, flat-footed 21); Atk +14/+9 melee (1d8+7/×3, +2 battleaxe) or<br />
+10/+5 ranged (1d8+3/×3, masterwork mighty composite longbow<br />
(+3 Str bonus); AL LG; SV Fort +8, Ref +4, Will +3; Str 16,<br />
Dex 13, Con 12, Int 15, Wis 10, Cha 14.<br />
Skills and Feats: Bluff +4, Climb +4, Gather Information +4,<br />
Handle Animal +8, Intimidate +4, Jump +5, Listen +2, Ride<br />
(horse) +9, Sense Motive +2, Spot +2, Swim +9; Blind-Fight,<br />
Cleave, Dodge, Improved Critical (battleaxe), Mobility, Power<br />
Attack, Spring Attack, Weapon Focus (battleaxe), Weapon<br />
Specialization (battleaxe).<br />
Possessions: +2 chainmail, +1 large steel shield, +2 battleaxe,<br />
masterwork mighty composite longbow (+3 Str bonus), 21 +1<br />
arrows, potion of cure moderate wounds, potion of endurance, cloak of<br />
resistance +1, ring of protection +1, periapt of proof against poison, dust<br />
of disappearance (12 pinches).<br />
dSpugnoir: Male human Wiz7; CR 7; Medium-size humanoid<br />
(human); HD 7d4+17; hp 33; Init +6; Spd 30 ft. AC 14 (touch 13,<br />
flat-footed 12); Atk +3 melee (1d4/19–20, dagger) or +5 ranged<br />
(1d8/19–20, light crossbow); AL NG; SQ Familiar benefits; SV<br />
Fort +4, Ref +6, Will +5; Str 11, Dex 15, Con 14, Int 19, Wis 11,<br />
Cha 7.<br />
Skills and Feats: Alchemy +14, Concentration +12, Knowledge<br />
(arcana) +14, Knowledge (local) +14, Listen +3, Move Silently<br />
+14, Scry +14, Spellcraft +14, Spot +3; Alertness, Brew Potion,<br />
Combat Casting, Improved Initiative, Lightning Reflexes,<br />
Scribe Scroll, Toughness.<br />
Familiar Benefits: Alertness when familiar is within reach,<br />
+2 bonus on Move Silently checks, empathic link, share spells<br />
with familiar, deliver touch spells via familiar.<br />
Spells Prepared (4/5/4/3/2; base DC = 14 + spell level): 0—<br />
daze, detect poison, flare, resistance; 1st—detect secret doors, mage<br />
armor (2), magic missile, unseen servant; 2nd—cat’s grace, daylight,<br />
flaming sphere, invisibility, web; 3rd—dispel magic, lightning bolt,<br />
nondetection; 4th—fire shield, scrying.<br />
Spellbook: 0—arcane mark, dancing lights, daze, detect magic,<br />
detect poison, disrupt undead, flare, ghost sound, light, mage gand,<br />
mending, open/close, prestidigitation, ray of frost, read magic, resistance;<br />
1st—detect secret doors, enlarge, jump, mage armor, magic<br />
missile, reduce, spider climb, unseen servant; 2nd—alter self, blur,<br />
bull’s strength, cat’s grace, darkvision, daylight, detect thoughts,<br />
endurance, invisibility, levitate, web; 3rd—dispel magic, fly, gaseous<br />
form, haste, lightning bolt, nondetection, protection from elements,<br />
tongues, water breathing; 4th—dimension door, fire shield, scrying.<br />
Possessions: Wand of shield (18 charges), headband of intellect +2,<br />
ring of protection +1, amulet of natural armor +1, goggles of minute<br />
seeing, dagger, light crossbow with 20 bolts, 125 gp.<br />
dSebbekai: Male cat familiar of Spugnoir: CR —; Tiny magical<br />
beast; HD 1/2 d8 (7 HD); hp 16; Init +2; Spd 30 ft.; AC 18<br />
(touch 14, flat-footed 16); Atk +7 melee (1d2–4, 2 claws) and<br />
+2 melee (1d3–4, bite); Face 2 1/2 ft. by 2 1/2 ft.; SQ<br />
Improved evasion, speak with Spugnoir, speak with cats; AL<br />
NG; SV Fort +2, Ref +4, Will +6; Str 3, Dex 15, Con 10, Int 9,<br />
Wis 12, Cha 7.<br />
Skills and Feats: Balance +10, Climb +5, Hide +17, Listen +4,<br />
Move Silently +14, Spot +4 (+4 on Hide checks in tall grass or<br />
heavy undergrowth); Weapon Finesse (claw, bite).<br />
dTerjon: Male human Clr6; CR 6; Medium-size humanoid<br />
(human); HD 6d8+18; hp 49; Init +1; Spd 20 ft.; AC 19 (touch<br />
12, flat-footed 18); Atk +6 melee (1d8+1, +1 heavy mace) or +5<br />
ranged (1d8/19–20, light crossbow); SA Turn undead 3/day; AL<br />
LG; SV Fort +8, Ref +3, Will +8; Str 11, Dex 12, Con 16, Int 10,<br />
Wis 16, Cha 8.<br />
Skills and Feats: Concentration +9, Heal +9, Knowledge<br />
(arcana) +4, Knowledge (religion) +4, Spellcraft +4; Brew<br />
Potion, Combat Casting, Dodge, Weapon Focus (heavy mace).<br />
Spells Prepared (5/5/5/4; base DC = 13 + spell level): 0—cure<br />
minor wounds, detect magic (2), light, read magic; 1st—command,<br />
detect chaos, magic weapon, sanctuary*, shield of faith; 2nd—bull’s<br />
strength, endurance, hold person, remove paralysis, shield other*;<br />
3rd—daylight, magic circle against chaos*, prayer, searing light.<br />
*Domain spell. Deity: St. Cuthbert. Domains: Law (cast law<br />
spells at 7th level); Protection (1/day grant one target a +7<br />
resistance bonus on one save).<br />
Possessions: Chainmail, large wooden shield, ring of protection<br />
+1, +1 heavy mace, light crossbow, 20 crossbow bolts, potion of cure<br />
light wounds, potion of delay poison, potion of lesser restoration,<br />
divine scroll of dispel magic, 69 gp.<br />
dToridan: Male half-orc Ftr2; CR 2; Medium-size humanoid<br />
(half-orc); HD 2d10+4; hp 19; Init +1; Spd 20 ft.; AC 19 (touch<br />
11, flat-footed 18); Atk +7 melee (1d12+4/×3, greataxe) or +3<br />
ranged (1d8/19–20, light crossbow); SQ Darkvision 60 ft.; AL<br />
CE; SV Fort +5, Ref +1, Will +1; Str 17, Dex 13, Con 14, Int 8,<br />
Wis 12, Cha 6.<br />
Skills and Feats: Jump +0, Spot +2; Cleave, Power Attack,<br />
Weapon Focus (greataxe).<br />
Possessions: Full plate, masterwork greataxe, light crossbow<br />
and 10 bolts, 2 potions of cure light wounds.<br />
dVacra: Female tiefling Wiz3; CR 3; Medium-size outsider; HD<br />
3d4; hp 10; Init +2; Spd 30 ft.; AC 12 (touch 12, flat-footed 10); Atk<br />
+1 melee (1d4/19–20, dagger) or +3 ranged (1d10/19–20, heavy<br />
crossbow); SQ Cannot be raised or resurrected, cold, electricity,
APPENDIX 3: NPC STATISTICS<br />
and fire resistance 5, darkness, darkvision 60 ft.; AL LE; SV<br />
Fort +2, Ref +3, Will +4; Str 11, Dex 14, Con 13, Int 15, Wis 12,<br />
Cha 10.<br />
Skills and Feats: Bluff +4, Concentration +7, Hide +5,<br />
Knowledge (arcana) +8, Spellcraft +8; Combat Casting, Dodge,<br />
Scribe Scroll.<br />
Darkness (Sp): 1/day (as Sor3).<br />
Spells Prepared (4/3/2; base DC = 12 + spell level): 0—detect<br />
magic, detect poison, open/close, read magic; 1st—alarm, identify,<br />
magic missile; 2nd—invisibility, levitate.<br />
Spellbook: 0—arcane mark, dancing lights, daze, detect magic,<br />
detect poison, disrupt undead, flare, ghost sound, light, mage hand,<br />
mending, open/close, prestidigitation, ray of frost, read magic, resistance;<br />
1st—alarm, burning hands, charm person, identify, magic<br />
missile, shield; 2nd—invisibility, levitate, resist elements.<br />
Possessions: Arcane scroll of resist elements (cold), dagger, heavy<br />
crossbow, 20 bolts, spellbook (hidden in the cellar of area 28 in<br />
the Town of Hommlet), wand of change self.<br />
dXaod the Slayer: Male human Pal4; CR 4; Medium-size<br />
humanoid (human); HD 3d10; hp 28; Init +0; Spd 20 ft.; AC 19<br />
(touch 10, flat-footed 19); Atk +7 melee (1d8+2/19–20, masterwork<br />
longsword) or +4 ranged (1d8+2/×3, mighty composite<br />
longbow [+2 Str bonus]); SA Smite evil (1/day, +3 attack, +4<br />
damage), turn undead 10/day; SQ Paladin abilities; AL LG; SV<br />
Fort +7, Ref +4, Will +4; Str 14, Dex 10, Con 10, Int 13, Wis 10,<br />
Cha 16.<br />
Skills and Feats: Handle Animal +10, Heal +4, Knowledge<br />
(religion) +7, Listen +1, Ride (horse) +7, Spot +2; Combat<br />
Reflexes, Extra Turning, Mounted Combat.<br />
Paladin Abilities: Detect evil, divine grace, divine health, lay<br />
on hands (12 points/day), aura of courage, remove disease<br />
1/week.<br />
Possessions: Glove of storing (dagger stored), heavy warhorse,<br />
masterwork half-plate, masterwork large steel shield, masterwork<br />
longsword, mighty composite longbow (+2 Str bonus),<br />
warhammer.<br />
THE MOATHOUSE<br />
dFestrath: Male human Clr5; CR 5; Medium-size humanoid<br />
(human); HD 5d8+5; hp 32 (currently 24); Init –1; Spd 20 ft.; AC<br />
19 (touch 9, flat-footed 19); Atk +5 melee (1d6+1/19–20, curved<br />
+1 short sword) or +2 ranged (1d8/19–20 crossbow); SA Rebuke<br />
undead 3/day; SQ Insanity; AL CE; SV Fort +5, Ref +0, Will +6;<br />
Str 10, Dex 9, Con 12, Int 11, Wis 16, Cha 10.<br />
Skills and Feats: Concentration +9, Knowledge (arcana) +8,<br />
Knowledge (religion) +8; Martial Weapon Proficiency (short<br />
sword), Weapon focus (short sword), Expertise.<br />
Insanity (Ex): Insanity score 2. Wis 18 for bonus spells and<br />
DCs; Wis 14 for all other Wis-based checks.<br />
Spells Prepared (5/5/4/3; base DC = 14 + spell level): 0—cure<br />
minor wounds, detect magic, light, mending, resistance; 1st—bane,<br />
command, cure light wounds, protection from good, random action*;<br />
2nd—bull’s strength, death knell, hold person, Tharizdun’s touch*;<br />
3rd—contagion, summon monster III, rage*.<br />
*Domain spell. Deity: Elder Elemental Eye. Domains: Madness<br />
(1/day add Insanity score to Wis-based roll ); Water (turn<br />
or destroy fire creatures, rebuke or command water creatures).<br />
Possessions: Ochre robes, message (see area 32E in the<br />
Moathouse), pearl of power (1st level), potion of fly, curved +1 short<br />
sword, full plate armor, large steel shield, light crossbow, 10<br />
bolts, 23 gp, 20 gp gem, holy symbol (black iron triangle with<br />
an inverted yellow Y).<br />
dGarrik: Male gnoll Rgr2; CR 3; Medium-size humanoid<br />
(gnoll); HD 2d8+2 plus 2d10+2; hp 28; Init +1; Spd 30 ft.; AC 16<br />
(touch 11, flat-footed 15); Atk +6 melee (1d8+3, masterwork<br />
longsword), or +4 melee (1d8+2/19–20, masterwork longsword<br />
and +4 melee (1d6+1/19–20, masterwork short sword), or +4<br />
ranged (1d6/×3, shortbow); SQ Favored enemy (humans +1),<br />
fight with two weapons; AL NE; SV Fort +7, Ref +1, Will +0; Str<br />
15, Dex 12, Con 12, Int 9, Wis 10, Cha 9.<br />
Skills and Feats: Listen +5, Spot +5, Wilderness Lore +2; Power<br />
Attack, Quick Draw, Track.<br />
Fight with Two Weapons: Ambidexterity and Two-Weapon<br />
Fighting when wearing light or no armor.<br />
Possessions: +1 studded leather, brooch of shielding, masterwork<br />
longsword, masterwork short sword, shortbow, 20 arrows.<br />
dGeynor Ton: Male human Clr2; CR 2; Medium-size<br />
humanoid (human); HD 2d8+4; hp 16; Init +0; Spd 20 ft.; AC 19<br />
(touch 10, flat-footed 19); Atk +2 melee (1d8, masterwork<br />
morningstar) or +1 ranged (1d8/19–20, light crossbow); SA<br />
Rebuke undead 3/day; SQ Insanity; AL CE; SV Fort +5, Ref +2,<br />
Will +5; Str 10, Dex 11, Con 14, Int 9, Wis 15, Cha 10.<br />
Skills and Feats: Concentration +7, Listen +4, Spot +4;<br />
Alertness, Lightning Reflexes.<br />
Insanity (Ex): Insanity score 1. Wis 16 for bonus spells and<br />
DCs; Wis 14 for all other Wis-based checks.<br />
Spells Prepared (4/4; base DC = 13 + spell level): 0—detect<br />
magic, light, read magic, resistance; 1st—bless, command, protection<br />
from good*, random action.<br />
*Domain spell. Deity: Elder Elemental Eye. Domains: Air<br />
(turn or destroy earth creatures, rebuke or command air creatures);<br />
Evil (cast evil spells at 3rd level).<br />
Possessions: Ochre robes, journal, potion of cure moderate wounds,<br />
divine scroll of bless and cure light wounds, masterwork morningstar,<br />
half plate armor, large steel shield, light crossbow, 10 bolts, 53 gp,<br />
2 sp, holy symbol (black iron triangle with an inverted yellow Y).<br />
dGren: Female human Clr2; CR 2; Medium-size humanoid<br />
(human); HD 2d8+5; hp 18; Init +0; Spd 20 ft.; AC 18 (touch 10,<br />
flat-footed 18); Atk +3 melee (1d8+1, morningstar) or +1 ranged<br />
(1d8/19–20, light crossbow); SA Rebuke undead 4/day; SQ<br />
Insanity; AL CE; SV Fort +4, Ref +0, Will +4; Str 12, Dex 10, Con<br />
12, Int 13, Wis 14, Cha 13.<br />
Skills and Feats: Concentration +6, Knowledge (arcana) +2,<br />
Knowledge (religion) +6, Listen +4, Spellcraft +6, Spot +4;<br />
Alertness, Toughness.<br />
Insanity (Ex): Insanity score 1. Wis 15 for bonus spells and<br />
DCs; Wis 13 for all other Wis-based checks.<br />
Spells Prepared (4/4; base DC = 12 + spell level): 0—detect<br />
magic, light, read magic, resistance; 1st—bless, command, cure light<br />
wounds, random action*.<br />
*Domain spell. Deity: Elder Elemental Eye. Domains: Chaos<br />
(cast chaos spells at 3rd level); Fire (turn or destroy water creatures,<br />
rebuke or command fire creatures).<br />
Possessions: Ochre robes, potion of sneak, potion of aid, potion of<br />
cure light wounds, masterwork morningstar, splint armor, large<br />
steel shield, light crossbow, 10 bolts, 12 gp, 20 sp, holy symbol<br />
(black iron triangle with an inverted yellow Y).<br />
dUtreshimon: Male young blue dragon; CR 5; Medium-size<br />
dragon (earth); HD 12d12+24; hp 102; Init +0; Spd 40 ft., burrow<br />
20 ft., fly 150 ft. (poor); AC 21 (touch 10, flat-footed 21); Atk<br />
+15 melee (1d8+3, bite) and +10 melee (1d6+1, 2 claws) and +10<br />
melee (1d4+1, 2 wings); SA Breath weapon, spell-like abilities;<br />
SQ Blindsight 90 ft., immune to sleep, paralysis, electricity; keen<br />
senses; AL LE; SV Fort +10, Ref +8, Will +9; Str 17, Dex 10, Con<br />
15, Int 12, Wis 13, Cha 12.<br />
167
APPENDIX 3: NPC STATISTICS<br />
168<br />
Skills and Feats: Bluff +13, Concentration +14, Diplomacy +15,<br />
Intimidate +3, Listen +13, Search +13 Sense Motive +8, Spot<br />
+13; Cleave, Flyby Attack, Hover, Power Attack.<br />
Breath Weapon (Su): 60-ft. line of lightning, 6d8 points of<br />
electricity damage, Ref save DC 18 half.<br />
Hover: Can attack with bite and 4 claws. Hemispherical<br />
cloud 90-ft. radius snuffs small fires, obscures vision, blinds<br />
those inside and for 1 round after they exit. Concentration DC<br />
16 to cast a spell inside.<br />
Spell-Like Abilities: 3/day—create/destroy water (DC 17).<br />
Keen Senses (Ex): Quadruple normal vision range in bad<br />
light; double normal vision range in good light; darkvision<br />
300 ft.<br />
dYsslansh: Male troglodyte Clr2; CR 3; Medium-size<br />
humanoid (reptilian); HD 2d8+4 plus 2d8+4; hp 28; Init +0; Spd<br />
20 ft.; AC 24 (touch 9, flat-footed 24); Atk +5 melee (1d8+1,<br />
masterwork morningstar) or +1 ranged (1d8/19–20, light crossbow);<br />
SA Rebuke undead 3/day, stench; SQ Darkvision 90 ft.,<br />
insanity; AL CE; SV Fort +9, Ref +0, Will +4; Str 12, Dex 9, Con<br />
14, Int 9, Wis 12, Cha 10.<br />
Skills and Feats: Concentration +4, Hide –4*, Knowledge<br />
(religion) +0, Listen +2; Multiattack, Weapon Focus (javelin),<br />
Weapon Focus (morningstar). *+4 bonus on Hide checks in<br />
rocky or subterranean settings.<br />
Stench (Ex): All creatures (except troglodytes) within 30 ft.<br />
of an angry or frightened troglodyte must succeed at a Fort save<br />
(DC 13) or be nauseated for 10 rounds, taking 1d6 points of<br />
temporary Str damage.<br />
Insanity (Ex): Insanity score 1. Wis 13 for bonus spells and<br />
DCs; Wis 11 for all other Wis-based checks.<br />
Spells Prepared (4/4; base DC = 11 + spell level): 0—detect<br />
magic, light, read magic, resistance; 1st—obscuring mist, protection<br />
from good*, random action, summon monster I.<br />
*Domain spell. Deity: Elder Elemental Eye. Domains: Chaos<br />
(cast chaos spells at 3rd level); Evil (cast evil spells at 3rd<br />
level).<br />
Possessions: Black robes, potion of levitate, potion of cure moderate<br />
wounds, cloak of resistance +1, masterwork morningstar, half plate<br />
armor, large steel shield, light crossbow, 10 bolts, curved knife,<br />
8 gp, 12 sp, holy symbol (obex).<br />
GHOST TOWN AND<br />
RUINED TEMPLE<br />
dHobgoblin Warriors: Male hobgoblin War1; CR 1;<br />
Medium-size humanoid (goblinoid); HD 1d8+3; hp varies (see<br />
text); Init +1; Spd 20 ft.; AC 17 (touch 11, flat-footed 16); Atk +5<br />
melee (2d6+3/19–20, greatsword) or +2 ranged (1d6+2, javelin);<br />
SQ Darkvision 60 ft.; AL LE; SV Fort +5, Ref +1, Will –1; Str 14,<br />
Dex 12, Con 16, Int 11, Wis 8, Cha 10.<br />
Skills and Feats: Intimidate +3, Jump +0, Move Silently –1;<br />
Weapon Focus (greatsword).<br />
Possessions: Banded mail, masterwork greatsword, 2 javelins,<br />
potion of bull’s strength.<br />
dAlubya: Female hobgoblin Adp3; CR 2; Medium-size<br />
humanoid (goblinoid); HD 3d6+6; hp 18; Init +0; Spd 30 ft.; AC<br />
13 (touch 10, flat-footed 13); Atk +0 melee (1d8–1/×3, shortspear)<br />
or +2 ranged (1d8/19–20, masterwork light crossbow);<br />
SQ Darkvision 60 ft.; AL LE; SV Fort +3, Ref +1, Will +5; Str 8,<br />
Dex 11, Con 14, Int 10, Wis 14, Cha 12.<br />
Skills and Feats: Concentration +6, Listen +6, Move Silently<br />
+3, Spot +4, Wilderness Lore +6; Alertness, Armor Proficiency<br />
(Light).<br />
Spells Prepared (3/3; base DC = 12 + spell level): 0—create water,<br />
ghost sound, mending; 1st—burning hands, cure light wounds,<br />
obscuring mist.<br />
Possessions: Studded leather armor, shortspear, masterwork<br />
light crossbow, 14 bolts, potion of cure moderate wounds, divine<br />
scroll of bull’s strength, gold bracelet (65 gp).<br />
dKella: Female half-elf Drd9; CR 9; Medium-size humanoid<br />
(half-elf ); HD 9d8+9; hp 51; Init +3; Spd 20 ft.; AC 17 (touch 13,<br />
flat-footed 14); Atk +8/+3 melee (1d6+2/18–20, +1 scimitar) or<br />
+10/+5 ranged (1d4, sling with masterwork bullet); SQ Druid<br />
abilities, immune to sleep, low-light vision, +2 bonus on saves<br />
against enchantment effects; AL NG; SV Fort +7, Ref +6, Will<br />
+9; Str 12, Dex 16, Con 13, Int 11, Wis 16, Cha 15.<br />
Skills and Feats: Animal Empathy +8, Concentration +7,<br />
Diplomacy +8, Handle Animal +8, Heal +7, Intuit Direction +7,<br />
Knowledge (nature) +6, Listen +4, Ride (horse) +5, Search +1,<br />
Spot +4, Wilderness Lore +13; Combat Casting, Dodge, Scribe<br />
Scroll, Track.<br />
Druid Abilities: Nature sense, woodland stride, trackless<br />
step, resist nature’s lure, wild shape (3/day, Small, Medium-size,<br />
or Large), venom immunity.<br />
Spells Prepared (6/5/5/4/2/1; base DC = 13 + spell level): 0—<br />
create water, cure minor wounds, detect poison, light, purify food and<br />
drink, resistance; 1st—calm animals, cure light wounds (2), detect<br />
animals or plants, summon nature’s ally I; 2nd—animal messenger,<br />
barkskin, charm person or animal, heat metal, lesser restoration;<br />
3rd—call lightning, cure moderate wounds, remove disease, stone<br />
shape; 4th—freedom of movement, reincarnate; 5th—ice storm.<br />
Possessions: +1 hide armor, +1 scimitar, sling, 10 masterwork<br />
bullets, wand of cure light wounds (12 charges), phylactery of<br />
change, 10 gp.<br />
dKrebbich: Male hobgoblin Adp6; CR 5; Medium-size<br />
humanoid (goblinoid); HD 6d6+15; hp 38; Init +1; Spd 30 ft.;<br />
AC 17 (touch 11, flat-footed 16); Atk +5 melee (1d8+1, masterwork<br />
morningstar); SQ Darkvision 60 ft., familiar benefits; AL<br />
LE; SV Fort +4, Ref +3, Will +7; Str 13, Dex 12, Con 14, Int 14,<br />
Wis 14, Cha 10.<br />
Skills and Feats: Concentration +11, Knowledge (religion) +8,<br />
Listen +6, Move Silently +6, Spellcraft +7, Spot +6, Wilderness<br />
Lore +6; Alertness, Armor Proficiency (Light), Brew Potion,<br />
Toughness.<br />
Familiar Benefits: Alertness when familiar is within reach,<br />
+2 bonus to Con, empathic link, share spells with familiar,<br />
deliver touch spells via familiar.<br />
Spells Prepared (3/3/2; base DC = 12 + spell level): 0—cure<br />
minor wounds, ghost sound, guidance; 1st—cause fear, command, protection<br />
from good; 2nd—bull’s strength, invisibility.<br />
Possessions: +1 chain shirt, masterwork morningstar, amulet of<br />
natural armor +1, brooch of shielding (can still absorb 47 magic<br />
missiles), wand of cure light wounds, divine scroll of cure serious<br />
wounds, potion of cure moderate wounds, potion of endurance, potion<br />
of glibness.<br />
dKubo: Male toad familiar of Krebbich; CR —; Diminutive<br />
magical beast; HD 1/4 d8 (6 HD); hp 19; Init +1; Spd 5 ft.; AC<br />
18 (touch 15, flat-footed 17); Atk—; Face/Reach 1 ft. by 1 ft./0<br />
ft.; SQ Improved evasion, speak with Krebbich; AL LE; SV Fort<br />
+2, Ref +3, Will +7; Str 1, Dex 12, Con 11, Int 8, Wis 14, Cha 4.<br />
Skills: Hide +21, Listen +6, Spot +6.<br />
dLareth the Beautiful: Male human Clr7; CR 7; Mediumsize<br />
humanoid (human); HD 7d8+21; hp 60; Init +7; Spd 30 ft.;<br />
AC 14 (touch 13, flat-footed 11); Atk +11 melee (1d6+6, masterwork<br />
quarterstaff ); SA Rebuke undead 1/day; SQ Insanity; AL
APPENDIX 3: NPC STATISTICS<br />
CE; SV Fort +8, Ref +5, Will +8; Str 18, Dex 17, Con 16, Int 9,<br />
Wis 19, Cha 6.<br />
Skills and Feats: Concentration +7, Diplomacy +4, Knowledge<br />
(religion) +3, Spellcraft +5; Combat Casting, Improved Initiative,<br />
Power Attack, Weapon Focus (quarterstaff ).<br />
Insanity (Ex): Insanity score 3. Wis 22 for bonus spells and<br />
DCs; Wis 16 for all other Wis-based checks.<br />
Spells Prepared (6/7/6/4/3; base DC = 16 + spell level): 0—<br />
detect magic, guidance, inflict minor wounds, light, read magic,<br />
resistance; 1st—bane, cause fear, divine favor, doom, protection<br />
from good*, sanctuary, shield of faith; 2nd—bull’s strength, death<br />
knell, endurance, Tharizdun’s touch* (3); 3rd—dispel magic, invisibility<br />
purge, rage*, searing light; 4th—confusion*, greater magic<br />
weapon, poison.<br />
*Domain spell. Deity: Elder Elemental Eye. Domains: Evil<br />
(cast evil spells at 8th level); Madness (1/day add Insanity score<br />
to Wis-based roll ).<br />
Possessions: Bracers of armor +1, cloak of arachnida, masterwork<br />
quarterstaff.<br />
dRarkus: Male hobgoblin Ftr4/Rog1; CR 5; Medium-size<br />
humanoid (goblinoid); HD 4d10+8 plus 1d6+2; hp 40; Init +2;<br />
Spd 20 ft.; AC 18 (touch 12, flat-footed 16); Atk +7 melee and +7<br />
melee (1d8+6/19–20, two-bladed sword), or +7 ranged<br />
(1d8/19–20, masterwork light crossbow); SA Sneak attack<br />
+1d6; SQ Darkvision 60 ft., locate traps; AL LE; SV Fort +6, Ref<br />
+5, Will +1; Str 16, Dex 15, Con 14, Int 10, Wis 10, Cha 12.<br />
Skills and Feats: Climb +3, Diplomacy +3, Intimidate +6, Move<br />
Silently +6, Sense Motive +2; Ambidexterity, Exotic Weapon<br />
Proficiency (two-bladed sword), Two-Weapon Fighting,<br />
Weapon Focus (two-bladed sword), Weapon Specialization<br />
(two-bladed sword).<br />
Possessions: +1 chainmail, +1 two-bladed sword, masterwork<br />
light crossbow, 12 bolts, 1 flask of alchemist’s fire, potion of cure<br />
moderate wounds, potion of spider climb.<br />
dUndra: Female human Clr2/Rog2; CR 4; Medium-size<br />
humanoid (human); HD 2d8 plus 2d6; hp 19; Init +7; Spd 30 ft.;<br />
AC 19 (touch 13, flat-footed 16); Atk +3 melee (1d6/19–20,<br />
masterwork short sword) or +7 ranged (1d8+1/19–20, masterwork<br />
light crossbow with +1 bolt); SA Rebuke undead 4/day,<br />
sneak attack +1d6; SQ Evasion, insanity, locate traps; AL CE; SV<br />
Fort +3, Ref +6, Will +5; Str 10, Dex 16, Con 10, Int 13, Wis 15,<br />
Cha 12.<br />
Skills and Feats: Bluff +3, Concentration +5, Diplomacy +8,<br />
Gather Information +4, Hide +5, Knowledge (geography) +2,<br />
Knowledge (religion) +6, Listen +6, Move Silently +5, Search<br />
+3, Spellcraft +4, Spot +6, Wilderness Lore +3; Alertness,<br />
Improved Initiative, Scribe Scroll.<br />
Insanity (Ex): Insanity score 1. Wis 16 for bonus spells and<br />
DCs; Wis 14 for all other Wis-based checks.<br />
Spells Prepared (4/4; base DC = 13 + spell level): 0—create<br />
water, light, mending, purify food and drink; 1st—comprehend languages,<br />
magic weapon, obscuring mist*, shield of faith.<br />
*Domain spell. Deity: Elder Elemental Eye. Domains: Air<br />
(turn/destroy earth creatures, rebuke/command water creatures);<br />
Chaos (cast chaos spells at 3rd level).<br />
Possessions: Mithral shirt, darkwood shield, masterwork short<br />
sword, masterwork light crossbow, 20 +1 bolts, divine scroll of<br />
cure moderate wounds (2), divine scroll of summon monster II and<br />
zone of truth, potion of spider climb, 5 days’ trail rations, bedroll.<br />
dWat: Male ghost Rog5/Asn1; CR 6; Medium-size undead<br />
(incorporeal); HD 5d12 plus 1d12; hp 39; Init +3; Spd fly 30 ft.<br />
(perfect); AC 16 (touch 16, flat-footed 16); Atk +4 melee<br />
(1d8+1/19–20, longsword) or +6 melee (1d4, incorporeal<br />
touch); SA Death attack, horrific appearance, manifestation,<br />
sneak attack +4d6; SQ Evasion, incorporeal, locate traps, poison<br />
use, rejuvenation, uncanny dodge (Dex bonus to AC when flatfooted,<br />
can’t be flanked), undead, +4 turn resistance; AL CE; SV<br />
Fort +1, Ref +9, Will +4; Str 10, Dex 16, Con —, Int 12, Wis 13,<br />
Cha 16.<br />
Skills and Feats: Bluff +11, Diplomacy +5, Disguise +12, Escape<br />
Artist +12, Hide +20, Intimidate +13, Knowledge (local) +5,<br />
Listen +18, Move Silently +12, Search +17, Spot +18; Blind-<br />
Fight, Combat Reflexes, Dodge, Martial Weapon Proficiency<br />
(longsword).<br />
Against Nonmaterial Opponents: AC 19 (touch 16, flat-footed<br />
16); Atk +3 melee (1d4, incorporeal touch).<br />
Death Attack (Ex): If an assassin studies a target for 3<br />
rounds and then makes a sneak attack with a melee weapon<br />
that successfully deals damage, the sneak attack can also paralyze<br />
(for 1d6+1 rounds) or kill the victim. Fort save DC 12<br />
to resist.<br />
Horrific Appearance (Su): Living creatures within 60 ft. of<br />
the ghost that view it must succeed at a Fort save (DC 16) or suffer<br />
1d4 points of permanent drain to Str, Dex, and Con.<br />
Creatures that save can’t be affected by the ghost’s horrific<br />
appearance for one day.<br />
Manifestation (Su): A manifested ghost’s attacks and spells<br />
can affect targets on the Material Plane normally. The ghost<br />
becomes visible on the Material Plane but remains incorporeal.<br />
Incorporeal: Can be harmed only by other incorporeal creatures,<br />
+1 or better magic weapons, or magic, with a 50% chance<br />
to ignore any damage from a corporeal source. Can pass<br />
through solid objects at will, and own attacks pass through<br />
armor. Always moves silently.<br />
Rejuvenation (Su): Wat’s “destroyed” spirit restores itself in<br />
2d4 days on a successful level check (DC 16). The only way to<br />
destroy Wat for certain is to burn down the hostel.<br />
Undead: Immune to mind-influencing effects, poison,<br />
sleep, paralysis, stunning, and disease. Not subject to critical<br />
hits, subdual damage, ability damage, energy drain, or death<br />
from massive damage.<br />
Spells Prepared (1; base DC = 11 + spell level): 1st—obscuring mist.<br />
Spellbook: 1st—change self, ghost sound, obscuring mist, spider climb.<br />
Possessions: +1 ghost touch longsword, masterwork studded<br />
leather (ethereal).<br />
THE CRATER RIDGE MINES<br />
dBugbear Scouts: Male bugbear Rog1; CR 4; Medium-size<br />
humanoid (goblinoid); HD 3d8+3 plus 1d6+1; hp varies (see<br />
text); Init +1; Spd 30 ft.; AC 14 (touch 11, flat-footed 13); Atk +3<br />
melee (1d8+2, morningstar) or +2 ranged (1d6+2, javelin); SA<br />
Sneak attack +1d6; SQ Darkvision 60 ft., locate traps; AL CE; SV<br />
Fort +2, Ref +6, Will +1; Str 15, Dex 12, Con 13, Int 10, Wis 10,<br />
Cha 9.<br />
Skills and Feats: Climb +3, Hide +4, Knowledge (religion) +1,<br />
Listen +6, Move Silently +9, Spot +6; Alertness.<br />
Possessions: potion of cure moderate wounds, potion of invisibility,<br />
leather armor, small wooden shield, morningstar, 2 javelins,<br />
pouch with 250 gp.<br />
dElf Warriors: Male and female elf War1; CR 1; Medium-size<br />
humanoid (elf ); HD 1d8; hp varies (see text); Init +3; Spd 20 ft.;<br />
AC 18 (touch 13, flat-footed 15); Atk +5 melee (1d8+3/19–20,<br />
masterwork longsword) or +4 ranged (1d6+2/×3, mighty composite<br />
shortbow [+2 Str bonus]); SQ Immune to sleep, low-light<br />
vision, +2 bonus on saves against enchantment effects; AL CE;<br />
SV Fort +2, Ref +3, Will –1; Str 15, Dex 16, Con 11, Int 12, Wis<br />
8, Cha 10.<br />
169
APPENDIX 3: NPC STATISTICS<br />
170<br />
Skills and Feats: Climb +2, Jump +2, Listen +1, Search +3, Spot<br />
+3; Weapon Focus (longsword).<br />
Possessions: Breastplate, masterwork longsword, mighty<br />
composite shortbow (+2 Str bonus), 20 arrows, 2 potions of cure<br />
light wounds.<br />
dHuman Warriors: Male and female human War1; CR 1;<br />
Medium-size humanoid (human); HD 1d8+2; hp varies (see<br />
text); Init +1; Spd 20 ft.; AC 18 (touch 11, flat-footed 17); Atk +5<br />
melee (1d10+2/19–20, masterwork bastard sword) or +2 ranged<br />
(1d8/×3, longbow); AL NE; SV Fort +4, Ref +1, Will +1; Str 15,<br />
Dex 13, Con 14, Int 11, Wis 12, Cha 8.<br />
Skills and Feats: Climb +0, Intimidate +3, Jump +0; Exotic<br />
Weapon Proficiency (bastard sword), Weapon Focus (bastard<br />
sword).<br />
Possessions: Masterwork banded mail, small wooden shield,<br />
masterwork bastard sword, longbow, 20 arrows, potion of cure<br />
light wounds.<br />
dKuo-Toa Fighters: Male and female kuo-toa Ftr1; CR 3;<br />
Medium-size monstrous humanoid (aquatic); HD 2d8+2 plus<br />
1d10+1; hp varies (see text); Init +0; Spd 20 ft., swim 50 ft.; AC<br />
20 (touch 10, flat-footed 20); Atk +6 melee (1d6+1/×3, halfspear)<br />
and –1 melee (1d4, bite), or +4 ranged (1d6+1/×3, halfspear);<br />
SQ Adhesive, amphibious, electricity resistance 30,<br />
immune to webs, poison, paralysis, hold, and figments, keen<br />
sight, light blindness, slippery; AL NE; SV Fort +5, Ref +3, Will<br />
+5; Str 13, Dex 10, Con 13, Int 13, Wis 14, Cha 8.<br />
Skills and Feats: Escape Artist +18, Knowledge (religion) +6,<br />
Listen +10, Move Silently +3, Search +10, Spot +11, Swim +2;<br />
Alertness, Great Fortitude, Power Attack, Weapon Focus<br />
(halfspear).<br />
Adhesive (Ex): On a failed melee attack, attacker must succeed<br />
at a Ref save (DC 14), or weapon sticks to kuo-toa’s shield<br />
and is yanked from wielder’s grasp.<br />
Amphibious (Ex): Although kuo-toas breathe by means of<br />
gills, they can survive indefinitely on land.<br />
Keen Sight (Ex): Kuo-toas spot a moving object or creature<br />
even if it is invisible, ethereal, or astral.<br />
Light Blindness (Ex): Blinded for 1 round by abrupt exposure<br />
to bright light (such as sunlight or a daylight spell). Suffers<br />
a –1 circumstance penalty on all attack rolls, saves, and checks<br />
in bright light.<br />
Slippery (Ex): Not affected by webs or other forms of confinement.<br />
Possessions: potion of cure moderate wounds, potion of cat’s grace,<br />
potion of bull’s strength; masterwork halfspear, pouch with 50 gp,<br />
leather armor, large wooden shield.<br />
dOrc Warriors: Male orc War1; CR 1; Medium-size<br />
humanoid (orc); HD 1d8+2; hp varies (see text); Init +0; Spd<br />
20 ft.; AC 16 (touch 10, flat-footed 16); Atk +0 melee and –4<br />
melee (1d8+1/×3, masterwork orc double axe), or +1 ranged<br />
(1d6+2, javelin); SQ Darkvision 60 ft., light sensitivity; AL CE;<br />
SV Fort +4, Ref +0, Will –1; Str 15, Dex 10, Con 14, Int 9, Wis<br />
8, Cha 8.<br />
Skills and Feats: Jump –1; Exotic Weapon Proficiency (orc<br />
double axe).<br />
Light Sensitivity: –1 penalty on attack rolls in bright sunlight<br />
or in daylight spell.<br />
Possessions: Splint mail, masterwork orc double axe, 2 javelins,<br />
potion of cure moderate wounds.<br />
dTroglodyte Warriors: Male and female troglodyte War1; CR<br />
3; Medium-size humanoid (reptilian); HD 2d8+4 plus 1d8+2; hp<br />
varies (see text); Init –1; Spd 30 ft.; AC 15 (touch 9, flat-footed<br />
15); Atk +3 melee (1d8/×3, longspear) and +0 melee (1d4, bite),<br />
or +2 ranged (1d6, javelin); SA Stench; SQ Darkvision 90 ft.; AL<br />
CE; SV Fort +4, Ref +2, Will +0; Str 10, Dex 9, Con14, Int 8, Wis<br />
10, Cha 10.<br />
Skills and Feats: Climb +1, Hide +6*, Listen +3; Multiattack,<br />
Weapon Focus (javelin), Weapon Focus (longspear). *+4 bonus<br />
on Hide checks in rocky or subterranean settings.<br />
Stench (Ex): All creatures (except troglodytes) within 30 ft.<br />
of an angry or frightened troglodyte must succeed at a Fort save<br />
(DC 13) or be nauseated for 10 rounds, taking 1d6 points of<br />
temporary Str damage.<br />
Possessions: Longspear, 5 javelins, pouch with 200 gp, emerald<br />
pendant on silver chain (1,000 gp).<br />
dArlainth: Male half-elf Sor6; CR 6; Medium-size humanoid<br />
(half-elf ); HD 6d4; hp 20; Init +1; Spd 30 ft.; AC 11 (touch 11,<br />
flat-footed 10); Atk +1 melee (1d4–2/19–20, dagger) or +4<br />
ranged (1d8/19–20, light crossbow); SQ Immune to sleep, lowlight<br />
vision, +2 bonus on saves against enchantment effects; AL<br />
CE; SV Fort +2, Ref +3, Will +6; Str 6, Dex 13, Con 11, Int 14,<br />
Wis 12, Cha 18.<br />
Skills and Feats: Alchemy +10, Knowledge (arcana) +6, Listen<br />
+6, Search +3, Spellcraft +10, Spot +6; Brew Potion, Run, Spell<br />
Focus (Evocation).<br />
Spells Known (6/7/6/4; base DC = 14 + spell level): 0—<br />
detect magic, detect poison, light, mage hand, prestidigitation, read<br />
magic, resistance; 1st—burning hands, expeditious retreat, mage<br />
armor, magic missile; 2nd—flaming sphere, Melf ’s acid arrow;<br />
3rd—fireball.<br />
Possessions: Wand of fireball (6th-level caster, 14 charges), dagger,<br />
light crossbow, arcane scroll of invisibility, potion of cure serious<br />
wounds, potion of darkvision, potion of charisma, potion of aid.<br />
dChoranth: Female human Clr4; CR 4; Medium-size<br />
humanoid (human); HD 4d8+4; hp 26; Init +1; Spd 20 ft.; AC 21<br />
(touch 11, flat-footed 20); Atk +4 melee (1d8, masterwork heavy<br />
mace) or +4 ranged (1d8/19–20, light crossbow); SA Rebuke<br />
undead 5/day; SQ Insanity; AL CE; SV Fort +5, Ref +2, Will +7;<br />
Str 10, Dex 12, Con 13, Int 10, Wis 17, Cha 14.<br />
Skills and Feats: Concentration +8, Knowledge (religion) +7,<br />
Spellcraft +7; Combat Casting, Extra Turning, Scribe Scroll.<br />
Insanity (Ex): Insanity score 2. Wis 19 for bonus spells and<br />
DCs; Wis 15 for all other Wis-based checks.<br />
Spells Prepared (5/5/4; base DC = 14 + spell level): 0—cure<br />
minor wounds, detect magic, guidance, read magic, resistance; 1st—<br />
command, cure light wounds, divine favor, protection from good*, shield<br />
of faith; 2nd—hold person, silence, spiritual weapon, wind wall*.<br />
*Domain spell. Deity: Elder Elemental Eye. Domains: Air<br />
(turn or destroy earth creatures, rebuke or command air creatures);<br />
Evil (cast evil spells at 5th level).<br />
Possessions: Ochre robes, dust of illusion, divine scroll of bless,<br />
magic weapon, doom and cure moderate wounds, divine scroll of<br />
endurance, augury and darkness, masterwork heavy mace, full<br />
plate armor, large steel shield, light crossbow, 10 bolts, 131 gp,<br />
air temple symbol, lesser key of air.<br />
dDescritad: Female halfling Bbn3/Rog3; CR 5 (6 with appropriate<br />
gear); Small humanoid (halfling); HD 3d12+3 plus<br />
3d6+3; hp 41; Init +8; Spd 40 ft.; AC 19 (touch 13, flat-footed 19);<br />
Atk +8 melee (1d6+1/18–20, masterwork scimitar) or +10<br />
ranged (1d6+2/×3, masterwork mighty composite shortbow<br />
[+1 Str bonus]); SA Rage, sneak attack +2d6; SQ Evasion, locate<br />
traps, uncanny dodge (Dex bonus to AC when flat-footed), +1<br />
bonus on attacks with thrown weapons, +2 morale bonus on<br />
saves against fear; AL CN; SV Fort +6, Ref +9, Will +3; Str 13,<br />
Dex 19, Con 12, Int 11, Wis 11, Cha 6.
APPENDIX 3: NPC STATISTICS<br />
Skills and Feats: Balance +7, Climb +8, Hide +10, Jump +7,<br />
Listen +6, Move Silently +5, Spot +4, Swim +7, Wilderness Lore<br />
+5; Improved Initiative, Power Attack, Cleave.<br />
Rage (Ex): 1/day—hp 53; AC 17 (touch 11, flat-footed 17);<br />
Atk +10 melee (1d6+3/18–20, masterwork scimitar) or +10<br />
ranged (1d6+2/×3, masterwork mighty composite shortbow<br />
[+1 Str bonus]); SV Fort +8, Will +5; Str 17, Con 16. Climb +10,<br />
Jump +9, Swim +9. Lasts 6 rounds, then fatigued.<br />
Possessions: None (but see Treasure in area 43 of the Crater<br />
Ridge Mines).<br />
dD’Gran: Male half-fiend/half-ogre mage; CR 10; Large outsider<br />
evil, chaotic); HD 5d8+20; hp 43; Init +6; Spd 30 ft. fly 40<br />
ft. (good); AC 21 (touch 11, flat-footed 19); Atk +10 melee<br />
(2d8+12/19–20, Huge greatsword) or +4 ranged (2d6/×3, Huge<br />
longbow); Reach 10 ft.; SA Spell-like abilities; SQ Acid, cold,<br />
electricity, and fire resistance 20, darkvision 60 ft., immune to<br />
poison, regeneration 2; SR 18; AL CE; SV Fort +8, Ref +3, Will<br />
+3; Str 27, Dex 14, Con 19, Int 18, Wis 14, Cha 19.<br />
Skills and Feats: Concentration +10, Hide –1, Intimidate +7,<br />
Intuit Direction +5, Knowledge (arcana) +7, Listen +8, Move<br />
Silently +3, Search +7, Spellcraft +10, Spot +8; Improved<br />
Initiative.<br />
Spell-Like Abilities (Sp): At will—darkness, invisibility;<br />
1/day—charm person, cone of cold, desecrate, gaseous form, polymorph<br />
self, sleep, unholy blight (all as Sor5). DC = 14 + spell level.<br />
Possessions: Gauntlets of ogre power, Large chain shirt, Huge<br />
greatsword, Huge longbow, 12 arrows, fire temple symbol.<br />
dEeridik: Male human wererat Sor8 (hybrid form); CR 10;<br />
Medium-size shapechanger; HD 8d4+24; hp 44; Init +2; Spd 30<br />
ft.; AC 18 (touch 13, flat-footed 16); Atk +7 melee<br />
(1d4+1/19–20, dagger) and +4 melee (1d4, bite); SA Curse of<br />
lycanthropy; SQ Alternate form (dire rat or human), damage<br />
reduction 15/silver, rat empathy, scent; AL LE; SV Fort +7, Ref<br />
+4, Will +10; Str 10, Dex 14, Con 16, Int 12, Wis 14, Cha 16.<br />
Skills and Feats: Alchemy +12, Climb +5, Concentration<br />
+14, Diplomacy +5, Hide +6, Listen +10, Move Silently +5,<br />
Scry +2, Search +9, Sense Motive +7, Spellcraft +12, Spot +10;<br />
Brew Potion, Combat Casting, Dodge, Improved Control<br />
Shape, Mobility, Multiattack, Weapon Finesse (bite), Weapon<br />
Finesse (dagger).<br />
Curse of Lycanthropy (Su): Any humanoid hit with a bite<br />
or dagger attack must make a DC 15 Fort save or contract<br />
lycanthropy.<br />
Rat Empathy (Ex): Eeridik can communicate with normal<br />
rats and dire rats. He gets a +4 racial bonus on checks to influence<br />
their attitude.<br />
Spells Known (6/7/7/6/3; base DC = 13 + spell level): 0—<br />
arcane mark, detect magic, detect poison, ghost sound, mage hand,<br />
open/close, read magic, resistance; 1st—change self, expeditious<br />
retreat, magic missile, message, shield; 2nd—bull’s strength, cat’s grace,<br />
endurance; 3rd—haste, lightning bolt; 4th—stoneskin.<br />
Possessions: Bracers of armor +2, +1 dagger, ring of protection<br />
+1, wand of arcane lock (11 charges), arcane scroll of improved<br />
invisibility.<br />
dFachish: Male human Clr7; CR 7; Medium-size humanoid<br />
(human); HD 7d8+14; hp 50; Init –1; Spd 20 ft.; AC 21 (touch 9,<br />
flat-footed 21); Atk +7 melee (1d8+1, masterwork morningstar)<br />
or +5 ranged (1d8/19–20, masterwork light crossbow); SA<br />
Rebuke undead 3/day; SQ Insanity; AL CE; SV Fort +7, Ref +3,<br />
Will +6; Str 12, Dex 9, Con 14, Int 12, Wis 16, Cha 11.<br />
Skills and Feats: Concentration +12, Heal +9, Knowledge (religion)<br />
+11, Listen +3, Spellcraft +11, Spot +4; Alertness,<br />
Lightning Reflexes, Point Blank Shot, Quick Draw.<br />
Insanity (Ex): Insanity score 3. Wis 19 for bonus spells and<br />
DCs; Wis 13 for all other Wis-based checks.<br />
Spells Prepared (6/6/5/4/3; base DC = 14 + spell level): 0—cure<br />
minor wounds, detect magic, guidance, light, read magic, resistance;<br />
1st—bless, cause fear (2), command (2), random action*; 2nd—cure<br />
moderate wounds, darkness, endurance, hold person, resist elements,<br />
wind wall*; 3rd—bestow curse, blindness/deafness, gaseous form*,<br />
summon monster III; 4th—air walk, confusion*, dismissal.<br />
*Domain spell. Deity: Elder Elemental Eye. Domains: Air<br />
(turn or destroy earth creatures, rebuke or command air creatures);<br />
Madness (1/day add Insanity score to Wis-based roll).<br />
Possessions: Ochre robes, wand of divine favor (25 charges),<br />
wand of inflict light wounds (20 charges), divine scroll of raise dead<br />
and cure critical wounds, masterwork morningstar, +1 full plate<br />
armor, +1 large steel shield, masterwork light crossbow, 10 bolts,<br />
22 gp, 23 sp, 150 gp gold ring, air temple symbol, lesser key of air.<br />
dFesad: Female bugbear Clr5; CR 7; Medium-size humanoid<br />
(goblinoid); HD 3d8+3 plus 5d8+5; hp 46; Init +1; Spd 30 ft.; AC<br />
18 (touch 11, flat-footed 17); Atk +7 melee (1d8+2, morningstar)<br />
or +6 ranged (1d6+2, javelin); SA Rebuke undead 2/day;<br />
SQ Darkvision 60 ft.; AL CE; SV Fort +7, Ref +6, Will +7; Str 15,<br />
Dex 12, Con 13, Int 10, Wis 13, Cha 9.<br />
Skills and Feats: Climb +3, Concentration +7, Heal +2, Hide<br />
+4, Knowledge (religion) +3, Listen +4, Move Silently +7, Spot<br />
+4; Alertness, Combat Casting.<br />
Spells Prepared (5/5/3/2; base DC = 11 + spell level): 0—detect<br />
magic (2), guidance, resistance, virtue; 1st—command, doom, protection<br />
from good*, sanctuary, shield of faith; 2nd—endurance, shatter*,<br />
sound burst; 3rd—contagion, magic circle against good*.<br />
*Domain spell. Deity: Hruggek. Domains: Chaos (cast chaos<br />
spells at 6th level); Evil (cast evil spells at 6th level).<br />
Possessions: +1 small wooden shield, cloak of resistance +1, pearl of<br />
power (1st-level spells), morningstar with blue star sapphire in<br />
hilt (900 gp), javelin, potion of cure moderate wounds, leather armor.<br />
dFirre Oranac: Male gnome Ftr3/Clr4; CR 7; Small<br />
humanoid (gnome); HD 3d10+3 plus 4d8+4; hp 58; Init +7; Spd<br />
20 ft.; AC 22 (touch 13, flat-footed 20); Atk +10/+5 melee<br />
(1d6+2/19–20, +1 short sword) or +10/+5 ranged (1d6+1/×3,<br />
mighty composite shortbow [+1 Str bonus]); SA Rebuke<br />
undead 2/day; SQ Cantrips, insanity, low-light vision, speak<br />
with burrowing animals, +2 bonus on saves against illusions, +1<br />
bonus on attacks against kobolds and goblinoids, +4 dodge<br />
bonus against giants; AL CE; SV Fort +10, Ref +5, Will +6; Str<br />
12, Dex 16, Con 17, Int 11, Wis 15, Cha 9.<br />
Skills and Feats: Climb +2, Concentration +7, Hide +2,<br />
Knowledge (religion) +4, Listen +6; Dodge, Improved Initiative,<br />
Mobility, Point Blank Shot, Weapon Focus (short sword).<br />
Cantrips: 1/day—dancing lights, ghost sound, prestidigitation<br />
(all as Sor1). DC 10.<br />
Insanity (Ex): Insanity score 2. Wis 17 for bonus spells and<br />
DCs; Wis 13 for all other Wis-based checks.<br />
Spells Prepared (5/5/4; base DC = 13 + spell level; 25% arcane<br />
spell failure chance): 0—cure minor wounds, detect magic, guidance,<br />
read magic, resistance; 1st—burning hands*, command, cure<br />
light wounds (2), divine favor; 2nd—bull’s strength, hold person, produce<br />
flame*, spiritual weapon.<br />
*Domain spell. Deity: Elder Elemental Eye. Domains: Evil<br />
(cast evil spells at 5th level); Fire (turn or destroy water creatures,<br />
rebuke or command fire creatures).<br />
Possessions: +1 short sword, +1 chainmail, +1 large steel shield, bracers<br />
of health +2, mighty composite shortbow (+1 Str bonus), 20<br />
arrows, 8 gp, fire temple symbol, lesser key of fire, pair of keys (for<br />
chest in area 118 of the Crater Ridge Mines), 3 doses of deathblade<br />
poison (Fort save DC 20; 1d6 Con/2d6 Con).<br />
171
APPENDIX 3: NPC STATISTICS<br />
172<br />
dGouquog: Female sea hag Ftr4; CR 8; Large monstrous<br />
humanoid (aquatic); HD 3d8+3 plus 4d10+4; hp 34; Init +1; Spd<br />
30 ft., swim 40 ft.; AC 13 (touch 10, flat-footed 12); Atk +14/+14<br />
melee (1d4+8, 2 claws); Reach 10 ft.; SA Evil eye, horrific<br />
appearance; SQ Water breathing; SR 15; AL CE; SV Fort +6, Ref<br />
+5, Will +5; Str 22, Dex 12, Con 12, Int 10, Wis 13, Cha 10.<br />
Skills and Feats: Climb +7, Hide +6, Jump +7, Knowledge<br />
(Outer Fane) +4, Listen +9, Spot +9; Alertness, Cleave, Power<br />
Attack, Weapon Focus (claws); Weapon Specialization (claws).<br />
Evil Eye (Su): 3/day direct gaze at target within 30 ft. The<br />
target must succeed at a Fort save (DC 11). Creatures that fail<br />
have a 25% chance of dying instantly from fright; even if they<br />
survive, they fall into a whimpering catatonia for three days.<br />
Horrific Appearance (Su): Upon seeing the hag, victims<br />
must succeed at a Fort save (DC 11) or take 2d8 points of temporary<br />
Str damage. Creatures who save cannot be affected by<br />
the same hag’s horrific appearance for one day.<br />
Possessions: potion of blur, bracers of ogre power (as gauntlets), 4<br />
pearls (1,000 gp).<br />
dGraud: Male half-orc Bbn4; CR 4; Medium-size humanoid<br />
(half-orc); HD 4d12+4; hp 42; Init +2; Spd 40 ft.; AC 16 (touch<br />
12, flat-footed 16); Atk +9 melee (1d12+5/×3, +1 greataxe) or +7<br />
ranged (1d8+3/×3, mighty composite longbow [+3 Str bonus]);<br />
SA Rage; SQ Darkvision 60 ft., uncanny dodge (Dex bonus to<br />
AC when flat-footed); AL CE; SV Fort +5, Ref +3, Will +1; Str 17,<br />
Dex 14, Con 13, Int 10, Wis 10, Cha 6.<br />
Skills and Feats: Intimidate +5, Intuit Direction +7, Listen +7,<br />
Swim +6, Wilderness Lore +4; Dodge, Weapon Focus (greataxe).<br />
Rage (Ex): 1/day—hp 50; AC 14 (touch 10, flat-footed 14);<br />
Atk +11 melee (1d12+7/×3, +1 greataxe) or +7 ranged (1d8+3/×3,<br />
mighty composite longbow [+3 Str bonus]); SV Fort +7, Will +3;<br />
Str 21, Con 17. Swim +8. Lasts 6 rounds, then fatigued.<br />
Possessions: Masterwork chain shirt, +1 greataxe, mighty composite<br />
longbow (+3 Str bonus), 20 masterwork arrows, potion of<br />
cure moderate wounds.<br />
dGreshta: Female troglodyte Rog3; CR 4; Medium-size<br />
humanoid (reptilian); HD 2d8 plus 3d6; hp 19; Init +2; Spd 30<br />
ft.; AC 23 (touch 12, flat-footed 23); Atk +4 melee (1d8/×3, longspear)<br />
and +1 melee (1d4, bite), or +6 ranged (1d6, javelin); SA<br />
Sneak attack +2d6, stench; SQ Darkvision 90 ft., evasion, locate<br />
traps, uncanny dodge (Dex bonus to AC when flat-footed); AL<br />
CE; SV Fort +4, Ref +5, Will +1; Str 10, Dex 14, Con10, Int 8,<br />
Wis 10, Cha 10.<br />
Skills and Feats: Hide +6*, Listen +8, Move Silently +4, Search<br />
+2, Spot +2; Multiattack, Weapon Focus (javelin), Weapon<br />
Focus (longspear). *+4 bonus on Hide checks in rocky or subterranean<br />
settings.<br />
Stench (Ex): All creatures (except troglodytes) within 30 ft.<br />
of an angry or frightened troglodyte must succeed at a Fort save<br />
(DC 13) or be nauseated for 10 rounds, taking 1d6 points of<br />
temporary Str damage.<br />
Possessions: 3 potions of invisibility, boots of elvenkind, chitin<br />
breastplate, longspear, 5 javelins, pouch with 100 gp.<br />
dHeunar: Male half-orc Wiz4; CR 4; Medium-size humanoid<br />
(half-orc); HD 4d4+4; hp 13; Init +0; Spd 30 ft.; AC 10 (touch 10,<br />
flat-footed 10); Atk +4 melee (1d6+2, quarterstaff ); SQ<br />
Darkvision 60 ft.; AL LE; SV Fort +4, Ref +3, Will +4; Str 14, Dex<br />
10, Con 12, Int 13, Wis 10, Cha 8.<br />
Skills and Feats: Concentration +8, Knowledge (arcana) +8,<br />
Spellcraft +8; Great Fortitude, Lightning Reflexes, Scribe Scroll.<br />
Spells Prepared (4/4/2; base DC = 11 + spell level): 0—detect<br />
magic, mage hand, read magic, resistance; 1st—charm person, magic<br />
missile, shield, sleep; 2nd—invisibility, summon monster II.<br />
Spellbook: 0—arcane mark, dancing lights, daze, detect magic,<br />
detect poison, disrupt undead, flare, ghost sound, light, mage hand,<br />
mending, open/close, prestidigitation, ray of frost, read magic, resistance;<br />
1st—charm person, magic missile, shield, sleep; 2nd—detect<br />
thoughts, invisibility, summon monster II, web.<br />
Possessions: Wand of shatter (10 charges), potion of levitate,<br />
arcane scroll of shield, quarterstaff, 8 gp.<br />
dJurrikath Musseloto: Male human Brd5; CR5; Medium-size<br />
humanoid (human); HD 5d6+5; hp 32; Init +2; Spd 30 ft.; AC 12<br />
(touch 12, flat-footed 10); Atk +3 melee (1d3 subdual) or +5<br />
ranged; SQ Bardic knowledge +7, bardic music (countersong, fascinate,<br />
inspire courage, inspire competence); AL NG; SV Fort +2,<br />
Ref +6, Will +6; Str 11, Dex 14, Con 12, Int 14, Wis 14, Cha 15.<br />
Skills and Feats: Bluff +10, Decipher Script +10, Diplomacy<br />
+14, Hide +10, Intimidate +2, Move Silently +10, Perform<br />
(melody) +10, Sense Motive +10; Ambidexterity, Two-Weapon<br />
Fighting, Weapon Finesse (short sword).<br />
Spells Known (3/4/2; base DC = 12 + spell level): 0—detect<br />
magic, ghost sound, light, mending, prestidigitation, read magic;<br />
1st—charm person, grease, mage armor, sleep; 2nd—cure moderate<br />
wounds, minor image, suggestion.<br />
Possessions: None. (Jurrikath’s personal belongings have been<br />
scattered among his former captors; Firre has none of them.)<br />
dKadiss: Male elf Wiz6; CR 6; Medium-size humanoid (elf );<br />
HD 6d4; hp 17; Init +2; Spd 30 ft.; AC 12 (touch 12, flat-footed<br />
10); Atk +4 melee (1d8/19–20, masterwork longsword) or +6<br />
ranged (1d8+1/×3, longbow); SQ Immune to sleep, low-light<br />
vision, +2 bonus on saves against enchantment effects; AL NE;<br />
SV Fort +2, Ref +4, Will +7; Str 11, Dex 14, Con 11, Int 16, Wis<br />
14, Cha 13.<br />
Skills and Feats: Concentration +9, Knowledge (arcana) +12,<br />
Listen +6, Search +7, Spellcraft +12, Spot +6; Point Blank Shot,<br />
Precise Shot, Scribe Scroll, Spell Focus (Enchantment), Spell<br />
Mastery (suggestion, fly, lightning bolt).<br />
Kadiss has mage armor, shield, blur, and endurance in effect<br />
upon himself when encountered. With mage armor, shield, blur,<br />
and endurance: hp 29; AC 16 (or 23 if shield is usable); SQ 20%<br />
miss chance; SV Fort +6, Ref +7 against area attacks; Con 15.<br />
Concentration +11.<br />
Spells Prepared (4/4/4/3; base DC = 13 + spell level): 0—detect<br />
magic, prestidigitation, read magic, resistance; 1st—mage armor*,<br />
shield*, sleep, magic missile; 2nd—blur*, endurance*, see invisibility,<br />
summon monster II; 3rd—fly, lightning bolt, tongues.<br />
Spellbook: 0—arcane mark, dancing lights, daze, detect magic,<br />
detect poison, disrupt undead, flare, ghost sound, light, mage hand,<br />
mending, open/close, prestidigitation, ray of frost, read magic, resistance;<br />
1st—mage armor, magic missile, shield, sleep, summon monster<br />
I; 2nd—alter self, blur, darkness, endurance, mirror image, see invisibility,<br />
shatter, summon monster II; 3rd—fireball, fly, lightning bolt,<br />
summon monster III, tongues.<br />
Possessions: +1 longbow, 20 arrows, wand of summon monster IV<br />
(6 charges), arcane scroll of summon swarm, arcane scroll of<br />
detect thoughts, masterwork longsword.<br />
dKelashein: Female human Clr7; CR 7, Medium-size<br />
humanoid (human); HD 7d8+14; hp 45; Init +0; Spd 20 ft.; AC<br />
20 (touch 10, flat-footed 20); Atk +10 melee (1d8+3, masterwork<br />
heavy mace) or +6 ranged (1d8/19–20, light crossbow); SA<br />
Rebuke undead 4/day; SQ Insanity; AL CE; SV Fort +6, Ref +4,<br />
Will +9; Str 16, Dex 10, Con 12, Int 15, Wis 17, Cha 13.<br />
Skills and Feats: Bluff +3, Concentration +11, Heal +13, Hide<br />
+2, Knowledge (religion) +10, Listen +5, Spellcraft +12; Iron<br />
Will, Lightning Reflexes, Weapon Focus (heavy mace), Weapon<br />
Focus (light crossbow).
APPENDIX 3: NPC STATISTICS<br />
Insanity (Ex): Insanity score 2. Wis 19 for bonus spells and<br />
DCs; Wis 15 for all other Wis-based checks.<br />
Spells Prepared (6/6/5/4/3; base DC = 15 + spell level): 0—cure<br />
minor wounds (2), guidance (2), read magic, resistance; 1st—command,<br />
cure light wounds, divine favor, endure elements, obscuring<br />
mist, protection from good*; 2nd—cure moderate wounds, death knell,<br />
fog cloud*, silence, spiritual weapon; 3rd—bestow curse,<br />
blindness/deafness, prayer, water breathing*; 4th—freedom of movement,<br />
summon monster IV, unholy blight*.<br />
*Domain spell. Deity: Elder Elemental Eye. Domains: Evil<br />
(cast evil spells at 8th level); Water (turn or destroy fire creatures,<br />
rebuke or command water creatures).<br />
Possessions: Ochre robes, wand of inflict moderate wounds (20<br />
charges), lens of detection, divine scroll of neutralize poison,<br />
masterwork heavy mace, masterwork full plate armor, masterwork<br />
large steel shield, light crossbow, 10 bolts, 35 gp, 200 gp<br />
coral wreath, water temple symbol, lesser key of water.<br />
dKellial: Male human Ftr7; CR 7; Medium-size humanoid<br />
(human); HD 7d10+14; hp 57; Init +1; Spd 20 ft.; AC 21<br />
(touch 10, flat-footed 21); Atk +12/+7 melee (1d8+6/19–20,<br />
+1 longsword) or +9/+4 ranged (1d8+3/×3, masterwork<br />
mighty composite longbow [+3 Str bonus]); AL CE; SV Fort<br />
+8, Ref +4, Will +3; Str 16, Dex 13, Con 14, Int 13, Wis 10,<br />
Cha 11.<br />
Skills and Feats: Climb +6, Jump +6, Listen +4, Ride (horse) +5,<br />
Spot +4; Combat Reflexes, Dodge, Expertise, Mobility, Spring<br />
Attack, Weapon Focus (longsword), Weapon Specialization<br />
(longsword), Whirlwind Attack.<br />
Possessions: +1 half-plate (black), +1 large steel shield, +1 longsword,<br />
masterwork mighty composite longbow (+3 Str bonus),<br />
20 arrows, cloak of resistance +1 (black), potion of cat’s grace, potion<br />
of cure moderate wounds, key to door to area 82a in the Crater<br />
Ridge Mines.<br />
dKrall: Male troll Ftr2; CR 6; Large giant; HD 6d8+36 plus<br />
2d10+6; hp 86; Init +2; Spd 30 ft.; AC 23 (touch 9, flat-footed 23);<br />
Atk +7 melee and +2 melee (2d6+6/2d6+3/19–20, Huge twobladed<br />
sword), or +11 melee (1d6+6, 2 claws) and +6 melee<br />
(1d6+3, bite); Reach 10 ft.; SA Rend 2d6+9; SQ Darkvision 90 ft.,<br />
regeneration 5, scent; AL CE; SV Fort +14, Ref +4, Will +3; Str<br />
23, Dex 14, Con 23, Int 6, Wis 9, Cha 6.<br />
Skills and Feats: Hide –8, Jump +2, Listen +5, Spot +5;<br />
Alertness, Ambidexterity, Exotic Weapon Proficiency (twobladed<br />
sword), Iron Will.<br />
Rend (Ex): If a troll hits with both claw attacks, it latches<br />
onto the opponent’s body and tears flesh, automatically dealing<br />
an additional 2d6+9 points of damage.<br />
Regeneration (Ex): Fire and acid deal normal damage to a<br />
troll. If a troll loses a limb or body part, the lost portion regrows<br />
in 3d6 minutes. The creature can reattach the severed member<br />
instantly by holding it to the stump.<br />
Possessions: Large masterwork half-plate armor, Huge twobladed<br />
sword, potion of bull’s strength, potion of heroism, potion of<br />
protection from elements (fire), 2 pearl earrings (100 gp each).<br />
dMereclar: Male half-elf Rgr5; CR 5; Medium-size humanoid<br />
(half-elf ); HD 5d10+5; hp 36; Init +3; Spd 30 ft.; AC 17 (touch<br />
13, flat-footed 14); Atk +7 melee (1d8+2/19–20, masterwork<br />
longsword) and +6 melee (1d6+1/19–20, masterwork short<br />
sword), or +10 ranged (1d8+2/×3, masterwork mighty composite<br />
longbow [+2 Str bonus]); SA Favored enemy (dwarves +2,<br />
animals +1); SQ Fight with two weapons, immune to sleep, lowlight<br />
vision, +2 bonus on saves against enchantment effects; AL<br />
CE; SV Fort +6, Ref +5, Will +3; Str 14, Dex 16, Con 13, Int 10,<br />
Wis 12, Cha 8.<br />
Skills and Feats: Heal +5, Hide +5, Listen +10, Move Silently<br />
+5, Search +1, Spot +15, Wilderness Lore +9; Quick Draw, Track,<br />
Weapon Finesse (longsword).<br />
Fight with Two Weapons: Ambidexterity and Two-Weapon<br />
Fighting when wearing light or no armor.<br />
Spells Prepared (1; base DC = 11 + spell level): 1st—resist elements.<br />
Possessions: Masterwork longsword, masterwork short sword,<br />
masterwork mighty composite longbow (+2 Str bonus), 20<br />
masterwork arrows, +1 studded leather armor, cloak of resistance +1,<br />
eyes of the eagle, potion of cure light wounds.<br />
dMiikolak: Female troglodyte Clr5; CR 6; Medium-size<br />
humanoid (reptilian); HD 2d8+4 plus 5d8+10; hp 46; Init +0; Spd<br />
20 ft.; AC 24 (touch 10, flat-footed 24); Atk +6 melee (1d6, quarterstaff<br />
) and +2 melee (1d4, bite), or +5 ranged (1d6, javelin); SA<br />
Rebuke undead 3/day, stench; SQ Darkvision 90 ft., insanity; AL<br />
NE; SV Fort +10, Ref +2, Will +5; Str 10, Dex 11, Con 14, Int 10,<br />
Wis 13, Cha 10.<br />
Skills and Feats: Climb +4, Concentration +7, Hide +2*,<br />
Knowledge (religion) +5, Listen +3; Multiattack, Scribe Scroll,<br />
Weapon Focus (quarterstaff ), Weapon Focus (javelin). *+4<br />
bonus on Hide checks in rocky or subterranean settings.<br />
Stench (Ex): All creatures (except troglodytes) within 30 ft.<br />
of an angry or frightened troglodyte must succeed at a Fort save<br />
(DC 13) or be nauseated for 10 rounds, taking 1d6 points of<br />
temporary Str damage.<br />
Insanity (Ex): Insanity score 2. Wis 15 for bonus spells and<br />
DCs; Wis 11 for all other Wis-based checks.<br />
Spells Prepared (5/5/4/2; base DC = 12 + spell level): 0—cure<br />
minor wounds, detect magic, guidance(2), resistance; 1st—bane, bless,<br />
divine favor, protection from good*, shield of faith; 2nd—bull’s<br />
strength, endurance, soften earth and stone*, spiritual weapon; 3rd—<br />
dispel magic, stone shape*.<br />
*Domain spell. Deity: Elder Elemental Eye. Domains: Earth<br />
(turn or destroy air creatures, rebuke or command earth creatures);<br />
Evil (cast evil spells at 6th level).<br />
Possessions: Ring of climbing, cloak of resistance +1, potion of cure<br />
serious wounds, divine scroll of cure moderate wounds and summon<br />
monster III, 2 javelins, masterwork quarterstaff, chitin full plate<br />
armor, curved knife, 56 gp, earth temple symbol.<br />
dMoolowik: Male kuo-toa Rog4; CR 6; Medium-size monstrous<br />
humanoid (aquatic); HD 2d8+2 plus 4d6+4; hp 29; Init<br />
+1; Spd 20 ft., swim 50 ft.; AC 20 (touch 11, flat-footed 20); Atk<br />
+7/+1 melee (1d6+2/×3, +1 halfspear; 1d4, bite) or +7 ranged<br />
(1d6+2, +1 halfspear); SA Sneak attack +1d6; SQ Adhesive,<br />
amphibious, electricity resistance 30, evasion, immune to webs,<br />
poison, paralysis, hold, and figments, insanity, keen sight, light<br />
blindness, locate traps, slippery, uncanny dodge (Dex bonus to<br />
AC when flat-footed); AL NE; SV Fort +4, Ref +8, Will +4; Str<br />
13, Dex 13, Con 13, Int 13, Wis 10, Cha 8.<br />
Skills and Feats: Climb +5, Disable Device +3, Escape Artist<br />
+24, Hide +8, Knowledge (local) +3, Knowledge (religion) +6,<br />
Listen +9, Move Silently +11, Search +14, Sense Motive +4, Spot<br />
+13; Alertness, Blind-Fight, Dodge, Great Fortitude.<br />
Adhesive (Ex): On a failed melee attack, attacker must succeed<br />
at a Ref save (DC 14), or weapon sticks to kuo-toa’s shield<br />
and is yanked from wielder’s grasp.<br />
Amphibious (Ex): Although kuo-toas breathe by means of<br />
gills, they can survive indefinitely on land.<br />
Insanity (Ex): Insanity score 1. Wis 16 for bonus spells and<br />
DCs; Wis 14 for all other Wis-based checks.<br />
Keen Sight (Ex): Kuo-toas spot a moving object or creature<br />
even if it is invisible, ethereal, or astral.<br />
Light Blindness (Ex): Blinded for 1 round by abrupt exposure<br />
to bright light (such as sunlight or a daylight spell). Suffers<br />
173
APPENDIX 3: NPC STATISTICS<br />
174<br />
a –1 circumstance penalty on all attack rolls, saves, and checks<br />
in bright light.<br />
Slippery (Ex): Not affected by webs or other forms of confinement.<br />
Possessions: +1 halfspear, pouch with 200 gp, +1 leather armor,<br />
large wooden shield with sapphire inlaid (400 gp).<br />
dMurant: Male orc Bbn5; CR 5; Medium-size humanoid (orc);<br />
HD 5d12+15; hp 47; Init +2; Spd 40 ft.; AC 16 (touch 12, flatfooted<br />
16); Atk +4 melee (1d8+4/×3, orc double axe) and +3<br />
melee (1d8+2/×3, orc double axe), or +7 ranged (1d8+4, trident);<br />
SA Poison, rage; SQ Darkvision 60 ft., light sensitivity,<br />
uncanny dodge (Dex bonus to AC when flat-footed, can’t be<br />
flanked); AL CE; SV Fort +7, Ref +3, Will –1; Str 19, Dex 14, Con<br />
17, Int 8, Wis 7, Cha 9.<br />
Skills and Feats: Intimidate +7, Intuit Direction +6, Listen +6;<br />
Ambidexterity, Two-Weapon Fighting.<br />
Poison (Ex): Large scorpion poison on both ends of orc double<br />
axe. Fort save DC 18; 1d6 Str/1d6 Str.<br />
Rage (Ex): 2/day—hp 57; AC 14 (touch 10, flat-footed 14);<br />
Atk +6 melee (1d8+6/×3, orc double axe) and +5 melee<br />
(1d8+3/×3, orc double axe), or +7 ranged (1d8+6, trident); SV<br />
Fort +9, Will +1; Str 23, Con 21. Lasts 8 rounds, then fatigued.<br />
Light Sensitivity: –1 penalty on attack rolls in bright sunlight<br />
or in daylight spell.<br />
Possessions: +1 orc double axe, +1 hide armor, trident, potion of<br />
blur, Large scorpion venom (1 dose on each axe head).<br />
dNilbool: Male kuo-toa Clr2/Wiz5; CR 9; Medium-size monstrous<br />
humanoid (aquatic); HD 2d8+2 plus 2d8+2 plus 5d4+5;<br />
hp 43; Init +0; Spd 20 ft., swim 50 ft.; AC 17 (touch 10, flat-footed<br />
17); Atk +6 melee (1d8+1, heavy mace) and +1 melee (1d4,<br />
bite); SA Rebuke undead 2/day; SQ Amphibious, electricity<br />
resistance 30, immune to webs, poison, paralysis, hold, and figments,<br />
insanity, keen sight, light blindness, slippery; AL NE;<br />
SV Fort +7, Ref +6, Will +14; Str 13, Dex 10, Con 13, Int 16, Wis<br />
15, Cha 8.<br />
Skills and Feats: Concentration +8, Craft (metalworking) +8,<br />
Escape Artist +20, Heal +3, Knowledge (arcana) +10,<br />
Knowledge (religion) +10, Listen +9, Move Silently +5, Scry +8,<br />
Search +8, Spellcraft +10, Spot +9; Alertness, Craft Wand,<br />
Dodge, Great Fortitude, Iron Will, Lightning Reflexes, Scribe<br />
Scroll, Spell Focus (Evocation).<br />
Amphibious (Ex): Although kuo-toas breathe by means of<br />
gills, they can survive indefinitely on land.<br />
Insanity (Ex): Insanity score 1. Wis 16 for bonus spells and<br />
DCs; Wis 14 for all other Wis-based checks.<br />
Keen Sight (Ex): Kuo-toas spot a moving object or creature<br />
even if it is invisible, ethereal, or astral.<br />
Light Blindness (Ex): Blinded for 1 round by abrupt exposure<br />
to bright light (such as sunlight or a daylight spell). Suffers<br />
a –1 circumstance penalty on all attack rolls, saves, and checks<br />
in bright light.<br />
Slippery (Ex): Not affected by webs or other forms of confinement.<br />
Wizard Spells Prepared (4/4/3/2; base DC = 13 + spell level):<br />
0—detect magic, mage hand, read magic, resistance; 1st—magic missile<br />
(2), shield, true strike; 2nd—invisibility, mirror image, web;<br />
3rd—displacement, lightning bolt.<br />
Spellbook: 0—arcane mark, dancing lights, daze, detect magic,<br />
detect poison, disrupt undead, flare, ghost sound, light, mage hand,<br />
mending, open/close, prestidigitation, ray of frost, read magic, resistance;<br />
1st—endure elements, mage armor, magic missile, shield, sleep,<br />
summon monster I, true strike; 2nd—blur, cat’s grace, darkness,<br />
endurance, invisibility, mirror image, web; 3rd—blink, displacement,<br />
lightning bolt.<br />
Cleric Spells Prepared (4/4; base DC = 13 + spell level): 0—detect<br />
magic, light, read magic, resistance; 1st—command, obscuring mist*,<br />
protection from good, summon monster I.<br />
*Domain spell. Deity: Elder Elemental Eye. Domains: Chaos<br />
(cast chaos spells at 3rd level); Water (turn or destroy fire creatures,<br />
rebuke or command water creatures).<br />
Possessions: Wand of slow (8 charges), wand of levitate (25<br />
charges), wand of mage armor (50 charges), potion of haste,<br />
potion of protection from elements (fire), potion of nondetection, ring<br />
of protection +1, curved knife, heavy mace, two 10 gp gold earrings,<br />
50 gp coral ring, 75 gp gold ring, 110 gp coral earring,<br />
water temple symbol.<br />
dOamarthis: Male duergar Ftr7; CR 8; Medium-size<br />
humanoid (dwarf ); HD 7d10+21; hp 62; Init +4; Spd 15 ft. (full<br />
plate); AC 21 (touch 10, flat-footed 21); Atk +12/+7 melee<br />
(1d10+6/×3, +1 dwarven waraxe); SQ Darkvision 120 ft.,<br />
immune to paralysis, phantasms, and magical or alchemical<br />
poisons, light sensitivity, spell-like abilities, stonecunning, +2<br />
bonus on saves against poison, spells, or spell-like effects, +1<br />
bonus on attacks against orcs and goblinoids, +4 dodge bonus<br />
against giants, +2 bonus on Appraise or Craft checks related to<br />
stone or metal; AL LE; SV Fort +9, Ref +2, Will +2; Str 16, Dex<br />
10, Con 18, Int 10, Wis 10, Cha 10.<br />
Skills and Feats: Appraise +2, Climb +6, Craft (metalworking)<br />
+2, Craft (stoneworking) +2, Listen +5, Move Silently –3, Spot +5,<br />
Swim +5; Alertness, Cleave, Exotic Weapon Proficiency (dwarven<br />
waraxe), Great Cleave, Improved Initiative; Power Attack,<br />
Weapon Focus (dwarven waraxe), Weapon Specialization<br />
(dwarven waraxe).<br />
Light Sensitivity (Ex): –2 penalty on attack rolls, saves, and<br />
checks in bright sunlight or in daylight spell.<br />
Spell-Like Abilities (Sp): 1/day—enlarge, invisibility (both<br />
as Wiz14). These abilities can only affect the duergar and whatever<br />
it carries.<br />
Possessions: +1 dwarven waraxe, +1 full plate, bracers of health +2<br />
(included above), assorted gems (300 gp), large steel shield,<br />
metal key to area 206.<br />
dOomkaan: Male half-fiend/half-kuo-toa Clr4; CR 9; Mediumsize<br />
outsider (evil); HD 6d8+12; hp 40; Init +2; Spd 20 ft., fly 20 ft.<br />
(average), swim 50 ft.; AC 23 (touch 12, flat-footed 21); Atk +9<br />
melee (1d6+3, bite) and +3 melee (1d4+1, 2 claws); SA Rebuke<br />
undead 3/day, spell-like abilities; SQ Acid, cold, and fire resistance<br />
20, adhesive, amphibious, darkvision 60 ft., electricity resistance<br />
30, immune to webs, poison, paralysis, hold, and figments,<br />
insanity, keen sight, light blindness, slippery; AL NE; SV Fort +9,<br />
Ref +6, Will +8; Str 17, Dex 14, Con 15, Int 17, Wis 15, Cha 10.<br />
Skills and Feats: Concentration +6, Escape Artist +20, Heal +5,<br />
Knowledge (arcana) +7, Knowledge (nature) +7, Knowledge<br />
(religion) +7, Listen +7, Move Silently +5, Search +11, Spellcraft<br />
+7, Spot +9; Alertness, Dodge, Great Fortitude, Lightning<br />
Reflexes, Mobility, Weapon Focus (bite).<br />
Spell-Like Abilities (Sp): 3/day—darkness; 1/day—desecrate,<br />
unholy blight (all as Sor6). DC = 10 + spell level.<br />
Adhesive (Ex): On a failed melee attack, attacker must succeed<br />
at a Ref save (DC 14), or weapon sticks to kuo-toa’s shield<br />
and is yanked from wielder’s grasp.<br />
Amphibious (Ex): Although kuo-toas breathe by means of<br />
gills, they can survive indefinitely on land.<br />
Insanity (Ex): Insanity score 2. Wis 17 for bonus spells and<br />
DCs; Wis 13 for all other Wis-based checks.<br />
Keen Sight (Ex): Kuo-toas spot a moving object or creature<br />
even if it is invisible, ethereal, or astral.<br />
Light Blindness (Ex): Blinded for 1 round by abrupt exposure<br />
to bright light (such as sunlight or a daylight spell). Suffers
APPENDIX 3: NPC STATISTICS<br />
a –1 circumstance penalty on all attack rolls, saves, and checks<br />
in bright light.<br />
Slippery (Ex): Not affected by webs or other forms of confinement.<br />
Spells Prepared (5/5/4; base DC = 13 + spell level): 0—cure minor<br />
wounds, detect magic, guidance, resistance (2); 1st—cure light wounds,<br />
divine favor, entropic shield, obscuring mist*, shield of faith; 2nd—bull’s<br />
strength, cure moderate wounds, endurance, Tharizdun’s touch*.<br />
*Domain spell. Deity: Elder Elemental Eye. Domains: Madness<br />
(1/day add Insanity score to Wis-based roll); Water (turn or<br />
destroy fire creatures, rebuke or command water creatures).<br />
Possessions: +2 large steel shield, potion of cat’s grace, divine scroll<br />
of cure moderate wounds (2), 12 pp, water temple symbol, lesser key<br />
of water.<br />
dPoolidib (whip): Male kuo-toa Clr5; CR 7; Medium-size monstrous<br />
humanoid (aquatic); HD 2d8+2 plus 5d8+5; hp 41; Init +0;<br />
Spd 20 ft., swim 50 ft.; AC 18 (touch 10, flat-footed 18); Atk +6<br />
melee (1d8+1, heavy mace) and +1 melee (1d4, bite); SA Rebuke<br />
undead 2/day; SQ Adhesive, amphibious, electricity resistance<br />
30, immune to webs, poison, paralysis, hold, and figments, insanity,<br />
keen sight, light blindness, slippery; AL NE; SV Fort +7, Ref<br />
+4, Will +9; Str 13, Dex 10, Con 13, Int 13, Wis 14, Cha 8.<br />
Skills and Feats: Concentration +6, Escape Artist +18, Heal +6,<br />
Knowledge (religion) +6, Listen +9, Move Silently +3, Search<br />
+10, Spellcraft +2, Spot +13; Alertness, Dodge, Great Fortitude,<br />
Still Spell.<br />
Adhesive (Ex): On a failed melee attack, attacker must succeed<br />
at a Ref save (DC 14), or weapon sticks to kuo-toa’s shield<br />
and is yanked from wielder’s grasp.<br />
Amphibious (Ex): Although kuo-toas breathe by means of<br />
gills, they can survive indefinitely on land.<br />
Insanity (Ex): Insanity score 2. Wis 16 for bonus spells and<br />
DCs; Wis 12 for all other Wis-based checks.<br />
Keen Sight (Ex): Kuo-toas spot a moving object or creature<br />
even if it is invisible, ethereal, or astral.<br />
Light Blindness (Ex): Blinded for 1 round by abrupt exposure<br />
to bright light (such as sunlight or a daylight spell). Suffers<br />
a –1 circumstance penalty on all attack rolls, saves, and checks<br />
in bright light.<br />
Slippery (Ex): Not affected by webs or other forms of confinement.<br />
Spells Prepared (5/5/4/3; base DC = 13 + spell level): 0—cure<br />
minor wounds, detect magic, read magic, resistance (2); 1st—command<br />
(2), cure light wounds, obscuring mist*, protection from good;<br />
2nd—bull’s strength, endurance, hold person, Tharizdun’s touch*;<br />
3rd—cure serious wounds, stilled hold person, rage*.<br />
*Domain spell. Deity: Elder Elemental Eye. Domains: Madness<br />
(1/day add Insanity score to Wis-based roll); Water (turn or<br />
destroy fire creatures, rebuke or command water creatures).<br />
Possessions: Ring of protection +2, potion of stoneskin, large wooden<br />
shield, heavy mace, 12 pp, water temple symbol.<br />
dReokallitan: Male troglodyte Rog3/Clr4; CR 9; Mediumsize<br />
humanoid (reptilian); HD 2d8+2 plus 3d6+3 plus 4d8+4; hp<br />
49; Init +2; Spd 30 ft.; AC 25 (touch 11, flat-footed 25); Atk<br />
+6/+1 melee (1d6+2/19–20, +1 short sword) and +6 melee<br />
(1d6/19–20, masterwork short sword) and +5 melee (1d4, bite),<br />
or +9/+4 ranged (1d6+1, javelin); SA Rebuke undead 4/day,<br />
sneak attack +1d6, stench; SQ Darkvision 90 ft., evasion, insanity,<br />
locate traps, uncanny dodge (Dex bonus to AC when flatfooted);<br />
AL NE; SV Fort +9, Ref +6, Will +7; Str 13, Dex 15, Con<br />
12, Int 11, Wis 15, Cha 12.<br />
Skills and Feats: Balance –1, Bluff +4, Concentration +5, Disable<br />
Device +3, Hide +7*, Knowledge (religion) +4, Listen +7, Move<br />
Silently –1, Search +3, Spot +4; Ambidexterity, Multiattack,<br />
Scribe Scroll, Two-Weapon Fighting, Weapon Focus (javelin). *+4<br />
bonus on Hide checks in rocky or subterranean settings.<br />
Stench (Ex): All creatures (except troglodytes) within 30 ft.<br />
of an angry or frightened troglodyte must succeed at a Fort save<br />
(DC 13) or be nauseated for 10 rounds, taking 1d6 points of<br />
temporary Str damage.<br />
Insanity (Ex): Insanity score 2. Wis 17 for bonus spells and<br />
DCs; Wis 13 for all other Wis-based checks.<br />
Spells Prepared (5/5/4; base DC = 13 + spell level): 0—cure<br />
minor wounds, detect magic, detect poison, guidance, resistance; 1st—<br />
bane, command, cure light wounds (2), random action*; 2nd—bull’s<br />
strength, endurance, summon monster II, Tharizdun’s touch*.<br />
*Domain spell. Deity: Elder Elemental Eye. Domains: Earth<br />
(turn or destroy air creatures, rebuke or command earth creatures);<br />
Madness (1/day add Insanity score to Wis-based roll).<br />
Possessions: +1 short sword, divine scroll of summon monster II,<br />
divine favor, and bless, masterwork short sword, 4 javelins, full<br />
plate armor, curved knife, 21 gp, 120 gp gold bracelet, earth<br />
temple symbol.<br />
dSkassik: Male salamander Ftr1/Blk3; CR 9; Medium-size<br />
outsider (fire); HD 7d8+7 plus 1d10+1 plus 3d10+3; hp 69;<br />
Init +1; Spd 15 ft.; AC 24 (touch 10, flat-footed 24); Atk<br />
+15/+10/+5 melee (2d6+3/19–20, barbed masterwork<br />
greatsword and 1d6 fire) and +13 melee (2d6+1, tail slap and<br />
1d6 fire); SA Command undead 5/day, constrict 2d6+1 and 1d6<br />
fire, poison, smite good (1/day, +2 attack, +3 damage); SQ<br />
Blackguard abilities, damage reduction 10/+1, fire subtype;<br />
AL CE; SV Fort +13, Ref +9, Will +10; Str 14, Dex 13, Con 12,<br />
Int 14, Wis 15, Cha 14.<br />
Skills and Feats: Craft (metalworking) +16, Escape Artist +4,<br />
Hide +5, Knowledge (religion) +3, Listen +12, Move Silently +8,<br />
Search +12, Spot +12; Cleave, Multiattack, Sunder, Weapon<br />
Focus (greatsword).<br />
Constrict (Ex): Skassik deals automatic tail slap damage<br />
(including fire damage) with a successful grapple check against<br />
creatures up to Large size.<br />
Poison (Ex): Giant wasp poison. Fort save DC 18; 1d6<br />
Dex/1d6 Dex.<br />
Blackguard Abilities: Detect good at will, aura of despair<br />
(enemies within 10 ft. suffer –2 morale penalty on all saves).<br />
Fire Subtype (Ex): Fire immunity, double damage from cold<br />
except on a successful save.<br />
Spells Prepared (2/1; base DC = 12 + spell level): 1st—cause fear,<br />
cure light wounds; 2nd—bull’s strength.<br />
Possessions: Bright red half-plate armor, barbed masterwork<br />
greatsword, ring of feather falling, giant wasp poison (2 doses).<br />
dSlaazh: Male troll Ftr2; CR 4; Large giant; HD 6d8+36 plus<br />
2d10+12; hp 86; Init +2; Spd 20 ft.; AC 26 (touch 11, flat-footed<br />
24); Atk +13/+8 melee (2d6+7/19–20, masterwork greatsword),<br />
or +12 melee (1d6+7, 2 claws) and +7 melee (1d6+3, bite); Reach<br />
10 ft.; SA Rend 2d6+10; SQ Darkvision 90 ft., regeneration 5,<br />
scent; AL CE; SV Fort +14, Ref +4, Will +3; Str 24, Dex 14, Con<br />
22, Int 8, Wis 8, Cha 7.<br />
Skills and Feats: Climb +2, Listen +6, Spot +5; Alertness,<br />
Cleave, Iron Will, Power Attack.<br />
Rend (Ex): If a troll hits with both claw attacks, it latches<br />
onto the opponent’s body and tears the flesh for an additional<br />
2d6+10 points of damage.<br />
Regeneration (Ex): Fire and acid deal normal damage to a<br />
troll. If a troll loses a limb or body part, the lost portion regrows<br />
in 3d6 minutes. The creature can reattach the severed member<br />
instantly by holding it to the stump.<br />
Possessions: Masterwork greatsword, +1 chainmail, large wooden<br />
shield, dust of tracelessness.<br />
175
APPENDIX 3: NPC STATISTICS<br />
176<br />
dSnearak: Male troglodyte Clr5; CR 6; Medium-size<br />
humanoid (reptilian); HD 2d8+4 plus 5d8+10; hp 46; Init –1;<br />
Spd 20 ft.; AC 25 (touch 9, flat-footed 25); Atk +5 melee (1d8,<br />
masterwork morningstar) and +2 melee (1d4, bite), or +4<br />
ranged (1d6, javelin); SA Rebuke undead 4/day, stench; SQ<br />
Darkvision 90 ft., insanity; AL NE; SV Fort +6, Ref +5, Will +6;<br />
Str 10, Dex 9, Con 15, Int 11, Wis 15, Cha 12.<br />
Skills and Feats: Concentration +7, Hide +7*, Knowledge<br />
(religion) +5, Listen +4; Multiattack, Scribe Scroll, Lightning<br />
Reflexes, Weapon focus (javelin). *+4 bonus on Hide checks<br />
in rocky or subterranean settings.<br />
Stench (Ex): All creatures (except troglodytes) within 30 ft.<br />
of an angry or frightened troglodyte must succeed at a Fort save<br />
(DC 13) or be nauseated for 10 rounds, taking 1d6 points of<br />
temporary Str damage.<br />
Insanity (Ex): Insanity score 2. Wis 17 for bonus spells and<br />
DCs; Wis 13 for all other Wis-based checks.<br />
Spells Prepared (5/5/4/3; base DC = 13 + spell level): 0—cure<br />
minor wounds, detect magic, detect poison, guidance, resistance; 1st—<br />
bane, bless, command, magic stone*, shield of faith; 2nd—hold person<br />
(2), spiritual weapon, soften earth and stone*; 3rd—cure serious<br />
wounds, dispel magic, stone shape*.<br />
*Domain spell. Deity: Elder Elemental Eye. Domains: Earth<br />
(turn or destroy air creatures, rebuke or command earth creatures);<br />
Evil (cast evil spells at 6th level).<br />
Possessions: Wand of summon monster III (12 charges), potion of<br />
cure light wounds, divine scroll of hold person, remove paralysis, protection<br />
from elements, 2 javelins, masterwork morningstar, full<br />
plate armor, large steel shield, 90 gp gem (agate), earth temple<br />
symbol, lesser key of earth.<br />
dSwordmaster: Male troglodyte Ftr4; CR 5; Medium-size<br />
humanoid (reptilian); HD 2d8+4 plus 4d10+8; hp 60; Init +4;<br />
Spd 30 ft.; AC 23 (touch 10, flat-footed 23); Atk +10 melee<br />
(2d6+6/19–20, sword of earth) and +5 melee (1d4, bite), or +6<br />
ranged (1d6+2, javelin); SA Stench; SQ Darkvision 90 ft.; AL<br />
CE; SV Fort +9, Ref +1, Will +1; Str 14, Dex 10, Con14, Int 8,<br />
Wis 10, Cha 8.<br />
Skills and Feats: Climb –3, Hide +0*, Listen +4; Cleave,<br />
Improved Initiative, Multiattack, Power Attack, Weapon Focus<br />
(greatsword), Weapon Focus (javelin), Weapon Specialization<br />
(greatsword). *+4 bonus on Hide checks in rocky or subterranean<br />
settings.<br />
Stench (Ex): All creatures (except troglodytes) within 30 ft.<br />
of an angry or frightened troglodyte must succeed at a Fort save<br />
(DC 13) or be nauseated for 10 rounds, taking 1d6 points of<br />
temporary Str damage.<br />
Possessions: Sword of earth (see Appendix 1), 4 javelins, halfplate<br />
armor.<br />
dTac: Male human Mnk9; CR 9; Medium-size humanoid<br />
(human); HD 9d8+18; hp 78; Init +3 (+3 Dex); Spd 60 ft.; AC 22<br />
(touch 16, flat-footed 19); Atk +7/+4 melee (1d10+1, unarmed<br />
strike) or +5/+5/+2 melee (1d10+1, flurry of blows); SA<br />
Stunning attack; SQ Monk abilities; AL LE; SV Fort +8, Ref +9,<br />
Will +8; Str 13, Dex 16, Con 14, Int 14, Wis 14, Cha 12.<br />
Skills and Feats: Balance +17, Climb +13, Hide +15, Jump +15,<br />
Listen +12, Move Silently +15, Spot +6, Tumble +17; Alertness,<br />
Deflect Arrows, Dodge, Improved Trip, Mobility, Spring Attack.<br />
Stunning Attack (Ex): 9/day; DC 16.<br />
Monk Abilities: Still mind, slow fall 50 ft., purity of body,<br />
wholeness of body, leap of the clouds, improved evasion.<br />
Possessions: Bracers of armor +2, amulet of natural armor +1, ring<br />
of sustenance, ring of warmth, potion of blur, potion of bull’s strength,<br />
potion of endurance, potion of darkvision.<br />
dTarren: Male human Drd8; CR 8; Medium-size humanoid<br />
(human); HD 8d8; hp 35; Init +2; Spd 30 ft.; AC 16 (touch 12,<br />
flat-footed 14); Atk +6/+1 melee (1d6–1/18–20, scimitar) or<br />
+8/+3 ranged; SQ Druid abilities; AL NE; SV Fort +6, Ref +6,<br />
Will +8; Str 9, Dex 15, Con 10, Int 13, Wis 14, Cha 17.<br />
Skills and Feats: Animal Empathy +14, Handle Animal +14,<br />
Heal +15, Knowledge (nature) +12, Profession (herbalist) +13,<br />
Wilderness Lore +13; Brew Potion, Dodge, Lightning<br />
Reflexes, Track.<br />
Druid Abilities: Nature sense, animal companion (Kiibo, a<br />
dire bear, hp 110, see Monster Manual page 58), woodland stride,<br />
trackless step, resist nature’s lure, wild shape (3/day, Small or<br />
Medium-size).<br />
Spells Prepared (6/5/4/3/2; base DC = 12 + spell level): 0—create<br />
water, detect magic, guidance, know direction, light, resistance;<br />
1st—calm animals, cure light wounds, endure elements, magic fang,<br />
pass without trace; 2nd—barkskin, flame blade, heat metal, speak<br />
with animals; 3rd—cure moderate wounds, greater magic fang, protection<br />
from elements; 4th—dispel magic, flame strike.<br />
Possessions: +2 leather armor, periapt of proof against poison, potion<br />
of cure light wounds, potion of lesser restoration, potion of neutralize<br />
poison, potion of poison, masterwork scimitar.<br />
dTenaris Glimmerdawn: Female elf Ftr3; CR 3 (currently 2<br />
without gear); Medium-size humanoid (elf ); HD 3d10+3; hp<br />
19; Init +7; Spd 30 ft.; AC 13 (touch 13, flat-footed 10); Atk +5<br />
melee (1d3+2 subdual, unarmed) or +6 ranged; SQ Immune to<br />
sleep, low-light vision, +2 bonus on saves against enchantment<br />
effects; AL CG; SV Fort +4, Ref +4, Will +1; Str 14, Dex 17, Con<br />
13, Int 11, Wis 10, Cha 12.<br />
Skills and Feats: Climb +8, Handle Animal +4, Listen +2, Ride<br />
(horse) +6, Search +2, Spot +2; Dodge, Improved Initiative,<br />
Mounted Archery, Mounted Combat.<br />
Possessions: None.<br />
dTerrenygit: Male troglodyte Clr5; CR 6; Medium-size<br />
humanoid (reptilian); HD 7d8+21; hp 55; Init +0; Spd 20 ft.; AC<br />
26 (touch 10, flat-footed 26); Atk +8 melee (1d8+3, +1 morningstar)<br />
and +4 melee (1d4+1, bite), or +5 ranged (1d6+2, javelin);<br />
SA Rebuke undead 4/day, stench; SQ Darkvision 90 ft., insanity;<br />
AL NE; SV Fort +10, Ref +1, Will +6; Str 14, Dex 10, Con 17,<br />
Int 11, Wis 16, Cha 13.<br />
Skills and Feats: Concentration +8, Hide +0*, Knowledge (religion)<br />
+5, Listen +5; Multiattack, Scribe Scroll, Weapon focus<br />
(morningstar), Weapon focus (javelin). *+4 bonus on Hide<br />
checks in rocky or subterranean settings.<br />
Stench (Ex): All creatures (except troglodytes) within 30 ft.<br />
of an angry or frightened troglodyte must succeed at a Fort save<br />
(DC 13) or be nauseated for 10 rounds, taking 1d6 points of<br />
temporary Str damage.<br />
Insanity (Ex): Insanity score 2. Wis 18 for bonus spells and<br />
DCs; Wis 14 for all other Wis-based checks.<br />
Spells Prepared (5/5/4/3; base DC = 14 + spell level): 0—cure<br />
minor wounds, detect magic, detect poison, guidance, resistance; 1st—<br />
bane, command, cure light wounds, random action*, shield of faith;<br />
2nd—bull’s strength, endurance, spiritual weapon, Tharizdun’s<br />
touch*; 3rd—blindness/deafness, dispel magic, rage*.<br />
*Domain spell. Deity: Tharizdun. Domains: Evil (cast evil<br />
spells at 6th level); Madness (1/day add Insanity score to Wisbased<br />
roll).<br />
Possessions: Black robes, +1 morningstar, potion of cat’s grace,<br />
divine scroll of hold person, rage, and prayer, 2 javelins, full plate<br />
armor, large steel shield, curved knife, necklace of bones and<br />
teeth (worthless), 76 gp, holy symbol (obex).
APPENDIX 3: NPC STATISTICS<br />
dTessimon: Female human Clr9; CR 10, Medium-size<br />
humanoid (human); HD 9d8+18; hp 61; Init –1; Spd 20 ft.; AC<br />
19 (touch 9, flat-footed 19); Atk +11/+6 melee (1d8+3, masterwork<br />
heavy mace with demonic right arm) or +9 melee (6, 3<br />
tentacles from lesser tentacle rod) or +5 ranged (1d8/19–20, light<br />
crossbow); SA Demonic right arm, rebuke undead 5/day; SQ<br />
Insanity; AL CE; SV Fort +8, Ref +2, Will +9; Str 12, Dex 9, Con<br />
14, Int 14, Wis 16, Cha 14.<br />
Skills and Feats: Concentration +14, Heal +17, Knowledge<br />
(religion) +14, Profession (herbalist) +15, Spellcraft +14; Brew<br />
Potion, Empower Spell, Scribe Scroll, Toughness, Weapon<br />
Focus (heavy mace).<br />
Demonic Right Arm (Ex): A demonic right arm is muscular<br />
and sinewy, with a large clawed hand. When using the arm,<br />
the character’s Str is treated as 4 points higher. It can make<br />
attacks against the character’s enemies with the character’s best<br />
attack bonus, inflicting 1d6 points of damage plus the character’s<br />
Str bonus. (See the sidebar Drawbacks to Demonic<br />
Additions, page 115, for more information.)<br />
Insanity (Ex): Insanity score 4. Wis 20 for bonus spells and<br />
DCs; Wis 12 for all other Wis-based checks.<br />
Spells Prepared (6/7/6/5/4/3; base DC = 15 + spell level): 0—<br />
cure minor wounds (2), guidance, read magic, resistance (2); 1st—<br />
burning hands*, command (2), divine favor, entropic shield, protection<br />
from good, shield of faith; 2nd—cure moderate wounds, death knell,<br />
endurance, produce flame*, silence, spiritual weapon; 3rd—blindness/deafness,<br />
dispel magic, magic circle against good*, magic vestment,<br />
protection from elements; 4th—cure critical wounds, divine<br />
power, summon monster IV, unholy blight*; 5th—flame strike, fire<br />
shield*, spell resistance.<br />
*Domain spell. Deity: Elder Elemental Eye. Domains: Evil<br />
(cast evil spells at 10th level); Fire (turn or destroy water creatures,<br />
rebuke or command fire creatures).<br />
Possessions: Ochre robes, lesser tentacle rod, potion of heroism,<br />
divine scroll of raise dead, flame strike and cure moderate wounds,<br />
divine scroll of flame strike and cure moderate wounds, masterwork<br />
heavy mace, masterwork full plate armor, large steel shield, light<br />
crossbow, 10 bolts, fire temple symbol, lesser key of fire.<br />
dTippesh: Female human Evo6; CR 6; Medium-size<br />
humanoid (human); HD 6d4+6; hp 21; Init +2; Spd 30 ft.; AC 12<br />
(touch 12, flat-footed 10); Atk +3 melee (1d4/19–20, dagger) or<br />
+5 ranged (1d4/19–20, dagger); AL LE; SV Fort +3, Ref +4, Will<br />
+4; Str 11, Dex 14, Con 12, Int 15, Wis 9, Cha 10.<br />
Skills and Feats: Alchemy +11, Concentration +10, Knowledge<br />
(arcana) +11, Knowledge (religion) +11, Spellcraft +11; Brew<br />
Potion, Dodge, Empower Spell, Scribe Scroll, Spell Focus<br />
(Evocation), Toughness.<br />
Tippesh has mage armor in effect upon herself when encountered.<br />
With mage armor: AC 16 (touch 12, flat-footed 14).<br />
Spells Prepared (5/5/5/3; base DC = 12 + spell level): 0—detect<br />
magic, detect poison, mage hand, read magic, resistance; 1st—magic<br />
missile (2)*, charm person (2), sleep; 2nd—darkness*, flaming<br />
sphere*, obscure object, shatter*, see invisibility; 3rd—fireball*, lightning<br />
bolt (2)*.<br />
Spellbook: 0—arcane mark, dancing lights*, daze, detect magic,<br />
detect poison, disrupt undead, flare*, ghost sound, light*, mage hand,<br />
mending, open/close, prestidigitation, read magic, resistance; 1st—<br />
alarm, charm person, hold portal, magic missile*, sleep, Tenser’s floating<br />
disk; 2nd—darkness*, daylight*, flaming sphere*, obscure object,<br />
see invisibility, shatter*; 3rd—dispel magic, explosive runes, fireball*,<br />
gust of wind*, lightning bolt*.<br />
*These spells belong to the school of Evocation, which is this<br />
character’s specialty. Because of Spell Focus (Evocation), the<br />
base DC for saves against these spells is 14 + spell level.<br />
Prohibited school: Conjuration.<br />
Possessions: Slippers of spider climbing, arcane scroll of blink,<br />
potion of cure light wounds, potion of cat’s grace, potion of endurance,<br />
potion of intelligence, 2 daggers, 15 gp.<br />
dUrlurg: Male kuo-toa Mnk6; CR 6; Medium-size monstrous<br />
humanoid (aquatic); HD 2d8+2 plus 6d8+6; hp 44; Init<br />
+2; Spd 50 ft., swim 50 ft.; AC 25 (touch 16, flat-footed 23); Atk<br />
+7/+4 melee (1d8+1, unarmed strike) or +5/+5/+2 melee<br />
(1d8+1, flurry of blows) or +7/+2 ranged (1d6+1/×3, halfspear);<br />
SA Stunning attack; SQ Amphibious, electricity resistance<br />
30, immune to webs, poison, paralysis, hold, and figments,<br />
keen sight, light blindness, monk abilities, slippery;<br />
AL LE; SV Fort +8, Ref +10, Will +11; Str 13, Dex 14, Con 13,<br />
Int 10, Wis 16, Cha 10.<br />
Skills and Feats: Balance +6, Climb +3, Escape Artist +20,<br />
Knowledge (religion) +1, Jump +5, Listen +12, Move Silently<br />
+11, Search +9, Spot +4; Alertness, Deflect Arrows, Dodge,<br />
Great Fortitude, Improved Trip.<br />
Stunning Attack (Ex): 6/day; DC 16.<br />
Amphibious (Ex): Although kuo-toas breathe by means of<br />
gills, they can survive indefinitely on land.<br />
Keen Sight (Ex): Kuo-toas spot a moving object or creature<br />
even if it is invisible, ethereal, or astral.<br />
Light Blindness (Ex): Blinded for 1 round by abrupt exposure<br />
to bright light (such as sunlight or a daylight spell). Suffers<br />
a –1 circumstance penalty on all attack rolls, saves, and checks<br />
in bright light.<br />
Monk Abilities: Evasion, still mind, slow fall 30 ft., purity<br />
of body.<br />
Slippery (Ex): Not affected by webs or other forms of confinement.<br />
Possessions: Bracers of armor +2, brooch of shielding, diamond (800<br />
gp), 3 halfspears.<br />
dUrolax: Female bugbear Ftr4; CR 7; Medium-size humanoid<br />
(goblinoid); HD 3d8+3 plus 4d10+4; hp 50; Init +1; Spd 30 ft.;<br />
AC 18 (touch 11, flat-footed 17); Atk +13/+8 melee<br />
(1d10+8/19–20, +2 bastard sword) or +7/+2 ranged (1d6+4,<br />
javelin); SQ Darkvision 60 ft.; AL CE; SV Fort +6, Ref +5, Will<br />
+2; Str 18, Dex 12, Con 13, Int 10, Wis 10, Cha 12.<br />
Skills and Feats: Jump +3, Listen +3, Move Silently +4, Spot +4;<br />
Alertness, Cleave, Exotic Weapon Proficiency (bastard sword),<br />
Power Attack, Weapon Focus (bastard sword), Weapon<br />
Specialization (bastard sword).<br />
Possessions: +2 bastard sword, banded mail, small wooden<br />
shield, 4 javelins.<br />
dUskathoth: Male troglodyte Clr6; CR 6; Medium-size<br />
humanoid (reptilian); HD 2d8+4 plus 6d8+12; hp 53; Init +1;<br />
Spd 20 ft.; AC 27 (touch 11, flat-footed 26); Atk +8 melee<br />
(1d8+2, masterwork morningstar) and +5 melee (1d4+1, bite),<br />
or +7 ranged (1d6+2, javelin); SA Rebuke undead 4/day, stench;<br />
SQ Darkvision 90 ft., insanity; AL NE; SV Fort +10, Ref +3, Will<br />
+6; Str 14, Dex 13, Con 14, Int 12, Wis 17, Cha 13.<br />
Skills and Feats: Concentration +8, Hide +1*, Knowledge (religion)<br />
+7, Listen +6, Spellcraft +7; Dodge, Multiattack, Scribe<br />
Scroll, Weapon focus (javelin). *+4 bonus on Hide checks in<br />
rocky or subterranean settings.<br />
Stench (Ex): All creatures (except troglodytes) within 30 ft.<br />
of an angry or frightened troglodyte must succeed at a Fort save<br />
(DC 13) or be nauseated for 10 rounds, taking 1d6 points of<br />
temporary Str damage.<br />
Insanity (Ex): Insanity score 3. Wis 20 for bonus spells and<br />
DCs; Wis 14 for all other Wis-based checks.<br />
Spells Prepared (5/6/5/4; base DC = 15 + spell level): 0—cure<br />
minor wounds (2), detect magic, guidance, resistance; 1st—cure light<br />
177
APPENDIX 3: NPC STATISTICS<br />
178<br />
wounds, divine favor (2), magic weapon, random action*, shield of faith;<br />
2nd—aid, bull’s strength, endurance, resist elements, Tharizdun’s<br />
touch*; 3rd—bestow curse, magic vestment, rage (2)*.<br />
*Domain spell. Deity: Elder Elemental Eye. Domains: Earth<br />
(turn or destroy air creatures, rebuke or command earth creatures);<br />
Madness (1/day add Insanity score to Wis-based roll).<br />
Possessions: Gloves of Dexterity +2, potion of cure moderate wounds,<br />
divine scroll of dispel magic, masterwork morningstar, 3 javelins,<br />
full plate armor, large steel shield, curved knife, three 75 gp<br />
gems (rose quartz), iron key (opens chest in area 223 in Crater<br />
Ridge Mines), lesser key of earth.<br />
dVirith: Female elf War4; CR 3; Medium-size humanoid<br />
(elf ); HD 4d8; hp 20; Init +3; Spd 30 ft.; AC 17 (touch 13, flatfooted<br />
14); Atk +8 melee (1d8+4/19–20, masterwork longsword)<br />
or +7 ranged (1d8+3/×3, masterwork mighty composite<br />
longbow [+3 Str bonus]); SQ Immune to sleep, low-light<br />
vision, +2 bonus on saves against enchantment effects; AL<br />
CE; SV Fort +4, Ref +4, Will +1; Str 16, Dex 16, Con 11, Int 9,<br />
Wis 10, Cha 12.<br />
Skills and Feats: Intimidate +5, Jump +5, Listen +2, Ride<br />
(horse) +4, Search +1, Spot +2; Point Blank Shot, Precise Shot.<br />
Possessions: Masterwork mighty composite longbow (+3 Str<br />
bonus), 20 masterwork arrows, mithral shirt, masterwork longsword,<br />
potion of blur, potion of endurance, Quaal’s feather token (bird).<br />
dVranthis: Male juvenile green dragon; CR 7; Large dragon<br />
(air); HD 14d12+42; hp 133; Init +4; Spd 40 ft., fly 150 ft. (poor),<br />
swim 40 ft.; AC 22 (touch 9, flat-footed 22); Atk +17 melee<br />
(2d6+4, bite) and +12 melee (1d8+2, 2 claws) and +12 melee<br />
(1d6+2, 2 wings) and +12 melee (1d8+6, tail slap); Face/Reach 5<br />
ft. by 10 ft./10 ft.; SA Breath weapon; SQ Blindsight 120 ft.,<br />
immune to sleep, paralysis, and acid, keen senses, low-light<br />
vision, water breathing; AL LE; SV Fort +12, Ref +9, Will +11;<br />
Str 19, Dex 10, Con 17, Int 14, Wis 15, Cha 14.<br />
Skills and Feats: Bluff +16, Concentration +17, Diplomacy +18,<br />
Escape Artist +14, Hide –4, Intimidate +4, Knowledge (religion)<br />
+16, Listen +16, Search +16, Spellcraft +16, Spot +16;<br />
Flyby Attack, Improved Initiative, Power Attack, Sunder.<br />
Breath Weapon (Su): 40-ft. cone of acid gas, 8d6 points of<br />
acid damage, Ref save DC 20 half.<br />
Water Breathing (Ex): Vranthis can breathe underwater<br />
indefinitely and can use his breath weapon and other abilities<br />
while submerged.<br />
Keen Senses (Ex): Includes darkvision 400 ft..<br />
Spells Known (5/5; base DC = 12 + spell level): 0—arcane mark,<br />
detect magic, mage hand, read magic; 1st—mage armor, spider climb.<br />
dWormspike: Male ogre War2; CR 4; Large giant; HD 4d8+8<br />
plus 2d8+4; hp 39; Init –1; Spd 30 ft.; AC 16 (touch 8, flat-footed<br />
16); Atk +11 melee (2d6+8, +1 Huge greatclub) or +3 ranged<br />
(2d6+5/×3, Huge shortspear); Reach 10 ft.; AL CE; SV Fort +9,<br />
Ref +0, Will +1; Str 21, Dex 8, Con 15, Int 6, Wis 10, Cha 7.<br />
Skills and Feats: Climb +6, Listen +2, Spot +2; Power Attack,<br />
Weapon Focus (greatclub).<br />
Possessions: +1 Huge greatclub, Huge hide armor, 4 Huge shortspears,<br />
gold necklace (500 gp).<br />
dZert: Male human Ftr8; CR 8; Medium-size humanoid<br />
(human); HD 8d10+8; hp 52; Init +6; Spd 20 ft.; AC 17 (touch<br />
10, flat-footed 17); Atk +11/+6 melee (1d6+6/19–20 and 1d6<br />
fire, +1 flaming short sword) and +12/+7 melee (1d6+5/19–20,<br />
sword of fire); AL CE; SV Fort +7, Ref +4, Will +1; Str 17, Dex 15,<br />
Con 12, Int 13, Wis 9, Cha 10.<br />
Skills and Feats: Climb +7, Handle Animal +7, Jump +7, Ride<br />
(horse) +5, Swim +7; Ambidexterity, Cleave, Dodge, Improved<br />
Initiative, Improved Two-Weapon Fighting, Power Attack, Two-<br />
Weapon Fighting, Weapon Focus (short sword), Weapon<br />
Specialization (short sword).<br />
Possessions: Sword of fire, +1 flaming short sword, potion of<br />
endurance, half-plate armor, lesser key of fire, iron key (opens<br />
chest in area 116 of the Crater Ridge Mines).<br />
THE INNER AND<br />
OUTER FANES<br />
dHalf-Black (or Half-Blue) Dragon Tyrannosaurus: CR 10;<br />
Huge dragon (water or earth); HD 18d12+90; hp 194 (black) or<br />
199 (blue); Init +5; Spd 40 ft.; AC 22 (touch 9, flat-footed 21);<br />
Atk +24 melee (5d8+13, bite) and +19 melee (2d8+6, 2 claws);<br />
Face/Reach 10 ft. by 10 ft./15 ft.; SA Breath weapon, improved<br />
grab, swallow whole; SQ Darkvision 60 ft., immune to acid<br />
(black) or electricity (blue), immune to sleep and paralysis, lowlight<br />
vision, scent; AL CE; SV Fort +16, Ref +12, Will +8; Str 36,<br />
Dex 12, Con 21, Int 4, Wis 15, Cha 12.<br />
Skills and Feats: Hide –7, Listen +22, Move Silently +10, Spot<br />
+22; Alertness, Cleave, Improved Initiative, Power Attack.<br />
Breath Weapon (Ex): 1/day (black)—60-ft. stream of acid,<br />
6d4 points of acid damage, Ref save DC 17 half; or 1/day<br />
(blue)—60-ft. bolt of lightning, 6d8 points of electricity damage,<br />
Ref save DC 18 half.<br />
Improved Grab (Ex): To use this ability, the tyrannosaurus<br />
must hit a Medium-size or smaller opponent with its bite<br />
attack. If it gets a hold, it can try to swallow the foe.<br />
Swallow Whole (Ex): A tyrannosaurus can try to swallow<br />
a Medium-size or smaller opponent by making a successful<br />
grapple check. The swallowed creature takes 2d8+8<br />
points of crushing damage per round plus 8 points of acid<br />
damage from the tyrannosaurus’s gizzard. A swallowed creature<br />
can cut its way out by using claws or a Small or Tiny<br />
slashing weapon to deal 25 points of damage to the gizzard<br />
(AC 20). Once the creature exits, muscular action closes the<br />
hole; another swallowed opponent must again cut its own<br />
way out.<br />
The tyrannosaurus’s gizzard can hold two Medium-size, four<br />
Small, eight Tiny, sixteen Diminutive, or thirty-two Fine or<br />
smaller opponents.<br />
dSpider Eater Riders: Male and female human War2; CR 1;<br />
Medium-size humanoid (human); HD 2d8+4; hp varies (see<br />
text); Init +1; Spd 20 ft.; AC 18 (touch 11, flat-footed 17); Atk +5<br />
melee (1d10+2/19–20, masterwork bastard sword) or +5 ranged<br />
(1d8+2/×3, masterwork mighty composite longbow [+2 Str<br />
bonus]); AL NE; SV Fort +5, Ref +1, Will –1; Str 15, Dex 13, Con<br />
14, Int 11, Wis 8, Cha 12.<br />
Skills and Feats: Handle Animal +6, Intimidate +6, Ride +8<br />
(spider eater); Exotic Weapon Proficiency (bastard sword),<br />
Weapon Focus (composite longbow).<br />
Possessions: Masterwork breastplate, masterwork bastard<br />
sword, large wooden shield, masterwork mighty composite<br />
longbow (+2 Str bonus), 20 arrows, potion of cure moderate wounds.<br />
dElite Guards: Male and female human War4; CR 3;<br />
Medium-size humanoid (human); HD 4d8+8; hp varies (see<br />
text); Init +1; Spd 20 ft.; AC 21 (touch 11, flat-footed 20); Atk +9<br />
melee (1d10+3/19–20, masterwork bastard sword) or +6 ranged<br />
(1d8+3/×3, masterwork mighty composite longbow [+3 Str<br />
bonus]); AL NE; SV Fort +6, Ref +2, Will +2; Str 16, Dex 13, Con<br />
14, Int 11, Wis 12, Cha 8.<br />
Skills and Feats: Climb +3, Intimidate +6, Jump +3; Exotic<br />
Weapon Proficiency (bastard sword), Power Attack, Weapon<br />
Focus (bastard sword).
APPENDIX 3: NPC STATISTICS<br />
Possessions: Masterwork full plate, masterwork bastard sword,<br />
large wooden shield, masterwork mighty composite longbow<br />
(+3 Str bonus), 20 arrows, potion of cure moderate wounds.<br />
dMinotaur Guards: Male minotaur Bbn2; CR 4; Large monstrous<br />
humanoid; HD 6d8+12 plus 2d12+4; hp varies (see text);<br />
Init –1; Spd 40 ft.; AC 18 (touch 8, flat-footed 18); Atk +14/+9<br />
melee (2d8+6/×3, Huge masterwork greataxe) and +8 melee<br />
(1d8+3, gore); Reach 10 ft.; SA Charge, rage; SQ Natural cunning,<br />
scent, uncanny dodge (Dex bonus to AC when flat-footed);<br />
AL CE; SV Fort +9, Ref +4, Will +5; Str 22, Dex 8, Con 15,<br />
Int 6, Wis 10, Cha 7.<br />
Skills and Feats: Hide –6, Intimidate +7, Jump +7, Listen +10,<br />
Search +6, Spot +10; Great Fortitude, Power Attack.<br />
Charge (Ex): In addition to the normal effects of a charge,<br />
the minotaur’s gore attack does 4d6+9 points of damage (or<br />
4d6+12 when raging).<br />
Rage (Ex): 1/day—hp +16; AC 16 (touch 6, flat-footed 16);<br />
Atk +16/+11 melee (2d8+8/×3, Huge masterwork greataxe) and<br />
+10 melee (1d8+5, gore); SV Fort +11, Will +7; Str 26, Con 19.<br />
Jump +9. Lasts 7 rounds, then fatigued.<br />
Natural Cunning (Ex): Immune to maze spells, can’t get<br />
lost, can track enemies, and is never flat-footed.<br />
Possessions: Huge masterwork greataxe, +1 chain shirt, potion<br />
of haste.<br />
dAthemal: Male halfling Com2; CR 1; Small humanoid<br />
(halfling); HD 2d4+2; hp 8; Init +3; Spd 20 ft.; AC 14 (touch 14,<br />
flat-footed 11); Atk +2 melee (1d4, demonic left arm) or +4<br />
ranged; SA Demonic left arm; SQ +1 bonus on attacks with<br />
thrown weapons, +2 morale bonus on saves against fear; AL<br />
NG; SV Fort +3, Ref +4, Will +1; Str 10, Dex 17, Con 14, Int 10,<br />
Wis 10, Cha 8.<br />
Skills and Feats: Climb +2, Hide +7, Jump +2, Listen +2, Move<br />
Silently +5, Profession (baker) +7, Spot +2, Swim +3; Skill Focus<br />
(Profession [baker]).<br />
Demonic Left Arm (Ex): A demonic left arm is long and<br />
flexible like a tendril, with a crude, three-fingered claw at the<br />
end. If empty, it can attack (as noted above). Weapons used in<br />
the hand suffer a –2 attack penalty. Once per day, it can cast<br />
magic missile as a 5th-level wizard. Athemal has suffered a net<br />
total of 3 points of temporary Wis damage as a result of this<br />
arm’s presence. (See the sidebar Drawbacks to Demonic<br />
Additions, page 115, for more information.)<br />
Possessions: None.<br />
dBethe: Female human Rog5/Asn4; CR 9; Medium-size<br />
humanoid (human); HD 5d6+5 plus 4d6+4; hp 40; Init +7; Spd<br />
30 ft.; AC 21 (touch 13, flat-footed 18); Atk +9/+4 melee<br />
(1d6+3/18–20, +1 rapier) or +9/+4 ranged (5d6 lightning +2,<br />
javelin of lightning); SA Death attack, sneak attack +5d6; SQ<br />
Evasion, locate traps, poison use, uncanny dodge (Dex bonus to<br />
AC when flat-footed, can’t be flanked), +2 bonus on saves<br />
against poison; AL CE; SV Fort +3, Ref +11, Will +5; Str 14, Dex<br />
17, Con 12, Int 11, Wis 12, Cha 9.<br />
Skills and Feats: Balance +12, Concentration +3, Disguise +3,<br />
Escape Artist +6, Hide +24, Intimidate +7, Jump +11, Listen +13,<br />
Move Silently +14, Spot +9, Tumble +16; Dodge, Improved<br />
Initiative, Iron Will, Mobility, Spring Attack.<br />
Death Attack (Ex): If the assassin studies a target for 3<br />
rounds and then makes a sneak attack with a melee weapon<br />
that successfully deals damage, the sneak attack can also paralyze<br />
(for 1d6+4 rounds) or kill the victim. Fort save DC 14<br />
to resist.<br />
Spells Prepared (1/1; base DC = 10 + spell level; 25% arcane<br />
spell failure chance): 1st—spider climb; 2nd—darkness.<br />
Spellbook: 1st—change self, detect poison, ghost sound, obscuring<br />
mist, spider climb; 2nd—alter self, darkness, pass without trace, undetectable<br />
alignment.<br />
Possessions: +1 rapier, +1 elven chain, +1 buckler, 2 javelins of lightning,<br />
cloak of elvenkind, potion of cure moderate wounds.<br />
dChymon: Female young adult red dragon; CR 12; Huge dragon<br />
(fire); HD 19d12+95; hp 218; Init +4; Spd 40 ft., fly 150 ft.<br />
(poor); AC 26 (touch 9, flat-footed 26); Atk +27 melee (2d8+10,<br />
bite) and +22 melee (2d6+5, 2 claws) and +22 melee (1d8+5, 2<br />
wings) and +22 melee (2d6+15, tail slap), or +27 melee (2d8+15,<br />
crush); Face/Reach 10 ft. by 20 ft./10 ft.; SA Breath weapon,<br />
frightful presence; SQ Blindsight 150 ft., damage reduction<br />
5/+1, fire subtype, immune to sleep and paralysis, keen senses,<br />
locate object; SR 19; AL CE; SV Fort +16, Ref +11, Will +13; Str 31,<br />
Dex 12, Con 22, Int 15, Wis 14, Cha 15.<br />
Skills and Feats: Bluff +21, Concentration +24, Diplomacy +23,<br />
Hide –8, Intimidate +4, Jump +29, Knowledge (religion) +21,<br />
Listen +21, Scry +21, Search +21, Spellcraft +21, Spot +21; Flyby<br />
Attack, Improved Initiative, Power Attack, Snatch, Sunder.<br />
Breath Weapon (Su): 50-ft. cone of fire, 10d10 points of fire<br />
damage, Ref save DC 24 half.<br />
Frightful Presence (Ex): 150-ft. range; creatures must<br />
succeed at a Will save (DC 21) or become panicked for 4d6<br />
rounds (if 4 or less HD) or become shaken for 4d6 rounds (5<br />
HD or more).<br />
Crush (Ex): Chymon’s crush attack is effective only against<br />
opponents who are Small size or smaller. It affects all such<br />
opponents that fit under its body, and they must succeed at a<br />
Ref save (DC 24) or be pinned, taking 2d8+15 points of bludgeoning<br />
damage during the next round unless Chymon moves<br />
off them. If Chymon chooses to maintain the pin, treat it as a<br />
normal grapple attack. Pinned creatures take crush damage<br />
each round if they don’t escape.<br />
Snatch (Ex): If Chymon hits a Tiny or smaller opponent<br />
with a claw attack or a Small or smaller foe with a bite attack, it<br />
can attempt to start a grapple as a free action. While grappling,<br />
it automatically does claw or bite damage (as appropriate) each<br />
round. If Chymon doesn’t move and takes no other action in<br />
combat, it deals double bite damage to the snatched creature. A<br />
snatched creature gets no saving throw against Chymon’s<br />
breath weapon.<br />
Fire Subtype (Ex): Fire immunity, double damage from cold<br />
except on a successful save.<br />
Keen Senses (Ex): Includes darkvision 500 ft.<br />
Locate Object (Sp): 5/day (as Sor5).<br />
Spells Known (6/7/5; base DC = 12 + spell level): 0—arcane<br />
mark, detect magic, ghost sound, mage hand, open/close, read magic;<br />
1st—alarm, cure light wounds, mage armor, true strike; 2nd—cure<br />
moderate wounds, invisibility.<br />
dDaagra: Female annis Rgr5; CR 9; Large monstrous<br />
humanoid; HD 7d8+14 plus 5d10+10; hp 83; Init +5; Spd 40<br />
ft.; AC 26 (touch 10, flat-footed 25); Atk +19 melee (1d6+8, 2<br />
claws) and +14 melee (1d6+4, bite), or +12/+7/+2 ranged<br />
(2d6/×3, Huge longbow); Reach 10 ft.; SA Favored enemy<br />
(humans +2; elves +1), improved grab, rend, tear; SQ Fight<br />
with two weapons, spell-like abilities, steely skin; SR 19; AL<br />
CE; SV Fort +8, Ref +7, Will +7; Str 26, Dex 12, Con 14, Int 13,<br />
Wis 13, Cha 11.<br />
Skills and Feats: Concentration +12, Hide +7, Listen +11,<br />
Move Silently +8, Search +9, Spot +11, Wilderness Lore +9;<br />
Alertness, Blind-Fight, Combat Casting, Improved Initiative,<br />
Power Attack, Track.<br />
Improved Grab (Ex): To use this ability, the annis must hit<br />
a Large or smaller creature with a claw attack.<br />
179
APPENDIX 3: NPC STATISTICS<br />
180<br />
Rend (Ex): An annis that hits with both claw attacks latches<br />
onto the opponent’s body and tears the flesh. This attack automatically<br />
deals an additional 2d6+16 points of damage.<br />
Tear (Ex): An annis automatically hits a held opponent with<br />
all its melee attacks each round it maintains the hold.<br />
Fight with Two Weapons: Ambidexterity and Two-Weapon<br />
Fighting when wearing light or no armor.<br />
Spell-Like Abilities: 3/day—change self, fog cloud (both as<br />
Sor8). DC = 10 + spell level.<br />
Steely Skin (Ex): The steely skin of an annis reduces<br />
damage dealt by slashing and piercing weapons by 1 point<br />
of damage per hit. Conversely, its brittle bones increase<br />
damage dealt by bludgeoning weapons by 1 point per hit.<br />
(Treat combination weapons such as morningstars as bludgeoning<br />
weapons.)<br />
Spells Prepared (1; base DC = 11 + spell level): 1st—magic fang.<br />
Possessions: potion of endurance, potion of heroism, +2 chain shirt,<br />
Huge longbow, 12 arrows, platinum bracelet (200 gp).<br />
dDirass: Male drow Wiz10; CR 11, Medium-size humanoid<br />
(elf ); HD 10d4; hp 37; Init +4; Spd 30 ft.; AC 18 (touch 16, flatfooted<br />
14); Atk +4 melee (1d4–1/19–20, dagger) or +9 ranged<br />
(1d4/19–20, hand crossbow); SA Spell-like abilities; SQ Light<br />
blindness; SR 22; AL CE; SV Fort +5, Ref +10, Will +8; Str 9, Dex<br />
18, Con 11, Int 21, Wis 10, Cha 13.<br />
Skills and Feats: Concentration +14, Diplomacy +6, Hide +6,<br />
Knowledge (arcana) +18, Knowledge (the planes) +18, Listen<br />
+2, Move Silently +10, Scry +18, Search +7, Spellcraft +18, Spot<br />
+2; Brew Potion, Craft Wondrous Item, Dodge, Empower Spell,<br />
Scribe Scroll, Silent Spell, Still Spell, Exotic Weapon<br />
Proficiency (hand crossbow).<br />
Dirass has cat’s grace, mage armor, and endurance (from Maracla)<br />
in effect upon himself when encountered. With cat’s grace, mage<br />
armor, and endurance: hp 47; Init +6; AC 22 (touch 18, flat-footed<br />
16); Atk +11 ranged; SV Fort +6; Dex 22, Con 14. Concentration<br />
+15, Hide +8, Move Silently +12.<br />
Spell-Like Abilities (Sp): 1/day—dancing lights, darkness,<br />
faerie fire (all as Sor10). DC = 11 + spell level.<br />
Light Blindness (Ex): Abrupt exposure to bright light<br />
(such as sunlight or a daylight spell) blinds for 1 round. Suffers<br />
a –1 circumstance penalty on all attack rolls, saves, and checks<br />
in bright light.<br />
Spells Prepared (4/6/5/4/4/3; base DC = 15 + spell level): 0—<br />
daze, detect magic, ray of frost, read magic; 1st—alarm, color spray,<br />
mage armor (2)*, magic missile, shield; 2nd—blur, cat’s grace*, levitate,<br />
Melf ’s acid arrow, web; 3rd—lightning bolt (2), major image,<br />
nondetection; 4th—ice storm, improved invisibility (2), stoneskin;<br />
5th—cone of cold, empowered lightning bolt, summon monster V.<br />
Possessions: Headband of intellect +4, amulet of natural armor +2,<br />
cloak of resistance +1, potion of haste, potion of cure serious wounds,<br />
arcane scroll of stilled and silent magic missile, passwall, and see<br />
invisibility, arcane scroll of wall of fire, dimension door, dispel magic,<br />
and empowered magic missile, dagger, hand crossbow, 10 bolts, 3<br />
doses of giant wasp poison (Fort save DC 18; 1d6 Dex/1d6 Dex),<br />
16 pp.<br />
dErdso: Male human Mnk8; CR 8 (currently 7 without gear);<br />
Medium-size humanoid (human); HD 8d8+8; hp 50; Init +3;<br />
Spd 50 ft.; AC 13 (touch 13, flat-footed 10); Atk +10/+7 melee<br />
(1d10, unarmed strike) or +8/+8/+5 melee (1d10, flurry of<br />
blows); SA Stunning attack; SQ Monk abilities; AL LN; SV Fort<br />
+7, Ref +9, Will +4; Str 10, Dex 17, Con 12, Int 8, Wis 6, Cha 10.<br />
Skills and Feats: Balance +5, Climb +11, Listen +11, Move<br />
Silently +14, Spot +0, Tumble +14; Alertness, Deflect Arrows,<br />
Dodge, Improved Trip, Weapon Finesse (unarmed strike),<br />
Weapon Focus (unarmed strike).<br />
Stunning Attack (Ex): 8/day; DC 9.<br />
Monk Abilities: Evasion, still mind, slow fall 50 ft., purity of<br />
body, wholeness of body, leap of the clouds.<br />
Possessions: None (held by Yrthuk Innar).<br />
dFestalon Girrot: Male elf Clr7; CR 7 (currently 6 without<br />
gear); Medium-size humanoid (elf ); HD 7d8; hp 32; Init +1; Spd<br />
30 ft.; AC 11 (touch 11, flat-footed 10); Atk +7 melee (1d3+2<br />
subdual, unarmed strike); SA Turn undead 5/day; SQ Immune<br />
to sleep, low-light vision, +2 bonus on saves against enchantment<br />
effects; AL CG; SV Fort +5, Ref +5, Will +8; Str 14, Dex 12,<br />
Con 10, Int 13, Wis 17, Cha 15.<br />
Skills and Feats: Concentration +10, Heal +13, Knowledge<br />
(religion) +11, Listen +5, Search +3, Spot +5; Craft Wand,<br />
Lightning Reflexes, Weapon Focus (morningstar).<br />
Spells Prepared (6/6/5/4/2; base DC = 13 + spell level):<br />
None currently.<br />
Deity: Ehlonna. Domains: Good (cast good spells at 8th level);<br />
Sun (1/day greater turning).<br />
Possessions: None (held by Yrthuk Innar).<br />
dThe First: Male human Clr10/Doomdreamer5; CR 15;<br />
Medium-size humanoid (human); HD 10d8+30 plus 5d8+15;<br />
hp 128; Init +5; Spd 20 ft.; AC 29 (touch 13, flat-footed 28); Atk<br />
+15 melee (9, 6 tentacles from greater tentacle rod) or +13/+8<br />
melee (touch attack); SA Chill soul, dark lore, maddening howl,<br />
rebuke undead 5/day; SQ Dark communion ritual, doomdreamer<br />
secrets, insanity; AL CE; SV Fort +13, Ref +9, Will<br />
+17; Str 16, Dex 13, Con 16, Int 17, Wis 21, Cha 15.<br />
Skills and Feats: Concentration +21, Heal +15, Knowledge<br />
(arcana) +21, Knowledge (religion) +21, Listen +11, Spellcraft<br />
+21; Dodge, Improved Initiative, Iron Will, Lightning Reflexes,<br />
Maximize Spell, Mobility, Spell Focus (Necromancy).<br />
Chill Soul (Su): Can touch a living creature and inflict 3d8<br />
points of damage. This can be used in conjunction with an<br />
inflict wounds spell, but is negated if the victim is wearing the<br />
purple robes of Tharizdun.<br />
Dark Lore (Su): 1/day speak a creature’s secret. Target must<br />
make a Will save (DC 20) or be stunned for 1d3 rounds.<br />
Maddening Howl (Sp): 1/day, as a standard action, give a howl<br />
that affects all living creatures within 50 ft. Those in the area<br />
must make Will saves (DC 20). Failure means that the victim<br />
stands still (treat as dazed) for 1 round.<br />
Dark Communion Ritual (Sp): 1/week can perform a ritual<br />
(this takes a full night and must be performed in a temple with<br />
a human sacrifice) that allows him to gain knowledge (See<br />
Appendix 2).<br />
Doomdreamer Secrets: Unnatural vitality (+3 hp), curse of<br />
power (treat as 16th level when casting evil spells), paying fealty<br />
to death (+1 to DC of death effects).<br />
Insanity (Ex): Insanity score 7. Wis 28 for bonus spells and<br />
DCs; Wis 14 for all other Wis-based checks.<br />
Spells Prepared (6/9/8/8/7/7/5/4/3; base DC = 19 + spell level):<br />
0—cure minor wounds, detect magic, light, mending, resistance (2);<br />
1st—bane, command, comprehend languages, cure light wounds,<br />
entropic shield, obscuring mist, protection from good, random action*,<br />
shield of faith; 2nd—bull’s strength, darkness, death knell†, hold person<br />
(2), silence, spiritual weapon, Tharizdun’s touch*; 3rd—bestow curse,<br />
cure serious wounds (2), dispel magic, invisibility purge, magic vestment,<br />
protection from elements, rage*; 4th—confusion*, death ward†,<br />
discern lies, dismissal, neutralize poison, restoration, spell immunity;<br />
5th—circle of doom*††, dispel good, maximized endurance, flame<br />
strike, slay living††, spell resistance, true seeing; 6th—blade barrier,<br />
etherealness, greater dispelling, heal, phantasmal killer*††; 7th—<br />
blasphemy, destruction†† (2), disintegrate*††; 8th—maximized<br />
flame strike, Tharizdun’s maddening scream*, unholy aura.
APPENDIX 3: NPC STATISTICS<br />
*Domain spell. Deity: Tharizdun. Domains: Destruction<br />
(1/day smite, +4 attack, +15 damage); Madness (1/day add<br />
Insanity score to Wis-based roll).<br />
†Because of Spell Focus (Necromancy), the base DC against<br />
these spells is 20 + spell level.<br />
††Because of the paying fealty to death ability, the base DC<br />
against these spells is 21 + spell level.<br />
Possessions: Greater tentacle rod (see Appendix 1), +2 full plate<br />
armor, +2 large steel shield, amulet of natural armor +2, helmet of<br />
protection +2 (as ring), cloak of resistance +2, necklace of prayer<br />
beads (karma), torch of revealing (and 6 cones of incense of dreaming;<br />
see Appendix 1), black thurible (and 4 balls of incense of<br />
dreaming; see Appendix 1), potion of haste, 200 gp ring, holy<br />
symbol (obex).<br />
dHedrack: Male human Clr14; CR 14, Medium-size<br />
humanoid (human); HD 14d8+28*; hp 102; Init +0; Spd 20 ft.;<br />
AC 24 (touch 10, flat-footed 24); Atk +13/+8 melee (1d8+1,<br />
masterwork heavy mace) or +9 melee (6, 3 tentacles from lesser<br />
tentacle rod) or +10 ranged (1d8/19–20, light crossbow); SA<br />
Rebuke undead 4/day; SQ Insanity; AL CE; SV Fort +11* , Ref<br />
+4, Will +11; Str 13*, Dex 10, Con 15*, Int 15, Wis 21, Cha 13.<br />
Skills and Feats: Concentration +19, Knowledge (arcana) +18,<br />
Knowledge (religion) +18, Listen +9, Spellcraft +18, Spot +9;<br />
Alertness, Cleave, Empower Spell, Power Attack, Scribe Scroll,<br />
Weapon Focus (heavy mace).<br />
Hedrack has bull’s strength and endurance in effect upon himself<br />
when encountered. With bull’s strength and endurance: hp<br />
130, Atk +15/+10 (1d8+3, masterwork heavy mace); SV Fort<br />
+13; Str 16, Con 18. Concentration +21.<br />
Insanity (Ex): Insanity score 7. Wis 28 for bonus spells and<br />
DCs; Wis 14 for all other Wis-based checks.<br />
Spells Prepared (6/9/8/7/7/6/5/4; base DC = 19 + spell<br />
level): 0—cure minor wounds, detect magic, guidance, light, read<br />
magic, resistance; 1st—bless, command, cure light wounds, divine<br />
favor, doom, protection from good, random action*, sanctuary, shield<br />
of faith; 2nd—bull’s strength, cure moderate wounds, death knell,<br />
endurance, hold person, shatter*, silence, spiritual weapon; 3rd—<br />
cure serious wounds, dispel magic, magic vestment, prayer, protection<br />
from elements, rage*, summon monster III; 4th—confusion*, cure<br />
critical wounds, divine power, freedom of movement, greater magic<br />
weapon, spell immunity, summon monster IV; 5th—circle of<br />
doom*, dispel good, flame strike, greater command, insect plague,<br />
slay living; 6th—blade barrier, greater dispelling, harm, phantasmal<br />
killer*, word of recall; 7th—blasphemy, destruction, disintegrate*,<br />
greater scrying.<br />
*Domain spell. Deity: Tharizdun. Domains: Destruction<br />
(1/day smite, +4 attack, +14 damage); Madness (1/day add<br />
Insanity score to Wis-based roll).<br />
Possessions: Ochre robes, lesser tentacle rod, periapt of wisdom +2,<br />
+1 full plate, amulet of natural armor +2, +1 large steel shield, divine<br />
scroll of heal, harm, and spell resistance, divine scroll of true seeing,<br />
contact medallion, masterwork heavy mace, light crossbow, 10<br />
bolts, 15 pp, 68 gp, holy symbol (obex).<br />
dMaracla: Female drow Clr9; CR 10, Medium-size humanoid<br />
(elf ); HD 9d8; hp 44; Init +2; Spd 20 ft.; AC 21 (touch 12, flatfooted<br />
19); Atk +8/+3 melee (1d8+1, masterwork heavy mace)<br />
or +8 ranged (1d4/19–20, hand crossbow); SA Rebuke undead<br />
5/day, spell-like abilities; SQ Insanity, light blindness; SR 21;<br />
AL CE; SV Fort +6, Ref +5, Will +8; Str 12, Dex 14, Con 10, Int<br />
13, Wis 18, Cha 15.<br />
Skills and Feats: Concentration +12, Knowledge (religion)<br />
+13, Listen +4, Search +3, Spot +4, Spellcraft +13; Brew Potion,<br />
Empower Spell, Exotic Weapon Proficiency (hand crossbow),<br />
Scribe Scroll.<br />
Maracla has bull’s strength in effect upon herself when<br />
encountered. With bull’s strength: Atk +10/+5 melee (1d8+3,<br />
masterwork heavy mace); Str 16. In addition, she casts<br />
endurance on Dirass each day.<br />
Spell-Like Abilities (Sp): 1/day—dancing lights, darkness,<br />
faerie fire (all as Sor9). DC = 12 + spell level.<br />
Insanity (Ex): Insanity score 4. Wis 22 for bonus spells and<br />
DCs; Wis 14 for all other Wis-based checks.<br />
Light Blindness (Ex): Abrupt exposure to bright light<br />
(such as sunlight or a daylight spell) blinds for 1 round. Suffers<br />
a –1 circumstance penalty to all attack rolls, saves, and checks<br />
in bright light.<br />
Spells Prepared (6/7/7/5/4/3; base DC = 16 + spell level): 0—<br />
cure minor wounds (2), guidance, read magic, resistance (2); 1st—bless,<br />
cause fear, command, divine favor, entropic shield*, protection from<br />
good, shield of faith; 2nd—bull’s strength, cure moderate wounds, death<br />
knell, endurance, hold person, shatter*, silence; 3rd—contagion, dispel<br />
magic, magic circle against good*, magic vestment, protection from elements;<br />
4th—dismissal, divine power, freedom of movement, greater<br />
command, unholy blight*; 5th—dispel good*, slay living.<br />
*Domain spell. Deity: Tharizdun. Domains: Chaos (cast chaotic<br />
spells at 10th level); Evil (cast evil spells at 10th level).<br />
Possessions: +1 chainmail, +1 large steel shield of arrow deflection,<br />
potion of fly, divine scroll of greater command, flame strike and<br />
endurance, divine scroll of slay living and hold person, divine<br />
scroll of inflict critical wounds (2), masterwork heavy mace, hand<br />
crossbow, 10 bolts, 3 doses of giant wasp poison (Fort save DC<br />
18; 1d6 Dex/1d6 Dex), 34 pp.<br />
dNaquent: Female human Clr10; CR 10, Medium-size<br />
humanoid (human); HD 10d8+10; hp 54; Init +0; Spd 20 ft.; AC<br />
21 (touch 10, flat-footed 21); Atk +8/+3 melee (1d8, masterwork<br />
heavy mace) or +7 ranged (1d8/19–20, light crossbow); SA<br />
Rebuke undead 5/day; SQ Insanity; AL CE; SV Fort +11, Ref +6,<br />
Will +10; Str 10, Dex 11, Con 12, Int 16, Wis 18, Cha 14.<br />
Skills and Feats: Concentration +14, Diplomacy +15, Heal +15,<br />
Knowledge (arcana) +16, Knowledge (religion) +16, Spellcraft<br />
+16; Brew Potion, Craft Wand, Great Fortitude, Lightning<br />
Reflexes, Scribe Scroll.<br />
Insanity (Ex): Insanity score 5. Wis 23 for bonus spells and<br />
DCs; Wis 13 for all other Wis-based checks.<br />
Spells Prepared (6/7/7/5/5/4; base DC = 16 + spell level): 0—<br />
cure minor wounds, detect magic, guidance (2), read magic, resistance;<br />
1st—command, divine favor, doom, protection from good*,<br />
sanctuary, shield of faith, summon monster I; 2nd—death knell,<br />
endurance, hold person, silence, spiritual weapon(2), Tharizdun’s<br />
touch*; 3rd—cure serious wounds, magic circle against good*,<br />
magic vestment, protection from elements, summon monster III;<br />
4th—cure critical wounds, poison, spell immunity, summon monster<br />
IV, unholy blight*; 5th—dispel good*, ethereal jaunt, greater<br />
command, spell resistance.<br />
*Domain spell. Deity: Tharizdun. Domains: Evil (cast evil<br />
spells at 11th level); Madness (1/day add Insanity score to Wisbased<br />
roll ).<br />
Possessions: Ochre robes, +1 full plate armor, boots of speed, cloak<br />
of resistance +1, wand of dispel magic (20 charges), potion of fly,<br />
divine scroll of true seeing, summon monster V, and invisibility<br />
purge, masterwork heavy mace, large steel shield, light crossbow,<br />
10 bolts, holy symbol (obex).<br />
dSatau: Male mind flayer Sor2; CR 10; Medium-size aberration;<br />
HD 8d8 plus 2d4; hp 41; Init +6; Spd 30 ft.; AC 17 (touch<br />
14, flat-footed 15); Atk +9 melee (1d4+1, 4 tentacles); SA<br />
Extract, improved grab, mind blast, psionics; SQ Darkvision 60<br />
ft., telepathy; SR 25; AL LE; SV Fort +2, Ref +4, Will +13; Str 13,<br />
Dex 15, Con 10, Int 19, Wis 18, Cha 17.<br />
181
APPENDIX 3: NPC STATISTICS<br />
182<br />
Skills and Feats: Bluff +8, Concentration +13, Diplomacy +5,<br />
Hide +8, Intimidate +10, Knowledge (arcana) +9, Knowledge<br />
(religion) +9, Listen +11, Move Silently +7, Spellcraft +14, Spot<br />
+11; Alertness, Combat Casting, Dodge, Expertise, Improved<br />
Initiative, Weapon Finesse (tentacle).<br />
Extract (Ex): If Satau begins a turn with all four tentacles<br />
attached, and maintains its hold, it extracts the brain, killing<br />
the victim.<br />
Improved Grab (Ex): Must hit Small to Large creature with<br />
tentacle. If it hits, it gets a free grapple check to establish a hold.<br />
If successful, it can attach the remaining tentacles with another<br />
successful grapple check. If the foe is trying to escape, the<br />
mind flayer gets a +2 circumstance bonus for every tentacle<br />
attached at the beginning of the turn.<br />
Mind Blast (Sp): 60-ft. cone; Will save DC 17 or be stunned<br />
for 3d4 rounds.<br />
Psionics (Sp): At will—astral projection, charm monster, detect<br />
thoughts, levitate, plane shift, suggestion (all as Sor8). DC = 13 +<br />
spell level.<br />
Telepathy (Su): Satau can communicate telepathically with<br />
any creature within 100 ft. that has a language.<br />
Spells Known (6/5; base DC = 13 + spell level): 0—arcane<br />
mark, detect magic, detect poison, mage hand, read magic; 1st—<br />
shield, true strike.<br />
Possessions: Wand of invisibility (16 charges), ring of protection +2,<br />
arcane scroll of see invisibility, arcane scroll of displacement, pearl<br />
of power (1st), wand of magic missile (5th, 20 charges), silver necklace<br />
with moonstones (700 gp value).<br />
dThe Third: Female half-air elemental/half-human<br />
Clr8/Doomdreamer5; CR 15; Medium-size outsider; HD<br />
8d8+24 plus 5d8+18; hp 133; Init +4; Spd 30 ft.; AC 23 (touch 16,<br />
flat-footed 19); Atk +13/+8 melee (1d10+4/19–20 [+1d10 cold<br />
on crit], +1 icy burst heavy flail); SA Chill soul, dark lore, maddening<br />
howl, rebuke undead 6/day; SQ Dark communion ritual,<br />
doomdreamer secrets, half-elemental abilities, insanity; AL CE;<br />
SV Fort +11, Ref +9, Will +12; Str 14, Dex 19, Con 18, Int 16, Wis<br />
19, Cha 17.<br />
Skills and Feats: Concentration +20, Diplomacy +5, Intimidate<br />
+15, Knowledge (arcana) +18, Knowledge (religion) +19, Search<br />
+8, Spellcraft +19; Dodge, Iron Will, Lightning Reflexes, Spell<br />
Focus (Necromancy), Weapon Focus (heavy flail).<br />
The Third has bull’s strength and endurance in effect upon<br />
herself when encountered. With bull’s strength and endurance:<br />
hp 159; Atk +14/+9 melee (1d10+5/19–20 [+1d10 cold on<br />
crit], +1 icy burst heavy flail); SV Fort +13; Str 17, Con 22.<br />
Concentration +22.<br />
Chill Soul (Su): Can touch a living creature and inflict 3d8<br />
points of damage. This can be used in conjunction with an<br />
inflict wounds spell, but is negated if the victim is wearing the<br />
purple robes of Tharizdun.<br />
Dark Lore (Su): 1/day speak a creature’s secret. Target must<br />
make a Will save (DC 20) or be stunned for 1d3 rounds.<br />
Maddening Howl (Sp): 1/day, as a standard action, give a howl<br />
that affects all living creatures within 50 ft. Those in the area<br />
must make Will saves (DC 20). Failure means that the victim<br />
stands still (treat as dazed) for 1 round.<br />
Dark Communion Ritual (Sp): 1/week can perform a ritual<br />
(this takes a full night and must be performed in a temple with<br />
a human sacrifice) that allows him to gain knowledge (See<br />
Appendix 2).<br />
Doomdreamer Secrets: Unnatural vitality (+3 hp), deeper<br />
madness (+2 to Insanity score), unholy pact (1/week, no payment<br />
needed for planar ally).<br />
Half-Elemental Abilities (Sp): 1/day—obscuring mist, wind<br />
wall, gaseous form, air walk, control winds, chain lightning, control<br />
weather. DC = 13 + spell level. Immune to cold and disease. +4<br />
racial bonus on saves against poison.<br />
Insanity (Ex): Insanity score 8. Wis 27 for bonus spells and<br />
DCs; Wis 11 for all other Wis-based checks.<br />
Spells Prepared (6/8/8/7/7/5/4/3; base DC = 18 + spell level):<br />
0—cure minor wounds, detect magic, guidance, light, resistance (2);<br />
1st—command, cure light wounds, divine favor, entropic shield, mage<br />
armor*, protection from good, random action, shield of faith; 2nd—<br />
bull’s strength, cure moderate wounds, darkness, endurance, hold person,<br />
magic missile*, silence, spiritual weapon; 3rd—bestow curse, blast<br />
of force*, blindness/deafness, cure serious wounds, dispel magic, magic<br />
vestment, protection from elements; 4th—discern lies, dismissal,<br />
divine power, freedom of movement, neutralize poison, Otiluke’s<br />
resilient sphere*, tongues; 5th—greater command, slay living† (2),<br />
spell resistance, true seeing, wall of force*; 6th—banishment, harm†,<br />
heal, repulsion*; 7th—blasphemy, destruction†, forcecage*.<br />
*Domain spell. Deity: Tharizdun. Domains: Force (1/day reroll<br />
any damage roll for a weapon, a spell, or an ability); Madness<br />
(1/day add Insanity score to Wis-based roll).<br />
†Because of Spell Focus (Necromancy), the base DC for saves<br />
against these spells is 20 + spell level.<br />
Possessions: +1 icy burst heavy flail, bracers of armor +4, amulet of<br />
natural armor +3, ring of protection +2, torch of revealing (and 4<br />
cones of incense of dreaming) (see Appendix 1), black thurible (and<br />
5 balls of incense of dreaming) (see Appendix 1), 400 gp earrings,<br />
holy symbol (obex).<br />
dThrommel: Human vampire Pal3/Blk9; CR 14; Medium-size<br />
undead; HD 12d12+20; hp 83; Init +7; Spd 40 ft.; AC 26 (touch<br />
14, flat-footed 23); Atk +20/+15/+10 melee (2d6+11/19–20, +1<br />
unholy greatsword) or +19/+14/+9 melee (1d6+10 and energy<br />
drain, slam); SA Aura of despair, blood drain, command<br />
undead 8/day (as Clr7), create spawn, detect good, domination,<br />
energy drain, smite good (2/day, +5 attack, +9 damage), sneak<br />
attack +2d6; SQ Alternate form, children of the night, cold and<br />
electricity resistance 20, damage reduction 15/+1, fast healing,<br />
fiendish servant benefits, gaseous form, lay on hands, poison<br />
use, spider climb, undead, +4 turn resistance; AL CE; SV Fort<br />
+14, Ref +14, Will +12; Str 24, Dex 16, Con —, Int 13, Wis 17,<br />
Cha 20.<br />
Skills and Feats: Bluff +13, Concentration +11, Hide +13,<br />
Jump +14, Knowledge (history) +3, Knowledge (nobility and<br />
royalty) +3, Knowledge (religion) +3, Listen +13, Move<br />
Silently +9, Ride (horse) +15, Search +9, Sense Motive +11,<br />
Spot +13; Alertness, Cleave, Combat Reflexes, Dodge,<br />
Improved Initiative, Lightning Reflexes, Mobility, Silent Spell,<br />
Power Attack, Sunder.<br />
Aura of Despair (Su): Enemies within 10 ft. suffer a –2<br />
morale penalty on all saving throws.<br />
Blood Drain (Ex): Thrommel can suck blood from a living<br />
victim with his fangs by making a successful grapple check. If<br />
he pins the foe, he drains blood, inflicting 1d4 points of permanent<br />
Con drain each round the pin is maintained.<br />
Create Spawn (Su): A humanoid or monstrous humanoid<br />
slain by a vampire’s energy drain attack rises as a vampire spawn<br />
(see Monster Manual page 182) 1d4 days after burial. If the vampire<br />
instead drains the victim’s Con to 0 or less, the victim<br />
returns as a spawn if it had 4 or less HD and as a vampire if it<br />
had 5 or more HD. In either case, the new vampire or spawn is<br />
under the command of the vampire that created it and remains<br />
enslaved until its master’s death.<br />
Detect Good (Sp): At will.<br />
Domination (Su): A vampire can crush an opponent’s will<br />
just by looking into his or her eyes. This is similar to a gaze<br />
attack, except that the vampire must take a standard action, and<br />
those merely looking at it are not affected. Anyone the vampire
APPENDIX 3: NPC STATISTICS<br />
targets must succeed at a Will save (DC 23) or fall instantly<br />
under the vampire’s influence as though by a dominate person<br />
spell cast by a Sor12. The ability has a range of 30 ft.<br />
Energy Drain (Su): Living creatures hit by a vampire’s slam<br />
attack suffer two negative levels.<br />
Alternate Form (Su): As polymorph self (as Sor12), but can<br />
only assume the shape of a bat, dire bat, wolf, or dire wolf as a<br />
standard action. It can remain in that form until it assumes<br />
another or until the next sunrise.<br />
Children of the Night (Su): Vampires command the lesser<br />
creatures of the world and once per day can call forth a pack of<br />
4d8 dire rats, a swarm of 10d10 bats, or a pack of 3d6 wolves as<br />
a standard action. These creatures arrive in 2d6 rounds and<br />
serve the vampire for up to 1 hour.<br />
Fast Healing (Ex): A vampire heals 5 points of damage each<br />
round so long as it has at least 1 hit point. If reduced to 0 hp or<br />
lower, a vampire automatically assumes gaseous form and<br />
attempts to escape. It must reach its coffin home within 2<br />
hours or be utterly destroyed. Once at rest in its coffin, it rises<br />
to 1 hit point after 1 hour, then resumes healing at the rate of 5<br />
hp per round.<br />
Fiendish Servant Benefits: Empathic link, share spells.<br />
Gaseous Form (Su): As a standard action, a vampire can<br />
assume gaseous form at will (as Sor5), but can remain gaseous<br />
indefinitely and has a fly speed of 20 ft. (perfect).<br />
Lay on Hands (Sp): 1/day, Thrommel can heal himself or his<br />
fiendish servant of 45 points of damage.<br />
Spider Climb (Ex): A vampire can climb sheer surfaces as<br />
though with a spider climb spell.<br />
Undead: Immune to mind-influencing effects, poison,<br />
sleep, paralysis, stunning, and disease. Not subject to critical<br />
hits, subdual damage, ability damage, energy drain, or death<br />
from massive damage.<br />
Spells Prepared (3/3/2/1; base DC = 13 + spell level): 1st—<br />
doom, inflict light wounds (2); 2nd—darkness, death knell, inflict<br />
moderate wounds; 3rd—silent bull’s strength, inflict serious wounds;<br />
4th—silent protection from elements.<br />
Thrommel was once a 12th-level paladin, but he exchanged<br />
nine paladin levels for blackguard levels after becoming a vampire.<br />
Possessions: +1 unholy greatsword (“Dirge”), +1 breastplate, boots of<br />
striding and springing, ring of counterspells (currently loaded with<br />
fireball), ring of protection +1, holy symbol (obex).<br />
dJolana: Female fiendish bat servant; CR —; Diminutive magical<br />
beast (evil, chaotic); HD 2 1/2 d8; hp 10; Init +2; Spd 5 ft.,<br />
fly 40 ft. (good); AC 17 (touch 16, flat-footed 15); Atk—;<br />
Face/Reach 1 ft. by 1 ft./0 ft.; SQ Blindsight 120 ft., cold and fire<br />
resistance 5, improved evasion, share saving throws; SR 4; AL<br />
CE; SV Fort +14, Ref +11, Will +11; Str 2, Dex 15, Con 10, Int 6,<br />
Wis 14, Cha 4.<br />
Skills: Listen +9*, Move Silently +6, Spot +9*. *Reduce by 4 if<br />
blindsight negated.<br />
dTychon: Male human Clr9/Doomdreamer2; CR 11;<br />
Medium-size humanoid (human); HD 9d8+9 plus 2d8+2; hp<br />
56; Init –1; Spd 20 ft.; AC 23 (touch 9, flat-footed 23); Atk<br />
+14/+9 (1d8+6, +4 heavy mace); SA Dark lore, rebuke undead<br />
4/day; SQ Doomdreamer secret, insanity; SR 13; AL CE; SV<br />
Fort +7, Ref +2, Will +10; Str 14, Dex 8, Con 12, Int 12, Wis 18,<br />
Cha 13.<br />
Skills and Feats: Concentration +15, Knowledge (arcana) +14,<br />
Knowledge (religion) +15, Spellcraft +15; Craft Magic Arms<br />
and Armor, Empower Spell, Power Attack, Spell Focus<br />
(Necromancy), Weapon Focus (heavy mace).<br />
Dark Lore (Su): 1/day speak a creature’s secret. Target must<br />
make a Will save (DC 20) or be stunned for 1d3 rounds.<br />
Doomdreamer Secret: Deeper madness (+2 to Insanity score).<br />
Insanity (Ex): Insanity score 7. Wis 25 for bonus spells and<br />
DCs; Wis 11 for all other Wis-based checks.<br />
Spells Prepared (6/8/7/7/5/4/3; base DC = 17 + spell level):<br />
0—cure minor wounds (2), detect magic, read magic, resistance,<br />
virtue; 1st—bless, cure light wounds (2), divine favor, doom, protection<br />
from good*, shield of faith (2); 2nd—cure moderate wounds,<br />
endurance, hold person, magic missile*, silence, spiritual weapon;<br />
3rd—animate dead†, blast of force*, contagion, dispel magic, protection<br />
from elements (2), summon monster III; 4th—empowered<br />
bull’s strength (2), divine power, Otiluke’s resilient sphere*, poison†;<br />
5th—dispel good*, greater command, spell resistance, summon monster<br />
V; 6th—blade barrier, heal, repulsion*.<br />
*Domain spell. Deity: Tharizdun. Domains: Evil (cast evil<br />
spells at 12th level); Force (1/day reroll any damage roll for a<br />
weapon, a spell, or an ability).<br />
†Because of Spell Focus (Necromancy), the base DC for saves<br />
against these spells is 19 + spell level.<br />
Possessions: +4 heavy mace, +2 full plate armor of spell resistance<br />
(13), +2 large steel shield, black thurible (and 3 balls of incense of<br />
dreaming; see Appendix 1), potion of haste, 30 gp, holy symbol<br />
(obex), robes.<br />
dUkemil: Male troglodyte Clr5/Rog4; CR 10; Medium-size<br />
humanoid (reptilian); HD 2d8+4 plus 5d8+10 plus 4d6+8; hp<br />
69; Init +4; Spd 40 ft.; AC 24 (touch 14, flat-footed 20); Atk<br />
+9/+4 melee (1d6+2/19–20, +1 short sword) and +6 melee (1d4,<br />
bite), or +12/+7 ranged (1d6+1, javelin); SA Rebuke undead<br />
5/day, sneak attack +2d6, stench; SQ Darkvision 90 ft., demonic<br />
right leg, evasion, insanity, locate traps, uncanny dodge (Dex<br />
bonus to AC when flat-footed); AL NE; SV Fort +9, Ref +9, Will<br />
+7; Str 12, Dex 18, Con 13, Int 11, Wis 16, Cha 14.<br />
Skills and Feats: Bluff +6, Climb +7, Concentration +8, Disable<br />
Device +4, Hide +15*, Jump +7, Knowledge (religion) +5,<br />
Listen +9, Move Silently +18, Search +4, Spot +6, Use Magic<br />
Device +5; Dodge, Mobility, Multiattack, Scribe Scroll,<br />
Weapon Focus (javelin). *+4 bonus on Hide checks in rocky or<br />
subterranean settings.<br />
Stench (Ex): All creatures (except troglodytes) within 30 ft.<br />
of an angry or frightened troglodyte must succeed at a Fort save<br />
(DC 13) or be nauseated for 10 rounds, taking 1d6 points of<br />
temporary Str damage.<br />
Demonic Right Leg (Ex): A demonic right leg is long and<br />
agile. It increases Ukemil’s speed by +10 (included above) and<br />
grants a +5 competence bonus on Climb and Jump checks. (See<br />
the sidebar Drawbacks to Demonic Additions, page 115, for<br />
more information.)<br />
Insanity (Ex): Insanity score 2. Wis 18 for bonus spells and<br />
DCs; Wis 14 for all other Wis-based checks.<br />
Spells Prepared (5/5/4/3; base DC = 14 + spell level): 0—cure<br />
minor wounds (2), detect magic, detect poison, resistance; 1st—bane,<br />
command, cure light wounds, random action*, shield of faith; 2nd—<br />
bull’s strength, endurance, hold person, Tharizdun’s touch*; 3rd—contagion*,<br />
cure serious wounds, dispel magic.<br />
*Domain spell. Deity: Tharizdun. Domains: Destruction<br />
(1/day smite, +4 attack, +5 damage); Madness (1/day add<br />
Insanity score to Wis-based roll).<br />
Possessions: Black robes, +2 leather armor of silent moves, +1 short<br />
sword, potion of cat’s grace, divine scroll of cure light wounds, divine<br />
favor, and locate object, 2 javelins, curved knife, 110 gp, iron key<br />
(opens chest in area 41 of the Outer Fane), holy symbol (obex).<br />
dVarachan: Male human Clr12; CR 12, Medium-size<br />
humanoid (human); HD 12d8+24; hp 80; Init +4; Spd 20 ft.; AC<br />
21 (touch 10, flat-footed 21); Atk +11/+6 melee (1d8+1, masterwork<br />
heavy mace) or +9 ranged (1d8/19–20, light crossbow);<br />
183
APPENDIX 3: NPC STATISTICS<br />
184<br />
SA Turn undead 5/day; AL NG; SV Fort +11, Ref +7, Will +12;<br />
Str 13, Dex 10, Con 14, Int 12, Wis 17, Cha 14.<br />
Skills and Feats: Bluff +9, Concentration +17, Diplomacy +4,<br />
Intimidate +4, Knowledge (arcana) +16, Knowledge (religion)<br />
+16; Brew Potion, Craft Wand, Improved Initiative, Lightning<br />
Reflexes, Scribe Scroll, Still Spell.<br />
Spells Prepared: None currently.<br />
Deity: None (formerly Tharizdun).<br />
Possessions: +1 full plate armor, cloak of resistance +1, wand of cure<br />
light wounds (15 charges), wand of silence (42 charges), potion of<br />
neutralize poison, divine scroll of true seeing, summon monster III<br />
and flame strike, masterwork heavy mace, large steel shield,<br />
light crossbow, 10 bolts, iron key (opens chest in area 41 of the<br />
Outer Fane).<br />
dVictor: Male half-elf Rog5/Asn4; CR 9; Medium-size<br />
humanoid (half-elf ); HD 5d6+5 plus 4d6+4; hp 40; Init +6;<br />
Spd 30 ft.; AC 20 (touch 12, flat-footed 18); Atk +10/+5 melee<br />
(1d6+4/18–20, +1 rapier) or +9 ranged (1d8+1/19–20, masterwork<br />
light crossbow with +1 bolt); SA Death attack, sneak<br />
attack +5d6; SQ Evasion, immune to sleep, locate traps, lowlight<br />
vision, poison use, uncanny dodge (Dex bonus to AC<br />
when flat-footed, can’t be flanked), +2 bonus on saves against<br />
poison, +2 bonus on saves against enchantment effects; AL<br />
CE; SV Fort +3, Ref +10, Will +2; Str 16, Dex 14, Con 13, Int<br />
13, Wis 10, Cha 9.<br />
Skills and Feats: Balance +11, Concentration +3, Disguise +3,<br />
Escape Artist +5, Hide +23, Intimidate +7, Jump +12, Listen +13,<br />
Move Silently +13, Search +2, Spot +9, Tumble +15; Dodge,<br />
Expertise, Improved Disarm, Improved Initiative.<br />
Death Attack (Ex): If an assassin studies a target for 3<br />
rounds and then makes a sneak attack with a melee weapon<br />
that successfully deals damage, the sneak attack can also paralyze<br />
(for 1d6+4 rounds) or kill the victim. Fort save DC 15<br />
to resist.<br />
Spells Prepared (2/1; base DC = 11 + spell level; 25% arcane spell<br />
failure chance): 1st—ghost sound, spider climb; 2nd—darkness.<br />
Spellbook: 1st—change self, detect poison, ghost sound, obscuring<br />
mist, spider climb; 2nd—alter self, darkness, pass without trace,<br />
undetectable alignment.<br />
Possessions: +1 rapier, +1 elven chain, +1 buckler, masterwork<br />
light crossbow, 5 +1 bolts, 1 screaming bolt, 14 bolts, cloak of<br />
elvenkind, potion of lesser restoration.<br />
dVister: Female elf Pal7; CR 7 (currently 6 without gear);<br />
Medium-size humanoid (elf ); HD 7d10+7; hp 50; Init +1; Spd<br />
30 ft.; AC 11 (touch 11, flat-footed 10); Atk +9/+4 melee (1d3+2<br />
subdual, unarmed strike); SA Smite evil (1/day, +3 attack, +7<br />
damage), turn undead 5/day (as Clr5); SQ Immune to sleep, lowlight<br />
vision, paladin abilities, +2 bonus on saves against<br />
enchantment effects; AL LG; SV Fort +8, Ref +5, Will +5; Str 14,<br />
Dex 13, Con 12, Int 10, Wis 12, Cha 15.<br />
Skills and Feats: Concentration +6, Diplomacy +4, Heal +3,<br />
Knowledge (religion) +1, Listen +3, Ride (horse) +11, Search +2,<br />
Spot +3; Dodge, Mobility, Mounted Combat.<br />
Paladin Abilities: Detect evil, divine grace, divine health,<br />
lay on hands (14 points/day), aura of courage, remove disease<br />
2/week.<br />
Spells Prepared (2; base DC = 11 + spell level): 1st—divine favor,<br />
protection from evil.<br />
Possessions: None (currently imprisoned).<br />
dYrthuk Innar: Male half-earth elemental/half-human<br />
Ftr10; CR 13 (normally 12; +1 for extra gear); Medium-size outsider<br />
(evil); HD 10d10+40; hp 101; Init +0; Spd 20 ft.; AC 27<br />
(touch 12, flat-footed 27); Atk +18/+13 melee (1d10+9/17–20,<br />
bastard sword); SQ Half-elemental abilities, immune to disease,<br />
immune to earth effects, +4 bonus on saves against poison; AL<br />
NE; SV Fort +11, Ref +5, Will +6; Str 23, Dex 10, Con 18, Int 13,<br />
Wis 12, Cha 8.<br />
Skills and Feats: Craft (torture equipment) +5, Diplomacy<br />
+1, Heal +7, Intimidate +7, Sense Motive +7, Spot +7; Cleave,<br />
Exotic Weapon Proficiency (bastard sword), Expertise,<br />
Improved Critical (bastard sword), Improved Disarm, Iron<br />
Will, Lightning Reflexes, Power Attack, Skill Focus<br />
(Intimidate), Weapon Focus (bastard sword), Weapon<br />
Specialization (bastard sword).<br />
Half-Elemental Abilities (Sp): 1/day—magic stone, soften<br />
earth and stone, stone shape, spike stones, wall of stone (all as Sor10).<br />
DC = 9 + spell level.<br />
Possessions: +1 full plate armor, +1 large steel shield, +1 bastard<br />
sword of wounding, ring of protection +2, gauntlets of ogre power, hand<br />
of the mage, potion of truth, potion of ghoul touch, potion of cure serious<br />
wounds, potion of cure light wounds.<br />
THE RECOVERED TEMPLE<br />
dOgre Guards: Male ogre War4; CR 5; Large giant; HD 4d8+8<br />
plus 4d10+8; hp varies (see text); Init –1; Spd 20 ft.; AC 20<br />
(touch 8, flat-footed 20); Atk +14/+9 melee (2d6+9, Huge<br />
masterwork greatclub) or +5 ranged (2d6+6/×3, Huge shortspear);<br />
Reach 10 ft.; AL CE; SV Fort +10, Ref +1, Will +2; Str 22,<br />
Dex 8, Con 15, Int 6, Wis 10, Cha 7.<br />
Skills and Feats: Climb +1, Hide –12, Listen +3, Spot +3; Power<br />
Attack, Weapon Focus (greatclub).<br />
Possessions: Large half-plate armor, Huge masterwork greatclub,<br />
2 Huge shortspears, potion of cure serious wounds, potion of<br />
endurance, potion of protection from elements (fire), 200 gp, golden<br />
topaz (value 400 gp).<br />
dOgre Elite Guards: Male ogre Ftr6; CR 8; Large giant; HD<br />
4d8+8 plus 6d10+12; hp varies (see text); Init –1; Spd 20 ft.; AC<br />
21 (touch 8, flat-footed 21); Atk +16/+11 melee (2d6+12, +1<br />
Huge greatclub) or +7/+2 ranged (2d6+6/×3, Huge shortspear);<br />
Reach 10 ft.; AL CE; SV Fort +11, Ref +4, Will +3; Str 22, Dex 8,<br />
Con 15, Int 6, Wis 10, Cha 7.<br />
Skills and Feats: Climb +4, Hide –11, Listen +5, Spot +5;<br />
Alertness, Cleave, Improved Bull Rush, Lightning Reflexes,<br />
Power Attack, Weapon Focus (greatclub), Weapon Specialization<br />
(greatclub).<br />
Possessions: +1 half-plate armor, +1 Huge greatclub, Huge shortspear,<br />
potion of cure serious wounds, potion of bull’s strength, tanglefoot<br />
bag, 20 pp, golden topaz (value 400 gp).<br />
dDein: Male half-fiend/half-stone giant; CR 10, Large outsider<br />
(evil, chaotic); HD 14d8+70; hp 160; Init +4; Spd 40 ft.; AC<br />
28 (touch 13, flat-footed 24); Atk +20/+15 melee (2d6+16/19–20<br />
Huge greatclub), or +19 melee (1d8+10, bite) and +14 melee<br />
(1d6+5, 2 claws), or +14/+9 ranged (2d8+10, rock); Reach 10 ft.;<br />
SA Rock throwing, spell-like abilities; SQ Acid, cold, electricity,<br />
and fire resistance 20, darkvision 60 ft., immune to poison,<br />
rock catching; AL CE; SV Fort +14, Ref +8, Will +4; Str 31, Dex<br />
19, Con 21, Int 14, Wis 10, Cha 13.<br />
Skills and Feats: Bluff +8, Climb +24, Diplomacy +5, Hide<br />
+12 (+20 in rocky terrain), Intimidate +9, Jump +24;<br />
Knowledge (religion) +8, Listen +6, Search +8, Sense Motive<br />
+6, Spot +17; Combat Reflexes, Point Blank Shot, Power<br />
Attack, Precise Shot.<br />
Rock Throwing: Range increment 180 ft.<br />
Spell-Like Abilities (Sp): 3/day–darkness, poison, unholy<br />
aura; 1/day–desecrate, unholy blight, contagion, blasphemy, unhallow<br />
(all as Sor14). DC = 11 + spell level.
APPENDIX 3: NPC STATISTICS<br />
Rock Catching: Can catch Small, Medium-size, or Large<br />
rocks with a successful Ref save (DC 15, 20, or 25 respectively)<br />
if ready for and aware of the attack.<br />
Possessions: Large hide armor, +1 Huge greatclub, potion of cure<br />
serious wounds.<br />
dDugart: Male half-orc Clr10/Doomdreamer2; CR 12;<br />
Medium-size humanoid (half-orc); HD 10d8+40 plus 2d8+8; hp<br />
101; Init +4; Spd 20 ft.; AC 24 (touch 10, flat-footed 24); Atk<br />
+14/+9 melee (1d8+6, +2 morningstar); SA Dark lore, rebuke<br />
undead 2/day; SQ Darkvision 60 ft., doomdreamer secret,<br />
insanity; AL CE; SV Fort +11, Ref +5, Will +11; Str 19, Dex 10,<br />
Con 18, Int 11, Wis 18, Cha 9.<br />
Skills and Feats: Concentration +12, Knowledge (arcana) +11,<br />
Knowledge (religion) +11; Brew Potion, Improved Initiative,<br />
Lightning Reflexes, Scribe Scroll, Spell Focus (Necromancy).<br />
Dugart has bull’s strength and endurance in effect upon himself<br />
when encountered. With bull’s strength and endurance: hp 113;<br />
Atk +16/+11 (1d8+8, +2 morningstar); SV Fort +12; Str 22, Con<br />
21. Concentration +13.<br />
Dark Lore (Su): 1/day speak a creature’s secret. Target must<br />
make a Will save (DC 17) or be stunned for 1d3 rounds.<br />
Doomdreamer Secret: Demon’s name (10 HD demon<br />
comes with lesser planar ally)<br />
Insanity (Ex): Insanity score 6. Wis 24 for bonus spells and<br />
DCs; Wis 12 for all other Wis-based checks.<br />
Spells Prepared (6/8/7/7/5/5/4; base DC = 17 + spell level):<br />
0—cure minor wounds, detect magic (2), light, mending, resistance;<br />
1st—bane, cause fear†, command (2), doom, protection from good,<br />
random action*, shield of faith; 2nd—bull’s strength (2), endurance,<br />
hold person, silence, spiritual weapon, Tharizdun’s touch*; 3rd—<br />
bestow curse, cure serious wounds (2), dispel magic, magic vestment,<br />
protection from elements, rage*; 4th—cure critical wounds, freedom of<br />
movement, greater magic weapon, neutralize poison, unholy blight*;<br />
5th—bolts of bedevilment*, flame strike, slay living†, summon monster<br />
V, true seeing; 6th—etherealness, harm†, phantasmal killer*,<br />
word of recall.<br />
*Domain spell. Deity: Tharizdun. Domains: Evil (cast evil<br />
spells at 13th level); Madness (1/day add Insanity score to Wisbased<br />
roll ).<br />
†Because of Spell Focus (Necromancy), the base DC against<br />
these spells is 19 + spell level.<br />
Possessions: +2 morningstar, +2 full plate armor, +2 light fortification<br />
large steel shield, helm of comprehending languages and reading<br />
magic, divine scroll of harm, heal and raise dead, 2 vials of acid, 54<br />
gp, holy symbol (obex), robes, iron key (opens trunk 3 in area<br />
20 of the Recovered Temple).<br />
dEstalion: Male elf Sor6/Clr6/Doomdreamer1; CR 13;<br />
Medium-size humanoid (elf ); HD 6d4 plus 6d8 plus 1d8; hp 44;<br />
Init +8; Spd 30 ft.; AC 17 (touch 17, flat-footed 13); Atk +8/+3<br />
melee (1d8, masterwork heavy mace); SA Rebuke undead<br />
2/day; SQ Doomdreamer secret, immune to sleep, insanity, lowlight<br />
vision, +2 bonus on saves against enchantment effects; AL<br />
CE; SV Fort +7, Ref +8, Will +15; Str 10, Dex 19, Con 11, Int 15,<br />
Wis 19, Cha 13.<br />
Skills and Feats: Concentration +16, Knowledge (arcana) +15,<br />
Knowledge (religion) +13, Listen +6, Scry +4, Search +4,<br />
Spellcraft +18, Spot +6; Empower Spell, Improved Initiative,<br />
Scribe Scroll, Spell Focus (Necromancy), Toughness.<br />
Doomdreamer Secret: Curse of power (treat as 8th level<br />
when casting evil spells).<br />
Insanity (Ex): Insanity score 3. Wis 22 for bonus spells and<br />
DCs; Wis 16 for all other Wis-based checks.<br />
Cleric Spells Prepared (6/7/6/4/3; base DC = 16 + spell level):<br />
0—cure minor wounds, detect magic, inflict minor wounds†, read<br />
magic, resistance, virtue; 1st—bane, cause fear†, command, cure light<br />
wounds, doom, random action*, shield of faith; 2nd—aid, death<br />
knell†, endurance, magic missile*, silence, spiritual weapon; 3rd—<br />
blast of force*, blindness/deafness, contagion†, summon monster III;<br />
4th—confusion*, poison†, empowered spiritual weapon.<br />
*Domain spell. Deity: Tharizdun. Domains: Force (1/day reroll<br />
any damage roll for a weapon, a spell, or an ability); Madness<br />
(1/day add Insanity score to Wis-based roll).<br />
Sorcerer Spells Known (7/7/5/3; base DC = 11 + spell level):<br />
0—arcane mark, dancing lights, daze, flare, ghost sound, mage hand,<br />
ray of frost; 1st—burning hands, mage armor, ray of enfeeblement†,<br />
shield; 2nd—invisibility, web; 3rd—lightning bolt.<br />
†Because of Spell Focus (Necromancy), the base DC against<br />
these spells is 13 + spell level.<br />
Possessions: Masterwork heavy mace, wand of bolts of bedevilment<br />
(22 charges), +2 periapt of wisdom, ring of protection +3, torch<br />
of revealing (and 3 cones of incense of dreaming; see Appendix 1),<br />
potion of protection from elements (electricity), arcane scroll of displacement,<br />
levitate, and darkness, divine scroll of bestow curse, stone<br />
shape, obscure object, and find traps, 61 gp, four 200 gp platinum<br />
rings, holy symbol (obex), helmet, robes, iron key (opens trunk<br />
1 in area 20 of the Recovered Temple).<br />
dFalrinth: Male human Wiz14; CR 14; Medium-size<br />
humanoid (human); HD 14d4+28; hp 62; Init +3; Spd 30 ft.; AC<br />
19 (touch 16, flat-footed 16); Atk +7/+2 melee (1d4/19–20,<br />
dagger) or +10/+5 ranged (1d4/19–20, dagger); AL NE; SV<br />
Fort +6, Ref +7, Will +9; Str 10, Dex 17, Con 15, Int 18, Wis 10,<br />
Cha 12.<br />
Skills and Feats: Alchemy +20, Concentration + 19, Diplomacy<br />
+9, Hide +11, Knowledge (arcane) +21, Spellcraft +21; Brew<br />
Potion, Craft Rod, Craft Wand, Craft Wondrous Item, Dodge,<br />
Empower Spell, Forge Ring, Quicken Spell, Scribe Scroll.<br />
Falrinth has cat’s grace and endurance in effect upon himself<br />
when encountered. With cat’s grace and endurance: hp 90; Init +5;<br />
AC 21 (touch 18, flat-footed 16); Atk +12/+7 ranged<br />
(1d4/19–20, dagger); SV Fort +8, Ref +9; Dex 20, Con 19.<br />
Concentration +21, Hide +13.<br />
Spells Prepared (4/5/5/5/5/3/3/2; base DC = 14 + spell<br />
level): 0—detect magic, mage hand, ray of frost, read magic; 1st—<br />
hypnotism, magic missile (2), mage armor, shield; 2nd—cat’s<br />
grace*, endurance*, levitate, protection from arrows, web; 3rd—dispel<br />
magic, fireball, haste, lightning bolt, sleet storm; 4th—charm<br />
monster, ice storm, improved invisibility, Otiluke’s resilient sphere,<br />
stoneskin; 5th—cone of cold, teleport, wall of force; 6th—chain<br />
lightning, disintegrate, true seeing; 7th—finger of death, quickened<br />
lightning bolt.<br />
Spellbook: 0—arcane mark, dancing lights, daze, detect magic,<br />
detect poison, disrupt undead, flare, ghost sound, light, mage hand,<br />
mending, open/close, prestidigitation, ray of frost, read magic, resistance;<br />
1st—alarm, animate rope, comprehend languages, detect<br />
secret doors, endure elements, hypnotism, identify, mage armor,<br />
magic missile, shield, sleep; 2nd—alter self, cat’s grace, endurance,<br />
invisibility, levitate, locate object, protection from arrows, summon<br />
monster II, web; 3rd—dispel magic, explosive runes, fireball, flame<br />
arrow, fly, haste, lightning bolt, secret page, sepia snake sigil, sleet<br />
storm; 4th—charm monster, fire shield, fire trap, ice storm,<br />
improved invisibility, Otiluke’s resilient sphere, rainbow pattern,<br />
scrying, stoneskin; 5th—cone of cold, lesser planar binding, sending,<br />
telekinesis, teleport, wall of force, wall of stone; 6th—chain lightning,<br />
circle of death, disintegrate, permanent image, project image,<br />
summon monster VI, true seeing; 7th—finger of death, limited<br />
wish, phase door, reverse gravity, sequester.<br />
Possessions: bracers of armor +3, minor cloak of displacement,<br />
ring of protection +3, wand of polymorph other (30 charges) rod of<br />
cancellation, arcane scroll of spell turning, prismatic spray, arcane<br />
185
APPENDIX 3: NPC STATISTICS<br />
186<br />
scroll of flesh to stone, stone to flesh, project image and antimagic<br />
field, potion of cure moderate wounds, potion of intelligence, potion of<br />
gaseous form, 2 daggers, ring of three keys (these open the coffers<br />
in area 4 of the Recovered Temple), 25 gp, 130 gp gold ring.<br />
dThe Second: Aboleth Clr7/Doomdreamer1; CR 16; Huge<br />
aberration (aquatic); HD 8d8+40 plus 7d8+35 plus 1d8+5; hp<br />
161; Init +1; Spd 10 ft., swim 60 ft.(30 ft. within sheath); AC 20<br />
(touch 9, flat-footed 19); Atk +17 melee (1d6+8 and transformation,<br />
4 tentacles); Face/Reach 10 ft. by 20 ft./10 ft.; SA<br />
Enslave, psionics, rebuke undead 6/day, transformation; SQ<br />
Doomdreamer secret, insanity, mucus cloud; AL CE; SV Fort<br />
+12, Ref +5, Will +15; Str 26, Dex 13, Con 21, Int 15, Wis 20,<br />
Cha 17.<br />
Skills and Feats: Concentration +16, Hide –7, Knowledge<br />
(arcana) +16, Knowledge (religion) +11, Listen +18, Spot +19;<br />
Alertness, Combat Casting, Craft Wand, Heighten Spell, Power<br />
Attack, Spell Focus (Necromancy).<br />
Enslave (Su): 3/day, attempt to enslave any one living creature<br />
within 30 ft. (as dominate person, but creature won’t fight on<br />
aboleth’s behalf ). As Sor16; Will save (DC 17) to resist. An<br />
enslaved creature can attempt a new Will save every 24 hours<br />
to break free. The control is also broken if the aboleth dies or<br />
travels more than one mile from its slave.<br />
Psionics (Sp): At will—hypnotic pattern, illusory wall, mirage<br />
arcana, persistent image, programmed image, project image, veil (all as<br />
Sor16). DC = 13 + power level.<br />
Transformation (Ex): A blow from an aboleth’s tentacle<br />
can cause a terrible transformation. Affected creatures must<br />
succeed at a Fort save (DC 19) or begin to transform over the<br />
next 1d4+1 minutes, the skin gradually becoming a clear,<br />
slimy membrane. A transformed creature must remain moistened<br />
with cool, fresh water or suffer 1d12 points of damage<br />
every 10 minutes.<br />
A remove disease spell cast before the transformation is complete<br />
restores an afflicted creature to normal. Afterward, however,<br />
only a heal or mass heal spell can reverse the change.<br />
Doomdreamer Secret: Deeper madness (+2 to Insanity score).<br />
Insanity (Ex): Insanity score 6. Wis 26 for bonus spells and<br />
DCs; Wis 14 for all other Wis-based checks.<br />
Mucus Cloud (Ex): An aboleth underwater surrounds itself<br />
with a viscous cloud of mucus roughly 1 ft. thick. Any creature<br />
coming into contact with and inhaling this substance must<br />
succeed at a Fort save (DC 19) or lose the ability to breathe air<br />
for the next 3 hours. The affected creature suffocates in 2d6<br />
minutes if removed from the water. Renewed contact with the<br />
mucus cloud and failing another Fort save continues the effect<br />
for another 3 hours.<br />
Spells Prepared (6/7/6/6/5; base DC = 18 + spell level): 0—<br />
cure minor wounds, detect magic (2), light, read magic, resistance;<br />
1st—bane, cause fear†, command, doom, protection from good, random<br />
action*, shield of faith; 2nd—bull’s strength, death knell†,<br />
endurance, silence, spiritual weapon, Tharizdun’s touch*; 3rd—<br />
bestow curse, cure serious wounds, dispel magic, prayer, protection<br />
from elements, rage*; 4th—cure critical wounds, death ward†, poison†<br />
(2), unholy blight*.<br />
*Domain spell. Deity: Tharizdun. Domains: Evil (cast evil<br />
spells at 9th level); Madness (1/day add Insanity score to Wisbased<br />
roll ).<br />
†Because of Spell Focus (Necromancy), the base DC against<br />
these spells is 20 + spell level.<br />
Possessions: Ring of fire elemental command (a new wearer must<br />
take the ring to the Elemental Plane of Fire itself before accessing<br />
its true nature; see page 193 of the DUNGEON MASTER’s Guide),<br />
wand of hold person (heightened to 4th level) (32 charges), divine<br />
scroll of ethereal jaunt, holy symbol (obex).<br />
dSenshock: Male human ghost Wiz9; CR 11; Medium-size<br />
undead (incorporeal); HD 9d12; hp 58; Init +3; Spd fly 30 ft.<br />
(perfect); AC 14 (touch 12, flat-footed 14); Atk +3 melee (1d4,<br />
incorporeal touch) or +4 melee (1d6, staff ) or +5 ranged<br />
(1d8/19–20, masterwork light crossbow with masterwork bolt);<br />
SA Corrupting touch, manifestation, telekinesis; SQ<br />
Incorporeal, rejuvenation, undead, +4 turn resistance; AL CE;<br />
SV Fort +4, Ref +5, Will +6; Str 11, Dex 8, Con —, Int 18, Wis 9,<br />
Cha 17.<br />
Skills and Feats: Alchemy +12, Concentration +12, Hide +7,<br />
Knowledge (arcana) +16, Knowledge (religion) +12, Listen<br />
+7, Scry +16, Search +15, Spellcraft +12, Spot +9; Combat<br />
Casting, Improved Initiative, Lightning Reflexes, Scribe<br />
Scroll, Spell Mastery (magic missile, fireball, ice storm, lightning<br />
bolt), Toughness.<br />
Against Nonmaterial Opponents: AC 13 (touch 11, flat-footed<br />
13); Atk +4 melee (1d4, incorporeal touch).<br />
Corrupting Touch (Su): Deals damage with incorporeal<br />
touch attack against material or ethereal creatures.<br />
Manifestation (Su): Able to use touch attacks only against<br />
material opponents, but remains incorporeal.<br />
Telekinesis (Su): 1/round as a free action (as Sor12).<br />
Incorporeal: Can be harmed only by other incorporeal creatures,<br />
+1 or better magic weapons, or magic, with a 50% chance<br />
to ignore any damage from a corporeal source. Can pass<br />
through solid objects at will, and own attacks pass through<br />
armor. Always moves silently.<br />
Rejuvenation (Su): With a successful level check, cannot<br />
be permanently destroyed unless specified conditions are met.<br />
Undead: Immune to mind-influencing effects, poison,<br />
sleep, paralysis, stunning, and disease. Not subject to critical<br />
hits, subdual damage, ability damage, energy drain, or death<br />
from massive damage.<br />
Turn Resistance (Ex): Treat as 13th level for turning purposes.<br />
Spells Prepared (4/5/5/4/3/1; base DC = 14 + spell level):<br />
0—detect magic, light, ray of frost, read magic; 1st—charm person,<br />
mage armor, magic missile (3); 2nd—invisibility, Melf ’s acid<br />
arrow (2), see invisibility, web; 3rd—displacement, fireball, haste,<br />
lightning bolt; 4th—ice storm (2), phantasmal killer; 5th—summon<br />
monster V.<br />
Possessions (all ethereal): Masterwork light crossbow, 10<br />
masterwork bolts, bracers of armor +2, cloak of resistance +1, ring of<br />
protection +2, staff of fire (9 charges).<br />
dSmigmal Redhand: Female half-orc Ftr5/Rog2/Asn7; CR<br />
14; Medium-size humanoid (half-orc); HD 5d10+10 plus 2d6+4<br />
plus 7d6+14; hp 87; Init +7; Spd 30 ft.; AC 21 (touch 14, flat-footed<br />
21); Atk +17/+12/+7 melee (1d4+6/19–20, assassin’s dagger) or<br />
+17/+12/+7 melee (2d6+9/19–20 and poison, greatsword); SA<br />
Death attack, sneak attack +5d6, poison; SQ Darkvision 60 ft.,<br />
evasion, locate traps, uncanny dodge (Dex bonus to AC when<br />
flat-footed, can’t be flanked), +3 bonus on saves against poison;<br />
AL CE; SV Fort +8, Ref +12, Will +3; Str 18, Dex 16, Con 14, Int<br />
10, Wis 11, Cha 7.<br />
Skills and Feats: Balance +6, Disguise +2, Hide +19, Jump +15,<br />
Listen +7, Move Silently +19, Tumble +12; Combat Reflexes,<br />
Dodge, Improved Initiative, Mobility, Quick Draw, Spring<br />
Attack, Weapon Focus (greatsword), Weapon Specialization<br />
(greatsword).<br />
Death Attack (Ex): If the assassin studies a target for 3<br />
rounds and then makes a sneak attack with a melee weapon<br />
that successfully deals damage, the sneak attack can also paralyze<br />
(for 1d6+7 rounds) or kill the victim. Fort save DC 17 to<br />
resist (DC 18 with assassin’s dagger).<br />
Poison (Ex): Deathblade poison on greatsword. Fort save<br />
DC 20; 1d6 Con/2d6 Con.
APPENDIX 3: NPC STATISTICS<br />
Spells Prepared (2/1/1; base DC = 10 + spell level; 10% arcane<br />
spell failure chance): 1st—change self, spider climb; 2nd—darkness;<br />
3rd—misdirection.<br />
Spellbook: 1st—change self, detect poison, ghost sound, obscuring<br />
mist, spider climb; 2nd—alter self, darkness, pass without trace,<br />
undetectable alignment; 3rd—deeper darkness, invisibility, misdirection,<br />
nondetection.<br />
Possessions: Ring of invisibility, deathblade poison (1 dose), +2<br />
mithral shirt, ring of protection +1, amulet of natural armor +1, potion<br />
of cat’s grace, potion of heroism, potion of nondetection, potion of cure<br />
serious wounds, assassin’s dagger, +1 greatsword, arcane scroll of<br />
improved invisibility, arcane scroll of dimension door, steel key<br />
(opens chest in area 15 of Recovered Temple).<br />
dSusain Carun: Female human Clr8/Rog2/Doomdreamer3;<br />
CR 13; Medium-size humanoid (human); HD 8d8+8 plus<br />
2d6+2 plus 3d8+6; hp 70; Init +3; Spd 40 ft.; AC 18 (touch 14,<br />
flat-footed 15); Atk +9 melee (6, 3 tentacles from lesser tentacle<br />
rod) or +12/+7 melee (touch spells); SA Chill soul, dark lore,<br />
rebuke undead 2/day, sneak attack +1d6; SQ Demonic right<br />
leg, doomdreamer secrets, evasion, insanity, locate traps; AL<br />
CE; SV Fort +10, Ref +9, Will +10; Str 16, Dex 17, Con 12, Int<br />
10, Wis 17, Cha 8.<br />
Skills and Feats: Climb +9, Concentration +16, Hide +7, Jump<br />
+9, Knowledge (arcana) +11, Knowledge (religion) +16, Listen<br />
+7, Move Silently +8, Search +3, Spot +7; Alertness, Dodge,<br />
Forge Ring, Great Fortitude, Spell Focus (Necromancy),<br />
Mobility.<br />
Chill Soul (Su): Can touch a living creature and inflict 3d8<br />
points of damage. This can be used in conjunction with an<br />
inflict wounds spell, but is negated if the victim is wearing the<br />
purple robes of Tharizdun.<br />
Dark Lore (Su): 1/day speak a creature’s secret. Target must<br />
make a Will save (DC 20) or be stunned for 1d3 rounds.<br />
Demonic Right Leg (Ex): A demonic right leg is long and<br />
agile. It increases Carun’s speed by +10 (included above) and<br />
grants a +5 competence bonus on Climb and Jump checks. (See<br />
the sidebar Drawbacks to Demonic Additions, page 115, for<br />
more information.)<br />
Doomdreamer Secrets: Unnatural vitality (+3 hp), paying<br />
fealty to death (+1 to DC of death effects).<br />
Insanity (Ex): Insanity score 5. Wis 22 for bonus spells and<br />
DCs; Wis 12 for all other Wis-based checks.<br />
Spells Prepared (6/8/7/6/5/4/3; base DC = 16 + spell level):<br />
0—cure minor wounds (2), detect magic, mending, read magic, virtue;<br />
1st—bane, bless, cause fear†, command, cure light wounds, divine<br />
favor, random action*, shield of faith; 2nd—bull’s strength, cure moderate<br />
wounds, death knell†, endurance, magic missile*, silence, spiritual<br />
weapon; 3rd—blast of force*, contagion†, cure serious wounds, dispel<br />
magic, magic vestment, protection from elements; 4th—cure critical<br />
wounds, divine power, Otiluke’s resilient sphere*, poison†, summon<br />
monster IV; 5th—bolts of bedevilment*, dispel good, slay living††,<br />
spell resistance; 6th—harm†, heal, phantasmal killer††*.<br />
*Domain spell. Deity: Tharizdun. Domains: Force (1/day reroll<br />
any damage roll for a weapon, a spell, or an ability); Madness<br />
(1/day add Insanity score to Wis-based roll ).<br />
†Because of Spell Focus (Necromancy), the base DC against<br />
these spells is 18 + spell level.<br />
††Because of the paying fealty to death ability, the base DC<br />
against these spells is 19 + spell level.<br />
Possessions: Lesser tentacle rod (see Appendix 1), +2 leather<br />
armor, ring of protection +1 ring of the ram (50 charges), torch of<br />
revealing (and 3 cones of incense of dreaming)(See Appendix 1),<br />
78 gp, 550 gp gold ring with sapphire, purple robe of Tharizdun,<br />
holy symbol (obex), robes, iron key (opens trunk 4 in area 20<br />
of the Recovered Temple).<br />
dThuchos Nalred: Male human Clr9/Doomdreamer3; CR<br />
12; Medium-size humanoid (human); HD 9d8+18 plus 3d8+9;<br />
hp 93; Init +1; Spd 20 ft.; AC 25 (touch 11, flat-footed 24); Atk<br />
+12/+7 melee (1d8+3, +1 heavy mace); SA Chill soul, dark lore,<br />
rebuke undead 4/day; SQ Doomdreamer secrets, insanity; AL<br />
CE; SV Fort +9, Ref +5, Will +11; Str 15, Dex 12, Con 14, Int 14,<br />
Wis 20, Cha 12.<br />
Skills and Feats: Concentration +17, Diplomacy +13,<br />
Knowledge (arcana) +14, Knowledge (religion) +17, Scry +8,<br />
Spellcraft +17; Power Attack, Cleave, Combat Reflexes, Spell<br />
Focus (Necromancy), Weapon Focus (heavy mace).<br />
Chill Soul (Su): Can touch a living creature and inflict 3d8<br />
points of damage. This can be used in conjunction with an<br />
inflict wounds spell, but is negated if the victim is wearing the<br />
purple robes of Tharizdun.<br />
Dark Lore (Su): 1/day speak a creature’s secret. Target must<br />
make a Will save (DC 20) or be stunned for 1d3 rounds.<br />
Doomdreamer Secrets: Unnatural vitality (+3 hp), curse of<br />
power (treat as 13th level when casting evil spells), paying fealty<br />
to death (+1 to DC of death effects)<br />
Insanity (Ex): Insanity score 6. Wis 26 for bonus spells and<br />
DCs; Wis 14 for all other Wis-based checks.<br />
Spells Prepared (6/8/7/7/6/5/4; base DC = 18 + spell level):<br />
0—cure minor wounds (2), detect magic, inflict minor wounds†,<br />
resistance, virtue; 1st—bane, cause fear†, cure light wounds, divine<br />
favor, protection from good, random action*, shield of faith (2);<br />
2nd—aid, bull’s strength, cure moderate wounds, death knell†,<br />
endurance, magic missile*, spiritual weapon; 3rd—cure serious<br />
wounds, contagion†, dispel magic, magic vestment, negative energy<br />
protection, protection from elements, rage*; 4th—confusion*, cure<br />
critical wounds, divine power, greater magic weapon, poison†, spell<br />
immunity; 5th—bolts of bedevilment*, righteous might, slay living††,<br />
spell resistance, true seeing; 6th—greater dispelling, harm†,<br />
heal, repulsion*.<br />
*Domain spell. Deity: Tharizdun. Domains: Force (1/day reroll<br />
any damage roll for a weapon, a spell, or an ability); Madness<br />
(1/day add Insanity score to Wis-based roll ).<br />
†Because of Spell Focus (Necromancy), the base DC against<br />
these spells is 20 + spell level.<br />
††Because of the paying fealty to death ability, the base DC<br />
against these spells is 21 + spell level.<br />
Possessions: +1 heavy mace, +2 full plate armor, masterwork<br />
large steel shield, amulet of natural armor +2, helmet of flying (as<br />
wings), torch of revealing (and 2 cones of incense of<br />
dreaming)(See Appendix 1), potion of gaseous form, divine scroll<br />
of word of recall, summon monster VI, 232 gp, 4 100 gp gems,<br />
holy symbol (obex), robes, iron key (opens trunk 2 in area 20<br />
of the Recovered Temple).<br />
dTrond: Male ogre Bbn6; CR 8; Large giant; HD 4d8+8 plus<br />
6d12+12; hp 90; Init +0; Spd 40 ft.; AC 19 (touch 9, flat-footed<br />
19); Atk +19/+9 melee (2d6+7/19–20, Huge heavy flail) or<br />
+12/+7 ranged (2d6+6, Huge shortspear); Reach 10 ft.; SA Rage;<br />
SQ Uncanny dodge (Dex bonus to AC when flat-footed, can’t be<br />
flanked); AL CE; SV Fort +11, Ref +3, Will +3; Str 19, Dex 10,<br />
Con 15, Int 7, Wis 10, Cha 9.<br />
Skills and Feats: Climb +12, Listen +4, Spot +3; Improved Bull<br />
Rush, Power Attack, Weapon Focus (heavy flail).<br />
Rage (Ex): 2/day—hp 114; AC 17 (touch 7, flat-footed 17);<br />
Atk +21/+11 melee (2d6+9/19–20, Huge heavy flail) or +14/+9<br />
ranged (2d6+8, Huge shortspear); SV Fort +13, Will +5; Str 23,<br />
Con 19. Climb +14. Lasts 7 rounds, then fatigued.<br />
Possessions: +1 Huge heavy flail, 2 Huge masterwork shortspears,<br />
+1 chain shirt, eyes of the eagle, potion of cure serious wounds.<br />
187
APPENDIX 4: HANDOUTS<br />
THE FIRE NODE<br />
dImix, Prince of Evil Fire Elementals: CR 17; Gargantuan<br />
elemental (fire); HD 36d8+180; hp 342; Init +14; Spd 50 ft.; AC<br />
26 (touch 16, flat-footed 16); Atk +33/+28/+23/+18/+13/+8<br />
melee (4d8+14/19–20 and 1d6 fire, Colossal +2 flaming greatsword,<br />
2d10+12 and 2d8 fire, slam); Face/Reach 20 ft. by 20<br />
ft./20 ft.; SA Burn, spell-like abilities; SQ Damage reduction<br />
15/+3, elemental traits, fire subtype; SR 20; AL CE; SV Fort +17,<br />
Ref +30, Will +16; Str 26, Dex 31, Con 20, Int 20, Wis 18, Cha 18.<br />
Skills and Feats: Concentration +10, Hide –2, Intimidate +9,<br />
Knowledge (the planes) +10, Listen +29, Spot +29; Cleave,<br />
Combat Reflexes, Dodge, Expertise, Improved Critical<br />
(greatsword), Improved Initiative, Martial Weapon Proficiency<br />
(greatsword), Mobility, Power Attack, Spring Attack, Weapon<br />
Finesse (slam), Whirlwind Attack.<br />
Burn (Ex): Those hit by Imix’s slam attack must succeed at a<br />
Ref save (DC 26) or catch fire. The flame burns for 1d4 rounds<br />
(see Catching on Fire, page 86 of the DUNGEON MASTER’s Guide).<br />
A burning creature can take a move-equivalent action to put<br />
out the flame. Creatures hitting Imix with natural weapons or<br />
unarmed attacks take fire damage as though hit by his slam<br />
attack, and also catch fire unless they succeed at a Ref save.<br />
Elemental Traits: Immune to poison, sleep, paralysis, and<br />
stunning. Not subject to critical hits.<br />
Spell-like Abilities (Sp): At will — fireball (10d6 damage,<br />
DC 18), wall of fire (2d4, 1d4, or 2d6+15 damage, DC 19); 1/day<br />
— summon elemental (one elder fire elemental, 1d3 Huge fire<br />
elementals, 1d3 efreet, 1d6 salamanders, or 3d6 fire mephits).<br />
All as a 15th-level sorcerer.<br />
Fire Subtype (Ex): Fire immunity, double damage from cold<br />
except on a successful save.<br />
Possessions: Colossal +2 flaming greatsword.<br />
dMaliskra: Female half-fire elemental/half-medusa<br />
Clr5/Doomdreamer1; CR 15; Medium-size outsider (evil,<br />
chaotic); HD 6d8+6 plus 5d8+5 plus 1d8+4; hp 71; Init +4; Spd<br />
20 ft.; AC 27 (touch 14, flat-footed 23); Atk +9/+4 melee<br />
(1d4/19–20, curved knife) and +8 melee (1d4 and poison,<br />
snakes), or +14/+9 ranged (1d6+1/×3, +1 shortbow); SA<br />
Petrifying gaze, poison, rebuke undead 6/day, spell-like abilities;<br />
SQ Doomdreamer secret, immune to disease and fire,<br />
insanity, +4 bonus on saves against poison; AL CE; SV Fort +7,<br />
Ref +10, Will +13; Str 10, Dex 19, Con 12, Int 12, Wis 18, Cha 17.<br />
Skills and Feats: Bluff +12, Concentration +4, Disguise +12,<br />
Hide +6, Intimidate +5, Knowledge (arcana) +9, Knowledge<br />
(religion) +9, Move Silently +11, Sense Motive +6, Spot +11;<br />
Lightning Reflexes, Point Blank Shot, Precise Shot, Spell Focus<br />
(Necromancy), Weapon Finesse (snakes).<br />
Petrifying Gaze (Su): Turn to stone permanently, 30 ft., Fort<br />
save DC 16.<br />
Poison (Ex): Snakes. Fort save DC 14; 1d6 Str/1d6 Str.<br />
Spell-Like Abilities (Sp): 1/day—burning hands, produce<br />
flame, flaming sphere, wall of fire, fire shield, fire seeds (all as Sor 12).<br />
DC = 13 + spell level.<br />
Doomdreamer Secret: Unnatural vitality (+3 hp).<br />
Insanity (Ex): Insanity score 3. Wis 21 for bonus spells and<br />
DCs; Wis 15 for all other Wis-based checks.<br />
Spells Prepared (5/6/5/4; base DC = 15 + spell level): 0—cure<br />
minor wounds, detect magic, inflict minor wounds†, read magic, resistance;<br />
1st—bless, command, cure light wounds, divine favor, inflict<br />
light wounds†*, shield of faith, 2nd—bull’s strength, death knell†,<br />
endurance, hold person, shatter*; 3rd—blindness/deafness, contagion†*,<br />
dispel magic (2).<br />
*Domain spell. Deity: Tharizdun. Domains: Destruction<br />
(1/day smite, +4 attack, +6 damage); Madness (1/day add<br />
Insanity score to Wis-based roll).<br />
†Because of Spell Focus (Necromancy), the base DC against<br />
these spells is 17 + spell level.<br />
Possessions: Orb of Oblivion (see Appendix 1), +1 shortbow, +2<br />
chain shirt, +1 large steel shield, rope of climbing, black thurible (and<br />
3 balls of incense of dreaming; see Appendix 1), torch of revealing<br />
(and 3 cones of incense of dreaming; see Appendix 1), curved<br />
knife, 20 arrows, 81 gp, iron key (opens trunk 5 in area 20 of the<br />
Recovered Temple), holy symbol (obex), robes.<br />
APPENDIX 4: HANDOUTS<br />
The two handouts on the following pages are taken from the<br />
journals of the clerics Geynor Ton (encountered in the Moathouse)<br />
and Hedrack (encountered in the Outer Fane).<br />
Give Handout 1 (The Journal of Geynor Ton) to the players<br />
when the PCs open the box in area 30 of the moathouse.<br />
Give Handout 2 (The Journal of Hedrack) to the players<br />
when the PCs discover it in area 19 of the Outer Fane.<br />
Permission is given to photocopy these pages for personal<br />
use only.<br />
188
Excerpts from the Journal<br />
of Geynor Ton<br />
I do not claim to understand fully the workings of the Great Church and the<br />
Masters of All-Consumption. Their alliance with these foul-smelling brutes is one<br />
that surprises me. I had assumed that we were the favored of the Dark Lord. Who are these scaly<br />
beastmen to tell us what to do? No matter. Soon we’ll leave this accursed town and I won’t<br />
be cooped up in this flourmill with the creature.<br />
Annihilation take you, Hommlet! I’ve not enjoyed my brief stay here. The food from<br />
the inn brought by Chatrilon was very good, however. Venison cured very nicely. What is<br />
that seasoning? Perhaps when we’ve slain all the people of this place, I can discover the secrets of<br />
its preparation. Great will be that day. Praise to the Elder Elemental Eye!<br />
Just as the Doomdreamers proclaimed, the Dark Obelisk is here, under a pool in a<br />
cave. We discovered that below the pool was a shaft with a false bottom, sealed for many years.<br />
Once penetrated, the pool drained down into a wondrous cave pulsating with the power of<br />
our revered Master of Masters. O great day!<br />
Apparently, the water from the stream above was diverted into the shaft, to fill up the pool<br />
and hide the cave from unworthy eyes! Truly the Dark God inspired such a<br />
wondrous plan, although it surely was carried out only after his unjust imprisonment. Yours shall<br />
be the name we proclaim, Dark Lord, once we have breathed new life into your most<br />
deserved worship. Once you are free all shall be set right, and those who deserve it most<br />
shall meet their cruel, cruel fate. Blessed destruction!<br />
I marvel at the skill of our enlightened predecessors who constructed the Obelisk to<br />
honor and commune with the Dark Lord. Those must have been wonderful, heady days in<br />
which to live. Under the leadership of Master Thaque, we shall recover the relics of our lost<br />
heritage. Praise the Elder Elemental Eye!<br />
Alas! Foul beast! What fate has befallen us? It must be a test sent to us from beyond—we<br />
must now go on without the leadership of Master Thaque, may his soul rest with the Dark God in<br />
the cold embrace of dissolution now and forevermore. Oh, wicked, cruel fate—I seek<br />
not your judgment in the claws of some dragon!<br />
But Gungash is also dead. I hated him—he stole my lunch two days ago, and it was an<br />
excellent boiled egg and some of Tashi’s delicious spicebread. Take his soul, Dark Lord,<br />
and crush it beneath your contemptuous heel.<br />
It appears that we are trapped here for a time. Festrath cannot convince the gnolls to attack the<br />
beast together—not after what happened two days ago. I think the dragon laughs at us. A grand joke,<br />
beast, but one that you’ll pay for with your very soul! Now Festrath hides with the Obelisk and the<br />
creature. We will continue our work here, but eventually we shall run out of food. Perhaps we<br />
shall have to live as the lovely ghouls do here. Or perhaps gnoll flesh can be flavored<br />
in some way so as to make it palatable.
Excerpts from the<br />
Journal of HEDRACK<br />
IMAGINE my surprise to discover that Lord Iuz, whom I had so faithfully and skillfully served until then, was not the<br />
true power behind the Temple of Elemental Evil. Even his ally, the demoness Zuggtmoy, was but a pawn. Cannily, I discovered<br />
that the true power was the cult of the Elder Elemental Eye, and behind them, the cult of Tharizdun. Finally, a cause<br />
worthy of my skills and prowess. Finally, I learned the proper path to ultimate power. The Doomdreamers rule over the cult,<br />
and the Triad are the masters of the Doomdreamers. I shall join their ranks, and eventually become the ultimate high priest<br />
of the Dark God himself—The First.<br />
I have gained much respect in my time here—they know greatness when they see it. I have been entrusted with the tentacle<br />
rod, symbol of my office, and mastery of the Greater Temple in the Outer Fane. Soon, I shall advance into the ranks of the<br />
Doomdreamers in the Inner Fane.<br />
IN my time as supreme commander of the Temple of Elemental Evil, I saw no greater servant of evil than the one called<br />
Lareth the Beautiful. Iuz, Zuggtmoy, and even Lolth recognized his power. Although he died defending the Moathouse, I<br />
brought him back from death—albeit disfigured. I believe that he still lives in Nulb, despite the fact that he knew that the cult<br />
of the Elder Elemental Eye was willing to cover our escape from the area when the Temple of Elemental Evil fell. Perhaps he<br />
is now insane. What a waste.<br />
WHEN I was informed that the Doomdreamers spoke the Prophecy of the Champion of Elemental Evil, the one who would<br />
restore the power of the Temple of Elemental Evil, I of course assumed that I was he. Imagine my surprise to discover that I<br />
was not. I believe, however, that I am the one who is destined to find this Champion and be his shepherd. Or perhaps her<br />
shepherd? I must contact Tessimon.<br />
TESSIMON of the Fire Temple came to the Outer Fane today. We tested her in the Greater Temple and found that<br />
she was not the prophesied Champion. Still, she craved power and sought to seduce me yet again in order to get it. I introduced<br />
her to the Infernal Device. Now she shall have a fiendish helper with her at all times—she got the power she craved, although<br />
I suspect she barely survived the process.<br />
ZUGGTMOY and Iuz created an artifact called the Orb of Golden Death to help them fashion the Elemental Nodes<br />
deep in the dungeon. Now I know that they were given the secrets to do this through agents of the Doomdreamers. Although<br />
the Orb of Golden Death was destroyed (completely collapsing the underground levels of the Temple of Elemental Evil and<br />
sealing off the nodes), the cult of the Dark God has an artifact of which the Orb of Golden Death was just a copy. They call it<br />
the Orb of Oblivion and have taken it to the Temple of Elemental Evil to recover the nodes.<br />
ALTHOUGH the Doomdreamers have taken the Orb of Oblivion, the Orb of Silver Death, another copy, still lies within<br />
the Black Cyst, beyond the Purple Veil.<br />
MY enemy, the wizard Falrinth, and his associate Smigmal Redhand are alive. I happily assumed that they died when the<br />
Temple of Elemental Evil fell. Now they work with the Doomdreamers in their excavation of the lower levels of the old<br />
Temple, apparently because they knew a direct, secret way into the third level. Dark God take them! They are sure to betray<br />
the Doomdreamers in some way, and spoil all our plans. If only someone would listen to my wisdom, Falrinth’s head would be<br />
sitting on the shelf next to my bath.<br />
THE Rod of Force and the Rings of Force Armor are kept in the Black Cyst to await the Champion of Elemental Evil, as<br />
gifts of the Dark God and symbols of his acceptance of the Champion.<br />
I now believe that the Champion of Elemental Evil is Lareth the Beautiful. Just yesterday, Satau (our oracle illithid) confirmed<br />
that my suspicions are likely correct. With that information, I used the tentacle rod in the Greater Temple to transport directly<br />
into the Inner Fane. Granted an audience with The First of the Triad, I told him of my belief and Satau’s confirmation. The<br />
First said that as my reward, I would stand among the Doomdreamers when Tharizdun once again walked the earth.<br />
—The journal ends here—
Little things<br />
can make a big difference<br />
Like knowing who<br />
getS the face<br />
full of acid<br />
www.wizards.com/dnd<br />
When your party stumbles onto something<br />
disagreeable, knowing who’s standing<br />
where can get important pretty fast.<br />
And whether you’re running through<br />
The Forge of Fury adventure or some<br />
devious creation of your own, official<br />
Dungeons & Dragons® miniatures<br />
will help bring imaginations to life<br />
and make combats run more quickly.<br />
So, pick up what you need at your<br />
hobby or game store — and make it<br />
easier for your players to see their<br />
characters’ lives flash before their eyes.<br />
All trademarks are property of Wizards of the Coast, Inc. ©2001 Wizards.
®<br />
A brand new novel<br />
based on one of the most popular<br />
&<br />
adventures of all time!<br />
®<br />
The Temple of Elemental Evil<br />
By Thomas M. Reid<br />
An elven wizard<br />
on a quest for<br />
vengeance . . .<br />
A knight on a<br />
holy crusade . . .<br />
A druid fighting<br />
to preserve her<br />
homeland . . .<br />
. . . and a band of warriors<br />
trying to get out alive.<br />
A foul demon<br />
struggles to escape<br />
her prison . . .<br />
A power-hungry<br />
demigod plots to<br />
bend her to his will . . .<br />
A sadistic priest<br />
awakens a<br />
slumbering evil . . .<br />
. . . and the Spider Queen weaves<br />
her webs around them all.<br />
Join the adventure<br />
as heroes and villains clash in the<br />
darkest pit of despair in all the lands.<br />
GREYHAWK, DUNGEONS & DRAGONS, and the WIZARDS OF THE COAST logo are registered trademarks owned by Wizards of the Coast, Inc. ©2001 Wizards of the Coast, Inc.
Hcrnmlet and Environs<br />
•Homml..,<br />
Area 32<br />
-_. •
The Temple
•<br />
;remple of "II-Consumption<br />
",<br />
"""<br />
w••<br />
Il.asl" r»<br />
6 mil...,<br />
Te mple Qvpr.r;E'W<br />
- - Ternple<br />
CUI-Away Sidp ViE'w
'l'''_~101 ....<br />
Map B
Ma p E<br />
Ma p F
Map I
Sub~3<br />
Sub L.nool ~
The Outer Fane<br />
l.eqend<br />
000,<br />
Wall Und
1..,~~ 13<br />
1 . ~ ~..12<br />
l ..~..11
y Monte Cook · illustrated by Mike Dutton<br />
Evll t.......". Ionnt ond"...,.,.<br />
__ E......'. b . II ,..., one<br />
wch Iype 01 "'"""""" corrupI'_<br />
"'"' '--1ofIC.... lho: ft:mnl6<br />
..r>d01_ doIboIic foencl. k is. f'Ol.<br />
...............<br />
~1JlOI"1ho.......,. c..... 0I~<br />
"'"'- "'" ~<br />
rw-:l -.d duItI. des"""...... ond<br />
.....,... Iloid ~.- """.,..<br />
_,.... _ :~wt\lII_<br />
-'-"'....~.. _.... .... [<br />
In !fle SeNice of D!:menr. Evil<br />
0.-0. (...........-.1 "' .... CGflcepf•<br />
.eo ..f' ,s__"""<br />
~...w<br />
1oob<br />
......-..oIM _.1ho<br />
.......,.-.. 01 ~ . The ,.........<br />
01 0...-.. [ Ihu,"';".. inlo<br />
,..... 1 "" uch 0I1ho .....<br />
-.. ""- T In_<br />
........_ boIIltwy .... u1,o,..,d.<br />
onf.. by , "" luOonhp "'"' _<br />
..... r....... Iho ohodow1<br />
"""- -. 01 ~,. [ .....<br />
__ 01 bolnSs "I&do! 0I1ho .....<br />
men" 'P""ll '0 lIWId, But !Nt " only<br />
!he~ The ~... servonl'!l of<br />
Elotnem. [YlIIrIdude cltnu "'"' d""<br />
_<br />
'lPO" lho: eltmen.. f
'" T...,pe...... lei lII'lIt group<br />
of foes for 1'00 IQ w, E_ " rn.<br />
~ T....plo·' powttr.-.d """""""c<br />
onc_ bee...... of rn.", ....,01)
• f' ,,01 E'" '..po<br />
~""z ItNt'; ...<br />
••~.C ,IE"<br />
AcIh"O C I. E'" '..po<br />
lJii..... t1 ' ) Will .....~<br />
n.,,'....."' C oIht ,<br />
Tho no6oo '-I .. .""*00_*"<br />
.... pIono "" w+tdIlhey bor~ bIIf<br />
COO"""",," --.,-..... lets hosHe,<br />
......... ,r liffic.... bo". _ ""Po '*""<br />
,~ JI"l'>lIIo of "'" M.terill PIlone to_·<br />
"w e ""'...,<br />
~ .. Iolely ,..... "'" Pnntes '"<br />
tI."",",.. E.~ pl,yed """'" ~ ,lie<br />
creo'''''' of "'" nodes. ~ ~ .....".Iy<br />
IN! .... Iorcet '" EIomo!rOI" Evil uM>d<br />
_ "'" of~ wnf.., ' 0 h8p<br />
cru~ IIId _ "'""'- 'WhoIt>or .....<br />
_ , ..-.. 1>0 ......<br />
1I00<br />
..............ca "'" "*"-"*'-l A .......<br />
lI-11,...... of fre<br />
o.no-:,~ 1)1<br />
s.-.. nor-: ""'""<br />
$pool ae-_<br />
No<br />
.... rn _ ........ ,..... ""'!*'<br />
~__<br />
.......... ......,.<br />
""'cr-'OS_'<br />
rIkIoiC """""""<br />
___ Ant-.onftcIed by rn<br />
,- _.oI--........ .._tIl_ "' ... ...<br />
,..... u""""" by .olll 01<br />
r. ."""'Tf pel" r......:I. n.<br />
INf US( ""1T1t f l fHlNf<br />
r,...".......'_ iE...j<br />
LA"'II: r.m ... 1w 4. fore ...<br />
1,1..... 4<br />
Cooo_..." V. S, M<br />
c.mt T.., ......<br />
ROIl£r. h,.. fl. • 10<br />
fl JIt.eJ<br />
T...., tJ-.r: tI'UfI.n touefted<br />
o..r-: 10~ 10)<br />
s.-c Throw: f-.do~<br />
,......,<br />
s,oIltniot-.: Yeo<br />
V .." .....<br />
' a '""-.....~<br />
---<br />
.......mt ~~,.......t to,.<br />
....""-......,. "" .... rypo<br />
If ..... . ".......... ...,.<br />
...... ....,., 44. t:oor- ...<br />
0 10 ........,_<br />
_ ~.-dm_-<br />
_.-<br />
If utt _ .... !he''''<br />
<br />
mNnc ' borl\c: 1d4 poon.. 01 domIllfl per<br />
lovd 01 the "",11((" I............<br />
~
NEW<br />
MON STER S<br />
GRUIS<br />
are rile rnulr of e~' Sl"'b "''''''ll: rile ........nla' plarIes. TheH~<br />
G""" crea........... 'fl3WII"d ill dan pIKes wilhirl ""'"" plIorIes. aI'Id !hey hOi<<br />
..,Iho\ oudo . reas " ,... oed t(I -.oIt>et fII- ~!hey (;an wort_<br />
evl They ..,,,.!heir pion< wh. fO
-..or "' .._III opeI. ""....,~.....".. . ......., .....
OEMONICAllV fUSED ELEMENTAL TEMPlATE<br />
......<br />
.... _.CfUI\n.<br />
_-....._.~~t.....s<br />
,_..t ...Ih ............, essence- Tbo COIIIP'*'t' beon8 • 1 ""' ..... of<br />
~I"""'_.,",_""""'''~.-.I<br />
CBMuA. """""M""'"1dIf...-~.-.I &ff.......~<br />
_......., _ . _. IOIlII"e __ . ..__ of ..... one<br />
..<br />
Crw~ A~ f UNd 1JetneN..<br />
~f.-l""''-Sll : "_UIlbelddell",rpt"<br />
'·.~_~'YP"-A<br />
~f...,d-...._. .....t--..-'..<br />
_.~r-..Io_""'eo :<br />
...<br />
...... eIU9' . _ here.<br />
........ ,..,<br />
.....<br />
A~ t.-l<br />
_.~<br />
........... speaoI<br />
...-J.. of ..... b&w<br />
trUIl.n I'"d ....,...<br />
,-<br />
...,,,,,,,r--<br />
1tItsIe I'"d - good. "",;;r- Alf;w;aild<br />
e..e- !he trW"""<br />
.... I
Eumple:<br />
DEMONICAllY FUSED FIRE ElEMENTAL<br />
SMAil UlMlNTAL If...l<br />
Hi! Da:<br />
..ss•• In hpl<br />
..........: ·, (·3D....~<br />
~"...,....j<br />
.._ ,<br />
..... ..,<br />
00 .. I.' ..... . j<br />
D... .j_<br />
... ·4'-e1<br />
An.....:: sa..·5....<br />
..... sa..dt·._<br />
.. ~<br />
r...<br />
...<br />
1IlMdr. 5 fI b
..<br />
•<br />
r.<br />
•<br />
THE BESTIARY<br />
SPAWNo<br />
ELEM NTAL EVIL<br />
BY .JAMES JACOBS -ILLUSTRATED BY CARLO ARELLANO<br />
~ (;n.orley for- two Iud ~ ..pur~.<br />
...... as • den of ",on"e~ and lu""J"fl<br />
.vi for tMny l'I'¥1, de1po,. rn.'oct<br />
'ho' 1"'lIe •••,,""'. of ",. "'"""'" ore<br />
...gul¥ty patrollolTI.,,,"'" ...... buolt by. cult lilA."""'<br />
eWed !he dan. and evy 1M Oemo u UdVof r""8'.<br />
and ."...." .......' JlOW or- pets. One of !he mos'<br />
pcpt ~.. bullarge<br />
............ of "'" cl"Ol!u....". !uri< ,n<br />
fo,go"en d~ . in ''''' WC>C>uol, "",ny underground<br />
~, during thel' tq!n. _ tlle~<br />
oh en b'cle mto ••;sting ~V.",,,, or<br />
Il"" IV ""0 !tie Underdri, One<br />
of """" .". n..s .eod~ been<br />
cloJmed by. band of "'.onge c" " yceo<br />
Cilbl l' olu.... Sin" .., _ c, ue1 to ,lie<br />
COl"O, 'hose ,,,,.,.,r~"'Il ".,."".... comtfIy"<br />
nicated by m nf.- viC'..... Cur....<br />
chap!.... of !he c>b made • briol Iluol<br />
..... of trod''If: c' PM"ed "'"" MId<br />
_ to CI"Iy1hrs olav... for ..... eI'<br />
.......nt.. m......... Sev."'" """"",,,,,,'<br />
go to !he crlyth...• heme pIonc<br />
...ere o ,ed in no '"" ,..... f_<br />
dr••ry boglone of """'"" """"IS and ...ere often<br />
puI in charge of 'Ildo
~...<br />
.......,<br />
..... ""<br />
BR£AlHDRlNKER<br />
Modo- we Iw ElecIeno.. I",. [vii<br />
o r :<br />
f _<br />
'1ltod:<br />
s,..... _ o:<br />
""ad ........ of 16 I...,<br />
Stell llo'u'h l s..~ The bru~ . an In....... '0 S1uf<br />
"'" breaItI of . heIp/os5 YICM, ,n """"" .1IftfI!' Tho'I:I . fulca..<br />
~fT.....<br />
Or~ ~<br />
Ct' • IloM(:<br />
,-<br />
~ C_<br />
-.... Ilocp:<br />
h., ",,,_••<br />
"..... ,<br />
__'-M<br />
e--.e ~ llMp ~<br />
'7....~<br />
Tho "''''do• ..". io • *-"'I......... "'" '-Is ...<br />
" ~....ted ~ UIp of ~ UUOI.nI. ~ io "'"<br />
__ .... _ ' ...",...... . ."'."- such<br />
• __• to.- if _ .... ~..... .-t;ft6I<br />
.....,."' ........" of hofp/eu_<br />
Tho~.. .........,. u
• • •<br />
,<br />
•<br />
RUKARAZYLL<br />
MedO,om 0utWet lEarth. Evl l<br />
"nado:<br />
c.-go:<br />
f oc. iROK~ :<br />
SpeciM AIlKh:<br />
S.-.aI Qual;riel;<br />
So"",,:<br />
Abili"..:<br />
t>dll- ~8 1102 hpj<br />
_6 (. 8 Dex)<br />
10 I!.. climb 50 It.<br />
l-4 (. 8 0.,., '3""'d, '3 prot....)<br />
3 Tondris _'0 ......... B.e . '0 melee; '"<br />
.pl 00'• • "" raon«ed<br />
TendHI ,dl'i-., Bil. ld6-. plus o11. ( :!UP' An,,' ,,6.<br />
f orgery ' 9. Hide " 4. lnhmo;!ol...II.<br />
Il.nowiedge lrdl£lonl . ,•. s.""", ' g.<br />
Sen>< Mol"", ..a Spekrah +>2, $pol<br />
,8. T~mble -'3<br />
b penioe, lmI>ro....:! Diwnn, ImP'"OvN<br />
Tri!',~ f1Mous of ..,.';"rot fuogoid mall..-.<br />
"udOed .."to eyes ar>d ,","'rot om",os IN' leal< snn\.·<br />
irlg. black d.ooL h has "" Ioog. Mok· "udOed 'en·<br />
d e. 1TUdo from.anou..ar>dom """''' on<br />
I!le e body. ThN>t 01 ' l>oso ,_ serve<br />
.. legs whiIc I!le o,t>..- rhr.. _ I\aorIds.<br />
h '01ldlrlg f,om 1l>e ,~ of ..... body IS ' 1cInjI:<br />
0CJIiy 'en'ado " OP "lIich"" rile c.ea''''''''<br />
"" ad. Its ""ad resernblos '. skull """ plo~<br />
"" Ito homs. Grco' fao:>gs " ud hploss """"h<br />
f!'Oll\ wllich bubbIu>g acidk frorl> com,......,<br />
_. Tho ruUrat)'f's ,,",ural ~o is Ihid<br />
as If its """", ...".. partially<br />
.rwJ ~ rg\iflt.<br />
doggtd ,,"" mud . bu' ""'...., '(Is ate good<br />
ar di'l!"lSing ,;"S_'Id "'''"'' anemp!elv", oIf .. """,.f>OIds.<br />
Wrnlwlg IW:''' of pall: fungaililaJneo"<br />
r.. rhcir CI'OS rtl<br />
1 """""eto foghT I""'C " IS ~. 1rI e""""','T<br />
of its Ten;I.... arwJ tM,es ",Ito<br />
OS ..Ill"' Ii ,""to f,jl advanTage of ns<br />
f..'s. ....."Il hp
"<br />
~ ..ad.i"'~ ••<br />
__...... C""*-_ • .........,. ..<br />
........ ~......... f '_'''.''''''<br />
l s,.~ ,., _-*.<br />
lb. ~""'" t _ ..,....."<br />
~Is.<br />
Iwl Thew..,...... IS ..... W Ill"'" "' I f _ ..""1l ""- IDC "" or<br />
becomo W..,a<br />
drain I"" doy. One. me vit,..·, ChonorM rMIy ~« "veIy .....n 10 block and "'"'<br />
..-10 IJI'bu"'<br />
0..... redI/~<br />
......<br />
~<br />
.-<br />
"',<br />
"'nodi:<br />
0_<br />
r.
The r~ 1"'11: lS only foo' Ionfl,. bur " <br />
AnKh: ,~lo " 0 ......<br />
~; CIo-w.0:I5'5<br />
_ _'<br />
h t./lIeKh: 5 ft. ..., 5 ftl5 fl.<br />
..........<br />
Spocool Anods: s,e' IW dol','.o••'_ ~.<br />
SpoooooI I), 'Nr<br />
...<br />
-,<br />
.................... ;<br />
..<br />
""c dDud. cWt;_ 50 fT.<br />
Fort . &. 1leI.,. ...... -6<br />
Sn" .." De. '4, Con 06. " 12. ....... 11.<br />
"".<br />
tWo ., 11_ ,,,," """"'I .\j.<br />
~ Mc>ooe ~'oo. S;oot ....<br />
Sun:II . 11,~,_. ...<br />
~$ptIPu...<br />
a.....''l_ ,........... "' tqUIftC<br />
Clrf-I-<br />
S
Tho .......~ 1$ """'«'" 10 i'IoI r... ItIo ["--'I<br />
"-'" 01 w_. In ............. tnooI.-d MdooIoo: ............<br />
~"""'__.-d..r....,...~""<br />
__"'ifIl1oeHJ,-.~_'"' ......<br />
..... . • rube t .-d _<br />
~01~ '"- --".-d forced to<br />
_.~ b>d, "" _ The or¥!lFs...,.. .<br />
......~ PIoroe 01 W- SO to,n.-d ........<br />
-' .<br />
,.","""""'".....- OIl "'""'- ........ PIoroe ..<br />
__"-'.. u~ot- -,,1Iod .. ~.,..,. to<br />
~__W __ior_"."", .. A<br />
..... r.... .,"'"'" pre/ ItIo _ . ~ "'" cll!le"'-<br />
Io4olenol ...... III .........- f 01 ....... """'" pl-.e. ...<br />
boo'h ~ • """'" Mole"'" 1IIys iT_ '",,'1Ibhl> I<br />
colony 01 _ ........." q.ldel I ~<br />
An bod'! cor-t 01. ~""~......<br />
0I ~..:Isen-v _ ~ " ,_<br />
.......... I-..:od ..... """' -..1 ,...... ..:1. c-.<br />
•__ rIJ'OIIy _ .. _lob$ow.v." 'a Oft a..d. ..<br />
~ '-_ .......<br />
Tho artyort.s ': : .,. Nt!twINtJo • __<br />
_110-'" : _:ds ............. s<br />
..._ide 1'_-'<br />
"""""<br />
No """""" pnf.... to ,.........,<br />
pi On '-"llhey<br />
~ rar "" "-'-'* II>"-"- __ to.." III __<br />
-.. no. .."....,. ......, '"- Ill .., a _<br />
, .tIII..... _ II"'_ ........<br />
_ ... "" doI>.~.iul,~. A -.. : '~ """" ......<br />
to~lor irs ~ .I>,o~'" servoca. Adv&'iI\nn<br />
~ be 10 tI'IismIt' tud'I otf..... lot .. orlyThrs ......-<br />
ob/y "". up1t .. !he flrsr~ Iy .<br />
S -u.. At>;he. IS ~ l :"" "",,",Cf'4YI\I wtr1t'. dt1W:1 ""IifJC.<br />
f6e!nl!! f/rrr, UIIOO ,_. sof"'" _ _ .-.~<br />
31day-dupcl~$-wJrom.. C ......... ........-<br />
Ioted ..... Tho f.- 01 ...-. is • """ 01 "" ....<br />
~ _001 "" Ihid. ~,teIII_ Tho , ..........,••<br />
' till" 1$ 'ft ,.., .......... 01 n..ible biId . _ "'"' ends<br />
.. . ,.~""""" """"""'"'"' 1>,0 f,.., ~<br />
"arl\sI>-" ........<br />
tlRt:8 . 1 11
•<br />
•<br />
•<br />
-<br />
--<br />
50 closely, m foe•. "'"' """'Y odv""'ure~ ¥ld explorer' ....<br />
ql.'lic, and on<br />
~ bard ClIn ..",..Iitnes pIKaIe "" "'!'Y ........<br />
",illl • porl"u/,orly impre>"ve S(Ifljl. Placat"'t:<br />
'" .. 1M<br />
manner ge""ralIy reqJor.,. m. bml ttl m.h • P.rfunn CMck<br />
""posed by tho "".ush own Pmonn thed. r....... sor(S<br />
aTe ....... .ond """0""8- and Illev ....., oI.en """.ken for ......:I<br />
blowing o-er in desob'. bad\onds. Thtovgh ,,,,,",,<br />
e ............. ~.. T........ SOIlg' (10<br />
"""" ...t'w:1 '"" undo.....and It>e Ia"&"ogel Ire Invonlbly ,<br />
ocrs of .......« er$. tt daM nor<br />
0!I'>en0',.. afT",,, ..... foght, Tc"",,".<br />
ore fond of~ tIIO"O> in<br />
tQfl"b.>l _ .tIM" oIwy "'"<br />
Powe' Anp leot to"""" , ,<br />
Inps more I"""""'"' nd<br />
t...... """' ~<br />
bv ............. c.....<br />
_, maU. fon,tude S4Vtne lhr"",<br />
(DC t6) .... ,....., t potnt '"~ t<br />
o.:'te\"lty d"""" their bod)' oInwly<br />
begins to ..df A"Y""'" drained '0 0<br />
o.:,t"",,, in 11>ilUed A .,.,.,., '" II.sIl<br />
>;>d un ~t<br />
poonful.<br />
POI.on (S"l< A........'.<br />
clo. beam of<br />
sono: ....rgy m,,, me ctNr",* un doft!C1 al any lingle<br />
.orget ..,tIvn 60 fee~ .....~ ""''' hn " ,'h • ..-.god<br />
rouch 'had.. >ubot~uling' peri"",, ched for ..... '!lad. roI.<br />
If .'-'CC.....ful me VIt".. ouFf.".. 0>I>o4l.<br />
Conrrol 5'""" (5"); Onee • day...... rroIusI; an conrrol<br />
,"0"" b~ intdo 01\ ..... reouh , '!'he rr........ (.¥I thoo.. 10""Ilk••e<br />
""".".,. elf"". on 'he .abIe below del>end"'4l on ..... res
Caves of ancient secrets<br />
A Return to the Temple of Elemental Evil<br />
Web Enhancement by Monte Cook<br />
Return to the Temple of Elemental Evil offers an epic<br />
adventure that takes characters from 4th to 14th<br />
levels. Caves of Ancient Secrets contains additional<br />
encounters designed to be played with that adventure.<br />
This small section of caverns, older than The Temple of<br />
All-Consumption (see Part 2 of Return to the Temple) is<br />
played during Chapter 5: The Crater Ridge Mines. It<br />
climaxes in a meeting with the half-fiend aboleth who<br />
took over the role of the Master from the current<br />
Second of the Triad (see Chapter 6: The Inner and<br />
Outer Fanes).<br />
The bonus material in the Caves of Ancient Secrets web<br />
enhancement adds to the background and theme of<br />
the entire Return to the Temple of Elemental Evil adventure.<br />
It’s exclusive to the Wizards of the Coast website:<br />
www.wizards.com/dnd.<br />
BACKGROUND<br />
One of the reasons Mount Stalagos was chosen as the<br />
center of the Tharizdun cult years ago was because it was<br />
so near an ancient colony of aboleths and their kuo-toan<br />
allies—all servants of Tharizdun. The aboleths beneath<br />
Stalagos are keepers of truly vile and dark secrets.<br />
All the kuo-toas in the Crater Ridge mines know<br />
about this area, as do any non-kuo-toan Water Priests<br />
and the Triad. The Second of the Triad once lived here,<br />
before the creation of the Temple of All-Consumption.<br />
MAP KEY<br />
About 50 feet from the beginning of the secret passage<br />
in Area 193 (see Chapter 5 of Return to the Temple),<br />
there is a chamber with a 15-foot-diameter shaft going<br />
down. This shaft leads to an area beneath Mount Stalagos—beneath<br />
the lake that bears the mountain’s<br />
name—where a small but ancient enclave of aboleths<br />
and their servants dwells.A map of these caves appears<br />
on page 3.<br />
This portion of the adventure assumes that the PCs find<br />
some means to descend down the shaft (Climb DC 20).<br />
1. The Plunge<br />
Read or paraphrase the following aloud:<br />
The shaft plunges down at least<br />
300 feet. The sides are slick and the<br />
air feels cool and damp. The walls of<br />
the last 20 feet of the shaft are lined<br />
with iron. The bottom of the shaft is<br />
a metal grate, and level with the<br />
grate, in the north portion of the<br />
wall, stands an iron door.<br />
These metal walls are carved with<br />
disturbing images of fish and fishlike<br />
humanoids torturing humans,<br />
elves, dwarves, and halflings before<br />
a misshapen, tentacled horror.<br />
The door is not locked. Below the grate lies<br />
a huge reservoir of water. When the lever at<br />
the spot on the map marked ”A” is pulled,<br />
water pressure increases below, pushing<br />
water up the shaft to fully submerge it. This<br />
allows the inhabitants of the areas down<br />
here to swim up and down to the Crater<br />
Ridge Mines when needed. Normally, however,<br />
the water level remains low to make it<br />
difficult to get down to this level.<br />
2. Guard Post (EL 7)<br />
Read or paraphrase the following aloud:<br />
This large cave smells of fish. The damp walls<br />
are crusted with lime, forming strange, alien<br />
shapes on the walls.<br />
This cave is empty except for the guards stationed here.<br />
Creatures. Six kuo-toas have been commanded to wait<br />
here and attack any non-authorized creatures that enter<br />
the complex.<br />
Additional Credits<br />
“Effects of Water” Design:<br />
Skip Williams<br />
Editing and Web<br />
Production: Sue Cook<br />
Web Development:<br />
Mark Jindra<br />
Cartography: Todd Gamble<br />
Graphic Design: Sean Glenn,<br />
Cynthia Fliege<br />
Based on the original DUNGEONS &<br />
DRAGONS® game by E. Gary Gygax<br />
and Dave Arneson and on the new<br />
edition of the DUNGEONS & DRAGONS<br />
game designed by Jonathan Tweet,<br />
Monte Cook, Skip Williams, Rich<br />
Baker, and Peter Adkison.<br />
D&D, DUNGEONS & DRAGONS, and DUNGEON<br />
MASTER are registered trademarks owned by<br />
Wizards of the Coast, Inc. All Wizards characters,<br />
character names, and the distinctive likenesses<br />
thereof are trademarks owned by<br />
Wizards of the Coast, Inc.<br />
This material is protected under the copyright<br />
laws of the United States of America. Any<br />
reproduction or unauthorized use of the material<br />
or artwork contained herein is prohibited<br />
without the express written permission of<br />
Wizards of the Coast, Inc.<br />
This product is a work of fiction. Any similarity<br />
to actual people, organizations, places, or<br />
events is purely coincidental.<br />
©2001 Wizards of the Coast, Inc. All rights<br />
reserved. Made in the U.S.A.<br />
1
General Information<br />
The caverns in this area are, for the<br />
most part, natural and not a part of<br />
the Crater Ridge Mines. In fact, the<br />
dwarves that created the mines<br />
never came here.<br />
Unlike those above, the kuo-toas<br />
and other creatures here do not<br />
bear any symbols—even of the<br />
Elder Elemental Eye. A few have<br />
obex symbols of Tharizdun, but<br />
those are mentioned specifically in<br />
the various locations.<br />
Remember to make Listen<br />
checks for guards and other creatures—to<br />
make this easy, however,<br />
assume that they all roll a 0. The<br />
whips in Area 5, for example, will<br />
hear a fight in Area 4 since the<br />
whips have Listen check bonuses of<br />
+8, and the DC to hear a pitched<br />
battle is –10 modified by +1 per 10<br />
feet of distance, +5 per closed door<br />
(for a final DC of 0)<br />
All ceilings are about 15 feet high<br />
unless otherwise noted, and doors<br />
are stone (Hardness 8, 60 hp, Break<br />
DC 28 if locked).<br />
The inhabitants of Areas 1 to 22<br />
know the layout of these areas and<br />
the general floor plan of the whole<br />
temple complex above (they know<br />
there’s a lake in the middle of the<br />
crater and three bridges that go out<br />
to an island where the masters of<br />
the place reside), and that’s about<br />
it. The aboleths and 1 in 6 kuo-toas<br />
know about Areas 177 and 197 of<br />
the Crater Ridge Mines (the Water<br />
Temple) in detail.<br />
See “The Effects of Water” sidebar<br />
on page 5 for important rules<br />
that will come up as you play<br />
through encounters in these submerged<br />
caves.<br />
2<br />
Kuo-toas (6): hp 9, 11, 15, 8, 10, 11; see Monster<br />
Manual page 125.<br />
Tactics. These creatures throw spears, then dive into<br />
close combat with a religious fervor. They believe they<br />
are invincible here (since they’ve never faced defeat).<br />
Development. These guards come into Area 1 to<br />
investigate the sounds of anyone moving around. If<br />
they hear fighting elsewhere or cries<br />
for help (in Kuo-Toa), they move to<br />
assist.<br />
3. Empty Cave<br />
Read or paraphrase the following:<br />
A small, lime-filled pool lies in<br />
the north portion of this cave,<br />
next to a column of rock rising<br />
from floor to ceiling.<br />
4. Kuo-Toan Complex<br />
Entrance (EL 8)<br />
Read or paraphrase the following:<br />
The walls and floor here are<br />
smooth, worked stone. Each<br />
stone has ancient images carved<br />
upon it—grotesqueries of kuotoan<br />
depravity. A large conchshell<br />
horn rests on a wooden<br />
stand next to the entrance from<br />
the north.<br />
Standard procedure is to pick up the<br />
horn and blow it, announcing yourself<br />
as one of the faithful.<br />
There are peepholes from areas marked<br />
4A, where guards are stationed. Finding<br />
the secret doors to these areas requires a<br />
Search check (DC 20).<br />
Creatures. Four kuo-toas wait in each<br />
of the guard areas, one watching<br />
through the peephole at all times. If they<br />
see trouble, they come out through the<br />
secret doors and attack.<br />
Kuo-toas (4): hp 11, 13, 10, 12; see<br />
Monster Manual p age 125.<br />
Treasure: The finely crafted conch-shell horn is<br />
worth 120 gp.<br />
5. Chamber of the Whip (EL 7)<br />
There are two of these chambers. The description<br />
below suits either one.<br />
This cold room is painted black with a thick<br />
pitch. Even the ceiling and floor are black. A<br />
purple mat of woven seaweed lies in the middle<br />
of the floor, just big enough for a person to<br />
kneel upon.<br />
These rooms remain virtually empty, for better meditation<br />
upon the Dark God.<br />
Creatures. A whip meditates in each of these rooms.<br />
If disturbed by the sounds of combat or alarm, they<br />
come out to defend the shrine (Area 6). If disturbed by<br />
the sound of the blowing horn, they come to escort the<br />
worshippers.<br />
Drapood and Jopaarg (whips): Male kuo-toas Clr5;<br />
CR 7; Medium-size monstrous humanoid (6 ft. tall);<br />
HD 2d8+2 plus 5d8+5; hp 41 and 43; Init +0; Spd 20 ft.,<br />
swim 50 ft.; AC 18, touch 10, flat-footed 20; Atk +6<br />
melee (1d10+1, pincer staff ), +1 melee (1d4, bite); SA<br />
Pincer staff; SQ Insanity, slippery, adhesive, immunities,<br />
electricity resistance 30, light blindness, amphibious;<br />
AL NE; SV Fort +7, Ref +4, Will +8; Str 13, Dex 10,<br />
Con 13, Int 13, Wis 14, Cha 8.<br />
Skills and Feats: Concentration +6, Escape Artist +18*,<br />
Heal +6, Knowledge (religion) +6, Listen +8, Move<br />
Silently +3, Search +10*, Spellcraft +6, Spot +10*; Alertness,<br />
Great Fortitude, Exotic Weapon (pincer staff ),<br />
Scribe Scroll.<br />
* An asterisk indicates a +15 racial bonus to Escape<br />
Artist and +4 racial bonus to Spot and Search.<br />
Insanity: Adds +1 to DC of spells cast. –1 to all Wisdom<br />
checks.<br />
Pincer Staff (Ex): A pincer staff deals 1d10 points of<br />
bludgeoning damage, threatens a critical hit on a 20,<br />
and deals double damage on a critical hit. It has a 10-<br />
foot reach and cannot be used against an adjacent opponent.<br />
A wielder that hits an opponent of at least Small<br />
but no greater than Large size attempts to start a grapple<br />
as a free action without provoking an attack of<br />
opportunity. If the wielder gets a hold, the staff grabs<br />
the opponent and deals 1d10 points of damage each<br />
round the hold is maintained.<br />
Keen Sight (Ex): Can spot a moving object or creature<br />
even if it is invisible, ethereal, or astral. Only by<br />
remaining perfectly still can such objects or creatures<br />
avoid notice.
Slippery (Ex): Webs, magic or otherwise, don’t affect<br />
kuo-toa, and they usually can wriggle free from most<br />
other forms of confinement.<br />
Adhesive (Ex): Anyone who makes an unsuccessful<br />
melee attack against a kuo-toa must succeed at a Reflex<br />
save (DC 14), or the attacker’s weapon sticks to the<br />
shield and is yanked out of the wielder’s grip. Creatures<br />
using natural weapons are automatically grappled if<br />
they get stuck.<br />
Immunities (Ex): Kuo-toa are immune to poison and<br />
paralysis. The various hold spells also have no effect on<br />
them, and their keen sight automatically detects figments<br />
for what they are.<br />
Light Blindness (Ex): Abrupt exposure to bright<br />
light (such as sunlight or a daylight spell) blinds kuo-toa<br />
for 1 round. In addition, they suffer a –1 circumstance<br />
penalty to all attack rolls, saves, and checks while operating<br />
in bright light.<br />
Possessions (Drapood): wand of darkness (48 charges),<br />
scrolls of magic vestment, wall of stone, large shield,<br />
pincer staff, 14 pp, obex symbol.<br />
Possessions (Jopaarg): pearl of power (3rd level), potion of<br />
invisibility, large shield, pincer staff, 11 pp, obex symbol.<br />
Spells Prepared (5/4+1/3+1/2+1): 0—cure minor wounds,<br />
detect magic, read magic, resistance (2); 1st—command (2),<br />
cure light wounds, obscuring mist*, protection from good;<br />
2nd—bull’s strength, endurance, hold person, Tharizdun’s<br />
touch*; 3rd—cure serious wounds, dispel magic, rage*.<br />
*Domain Spells. Deity: Tharizdun. Domains: Madness<br />
(Use Insanity penalty to Wisdom as a bonus to Wisdom<br />
once per day); Water (turn or destroy fire creatures,<br />
rebuke or command water creatures).<br />
Tactics: Drapood and Jopaarg fight best when they are<br />
together. Both are usually encountered with bull’s<br />
strength and endurance already in effect. Typically,<br />
Drapood uses rage while Jopaarg offers support with<br />
command spells and healing after becoming invisible<br />
with his potion.<br />
This entire area is unholy, as described in the spell<br />
unhallow. In addition to the protection from good effect,<br />
and the –4 to turning undead attempts (+4 to rebuke<br />
undead attempts), the unhallow continually grants all<br />
evil beings an aid spell as cast by an 10th-level caster<br />
while they remain in this room.<br />
Any creature of good alignment that touches the black<br />
energy suffers 10d6 points of damage (no save). Any<br />
creature of good alignment that even enters this room<br />
draws a pulse of the black energy that summons a<br />
wraith from the darkness.<br />
The kuo-toa treat the blackness as an altar of sorts,<br />
praying to the Dark God through it. It is a direct extension<br />
of his power.<br />
Creatures. These wraiths attack good creatures<br />
immediately.<br />
Wraiths (varies): hp 82; see Monster Manual page 185.<br />
7. Common Pool.<br />
Read or paraphrase the following aloud:<br />
This chamber is filled with a fairly shallow<br />
pool 30 feet long and 25 feet wide. A narrow<br />
ledge on either side connects the east and west<br />
halves of the room.<br />
The pool measures 4 feet deep. This is where the kuotoa<br />
congregate when not on duty.<br />
8. Monitor’s Quarters (EL 10)<br />
Read or paraphrase the following aloud:<br />
A 6-foot-long, 3-foot-wide, 3-foot-high<br />
wooden basin filled with water occupies the<br />
center of this spartan room. Long strands of<br />
seashells entwined in string dangle from the<br />
ceiling throughout the chamber.<br />
4<br />
6. Shrine (EL varies)<br />
Read or paraphrase the following aloud:<br />
This large area is cold. The walls are black and<br />
carved in an elaborate relief that gives the<br />
impression of writhing tentacles or snakes (or<br />
both). The floor is covered in a woven mat of<br />
dried, purple seaweed that is occasionally<br />
stained with reddish-brown splotches. Hovering<br />
in the air, a nimbus of black energy 10 feet<br />
across fluctuates menacingly.<br />
This chamber belongs to the leader of the complex.<br />
Vuoor sleeps in the basin.<br />
Creatures. Vuoor the monitor and his shield guardian<br />
are here. The shield guardian (a gift from the Inner<br />
Fane long ago to win the favor of these creatures) is<br />
made from stone, coral and fishbones as well as iron. It<br />
has a fireball spell (cast at 10th level) stored within it,<br />
which it casts if ever Vuoor is killed.<br />
Shield guardian: hp 82; see Monster Manual page 163.
The Effects of Water<br />
Land-based creatures can have considerable difficulty when trying to fight in the water. Water affects a creature’s attacks rolls, damage,<br />
Armor Class, and Movement. In some cases, a creature’s opponents may get a bonus to attack the creature. The effects are<br />
summarized below:<br />
Combat Adjustments for Water<br />
Condition 1 Slash or Bludgeon Att./Dmg. Claw or Att./Dmg. Move Tail Off Balance?<br />
Freedom of movement effect Normal Normal Normal No<br />
Swim speed –2/Half Normal Normal No<br />
Successful Swim check –2/Half 3 –2/Half Quarter or half 2 No<br />
Firm Footing 4 –2/Half –2/Half Half No<br />
None of the above –2/Half –2/Half Normal Yes 5<br />
Footnotes<br />
1. Water modifiers apply when wading in water at least waist deep, swimming, or walking along the bottom.<br />
2. The speeds listed are standard for the Swim skill (you can move one quarter your speed as a move-equivalent action or onehalf<br />
your speed as a full-round action. To avoid the off-balance penalty (see note 5), you must succeed at a Swim check (DC<br />
5+ the DC for the water). The effects of a successful check last until your next turn. Making the Swim check is a move-equivalent<br />
action.<br />
3. Creatures without free action effects or swim speeds make grapple checks underwater at a –2 penalty, but they inflict damage<br />
normally when grappling.<br />
4. Creatures have firm footing when walking along the bottom, braced against a wall, or the like. You can walk along the bottom<br />
only if you carry enough to weigh you down. The amount of weight required depends on your size, as follows: Fine 1 lb;<br />
Diminutive 2 lb; Tiny 4 lb.; Small 8 lb.; Medium-16 lb.; Large 32 lb.; Huge 64 lb.; Gargantuan 128 lb.; Colossal 256 lb. The<br />
items you carry to weigh yourself down must be non-bulky and non-buoyant.<br />
5. Off-balance creatures lose Dexterity bonuses to Armor Class and give opponents a +2 attack bonus against them.<br />
Fire: Non-magical fire (including alchemist’s fire) does not burn underwater. Spells or spell-like effects with the fire descriptor<br />
are ineffective underwater unless the caster makes a successful Spellcraft check (DC 15 + spell level). If successful, the spell creates<br />
a bubble of steam instead of its usual fiery effect. Supernatural fire effects are ineffective underwater unless their descriptions<br />
state otherwise.<br />
The surface of a body of water blocks line of effect for any fire spell. If the caster has made a Spellcraft check to make the fire<br />
spell useful underwater, the surface also blocks the spell’s line of effect. For example, a fireball cast underwater cannot be targeted<br />
at creatures above the surface, nor can an underwater fireball spread above the surface.<br />
Attacks from Land: Characters swimming, floating, or treading water on the surface, or wading in water at least chest deep, have<br />
one-quarter cover against melee or ranged attacks form landbound opponents. Landbound opponents who have freedom of movement<br />
effects ignore this cover when making melee attacks. A completely submerged creature has one-half cover against landbound<br />
opponents unless those opponents have a freedom of movement effect. Magical effects remain unchanged, except for fire effects<br />
and effects that require attack rolls; these are treated like any other effects.<br />
Ranged Attacks Underwater: Thrown weapons are ineffective underwater, even when launched from land. Other ranged weapons<br />
suffer a –2 attack penalty for each 5 feet of water they pass through, in addition to the normal penalties for range.<br />
Underwater Visibility: Submerged or swimming creatures may also again concealment from the water, depending on how clear<br />
it is. Even perfectly clear water obscures vision, including darkvision, beyond 200 feet. All creatures have one-quarter concealment<br />
at 50 feet (10% miss chance), one-half concealment at 100 feet (20% miss chance), three-quarters concealment at 150 feet (30%<br />
miss chance), and nine-tenths concealment at 200 feet (40% miss chance). Beyond 200 feet, creatures have total concealment<br />
(50% miss chance), and opponents cannot use sight to locate the creature.<br />
Murkier water allows less sighting distance, and creatures become completely concealed more quickly. The maximum sighting<br />
distance in murky water is 100 feet. At half the listed distance, creatures have one-half concealment; at the listed distance creatures<br />
have nine-tenths concealment; and they have total concealment beyond the listed distance. For example, if murky water<br />
allows vision to 40 feet, creatures have one-half concealment at 20 feet, nine-tenths concealment at 40 feet, and total concealment<br />
beyond 40 feet. Water can be so murky that it allows vision to 5 feet or 0 feet. Aquatic creatures can see twice as far through the<br />
water as other creatures (but twice 0 feet is still 0 feet).<br />
Invisible creatures displace water and leave a visible bubble, though such creatures still have half concealment (20% miss<br />
chance).<br />
Holding Your Breath: Any character can hold his breath for a number of rounds equal to twice his Constitution score. After this<br />
period of time, the character must make a Constitution check (DC 10) every round in order to continue holding his breath. Each<br />
round, the DC increases by 1. When the character finally fails his Constitution check, he begins to drown. In the first round, he<br />
falls unconscious (0 hp). In the following round, he drops to –1 hit points and is dying. In the third round, he drowns.<br />
Vigorous activity, such as fighting, strains the character, reducing the time a character can hold his breath to a number of rounds<br />
equal to twice his Constitution score.<br />
—Skip Williams<br />
5
6<br />
Vuoor (monitor): Male kuo-toa Mnk6; CR 8;<br />
Medium-size monstrous humanoid (aquatic); HD<br />
2d8+2 (kuo-toa) plus 6d8+6 (Mnk); hp 46; Init +0 (Dex);<br />
Spd 50 ft., swim 50 ft.; AC 24, touch 16, flat-footed 20;<br />
Atk +6/+3 melee (1d8+1, unarmed attack) or +9 melee<br />
(1d8+2/x3, +1 longspear) or +9 ranged (1d8+2/x3, +1<br />
longspear); SA stunning attack, improved trip; SQ<br />
dodge, deflect arrows, evasion, still mind, slow fall,<br />
keen sight, slippery, immunities, light blindness; AL<br />
NE; SV Fort +8, Ref +10, Will +9; Str 13, Dex 14, Con 13,<br />
Int 10, Wis 16, Cha 10.<br />
Skills and Feats: Balance +6, Climb +3, Escape Artist<br />
+20, Knowledge (religion) +5, Jump +5, Listen +12,<br />
Move Silently +11, Search +9, Spot +12, Tumble +8;<br />
Alertness, Deflect Arrows, Dodge, Great Fortitude,<br />
Improved Trip,Weapon Finesse (unarmed attack).<br />
Keen Sight (Ex): Kuo-toas spot a moving object or<br />
creature even if invisible, ethereal, or astral.<br />
Slippery (Ex): Skin secretions make kuo-toas<br />
immune to webs and grant a bonus to Escape Artist<br />
checks.<br />
Immunities (Ex): Immune to poison, paralyzation,<br />
hold, illusions, and natural diseases.<br />
Light Blindness (Ex): Abrupt exposure to light (such<br />
as a daylight spell) blinds kuo-toas for 1 round. In addition,<br />
they suffer a –1 circumstance penalty to all attack<br />
rolls, saves, and checks while operating in bright light.<br />
Possessions: amulet of natural armor +2, +1 longspear,<br />
shield guardian amulet, conch-shell horn.<br />
Tactics: Vuoor lets the shield guardian take the brunt<br />
of all attacks, using his longspear at 10-foot reach<br />
length as long as possible.<br />
Treasure: Vuoor keeps a small stash of treasure for<br />
emergencies hidden in his basin. This hoard consists of<br />
a burlap bag with 154 pp and three 100 gp garnets in an<br />
even smaller leather bag.<br />
Development: If he hears fighting elsewhere, Vuoor<br />
comes to investigate with the shield guardian. If<br />
attacked himself, he uses his conch-shell horn to<br />
attempt to summon aid (such as from Area 10).<br />
9. Barracks<br />
There are two of these chambers; the text below<br />
applies to both of them.<br />
This chamber contains 10 nestlike beds of<br />
weeds and woven cloth, as well as the occasional<br />
bag, box, or piece of equipment lying amid<br />
them. Dark war banners painted on sewn sheets<br />
of scaly flesh adorn the walls. They depict<br />
purple kuo-toan pincher staffs gripping skulls.<br />
A careful search (DC 20) of these rooms produces<br />
3d10 pp hidden amid the beds, as well as 1d4 large steel<br />
shields, 1d6 halfspears, and a random minor potion.<br />
10. Spawning Pool. (EL 7)<br />
Read or paraphrase the following aloud:<br />
A 25-foot-square pool fills this room. It<br />
appears to be quite deep. Tiny creatures swim<br />
about in the water. Images of fish, crustaceans,<br />
frogs, and things far more bizarre cavort on the<br />
walls above and below the water.<br />
A number of (harmless) kuo-toan spawn swim around<br />
this room. The pool is 20 feet deep.<br />
Creatures. Four kuo-toan fighters are currently here,<br />
preparing to spawn.<br />
Kuo-toa fighters: Male & female kuo-toa Ftr1; CR 3;<br />
Medium-size monstrous humanoid (aquatic); HD<br />
2d8+2 (kuo-toa) plus 1d10+1 (Ftr); hp 18, 20, 21; Init +0<br />
(Dex); Spd 20 ft., swim 50 ft.; AC 18, touch 10, flatfooted<br />
18; Atk +6 melee (1d6+1/x3, halfspear) and –1<br />
melee(1d4, bite) or +4 ranged (1d6+1/x3, halfspear); SQ<br />
Keen sight, slippery, adhesive, immunities, light blindness;<br />
AL NE; SV Fort +5, Ref +3, Will +5; Str 13, Dex 10,<br />
Con 13, Int 13, Wis 14, Cha 8.<br />
Skills and Feats: Escape Artist +18, Knowledge (religion)<br />
+6, Listen +10, Move Silently +3, Search +10, Spot<br />
+11; Alertness, Great Fortitude, Weapon Finesse (halfspear).<br />
Keen Sight (Ex): Kuo-toas spot a moving object or<br />
creature even if invisible, ethereal, or astral.<br />
Slippery (Ex): Skin secretions make kuo-toas<br />
immune to webs and grant a bonus to Escape Artist<br />
checks.<br />
Adhesive (Ex): Anyone who makes an unsuccessful<br />
melee attack against a kuo-toa must succeed at Reflex<br />
save (DC 14), or the attacker’s weapon sticks to the kuotoa’s<br />
shield and is yanked out of the wielder’s grip. Creatures<br />
using natural weapons are automatically grappled<br />
if they get stuck.<br />
Immunities (Ex): Immune to poison, paralyzation,<br />
hold, and illusions.<br />
Light Blindness (Ex): Abrupt exposure to light (such<br />
as a daylight spell) blinds kuo-toas for 1 round. In addition,<br />
they suffer a –1 circumstance penalty to all attack<br />
rolls, saves, and checks while operating in bright light.<br />
Possessions: potion of cure moderate wounds, potion of cat’s
grace, potion of bull’s strength; masterwork spear, pouch<br />
with 50 gp, leather armor, large shield.<br />
11. Desecrated Temple<br />
Read or paraphrase the following aloud:<br />
A huge pool stretches across this room. It<br />
appears to be at least 20 feet deep and filled with<br />
fish of various sizes. At the center of the pool is a<br />
raised square dais, upon which sits a bizarre<br />
statue of a human female with lobster claws for<br />
hands and a crustacean’s head. Something<br />
appears to be caked over much of the statue.<br />
The pool actually measures 30 feet deep. Close examination<br />
reveals that the statue has been defaced with<br />
cuts, crude carvings, and feces. This was once a shrine<br />
to Blibdoolpoolp, the traditional kuo-toan deity. The<br />
goddess was overthrown in favor of Tharizdun long ago<br />
by these particular kuo-toas, however.<br />
The fish in the pool are all harmless, kept by the kuotoas<br />
to harvest as food from time to time.<br />
Terrin: Male human War1; CR 1; Medium-size<br />
humanoid; HD 1d8+2; hp 3 (max 9); Init +1 (Dex); Spd<br />
20 ft.; AC 18, touch 11, flat-footed 17; Atk +5 melee<br />
(1d10+2/19–20/x2, bastard sword), +2 ranged<br />
(1d8/19–20/x2, longbow); AL NE; SV Fort +2+1 Con,<br />
Ref +0+1 Dex, Will +0+1 Wis; Str 15, Dex 13, Con 14,<br />
Int 11, Wis 12, Cha 8.<br />
Skills and Feats: Climb +4, Intimidate +4, Jump +4;<br />
Exotic Weapon Proficiency (bastard sword), Weapon<br />
Focus (bastard sword).<br />
13. Storage<br />
The door to this room is locked by a large iron lock (DC<br />
25 to open). Only the whips and the monitor have keys.<br />
Crates, barrels, and miscellaneous equipment<br />
half-fill this room. Nets, digging tools, stonemasonry<br />
tools, leatherworking tools, rope, and<br />
a large collection of shells appear among the<br />
clutter.<br />
All of the materiel in this chamber is nonmagical.<br />
12. Prison<br />
The door into this chamber is locked by a large iron<br />
lock (DC 30 to open). Only the whips and the monitor<br />
have keys.<br />
Rusted iron manacles are bolted all along the<br />
walls in pairs here. It smells of waste and sweat.<br />
Two figures languish in the chains, barely recognizing<br />
your presence.<br />
The kuo-toas keep this room as a prison. It was once<br />
used for sacrifices to Blibdoolpoolp, but now they are<br />
meant for Tharizdun.<br />
Creatures. The prisoners, doomed to be sacrificed in<br />
Area 6 eventually, are weak, dehydrated, and starving.<br />
The first is a human named Terrin, who was hired to<br />
work in the Crater Ridge Mines for the temple, but<br />
eventually had a change of heart; he was caught trying<br />
to slip away. The other is a troglodyte secretly captured<br />
from the Earth Temple. The kuo-toas hate the trogs and<br />
want them all dead.<br />
Rischak (troglodyte): hp 2 (max 12); see Monster<br />
Manual p.age 179.<br />
14. Skum Lair (EL 8)<br />
Read or paraphrase the following aloud:<br />
Covering the walls of this dark cave are crude<br />
paintings showing scenes of battle, bloodlust,<br />
and inhuman depravity. Near the middle of the<br />
south wall lies a pile of small bones—many of<br />
them appear to be fish bones, but others<br />
belonged to larger beasts. The place smells particularly<br />
sour, and the splashing of water<br />
sounds in the near distance.<br />
When the PCs arrive at this cave, the skum here are<br />
moving a large stone statue using ropes. The statue is of<br />
an aboleth with far more eyes and tentacles than even<br />
those horrible beasts are supposed to have. This is “The<br />
Guardian of Whispers,” an important figure in aboleth<br />
myth. They are dragging the statue from Area 15 to<br />
Area 22.<br />
Creatures. Direct servants of the aboleths (as opposed<br />
to those subjugated by still semi-independent kuo-toa),<br />
the skum in this cave attack any intruders with hunger<br />
and savagery but retreat to Area 16 if more than four of<br />
them are slain.<br />
7
Liquid Ice<br />
This oddly named concoction is<br />
made by aboleths and skum. It is a<br />
deep blue liquid that freezes upon<br />
contact with air. You can throw a<br />
flask of liquid ice as a grenadelike<br />
weapon (see the Grenadelike<br />
Weapon Attacks section in the<br />
Player’s Handbook, page 138). It<br />
inflicts 1d6 points of cold damage<br />
in a direct hit, and 1 point on a<br />
splash.<br />
On the round following a direct<br />
hit, the target suffers an additional<br />
1d6 points of cold damage. Unlike<br />
alchemist’s fire, to which it bears<br />
many similarities, there is no way to<br />
“extinguish” the ice. If sold, a flask<br />
of liquid ice is worth 30 gp.<br />
8<br />
Skum (8): hp: 11, 10, 12, 8, 9, 10, 15, 13; see Monster<br />
Manual page 166.<br />
Tactics. Each of the skum is armed<br />
with a flask of liquid ice (see sidebar)<br />
cinched around their waists on cords.<br />
They launch these grenadelike weapons<br />
before entering into melee with their<br />
claws and teeth.<br />
Treasure: One of the skum wears a<br />
gold ring worth 95 gp.<br />
15. Cave of Secrets (EL 8)<br />
The entrance to this cave is trapped.<br />
The aboleths and kuo-toan clerics have<br />
devised a unique magical trap that activates<br />
only when a creature other than a<br />
skum, aboleth, or kuo-toa crosses the<br />
floor at the point marked “A” on the map.<br />
When this happens, a wall of fire appears at the points<br />
marked “B” and “C” (20 feet apart), with the flames both<br />
focused toward point “A”. This means that no matter<br />
where a character stands, he remains within 10 feet of<br />
one and within 20 feet of the other (thus suffering 3d4<br />
points of fire damage). Anyone moving through one of<br />
the walls suffers 2d6+8 points of damage. The walls last<br />
for 10 rounds.<br />
One round after the walls appear, two small vents in<br />
the floor begin issuing forth poison gas (Fortitude save<br />
DC 18, 1d4 points of temporary Dexterity damage and<br />
1d4 more a minute later). A new save is required every<br />
round. Worst of all, however, the gas is flammable,<br />
increasing the damage suffered in between the walls by<br />
+1d6.<br />
Wall of Fire/Poison Gas Trap: CR 6; As described<br />
above; Search (DC 30); Disable Device (DC 30).<br />
Strange statuary fills this cave, and carved<br />
reliefs adorn its walls. These are images of horrible<br />
piscine creatures, tentacled beasts, and<br />
other, less identifiable things—creatures that<br />
one might see in a nightmare set in the dark<br />
ocean depths where no human has ever ventured<br />
and no ray of light has ever illuminated.<br />
The central figure amid the statues is a creature<br />
half fish and half man with a wide, froglike<br />
head. It holds a bronze scroll tube, covered in<br />
verdigris, in its outstretched, finned hands.<br />
If a character examines the carved images and statues<br />
and makes an Intelligence check (DC 15), she gathers<br />
from the strange pictures an idea of the story that they<br />
tell. She learns of a Dark God that was more like a force<br />
of destruction than a being (as we understand the idea)<br />
that came to the aboleths thousands of years ago and<br />
told them secrets of destruction and utter evil. The aboleths<br />
have worshiped this being ever since.<br />
Anyone touching the scroll tube must make a Will<br />
saving throw (DC 17) or go insane (as described in the<br />
spell insanity).<br />
Insanity Trap: CR 7; As described above; Search (DC<br />
32); Disable Device (DC 32).<br />
Inside, the tube holds The Scroll of Written Whispers, an<br />
ancient work inscribed upon mammal flesh (not<br />
human, for it is said to be magically preserved and predates<br />
humanity). It is written in the aboleth tongue and<br />
is a record of past events, horrible depravities, and vile<br />
secrets. This scroll would be worth up to 8,000 gp to the<br />
proper collector or historian.<br />
16. Pool Cave (EL 8)<br />
Read or paraphrase the following aloud:<br />
The north half of this long cave is filled with<br />
water. At the water’s edge, a squat stone statue<br />
of a froglike demon stares toward the southwest.<br />
The walls and floors feel very damp, and<br />
the place smells of fish.<br />
The water is 10 feet deep, 15 near the north end.<br />
Creatures. An aboleth and its four skum slaves dwell<br />
in the pool in this cave.<br />
Aboleth: hp 78; see Monster Manual page 15.<br />
Skum (4): hp: 10, 12, 10, 13; see Monster Manual page<br />
166.<br />
Tactics. In battle, the skum attack foes (even if it<br />
means climbing up onto dry land) while the aboleth<br />
stays back to use its psionic powers.<br />
Development. The skum fight to the death, but at the<br />
first sign of real danger, the aboleth swims to Area 17.<br />
Treasure: If anyone approaches the statue of the<br />
demon as says “Give me an elixir for the weak” in any<br />
language, a potion of water breathing appears in the<br />
demon’s cupped hands. This can be used four times per<br />
day; the inhabitants here can occasionally bring airbreathing<br />
guests or prisoners to areas beyond. These<br />
special potions, made from aboleth mucus, become corrupt<br />
and impotent after sitting unused for one day.
17. Lair (EL 9)<br />
Read or paraphrase the following aloud:<br />
The water in this small cave looks darker and<br />
murkier than elsewhere. Strange and alien rock<br />
formations, with odd curves and spinelike<br />
growths, cover all surfaces.<br />
The rock growths provide a +4 Hide bonus in this<br />
cave.<br />
Creatures. Two aboleths call this cave home.<br />
Aboleths (2): hp 70, 81; see Monster Manual page 15.<br />
Tactics. The aboleths here use illusions and projected<br />
images to confuse opponents and mask their positions.<br />
If a few enslave attempts fail, they begin hit-and-run<br />
tactics: One of them strikes foes in melee while the<br />
other uses illusions to confuse opponents, then they<br />
switch positions.<br />
Development. The aboleth from Area 16 might also<br />
be here, if it retreated here following battle.<br />
18. Empty Cave<br />
Read or paraphrase the following aloud:<br />
Steps descend down from the southwest into<br />
this cave, where the water level reaches the<br />
ceiling.<br />
This cave is empty.<br />
19. Kuo-Toa Cave (EL 8)<br />
Read or paraphrase the following aloud:<br />
The north end of this cave rises up and out of<br />
the water. A strange stone statue submerged in<br />
a natural alcove depicts a huge goggle-eyed fish<br />
man with a net and a long spear.<br />
This is the dwelling place of the kuo-toa in charge of<br />
working directly with the aboleth masters of this complex.<br />
Although the aboleths subjugated the kuo-toa by<br />
by force, the marine creatures are grateful to them for<br />
introducing them to the worship of the Dark God.<br />
Creatures. The kuo-toa liaison with the aboleths is<br />
Uustra, a rogue/fighter.<br />
Uustra: Female kuo-toa Rog4/Ftr2; CR 8; Mediumsize<br />
monstrous humanoid (aquatic); HD 2d8+4 (kuotoa)<br />
plus 4d6+8 (Rog) plus 2d10+4 (Ftr); hp 52; Init +2<br />
(Dex); Spd 20 ft., swim 50 ft.; AC 20, touch 12, flatfooted<br />
18; Atk +10/+5 melee (1d6+3, +1 halfspear) and<br />
+1 melee (1d4+2, bite) or +10 ranged (1d6+3, +1 halfspear);<br />
SA Sneak attack +2d6; SQ Evasion, uncanny<br />
dodge, keen sight, slippery, adhesive, immunities, light<br />
blindness; AL NE; SV Fort +6, Ref +5, Will +5; Str 14,<br />
Dex 12, Con 14, Int 13, Wis 10, Cha 8.<br />
Skills and Feats: Climb +5, Disable Device +3, Escape<br />
Artist +24, Knowledge (local) +5, Hide +7, Listen +11,<br />
Move Silently +10, Search +14, Sense Motive +4, Spot<br />
+13, Tumble +6; Alertness, Blind-fight, Cleave, Dodge,<br />
Iron Will, Power Attack.<br />
Keen Sight (Ex): Kuo-toas spot a moving object or<br />
creature even if it is invisible, ethereal, or astral.<br />
Slippery (Ex): Skin secretions make kuo-toas<br />
immune to webs and grant a bonus to Escape Artist<br />
checks.<br />
Adhesive (Ex): Anyone who makes an unsuccessful<br />
melee attack against a kuo-toa must succeed at Reflex<br />
save (DC 14), or the attacker’s weapon sticks to the<br />
kuo-toa’s shield and is yanked out of the wielder’s grip.<br />
Creatures using natural weapons are automatically<br />
grappled if they get stuck.<br />
Immunities (Ex): Immune to poison, paralyzation,<br />
hold, and illusions.<br />
Light Blindness (Ex): Abrupt exposure to light<br />
(such as a daylight spell) blinds kuo-toas for 1 round. In<br />
addition, they suffer a –1 circumstance penalty to all<br />
attack rolls, saves, and checks while operating in bright<br />
light.<br />
Possessions: +1 halfspear, +1 leather armor, potion of cure<br />
serious wounds, large shield, pouch with 10 pp.<br />
Tactics. If threatened, Uustra attempts to escape,<br />
hide, then attack later with her sneak attack bonus.<br />
Development. Uustra does not leave this area except<br />
to flee if she has to. When retreating, she attempts to<br />
make it back to areas 4 through 13, where she has allies.<br />
20. Dry Cave<br />
Read or paraphrase the following aloud:<br />
Bones litter the floor of this cave. Although<br />
the floor and walls feel damp, it is drier here<br />
than in the surrounding caves.<br />
The passage to the west provides easy access down<br />
into the water. To the south, the drop-off is 10 feet.<br />
9
Th aboleths use this cave in a cruel sort of sacrifice:<br />
They put surface-dwelling captives here and let them<br />
starve to death slowly. Each day that prisoners remain<br />
here, the aboleths come and chant for an hour telepathically,<br />
dedicating the starving victims’ souls to Tharizdun.<br />
Treasure. Although the inhabitants of the caves usually<br />
try to take any valuables from their prisoners, a<br />
bone wand of cure light wounds (10 charges) lies amid<br />
the bones here (DC 30 to find with a Search check).<br />
21.Underwater Gauntlet (EL 1)<br />
Read or paraphrase the following aloud:<br />
Long metal spikes protrude from all surfaces<br />
of this underwater cave. It appears extremely<br />
dangerous to attempt to swim through it.<br />
Anyone trying to swim through this cave must make a<br />
Swim check (DC 25) or suffer 2d6 points of damage from<br />
the spikes. A natural swimmer (a creature with a natural<br />
swim movement rate) automatically makes the check.<br />
22. Cavern of the Master (EL 9)<br />
The hallway leading in from the south features<br />
grotesque carvings on the floor, walls, and ceiling. Most<br />
depict fish and tentacles devouring humans and other<br />
surface dwellers. The carvings in this hall are also<br />
rigged with a permanent arcane eyelike effect linked<br />
with the Master (see below). If he sees creatures<br />
approaching, he greets them with a programmed image<br />
of a cave-in, followed quickly with an illusory wall.<br />
Use the following read-aloud text only if the PCs get<br />
past the above mentioned illusions.<br />
This vast cavern is mostly filled with water.<br />
Massive stalactites droop from the ceiling, dripping<br />
moisture down into the huge pool. The<br />
effect created is like being in a light rainfall.<br />
The pool measures 40 feet at its deepest point (in the<br />
center). The passage from the east lies 10 feet below the<br />
surface of the water.<br />
Creatures. The Master, a half-demon/half aboleth,<br />
controls this entire complex. The current Master<br />
replaced his predecessor when he left to join the Inner<br />
Fane (to become the Second of the Triad).<br />
The Master, half-fiend aboleth: CR 9; Huge aberration<br />
(aquatic) (20 ft. long); HD 8d8+48; hp 101; Init +3<br />
(dex); Spd 10 ft. swim 60 ft fly 60 (average); AC 21,<br />
touch 11, flat-footed 18; Atk +14 melee (1d6+10 and<br />
transformation, 4 tentacles) and +9 melee (2d6+10 bite)<br />
and +9 melee (2d8+10 claws); Face/Reach 10 ft. × 20<br />
ft./10 ft.; SA Transformation, psionics, spell-like abilities,<br />
enslave; SQ Mucus cloud, immune to poison, acid,<br />
cold, and electricity, and fire resistance 20; AL CE; SV<br />
Fort +7, Ref +5, Will +11; Str 30, Dex 16, Con 22, Int 19,<br />
Wis 17, Cha 19.<br />
Skills and Feats: Concentration +17, Knowledge<br />
(arcane) +15, Knowledge (history) +15, Knowledge<br />
(religion) +15, Listen +16, Search +15, Sense Motive<br />
+15, Spellcraft +11, Spot +16; Alertness, Iron Will,<br />
Lightning Reflexes.<br />
Transformation (Ex): A blow from an aboleth’s tentacle<br />
can cause a terrible transformation. Affected creatures<br />
must succeed at a Fortitude save (DC 20) or begin<br />
to transform over the next 1d4+1 minutes, the skin<br />
gradually becoming a clear, slimy membrane. A transformed<br />
creature must remain moistened with cool,<br />
fresh water or suffer 1d12 points of damage every 10<br />
minutes.<br />
A remove disease spell cast before the transformation is<br />
complete will restore an afflicted creature to normal.<br />
Afterward, however, only a heal or mass heal spell can<br />
reverse the change.<br />
Psionics (Sp): At will—hypnotic pattern, illusory wall,<br />
mirage arcana, persistent image, programmed image, project<br />
image, and veil. These effects are as the spells cast by a<br />
16th-level sorcerer (save DCs, where applicable, are 14<br />
+ spell level).<br />
Spell-Like Abilities (Sp): Darkness 3/day, desecrate<br />
1/day, unholy blight 1/day, poison 3/day. All cast as if by<br />
an 8th-level caster.<br />
Enslave (Su): Three times a day, an aboleth can<br />
attempt to enslave any one living creature within 30<br />
feet. The target must succeed at a Will save (DC 18) or<br />
be affected as though by a dominate person spell cast by a<br />
16th-level sorcerer. An enslaved creature obeys the aboleth’s<br />
telepathic commands (but will not fight on its<br />
behalf ) until freed by remove curse or dispel magic. A<br />
victim can attempt a new Will save every 24 hours to<br />
break free. The control is also broken if the aboleth dies<br />
or travels more than 1 mile from its slave.<br />
Mucus Cloud (Ex): Underwater an aboleth surrounds<br />
itself with a viscous cloud of mucus roughly 1<br />
foot thick. Any creature coming into contact with and<br />
10
inhaling this substance must succeed at a Fortitude<br />
save (DC 20) or lose the ability to breathe air for the<br />
next three hours. The affected creature suffocates in<br />
2d6 minutes if removed from the water. Renewed contact<br />
with the mucus cloud and failing another Fortitude<br />
save continues the effect for another three hours.<br />
Possessions: +2 bracers of armor<br />
Tactics. The Master uses project image, unholy blight,<br />
mirage arcana, and darkness to hurt and foil enemies as<br />
much as possible while they are on the shore, hiding in<br />
the water with veil to keep his location a secret even<br />
from scrying. If anyone enters the water, he uses his<br />
poison ability, then attacks. Keep in mind that, unlike<br />
other aboleths, he has two claws and a bite attack in<br />
addition to his tentacles (only the tentacles carry the<br />
transformation attack).<br />
Treasure. The Master’s hoard lies at the bottom of the<br />
pool, hidden amid a lime-encrusted rock formation<br />
(Search 25 to find) and a number of statues of aboleths.<br />
It consists of the following:<br />
• A stone box with 876 gp, 234 pp, and potions of<br />
remove poison, flying and firebreath<br />
• An obsidian urn worth 300 gp<br />
• A coral box (worth 50 gp) containing a 1,000 gp<br />
necklace made of gold and small rubies<br />
• A bone case with a steel wand of magic missiles (cast<br />
at 5th level, 45 charges)<br />
• Stone tablets written in Aboleth that describe the<br />
history of the previous Master, now known as the<br />
Second of the Triad, as well as details concerning<br />
his abilities, magic items, and the strange “water<br />
sheath” that he travels within. (For more details, see<br />
Chapter 7: The Recovered Temple in Return to the<br />
Temple of Elemental Evil.)<br />
ENDING THE<br />
ADVENTURE<br />
Conquering this complex of caverns is not crucial to<br />
defeating the Cult of Tharizdun and the Temple of All-<br />
Consumption. However, it can add needed experience<br />
and treasure to help PCs getting ready to take on the<br />
Outer Fane. It also provides an interesting side adventure<br />
that still relates back to the original scenario.<br />
Lastly, learning a few of the secrets of the Second may<br />
come in handy later.<br />
ABOUT THE AUTHOR<br />
Monte Cook started working professionally in the<br />
game industry in 1988. In the employ of Iron Crown<br />
Enterprises, he worked with the Rolemaster and<br />
Champions games as an editor, developer, and<br />
designer.<br />
In 1994 Monte came to work at TSR as a game<br />
designer. As a senior game designer with Wizards of<br />
the Coast, he codesigned the new edition of<br />
DUNGEONS & DRAGONS and authored the Dungeon<br />
Master's Guide. His newest release is Return to the<br />
Temple of Elemental Evil.<br />
A graduate of the Clarion West writer's workshop,<br />
Monte has also published short stories and two<br />
novels. In his spare time, he runs anywhere from one<br />
to three games per week, holds a yearly game convention<br />
at his house, builds vast dioramas out of<br />
LEGO building bricks, and reads a lot of comics.<br />
Monte designed the July 2001 adventure, The Ministry<br />
of Winds, for the Official D&D Website. To read<br />
more of his recent d20 work, visit his home page at<br />
www.montecook.com.<br />
11
6<br />
scale: in feet<br />
75